
Home » Incredible PBX (Page 17)
Category Archives: Incredible PBX
The Most Versatile VoIP Provider: FREE PORTING

 JUST RELEASED: Visit the Incredible PBX Wiki
Happy New Decade: It’s Incredible PBX 2020 for Raspberry Pi

As we begin a new decade, it seemed a fitting time for a terrific new project for you and your Raspberry Pi 4. It features Asterisk® 16 with all the latest FreePBX® 15 GPL modules plus the feature sets of Incredible PBX® and RasPBX and RonR’s latest build. The icing on the cake is support for plug-and-play Incredible IP Phones and a new trunking platform that integrates SMS messaging into your Asterisk platform. And it’s all rolled into one terrific (free) bundle.
This is the first of several articles on Incredible PBX 2020. Today, we’ll get your platform built and walk you through what’s included in the new build. In coming weeks, we’ll integrate the CentOS 7 platform enhancements into the Raspbian 10 Buster image for the Raspberry Pi. In the meantime, come enjoy and explore the powerful, new feature set that comes with Incredible PBX 2020 out of the box. Unlike other aggregations, there’s nothing to compile with Incredible PBX 2020 for Raspbian 10. And, unlike the FreePBX Distro, we don’t rely on static packages which make it difficult to make future modifications on your own. Instead, Incredible PBX 2020 offers a snapshot image with a complete toolkit to make future modifications as desired. Last, but not least, Incredible PBX 2020 features the new ClearlyIP module repository which protects you from proprietary modifications that limit or cripple your PBX moving forward.
What’s Included? Incredible PBX 2020 for Raspbian 10 serves up a VoIP powerhouse featuring Asterisk 16 and all FreePBX 15 GPL modules, an Apache web server, the latest MariaDB SQL server (formerly MySQL), Exim4 mail server, and most of the Incredible PBX feature set including SIP, SMS, voice recognition, AsteriDex, PicoTTS Text-to-Speech VoIP applications plus fax support, Click-to-Dial, News, Weather, Telephone Reminders, and hundreds of features that typically are found in commercial PBXs: Conferencing, IVRs and AutoAttendants, Email Delivery of Voicemail, Voicemail Blasting, and more. We’ve also incorporated the Zero Trunk Configuration feature from the LITE build which lets you sign up with one of four VoIP providers and start making and receiving calls instantly. Or you can use the new ClearlyIP trunking module included in the GUI for a seamless integration of SMS messaging into FreePBX and its User Control Panel.
Choosing a SIP Provider. As we mentioned, Incredible PBX 2020 comes preconfigured to support five of the major SIP providers: ClearlyIP, Skyetel, VoIP.ms, V1VoIP, and Anveo Direct. We obviously hope you’ll choose ClearlyIP or Skyetel trunking because both financially support Nerd Vittles and our open source projects. As the old saying goes, they may not be the cheapest, but you get what you pay for. With all five providers, you only pay for minutes you use so signing up with more than one provider is a smart idea.
Assembling the Required Raspberry Pi Components
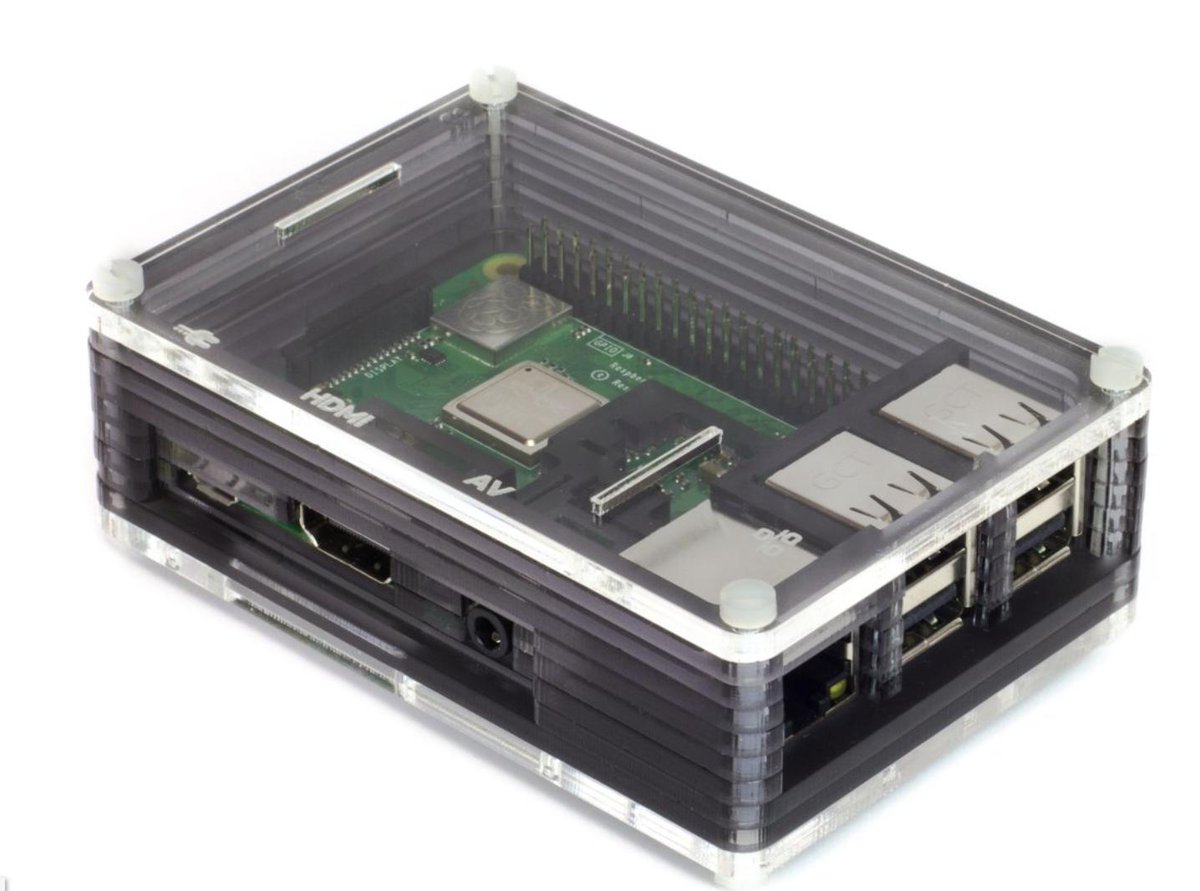
Before you can deploy Incredible PBX 2020, you’ll first need the necessary Raspberry Pi hardware. Here’s the short list and, if you’re in a hurry, the $35 Raspberry Pi 3B+ will cost you less than $3 extra to get it quickly from Amazon using our referral link. If you prefer to wait for a Raspberry Pi 4, read on. Either way, the RasPi remains one of the world’s best bargains! Assuming you already own an HDMI-compatible monitor and a USB keyboard…
Raspberry Pi 4B from a Raspberry Pi reseller $8 USB-C RasPi 4 (only) Power Supply $10 32GB microSDHC Class 10 card (strongly recommended!) $5 Official RasPi 4 Case
Getting Started with Incredible PBX 2020
Here’s our 10-Step Guide to installation and setup. "Automatic" means just watch. Steps #1 and #2: follow the links. For the remaining steps, we’ll further document the procedures.
- Download and unzip Incredible PBX 2020.3 image from SourceForge
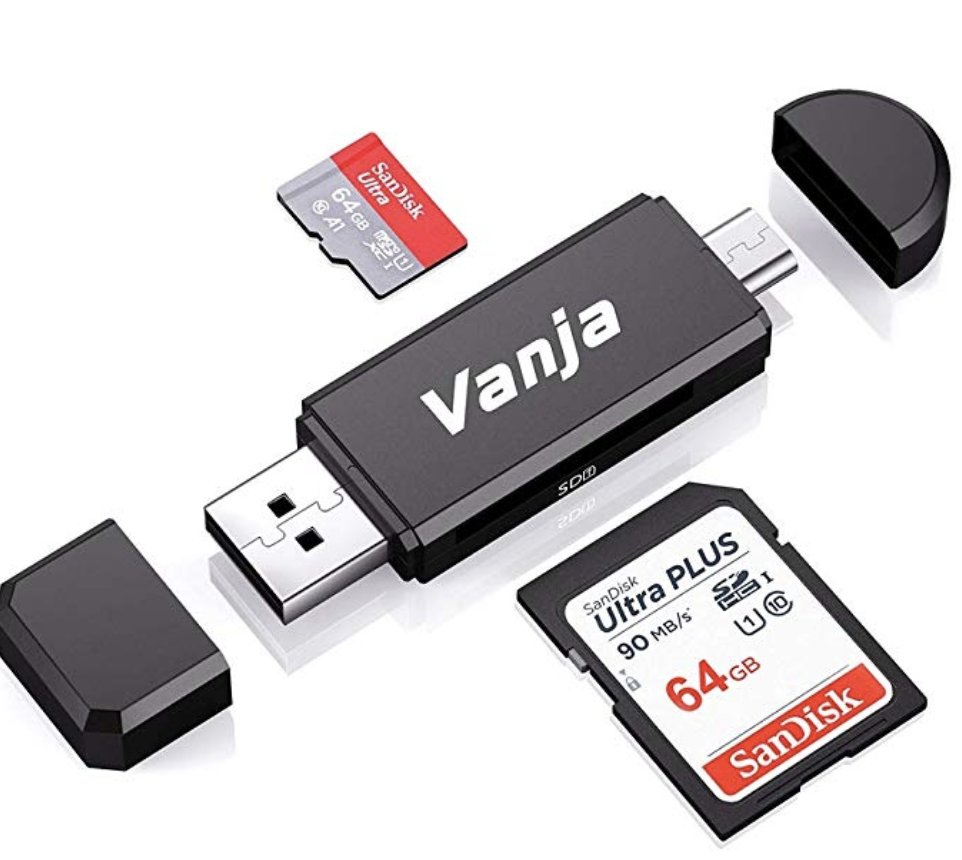
- Transfer Incredible PBX 2020 image to microSD card
- Boot Raspberry Pi from new microSD card (16GB minimum)
- Login to RasPi console as root:password to initialize your server (Automatic)
- In raspi-config Advanced Options, Expand FileSystem to fill your SD card
- In Localization Options, set Locale, TimeZone, Keyboard, & WiFi Country
- Reboot after writing down your server IP address (Automatic)
- Login via SSH or Putty as root:password to set passwords & setup firewall (Automatic)
- Run admin-pw-change to set the admin password for access to the web GUI
- Register for and configure at least one trunk provider for Incredible PBX 2020
- Enjoy!
First Boot of Incredible PBX 2020 with Wi-Fi
Incredible PBX 2020 requires Internet connectivity to complete its automated install. If you’re using a wired network connection, you can skip to the next section. With the Raspberry Pi 3B and 4B, WiFi is built into the hardware. But you still have to insert your SSID name and SSID password to make a connection to your WiFi network. To do so, follow these next steps carefully. Insert the Incredible PBX 2020 microSD card into your Raspberry Pi 3 or 4 and apply power to the hardware. When the bootup procedure finishes, login as root with the default password: password. At the first prompt, DO NOT PRESS THE ENTER KEY! Instead, press Ctrl-C to break out of the setup script. At the command prompt, issue the following commands to bring up the WiFi config file:
cd /etc/wpa_supplicant
nano -w wpa_supplicant.conf
If your WiFi network does not require a password, uncomment or insert the four lines below and save the file: Ctrl-X, Y, then Enter. Now restart your server: reboot. When the reboot finishes, you now should have network connectivity.
network={
 key_mgmt=NONE
 priority=1
}
If your WiFi network requires a password, uncomment or insert the following into wpa_supplicant.conf:
ctrl_interface=DIR=/var/run/wpa_supplicant GROUP=netdev
update_config=1

network={
 ssid="YourSSID"
 psk="YourSSIDpassword"
 key_mgmt=WPA-PSK
 scan_ssid=1
 priority=7
}
Then scroll down to the SSID entry and replace YourSSID with the actual SSID of your WiFi network. Make sure you preserve the entry with the quotes as shown. Next, replace YourSSIDpassword with the SSID password of your WiFi network. Save the file: Ctrl-X, Y, then Enter. Now restart your server: reboot. When the reboot finishes, you now should have network connectivity.
Once the reboot process finishes, you should see an entry on about the middle line displayed on your monitor which reads: "My IP address is…". Write down the IP address shown. You’ll need it in a minute. Skip the next section since you are using a WiFi connection.
If you don’t see an IP address assigned to your server, then correct the network deficiency (invalid WiFi credentials, DHCP not working, Internet down), and reboot until you see an IP address assigned to your server. DO NOT PROCEED WITHOUT AN ASSIGNED IP ADDRESS.
First Boot of Incredible PBX Using Wired Connection
Incredible PBX 2020 requires Internet connectivity to complete its automated install. After connecting your server to your local network with a network cable, insert the Incredible PBX 2020 microSD card into your Raspberry Pi and apply power to the hardware. When the bootup procedure finishes, you should see an entry on about the middle line displayed on your monitor which reads: "My IP address is…". Write down the IP address shown. You’ll need it in the next step.
If you don’t see an IP address assigned to your server, then correct the network deficiency (cable not connected, DHCP not working, Internet down), and reboot until you see an IP address assigned to your server. DO NOT PROCEED WITHOUT AN ASSIGNED IP ADDRESS.
Completing the Incredible PBX Initialization Procedure
Unless your desktop PC and RasPi are both on the same private LAN, the remainder of the install procedure should be completed from a desktop PC using SSH or Putty. This will assure that your desktop PC is also whitelisted in the Incredible PBX firewall. Using the console to complete the install is NOT recommended as your desktop PC will not be whitelisted in the firewall. This may result in your not being able to log in to your server. Once you have network connectivity, log in to your server as root from a desktop PC using the default password: password. Accept the license agreement by pressing ENTER. You then will be redirected to raspi-config. This is the utility used to expand your Incredible PBX 2020 image to use your entire microSD card. If you fail to complete this step, your microSD card will be restricted to 16GB. In the raspi-config utility, choose Localization Options and set Locale, TimeZone, Keyboard, & WiFi Country. Then choose Advanced Options. All of the defaults should be satisfactory with the exception of the first item: Expand Filesystem. Choose this option and activate the resizing directive. Review the other items and then exit and reboot.
Once your server reboots and you log back in as root, all of your passwords will be randomly assigned with the exception of the root user Linux password and your admin password for access to the web GUI. You can set the root password by issuing the command: passwd. Set the admin password for access to the web GUI with this command: /root/admin-pw-change. With the exception of these two passwords, the remaining passwords can be displayed using the command: /root/show-passwords.
Finally, if your PBX is sitting behind a NAT-based router, you’ll need to redirect incoming UDP 5060-5061 and UDP 10000-20000 traffic to the private IP address of your PBX. This is required for all of the SIP providers included in the Incredible PBX 2020 build. Otherwise, all inbound calls will fail.
A Word About FreePBX Module Morphing
If you’ve been following the latest FreePBX module saga, then we probably don’t need to repeat that now is not a good time to be indiscriminately updating FreePBX modules using the Module Admin utility. Chances are pretty good that you may irreparably break something. Should an alert appear in the Dashboard indicating that a particular module has a security vulnerability, please post a note on the PIAF Forum and await a response before attempting to upgrade the module. We also strongly recommend backing up your microSD card as documented below to avoid future surprises.

Configuring Skyetel for Incredible PBX 2020
If you’ve decided to go with Skyetel, here’s the drill. Sign up for Skyetel service and take advantage of the Nerd Vittles Free $10 credit and BOGO special. First, complete the Prequalification Form here. You then will be provided a link to the Skyetel site to complete your registration. Once you have registered on the Skyetel site and your account has been activated, open a support ticket and request the $10 credit for your account by referencing the Nerd Vittles special offer. Once you are happy with the service, open another ticket after funding your account and request that Skyetel match your deposit of up to $250. That gets you up to $500 of helf-price calling. Credit is limited to one per person/company/address/location. If you have numbers to port in, you can do it at no cost after funding your account. Effective 10/1/2023, $25/month minimum spend required.
Skyetel does not use SIP registrations to make connections to your PBX. Instead, Skyetel utilizes Endpoint Groups to identify which servers can communicate with the Skyetel service. An Endpoint Group consists of a Name, an IP address, a UDP or TCP port for the connection, and a numerical Priority for the group. For incoming calls destined to your PBX, DIDs are associated with an Endpoint Group to route the calls to your PBX. For outgoing calls from your PBX, a matching Endpoint Group is required to authorize outbound calls through the Skyetel network. Thus, the first step in configuring the Skyetel side for use with your PBX is to set up an Endpoint Group. Here’s a typical setup for Incredible PBX 2020:
- Name: MyPBX
- Priority: 1
- IP Address: PBX-Public-IP-Address
- Port: 5060
- Protocol: UDP
- Description: 2020.incrediblepbx.com
To receive incoming PSTN calls, you’ll need at least one DID. On the Skyetel site, you acquire DIDs under the Phone Numbers tab. You have the option of Porting in Existing Numbers (free for the first 60 days after you fund your account) or purchasing new ones under the Buy Phone Numbers menu option.
Once you have acquired one or more DIDs, navigate to the Local Numbers or Toll Free Numbers tab and specify the desired SIP Format and Endpoint Group for each DID. Add SMS/MMS and E911 support, if desired. Call Forwarding and Failover are also supported. That completes the VoIP setup on the Skyetel side. System Status is always available here.
Configuring VoIP.ms for Incredible PBX 2020
To sign up for VoIP.ms service, may we suggest you use our signup link so that Nerd Vittles gets a referral credit for your signup. Once your account is set up, you’ll need to set up a SIP SubAccount and, for Authentication Type, choose Static IP Authentication and enter your Incredible PBX 2020 server’s public IP address. For Transport, choose UDP. For Device Type, choose Asterisk, IP PBX, Gateway or VoIP Switch. Order a DID in their web panel, and then point the DID to the SubAccount you just created. Be sure to specify atlanta1.voip.ms as the POP from which to receive incoming calls. On the Incredible PBX side, simply Enable the VoIPms trunk and save your update.
Configuring V1VoIP for Incredible PBX 2020
To sign up for V1VoIP service, sign up on their web site. Then login to your account and order a DID under the DIDs tab. Once the DID has been assigned, choose View DIDs and click on the Forwarding button beside your DID. For Option #1, choose Forward to IP Address/PBX. For the Fowarding Address, enter the public IP address of your server. For the T/O (timeout) value, set it to 2o seconds. Then click the Update button. Under the Termination tab, create a new Endpoint with the public IP address of your server so that you can place outbound calls through V1VoIP. On the Incredible PBX side, simply Enable the V1VoIP trunks and save your updates.
Configuring Anveo Direct for Incredible PBX 2020
To sign up for Anveo Direct service, sign up on their web site and then login. After adding funds to your account, purchase a DID under Inbound Service -> Order DID. Next, choose Configure Destination SIP Trunk. Give the Trunk a name. For the Primary SIP URI, enter $[E164]$@server-IP-address. For Call Options, select your new DID from the list. You also must whitelist your public IP address under Outbound Service -> Configure. Create a new Call Termination Trunk and name it to match your server. For Dialing Prefix, choose six alphanumeric characters beginning with a zero. In Authorized IP Addresses, enter the public IP address of your server. Set an appropriate rate cap. We like $0.01 per minute to be safe. Set a concurrent calls limit. We like 2. For the Call Routing Method, choose Least Cost unless you’re feeling extravagant. For Routes/Carriers, choose Standard Routes. Write down your Dialing Prefix and then click the Save button. On the Incredible PBX side, simply Enable the AnveoDirect trunks and save your updates.
Before you can make outbound calls through Anveo Direct from your PBX, you first must configure the Dialing Prefix that you wrote down in the previous step. Using a browser, login to the GUI as admin. Navigate to Connectivity -> Trunks -> Anveo-Out. Click the Pencil icon to edit the trunk settings. Then click the Custom Settings tab. Replace anveo-pin with your actual Anveo PIN. Click Submit and Apply Settings to save your changes.
By default, incoming Anveo Direct calls will be processed by the Default inbound route on your PBX. If you wish to redirect incoming Anveo Direct calls using DID-specific inbound routes, then you’ve got a bit more work to do. In addition to creating the inbound route using the 11-digit Anveo Direct DID, enter the following commands after logging into your server as root using SSH/Putty:
cd /etc/asterisk
echo "[from-anveo]" >> extensions_custom.conf
echo "exten => _.,1,Ringing" >> extensions_custom.conf
echo "exten => _.,n,Goto(from-trunk,\\${SIP_HEADER(X-anveo-e164)},1)" >> extensions_custom.conf
asterisk -rx "dialplan reload"
Configuring a Softphone for Incredible PBX 2020
We’re in the home stretch now. You can connect virtually any kind of telephone to your new PBX. Plain Old Phones require an analog telephone adapter (ATA) which can be a separate board in your computer from a company such as Digium. Or it can be a standalone SIP device such as ObiHai’s OBi100 or OBi110 (if you have a phone line from Ma Bell to hook up as well). SIP phones can be connected directly so long as they have an IP address. These could be hardware devices or software devices such as the YateClient softphone. We’ll start with a free one today so you can begin making calls. You can find dozens of recommendations for hardware-based SIP phones both on Nerd Vittles and the PIAF Forum when you’re ready to get serious about VoIP telephony.
We recommend YateClient for Windows which is free. Download it from here. Run YateClient once you’ve installed it and enter the credentials for the 701 extension on Incredible PBX. You can find them by running /root/show-passwords. You’ll need the IP address of your server plus your extension 701 password. In the YateClient, fill in the blanks using the IP address of your Server, 701 for your Username, and whatever Password was assigned to the extension when you installed Incredible PBX. Click OK to save your entries.

Once you are registered to extension 701, close the Account window. Then click on YATE’s Telephony Tab and place some test calls to the numerous apps that are preconfigured on Incredible PBX. Dial a few of these to get started:
DEMO - Apps Demo
123 - Reminders
947 - Weather by ZIP Code
951 - Yahoo News
TODAY - Today in History
LENNY - The Telemarketer's Worst Nightmare
If you are a Mac user, another great no-frills softphone is Telephone. Just download and install it from the Mac App Store.
Audio Issues with Incredible PBX 2020
Only if you experience one-way or no audio on some calls, add your external IP address and LAN subnet in the GUI by navigating to Settings -> Asterisk SIP Settings. In the NAT Settings section, click Detect Network Settings. Click Submit and Apply Settings to save your changes.
Configuring Gmail as Exim Smart Relay Host
Most Raspberry Pi implementations will be on networks managed by companies like Comcast, Spectrum, and AT&T that block downstream mail servers (that’s you) from sending email. The solution is to use Gmail or your local ISP as a smart relay host to send mail from your server. You’ll need this to deliver voicemails via email. Here’s how to set it up using a Gmail account without two-step authentication. Log into your server as root and run dpkg-reconfigure exim4-config. Choose "mail sent by smarthost; received via SMTP or fetchmail." Accept all the defaults until you get to Outgoing Smarthost prompt. Enter: smtp.gmail.com::587. At the following prompts, choose NO, NO, mbox, and NO. When the setup completes, edit /etc/exim4/passwd.client and insert the following line using your Gmail AcctName and AcctPW. NOTE: If you are using a Gmail account with 2-step verification enabled, you MUST use a Gmail App Key instead of your Gmail account password. You also must enable Less Secure Apps access to your Gmail account.
*.google.com:AcctName@gmail.com:AcctPWsmtp.gmail.com:AcctName@gmail.com:AcctPW
Save the file and then issue the following commands to complete the setup:
update-exim4.conf
systemctl restart exim4
exim4 -qff
Now send yourself a test email message to make sure things are working properly:
echo "test" | mail -s testmessage yourname@yourmailprovider.com
Some prefer an email notification whenever your server is booted. Once you have configured a relay host above, you can add the feature by editing /etc/rc.local and adding the following lines with your actual email address just above the service knockd start line:
_PRIVATE="Private IP: `cat /etc/hostip | cut -f1-2 -d " "`"
_PUBLIC=" Public IP: `curl -s -S --user-agent \\
"Mozilla/4.0" http://myip.incrediblepbx.com | awk 'NR==2'`"
echo "$_PRIVATE\\n$_PUBLIC" | mail -s "RasPi 2020 has booted" yourname@yourmailserver.com
Building the Incredible PBX Demo IVR
If you’d like to try your hand at building an IVR, here are the steps to build the Incredible PBX Demo IVR. From the FreePBX Dashboard, choose Applications -> IVR -> Add IVR. Then fill in the template using the entries shown below. Then click Submit and Reload Dialplan.


Building the Incredible PBX Stealth AutoAttendant
Many users prefer to play an announcement to incoming callers with a brief pause thereafter which indicates that the call is being connected. If configured properly, this lets you embed several dial codes which can be entered while the announcement is playing and the call is being transferred. For example, you might wish to route incoming calls to Lenny if a caller presses 0. Or you might wish to immediately route an incoming call to a Ring Group if the caller presses 1. Here’s a sample IVR setup to get you started.

Incredible PBX 2020 Administration
We’ve eased the pain of administering your new PBX with a collection of scripts which you will find in the /root folder after logging in with SSH or Putty. Here’s a quick summary of what each of the scripts does.
admin-pw-change lets you update the admin password for web browser access to the Incredible PBX GUI.
apache-pw-change lets you update the admin password for Apache applications such as AsteriDex and Reminders.
avantfax-pw-change lets you update the root password for AvantFax access (coming soon!).
add-fqdn is used to whitelist a fully-qualified domain name in the firewall. Because Incredible PBX 2020 blocks all traffic from IP addresses that are not whitelisted, this is what you use to authorize an external user for your PBX. The advantage of an FQDN is that you can use a dynamic DNS service to automatically update the IP address associated with an FQDN so that you never lose connectivity.
add-ip is used to whitelist a public IP address in the firewall. See the add-fqdn explanation as to why this matters.
del-acct is used to remove an IP address or FQDN from the firewall’s whitelist.
configure-exim-email lets you reconfigure the email server if you need to use an SMTP relay such as Google to get outbound email flowing. Tutorial here.
iptables-restart is the ONLY command you should ever use to restart the IPtables firewall and Fail2Ban.
knock.FAQ contains your PortKnocker credentials for emergency access to your server if the firewall locks you out. Tutorial here.
proximity (once configured) will automatically forward calls to your cellphone when you are out of BlueTooth range from your RasPi. Also must enable running of script in /etc/crontab.
reset-conference-pins is a script that automatically and randomly resets the user and admin pins for access to the preconfigured conferencing application. Dial C-O-N-F from any registered SIP phone to connect to the conference.
reset-extension-passwords is a script that automatically and randomly resets ALL of the SIP passwords for extensions 701-705. Be careful using this one, or you may disable existing registered phones and cause Fail2Ban to blacklist the IP addresses of those users. HINT: You can place a call to the Ring Group associated with all five extensions by dialing 777.
reset-reminders-pin is a script that automatically and randomly resets the pin required to access the Telephone Reminders application by dialing 123. It’s important to protect this application because a nefarious user could set up a reminder to call a number anywhere in the world assuming your SIP provider’s account was configured to allow such calls.
rpi-clone is a utility that makes it easy to make a bootable image of the microSD card used to start your Raspberry Pi. You’ll need a USB-to-microSD adapter to begin. Insert a backup microSD card large enough to hold all of the data on the primary microSD card (df -h). Insert the USB stick with the card. Identify the backup microSD card, usually sda (fdisk -l). Format the backup microSD as an MSDOS partition. Then issue the following command to clone the primary microSD card: rpi-clone -f sda. Complete tutorial here.
show-feature-codes is a cheat sheet for all of the feature codes which can be dialed from any registered SIP phone. It documents how powerful a platform Incredible PBX 2020 actually is. A similar listing is available in the GUI at Admin -> Feature Codes.
show-passwords is a script that displays ALL of the passwords associated with Incredible PBX 2020. This includes SIP extension passwords, voicemail pins, conference pins, telephone reminders pin, and your Anveo Direct outbound calling pin (if configured). Note that voicemail pins are configured by the user of a SIP extension the first time the user accesses the voicemail system by dialing *97.
timezone-setup lets you reconfigure the correct time zone for your server.
purge-cdr-cel-records cleans out all existing entries in both the CDR and CEL tables of the Asterisk CDR database.
log-cleanup removes all entries from most of the logs in /var/log.
sig-fix disables module signature checking in FreePBX. It is automatically disabled upon installation.
readme-RonR.txt documents the scripts provided from RonR build. We do NOT recommend using the FCC Blacklist because of its current size.
update-asterisk16 is a utility that updates Asterisk 16 to the latest release. This should only be necessary when a security issue or bug is identified that affects the operation of your PBX.
update-IncrediblePBX is the Automatic Update Utility which checks for server updates from incrediblepbx.com every time you log into your server as root using SSH or Putty. Do NOT disable it as it is used to load important fixes and security updates when necessary. We recommend logging into your server at least once a week.
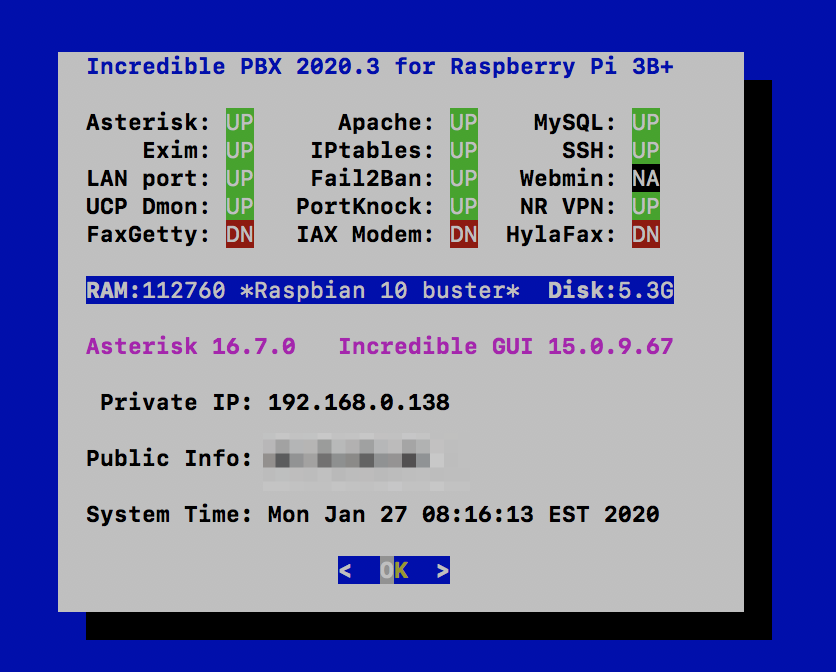
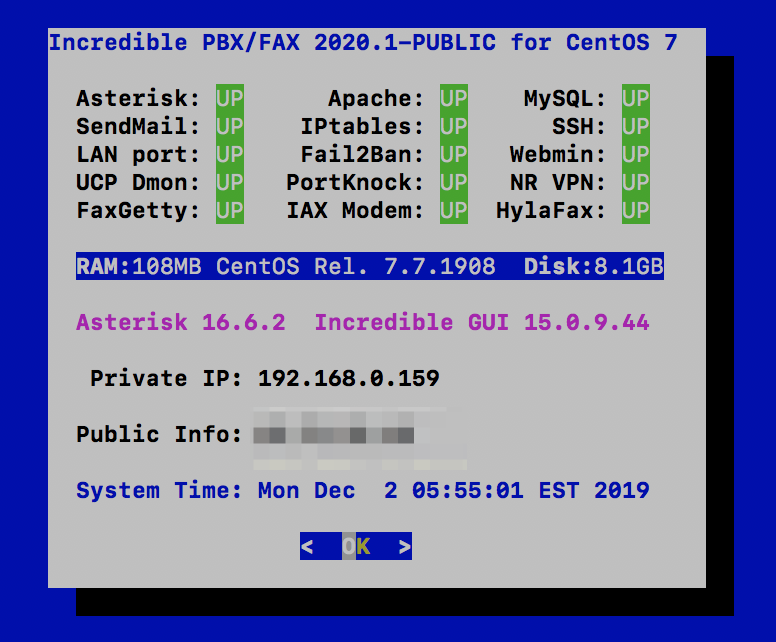
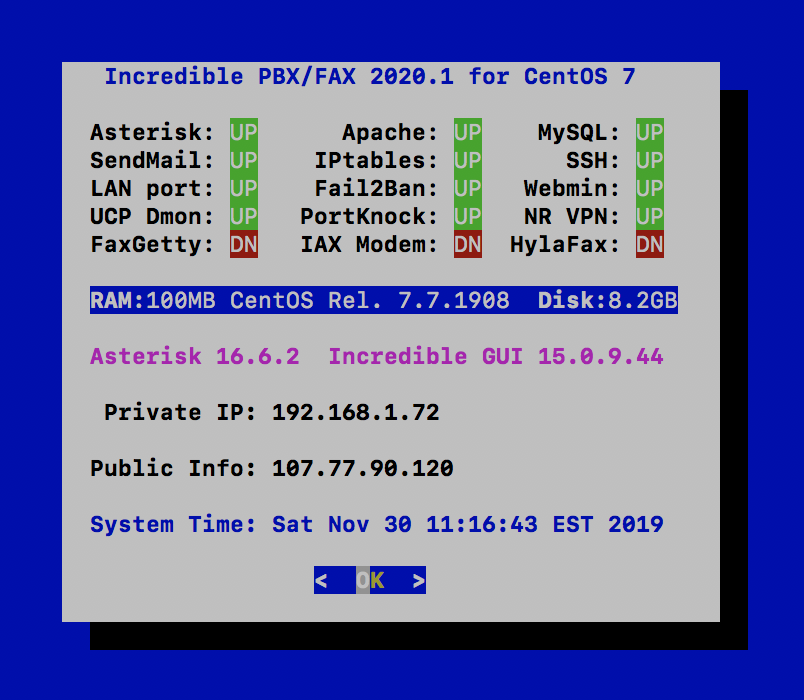
pbxstatus (shown above) displays status of all major components of Incredible PBX 2020.
Forwarding Calls to Your Cellphone. Keep in mind that inbound calls to your DIDs automatically ring all five SIP extensions, 701-705. The easiest way to also ring your cellphone is to set one of these five extensions to forward incoming calls to your cellphone. After logging into your PBX as root, issue the following command to forward calls from extension 705 to your cellphone: asterisk -rx "database put CF 705 6781234567"
To remove call forwarding: asterisk -rx "database del CF 705"
Keeping FreePBX 15 Modules Current
We strongly recommend that you periodically update all of your FreePBX modules to eliminate bugs and to reduce security vulnerabilities. Make a backup image with rpi-clone first! From the Linux CLI, log into your server as root and issue the following commands:
rm -f /tmp/*
fwconsole ma upgradeall
fwconsole reload
/root/sig-fix
systemctl restart apache2
/root/sig-fix
Continue Reading: Icing on the Cake for Incredible PBX and Raspberry Pi
Originally published: Monday, January 27, 2020

Need help with Asterisk? Visit the PBX in a Flash Forum.
Special Thanks to Our Generous Sponsors
FULL DISCLOSURE: ClearlyIP, Skyetel, Vitelity, DigitalOcean, Vultr, VoIP.ms, 3CX, Sangoma, TelecomsXchange and VitalPBX have provided financial support to Nerd Vittles and our open source projects through advertising, referral revenue, and/or merchandise. As an Amazon Associate and Best Buy Affiliate, we also earn from qualifying purchases. We’ve chosen these providers not the other way around. Our decisions are based upon their corporate reputation and the quality of their offerings and pricing. Our recommendations regarding technology are reached without regard to financial compensation except in situations in which comparable products at comparable pricing are available from multiple sources. In this limited case, we support our sponsors because our sponsors support us.
 BOGO Bonaza: Enjoy state-of-the-art VoIP service with a $10 credit and half-price SIP service on up to $500 of Skyetel trunking with free number porting when you fund your Skyetel account. No limits on number of simultaneous calls. Quadruple data center redundancy. $25 monthly minimum spend required. Tutorial and sign up details are here.
![]() The lynchpin of Incredible PBX 2020 and beyond is ClearlyIP components which bring management of FreePBX modules and SIP phone integration to a level never before available with any other Asterisk distribution. And now you can configure and reconfigure your new Incredible PBX phones from the convenience of the Incredible PBX GUI.
The lynchpin of Incredible PBX 2020 and beyond is ClearlyIP components which bring management of FreePBX modules and SIP phone integration to a level never before available with any other Asterisk distribution. And now you can configure and reconfigure your new Incredible PBX phones from the convenience of the Incredible PBX GUI.
 VitalPBX is perhaps the fastest-growing PBX offering based upon Asterisk with an installed presence in more than 100 countries worldwide. VitalPBX has generously provided a customized White Label version of Incredible PBX tailored for use with all Incredible PBX and VitalPBX custom applications. Follow this link for a free test drive!
 Special Thanks to Vitelity. Vitelity is now Voyant Communications and has halted new registrations for the time being. Our special thanks to Vitelity for their unwavering financial support over many years and to the many Nerd Vittles readers who continue to enjoy the benefits of their service offerings. We will keep everyone posted on further developments.

Sangoma’s New FreePBX Gotchas With Module Signatures

The ink was barely dry on Bill Wignall’s December Ode to Open Source in which the CEO sang the praises of Sangoma’s commitment to open source development and extolled the virtues of "reinventing the ways in which we foster relationships with you, our open source community." We’ve now learned that Sangoma is planning to revoke the master key used to sign every FreePBX® module. It will be replaced with a new master key. This affects every developer with an existing GPG key signed by the soon-to-be revoked master key. The practical effect is that every existing FreePBX module will either cease to function or trigger security alerts in the Dashboard of your PBX until every module is updated. In addition, it means every developer will have to apply to have their GPG key resigned with the new master key. We were curious why Sangoma would take such a Draconian step until we read the Module Signature Checking Wiki which was modified by the Sangoma General Counsel yesterday. Here’s the new language that will trigger key revocation from open source developers of FreePBX products:
You have developed and/or are utlizing a module with FreePBX for which you are directly or indirectly generating revenue or commercial advantage and you have not entered into a commercial agreement with Sangoma that protects its commercial interests and its intellectual property
UPDATE: Without addressing whether revocation of the FreePBX Master Key was under consideration, Sangoma now denies any plan to revoke the FreePBX Master Key. See this thread on the FreePBX Forum.
You may recall that AstriCon this year featured zero outside commercial products and organizations. Now it appears Sangoma is taking much the same monopolistic approach on the open source side of the house. And you wonder why Incredible PBX® has always disabled module signature checking.
Fortunately, for those who have deployed Incredible PBX 2020, you have nothing to worry about because every new release of Incredible PBX 2020 utilizes the Clearly IP repository. This assures no interruption in the operation of your PBX.
Before your PBX self-destructs, there’s a simple fix for those using Incredible PBX 13-13 and Incredible PBX 16-15 releases. Although we haven’t tested other distributions, this fix should work fine with all other FreePBX 13 and 15 implementations. Other than rebranding your PBX and changing the destination for module updates, this update makes no other changes to your PBX. Deploying the IncrediblePBX module will also make the Clearly IP Trunking and Phones modules available in the new repository. We’ll be covering these in detail in coming weeks. For those updating a non-Incredible PBX platform, remember to make a backup before proceeding. If you experience problems, post a comment and we’ll get you a quick fix.
Here’s how to download and install the new IncrediblePBX module which will enable the Clearly IP repository on any FreePBX 13 or 15-based server:
cd /var/www/html/admin/modules
wget http://incrediblepbx.com/incrediblepbx-13.03.tgz
tar zxvf incrediblepbx-13.03.tgz
rm -f incrediblepbx-13.03.tgz
fwconsole ma install incrediblepbx
fwconsole reload
fwconsole restart
If you also wish to add support for the new Incredible PBX IP phones including plug-and-play endpoint management and configuration, here’s how. If your system still uses FreePBX 13, be advised that phone apps such as follow-me are not supported because of system limitations on the FreePBX 13 platform.
cd /var/www/html/admin/modules
wget http://incrediblepbx.com/clearlydevices.tgz
tar zxvf clearlydevices.tgz
rm -f clearlydevices.tgz
fwconsole ma install clearlydevices
fwconsole reload
fwconsole restart
These latest developments suggest that perhaps the time has come for a new steward for the FreePBX GPL modules, an organization that actually respects the interests of the open source development community. Stay tuned.
Sangoma Blinks: Here is a belated response from the FreePBX developers.
Originally published: Wednesday, January 22, 2020
Need help with Asterisk? Visit the PBX in a Flash Forum.
Special Thanks to Our Generous Sponsors
FULL DISCLOSURE: ClearlyIP, Skyetel, Vitelity, DigitalOcean, Vultr, VoIP.ms, 3CX, Sangoma, TelecomsXchange and VitalPBX have provided financial support to Nerd Vittles and our open source projects through advertising, referral revenue, and/or merchandise. As an Amazon Associate and Best Buy Affiliate, we also earn from qualifying purchases. We’ve chosen these providers not the other way around. Our decisions are based upon their corporate reputation and the quality of their offerings and pricing. Our recommendations regarding technology are reached without regard to financial compensation except in situations in which comparable products at comparable pricing are available from multiple sources. In this limited case, we support our sponsors because our sponsors support us.
BOGO Bonaza: Enjoy state-of-the-art VoIP service with a $10 credit and half-price SIP service on up to $500 of Skyetel trunking with free number porting when you fund your Skyetel account. No limits on number of simultaneous calls. Quadruple data center redundancy. $25 monthly minimum spend required. Tutorial and sign up details are here.
![]() The lynchpin of Incredible PBX 2020 and beyond is ClearlyIP components which bring management of FreePBX modules and SIP phone integration to a level never before available with any other Asterisk distribution. And now you can configure and reconfigure your new Incredible PBX phones from the convenience of the Incredible PBX GUI.
The lynchpin of Incredible PBX 2020 and beyond is ClearlyIP components which bring management of FreePBX modules and SIP phone integration to a level never before available with any other Asterisk distribution. And now you can configure and reconfigure your new Incredible PBX phones from the convenience of the Incredible PBX GUI.
VitalPBX is perhaps the fastest-growing PBX offering based upon Asterisk with an installed presence in more than 100 countries worldwide. VitalPBX has generously provided a customized White Label version of Incredible PBX tailored for use with all Incredible PBX and VitalPBX custom applications. Follow this link for a free test drive!
Special Thanks to Vitelity. Vitelity is now Voyant Communications and has halted new registrations for the time being. Our special thanks to Vitelity for their unwavering financial support over many years and to the many Nerd Vittles readers who continue to enjoy the benefits of their service offerings. We will keep everyone posted on further developments.
Return of Free Voicemail Transcription & Voice Dialing

It’s been a bumpy road for Speech-to-Text solutions with Asterisk® since Google pulled the rug out from under their (formerly) free offering. We found a partial solution with IBM’s offering which now provides 500 free minutes a month on their LITE plan, or you can choose their Standard Pricing Plan and pay 2¢ a minute for all you can eat. Be advised that the IBM offerings have changed three times in the last year. But we’ve been searching for turnkey voicemail transcription and voice dialer offerings that could be incorporated into Incredible PBX 2020 at no cost. And now we’ve found one thanks to Mozilla Machine Learning Group’s DeepSpeech project. Details here. We also want to thank @Stepan Novotill and @jerrm on the PIAF Forum for their work in bringing this project to fruition for the Asterisk community.
The instructions which follow should work fine with existing Incredible PBX 2020, Incredible PBX 16-15, and Incredible PBX 13-13 platforms running on CentOS 7. We haven’t tested on other platforms, but @jerrm has offered some tips for those using Debian/Raspbian.
Deploying Voicemail Transcription with DeepSpeech
Log into your server as root and issue these commands to install DeepSpeech components:
(NOTE: Lines 4, 5, and 6 below are actually part of a single line of code)
cd /usr/local/sbin
yum -y install python3-pip wget
pip3 install deepspeech
wget -O - https://github.com/mozilla/DeepSpeech/releases/download/v0.6.1/deepspeech-0.6.1-models.tar.gz | tar xzv --no-same-owner
chown -R asterisk:asterisk deepspeech-0.6.1-models
wget http://incrediblepbx.com/sendmail-deepspeech.tar.gz
tar zxvf sendmail-deepspeech.tar.gz
rm -f sendmail-deepspeech.tar.gz
cp -p sendmailmp3.deepspeech sendmailmp3
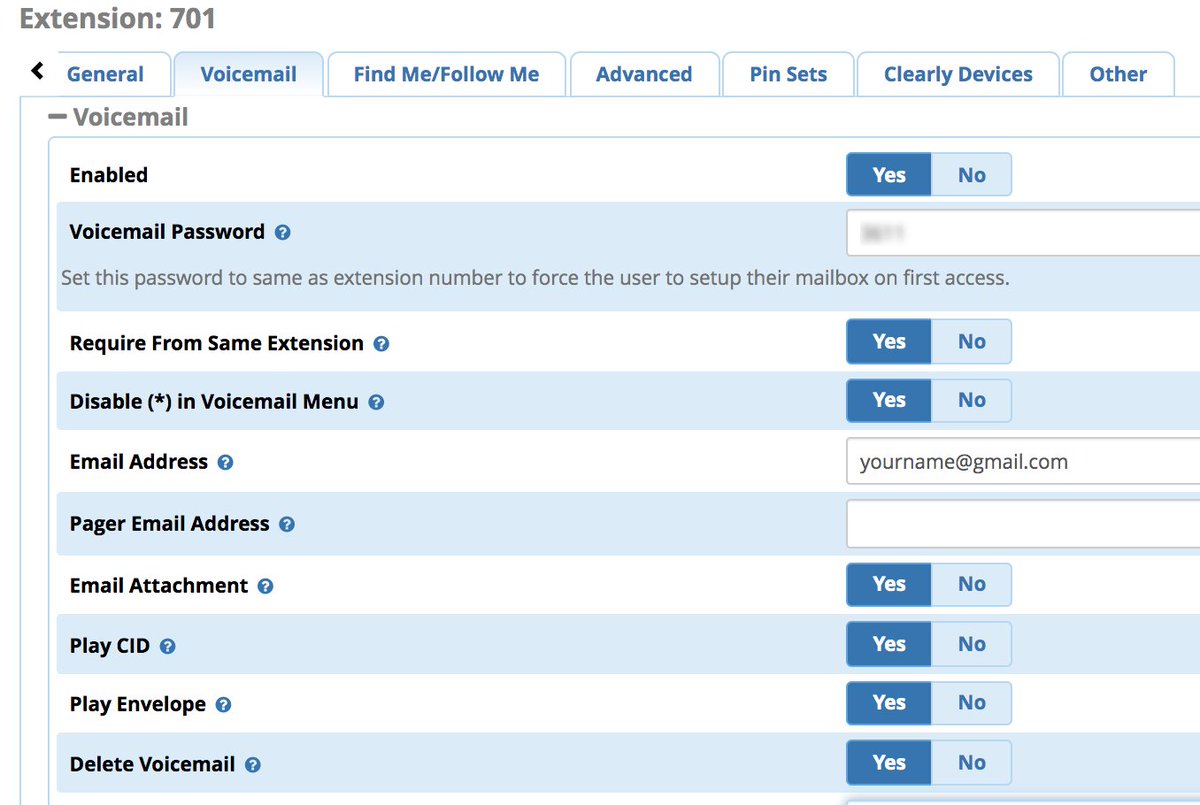
In the FreePBX GUI, edit your extensions and enable voicemail with settings like these:
For delivery of transcribed voicemail messages to arrive in your email, you obviously must have outbound email working on your PBX. You can test this using the following command with your actual email address:
echo "test" | mail -s testmessage yourname@gmail.com
If the email never arrives, first check your spam folder. If it’s not there, then chances are you have not configured an FQDN for your PBX properly. Try the following tips.
hostname noreply.incrediblepbx.com
nano -w /etc/hosts
Make certain the 127.0.0.1 line in /etc/hosts begins like this:
127.0.0.1 noreply.incrediblepbx.com pbx.local
Deploying a Free Voice Dialer with DeepSpeech
Once you complete the steps above, it’s easy to deploy a free Voice Dialer for Asterisk on any Incredible PBX platform. This allows you to pick up a phone connected to your PBX, dial 411, and call any individual or company listed in your AsteriDex database by saying their name.
Issue the following commands to replace the default Incredible PBX Voice Dialer setup:
(NOTE: Lines 6 and 7 below are actually part of a single line of code)
cd /usr/local/sbin
mv deepspeech-411.txt /var/lib/asterisk/agi-bin
mv getnumber2.sh /var/lib/asterisk/agi-bin
cd /etc/asterisk
sed -i '\:// BEGIN Call by Name:,\:// END Call by Name:d' extensions_custom.conf
sed -i '/\[from-internal-custom\]/r /var/lib/asterisk/agi-bin/deepspeech-411.txt' extensions_custom.conf
asterisk -rx "dialplan reload"
Now pick up a phone on your PBX and dial 411. When prompted, say "American Airlines" and then press the pound (#) key. You’ll be connected to American Airlines reservations. Enjoy!
Originally published: Monday, January 20, 2020
Need help with Asterisk? Visit the VoIP-info Forum.
Special Thanks to Our Generous Sponsors
FULL DISCLOSURE: ClearlyIP, Skyetel, Vitelity, DigitalOcean, Vultr, VoIP.ms, 3CX, Sangoma, TelecomsXchange and VitalPBX have provided financial support to Nerd Vittles and our open source projects through advertising, referral revenue, and/or merchandise. As an Amazon Associate and Best Buy Affiliate, we also earn from qualifying purchases. We’ve chosen these providers not the other way around. Our decisions are based upon their corporate reputation and the quality of their offerings and pricing. Our recommendations regarding technology are reached without regard to financial compensation except in situations in which comparable products at comparable pricing are available from multiple sources. In this limited case, we support our sponsors because our sponsors support us.
BOGO Bonaza: Enjoy state-of-the-art VoIP service with a $10 credit and half-price SIP service on up to $500 of Skyetel trunking with free number porting when you fund your Skyetel account. No limits on number of simultaneous calls. Quadruple data center redundancy. $25 monthly minimum spend required. Tutorial and sign up details are here.
![]() The lynchpin of Incredible PBX 2020 and beyond is ClearlyIP components which bring management of FreePBX modules and SIP phone integration to a level never before available with any other Asterisk distribution. And now you can configure and reconfigure your new Incredible PBX phones from the convenience of the Incredible PBX GUI.
The lynchpin of Incredible PBX 2020 and beyond is ClearlyIP components which bring management of FreePBX modules and SIP phone integration to a level never before available with any other Asterisk distribution. And now you can configure and reconfigure your new Incredible PBX phones from the convenience of the Incredible PBX GUI.
VitalPBX is perhaps the fastest-growing PBX offering based upon Asterisk with an installed presence in more than 100 countries worldwide. VitalPBX has generously provided a customized White Label version of Incredible PBX tailored for use with all Incredible PBX and VitalPBX custom applications. Follow this link for a free test drive!
Special Thanks to Vitelity. Vitelity is now Voyant Communications and has halted new registrations for the time being. Our special thanks to Vitelity for their unwavering financial support over many years and to the many Nerd Vittles readers who continue to enjoy the benefits of their service offerings. We will keep everyone posted on further developments.
Introducing Plug-and-Play Incredible PBX IP Phones

Let’s face it. One of the most tedious tasks in setting up a new PBX is configuring all of the buttons on all of the SIP phones connected to your PBX. Finally, there’s a one-click solution with the new Incredible IP Phones from ClearlyIP. Using the Clearly IP Devices module included in every Incredible PBX 2020 platform, you can use a web browser to point-and-click your way through setting up one or multiple phone configurations which can be pushed to every phone by simply entering its MAC address and extension number. When changes are needed, simply modify the web configuration for the desired phones and the modifications are immediately pushed to the affected devices without ever rebooting any of the affected phones. If you only have a couple extensions attached to your PBX, this may not sound like a big deal; however, if you have hundreds of phones in dozens of locations, you’ve just saved yourself hundreds of hours and thousands of dollars in labor costs.
Unlike the Sangoma "solution" there’s no costly FreePBX module required to auto-provision Incredible PBX phones. It’s an integral component of Incredible PBX 2020.
But don’t take our word for it. Watch Chris Sherwood’s YouTube video above and chuckle to yourself knowing that the first two of the four setup steps are already in place with every new Incredible PBX 2020 install.
Better yet, sign up for one of the (free) Tony Lewis webinars currently scheduled for this Tuesday, January 7, at 2 p.m. Eastern time or Friday, January 10 at 9 a.m. Eastern time. You may remember Tony as the former Chief Operating Officer at Sangoma until he resigned and started the new ClearlyIP organization in which he now serves as the CEO. Come join us!
We’ll hold off the tutorial for a bit to give everyone an opportunity to watch the video and attend one of the webinars on Tuesday. Be sure to sign up to reserve your place. Then check back here soon for the Incredible IP Phones tutorial.
Continue reading: ClearlyIP Introduces New Features for Incredible PBX Phones
Originally published: Sunday, January 5, 2020
Need help with Asterisk? Visit the VoIP-info Forum.
Special Thanks to Our Generous Sponsors
FULL DISCLOSURE: ClearlyIP, Skyetel, Vitelity, DigitalOcean, Vultr, VoIP.ms, 3CX, Sangoma, TelecomsXchange and VitalPBX have provided financial support to Nerd Vittles and our open source projects through advertising, referral revenue, and/or merchandise. As an Amazon Associate and Best Buy Affiliate, we also earn from qualifying purchases. We’ve chosen these providers not the other way around. Our decisions are based upon their corporate reputation and the quality of their offerings and pricing. Our recommendations regarding technology are reached without regard to financial compensation except in situations in which comparable products at comparable pricing are available from multiple sources. In this limited case, we support our sponsors because our sponsors support us.
BOGO Bonaza: Enjoy state-of-the-art VoIP service with a $10 credit and half-price SIP service on up to $500 of Skyetel trunking with free number porting when you fund your Skyetel account. No limits on number of simultaneous calls. Quadruple data center redundancy. $25 monthly minimum spend required. Tutorial and sign up details are here.
![]() The lynchpin of Incredible PBX 2020 and beyond is ClearlyIP components which bring management of FreePBX modules and SIP phone integration to a level never before available with any other Asterisk distribution. And now you can configure and reconfigure your new Incredible PBX phones from the convenience of the Incredible PBX GUI.
The lynchpin of Incredible PBX 2020 and beyond is ClearlyIP components which bring management of FreePBX modules and SIP phone integration to a level never before available with any other Asterisk distribution. And now you can configure and reconfigure your new Incredible PBX phones from the convenience of the Incredible PBX GUI.
VitalPBX is perhaps the fastest-growing PBX offering based upon Asterisk with an installed presence in more than 100 countries worldwide. VitalPBX has generously provided a customized White Label version of Incredible PBX tailored for use with all Incredible PBX and VitalPBX custom applications. Follow this link for a free test drive!
Special Thanks to Vitelity. Vitelity is now Voyant Communications and has halted new registrations for the time being. Our special thanks to Vitelity for their unwavering financial support over many years and to the many Nerd Vittles readers who continue to enjoy the benefits of their service offerings. We will keep everyone posted on further developments.
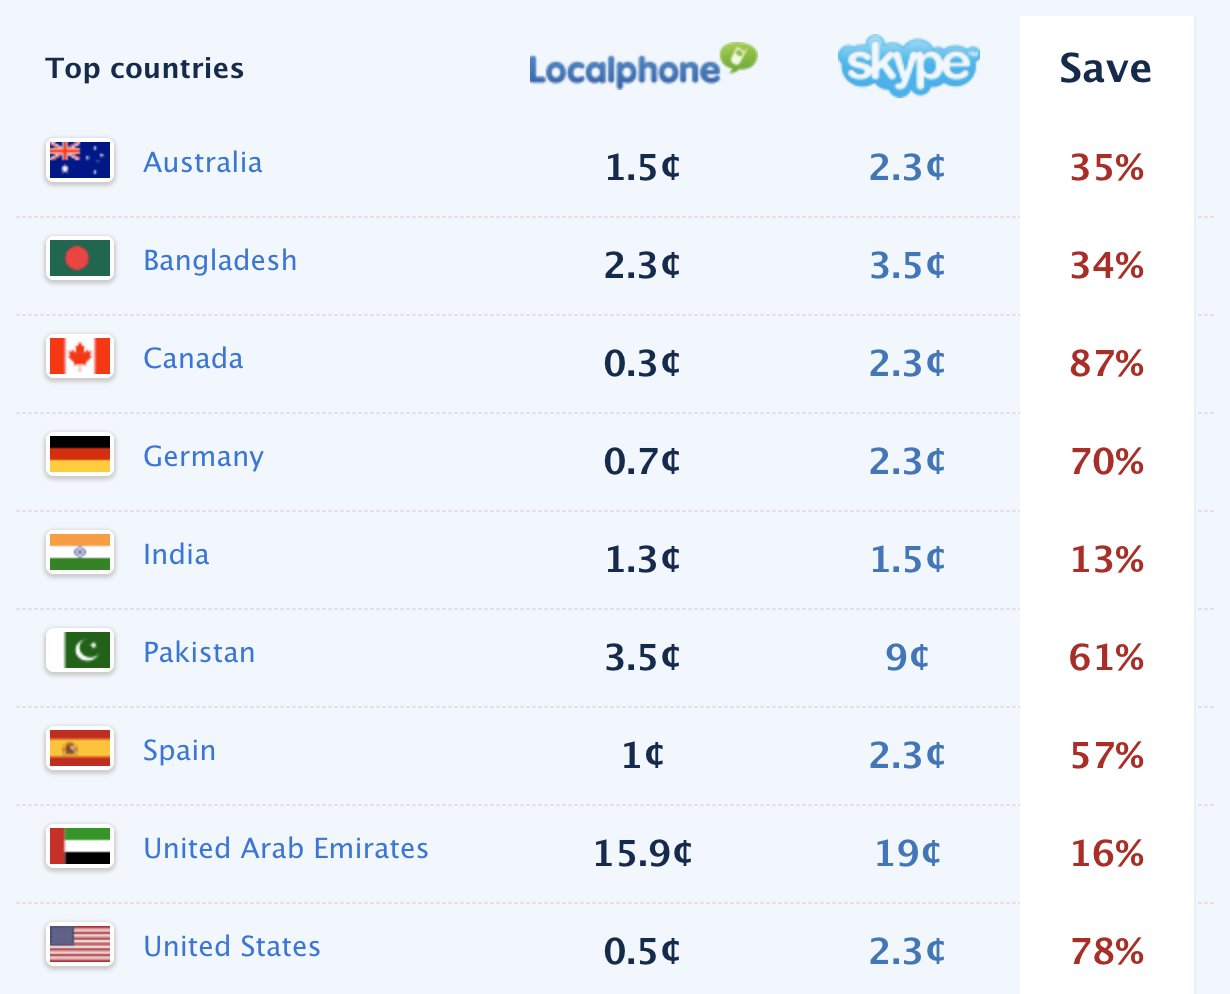
The Next Best Thing to (formerly free) Google Voice

Today we want to once again shine the spotlight on LocalPhone, an oft-overlooked VoIP service that’s been around forever. You can call to and be called from any LocalPhone user at no cost. They also offer phone numbers (DIDs) of your choice almost anywhere in the world with free or almost free incoming calls. For those wanting a U.S. DID, the cost is 99¢ a month with a $3 setup fee. That gets you up to 100 free incoming calls a day to your PBX or any SIP phone. Additional calls are a penny per call. There are no limitations on the duration of the calls. If you prefer to forward the calls to your cellphone number in the contiguous U.S., there’s an additional fee of 0.5¢ per minute. But there’s little reason to do that when sending the calls to a SIP softphone on your Android device or iPhone is free. And now the mobile LocalPhone app supports PUSH Notifications. We’ll show you how.
FYI: Nerd Vittles receives a referral credit to keep the lights on when you sign up for service.
Deciphering Your SIP Credentials with LocalPhone
Once you have signed up for a LocalPhone account, the first thing you’ll want to do is make note of your Internet Phone credentials under My Account. These are what we typically refer to as SIP credentials consisting of a SIP ID, SIP password, and SIP server (localphone.com). That’s all you’ll need to configure an incoming LocalPhone trunk on any Incredible PBX® server. And these are the same settings you’d use to configure any SIP phone running on any Android or iOS device. As we noted, you and any other LocalPhone user can call any Internet Phone number worldwide at no cost without limitation. For world travelers, you’ll want to download the LocalPhone app for your smartphone (Android or iOS) and take advantage of their extremely competitive international calling rates.1
Ordering Incoming Numbers (DIDs) from LocalPhone
Begin by funding your account under My Account -> Add Credit. $10 will last you a long time.
The next step is to order one or more incoming phone numbers from LocalPhone.2 If you have friends in far away places that call you frequently, you can purchase DIDs in those locations to eliminate the cost of incoming calls both to them and to you. If you only want a dirt cheap U.S. DID for your home or small office, then LocalPhone is also a perfect fit. Navigate to My Account -> Incoming Numbers and choose the United States as the desired Country. Next, pick the State and City for the desired DID. For free incoming calls, set Call Forwarding and Caller ID for Internet Phone to your assigned Internet Phone SIP ID. You can also elect to forward calls to a SIP URI, if desired. Agree to the terms of use and make your purchase.
Configuring a LocalPhone Trunk with Incredible PBX
We’ve previously covered the LocalPhone trunk setup with Wazo. Most other releases of Incredible PBX include preconfigured LocalPhone trunks for incoming and outgoing calls. Login to the Incredible PBX GUI as admin using your favorite browser and navigate to Connectivity -> Trunks and edit the LocalPhone-In trunk. Set Disable Trunk to NO. Then click the sip-Settings tab. Insert your LocalPhone SIP ID in the username, fromuser, and authuser fields. Insert your LocalPhone SIP Password in the secret field. Change the context field entry to from-trunk. Click on the Incoming tab, and modify the Register String 9999999:yourpassword@localphone.com/9999999 replacing 9999999 with your LocalPhone SIP ID and yourpassword with your LocalPhone SIP Password. Click the Submit button and reload your dialplan when prompted.
Navigate to Connectivity -> Inbound Routes and create a new Inbound Route for LocalPhone using your SIP ID as the DID Number and choosing a desired Destination for incoming calls from your LocalPhone DID. Save your settings and reload the dialplan when prompted.
Configuring a LocalPhone Trunk with VitalPBX
Login to the VitalPBX GUI as admin using your favorite browser and navigate to PBX -> External -> Trunks. Create a new SIP trunk with the following settings replacing 999999 with your LocalPhone SIP ID and 1234 with the LocalPhone SIP Password. Leave the Device for Incoming Calls (User) section blank. Then click SAVE and reload your dialplan.
- Description: LocalPhone
- Codecs: ulaw,alaw
- Local Username: 999999
- Remote Host: localphone.com
- Remote Port: 5060
- Local Secret: 1234
- Insecure: Port,Invite
- Allow Inbound Calls: YES
- Username: [leave blank]
- Host: [leave blank]
- Local Secret: [leave blank]
- Remote Username: 999999
- Remote Secret: 1234
- From User: 999999
- From Domain: localphone.com
- Qualify: YES
- Insecure: [leave blank]
- IP Authentication: NO
- Qualify: [leave default]
- Register String: 999999:1234@localphone.com/999999
Navigate to PBX -> External -> Inbound Routes. Create a new Inbound Route for LocalPhone using your SIP ID as the DID Number and choosing a desired Destination for incoming calls from your LocalPhone DID. Save your settings and reload the dialplan when prompted.
Configuring a LocalPhone Trunk with FreePBX
Login to the FreePBX® GUI as admin using your favorite browser and navigate to Connectivity -> Trunks. Add a new chan_sip trunk named localphone. Then click on the sipSettings tab and enter the following replacing 999999 with your LocalPhone SIP ID and 1234 with the LocalPhone SIP Password.
- username=9999999
- type=friend
- secret=1234
- nat=no
- insecure=port,invite
- host=localphone.com
- fromuser=9999999
- fromdomain=localphone.com
- dtmfmode=rfc2833
- disallow=all
- context=from-trunk
- canreinvite=no
- authuser=9999999
- allow=ulaw&alaw
Next, click on the Incoming tab and enter the following Register String replacing 999999 with your LocalPhone SIP ID and 1234 with the LocalPhone SIP Password:
9999999:1234@localphone.com/9999999
Then click SUBMIT and reload your dialplan.
Navigate to Connectivity -> Inbound Routes and create a new Inbound Route for LocalPhone using your SIP ID as the DID Number and choosing a desired Destination for incoming calls from your LocalPhone DID. Save your settings and reload the dialplan when prompted.
Using Local Numbers for International Calls
LocalPhone has a unique feature that lets you dial a local number from a phone number you have whitelisted in your country and reach almost anyone in the world that you’ve added to your Contacts List. You only pay LocalPhone’s discounted international calling rate for the calls. For example, to call a landline in the U.K. from the U.S. using a LocalPhone-provided U.S. phone number, the calling rate is less than a penny a minute. A call to Cyprus by dialing a U.S. number assigned to your account for your whitelisted phone numbers is 4.5 cents per minute. To get started setting up your whitelisted phone numbers and contacts list, navigate to My Account -> Local Numbers in your LocalPhone account. In your Local Numbers list, first add and verify phone numbers you want to authorize to make calls on your nickel. Next, add the names and phone numbers of international destinations you wish to reach by dialing a local number. LocalPhone will immediately assign a local number for each destination. Simply add these local numbers to the contacts list on your smartphone, and you can call from anywhere in your country at the discounted LocalPhone international calling rates. There are no double-dialing or call menus to navigate. Dialing the assigned local number transparently connects you directly to your destination with no intermediate hurdles.
Using LocalPhone with Other Trunk Providers
So long as your PBX doesn’t have more than two incoming calls to a single DID at the same time, the most economical PBX design is to use LocalPhone DIDs as your published DIDs. This reduces the cost of incoming calls to less than a dollar a month per DID for up to 3,000 incoming calls of unlimited duration. Then use one of our Platinum Sponsors, Skyetel or our soon-to-be-available ClearlyIP SIP trunking service for outbound calls and spoof the outbound CallerID on those other trunks using your LocalPhone DID.
Enjoying the Best of All Worlds with LocalPhone
If you have an iPhone or Android smartphone in addition to a PBX, you can take advantage of LocalPhone’s ability to send incoming calls to multiple destinations. Just make sure your PBX isn’t routing the incoming calls to a destination that is automatically answered, e.g. an IVR. On your Android phone, download the VitalPBX Communicator from the Google Play Store and configure a SIP connection using your LocalPhone SIP credentials. Incoming calls from your LocalPhone DIDs and Internet Phone Number now will be sent to both destinations.
If you have followed one of our previous tutorials that document making SIP URI calls from either a PBX or a SIP client such as LinPhone on your smartphone, then you can take advantage of LocalPhone’s incoming SIP URI feature.3 Just dial 9999999@localphone.com where 9999999 is any LocalPhone SIP ID. You also can add Custom Extensions in Incredible PBX much like the Lenny extension using a Dial string of SIP/9999999@localphone.com to reach worldwide LocalPhone destinations from any PBX extension at no cost. Enjoy!
Originally published: Monday, December 9, 2019
Need help with Asterisk? Visit the VoIP-info Forum.
Special Thanks to Our Generous Sponsors
FULL DISCLOSURE: ClearlyIP, Skyetel, Vitelity, DigitalOcean, Vultr, VoIP.ms, 3CX, Sangoma, TelecomsXchange and VitalPBX have provided financial support to Nerd Vittles and our open source projects through advertising, referral revenue, and/or merchandise. As an Amazon Associate and Best Buy Affiliate, we also earn from qualifying purchases. We’ve chosen these providers not the other way around. Our decisions are based upon their corporate reputation and the quality of their offerings and pricing. Our recommendations regarding technology are reached without regard to financial compensation except in situations in which comparable products at comparable pricing are available from multiple sources. In this limited case, we support our sponsors because our sponsors support us.
BOGO Bonaza: Enjoy state-of-the-art VoIP service with a $10 credit and half-price SIP service on up to $500 of Skyetel trunking with free number porting when you fund your Skyetel account. No limits on number of simultaneous calls. Quadruple data center redundancy. $25 monthly minimum spend required. Tutorial and sign up details are here.VitalPBX is perhaps the fastest-growing PBX offering based upon Asterisk with an installed presence in more than 100 countries worldwide. VitalPBX has generously provided a customized White Label version of Incredible PBX tailored for use with all Incredible PBX and VitalPBX custom applications. Follow this link for a free test drive!Special Thanks to Vitelity. Vitelity is now Voyant Communications and has halted new registrations for the time being. Our special thanks to Vitelity for their unwavering financial support over many years and to the many Nerd Vittles readers who continue to enjoy the benefits of their service offerings. We will keep everyone posted on further developments.
- Rates are based on the lowest pay as you go per-minute price to call a landline or a mobile. Skype is a registered trademark of Microsoft Corporation. [↩]
- LocalPhone advises that DID fulfillment can take up to 14 days although our orders always have been completed in less than an hour. [↩]
- LocalPhone offers call filtering for your Internet Phone number using either a blacklist or whitelist in addition to offering the option of blocking anonymous calls. [↩]
Meet Incredible PBX 2020 for CentOS 7
We are pleased to introduce the production-ready release of Incredible PBX® 2020 for CentOS 7 with the latest version of Asterisk® 16 and the Clearly IP-enhanced FreePBX® 15 components supporting the new Incredible PBX line of SIP phones. Today’s the final day to score some incredible deals on Incredible PBX hardware (above) and, for those that prefer cloud-based platforms, the new Incredible PBX 2020 installer for CentOS 7 is now available as well. Complete documentation is provided below for do-it-yourselfers.
In addition to the latest Asterisk 16 release, you also get the entire FreePBX 15 GPL module collection including the ClearlyIP-enhanced User Control Panel (UCP) plus the Incredible PBX device management module which lets you provision the entire Incredible PBX phone line from within the GUI. The module also allows direct integration with PBX functions allowing your end-users to control their button maps, BLF, speed dials and applications such as presence control, follow-me settings and login-logout coming soon. As new applications are added or developed they will be available for use on the Incredible PBX phones.
Incredible PBX 2020 is plug-and-play with immediate calling capability using any of four commercial SIP providers. And ClearlyIP self-configuring trunks will be available later this month with native SMS capability as well as inbound AND outbound CNAM and E911 support. For do-it-yourselfers, you can choose one of 16 other preconfigured SIP providers, enter your credentials, and enjoy instant connectivity without worrying about SIP settings. Last, but not least, you can easily turn your Incredible PBX 2020 server into a secure public-facing PBX, add fax support, or interconnect a Raspberry Pi for traveling so that you never miss a call.
What’s Included? Incredible PBX 2020 serves up a VoIP powerhouse featuring Asterisk 16, the FreePBX 15 GPL platform including User Control Panel (UCP), an Apache web server, the latest MariaDB SQL server (formerly MySQL), SendMail, and the Incredible PBX feature set including SIP, SMS, Opus, voice recognition, PicoTTS Text-to-Speech VoIP applications plus fax support, Click-to-Dial, News, Weather, Reminders, ODBC, and hundreds of features that typically are found in commercial PBXs: Conferencing, IVRs and AutoAttendants, Email Delivery of Voicemails, and much more.
Choosing a SIP Provider. Incredible PBX 2020 comes preconfigured with support for five SIP extensions and four of the major SIP providers: Skyetel, VoIP.ms, V1VoIP, and Anveo Direct. We obviously hope you’ll choose Skyetel not only because they financially support Nerd Vittles and our open source projects, but also because it is a clearly superior platform offering crystal-clear communications and triple-redundancy so you never miss a call. Skyetel also sets itself apart from the other providers in the support department. They actually respond to issues, and there’s never a charge. As the old saying goes, they may not be the cheapest, but you get what you pay for. Even without taking advantage of Nerd Vittles half-price offer on up to $500 of Skyetel services, they’re still dirt cheap compared to the Bell Sisters and cable companies. Skyetel is so sure you’ll love their service that they give you a $10 credit to kick the tires before you ever spend a dime. Traditional DIDs are $1 per month. Outbound conversational calls are $0.012 per minute. Incoming conversational calls are a penny a minute, and CallerID lookups are $0.004. You only pay for minutes you use. Once you’re satisfied with the service and fund your account, you can port in your existing DIDs at no cost for 60 days after signup. In short, you have nothing to lose by trying out the Skyetel service. Effective 10/1/2023, $25/month minimum spend required.
Choosing a Platform for Incredible PBX 2020
As with our other open source offerings, the platform choice for Incredible PBX 2020 depends upon a number of factors. For on-premise installations, we recommend you consider the Incredible PBX server which works well for home or SOHO implementations. Cloud-based platforms are available for about $2-$5 a month. We no longer recommend the OpenVZ offerings below because of a bug in the SolusVM systemd implementation with CentOS 7. KVM platforms are much more robust and reliable, but you still need off-site backups AND a tested backup plan. Three providers previously listed have closed their doors in 2019. You’ve been warned.
Vultr, Digital Ocean, and OVH are your best bets at the moment. And Vultr and Digital Ocean both support Nerd Vittles through referral credits.
| Provider | RAM | Disk | Bandwidth | Performance as of 12/1/19 | Cost |
|---|---|---|---|---|---|
| CrownCloud KVM (LA) | 1GB | 20GB + Snapshot | 1TB/month | 598Mb/DN 281Mb/UP 2CPU Core | $25/year Best Buy! |
| Naranjatech KVM (The Netherlands) | 1GB | 20GB | 1TB/month | Hosting since 2005 VAT: EU res. | 20€/year w/code: SBF2019 |
| BudgetNode KVM (LA) | 1GB | 40GB RAID10 | 1TB/month | Also available in U.K PM @Ishaq on LET before payment | $24/year |
| FreeRangeCloud KVM (Ashburn VA, Winnipeg, Freemont CA) | 1GB | 20GB SSD | 3TB/month | Pick EGG loc'n Open ticket for last 5GB SSD | $30/year w/code: LEBEGG30 |
Installing Incredible PBX 2020 with CentOS 7
NOTE: The generic Incredible PBX 2020 tarball below is suitable for ALL CentOS 7 platforms. If you are installing Incredible PBX on dedicated hardware, a slightly enhanced implementation of Asterisk is possible using the BUILD_NATIVE flag. Do not use this option on virtual machine platforms or in environments where the processor may change if you may migrate to new hardware down the road as Asterisk will not load successfully. To download the enhanced version, replace the incrediblepbx2020.1.tar.gz lines below with this tarball: incrediblepbx2020.1.native.tar.gz.
If you’ve installed previous iterations of Incredible PBX, today’s drill is similar. Here is a thumbnail sketch of the install procedure for Incredible PBX 2020. Begin by installing a minimal CentOS 7 (64-bit) platform or pick the CentOS 7 option with 1GB RAM and 20GB of storage from your cloud provider’s menu of choices. Then log into your server as root using SSH or Putty from a desktop PC that you will use to manage your PBX. This assures that your desktop machine gets whitelisted in the firewall setup. Now issue the following commands:
passwd
yum -y update
yum -y install net-tools nano wget tar
cd /root
wget http://incrediblepbx.com/incrediblepbx2020.1.tar.gz
tar zxvf incrediblepbx2020.1.tar.gz
rm -f incrediblepbx2020.1.tar.gz
# to add swap file on non-OpenVZ cloud platforms with no swap file
./create-swapfile-DO
# kick off Phase I install
./IncrediblePBX2020.sh
# after reboot, kick off Phase II install
./IncrediblePBX2020.sh
# set desired timezone
./timezone-setup
# set FreePBX admin password
./admin-pw-change
# set Apache admin password for AsteriDex and Reminders
./apache-pw-change
# display your passwords
./show-passwords
# optionally install Incredible Fax 2020
./incrediblefax2020.sh
# remember to enable TUN/TAP if using VPS Control Panel with OpenVZ
# reconfigure PortKnocker if installing on an OpenVZ platform
echo 'OPTIONS="-i venet0:0"' >> /etc/sysconfig/knockd
service knockd restart
# set up NeoRouter VPN client, if desired
nrclientcmd
# check network speed
wget -O speedtest-cli https://raw.githubusercontent.com/sivel/speedtest-cli/master/speedtest.py
chmod +x speedtest-cli
./speedtest-cli
WebMin is also installed and configured as part of the base install. The root password for access is the same as your Linux root password. We strongly recommend that you not use WebMin to make configuration changes to your server. You may inadvertently damage the operation of your PBX beyond repair. WebMin is an excellent tool to LOOK at how your server is configured. When used for that purpose, we highly recommend WebMin as a way to become familiar with your Linux configuration.
Planning Ahead for That Rainy Day
If you haven’t already learned the hard way, let us save you from a future shock. Hardware fails. All of it. So spend an extra hour now so that you’ll be prepared when (not if) disaster strikes. First, once you have your new PBX configured the way you plan to use it, make a backup of your PBX by running the Incredible Backup script: /root/incrediblebackup16
Copy down the name of the backup file that was created. You’ll need it in a few minutes.
Second, build yourself an identical VirtualBox platform on your desktop PC. It’s the same steps as outlined above.
Next, create a /backup folder on your VirtualBox PBX and copy the backup file from your main server to your VirtualBox server and restore it after logging in to VirtualBox PBX as root:
mkdir /backup
scp root@main-pbx-ip-address:/backup/backup-file-name.tar.gz /backup/.
/root/incrediblerestore16 /backup/backup-file-name.tar.gz
Complaints that you "forgot" to make a backup and your hardware has failed or your provider has gone out of business are not welcomed. We’re sorry for your loss. Case closed.
Completing the Incredible PBX Setup Procedure
Unless your desktop PC and server are both on the same private LAN, the install procedure should be performed from a desktop PC using SSH or Putty. This will insure that your desktop PC is also whitelisted in the Incredible PBX firewall. Using the console to perform the install is NOT recommended as your desktop PC will not be whitelisted in the firewall. This may result in your not being able to log in to your server. Once you have network connectivity, log in to your server as root from a desktop PC using your root password. Accept the license agreement by pressing ENTER.
Kick off the Phase I install. Once your server reboots and you log back in as root, start the Phase II install. All of your passwords will be randomly assigned with the exception of the root user Linux password. You can set it at any time by issuing the command: passwd. You also must set up an admin password to access the FreePBX web GUI with the command: /root/admin-pw-change. With the exception of your root user and FreePBX admin passwords, most of the remaining passwords can be displayed using the command: /root/show-passwords.
Finally, if your PBX is sitting behind a NAT-based router, you’ll need to redirect incoming UDP 5060 and UDP 10000-20000 traffic to the private IP address of your PBX. This is required for all of the SIP providers included in the Incredible PBX 2020 default build that don’t require a SIP registration. Otherwise, inbound calls will fail.
Configuring Skyetel for Incredible PBX 2020
If you’ve decided to go with Skyetel, here’s the drill. Sign up for Skyetel service and take advantage of the Nerd Vittles specials. First, complete the Prequalification Form here. You then will be provided a link to the Skyetel site to complete your registration. Once you have registered on the Skyetel site and your account has been activated, open a support ticket and request the $10 credit for your account by referencing the Nerd Vittles special offer. Once you are satisfied with the service, fund your account as desired, and Skyetel will match your deposit of up to $250 simply by opening another ticket. That gets you up to $500 of half-price calling. Credit is limited to one per person/company/address/location.
Skyetel does not use SIP registrations to make connections to your PBX. Instead, Skyetel utilizes Endpoint Groups to identify which servers can communicate with the Skyetel service. An Endpoint Group consists of a Name, an IP address, a UDP or TCP port for the connection, and a numerical Priority for the group. For incoming calls destined to your PBX, DIDs are associated with an Endpoint Group to route the calls to your PBX. For outgoing calls from your PBX, a matching Endpoint Group is required to authorize outbound calls through the Skyetel network. Thus, the first step in configuring the Skyetel side for use with your PBX is to set up an Endpoint Group. Here’s a typical setup for Incredible PBX 2020:
- Name: MyPBX
- Priority: 1
- IP Address: PBX-Public-IP-Address
- Port: 5060
- Protocol: UDP
- Description: my.incrediblepbx.com
To receive incoming PSTN calls, you’ll need at least one DID. On the Skyetel site, you acquire DIDs under the Phone Numbers tab. You have the option of Porting in Existing Numbers (free for the first 60 days after you sign up for service) or purchasing new ones under the Buy Phone Numbers menu option.
Once you have acquired one or more DIDs, navigate to the Local Numbers or Toll Free Numbers tab and specify the desired SIP Format and Endpoint Group for each DID. Add SMS/MMS and E911 support, if desired. Call Forwarding and Failover are also supported. That completes the VoIP setup on the Skyetel side. System Status is always available here.
Configuring VoIP.ms for Incredible PBX 2020
To sign up for VoIP.ms service, may we suggest you use our signup link so that Nerd Vittles gets a referral credit for your signup. Once your account is set up, you’ll need to set up a SIP SubAccount and, for Authentication Type, choose Static IP Authentication and enter your Incredible PBX 2020 server’s public IP address. For Transport, choose UDP. For Device Type, choose Asterisk, IP PBX, Gateway or VoIP Switch. Order a DID in their web panel, and then point the DID to the SubAccount you just created. Be sure to specify atlanta1.voip.ms as the POP from which to receive incoming calls. In the Incredible PBX GUI, be sure to enable the VoIP.ms trunk.
Configuring V1VoIP for Incredible PBX 2020
To sign up for V1VoIP service, sign up on their web site. Then login to your account and order a DID under the DIDs tab. Once the DID has been assigned, choose View DIDs and click on the Forwarding button beside your DID. For Option #1, choose Forward to IP Address/PBX. For the Forwarding Address, enter the public IP address of your server. For the T/O (timeout) value, set it to 2o seconds. Then click the Update button. Under the Termination tab, create a new Endpoint with the public IP address of your server so that you can place outbound calls through V1VoIP. In the Incredible PBX GUI, be sure to enable all of the V1VoIP trunks.
Configuring Anveo Direct for Incredible PBX 2020
To sign up for Anveo Direct service, sign up on their web site and then login. After adding funds to your account, purchase a DID under Inbound Service -> Order DID. Next, choose Configure Destination SIP Trunk. Give the Trunk a name. For the Primary SIP URI, enter $[E164]$@server-IP-address. For Call Options, select your new DID from the list. You also must whitelist your public IP address under Outbound Service -> Configure. Create a new Call Termination Trunk and name it to match your server. For Dialing Prefix, choose six alphanumeric characters beginning with a zero. In Authorized IP Addresses, enter the public IP address of your server. Set an appropriate rate cap. We like $0.01 per minute to be safe. Set a concurrent calls limit. We like 2. For the Call Routing Method, choose Least Cost unless you’re feeling extravagant. For Routes/Carriers, choose Standard Routes. Write down your Dialing Prefix and then click the Save button.
Before you can make outbound calls through Anveo Direct from your PBX, you first must configure the Dialing Prefix that you wrote down in the previous step. Log into the GUI as admin using a web browser and edit the Anveo-Out trunk in Connectivity -> Trunks. Enable the Trunk. Then click on the custom-Settings tab and replace anveo-pin with your actual Dialing Prefix. Click Submit and Apply Config to complete the setup. In the Incredible PBX GUI, be sure to enable all of the remaining Anveo trunks.
By default, incoming Anveo Direct calls will be processed by the Default inbound route on your PBX. If you wish to redirect incoming Anveo Direct calls using DID-specific inbound routes, then you’ve got a bit more work to do. In addition to creating the inbound route using the 11-digit Anveo Direct DID, enter the following commands after logging into your server as root using SSH/Putty:
cd /etc/asterisk
echo "[from-anveo]" >> extensions_custom.conf
echo "exten => _.,1,Ringing" >> extensions_custom.conf
echo "exten => _.,n,Goto(from-trunk,\\${SIP_HEADER(X-anveo-e164)},1)" >> extensions_custom.conf
asterisk -rx "dialplan reload"
Configuring a Softphone for Incredible PBX 2020
We’re in the home stretch now. You can connect virtually any kind of telephone to your new PBX. Plain Old Phones require an analog telephone adapter (ATA) which can be a separate board in your computer from a company such as Digium. Or it can be a standalone SIP device such as ObiHai’s OBi100 or OBi110 (if you have a phone line from Ma Bell to hook up as well). SIP phones can be connected directly so long as they have an IP address. These could be hardware devices or software devices such as the YateClient softphone. We’ll start with a free one today so you can begin making calls. You can find dozens of recommendations for hardware-based SIP phones both on Nerd Vittles and the PIAF Forum when you’re ready to get serious about VoIP telephony.
We recommend YateClient which is free. Download it from here. Run YateClient once you’ve installed it and enter the credentials for the 701 extension on Incredible PBX. You can find them by running /root/show-passwords. You’ll need the IP address of your server plus your extension 701 password. In the YateClient, fill in the blanks using the IP address of your Server, 701 for your Username, and whatever Password was assigned to the extension when you installed Incredible PBX. Click OK to save your entries.
Once you are registered to extension 701, close the Account window. Then click on YATE’s Telephony Tab and place some test calls to the numerous apps that are preconfigured on Incredible PBX. Dial a few of these to get started:
DEMO - Apps Demo
123 - Reminders
947 - Weather by ZIP Code
951 - Yahoo News
TODAY - Today in History
LENNY - The Telemarketer's Worst Nightmare
If you are a Mac user, another great no-frills softphone is Telephone. Just download and install it from the Mac App Store. For Android users, check out the terrific new VitalPBX Communicator. Works flawlessly with Incredible PBX.
Audio Issues with Incredible PBX 2020
If you experience one-way or no audio on some calls, add your external IP address and LAN subnet in the GUI by navigating to Settings -> Asterisk SIP Settings. In the NAT Settings section, click Detect Network Settings. Click Submit and Apply Settings to save your changes.
Incredible PBX 2020 Administration
We’ve eased the pain of administering your new PBX with a collection of scripts which you will find in the /root folder after logging in with SSH or Putty. Here’s a quick summary of what each of the scripts does.
add-fqdn is used to whitelist a fully-qualified domain name in the firewall. Because Incredible PBX 2020 blocks all traffic from IP addresses that are not whitelisted, this is what you use to authorize an external user for your PBX. The advantage of an FQDN is that you can use a dynamic DNS service to automatically update the IP address associated with an FQDN so that you never lose connectivity.
add-ip is used to whitelist a public IP address in the firewall. See the add-fqdn explanation as to why this matters.
del-acct is used to remove an IP address or FQDN from the firewall’s whitelist.
admin-pw-change is used to set the admin password for access to the FreePBX/Incredible PBX web GUI using a browser pointed to the local IP address of your server.
apache-pw-change is used to set the admin password for access to Apache/Incredible PBX apps including AsteriDex and Reminders. This provides a password layer of protection for access to these applications.
reset-conference-pins is a script that automatically and randomly resets the user and admin pins for access to the preconfigured conferencing application. Dial C-O-N-F from any registered SIP phone to connect to the conference.
reset-extension-passwords is a script that automatically and randomly resets ALL of the SIP passwords for extensions 701-705. Be careful using this one, or you may disable existing registered phones and cause Fail2Ban to blacklist the IP addresses of those users. HINT: You can place a call to the Ring Group associated with all five extensions by dialing 777.
reset-reminders-pin is a script that automatically and randomly resets the pin required to access the Telephone Reminders application by dialing 123. It’s important to protect this application because a nefarious user could set up a reminder to call a number anywhere in the world assuming your SIP provider’s account was configured to allow such calls.
show-feature-codes is a cheat sheet for all of the feature codes which can be dialed from any registered SIP phone. It documents how powerful a platform Incredible PBX 2020 actually is. A similar listing is available in the GUI at Admin -> Feature Codes.
show-passwords is a script that displays most of the passwords associated with Incredible PBX 2020. This includes SIP extension passwords, voicemail pins, conference pins, telephone reminders pin, and your Anveo Direct outbound calling pin (if configured). Note that voicemail pins are configured by the user of a SIP extension the first time the user accesses the voicemail system by dialing *97.
update-IncrediblePBX is the Automatic Update Utility which checks for server updates from incrediblepbx.com every time you log into your server as root using SSH or Putty. Do NOT disable it as it is used to load important fixes and security updates when necessary. We recommend logging into your server at least once a week.
pbxstatus (shown above) displays status of all major components of Incredible PBX 2020.
Forwarding Calls to Your Cellphone. Keep in mind that inbound calls to your DIDs automatically ring all five SIP extensions, 701-705. The easiest way to also ring your cellphone is to set one of these five extensions to forward incoming calls to your cellphone. After logging into your PBX as root, issue the following command to forward calls from extension 705 to your cellphone: asterisk -rx "database put CF 705 6781234567"
To remove call forwarding: asterisk -rx "database del CF 705"
Configuring SendMail with Incredible PBX 2020
In order to receive voicemails by email delivery, outbound mail functionality from your server obviously is required. If you’ve deployed your server in your home, your Internet Service Provider probably blocks downstream mail servers such as Incredible PBX from sending mail. This is done to reduce SPAM. In this case, you will need to configure SendMail using either your ISP or Gmail as an SMTP Relay Host. NOTE: If you are using a Gmail account with 2-step verification enabled, you MUST use a Gmail App Key instead of your Gmail account password. You also must enable Less Secure Apps access to the Gmail account. Here are the steps using a Gmail account:
cd /etc/mail
yum -y install sendmail-cf
hostname -f > genericsdomain
touch genericstable
cd /usr/bin
rm -f makemap
ln -s ../sbin/makemap.sendmail makemap
cd /etc/mail
makemap -r hash genericstable.db < genericstable
mv sendmail.mc sendmail.mc.original
wget http://incrediblepbx.com/sendmail.mc.gmail
cp sendmail.mc.gmail sendmail.mc
mkdir -p auth
chmod 700 auth
cd auth
echo AuthInfo:smtp.gmail.com \\"U:smmsp\\" \\"I:user_id\\" \\"P:password\\" \\"M:PLAIN\\" > client-info
echo AuthInfo:smtp.gmail.com:587 \\"U:smmsp\\" \\"I:user_id\\" \\"P:password\\" \\"M:PLAIN\\" >> client-info
echo AuthInfo:smtp.gmail.com:465 \\"U:smmsp\\" \\"I:user_id\\" \\"P:password\\" \\"M:PLAIN\\" >> client-info
# Stop here and edit client-info (nano -w client-info) in all three lines.
# Replace  user_id with your gMail account name without @gmail.com
# Replace password with your real gMail password OR
#  use your Gmail App Key if 2-step verification is enabled
# Be sure to replace the double-quotes shown above if they don't appear in the file!!!
# Save your changes (Ctrl-X, Y, then Enter)
chmod 600 client-info
makemap -r hash client-info.db < client-info
cd ..
# on Debian servers, uncomment next line
# sed -i 's|sendmail-cf|sendmail/cf|' Makefile
make
systemctl restart sendmail
If your server is hosted in the cloud and your provider does not block TCP port 25, then you can send mail without using a SmartHost; however, your server's hostname must actually be real or downstream mail servers will reject your mail. You can set your server's hostname like this: hostname myserver.myhost.com. This is usually sufficient; however, it's a good idea to also add the hostname in /etc/hostname and in /etc/hosts as the first entry on 127.0.0.1 line:
127.0.0.1 myserver.myhost.com pbx.local localhost localhost.localdomain
Next, test outbound mail using this command with your actual email address:
echo "test" | mail -s testmessage yourname@youremaildomain.com
Once you are sure your emails are being delivered reliably, here's a sample GUI voicemail configuration for an extension:
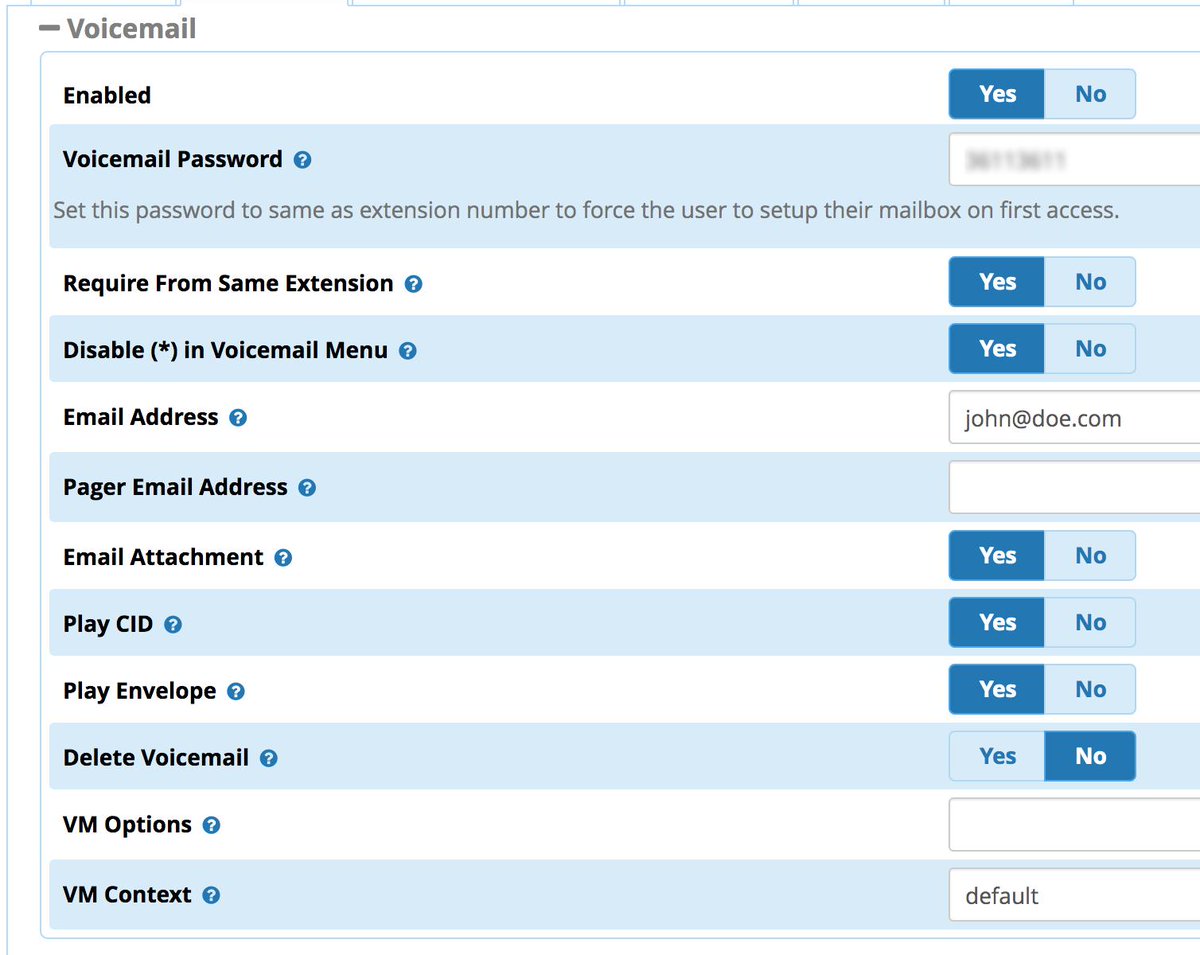
Getting Started with Incredible Fax 2020
Believe it or not, there still are lots of folks that use faxes in their everyday lives. If you're one of them, Incredible PBX has your back. Begin by logging into your server as root and running incrediblefax2020.sh to install HylaFax and AvantFax on your server. You'll be prompted a dozen or more times for information. Answer no to the secure fax question. For the rest of the prompts, just press ENTER to accept the default entries. Rebooting your server is required when the install finishes. Once your server is back on line, there will be a new AvantFax tab in the GUI. Before proceeding, be sure to set an Apache web apps password by running /root/apache-pw-change. Next, login to AvantFax with your browser. You first will be prompted for your Apache credentials. Enter admin for the username and whatever password you set up in the previous step. Then you will be prompted for your AvantFax credentials. The default is admin:password. After you enter the username and password, you will be prompted to change your admin password. The old password is still password. Then enter your desired password twice and save the setting. The AvantFax dashboard then will display. If nothing has come unglued, you should see four green Idle icons:
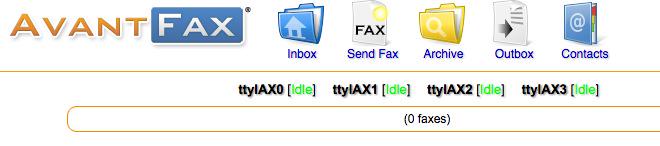
You can Send Faxes from within AvantFax by choosing the Send Fax tab, or you can use one of many HylaFax clients. Google is your friend.
Getting Started with ODBC for Asterisk
If you're new to the ODBC World, here's a quick primer. The idea behind Open Data Base Connectivity is to simplify the task of connecting up any flavor database management system so that it can talk to applications and foreign databases without having to write custom code to support every different DBMS. ODBC serves in much the same way as a translator who sits between you and foreign visitors. With the benefit of a translator, whatever is spoken is understood on both ends of the conversation. The real beauty of ODBC is that it is conversant with almost every DBMS offering on the planet including Oracle, Informix, SAS, MS Access, DB2, SQL Server, MySQL, MariaDB, PostgreSQL, Sybase, and even dBase, FoxPro, and XDB. All you really need is the ODBC connector for your operating system plus one or more database drivers for the DBMS data sources you wish to use.
Because the FreePBX modules are driven by MySQL tables, we've included the MySQL connector for Asterisk in Incredible PBX 2020 together with two sample applications to get you started. If you add your own MySQL databases, it's easy to connect them with ODBC by simply running the odbc-gen.sh script in /root again. The two sample applications we've included will show you how to integrate ODBC queries into your Asterisk dialplan. The code is available in odbc.conf in the /etc/asterisk folder. The first sample is a typical employee database. By dialing 222, you will be prompted to enter the employee number (12345), and the ODBC app then will look up the employee number and read you the name of the employee. The second sample is a speed dialer using the AsteriDex database. The sample entries in the database include a 3-numeric-digit DIALCODE which simply matches the first three letters of each AsteriDex name spelled out on a phone, e.g. 335 = DELta Airlines and 263 = AMErican Airlines. As you add new entries to AsteriDex, you can add dialcodes in the same way or in any other scheme you prefer. Once you have signed up with a provider so that you can make outbound calls, just dial 223 and enter the AsteriDex dialcode to place the call. Think of it as a Speed Dialer on Steroids.
Keeping FreePBX 15 Modules Current
We strongly recommend that you periodically update all of your FreePBX modules to eliminate bugs and to reduce security vulnerabilities. From the Linux CLI, log into your server as root and issue the following commands:
mysql -u root -ppassw0rd asterisk -e "UPDATE freepbx_settings SET value = 'https://mirror.clearlyip.com' where keyword = 'MODULE_REPO';"
rm -f /tmp/*
fwconsole ma upgradeall
fwconsole reload
/root/sig-fix
service httpd restart
/root/sig-fix
Where To Go From Here
Complete documentation on the ClearlyIP Devices Module is available here.
Complete documentation on the FreePBX GPL Modules is available here.
Complete documentation on the Incredible PBX additions is available here.
An introduction to configuring extensions, trunks, and routes is available here.
Originally published: Monday, December 2, 2019
Need help with Asterisk? Visit the VoIP-info Forum.
Special Thanks to Our Generous Sponsors
FULL DISCLOSURE: ClearlyIP, Skyetel, Vitelity, DigitalOcean, Vultr, VoIP.ms, 3CX, Sangoma, TelecomsXchange and VitalPBX have provided financial support to Nerd Vittles and our open source projects through advertising, referral revenue, and/or merchandise. As an Amazon Associate and Best Buy Affiliate, we also earn from qualifying purchases. We’ve chosen these providers not the other way around. Our decisions are based upon their corporate reputation and the quality of their offerings and pricing. Our recommendations regarding technology are reached without regard to financial compensation except in situations in which comparable products at comparable pricing are available from multiple sources. In this limited case, we support our sponsors because our sponsors support us.
BOGO Bonaza: Enjoy state-of-the-art VoIP service with a $10 credit and half-price SIP service on up to $500 of Skyetel trunking with free number porting when you fund your Skyetel account. No limits on number of simultaneous calls. Quadruple data center redundancy. $25 monthly minimum spend required. Tutorial and sign up details are here.
![]() The lynchpin of Incredible PBX 2020 and beyond is ClearlyIP components which bring management of FreePBX modules and SIP phone integration to a level never before available with any other Asterisk distribution. And now you can configure and reconfigure your new Incredible PBX phones from the convenience of the Incredible PBX GUI.
The lynchpin of Incredible PBX 2020 and beyond is ClearlyIP components which bring management of FreePBX modules and SIP phone integration to a level never before available with any other Asterisk distribution. And now you can configure and reconfigure your new Incredible PBX phones from the convenience of the Incredible PBX GUI.
VitalPBX is perhaps the fastest-growing PBX offering based upon Asterisk with an installed presence in more than 100 countries worldwide. VitalPBX has generously provided a customized White Label version of Incredible PBX tailored for use with all Incredible PBX and VitalPBX custom applications. Follow this link for a free test drive!
Special Thanks to Vitelity. Vitelity is now Voyant Communications and has halted new registrations for the time being. Our special thanks to Vitelity for their unwavering financial support over many years and to the many Nerd Vittles readers who continue to enjoy the benefits of their service offerings. We will keep everyone posted on further developments.
Black Friday/Cyber Monday & Beyond: Incredible PBX 2020

We’re pleased to announce our first-ever hardware featuring the new Incredible PBX 2020. This new PBX hardware platform introduces customized versions of Asterisk® 16 and FreePBX® 15 that offer integrated FXO and FXS components together with a line of self-configuring, turnkey SIP phones. In addition, inbound and outbound CNAM delivery as well as SMS messaging are integral components of the platform plus all-new support for Kari’s Law 911 location identification on a per extension basis. For those managing larger deployments, you can opt to brand your own PBXs and phones, or you can deploy any of our three different implementations of FreePBX 15: standard, enhanced, and bleeding edge.
The Black Friday/Cyber Monday Special
Normally, the Incredible PBX 2020 appliance will be offered at $399 and the SIP phones are competitively priced from MSRP $99 to $179 with discounts available to resellers. Beginning on Black Friday until midnight on Cyber Monday, you can purchase the Incredible PBX 2020 appliance bundled with the top-of- the-line $179 CIP270 WiFi phone for $399. Or purchase the Incredible PBX 2020 appliance with no SIP phone for $299. You also can purchase a bundle of all three SIP phones for $299. Delivery of Appliances can be expected to coincide with Santa’s arrival while Incredible PBX-branded phones already are in stock and available.
On Black Friday, you can purchase these special offerings HERE. First come, first delivered.
Incredible PBX 2020 Appliance
The new Incredible PBX 2020 appliance is a perfect fit for home and SOHO deployments. The appliance has been successfully tested with 40 users and 10 concurrent calls. Plug in a network cable and add SIP trunking or an analog POTS line using the native FXO port, and you’ll have a turnkey PBX in minutes.

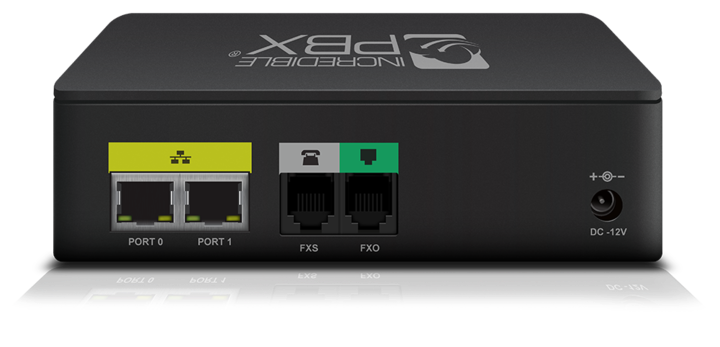
Technical Specifications:
- Quad Core Atom Processor
- 2GB Memory
- 32GB SSD Storage
- 2 10/100 NICs
- HDMI Port
- Built-in: 1 FXO/1 FXS or 2 FXO Ports
- Incredible PBX 2020 Preinstalled
Incredible PBX 2020 SIP Phones
All of the new Incredible PBX 2020 SIP Phones support the following features:
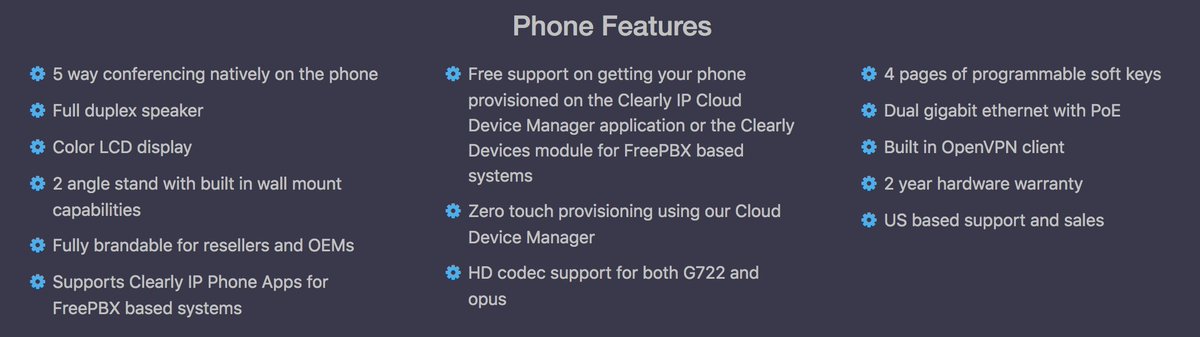
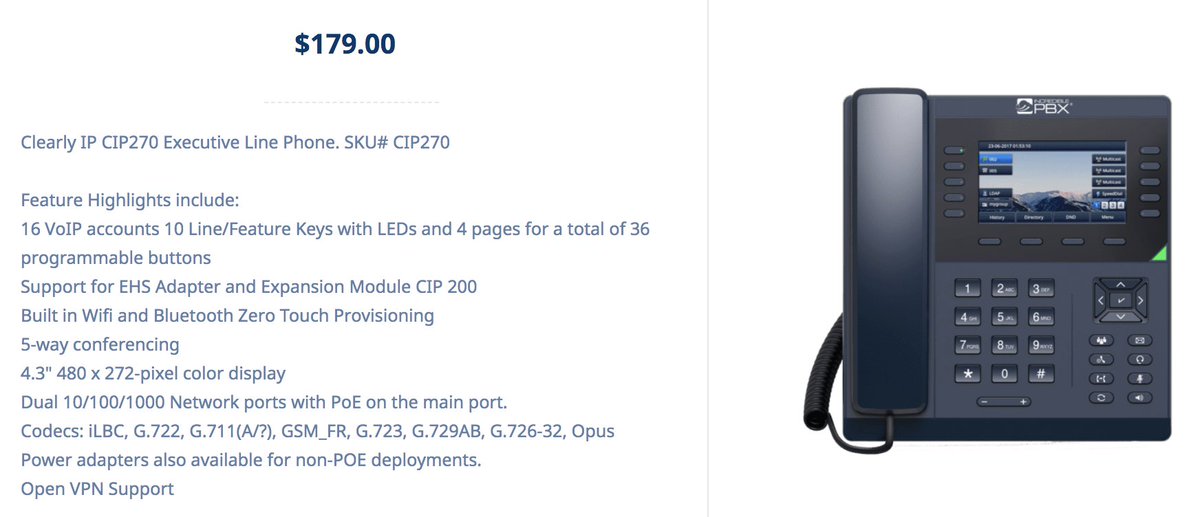
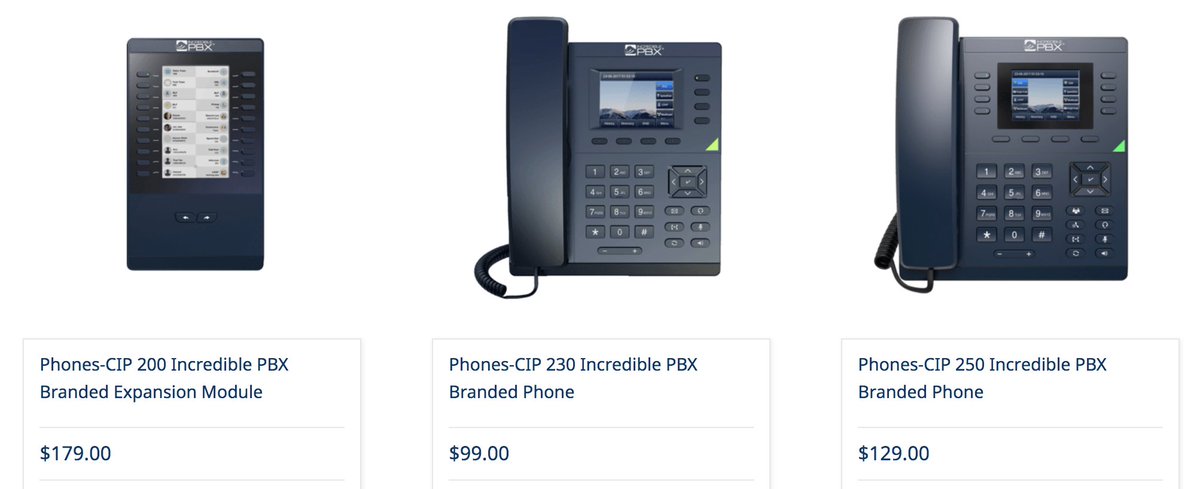
Introducing Incredible PBX 2020
In coming weeks, we will flesh out all of the new features in Incredible PBX 2020. Suffice it to say, all of the Incredible PBX 16-15 feature set remains. What has been added is a superset of FreePBX 15. Topping the list of new features is an all-new design for the module repository which gives us very tight control over selection, versioning, and deployment of FreePBX modules presented in the Module Admin component. And the new endpoint management module, Clearly IP Devices, lets you preconfigure all of your IPBX-series phones and modify their settings on the fly without ever rebooting your phones. The enhanced User Control Panel Dashboard Widgets now let end-users manage their presence, call forwarding, call events, call history, voicemail and SMS messages from the convenience of a browser. A new firewall also is in the works as well as a number of new surprises. Stay tuned!

Coming Soon: Incredible PBX 2020 SIP Trunking
Later next month, we will introduce a new SIP trunking option that is preconfigured for use with Incredible PBX 2020. As previously noted, these trunks provide inexpensive buckets of minutes with inbound as well as outbound CNAM support. Every DID includes integrated SMS messaging support in FreePBX’s User Control Panel. For larger implementations, Kari’s Law 911 location identification is baked into the platform so emergency services can be directed to the physical location of individual extensions on your PBX without the need to add costly DIDs for every unique location as was required in previous VoIP deployments.
Incredible PBX 2020 Admin/Developer Training
We’re also pleased to announce a four-day bootcamp for Incredible PBX 2020 and FreePBX coming to Charleston or Hilton Head, March 16 through 19, 2020. Seating is limited so block out the dates on your calendar, and we’ll provide signup details in coming weeks.
Originally published: Tuesday, November 26, 2019
Need help with Asterisk? Visit the VoIP-info Forum.
Special Thanks to Our Generous Sponsors
FULL DISCLOSURE: ClearlyIP, Skyetel, Vitelity, DigitalOcean, Vultr, VoIP.ms, 3CX, Sangoma, TelecomsXchange and VitalPBX have provided financial support to Nerd Vittles and our open source projects through advertising, referral revenue, and/or merchandise. As an Amazon Associate and Best Buy Affiliate, we also earn from qualifying purchases. We’ve chosen these providers not the other way around. Our decisions are based upon their corporate reputation and the quality of their offerings and pricing. Our recommendations regarding technology are reached without regard to financial compensation except in situations in which comparable products at comparable pricing are available from multiple sources. In this limited case, we support our sponsors because our sponsors support us.
BOGO Bonaza: Enjoy state-of-the-art VoIP service with a $10 credit and half-price SIP service on up to $500 of Skyetel trunking with free number porting when you fund your Skyetel account. No limits on number of simultaneous calls. Quadruple data center redundancy. $25 monthly minimum spend required. Tutorial and sign up details are here.
![]() The lynchpin of Incredible PBX 2020 and beyond is ClearlyIP components which bring management of FreePBX modules and SIP phone integration to a level never before available with any other Asterisk distribution. And now you can configure and reconfigure your new Incredible PBX phones from the convenience of the Incredible PBX GUI.
The lynchpin of Incredible PBX 2020 and beyond is ClearlyIP components which bring management of FreePBX modules and SIP phone integration to a level never before available with any other Asterisk distribution. And now you can configure and reconfigure your new Incredible PBX phones from the convenience of the Incredible PBX GUI.
VitalPBX is perhaps the fastest-growing PBX offering based upon Asterisk with an installed presence in more than 100 countries worldwide. VitalPBX has generously provided a customized White Label version of Incredible PBX tailored for use with all Incredible PBX and VitalPBX custom applications. Follow this link for a free test drive!
Special Thanks to Vitelity. Vitelity is now Voyant Communications and has halted new registrations for the time being. Our special thanks to Vitelity for their unwavering financial support over many years and to the many Nerd Vittles readers who continue to enjoy the benefits of their service offerings. We will keep everyone posted on further developments.
Adding CallerID Names to VitalPBX Inbound & Outbound Calls

In the early days of Asterisk®, it was not unlike the Wild West. Extension passwords of 1234 were pretty safe, and "anything goes" was the only rule when it came to scraping other folks’ web sites for data that you needed. And the master scraper of them all, Google, even had a phone: function (until they didn’t) that let you look up almost anyone’s name or telephone number. Ma Bell pretty much had a monopoly on CallerID Name (CNAM) data for phone numbers which is probably the reason the Google feature suddenly disappeared. Since the telecom industry universally discarded CNAM data when routing calls to destinations, it was up to the DID provider to look up the associated names out of their proprietary databases before connecting the call. Ma Bell called it a feature. It was more like a revenue generator.
For VoIP users, there were no CNAM services to speak of. Thus was born our CallerID Trifecta and later CallerID Superfecta projects more than a decade ago. Superfecta was later elevated to the stratosphere by some of the early FreePBX® pioneers including Lorne Gaetz and Andrew Nagy. The real beauty of CallerID Superfecta was the ability to search a cache for a CNAM match before scouring and scraping the web, a process which took a lot more time.
Much has changed in the last 10 years. One of the early lessons in CNAM lookups obtained by scraping web sites was that most of the site owners didn’t appreciate their newfound popularity. As a result, they continually modified their sites to discourage scraping, and this in turn regularly broke CallerID Superfecta. The other major change is that there now are multiple CNAM services for VoIP users. Almost all VoIP providers also include a CNAM lookup option, and there are dirt-cheap standalone services such as OpenCNAM and BulkCNAM.
In introducing CallerID Superfecta to the VitalPBX community, we wanted to take advantage of what we’ve learned as well as the new CNAM landscape. There still are limitations. All of the CNAM lookup services don’t mind charging you to return a CNAM result of Los Angeles, CA which you could have deciphered by simply examining the area code of the incoming call. And, if your girlfriend calls you twenty times a day, the CNAM services are more than happy to charge you for the same CNAM dip twenty times. And at least one VoIP provider charges for CNAM lookups whether you want them or not. That adds another half a cent to the cost of every incoming call. Most providers charge between $.002 (new BulkCNAM rate) and $.005 per dip1 so the charges can add up particularly with a lot of calls of short duration.
We previously mentioned using VitalPBX’s native OpenCNAM functionality to add CallerID Names to incoming calls. But there are three possible concerns with this approach. First, there’s the frequently calling girlfriend issue. Depending upon how much you like your girlfriend, that may or may not be acceptable. A second issue is the CNAM dips that only return the city and state of the call. For frequent callers, you obviously would like actual names associated with these callers. And a third issue is the absence of CNAM data in your CDR logs and on your SIP phone for outbound calls.
In considering a modern CallerID Superfecta design, we’ve concluded that you really only need three components. First, you need to examine whether an actual name was passed with the incoming call. Second, you need to check whether your local database already has a CNAM entry for the caller. And, third, if those two sources don’t bear fruit, you need a lookup from a stand-alone CNAM provider. We believe the prudent design for the local component is to consolidate all available CNAM information into a single local CNAM database with import tools from other servers for apps such as the Asterisk Phonebook, AsteriDex, and Google Contacts. The local Asterisk Phonebook included in AstDB’s SQLite3 database is perfectly suited to serve as a local CNAM repository.
Legal Disclaimer: Most CNAM providers have restrictions regarding caching of CNAM data. The courts consistently have ruled that phonebook data is not copyrightable. And every PBX caches CNAM data. After all, that’s what CDR logs are all about. Consult with your own attorney if you have concerns, or simply stop reading here. 🙂
Now that VitalPBX has included unlimited Custom Contexts at no cost, our tasks today are easy. The plan of attack goes like this. When an incoming call hits your PBX, we’ll check whether a CallerID name accompanied the call. Next, we’ll check the Asterisk Phonebook to see if we have a name associated with that phone number. If there’s no CNAM entry after checking both sources, then we’ll perform an OpenCNAM lookup using your credentials. For outgoing calls, we’ll check the Asterisk Phonebook for a CNAM match on the number being called and, if there is no match, we’ll perform an OpenCNAM lookup using your credentials. You have the option of using either, both, or neither of these CNAM scripts.
Before we get started, it’s worth noting that finding a "hook" for outbound calls was not a simple task with VitalPBX. The trick was to find a subroutine that could be replaced without damaging the native functionality of the PBX. We finally found a spot, but we were limited to just two lines of code. The solution was to use one of those lines to execute a separate subroutine which had no restrictions on size. So let’s get started.
As with FreePBX, a config file is used to manage custom contexts. With VitalPBX, extensions__80-custom.conf in /etc/asterisk/ombutel is the file you need. If it doesn’t exist, simply create it. This file has two parts which again are similar to the FreePBX design. The [cos-all-custom](+) context is used for extension code in exactly the same way that the [from-internal-custom] context is used in FreePBX. In addition to extension dialplan code, you also can embed additional contexts just as you could with FreePBX. If you’ve installed Incredible PBX for VitalPBX, then you already have a number of extension components in the [cos-all-custom](+) context. So we’ll be adding some additional contexts at the bottom of the file. If you don’t already have an extensions__80-custom.conf file, create it and add [cos-all-custom](+) as the first line in the file. All of today’s code is licensed for your use pursuant to the terms of the GPLv2 license available here.
Adding CallerID Superfecta for Incoming Calls
Log into your server as root and navigate to /etc/asterisk/ombutel. Edit extensions__80-custom.conf and cut-and-paste the following code to the bottom of the file. Be sure to insert your actual OpenCNAM credentials in the SID and TOKEN entries near the top of the code replacing xxxx and yyyy.
;# // BEGIN CallerID Superfecta
[superfecta]
exten => s,1,NoOp(Executing CID Superfecta)

; insert OpenCNAM credentials below
  same => n,Set(SID=xxxx)
  same => n,Set(TOKEN=yyyy)

  same => n,NoOp(CID Number: ${CALL_SOURCE})
  same => n,Set(CID_NAME=${CALLERID(name)})
  same => n,NoOp(AstDB lookup underway)
  same => n,Set(CID_NAME2=${DB(cidname/${CALL_SOURCE})})
  same => n,GotoIf($["foo${CID_NAME2}" = "foo"]?runOpenCNAM:skipOpenCNAM)
  same => n(runOpenCNAM),NoOp(OpenCNAM lookup underway)
  same => n,Set(DB(cidname/${CALL_SOURCE})=${CID_NAME})
  same => n,Set(CID_NAME3=${SHELL(curl https://${SID}:${TOKEN}@api.opencnam.com/v2/phone/${CALL_SOURCE}?format=pbx)})
; for BulkCNAM, comment out line above and uncomment line below after inserting your APIkey
; same => n,Set(CID_NAME3=${SHELL(curl -X GET "https://cnam.bulkCNAM.com/?id=APIkey&did=${CALL_SOURCE}")})
  same => n,GotoIf($["foo${CID_NAME3}" = "foo"]?skipBOTH
  same => n,Set(DB(cidname/${CALL_SOURCE})=${CID_NAME3})
  same => n,Set(CALLERID(name)=${CID_NAME3})
  same => n,Goto(skipBOTH)
  same => n(skipOpenCNAM),Set(CALLERID(name)=${CID_NAME2})
  same => n(skipBOTH),Set(ICALL=yes)
  same => n,Answer

;  same => n,Wait(2)
;; requires addition of nv-GenericWelcome.ulaw in /var/lib/asterisk/sounds/custom
;  same => n,Background(custom/nv-GenericWelcome&silence/1&continue-in-english&press-7,nm)
;  same => n,WaitExten(.)
;; exten => 7,1,Goto(cos-all,701,1)
;; exten => 7,1,Goto(cos-all-trunk,8436060555,1)
;; exten => 7,1,Goto(newcontext,s,1)
;  exten => 7,1,Goto(incrediblepbx,s,1)
;  same => n,Return()
; exten => t,1,Hangup
;  same => n,Return()
; exten => i,1,Hangup
;  same => n,Return()

; same => n,Goto(cos-all,701,1)
; same => n,Goto(cos-all-trunk,8436060555,1)
; same => n,Goto(newcontext,s,1)
; same => n,ExecIf($["${DID}" = "8436060555"]?Goto(incrediblepbx,s,1))
  same => n,Goto(incrediblepbx,s,1)
  same => n(return),Return()
;# // END CallerID Superfecta
Replacing OpenCNAM with BulkCNAM for Queries
With the recent price drop, you may prefer to use BulkVS.com for your CNAM queries. You’ll need to obtain your APIkey from their portal in API:API Credentials. Then locate the Set(CID_NAME3… line in the script above and replace it with the following line using your actual APIkey:
same => n,Set(CID_NAME3=${SHELL(curl -X GET "https://cnam.bulkCNAM.com/?id=APIkey&did=${CALL_SOURCE}")})
Choosing a Destination for Incoming Calls
We want to spend a minute on the last several lines of the Superfecta dialplan code:
; same => n,Goto(cos-all,701,1)
; same => n,Goto(cos-all-trunk,8436060555,1)
; same => n,Goto(newcontext,s,1)
  same => n,ExecIf($["${DID}" = "8436060555"]?Goto(cos-all,701,1))
  same => n,Goto(incrediblepbx,s,1)
These five lines demonstrate how to redirect incoming calls to five different destinations: an extension, an external phone number, another custom context, a DID-specific routing, or the Incredible PBX Demo IVR. As shown, the calls would be routed to the default Demo IVR unless the DID matches 8436060555 in which case the call would be routed to extension 701. You can modify the destination scenario simply by uncommenting a different line in the dialplan examples. Keep in mind that a Goto command permanently redirects calls to that destination outside the Custom Context so the first uncommented Goto line will always take precedence. Also note that you can have multiple ExecIf lines preceding a Goto line to route calls to different destinations depending upon the DID of the incoming call. Stated another way, multiple ExecIf commands can be followed by a Goto command that serves as the default destination for any non-matching DIDs. You could also redirect by CallerID number.
Blocking Telemarketers with CallerID Superfecta
As election season heats up in the United States, be advised that your favorite legislators have exempted themselves from the robocall rules so dinnertime will get more interesting in coming months. One simple solution is to prompt the caller to enter a number before actually connecting the call. This kills most robocalls. We’ve included the code to do this in CallerID Superfecta. Just uncomment the code so that it looks like the following after choosing a call destination as documented in the previous section:
  same => n,Wait(2)
; requires addition of nv-GenericWelcome.ulaw in /var/lib/asterisk/sounds/custom
  same => n,Background(custom/nv-GenericWelcome&silence/1&continue-in-english&press-7,nm)
  same => n,WaitExten(.)
; exten => 7,1,Goto(cos-all,701,1)
; exten => 7,1,Goto(cos-all-trunk,8436060555,1)
; exten => 7,1,Goto(newcontext,s,1)
  exten => 7,1,Goto(incrediblepbx,s,1)
  same => n,Return()
 exten => t,1,Hangup
  same => n,Return()
 exten => i,1,Hangup
  same => n,Return()
Before this will work, you’ll need to download the nv-GenericWelcome.ulaw recording:
cd /var/lib/asterisk/sounds/custom
wget http://incrediblepbx.com/nv-GenericWelcome.ulaw
Adding CallerID Superfecta for Outgoing Calls
If CNAM data for outgoing calls is also desired for your CDR logs, here’s the dialplan code to cut-and-paste into the bottom of the Custom Contexts file. Insert your OpenCNAM credentials in the code replacing xxxx and yyyy just as you did in the previous section:
[cos-all-custom]
exten => _.,1,NoOp(*** Custom Outbound CNAM Code ***))
    same => n,GoSub(cnam-out,s,1)

[cnam-out]
exten => s,1,NoOp(*** Outbound CNAM context for Incredible PBX ***)
  same => n,Set(SID=xxxx)
  same => n,Set(TOKEN=yyyy)
  same => n,NoOp(Calling: ${EXTENSION})
  same => n,Set(CID_NUM=${EXTENSION})
  same => n,NoOp(AstDB lookup underway)
  same => n,Set(CID_NAME=${DB(cidname/${CID_NUM})})
  same => n,GotoIf($["foo${CID_NAME}" = "foo"]?runOpenCNAM:skipOpenCNAM)
  same => n(runOpenCNAM),NoOp(OpenCNAM lookup underway)
  same => n,Set(CID_NAME=${SHELL(curl https://${SID}:${TOKEN}@api.opencnam.com/v2/phone/${CID_NUM}?format=pbx)})
; for BulkCNAM, comment out line above and uncomment line below after inserting your APIkey
;  same => n,Set(CID_NAME=${SHELL(curl -X GET "https://cnam.bulkCNAM.com/?id=APIkey&did=${CID_NUM}")})
  same => n,Set(DB(cidname/${CID_NUM})=${CID_NAME})
  same => n(skipOpenCNAM),Set(CDR(customer_code)=${CID_NAME})
  same => n,Set(ICALL=yes)
  same => n,NoOp(*** Outbound CNAM context ends here ***)
  same => n,Return()
Activating CallerID Superfecta with VitalPBX
As with any dialplan changes, you first must reload the dialplan: asterisk -rx "dialplan reload". Next, we need to create a Custom Context within the VitalPBX GUI and point any desired Inbound Routes to that custom context. Using a web browser, log in to the VitalPBX GUI as admin. Navigate to PBX:Applications:Custom Contexts and create a new custom context for CallerID Superfecta:
Description: CID Superfecta
Context: superfecta
Extension: s
Priority: 1
Destination: Terminate Call -> Hangup
Next, identify the Trunks that you want to use with CallerID Superfecta and create an Inbound Route for those trunks pointing to CallerID Superfecta as the Destination for those calls.
If you want different destinations within CallerID Superfecta context for different trunks, then you’ll need to use ExecIf commands as shown in the dialplan to identify each trunk and to route the calls to the desired locations. Note that you can have multiple ExecIf commands followed by an uncommented default destination for any incoming calls that do not have a DID match.
Importing Asterisk Phonebook Data from Another PBX
To supplement your local Asterisk Phonebook which will serve as the local CNAM repository for VitalPBX, you can easily import data from other sources. And, as those sources change, you can export the entire database again and repeat the import procedure without worrying about duplicating data in your local Asterisk Phonebook. Imported data always overwrites existing entries which have a match on the phone number. To import an Asterisk Phonebook from another PBX, here are the steps to run on that PBX to create the import script which should be copied and run on the VitalPBX platform: import-asterisk-phonebook.sh
CAUTION: Carefully review the generated import script for anomalies before running it.
cd /var/lib/asterisk
sqlite3 astdb.sqlite3 "select key,value from astdb \\
 where key LIKE '%cidname/%'" > /root/import.sh
cd /root
sed -i 's|/cidname|asterisk -rx "database put cidname "|' import.sh
sed -i 's| "/| |' import.sh
sed -i 's|\\|| "|' import.sh
sed -i 's|$|"|' import.sh
sed -i "s|\"d|'d|" import.sh
sed -i "s|$|'|" import.sh
chmod +x import.sh
mv import.sh import-asterisk-phonebook.sh
Importing AsteriDex Data from Another PBX
Here are the steps to export existing AsteriDex data from another Incredible PBX platform. Once the steps have been completed, copy import-asteridex.sh to VitalPBX, make the script executable, and run it.
mysql -u root -ppassw0rd asteridex -N -s -e 'select "*",`out`,`name` from user1' | \\
 sed 's|\\t|, |g' > tmp.txt
sed -i "s|*,|asterisk -rx 'database put|" tmp.txt
sed -i 's|, | "|' tmp.txt
sed -i 's|$|"|' tmp.txt
sed -i "s|$|'|" tmp.txt
mv tmp.txt import-asteridex.sh
Importing Google Contacts into Asterisk Phonebook
Here are the steps to import existing Google Contacts into the VitalPBX Asterisk Phonebook:
- From within Google Contacts, export your contacts into a vcard format file: contacts.vcf
- Copy the contacts.vcf file to the /root folder of your PBX
wget http://incrediblepbx.com/googlecontacts-importer.tar.gztar zxvf googlecontacts-importer.tar.gzrm -f googlecontacts-importer.tar.gz- Run the main script:
/root/vcard-import.sh - Edit the shell script that is generated:
nano -w import-google-contacts.sh - Make any changes to clean up the entries from Google Contacts
chmod +x /root/import-google-contacts.sh- Run the script to import your Google Contacts:
/root/import-google-contacts.sh
Managing the Asterisk Phonebook with VitalPBX
To add or replace entries in the Asterisk Phonebook from the Linux CLI, here’s the syntax:
asterisk -rx 'database put cidname 8005551212 "Directory Assistance"'
To remove an entry from the Asterisk Phonebook, the syntax looks like this:
asterisk -rx "database del cidname 8005551212"
To display all entries in your Asterisk Phonebook, issue the following command:
asterisk -rx "database show cidname"
Originally published: Monday, November 4, 2019
Need help with Asterisk? Visit the VoIP-info Forum.
Special Thanks to Our Generous Sponsors
FULL DISCLOSURE: ClearlyIP, Skyetel, Vitelity, DigitalOcean, Vultr, VoIP.ms, 3CX, Sangoma, TelecomsXchange and VitalPBX have provided financial support to Nerd Vittles and our open source projects through advertising, referral revenue, and/or merchandise. As an Amazon Associate and Best Buy Affiliate, we also earn from qualifying purchases. We’ve chosen these providers not the other way around. Our decisions are based upon their corporate reputation and the quality of their offerings and pricing. Our recommendations regarding technology are reached without regard to financial compensation except in situations in which comparable products at comparable pricing are available from multiple sources. In this limited case, we support our sponsors because our sponsors support us.
BOGO Bonaza: Enjoy state-of-the-art VoIP service with a $10 credit and half-price SIP service on up to $500 of Skyetel trunking with free number porting when you fund your Skyetel account. No limits on number of simultaneous calls. Quadruple data center redundancy. $25 monthly minimum spend required. Tutorial and sign up details are here.VitalPBX is perhaps the fastest-growing PBX offering based upon Asterisk with an installed presence in more than 100 countries worldwide. VitalPBX has generously provided a customized White Label version of Incredible PBX tailored for use with all Incredible PBX and VitalPBX custom applications. Follow this link for a free test drive!Special Thanks to Vitelity. Vitelity is now Voyant Communications and has halted new registrations for the time being. Our special thanks to Vitelity for their unwavering financial support over many years and to the many Nerd Vittles readers who continue to enjoy the benefits of their service offerings. We will keep everyone posted on further developments.- BulkCNAM previously charged $.005 per CNAM dip but recently sent out an email indicating they were dropping the rate to $.002. Our CNAM charges continued to be billed at $.005 with the daily charges being rounded up to the whole penny. So… you may want to check your CNAM charges for a bit to verify that you are being billed at the new rate. If not, open a ticket and they will correct it. [↩]
Free Asterisk Solutions
