
Home » Incredible PBX (Page 9)
Category Archives: Incredible PBX
The Most Versatile VoIP Provider: FREE PORTING

 JUST RELEASED: Visit the Incredible PBX Wiki
Is SIP Trunking Safe & Reliable in the DDoS World?

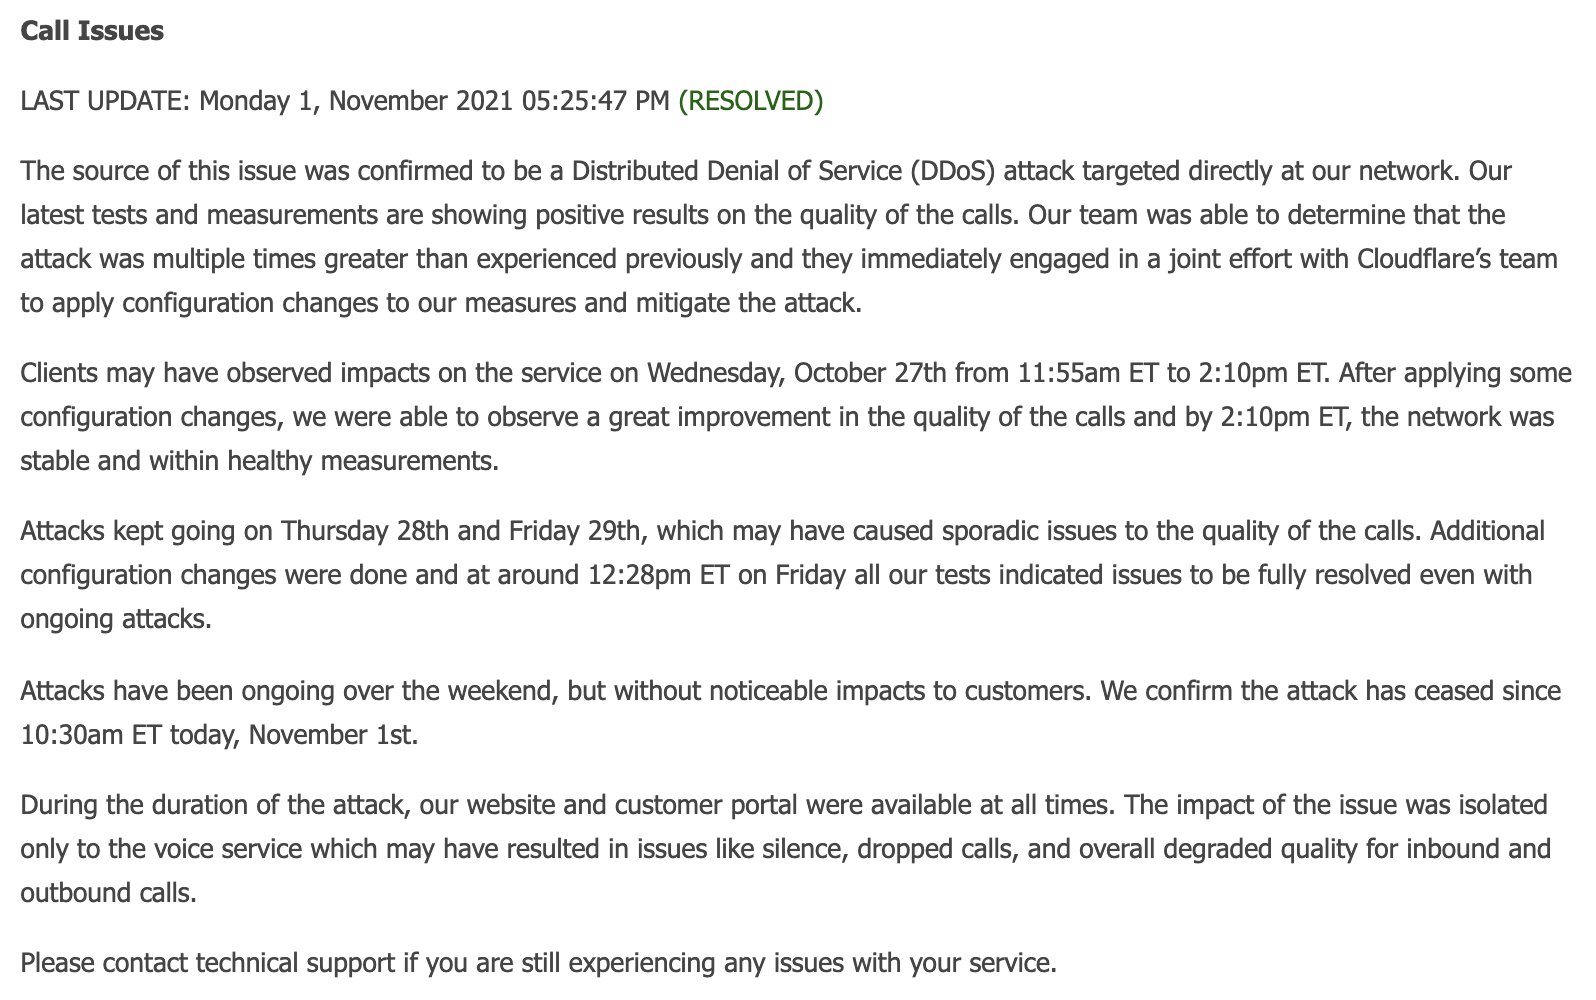
Since last Thursday when VoIP.ms suffered (and continues to suffer) one of the worst Distributed Denial of Service (DDOS) attacks in the VoIP era, we’ve been asked a thousand times whether any SIP trunking provider can provide a safe and reliable platform under circumstances similar to the VoIP.ms outage. We obviously cannot vouch for every trunking provider but, based upon our discussions with two of the major carriers that support Incredible PBX, we are confident that either of them could withstand a similar attack and your phones would still ring. Keep in mind that one of the hidden beauties of VoIP is the ability to configure your PBX to use multiple carriers for failover in making outbound calls, something we have always recommended. Unfortunately, inbound calls are tied to registration of each DID with one and only one carrier. Thus, if that carrier goes off line, incoming calls to DIDs registered with that carrier will fail.
To restate the obvious, no provider is going to publicly document their DDOS remediation methodology thereby providing attackers with a blueprint to their network design and remediation strategy. However, under non-disclosure agreements, we have spoken at length with the owners of our two major Incredible PBX providers: Skyetel and Clearly IP. Based upon our NDA discussions over the past few days, we are satisfied that the SIP trunking offerings of our two primary carriers are sufficiently robust to withstand a VoIP.ms-like DDOS attack. Having said that, we are optimistic that the VoIP.ms outage has placed a renewed spotlight on the seriousness of these DDOS attacks with the FBI and the U.S. Department of Homeland Security.
So what’s missing from the VoIP.ms design that has made their infrastructure so vulnerable? Lots. For openers, VoIP.ms apparently does not rely upon SIP proxies or firewalls using industry-standard network management procedures. In fact, until several days ago, VoIP.ms reportedly was hosting its own DNS servers exclusively. While that has been addressed by moving to Cloudflare, other design vulnerabilities have been more difficult to ameliorate. For example, SIP trunking with VoIP.ms by design requires registration to one of several dozen POPs on both your PBX and on their public-facing portal. An inability to access their public portal means an administrator cannot redirect traffic to another POP in case of an outage. And, if an individual POP is overwhelmed with a DDOS attack, that POP can no longer redirect its incoming calls to a failover location. And apparently it is the only server from which this redirection can be initiated. As the current five-day outage makes clear, reengineering this design would be a Herculean task. So an important lesson learned should be that FORWARDING DIDS TO ANOTHER NUMBER OR SIP ADDRESS SHOULD BE COMPLETELY INDEPENDENT OF YOUR PUBLIC-FACING ARCHITECTURE.
What can you do at this juncture to lessen your vulnerability to a future DDOS attack? First, don’t put all of your eggs in one carrier’s basket. This is especially true with your main phone numbers (DIDs). Second, if you are a major organization, move your most important DIDs to one of our preferred providers, Skyetel or ClearlyIP. And, if money is no object, consider an AT&T, Verizon, T-Mobile, or Google Voice trunk. With multi-path forwarding, simultaneous incoming calls can be redirected to other DIDs hosted with SIP trunking providers. These paths can easily be adjusted in the event of a DDOS attack. Many of these providers offer heavily discounted rates for forwarding calls to other SIP destinations which need not be publicly disclosed.
Latest VoIP.ms Update:
Originally published: Monday, September 20, 2021

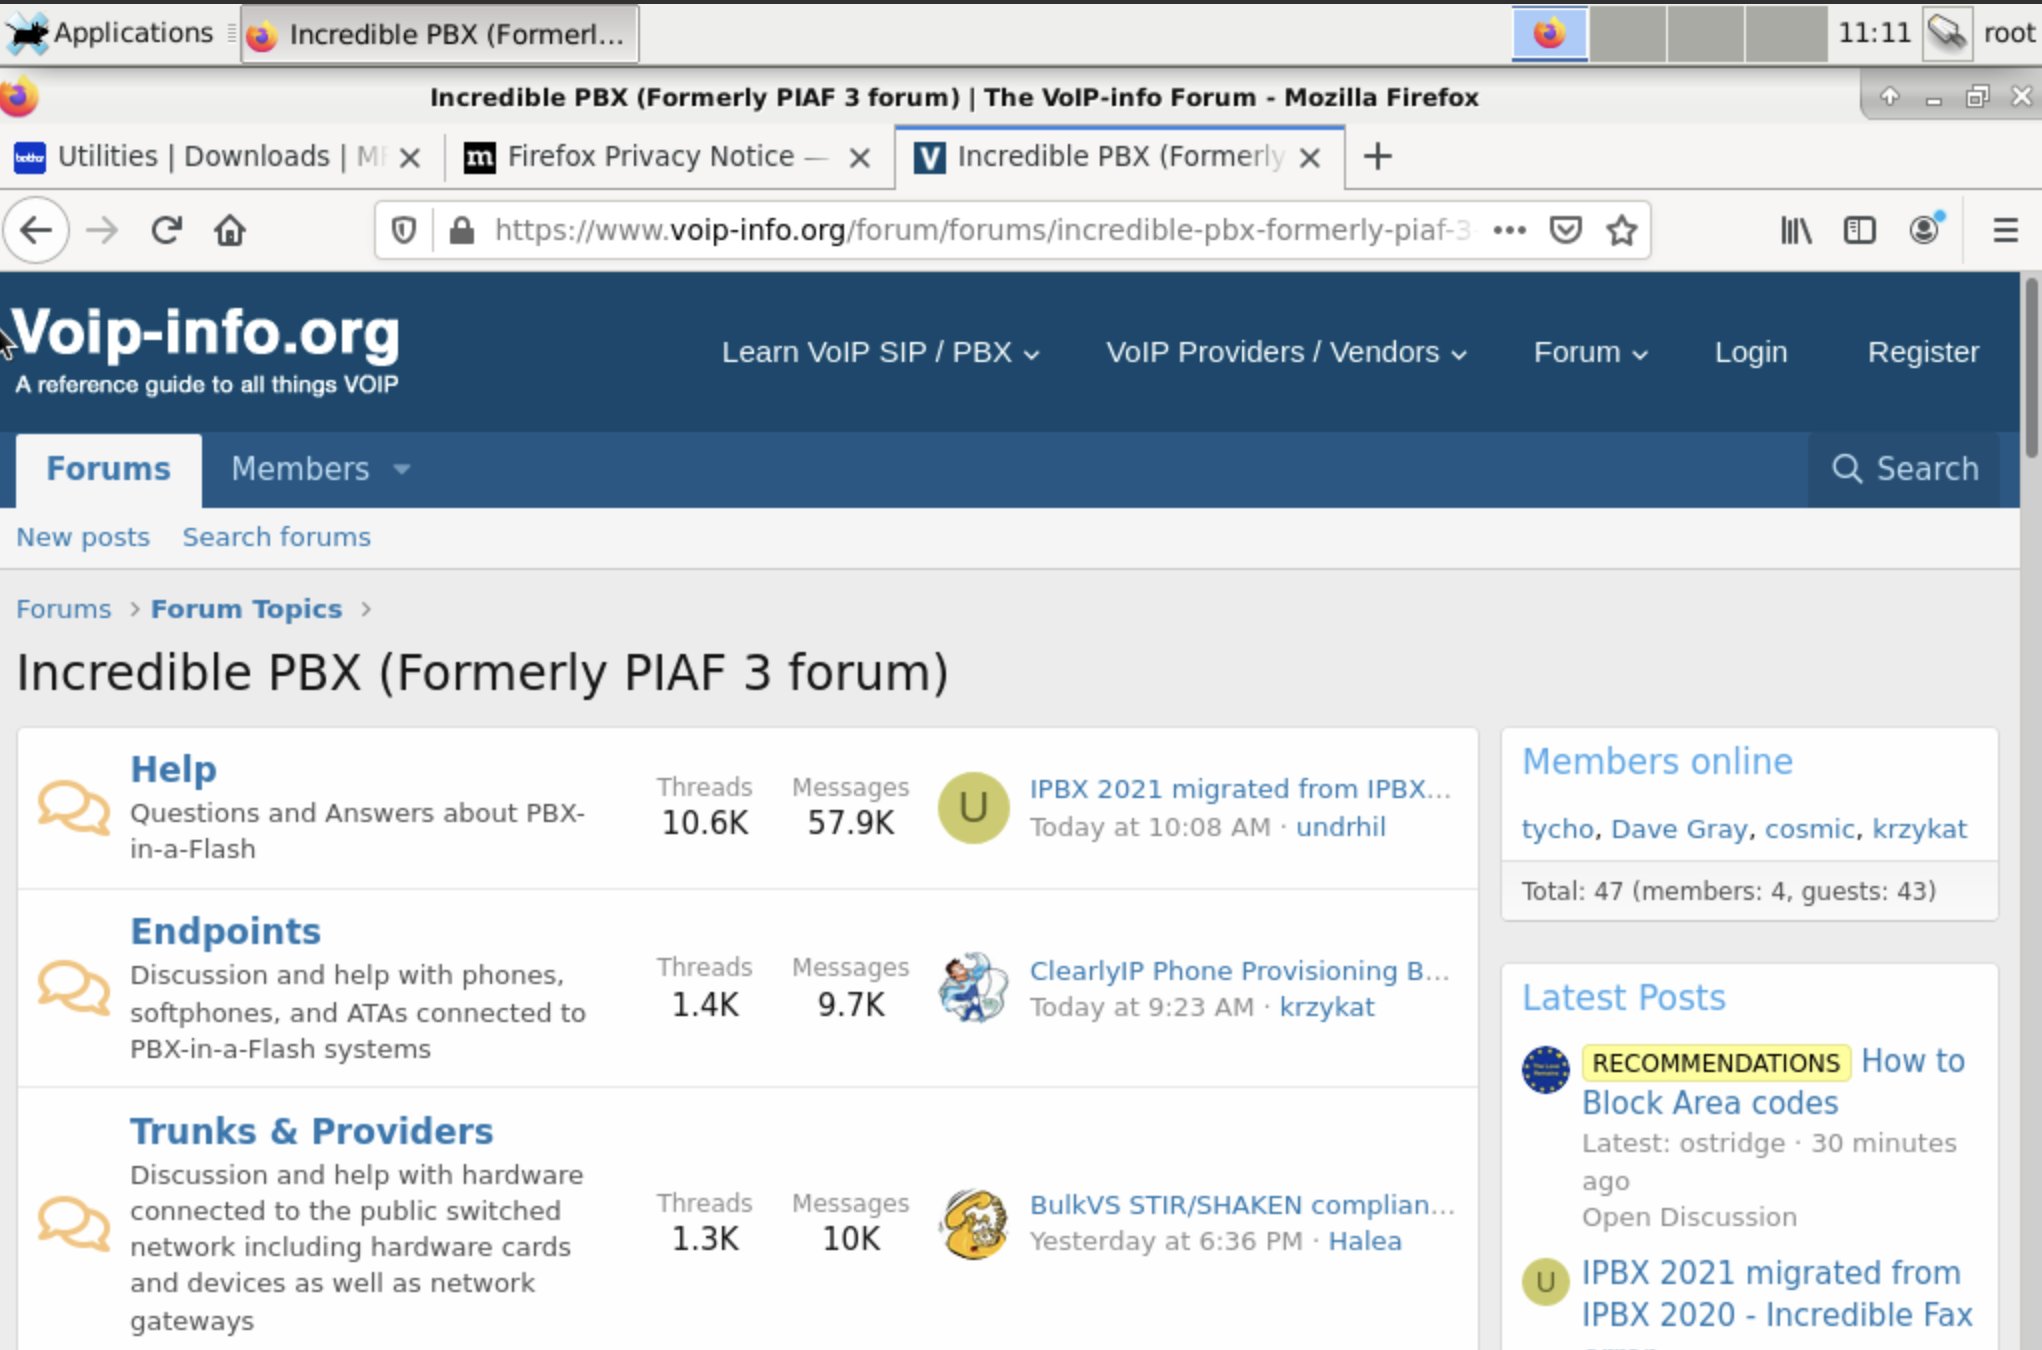
Need help with Asterisk? Visit the VoIP-info Forum.
Special Thanks to Our Generous Sponsors
FULL DISCLOSURE: ClearlyIP, Skyetel, Vitelity, DigitalOcean, Vultr, VoIP.ms, 3CX, Sangoma, TelecomsXchange and VitalPBX have provided financial support to Nerd Vittles and our open source projects through advertising, referral revenue, and/or merchandise. As an Amazon Associate and Best Buy Affiliate, we also earn from qualifying purchases. We’ve chosen these providers not the other way around. Our decisions are based upon their corporate reputation and the quality of their offerings and pricing. Our recommendations regarding technology are reached without regard to financial compensation except in situations in which comparable products at comparable pricing are available from multiple sources. In this limited case, we support our sponsors because our sponsors support us.
 BOGO Bonaza: Enjoy state-of-the-art VoIP service with a $10 credit and half-price SIP service on up to $500 of Skyetel trunking with free number porting when you fund your Skyetel account. No limits on number of simultaneous calls. Quadruple data center redundancy. $25 monthly minimum spend required. Tutorial and sign up details are here.
![]() The lynchpin of Incredible PBX 2020 and beyond is ClearlyIP components which bring management of FreePBX modules and SIP phone integration to a level never before available with any other Asterisk distribution. And now you can configure and reconfigure your new Incredible PBX phones from the convenience of the Incredible PBX GUI.
The lynchpin of Incredible PBX 2020 and beyond is ClearlyIP components which bring management of FreePBX modules and SIP phone integration to a level never before available with any other Asterisk distribution. And now you can configure and reconfigure your new Incredible PBX phones from the convenience of the Incredible PBX GUI.
 VitalPBX is perhaps the fastest-growing PBX offering based upon Asterisk with an installed presence in more than 100 countries worldwide. VitalPBX has generously provided a customized White Label version of Incredible PBX tailored for use with all Incredible PBX and VitalPBX custom applications. Follow this link for a free test drive!
 Special Thanks to Vitelity. Vitelity is now Voyant Communications and has halted new registrations for the time being. Our special thanks to Vitelity for their unwavering financial support over many years and to the many Nerd Vittles readers who continue to enjoy the benefits of their service offerings. We will keep everyone posted on further developments.

DEAL OF THE DAY: OBi2182 Color WiFi Phones now $69.98

These won’t last long but, if you still have some Google Voice numbers lying around unused and you live in the United States, you’d better jump on this one. Amazon is selling the OBi2182 phones with Google Voice, WiFi and power adapter for $69.98. Here’s the link.
We were big fans of OBiHai once upon a time. But then they sold out to Polycom. And they subsequently sold out to Plantronics. And support has gone from bad to worse along the way. But if you like free calling in the U.S. and Canada and have the patience of Job, today’s deal may just be your cup of tea. Just don’t come crying to us when things go wrong. We no longer have any dealings with ObiHai, Polycom, or Plantronics. But we know many of our followers were left high and dry when Google pulled the plug on Google Voice. And today’s deal is an easy way to reactivate free calling in your home or home office. Admin Guide available here.
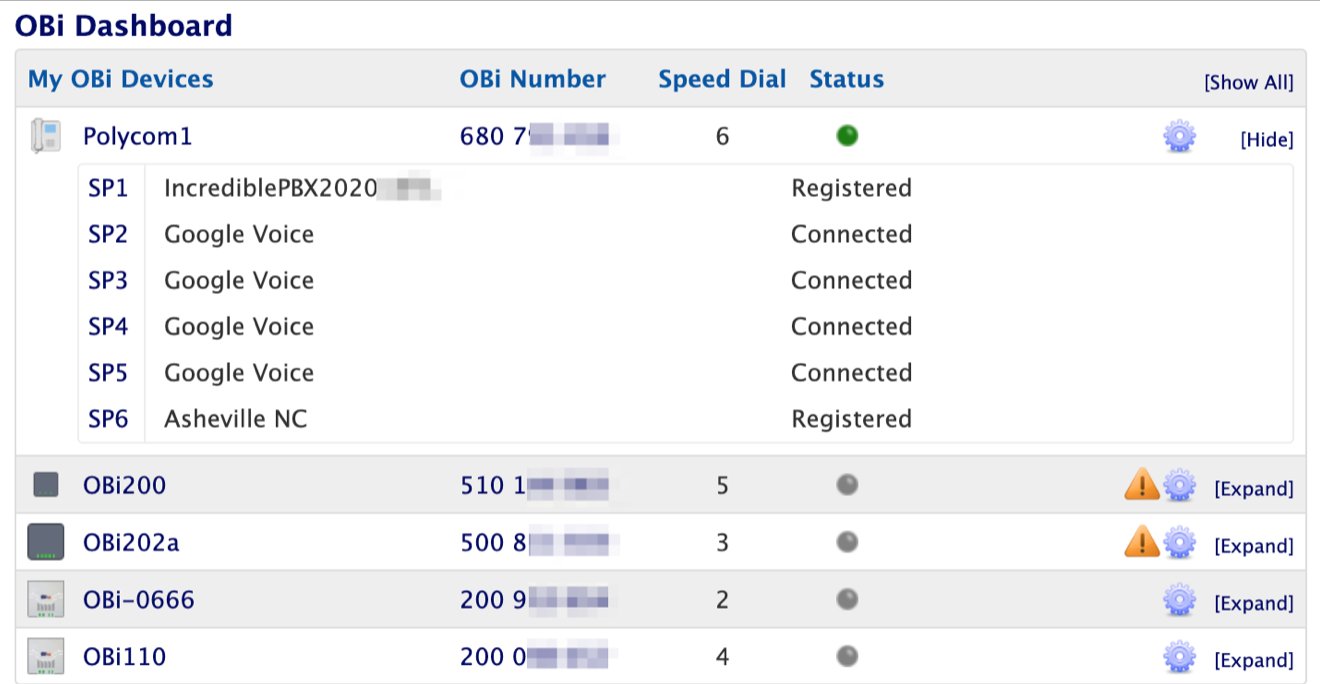
UPDATE: While the price has fluctuated a bit, these phones are still a good buy. We’ve received and configured one with four Google Voice trunks and free calling in the U.S. and Canada as well as two SIP trunks and a Bluetooth connection to an iPhone so it’s well worth $69.98 for those in the U.S.
Originally published: Saturday, April 10, 2021 Updated: Friday, November 19, 2021
Need help with Asterisk? Visit the VoIP-info Forum.
Special Thanks to Our Generous Sponsors
FULL DISCLOSURE: ClearlyIP, Skyetel, Vitelity, DigitalOcean, Vultr, VoIP.ms, 3CX, Sangoma, TelecomsXchange and VitalPBX have provided financial support to Nerd Vittles and our open source projects through advertising, referral revenue, and/or merchandise. As an Amazon Associate and Best Buy Affiliate, we also earn from qualifying purchases. We’ve chosen these providers not the other way around. Our decisions are based upon their corporate reputation and the quality of their offerings and pricing. Our recommendations regarding technology are reached without regard to financial compensation except in situations in which comparable products at comparable pricing are available from multiple sources. In this limited case, we support our sponsors because our sponsors support us.
BOGO Bonaza: Enjoy state-of-the-art VoIP service with a $10 credit and half-price SIP service on up to $500 of Skyetel trunking with free number porting when you fund your Skyetel account. No limits on number of simultaneous calls. Quadruple data center redundancy. $25 monthly minimum spend required. Tutorial and sign up details are here.
![]() The lynchpin of Incredible PBX 2020 and beyond is ClearlyIP components which bring management of FreePBX modules and SIP phone integration to a level never before available with any other Asterisk distribution. And now you can configure and reconfigure your new Incredible PBX phones from the convenience of the Incredible PBX GUI.
The lynchpin of Incredible PBX 2020 and beyond is ClearlyIP components which bring management of FreePBX modules and SIP phone integration to a level never before available with any other Asterisk distribution. And now you can configure and reconfigure your new Incredible PBX phones from the convenience of the Incredible PBX GUI.
VitalPBX is perhaps the fastest-growing PBX offering based upon Asterisk with an installed presence in more than 100 countries worldwide. VitalPBX has generously provided a customized White Label version of Incredible PBX tailored for use with all Incredible PBX and VitalPBX custom applications. Follow this link for a free test drive!
Special Thanks to Vitelity. Vitelity is now Voyant Communications and has halted new registrations for the time being. Our special thanks to Vitelity for their unwavering financial support over many years and to the many Nerd Vittles readers who continue to enjoy the benefits of their service offerings. We will keep everyone posted on further developments.
Unified Communications: Adding SMS to the Asterisk Toolkit

As we roll into September, the VoIP landscape continues to evolve. For various reasons, SMS functionality has become a must-have with many VoIP deployments. What we’ve observed lately is that many businesses and professional offices now assume that all phone numbers are SMS-enabled which means, if your primary phone numbers don’t support SMS, you may miss important notices and reminders. Particularly in this COVID era, physicians have incredibly high rates of no-shows for appointments so you’ll typically get multiple SMS messages to multiple numbers beginning several days before an appointment. And, believe it or not, there are many locations where a cellphone lacks service but VoIP is alive and well.
The gap we want to close today is to enable SMS on your Incredible PBX® platform and its critical extensions. It’s also a good time to determine whether your existing SIP phones include SMS support so that notifications can be delivered to the desktop PC and phone in a reliable and timely manner. The good news is you don’t need to mortgage your house with a BroadWorks Instant Message and Presence (IM&P) subscription in order to implement SMS messaging on Asterisk® and FreePBX® platforms. SMS VoIP implementations typically cost less than a penny a message. While that’s not as inexpensive as many cellular services, it won’t break the bank either.
While we’ve all grown accustomed to SMS messaging on our smartphones, SMS and MMS messaging in the VoIP sphere is a different beast because there’s little uniformity in the way messages are sent and delivered. Proprietary messaging unfortunately is the rule rather than the exception. So today we’ll offer several VoIP provider alternatives. If you’re new to all of this, here’s the bottom line. SMS messages are delivered to VoIP trunks or DIDs. SMS messages are sent from VoIP extensions or users. Thus, it becomes the job of the PBX platform to map DIDs to extensions and to map extensions to DIDs in order to reliably send and receive SMS and MMS messages.
Our personal favorite for SMS messaging with Incredible PBX is the Clearly IP offering coupled with the Incredible PBX SIP Trunking platform because of its seamless integration with FreePBX and its User Control Panel as well as the Clearly Anywhere softphone. Once deployed, you can send and retrieve messages from your desktop PC by logging into the User Control Panel or simply calling up the Clearly IP softphone on your smartphone or desktop PC. Complete deployment tutorial is available in the Incredible PBX Wiki.
A close second place goes to VoIP.ms with their extremely flexible SMS/MMS offering which lets you redirect incoming messages to your email address, another SMS number, an SMS SIP account on VoIP.ms, and the VoIP.ms SMS/MMS Portal. We have previously documented and recently updated the Incredible PBX setup procedure to both receive and send messages as well as to deliver the messages to SMS-enabled SIP phones. Email replies to incoming SMS messages are automatically delivered to the original sender. And, of course, SMS replies on your SMS-enabled SIP phone also are delivered to the original sender. Complete Incredible PBX deployment takes only a few minutes.
A third alternative for messaging is our Platinum Partner, Skyetel. As with VoIP.ms, we previously have documented the setup procedure so we won’t repeat it here. The complete deployment tutorial is available here.
Finally, we would direct your attention to the BulkVS messaging tutorial on the VoIP-info.org Forum. It will walk you through the setup procedure using that provider.
Originally published: Wednesday, September 1, 2021
Need help with Asterisk? Visit the VoIP-info Forum.
Special Thanks to Our Generous Sponsors
FULL DISCLOSURE: ClearlyIP, Skyetel, Vitelity, DigitalOcean, Vultr, VoIP.ms, 3CX, Sangoma, TelecomsXchange and VitalPBX have provided financial support to Nerd Vittles and our open source projects through advertising, referral revenue, and/or merchandise. As an Amazon Associate and Best Buy Affiliate, we also earn from qualifying purchases. We’ve chosen these providers not the other way around. Our decisions are based upon their corporate reputation and the quality of their offerings and pricing. Our recommendations regarding technology are reached without regard to financial compensation except in situations in which comparable products at comparable pricing are available from multiple sources. In this limited case, we support our sponsors because our sponsors support us.
BOGO Bonaza: Enjoy state-of-the-art VoIP service with a $10 credit and half-price SIP service on up to $500 of Skyetel trunking with free number porting when you fund your Skyetel account. No limits on number of simultaneous calls. Quadruple data center redundancy. $25 monthly minimum spend required. Tutorial and sign up details are here.
![]() The lynchpin of Incredible PBX 2020 and beyond is ClearlyIP components which bring management of FreePBX modules and SIP phone integration to a level never before available with any other Asterisk distribution. And now you can configure and reconfigure your new Incredible PBX phones from the convenience of the Incredible PBX GUI.
The lynchpin of Incredible PBX 2020 and beyond is ClearlyIP components which bring management of FreePBX modules and SIP phone integration to a level never before available with any other Asterisk distribution. And now you can configure and reconfigure your new Incredible PBX phones from the convenience of the Incredible PBX GUI.
VitalPBX is perhaps the fastest-growing PBX offering based upon Asterisk with an installed presence in more than 100 countries worldwide. VitalPBX has generously provided a customized White Label version of Incredible PBX tailored for use with all Incredible PBX and VitalPBX custom applications. Follow this link for a free test drive!
Special Thanks to Vitelity. Vitelity is now Voyant Communications and has halted new registrations for the time being. Our special thanks to Vitelity for their unwavering financial support over many years and to the many Nerd Vittles readers who continue to enjoy the benefits of their service offerings. We will keep everyone posted on further developments.
Meet RackNerd: The Best VoIP Cloud Bargain on the Planet

We continue to scour the Internet for the best bargains to host Incredible PBX 2021 in the Cloud. When the annual cost drops to $1 a month, you would be crazy not to move your PBX to a cloud-based solution. And, yes, we eat our own dog food. We have four VPS offerings from RackNerd that are scattered across the United States in Chicago, Atlanta, New York, and Seattle. Over the past year, inflation has set in. For new signups, the price has increased a whopping dollar to $12.00 per year. Renewals remain the same as your original cost.
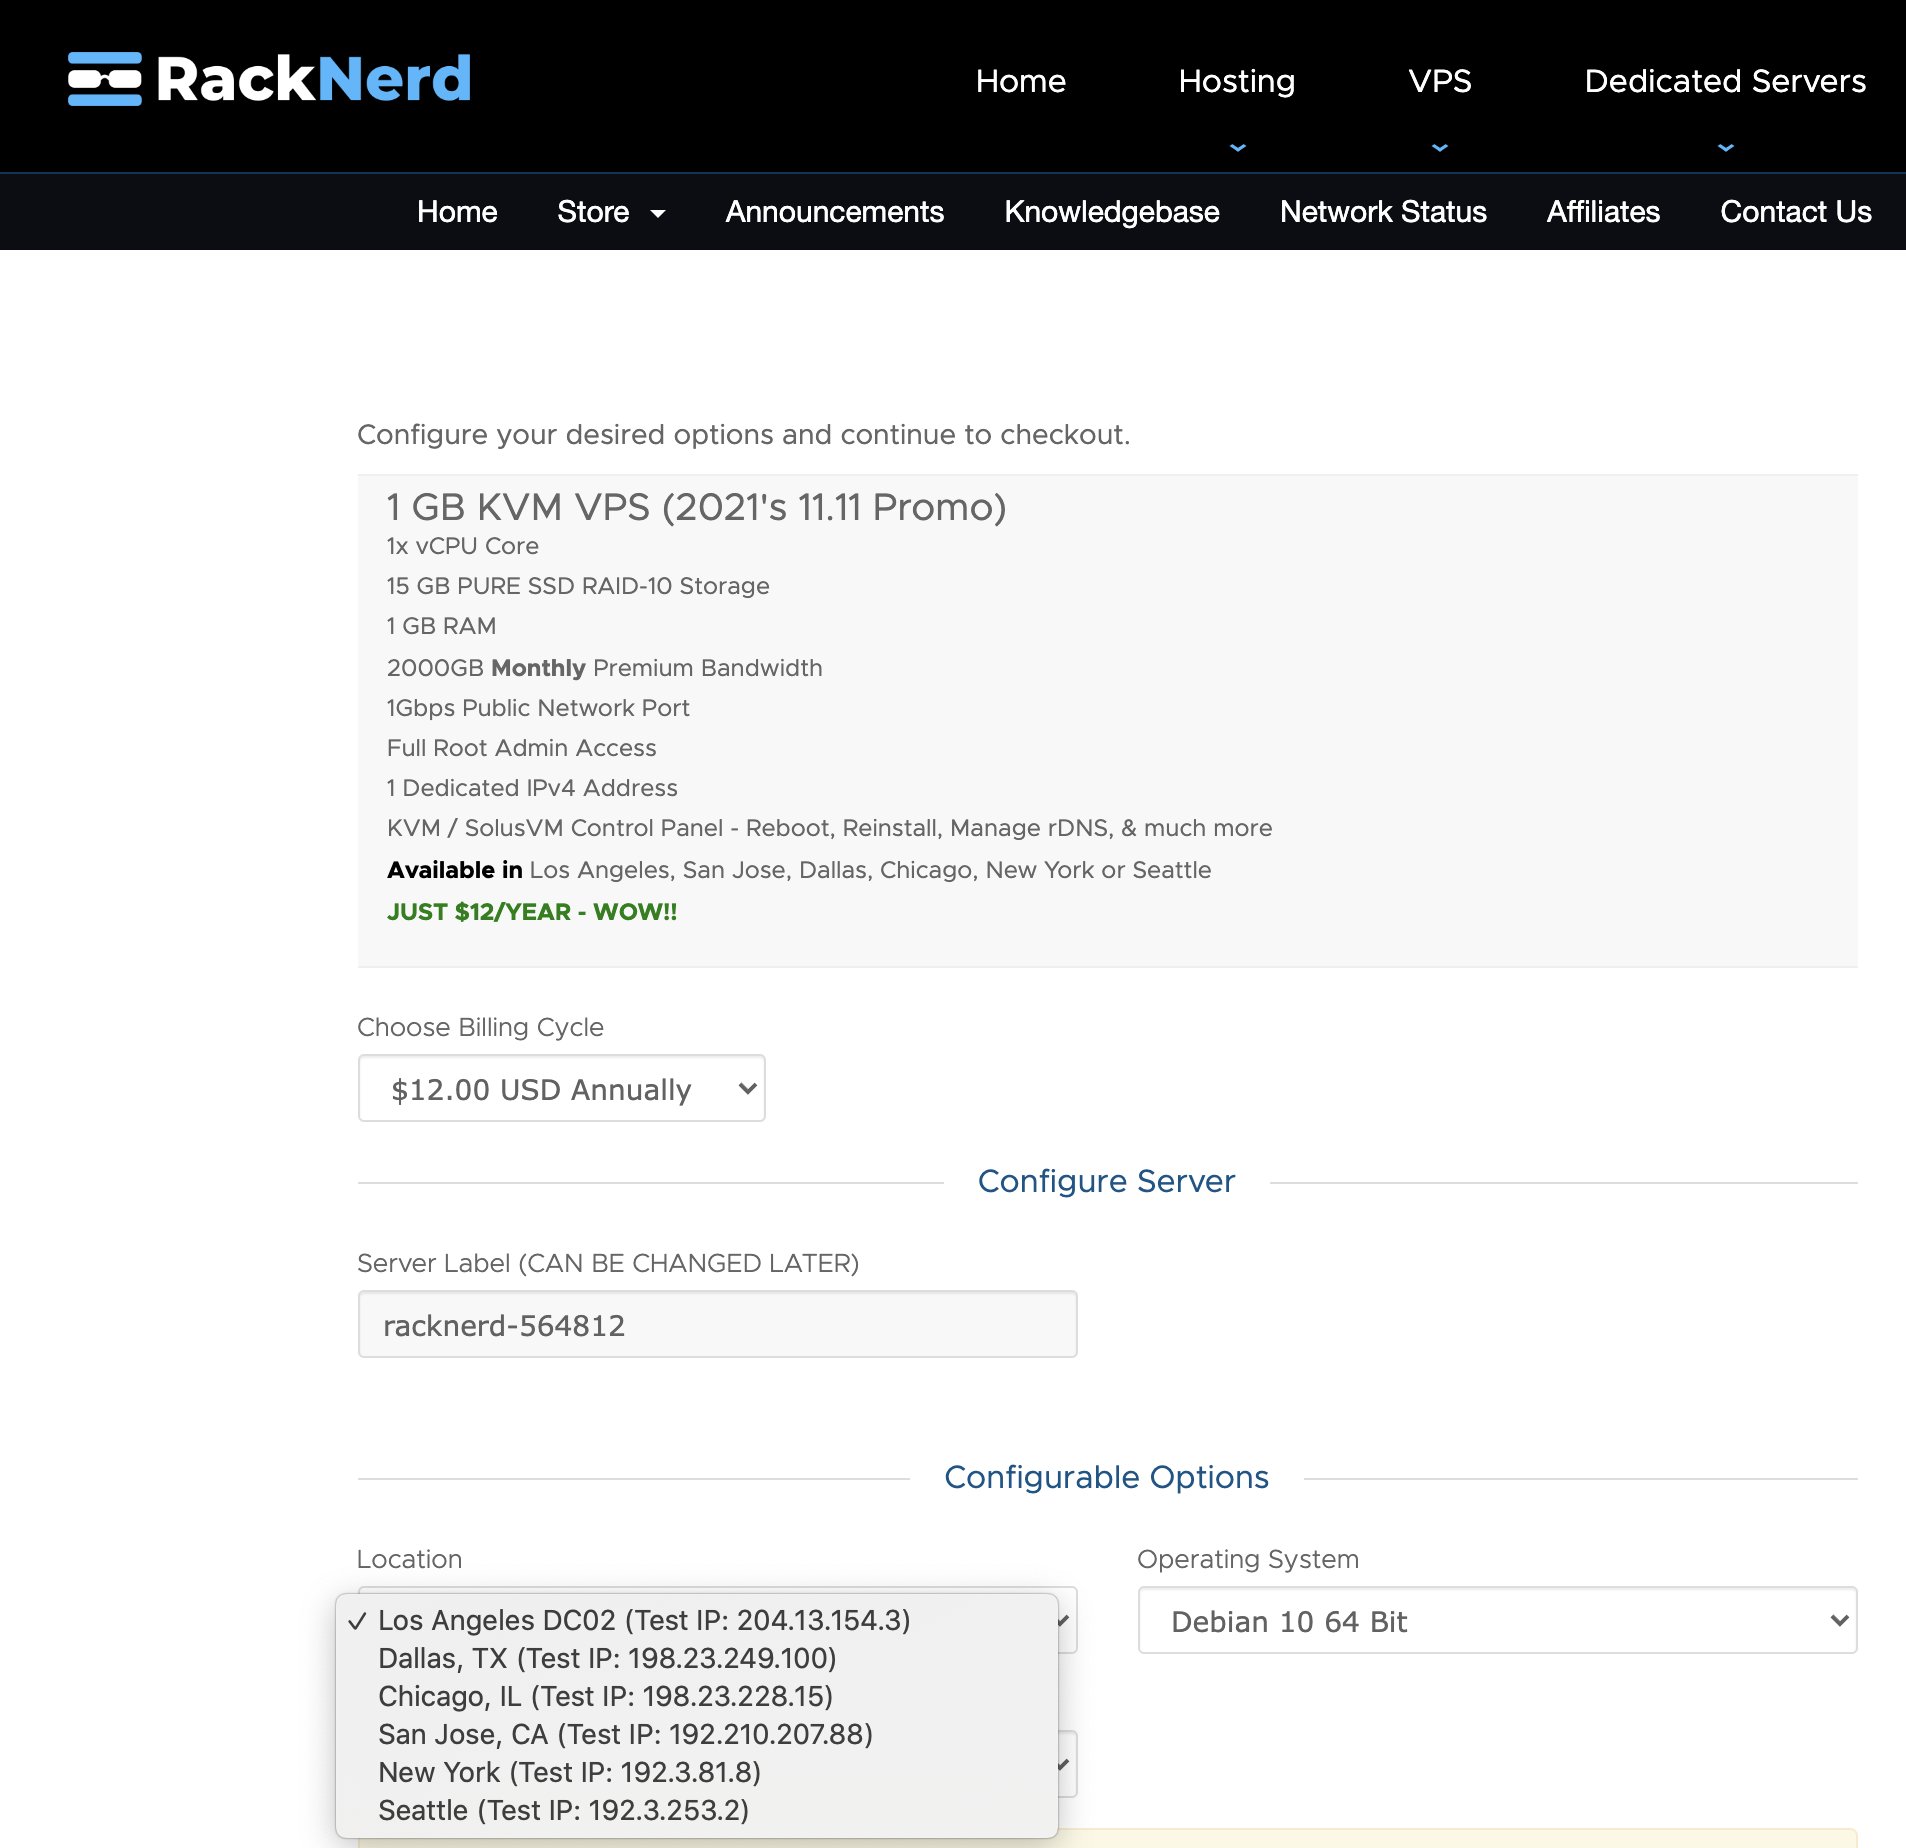
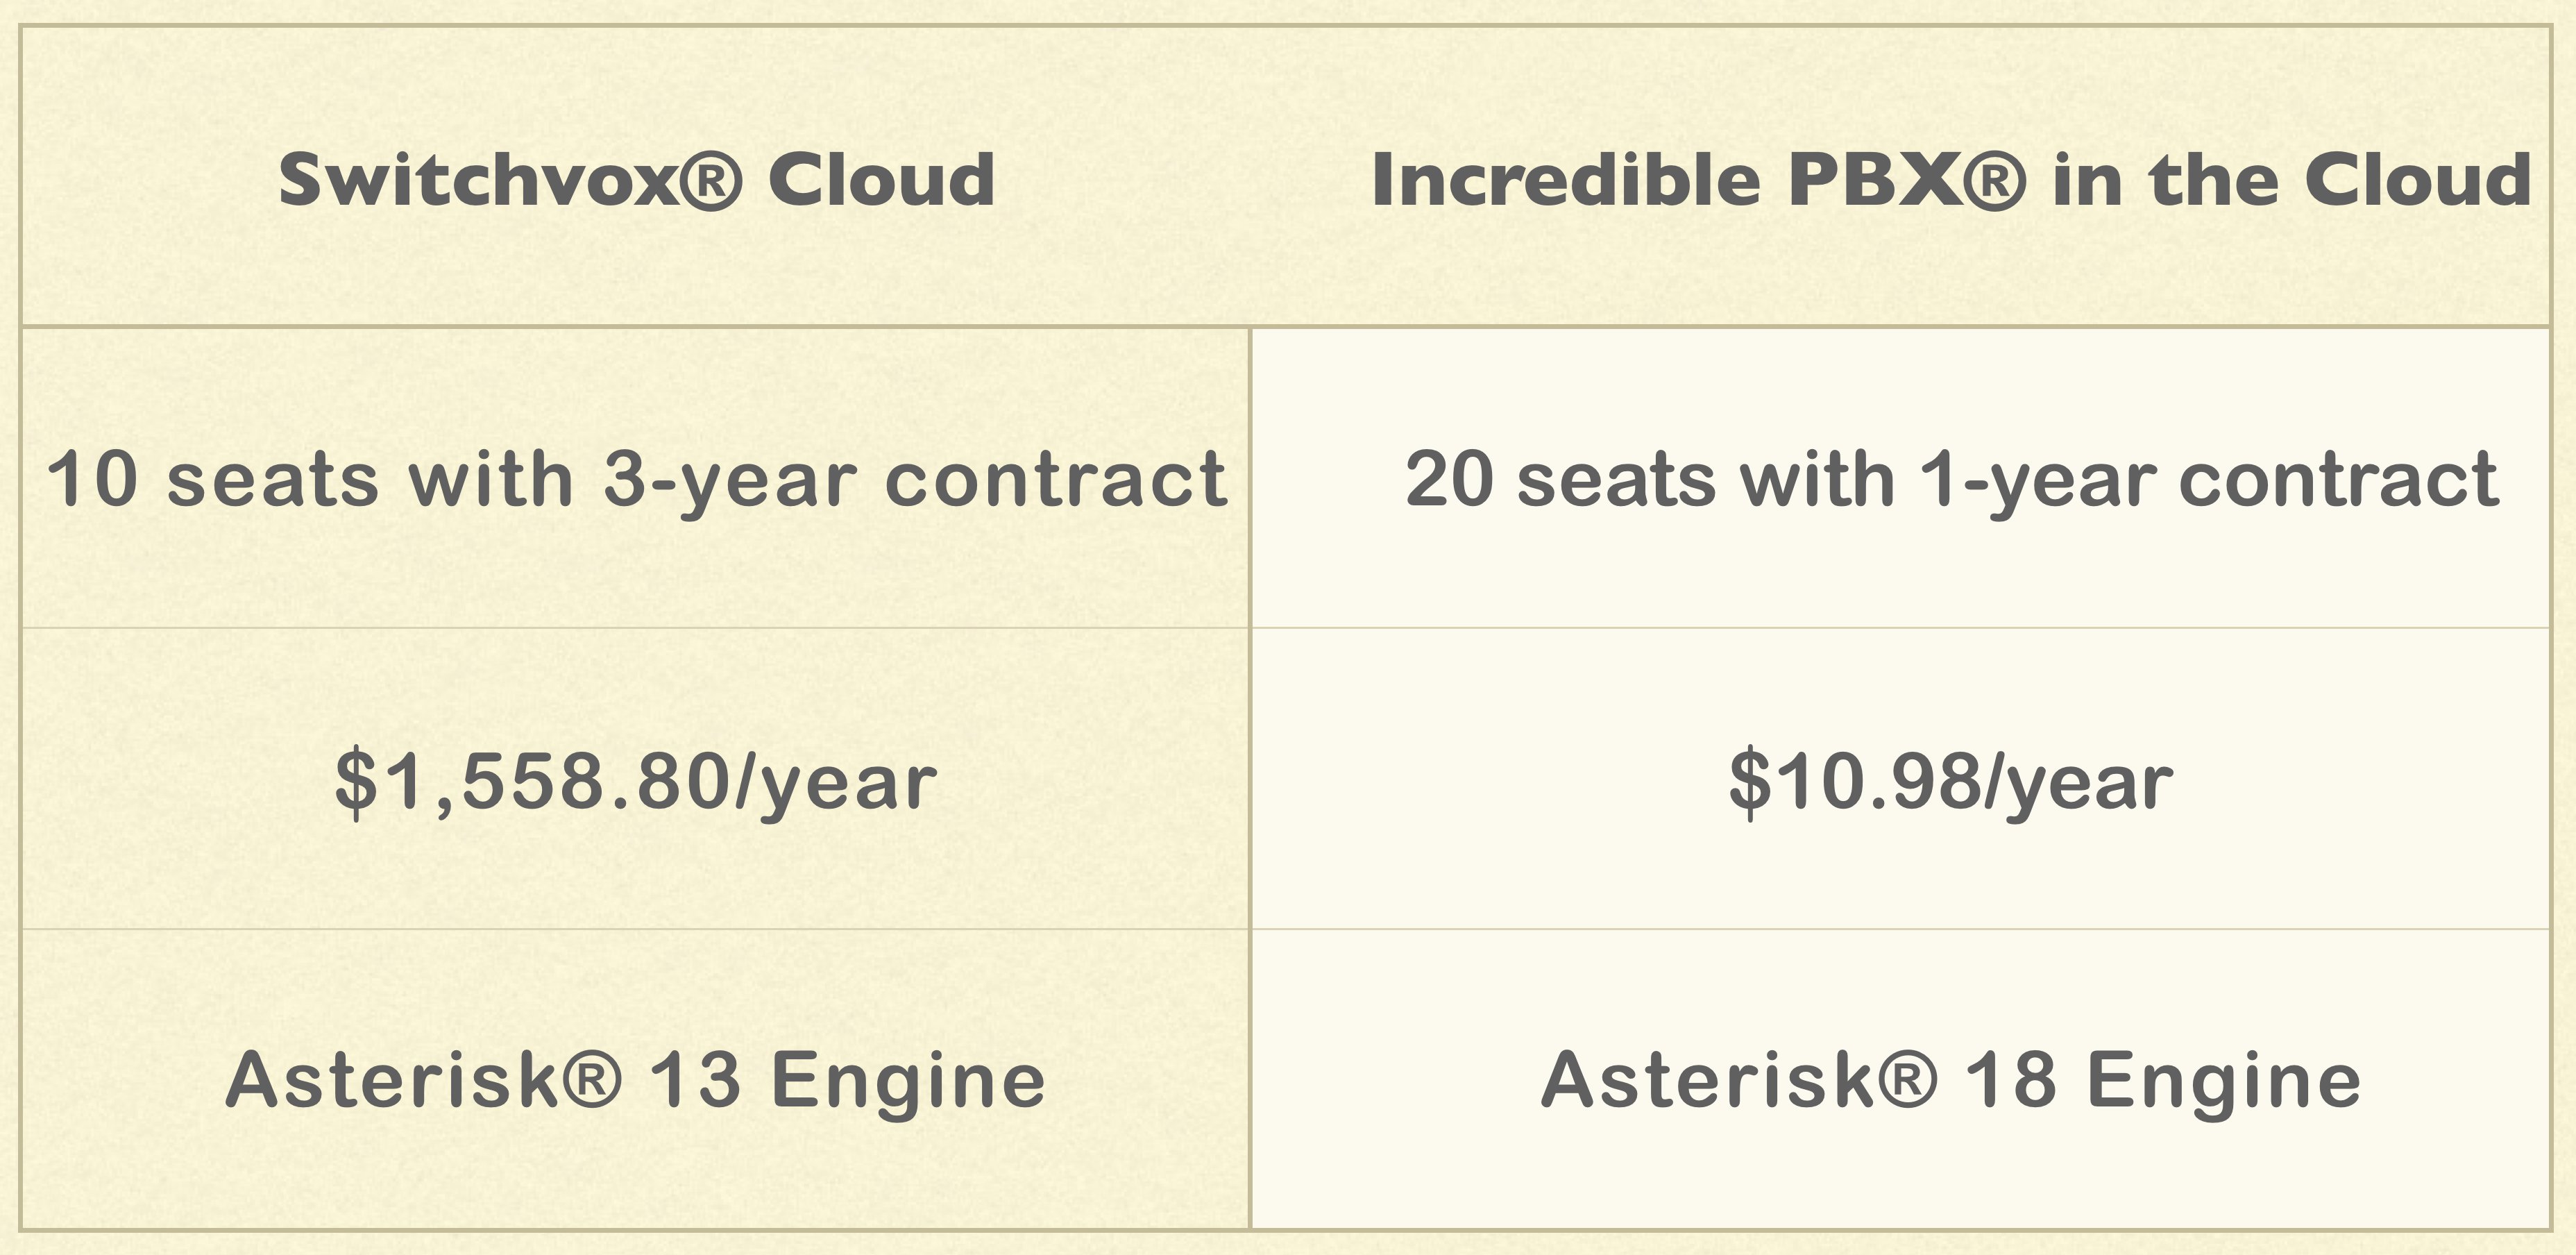
What’s the catch? Nothing really other than you have to handle backing up your platform as no backup or snapshot option is offered with the service at this price point. Performance is not a problem. SpeedTest reports 547 Mbit/s downloads and 462 Mbit/sec uploads on our most recent install. Here’s the signup link. Dare to Compare:
Installing Incredible PBX 2021 with Debian 10. Installing Incredible PBX 2021 is a breeze. Simply signup for a Debian 10 VPS at RackNerd and wait a minute or two for your credentials to arrive. Then follow the steps in the latest Incredible PBX 2021 tutorial. You’ll be up and running in less than 15 minutes.
For more VoIP Cloud Provider Alternatives, go here or visit the Incredible PBX Wiki.
Originally published: Monday, August 23, 2021 Updated: Sunday, October 24, 2021
Need help with Asterisk? Visit the VoIP-info Forum.
Special Thanks to Our Generous Sponsors
FULL DISCLOSURE: ClearlyIP, Skyetel, Vitelity, DigitalOcean, Vultr, VoIP.ms, 3CX, Sangoma, TelecomsXchange and VitalPBX have provided financial support to Nerd Vittles and our open source projects through advertising, referral revenue, and/or merchandise. As an Amazon Associate and Best Buy Affiliate, we also earn from qualifying purchases. We’ve chosen these providers not the other way around. Our decisions are based upon their corporate reputation and the quality of their offerings and pricing. Our recommendations regarding technology are reached without regard to financial compensation except in situations in which comparable products at comparable pricing are available from multiple sources. In this limited case, we support our sponsors because our sponsors support us.
BOGO Bonaza: Enjoy state-of-the-art VoIP service with a $10 credit and half-price SIP service on up to $500 of Skyetel trunking with free number porting when you fund your Skyetel account. No limits on number of simultaneous calls. Quadruple data center redundancy. $25 monthly minimum spend required. Tutorial and sign up details are here.
![]() The lynchpin of Incredible PBX 2020 and beyond is ClearlyIP components which bring management of FreePBX modules and SIP phone integration to a level never before available with any other Asterisk distribution. And now you can configure and reconfigure your new Incredible PBX phones from the convenience of the Incredible PBX GUI.
The lynchpin of Incredible PBX 2020 and beyond is ClearlyIP components which bring management of FreePBX modules and SIP phone integration to a level never before available with any other Asterisk distribution. And now you can configure and reconfigure your new Incredible PBX phones from the convenience of the Incredible PBX GUI.
VitalPBX is perhaps the fastest-growing PBX offering based upon Asterisk with an installed presence in more than 100 countries worldwide. VitalPBX has generously provided a customized White Label version of Incredible PBX tailored for use with all Incredible PBX and VitalPBX custom applications. Follow this link for a free test drive!
Special Thanks to Vitelity. Vitelity is now Voyant Communications and has halted new registrations for the time being. Our special thanks to Vitelity for their unwavering financial support over many years and to the many Nerd Vittles readers who continue to enjoy the benefits of their service offerings. We will keep everyone posted on further developments.
Morphing Incredible PBX into a PUBLIC-Facing Cloud PBX

We’ve previously documented how to change Incredible PBX 2021 and Incredible PBX 2020 into PUBLIC-facing PBXs. What that means is that authorized users could still connect to your PBX regardless of where they may be located without having to worry about whitelisting IP addresses. To suggest that the procedure was convoluted is a bit of an understatement. So today we offer a simplified solution that you can deploy in a couple of minutes. It lacks some of the safeguards of the earlier releases, but it remains secure so long as you don’t employ a readily decipherable FQDN for your PBX. The idea here is to block communications access to your PBX using its public IP address and allow access by those that know the fully-qualified domain name (FQDN) of your PBX. You can also restrict the extensions that are accessible. And SSH access to your PBX will be protected by assigning a random port number or by requiring public key authentication for access.
Prerequisites. To get started, you’ll obviously need a cloud-based Incredible PBX 2020 or 2021 platform running CentOS 7, Debian 10, or Raspbian. Next, you’ll need these items:
- Public IP Address of your server
- FQDN linked to the public IP address
- Random SSH port for SSH access to PBX
- List of secure extensions to enable for SIP URI access
- IP Addresses to WhiteList for Access to the Web GUI
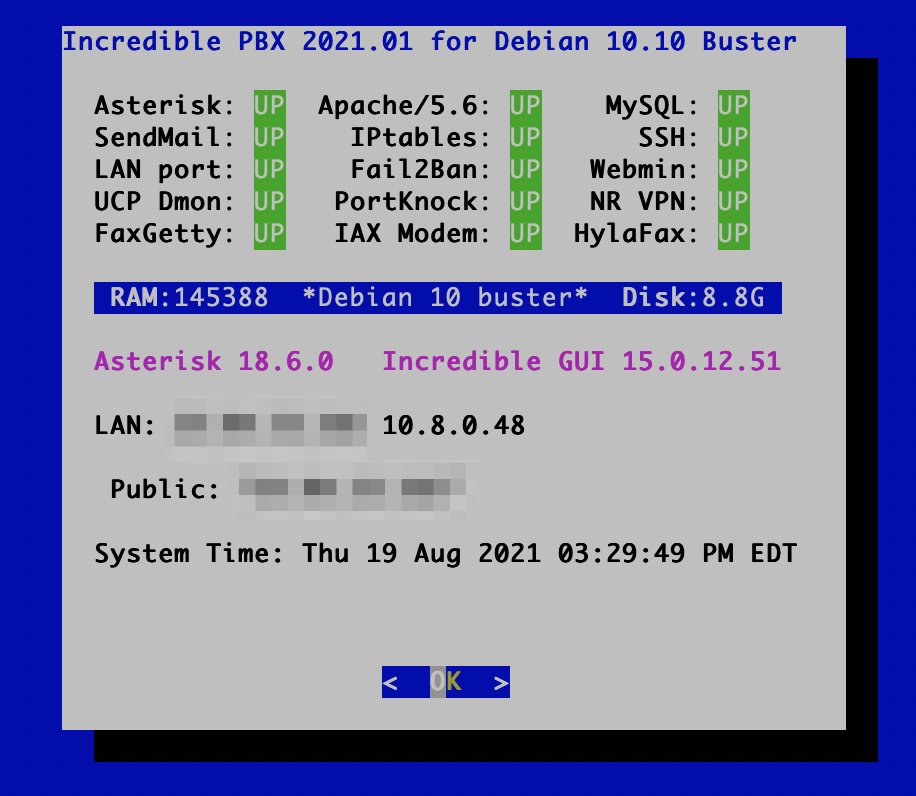
1. Deciphering Public IP Address of Your PBX
After logging into your PBX as root, you can execute pbxstatus to decipher the public IP address of the PBX.
2. Obtaining an FQDN for Your PBX
Security through obscurity provides the critical layer of protection for your server so choose an FQDN carefully. sip.yourname.com provides little protection while f246g.yourname.com pretty much assures that nobody is going to guess your domain name. This is particularly important with SIP registrations because registered extensions on your PBX can obviously make phone calls that cost you money. If you don’t have your own domain, you can always obtain a free hostname from a service such as NoIP.com.
3. Securing SSH Access to Your PBX
Whatever you do, don’t leave SSH access via port 22 exposed on your PBX. In the time it took to create a new PBX on CloudAtCost, there were over 400 attempted logins to the default SSH port of the new server. The simplest (but least secure) method to avoid these script kiddie attacks is to change the port number for SSH access to your server. We suggest using the year you were born as the port number because it’s easy to remember. Edit /etc/ssh/sshd_config and uncomment the Port line replacing 22 with the port number you chose. Then restart SSH: systemctl restart sshd.
The preferable solution to secure SSH is to create and use SSH keys for access and set PasswordAuthentication no in /etc/ssh/sshd_config. Digital Ocean has an excellent tutorial to walk you through the setup process.
4. Choosing Extensions for SIP URI Public Access
With today’s PUBLIC design, exposing an extension for PUBLIC access means anyone in the world that knows the FQDN of your server and the extension number can do two things using any SIP client: (1) they can call you and (2) they can attempt to register to that extension and make calls on your trunks AND your nickel. So only expose extensions for public access if there is a need to connect or call from remote locations. For extensions you decide to expose, make certain that the passwords for these extensions are extremely secure, lengthy, and use numbers with both UPPER and lower case letters. Never use default extension passwords!
5. Whitelisting IP Addresses for Public Web Access
Without enumerating IP addresses for public web access, you won’t be able to connect to the web GUI of your PBX. Down the road, if you wish to add additional IP addresses, you can use /root/add-ip to add them via SSH.
Deploying New PUBLIC Firewall
To get started, log into your server as root and issue the following commands:
cd /tmp
wget http://incrediblepbx.com/newpublic.tar.gz
tar zxvf newpublic.tar.gz
rm -f newpublic.tar.gz
Next, edit /tmp/iptables.base and change the highlighted entries:
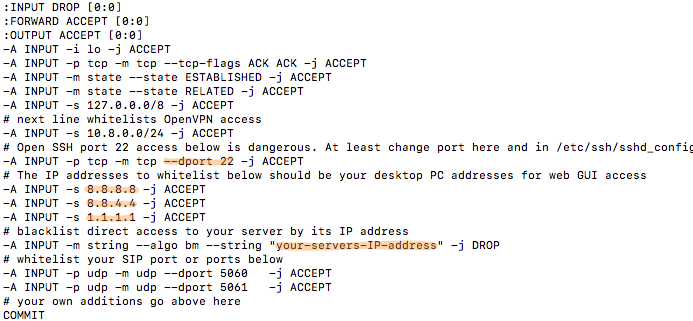
Change port 22 in the dport entry to the SSH port number you chose in Step 3, above.
Change 8.8.8.8, 8.8.4.4., and 1.1.1.1 to actual public IP addresses of desktop machines you wish to use to access the web GUI of your PBX. If you don’t need three entries, comment out the other entries with # at the beginning of each line.
Replace your-servers-IP-address with the actual IP address of your PBX from Step 1, above.
Save the file.
On Debian and Raspbian platforms, issue the following commands:
cd /etc/iptables
cp /tmp/iptables.base .
mv rules.v4 rules.v4.orig
cp iptables.base rules.v4
On CentOS platforms, issue the following commands:
cd /etc/sysconfig
cp /tmp/iptables.base .
mv iptables iptables.orig
cp iptables.base iptables
Using Incredible PBX PUBLIC with Asterisk
The first line of defense with this PUBLIC implementation is your FQDN. Second is the IPtables firewall setup above. And third is the Asterisk® extensions configuration in extensions_override_freepbx.conf. Here’s how to configure it. Edit /tmp/extensions_override_freepbx.base and change the highlighted entries:
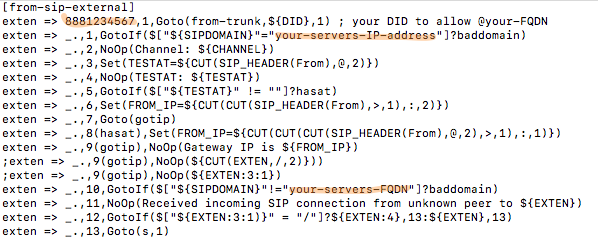
If there are phone numbers assigned to your PBX that you want processed according to your Inbound Routing rules, duplicate the first highlighted line above and, for each trunk, replace 8881234567 with your actual DID numbers.
In exten => _.,1 line, replace your-servers-IP-address with the actual IP address of your PBX from Step 1, above.
In exten => _.,10 line, replace your-servers-FQDN with the actual FQDN assigned to your PBX from Step 2, above.
Scroll down in the file to the following section:
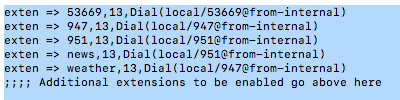
Comment out undesired default extensions. Place a semicolon at the beginning of the lines.
For any extensions you wish to add, insert a new line in the following format replacing both 7000 entries with the desired extension number:
exten => 7000,13,Dial(local/7000@from-internal)
Save the file and then execute the following commands to complete the PUBLIC setup:
cd /etc/asterisk
cp /tmp/extensions_override_freepbx.base .
mv extensions_override_freepbx.conf extensions_override_freepbx.orig
cp extensions_override_freepbx.base extensions_override_freepbx.conf
fwconsole restart
asterisk -rx "dialplan reload"
iptables-restart
sed -i 's|-A INPUT|-I INPUT|' /root/add-ip
sed -i 's|-A INPUT|-I INPUT|' /root/add-fqdn
Calling an Incredible PBX PUBLIC Extension
Any extensions that you have whitelisted in the blue section above can be called from anywhere using any SIP client. Simply enter the SIP URI for the extension in the following format: SIP/extension@your-servers-FQDN
CAUTION: If a caller attempts to call any extension on your PUBLIC server from an extension on another Asterisk server to which the caller is registered, the call will fail if there is a matching extension number on the PUBLIC server and the two servers are not registered to each other. So remember to use unique extension numbers on your PUBLIC server if you expect callers from other Asterisk servers.
Registering Incredible PBX PUBLIC Extension
If you wish to login to a whitelisted extension using a SIP client, enter the extension and password of the extension. For the server address, enter the FQDN of your server. If it’s a PJsip extension, add :5061 to the end of the FQDN.
Switching Back to Incredible PBX Default
Should you change your mind and decide to switch back to the default Incredible PBX setup, it’s simple to do so. Here are the steps.
sed -i 's|Port|#Port|' /etc/ssh/sshd_config
cd /etc/asterisk
cp -p extensions_override_freepbx.orig extensions_override_freepbx.conf
cd /root
cd /etc/sysconfig
cp -p iptables.orig iptables
cd /root
cd /etc/iptables
cp -p rules.v4.orig rules.v4
asterisk -rx "dialplan reload"
iptables-restart
systemctl restart sshd
Originally published: Monday, August 16, 2021
Need help with Asterisk? Visit the VoIP-info Forum.
Special Thanks to Our Generous Sponsors
FULL DISCLOSURE: ClearlyIP, Skyetel, Vitelity, DigitalOcean, Vultr, VoIP.ms, 3CX, Sangoma, TelecomsXchange and VitalPBX have provided financial support to Nerd Vittles and our open source projects through advertising, referral revenue, and/or merchandise. As an Amazon Associate and Best Buy Affiliate, we also earn from qualifying purchases. We’ve chosen these providers not the other way around. Our decisions are based upon their corporate reputation and the quality of their offerings and pricing. Our recommendations regarding technology are reached without regard to financial compensation except in situations in which comparable products at comparable pricing are available from multiple sources. In this limited case, we support our sponsors because our sponsors support us.
BOGO Bonaza: Enjoy state-of-the-art VoIP service with a $10 credit and half-price SIP service on up to $500 of Skyetel trunking with free number porting when you fund your Skyetel account. No limits on number of simultaneous calls. Quadruple data center redundancy. $25 monthly minimum spend required. Tutorial and sign up details are here.
![]() The lynchpin of Incredible PBX 2020 and beyond is ClearlyIP components which bring management of FreePBX modules and SIP phone integration to a level never before available with any other Asterisk distribution. And now you can configure and reconfigure your new Incredible PBX phones from the convenience of the Incredible PBX GUI.
The lynchpin of Incredible PBX 2020 and beyond is ClearlyIP components which bring management of FreePBX modules and SIP phone integration to a level never before available with any other Asterisk distribution. And now you can configure and reconfigure your new Incredible PBX phones from the convenience of the Incredible PBX GUI.
VitalPBX is perhaps the fastest-growing PBX offering based upon Asterisk with an installed presence in more than 100 countries worldwide. VitalPBX has generously provided a customized White Label version of Incredible PBX tailored for use with all Incredible PBX and VitalPBX custom applications. Follow this link for a free test drive!
Special Thanks to Vitelity. Vitelity is now Voyant Communications and has halted new registrations for the time being. Our special thanks to Vitelity for their unwavering financial support over many years and to the many Nerd Vittles readers who continue to enjoy the benefits of their service offerings. We will keep everyone posted on further developments.
Amazon’s Alexa Now Available for Incredible PBX

Loyal readers already know that voice recognition applications occupy a special place in the Incredible PBX® toolchest. Over 8 years ago, we introduced Wolfram Alpha integrating the world’s largest almanac into Asterisk®. And today we’re pleased to add Amazon’s Alexa to the Incredible PBX fold for our latest Incredible PBX 2021 for Debian, Raspberry Pi and CentOS 7 builds. Just dial 5555 and tell Alexa what you’d like to know or do. If you’ve been sleeping under a rock these past few years, Alexa provides not only a thesaurus but also current news and weather, cooking tips and recipes, calendars, movie showtimes and data, Amazon purchasing, shopping lists, reminders, maps, music.everything, home automation control to turn on your lights, lock your doors and adjust your thermostat, sports scores and scheduling, grocery shopping, and almost anything else you can imagine asking for. And our special tip of the hat goes to Russell Grokett for his creativity in bringing the Alexa platform to the Asterisk community. Here’s a simple graphic showing the call flow in a typical Alexa call from any SIP phone connected to Incredible PBX:

Before we get started, let me offer a few words of caution. You’ll need to be a careful reader and follow the instructions below carefully to get Alexa working. Amazon uses OAuth 2 authentication which is secure (and tedious) by design. The good news is you only have to go through this setup exercise once after which Alexa will be available at any time without further tweaking. We’ve made some changes in Russell Grokett’s original design to hopefully simplify the OAuth procedure and to adjust some of the configuration to correctly interface with newer releases of the open source components including sox which handles the audio translations between Asterisk and Alexa. All of the code is licensed pursuant to GNU GPLv3.
Prerequisites. Before you begin, you’ll need a working Incredible PBX 2020 platform running CentOS 7, or Incredible PBX 2021 running Debian 10, or the latest Incredible PBX release for Raspbian preferably running on a Raspberry Pi 4 with at least 2GB of RAM.
Overview. There are four steps in today’s installation procedure. First, we will download and install a number of open source components on Incredible PBX by running a simple script. Second, you’ll need to sign up for both an Amazon account if you don’t already have one AND an Amazon Developer Account. Third, we’ll create an Alexa Voice Service application and set up the Alexa Security Profile for the application. Finally, using the credentials obtained during this setup process, we’ll configure the components on your PBX to talk to Alexa. Be advised that the Amazon license we will be using authorizes only private, non-commercial use. Today’s design does not meet Amazon’s terms for commercial and/or public use!
1. Installing Alexa Basics for Incredible PBX
Log into your server as root and issue the following commands to download and install the basic components to support Alexa integration into Incredible PBX:
cd /
wget http://incrediblepbx.com/incredible-alexa.tar.gz
tar zxvf incredible-alexa.tar.gz
rm -f incredible-alexa.tar.gz
./install-alexa
2. Creating an Amazon and Amazon Developer Account
If you don’t already have one, you can create an Amazon account at amazon.com. Write down your email address and password. You’ll need them in the following steps. Next, navigate to the Amazon Developer Portal and set up a free account using your Amazon credentials.
3. Creating Voice Service Application & Security Profile
After creating your Amazon developer account, we’re ready to create a product and security profile. Begin by logging into the AVS Dashboard. Click GET STARTED to begin.
Click PRODUCTS. Then click ADD NEW PRODUCT. Fill in form as shown below. Click NEXT.
- Product Name: IncrediblePBX
- Product ID: IncrediblePBX
- Product Type: Application with Alexa built-in
- Product Category: Communications
- Brief Product Description: Alexa for Incredible PBX
- User Interaction: Hands-free
- Distribute Commercially: NO
- Children’s Product: NO
In LWA Security Profile dialog, click CREATE NEW PROFILE. Fill in template. Then NEXT.
- Security Profile Name: IncrediblePBX
- Security Profile Description: Incredible PBX security profile
In the second LWA Security Profile dialog, copy your Security Profile ID, Client ID, and Client Secret to a text file so that you can use them in the following steps.
In the Allowed return URLs field, create two entries clicking ADD button after entering each:
- http://localhost
- https://actual-Incredible-PBX-IP-address:5000/code
Check the I Agree checkbox and then click FINISH.
Your Product should now appear as successfully configured in Alexa Voice Service overview.
Next, navigate to: https://developer.amazon.com/lwa/sp/overview.html.
Click Select a Security Profile and choose your IncrediblePBX profile. Click CONFIRM.
In the Consent Screen dialog, enter the following and then click SAVE.
- Consent Privacy Notice URL: http://dummyurl.com
- Consent Logo Image: leave blank
Verify your ClientID and Secret that you wrote down above.
Cut-and-paste the following as a single line of code into your favorite text editor. Or you can simply edit /root/Alexa-URL which contains the same code.
https://www.amazon.com/ap/oa?client_id=YOURCLIENTID&scope=alexa%3Aall&scope_data=%7B%22alexa%3Aall%22%3A%7B%22productID%22%3A%22IncrediblePBX%22,%22productInstanceAttributes%22%3A%7B%22deviceSerialNumber%22%3A%2212345%22%7D%7D%7D&response_type=code&redirect_uri=http%3A%2F%2Flocalhost
Replace YOURCLIENTID in the above code substituting your actual Alexa Client ID.
Next, select the entire block of code that now includes your actual Client ID and paste it into the Address URL of your favorite browser. You should be prompted for your Amazon user credentials. Once you sign in, click ALLOW. You then should see an Unable to Connect error message. This is fine. What we actually need is the Token which now is shown immediately after code= in the Address URL of your browser. Copy everything after code= up to the &.
http://localhost/?code=YOURTOKEN&scope=alexa%3Aall
With YOURTOKEN, Client ID, and Client Secret in hand, proceed to the next section.
4. Activating Alexa in Incredible PBX
Log into Incredible PBX as root and navigate to the /root directory. Make a copy of grant-token.sh in case you make a mistake. Now edit grant_token.sh. Replace YOURTOKEN with your actual Token. Replace YOURCLIENTID with your actual Alexa Client ID. Replace YOURCLIENTSECRET with your actual Alexa Client Secret. Save the file and then run the script: ./grant_token.sh.
The script will return a JSON message that includes both an access_token and a refresh_token. It will be a very long single string that you should cut-and-paste and save for a rainy day. The string can be parsed in an editor so that it looks something like this:
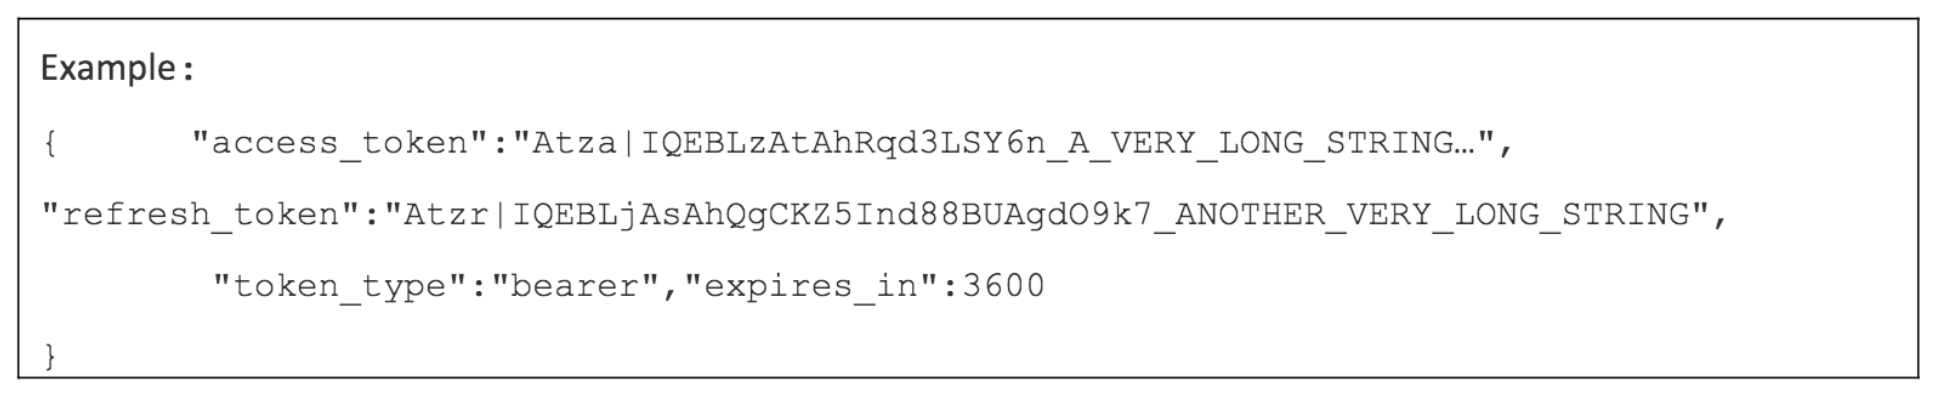
Access tokens expire every hour, but this refresh token never expires. We’ll use the refresh token to generate a new access token whenever Alexa is run from an Asterisk extension. So cut-and-paste the very long refresh_token and save it with your Client ID and Client Secret.
Next, change to the /var/lib/asterisk/agi-bin directory and make a copy of token.pl in case you make a mistake. Then edit token.pl and scroll to the my $post line (line 16). Replace YOUR_REFRESH_TOKEN with the refresh_token from above. Replace YOUR_CLIENT_ID with your actual Client ID. And replace YOUR_CLIENT_SECRET with your Client Secret.
Save the file.
TIP: If you decide to install Alexa on more than one of your PBXs, the setup process only takes a couple minutes. Complete Step #1 as documented above. Then copy the my $post line from token.pl that includes your credentials and replace the my $post line of token.pl script in your second PBX. Done.
Now you’re ready to try things out. From the command line, issue the command: ./token.pl
List the results like this: cat /tmp/token.resp
There should be no errors and the results should look something like this:
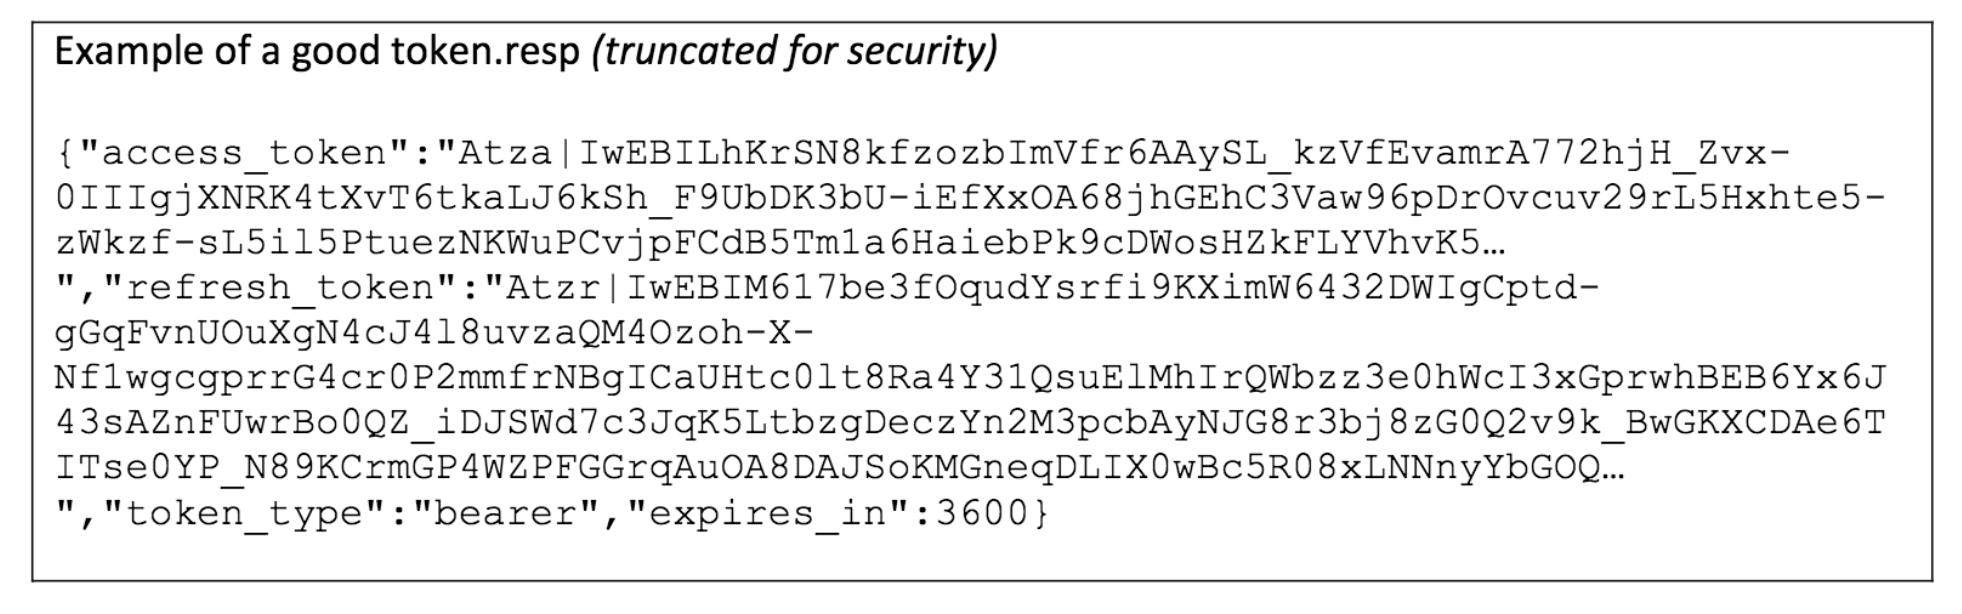
IMPORTANT: Don’t forget this step or future queries from Asterisk will fail since our test generated files with root permissions only: rm -f /tmp/token*
Now we’re all set to use Alexa from your PBX. From an extension on your PBX, dial 5555. When prompted, say "What’s the weather for today?" After receiving the response from Alexa, you can either hang up or say another query.
We’ve documented some Alexa queries and skills in this thread on the VoIP-Info.org Forum.
If you have problems getting all the pieces to work, check over the steps again. You may also wish to consult the original documentation. Ignore references to differing file locations.
Republished: Tuesday, August 3, 2021
Need help with Asterisk? Visit the VoIP-info Forum.
Special Thanks to Our Generous Sponsors
FULL DISCLOSURE: ClearlyIP, Skyetel, Vitelity, DigitalOcean, Vultr, VoIP.ms, 3CX, Sangoma, TelecomsXchange and VitalPBX have provided financial support to Nerd Vittles and our open source projects through advertising, referral revenue, and/or merchandise. As an Amazon Associate and Best Buy Affiliate, we also earn from qualifying purchases. We’ve chosen these providers not the other way around. Our decisions are based upon their corporate reputation and the quality of their offerings and pricing. Our recommendations regarding technology are reached without regard to financial compensation except in situations in which comparable products at comparable pricing are available from multiple sources. In this limited case, we support our sponsors because our sponsors support us.
BOGO Bonaza: Enjoy state-of-the-art VoIP service with a $10 credit and half-price SIP service on up to $500 of Skyetel trunking with free number porting when you fund your Skyetel account. No limits on number of simultaneous calls. Quadruple data center redundancy. $25 monthly minimum spend required. Tutorial and sign up details are here.
![]() The lynchpin of Incredible PBX 2020 and beyond is ClearlyIP components which bring management of FreePBX modules and SIP phone integration to a level never before available with any other Asterisk distribution. And now you can configure and reconfigure your new Incredible PBX phones from the convenience of the Incredible PBX GUI.
The lynchpin of Incredible PBX 2020 and beyond is ClearlyIP components which bring management of FreePBX modules and SIP phone integration to a level never before available with any other Asterisk distribution. And now you can configure and reconfigure your new Incredible PBX phones from the convenience of the Incredible PBX GUI.
VitalPBX is perhaps the fastest-growing PBX offering based upon Asterisk with an installed presence in more than 100 countries worldwide. VitalPBX has generously provided a customized White Label version of Incredible PBX tailored for use with all Incredible PBX and VitalPBX custom applications. Follow this link for a free test drive!
Special Thanks to Vitelity. Vitelity is now Voyant Communications and has halted new registrations for the time being. Our special thanks to Vitelity for their unwavering financial support over many years and to the many Nerd Vittles readers who continue to enjoy the benefits of their service offerings. We will keep everyone posted on further developments.
Moving from Incredible PBX 2020 to 2021 on the Raspberry Pi
Many have clamored for an upgrade path from Incredible PBX 2020 on the Raspberry Pi to take advantage of the stability that Asterisk® 18 offers. Today we’re pleased to introduce a quick-and-easy upgrade script that moves your platform to Incredible PBX 2021 and handles everything for you. After running the script, you’ll have the latest release of Asterisk 18 and the latest modules for FreePBX® 15 plus all of the other goodies that make Incredible PBX 2021 the VoIP community’s swiss army knife of choice.
If you’re new to the VoIP world, you can begin your adventure by installing Incredible PBX 2020 for the Raspberry Pi. Our tutorial will walk you through the simple setup process. When you’re finished, you’ll have a fully functional PBX featuring Asterisk 16, FreePBX 15, and literally dozens of utilities to make the setup of your PBX a walk in the park.
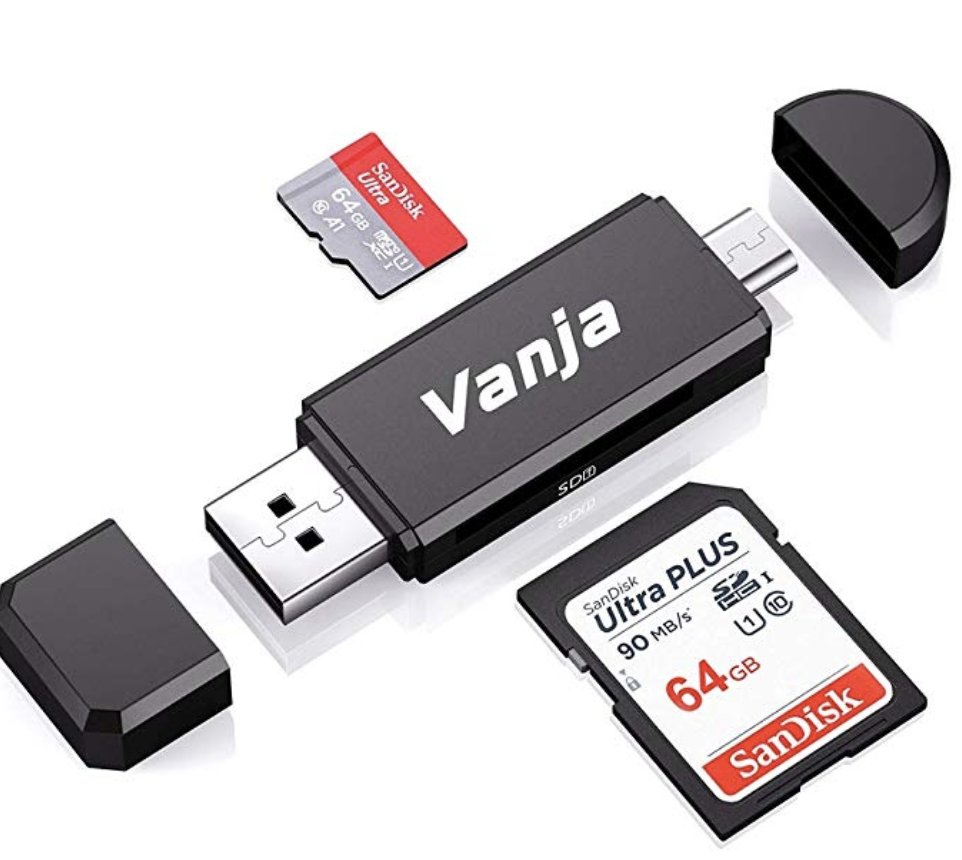
Whether you’re new to Incredible PBX or an old-timer, the next step is critically important. You need a clean backup of your microSD card that you’ve tested and verified that it actually works. There are many ways to make backup images, but here’s the one that we’ve always found to be failsafe. Purchase the $8 USB-to-microSD adapter pictured above and buy a spare microSD card as large or larger than the one you’re using with Incredible PBX 2020. With your PBX running, insert the new microSD card into the adapter and then plug it into one of the blue USB slots on your Raspberry Pi. While logged into your server as root, identify the backup microSD card, usually sda (
fdisk -l). Using the sd entry you deciphered, format the microSD card: mkfs.vfat /dev/sda1 && mkfs.ext4 /dev/sda2. Then issue the following command to clone the primary microSD card: rpi-clone -f sda.
Once the backup finishes, shutdown your PBX with the halt command. Insert the new microSD card and reboot the RasPi to make sure everything got backed up successfully. Put your old microSD card in a safe place just in case something goes wrong during the upgrade.
After logging back into your PBX as root, issue the following commands to kick off the upgrade to Incredible PBX 2021. When the upgrade finishes, reboot your PBX and verify that everything still functions as advertised. Enjoy!
cd /root
wget http://incrediblepbx.com/2021-raspi-upgrade.tar.gz
tar zxvf 2021-raspi-upgrade.tar.gz
rm -f 2021-raspi-upgrade.tar.gz
./upgrade-to-incrediblepbx2021
From time to time, you may wish to upgrade Asterisk 18 to the latest release. Here’s a script that will do it for you:
cd /root
wget http://incrediblepbx.com/upgrade-asterisk18-raspi.tar.gz
tar zxvf upgrade-asterisk18-raspi.tar.gz
rm -f upgrade-asterisk18-raspi.tar.gz
./upgrade-asterisk18
Originally published: Friday, June 18, 2021 Updated: Friday, July 23, 2021
Need help with Asterisk? Visit the VoIP-info Forum.
Adding the Linux XFCE GUI to Incredible PBX 2021
One of the most requested add-ons for Incredible PBX® is a graphical user interface for Linux. And today we’ll show you the quick and easy way to add XFCE 4 to your Debian 10 platform. What it gets you is simple access to a number of Linux applications and utilities which only run inside a GUI. These include the Firefox browser, LibreOffice with Microsoft Office compatibility, ImageMagick, media players, a FileManager GUI, and Linux utilities such as TimeShift and gparted.
None of these applications will run inside of SSH. So you’ll need an app such as VNC which is included with most cloud platforms by simply clicking on the Console option inside the cloud server’s management portal. To install XFCE on your Incredible PBX 2021 Debian platform, log in as root using SSH or Putty and issue the following commands:
apt-get update
apt-get install task-xfce-desktop
reboot
Once your server has rebooted, click on the Console icon in your cloud management portal or in VMware ESXi portal and login with your root credentials when prompted:
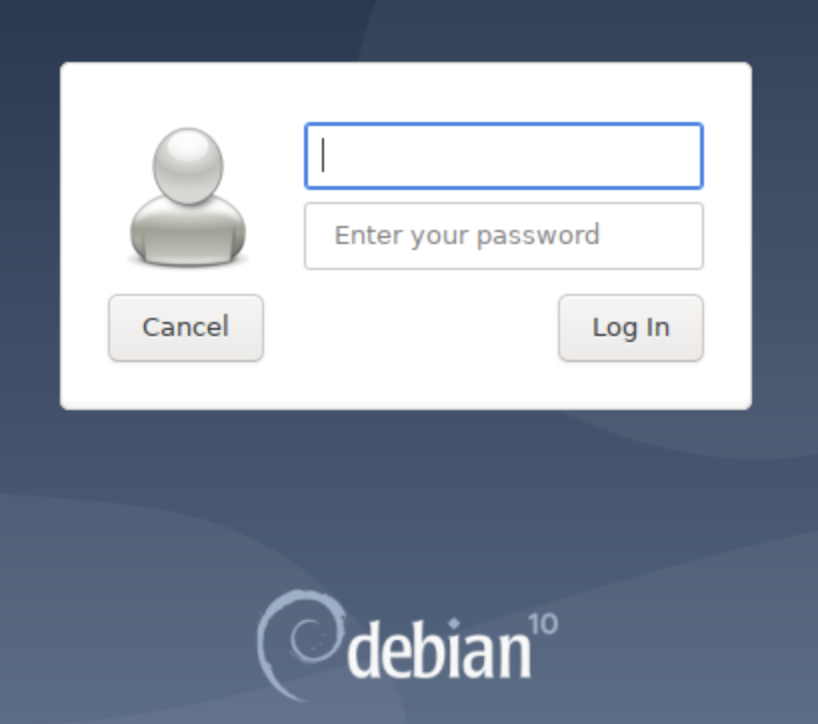
Double-click on the Home folder icon and the Home menu for the root user will open:

Icons at the bottom of the display allow you to minimize open windows as well as access the terminal emulator, file manager, web browser, application finder, and your root directory.
At the top of the display, you’ll find tabs for all of your open windows including Applications which provides access to all of the installed GUI applications:

CrownCloud & RackNerd Setup for Remote VNC Access
If you’re running Incredible PBX 2021 on CrownCloud or RackNerd or any other provider using the SolusVM Control Panel, here are the steps for remote VNC access. First, login to your Control Panel and click on the VNC Access button. Write down the IP address, port number, and password for remote VNC access. Next, install the appropriate VNC Viewer for your desktop computer from RealVNC. Open the VNC Viewer app on your desktop and enter the IP address followed by a colon and the port number that you wrote down above. When prompted for your password, enter the VNC password assigned by your provider. You then will get a login screen to enter your root username and root password for Incredible PBX 2021. NOTE: The public IP address of your desktop computer must be whitelisted in IPtables using the All-Access option 0 with add-ip or add-fqdn in the /root folder of your server.
Vultr & Digital Ocean Setup for Remote VNC Access
If you’re running Incredible PBX 2021 on Vultr, Digital Ocean, and most other platforms including VMware, here are the additional steps to gain remote VNC access to your server’s public IP address or VMware’s private IP address. Issue the following commands after logging into your server as root:
apt-get -y install xorg lxde-core tightvncserver
reboot
Once your server has rebooted, log back in as root. First, set an 8-character VNC access password: tightvncserver :1
Next, edit the xstartup config file: nano ~/.vnc/xstartup
Uncomment the x-window-manager line. Immediately below that line, add the two new entries below and save the file:
x-window-manager &
lxterminal &
/usr/bin/lxsession -s LXDE &
Finally, stop and restart tightvncserver:
tightvncserver -kill :1
vncserver :1 -geometry 1024x768 -depth 16 -pixelformat rgb565
With VMware ESXi, substitute the following vncserver startup command:
vncserver :1 -geometry 800x600 -depth 16 -pixelformat rgb565
Now install the appropriate VNC Viewer for your desktop computer from RealVNC. Open the VNC Viewer app on your desktop and enter the IP address followed by :1. Enter your root credentials when prompted.
With VMware, you also can access VNC through the VMware ESXi Console by simply entering your root credentials.
NOTE: The public IP address of your desktop computer must be whitelisted in IPtables using the All-Access option 0 with add-ip or add-fqdn in the /root folder of your server.
Originally published: Friday, June 11, 2021
Need help with Asterisk? Visit the VoIP-info Forum.
Free Asterisk Solutions
