
Home » Technology » Telephony (Page 78)
Category Archives: Telephony
The Most Versatile VoIP Provider: FREE PORTING

 JUST RELEASED: Visit the Incredible PBX Wiki
March Madness: Another Asterisk Security Hole in TrixBox Systems
 Here we go again. It's a repeat of the week before last when everything gets put on hold in order to patch (another) denial of service security problem with Asterisk®. All versions are apparently affected. We obviously can't provide step-by-step instructions for each and every version of Asterisk@Home and TrixBox. But we have thousands of loyal readers that depend upon TrixBox 1.2.3 systems in a production environment. So today's column is for these folks. Our special thanks to Bubba for lending a technical hand as well. This should work reliably on all Nerd Vittles editions of TrixBox 1.2.3. That includes PBX-in-a-Flash implementations on Linux systems as well as Nerd Vittles VMware builds of TrixBox 1.2.3 which run on Windows and Mac desktop systems. If you're running a different system, you'll have to read between the lines and do the best you can. Based upon the results two weeks ago, this fix should also work on Trixbox 2.x systems. If you really get stumped, post your questions on the TrixBox forums and someone will come to your rescue. Make a backup of your system before you begin. For an excellent free backup solution, visit Thomas King's site for Backup 2 and follow the instructions.
The Asterisk Security Problem. The issue involves a hole which allows an improperly formatted SIP packet to crash your server. For more details, go here. In the scheme of things, security problems don't get much worse than this one. All Asterisk servers accept SIP INVITE packets so all Asterisk servers can be crashed from any remote location. New versions of both Asterisk and Zaptel are again available, and today we'll show you how to apply the upgrade to Nerd Vittles TrixBox 1.2.3 systems.
Getting the Latest Kernel Source for TrixBox. If you went through this knuckle-drill two weeks ago, you can skip this step. Otherwise, be aware that TrixBox systems don't ship with kernel source code so we have to begin there before we have the necessary pieces in place to compile the new version of Asterisk and Zaptel. Log into your Asterisk server as root and issue the following command:
Addressing the RedHat Bug. Every time there is an update using the Asterisk kernel, module support needs to be rebuilt using the new kernel. Unfortunately, a RedHat bug (inherited by CentOS) causes the rebuilding process to fail. Here's the fix. Log into your new server as root and issue the following commands to determine which new kernel source was loaded on your system:
cd /usr/src/kernels

ls
You should see an entry that looks something like this: 2.6.9-34.0.2.EL-something. Depending upon the processor in your system, the something may be different than our machine. Write down the name of the new kernel directory and substitute it below for 2.6.9-34.0.2.EL-i686. Now issue these commands:
cd /usr/src/kernels/2.6.9-34.0.2.EL-i686/include/linux

mv spinlock.h spinlock.h.old

wget http://nerdvittles.com/trixbox/spinlock.h

shutdown -r now
Fixing a Source Code Wrinkle. At least one of the existing (older) source modules in the TrixBox 1.2.3 build will cause Asterisk to fail to restart after updating Asterisk. The simple fix below solved it for us. Your mileage may vary. If you have problems, look at the tail of the Asterisk error log (tail /var/log/asterisk/full) and then find the offending source module in the directory shown below. Rename the module and try the compiles again. Here's the error we received (app_speech_utils.so: Asterisk died with code 1.) and what solved it for us without breaking anything (actually it apparently does break Lumenvox; see Comment #7 from two weeks ago if you're using Lumenvox):
cd /usr/lib/asterisk/modules

mv app_speech_utils.so app_speech_utils.so.old
Installing Asterisk 1.2.17 and Zaptel 1.2.16. Now we're ready to install the Asterisk and Zaptel updates. While still logged in as root, execute the following commands in order:
amportal stop
cd /usr/src
wget http://ftp.digium.com/pub/telephony/zaptel/zaptel-1.2.16.tar.gz
wget http://ftp.digium.com/pub/telephony/libpri/libpri-1.2.4.tar.gz
wget http://ftp.digium.com/pub/telephony/asterisk/asterisk-1.2.17.tar.gz
wget http://ftp.digium.com/pub/telephony/asterisk/asterisk-addons-1.2.5.tar.gz
tar -zxvf zaptel-1.2.16.tar.gz
tar -zxvf libpri-1.2.4.tar.gz
tar -zxvf asterisk-1.2.17.tar.gz
tar -zxvf asterisk-addons-1.2.5.tar.gz
cd zaptel-1.2.16
make clean
make install
cd ..
cd libpri-1.2.4
make clean
make install
cd ..
cd asterisk-1.2.17
make clean
make install
cd ..
cd asterisk-addons-1.2.5
make clean
make install
cd ..
shutdown -r now
Now rebuild support for your ZAP devices or ztdummy if you have no ZAP devices. Log in as root again and type the following command: rebuild_zaptel. Then reboot your system: shutdown -r now. Now log in as root again. If you have zaptel devices, type modprobe wcfxo. Whether you have zaptel devices or not, type amportal stop and then genzaptelconf. Reboot your system again, and you should be back in business with a rock solid Asterisk system. Be sure to read the comments below as well as the original comments (especially 5, 8, 10, and 11) if this is your first attempt to patch Asterisk. There was a slight glitch with Music on Hold and the Voicemail introductory message, but we've found the fixes for both of those, and they're documented in the original comments if you run into the same problems. Enjoy!
P.S. There now is also a scripted solution to this update if you prefer auto-pilot. Here's the link.
 trixbox Appliance. In case you missed it, Fonality has announced a new line of turnkey trixbox appliances. Two-port and six-port configurations as well as models with one and two preconfigured T1's, mirrored drives, and redundant power supplies will be available for purchase in June starting at $999 for the base model. Stay tuned to Nerd Vittles for a sneak peak and test drive of what's coming. In the meantime, you can read all about the new line of trixbox appliances by clicking on the link at the top of the page. Great idea!
 Nerd Vittles Demo Hot Line (courtesy of les.net). You now can take a number of Nerd Vittles projects for a test drive... by phone! The current demos include (1) MailCall for Asterisk with password 1111 (retrieve your email by phone), (2) NewsClips for Asterisk (latest news headlines in dozens of categories), (3) Weather Forecasts by U.S. Airport Code, and (4) Weather Forecasts by U.S. ZIP Code. You're not prompted for #4 yet, but it does work! Just call our number (shown in the left margin) and take any or all of them for a spin. The sound quality may not be perfect due to performance limitations of our ancient Intel 386 demo machine. But the price is right.
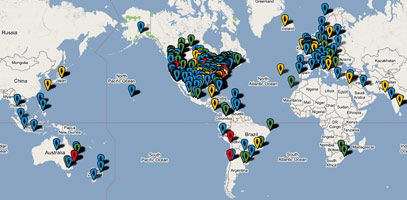
Nerd Vittles Fan Club Map. Thanks for visiting! We hope you'll take a second and add yourself to our Frappr World Map compliments of Google. In making your entry, you can choose an icon: guy, gal, nerd, or geek. For those that don't know the difference in the last two, here's the best definition we've found: "a nerd is very similar to a geek, but with more RAM and a faster modem." We're always looking for the best BBQ joints on the planet. So, if you know of one, add it to the map while you're visiting as well.
Introducing Phone Genie for Asterisk (Web Edition)
 Today we’re finishing up the Phone Genie for Asterisk® project by introducing version 2.0. For those that missed the original article last month, you might want to start there. Phone Genie for Asterisk is an all-purpose web utility that lets you reconfigure virtually anything and everything on your Asterisk system on the fly using an incredibly powerful HTML command language that you can master in a matter of minutes. All you’ll need is a web browser including most cellphone web browsers as well. And, of course, it’s free just like version 1.0.
What Phone Genie 1.0 provided was a web interface to the complete Asterisk Manager API. With version 2.0, you now get HTTPS secure web access as well as a web interface to both the Asterisk Command Line Interface (CLI) and the Linux command prompt with bash command and script support as well. And all this power is accessible using nothing more than simple web requests. As in the original version, Phone Genie 2.0 also provides complete control over Asterisk’s internal database: dbget to query the Asterisk internal database, dbput to add and update information in the database, dbdel to delete records from the database, and dbshow to display all or a subset of the Asterisk database contents.
Do you have to be a whiz kid to use the Phone Genie? Not at all. In fact, all you really need to do is download the application into the default web directory on your Asterisk, TrixBox, or Asterisk@Home web server, and keep reading. We’ve tested Phone Genie with versions of Asterisk@Home dating back to 2.8, and it should work with all the latest TrixBox releases as well.
Security Warning. Phone Genie 2.0 includes two password schemes to protect your Asterisk system from intrusion and/or destruction. Without secure passwords, Phone Genie is about as dangerous a tool as you can imagine. Anything and everything on your Asterisk server can be destroyed by anyone who gains access to Phone Genie with the administrator password. If you’re not going to change the default password, you might as well put your Asterisk server on your front curb.
Installation. To download the new software and for the complete write-up on installation and security setup as well as examples of all the web commands supported by Phone Genie 2.0, visit our Best of Nerd Vittles site. While you’re there, take a look around. There are loads of new Asterisk goodies that are free for the taking. There’s also a new Best of Nerd Vittles RSS Feed to keep you up to date on additions and changes on the site. Enjoy!
Nerd Vittles Demo Hot Line (courtesy of les.net). You now can take a number of Nerd Vittles projects for a test drive… by phone! The current demos include (1) MailCall for Asterisk with password 1111 (retrieve your email by phone), (2) NewsClips for Asterisk (latest news headlines in dozens of categories), (3) Weather Forecasts by U.S. Airport Code, and (4) Weather Forecasts by U.S. ZIP Code. You’re not prompted for #4 yet, but it does work! Just call our number (shown in the left margin) and take any or all of them for a spin. The sound quality may not be perfect due to performance limitations of our ancient Intel 386 demo machine. But the price is right.
Nerd Vittles Fan Club Map. Thanks for visiting! We hope you’ll take a second and add yourself to our Frappr World Map compliments of Google. In making your entry, you can choose an icon: guy, gal, nerd, or geek. For those that don’t know the difference in the last two, here’s the best definition we’ve found: "a nerd is very similar to a geek, but with more RAM and a faster modem." We’re always looking for the best BBQ joints on the planet. So, if you know of one, add it to the map while you’re visiting as well.
Some Recent Nerd Vittles Articles of Interest…
Fixing the Asterisk Security Hole in TrixBox Systems
It's one of those unfortunate weeks when everything gets put on hold in order to patch a denial of service security problem with Asterisk®. All versions are apparently affected. We obviously can't provide step-by-step instructions for each and every version of Asterisk@Home and TrixBox. But we have thousands of loyal readers that depend upon TrixBox 1.2.3 systems in a production environment. So today's column is for these folks. Our special thanks to Bubba for lending a technical hand as well. We've tested this pretty carefully on Nerd Vittles editions of TrixBox 1.2.3.
Update: For the latest information, please read our Primer on Asterisk Security.
If you're running a different system, you'll have to read between the lines and do the best you can. It reportedly works fine to upgrade Trixbox 2.x sysems as well. If you really get stumped, post your questions on the TrixBox forums and someone will come to your rescue. Make a backup of your system before you begin. For an excellent free backup solution, visit Thomas King's site for Backup 2 and follow the instructions.
The Asterisk Security Problem. The issue involves a hole which allows an improperly formatted SIP packet to crash your server. For more details, go here. In the scheme of things, security problems don't get much worse than this one. All Asterisk servers accept SIP INVITE packets so all Asterisk servers can be crashed from any remote location. New versions of both Asterisk and Zaptel are now available, and today we'll show you how to apply the upgrade to Nerd Vittles TrixBox 1.2.3 systems.
Getting the Latest Kernel Source for TrixBox. TrixBox systems don't ship with kernel source code so we have to begin there before we have the necessary pieces in place to compile the new version of Asterisk and Zaptel. Log into your Asterisk server as root and issue the following command:
Addressing the RedHat Bug. Every time there is an update using the Asterisk kernel, module support needs to be rebuilt using the new kernel. Unfortunately, a RedHat bug (inherited by CentOS) causes the rebuilding process to fail. Here's the fix. Log into your new server as root and issue the following commands to determine which new kernel source was loaded on your system:
cd /usr/src/kernels

ls
You should see an entry that looks something like this: 2.6.9-34.0.2.EL-something. Depending upon the processor in your system, the something may be different than our machine. Write down the name of the new kernel directory and substitute it below for 2.6.9-34.0.2.EL-i686. Now issue these commands:
cd /usr/src/kernels/2.6.9-34.0.2.EL-i686/include/linux

mv spinlock.h spinlock.h.old

wget http://nerdvittles.com/trixbox/spinlock.h

shutdown -r now
Fixing a Source Code Wrinkle. At least one of the existing (older) source modules in the TrixBox 1.2.3 build will cause Asterisk to fail to restart after updating Asterisk. The simple fix below solved it for us. Your mileage may vary. If you have problems, look at the tail of the Asterisk error log (tail /var/log/asterisk/full) and then find the offending source module in the directory shown below. Rename the module and try the compiles again. Here's the error we received (app_speech_utils.so: Asterisk died with code 1.) and what solved it for us without breaking anything (actually it apparently does break Lumenvox; see Comment #7 below for how to fix it):
cd /usr/lib/asterisk/modules

mv app_speech_utils.so app_speech_utils.so.old
Installing Asterisk 1.2.16 and Zaptel 1.2.15. Now we're ready to install the Asterisk and Zaptel updates. While still logged in as root, execute the following commands in order:
amportal stop
cd /usr/src
wget http://ftp.digium.com/pub/telephony/zaptel/zaptel-1.2.15.tar.gz
wget http://ftp.digium.com/pub/telephony/libpri/libpri-1.2.4.tar.gz
wget http://ftp.digium.com/pub/telephony/asterisk/asterisk-1.2.16.tar.gz
wget http://ftp.digium.com/pub/telephony/asterisk/asterisk-addons-1.2.5.tar.gz
tar -zxvf zaptel-1.2.15.tar.gz
tar -zxvf libpri-1.2.4.tar.gz
tar -zxvf asterisk-1.2.16.tar.gz
tar -zxvf asterisk-addons-1.2.5.tar.gz
cd zaptel-1.2.15
make clean
make install
cd ..
cd libpri-1.2.4
make clean
make install
cd ..
cd asterisk-1.2.16
make clean
make install
cd ..
cd asterisk-addons-1.2.5
make clean
make install
cd ..
shutdown -r now
Now rebuild support for your ZAP devices or ztdummy if you have no ZAP devices. Log in as root again and type the following command: rebuild_zaptel. Then reboot your system: shutdown -r now. Now log in as root again. If you have zaptel devices, type modprobe wcfxo. Whether you have zaptel devices or not, type amportal stop and then genzaptelconf. Reboot your system again, and you should be back in business with a rock solid Asterisk system. Be sure to read the comments below, especially Comment #5. There was a slight glitch with Music on Hold, but we've found the fix for that as well. Enjoy!
 Nerd Vittles Demo Hot Line (courtesy of les.net). You now can take a number of Nerd Vittles projects for a test drive... by phone! The current demos include (1) MailCall for Asterisk with password 1111 (retrieve your email by phone), (2) NewsClips for Asterisk (latest news headlines in dozens of categories), (3) Weather Forecasts by U.S. Airport Code, and (4) Weather Forecasts by U.S. ZIP Code. You're not prompted for #4 yet, but it does work! Just call our number (shown in the left margin) and take any or all of them for a spin. The sound quality may not be perfect due to performance limitations of our ancient Intel 386 demo machine. But the price is right.
Nerd Vittles Fan Club Map. Thanks for visiting! We hope you'll take a second and add yourself to our Frappr World Map compliments of Google. In making your entry, you can choose an icon: guy, gal, nerd, or geek. For those that don't know the difference in the last two, here's the best definition we've found: "a nerd is very similar to a geek, but with more RAM and a faster modem." We're always looking for the best BBQ joints on the planet. So, if you know of one, add it to the map while you're visiting as well.
Introducing Nerd Vittles Phone Genie for Asterisk
Ever left your home or office and wished you had transferred your calls to your cellphone before you departed. Unless you've done a good bit of design work on your Asterisk® PBX or paid Ma Bell half your monthly paycheck, you're probably S.O.L. until you return to home base. Well, at least until today. Today we introduce version 1.0 of Phone Genie for Asterisk, an all-purpose web utility that lets you reconfigure virtually anything and everything on your Asterisk system on the fly using an incredibly powerful HTML command language that you can master in a matter of minutes. All you'll need is a web browser including most cellphone web browsers as well. And, of course, it's free.
The easiest way to explain how powerful Phone Genie for Asterisk really can be is to give a few examples. So, let's assume you've registered a fully-qualified domain name for your Asterisk server using a free service such as DynDNS.org. Let's use asterisk.dydns.org in our example. Now you're on the road and want to forward calls from extension 200 on your PBX in a Flash system to your cellphone: 678-234-5678. All you need to do is open the browser on your cellphone or any desktop PC and enter the following web address:
If you're new to Asterisk, a few hints may be in order. What the Nerd Vittles' Phone Genie does is provide a web interface to the complete Asterisk Manager API. If you also happen to be using the Asterisk Management Portal or freePBX, then the sky's the limit since there are dozens of functions you can execute by simply manipulating data stored in Asterisk's internal database. We'll give you some examples today, and add many more in the coming weeks and months. For today, you'll have to settle for the Phone Genie Starter Kit with three critical Asterisk Manager tools. These three tools give you complete control over Asterisk's internal database: dbget to query the Asterisk internal database, dbput to add and update information in the database, and dbdel to delete records from the database. For the Asterisk whiz kids out there, you're probably chuckling that there's no such command as dbdel in the Asterisk Manager API. And you'd be right, but now there is... at least with the Nerd Vittles Phone Genie.
Do you have to be a whiz kid to use the Phone Genie? Not at all. In fact, all you really need to do is download the application into the default web directory on your Asterisk, PBX in a Flash, trixbox, or Asterisk@Home web server, and keep reading. We've tested Phone Genie with versions of Asterisk@Home dating back to 2.8, and it works perfectly with PBX in a Flash.
Installation and Setup. To begin, you'll need to download the Phone Genie application and set up a very secure password. Why? Because anyone with the web site address of your Asterisk server and access to this application could trash your Asterisk system faster than you can mutter "Genie in a Bottle." So log into your PBX in a Flash server as root and issue these commands:
cd /var/www/html

wget http://nerdvittles.com/trixbox123/phonegenie.zip

unzip phonegenie.zip

rm -f phonegenie.zip

chown asterisk:asterisk nv-genie.php

chmod +x nv-genie.php
Once the application is in place, you need to edit the file and change the default password to something secure: nano -w nv-genie.php. On line 2 of the file, change 1234 to a numeric value that only you know! Do NOT include non-numeric characters or PHP will reset your password to zero... which isn't that secure. You shouldn't have to change anything else in the file unless you've "improved" the account name and password used to access your Asterisk Manager API in /etc/asterisk/manager.conf. This Manager password is more secure than it appears because it only works from 127.0.0.1, i.e. localhost. So, without adding another entry in this file, you could not run this application from a web server that's different than your Asterisk server.
Getting Started with Call Forwarding. Now that everything's installed and configured, it's time for a test run. For this to work, you'll need a fairly recent version of Asterisk@Home or TrixBox with AMP or freePBX since we'll be using freePBX functions. If you're going to access the Phone Genie application from inside your firewall where your Asterisk server also resides, then you'll need the internal IP address of your Asterisk server. Otherwise, you'll need to configure your firewall to forward port 80 HTTP traffic to the internal IP address of your Asterisk server. And you'll need either the external IP address of your Asterisk system or the fully-qualified domain name for your system. Next, you'll need an extension number on your Asterisk system that we can experiment with. If you want to be able to forward incoming calls back out to your cellphone, then you'll need at least two trunks. The DID trunk handles the incoming call, and a termination trunk will actually forward the inbound call back out to your cell. We'll also need the phone number of your cellphone in the same format that you would dial it on your Asterisk PBX. For example, if a prefix of 1 is required to call outside your PBX, then the number would look like this: 16782345678.
Once you have all the pieces of information, open a web browser and issue a command that looks something like this for a web browser inside your firewall. Otherwise, follow the sample above.
NOTE: All database entries are case-sensitive so be sure you use the family name exactly as it should appear in your database. FreePBX uses CF in ALL CAPS for the call forwarding family of data.
Substitute your own internal or external address for 192.168.0.123. To forward a call, we'll use the freePBX CF function and we'll use dbput to put the information in Asterisk's internal database. Use your real extension number instead of 200. This becomes the key in Asterisk database lingo. Substitute your properly formatted cellphone number for 6782345678. And replace 1234 with the password you stored in the nv-genie.php file. This becomes the value for the call forwarding key 200. Once you get this working either internally or externally on your cellphone, you can save your entry as a favorite in your browser and forward calls at any time with one click!
In addition to a confirmation message, you can check your work in a couple other ways. You can obviously call the extension and see if it forwards the call to your cellphone. You also can query the Asterisk database using Phone Genie. The syntax for a query is almost identical to a dbput command except you don't need to include a value. Here's what it would look like for a query from your cell phone browser:
When you return to home base and want to cancel the call forwarding, you can either pick up the extension you forwarded and dial *73 or you can use Phone Genie's dbdel function. This also can be saved as a favorite so that it's one click away when you need it.
<sermon> It goes without saying, but we'll say it anyway. Don't start randomly using dbdel to delete stuff out of the Asterisk internal database or you'll find yourelf with a whirring boat anchor in a matter of minutes. Both Asterisk and FreePBX rely upon database entries to function at all. Rule #1: If in doubt, leave it alone! <end of sermon>
What Else Can Phone Genie Do? We've barely scratched the surface of what lies ahead. For a list of database entries that you can query, manipulate, and delete, open the Asterisk CLI after logging into your server as root: asterisk -rvvvvv. Now issue the following command: database show. In the listing, you'll see some entries that look like this: /CALLTRACE/502 : 500 . Call Trace is a database family that keeps track of the number that last called a particular extension. In this example, extension 502 was called by extension 500. An easy way to figure this out when you're on the road would be to issue a query using the Phone Genie:
Asterisk Database Display. There may be times when you just want to review a group of settings in your Asterisk database or even the entire database without having to start up a CLI session. The dbshow action in Phone Genie provides this functionality. In its simplest form, the command looks like the following to display your entire Asterisk database:
If you'd prefer to display only a single family of entries in the database, then the syntax looks like this:
That's about it for today. We'll leave you with a partial list of freePBX functions that can be controlled from within Phone Genie. We'll cover other things you can do with the Asterisk Manager and Phone Genie in a future article. If you're in a hurry to add some additional functions and you speak PHP, please feel free to add away. Send us your additions and we'll include them in the next version. Enjoy!
Dialcode: *72
Phone Genie: http://192.168.0.123/nv-genie.php?action=dbput&family=CF&key=200&value=6782345678&pw=1234
Dialcode: *73
Phone Genie: http://192.168.0.123/nv-genie.php?action=dbdel&family=CF&key=200&pw=1234
Dialcode: *90
Phone Genie: http://192.168.0.123/nv-genie.php?action=dbput&family=CFB&key=200&value=6782345678&pw=1234
Dialcode: *91
Phone Genie: http://192.168.0.123/nv-genie.php?action=dbdel&family=CFB&key=200&pw=1234
Dialcode: *52
Phone Genie: http://192.168.0.123/nv-genie.php?action=dbput&family=CFU&key=200&value=6782345678&pw=1234
Dialcode: *53
Phone Genie: http://192.168.0.123/nv-genie.php?action=dbdel&family=CFU&key=200&pw=1234
Dialcode: *69
Phone Genie: http://192.168.0.123/nv-genie.php?action=dbget&family=CALLTRACE&key=200&pw=1234
Dialcode: *70
Phone Genie: http://192.168.0.123/nv-genie.php?action=dbput&family=CW&key=200&value=ENABLED&pw=1234
Dialcode: *71
Phone Genie: http://192.168.0.123/nv-genie.php?action=dbdel&family=CW&key=200&pw=1234
Dialcode: *78
Phone Genie: http://192.168.0.123/nv-genie.php?action=dbput&family=DND&key=200&value=YES&pw=1234
Dialcode: *79
Phone Genie: http://192.168.0.123/nv-genie.php?action=dbdel&family=DND&key=200&pw=1234
NOTE: The Best of Nerd Vittles tutorial on Phone Genie for Asterisk covers all updates and new features.
Nerd Vittles Demo Hot Line (courtesy of les.net). You now can take a number of Nerd Vittles projects for a test drive... by phone! The current demos include (1) MailCall for Asterisk with password 1111 (retrieve your email by phone), (2) NewsClips for Asterisk (latest news headlines in dozens of categories), (3) Weather Forecasts by U.S. Airport Code, and (4) Weather Forecasts by U.S. ZIP Code. You're not prompted for #4 yet, but it does work! Just call our number (shown in the left margin) and take any or all of them for a spin. The sound quality may not be perfect due to performance limitations of our ancient Intel 386 demo machine. But the price is right.
Nerd Vittles Fan Club Map. Thanks for visiting! We hope you'll take a second and add yourself to our Frappr World Map compliments of Google. In making your entry, you can choose an icon: guy, gal, nerd, or geek. For those that don't know the difference in the last two, here's the best definition we've found: "a nerd is very similar to a geek, but with more RAM and a faster modem." We're always looking for the best BBQ joints on the planet. So, if you know of one, add it to the map while you're visiting as well.
Some Recent Nerd Vittles Articles of Interest...
Programmer’s Corner: Asterisk Weather Station Updates
 Now that we've solved Asterisk weather forecasting for the rest of the world, wouldn't you know our U.S. weather reports would come unglued. One of the problems with depending upon the web data of other organizations (such as the National Weather Service) is that, when they shift gears, you have to make adjustments to your applications as well. So this week is cleanup time at Nerd Vittles. In its infinite wisdom, the National Weather Service decided last week to add latitude, longitude, and elevation information to all of their weather reports. This caused some wrinkles in both the Asterisk® Weather Station by Airport Code and Zip Code applications which didn't know how to interpret this new data. Personally, we were always big supporters of more federal holidays because it meant the bureaucrats and politicians had less time to screw things up. These new "improvements" are a good example of what happens when federal workers have too much time on their hands.
All of the Nerd Vittles weather applications for Asterisk (except last week's Worldwide Weather Forecasts) depend upon NOAA web site information at a web link that looks like the following. You can enter either a zip code or a city and state.
http://www.srh.noaa.gov/port/port_zc.php?inputstring=Charleston,SC
Using MySQL databases, we convert telephone input of airport codes and zip codes into City and State information which then can be passed to NOAA's web link to collect the information that we use to convert the text to speech with the Flite application. If you look at one of the reports, you'll see that the main page display now looks like this:
Charleston, SC

Current Local Conditions at:

Charleston Air Force Base

Lat: 32.91   Lon: -80.03   Elev: 59.055

Last Update: 02/20/07, 08:56 AM EST

Fair: 48 °F
Forecast at a Glance

Detailed 7-day Forecast

Your Local Radar

Current Conditions

Satellite Image

Hazardous Weather

Area Forecast Discussion
Changes in Latitudes. So, Problem #1 is that there's a new Line 4 on the web page with the Latitude, Longitude, and Elevation information. Problem #2 is what to do with it. The two options, of course, are to discard it and leave things the way they were in the Asterisk weather reports or to convert it into intelligible text and play it with the weather report. The addition is a little puzzling quite frankly because it's static information and it really doesn't pertain to the weather other than telling you how close to the equator you are or how close to the sun you live plus or minus 93 million miles. They could just as easily have added the State Bird or State Flower but, no, we have Latitude, Longitude, and Elevation to deal with instead. The good news is that, if you ever want to build an application that computes the distance between two cities, this new information combined with searches for two cities using the NOAA link above will give you everything you need to make the calculation without having to rely upon a ZIP code database with latitude and longitude information (which we've previously given you). So we'll leave that as your homework project. With a little Googling, you can find the formula. And we'll throw in one of our PBX-in-a-Flash drives to the first person that posts a comment with working PHP code that correctly calculates the distance between two U.S. cities using NOAA website data only.
Manually Updating the Weather Applications. We've made the management decision to throw the new data in the proverbial bit bucket, but we also want to show you how to convert the data into a usable format for the one or two folks that just can't live without it. Why are we going to such pains? Because we want to encourage others to build PHP applications for Asterisk that do something useful. And, if you walk through the Nerd Vittles code for these applications, it will give you a good idea how to get started. Looking through the code, you'll notice that we have to parse the web data to actually collect the information we need to "play" a weather report on the telephone. So, to strip out this line of text, there are a couple ways to approach it. One way would be to look for Lat: and then search for the next line break character: <br> and strip out the intervening text. We chose to actually count line breaks after the Current Local Conditions line (above) until we got to the desired string of text:
// new code to delete Latitude, Longitude, and Elevation info from report

$start = strpos($newvalue,"<br>") ;

$start2 = strpos($newvalue,"<br>",$start+1) ;

$start3 = strpos($newvalue,"<br>",$start2+1) ;

$newvalue = substr($newvalue,0,$start2) . "  " . substr($newvalue,$start3) ;

// new code ends here
So the new code above needs to be inserted immediately after the line that looks like this:
$newvalue=substr($newvalue, 0, $finish);
This change should be made in both /var/lib/asterisk/agi-bin/nv-weather.php and /var/lib/asterisk/agi-bin/nv-weather-zip.php if you happen to be using both the Weather Station by Airport Code and by Zip Code. And, not to worry, we've fixed the original downloadable code so that newbie's will never know anything changed.
If you'd prefer to actually have the Latitude, Longitude, and Elevation information spoken to callers, then you'd obviously not include the new code above. Instead, we need to add three new parsing instructions after the following line:
$newvalue = str_replace( "NA:", " ", $newvalue );
Here are the new lines you'd insert to translate the NOAA abbreviations into Plain English:
$newvalue = str_replace( "Lat:", "Latitude:  ", $newvalue );

$newvalue = str_replace( "Lon:", ". Longitude:  ", $newvalue );

$newvalue = str_replace( "Elev:", ". Elevation:  ", $newvalue );
Now that we've covered all the theory, it occurred to us that some of you might just like to download the new code. If you prefer that approach, here are the step-by-step instructions for each application. These instructions assume that you've already installed the Weather Applications previously. If not, just choose your desired installation from the Best of Nerd Vittles site.
Installing Weather by Airport Code Update. To install the Weather by Airport Code update, log into your Asterisk server as root and issue the following commands:
cd /var/lib/asterisk/agi-bin

rm -f nv-weather2-zip.*

wget http://nerdvittles.com/wp-content/nv-weather2.zip

mv nv-weather.php nv-weather.old2.php

unzip nv-weather2.zip

rm -f nv-weather2.zip

chmod 775 nv-weather.php

chown asterisk:asterisk nv-weather.php
Installing Weather by Zip Code Update. To install the Weather by Zip Code update, log into your Asterisk server as root and issue the following commands:
cd /var/lib/asterisk/agi-bin

rm -f nv-weather-zip.zip

wget http://nerdvittles.com/trixbox123/nv-weather-zip.zip

mv nv-weather-zip.php nv-weather-zip.old.php

unzip  nv-weather-zip.zip

rm -f nv-weather-zip.zip

chown asterisk:asterisk nv-weather-zip.php

chmod 775 nv-weather-zip.php
Test Driving the Latest Asterisk Weather Applications. To use the Asterisk Weather Station by Airport Code, pick up any phone connected to your Asterisk server and dial 611. When prompted, key in the three-character Airport Code for the weather report you wish to retrieve. Then sit back and listen to the latest weather report for your Airport Code from the National Weather Service.
To use the Asterisk Weather Station by Zip Code, pick up any phone connected to your Asterisk server and dial Z-I-P (947). When prompted, key in the five-digit Zip Code for the weather report you wish to retrieve. Then sit back and listen to the latest weather report for your Zip Code from the National Weather Service.
Nerd Vittles Demo Hot Line (courtesy of les.net). You now can take a number of Nerd Vittles projects for a test drive... by phone! The current demos include (1) MailCall for Asterisk with password 1111 (retrieve your email by phone), (2) NewsClips for Asterisk (latest news headlines in dozens of categories), (3) Weather Forecasts by U.S. Airport Code, and (4) Weather Forecasts by U.S. ZIP Code. You're not prompted for #4 yet, but it does work! Just call our number (shown in the left margin) and take any or all of them for a spin. The sound quality may not be perfect due to performance limitations of our ancient Intel 386 demo machine. But the price is right.
Nerd Vittles Fan Club Map. Thanks for visiting! We hope you'll take a second and add yourself to our Frappr World Map compliments of Google. In making your entry, you can choose an icon: guy, gal, nerd, or geek. For those that don't know the difference in the last two, here's the best definition we've found: "a nerd is very similar to a geek, but with more RAM and a faster modem." We're always looking for the best BBQ joints on the planet. So, if you know of one, add it to the map while you're visiting as well.
Click2Dial for Every(Asterisk)man… and Woman
 There have been any number of click to call applications released for Asterisk®, but none quite so simple to implement as the one we've uncovered. The original was introduced at VoIPjots.com about this time last year. Then Rafael Cortes at asteriskpbxs.com further embellished it. We took Rafael's version and added a few minor enhancements, and today you get Click2Dial for Asterisk to freely use with virtually any Asterisk PBX. It works exceptionally well with our customized versions of TrixBox 1.2.3 which you can download from the links above for Windows, Intel Macs, and Linux.
Overview. For those new to this technology, the basic idea behind Click-to-Dial or click to call applications is that folks can visit your web site, click on a link after plugging in their phone number, and a call is placed from your Asterisk PBX connecting you and them without the visitors incurring any long distance charges. The initial call to you is placed first, and it can be to any extension on your Asterisk system or even your cellphone if you have more than one outbound (termination) trunk. If you don't answer, no second call is placed. Once you answer, the outbound call to the web site visitor is placed. We've added support in the PHP application so that callers can also enter their name, and the name entry together with the phone number to be called will be displayed on your phone before you answer the call: Web-John Doe 843-678-1234. Be aware that cellphone providers throw CallerIDName information in the bit bucket so the name display only works on calls to Asterisk extensions, but the CallerIDNumber will work with any of the providers that support adjusting your outbound CallerID, such as TelaSIP. See our Roundup of VoIP Providers for more choices. Anyway, the web site visitors get 12 characters in which to enter their name and 10 for their area code and phone number. Without much tweaking, the 10-digit limitation can be adjusted for international calling. No dialplan changes are required to get this working assuming your dialplan supports 10-digit dialing from extensions on your system. Simply drop the code into the web directory on your Asterisk server, open port 80 on your firewall to point to the web server on your Asterisk or TrixBox system, and you're off to the races. Installation and setup time: about 2 minutes.
Click2Dial for Asterisk Installation and Setup. To download the Click2Dial for Asterisk application, click on this link. Save and unzip the archive on your Desktop. Open the Click2Dial folder and copy click2dial.php into the web folder on your Asterisk server (/var/www/html on TrixBox systems). Log into your Asterisk server as root and edit the file: nano -w /var/www/html/click2dial.php. For TrixBox systems, the only entry you need to change is the incoming call destination on line 38. For a SIP extension on your Asterisk system, the line should look like this: $strChannel = "SIP/502"; where 502 is the extension you wish to ring for incoming Click2Dial calls. If you have multiple outbound trunks and you want to route incoming web calls to your cellphone, here's the syntax:
$strChannel = "local/1NXXNXXXXXX@from-internal" ;
Replace 1NXXNXXXXXX with the actual phone number that you currently dial from an extension on your system to place a call to your cellphone. Save your change (Ctrl-X, Y, then Enter), and you're done! To try it out, point a web browser at the following page substituting your own fully-qualified domain name or IP address of your Asterisk server: http://192.168.0.211/click2dial.php. Feel free to cut-and-paste the code into an actual web page if you'd prefer to integrate Click2Dial for Asterisk into your existing web layout.
Other Goodies. We've also included all of Rafael Cortes' other handiwork in the archive which you are free to use (not sell!) if you so desire. In addition, we've included our YeeHah add-on for AsteriDex. This lets you do a couple of things. First, you can use it as a Click2Dial add-on which works exactly like the code described above. Just edit the top of the file and specify your CallerID number and extension number to be called. Then move the file to your existing AsteriDex folder on your Asterisk server. While editing the file, if you set Click2Call=false, then the application lets you actually dial outbound calls to two phones of your choosing from the web page. This is handy for personal use but obviously has serious security risks unless you also uncomment the top few lines in the application and specify the actual IP addresses of the computers on which this application can be used. If you don't understand what any of this means, then do yourself and your phone bill a favor, don't use it! Otherwise, anyone with access to your AsteriDex web application can make unlimited calls on your nickel to anywhere. Enjoy!
Nerd Reminder. Don't forget today is Valentine's Day. Give the keyboard a rest for a bit.
Nerd Vittles Valentine's Day Giveaway. As a special thanks to our loyal readers, we have a couple of free passes to give away to the Fonality trixbox Open Communications Certification course being held on March 5-6, 2007 at the Los Angeles LAX Westin. The retail value of each pass is $1495. If you'd like to attend, post a comment to this article which begins with I WANNA GO. Just tell us why you'd like or need to go to the course. And be sure to include your real name and email address in the required fields. Email addresses do NOT get shown on the web but do give us a way to get in touch with you. Except for the winning entries, none of the other comments will actually be posted on the blog so feel free to lie your ass off beg. To be eligible, we must receive your comment before 7 a.m., Eastern time, on Thursday, February 15, 2007. We will pick two lucky winners tomorrow morning. Decision of the judges (Nerd Uno) is final. If you don't hear from us by noon (Eastern time) tomorrow, then you didn't win. Sorry. Make up a better story next time. Winners are, of course, responsible for their own transportation, lodging, food and beverage expenses. This is a perfect opportunity to get certified on the TrixBox platform at minimal expense. Offer void where prohibited by law. Good luck!
Nerd Vittles Demo Hot Line (courtesy of les.net). You now can take a number of Nerd Vittles projects for a test drive... by phone! The current demos include (1) MailCall for Asterisk with password 1111 (retrieve your email by phone), (2) NewsClips for Asterisk (latest news headlines in dozens of categories), (3) Weather Forecasts by U.S. Airport Code, and (4) Weather Forecasts by U.S. ZIP Code. You're not prompted for #4 yet, but it does work! Just call our number (shown in the left margin) and take any or all of them for a spin. The sound quality may not be perfect due to performance limitations of our ancient Intel 386 demo machine. But the price is right.
Nerd Vittles Fan Club Map. Thanks for visiting! We hope you'll take a second and add yourself to our Frappr World Map compliments of Google. In making your entry, you can choose an icon: guy, gal, nerd, or geek. For those that don't know the difference in the last two, here's the best definition we've found: "a nerd is very similar to a geek, but with more RAM and a faster modem." We're always looking for the best BBQ joints on the planet. So, if you know of one, add it to the map while you're visiting as well.
Some Recent Nerd Vittles Articles of Interest...
Weather, Weather Everywhere: Finally, Worldwide Weather Forecasts for Asterisk
 Wouldn't it be nice if you could just describe your product and folks would know what you meant? Well, thanks to the lawyers, you can't. So, for all sorts of legal reasons, today's new product will not be called the Asterisk® Weather Station: Whole Earth Edition. We're back from the bunny honeymoon, and we've finally found a source to generate Asterisk weather reports worldwide. We've now written so many weather applications for Asterisk that we're thinking of changing our name to Willard Scott. Ooops! Can't do that either. Whatever you want to call this new application, it was the #1 Request on the Nerd Vittles Wish List, and today it's soup. With all the news organizations in the world, you wouldn't think it would be so difficult to find a source for worldwide weather information, but it's been a twelve-month ordeal. For those of you that thought last week's column on the Nabaztag WiFi Rabbit was a big waste of time, think again. It was the proud owner of a Nabaztag bunny that provided the tip which led to today's worldwide weather application for Asterisk and TrixBox systems. Thanks to Channel 4 in London, the weather forecasts are freely available on the web for thousands of cities around the world. Assuming you visit their web site from time to time and take advantage of some of their "advertising opportunities," we're pretty sure they won't object to your retrieving their forecasts using a telephone from time to time. Just be sure it's for non-commercial use, and we think you're in pretty good shape with their terms of service. This is not legal advice... but you knew that.
Update: Due to changes at Channel4.com, this application no longer works. For a current, working Worldwide Weather application for Asterisk 1.8 using the Google Talk Guru, see this article.
Prerequisites. If you've previously installed one of the Nerd Vittles Weather Applications, then today's installation drill shouldn't take you more than 5 or 10 minutes. If you're new to all of this, then here's a quick list of what you'll need. A TrixBox 1.2.3 server for Windows, an Intel Mac, or Linux is the ideal platform because it includes all of the tools you'll need to be up and running in minutes. Almost any other Asterisk server should work so long as you've installed freePBX, PHP and the Flite voice synthesizer. But you're on your own. If you're a nuts-and-bolts Asterisk guy, then you should be able to decipher what needs to be done by reading through this tutorial. And, yes, the code could be reworked in less than six lines to support Festival or Cepstral if you'd prefer different voices for your weather reports. In fact, we use Cepstral with our Nabaztag/tag bunny, Pat the Nerd, and it works like a champ using an existing Asterisk@Home server. Our bunny tutorial will walk you through the Cepstral installation.
Installation Overview. Assuming you have all the prerequisites in place, today's installation is about a five minute chore. You'll need to download the weather application into the agi-bin directory on your Asterisk system. Then you need to configure the 10 cities you want to support with dial-up weather forecasts. Finally, you'll drop in a little snippet of dialplan code and reload Asterisk. And, you're off to the races. If you want to retrieve weather forecasts for more than 10 cities, the easiest solution is to rework the dialplan code and the program to accept multiple digits for the city code. The number of digits is up to you. Another option is to copy the program to another filename, add another chunk of dialplan code for another extension, and expand your city count to 20, or 30, or whatever. You could even have 10 cities for each continent if that's your thing. The instructions below assume you have a TrixBox 1.2.3 system in place. It works equally well on an Asterisk@Home 1.5 system and most systems in between. If you're using an older Asterisk@Home system, just remember to put the dialplan code in extensions_custom.conf instead of extensions_trixbox.conf, and you'll be just fine.
Installing nv-weather-world.php. Sounds like something out of a Sci-Fi movie, doesn't it. Well, it's not as hard as it sounds. Log into your TrixBox server as root and issue the following commands in order:
cd /var/lib/asterisk/agi-bin

wget http://nerdvittles.com/trixbox123/nv-weather-world.zip

unzip nv-weather-world.zip

rm -f nv-weather-world.zip

chown asterisk:asterisk nv-weather-world.php

chmod +x nv-weather-world.php
Configuring Cities for Phone Access to Weather Forecasts. By default, the Worldwide Weather for Asterisk application comes preconfigured to support 10 cities around the world. Here's the list:
You'll notice that the syntax is identical for every entry except London, #5. Cities in the U.K. have a different syntax... because that's Channel 4's home base. That's why. For cities outside the U.K., the syntax is pretty straight-forward. You need a city, a country, and a continent. No spaces in any of the entries. If there's a real space in either a city or country name, then you replace the spaces with plus signs (+). How do you figure out the entries? Well, for most of them, a guess is probably good enough. Cities and countries don't switch continents that often. If you flunked geography, then you can use Channel 4's web site and call up the weather report for the city you're interested in. The answer will be in the browser's address bar.
While you're displaying a sample weather report from Channel 4, you'll probably notice the little programming challenge that we were up against. Telephones don't (yet) display images of a weather forecast or wind direction too well. Not to worry. We solved it. The only trick was trying to figure out what all 32 weather icons meant. Your guess may be better than ours so feel free to adjust the code to your heart's content. You can make it rain on a sunny day if that's your thing.
Now where were we? You need to make yourself a list of 10 cities with the link code to the weather reports. You'll notice that our cities happen to match the letters on the telephone except for zero and one. Once you have your city links in hand, edit nv-weather-world.php: nano -w /var/lib/asterisk/agi-bin/nv-weather-world.php. Then cursor down to line 19 and edit the ten entries with the locations you've chosen. Be very careful in editing the code! The http links need to be surrounded with quotes, and each line ends with a semi-colon. Leave everything to the left of the equals sign and the equals sign alone. If you decide to add more than 10, just follow the examples and keep numbering. Before you add any additional lines, scroll down to line 148 and change strlen($code)>1 to the maximum number of digits you plan to use. Save your changes when you're finished: Ctrl-X, Y, then Enter.
Adding the Dialplan Code Snippet. In order to activate extension 612 to answer calls for your Worldwide Weather Forecasts, you'll need to drop the following code into your dialplan in the [from-internal-trixbox] context of /etc/asterisk/extensions_trixbox.conf. The easiest way is to access TrixBox from your browser and choose System Administration, Config Edit. Then click on the extensions_trixbox.conf file in the left column, scroll down into the [from-internal-trixbox] context and cut-and-paste the following. If you've decided to support more than 10 cities at a time, then you'll need to change the one in line 6 to a bigger number. Once you get it the way you like it, click the Update button to save your changes.
exten => 612,1,Answer

exten => 612,2,Wait(1)

exten => 612,3,DigitTimeout(7)

exten => 612,4,ResponseTimeout(10)

exten => 612,5,Flite("At the beep enter the code for the weather report you wish to retrieve.")

exten => 612,6,Read(APCODE,beep,1)

exten => 612,7,Flite("Please hold a moment while we retrieve your report.")

exten => 612,8,AGI(nv-weather-world.php|${APCODE})

exten => 612,9,NoOp(Wave file: ${TMPWAVE})

exten => 612,10,Playback(${TMPWAVE})

exten => 612,11,Hangup
Adding a Miscellaneous Destination. While you're still in TrixBox with your browser, choose freePBX and then choose Setup, Misc Destination. Add a new entry for WorldWideWeather with 612 as the Dial entry. Save your entry and then click the Red Bar to reload Asterisk.
Taking the WorldWide Weather Forecaster for a Spin. Now we should be all set. Just pick up an extension on your system and dial 612. You'll be prompted to enter a one-digit code. Punch in 5 and check out the weather forecast for good old London. Enjoy!
Housekeeping 101. Temporary files in /tmp get cleaned up by Linux housekeeping automatically. Temporary files stored elsewhere don't unless you're using a Nerd Vittles build of TrixBox with either the VMware edition of nv-trixbox for Windows, an Intel Mac, or PBX-in-a-Flash for Linux. The weather scripts store .wav files with your requested weather forecasts in /var/lib/asterisk/sounds/tts. So, from time to time, make a mental note to remove all of these files with a command like this:
rm -f /var/lib/asterisk/sounds/tts/*
Or just log into your Asterisk server as root and edit the following file: nano -w /etc/crontab. Move to the bottom of the file and insert the following code on a blank line:
3 0 * * * /usr/bin/find /var/lib/asterisk/sounds/tts -type f -mtime +14 | /usr/bin/xargs /bin/rm -f >/dev/null 2>&1
This code will delete all of the files in the tts folder every two weeks. If you'd prefer a shorter time, change the number 14 accordingly. Now save your changes: Ctrl-X, Y, then Enter.
Best of Nerd Vittles Link. This application also is now available on our Best of Nerd Vittles site.
Hosting Provider Special. Just an FYI that the Nerd Vittles hosting provider, BlueHost, has raised the bar again on hosting services. For $6.95 a month, you can host up to 6 domains with 200 gigs of disk storage and 2000 gigs (that's 2 terabytes!) of monthly bandwidth. Free domain registration is included for as long as you have an account. That almost doubles last month's deal, and it still doesn't get any better than that. Their hosting services are flawless! We oughta know. We've tried the best of them. If you haven't tried a web hosting provider, there's never been a better time. Just use our link. You get a terrific hosting service, and we get a little lunch money.
Want More Projects? For a complete catalog of all our previous Asterisk projects, click here. For the most recent articles, click here and just scroll down the page.
Some Recent Nerd Vittles Articles of Interest...
Hacker’s Dream Machine: Introducing the Best Gadget of the Year And It’s Not From Apple
 Attention Toy Junkies and Hackers: Imagine a 14 ounce device the size of a five pound bag of sugar with a self-contained Wi-Fi server, web server, streaming audio player, MP3 player, RSS Feed fetcher, email reader, voice recognition, built-in RFID proximity detection, text-to-speech and speech-to-text capabilities and... wiggly ears, a VoIP belly button, a speaker, and blinking lights all over the place. It's a bird, it's a plane. No, it's a Nabaztag/tag. With a name like that, you know it has to be good. Nabaztag actually is the Armenian word for rabbit. And the Nabaztag/tag is the second generation of Violet's infamous WiFi Bunny... from France no less.
For those of you thinking about one of these fine critters as a Valentine's gift, let me just offer up a quote from someone near and dear to me: "If you'd gotten me one of those stupid bunnies for Valentine's, you'd be sleeping in your car." Yes, much to the chagrin of the Little Mrs., we've spent an entire week playing with Pat the Nerd. And, with the help of a number of similarly misguided souls from around the world, we've managed to turn this rabbit, uh, on its ear. Or is it the other way around? You see Pat costs $179 at ThinkGeek. But there's more to it. Violet, the bunny's proud inventor, is also proud of their connection service. Beginning Valentine's Day, Violet has a special surprise for bunny lovers. They'd like every bunny owner to pony up $6.95 a month (forever) to keep your bunny hopping. No more animal jokes, we promise! There still will be some free services such as time and weather information. And Violet will still let your bunny receive a whopping 14 15 messages a month. That's almost a whole 30-second message every couple of days! But, after that, it's Pay Per View time. Believe it or not, there already are hundreds of thousands of Nabaztags in the homes of our European friends. But the bunny lovers of the world are in for a little surprise in a couple weeks. Happy Valentines! Heh, heh.
Well, that was last week. Several projects have been underway for months on SourceForge to unearth the bunny's innermost secrets. They quickly discovered that the first generation bunnies had a severe limitation because of an extremely proprietary sound chip. The second gen Nabaztag/tag resolves that by supporting playback of industry-standard sound files. The other problem with the SourceForge projects was the Hobson's Choice of an either-or bunny. You could either connect to Violet's servers and enjoy their offerings, or you could venture out on your own by creating your own applications using your own server. Thanks to Olivier Azeau, you now can have your cake and eat it, too. In addition to being an adept PHP programmer, Olivier also happens to like bunnies. So he began the OpenNab project on SourceForge to build a PHP-driven Nabaztag/tag proxy. Just as the name implies, it transforms the WiFi Rabbit into an open source platform while maintaining your existing connection to the Mother Ship. Stated another way, by using the OpenNab proxy, you don't throw the baby out with the bath water. Instead, you get the best of both worlds: all of the free Nabaztag services from Violet plus all of the free open source apps that the rest of us can dream up. And, if you want to subscribe to Violet's monthly service plan, you can do that as well. It also opens the door for competitive server platforms to support the Nabaztag/tag for those that have no interest in building and supporting a server just to trick out your dumb bunny.
That, of course, is where a TrixBox Asterisk® server comes into play. In addition to getting a first-rate (free) PBX that will run on Linux, a Mac, or Windows (download links at top of the page), you now have the perfect platform for the OpenNab proxy. For our non-Asterisk readers, you don't have to use a TrixBox server to make all of this work... if you don't mind wrestling with Linux. Or, for the Windows platform, you might want to try WAMP5. The beauty of installing one of our TrixBox servers for the Mac or Windows platform is that you don't have to have a dedicated Linux server. You can run the TrixBox server in a window on your desktop, and you never need to touch the PBX if you don't want to. In short, a TrixBox server is an ideal development platform for projects such as this because all of the tools you'll need are already integrated into a turnkey appliance. In addition to a fairly complete Linux toolkit, it also includes an Apache web server with PHP and a voice synthesizer called Flite right out of the box so there's nothing to install... except OpenNab. We'll walk you through that installation, and we'll provide a couple of our reworked open source applications for your OpenNab-energized Bunny to get you started: weather reports for every U.S. city and a Yahoo Headline News Feed Reader. Then you can rip into our code and contribute some applications of your own to the cause. A few have already been contributed, and we'll post those on our new Wabbit Vittles web site in the next few days.
OpenNab Prerequisites. As mentioned, you'll need a server platform that includes a web server with PHP 4.4.3 or later and CURL, a text-to-speech voice synthesizer such as Flite (free) or Cepstral ($30), and an encoding utility in order to get much use out of the OpenNab proxy. The free TrixBox appliances include everything you'll need to get started.
Downloading OpenNab. Once you have your web server with PHP and CURL running, you're ready to install OpenNab. Start by downloading the OpenNab Proxy application from SourceForge. Unzip the file, and you'll have a folder named opennab with a version number. We're assuming it's 0.04, or some of the fixes below may not be necessary. There are several tricks to getting OpenNab installed and working reliably. We're going to walk through the TrixBox installation scenario. It's also possible to run this on a dedicated Linux machine or through a Linux hosting provider site, but it's considerably more complex to get all the pieces working as you'll quickly discover if you decide to try it. We've put up a demo system through our hosting provider, BlueHost, just to show it's possible. BlueHost incidentally happens to be the best AND the cheapest hosting provider on the planet if you ever have a need. Regardless of which route you take or even if you roll your own server, be aware that the two folders (vl and broad) both have to be copied into the root directory of your web server.
OpenNab Installation and Setup. In the case of a TrixBox installation, copy the vl and broad folders into var/www/html which is the web server's home directory. If you're using a hosting provider, copy the two directories into your root web folder, usually www or public_html with cPanel systems. Instead of Apache redirect commands, OpenNab uses ErrorDocument redirection to reroute traffic from Violet's servers to your OpenNab Proxy. So, if they don't already exist, create a .htaccess file in both the vl and broad folders: nano -w .htaccess after logging into your server as root (for TrixBox) or your accountname (for hosted servers) and changing to the proper directory.
In the vl folder, make sure you have the following line in a .htaccess file. This was missing in version 0.02 :
ErrorDocument 404 /vl/bc.php
In the broad folder, the following line should appear in .htaccess:
ErrorDocument 404 /vl/media.php
Next we need to modify the Apache config file on your TrixBox server so that it allows .htaccess commands to override Apache defaults at the directory level. This isn't required on most hosted systems since they already allow directory-level overrides. While still logged in as root on your TrixBox server, edit the Apache config file: nano -w /etc/httpd/conf/httpd.conf. Press Ctrl-W and search for AllowOverride None. Press Enter to execute the search. Leave this entry alone. Now press Ctrl-W and Enter again. Change this entry to AllowOverride All. What this does is allow .htaccess overrides on the /var/www/html directory and its subdirectories which is what we want since that's the root directory for the web server. Save your changes: Ctrl-X, Y, then Enter. Then restart Apache: apachectl restart.
Regardless of your server type, we need to create a few new folders to make sure OpenNab can successfully pass its startup tests. Just issue the following commands while logged in as root:
cd /var/www/html/vl/plugins/files_simpleplay (NOTE: Version 0.03 and 0.02 stored these files in /var/www/html/broad)

mkdir 0

cd 0

mkdir 1

cd 1

mkdir 2

cd 2

mkdir 3

cd 3

touch 4.mp3
If you're using a hosting provider, you can ignore this step. On TrixBox servers, the web service runs as user asterisk unlike other Linux systems. We need to adjust the permissions on the folders we installed to be sure this user can read, write, and execute in these directory trees. So issue the following commands while logged in as root:
cd /var/www/html

chown -R asterisk:root vl

chown -R asterisk:root broad
Finally, regardless of your server type, there was a little bug in version 0.02 that occurred if you happened to enter the MAC address of your bunny in upper case letters. This is fixed in version 0.03 and 0.04, but if you have the 0.02 version here's the patch:
cd /var/www/html/vl/includes

nano -w burrow.php
Once the editor opens, cursor down to line 45 and add the strtolower function to the existing line so that the new line looks like this:
$this->fileName = 'burrows/'.strtolower($serialNumber);
Save your change: Ctrl-X, Y, then Enter.
Securing OpenNab. We highly recommend using a TrixBox server or some other Linux server behind a firewall for this project. Running OpenNab on the public Internet with or without a hosting provider adds all sorts of security implications. At a minimum, there are some changes we recommend you make to lessen the opportunity for abuse from outsiders. Insert index.php documents in the folders that don't already have such a document. Here's what each index.php document should look like:
<?php

 echo " ";

?>
The second tip is don't activate the logging feature in vl/config.php because it will compromise the MAC addresses of every rabbit that connects through your server... unless you password protect the vl/logs directory. Finally, remove the phpinfo.php file from vl/tests once you complete your testing as this reveals all sorts of information to someone that may be attempting to break into your server.
Testing Your Nabaztag/tag. There are two tests you need to perform to make sure your Apache server, PHP, and CURL are operating properly. Using a web browser, go to the following links using the IP address or fully qualified domain name of your OpenNab Proxy:
http://my.domain.com/vl/foobar should return: ERROR 404 from OpenNab

http://my.domain.com/vl/tests/ should return: 48 passes, 0 fails and 0 exceptions with a Green Bar
Configuring Your Nabaztag/tag to Use OpenNab. Once you've passed the testing with flying colors, it's time to activate the OpenNab Proxy. Step 1: Get your tag/tag functioning reliably with Violet's server first. If you need help, here's a link. Before connecting through OpenNab, you'll also need to write down either the IP address of your TrixBox server on your internal LAN or a fully-qualified domain name that points to your web site on the Internet if you're using a hosting provider. So the syntax for the entry you're about to make should look like one of the following using your correct IP address or domain name:
192.168.0.129/vl

wabbitvittles.com/vl  (This one actually works if you'd just like to try things out without installing any software.)
Once you have your entry in hand, unplug your rabbit. Press and hold down the top button and reconnect power to your rabbit. As soon as all four front lights turn blue, release the button. This usually occurs in less than one second if you have an Internet connection. If you hold the button down too long after the lights turn blue, you'll need to start over. Now count slowly to twenty. From a wireless PC or Mac on the same subnet as your rabbit, open the Wireless Networking window and select Nabaztagnn as your WiFi host. The nn will match the last two numbers of the MAC address on the bottom of your rabbit. Count to twenty again and then open the following page with a web browser: http://192.168.0.1/. Click on Click Here to Start link. When the next page displays, click Advanced Configuration. You shouldn't have to change anything except the very bottom entry on the form which reads r.nabaztag.com/vl. Replace that entry with the entry you wrote down above and Save your change. This will reboot your bunny, disconnect you from the wireless connection, and restart your bunny using the OpenNab Proxy. Now is a good time to reconnect your PC or Mac to a functioning wireless network! The lights on your bunny will start out orange and then should turn green and go away after the bunny wiggles his ears. When properly connected, you'll have the glowing purple light on the bottom of the bunny and no other lights lit... just as you had when connected directly to Violet's server. Congratulations! You now have an operational OpenNab Proxy.
But What Can It Do? If you'd like to try all of this through our OpenNab Proxy first, then go through the configuration step above using wabbitvittles.com/vl as your proxy address. Once your bunny springs to life, here's a simple test to make sure everything's working. Write down the MAC address of your bunny. Then open a web browser and go to the following link substituting the MAC address of your bunny for the string of zeros, of course. You can also pick any other city and state in the United States... as long as they really exist. This demo system uses Cepstral's Diane 8kHz English voice. There are many others available. You can try them out here.
http://wabbitvittles.com/vl/api_demo/opennab-weather.php?sn=000000000000&code=422&city=Washington,DC
The Cepstral voices on our demo site are nice, but we don't find them to be appreciably better than the default voice installed with Flite. Flite also happens to be free and is bundled in the TrixBox servers we recommend. There's also the hassle of finding a conversion utility to get the text into a format that your bunny can decipher. All of these tools come preconfigured on the TrixBox systems. Hint!
OpenNab Applications. We're going to contribute several OpenNab applications to get you started today. Before you can use them, you'll need a TrixBox server or a garden-variety Linux server if you know what you're doing. If you roll your own, install Flite or Cepstral to handle text-to-speech conversion and a conversion tool to get the files into a format your bunny can decipher. You can look through the last couple dozen lines of code in the applications to figure out what you need.
Cepstral Installation. The only trick to installing Cepstral is choosing a good voice. We've had better luck with the "telephone voices" which are 8kHz, but you can try out all of them here. We'd recommend you begin by downloading the Diane-8kHz voice for Linux and get it working first. You don't have to buy it unless you like it! Once you download it, log into your TrixBox/Linux system as root, and issue the following commands using the voice name associated with your download:
mkdir /nerdvitt

mkdir /cepstral

cd /cepstral

[copy your download into the /cepstral folder now]

gunzip Cepstral_Diane-8kHz_i386-linux_4.1.4.tar.gz

tar xvsf Cep*

cd Cepstral_Diane-8kHz_i386-linux_4.1.4

./install.sh
When prompted for the installation path, use /nerdvitt. Just to make sure you have a link to the application in your path, execute the following command:
ln -s "/nerdvitt/bin/swift" /usr/local/bin/swift
When you decide to buy a license ($30), you'll get an activation key. You activate it by issuing the following command (while logged in as root!) and filling in the blanks using the same name you used when you purchased the license:
swift --reg-voice -n Diane-8kHz
Installing OpenNab Applications. First, you'll need to download the desired applications. Assuming you want all of them, just execute the following commands after logging into your TrixBox server as root:
cd /var/www/html/vl/api_demo

wget http://wabbitvittles.com/applications/weather-opennab.zip

wget http://wabbitvittles.com/applications/news-opennab.zip

unzip weather-opennab.zip

unzip news-opennab.zip
Once you've unzipped the files, you'll need to edit each .php file to configure it. For the weather, edit the following file: nano -w opennab-weather.php. The configuration changes begin at line 37:
if (strlen($city)==0) :

 $city="Charleston, South Carolina";

endif ;

if (strlen($SN)==0) :

 $SN = "000000000000";

endif ;

$WebRoot="/var/www/html";

$BinRoot="/nerdvitt/bin";

$ProxyAddress="0.0.0.0";

$UseCepstral=false ;

$voice="Diane-8kHz" ;
Choose a default city to replace Charleston, South Carolina, e.g. Atlanta,GA is fine for the syntax. Enter the serial number ($SN) of your rabbit to replace 000000000000. If you're using a TrixBox server, the $WebRoot and $BinRoot entries are fine. These are the root directory of your web server and the location of the Cepstral executable. Replace the $ProxyAddress entry of 0.0.0.0 with the IP address fully-qualified domain name of your TrixBox/Linux server. If you plan to use Flite for speech synthesis, nothing else needs to be changed. If you're using Cepstral, change $UseCepstral=false to $UseCepstral=true. Don't delete the semicolon at the end of the line! If you're not using the Diane-8kHz voice with Cepstral, enter the file name of your voice surrounded by quotation marks. Save your changes: Ctrl-X, Y, then Enter.
Now edit the opennab-news.php file: nano -w opennab-news.php. Beginning at line 18, you'll find the configuration settings:
if (strlen($category)==0) :

 $category="topstories";

endif ;

if (strlen($SN)==0) :

 $SN = "000000000000";

endif ;

$WebRoot="/var/www/html";

$BinRoot="/nerdvitt/bin";

$ProxyAddress="0.0.0.0";

$UseCepstral=false ;

$voice="Diane-8kHz" ;
Choose a default news category to replace topstories. Available choices include: topstories, us, world, iraq, world, mideast, politics, business, health, science, technology, showbiz, mostviewed, mostemailed, mostblogged, highestrated, adventures, obits, hotzone, nasashuttle, sept11, oped, oddlyenough, and many others. Here's the complete list of Yahoo RSS Feeds. Enter the serial number ($SN) of your rabbit to replace 000000000000. If you're using a TrixBox server, the $WebRoot and $BinRoot entries are fine. These are the root directory of your web server and the location of the Cepstral executable. Replace the $ProxyAddress entry of 0.0.0.0 with the IP address fully-qualified domain name of your TrixBox/Linux server. If you plan to use Flite for speech synthesis, nothing else needs to be changed. If you're using Cepstral, change $UseCepstral=false to $UseCepstral=true. Don't delete the semicolon at the end of the line! If you're not using the Diane-8kHz voice with Cepstral, enter the file name of your voice surrounded by quotation marks. Save your changes: Ctrl-X, Y, then Enter.
Running the Weather Application. There are several ways to run each of these new applications. The weather application can be activated using a web browser using the IP address of your TrixBox/Linux server:
http://192.168.0.129/vl/api_demo/opennab-weather.php?city=Charleston,SC
The application also can be run from the Linux command line after logging into your server as root:
php /var/www/html/vl/api_demo/opennab-weather.php city=Charleston,SC
Using the command line syntax, you also can schedule the application to run automatically at various times of the day using a crontab entry. For example, the following entry could be added to /etc/crontab to kick off a weather bunny report at 29 minutes after the hour beginning at 6:29 a.m. until 8:29 p.m. every day:
29 6-20 * * * root /etc/weather.sh
For the /etc/weather.sh script, simply copy the above line to the script and make it executable:
echo php /var/www/html/vl/api_demo/opennab-weather.php city=Charleston,SC > /etc/weather.sh

chmod +x /etc/weather.sh
Running the News Application. The Yahoo News application can be run in much the same way. It could be activated using a web browser using the IP address of your TrixBox/Linux server:
http://192.168.0.129/vl/api_demo/opennab-news.php?category=topstories
The application also could be run from the Linux command line after logging into your server as root:
php /var/www/html/vl/api_demo/opennab-news.php category=topstories
Using the command line syntax, you also could schedule the application to run automatically at various times of the day using a crontab entry. For example, the following entry could be added to /etc/crontab to kick off a news bunny report at 1 minute after the hour beginning at 6:01 a.m. until 8:01 p.m. every day:
01 6-20 * * * root /etc/news.sh
For the /etc/news.sh script, simply copy the above line to the script and make it executable:
echo php /var/www/html/vl/api_demo/opennab-news.php category=topstories > /etc/news.sh

chmod +x /etc/news.sh
Finding the Latest Nabaztag Applications. Well, that should get you started with OpenNab. And we'll be adding more and more applications in the weeks ahead as others begin to contribute as well. It seemed a fitting time to dedicate a new web site to our non-furry friend so... Welcome to Wabbit Vittles. If you have a contribution to add, just send us a message, and we'll be glad to host it for you. You'll also want to check out the terrific new Nabaztalk Forums for late-breaking tips and tricks. Enjoy!
Free Asterisk Solutions
