
The Most Versatile VoIP Provider: FREE PORTING

 JUST RELEASED: Visit the Incredible PBX Wiki
The Poor Wise Man’s Burglar Alarm System with Asterisk: Under $10/month

If you’re like us, spending $50 a month or more on a home security system is a bit like pouring money down the toilet. Add to that the complications of getting one to work reliably with VoIP without spending another $50 a month on a Ma Bell vintage telephone line just adds insult to injury.
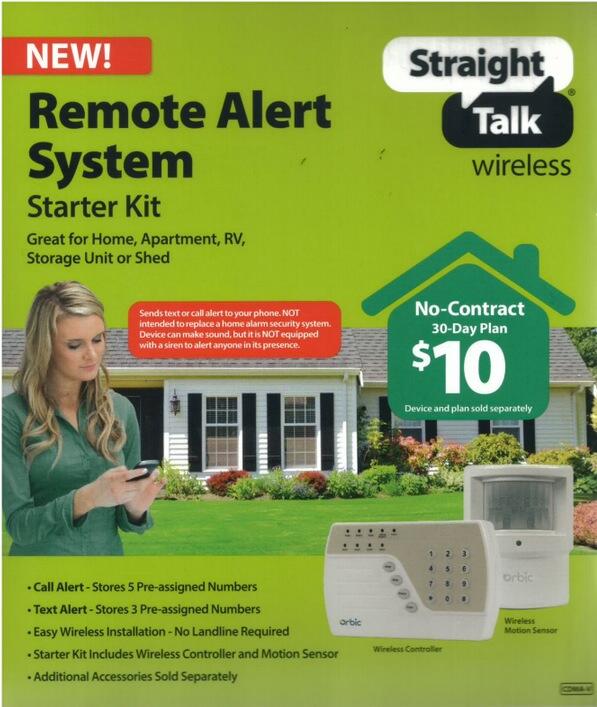
So perhaps you can share our elation when an email arrived last week announcing Straight Talk’s new Remote Alert System, a $10/month cellular-based system that uses Verizon Wireless to provide SMS and phone call alerts for up to eight numbers. And actually it’s cheaper than that. $100 buys you a year of service. That’s less than $8.50 a month. Today we’ll show you how to transform your Prius-like Remote Alert System into a Tesla that will rival virtually any intrusion detection system on the market… at any price! The extra hardware required: any Asterisk-based server including the Raspberry Pi and BeagleBone Black.
Read and weep, ADT!
If we didn’t already have three Straight Talk lines of service, we would have filed this in the Too Good To Be True pile and moved on. But we’ve had terrific Almost-Unlimited™ AT&T Wireless service with Straight Talk for less than $500 a year. It’s not only indistinguishable from AT&T’s own offerings costing at least 50% more, but it’s also contract-free so we can bring any AT&T smartphone including iPhones to the party and never miss a beat.

We decided to take the bait and ordered the home security bundle. This gets you the Remote Alert wireless controller plus a wireless motion sensor plus a year of service for $229.99. If you prefer a one-month gamble, the bundle is only $139.99. Down the road, you can add additional motion sensors and window/door sensors for about $30 each. The add-ons now are available at Wal-Mart.
Shameless Plug. We obviously don’t charge for access to our articles. But you can assist the Nerd Vittles project financially by using our referral link with eBates® to make your purchase if you decide to try this. It doesn’t cost you a dime but returns 13.5% of your purchase price to the Nerd Vittles project. It’s just a couple of clicks.  Start here to access eBates.
  Then Search for Straight Talk and click on the link. After the Straight Talk web site displays, click on the following link to access the Straight Talk Security Bundle. And, THANK YOU!
So… back to our story. The controller supports four zones for monitoring. Zone 4 is reserved for sensors you want to monitor while someone may still be moving around in the house, for example while only some of your family may be sleeping or if pets are roaming. The other three zones typically would be used for motion sensors that trigger alerts when anything moves… after giving you 30 seconds to leave and return, of course. You can activate Home or Away monitoring using either the controller, an optional $25 key fob, or a free app for your iPhone or Android smartphone.
You get to decide what happens when the system is armed and an alert is triggered either by motion or a monitored door or window being opened. For us, silence was the name of the game. Using the Android Remote Alert System, click the Silent ARM icon once you leave the house, and you’re done. When you return, click the Disarm icon within 30 seconds of opening the door, and monitoring is disabled. You can also enter your 4-digit alarm code on the controller to disable monitoring.
Remote Alert System Setup. Once you get the equipment, it’s a 5-minute phone call to get set up. Install the backup batteries in the controller and motion detector, and plug the controller into an A/C power source. Press the required sequence on the controller to activate it, and you’re in business. The motion detector is already paired with the controller when it arrives, but adding new sensors is a 15-second task. All of the commands are documented in the manual which accompanies the system. But the tutorials also are available on line if you want to have a look.
Step #1 is changing your security alarm password. The next step is entering your phone numbers. Straight Talk goes to great lengths warning you that this is not a home security system because it has no external siren and can’t make 911 calls. They obviously haven’t heard of Asterisk®. 🙂 But let’s get through the standard setup before we talk about Asterisk integration. You get to set up three numbers to receive SMS text messages when an alarm is triggered. And you get to set up five phone numbers to receive calls when an alarm is triggered. What the called party will actually hear is an obnoxious alarm tone which continues to play for 15 seconds. If you had multiple properties with alarm systems and no Caller ID, you’d never know the source of the alarm! But people with multiple properties probably aren’t smart enough to use this system to begin with so let’s move on. You configure the SMS and phone numbers by entering a special code on the controller to program each of the eight destinations. Then you enter the 10-digit number twice, and you’re done. Easy Peasy!
If you’re new to home security systems, the key to motion sensors is placement. Straight Talk recommends placement about seven to ten feet off the floor with a wide field of view. The range of the motion sensor is about 26 feet. It obviously depends upon the layout of your house or apartment, but we had much better success placing the motion sensor on a window sill at about 5 feet high and aiming it at the center hall of our home. It improved the motion detection dramatically. Trial and error is your friend!
The next step is positioning your controller. A mounting bracket is included so that you can place it almost anywhere you like. Our preference is to hide it so long as it still has Verizon cellular coverage and a source of electricity. You can test it by arming the controller with your smartphone and then triggering the motion sensor. If you get an SMS message or a call, it’s working. We also prefer silent mode. An intruder is obviously going to attempt to destroy your controller if they hear it. Yes, the intruder may leave, but they’ll probably carry some of the family jewels with them. With an Asterisk server in place, we’d prefer to send the police without alerting the intruder that something has gone wrong.
Asterisk Integration. Speaking of Asterisk, here’s what we’ve developed to add 911 alerts and telephone alarms to this system. It’s a 5-10 minute project! The way this works is to first add a phone number to your controller that calls a dedicated DID on your Asterisk server. Calls to that DID trigger the special context [st-remote-alert] which verifies the CallerID number of your alarm system. As configured, if the CallerID doesn’t match, the call is immediately disconnected although you could easily modify our code to use an existing (non-dedicated) DID if you prefer. Just route the non-matching CallerIDs to whatever context you traditionally use to process inbound calls. If the CallerID of the alarm system is matched, then the call is disconnected AND an outbound call is placed to 911. When the 911 operator answers, a prerecorded message is played at least twice that says something like this using REAL information:
This is an automated security request for assistance from the residence at 36 Elm Street in Podunck, Arkansas. The owner of this residence is Joe Schmo at phone number: 678-123-8888. An intruder has been detected inside the home. A suspected burglary is in progress. All of the residents of the home are unavailable to place this call. Please send the police.
The phone number from which this automated call is being placed is 678-123-4567. If the owners have a working cell phone, you can reach them at the following number: 678-123-9999. Please dispatch the police to 36 Elm Street immediately, whether you can reach the owners or not.
A suspected burglary is in progress. Thank you for your assistance. This message will repeat until you hang up…
You can either use Flite and Igor to play the message, or you can record your own message to be played to 911. Use the FreePBX® Admin -> System Recordings option. We recommend the latter especially since you’ll be sending these emergency calls to 911. You obviously want the 911 operator to be able to quickly decipher what’s being said.
Legal Disclaimer. We cannot stress strongly enough that you need to test this carefully on your own server by placing test calls to some number other than 911 until you are positive that it is working reliably as determined solely by you. Be advised that this system will not work at all in the event of an electrical, Internet, or server outage. As delivered, this code will NOT place calls to 911. The choice of whether to modify the code to place 911 emergency calls is solely yours to make. Be advised that false and inadvertent calls to 911 may result in civil and criminal penalties. DON’T BLAME US!
NO WARRANTIES, EXPRESS OR IMPLIED, INCLUDING THE IMPLIED WARRANTY OF FITNESS
FOR A PARTICULAR PURPOSE AND MERCHANTABILITY, ARE BEING PROVIDED.
BY PROCEEDING WITH IMPLEMENTATION AND INSTALLATION OF THIS SOFTWARE, YOU AGREE
TO ASSUME ALL RISK AND COMPLETE RESPONSIBILITY FOR ANY AND ALL CONSEQUENCES
OF IMPLEMENTATION WHETHER INTENDED OR NOT AND WHETHER IMPLEMENTED CORRECTLY
OR NOT. YOU ALSO AGREE TO HOLD WARD MUNDY, WARD MUNDY & ASSOCIATES LLC, AND
NERD VITTLES HARMLESS FROM ALL CLAIMS FOR ACTUAL OR CONSEQUENTIAL DAMAGES.
BEFORE IMPLEMENTING AUTOMATED 911 CALLS, CHECK WITH A LOCAL ATTORNEY TO MAKE
CERTAIN THAT SUCH CALLS ARE LEGAL IN YOUR JURISDICTION.
IN THE EVENT THAT ANY OF THESE TERMS AND CONDITIONS ARE RULED UNENFORCEABLE,
YOU AGREE TO ACCEPT $1.00 IN COMPENSATION FOR ANY AND ALL CLAIMS YOU MAY HAVE.
THIS SOFTWARE IS FREE AND YOU AGREE TO ASSUME ALL RISKS WHETHER INTENDED OR NOT.
YOU ALSO ACKNOWLEDGE AND UNDERSTAND THAT THINGS CAN GO WRONG IN TECHNOLOGY.
WE CANNOT AND DO NOT WARRANT THAT THIS CODE IS ERROR-FREE OR THAT IT WILL
PROTECT YOUR PROPERTY, YOUR LOVED ONES, OR ANYONE, OR ANY THING IN ANY WAY.
IF YOU DO NOT AGREE WITH THESE TERMS AND CONDITIONS OF USE, DO NOT PROCEED!
Asterisk Implementation. First, you’ll need a dedicated DID that can be used to receive incoming calls from your Remote Alert System. Hopefully, you won’t be receiving many calls on this number so any of the inexpensive pay-by-the-minute DIDs will suffice. Or you can use a free DID from ipkall.com. The only gotcha with ipkall.com is having to make a call to keep the number active at least once every 30 days. But this could be accomplished with a weekly telephone reminder that only connected for a few seconds. Just don’t make the weekly call using the CallerID of your alarm system. You obviously do not want to trigger a 911 emergency call.
Next, you’ll need an outbound trunk on your Asterisk server that’s previously been registered with E911 support and that already is configured to place outbound 911 calls from your server. Google Voice trunks will not work! Your name, address, and phone number as they were registered with E911 will be important pieces of information to relay in your automated emergency call to 911. You’ll also need a cellphone number that can be provided with your 911 calls so that emergency responders have a way to contact you to follow up on automated emergency calls from your server.
Temporarily, you’ll also need a 10-digit number to which to deliver the automated emergency calls for testing. Your cellphone number would suffice. Once you’re sure everything is working, we’ll show you how to modify the dial plan code to replace this number with 911 when your system goes "live."
Installation. Once you have all of the required pieces in place, you’re ready to begin the installation. Log into your server as root and issue the following commands to begin:
cd /root
wget http://nerdvittles.com/wp-content/st-remote-alert.tar.gz
tar zxvf st-remote-alert.tar.gz
rm -f st-remote-alert.tar.gz
./st-remote-alert.sh
Once the install is finished, use FreePBX to modify the DID Trunk that will receive the incoming alerts from your Remote Alert System. Change the context entry to: context=st-remote-alert
Test. Test. Test. Testing is critically important before you actually turn on automated calls to 911. Once you’ve installed the software, activate your Remote Alarm System and then trip the motion detector to trigger a call to the dedicated DID on your Asterisk server. There’s typically a 30-second delay between tripping a motion detector and the commencement of the alert calls. Within a minute, you should receive a call on the emergency number you set up for testing. You can follow the progress of the procedure using the Asterisk CLI: asterisk -rvvvvvvvvvv. We recommend testing this repeatedly for at least a month before even considering 911 deployment. Make certain that everyone in your household knows how to disable the alarm system when they return home after arming it. Make certain that everyone in your household knows to never arm the system with motion detectors activated when anyone or any animal inside the house could potentially trip the alarm. At least until everyone is accustomed to these new security procedures and has a proven (successful) track record, NEVER DEPLOY SILENT ARMING OF YOUR REMOTE ALERT SYSTEM! If you change to silent arming of the Remote Alert System, test for at least another full month with no inadvertent failures before considering 911 deployment.
Making Changes. The st-remote-alert.sh installer has been designed to let you run it over and over again to replace or update your settings. So don’t be shy about making changes.
Substituting a Personally Recorded Message. If you’d prefer to record your own message to be delivered to 911, then review the script above and make yourself a cheat sheet before you begin. Then use a browser to open FreePBX. Choose Admin -> System Recordings and enter an extension number on your system to use for recording. Click the Go button to begin. Then dial *77 from that extension and record your message. Press # when you’re finished. Be sure to listen to the recording to make sure it’s what you intended. If not, rerecord the message until you get it right. You can dial *99 to listen to your recording a final time. When you’re sure it’s correct, name the recording nv-alert. Click Save.
Now you need to tell the automated alert dialer to use your recorded message instead of Flite and Igor.
Edit /etc/asterisk/extensions_custom.conf. Search for the line containing "pickrecording". Change Extension: 4 to Extension: 5. Save the file and reload your dial plan: asterisk -rx "dialplan reload"
Do some additional testing if you have substituted your own recording!
Adding Audible Alarms During Emergencies. If you prefer a little noise sprinkled around your home during burglaries, then we’ve put in place the necessary components to sound alarms on SIP phones that support AutoAnswer after feeding an extension to the speakerphone. For example, assuming you have deployed a Yealink T46G with an IP address of 192.168.0.10 and default admin credentials, you could add this additional line just before the final s,n,Hangup line in the [st-remote-alert] context of /etc/asterisk/extensions_custom.conf:
exten => s,n,System(curl -s -S --user-agent "Alert" http://admin:admin@192.168.0.10/servlet?number=25276)
To add additional Yealink phones, just add additional lines to the dialplan with the IP address of each phone. For other phone models, you’ll need to do a little research. 😉
Going Live with Automated Emergency Calls to 911. When you and everyone in your household are absolutely comfortable with the arming, disarming, and motion detection procedures, then you can decide whether to reroute the automated notifications to 911. Be advised that, in some states or municipalities, it may be illegal to auto-dial 911 from a non-human caller/system. Before doing this, check with an attorney or local authorities in your jurisdiction to make sure you are in compliance with federal/state/local laws.1 If you elect to proceed, edit extensions_custom.conf in /etc/asterisk. Search for the line containing "SEND-HELP-REQUEST-TO". Replace the temporary number that you set up with the number: 911. Save the file and reload your dial plan: asterisk -rx "dialplan reload". Sleep well!
Originally published: Monday, July 14, 2014
 Support Issues. With any application as sophisticated as this one, you’re bound to have questions. Blog comments are a terrible place to handle support issues although we welcome general comments about our articles and software. If you have particular support issues, we encourage you to get actively involved in the PBX in a Flash Forums. It’s the best Asterisk tech support site in the business, and it’s all free! Please have a look and post your support questions there. Unlike some forums, ours is extremely friendly and is supported by literally hundreds of Asterisk gurus and thousands of users just like you. You won’t have to wait long for an answer to your question.

Need help with Asterisk? Visit the PBX in a Flash Forum.
Special Thanks to Our Generous Sponsors
FULL DISCLOSURE: ClearlyIP, Skyetel, Vitelity, DigitalOcean, Vultr, VoIP.ms, 3CX, Sangoma, TelecomsXchange and VitalPBX have provided financial support to Nerd Vittles and our open source projects through advertising, referral revenue, and/or merchandise. As an Amazon Associate and Best Buy Affiliate, we also earn from qualifying purchases. We’ve chosen these providers not the other way around. Our decisions are based upon their corporate reputation and the quality of their offerings and pricing. Our recommendations regarding technology are reached without regard to financial compensation except in situations in which comparable products at comparable pricing are available from multiple sources. In this limited case, we support our sponsors because our sponsors support us.
 BOGO Bonaza: Enjoy state-of-the-art VoIP service with a $10 credit and half-price SIP service on up to $500 of Skyetel trunking with free number porting when you fund your Skyetel account. No limits on number of simultaneous calls. Quadruple data center redundancy. $25 monthly minimum spend required. Tutorial and sign up details are here.
![]() The lynchpin of Incredible PBX 2020 and beyond is ClearlyIP components which bring management of FreePBX modules and SIP phone integration to a level never before available with any other Asterisk distribution. And now you can configure and reconfigure your new Incredible PBX phones from the convenience of the Incredible PBX GUI.
The lynchpin of Incredible PBX 2020 and beyond is ClearlyIP components which bring management of FreePBX modules and SIP phone integration to a level never before available with any other Asterisk distribution. And now you can configure and reconfigure your new Incredible PBX phones from the convenience of the Incredible PBX GUI.
 VitalPBX is perhaps the fastest-growing PBX offering based upon Asterisk with an installed presence in more than 100 countries worldwide. VitalPBX has generously provided a customized White Label version of Incredible PBX tailored for use with all Incredible PBX and VitalPBX custom applications. Follow this link for a free test drive!
 Special Thanks to Vitelity. Vitelity is now Voyant Communications and has halted new registrations for the time being. Our special thanks to Vitelity for their unwavering financial support over many years and to the many Nerd Vittles readers who continue to enjoy the benefits of their service offerings. We will keep everyone posted on further developments.
Some Recent Nerd Vittles Articles of Interest…
- Autodialers that make emergency calls to E911 as part of a burglar alarm system are specifically exempted in some states such as Illinois. This comports with federal law under The Telephone Consumer Protection Act (47 U.S.C. § 227). Emergency robocalls are specifically exempted from the new PSAP Do-Not-Call Registry rules. See also this article about E911 laws in the Northeast. In most cases, but not all, these laws target abuse of the E911 system. Surprisingly, one town that reportedly prohibits ALL autodialing to 911 is Palo Alto, CA. And Paris, Tennessee also has joined the illegal club. Special thanks to @TheMole on the PIAF Forum for his excellent research. [↩]
Free Asterisk Solutions
