
The Most Versatile VoIP Provider: FREE PORTING

 JUST RELEASED: Visit the Incredible PBX Wiki
Googlified Messaging: Asterisk’s New Best Friend
 Within the past few months, we've added several hundred million free phone numbers to our Asterisk® PBX by creating a Skype Gateway as well as Gizmo Backdoor Dialing and ENUM interfaces that didn't cost us a dime. And, today, we turn our attention to Google's recent transmogrification of GrandCentral into Google Voice. More specifically, what we want to do is examine some ways to integrate the Google Voice feature set into our existing Asterisk implementations. The potential benefits are enormous. There's free calling in the U.S., free distribution of inbound calls to multiple phone numbers scattered around the country, free SMS messaging and delivery by email, free transcription of voicemail messages into text-based emails, free conferencing, and free GOOG-411, a voice-activated service that let's you find nearby businesses by saying where you are and what you're looking for. For today, we've set our sights on the Google Voice feature set which is easiest to integrate into existing Asterisk systems: free voicemail message transcription, free calling in the United States, and free GOOG-411 directory assistance. For lack of a better term, we call it... Googlified Messaging™. 😉
Update: The original SIP interface to Google Voice described in this posting no longer works. A new approach that really works is now available on Nerd Vittles at this link.
Integrating Google Voice into Asterisk. If there is a recurring theme to Google Voice, it's this. Google Voice was designed to be a user-friendly, interactive messaging system. Google didn't intend to provide a telephony toolkit for Asterisk developers, but they haven't blocked any functionality either. There's no SIP connectivity in Google Voice... at least that is obvious. Can you spell G-I-Z-M-O? Well, that was the first hint. But a simple call trace revealed a lot more. It appears the entire Google Voice platform is SIP-based which makes it a perfect fit with Asterisk.
Because of the Google Voice design, there's no simple way to use your Google Voice DID for incoming call distribution while also integrating voicemail transcription and outbound calling into your Asterisk dialplan. Why? Because you can't take advantage of the free voicemail transcription service with Asterisk if Google Voice is sending inbound calls all over the countryside. So the real key to unlocking the greatness of Googlified Messaging is having two Google Voice accounts so that each can be used for a dedicated purpose. The first account will be used for outbound functions and voicemail transcription while the second is used to manage and route incoming calls. This is important because, for security reasons, you don't want to reveal your Google Voice number that is being used for outbound calling. Why? Because it is a SIP connection, and your Google Voice phone bill is only protected by a 4-digit PIN. If Google hasn't learned about Fail2Ban, they will soon. As this is written, multiple Google Voice accounts aren't possible unless you had more than one GrandCentral account since only GrandCentral users currently are eligible for Google Voice accounts. But that, too, will change!
For today, let's put aside the incoming call routing and concentrate on the remaining Googlified Messaging functionality. We turn first to Google Voice's free transcription of voicemail messages into text-based messages for email delivery to your desktop PC or cellphone.
Voicemail Transcription Overview. We begin with a cautionary note. Google's new automated voicemail transcription service is absolutely incredible... even if it's not quite perfect. We've tried a couple of messages to evaluate the transcription accuracy, and we'll let you judge for yourself.
Actual Message: "Hi. I was just passing through the airport. I hadn't seen you in a couple years, and I thought you might wanna get together for a quickie. Give me a call."
Googlified Transcription: "hi i was just passing through the airport i hadn't seen you in a couple years and i thought you might wanna get together for a quickie give me a call"
As you can see, the accuracy was pretty good. But there are a couple of problems. First, there's no CallerID name associated with inbound calls. So, if the caller doesn't identify himself or herself (especially if the caller is using a pay phone), you're S.O.L. relying on the transcription. But the message and phone number were accurate. It probably would motivate you to quickly connect to your email account and actually listen to the voicemail to decipher the caller's identity and avoid a missed opportunity. 🙂
Actual Message: "Hi. I've read over your corporate acquisitions and merger paper, and it isn't quite accurate with regard to our position."
Googlified Transcription: "hi i have a red over your corporate acquisitions in merger paper and it is a quite accurate with regard to our position"
This second example is a bit more problematic. The same issues apply from the first example. Plus there's a new wrinkle that could be a show stopper: the Googlification of "isn't quite accurate" into "it is a quite accurate." You'd better hope there was more to the message than this before running off to present your paper. It also highlights the difficulty that automated systems have when deciphering conjunctions such as "isn't" which often are used in conversational speech.
Some might suggest that this demonstrates the Google developers actually have their priorities in order. Get the kinks out of the sex jargon before focusing on exciting subject matter such as conjunctions. 🙄
Bottom Line: Googlified Messaging may be a boon to your sex life, but don't stake your job security on it just yet. Also make certain that your voicemail announcement includes a very emphatic request that callers actually identify themselves and leave a callback number where they can be quickly reached.
Google Voice Design. To integrate free voicemail transcription into Asterisk, what we first must do is turn your Google Voice account into a glorified answering machine and message distribution system. When calls arrive on your Google Voice number, they will immediately trigger a greeting message that says something like this:
Thank you for calling Nerd Vittles. No one is available at the moment to take your call. After the tone, please identify yourself, leave a callback number, and a brief message. Your message will be transcribed and delivered to us. We will get back to you promptly. Please begin speaking after the tone.
Once a voicemail message is received, we want Google Voice to transcribe it and email us both the voicemail message and the transcribed text.
Google Voice Setup. Log into your Google Voice account and click Settings, General. In the Voicemail Greeting section of the form, record your greeting message as outlined above. In the Notifications section, identify the email and SMS addresses for delivery of your voicemail messages. In Voicemail Transcripts, check the option to transcribe voicemails. Now click on the Do Not Disturb check box to forward all inbound calls to voicemail.
FreePBX Setup. Obviously there are numerous ways to integrate this transcription service into Asterisk. If you're using FreePBX, here are a couple of simple ways. First, create a Miscellaneous Destination for Google Voice and provide your Google Voice number in the correct format to match your dialplan. Next, if you use a Ring Group to answer incoming calls, choose your new Google Voice Miscellaneous Destination as the "Destination if no Answer." If you're using an IVR to route calls, then perhaps you'll want to add an option to leave a voicemail and have it transcribed for delivery to your email account.
HINT: For rerouting of Asterisk calls to Google Voice, be sure to use an outbound trunk that supports CallerID pass-through. And configure the trunk with a blank CallerID value in FreePBX. Then the actual CallerID of the incoming call will be passed along to Google Voice and stored as part of the voicemail message.
Connecting the Dots. For the visionaries in the audience, you're probably wondering what it would take to add language translation to transcription. So were we. It raises some interesting questions, and some of our early adopters already have tried it. Suffice it to say, it doesn't work yet. But it wouldn't take much effort to run a transcribed message through Google Translate and spit out a Spanish, French, or German message on the other end. Or vice versa: transcribe a German message and translate it into English for email delivery in an English-speaking country. Exciting times, indeed. Stay tuned!
Free U.S. Calls with Google Voice. At least for now, calls through Google Voice to phone numbers in the United States are free. And the rates are quite reasonable to other countries. It's a penny a minute to Canada and two cents a minute to many other countries whose names don't include the word "island." There are several ways to terminate calls through Google Voice with Asterisk. Here's the only way we've found to place outbound calls and also preserve the message transcription functionality.
Log into your Asterisk server as root and edit extensions_custom.conf in the /etc/asterisk folder. In the [from-internal-custom] context, add one or more entries for people you wish to call. Be sure to make the following substitutions to match your Google Voice credentials:
999 - Extension number to call
9876543210 - Your Google Voice DID
8888 - Your Google Voice PIN
1234567890 - Phone number of person to call
And here's the default entry which should be one continuous entry on one line:
exten =>999,1,Dial(SIP/9876543210@216.239.37.15:5061
,30,mD(wwwwwwwwwwww*ww8888ww2ww1234567890#))
When you finish making all the extension entries desired, save the file. Then reload your Asterisk dialplan: asterisk -rx "dialplan reload"
Google Dialer for Asterisk. Another approach for outbound calling with Google Voice would be to create a simple dialer in your Asterisk dialplan. The idea here is that anyone can pick up a phone and dial *GV (which is *48) to place a call. They then will be prompted to enter the 10-digit number to call. This code would be inserted in the same [from-internal-custom] context, and remember to insert your actual Google phone number and PIN in the dial string and keep the entire Dial command on a single line (which we can't do in this blog's template). Reload the Asterisk dialplan when you're finished.
exten => *48,1,Answer
exten => *48,n,Wait(1)
exten => *48,n,Set(TIMEOUT(digit)=15)
exten => *48,n,Set(TIMEOUT(response)=20)
exten => *48,n,Playback(pls-entr-num-uwish2-call)
exten => *48,n,Read(NUM2CALL,beep,10)
exten => *48,n,Playback(pls-wait-connect-call)
exten => *48,n,Dial(SIP/9876543210@216.239.37.15:5061
,30,mD(wwwwwwwwwwww*ww8888ww2ww${NUM2CALL}#))
exten => *48,n,Hangup
Outbound Trunk Alternative. Since the original article was published, our British colleague, Joe Roper, suggested that we also include instructions for configuring Google Voice as a dial-out trunk (instead of an extension) in Asterisk. The advantage of this approach is that outbound calls can be dialed in the traditional way without interaction with voice prompts. The solution we will outline below lets you place a call from any Asterisk phone by dialing the GV prefix plus a 10-digit number. So, to place a call to President Obama in Washington through Google Voice, you'd dial 48-202-456-1111. Good luck with that, but here's how...
First, log into your Asterisk server as root and edit extensions_custom.conf again. This time, go to the very bottom of the file and add the following code using your Google Voice phone number and PIN. Remember to expand the two-line dial string so it fits on a single line with no spaces! Save your changes and reload the dialplan.
[custom-google-voice]
exten => _X.,1,Dial(SIP/9876543210@216.239.37.15:5061
,30,rD(wwwwwwwwwwwwww*www8888www2wwww${EXTEN}#))
exten => _X.,n,Hangup
Next, open FreePBX with a web browser and choose Setup, Trunks, Add Custom Trunk. Insert the following Custom Dial String on the form and Submit Changes and reload the dialplan:
local/$OUTNUM$@custom-google-voice
Finally, choose Setup, Outbound Routes, Add Route and fill in the following entries on the form:
Route Name: GoogleVoice
Dial Pattern: 48|NXXNXXXXXX
Trunk Seq: local/$OUTNUM$@custom-google-voice
Save your changes and reload the Asterisk dial plan one more time to complete the setup. Now you're all set to call the President whenever the urge strikes: 48-202-456-1111. And, remember, it's a free call... at least for now.
Homework. Google also has introduced a slick new directory assistance service which also is free. We'll leave it to you to take the lesson above and create a GOOG-411 entry in your dialplan. HINT: You choose option 3 instead of option 2 after entering your PIN in the Google Voice menu. Enjoy!
Chapter 2. Google Voice: Is the SIP and Asterisk Honeymoon Over?
Chapter 3. The Return of Googlified Messaging With Free U.S. Calling
Special Thanks to Our Generous Sponsors
FULL DISCLOSURE: ClearlyIP, Skyetel, Vitelity, DigitalOcean, Vultr, VoIP.ms, 3CX, Sangoma, TelecomsXchange and VitalPBX have provided financial support to Nerd Vittles and our open source projects through advertising, referral revenue, and/or merchandise. As an Amazon Associate and Best Buy Affiliate, we also earn from qualifying purchases. We’ve chosen these providers not the other way around. Our decisions are based upon their corporate reputation and the quality of their offerings and pricing. Our recommendations regarding technology are reached without regard to financial compensation except in situations in which comparable products at comparable pricing are available from multiple sources. In this limited case, we support our sponsors because our sponsors support us.
 BOGO Bonaza: Enjoy state-of-the-art VoIP service with a $10 credit and half-price SIP service on up to $500 of Skyetel trunking with free number porting when you fund your Skyetel account. No limits on number of simultaneous calls. Quadruple data center redundancy. $25 monthly minimum spend required. Tutorial and sign up details are here.
![]() The lynchpin of Incredible PBX 2020 and beyond is ClearlyIP components which bring management of FreePBX modules and SIP phone integration to a level never before available with any other Asterisk distribution. And now you can configure and reconfigure your new Incredible PBX phones from the convenience of the Incredible PBX GUI.
The lynchpin of Incredible PBX 2020 and beyond is ClearlyIP components which bring management of FreePBX modules and SIP phone integration to a level never before available with any other Asterisk distribution. And now you can configure and reconfigure your new Incredible PBX phones from the convenience of the Incredible PBX GUI.
 VitalPBX is perhaps the fastest-growing PBX offering based upon Asterisk with an installed presence in more than 100 countries worldwide. VitalPBX has generously provided a customized White Label version of Incredible PBX tailored for use with all Incredible PBX and VitalPBX custom applications. Follow this link for a free test drive!
 Special Thanks to Vitelity. Vitelity is now Voyant Communications and has halted new registrations for the time being. Our special thanks to Vitelity for their unwavering financial support over many years and to the many Nerd Vittles readers who continue to enjoy the benefits of their service offerings. We will keep everyone posted on further developments.
Some Recent Nerd Vittles Articles of Interest...
A Baker’s Dozen Asterisk Nuggets from the Forums
 Whether you’re new to the Open Source VoIP Community or an old-timer, we wonder how many folks actually miss many of the terrific Asterisk® applications that are hidden in message threads on the various Asterisk forums around the globe. In honor of St. Patty’s Day, today we want to take a stroll through the PBX in a Flash forum just to demonstrate what you may be missing by not visiting the forums or subscribing to some of the better syndication feeds.
Skype Gateway to Asterisk. If you read our recent column on integrating a Skype gateway into your Asterisk server, good for you. But, if you missed the forum dialog which followed release of the article, you missed all sorts of enhancements and system integration tips which made the Skype gateway a much better fit on many systems.
CallerID Superfecta. One of the most perplexing issues facing those that implement VoIP telephony solutions is wrestling with CallerID issues which flow from the ongoing Baby Bell phonebook monopoly. Many of you may have tried our CallerID Superfecta application which provides CallerID lookups for FreePBX-based systems using AsteriDex, Google Phonebook, AnyWho, and WhitePages. But, if you’d explored the forum additions to CallerID Superfecta, you would have uncovered an incredibly slick FreePBX installer as well as support for WhoCalled.us and Telcodata plus SugarCRM as well as numerous fixes for syntax changes on the various lookup sources.
Faxing with Asterisk. Other than CalleriD, there’s probably no issue that generates more consternation in the Asterisk community than fax integration. We reintroduced nvfax for Asterisk 1.4 recently. But, if you’d been following the forums, you’d also know that HylaFax and AvantFax now can be easily integrated into PBX in a Flash thanks to the work of Joe Roper and Tony Shiffer.
A2Billing for Asterisk. Another application that’s been difficult to get working with Asterisk has been A2Billing, a sophisticated calling card and PBX billing system. There really never has been a clear, concise cookbook for getting the software installed and properly configured. Once again, thanks to Joe and Tony, this forum thread provides a step-by-step tutorial for getting every facet of A2Billing installed and properly configured.
Asterisk Stickies. This is another promising Asterisk web application for PBX in a Flash that pops up stickies when incoming calls are received. You then can add the contact to your phonebook and also generate the XML code to update the phone directory on Grandstream and Cisco phone sets. It also supports click-to-dial from the web interface. You can keep up with the progress of this developing application in this very active message thread.
Text-to-Speech FreePBX Module. Just today a new TTS module for FreePBX was introduced which lets you generate TTS announcements for use with any FreePBX-based Asterisk system.
Overhead Paging with Asterisk 1.4. Most workplaces need some sort of overhead paging system. With the tips in this thread and any Asterisk 1.4 server, it’s incredibly easy to implement.
Streaming Music on Hold. We introduced streaming audio for Asterisk over three years ago in the Asterisk 1.2 days. A new message thread has updated that technology to support Internet radio using any Asterisk 1.4 server.
Email Alerts on Trunk Failures. For those that rely upon Asterisk systems to do real work, it’s essential to know when access to your carrier has failed so that you can make adjustments to your outbound and inbound trunks. This thread provides a simple tutorial and script to get you started.
Outbound Emails with Asterisk and SendMail. Another one of our Top 5 most perplexing problems with Asterisk is getting an outbound email capability with SendMail working reliably. Part of this is the configuration hassles with SendMail. But service providers such as Comcast have made matters worse by blocking outbound access to port 25 on most non-business accounts. Here’s a message thread that will walk you through configuring SendMail to use Gmail as your outbound SMTP relay host, and you’ll never have an email problem again on your Asterisk server.
Voicemail Notification. Unified messaging may be everyone’s dream but the reality is that it would be nice to be called on your cellphone when a new voicemail arrived at your office. The Voicemail Notification System does just that. And this thread integrates the original design into a FreePBX module.
Configuration Editor for FreePBX. FreePBX stores much of its magic in Asterisk config files. At least in PBX in a Flash, we hide some of these files to protect the integrity of your system. In addition, changes made to some of these files will get overwritten the next time FreePBX is started since it populates a lot of the information in these config files from data stored in MySQL tables. For those that want to learn more about the FreePBX, there now is a configuration file editor which will let you view and edit any FreePBX config file on your system. You’ll find a complete tutorial in the forums.
Hotel-Style Wakeup Calls. A few weeks ago we covered Tony Shiffer’s new add-on module for FreePBX that provides hotel-style wakeup calls for Asterisk systems. This code actually had been available in the forum for several months and is yet another reason to frequently check the new message threads.
Mac OS X Scripting Package. Since publication, a new link to a Treasure Trove of Goodies for Mac OS X has been posted including a link to the new Mac OS X Scripting Package and Asterisk binaries for Mac OS X from Sven Slezak at Mezzo.
Syndication Syntax. Many forums provide a syndication feed link, but many do not. For vBulletin-based forums, the basic syntax for an RSS feed looks like this:
http://fqdn.com/forum/external.php
You can refine the type of feed you want by specifying the type: RSS, RSS2, ATOM, or XML. For example, to pull down a feed from the PBX in a Flash forum, here’s the syntax for the various formats that are supported:
http://pbxinaflash.com/forum/external.php?type=RSS
http://pbxinaflash.com/forum/external.php?type=RSS2
http://pbxinaflash.com/forum/external.php?type=ATOM
http://pbxinaflash.com/forum/external.php?type=XML
You can further refine the feed by narrowing it down to a particular forum of interest. For example, to retrieve the latest threads from the PBX in a Flash Open Discussion forum, the syntax looks like this:
http://pbxinaflash.com/forum/external.php?type=RSS2&forumids=2
Finally, here’s the list of forum ID numbers for the PBX in a Flash forum:
2 – Open Discussion
3 – Help
4 – Endpoints
5 – Trunks
6 – Providers
7 – Wish List
9 – Bug Reporting & Fixes
10 – Add-On Install Instructions
Something We Missed? There are hundreds of additional Asterisk apps hiding in the woodwork. Please share your discoveries by posting a comment and link below. Enjoy!
 Want a Bootable PBX in a Flash Drive? Our Atomic Flash bootable USB flash installer for PBX in a Flash has been quite the hit. Special thanks to all of our generous contributors! Atomic Flash provides all of the goodies in the VPN in a Flash system featured last month on Nerd Vittles. You can build a complete turnkey system using almost any current generation PC with a SATA drive and this USB flash installer in less than 15 minutes!
If you’d like to put your name in the hat for a chance to win a free one delivered to your door, just post a comment with your best PBX in a Flash story.1
Be sure to include your real email address which will not be posted. The winner will be chosen by drawing an email address out of a hat (the old fashioned way!) from all of the comments posted over the next several weeks.
And it still isn’t too late to make a contribution of $50 or more to the PBX in a Flash project and get a free Atomic Flash installer delivered to your door as our special thank you gift. See this Nerd Vittles article for details.
Special Thanks to Our Generous Sponsors
FULL DISCLOSURE: ClearlyIP, Skyetel, Vitelity, DigitalOcean, Vultr, VoIP.ms, 3CX, Sangoma, TelecomsXchange and VitalPBX have provided financial support to Nerd Vittles and our open source projects through advertising, referral revenue, and/or merchandise. As an Amazon Associate and Best Buy Affiliate, we also earn from qualifying purchases. We’ve chosen these providers not the other way around. Our decisions are based upon their corporate reputation and the quality of their offerings and pricing. Our recommendations regarding technology are reached without regard to financial compensation except in situations in which comparable products at comparable pricing are available from multiple sources. In this limited case, we support our sponsors because our sponsors support us.
BOGO Bonaza: Enjoy state-of-the-art VoIP service with a $10 credit and half-price SIP service on up to $500 of Skyetel trunking with free number porting when you fund your Skyetel account. No limits on number of simultaneous calls. Quadruple data center redundancy. $25 monthly minimum spend required. Tutorial and sign up details are here.
![]() The lynchpin of Incredible PBX 2020 and beyond is ClearlyIP components which bring management of FreePBX modules and SIP phone integration to a level never before available with any other Asterisk distribution. And now you can configure and reconfigure your new Incredible PBX phones from the convenience of the Incredible PBX GUI.
The lynchpin of Incredible PBX 2020 and beyond is ClearlyIP components which bring management of FreePBX modules and SIP phone integration to a level never before available with any other Asterisk distribution. And now you can configure and reconfigure your new Incredible PBX phones from the convenience of the Incredible PBX GUI.
VitalPBX is perhaps the fastest-growing PBX offering based upon Asterisk with an installed presence in more than 100 countries worldwide. VitalPBX has generously provided a customized White Label version of Incredible PBX tailored for use with all Incredible PBX and VitalPBX custom applications. Follow this link for a free test drive!
Special Thanks to Vitelity. Vitelity is now Voyant Communications and has halted new registrations for the time being. Our special thanks to Vitelity for their unwavering financial support over many years and to the many Nerd Vittles readers who continue to enjoy the benefits of their service offerings. We will keep everyone posted on further developments.
Some Recent Nerd Vittles Articles of Interest…
- This offer does not extend to those in jurisdictions in which our offer or your participation may be regulated or prohibited by statute or regulation. [↩]
Introducing PBX in a Flash 1.4: The Lean, Mean Asterisk Machine
It's almost spring. So what better time to introduce version 1.4 of PBX in a Flash. It's chock full of new telephony goodies to whet your appetite for Internet Telephony. Tom King has worked his usual Magic™ to come up with a pair of new ISOs that are nothing short of spectacular. Not only is PBX in a Flash leaner and meaner, but it's now incredibly flexible and even easier to use.
You don't get the kitchen sink in PBX in a Flash ISOs. Instead you get a rock-solid CentOS 5.2 operating system with the latest CentOS kernel on which to build an Internet telephony server that meets your specific needs. Want a 64-bit operating system? We've got it. Prefer to stick with a 32-bit operating system? We've got you covered there, too. Want to experiment with Asterisk® 1.6 and DAHDI? We've got it. Prefer to stick with Asterisk 1.4 and Zaptel for a production environment? No problem. Do you prefer LVM, ext3, or SATA RAID for your disk drives? Well, take your pick. PBX in a Flash 1.4 now supports all of them. For those with a physical handicap, you now can install the complete system with no user intervention by typing ksauto at the first prompt. And, for PBX in a Flash development partners, we've got a 2-CD install set that makes generation of multiple systems with minimal Internet access a reality.
A Better Mousetrap. Asterisk-based LAMP aggregations thankfully are more plentiful today, but we think we have a better mousetrap. Here are a few reasons why? First, PBX in a Flash is the only distribution that is totally source-based with Asterisk compiled from source as part of the install. What that means is when you purchase add-on hardware and it has a problem for some reason, all of the tools are already in place for you to contact the manufacturer or reseller and have them reconfigure or recompile whatever is necessary on your system to get you back in business quickly. It also means that most of our applications are compiled from source on your specific hardware which assures a more reliable and stable software platform on which to build your telephony system.
Second, we don't release PBX in a Flash ISOs every other week. We don't have to. Every time a new security patch is released for Asterisk, the "other guys" have to create a new RPM or ISO to support it. That means your system is vulnerable for weeks or months while that process is underway. In some cases, it means installing a new ISO and starting over. I wish I had a nickel for every time I reinstalled and basically started over with Asterisk@Home or trixbox. With PBX in a Flash, you simply type update-source at the command prompt and your system is brought current without missing a beat. The total downtime for your system is typically under 15 minutes!
Third, PBX in a Flash uses a two-step install process that all but eliminates the ISO obsolescence issues that have plagued other distributions. The PBX in a Flash ISO is used to install either the 32-bit or the 64-bit CentOS 5.2 operating system and kernel. When that process completes, the installer then searches multiple sites on the Internet for our "payload file" which contains the latest, greatest version of Asterisk which is compiled on-the-fly. The payload script also installs FreePBX and many of the customized features that make PBX in a Flash unique. If you need additional functionality, we have an entire web site, pbxinaflash.org, dedicated to add-on scripts. Most of these add-on scripts install without user intervention in under a minute. So... install what you need and skip the BloatWare. Using this design, most bugs are eliminated as well without your having to do much of anything. Translation: More time to enjoy your production-quality VoIP PBX... and less all-nighters!
So today we're proud to introduce the 1.4 release of PBX in a Flash for Linux, Windows, and Macs. It's still the Lean, Mean Asterisk Machine designed to meet the needs of hobbyists as well as business users. Text-to-speech works, Bluetooth works, faxing works. FreePBX 2.5 is rock-solid and much more secure.
And, speaking of security, PBX in a Flash is the only distribution that brings you multiple layers of security out of the box. There's the preconfigured Linux IPtables firewall. And, in addition, there's the latest and greatest version of Fail2Ban which blocks malicious intruders attempting to guess your passwords and break into your system. We also recommend adding a hardware-based firewall/router to block HTTP access to your system unless you really know what you're doing. Does all of this matter? Well, it's your phone bill. Here's a link to our article about a company that recently received an unexpected $120,000 phone bill in the mail. So you decide. If you read nothing else before embarking on your VoIP adventure, read our Primer on Asterisk Security!
As some of our regular readers know, we have been very concerned with the Asterisk development strategy that continues the process of regularly deleting commands and syntaxes with each major version change. Many of us rely upon these commands in building dialplans and vertical market applications for Asterisk so it causes real problems. PBX systems break that used to work. When that happens almost annually, it's a bad thing. One way that we hope to improve the dialogue with the developers is to make it easy for more people to experiment with Asterisk 1.6. Whether you choose our 32-bit or 64-bit ISO, you also have the option to install the latest release of Asterisk 1.6 and get you involved in this process. Otherwise, we might as well look forward to annual train wrecks because of the Asterisk design strategy. You can read all about it here and here.
Getting Started with PBX in a Flash 1.4. Begin by downloading either the 32-bit or 64-bit ISO image for PBX in a Flash. Don't worry. If you try to run the 64-bit install on a system that doesn't support it, it'll just sit there so you've got nothing to lose by trying the Ferrari first. As new locations for ISO downloads come on line, we will add them to the download list. Once you've got the ISO image in hand, use your favorite tool to burn it to a bootable CD. This next step is the most important. Do some reading!! There also are loads of helpful tutorials that are free for the downloading from our support site.
What About Hardware? If you're new to all of this, let us recommend you try either one of Dell's entry-level T100 or T105 PowerEdge servers or one of the newer Intel Atom-based small-footprint PCs or netbooks such as the Acer Aspire One. On sale pricing is typically around $300. You can save an additional 2% plus $5 by using our coupon link in the right margin. These systems are just about perfect for a home or small business telephony server.
Basic Install. Once you have your new system, just insert the CD containing the pbxinaflash.iso and then reboot the machine you wish to dedicate to PBX in a Flash. After reading this tutorial and the initial prompts and warnings, choose an option and press the <Enter key> to begin the installation. If you want to first check the media for corruption, type linux mediacheck and then press the <Enter> key. When prompted, be sure to choose the option that erases all existing partitions and uses the default partition layout. Then choose your time zone and leave the UTC system clock option unchecked. Next choose a root password for your new system. Make it secure, and write it down (not on your shoe). We plan to use this password for virtually everything on your new system. The install process begins. This includes MySQL, Apache, PHP, CUPS, Samba, WebMin, Subversion, SendMail, Yum, Bluetooth support, SSL, Perl, Python, the kernel development package, and much more. In about 15 minutes depending upon the speed of your PC, the machine will reboot. Be sure to eject the CD at this point. You now must have an Internet connection to complete the install so be sure you've plugged in a 10/100 cable if you haven't done so already.
After the reboot, the system will start up with CentOS 5.2, then download and install Asterisk and FreePBX, and search for the necessary installation script and payload file on pbxinaflash.net. If that site happens to be down, the script will go to pbxinaflash.com for the same payload file. Just to repeat, if you don't have Internet connectivity, then the installation cannot complete. When the installation finishes, reboot your system and log in as root. The IP address of your PBX in a Flash system will be displayed once you log in. If it's blank, type service network restart after assuring that you have Internet connectivity and access to a DHCP server that hands out IP addresses. Typing ifconfig should display your IP address on the eth0 port. Write it down. We'll need it in a minute.
Now that you've logged in as root, you should see the IP address displayed with the following command prompt: root@pbx:~/. If instead you see bash displayed as the command prompt and it's not green, then the installation has not completed successfully. This is probably due to network problems but also could be caused by the time being set incorrectly on your server. You can't compile Asterisk if the time on your computer is a date in the past! For this glitch you have to try again. If it's a network issue, fix it and then reboot and watch for the eth0 connection to complete. Assuming it doesn't fail the second time around, the installation will continue. Likewise, if you do not have DHCP on your network, the installation will fail because the PBX will not be given an IP address. Simply type netconfig, fill in the blanks and reboot.
Four Steps to Complete the Install. There are four important things to do to complete the installation. First, from the command prompt, run genzaptelconf. This sets up your ZAP hardware as well as a timing source for conferencing. If you're using additional hardware for your Asterisk system, we recommend removing the 56K modem when you install the cards. This will help avoid interrupt conflicts. Second, decide how to handle the IP address for your PBX in a Flash server. The default is DHCP, but you don't want the IP address of your PBX changing. Phones and phone calls need to know how to find your PBX, and if your internal IP address changes because of DHCP, that's a problem. You have two choices. Either set your router to always hand out the same DHCP address to your PBX in a Flash server by specifying its MAC address in the reserved IP address table of your router, or run netconfig at the command prompt and assign a permanent IP address to your server. Be aware that netconfig no longer is a part of CentOS 5.2. We added it back in as part of the install. If you update your CentOS configuration, you will need to reinstall it by running update-scripts, then update-fixes, and then install-netconfig. If you experience problems with the process, see this message thread on the forum. The third configuration requirement probably accounts for more beginner problems with Asterisk systems than everything else combined. Read the next section carefully and do it now!
Getting Rid of One-Way Audio. There are some settings you'll need to add to /etc/asterisk/sip_custom.conf if you want to have reliable, two-way communications with Asterisk: nano -w /etc/asterisk/sip_custom.conf. The entries depend upon whether your Internet connection has a fixed IP address or a DHCP address issued by your provider. In the latter case, you also need to configure your router to support Dynamic DNS (DDNS) using a service such as dyndns.org. If you have a fixed IP address, then enter settings like the following using your actual public IP address and your private IP subnet:
externip=180.12.12.12

localnet=192.168.1.0/255.255.255.0
If you have a public address that changes and you're using DDNS, then the settings would look something like the following:
externhost=myserver.dyndns.org

localnet=192.168.0.0/255.255.255.0
(NOTE: The first 3 octets in the above localnet entries need to match your private IP addresses!)
Once you've made your entries, save the file: Ctrl-X, Y, then Enter. Reload Asterisk: amportal restart. If you assigned a permanent IP address, reboot your server: shutdown -r now.
Be aware that some people experience problems with the externhost approach outlined above. If your provider only gives you a dynamic IP address, you still can use the externip approach above so long as you have a method to frequently verify your IP address. The approach we actually use on our home network is to run a little script every 5 minutes. If it finds that your outside IP address has changed, it will automatically update your sip_custom.conf file with the new address. To use our approach, create a file in /var/lib/asterisk/agi-bin names ip.sh. Here's the code:1
#!/bin/bash

# File to log the IP Address

IPFILE='/var/log/asterisk/externip'

# Your local lan ip block

localnet=192.168.1.0

# Nothing else needs to be changed.

if [ ! -f "$IPFILE" ]; then

        echo "creating $IPFILE"

        echo first_time_usage > $IPFILE

fi

lastip=`cat $IPFILE`

externip=$(curl -s -S --user-agent "PIAF 1.4"↩
 http://myip.pbxinaflash.com | awk 'NR==2')

if [ $externip != $lastip ]; then

        # Writes new IP address (if it has changed) to file.

        echo "$externip" > $IPFILE

        echo "externip=$externip" > /etc/asterisk/sip_custom.conf

        echo "localnet=$localnet/255.255.255.0" >>↩
 /etc/asterisk/sip_custom.conf

        echo "srvlookup=yes" >> /etc/asterisk/sip_custom.conf

        echo "nat=yes" >> /etc/asterisk/sip_custom.conf

        asterisk -rx "dialplan reload" ;

else

        exit 0;

fi

exit;
On line 5, enter the internal subnet for your server as the localnet entry. This is usually 192.168.0.0 or 192.168.1.0. YMMV!
Save the file and give it execute permissions: chmod +x /var/lib/asterisk/agi-bin/ip.sh. Then make asterisk the file owner: chown asterisk:asterisk /var/lib/asterisk/agi-bin/ip.sh.
Finally, add the following entry to the bottom of /etc/crontab:
*/5 * * * * asterisk /var/lib/asterisk/agi-bin/ip.sh > /dev/null
Getting Your Machine Up to Date. Tom King, one of our lead developers, has gone to great pains to make it easy for you to always have a current system. All you have to do is type a few commands, but you do have to type them. So do it now! After logging in as root, type update-scripts to get the latest PBX in a Flash scripts installed on your system. This doesn't run them, it merely makes them available for you to run them. Once you complete this step, you can always review the latest scripting options by typing help-pbx. Now run update-fixes to apply the latest patches to your PBX in a Flash system. When it completes, you're up to date. If you want the latest version of Asterisk, it's easy! Just run update-source. In the case of PBX in a Flash 1.4, you have the latest stable version of Asterisk 1.4 or 1.6... at least for today.
Activating Email Delivery of Voicemail Messages. We've previously shown how to configure systems to reliably deliver email messages whenever a voicemail arrives unless your ISP happens to block downstream SMTP mail servers. Here's the link in case you need it. As it happens, you really don't have to use a real fully-qualified domain name to get this working. So long as the entry (such as pbx.dyndns.org) is inserted in both the /etc/hosts file and /etc/asterisk/vm_general.inc with a matching servermail entry of vm@pbx.dyndns.org (as explained in the link above), your system will reliably send emails to you whenever you get a voicemail if you configure your extensions in FreePBX to support this capability. You can, of course, put in real host entries if you prefer. For 90% of the systems around the world, if you just want your server to reliably e-mail you your voicemail messages, make line 3 of /etc/hosts look like this with a tab after 127.0.0.1 and spaces between the domain names:
127.0.0.1 pbx.dyndns.org pbx.local pbx localhost.localdomain localhost
And then make line 6 of /etc/asterisk/vm_general.inc look like the following:
serveremail=voicemail@pbx.dyndns.org
Now issue the following two commands to make the changes take effect:
service network restart

amportal restart
The command "setup-mail" can be used from the Linux prompt to set the fully-qualified domain name (FQDN) of the mail that is sent out from your server. This may help mail to be delivered from the PBX. One of things mail servers do to reduce spam is to do a reverse lookup on where the mail has come from, checking that there is actually a mailserver at the other end. You can only do this if you have set up dynamic DNS or if you have pointed a hostname at your fixed IP address. Once you have done this, and assuming your ISP is cooperative, then you will receive your voicemails via email if you wish (this is set within FreePBX),and your PBX will email you when FreePBX needs an update. You set this feature in FreePBX General Settings.
If your hosting provider blocks downstream SMTP servers to reduce spam, here's a simple way to use your Gmail account (free!) as your SMTP Relay Host. Then you never have to worry about this again!
Setting Passwords and Other Stuff. Be aware that major security issues are reported from time to time with FreePBX. We strongly recommend that you not use FreePBX admin security alone to protect your system from a web attack. It may compromise root access to your entire server. For this reason, we recommend that you log in as root and immediately run passwd-master after completing the update-scripts and update-fixes scenario. This establishes Apache htaccess security on your FreePBX web interface. After running this conversion utility, you can only log into the FreePBX admin interface with the username maint (not admin) and the password which you establish when you run the utility.
Other passwords can be set in your system with these commands:
passwd... reset your root user password

passwd-maint... reset your FreePBX maint password

passwd-wwwadmin... for users needing FOP and MeetMe access

passwd-meetme... for users needing only MeetMe access

passwd-webmin... for users needing WebMin access to your server (very dangerous!)
There's also an Administration password that you can set in the KennonSoft UI that displays when you point your browser to the IP address of your server. Do NOT use the same password here that you use elsewhere as it is not overly secure.
Configuring WebMin. WebMin is the Swiss Army Knife of Linux. It provides TOTAL access to your system through a web interface. Search Nerd Vittles for webmin if you want more information. Be very careful if you decide to enable it on the public Internet. You do this by opening port 9001 on your router and pointing it to the private IP address of your PBX in a Flash server. Before using WebMin, you need to set up a username and password for access. From the Linux prompt while logged in as root, type the following command where admin is the username you wish to set up and foo is the password you've chosen for the admininstrator account. HINT: Don't use admin and foo as your username and password for WebMin unless you want your server trashed!
/usr/libexec/webmin/changepass.pl /etc/webmin root password
To access WebMin on your private network, go to http://192.168.0.123:9001 where 192.168.0.123 is the private IP address of your PBX in a Flash server. Then type the username and password you assigned above to gain entry. To stop WebMin: /etc/webmin/stop. To start WebMin: /etc/webmin/start. For complete documentation, go here.
Updating and Configuring FreePBX. FreePBX 2.5 is installed as part of the PBX in a Flash 1.4 implementation. This incredible, web-based tool provides a complete menu-driven user interface to Asterisk. The entire FreePBX project is a model of how open source development projects ought to work. And having Philippe Lindheimer's as the Captain of the Ship is just icing on the cake. All it takes to get started with FreePBX is a few minutes of configuration, and you'll have a functioning Asterisk PBX complete with voicemail, music on hold, call forwarding, and a powerful interactive voice response (IVR) system. There is excellent documentation for FreePBX which you should read at your earliest convenience. It will answer 99% of your questions about how to use and configure FreePBX. For the one percent that is not covered in the Guide, visit the FreePBX Forums which are frequented regularly by the FreePBX developers. Kindly post FreePBX questions on their forum rather than the PBX-in-a-Flash Forum. This helps everybody. Now let's get started.
NOTE: PBX in a Flash comes with the IPtables firewall enabled on your system. If this causes problems with access to the FreePBX repository (for loading the FreePBX updates below), you can easily (and temporarily) turn off the firewall. Type help-pbx for assistance. Don't forget to restart the firewall especially if your system has any Internet exposure!
Now move to a PC or Mac and, using your favorite web browser, go to the IP address you deciphered above for your new server. Be aware that FreePBX has a difficult time displaying properly with IE6 and IE7 and regularly blows up with older versions of Safari. Be safe. Use Firefox. From the PBX in a Flash Main Menu in your web browser, click on the Administration link and then click the FreePBX button. The username and password both default to admin. Click Apply Configuration Changes, Continue with Reload, and then Refresh your browser screen. Now click the Module Administration option in the left frame once FreePBX loads. Now click Check for Updates online in the upper right panel. Next, click Download All which will select every module for download and install. The important step here is to move down the list and Deselect Speed Dials and PHPAGI from the download and install options. Once these apps have been deselected, scroll to the bottom of the page and click Process, then Confirm, then Return once the apps are downloaded and installed, then Apply, then Continue with Reload. Now repeat the process once more and do not deselect the two applications, then Process, Confirm, Return, Apply Config Changes, and Continue with Reload. Finally, scroll down the Modules listing until you get to the Maintenance section. Click on each of the following and choose Install: ConfigEdit, Sys Info, and phpMyAdmin. Then click Process, then Confirm, then Return once the apps are downloaded and installed, then Apply, then Continue with Reload. All three of these tools now are installed in the Maintenance section of the Tools tab of FreePBX. One final step, and you're good to go. An update of FreePBX has been released. Click Check for Updates online. Then choose Download and Upgrade for the Core, FreePBX Framework, and System Dashboard modules. Then click Process, then Confirm, then Return once the apps are downloaded and installed, then Apply, then Continue with Reload. You now have an up-to-date version of FreePBX. You'll need to repeat the drill every few weeks as new updates are released. This will assure that you have all of the latest and greatest software. To change your Admin password, click on the Setup tab in the left frame, then click Administrators, then Admin in the far right column, enter a new password, and click Submit Changes, Apply Configuration Changes, and Continue with reload. We're going to be repeating this process a number of times in the next section so... when instructed to Save Your Changes, that means "click Submit Changes, Apply Configuration Changes, and Continue with reload."
Choosing Internet Telephony Hosting Providers for Your System. Before you can place calls to users outside your system or to receive incoming calls, you'll need at least one provider (each) for your incoming phone number (DID) and incoming calls as well as a provider for your outbound calls (terminations). We have a list of some of our favorites here, and there are many, many others. You basically have two choices with most providers. You can either pay as you go or sign up for an all-you-can-eat plan. Most of the latter plans also have caps on minutes so it's more akin to all-they-care-for-you-to-eat, and there are none of the latter plans for business service. In the U.S. market, the going rate for pay as you go service is about 1.5¢ per minute rounded to the tenth of a minute. The best deal on DIDs is from Vitelity. They charge $3.99 a month for a DID with unlimited, free incoming calls. There's a link to the Nerd Vittles discount on this service for PBX in a Flash users below.
Before you sign up for any all-you-can-eat plan, do some reading about the service providers. Some of them are real scam artists with backbilling and all sorts of unconscionable restrictions. You need to be careful. Our cardinal rule in the VoIP Wild West is never, ever entrust your entire PBX to a single hosting provider. As Forrest Gump would say, "Stuff happens!" And life's too short to have dead telephones, even if it's a rarity.
Setting Up FreePBX to Make Your First Call. There are four components in FreePBX that need to be configured before you can place a call or receive one from outside your PBX in a Flash system. So here's FreePBX for Dummies in less than 50 words. You need to configure Trunks, Extensions, Outbound Routes, and Inbound Routes. Trunks are hosting provider specifications that get calls delivered to and transported from your PBX to the rest of the world. Extensions are internal numbers on your PBX that connect your PBX to telephone hardware or softphones. Inbound Routes specify what should be done with calls coming in on a Trunk. Outbound Routes specify what should be done with calls going out to a Trunk. Everything else is bells and whistles.
Trunks. When you sign up with most of the better ITHP's that support Asterisk, they will provide documentation on how to connect their service with your Asterisk system. If they have a trixbox tutorial, use that since it also uses FreePBX as the web front end to Asterisk. Here's an example from les.net. And here's the Vitelity support page although you will need to set up an account before you can access it. We also have covered the setups for a number of providers in previous articles. Just search the Nerd Vittles site for the name of the provider you wish to use. You'll also find many Trunk setups in the trixbox Trunk Forum. Once you find the setup for your provider, add it in FreePBX by going to Setup, Trunks, Add SIP Trunk. Our AxVoice setup (which is all entered in the Outgoing section with a label of axvoice) looks like this with a Registration String of yourusername:yourpassword@sip.axvoice.com:
allow=ulaw

authname=yourusername

canreinvite=no

context=all-incoming

defaultip=sip.axvoice.com

disallow=all

dtmfmode=inband

fromdomain=sip.axvoice.com

fromuser=yourusername

host=sip.axvoice.com

insecure=very

nat=yes

secret=yourpassword

type=friend

user=phone

username=yourusername
And our Vitelity Outbound Trunk looks like the following (labeled vitel-outbound) with no registration string:
allow=ulaw&gsm

canreinvite=no

context=from-pstn

disallow=all

fromuser=yourusername

host=outbound1.vitelity.net

secret=yourpassword

sendrpid=yes

trustrpid=yes

type=friend

username=yourusername
Extensions. Now let's set up a couple of Extensions to get you started. A good rule of thumb for systems with less than 50 extensions is to reserve the IP addresses from 192.x.x.201 to 192.x.x.250 for your phones. Then you can create extension numbers in FreePBX to match those IP addresses. This makes it easy to identify which phone on your system goes with which IP address and makes it easy for end-users to access the phone's GUI to add bells and whistles. To create extension 201 (don't start with 200), click Setup, Extensions, Generic SIP Device, Submit. Then fill in the following blanks USING VERY SECURE PASSWORDS and leaving the defaults in the other fields for the time being.
User Extension ... 201
Display Name ... Home
Outbound CID ... [your 10-digit phone number if you have one; otherwise, leave blank]
Emergency CID ... [your 10-digit phone number for 911 ID if you have one; otherwise, leave blank]
Device Options
secret ... 1299864 < -- make this unique AND secure! dtmfmode ... rfc2833 Voicemail & Directory ... Enabled voicemail password ... 1299864 <-- make this unique AND secure! email address ... yourname@yourdomain.com [if you want voicemail messages emailed to you] pager email address ... yourname@yourdomain.com [if you want to be paged when voicemail messages arrive] email attachment ... yes [if you want the voicemail message included in the email message] play CID ... yes [if you want the CallerID played when you retrieve a message] play envelope ... yes [if you want the date/time of the message played before the message is read to you] delete Vmail ... yes [if you want the voicemail message deleted after it's emailed to you] vm options ... callback=from-internal [to enable automatic callbacks by pressing 3,2 after playing a voicemail message] vm context ... default
Now create several more extensions using the template above: 202, 203, 204, and 205 would be a good start. Keep the passwords simple. You'll need them whenever you configure your phone instruments.
Extension Security. We cannot overstress the need to make your extension passwords secure. All the firewalls in the world won't protect you from malicious phone calls on your nickel if you use your extension number or something like 1234 for your extension password because the SIP and IAX ports typically are exposed to allow connections to your providers. In addition to making up secure passwords, the latest version of FreePBX also lets you define the IP address or subnet that can access each of your extensions. Use it!!! Once the extensions are created, edit each one and modify the permit field to specify the actual IP address or subnet of each phone on your system. A specific IP address entry should look like this: 192.168.1.142/255.255.255.255. If most of your phones are on a private LAN, you may prefer to use a subnet entry like this: 192.168.1.0/255.255.255.0 using your actual subnet, of course.
Outbound Routes. The idea behind multiple outbound routes is to save money. Some providers are cheaper to some places than others. We're going to skip that tutorial today. You can search the site for lots of information on choosing providers. Assuming you have only one or two for starters, let's just set up a default outbound route for all your calls. Using your web browser, access FreePBX on your server and click Setup, Outbound Routes. Enter a route name of Everything. Enter the dial patterns for your outbound calls. In the U.S., you'd enter something like the following:
1NXXNXXXXXX

NXXNXXXXXX
Click on the Trunk Sequence pull-down and choose your providers in the order you'd like them to be used for outbound calls.Click Submit Changes and then save your changes. Note that a second choice in trunk sequence only gets used if the calls fail to go through using your first choice. You'll notice there's already a 9_outside route which we don't need. Click on it and then choose Delete Route 9_outside. Save your changes.
Inbound Routes. We're also going to abbreviate the inbound routes tutorial just to get you going quickly today. The idea here is that you can have multiple DIDs (phone numbers) that get routed to different extensions or ring groups or departments. For today, we recommend you first build a Ring Group with all of the extension numbers you have created. Once you've done that, choose Inbound Routes, leave all of the settings at their default values and move to the Set Destination section and choose your Ring Group as the destination. Now click Submit and save your changes. That will set up a default incoming route for your calls. As you add bells and whistles to your system, you can move the Default Route down the list of priorities so that it only catches calls that aren't processed with other inbound routing rules.
General Settings. Last, but not least, we need to enter an email address for you so that you are notified when new FreePBX updates are released. Scroll to the bottom of the General Settings screen after selecting it from the left panel. Plug in your email address, click Submit, and save your changes. Done!
Adding Plain Old Phones. Before your new PBX will be of much use, you're going to need something to make and receive calls, i.e. a telephone. For today, you've got several choices: a POTS phone, a softphone, or a SIP phone. Option #1 and the best home solution is to use a Plain Old Telephone or your favorite cordless phone set (with 8-10 extensions) if you purchase a little device known as a Sipura SPA-3102. It's under $70. Be sure you specify that you want an unlocked device, meaning it doesn't force you to use a particular service provider. This device also supports connection of your PBX to a standard office or home phone line as well as a telephone.
Downloading a Free Softphone. Unless you already have an IP phone, the easiest way to get started and make sure everything is working is to install an IP softphone. You can download a softphone for Windows, Mac, or Linux from CounterPath. Or download the pulver.Communicator or the snom 360 Softphone which is a replica of perhaps the best IP phone on the planet. Here's another great SIP/IAX softphone for all platforms that's great, too, and it requires no installation: Zoiper 2.0 (formerly IDEfisk). All are free! Just install and then configure with the IP address of your PBX in a Flash server. For username and password, use one of the extension numbers and passwords which you set up with freePBX. Once you make a few test calls, don't waste any more time. Buy a decent SIP telephone. Visit the PBX in a Flash Forum for lots of suggestions on telephones. Our personal favorite and the phone that PBX in a Flash officially supports is the Aastra 57i or 57iCT which also includes cordless DECT phone. Do some reading before you buy.
A Word About Ports. For the techies out there that want "the rest of the story" to properly configure firewalls, here's a list of the ports available and used by PBX in a Flash:
TCP 80 - HTTP

TCP 9080 - Duplicate HTTP

TCP 22 - SSH

TCP 9022 - Duplicate SSH

TCP 9001 - WebMin

UDP 10000-20000 - RTP

UDP 5004-5082 - SIP

UDP 4569 - IAX2

UDP 2727 - Media Gateway
Where To Go From Here. The PBX in a Flash script repository at pbxinaflash.org also has gotten a facelift. That should be your next stop because it is the home of all the goodies that make PBX in a Flash shine. Tom King, the ultimate scripting guru, manages that site. So check it often. You'll also find all of our Nerd Vittles Goodies work with this new release. Most of our original collection work flawlessly with Asterisk 1.4 including AsteriDex, Yahoo News Headlines, Weather by Airport Code, Weather by Zip Code, Worldwide Weather Forecasts, Telephone Reminders, MailCall for Asterisk, and TeleYapper. We have not yet completed testing with Asterisk 1.6, but most should work. Complete documentation for each application also is provided at the link above. And, if you still have a DBT-120 Bluetooth adapter, you'll be happy to learn that it works out-of-the-box with PBX in a Flash on your new Everex Green PC. Dust off our recent article on Proximity Detection, and you should be in business in under 10 minutes. Enjoy!
Nerd Vittles Skype Gateway to Asterisk. If you haven't yet built your own Skype Gateway to Asterisk, you're missing a treat. To give you some idea of the flexibility of the gateway, pick up any Skype phone and call our Skype demo hotline: nerdvittles. It was a 5-minute project once the gateway was running.
Want a Bootable PBX in a Flash Drive? Our Atomic Flash bootable USB flash installer for PBX in a Flash has been quite the hit. Special thanks to all of our generous contributors! Atomic Flash provides all of the goodies in the VPN in a Flash system featured last month on Nerd Vittles. You can build a complete turnkey system using almost any current generation PC with a SATA drive and this USB flash installer in less than 15 minutes!
If you'd like to put your name in the hat for a chance to win a free one delivered to your door, just post a comment with your best PBX in a Flash story.2
Be sure to include your real email address which will not be posted. The winner will be chosen by drawing an email address out of a hat (the old fashioned way!) from all of the comments posted over the next several weeks.
And it still isn't too late to make a contribution of $50 or more to the PBX in a Flash project and get a free Atomic Flash installer delivered to your door as our special thank you gift. See this Nerd Vittles article for details.
Special Thanks to Our Generous Sponsors
FULL DISCLOSURE: ClearlyIP, Skyetel, Vitelity, DigitalOcean, Vultr, VoIP.ms, 3CX, Sangoma, TelecomsXchange and VitalPBX have provided financial support to Nerd Vittles and our open source projects through advertising, referral revenue, and/or merchandise. As an Amazon Associate and Best Buy Affiliate, we also earn from qualifying purchases. We’ve chosen these providers not the other way around. Our decisions are based upon their corporate reputation and the quality of their offerings and pricing. Our recommendations regarding technology are reached without regard to financial compensation except in situations in which comparable products at comparable pricing are available from multiple sources. In this limited case, we support our sponsors because our sponsors support us.
BOGO Bonaza: Enjoy state-of-the-art VoIP service with a $10 credit and half-price SIP service on up to $500 of Skyetel trunking with free number porting when you fund your Skyetel account. No limits on number of simultaneous calls. Quadruple data center redundancy. $25 monthly minimum spend required. Tutorial and sign up details are here.
![]() The lynchpin of Incredible PBX 2020 and beyond is ClearlyIP components which bring management of FreePBX modules and SIP phone integration to a level never before available with any other Asterisk distribution. And now you can configure and reconfigure your new Incredible PBX phones from the convenience of the Incredible PBX GUI.
The lynchpin of Incredible PBX 2020 and beyond is ClearlyIP components which bring management of FreePBX modules and SIP phone integration to a level never before available with any other Asterisk distribution. And now you can configure and reconfigure your new Incredible PBX phones from the convenience of the Incredible PBX GUI.
VitalPBX is perhaps the fastest-growing PBX offering based upon Asterisk with an installed presence in more than 100 countries worldwide. VitalPBX has generously provided a customized White Label version of Incredible PBX tailored for use with all Incredible PBX and VitalPBX custom applications. Follow this link for a free test drive!
Special Thanks to Vitelity. Vitelity is now Voyant Communications and has halted new registrations for the time being. Our special thanks to Vitelity for their unwavering financial support over many years and to the many Nerd Vittles readers who continue to enjoy the benefits of their service offerings. We will keep everyone posted on further developments.
Some Recent Nerd Vittles Articles of Interest...
Why Wait? Build Your Own Skype Gateway to Asterisk
 As the world awaits the much-hyped Digium® commercial offering of a Skype for Asterisk® gateway, we began exploring existing alternatives last week that provide individuals1 the same functionality at what will no doubt be considerably less cost. The Gizmo5 offering is darn-near perfect for those that need a quick solution and don't mind spending $20 a year to let someone else wrestle with the technical complexities that invariably accompany maintenance of cross-platform gateways such as this one.
NOTE: Article has been updated. For the latest edition, follow this link.
We, of course, like the technical challenge that comes with the territory so today we turn our attention to Greg Dorfuss' SipToSis software which forms the lynchpin of Gizmo's offering and which lets any Asterisk user create much the same gateway at no cost other than the expense of any Skype Out calls you may choose to make. When we're finished, you'll be able to call any Skype user in the world from any extension on your Asterisk server by entering either a Skype username or any 10-digit telephone number preceded by an 8 to take advantage of SkypeOut calling rates. You'll also be able to receive incoming calls from any Skype user on any extension of your Asterisk system. In short, what you get is a transparent interface to several hundred million Skype users from your Asterisk server. And the time to set this up is less than 15 minutes assuming you already have one of the Nerd Vittles Orgasmatron Builds in operation. These are available for Dell PowerEdge servers, Everex gPC desktop systems and minis, and most of the new Atom-based systems. If you have a garden-variety FreePBX-based Asterisk server such as PBX in a Flash, trixbox, or Elastix, just add another 5 minutes to reconfigure a few things.
Prerequisites. For today's project, we're assuming you have an existing FreePBX-based Asterisk server with either CentOS 5.2 or the Fedora 10 Remix featured in our Atomic Flash build. You'll need both a keyboard and mouse! For inbound Skype calling to work with other implementations including generic PBX in a Flash systems, you'll need to create a SIP URI for your Asterisk server: mothership@127.0.0.1. We've previously explained how to set one up in this article. The Atomic Flash installer, VPN in a Flash build, and the Orgasmatron II and III builds include this SIP URI functionality out of the box. You'll also need Java 1.5. To see if it's included in your distribution, issue the following command: rpm -q jdk. Finally, we're assuming you already have an existing Skype account. If not, download the Skype software for your Mac or Windows PC, and sign up. Try out a demo from any Skype phone. Just call nerdvittles.
Installing JAVA. If your particular Asterisk distribution doesn't have JAVA 1.5 or higher installed (rpm -q jdk), here's how to do it. Go to Sun's Java SE Development Kit 6u12 website, choose Linux for the platform, and agree to the license agreement. Then click Continue. Download jdk-6u12-linux-i586-rpm.bin and copy it to your Asterisk server. Make the file executable (chmod +x jdk-6u12-linux-i586-rpm.bin) and then run it. Scroll down the wordy license agreement AGAIN and type yes. Java 1.6 then will be installed on your system. Whew!
Basic Installation. Now we're ready to get started. Log into your Asterisk server as root and issue the following commands.
cd /root
mkdir skype
cd skype
wget http://www.skype.com/go/getskype-linux-centos
#Atomic Flash builds including VPN in a Flash
#should skip the next 3 yum commands.
#Then pick up again after the next comment line.
yum install xorg-x11-server-Xvfb
yum install qt4
yum install xterm
#everyone continues on from here
yum install libXScrnSaver.i386
wget http://pbxinaflash.net/source/skype/siptosis.tgz
rpm -ivh skype*
cd /
tar zxvf /root/skype/siptosis.tgz
FreePBX Design. The FreePBX setup that we recommend goes something like this. For outbound Skype calls, you have two choices.
1. To place a call to a regular phone number using SkypeOut (which costs you money), you'll simply dial 8 plus the area code and number. Our foreign friends will have to adjust their dialplans and /siptosis/SkypeOutDialingRules.props accordingly. Today's setup assumes 10-digit phone numbers!
2. To place a call to a Skype username using a softphone that supports SIP URI dialing such as X-Lite, you simply precede the Skype username with an asterisk, e.g. *echo123 will connect you to the Skype Call Testing Service.
For incoming Skype calls, the default setup routes those calls to a SIP URI: mothership@127.0.0.1. Whether you point this URI to an extension, ring group, or IVR is up to you. In the default Orgasmatron and Atomic Flash builds, the mothership URI is pointed to the Stealth AutoAttendant, an IVR that plays a welcoming message and then transfers the call to a ring group if no digit is pressed by the caller.
Configuring FreePBX. To put this setup in place, use a web browser to access FreePBX on your Asterisk server. You'll need to create a Custom Trunk and then an Outbound Route.
1. Choose Setup, Add Trunk, Add Custom Trunk. Fill in the form so that it looks like the following using your own CallerID number obviously:
When you're finished, click the Submit Changes button and then reload the dialplan when prompted.
2. Next choose Setup, Outbound Routes, Add Route. Fill in the form so that it looks like this:
When you're finished, click the Submit Changes button. Be sure to move this new OutSkype route to the top position in your Outbound Routes listing in the right margin! Then reload the dialplan when prompted.
3. If you're not using one of our custom Asterisk builds, add a new DayNight Control 1 option while you're still in FreePBX. Just specify where you want calls routed for Day mode and Night mode. Then, here's the easy way to activate SIP URI support on your Asterisk/FreePBX server. Copy the [from-sip-external] context from the extensions.conf file in /etc/asterisk. Now copy the content into extensions_override_freepbx.conf. Be sure to preserve the context name in brackets! Now make it look like the following. The additions we're making are shown in bold below:
[from-sip-external]
;give external sip users congestion and hangup
; Yes. This is _really_ meant to be _. - I know asterisk whinges about it, but
; I do know what I'm doing. This is correct.
exten => _.,1,NoOp(Received incoming SIP connection from unknown peer to ${EXTEN})
exten => _.,n,Set(DID=${IF($["${EXTEN:1:2}"=""]?s:${EXTEN})})
exten => _.,n,Goto(s,1)
exten => s,1,GotoIf($["${ALLOW_SIP_ANON}"="yes"]?from-trunk,${DID},1)
exten => mothership,1,Goto(app-daynight,1,1)
exten => pbxinaflash,1,Goto(app-daynight,1,1)
exten => e164,1,Goto(from-trunk,e164,1)
exten => fax,1,Goto(from-trunk,fax,1)
exten => s,n,Set(TIMEOUT(absolute)=15)
exten => s,n,Answer
exten => s,n,Wait(2)
exten => s,n,Playback(ss-noservice)
exten => s,n,Playtones(congestion)
exten => s,n,Congestion(5)
exten => h,1,NoOp(Hangup)
exten => i,1,NoOp(Invalid)
exten => t,1,NoOp(Timeout)
Finally, reload your Asterisk dialplan, and we're finished with Asterisk and FreePBX setup:
asterisk -rx "dialplan reload"
Activating Your Skype Gateway. Now we're ready to place your Skype gateway in production. You'll need to perform these steps from the console on your Asterisk server since we have to run Skype in graphics mode. This may look a bit complicated. It's really not. It's just a bit tedious to figure out the sequence of steps, but we've done that part for you.
For those on a CentOS-based system, here are the steps:
1. Start up X-Windows: xinit
NOTE: If xinit won't start on your particular machine, you may need to create /etc/X11/xorg.conf. Here's a generic config file that should work fine for our purposes:
Section "ServerLayout"
Identifier "X.org Configured"
Screen 0 "Screen0" 0 0
EndSectionSection "Device"
Identifier "Card0"
Driver "vesa"
EndSectionSection "Screen"
Identifier "Screen0"
Device "Card0"
SubSection "Display"
Viewport 0 0
Depth 16
Modes "800x600"
EndSubSection
SubSection "Display"
Viewport 0 0
Depth 16
Modes "800x600"
EndSubSection
EndSection
2. Next we need to start up Skype, log in, set it to autologin whenever we start it, and then in the Skype configuration, set it to run minimized: skype
NOTE: Place a Skype Test Call (echo123) to be sure your audio settings are set correctly. If a test call fails with a bad audio message, go into Options, Sound Devices and reconfigure your Audio settings until you can place the test call successfully. Otherwise, none of the rest will work! If you're using a Dell server such as the PowerEdge T100, you're probably S.O.L. without an advanced degree in Rocket Science.
HINT: Intel Atom-based motherboards are a piece o' cake!
3. Once you've got Skype working and all of the Skype settings configured above, shut down Skype.
4. Now start Skype again in background mode: skype &
5. Be sure to write down the PID for Skype in case you need to kill the job if something goes wrong. 🙂
6. You should have a command prompt back now. So issue these commands:
cd /siptosis
./SipToSis_linux
7. A message from Skype should pop up asking if you want to authorize external use of Skype: yes. Also be sure to mark the Checkbox to save this setting for future connections!
8. Now go to a softphone connected to an extension on your Asterisk server and dial *echo123
9. Go to any extension connected to your Asterisk server and dial 8 + your home phone number. This will place the outbound call through SkypeOut at 2¢ a minute.
Finally, here are a few navigation tips for managing your Asterisk console on CentOS systems:
1. Ctrl-Alt-F2 gets you a new login prompt for your server
2. Ctrl-Alt-F7 gets you back to the SipToSis/Skype session. You can kill SipToSis by holding down Ctrl-C for several seconds. To kill Skype: kill pid# (that you wrote down). To restart Skype: skype & and to restart SipToSis, just issue the command again: ./SipToSis_Linux
3. Ctrl-Alt-F9 gets you to the Asterisk CLI.
Automating the Skype Gateway Startup. Once you're positive everything is working reliably and you've rebooted and tried it again just to make certain there are no prompts, here's how to fire up your Skype gateway whenever you reboot your server.
Log into your server as root and issue the following commands:
cd /root
wget http://pbxinaflash.net/source/skype/start-skype
chmod +x start-skype
echo "/root/start-skype" >> /etc/rc.d/rc.local
reboot
For those using one of our Fedora 10 builds such as VPN in a Flash or the Atomic Flash installer, these systems have a full implementation of X-Windows and KDE. Just start the system in mode5 (graphics mode), log in, run Skype in one window and start up SipToSis in a terminal window using the commands in Step 6 above. Authorize external use of Skype when prompted.
Setting Up Speed Dials for Skype Friends. One of the wrinkles with Skype is that Skype uses names for its users rather than numbers. If you don't have a SIP URI-capable softphone, there's still an easy way to place calls to your Skype friends using FreePBX. Just add a Speed Dial number to your FreePBX dialplan. Choose Extension, then select the Custom type, provide an Extension Number which is the Speed Dial number (this could actually spell your friend's name using a TouchTone phone), enter a Display Name for your friend, and add an optional SIP Alias. Then insert the following in the dial field replacing joeschmo with your friend's actual Skype name. Save your entries and reload the dialplan when prompted.
SIP/joeschmo@127.0.0.1:5070
Security Warning. One final note of caution. Do NOT expose UDP port 5070 to the Internet unless you first secure this port with a username and password to avoid Internet intruders using your gateway as a free Skype dialing platform! You do not need 5070 exposed to the Internet to implement today's gateway solution for inbound or outbound Skype calling from your Asterisk server so we recommend you keep it securely behind at least one firewall.
Where To Go From Here. Well, those are the basics. You now can make one outbound Skype call at a time from your Asterisk server, and you can receive an inbound Skype call on any Asterisk extension when Skype users call your regular Skype name. If you want to start up your own business (like Gizmo5), then you'll need to do some tweaking. What you'll need is the STS Trunk Builder toolkit which is free, but proprietary. Enjoy!
Want a Bootable PBX in a Flash Drive? Our Atomic Flash bootable USB flash installer for PBX in a Flash has been quite the hit. Special thanks to all of our generous contributors! Atomic Flash provides all of the goodies in the VPN in a Flash system featured last month on Nerd Vittles. You can build a complete turnkey system using almost any current generation PC with a SATA drive and this USB flash installer in less than 15 minutes!
If you'd like to put your name in the hat for a chance to win a free one delivered to your door, just post a comment with your best PBX in a Flash story.2
Be sure to include your real email address which will not be posted. The winner will be chosen by drawing an email address out of a hat (the old fashioned way!) from all of the comments posted over the next several weeks.
And it still isn't too late to make a contribution of $50 or more to the PBX in a Flash project and get a free Atomic Flash installer delivered to your door as our special thank you gift. See this Nerd Vittles article for details.
Special Thanks to Our Generous Sponsors
FULL DISCLOSURE: ClearlyIP, Skyetel, Vitelity, DigitalOcean, Vultr, VoIP.ms, 3CX, Sangoma, TelecomsXchange and VitalPBX have provided financial support to Nerd Vittles and our open source projects through advertising, referral revenue, and/or merchandise. As an Amazon Associate and Best Buy Affiliate, we also earn from qualifying purchases. We’ve chosen these providers not the other way around. Our decisions are based upon their corporate reputation and the quality of their offerings and pricing. Our recommendations regarding technology are reached without regard to financial compensation except in situations in which comparable products at comparable pricing are available from multiple sources. In this limited case, we support our sponsors because our sponsors support us.
BOGO Bonaza: Enjoy state-of-the-art VoIP service with a $10 credit and half-price SIP service on up to $500 of Skyetel trunking with free number porting when you fund your Skyetel account. No limits on number of simultaneous calls. Quadruple data center redundancy. $25 monthly minimum spend required. Tutorial and sign up details are here.
![]() The lynchpin of Incredible PBX 2020 and beyond is ClearlyIP components which bring management of FreePBX modules and SIP phone integration to a level never before available with any other Asterisk distribution. And now you can configure and reconfigure your new Incredible PBX phones from the convenience of the Incredible PBX GUI.
The lynchpin of Incredible PBX 2020 and beyond is ClearlyIP components which bring management of FreePBX modules and SIP phone integration to a level never before available with any other Asterisk distribution. And now you can configure and reconfigure your new Incredible PBX phones from the convenience of the Incredible PBX GUI.
VitalPBX is perhaps the fastest-growing PBX offering based upon Asterisk with an installed presence in more than 100 countries worldwide. VitalPBX has generously provided a customized White Label version of Incredible PBX tailored for use with all Incredible PBX and VitalPBX custom applications. Follow this link for a free test drive!
Special Thanks to Vitelity. Vitelity is now Voyant Communications and has halted new registrations for the time being. Our special thanks to Vitelity for their unwavering financial support over many years and to the many Nerd Vittles readers who continue to enjoy the benefits of their service offerings. We will keep everyone posted on further developments.
Some Recent Nerd Vittles Articles of Interest...
- Skype and this suggested implementation are intended for individual use. Your use is, of course, governed by the Skype Terms of Service. [↩]
- This offer does not extend to those in jurisdictions in which our offer or your participation may be regulated or prohibited by statute or regulation. [↩]
Now It’s a No-Brainer: Free Skype Calling with Asterisk
 Many of you may recall that last August we showed you an easy way to implement free calling to millions of cellphones using Gizmo5 and Asterisk®. Vaporware aside, it's been a quiet six months in the Skype for Asterisk department. But now the folks at Gizmo5 have outdone themselves once again. This time it's their new OpenSky service. Here's how it works. You can call as many Skype users as you like and talk for up to five minutes for free.
If there are people you frequently call and the time limit is a problem for you, then you can cough up $20 a year and make as many 2-hour Skype calls as you like to your ten best friends. If you've got more friends than that or if you plan to use this for something other than a home Asterisk system, then there are reasonably priced plans to accommodate you. $320 a year gets you 20 accounts to an unlimited number of Skype users with the same 2-hour per call limit. $800 buys you 50 accounts, and $1600 buys you 100 accounts per year.
Getting Started. The easiest way to integrate this into your existing Asterisk system is to sign up for a free Gizmo5 account and then follow our previous tutorial to set up your outbound trunk.
Once you have everything working, you're ready to add a few numbers on your Asterisk system for your Skype pals. Here's the easy way, and we'll cover some more sophisticated implementations in a subsequent article. Assuming you have a friend with a Skype username of joeschmo, here's what you need to do to call Joe by dialing 563 (J-O-E) from any extension on your Asterisk system.
Edit the /etc/asterisk/extensions_custom.conf file on your system and add the following line within the [from-internal-custom] context:
exten => 563,1,Dial(SIP/skype_joeschmo@proxy01.sipphone.com)
If you also use softphones which support SIP URI dialing, then you might want to add another entry like this in the same context:
exten => joeschmo,1,Dial(SIP/skype_joeschmo@proxy01.sipphone.com)
Now just reload your Asterisk dialplan, and you're ready to start calling your Skype buddies around the world from any Asterisk extension.
asterisk -rx "dialplan reload"
The FreePBX Alternative. As has been pointed out in a comment, you can accomplish much the same thing using newer versions of FreePBX without having to muck around in extensions_custom.conf. Just add an Extension, choose the Custom type, provide an Extension Number, a Display Name, and optional SIP Alias. Then insert the following in the dial field, save your entries, and reload the dialplan when prompted.
skype_joeschmo@proxy01.sipphone.com
$20 Buys You Skype Calling Aliases. One of the major drawbacks of Skype always has been the alphanumeric Skype names which make it next to impossible to place Skype calls using regular telephones. Well, Gizmo5 has solved that, too. With your $20 annual subscription which gets you 2-hour Skype calls to your 10 best friends for a year, you now can define new phone numbers to match against your 10 favorite Skype friends. For example, for a user named John Doe, you might choose 564-6363 (JOHN-DOE). Once you sign up for the $20 Skype subscription and configure this alias in your Gizmo account, you can reach John Doe on Skype by dialing 1-333-564-6363 through your Gizmo5 trunk from any Asterisk extension. In your Asterisk setup, just create an outbound route for Gizmo calls with the following dial strings, and you're all set.
1333NXXXXXX

333NXXXXXX
Special thanks to JPE on the PBX in a Flash Forum for the original tip and to Adrian at Gizmo5 Operations for the alias demo. Enjoy!
Want a Bootable PBX in a Flash Drive? Our Atomic Flash bootable USB flash installer for PBX in a Flash has been quite the hit this past week. Thank you to all of our generous contributors! Atomic Flash provides all of the goodies in the VPN in a Flash system featured last month on Nerd Vittles. You can build a complete turnkey system using almost any current generation PC with a SATA drive and this USB flash installer in less than 15 minutes!
If you'd like to put your name in the hat for a chance to win a free one delivered to your door, just post a comment with your best PBX in a Flash story.1
Be sure to include your real email address which will not be posted. The winner will be chosen by drawing an email address out of a hat (the old fashioned way!) from all of the comments posted over the next several weeks.
And it's still not too late to make a contribution of $50 or more to the PBX in a Flash project and get a free Atomic Flash installer delivered to your door as our special thank you gift. See this Nerd Vittles article for details.
Special Thanks to Our Generous Sponsors
FULL DISCLOSURE: ClearlyIP, Skyetel, Vitelity, DigitalOcean, Vultr, VoIP.ms, 3CX, Sangoma, TelecomsXchange and VitalPBX have provided financial support to Nerd Vittles and our open source projects through advertising, referral revenue, and/or merchandise. As an Amazon Associate and Best Buy Affiliate, we also earn from qualifying purchases. We’ve chosen these providers not the other way around. Our decisions are based upon their corporate reputation and the quality of their offerings and pricing. Our recommendations regarding technology are reached without regard to financial compensation except in situations in which comparable products at comparable pricing are available from multiple sources. In this limited case, we support our sponsors because our sponsors support us.
BOGO Bonaza: Enjoy state-of-the-art VoIP service with a $10 credit and half-price SIP service on up to $500 of Skyetel trunking with free number porting when you fund your Skyetel account. No limits on number of simultaneous calls. Quadruple data center redundancy. $25 monthly minimum spend required. Tutorial and sign up details are here.
![]() The lynchpin of Incredible PBX 2020 and beyond is ClearlyIP components which bring management of FreePBX modules and SIP phone integration to a level never before available with any other Asterisk distribution. And now you can configure and reconfigure your new Incredible PBX phones from the convenience of the Incredible PBX GUI.
The lynchpin of Incredible PBX 2020 and beyond is ClearlyIP components which bring management of FreePBX modules and SIP phone integration to a level never before available with any other Asterisk distribution. And now you can configure and reconfigure your new Incredible PBX phones from the convenience of the Incredible PBX GUI.
VitalPBX is perhaps the fastest-growing PBX offering based upon Asterisk with an installed presence in more than 100 countries worldwide. VitalPBX has generously provided a customized White Label version of Incredible PBX tailored for use with all Incredible PBX and VitalPBX custom applications. Follow this link for a free test drive!
Special Thanks to Vitelity. Vitelity is now Voyant Communications and has halted new registrations for the time being. Our special thanks to Vitelity for their unwavering financial support over many years and to the many Nerd Vittles readers who continue to enjoy the benefits of their service offerings. We will keep everyone posted on further developments.
Some Recent Nerd Vittles Articles of Interest...
- This offer does not extend to those in jurisdictions in which our offer or your participation may be regulated or prohibited by statute or regulation. [↩]
Introducing Atomic Flash: 15-Minute Turnkey Asterisk Installs
PBX in a Flash offers a number of Asterisk- compatible PBX solutions to meet virtually every need. These range from base installs of Asterisk 1.4 and 1.6 in both 32-bit and 64-bit flavors. In addition, the Orgasmatron builds provide turnkey installs for Everex gPC systems and Dell PowerEdge SC440 and T100 servers. And our recent VPN in a Flash build for the Acer Aspire One NetBook introduced the ultimate portable, secure traveling communications server including the Hamachi VPN.
For 2009 we round out our offerings with the ultimate development tool, a bootable USB flash drive which can create turnkey, full-featured Asterisk PBX systems in 15 minutes or less. As its name suggests, this build was specially engineered for the new Atom-based motherboards found in most netbooks although it works just fine with Dell’s PowerEdge T100 servers as well. Many of the newer netbooks lack a CD/DVD drive so a bootable flash installer is ideal. In addition to a current generation computer, you’ll also need an 80GB or larger SATA disk drive which can be configured as sda1, sda2, and sda3. RAID setups are not yet supported unless you’re very familiar with reconfiguring Mondo Restores. With your new computer in hand, just plug in the Atomic Flash, and boot the computer from the flash drive. Type nuke and have a cup of coffee. When you return in 15 minutes and type a couple commands, your system will be ready for deployment. Add your trunk providers, match phones to the preconfigured extensions, secure passwords, and you’re all set. It’s that easy!
Make no mistake. This is a Bleeding Edge installer featuring a Fedora 10 Remix1 that’s less than a week old. It supports the latest and greatest motherboards, wired and WiFi networks, and it includes the KDE graphical user interface for those that love GUIs. Out of the box, it provides a functioning softphone as well as your own private Hamachi VPN connecting up to 15 additional systems so the entire setup can be deployed as a mobile communications hub in less time and for less money than most folks spend on their breakfast.
For those that demo systems for a living, no one will touch this presentation. Just show up at a customer site with a $300 Acer Aspire One NetBook and an Aastra 57i business phone. While the customer watches the Atomic Flash build a new PBX in a Flash server from the ruins of a Windows XP clunker, you can connect and configure the 57i and explain how simple VoIP networks can be.
When you finish your 10-minute slide show, your system will be operational. Dial any 800 number from your Aastra phone, and presto… instant, flawless communications! Now explain to the customer what the world of penny-a-minute communications is all about with every call between PBX in a Flash systems and other SIP phones absolutely free… worldwide.
Friends of PIAF. So how do you get one? If you don’t mind a preproduction version, which means we have to custom-build every flash drive, here’s how to get yours. First, this offer is for a limited time (until we get sick of cloning flash drives). And don’t expect to receive your unit overnight. In fact, it may be several weeks or more depending upon how busy we get with other Honey-Do’s. But we won’t forget you!
Now what? Just make a contribution of $50 or more to the PBX in a Flash project through PayPal, and we’ll give you one (as in gift for free), and we’ll even pay the shipping. Limit of one per contributor please! Keep in mind that $50 barely covers the cost of the 8GB flash drive, the shipping, the PayPal commission, and the labor (at 5¢ an hour) so your generosity is most appreciated. And when we get tired of working for 5¢ an hour, we’ll holler. 🙂
Once your Atomic Flash device arrives, please visit http://atomicflash.org or http://pbxonaflash.com for complete installation instructions.
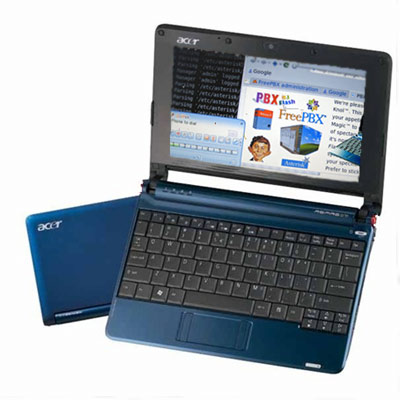

The Perfect Complement. The stars have all lined up to provide a perfect opportunity for you to purchase a state-of-the-art NetBook. Click or hover on the image above for details. If you’d prefer a server, you now can grab a Dell Poweredge T100 server with dual 160GB SATA drives and 2GB of RAM saving $397 off the list price. Either hardware works great with Atomic Flash.
Are You Crazy? Why Are You Doing This? Well, yes and because it’s the First Anniversary of PBX in a Flash! We want everyone to experience PBX in a Flash in all its greatness now that we’ve got it down to a 15-minute walk in the park. These are tough economic times for many businesses around the world, and we want you to help us spread the word about the savings that can be realized through Voice Over IP. We also want to encourage those of you on the fence about a career to enter the Asterisk® reseller community, and we’re doing our part by providing the perfect sales and development tool.
So now’s your chance. We hope you’ll tell every business acquaintance and friend you have about PBX in a Flash. And you have our heartfelt thanks for your continuing support. It’s been a blast!
Special Thanks to Our Generous Sponsors
FULL DISCLOSURE: ClearlyIP, Skyetel, Vitelity, DigitalOcean, Vultr, VoIP.ms, 3CX, Sangoma, TelecomsXchange and VitalPBX have provided financial support to Nerd Vittles and our open source projects through advertising, referral revenue, and/or merchandise. As an Amazon Associate and Best Buy Affiliate, we also earn from qualifying purchases. We’ve chosen these providers not the other way around. Our decisions are based upon their corporate reputation and the quality of their offerings and pricing. Our recommendations regarding technology are reached without regard to financial compensation except in situations in which comparable products at comparable pricing are available from multiple sources. In this limited case, we support our sponsors because our sponsors support us.
BOGO Bonaza: Enjoy state-of-the-art VoIP service with a $10 credit and half-price SIP service on up to $500 of Skyetel trunking with free number porting when you fund your Skyetel account. No limits on number of simultaneous calls. Quadruple data center redundancy. $25 monthly minimum spend required. Tutorial and sign up details are here.
![]() The lynchpin of Incredible PBX 2020 and beyond is ClearlyIP components which bring management of FreePBX modules and SIP phone integration to a level never before available with any other Asterisk distribution. And now you can configure and reconfigure your new Incredible PBX phones from the convenience of the Incredible PBX GUI.
The lynchpin of Incredible PBX 2020 and beyond is ClearlyIP components which bring management of FreePBX modules and SIP phone integration to a level never before available with any other Asterisk distribution. And now you can configure and reconfigure your new Incredible PBX phones from the convenience of the Incredible PBX GUI.
VitalPBX is perhaps the fastest-growing PBX offering based upon Asterisk with an installed presence in more than 100 countries worldwide. VitalPBX has generously provided a customized White Label version of Incredible PBX tailored for use with all Incredible PBX and VitalPBX custom applications. Follow this link for a free test drive!
Special Thanks to Vitelity. Vitelity is now Voyant Communications and has halted new registrations for the time being. Our special thanks to Vitelity for their unwavering financial support over many years and to the many Nerd Vittles readers who continue to enjoy the benefits of their service offerings. We will keep everyone posted on further developments.
Some Recent Nerd Vittles Articles of Interest…
- Fedora and the Infinity design logo are trademarks of Red Hat, Inc. Asterisk is a registered trademark of Digium, Inc. All other trademarks and registered trademarks are property of their respective owners. This software aggregation is neither provided nor supported by the Fedora Project and contains non-Fedora and modified Fedora content. Official Fedora software is available through the Fedora Project website [↩]
Avoiding the $100,000 Phone Bill: A Primer on Asterisk Security
 Here's a headline to wake up any CEO: "Small business gets $120,000 phone bill after hackers attack VoIP phone." News.com.au actually ran this story on January 20. "Criminals hacked into an Internet phone system and used it to make 11,000 international calls in just 46 hours... 115,000 international mobile calls were made using the small business's VoIP system over a six month period."
News Flash: Be sure to read our latest article introducing Travelin' Man 3, a completely new security methodology based upon FQDN Whitelists and DDNS. In a nutshell, you get set-it-and-forget-it convenience and rock-solid VoIP security for your Cloud-based PBX or any PBX in a Flash server that's lacking a hardware-based firewall and you get both transparent connectivity and security for your mobile or remote workforce.
For the latest Security Tips: See our most recent article.
Sad to say that folks install VoIP phone systems to save money and then completely ignore tried-and-true network security principles: hardening your system, regularly watching your logs, and periodically changing your passwords. If PBX in a Flash were a commercial offering, we'd probably keep much of what follows to ourselves and start touting our PBX systems as the only Asterisk® offering with Secure-Wrap™. That's not our world, of course, nor is it what open source is all about... which turns out to be both a blessing and a curse. We openly and jointly figure out ways to secure our Asterisk systems as well as those of our competitors. Then the bad guys get to read all about it and come up with new, more creative "solutions." The silver lining is there are millions of insecure Asterisk systems so the creeps typically move on to easier targets.
Today we'll walk you through our Top Ten Security Tips and Tricks. All of these can be implemented easily to harden your Asterisk PBX and lessen the chances of the bad guys transforming your VoIP system into a free, international payphone: you pay, they phone. In the process, we'll identify some common security blunders that accompany new system installs in hopes that you won't make the same mistakes. So let's start with the basics. If you plug your Asterisk PBX directly into the public Internet without carefully securing it, your chances of being hacked within the hour are pretty good.
Rule #1: Protect Your PBX With IPtables. PBX in a Flash systems are delivered with the IPtables firewall enabled. Leave it that way! If your Asterisk implementation doesn't have IPtables support, demand that it be added immediately or ask for assistance in adding it yourself. There is no reason not to use a freely available, open source firewall, period! And there are many good tools including WebMin (also included in PBX in a Flash distributions) to get it configured properly. With PBX in a Flash, all of the grunt work has been done for you.
Firewalls, of course, are only as good as the set of rules defined to secure your system. So only activate ports that are absolutely essential to run your PBX. For an excellent review of the ports that are opened by default in PBX in a Flash systems, see Joe Roper's summary. Think of an activated port as a hole in the dike. The more holes you add, the less secure your PBX will be. We'll leave it to you to count the holes in the dike if you choose to run your PBX without IPtables enabled. Our rule of thumb for PBX security goes something like this. If you don't need web access to your PBX, don't open ports 80 and 9080. If you don't need SSH, FTP, FOP, or WebMin access to your PBX, don't enable those ports. Better yet, don't even turn those services on unless there is a pressing need.
All of the IPtables rules are stored in /etc/sysconfig/iptables. Don't edit this file unless you know what you're doing. If you need help with the rules, post a question on the PBX in a Flash Forum. Typical response time on posted questions is under an hour on our forum. And don't forget to restart IPtables if you make changes to any of the rules: service iptables restart.
Rule #2: Protect Your PBX With A Hardware-Based Firewall. If one firewall is good protection, two firewalls are even better. As much as NAT-based firewall/routers get a bad rap, the extra layer of protection that a $50 hardware-based firewall/router delivers cannot be overstressed. Think of the software-based firewall as the tool of choice to secure your PBX on your internal LAN while the hardware-based firewall secures your system on the public Internet. We recommend the dLink WBR-2310 for home and SOHO use. It provides a reliable NAT-based router, a firewall, and excellent WiFi capability for under $50. If you've got some spare change, step up to one of dLink's Gaming Routers which we happen to use. They provide all the tools you'll need to prioritize your VoIP traffic. As with Rule #1, only open and redirect ports that are absolutely essential to use your PBX.
Rule #3: Safeguard Against Random Password Hacks. There is no better tool to protect your PBX from random password attacks than Fail2Ban 0.8.3. Fail2ban scans log files and bans IP addresses that make repeated, unsuccessful password attempts. It updates IPtables rules to reject those IP addresses for a period of time that you can set in /etc/fail2ban/jail.conf. Originally PBX in a Flash systems were shipped with an earlier version of Fail2Ban that provided only minimal protection. If your system doesn't include the jail.conf file above, you still have the older version. Simply run our update script to get the current release:
cd /root

mkdir fail2ban

cd fail2ban

wget http://pbxinaflash.net/source/fail2ban/fail2ban-update

chmod +x fail2ban-update

./fail2ban-update

service fail2ban restart
As was true with IPtables, Fail2Ban is only as good as the rules which are defined to identify failed password attempts on your system. On PBX in a Flash systems, we now protect against web, FTP, SSH, SIP, and IAX password attempts.
If your particular Asterisk implementation lacks Fail2Ban support, you're missing a critically important (free) tool to safeguard your system from random password attacks against SSH and your protected web sites as well as your SIP and IAX extension passwords. For tips on installation, review our script that is available on this thread in the PBX in a Flash Forum.
Rule #4: Narrow Access With IP Address Restrictions. Security privileges in the U.S. government are based upon a "need to know." It's pretty simple. If you don't have a need to know the information to perform your duties, you don't get the privilege. You can use a similar technique to secure your PBX by implementing IP address restrictions. For example, if all of your extensions are housed on a private subnet of your internal LAN, then there is no reason to allow Internet access to those extensions. Similarly, for extensions outside your local network, you now can hardcode the IP address into the extension to restrict access. To implement this with Asterisk and FreePBX-based systems, you'll first need to upgrade FreePBX to at least version 2.5.1.1. Once you've upgraded, go into each extension and enter either an IP address or an IP subnet for that extension in the permit field. For an IP address, the syntax is 192.168.0.44/255.255.255.255. For an IP subnet, the syntax would look like this: 192.168.0.0/255.255.255.0. This one tip would have been worth $120,000 to the Australian company referenced above. Yes, consultants can be worth their weight in gold. 🙂
If you're as absent-minded as we are, you don't want to have to worry about remembering this each time you add a new extension to your system. So it's quite simple to change the default permit entry from 0.0.0.0/0.0.0.0 to the subnet mask of your LAN. Then you only have to adjust this entry whenever you add an extension which is not on your internal LAN. For example, if your LAN subnet is 192.168.0, then we want to replace the default entry with 192.168.0.0/255.255.255.0. The file to edit is /var/www/html/admin/modules/core/functions.inc.php. Just search for $tmparr['permit'] in BOTH the iax2 and sip sections of the file and make the value substitution preserving the single quotes on both sides of your new entries.
You also can implement both password and IP address restrictions to limit web access to your server. With Apache web servers, this is done through .htaccess files and directory restrictions in your Apache config files. On PBX in a Flash systems, htaccess password restrictions now are the default setup in all of our builds. Suffice it to say, if you can access the /admin directory on your web site from the Internet without being prompted for a password, your site probably has been compromised. Keep in mind that these passwords get cached so be sure you have cleaned out your browser cache before having a heart attack. Better yet, try this from a browser you don't ordinarily use (such as the one on your cellphone).
For additional security, you can further restrict access to your web directories by adding a list of authorized IP addresses to the .htaccess file in each subdirectory. Here's what an .htaccess file with IP address restrictions might look like. The first Allow entry is the private LAN subnet, the second is a remote site, and the third is the Hamachi VPN subnet mask:
Deny from All

Allow from 192.168.0

Allow from 68.218.222.70

Allow from 5.67
Rule #5: Don't Use 'Normal Ports' for Internet Access. Think of network and PBX security as a shell game. You want to do as many things differently as possible to make it as difficult as possible for the bad guys to figure out what you've done. Read that last sentence again. It's important! With a hardware-based firewall such as the WBR-2310, this is incredibly easy. dLink calls them Virtual Servers. Here is a typical entry:
HTTP 192.168.0.150 TCP 80/2319 Allow All Always
You can simply redirect common ports to different ports for Internet access. Don't do this for SIP and IAX ports, but it works great for HTTP, FTP, and SSH access. For example, port 80 typically is the default web server port on Asterisk aggregations, and this port normally can be used on your internal LAN assuming you know and trust your users. For external (aka Internet) web access, simply remap TCP port 80 to some obscure port and change it periodically. For example, you might redirect TCP port 80 to port 2319. Once the setting is saved, you access the web site with a browser entry like this: http://pbx.mydomain.com:2319/. Then (and just as important!) next month, change the port to 4382, then 6109, and so on. Don't use these numbers obviously! Make up your own. The key here is that 5 minutes work every month will keep web access to your PBX much more secure than letting every Tom, Dick, and Ivan hammer away at port 80 every night while you're sleeping. Incidentally, most of these routers also will let you block access to certain ports during certain hours of the day. If you're sleeping, there's really not much need to provide SSH and web access to your Asterisk server. At the risk of being labeled xenophobic, keep in mind that many of the world's best crackers reside in countries where daytime happens to be nighttime in the United States.
Rule #6: Really Secure Passwords Really Do Matter. While we have no hard evidence to back this up, our wild-assed guess (WAG) is that 90% of the security breaches in Asterisk systems have been the direct result of folks using passwords that matched the extension numbers on their phone systems. Since most Asterisk PBX systems are configured with extension numbers beginning in the 200, 700, or 800 range of numbers, it really wasn't Rocket Science to remotely log into these servers and make unlimited SIP telephone calls. The first five rules would have protected most Asterisk systems. But our WAG on the number of Asterisk PBX's that have implemented all five rules above would be less than one in a thousand. Part of that is because some of these tools weren't readily available until recently. But part of it is because most of us are just plain L-A-Z-Y.
Really secure passwords really do matter. And it's more than having a secure root password. All of your passwords need to be secure including those on your phone extensions and voicemail accounts unless you are absolutely certain that you have blocked all access to your system from everyone except trusted users. If you use DISA, make certain it has a really, really secure password. Part of having really secure passwords is regularly changing them. And our rule of thumb on Asterisk system passwords goes one step further. Never, ever use passwords on your PBX that you use for other important personal information (such as financial accounts). You've been warned. It's your phone bill and bank account!
<end of sermon>
Rule #7: Minimize Web Access To Your PBX. Most of the Asterisk aggregations utilize FreePBX as the graphical user interface to configure your Asterisk PBX. Because FreePBX is web-based, it is extremely dangerous to leave it exposed on the Internet. As much as we love FreePBX, keep in mind that it was written by dozens and dozens of contributors of various skill levels over a very long period of time. Spaghetti code doesn't begin to describe some of what lies under the FreePBX covers. Make absolutely certain that you have .htaccess password protection in place for all web directories in at least these directory trees: admin, maint, meetme, and panel.
Our rule of thumb on Internet web accessibility to an Asterisk PBX goes like this. Don't! But, if you must, build as many layers of protection as possible to assure that your system is not compromised. If the bad guys get into FreePBX, the security of your PBX has been compromised... permanently! This means you need to start over with all-new passwords by installing a fresh system. You simply cannot fix every possible hole that has been opened on a FreePBX-compromised system!
Rule #8: Implement VPNs for PBX Systems. PBX in a Flash has provided simple install scripts to deploy Hamachi VPNs on all of our current systems. Hopefully, the other aggregations will do likewise. In addition, we offer turnkey VPN in a Flash systems which provide this functionality out of the box. VPNs provide an incredibly simple way to interconnect PBX systems worldwide and assure secure communications between these interconnected systems. We now are exploring other VPN solutions which would facilitate the use of VPN-enabled telephones such as the new offerings from SNOM.
Rule #9: Check Your Logs Every Day. We're still dumbfounded by the following quote from the article above: "115,000 international mobile calls were made using the small business's VoIP system over a six month period." Six months and they never checked their call logs? Sounds like they earned this phone bill. FreePBX provides an incredibly simple way to review your call logs. Click the Reports tab at the top of the screen and look at the bar graph showing the number of calls each day and the combined length of those calls. Nothing could be easier. Do it every single day! It also should be noted that Ethan Schroeder has released a beta of some new monitoring software which will provide more granular monitoring of daily call volumes. For additional information or to participate in the beta, visit this link.
Rule #10: Do Some Reading... Regularly. No security implementation is complete without a little regular effort on your part: reading. If you're going to manage your own network or PBX, then you need to keep abreast of what's happening in the business. There are any number of ways to do this, none of which take much time. The simplest approach is just to scan the Open Discussion, Add-Ons, and Bug Reporting topics on the PBX in a Flash Forum, the trixbox Forum, and the FreePBX Forum. Aside from reviewing your call logs, it's the best 15 minutes you could spend to safeguard your system. We also have an RSS Feed which includes security alerts.
Update #1: Be sure to read this great new article. It has two fresh ideas for securing your system!
Update #2: Please also read this Nerd Vittles Alert about FreePBX backdoors and default passwords that was published on April 15, 2011.
Some Other Suggestions. A couple other suggestions come to mind that don't involve securing your PBX per se but nevertheless will lessen your exposure in the event of a security breach. First, if your usual calling patterns don't involve international calling or if they're limited to one or two countries, tighten up your outbound dialplan and restrict calling to countries that you actually need. It can always be changed when the need to call elsewhere arises. Second, if you use pay-as-you-go providers, never use credit card auto-replenishment. Instead, add funds periodically using the provider's web interface. The advantage of this is that, if someone does manage to break into your system, your loss will be limited to the current balance in your provider account. You'll not only save a lot of money, but you'll also get a notification that something has gone horribly wrong. Finally, a forum user mentioned one we had overlooked. If you have a mix of POTS and VoIP lines, don't put the POTS lines in the default outbound pool for toll calls. This could potentially save you lots of money.
Continue Reading Part II: The VoIP WhiteList for IPtables...
Got Some Other Ideas? 50,000 heads always are better than one when it comes to network security. If there are things we've missed, take a minute to post a comment. It'll help all of us keep our systems more secure. Good luck!
Digium® Weighs In. Since this article first appeared, Digium has released its own set of tips on SIP security. By all means, have a look!
Security Alert of the Week. A trixbox user yesterday reported that he had discovered a rootkit exploit on his server. You can could read all about it here. The 6:03 a.m. (California time) post mysteriously disappeared a few hours later... soon after the trixbox staff got to work. Another darn computer failure according to Fonality staff. 😕 We've attempted to recreate the information from Google snippets. And here's a simple test to see if you have a similar rootkit problem:
ls -all /sbin/init.zk
Want a Bootable PBX in a Flash Drive? Our bootable USB flash installer for PBX in a Flash will provide all of the goodies in the VPN in a Flash system featured last month on Nerd Vittles. You can build a complete turnkey system using almost any current generation PC with a SATA drive and our flash installer in less than 15 minutes!
If you'd like to put your name in the hat for a chance to win a free one delivered to your door, just post a comment with your best PBX in a Flash story.1
Be sure to include your real email address which will not be posted. The winner will be chosen by drawing an email address out of a hat (the old fashioned way!) from all of the comments posted over the next couple weeks. All of the individuals whose comments were used in today's story will automatically be included in the drawing as well. Good luck to everyone and Happy New Year!!
Special Thanks to Our Generous Sponsors
FULL DISCLOSURE: ClearlyIP, Skyetel, Vitelity, DigitalOcean, Vultr, VoIP.ms, 3CX, Sangoma, TelecomsXchange and VitalPBX have provided financial support to Nerd Vittles and our open source projects through advertising, referral revenue, and/or merchandise. As an Amazon Associate and Best Buy Affiliate, we also earn from qualifying purchases. We’ve chosen these providers not the other way around. Our decisions are based upon their corporate reputation and the quality of their offerings and pricing. Our recommendations regarding technology are reached without regard to financial compensation except in situations in which comparable products at comparable pricing are available from multiple sources. In this limited case, we support our sponsors because our sponsors support us.
BOGO Bonaza: Enjoy state-of-the-art VoIP service with a $10 credit and half-price SIP service on up to $500 of Skyetel trunking with free number porting when you fund your Skyetel account. No limits on number of simultaneous calls. Quadruple data center redundancy. $25 monthly minimum spend required. Tutorial and sign up details are here.
![]() The lynchpin of Incredible PBX 2020 and beyond is ClearlyIP components which bring management of FreePBX modules and SIP phone integration to a level never before available with any other Asterisk distribution. And now you can configure and reconfigure your new Incredible PBX phones from the convenience of the Incredible PBX GUI.
The lynchpin of Incredible PBX 2020 and beyond is ClearlyIP components which bring management of FreePBX modules and SIP phone integration to a level never before available with any other Asterisk distribution. And now you can configure and reconfigure your new Incredible PBX phones from the convenience of the Incredible PBX GUI.
VitalPBX is perhaps the fastest-growing PBX offering based upon Asterisk with an installed presence in more than 100 countries worldwide. VitalPBX has generously provided a customized White Label version of Incredible PBX tailored for use with all Incredible PBX and VitalPBX custom applications. Follow this link for a free test drive!
Special Thanks to Vitelity. Vitelity is now Voyant Communications and has halted new registrations for the time being. Our special thanks to Vitelity for their unwavering financial support over many years and to the many Nerd Vittles readers who continue to enjoy the benefits of their service offerings. We will keep everyone posted on further developments.
Some Recent Nerd Vittles Articles of Interest...
- This offer does not extend to those in jurisdictions in which our offer or your participation may be regulated or prohibited by statute or regulation. [↩]
The Ultimate Asterisk Telephony Appliance
 We’ve been quietly waiting for Everex to finally get its act together and deliver the Ultimate Asterisk® Telephony Appliance for SOHO users and organizations. Truth be told, it’s the reason we shelved our original VPN in a Flash desktop unit from last August. Thanks to NewEgg, it’s now available and it’s dirt cheap… if you hurry. Would you believe $339 for the gPC mini ET2400. And with this coupon link, you can knock off another $11 and some change. Just sign up for a free eBates account and follow the eBates link to NewEgg to save 2% on your total order plus another $5 for signing up. We, of course, get five dollars wealthier in the process as well.
In addition to a fantastic-looking, small-footprint mini knockoff of your favorite fruit-inspired hardware, here’s what $339 buys you if you act quickly:
- 2.0GHz Intel® Pentium® Dual-Core Mobile Processor T2450
- 2MB L2 Cache
- 160GB SATA Hard Drive
- 2GB DDR2 667 SDRAM
- Slot-In DVD-ROM/DVD-RAM/DVD±RW Drive (Double Layer support)
- Intel® Graphics Media Accelerator GMA950
- Realtek ALC268 High-Definition Audio
- 10/100/1000 Ethernet Port
- 802.11 b/g Wireless LAN
- Bluetooth Wireless
- DVI-I Port with DVI to VGA/D-sub Adapter
- S-Video Port
- IEEE 1394 Firewire Port
- (4) USB 2.0 Ports
- 4-in1 Media Card Reader (SD, MMC, MS, MS Pro)
- Headphone/Line-Out Port
- Microphone/Line-In Port
- Windows Vista Home Premium (for your nearest trash can)
 Yes, you won’t be needing Windows for your new Ultimate Asterisk Telephony Appliance. Very shortly, Nerd Vittles will introduce its turnkey USB flash installer which brings you every Asterisk bell and whistle on the planet in under 15 minutes. We had hoped to introduce the new flash drives this week to celebrate the beginning of Nerd Vittles Fifth Year. But the pricing on 8GB flash drives that provide the compatibility we need to facilitate duplication just weren’t there so we’ll just wait a few weeks until they are. In the meantime, you can order up your new system and enjoy Windows at its very worst for a week or two while realizing a substantial $150 savings on your system. Enjoy!
Want a Bootable PBX in a Flash Drive? Our bootable USB flash installer for PBX in a Flash will provide all of the goodies in the VPN in a Flash system featured last month on Nerd Vittles. You can build a complete turnkey system using almost any current generation PC with a SATA drive and our flash installer in less than 15 minutes!
If you’d like to put your name in the hat for a chance to win a free one delivered to your door, just post a comment below with your best PBX in a Flash story.1
Be sure to include your real email address which will not be posted. The winner will be chosen by drawing an email address out of a hat (the old fashioned way!) from all of the comments posted over the next couple weeks. All of the individuals whose comments were used in today’s story will automatically be included in the drawing as well. Good luck to everyone and Happy New Year!!
Special Thanks to Our Generous Sponsors
FULL DISCLOSURE: ClearlyIP, Skyetel, Vitelity, DigitalOcean, Vultr, VoIP.ms, 3CX, Sangoma, TelecomsXchange and VitalPBX have provided financial support to Nerd Vittles and our open source projects through advertising, referral revenue, and/or merchandise. As an Amazon Associate and Best Buy Affiliate, we also earn from qualifying purchases. We’ve chosen these providers not the other way around. Our decisions are based upon their corporate reputation and the quality of their offerings and pricing. Our recommendations regarding technology are reached without regard to financial compensation except in situations in which comparable products at comparable pricing are available from multiple sources. In this limited case, we support our sponsors because our sponsors support us.
BOGO Bonaza: Enjoy state-of-the-art VoIP service with a $10 credit and half-price SIP service on up to $500 of Skyetel trunking with free number porting when you fund your Skyetel account. No limits on number of simultaneous calls. Quadruple data center redundancy. $25 monthly minimum spend required. Tutorial and sign up details are here.
![]() The lynchpin of Incredible PBX 2020 and beyond is ClearlyIP components which bring management of FreePBX modules and SIP phone integration to a level never before available with any other Asterisk distribution. And now you can configure and reconfigure your new Incredible PBX phones from the convenience of the Incredible PBX GUI.
The lynchpin of Incredible PBX 2020 and beyond is ClearlyIP components which bring management of FreePBX modules and SIP phone integration to a level never before available with any other Asterisk distribution. And now you can configure and reconfigure your new Incredible PBX phones from the convenience of the Incredible PBX GUI.
VitalPBX is perhaps the fastest-growing PBX offering based upon Asterisk with an installed presence in more than 100 countries worldwide. VitalPBX has generously provided a customized White Label version of Incredible PBX tailored for use with all Incredible PBX and VitalPBX custom applications. Follow this link for a free test drive!
Special Thanks to Vitelity. Vitelity is now Voyant Communications and has halted new registrations for the time being. Our special thanks to Vitelity for their unwavering financial support over many years and to the many Nerd Vittles readers who continue to enjoy the benefits of their service offerings. We will keep everyone posted on further developments.
Some Recent Nerd Vittles Articles of Interest…
- This offer does not extend to those in jurisdictions in which our offer or your participation may be regulated or prohibited by statute or regulation. [↩]
Free Asterisk Solutions
