
The Most Versatile VoIP Provider: FREE PORTING

 JUST RELEASED: Visit the Incredible PBX Wiki
The Whole House iPod (Revisited)
 About a year ago, we wrote about an incredible new whole-house audio system that is priced (literally) tens of thousands of dollars below the cost of a comparable "turnkey" system that you typically would purchase from a home audio consultant. You can read the rest of the (initial) story toward the end of today’s article. We decided to revisit the World of Sonos because there have been some incredible developments in the last 14 months, and today the company announced a new partnership with Sirius satellite radio. So here’s an update.
For those that are new to Sonos, you basically buy a little $500 Wi-Fi box for each room in your home or office where you want to play music. You plug in a pair of speakers and connect to your NAS-savvy music library. We recommend dLink’s DNS-323 which provides RAID1 mirrored SATA drives in any size you desire (about $180 delivered from NewEgg plus SATA drives). Be sure the drives you pick are on dLink’s compatibility list! If you happen to use Comcast for your broadband service, you also receive a free Rhapsody subscription which can be played (through a Windows PC) on every Sonos system in your house for free. For the rest of you, the Sonos system also supports streaming audio from more than 300 Internet radio stations, also free. And last but not least, beginning today, you can add all of the Sirius radio stations on the planet (80+ channels) to every room in your house for just $2.99 a month assuming you already have Sirius playing away in your car. If not, it’s still only $12.99 a month.
There are few companies in the world (much less the United States) that provide flawless hardware and software, free software updates (that always work), and regular updates that consistently add value to your initial purchase. Sonos is at the top of that very, very short list. Run, don’t walk, to add this system to your home or office. You’ll thank us for years to come. Enjoy!
And, our original article last year went something like this…
We thought we’d digress today and tell you about an incredible whole house audio system. Yes, there’s the iPod for private listening and there are some streaming audio solutions for those that want music in one or two rooms of a home or office. But what if you want music (different music) available in every room of your home. Well, until now, you could look at spending $20,000 to $50,000 for a very proprietary solution such as Elan’s Home Systems. It’s no accident that you won’t find any pricing on their web site.
As luck would have it, we just moved into a new home that was prewired for audio and video in eight rooms including recessed ceiling speakers in all the rooms. While this is an expensive proposition when retrofitting an older home, it’s fairly reasonable during new construction, and many builders now include it as part of the cost of a new house. The gotcha, however, is adding the multi-room amplifier, the audio devices to produce the music, and the touchpanel control units in each room. Can you spell outrageously expensive! In round numbers, you’re looking at $5,000 for installation of a suitable amplifier, $1,500 to $2,500 for each ultra-proprietary touchpanel display, and another $10,000 or more for the audio sources. These include CD jukeboxes, iPods with infrared remote access, a multi-channel XM radio receiver to the tune of $1,500 plus XM radio fees of nearly $30 a month (for three channels) forever, and loads of consulting fees at $100+ an hour. Each of the touchpanels or keypads is manually configured to match the audio components you purchase so that you can switch audio sources, adjust volume, and skip songs in each room. The double-gotcha is that despite having spent tens of thousands of dollars on this system, you have no ability to adjust anything down the road without another $100 an hour service call from the installer. So just pray they’re still around, or you’re basically stuck with your initial setup forever. A $500 magic box is used to configure the touchpanels and keypads, and, NO, you can’t buy one. It’s not sold to consumers, just dealers. Ouch!
You should be getting the picture of why we went shopping for an alternative with a bit more flexibility. That’s when we stumbled upon an incredible product called the Sonos Digital Music System. In a nutshell, you have a self-contained system unit in each room where you want music. It includes an optional amp for connection to a pair of speakers, wired and wireless networking, and a user and streaming audio interface that is as good or better than the iPod. Then you add as many touchpanel control units to select music and music sources as your budget can afford. There are also PC and Mac versions of the touchpanel which won’t cost you a dime. Each touchpanel can control every zone (aka room) in your home. What you don’t need with this system is a house prewired for audio because each unit lets you connect directly to a set of speakers or an external amplifier if desired. You also don’t need a wired network throughout your home. Only one of the Sonos units needs to be connected to a wired network. The rest of the devices automatically configure themselves to communicate wirelessly with the other system units and controllers scattered throughout your home. If you buy the starter pack with two system units including amps and one controller unit, you’re looking at $1,200 which works out to roughly $500 per system unit and about $200 for the controller. That’s roughly one tenth the cost of a functionally similar controller unit from Elan except you can configure the Sonos controller while a dealer has to configure the Elan unit … at $100 an hour.
 I feel a little like the guy selling the Ginsu knives on television: "but there’s more." Boy, is there! Not only is the sound of the systems downright incredible (depending upon your speakers, of course), but the variety of available music sources is going to make you want some of these in the morning. Each system unit can stream audio from almost any music source imaginable. This includes MP3’s stored on your PC, Mac, or our latest discovery, a $150 network-attached storage (NAS) device. You also can play Shoutcast streams, either your own or those available for free over the Internet. Another option is to map a file share from a Sonos unit to a Mac or PC. It takes about 10 seconds. Sonos units also can play music from Rhapsody. And, if you’re lucky enough to be a Comcast broadband subscriber like us, a Rhapsody streaming audio subscription with about 50 music channels is yours for free! Just login to your Comcast account and download the Comcast Rhapsody software to any Windows PC. Rhapsody Stations are every bit as good as XM or Sirius channels with one important difference. There’s no additional monthly charge to Comcast customers for as many simultaneous streams as you care to play. That’s quite a contrast from Elan’s three XM streams solution which means three rooms with XM radio and no more … for $30 a month … once you buy your $1,500 Elan XM receiver. With Rhapsody, you won’t need a receiver at all, just an old clunker PC sitting in the corner with the Rhapsody application running. It can be used for other tasks as well. At the moment, we have my daughter’s game PC running Rhapsody with four simultaneous streams playing in seven zones of the house. You can double up zones with the click of a button using any Sonos controller. In addition to all these music sources, you also can connect an old-fashioned analog audio device (like a CD jukebox or an iPod) to each system unit. Music from these sources can be streamed to any combination of rooms you choose, just like traditional Shoutcast streams or Rhapsody stations. The only thing missing with analog device streams is the album art, but it still sounds great.
There are some other reviews of the Sonos system which are worth a look. Check out David Pogue’s article in the New York Times, the Home Theater View, Audioholics, Playlist Magazine, and PC Magazine. Then you’ll want to run, don’t walk, to buy at least one for yourself! You can purchase units from Sonos and most of their dealers with a 30-day money-back guarantee. We installed eight systems with four remotes in just over two hours. We haven’t quit listening since. Now you know why we’re running a little behind on the Asterisk® and TrixBox articles. Enjoy!
Some Recent Nerd Vittles Articles of Interest…
Managing Your Cellphone Calls with Asterisk or MagicJack
 We recently showed how to use Bluetooth on your cellphone to manage your home or office phone so that calls would automatically be forwarded to your cell phone when you left your home or office carrying your Bluetooth-enabled cellphone. Justin Cramer sent us a note suggesting that it was just as important to be able to manage your cell phone calls unless you enjoy paying your cellphone provider 20¢ per minute to transfer all of your cell calls to the office number. Verizon, Sprint, and AT&T probably aren’t overly enthusiastic about your taking over their hubs to route your own cellphone calls… especially for free. But there is an inexpensive way to do it with Asterisk® or TrixBox, and today we’ll walk you through it. If you didn’t read our previous article on Bluetooth, start there to get up to speed on Bluetooth call routing in case you want to add that feature. But, frankly, you can automatically manage your cellphone from your Asterisk server without Bluetooth and without touching anything when you leave your home or office. Here’s how…
Ingredients. You’re going to need an Asterisk server to make all of this work. Well, not really, but we’ll save that for last. The easiest way to get started is to download one of our preconfigured TrixBox systems from the links at the top of this page. There’s a Linux flavor as well as Windows and Mac versions so pick your poison. They’re all free. The trick to making all of this work is that you’ll need a new phone number (DID) to give out for your cellphone calls. We’ll install this DID on your Asterisk server. Next, we’ll create an Asterisk extension to route calls to your real cellphone number. Finally, we’ll add some smarts to your server so that cellphone calls get routed to BOTH your home or office extension and your cellphone. That way you can pick up the incoming calls on a regular extension when you’re home and answer your cellphone when you’re away. Justin mentioned that he paid $42 to his cellphone provider one month just to transfer incoming cell calls to his office. The Asterisk approach we’re recommending today will cost you $3.99 a month for the incoming DID and almost nothing to route the calls to your cellphone if you’re using an all-you-can-eat VoIP provider or just over a penny a minute if you’re using a pay-as-you-go provider. See our recommended list of providers if you’re just getting started and need some suggestions.
Installing a DID. We’ve got to have a phone number on your Asterisk server that you can publish as your "cellphone number" for your customers. This is the number they will call to reach you on your cellphone. When a call comes in on this number, the Asterisk server will then ring both your real cellphone and one or more extensions on your Asterisk system. As an alternative, you can have incoming cell calls roll over to your office extensions after a certain number of seconds with no answer. But this will delay answering incoming calls at home which you may not want to do.
Our favorite DID provider is les.net. You can get a DID in numerous area codes with unlimited, free incoming calls with two simultaneous incoming trunks for $3.99 a month. Another option is a toll-free number from Vitelity. That will cost you 50¢ a month plus 1.9¢ a minute for each incoming call. Either approach works well for this application. Just keep in mind that each completed call to your actual cellphone requires two trunks, one for the inbound call through your published DID number and a second outbound call from your Asterisk server which patches the inbound call over to your cellphone.
Once you get signed up and choose your DID, you then have to configure an inbound trunk on your Asterisk system. Log into your account with your provider and use the recommended setup to add a SIP Trunk for les.net or Vitelity using freePBX on your Asterisk server.
Adding Cellphone Extensions. It’s really easy to add "extensions" which dial directly to your cellphones or phones in remote locations. Just create a new Ring Group, give it a Group Number specifying the extension number you want to dial to complete the call (e.g. 244), choose hunt for the Ring Strategy, enter your cellphone number in the extension field with a # on the end using a dial string that matches your existing outbound trunk requirements (e.g. 16781234567# if your provider requires a 1-areacode-number format), choose a ring time in seconds, and a destination extension if no answer. Make sure the time you enter is less than the time used by your cellphone provider to transfer unanswered calls to voicemail. A better approach we think is to enter your cellphone number AND several extension numbers on your Asterisk system to the call list. Now change hunt to ringall, and ALL of the numbers (including your cellphone) will be called simultaneously instead of sequentially. Save your Ring Group entry, click the Red bar to reload Asterisk, and then dial the Ring Group extension number from any phone on your Asterisk system to test it.
Creating an Inbound Route. Now that the cellphone ring group is working, all we need to do is tie this cellphone "extension" to the incoming trunk we set up previously. You do this in freePBX using an Inbound Route. Click Setup->Inbound Routes->Add Incoming Route. Enter the DID Number of your inbound trunk. Then skip down to the Fax Handling section and specify freePBX Default, Fax Detection Type: NVFax, and Pause After Answer: 3. This gives Asterisk time to set up an incoming call without losing any of the voice data. Finally, move down to the Set Destination section of the form and choose Ring Groups and pick the ring group number you set up previously for these calls. Click Submit and then the Red Bar to update Asterisk. Move your new Incoming Route up the list on the right so that it precedes the catch-all inbound route. Finally, test out the system by calling your DID from a phone that’s not on your Asterisk system. Both your cellphone and Asterisk extensions should start ringing. You may notice that the office extensions ring once or twice before the cellphone rings begin. This is a normal delay while your cellphone provider is setting up the inbound cellphone call. You now have a cellphone service in place that will ring your office phones whenever you’re in the office while still permitting you to answer the calls on your cellphone when you’re away. Enjoy!
The Low-Cost Alternatives. Last week, you may recall that we wrestled with a new product, MagicJack, which promises unlimited calling in the U.S. and Canada for under $20 a year. There’s also a $20 USB device you need to plug into a Windows XP or Vista machine to get everything working. After the developers read of our difficulties, they promptly contacted us and sent us a replacement unit. RHIP! That’s short for Reviewing Has Its Privileges! I’m happy to report that we installed the replacement unit without a hitch… in a Windows Vista machine with a patch from the vendor. Still no cigar with the XP machine, even with a powered USB hub which the vendor recommended. We’re still wrestling with it and will let you know when the problems are resolved. If you’re a pioneer and understand the risks, by all means get one. Once we got clean code on a functioning MagicJack, the product worked flawlessly and voice quality on the calls was excellent. Calls were crystal clear. Phones rang when a call arrived, and voicemail picked up when the calls went unanswered. That’s as good as it gets in our book, and you can’t beat the price: under $20 a year for unlimited calling in the U.S. and Canada.
One of the perks of the MagicJack is that you get a free phone number with the product. DIDs currently are limited to a handful of area codes; however, within the next few weeks, you’ll be able to modify your assigned number and choose a local number in any of the 31 largest American cities at no cost. Another scheduled addition to MagicJack is the ability to forward incoming calls to another number when you’re away. So now you see what all of this has to do with today’s article. You could also do much the same thing using Google’s GrandCentral, and it’s not vaporware. But you don’t get the outbound calling option. So, even without an Asterisk server, it’s entirely possible (or will be soon) to manage your cellphone calls solely through a MagicJack for under $20 a year or through GrandCentral for free. And you get unlimited, free outbound calls to anywhere in the U.S. and Canada as an added bonus with MagicJack. If you don’t have the time or the inclination to set up an Asterisk server to manage your cellphone calls, here are a couple of low-cost alternatives that may work for you.
 Nerd Vittles Demo Hot Line (courtesy of les.net). You now can take a number of Nerd Vittles projects for a test drive… by phone! The current demos include (1) MailCall for Asterisk with password 1111 (retrieve your email by phone), (2) NewsClips for Asterisk (latest news headlines in dozens of categories), (3) Weather Forecasts by U.S. Airport Code, and (4) Weather Forecasts by U.S. ZIP Code. You’re not prompted for #4 yet, but it does work! Just call our number (shown in the left margin) and take any or all of them for a spin. The sound quality may not be perfect due to performance limitations of our ancient Intel 386 demo machine. But the price is right.
Nerd Vittles Fan Club Map. Thanks for visiting! We hope you’ll take a second and add yourself to our Frappr World Map. In making your entry, you can choose an icon: guy, gal, nerd, or geek. For those that don’t know the difference in the last two, here’s the best definition we’ve found: "a nerd is very similar to a geek, but with more RAM and a faster modem." We’re always looking for the best BBQ joints on the planet. So, if you know of one, add it to the map while you’re visiting as well.
Some Recent Nerd Vittles Articles of Interest…
magicJack: Could It Be the Asterisk Killer?
 "Well, of course, not!" You’re probably like us. Anything with Magic in the name and Free in the advertising usually makes us start scurrying toward the nearest fire exit. Well, not so fast, Tonto. magicJack is a brilliant idea: a $20 USB dongle that plugs into any Windows XP PC. Then for $20 a year, you plug in any garden-variety telephone, and you get unlimited, free calls to any phone in the U.S. and Canada. That’s not quite free, but it’s close enough in our book. Released in April at the TED conference, the device design has just about everything right. And it’s all done with VoIP technology. You get a real telephone number in your favorite area code. You use a real telephone to make calls. And incoming calls can ring on both your regular phone (plugged into the magicJack) AND your cellphone… soon.
The only prerequisite is that you have to have at least your main phone connected through the magicJack to a working Windows XP machine. Vista support is now available but we didn’t test it. With cordless phone systems supporting a dozen extensions, the Windows machine requirement with an attached phone is not much of a drawback for most folks. Let’s just tick off who qualifies as the perfect audience for a device like this. Grandma and grandpa, traveling sales people, teenage girls, schools, nursing homes, summer camps, bars, resort hotels, restaurants, college dorms, rental apartments, those with a second (or third) home, people that travel or live outside the U.S. and Canada that need to make calls back to North America at no cost. Remember, this works anywhere with an XP machine, a phone, and a broadband Internet connection. You can even dispense with the phone and use the included softphone if you desire. And the PC doesn’t have to be a Dell behemoth. It could be a tiny PC about the size of a stack of four CDs. The magicJack itself functions much like a Sipura SPA-1001 analog VoIP adapter with similar call quality except for the attached PC requirement. So now you’ve got the theory down. Let’s unbox the device and put it through some basic tests.
Installation and Setup. The hardest part of installation is getting the magicJack out of its packaging. If you love all those shrink-wrapped toys that cut your hands open when you try to pry them loose from the package, then you’ll really love the magicJack. It’s got two layers of the stuff. But, once you finally free the magicJack from its packaging, you’ll be up and running in under 2 minutes. Plug the cord of a regular telephone into the magicJack. Then plug the magicJack into a USB port on your (functioning) XP machine. It’ll automatically install itself in under a minute. Now reboot your machine. Once your PC comes back to life, unplug the magicJack and then plug it back in again (Bug #1). When prompted, you’ll need to authorize the magicJack to access the Internet through your firewall obviously. Then you’ll be prompted to enter your email address and set up a password. Once completed, you’re good to go. Well, sorta… The PC software, which is always running, is a combination of a softphone, a user interface to the magicJack, and a billboard where magicJack someday plans to host advertising. Now you can appreciate the main reason for the PC requirement. A terminal adapter doesn’t have a screen to display advertising. Of course, you can minimize this one so it’s not much of a distraction unless that functionality should change in coming months.
One Minute of Patience For A Lifetime of Savings. Great motto, but… it’s going to take more than a minute of patience once you get the software installed. We work with all sorts of phones and PBXs for a living so let us sum up the current state of affairs with magicJack: B-U-G-G-Y. The theory and design of the product are right on the money, but the software is just not yet reliable or even stable. We experienced frequent software crashes and glitches both at their end and at ours. Crashes on the Windows desktop require you to remove and reinsert the device. There’s really no other way to restart the device since it runs all the time when your PC is on. One call always seemed to work great in either direction. And the call quality was excellent with no echo. But then it was downhill from there. A surefire way to kill incoming calls was to dial your new number from the phone connected to the magicJack. You’re instructed to do this to reset your voicemail password. But once we did it, no incoming calls arrived until the PC was rebooted. All the calls went directly to voicemail. And that was hit and miss as well. You’d get a typical unavailable message, but then the system would abruptly hang up. And a dozen attempts to call the voicemail system from the device to reset the password all failed with three beeps and then nothing. It took us a while to figure out that this is what was killing inbound calls. This is a little puzzling since it appears they’re using a standard Asterisk® server at least for voicemail. Here was the From address on the email delivery of the voicemail message: Magicjack <voicemail@asterisk>. Another quick way to kill the system was to leave the PC idle for an hour, even without a screensaver. After that, nothing worked. No dialtone. No incoming calls. No softphone functionality.
The interaction between the PC softphone display and the POTS phone also was quirky. Sometimes the softphone would lose track of whether a call had been answered, and this typically killed the ability to receive any further calls. So you’ll want to stay close to your PC because walking around with a cordless phone would give you no clue whether a call had been properly disconnected. And, whatever you do, don’t try the Advanced User option to restart the software. That crashed and trashed just about everything necessitating (yet another) system reboot. If you loved Windows 3.1, then you’ll feel right at home wrestling with this software.
Bottom Line. We actually got the device from a friend with about as many cellphone stores as AT&T. My advice to him went something like this. Let’s give the developers another three months to get the kinks out. Then we’ll test it again before Christmas and see if things have improved. Our bottom line with telephone service is quite simple. When someone calls, the phone had better ring. And, when no one answers, the voicemail had better work. For pioneers, this is a terrific product for experimentation, but we wouldn’t choose it yet if reliable phone service matters. So our current comparison of the magicJack to our Asterisk system would be a no-brainer. We reboot our Asterisk system about once every six months. We rebooted the magicJack about a dozen times in the first hour, and all we were doing was placing less than a handful of test calls. You can click on the screenshot above to visit their web site. Stay tuned!
Some Recent Nerd Vittles Articles of Interest…
Asterisk Weather Station Updates
 Well, our Asterisk® Weather Stations providing U.S. weather reports by zip code and airport code using your phone have come unglued again thanks to some more "improvements" from the National Weather Service. One of the problems with depending upon the web data of other organizations (such as the National Weather Service) is that, when they shift gears, you have to make adjustments to your applications as well. So this week is cleanup time at Nerd Vittles. In its continuing quest for the perfect web site, the National Weather Service decided last week to drop support for their Forecast at a Glance. This caused some wrinkles in both the Asterisk Weather Station by Airport Code and Zip Code applications which didn't know how to interpret the new menu. Personally, we were always big supporters of more federal holidays because it meant the bureaucrats and politicians had less time to screw things up. As we've said before, this new "improvement" is another good example of what happens when federal workers have too much time on their hands.
All of the Nerd Vittles weather applications for Asterisk (except the new Worldwide Weather Forecasts) depend upon NOAA web site information at a web link that looks like the following. You can enter either a zip code or a city and state. When you go to the new links, you'll notice that Forecast at a Glance is no longer the first option on the menu.
http://www.srh.noaa.gov/port/port_zc.php?inputstring=Charleston,SC
Here are the step-by-step instructions to update each application. These instructions assume that you've already installed the Weather Applications previously. If not, just choose your desired installation from the Best of Nerd Vittles site.
Installing Weather by Airport Code Update. To install the Weather by Airport Code update, log into your Asterisk server as root and issue the following commands:
cd /var/lib/asterisk/agi-bin

rm -f nv-weather2-zip.*

wget http://nerdvittles.com/wp-content/nv-weather2.zip

mv nv-weather.php nv-weather.old3.php

unzip nv-weather2.zip

rm -f nv-weather2.zip

chmod 775 nv-weather.php

chown asterisk:asterisk nv-weather.php
Installing Weather by Zip Code Update. To install the Weather by Zip Code update, log into your Asterisk server as root and issue the following commands:
cd /var/lib/asterisk/agi-bin

rm -f nv-weather-zip.zip

wget http://nerdvittles.com/trixbox123/nv-weather-zip.zip

mv nv-weather-zip.php nv-weather-zip.old3.php

unzip  nv-weather-zip.zip

rm -f nv-weather-zip.zip

chown asterisk:asterisk nv-weather-zip.php

chmod 775 nv-weather-zip.php
Test Driving the Latest Asterisk Weather Applications. To use the Asterisk Weather Station by Airport Code, pick up any phone connected to your Asterisk server and dial 611. When prompted, key in the three-character Airport Code for the weather report you wish to retrieve. Then sit back and listen to the latest weather report for your Airport Code from the National Weather Service.
To use the Asterisk Weather Station by Zip Code, pick up any phone connected to your Asterisk server and dial Z-I-P (947). When prompted, key in the five-digit Zip Code for the weather report you wish to retrieve. Then sit back and listen to the latest weather report for your Zip Code from the National Weather Service.
Nerd Vittles Demo Hot Line (courtesy of les.net). You now can take a number of Nerd Vittles projects for a test drive... by phone! The current demos include (1) MailCall for Asterisk with password 1111 (retrieve your email by phone), (2) NewsClips for Asterisk (latest news headlines in dozens of categories), (3) Weather Forecasts by U.S. Airport Code, and (4) Weather Forecasts by U.S. ZIP Code. You're not prompted for #4 yet, but it does work! Just call our number (shown in the left margin) and take any or all of them for a spin. The sound quality may not be perfect due to performance limitations of our ancient Intel 386 demo machine. But the price is right.
Nerd Vittles Fan Club Map. Thanks for visiting! We hope you'll take a second and add yourself to our Frappr World Map compliments of Google. In making your entry, you can choose an icon: guy, gal, nerd, or geek. For those that don't know the difference in the last two, here's the best definition we've found: "a nerd is very similar to a geek, but with more RAM and a faster modem." We're always looking for the best BBQ joints on the planet. So, if you know of one, add it to the map while you're visiting as well.
Some Recent Nerd Vittles Articles of Interest...
Proximity Detection Perfection: Bluetooth + Asterisk + iPhone
 If impressing your friends happens to be your thing, then you'll enjoy watching them all wet their pants today after you show them this little trick. It's been almost two years since we first introduced Bluetooth Proximity Detection to the Asterisk® community. Because we can't seem to get enough programming torture lately, we decided to revisit Follow Me Phoning by taking it to a whole new level with an all-new set of devices. If you're new to all of this, what we're talking about is the ability to stroll out of your home or office and have your telephone calls follow you on your cellphone automatically... without touching anything. And, when you return, the home or office phones start ringing again just as if you never left. Won't your boss or spouse be thrilled? What makes all of this possible, of course, is Bluetooth which happens to be running on your TrixBox/Asterisk server and on your brand new iPhone.
Since our original article, TrixBox has replaced Asterisk@Home as the leading (free) turnkey Asterisk system. freePBX has replaced the Asterisk Management Portal as the best Asterisk shell on the planet. And, of course, the iPhone has blown the cellphone industry out of the water. For long-time readers of our column, you may recall that we whined that the Treo 650 used in the original article was lousy for proximity detection because you always had to turn the display on to activate Bluetooth. It also drained the battery quickly which is probably why Palm left it turned off most of the time. You won't have either of those problems with the iPhone. The iPhone Bluetooth Adapter is always broadcasting away assuming you have turned it on. And we left the iPhone near our Asterisk server for 8 hours with virtually no battery drain on the phone. So, yes, it's damn near perfect for this task... and so many others.
NOTE: This article has been updated. For the current article, click here.
Our plan today is simple enough. We want to design a phone system so that, when you walk into your home or office, the phones ring in the office when there's an incoming call. And, when you walk out of your home or office carrying your iPhone with Bluetooth, calls to your home or office extension ring on your iPhone. If you're using one of our turnkey TrixBox systems at the top of this page, this project should take you about 20 minutes to complete once you have a dLink DBT120 USB Bluetooth Adapter in hand.
System Requirements. As mentioned, you'll need a Linux-based Asterisk server (we're working on Windows and Mac support), and we recommend our turnkey system because it has most of the software you'll need for this project preinstalled. That includes loads of Linux utilities, the Linux Bluetooth software toolkit, freePBX, Asterisk 1.2.x, and WebMin. But any TrixBox server will work. Other than your Asterisk server, the only other hardware you'll need is a dLink DBT120 Bluetooth Adapter. They run $30-$40 from most electronics stores although many retailers put them on sale regularly. CentOS 4.2 and above (used in the TrixBox builds) comes with the Bluetooth software preinstalled. If you're using some other Linux flavor, consult our original article for installation instructions.
DBT120 Bluetooth Adapter Installation. Boot up your Asterisk server if it is not already running and log in as root. Plug the DBT120 into an available USB slot. Now issue the following command:
/etc/init.d/bluetooth restart
You'll probably be told that your system couldn't stop bluetooth (because it wasn't running) and then it'll restart. Now let's make sure everything is running that should be:
/etc/init.d/bluetooth status
You should see messages that look like this:
hcid (pid somenumber) is running ...

sdpd (pid somennumber) is running ...
If you're alerted that some other application isn't running, we don't care. Now let's be sure the system has found your bluetooth adapter:
hcitool dev
Assuming you get a response telling you the system found device hci0 with the MAC address of the adapter, you have successfully installed your DBT120. So it's time to move on.
Configuring Linux Bluetooth Software to Start Automatically. You don't want to have to manually start up your Linux Bluetooth software each time you reboot your server. The easiest way to automatically start it is to use WebMin which comes preinstalled with our TrixBox builds. While logged in as root, make sure WebMin is running:
/etc/webmin/start
Then point your web browser to port 10000 on your Asterisk server: http://192.168.0.108:10000/. When prompted for username and password, type root and the password you assigned the root user on your system. From the Main Screen of WebMin, click the System button and then the Bootup and Shutdown link. Find bluetooth in the list of applications and click on it. The Action Details screen should show that bluetooth is running. Now click the Yes button beside "Start at Boot Time?" and then click the Save button to reconfigure your server. That wasn't hard, was it? Go back to the command prompt on your Asterisk server and stop WebMin by issuing the following command: /etc/webmin/stop. No need to waste processing cycles for a tool we're not using.
Deciphering the MAC Address of Your iPhone Bluetooth Adapter. We're going to be communicating with your iPhone to determine when you're in and when you're out. In order to do that, we need the MAC address of the iPhone Bluetooth Adapter. Here's how to find it. Move your iPhone within 10 feet or so of your Asterisk server. Then put your iPhone in Bluetooth Discovery Mode by choosing Settings, General, Bluetooth from the Main Screen on your phone. Be sure Bluetooth is set to ON. Once you've done that, the iPhone will report that it is Now Discoverable. Put the iPhone down near your Asterisk server. Now jump back to your Asterisk server console and issue the following command. Try it several times until you get the MAC address of your iPhone's Bluetooth Adapter:
hcitool scan
The system will whir away for a few seconds and then will report back the Bluetooth MAC address and name assigned to the adapter. It's probably your name. Write both of them down. We'll need the MAC address in a minute.
[root@asterisk1 ~]# hcitool scan

Scanning ...

    00:1D:64:C9:58:BA      Ward Mundy
Proximity Detection Design. Now we've got all the hardware information we need to make proximity detection work. We'll download the Proximity Detection Software in a minute.But first, sit down with a pencil and write down the other information you'll need to configure the Proximity Detection Software. To make the software as flexibile as possible, we've reworked the code a bit since the original article. With the new code, it's possible to manage multiple extensions of multiple people with multiple iPhones. So what you'll need is the extension numbers of the people that want to use this and the iPhone numbers of those people. For example, you may want to forward extension 200 to 6782345678 and extension 202 to 6783456789. Just make sure that the forwarding numbers are in the correct format for the default outbound dialing rules on your Asterisk server. If your server expects numbers to always begin with a 9 or a 1, be sure to include it in the dial string, or the calls won't be completed when they are forwarded. Obviously, you'll also need the MAC address for each of your iPhone Bluetooth Adapters so just repeat the drill above with each iPhone until you have all of the addresses. Finally, you'll need to assign an 8-character (or less) name to each user. So make yourself a nice little chart:
WARD  00:1D:64:C9:58:BA  200  6782345678

MARY  00:2D:54:C9:59:AB   201  6783456789
Today's installment assumes you are using a single Asterisk server both for your phone system AND proximity detection. We're still working on a multi-server solution. The only drawback with the current design is that the iPhones need to be placed close to that server when you arrive at your home or office. You can experiment on the distance the iPhones can be away from the server. Different Bluetooth adapters and iPhones have slightly different ranges. The bottom line is you always want to leave the iPhones close enough to the server with the Bluetooth adapter so that the proximity detection works reliably all the time. And, yes, we know it would be nice to be able to do all of this using a VMware or Parallels build of TrixBox running on a Windows or Mac desktop. Then you could detect the iPhone at the actual desktop where you hang out most of the time. We're working on it, but we just couldn't get it done for today's article. Stay tuned!
Proximity Detection Software Installation. All that remains to be done is to download and configure the proximity detection script and then put it in motion on your Linux machine. Log into your Asterisk server as root and move to the /root directory to download and unzip the script:
cd /root

wget http://nerdvittles.com/trixbox123/proximity.zip

unzip proximity.zip

chmod +x proximity
If you're going to be setting up proximity detection for multiple people, just make copies of the proximity script, e.g. cp proximity proximity1. Then edit each of the scripts and fill in the data from the little chart you made: nano -w proximity
deviceuser=WARD

devicemac=00:4B:63:D5:62:AB

myextension=200

mycellphone=6783456789
Save your changes and exit the editor: Ctrl-X, Y, then Enter.
Setting Up the Crontab Jobs. The last step is to set up a crontab entry for each script so that it gets run once a minute during whatever hours each day you want to monitor your iPhone. While still logged in as root, edit /etc/crontab: nano -w /etc/crontab. Insert a line like the following at the bottom of the existing file. This code would monitor your iPhone from 6 a.m. to 9 p.m. each day. To monitor your phone 24 hours a day, replace 6-21 with an additional asterisk.
* 6-21 * * * root /root/proximity > /dev/null
Save your changes and exit the editor: Ctrl-X, Y, then Enter. Repeat the drill for the other phones you want to monitor substituting the correct script names, and you're done.
Incidentally, if you ever want to disable the Proximity Detection System, just edit the crontab file and comment out the lines you want to disable by inserting # at the beginning of the line(s). If it happens that your calls are still being forwarded to your iPhone, you can cancel the forwarding from any Asterisk extension by dialing *74. Enjoy!
Nerd Vittles Demo Hot Line (courtesy of les.net). You now can take a number of Nerd Vittles projects for a test drive... by phone! The current demos include (1) MailCall for Asterisk with password 1111 (retrieve your email by phone), (2) NewsClips for Asterisk (latest news headlines in dozens of categories), (3) Weather Forecasts by U.S. Airport Code, and (4) Weather Forecasts by U.S. ZIP Code. You're not prompted for #4 yet, but it does work! Just call our number (shown in the left margin) and take any or all of them for a spin. The sound quality may not be perfect due to performance limitations of our ancient Intel 386 demo machine. But the price is right.
Nerd Vittles Fan Club Map. Thanks for visiting! We hope you'll take a second and add yourself to our Frappr World Map. In making your entry, you can choose an icon: guy, gal, nerd, or geek. For those that don't know the difference in the last two, here's the best definition we've found: "a nerd is very similar to a geek, but with more RAM and a faster modem." We're always looking for the best BBQ joints on the planet. So, if you know of one, add it to the map while you're visiting as well.
Some Recent Nerd Vittles Articles of Interest...
Introducing TeleYapper 3.0: The Free Asterisk Message Broadcasting System
AsteriDex Security Alert. Because of a security vulnerability in our AsteriDex robodialer, you should download and install the following patch to protect your system if AsteriDex is accessible from the public Internet or if your private network is used by individuals other than your immediate (trustworthy) family. Log into your Asterisk® server as root and issue the following commands. We also recommend you change the name of the asteridex folder to something that only you know. For further security precautions, read the Hardening Your System section of the Best of Nerd Vittles article.
cd /var/www/html/asteridex

rm -f callboth.php

wget http://nerdvittles.com/trixbox11/callboth.zip

unzip callboth.zip

rm -f callboth.zip

chown asterisk:asterisk callboth.php

chmod 775 callboth.php
 NOTE: This version of TeleYapper works with Asterisk 1.2 only. For Asterisk 1.4, read our new article on TeleYapper 4.0 or visit our Best of Nerd Vittles site.
WARNING: New federal regulations regarding robodialers go into effect on September 1, 2009. Before you use this software, make absolutely certain that you are in compliance with the new regulations regarding calls that deliver a prerecorded message! You can download the regulations here.
To start July off with a bang, we're back today with TeleYapper 3.0, an updated version of our Asterisk-based telephone broadcasting service. For those with multiple outbound trunks, TeleYapper 3.0 now supports simultaneous calls using multiple trunks. Special thanks to Matt Frederickson for the code. Version 3 works with all flavors of Asterisk@Home 2.x as well as most versions of TrixBox. We haven't tested it with Asterisk 1.4, but tips from others suggest that it'll work just fine with the DigitTimeout and ResponseTimeout tweaks that already are incorporated into TeleYapper 3.0. If you're running an earlier version of Asterisk@Home, use our version 1 code and tutorial. And, just like the original and version 2.5, TeleYapper 3.0 can be used for neighborhood association announcements, schools, little leagues, fundraisers, municipal governments, and anyone else that just wants to pester folks with annoying, but free, prerecorded phone calls.
Everything you'll need to get TeleYapper 3.0 dialing away is in this article. And functionally, TeleYapper still works identically to prior versions. The only problem was version 1 didn't work at all with AAH 2.4 and 2.5. For those new to TeleYapper, here's what happens. You create a recorded message using Asterisk. Then you create a list of phone numbers to call in a MySQL database using a tool such as phpMyAdmin which is bundled with TrixBox and Asterisk@Home. Finally, you place a phone call either to kick off TeleYapper or to redial calls that failed the first time around. The software will dutifully swing into action and call qualifying phone numbers from any of ten calling categories that you specify when you set up your database of callees. TeleYapper then will deliver the message you've recorded. It works much like call-em-all.com and numerous other telephone broadcasting services with one important difference: TeleYapper is FREE! So, instead of paying 15¢ a call or $35 to $100 a month for a commercial service or spending thousands of dollars for a commercial dialer, now you can do it yourself using TeleYapper and your (also free) TrixBox PBX. Look at the top of this page (just below the Nerd Vittles header) for links to Windows, Mac, and Linux versions of TrixBox that are perfectly suited for use with TeleYapper. Today we'll actually get TeleYapper making calls and emailing you the results of those calls. Don't be intimidated by the length of the article. You can still complete this project in about 30 minutes. It's mostly a cut-and-paste exercise. If you're using one of our TrixBox builds which we just described, then this is less than a 5-minute upgrade. In either case, we've done all the hard work for you.
Legalese. For those that are used to buying flawless software such as Microsoft Windows or Microsoft Office, let's be sure we're all on the same page up front. First, you're not buying this software. It's FREE! And, yes, sometimes you get what you pay for. Second, don't assume today's version is error-free. It's probably not. We try pretty hard to write reliable code, but even the best among us make mistakes. Third, by downloading or using this software, you are agreeing to assume all risks associated with use of the software. NO WARRANTIES EXPRESS OR IMPLIED INCLUDING ITS FITNESS FOR USE OR MERCHANTABILITY ARE PROVIDED WITH THIS SOFTWARE. And, finally, read or reread Part I of this series concerning Do Not Call statutes in your jurisdiction and make sure you are in compliance before placing any calls. Failure to heed this advice may subject you to serious criminal and civil penalties. If any of this gives you heartburn, exercise your constitutional right to not use the software.
Overview. Today's TeleYapper update provides a good framework for anyone wanting to write Asterisk AGI scripts using PHP. The code is well-documented to demonstrate how to pass variables to an AGI script from your dialplan and how to retrieve variables from an Asterisk AGI script into your dialplan. We needed this for TeleYapper because we're using a phone call to an Interactive Voice Response (IVR) session embedded in the dialplan to begin the calling process. We use the IVR session not only to determine which group of callees to call but also to give the caller the option of placing a call to everyone in the group or just those to whom the initial call was unsuccessful. After the caller hangs up, the results are passed to the teleyapper.php application to do the heavy lifting. The PHP program takes advantage of an AGI script's ability to actually set dialplan code in motion once a call is answered. In order to log calls and track which ones are successful, we have to pass variables into that dialplan code and then execute another PHP script when the call is completed. Stated another way, every call requires two round-trips from the Asterisk dialplan to PHP/AGI scripts. So, if you can't figure out how to pass variables back and forth using this application, you probably should consider another line of work. For those that just want to use the TeleYapper application and not learn much of anything about programming, you're welcome to do that subject to the license agreement which follows. We hope you'll put it to good use for the betterment of a school, an intramural sports program, or a neighborhood in which you happen to live.
 Licensing. We are retaining ownership of this software as well as the copyright. It is licensed for use under the terms of the Creative Commons Attribution Non-Commercial license. A Plain English summary is available here. We've done this primarily to do our part to stamp out the telemarketing creeps of the world. Those wishing to use TeleYapper in a commercial environment must first request a license outlining your proposed terms of use. We will promptly respond with a yay or nay. Telemarketers need not apply!
TeleYapper in a Nutshell. Before we get to the code, let's briefly cover how this message broadcasting system works. When you dial 674, the TeleYapper system will answer and prompt you for your password. Once you correctly enter the password, an interactive voice response (IVR) system will swing into action and give you several choices. That's what the [yapper] context handles. Pressing 1 lets you listen to your prerecorded TeleYapper message (if you have one). You don't yet so don't press 1. Pressing 2 lets you record a new TeleYapper message. This is handled by the [yapper2] context. Do this first and record something ... anything. You can rerecord a new message at any time by choosing option 2 again. Pressing 3 lets you kick off a TeleYapper dialing spree. It's handled by the [yapper3] context. Don't do this until we add your new database below, or you'll get smoke. If you choose option 3 to initiate a TeleYapper calling session, the system will first prompt you for a group option number to use. This is managed by the [yapper-options] context. Simply stated, when you build your database of callees for TeleYapper, you can specify a one-digit group number for each entry in the file. Then, when you begin a calling session, you can narrow down the calling group by telling TeleYapper which group of callees to call. If you want a callee to be in more than one group, you simply enter that callee into the database multiple times with different group numbers. If you want everyone in the same group, then enter 0 for every person in your database.
Once you specify the group number during your TeleYapper session, the system will actually look up and report back how many messages will be delivered to the callee group you've chosen. Allison will say something like this assuming there were 146 calls to be placed: "The number I have is one hundred and forty six messages." This will give you the count of qualifying records in the database and the option of proceeding with the calls, cancelling the transaction, or just redialing the numbers of the calls that failed to this group on the previous pass through the database. As noted previously, we've endeavored to build this entire application using the voice prompts that are delivered with Asterisk@Home and TrixBox so they're not quite perfect. But they work reasonably well once you understand how the pieces fit together. You're supposed to be nodding in agreement now.
TeleYapper's Calling Process. For those that like lists, it may help to visualize how all the TeleYapper code fits together by laying out the actual program steps in a typical call:
The TeleYapper code not only handles the actual dialing of the callees you've entered in your MySQL database (teleyapper.php), it also plays your message when a callee answers (dialplan contexts), and documents what happened during the calls (teleyapper2.php). Call progress is documented in two ways. First, when a call is completed, TeleYapper will log the date and time of the call as well as a best guess of what happened during the call in your MySQL database. So browsing entries in your TeleYapper database will always show the date, time, and status of the last completed call to each callee. We'll build a web interface for this one of these days. Second, when you install the TeleYapper PHP components, there are some configuration options which will also let you create a detailed log of what happened during the TeleYapper calls. If you have email working reliably on your Asterisk system, you also can enter your email address and tell TeleYapper to email you every log that is produced. There are log entries for the initial call setup (handled by teleyapper.php) and for the placement of the individual calls (handled by teleyapper2.php). Finally, you have the option of creating a new log with each series of calls that are placed (the default setting), or you can configure TeleYapper to keep adding to the end of the initial log. In the latter case, it's up to you to erase the log before it fills up your disk. Individual call entries, if logged, will be appended to the main TeleYapper call setup log (/var/log/asterisk/teleyapper.txt).
To keep things simple, everything you'll need to make TeleYapper work is covered in this article even though we've covered some of this in our previous TeleYapper articles. Here are the components that make up the complete TeleYapper system, and we'll cover them below in the order which simplifies the installation process:
Upgrading from TeleYapper 2.5. If you're using one of our preconfigured TrixBox 1.2.3 systems from the links at the top of this page or if you have an existing TeleYapper 2.5 system which is working, then the upgrade to TeleYapper 3.0 is a piece of cake. You only need to download and replace the teleyapper.php AGI script located in /var/lib/asterisk/agi-bin on your TrixBox system. Just log into your Asterisk server as root and execute the commands below to install the new code. Then adjust the default settings as described below to meet your needs. That's it. You're done!
cd /var/lib/asterisk/agi-bin

wget http://nerdvittles.com/trixbox123/teleyapper30.zip

mv teleyapper.php teleyapper25.php

unzip teleyapper30.zip

rm teleyapper30.zip

chmod 775 teleyapper.php

chown asterisk:asterisk teleyapper.php
Creating the TeleYapper Database. We use the MySQL database management system to manage the list of callees for TeleYapper to dial. It can handle a database of almost any size and generally stands up well in performance comparisons with Oracle. So you're covered on the database front.
To create the MySQL database to support TeleYapper, the easiest way is using phpMyAdmin. On Asterisk@Home systems, use a web browser pointed to your Asterisk server and choose: AMP->Maintenance->phpMyAdmin. On TrixBox systems, choose System Administration and then phpMyAdmin from the maintenancemenu. When phpMyAdmin loads, click on the SQL icon in the left column. When the SQL window appears, clear the existing SQL query and then cut-and-paste the following SQL code into that box and then click the Go button. When the import completes, click the teleyapper.callees table entry in the left column to open the file. Then click the Insert tab at the top of the right column to add entries to the table. You only need to add information for the name, phonenum, and group fields in the corresponding values column. The id, lastokcall, and lastcall fields should be left as is. The id field gets calculated automatically. The lastokcall will record the time and date of the last successful call using TeleYapper. And the lastcall field identifies what happened during the last call to this person, e.g. ok means the call was completed successfully, no answer means no one answered the call, or answering machine means an answering machine took the call.
You can add up to two records at a time and, by clicking the Insert Another New Row button, you will be returned to this data entry screen after you save your entries by clicking the Go button. The name field allows you to quickly review entries you've made. It won't be used when making TeleYapper calls. The phonenum field is the important one. This is the exact dial string required to place a call on your Asterisk system to this callee using whatever VoIP or PSTN outbound trunk you plan to use with TeleYapper. For example, if your preferred provider requires 11-digit phone numbers with a 1, area code, and number, then that's the way the numbers should be entered into the TeleYapper database. The group field has already been discussed. Just enter a number between 0 and 9 to identify the group with whom this individual should be associated. Finally, after adding records to the table, you can click the Browse tab to review your entries. And, while Browsing, you can click the Pencil icon beside any record entry to edit it. Clicking the red X icon beside a record entry deletes the record. If, for some reason, you wish to delete ALL the records in the file, click the Empty tab at the top of the right column. Under no circumstances should you click on the Drop tab as this removes not only the table's contents but also the table structure itself. In short, you'd have to import the database table again.
Answering the Incoming Call. A simple addition to your dialplan is used to force Asterisk to answer calls to M-S-G (extension 674) and pass them to the TeleYapper contexts for processing. Log into your Asterisk system as root and move to the /etc/asterisk directory. To add TeleYapper to your dialplan, just cut-and-paste the following code into the [from-internal-custom] context near the top of extensions_custom.conf. For TrixBox users, cut-and-paste the following code into the [from-internal-trixbox] context near the top of extensions_trixbox.conf. Be sure to change the 1234 password below to something secure for your system since this will be used to gain access to your TeleYapper system!
exten => 674,1,Answer  ; dial MSG on any extension to manage your TeleYapper system

exten => 674,2,Wait(1)

exten => 674,3,Authenticate(1234)

exten => 674,4,Goto(yapper,s,1)
If you're a long-time reader of Nerd Vittles and you're using either our Stealth AutoAttendant or some other AutoAttendant, then you already know why you need to be careful about putting extensions like 6-7-4 in your extensions_custom.conf file. Anyone can call you, dial 6-7-4 while your AutoAttendant is playing, and insert their own obscene message into your TeleYapper system. The solution is adding your own secure password in line 3 above rather than using the default 1234. Another precaution you should always perform is to first play your outgoing TeleYapper message to yourself to make certain it says what you think it should before you kick off a dialing spree to a thousand of your closest friends or business associates.
AutoAttendant Contexts for TeleYapper. Now insert the following chunk of code at the bottom of extensions_custom.conf or extensions_trixbox.conf if you're using TrixBox:
[yapper]

exten => s,1,Set(TIMEOUT(digit)=7)

exten => s,2,Set(TIMEOUT(response)=10)

exten => s,3,Background(T-to-hear-cur-ancmnt)

exten => s,4,Background(press-1)

exten => s,5,Background(to-rerecord-yr-message)

exten => s,6,Background(press-2)

exten => s,7,Background(to-place-outgoing-call)

exten => s,8,Background(press-3)

exten => s,9,Background(to-hear-menu-again)

exten => s,10,Background(press-4)

exten => s,11,Background(to-hang-up)

exten => s,12,Background(press-5)

exten => 1,1,Playback(custom/broadcast)

exten => 1,2,Wait(2)

exten => 1,3,Goto(s,3)

exten => 2,1,Goto(yapper2,s,1)

exten => 3,1,Goto(yapper-options,s,1)

exten => 4,1,Goto(s,3)

exten => 5,1,Playback(goodbye)

exten => 5,2,Hangup

exten => t,1,Goto(s,3)

exten => i,1,Goto(s,3)

exten => o,1,Goto(s,3)

exten => h,1,Hangup
[yapper2]
exten => s,1,Playback(after-the-tone)
exten => s,2,Playback(say-temp-msg-prs-pound)
exten => s,3,Wait(2)
exten => s,4,Record(custom/broadcast:gsm)
exten => s,5,Wait(2)
exten => s,6,Playback(custom/broadcast)
exten => s,7,Wait(2)
exten => s,8,Playback(your-msg-has-been-saved)
exten => s,9,Wait(2)
exten => s,10,Goto(yapper,s,1)
[yapper3]
exten => s,1,AGI(checkgroup.php|${GROUP})
exten => s,2,NoOp(tmp variable: ${tmp})
exten => s,3,GotoIf($[${tmp} = 0]?9,1)
exten => s,4,Set(COUNTER=${tmp}|g)
exten => s,5,Playback(the-num-i-have-is)
exten => s,6,SayNumber(${COUNTER})
exten => s,7,Playback(vm-messages)
exten => s,8,Wait(1)
exten => s,9,Set(TIMEOUT(digit)=7)
exten => s,10,Set(TIMEOUT(response)=10)
exten => s,11,Background(to-call-this-number)
exten => s,12,Background(press-1)
exten => s,13,Background(to-hang-up)
exten => s,14,Background(press-2)
exten => s,15,Background(vm-advopts)
exten => 1,1,Goto(yapper-gen,s,1)
exten => 2,1,Playback(goodbye)
exten => 2,2,Hangup
exten => 3,1,Goto(yapper-redial,s,1)
exten => 9,1,Playback(dir-nomatch)
exten => 9,2,Wait(1)
exten => 9,3,Goto(yapper,s,1)
exten => t,1,Playback(goodbye)
exten => t,2,Hangup
exten => i,1,Playback(goodbye)
exten => i,2,Hangup
exten => h,1,Hangup
[yapper-options]
exten => s,1,Wait(1)
exten => s,2,Playback(you-have-these-options)
exten => s,3,Playback(digits/0)
exten => s,4,Playback(through)
exten => s,5,Playback(digits/9)
exten => s,6,Playback(press-star-cancel)
exten => s,7,Read(tmp,vm-enter-num-to-call,1)
exten => s,8,Set(GROUP=${tmp}|g)
exten => s,9,NoOp(${GROUP})
exten => s,10,GotoIf($["foo${GROUP}" = "foo"]?s,78)
exten => s,11,GotoIf($["foo${GROUP}" = "foo*"]?s,88)
exten => s,12,GotoIf($["foo${GROUP}" = "foo#"]?s,98)
exten => s,13,Goto(yapper3,s,1)
exten => s,78,Playback(connection-timed-out)
exten => s,79,Wait(1)
exten => s,80,Goto(yapper,s,1)
exten => s,88,Playback(cancelled)
exten => s,89,Wait(1)
exten => s,90,Goto(yapper,s,1)
exten => s,98,Playback(option-not-implemented)
exten => s,99,Goto(yapper,s,1)
[yapper-gen]
exten => s,1,Playback(speed-dial)
exten => s,2,Playback(activated)
exten => s,3,Wait(1)
exten => s,4,Playback(goodbye)
exten => s,5,Hangup
exten => h,1,DeadAGI(teleyapper.php|${GROUP}|${COUNTER}|1)
exten => h,2,Hangup
[yapper-redial]
exten => s,1,Playback(speed-dial)
exten => s,2,Playback(activated)
exten => s,3,Wait(1)
exten => s,4,Playback(goodbye)
exten => s,5,Hangup
exten => h,1,DeadAGI(teleyapper.php|${GROUP}|${COUNTER}|3)
exten => h,2,Hangup
Call Processing Contexts for TeleYapper. Finally insert the following chunk of code at the bottom of extensions_custom.conf or extensions_trixbox.conf:
[broadcast]

exten => s,1,Answer

exten => s,2,Wait(2)

exten => s,3,Playback(system-status-msg)

exten => s,4,Wait(2)

;exten => s,5,BackgroundDetect(custom/broadcast|1000|50|3000)

exten => s,5,Playback(custom/broadcast)

exten => s,6,Goto(talk,1)

exten => t,1,Goto(talk,1)

exten => i,1,Goto(talk,1)

exten => o,1,Goto(talk,1)

exten => h,1,NoOp(Callee hung up call before menu. Dialed: ${DIAL}  ID: ${ID}.)

exten => h,2,Set(STATUS='EarlyHangup'|g)

exten => h,3,DeadAGI(teleyapper2.php|${ID}|${STATUS}|${DIAL})

exten => h,4,Hangup

exten => talk,1,Goto(broadcast2,s,1)
[broadcast2]
exten => s,1,Set(STATUS='Answered'|g)
exten => s,2,Set(TIMEOUT(digit)=4)
exten => s,3,Set(TIMEOUT(response)=4)
exten => s,4,Background(to-hear-msg-again)
exten => s,5,Background(press-1)
exten => s,6,Background(to-blklist-last-caller)
exten => s,7,Background(digits/2)
exten => s,8,Background(otherwise-press)
exten => s,9,Background(digits/3)
exten => t,1,NoOp(Callee's Answering Machine probably answered. Dialed: ${DIAL} ID: ${ID}.)
exten => t,2,Set(STATUS='AnsMachine'|g)
exten => t,3,Background(restarting)
exten => t,4,Wait(1)
exten => t,5,Playback(custom/broadcast) ; playing again for ans machine
exten => t,6,Background(goodbye)
exten => t,7,Hangup
exten => h,1,DeadAGI(teleyapper2.php|${ID}|${STATUS}|${DIAL})
exten => h,2,Hangup
exten => i,1,Goto(1,1)
exten => o,1,Goto(1,1)
exten => 1,1,Set(STATUS='ReplayedMsg'|g)
exten => 1,2,Goto(t,3)
exten => 2,1,Set(STATUS='Zap'|g)
exten => 2,2,Background(num-was-successfully)
exten => 2,3,Background(removed)
exten => 2,4,Background(goodbye)
exten => 2,5,NoOp(Callee Requested to have number removed. Dialed: ${DIAL} ID: ${ID}.)
exten => 2,6,Hangup
exten => 3,1,Set(STATUS='OK'|g)
exten => 3,2,Background(goodbye)
exten => 3,3,NoOp(Callee Acknowledged Call. Dialed: ${DIAL} ID: ${ID}.)
exten => 3,4,Hangup
Once you finish adding all of the new contexts above to extensions_custom.conf or extensions_trixbox.conf, save your changes to disk. There's no need to reload Asterisk just yet. We've still got our AGI scripts to install.
If you're using freePBX, then make the following addition to your freePBX configuration. Log into your TrixBox server with a web browser. Choose freePBX and then choose Setup, Misc Destination. Add a new entry for TeleYapper with 674 as the Dial entry. Save your change and click the Red Bar to update the freePBX configuration.
For those that are curious, you'll notice there is a commented out line 5 in the [broadcast] context. It's an Asterisk command called BackgroundDetect. What this command is supposed to do is play a sound file while listening for silence at the callee's end of the call. Once silence is detected, the call processing drops to talk. We couldn't get it to work reliably although we haven't tried it with Asterisk 1.4. So the current release blindly plays your message and then asks for an acknowledgment. If it doesn't get one, it plays your message again, and then hangs up. The theory here is that, even if a callee has an answering machine, the second playing of your message usually will get recorded. Just be aware that there may be further adjustments down the road. In the meantime, you can check back and read the latest comments to this blog entry.
Installing checkgroup.php AGI Script. Now let's install the checkgroup.php script in your /var/lib/asterisk/agi-bin directory and change file ownership and permissions on the file. Log in to your Asterisk server as root, and then execute the following commands:
cd /var/lib/asterisk/agi-bin

wget http://nerdvittles.com/checkgroup.zip

unzip checkgroup.zip

rm checkgroup.zip

chmod 775 checkgroup.php

chown asterisk:asterisk checkgroup.php
This script includes a debug log. The default settings are to create a new log file (/var/log/asterisk/telecheck.txt) each time the script is executed. This doesn't take up much room and is always there for you to read if something comes unglued: cat /var/log/asterisk/telecheck.txt. There are some other options. You can turn off the log file entirely ($debug=0). You can choose not to erase the previous log file each time the script is run ($newlogeachdebug=0) in which case the file continues to grow until your hard disk fills up. And you can have the log file emailed to you each time the script is executed ($emaildebuglog=1) by adding your email address ($email=youremailaddress). The last option obviously assumes you have followed our previous tutorials and gotten outbound email working reliably on your system. The functions are controlled by the following lines at the top of the checkgroup.php file. 1 means yes, and 0 means no. Just edit the file carefully: nano -w checkgroup.php. And save your changes when you're finished: Ctrl-X, Y, then press Enter.
$debug = 1;

$newlogeachdebug = 1;

$emaildebuglog = 0;

$email = "yourname@yourdomain" ;
NOTE: If you're using TeleYapper with Asterisk 1.4.x, comment out lines 168-172 in checkgroup.php to get the script to function properly. Special thanks to Lee Azzarello for the tip.
Installing teleyapper.php AGI Script. This code only works with Asterisk@Home 2.4 or 2.5. To install the teleyapper.php script in your /var/lib/asterisk/agi-bin directory, execute the following commands while logged into your server as root:
cd /var/lib/asterisk/agi-bin

wget http://nerdvittles.com/trixbox123/teleyapper30.zip

mv teleyapper.php teleyapper25.php

unzip teleyapper30.zip

rm teleyapper30.zip

chmod 775 teleyapper.php

chown asterisk:asterisk teleyapper.php
The teleyapper.php script has a number of configuration options including a debug log. Edit the file carefully while positioned in the correct directory: nano -w teleyapper.php. And save your changes when you're finished: Ctrl-X, Y, then press Enter. All of the options are shown below.
$maxlines=1 ;

$maxretries=1 ;

$retrytime=60 ;

$waittime=60 ;

$callspread=2 ;

$debug = 1;

$newlogeachdebug = 1;

$emaildebuglog = 0;

$email = "yourname@yourdomain" ;

$trunk = "local" ;

$callerid = chr(34) . "TeleYapper" . chr(34) . " <6781234567>"  ;
The first line lets you set the number of simultaneous calls which can be placed. Be sure you have sufficient outbound trunks to support the number you insert and be sure to use the "local" setting for $trunk. The callspread variable determines the spacing of calls (or groups of calls if you have multiple outbound trunks) to your various callees. The default has been changed from one minute to minutes based upon extensive testing with large numbers of calls. This means the call to the second callee (or group of callees if you have specified $maxlines > 1) begins two minutes after the first call starts. Because a broadcast message is usually more than about 20 seconds long, we have found the 2 minute setting to be better since it allows sufficient time to complete the first call before the next one begins. Otherwise, calls will start failing if you only have a single outbound trunk. If you're going to be placing hundreds of calls, be sure to read our previous article which covers a real-world example using a 700-call database.
The debug flags in this file are set the same way as in the checkgroup.php script above: 1 means yes, and 0 means no. The default settings are to create a new log file (/var/log/asterisk/teleyapper.txt) each time the script is executed. This doesn't take up much room and is always there for you to read if something comes unglued: cat /var/log/asterisk/teleyapper.txt. There are some other options. You can turn off the log file entirely ($debug=0). You can choose not to erase the previous log file each time the script is run ($newlogeachdebug=0) in which case the file continues to grow until your hard disk fills up. And you can have the log file emailed to you each time the script is executed ($emaildebuglog=1) by also adding your email address ($email=youremailaddress).
Two settings you will need to review and perhaps adjust to get calls to complete properly are the trunk and callerid variables. If you wish to use a specific trunk in your dialplan for outbound calls, the syntax for the outbound trunk is the same as it is in your dialplan, e.g. sip/telasip-gw or iax2/voxee. Look at the OUT settings at the top of your extensions_additional.conf file if you're not sure. At the request of a number of users, we've now added a new option which allows all outbound TeleYapper calls to be placed using the default dialplan rules on your server. The advantage of this approach is that different VoIP providers can be used automatically for different types of calls in your TeleYapper database. To use your default dial rules, set the trunk in all lowercase letters to local and TeleYapper will handle the rest of the setup for you.
The callerid variable should be set to the callerid number of your outbound trunk unless your service provider allows callerid spoofing (most don't!). The callerid setting is ignored if you choose to use your default dialplan rules with a trunk setting of local. Don't delete the variable! Just leave the default value.
Finally keep in mind that the format of the numbers to be dialed in your database must exactly match the syntax your trunk provider is expecting to see unless you're using your default dialplan rules. Otherwise, all of the outbound calls will fail. For example, if your provider requires that calls begin with a 1 followed by a 3-digit area code and 7-digit number, then that's the way the numbers must be entered in your TeleYapper database.
Installing teleyapper2.php AGI Script. Install the teleyapper2.php script in your /var/lib/asterisk/agi-bin directory, change file ownership and permissions on the file, and decide if you want to adjust the default debug configuration setup. Log in to your Asterisk server as root, and then execute the following commands:
cd /var/lib/asterisk/agi-bin

wget http://nerdvittles.com/aah2/teleyapper2.zip

unzip teleyapper2.zip

rm teleyapper2.zip

chmod 775 teleyapper2.php

chown asterisk:asterisk teleyapper2.php
The only configuration options in the teleyapper2.php script are for the debug log on individual calls that are placed. We recommend you leave the existing settings, or you'll get a new email every time a call is placed by TeleYapper. You can edit the file while positioned in the correct directory: nano -w teleyapper2.php. And save your changes when you're finished: Ctrl-X, Y, then press Enter. All of the options are shown below.
 $debug = 1;

 $emaildebuglog = 0;

 $email = "yourname@yourdomain" ;
The debug flags in this file are set the same way as in the teleyapper.php script above: 1 means yes, and 0 means no. The default settings are to append individual call information onto the teleyapper.txt log file (/var/log/asterisk/teleyapper.txt) each time a new call is placed. Unless you're planning to call hundreds of thousands of people, this doesn't take up much room and is there for you when something comes unglued. The other options are as follows. You can turn off the individual call logging entirely ($debug=0). And you can have the entire teleyapper.txt log file emailed to you each time a call is placed ($emaildebuglog=1) by also adding your email address ($email=youremailaddress). For your initial test calls, this may be desirable just so you can see what's going on ... if you're too lazy to read the log.
Taking TeleYapper for a Spin. Once you restart Asterisk (amportal stop then amportal start), you should have a Broadcast Message System that works. First, start up the Asterisk Command Line Interface (CLI) by typing asterisk -rvvvvv from the command prompt on your system after you've logged in as root. The CLI now will track the progress of your TeleYapper sessions.
Using phpMyAdmin, add your cellphone number to your TeleYapper database and specify Group 0 for the entry. Now dial 674 and provide your password, record a message (Option #2), and then place a call (Option #3) to Group 0. Press 1 to kick off the TeleYapper calling spree. Check your CLI and TeleYapper logs if your cellphone doesn't ring in the next two minutes. Enjoy!
Real-World Test of TeleYapper. Be sure to check out our follow-up article on TeleYapper for a real-world example dialing 700+ neighbors with information about a rezoning meeting.
Want More Projects? For a complete catalog of all our previous Asterisk projects, click here. For the most recent articles, click here and just scroll down the page.
From Our Legal Department, moi: The TeleYapper product name (our feeble attempt at humor through parody) has absolutely no affiliation with TeleZapper, the terrific hardware product designed to keep telemarketers from bugging the hell out of you while you're eating your dinner. We confess that our sense of humor got the better of us in coming up with the name for this non-commerical (aka "free") utility designed primarily as an educational vehicle to assist the Asterisk community in recognizing the almost limitless potential of AGI and PHP programming. Our parody seeks to amuse, not to confuse. Our telephony software Yaps. Their telephony hardware Zaps. Other than a telephone line, there is no product similarity as the two conjoined words make clear. And, yes, that is the whole point! The products are opposites, not identical nor even similar. One letter makes all the difference in Night and Light. So it is with Yapper and Zapper. Brand confusion in trademark law arises from synonyms, not antonyms. It is systems like what we're writing about today that TeleZapper is designed to protect against. And it does that very well. In fact, we use TeleZapper hardware in our own home and have for many years. The only problem, of course, is when that tornado comes rolling down the neighbor's street, it would have been nice to get the automated phone call from TeleYapper at the neighborhood headquarters. But, who cares, right? It's only your house. Class dismissed.
Some Recent Nerd Vittles Articles of Interest...
iPhone: The Perfect Asterisk Companion
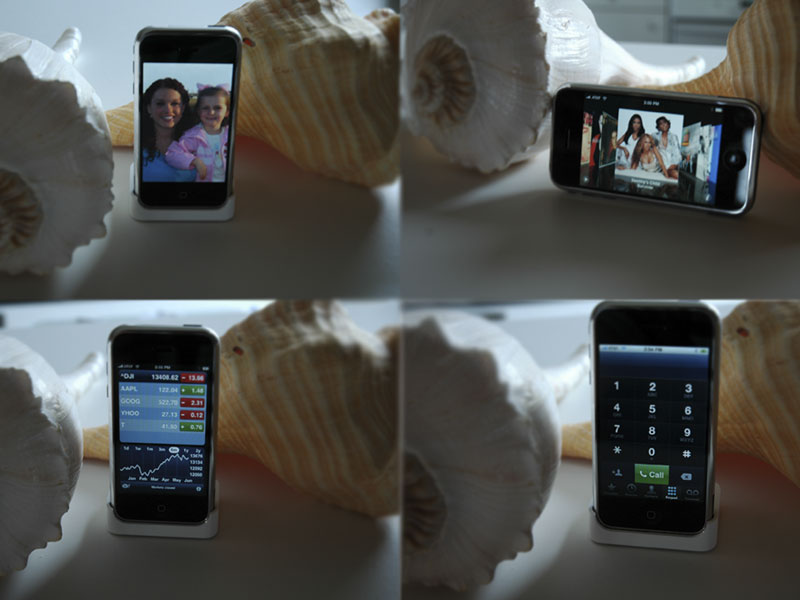 So, you didn’t get one, huh? Well, we did. Just goes to show that some folks don’t have much to do other than stand in line for 8 hours to claim what my wife has labeled "another stupid toy." Yes, the ultimate iToy. Boys and their toys! Apple has had the better part of four years to perfect Mac OS X, and it shows in the iPhone. So here’s our software report card:
The iPhone will take its place as one of the most revolutionary computers in the 21st century. And we think it may well be one of the best computers with one of the best computer interfaces ever delivered. But note that we said "best computers" not "best phones." It’s an incredibly good travelling Wi-Fi device, and that’s probably how it will be remembered ten years from now. And AT&T. Well, they’re still just as lousy as they were 10 years ago.
Before turning to Asterisk®, we wanted to quickly review our iPhone chronology for those who are considering a purchase. Bottom line: buy it from Apple. We didn’t because they don’t yet have a store in the entire state of South Carolina. They still manage to charge sales tax for web purchases, however.
Friday. Let’s start with AT&T. We arrive at a totally deserted store in the middle of a Mattress Factory strip mall at 10:30 a.m. on Friday. There are 12 people in line, the first six of whom are so-called iSitters, people paid a couple hundred bucks to wait in line for someone else. In our case, the #1 iSitter is standing in for Catherine Bell, the star of Lifetime TV’s Army Wives which is being filmed in Charleston. She arrives at 5 p.m. with her daughter in tow… in a brand new Porsche, of course. The TV crew promptly wets their pants. No one much complains that Catherine and her entourage assume their place at the front of the line. But, does the iSitter leave? Well, no. AT&T staff are totally clueless. They’ve been sitting in their (empty) air conditioned store all day doing absolutely nothing except turning down iPhone wanna-be’s asking to use the bathroom. "We don’t have one" is the stock reply. And the Store Manager’s one minute of fame consists of telling the ABC reporters that everyone in line will be taken care of "one way or another." Turns out, most folks get the "another" option. The store gets 15 phones delivered in a book bag by an AT&T delivery truck at about 4:30 p.m. They don’t trust their employees either! So, for most of the hundreds who have waited, their only option is to wait another "two to three days" to have one shipped to them. Heh, heh. Anyone want to take that bet?
Then there was the moment of truth. Six p.m. and the doors swing open for the first five in line. They, of course, make an exception for the Army Wives entourage. By the time they’re finished, there is one 8-gig iPhone and six 4-gig iPhones left. We snag one of the 4-gig models after AT&T recovers thirty minutes later from their first nationwide network implosion. They can’t even process a credit card transaction without a meltdown. Just another day for the A&T repair crews. With our iPhone in hand, we head out the door and do a quick package unopening for the local news crew. They’re thrilled. Then we’re off to play.
Any Windows XP machine with the latest version of iTunes works with the iPhone. But, if you’re a loyal Mac user, you have an extra hurdle. Only the very latest version of Tiger works and you need the latest version of iTunes as well. If any of this were operating system-dependent, we could understand the limitation. But this appears to be a way to sell more Mac OS X upgrades. Back in law school, they called it tying. We decide to use Windows XP and skip the Panther-to-Tiger upgrade hassle.
You register the iPhone and sign up for service using iTunes. The whole process takes less than 10 minutes and is flawless… at least for us. Remember, it’s not yet 6 p.m. on the West Coast. So the second wave of registration meltdowns has not yet begun. We decide to start off lean and mean to see how far 4 gigabytes goes. We load 500 songs, a couple of music videos, and 50 photos plus a dozen or so contacts just to be sure we have a stable system. We then add an IMAP email account and a gMail POP3 account. We still have a gig and a half of storage which looks pretty reasonable to us. We call it a night at midnight after a couple of quick calls to our Asterisk PBX. Everything works swimmingly.
Saturday. We’ve delayed heading out to the beach for a day because AT&T on Friday morning announces that their Georgetown store won’t be stocking the iPhone after all despite their day of training on Thursday and postings on the AT&T web site. Only because we called to see whether you could buy more than one phone are we spared from hating AT&T forever. "Oh, you didn’t hear the news. We’re not getting the iPhone after all. You’ll have to go to Charleston." So we stayed in Charleston Friday and headed out Saturday morning for the beach house. The trip is uneventful. My seven year old daughter masters every feature of the iPhone in less than an hour. Synching the iPhone to the Prius takes less than a minute. My daughter places several calls through the Prius Sound System searching for her beloved Webkinz. Some of the reviews have suggested that the sound quality isn’t all that great. We’ve found just the opposite. Calls are crystal clear. Even the Prius phonebook still works with the iPhone. Bye, bye Treo!
We actually have an iMac running Tiger at the beach house so it’s time to try a partial sync to get our Address Book and Calendars onto the iPhone. The whole process takes about 10 minutes and demonstrates that partial syncs from both a Windows machine and a Mac work well together, just as they do with an iPod. So our iPhone is complete with photos and music from a Windows version of iTunes and calendar and address book data from iTunes on an iMac. Perfect! All of the cousins arrive after lunch, and they spend the rest of the day monopolizing the iPhone… especially YouTube. WiFi at the beach house kicks in automatically to replace AT&T’s Edge network so the performance and display of Web applications is nothing short of amazing. Only limitation thus far appears to be lack of support for Java and Flash technology. Battery life is pretty amazing. Using the phone for most of the day with WiFi and Bluetooth and numerous phone calls consumes about half the battery life. Not bad.
Sunday. A friend of ours strolls into the Lenox Square Apple store in Atlanta on Sunday afternoon and walks out with an 8 gig iPhone in minutes.
The Drawbacks. The lack of Flash and Java technology already have been mentioned. Safari also is missing animated GIF support. Darn. So much for that collection. Most of the other shortcomings have to do with typical, high end cell phone features which aren’t (yet) available on the iPhone. The major one is voice-activated dialing. AT&T probably discouraged this so that they could charge a monthly fee for the service just as Sprint now does. You can’t gain access to the phone to add your own applications… yet. And, there appears to be a memory leak if you use the iPhone for an extended period of time (such as all day). Apps start closing abruptly. It’s easy enough to reboot the iPhone by holding the Power and Home buttons down simultaneously for about eight seconds. Text messaging is currently limited to SMS and email. A lot of folks will want more than that. Tethering to a PC is not yet supported although with Edge that’s not a big loss. GPS functionality also is missing although the Google Maps are great. A software zoom feature on the 2 megapixel camera also would be a nice touch. The photos look pretty great actually. An external memory card also would be a welcome addition. And a Skype application would be terrific. AT&T would be thrilled. Lack of any iPhone insurance plan and no battery access also may be deal breakers for a lot of folks. All things considered, we’re delighted with the iPhone. Let the hacking begin!
Using the iPhone with Asterisk. What remains is integration of the iPhone into our Asterisk system. Two minutes of dialplan changes and calls are automatically forwarded to the iPhone instead of the 3-year old Treo. AsteriDex pops up in the iPhone web browser perfectly with no modifications other than a new phone number for Admin access. If we decide to purchase a landline from AT&T, we then would be eligible for AT&T’s Unity plan. An extra $20 a month gets you unlimited calling to 100 million AT&T landlines and cellphones. Once on a Unity plan, free calls could be made to everywhere through the Asterisk system as we’ve explained in a previous article.
Undocumented RSS Reader on iPhone. One bit of good news. The Safari browser on the iPhone does support the same, cool RSS feed reader that’s found in the Safari browser with the Tiger version of Mac OS X. The syntax to access RSS feeds is also the same. The RSS feed for Nerd Vittles is accessed by going to feed://nerdvittles.com/wp-rss2.php while the Best of Nerd Vittles feed is accessed by going to feed://bestof.nerdvittles.com/rssfeed.xml. Enjoy!
Some Recent Nerd Vittles Articles of Interest…
Your Choice: iPhone + AT&T or A New Car
 This Friday marks the introduction of Apple’s new iPhone with their exclusive provider, the new, new AT&T. As much as we might love the new phone, the AT&T Wireless telephony package coupled with an iPhone makes this one of the most expensive cellphone bundles ever to hit Mother Earth. In fact, payments on a midsize automobile might just turn out to be cheaper than an ongoing iPhone contract with AT&T. AT&T may fool everyone and come to their senses on pricing before Friday, but we aren’t betting on it. Our guess is that AT&T is delaying a pricing announcement until the day before the phone’s introduction so that all the dumbest people on the planet won’t have time to do the math. It just goes to show that pairing the marketing genius of Apple with the greedy beancounters at AT&T still spells T-R-A-I-N-W-R-E-C-K. Not that any self-respecting college stud would be caught dead in a Ford Focus, but just for grins, let’s do the math so that everyone has a few days to bask in the real cost of an iPhone.
First, the iPhone hardly qualifies as a bargain. At $499 for the 4GB model and $599 for the 8GB, there’s no pricier phone in the cellphone marketplace. To add insult to injury, AT&T has taken things one step further: NO REBATE WITH AN iPHONE even with a two-year cellphone contract. Suggesting they’re MIGHTY PROUD OF IT is just the beginning of our little tale of woe! So, assuming the iPhone is actually worth its retail price, you begin this exercise paying roughly a $250 to $300 sign-up premium compared to purchasing a new RAZR phone or high end PDA with a two-year AT&T cellphone plan.
And then there’s the matter of picking a cellphone plan. Even Verizon can’t hold a candle to the new AT&T. If you plan to use the iPhone in the manner in which it is being advertised, i.e. to surf the web, to watch YouTube videos, and to send all kinds of messages to everyone on the planet, then hold on to your hat wallet for the ultimate sticker shock. The cheapest individual cellphone plan starts at $40+ a month for 450 daytime minutes plus nights and weekends starting at 9 p.m. To take advantage of free calls to other AT&T phones (100 million wireless and wired phones), add another $20 a month. For earlier nights and weekend calling (7 p.m. instead of 9 p.m.), add another $10 a month. For unlimited data usage, add $40. For unlimited messaging, add another $20 a month. For phone insurance, add another $5 a month. Now add AT&T surcharges and taxes for another $20 a month. That gets us to roughly $155 a month plus the $10-$15 a month no-rebate penalty amortized over the life of the two-year contract because you chose an iPhone. So, the grand total for an iPhone works out to $600 plus tax for the only decent model plus roughly $170 a month for the required two-year service contract. Amortizing the hardware cost of the iPhone over 24 months brings our monthly cost to approximately $195 a month. The early termination penalty actually looks like a bargain with a plan like this one! Now the shocker. To lease a 2007 Ford Focus with air conditioning, you’re looking at less money per month although you’d make payments for additional years. But then, you may want to use your iPhone for more than two years as well… assuming you either win the lottery or have a healthy trust fund. Just don’t plan on more than three years, or it’s another pricey adventure paying Apple to replace the iPhone battery.
To give you a point of reference, our current Sprint family plan with FOUR PHONES and no discounts costs roughly $200 a month. It includes 2500 shared minutes, free calls between home and the four phones, free nights and weekends starting at 7 p.m., free tethering to four PCs (another $20 option per phone with AT&T), free roaming and long distance, free calls to other Sprint phones, and unlimited Internet service and messaging on all four phones. And the total hardware cost for the four phones including two Treos and two Katanas (the better RAZR) is roughly the same as purchasing one iPhone. Call us crazy, but we’ll stick with Sprint a bit longer. If you really want some fun, price out the cost of switching a family of four to iPhones. Then you can kiss that new BMW goodbye forever.
 Pricing Update. We’re thrilled that our original article (above) produced dramatic price reductions within hours this morning. The new price is about one-third of the old one. You do think it was our article, don’t you? Steve Jobs has apparently worked his magic with AT&T just as he did with the music moguls. New pricing for the iPhone was just announced with unlimited data, visual voicemail, 200 SMS text messages, 5000 to unlimited night-and-weekend minutes, rollover minutes, and unlimited mobile-to-mobile calling each month. 450 daytime minutes will cost $60 a month while 1350 minutes will run $100 a month. Shared use family plans (700-2100 minutes) are $50 more with two lines activated. Great news for the iPhone and consumers. And there’s more good news. The entire activation and synching process for the iPhone will be handled using good ol’ iTunes in the privacy of your own home.
Some Recent Nerd Vittles Articles of Interest…
Free Asterisk Solutions
