
Home » Search results for 'sip' (Page 49)
Search Results for: sip
The Most Versatile VoIP Provider: FREE PORTING

 JUST RELEASED: Visit the Incredible PBX Wiki
Orgasmatron 5.2: The Secure Swiss Army Knife for Asterisk
 It’s been an exciting couple of weeks watching the overwhelmingly positive response to our release of Orgasmatron 5.1. With this version, we introduced a new Asterisk® security model that took into account the ever-increasing security risks posed by exposing web and telephony servers to direct Internet access. The bottom line is this. If your telecom requirements still can be accomplished by placing a server securely behind a $35 hardware-based Internet firewall with no Internet exposure, then it makes absolutely no sense to dangle such a tempting target in front of the world’s most nefarious creeps.
News Flash: Incredible PBX 4.0 is now available with FreePBX 2.10 support!
Coming January 19: Incredible PBX 11 & Incredible Fax for Asterisk 11 and FreePBX 2.11
Our experience suggests that the only trade off with this new approach is the inability to receive anonymous SIP calls… a small price to pay considering the potential financial and computer risks involved. You still can place outbound VoIP calls as well as placing and receiving calls using any of the phone numbers registered on your new PBX in a Flash server. And, thanks to Google Voice, SIPgate, and IPkall, all inbound calls are free, and all outbound calls to numbers in the U.S. and Canada are free as well.
If a SIP URI and your own Freenum/ISN number are simply features you can’t live without, sign up for a voip.ms IAX account, and you’ll get a SIP URI for free. Inbound SIP URI and Freenum/ISN calls will set you back $1 for every 1,000 minutes billed in 6 second increments.
Or you can sign up for a free IP Freedom CallCentric account and configure a new SIP trunk in FreePBX by following these directions. Once configured, your new server SIP URI will be 1777xxxxxxx@in.callcentric.com where xxxxxxx is your assigned 7-digit CallCentric number.
Keep in mind that a new security vulnerability has been found with either Asterisk or FreePBX almost monthly. The chart below tells you why. With virtually limitless attack surfaces because of the number of interrelated components in CentOS, Asterisk, and FreePBX comes enormous and recurring potential for remote compromise of these systems. Rather than play this cat-and-mouse security game with the underworld, the Orgasmatron design changes the paradigm. It lets you use any (secure or insecure) version of Asterisk and FreePBX without worrying about any outside attacks. Do passwords on your new server matter? Not really… unless there is someone inside your firewall that you don’t trust. 🙄 Are we going to secure them anyway? Absolutely. But instead of the constant worry over new security vulnerabilities, Orgasmatron 5.2 lets you enjoy exploring the world of Asterisk and VoIP telephony with an incredibly rich feature set that you won’t find anywhere else, period! We’ll resist making any other device analogies, but the idea here is to protect the good guy (you!) while keeping the bad guys out. No penetration. No worries. Simple as that.

In our former life working for a living, we actually procured and managed multimillion dollar PBXs as part of our "other duties as assigned." Without qualification, we can tell you that the feature set that Orgasmatron 5.2 brings to the table for free runs circles around anything you could buy (then or now) in the commercial marketplace. And, at one time or another, we purchased every Nortel feature good money could buy. There’s one other difference. Orgasmatron 5.2 runs swimmingly on a $200 Atom-based PC that you can purchase at any Best Buy as well as hundreds of other stores including Amazon, NewEgg, and Buy.com. We paid more than $200 to provision an additional extension on our Nortel switch! You, of course, can add as many extensions as you like. De nada.
So, why a new version of Orgasmatron in only a few weeks? Well, it’s not security-related. In fact, there is nothing wrong with continuing on with Orgasmatron 5.1. Unfortunately, it relied exclusively upon SIPgate to make free Google Voice calls in the U.S. and Canada. And SIPgate required an invite using an SMS message from a U.S.-based cellphone. That pretty well knocked out all of our friends living outside the United States. Today’s version fixes that by letting anyone sign up for a free IPkall phone number in Washington state. All you need is a valid email address. The setup process is a bit more complex because IPkall doesn’t support registered connections to their servers. But we’ll walk you through the additional steps and, once completed, your server will be just as secure as the SIPgate approach we set up with Orgasmatron 5.1. And few, if any, Linux skills are required to set up or manage Orgasmatron 5.2. As we’ve noted previously, if you can handle slice and bake cookies, you’ve got the necessary skillset! Be aware this is about a one-hour project, and you need to track through the article carefully, or the entire house of cards comes down.
 New Asterisk Security Model. Orgasmatron 5.2 maintains our design goal of running an absolutely secure Asterisk PBX from behind a hardware-based firewall with either NO INBOUND PORTS exposed to the Internet with SIPgate or an IP-address-restricted IAX port for IPkall. Don’t defeat this security mechanism by exposing additional ports on your PBX in a Flash server to Internet access. And choose your NAT-based firewall/router carefully. All of these devices are not created equally. Not only do some perform better than others, but certain models are notoriously bad at handling NAT-based routing tasks, a critical requirement in the Asterisk VoIP environment. In almost every case of problems with one-way audio, the real culprit can be traced back to a crappy router. For $35, you really can’t go wrong with the dLink WBR-2310. If you want traffic shaping functionality as well, take a look at dLink’s Gaming Router, our personal favorite.
As long as your router, Google Voice, SIPgate, and IPkall passwords are secure, you can sleep like a baby. We use an intermediate SIP provider for Google Voice to set up free outbound Google Voice calls in the U.S. and Canada because Google Voice actually places two calls to connect you to your destination. First, you get a call back. And then the party you’re calling is connected. The SIPgate or IPkall trunk is used by Google Voice to call you back so the inbound call is always free. We handle the interconnection magic with Asterisk transparently so your calls appear to be processed as if you were using a standard telephone to dial out. Just refrain from using extension 75 in Asterisk for personal conferencing!
The choice is yours. You can use SIPgate with no incoming ports exposed to your server from the Internet. Or you can use IPkall and map UDP port 4569 (IAX2) on your hardware-based firewall to the internal IP address of your new PBX in a Flash server. Even with the IPkall setup, we’ve locked down IPtables (our Linux firewall) to restrict IAX access to several specific IP addresses so your server remains absolutely secure. We’ve also included support for FonicaTec’s IAX offering for those that want a backup IAX provider. We’ll have much more to say about IPtables in coming weeks.
If you’ve already installed Orgasmatron 5.1 and it’s working for you, do you need to upgrade? NO. With the exception of the new IAX support for IPkall, the code in Orgasmatron 5.2 is identical.
We, of course, continue to recommend that you sign up with Vitelity so you have an alternate communications vehicle in the event of a problem with your free service. Vitelity also can provide 911 emergency service for your home or home office. You can save a little money while supporting the PBX in a Flash project by using the links at the end of this article.
 Swiss Army Knife Inventory. There’s no need for a Swiss Army Knife if you don’t know what all the blades are for. So, for those that are wondering what’s included in the Orgasmatron 5.2 build, here’s a feature list of the components you get in addition to the base PBX in a Flash build with CentOS 5.4, Asterisk 1.4, FreePBX 2.6, and Apache, SendMail, MySQL, PHP, phpMyAdmin, IPtables Linux firewall, Fail2Ban, and WebMin. Please note that A2Billing, Cepstral TTS, Hamachi VPN, and Mondo Backups are optional and may be installed using the scripts that are provided.
- A2Billing (/root/nv/install-a2billing)
- Amazon S3 Cloud Computing
- AsteriDex
- CallerID Superfecta (FreePBX Module)
- CallWho for Asterisk
- Cepstral TTS (/root/nv/install-cepstral.sh)
- Preconfigured Email That Works with SendMail
- Extensions (16 preconfigured)
- Fax Module using nvFax
- FONmail
- FreePBX Backups
- Gizmo5 (Free Calls to Gizmo5 users worldwide: 1747xxxxxxx*1089)
- Google Voice (preconfigured)
- Hamachi VPN (/root/nv/install-hamachi.x)
- Hotel-Style Wakeup Calls (FreePBX Module)
- ISN: FreeNum SIP Calling from Any Phone
- MeetMe Conference Bridge (just dial C-O-N-F)
- Mondo Full System Backups (/root/nv/install-diskbackup.x)
- NewsClips from Yahoo
- ODBC Database Support
- PogoPlug Cloud Computing
- Reminders by Phone and Web
- SIP URI Outbound Calling (call any SIP URI worldwide for free)
- TeleYapper
- Tide Reports with xTide
- Trunk Lister Script (/root/nv/trunks.sh)
- Trunks (Vitelity, Fonica, SIPgate, IPkall, and ENUM)
- Twitter Interface (Make Free Calls and Send SMS Messages)
- Weather by Airport Code
- Weather by ZIP Code
- Worldwide Weather
- Zaptel Updater (/root/nv/zaptel-update.sh)
Prerequisites. Here’s what you’ll need to get started:
- Broadband Internet connection
- Rock-solid NAT router/firewall. Recommend: $35 dLink WBR-2310
- $200 PC on which to run PBX in a Flash or a Proxmox Virtual Machine
- Free Google Voice account (HINT: Under $2 on eBay)
- Free SIPgateOne residential account (Use cell to get SMS invite) OR
- Free IPkall IAX account
Learn First. Install Second. Even though the installation process is now a No-Brainer, you are well-advised to do some reading before you begin. VoIP PBX systems have become a favorite target of the hackers and crackers around the world and, unless you have an unlimited bank account, you need to take some time learning where the minefields are in today’s VoIP world. Start by reading our Primer on Asterisk Security. Then read our PBX in a Flash and VPN in a Flash knols. If you’re still not asleep, there’s loads of additional documentation on the PBX in a Flash documentation web site.
Today’s Drill. The installation process is straight-forward, but a little different than the Orgasmo 5.1 scenario because of the need to accommodate IPkall. Just don’t skip any steps. In a nutshell, here are the 6 Steps to Free Calling and an incredibly versatile, preconfigured Asterisk PBX:
1. Install the latest version of PBX in a Flash
2. Run the Orgasmatron 5.2 Installer
3. Configure a softphone or SIP telephone
4. Configure Providers for Orgasmatron 5.2
5. Enter your Google Voice and SIPgate/IPkall credentials
6. Change existing passwords to secure your system
 Installing PBX in a Flash. Here’s a quick tutorial to get PBX in a Flash installed. We recommend you install the latest PIAF 1.6 beta on a new Atom-based PC. This beta is virtually identical to version 1.4 except it uses CentOS 5.4 instead of CentOS 5.2. This means it works better with newer hardware including Atom-based computers and newer network cards. Unlike other Asterisk aggregations, PBX in a Flash utilizes a two-step install process. The ISO only installs the CentOS operating system. Once installed, the server reboots and downloads a payload file that includes Asterisk, FreePBX, and many other VoIP and Linux utilities. We use the identical payload for versions 1.3, 1.4, 1.5, and 1.6 of PBX in a Flash. The beta label simply means we haven’t had time to sufficiently test CentOS. But this is not a Microsoft-style beta so fear not!
Download the 32-bit, PIAF 1.6 version from SourceForge, Vitelity, Cybernetic Networks, or AdHoc Electronics. The MD5 checksum for the file is e8a3fc96702d8aa9ecbd2a8afb934d36. Burn the ISO to a CD. Then boot from the installation CD and type ksalt to begin.
WARNING: This install will completely erase, repartition, and reformat ALL disks on your system! Press Ctrl-C to cancel the install.
On some systems you may get a notice that CentOS can’t find the kickstart file. Just tab to OK and press Enter. Don’t change the name or location of the kickstart file! This will get you going. Think of it as a CentOS ‘feature’. 🙂
At the keyboard prompt, tab to OK and press Enter. At the time zone prompt, tab once, highlight your time zone, tab to OK and press Enter. At the password prompt, make up a VERY secure root password. Type it twice. Tab to OK, press Enter. Get a cup of coffee. Come back in about 5 minutes. When the system has installed CentOS, it will reboot. Remove the CD promptly. After the reboot, choose A option. Have a 10-minute cup of coffee. After installation is complete, the machine will reboot a second time. Log in as root with your new password and execute the following commands:
update-scripts
update-fixes
When prompted, change the ARI password to something really obscure. You’re never going to use it! You now have a PBX in a Flash base install. On a stand-alone machine, it takes about 30 minutes. On a virtual machine, it takes about half that time.
NOTE: So long as your system is safely sitting behind a hardware-based firewall, we do NOT recommend running update-source on the Orgasmatron builds because of parking lot issues in the latest releases of Asterisk.
Running the Orgasmatron 5.2 Installer. Log into your server as root and issue the following commands to run the Orgasmatron 5.2 installer:
cd /root
wget http://pbxinaflash.net/orgasmo52.x
chmod +x orgasmo52.x
./orgasmo52.x
Have another 15-minute cup of coffee. It’s a great time to consider a modest donation to the Nerd Vittles project. You’ll find a link at the top of the page. When the installer finishes, READ THE SCREEN!
Now run passwd-master1. Set your FreePBX passwords to something very secure but different from your Linux root password.
Next, type status2 and press Enter. Write down the IP address of your new server.
If you’re using IPkall, now’s the time to log in to your hardware-based firewall/router and map UDP port 45693 to the private IP address that you just wrote down. This tells your firewall to pass all IAX2 traffic from the Internet directly to your new server. Don’t worry. We have severely restricted which IP addresses can actually send IAX data through the PBX in a Flash IPtables firewall which is an integral part of this build. And, remember, no hardware firewall adjustments are necessary if you’re using SIPgate instead of IPkall.
For good measure, we recommend you reboot your server at this point. The command to type is simple: reboot4
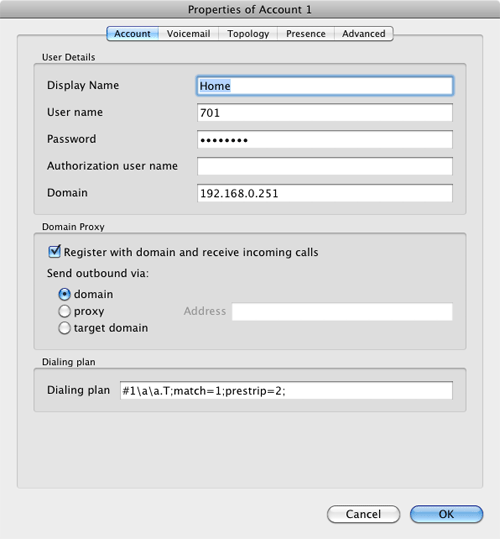
 Configuring a SIP Phone. There are hundreds of terrific SIP telephones and softphones for Asterisk-based systems. Once you get things humming along, you’ll want a real SIP telephone, and you’ll find lots of recommendations on Nerd Vittles. For today, let’s download a terrific (free) softphone to get you started. We recommend X-Lite because there are versions for Windows, Mac, and Linux. So download your favorite from this link. Install and run X-Lite on your Desktop. At the top of the phone, click on the Down Arrow and choose SIP Account Settings, Add. Enter the following information using 82812661 as the password for extension 701 and the actual IP address of your PBX in a Flash server instead of 192.168.0.251. Click OK when finished. Your softphone should now show: Available.
 Don’t Forget! After you change your extension passwords later in this tutorial, you will need to update the password entry in X-Lite, or you will no longer be able to place calls! In fact, you will get locked out of your server for 90 minutes after three failed password attempts. So put this on a sticky note so you don’t forget, or you’ll regret it in about 15 minutes.
Either a free SIPgate One residential phone number or an IPkall number is a key component in today’s project. And there’s really no reason you can’t use both if they’re available in your location. Do NOT use special characters in your provider passwords, or nothing will work! Continue reading whichever section below applies to you.
 Configuring SIPgate. If you live in the U.S. and have a cellphone, we’d recommend the SIPgate option since no adjustment of your hardware-based firewall is required. Otherwise, skip to the IPkall setup below. Step #1 is to request a SIPgate invite at this link. You’ll need to enter your U.S. cellphone number to receive the SMS message with your invitation code. Don’t worry. You can erase your cellphone number from your account once it is set up. Once you receive the invite code, enter it and choose the option to set up a residential account. Next, choose a phone number and write it down. The area code really doesn’t matter because Google Voice is the only one that will be calling this number after we get things set up. For now, leave your cellphone number in place so that you can receive your confirmation call from Google Voice in the next step. After that, you’ll want to revisit SIPgate and remove all parallel calling numbers. Finally, click on the Settings link and write down your SIP ID and SIP Password. You’ll need these in a few minutes to configure PBX in a Flash. Now place a call to your new SIPgate number and make certain that your cellphone rings before proceeding.
Configuring IPkall. If you’ve opted to use IPkall, here’s the drill. First, you’ll need to register for a free IPkall number. This is actually a two-step process. Set it up as a SIP connection when you first register. Then we’ll change it to IAX once your new phone number is provided. So your initial IPkall request should look like this:
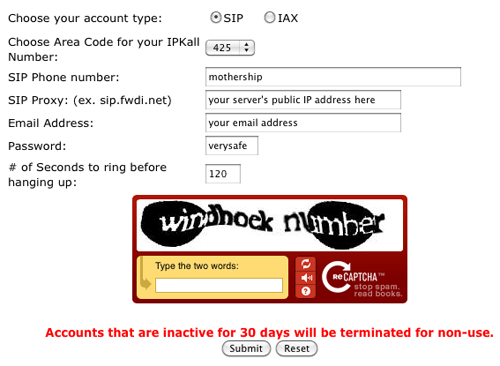
We recommend area code 425 for your requested number because IPkall appears to have lots of them. If they don’t have an available number, your request apparently goes in the bit bucket. You’ll know because IPkall typically turns these requests around in a few minutes. Don’t worry about the mothership entry. We’ll change it shortly. The other issue here is your public IP address. If you have a dedicated IP address, no worries. Just plug in the IP address for SIP Proxy. If it’s dynamic, then you’ll need to set up a fully-qualified domain name (FQDN) with a provider such as dyndns.com. Once you’ve got it set up, enter your credentials in the Dynamic DNS tab of your hardware-based firewall to assure that your dynamic IP address is always synchronized with your FQDN. Then enter the FQDN for your SIP Proxy address in the IPkall form. Be sure to make up a VERY secure password. Now send it off and wait for the return email with your new phone number.
When you receive your new phone number, you’ll need to revisit the IPkall site and log in with your phone number and the password you chose above. Make the changes shown below using your actual IPkall phone number instead of 4259876543:
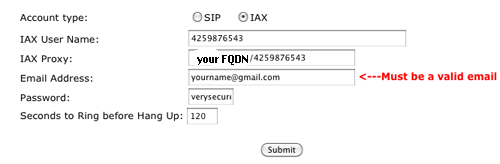
It’s worth stressing that these settings are extremely important so check your work carefully. Be sure the IAX option is selected. Be sure there are no typos in your two phone number entries. And be sure your FQDN or public IP address is correct. Then save your new settings.
We’re going to be making some entries in FreePBX which is the web-GUI that manages PBX in a Flash. For now, we simply need to enter your new IPkall phone number so that incoming calls to your IPkall number will actually ring on your softphone. Later, we’ll make some further adjustments once we get Google Voice humming along.
Using a web browser from your desktop, log in to FreePBX 2.6 at the following link substituting your server’s private IP address for ipaddress: http://ipaddress/admin. You’ll be prompted for a user name (maint) and password (the one you just created with passwd-master).
When FreePBX loads, choose Setup, Trunks, ipkall (iax). In the USER Context field, enter your 10-digit IPkall phone number. Click Submit Changes, Apply Configuration Changes, Continue with Reload to save your settings.
TIP: Be aware that IPkall cancels an assigned phone number after 30 consecutive days of inactivity. If you will be using your number infrequently, it’s a good idea to schedule a Weekly Reminder to call the number with a prerecorded message. This will assure that your number stays functional.
Now let’s test your new phone number. Call your IPkall number from a cellphone or some other phone. Your softphone should ring. Answer the call, and be sure you have voice in both directions! Do not proceed without success here, or the rest of the adventure is a waste of your time.
 Configuring Google Voice. Google Voice still is by invitation only so the first thing you’ll need is an invite. If you’re in a hurry, then stroll over to eBay where you’ll find lots of them for under $2. Once you have your invite in hand, click on the email link to set up your account. After you’ve chosen a telephone number, plug in your new SIPgate or IPkall number as the destination for your Google Voice calls and choose Office as the Phone Type. Trust us.
Google then will place a call to your number and ask you to enter a confirmation code that’s been provided. When your cellphone (SIPgate) or softphone (IPkall) rings, answer it and punch in the number. Wait for confirmation. Then hang up.
As we mentioned earlier, there’s no reason you can’t set up both SIPgate and IPkall forwarding numbers in Google Voice. Just repeat the drill with the other provider’s number if you wish to activate both numbers for use with Google Voice. They’re not both going to ring simultaneously as you will see in a minute.
While you’re still in Google Voice Settings, click on the Calls tab. Make sure your settings match these:
- Call Screening – OFF
- Call Presentation – OFF
- Caller ID (In) – Display Caller’s Number
- Caller ID (Out) – Don’t Change Anything
- Do Not Disturb – OFF
Click Save Changes once you adjust your settings. Under the Voicemail tab, plug in your email address so you get notified of new voicemails. Down the road, receipt of a Google Voice voicemail will be a big hint that something has come unglued on your PBX.
Finally, place a test call to your new Google Voice number and be sure your cellphone or softphone rings. Don’t move forward until you’ve been able to successfully place a call to your phone by dialing your Google Voice number. Once this is working, revisit SIPgate and remove all parallel calling numbers including your cell number.
 Adding Your Credentials to PBX in a Flash. We’re ready to insert your Google Voice credentials and SIPgate/IPkall number into PBX in a Flash. You’ll need four pieces of information: your 10-digit Google Voice phone number, your Google Voice account name (which is the email address you used to set up your GV account), your GV password (no spaces!), and your 11-digit SIPgate or IPkall RingBack DID (beginning with a 1). Don’t get the 10-digit GV number mixed up with the 11-digit SIPgate/IPkall RingBack DID, or nothing will work. 🙂
Log back into your server as root and issue the following command: ./configure-gv. Check your entries carefully. If you make a typo in entering any of your data, press Ctrl-C to cancel the script and then run it again!!
 Configuring FreePBX. Now shift back to your Desktop and, using a web browser, log in to FreePBX 2.6 at the following link substituting your actual IP address for ipaddress: http://ipaddress/admin. You’ll be prompted for a user name (maint) and password (the one you just created with passwd-master). Depending upon which intermediate provider you’re using, do the following:
SIPgate Setup. When FreePBX loads, choose Setup, Trunks, sipgate. In Peer Details, replace both instances of sipID with your actual SipGate SIP ID. In Peer Details, replace sipPassword with your actual SipGate SIP Password. In Register String, replace sipID with your SipGate SIP ID, replace sipPassword with your SipGate SIP Password, and replace 3333333333 with your 10-digit SipGate Phone Number. When finished, the Register String should look something like the following:
7004484f0:B8TTW3@sipgate.com/4155201234
Click Submit, Apply Configuration Changes, Continue with Reload to save your changes.
SIPgate and IPkall Setup. While still in FreePBX with your browser, click Setup, Inbound Routes, gv-ringback. In DID Number, replace 3333333333 with your 10-digit SIPGate or IPkall Phone Number. In CallerID Number, replace 7777777777 with your 10-digit Google Voice Number.
Click Submit, Apply Configuration Changes, Continue with Reload to save your changes.
Securing FreePBX. You’re almost done. While still in FreePBX, choose each of the 16 preconfigured extensions on your new server and change the extension AND voicemail passwords. Here’s the drill: Setup, Extensions, 501, Submit. After changing secret and Voicemail Password, repeat with the next extension number instead of 501. Then Apply Config Changes, Continue when you’ve finished with all of them.
Now change the default DISA password: Setup, DISA, DISAmain, PIN, Submit Changes, Apply Config Changes, Continue.
Don’t forget to adjust your X-Lite password to match the password entry you made for extension 701!
 Orgasmatron Test Flight. The proof is in the pudding as they say. So let’s try two simple tests. First, from another phone, call your Google Voice number. Your softphone should begin ringing shortly. Answer the call and make sure you can send and receive voice on both phones. Hang up. Now let’s place an outbound call. Using the softphone, dial your cellphone number. Google Voice should transparently connect you. Answer the call and make sure you can send and receive voice on both phones. If everything is working, congratulations!
 Solving One-Way Audio Problems. If you experience one-way audio on some of your phone calls, you may need to adjust the settings in /etc/asterisk/sip_custom.conf. Just uncomment the first two lines by removing the semicolons. Then replace 173.15.238.123 with your public IP address, and replace 192.168.0.0 with the subnet address of your private network. Save the file and restart Asterisk with the command: amportal restart.
![]() Choosing a VoIP Provider. For this week, we’ll point you to some things to play with on your new server. Then, in the subsequent articles below, we’ll cover in detail how to customize every application that’s been loaded. Nothing beats free when it comes to long distance calls. But nothing lasts forever. So we’d recommend you set up another account with Vitelity using our special link below. This gives your PBX a secondary way to communicate with every telephone in the world, and it also gets you a second real phone number for your new system… so that people can call you. Here’s how it works. You pay Vitelity a deposit for phone service. They then will bill you $3.99 a month for your new phone number. This $3.99 also covers the cost of unlimited inbound calls (two at a time) delivered to your PBX for the month. For outbound calls, you pay by the minute and the cost is determined by where you’re calling. If you’re in the U.S., outbound calls to anywhere in the U.S. are a little over a penny a minute. If you change your mind about Vitelity and want a refund of the balance in your account, all you have to do is ask.
Choosing a VoIP Provider. For this week, we’ll point you to some things to play with on your new server. Then, in the subsequent articles below, we’ll cover in detail how to customize every application that’s been loaded. Nothing beats free when it comes to long distance calls. But nothing lasts forever. So we’d recommend you set up another account with Vitelity using our special link below. This gives your PBX a secondary way to communicate with every telephone in the world, and it also gets you a second real phone number for your new system… so that people can call you. Here’s how it works. You pay Vitelity a deposit for phone service. They then will bill you $3.99 a month for your new phone number. This $3.99 also covers the cost of unlimited inbound calls (two at a time) delivered to your PBX for the month. For outbound calls, you pay by the minute and the cost is determined by where you’re calling. If you’re in the U.S., outbound calls to anywhere in the U.S. are a little over a penny a minute. If you change your mind about Vitelity and want a refund of the balance in your account, all you have to do is ask.
The VoIP world is new territory for some of you. Unlike the Ma Bell days, there’s really no reason not to have multiple VoIP providers especially for outbound calls. Depending upon where you are calling, calls may be cheaper using different providers for calls to different locations. So we recommend having at least two providers. Visit the PBX in a Flash Forum to get some ideas on choosing alternative providers.
Kicking the Tires. OK. That’s enough tutorial for today. Let’s play. Using your new softphone, begin your adventure by dialing these extensions:
- D-E-M-O – Nerd Vittles Orgasmatron Demo (running on your PBX)
- 1234*1061 – Nerd Vittles Demo via ISN FreeNum connection to NV
- 17476009082*1089 – Nerd Vittles Demo via ISN to Google/Gizmo5
- Z-I-P – Enter a five digit zip code for any U.S. weather report
- 6-1-1 – Enter a 3-character airport code for any U.S. weather report
- 5-1-1 – Get the latest news and sports headlines from Yahoo News
- T-I-D-E – Get today’s tides and lunar schedule for any U.S. port
- F-A-X – Send a fax to an email address of your choice
- 4-1-2 – 3-character phonebook lookup/dialer with AsteriDex
- M-A-I-L – Record a message and deliver it to any email address
- C-O-N-F – Set up a MeetMe Conference on the fly
- 1-2-3 – Schedule regular/recurring reminder (PW: 12345678)
- 2-2-2 – ODBC/Timeclock Lookup Demo (Empl No: 12345)
- 2-2-3 – ODBC/AsteriDex Lookup Demo (Code: AME)
- Dial *68 – Schedule a hotel-style wakeup call from any extension
- 1061*1061 – PBX in a Flash Support Conference Bridge
- 882*1061 – VoIP Users Conference every Friday at Noon (EST)
 Homework. Your homework for this week is to do some exploring. FreePBX is a treasure trove of functionality, and the Orgasmatron build adds a bunch of additional options. See if you can find all of them. For starters, you’ll want to activate CallerID Lookups in FreePBX. Choose Setup, CID Superfecta, Default and enter the maint password you created with passwd-master. Then choose Tools, Module Administration, CallerID Lookup, Enable, Process and Save the Settings. Then edit each of the Inbound Routes and choose CallerID Superfecta as the CID Lookup Source. Save your changes. Finally, choose Setup, CallerID Lookup Sources, CallerID Superfecta and be sure your maint password created with passwd-master is correct here, too. If not, update it. For additional tips, visit the forums.
 Be sure to log into your server as root and look through the scripts added in the /root/nv folder. You’ll find all sorts of goodies to keep you busy. s3cmd.faq tells you how to quickly activate the Amazon S3 Cloud Computing service. And, if you’ve heeded our advice and purchased a PogoPlug, you can link to your home-grown cloud. Just add your credentials to /root/pogo-start.sh. Then run the script to enable the PogoPlug Cloud on your server. All of your cloud resources are instantly accessible in /mnt/pogoplug. It’s also perfect for off-site backups!
Also check out Tweet2Dial which lets you use Twitter to make Google Voice calls, send free SMS messages, and manage your new Asterisk server. Don’t forget to List Yourself in Directory Assistance so everyone can find you by dialing 411. And add your new number to the Do Not Call Registry to block telemarketing calls. Or just call 888-382-1222 from your new number. Finally, try out the included Stealth AutoAttendant by dialing your own number and pressing 0 while the greeting is played. This will reroute your call to the demo applications option in the IVR.
 Support Issues. With any application as sophisticated as this one, you’re bound to have questions. Blog comments are a terrible place to handle support issues although we welcome general comments about our articles and software. If you have particular support issues, we encourage you to get actively involved in the PBX in a Flash Forums. It’s the best Asterisk tech support site in the business, and it’s all free! We maintain a thread with the latest Patches for Orgasmatron 5.1 and 5.2. Please have a look. Unlike some forums, ours is extremely friendly and is supported by literally hundreds of Asterisk gurus and thousands of ordinary users just like you. So you won’t have to wait long for an answer to your questions.
Coming Attractions. In our next episode, we’ll walk you through the process of adding a second, third, fourth, and fifth Google Voice line to your server so that you’ll never run out of free calling on your server. Enjoy!

Need help with Asterisk? Visit the PBX in a Flash Forum.
Or Try the New, Free PBX in a Flash Conference Bridge.
whos.amung.us If you’re wondering what your fellow man is reading on Nerd Vittles these days, wonder no more. Visit our new whos.amung.us statistical web site and check out what’s happening. It’s a terrific resource both for us and for you.
Special Thanks to Our Generous Sponsors
FULL DISCLOSURE: ClearlyIP, Skyetel, Vitelity, DigitalOcean, Vultr, VoIP.ms, 3CX, Sangoma, TelecomsXchange and VitalPBX have provided financial support to Nerd Vittles and our open source projects through advertising, referral revenue, and/or merchandise. As an Amazon Associate and Best Buy Affiliate, we also earn from qualifying purchases. We’ve chosen these providers not the other way around. Our decisions are based upon their corporate reputation and the quality of their offerings and pricing. Our recommendations regarding technology are reached without regard to financial compensation except in situations in which comparable products at comparable pricing are available from multiple sources. In this limited case, we support our sponsors because our sponsors support us.
 BOGO Bonaza: Enjoy state-of-the-art VoIP service with a $10 credit and half-price SIP service on up to $500 of Skyetel trunking with free number porting when you fund your Skyetel account. No limits on number of simultaneous calls. Quadruple data center redundancy. $25 monthly minimum spend required. Tutorial and sign up details are here.
![]() The lynchpin of Incredible PBX 2020 and beyond is ClearlyIP components which bring management of FreePBX modules and SIP phone integration to a level never before available with any other Asterisk distribution. And now you can configure and reconfigure your new Incredible PBX phones from the convenience of the Incredible PBX GUI.
The lynchpin of Incredible PBX 2020 and beyond is ClearlyIP components which bring management of FreePBX modules and SIP phone integration to a level never before available with any other Asterisk distribution. And now you can configure and reconfigure your new Incredible PBX phones from the convenience of the Incredible PBX GUI.
 VitalPBX is perhaps the fastest-growing PBX offering based upon Asterisk with an installed presence in more than 100 countries worldwide. VitalPBX has generously provided a customized White Label version of Incredible PBX tailored for use with all Incredible PBX and VitalPBX custom applications. Follow this link for a free test drive!
 Special Thanks to Vitelity. Vitelity is now Voyant Communications and has halted new registrations for the time being. Our special thanks to Vitelity for their unwavering financial support over many years and to the many Nerd Vittles readers who continue to enjoy the benefits of their service offerings. We will keep everyone posted on further developments.
Some Recent Nerd Vittles Articles of Interest…
- passwd-master is the PIAF utility for setting a master password for FreePBX access with the maint user account. [↩]
- status is the PIAF utility program that displays the current status of most major applications running on your server. [↩]
- Mapping a port on your firewall to a private IP address unblocks certain Internet packets and allows them to pass through your firewall directly to an IP device "inside" your firewall for further processing. [↩]
- reboot is the Linux command for restarting your server. It’s functionally equivalent to shutdown -r now. [↩]
It’s Orgasmatron 5.1: The Ultimate Asterisk Kitchen Sink
For those that want a turnkey Asterisk® VoIP PBX with every bell and whistle, today is your very lucky day. This tutorial will walk you through every step. In less than an hour, you'll have your very own, fully functional Asterisk PBX. No Linux skills are required for this setup. There's no charge for any outbound call made to any number in the U.S. or Canada. And inbound calls are free as well.
News Flash: Incredible PBX 4.0 is now available with FreePBX 2.10 support!
Coming January 19: Incredible PBX 11 & Incredible Fax for Asterisk 11 and FreePBX 2.11
New Asterisk Security Model. Orgasmatron 5.1 has an all-new design which is intended to let you run an absolutely secure Asterisk PBX in your home from behind a secure firewall with NO INBOUND PORTS exposed to the Internet. So long as your router, Google Voice, and SIPgate passwords are secure, you can sleep like a baby. Today's Magic uses SIPgate as an intermediate SIP provider for Google Voice to set up free outbound Google Voice calls in the U.S. and Canada. Remember that Google Voice actually places two calls to connect you to your destination. First, you get a call back. And then the party you're calling is connected. The SIPgate trunk is used by Google Voice to call you back so the inbound SIPgate call is free. We handle all of the interconnection magic with Asterisk transparently so your calls appear to be processed as if you were using a standard telephone to dial out. Just remember not to use extension 75 in Asterisk for your personal conferences!
Because we register your SIP connection with SIPgate permanently, there is no need to open the SIP or IAX Internet ports on your router. In short, your SIP connection with SIPgate works just as if you were using a browser behind a firewall. The return port will automatically be mapped by your NAT-based router. Hence, no security worries! We, of course, do recommend that you sign up with Vitelity so you have an alternate communications vehicle in the event of a problem with your free service. Vitelity also can provide 911 emergency service for your home or home office. You can save a little money while supporting the PBX in a Flash project by using the links at the end of this article.
Kitchen Sink Inventory. No kitchen is complete without an inventory. So, for those that are wondering what's included in the Orgasmatron 5.1 build, here's a feature list of the components you get in addition to the base PBX in a Flash build with Asterisk 1.4, FreePBX 2.6, and Apache, SendMail, MySQL, PHP, phpMyAdmin, IPtables Linux firewall, Fail2Ban, and WebMin. A2Billing, Cepstral, Hamachi VPN, and Mondo Backups are optional and may be installed using the scripts that are provided.
- A2Billing (/root/nv/install-a2billing)
- Amazon S3
- AsteriDex
- CallerID Superfecta (FreePBX Module)
- CallWho for Asterisk
- Cepstral TTS (/root/nv/install-cepstral.sh)
- Preconfigured Email That Works with SendMail
- Extensions (16 preconfigured)
- Fax Module using nvFax
- FONmail
- FreePBX Backups
- Gizmo5 (Free Calls to Gizmo5 users worldwide: 1747xxxxxxx*1089)
- Google Voice (preconfigured)
- Hamachi VPN (/root/nv/install-hamachi.x)
- Hotel-Style Wakeup Calls (FreePBX Module)
- ISN: FreeNum SIP Calling from Any Phone
- MeetMe Conference Bridge (just dial C-O-N-F)
- Mondo Full System Backups (/root/nv/install-diskbackup.x)
- NewsClips from Yahoo
- ODBC Database Support
- Reminders by Phone and Web
- SIP URI Outbound Calling (call any SIP URI worldwide for free)
- TeleYapper
- Tide Reports with xTide
- Trunk Lister Script (/root/nv/trunks.sh)
- Trunks (Vitelity, Fonica, SIPgate, and ENUM)
- Twitter Interface (Make Free Calls and Send SMS Messages)
- Weather by Airport Code
- Weather by ZIP Code
- Worldwide Weather
- Zaptel Updater (/root/nv/zaptel-update.sh)
Prerequisites. Here's what you'll need to get started:
- Broadband Internet connection
- Rock-solid NAT router/firewall. Recommend: $35 dLink WBR-2310
- $200 PC on which to run PBX in a Flash or a Proxmox Virtual Machine
- Free Google Voice account (HINT: Under $2 on eBay)
- Free SIPgateOne residential account (Use cell to get SMS invite)
Learn First. Install Second. Even though the installation process is now a No-Brainer, you are well-advised to do some reading before you begin. VoIP PBX systems have become a favorite target of the hackers and crackers around the world and, unless you have an unlimited bank account, you need to take some precautions to protect your phone bill. Start by reading our Primer on Asterisk Security. Then read our PBX in a Flash and VPN in a Flash knols. If you're still not asleep, there's loads of additional documentation on the PBX in a Flash documentation web site.
Today's Drill. The installation process is straight-forward. Just don't skip any steps. In a nutshell, here are the 6 Steps to Free Calling and an incredibly versatile, preconfigured Asterisk PBX:
1. Configure SIPgate and Google Voice for Orgasmatron 5.1
2. Install the latest version of PBX in a Flash
3. Run the Orgasmatron 5.1 Installer
4. Enter your Google Voice and SIPgate credentials
5. Change existing passwords to secure your system
6. Configure a softphone or SIP telephone
Configuring SIPgate. A free SIPgate One residential phone number is a key component in today's project. This allows you to receive free incoming calls on your SIPgate number. Step #1 is to request an invite at this link. You'll need to enter your U.S. cellphone number to receive the SMS message with your invitation code. Don't worry. You can erase your cellphone number from your account once it is set up. Once you receive the invite code, enter it and choose the option to set up a residential account. Next, choose a phone number and write it down. The area code really doesn't matter because Google Voice is the only one that will be calling this number after we get things set up. For now, leave your cellphone number in place so that you can receive your confirmation call from Google Voice in the next step. After that, you'll want to revisit SIPgate and remove all parallel calling numbers. Finally, click on the Settings link and write down your SIP ID and SIP Password. You'll need these in a few minutes to configure PBX in a Flash. Now place a call to your new SIPgate number and make certain that your cellphone rings before proceeding.
Configuring Google Voice. Google Voice still is by invitation only so the first thing you'll need is an invite. If you're in a hurry, then stroll over to eBay where you'll find lots of them for under $2. Once you have your invite in hand, click on the email link to set up your account. After you've chosen a telephone number, plug in your new SIPgate number as the destination for your Google Voice calls and choose Office as the Phone Type. Trust us.
Google then will place a call to your SIPgate number and ask you to enter a confirmation code that's been provided. When your cellphone rings, answer it and punch in the number. Wait for confirmation. Then hang up.
While you're still in Google Voice Settings, click on the Calls tab. Make sure your settings match these:
- Call Screening - OFF
- Call Presentation - OFF
- Caller ID (In) - Display Caller's Number
- Caller ID (Out) - Don't Change Anything
- Do Not Disturb - OFF
Click Save Changes once you adjust your settings. Under the Voicemail tab, plug in your email address so you get notified of new voicemails. Down the road, receipt of a Google Voice voicemail will be a big hint that something has come unglued on your PBX.
Now place a test call to your new Google Voice number and be sure your cellphone rings. Don't move forward until you've been able to successfully place a call to your cellphone by dialing your Google Voice number. Once this is working, revisit SIPgate and remove all parallel calling numbers including your cell number.
Installing PBX in a Flash. Now for the fun part. Here's a quick tutorial to get PBX in a Flash installed. We recommend you install the latest PIAF 1.6 beta which is virtually identical to version 1.4 except it uses CentOS 5.4 instead of CentOS 5.2. This means it works better with newer hardware including Atom-based computers and newer network cards. Download the 32-bit, PIAF 1.6 version from here, here, or here. The MD5 checksum for the file is e8a3fc96702d8aa9ecbd2a8afb934d36. Burn the ISO to a CD. Then boot your system from the installation CD and type ksalt to begin.
WARNING: This install will completely erase, repartition, and reformat ALL disks on your system! Press Ctrl-C to cancel the install.
On some systems you may get a notice that CentOS can't find the kickstart file. Just tab to OK and press Enter. Don't change the name or location of the kickstart file! This will get you going. Think of it as a CentOS 'feature'. 🙂
At the keyboard prompt, tab to OK and press Enter. At the time zone prompt, tab once, highlight your time zone, tab to OK and press Enter. At the password prompt, make up a VERY secure root password. Type it twice. Tab to OK, press Enter. Get a cup of coffee. Come back in about 5 minutes. When the system has installed CentOS, it will reboot. Remove the CD promptly. After the reboot, choose A option. Have a 10-minute cup of coffee. After installation is complete, the machine will reboot a second time. Log in as root with your new password and execute the following commands:
update-scripts
update-fixes
When prompted, change the ARI password to something really obscure. You're never going to use it! You now have a PBX in a Flash base install. On a stand-alone machine, it takes about 30 minutes. On a virtual machine, it takes about half that time.
Running the Orgasmatron 5.1 Installer. Log into your server as root and issue the following commands to run the Orgasmatron 5.1 installer:
cd /root
wget http://pbxinaflash.net/orgasmo51.x
chmod +x orgasmo51.x
./orgasmo51.x
Have another 15-minute cup of coffee. It's a great time to consider a modest donation to the Nerd Vittles project. You'll find a link at the top of the page. When the installer finishes, READ THE SCREEN!
Adding Your Credentials to PBX in a Flash. Now we're ready to insert your Google Voice credentials and SIPgate number into PBX in a Flash. You'll need four pieces of information: your 10-digit Google Voice phone number, your Google Voice account name (which is the email address you used to set up your GV account), your GV password (no spaces!), and your 11-digit SIPgate RingBack DID (beginning with a 1). Don't get the 10-digit GV number mixed up with the 11-digit SIPgate RingBack DID, or nothing will work. 🙂
While logged into your server as root, issue the following command: ./configure-gv. Check your entries carefully. If you make a typo in entering any of your data, press Ctrl-C to cancel the script and then run it again!!
Next, run passwd-master and set your FreePBX passwords to something equally secure but different from your Linux root password.
Finally, type status and press Enter. Write down the IP address of your new server. You'll need it in the next step.
Configuring FreePBX. Using a web browser, log in to FreePBX 2.6 at the following link substituting your actual IP address for ipaddress: http://ipaddress/admin. You'll be prompted for a user name (maint) and password (the one you just created with passwd-master).
When FreePBX loads, choose Setup, Trunks, sipgate. In Peer Details, replace both instances of sipID with your actual SipGate SIP ID. In Peer Details, replace sipPassword with your actual SipGate SIP Password. In Register String, replace sipID with your SipGate SIP ID, replace sipPassword with your SipGate SIP Password, and replace 3333333333 with your 10-digit SipGate Phone Number. When finished, the Register String should look something like the following:
7004484f0:B8TTW3@sipgate.com/4155201234
Click Submit Changes, Apply Configuration Changes, Continue with Reload to save your settings.
Now click Setup, Inbound Routes, gv-ringback. In DID Number, replace 3333333333 with your 10-digit SIPGate Phone Number. In CallerID Number, replace 7777777777 with your 10-digit Google Voice Number.
Click Submit, Apply Configuration Changes, Continue with Reload to save your changes.
Securing FreePBX. You're almost done. While still in FreePBX, choose each of the 16 preconfigured extensions on your new server and change the extension AND voicemail passwords. Here's the drill: Setup, Extensions, 501, Submit. After changing secret and Voicemail Password, repeat with the next extension number instead of 501. Then Apply Config Changes, Continue when you've finished with all of them.
Now change the default DISA password: Setup, DISA, DISAmain, PIN, Submit Changes, Apply Config Changes, Continue.
Whew! We recommend you reboot your server at this juncture just to be sure everything gets initialized correctly. Then all we need is a phone and you're all set.
Configuring a SIP Phone. There are hundreds of terrific SIP telephones and softphones for Asterisk-based systems. Once you get things humming along, you'll want a real SIP telephone, and you'll find lots of recommendations on Nerd Vittles. For today, let's download a terrific (free) softphone to get you started. We recommend X-Lite because there are versions for Windows, Mac, and Linux. So download your favorite from this link. Install and run X-Lite on your Desktop. At the top of the phone, click on the Down Arrow and choose SIP Account Settings, Add. Enter the following information using your actual password for extension 701 and the actual IP address of your PBX in a Flash server instead of 192.168.0.251. Click OK when finished.
Orgasmatron Test Flight. The proof is in the pudding as they say. So let's try two simple tests. First, from another phone, call your Google Voice number. Your softphone should begin ringing shortly. Answer the call and make sure you can send and receive voice on both phones. Hang up. Now let's place an outbound call. Using the softphone, dial your cellphone number. Google Voice should transparently connect you. Answer the call and make sure you can send and receive voice on both phones. If everything is working, congratulations!
Solving One-Way Audio Problems. If you experience one-way audio on some of your phone calls, you may need to adjust the settings in /etc/asterisk/sip_custom.conf. Just uncomment the first two lines by removing the semicolons. Then replace 173.15.238.123 with your public IP address, and replace 192.168.0.0 with the subnet address of your private network. Save the file and restart Asterisk with the command: amportal restart.
![]() Choosing a VoIP Provider. For this week, we'll point you to some things to play with on your new server. Then, in the subsequent articles below, we'll cover in detail how to customize every application that's been loaded. Nothing beats free when it comes to long distance calls. But nothing lasts forever. So we'd recommend you set up another account with Vitelity using our special link below. This gives your PBX a secondary way to communicate with every telephone in the world, and it also gets you a second real phone number for your new system... so that people can call you. Here's how it works. You pay Vitelity a deposit for phone service. They then will bill you $3.99 a month for your new phone number. This $3.99 also covers the cost of unlimited inbound calls (two at a time) delivered to your PBX for the month. For outbound calls, you pay by the minute and the cost is determined by where you're calling. If you're in the U.S., outbound calls to anywhere in the U.S. are a little over a penny a minute. If you change your mind about Vitelity and want a refund of the balance in your account, all you have to do is ask.
Choosing a VoIP Provider. For this week, we'll point you to some things to play with on your new server. Then, in the subsequent articles below, we'll cover in detail how to customize every application that's been loaded. Nothing beats free when it comes to long distance calls. But nothing lasts forever. So we'd recommend you set up another account with Vitelity using our special link below. This gives your PBX a secondary way to communicate with every telephone in the world, and it also gets you a second real phone number for your new system... so that people can call you. Here's how it works. You pay Vitelity a deposit for phone service. They then will bill you $3.99 a month for your new phone number. This $3.99 also covers the cost of unlimited inbound calls (two at a time) delivered to your PBX for the month. For outbound calls, you pay by the minute and the cost is determined by where you're calling. If you're in the U.S., outbound calls to anywhere in the U.S. are a little over a penny a minute. If you change your mind about Vitelity and want a refund of the balance in your account, all you have to do is ask.
The VoIP world is new territory for some of you. Unlike the Ma Bell days, there's really no reason not to have multiple VoIP providers especially for outbound calls. Depending upon where you are calling, calls may be cheaper using different providers for calls to different locations. So we recommend having at least two providers. Visit the PBX in a Flash Forum to get some ideas on choosing alternative providers.
Kicking the Tires. OK. That's enough tutorial for today. Let's play. Using your new softphone, begin your adventure by dialing these extensions:
- D-E-M-O - Nerd Vittles Orgasmatron Demo (running on your PBX)
- 1234*1061 - Nerd Vittles Demo via ISN FreeNum connection to NV
- 17476009082*1089 - Nerd Vittles Demo via ISN to Google/Gizmo5
- Z-I-P - Enter a five digit zip code for any U.S. weather report
- 6-1-1 - Enter a 3-character airport code for any U.S. weather report
- 5-1-1 - Get the latest news and sports headlines from Yahoo News
- T-I-D-E - Get today's tides and lunar schedule for any U.S. port
- F-A-X - Send a fax to an email address of your choice
- 4-1-2 - 3-character phonebook lookup/dialer with AsteriDex
- M-A-I-L - Record a message and deliver it to any email address
- C-O-N-F - Set up a MeetMe Conference on the fly
- 1-2-3 - Schedule regular/recurring reminder (PW: 12345678)
- 2-2-2 - ODBC/Timeclock Lookup Demo (Empl No: 12345)
- 2-2-3 - ODBC/AsteriDex Lookup Demo (Code: AME)
- Dial *68 - Schedule a hotel-style wakeup call from any extension
- 1061*1061 - PBX in a Flash Support Conference Bridge
- 882*1061 - VoIP Users Conference every Friday at Noon (EST)
Homework. Your homework for this week is to do some exploring. FreePBX is a treasure trove of functionality, and the Orgasmatron build adds a bunch of additional options. See if you can find all of them. For starters, you'll want to activate CID Superfecta in FreePBX. For tips, start here in the forums. Then log into your server as root and look through the scripts added in the /root/nv folder. You'll find all sorts of goodies to keep you busy. And, be sure to check out Tweet2Dial which lets you use Twitter to make Google Voice calls, send free SMS messages, and manage your new Asterisk server. Finally, don't forget to List Yourself in Directory Assistance so everyone can find you by dialing 411. And be sure to add your new number to the Do Not Call Registry to block telemarketing calls. Or just call 888-382-1222 from your new number. Enjoy!
Support Issues. With any application as sophisticated as this one, you're bound to have questions. Blog comments are a terrible place to handle support issues although we welcome general comments about our articles and software. If you have particular support issues, we encourage you to get actively involved in the PBX in a Flash Forums. It's the best Asterisk tech support site in the business, and it's all free! We maintain a thread with the latest Patches for Orgasmatron 5.1. Please have a look. Unlike some forums, ours is extremely friendly and is supported by literally hundreds of Asterisk gurus and thousands of ordinary users just like you. So you won't have to wait long for an answer to your questions.
 Upgrading Previous Orgasmatron V Installs. The question we hear over and over is "How do I upgrade from an existing Orgasmatron V install or from an existing Asterisk system?" The short answer is you can't. But there is some good news. For those with existing Orgasmatron V installs, we think we can fix your system so that it makes calls reliably. First, be sure your sipgate and gv-incoming settings match what is shown above in this article. Second, be sure you have configured a sipgate trunk with your proper sipgate credentials. Finally, log into your server as root and issue the following commands:
cd /root
wget http://pygooglevoice.googlecode.com/files/pygooglevoice-0.5.tar.gz
tar zxvf pygooglevoice-0.5*
cd pygooglevoice-0.5
python setup.py install
cd /etc/asterisk
sed -i 's|\${RINGBACK}|\${RINGBACK} 3|' extensions_custom.conf
asterisk -rx "dialplan reload"
Early Adopter WARNING. Current downloads are bug-free as best we can tell. But, for those that installed Orgasmatron 5.1 before 2:20 PM (EST) on Saturday, 2/27/2010, a couple of issues have arisen that need to be addressed. Please visit the following link to Orgasmatron 5.1 patches and apply those applicable to your particular situation. Without these patches, a security vulnerability may exist if you expose your server to web access from the Internet and a number of dialplan errors will cause unexpected behavior. It takes less than a minute to apply all of the patches! I'm reminded of the old Wild West adage: "You can always tell the pioneers by the arrows in their back."
Originally published: February 25, 2010
Need help with Asterisk? Visit the PBX in a Flash Forum.
Or Try the New, Free PBX in a Flash Conference Bridge.
whos.amung.us If you're wondering what your fellow man is reading on Nerd Vittles these days, wonder no more. Visit our new whos.amung.us statistical web site and check out what's happening. It's a terrific resource both for us and for you.
Special Thanks to Our Generous Sponsors
FULL DISCLOSURE: ClearlyIP, Skyetel, Vitelity, DigitalOcean, Vultr, VoIP.ms, 3CX, Sangoma, TelecomsXchange and VitalPBX have provided financial support to Nerd Vittles and our open source projects through advertising, referral revenue, and/or merchandise. As an Amazon Associate and Best Buy Affiliate, we also earn from qualifying purchases. We’ve chosen these providers not the other way around. Our decisions are based upon their corporate reputation and the quality of their offerings and pricing. Our recommendations regarding technology are reached without regard to financial compensation except in situations in which comparable products at comparable pricing are available from multiple sources. In this limited case, we support our sponsors because our sponsors support us.
BOGO Bonaza: Enjoy state-of-the-art VoIP service with a $10 credit and half-price SIP service on up to $500 of Skyetel trunking with free number porting when you fund your Skyetel account. No limits on number of simultaneous calls. Quadruple data center redundancy. $25 monthly minimum spend required. Tutorial and sign up details are here.
![]() The lynchpin of Incredible PBX 2020 and beyond is ClearlyIP components which bring management of FreePBX modules and SIP phone integration to a level never before available with any other Asterisk distribution. And now you can configure and reconfigure your new Incredible PBX phones from the convenience of the Incredible PBX GUI.
The lynchpin of Incredible PBX 2020 and beyond is ClearlyIP components which bring management of FreePBX modules and SIP phone integration to a level never before available with any other Asterisk distribution. And now you can configure and reconfigure your new Incredible PBX phones from the convenience of the Incredible PBX GUI.
VitalPBX is perhaps the fastest-growing PBX offering based upon Asterisk with an installed presence in more than 100 countries worldwide. VitalPBX has generously provided a customized White Label version of Incredible PBX tailored for use with all Incredible PBX and VitalPBX custom applications. Follow this link for a free test drive!
Special Thanks to Vitelity. Vitelity is now Voyant Communications and has halted new registrations for the time being. Our special thanks to Vitelity for their unwavering financial support over many years and to the many Nerd Vittles readers who continue to enjoy the benefits of their service offerings. We will keep everyone posted on further developments.
Some Recent Nerd Vittles Articles of Interest...
Choosing the World’s Best Mobile Phone… Again!
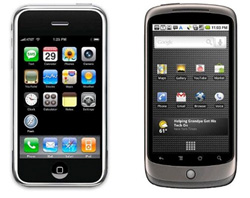 Up until now, we’ve resisted the temptation to wade into the iPhone vs. Nexus One battle. And there have been many thought-provoking contributions on both sides of the discussion. Our take on it is that, for many folks, it’s now come down to the Ford vs. Chevy debate. We know lots of Ford enthusiasts that would never set foot in a GM vehicle. And vice versa.
In the cellphone world, there are some differences between Apple and Google philosophically that you really don’t see in choosing between Ford and Chevy. If you’re looking for a cellphone that just works, that requires little involvement on your part, and that basically functions as a phone, a music player, and a handheld game device, then you’ll love the iPhone. Apple controls the entire user experience end-to-end, and they’ve gotten it just about right after three years of evolutionary development. If you’re looking for a cellphone that functions more as a mobile office, then the choice comes down to Blackberry vs. Nexus One at least in our book. The Blackberry still is the hands-down winner if your business runs on Microsoft Exchange although the Nexus One performs admirably. For everyone else, the Nexus One is your baby. That’s where we are today. But what about next year, and…
It’s Integration, Stupid! Unless you’ve been living under a rock, Cloud Computing should not be a new concept. The whole corporate world is moving there. Why? Because it’s too damn expensive to manage the complexities of modern data processing technology in house. And when it comes to Cloud Computing, there’s no one better at it than Google. The tight integration of email, messaging, voice communications, directories, calendaring/scheduling, and maps in the Google universe is legendary. And Google is damn close to Microsoft on the document preparation and spreadsheet front. Google’s search technology is simply the icing on the cake. But what icing! It ties all of these components together in a way that others only Bing about.
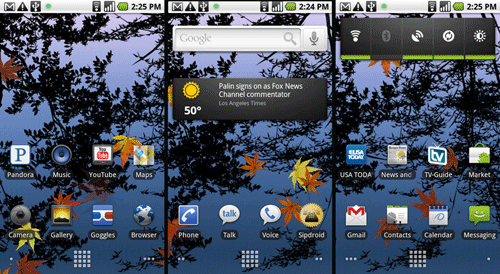
What the Nexus One brings to the table is a mobile computing platform that is fully capable of taking advantage of all of Google’s integration strengths. Email is always synchronized with your Gmail account. Your Address Book is always synchronized with your Google Address book. Your calendar is always synchronized with your Google Calendar and those of your coworkers. Your phone rings on your Nexus One at the same time it rings in your office or home. And your outbound calls, including your CallerID, can be processed just as if you were placing the same calls from your office or home. Simple, isn’t it? Can Apple do the same thing? To some extent, certainly. But the Apple MobileMe sync technology is archaic compared to the Google model. With Apple you’re synchronizing Address Books and Calendars from Apple-only desktop machines to a central server (for a fee) on a scheduled basis. That leaves 90% of corporate America out of the loop. With Google, there is only one Address Book and Calendar, and they’re both already stored in the Cloud. So you don’t have the endless problems associated with keeping a dozen or a hundred or thousands of users’ information in sync.
Long Live the Soup Nazi. For Seinfeld fans, no one can touch the Draconian deeds of the Soup Nazi. But Apple comes close: pushing out updates that reportedly bricked the iPhones of users that sought a bit more freedom in their software choices, telling the FCC that unlocked iPhones threaten the security of the national cellphone network, ruling the Apple Store with an iron fist. This is not acceptable corporate behavior in our book. For the average cellphone user, this conduct may not matter, but it should. The choice really comes down to spending your dollars with a company that fosters and encourages open source development versus a company that treats you as if you’re too dumb to know what’s good for you.
Our Pick: The Nexus One. We’ll leave you with our Baker’s Dozen reasons for choosing the Nexus One over the iPhone. YMMV! For the best and most balanced technical review to date, visit Ars Technica.
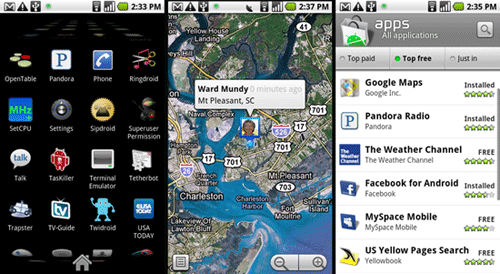
1. Google Apps Integration (see above)
2. Navigation integrated with Voice & Google Maps (video)
3. Phone-wide Speech-to-Text Voice Integration
4. Multitasking and Recent App Switcher Button
5. Back Button to non-destructively back out of anything
6. One-Touch App Directory plus 5 Custom Screens
7. Goggles & Dolphin Multi-Touch Browser
8. SIP and Google Voice integration with WiFi and Cell Nets
9. Intuitive store without corporate content control
10. Unlocked phone, easily rooted, Cyanogen
11. Replaceable battery
12. Expandable storage
13. Flash
In the immortal words of Bernie Mac, "Whatcha gonna do, America?"
Need help with Asterisk®? Visit the PBX in a Flash Forum.
Or Try the New, Free PBX in a Flash Conference Bridge.
whos.amung.us If you’re wondering what your fellow man is reading on Nerd Vittles these days, wonder no more. Visit our new whos.amung.us statistical web site and check out what’s happening. It’s a terrific resource both for us and for you.
Special Thanks to Our Generous Sponsors
FULL DISCLOSURE: ClearlyIP, Skyetel, Vitelity, DigitalOcean, Vultr, VoIP.ms, 3CX, Sangoma, TelecomsXchange and VitalPBX have provided financial support to Nerd Vittles and our open source projects through advertising, referral revenue, and/or merchandise. As an Amazon Associate and Best Buy Affiliate, we also earn from qualifying purchases. We’ve chosen these providers not the other way around. Our decisions are based upon their corporate reputation and the quality of their offerings and pricing. Our recommendations regarding technology are reached without regard to financial compensation except in situations in which comparable products at comparable pricing are available from multiple sources. In this limited case, we support our sponsors because our sponsors support us.
BOGO Bonaza: Enjoy state-of-the-art VoIP service with a $10 credit and half-price SIP service on up to $500 of Skyetel trunking with free number porting when you fund your Skyetel account. No limits on number of simultaneous calls. Quadruple data center redundancy. $25 monthly minimum spend required. Tutorial and sign up details are here.
![]() The lynchpin of Incredible PBX 2020 and beyond is ClearlyIP components which bring management of FreePBX modules and SIP phone integration to a level never before available with any other Asterisk distribution. And now you can configure and reconfigure your new Incredible PBX phones from the convenience of the Incredible PBX GUI.
The lynchpin of Incredible PBX 2020 and beyond is ClearlyIP components which bring management of FreePBX modules and SIP phone integration to a level never before available with any other Asterisk distribution. And now you can configure and reconfigure your new Incredible PBX phones from the convenience of the Incredible PBX GUI.
VitalPBX is perhaps the fastest-growing PBX offering based upon Asterisk with an installed presence in more than 100 countries worldwide. VitalPBX has generously provided a customized White Label version of Incredible PBX tailored for use with all Incredible PBX and VitalPBX custom applications. Follow this link for a free test drive!
Special Thanks to Vitelity. Vitelity is now Voyant Communications and has halted new registrations for the time being. Our special thanks to Vitelity for their unwavering financial support over many years and to the many Nerd Vittles readers who continue to enjoy the benefits of their service offerings. We will keep everyone posted on further developments.
Some Recent Nerd Vittles Articles of Interest…
Tweet2Dial: Free Google Voice Calling & SMS with Twitter
 To celebrate the New Year, it seemed only fitting to bring Google Voice calling out of the cloud and into our favorite social hangout. For our special New Year's project, we're pleased to introduce Tweet2Dial. It lets you use Twitter or your favorite Twitter client to make free outbound calls through Google Voice to anyone in the United States or Canada. Just send a Direct Message to your new Twitter account and, in less than a minute, your phone will ring connecting you to the person's phone number you specified in your Twitter message. In addition, you also can send SMS messages to anyone with an SMS-capable device in the U.S. and Canada. All of this magic is managed on your existing Asterisk® server or almost any Linux server or Mac. There's no Asterisk overhead to process the calls and SMS messages because Asterisk isn't required! But, to start 2010 off on the right foot, we've included a little bonus at the end of this article for all the Asterisk administrators in the house. If you happen to be using an Asterisk server, you now can manage it from Twitter with Tweet2Dial, too.
 For those with cellphone plans that let you designate certain numbers for free, unlimited calling (such as Sprint, AT&T, Verizon, and T-Mobile), adding your Google Voice number to your preferred number list will mean that all of your Tweet2Dial-originated cellphone calls to anyone and everyone throughout the U.S. and Canada will now also be totally free with no impact on your bucket of call minutes.
Yes, we know Jajah is working on something similar for Twitter. But you have to be invited to participate in Jajah's beta (we didn't make the cut!), free calls are limited to two minutes, and both parties have to have a Twitter account which doesn't work too well for calling grandma. So why put up with all the limitations and restrictions of Jajah when you can do it yourself?
There's been some tech chatter that the procedure we've outlined below is complicated. If you can paint by number or bake cookies from the back of a Nestle's bag, trust me. You can handle this! Getting a Mac or a Linux server set up to support Tweet2Dial only takes a minute or two. So ignore the trade rags. Some of them can barely read. 🙂
If you've already gone through our Google Voice tutorial which enables free Google Voice calling on your Asterisk server, or if you've installed our all-in-one Orgasmatron V build on your Asterisk server, or if you have a Mac or you've built your own Linux server without Asterisk, there's no need to wait for Jajah and no need to limit your calls to two minutes or to those with Twitter accounts! You can call anyone in the United States or Canada right now, talk as long as you like, and do it all for free with Tweet2Dial, Twitter, and Google Voice! If you're a Windows user, check out the Google Voice Dialer for Windows.
Prerequisites. To get started, you can use your Asterisk server configured for Google Voice as we've outlined above. We won't actually be using Asterisk to place the calls, but our previous tutorials get your server properly set up with Google Voice and the latest, awesomest1 pygooglevoice to support Tweet2Dial. Any of the Asterisk aggregations such as PBX in a Flash will work great.
If you don't have a PBX in a Flash server with Google Voice already configured, shame on you! Just kidding. Actually, any recent CentOS or Fedora Linux server will work just as well today. Log into your server as root. Run rpm -q python to make sure you have at least Python 2.4 installed on your system. If not, run: yum update python. Then execute the following commands:
cd /root
yum install python-setuptools
easy_install simplejson
wget http://pygooglevoice.googlecode.com/files/pygooglevoice-0.5.tar.gz
tar zxvf pygooglevoice*
cd pygooglevoice-0.5
python setup.py install
Tweet2Dial also will run just fine on any Mac of recent vintage. We've actually tested it with Snow Leopard. Basically, to get Python and Apache set up properly, you have to enable root access, switch to root user access with su in Terminal, activate PHP support in Apache, turn on Web Sharing in System Preferences->Sharing, run easy_install simplejson as root to install simplejson (the Python Setup Tools already are in place!), using a browser download pygooglevoice to your Downloads folder, untar it as root in Terminal with the same command as above, and then while still logged into Terminal as root, go to the Downloads/pygooglevoice-0.5 folder and run the following command: python setup.py install. The only variations in the Tweet2Dial setup will be the storage location for Tweet2Dial (there is no root folder on a Mac) and the methodology for setting up the crontab entry (HINT: we'll run crontab -e to add a crontab entry since there is no /etc/crontab file). Just follow along using the Mac-specific instructions below for details, and everything will work swimmingly.
 To test whether your server is properly configured for Tweet2Dial, log in as root and type: gvoice. You should be prompted for an email address. If so, press Ctrl-C to exit. You're ready to roll. If not, pygooglevoice has not been properly installed on your server.
 You'll obviously need a Google Voice account. Request an invite here or just post a brilliant comment below, and one might magically appear in your inbox. Configure your Google Voice account with all the phone numbers from which you want to place outbound calls. One of these numbers will already be the go-between number for Google Voice and your PBX in a Flash server (IPkall or SIPgate) if you've followed our previous tutorials. Now simply add additional numbers that you want to use to place outbound Google Voice calls. This would include numbers such as your cellphone, your vacation home, and your direct-dial office number. You do not need to enable them for ringing when inbound calls arrive on your GV number.
 For today's project, you'll also need a new Twitter account even if you already have one. Why? Because you can't send a Direct Message to yourself with Twitter. So we'll use your primary Twitter account to send Direct Messages with dialing instructions to your secondary Twitter account. Then we'll use Tweet2Dial to poll your secondary account and retrieve the dialing instructions to actually place the outbound calls with pygooglevoice through your server. It sounds harder than it actually is. Honest! Assuming you already have Google Voice running on your Asterisk server, you'll be tweeting away in 10 minutes. If you have a current Linux server, add an extra 2 minutes to install pygooglevoice using the steps above.
 Usage Considerations. Before someone asks, let's address Question #1. Can others send messages to my Twitter account in order to make outbound calls through my server using Google Voice? And the answer is yes and no. We're going to configure your new secondary Twitter account with Protect My Tweets enabled. This means you have to approve friends and also become their friend before they could send a Direct Message to your secondary Twitter account. So, yes, if you approve, any Twitter user could theoretically place calls using your Twitter secondary account. For the average reader, we wouldn't recommend it for a couple of reasons. Here's why.
Google Voice only lets you link a handful of phone numbers to your GV account. So, for your friends to be able to place calls using your GV credentials, you'd have to forfeit one of your allotted quota of numbers for each person... or their phone would never ring to place the outbound calls. Yours unfortunately would! Remember, Google Voice always places two calls to complete a connection: one to you (using one of the phone numbers defined in your GV account) and one to the person with whom you wish to speak.
 The other reason for not opening this up to other callers is that Google Voice limits your account to one outbound call at a time. If others are using Twitter to make calls using your GV credentials, it means you can't. And there's no mechanism for easily identifying when a call already is in progress. So our recommendation is to keep your secondary Twitter account private and set up Following and Follower linkage only with your primary Twitter account. This will mean that Direct Messages to your secondary Twitter account can only originate from your primary Twitter account. You can still place outbound calls to anybody, but others can't!
 Having said all of that, we've designed Tweet2Dial so that you can allow others to use your secondary Twitter account to place Google Voice calls using their own GV credentials. This saves them the aggravation of setting all of this up, but it means they have to trust you enough to share their Google Voice credentials. After all, what are friends for? 😉 At the end of this article, we'll walk you through how to do this if you really have the urge. We would hasten to add that the actual processing load on your server is virtually zero so don't be deterred by performance concerns. Pygooglevoice sends the calling instructions to Google Voice, and then your server is completely out of the call loop. We've still limited outbound call setup to one call per minute, but these calls do not have any impact on Asterisk resources and only very minimal impact on your server. The only drawback to hosting Tweet2Dial for your friends is that, if five simultaneous Twitter messages are sitting in the queue, it would mean the last call request won't be processed until about 5 minutes after the Twitter message was sent. But, unless you have a bunch of extremely chatty friends, call request congestion shouldn't be a problem.
 One final word of caution. Twitter currently permits a maximum of 150 Twitter API calls per hour per account. There is some good news. Within the next few weeks, this limit will be increased to 1500 per hour, but it hasn't happened yet. This application is designed to poll your secondary Twitter account once a minute to retrieve and then discard your oldest, existing Direct Message. So it uses 120 of your allotted 150 API calls per hour to work its magic. You are well advised NOT to run any third-party Twitter applications with this secondary Twitter account, or you will quickly exceed the current connection limitation. When the API limit is reached, it means none of your pending call requests would be processed until the next hour rolls around... at least until Twitter raises this connection limit. Once Twitter raises the API limit, we may revisit our code and eliminate the current one call per minute limitation. So stay tuned!
Creating A Secondary Twitter Account. First, let's get your secondary Twitter account set up. Go to twitter.com and create a new account with a very secure password! You must enter a different email address than the one used for your primary account. Use one you can actually access! Log into your new account and choose Settings. Scroll down to Protect my tweets and check the box by clicking on it. Save your settings. NOTE: This check box is critically important. It keeps the entire world from being able to access your server! There are other layers in the security model, but this one is VERY IMPORTANT so verify it twice! Now log back into your primary account. Then goto http://twitter.com/SecondaryAccountName and request access. You'll get a message that your request for access has been sent. Log out and back into your secondary account once again. Authorize your primary account name as a Follower. Now log out and back into your Primary Account. We'll use it to send a Direct Message to your secondary account in a few minutes.
Installation and Configuration. To install Tweet2Dial, log into your server as root and issue the following commands:
cd /root
wget http://pbxinaflash.net/source/twitter/tweet2dial.tgz
tar zxvf tweet2dial.tgz
rm tweet2dial.tgz
If you're doing this on a Mac, there is no wget application and no root folder so you'll need to download tweet2dial.tgz with your browser. Save it to your Downloads folder. Then open a Terminal window and execute this command:
tar zxvf Downloads/tweet2dial.tgz
Now let's configure the application:
nano -w tweet2dial.php
At the top of the file, you'll see the following lines:
// Your SECONDARY Twitter account username and password
$username = "TwitterUsername";
$password = "TwitterPassword";// Authorized Twitter users with corresponding GV credentials go below
$user['twitname'][1]="YourPrimaryTwitterUsername";
$user['gvemail'][1]="YourGoogleVoiceEmailAddress@gmail.com";
$user['gvpass'][1]="YourGoogleVoicePassword";
$user['gvcall'][1]="6781234567";// *** Leave everything below this line alone. 🙂
Begin by entering your secondary Twitter name and password by replacing TwitterUsername and TwitterPassword with your actual credentials. Be careful here. Capitalization matters! If you set up your Twitter username as gvNerdUno, don't enter gvnerduno! Now move down to the four $user entries. The first is your primary Twitter account name. Replace YourPrimaryTwitterUsername with your actual Twitter account name. Again be careful of capitalization! Next, enter the login email address for your Google Voice account replacing YourGoogleVoiceEmailAddress@gmail.com. Next, enter your Google Voice password replacing YourGoogleVoicePassword. Finally, enter one of the 10-digit ringback numbers you've configured in your Google Voice account by replacing 6781234567. Do NOT use the one that's reserved for use by Asterisk! This is the number that will be called by default whenever you place an outbound call with Twitter. You'll have the option of overriding it, but this saves your having to enter both a destination phone number and a callback number each time you wish to place a call. Be sure to preserve the quotes around each of the entries. Once you've double-checked all of your entries for typos, save your changes: Ctrl-X, Y, then Enter.
Tweet2Dial Test Drive. Now that everything is set up, let's place a test call to be sure everything is working. Log into your primary Twitter account. Click on Direct Messages. Choose your secondary Twitter account from the pulldown menu. In the block below Send a Direct Message, enter a 10-digit number in the U.S. or Canada that's different from your default callback number. Then click the Send button. It's that simple! Once Twitter tells you the message has been sent, log into your Asterisk server and execute the following commands.
cd /root
./tweet2dial.php
If you're on a Mac, just open a Terminal window and type ./tweet2dial.php. In either case, you should get a response indicating that your call has been placed, and your default phone number should begin to ring. When you answer it, Google Voice will place a call to the 10-digit number that you entered in your Twitter direct message above.
Now, just for fun, run Tweet2Dial again: ./tweet2dial.php. If everything is working properly, you will see the following message: Nothing to do.
Finally, assuming you have configured another callback number in Google Voice that is close at hand and not your Asterisk callback number, send another Twitter direct message with the following syntax: 8439876543:6781234567 where 8439876543 is the 10-digit number of someone you wish to call and 6781234567 is a 10-digit ringback number already set up in your Google Voice account. Once the message has been sent, run Tweet2Dial again from the command prompt.
When you're sure everything is working reliably, add the following entry to the bottom of /etc/crontab unless you're using a Mac. This will run the application once a minute around the clock looking for incoming Twitter messages:
* * * * * root /root/tweet2dial.php > /dev/null
If you're running this on a Mac, add an entry to your crontab like this. From the Terminal window, run: crontab -e. Once the vi editor opens, type:
* * * * * /users/youracct/tweet2dial.php
Substitute the name of your Mac account for youracct. Then press the Esc key followed by :wq. Check your work by typing: crontab -l. Your entry should look like this:
* * * * * /users/youracct/tweet2dial.php
 Sending SMS Messages with Twitter. To send SMS messages using Twitter, you'll use the same scenario outlined above to place free phone calls. Just send a direct message to your secondary Twitter account. Only those that you have authorized as friends can send direct messages to this account so it's as secure as you want it to be. The syntax for an SMS message looks like this where 6781234567 is the cellphone or Google Voice number of the SMS recipient:
SMS:6781234567:Here is a sample SMS message
Any replies to an SMS message which you send using Twitter will be forwarded to the email address that you used to set up your Google Voice account.
 For Whiz Kids Only. Now let's say you want to let your spouse use her Twitter account to place calls using her very own Google Voice credentials. First, you need to authorize her as a follower in your secondary Twitter Account. Second, you need to add a new block of code in tweet2dial.php that looks like the following. Place it immediately below the existing $user entries in the file:
$user['twitname'][2]="SpousePrimaryTwitterUsername";
$user['gvemail'][2]="SpouseGoogleVoiceEmailAddress@gmail.com";
$user['gvpass'][2]="SpouseGoogleVoicePassword";
$user['gvcall'][2]="6781234567";// *** Leave everything below this line alone. 🙂
Notice that the only change is this array subset is numbered [2] while the original was numbered [1]. You can add as many as you like so long as you increment this number and provide the credentials for each user. Now you have your own little Jajah-like sandbox, and it's absolutely free.
 For Asterisk Administrators Only. Want to manage your Asterisk server from Twitter? There's an app for that. We promised you a New Year's bonus so here it is. First, read our last article which explains how to manage your Asterisk server using email messages and the Asterisk CLI. Now you can do exactly the same thing using Twitter direct messages. The only Twitter user that can do this on your server is the Twitter account name you specified in the #1 $user slot above. So you don't have to worry about your pals trashing your Asterisk server if you give them privileges with Tweet2Dial. The syntax for issuing CLI commands using Tweet2Dial looks like this:
CLI: database show cidname 8437978000
Just be sure Direct Messages from your primary Twitter account begin with CLI in all CAPS followed by a colon, a space, and then the desired CLI command. That's all there is to it. You'll get a confirmation Direct Message in your main Twitter account once the command has been executed assuming you have established Following and Follower linkage between your primary and secondary Twitter accounts. Test sending DMs in both directions to double-check it. And if you've enabled email delivery for Direct Messages in your Twitter configuration, you'll get an email confirmation as well. Because of Twitter's 140 character limitation, some commands such as help don't provide all of the output you normally would receive from the CLI. You'll only get the last line. Aside from that, the CLI functionality is identical to interacting directly with the Asterisk CLI and the email implementation we outlined previously. Here's the CLI response:
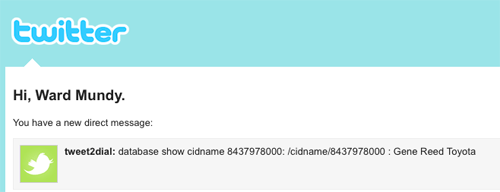
Before you can use the CLI interface in Tweet2Dial, you have to enable it. Edit tweet2dial.php and change $CLIenable=false to $CLIenable=true. And, yes, we understand there are some of you that don't trust Twitter to keep your commands secure. Well, first of all, in order to penetrate your Asterisk server, someone would have to send a Twitter Direct Message from your primary Twitter account. So they'd need your password and they'd need to know the syntax for Asterisk CLI commands AND the syntax for sending them via Twitter. But, there's always a Cracker Rapper2 somewhere. Right? So we've also built a password into the system at your server's end so you can sleep more comfortably. The default password is CLI. But feel free to change it to anything you like. Just edit tweet2dial.php and find this line: $CLIpword = "CLI";. Replace CLI (between the quotes only!) with whatever password you'd like. After saving your changes, you'll need to adjust your Twitter messages accordingly. For example, if you changed your password to FooBar, then your future Twitter CLI command syntax would look like this: FooBar: help. Enjoy!
Special Thanks. As Nerd Vittles prepares to celebrate its Fifth Birthday, we want to take a moment to thank those that have made Nerd Vittles and the PBX in a Flash project possible. Without the generous financial support of Vitelity and Google's AdSense program plus the unwavering support of our hosting providers who provide free downloads of PBX in a Flash around the globe, all of what we do would be much more difficult and expensive! It's not too late for you to kick in a nickel or two as well if a fleeting moment of generosity should strike. 😉 There's a Donate button at the top of the page. Finally, we want to thank Digium® for their continuing support of the Asterisk project and their generous contribution of hardware to the PBX in a Flash development team during 2009. Happy New Year everybody!
Need help with Asterisk? Visit the PBX in a Flash Forum.
Or Try the New, Free PBX in a Flash Conference Bridge.
whos.amung.us If you're wondering what your fellow man is reading on Nerd Vittles these days, wonder no more. Visit our new whos.amung.us statistical web site and check out what's happening. It's a terrific resource both for us and for you.
Special Thanks to Our Generous Sponsors
FULL DISCLOSURE: ClearlyIP, Skyetel, Vitelity, DigitalOcean, Vultr, VoIP.ms, 3CX, Sangoma, TelecomsXchange and VitalPBX have provided financial support to Nerd Vittles and our open source projects through advertising, referral revenue, and/or merchandise. As an Amazon Associate and Best Buy Affiliate, we also earn from qualifying purchases. We’ve chosen these providers not the other way around. Our decisions are based upon their corporate reputation and the quality of their offerings and pricing. Our recommendations regarding technology are reached without regard to financial compensation except in situations in which comparable products at comparable pricing are available from multiple sources. In this limited case, we support our sponsors because our sponsors support us.
BOGO Bonaza: Enjoy state-of-the-art VoIP service with a $10 credit and half-price SIP service on up to $500 of Skyetel trunking with free number porting when you fund your Skyetel account. No limits on number of simultaneous calls. Quadruple data center redundancy. $25 monthly minimum spend required. Tutorial and sign up details are here.
![]() The lynchpin of Incredible PBX 2020 and beyond is ClearlyIP components which bring management of FreePBX modules and SIP phone integration to a level never before available with any other Asterisk distribution. And now you can configure and reconfigure your new Incredible PBX phones from the convenience of the Incredible PBX GUI.
The lynchpin of Incredible PBX 2020 and beyond is ClearlyIP components which bring management of FreePBX modules and SIP phone integration to a level never before available with any other Asterisk distribution. And now you can configure and reconfigure your new Incredible PBX phones from the convenience of the Incredible PBX GUI.
VitalPBX is perhaps the fastest-growing PBX offering based upon Asterisk with an installed presence in more than 100 countries worldwide. VitalPBX has generously provided a customized White Label version of Incredible PBX tailored for use with all Incredible PBX and VitalPBX custom applications. Follow this link for a free test drive!
Special Thanks to Vitelity. Vitelity is now Voyant Communications and has halted new registrations for the time being. Our special thanks to Vitelity for their unwavering financial support over many years and to the many Nerd Vittles readers who continue to enjoy the benefits of their service offerings. We will keep everyone posted on further developments.
Some Recent Nerd Vittles Articles of Interest...
Free U.S. & Canada Calls: Google Voice Dialer for Windows
There now are a number of ways to make free calls to anyone in the U.S. and Canada using Google Voice without having to jump through the hoops of calling into your voicemail and having Google Voice call you back. There’s our Asterisk® implementation using pygooglevoice which lets you transparently place calls through Google Voice using any phone connected to your PBX in a Flash system. You also can set up a Sip Sorcery account and make free calls through that interface using a SIP phone. And now there’s Dogface05’s stand-alone Dialer for Windows that lets you place calls from the Windows command line in seconds. Because this is such a simple alternative, everyone should add it to their Windows toolkit. Here’s how.
Prerequisites. You’ll obviously need a Google Voice account. If you don’t have one, just register for an invite. Next, you’ll need a phone number to use for placing the outbound calls. And, finally, you’ll need to download and install Dogface05’s dialer on your Windows system.
Google Voice Setup. Log into your Google Voice account and click Settings, Phones, Add Another Phone. Add the area code and phone number of the phone you’ll be using to place calls and mark it as an Office phone. You’ll have to go through Google’s confirmation drill to successfully register the number with Google Voice. After the number is confirmed, be sure there’s a check mark beside this Google Voice destination so that incoming calls to your GV number will be routed to this number.
While you’re still in the Google Voice Setup, click on the General tab. Uncheck Enable Call Screening. Turn Call Presentation Off. And set CallerID to Display Caller’s Number. Finally, uncheck Do Not Disturb. Now click the Save Changes button.
Dialer Setup for Windows. From your Windows machine, open a browser and download the Google Voice dialer to your Desktop. Unzip the downloaded file and drag gvdial.exe to your \windows directory so that it’s in your path.
Placing a Call. Let’s first make sure everything is working properly. Open a command prompt window from the Windows Desktop and enter a dialing command using the following syntax:
gvdial username password destination ani [phonetype]
where:
- username = your Google Voice email address
- password = your Google Voice password
- destination = 10-digit number of person to call
- ani = your 10-digit phone number registered with Google Voice
- phonetype = 3
The phonetype is actually optional and can be ignored unless you happen to be using a Gizmo number in which case it needs to be 7. Never enter the brackets. That merely signifies that the entry is optional.
Assuming your registered email address with Google Voice is joe@gmail.com, your password is secret, the number you wish to call is 6781234567, and your number is 4049876543, the dial string should look like this:
gvdial joe@gmail.com secret 6781234567 4049876543
Your phone should ring at this point, and Google Voice will complete the outbound call to 678-123-4567.
Creating Speed Dial Batch Files. Using Notepad, you now can create batch files for frequently dialed numbers. For example, the entry above could be saved in a batch file called joe.bat. Then simply create a desktop icon for Joe and link it to joe.bat. Double-click on the Joe icon whenever you wish to place a call to Joe. Here’s how the batch file might look:
echo off
cls
gvdial joe@gmail.com secret 6781234567 4049876543
echo Press ENTER key after the called party answers.
pause
Surfing the Google Wave. We’ve got a dozen Google Wave invites to give away during the next week. Just post a comment on any Nerd Vittles article, and we’ll put your name in the hat. Be sure to provide a Gmail address with your comment as this is required to take advantage of the Google Wave Preview. Here’s a sample for you to try once you have Google Wave credentials:
Need help with Asterisk? Visit the PBX in a Flash Forum.
Or Try the New, Free PBX in a Flash Conference Bridge.
whos.amung.us If you’re wondering what your fellow man is reading on Nerd Vittles these days, wonder no more. Visit our new whos.amung.us statistical web site and check out what’s happening. It’s a terrific resource both for us and for you.
Special Thanks to Our Generous Sponsors
FULL DISCLOSURE: ClearlyIP, Skyetel, Vitelity, DigitalOcean, Vultr, VoIP.ms, 3CX, Sangoma, TelecomsXchange and VitalPBX have provided financial support to Nerd Vittles and our open source projects through advertising, referral revenue, and/or merchandise. As an Amazon Associate and Best Buy Affiliate, we also earn from qualifying purchases. We’ve chosen these providers not the other way around. Our decisions are based upon their corporate reputation and the quality of their offerings and pricing. Our recommendations regarding technology are reached without regard to financial compensation except in situations in which comparable products at comparable pricing are available from multiple sources. In this limited case, we support our sponsors because our sponsors support us.
BOGO Bonaza: Enjoy state-of-the-art VoIP service with a $10 credit and half-price SIP service on up to $500 of Skyetel trunking with free number porting when you fund your Skyetel account. No limits on number of simultaneous calls. Quadruple data center redundancy. $25 monthly minimum spend required. Tutorial and sign up details are here.
![]() The lynchpin of Incredible PBX 2020 and beyond is ClearlyIP components which bring management of FreePBX modules and SIP phone integration to a level never before available with any other Asterisk distribution. And now you can configure and reconfigure your new Incredible PBX phones from the convenience of the Incredible PBX GUI.
The lynchpin of Incredible PBX 2020 and beyond is ClearlyIP components which bring management of FreePBX modules and SIP phone integration to a level never before available with any other Asterisk distribution. And now you can configure and reconfigure your new Incredible PBX phones from the convenience of the Incredible PBX GUI.
VitalPBX is perhaps the fastest-growing PBX offering based upon Asterisk with an installed presence in more than 100 countries worldwide. VitalPBX has generously provided a customized White Label version of Incredible PBX tailored for use with all Incredible PBX and VitalPBX custom applications. Follow this link for a free test drive!
Special Thanks to Vitelity. Vitelity is now Voyant Communications and has halted new registrations for the time being. Our special thanks to Vitelity for their unwavering financial support over many years and to the many Nerd Vittles readers who continue to enjoy the benefits of their service offerings. We will keep everyone posted on further developments.
Some Recent Nerd Vittles Articles of Interest…
Meet The iPhone Terminator: The World’s Best Mobile Phone

With apologies to Arnold’s infamous line, all we can say to iPhone enthusiasts of the world is that once you try this Android phone, you won’t ever go back. Google has done for the mobile phone what Apple did with Mac OS X except Google also opened up the hardware platform. Unfortunately, Apple opted for locked and proprietary hardware and software in rolling out its iPhone. Now that the second-generation Android phones are appearing, the difference is palpable.
Update. There’s now a third-generation Android phone that’s even better than this one. You can read all about it in our latest article.
Choosing the World’s Best Cell Phone is obviously fraught with peril. All other things being equal we would have bestowed the honor on Nokia’s E71 which we reviewed recently and have personally used until a month ago. That’s when we jumped into the Android World which we will tell you up front is still a bit of a work in progress. But, all we can say is WOW! The openness, the technology, and the creativity showcased in the new Android phones point to an inescapable conclusion. Google once again has struck the Mother Lode. Seeing is believing as they say. And today we’ll digress from our usual format to bring you a pictorial tour of the HTC Magic. No. You don’t have to carry a white one like Arnold. Heh. A shiny black one is readily available. We actually had planned to walk through the process of rooting the phone, but we’ll leave that for another day primarily because this mobile phone provides sufficient flexibility in its native state to deliver an almost perfect cellphone experience even without root access.
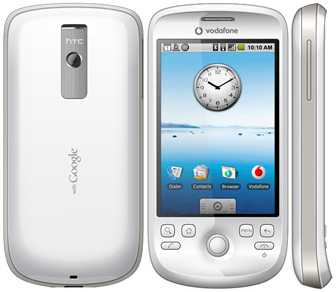
We’ve already covered our objections to the iPhone in a previous article so we won’t repeat them here other than to note that SIP clients can’t run in the background on an iPhone which makes them next to worthless for inbound calls. Yes, there are kludgey workarounds, but these open yet another can of worms. We’ll dispose of the Nokia product line by telling you they’re headed in the wrong direction just like Microsoft with the wrong operating system(s), the wrong product design, and the wrong technology mix. Just when the world is finally looking for a mobile platform that provides flexibility in transitioning between the cellular networks, WiFi, and WiMax, Nokia kills the SIP stack and SIP client on its entire line of new cellphones. So a company that once was THE innovative cell phone manufacturer in the world suddenly is looking a bit like Yahoo, lots of thrashing around but no cigar. Sadly, it’s mostly the result of self-inflicted wounds. But we’re not going to dwell on the past today. We’re going to look at what the future holds in mobile communications. And the one word that best sums up our hopes for future mobile telephony is Google… more precisely, Google’s totally open source Android Platform.
 So let’s again go about this by the book… with a requirements analysis! You can match it to your own wish list. We want a cellphone that makes cellular calls from most locations, and we want the ability to decide which cell provider we use depending upon where we are. We want the option to make phone calls through our own SIP provider, or Asterisk® server, or Google Voice whenever we feel like it with or without a Wi-Fi connection. And, of course, we want VoIP Prioritization. This means we want our cell phone to prioritize incoming and outgoing calls by attempting to use VoIP services first, cellphone carrier second. We also want to be able to check our email using gMail, POP3 and IMAP servers at 3G data speeds. For the business community, we also think Microsoft Exchange support is indispensable. When we need to send or receive something on our notebook computer and there’s no WiFi around, we want our cellphone to provide data connectivity. We’re not going to be downloading movies and 1,000-page books all day long. We just want to get an important file attachment from the office so we can read it on a normal screen. If the cellphone provided a PDF viewer, so much the better. And, finally, we’d like a QWERTY keyboard for messaging, and we want to be able to change our own battery, add a memory chip, and swap out SIM cards whenever we’d like. We also want the ability to gain root access should we ever wish to do so. After all, it’s our phone! Bluetooth for phone calls and A2DP for music in the car would be great, and a good camera as well as GPS functionality would be nice to have on the phone as well. For those in the U.S., we’d add one additional requirement: support for AT&T’s 3G network so you’re not stuck with T-Mobile’s dog-slow (and incompatible) wireless data network. Most of the Android phones currently flunk this test leaving you with nothing but EDGE service if you use a provider other than T-Mobile. Of course, with T-Mobile, you get mostly EDGE service in the U.S. as well. 🙄
And the winner is…
 Our pick is the unlocked Rogers HTC Magic phone, the only Android phone that we could find which supported rooting and AT&T’s 3G network in the U.S… albeit from a Canadian provider. That’s the price U.S. consumers pay for a government that continually rewards the telephone oligopoly with exclusivity rip-offs. So how does the HTC Magic stack up to our wish list? We’d give it a 94. It does everything on our Wish List… and more. The images which follow incidentally were taken using the screen capture utility that’s part of the Android 1.5 SDK. It is easily installed on either a Windows or Linux PC or your favorite Mac (except Snow Leopard for the moment). There’s a great tutorial on how to install the Android SDK as well as a YouTube video and tutorial on rooting the Rogers HTC Magic phone should you desire further information on those topics.
Getting Started. Before proceeding, set yourself up a Gmail account if you don’t already have one. As with most provider-specific cellphones, this HTC Magic phone is hard-coded to the Rogers network in Canada. Assuming you want to use AT&T’s network in the U.S., step #1 is to enter AT&T APN settings when you first turn on the phone. After inserting the AT&T SIM and booting the phone, press the Menu key before doing anything else. Next click Add APN. Enter the following values leaving the remaining fields blank:
Name: att
APN: wap.cingular
Password: CINGULAR1
Now press the Menu button again and choose Save. For other providers, try this Google Search.
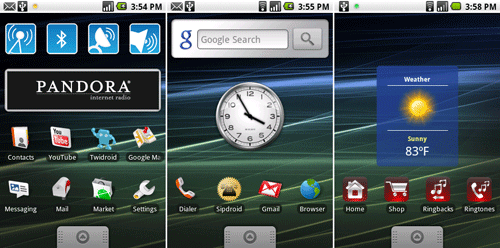
Main Screen. Once you’ve entered your Gmail credentials, the phone will boot and display a Main menu. It actually is three screens wide. You can move to the other screens by swiping your finger to the left or to the right. You’ll notice a thumb tab at the bottom of the display. By dragging this up, you can access all of the other applications on the phone. Move it back out of the way by dragging it back down or pressing the Back button (←) which is the third from the left button just below the screen display.
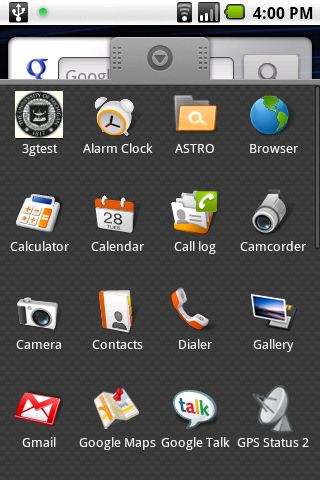 Applications. Here’s the first page of our Applications. You scroll through the list using the trackball, or you can drag your finger vertically on the screen to reposition the display up or down. Tapping on an entry starts the application. Pressing the Home button on the far left just below the screen display returns you to the Main Screen. Every app is displayed in this listing except for Widgets. Widgets are more like scripts and typically are used to toggle functions on and off. In the left Main screen above are four widgets to toggle WiFi, BlueTooth, GPS, and Ringer/Vibrate/Silent functions of the phone.
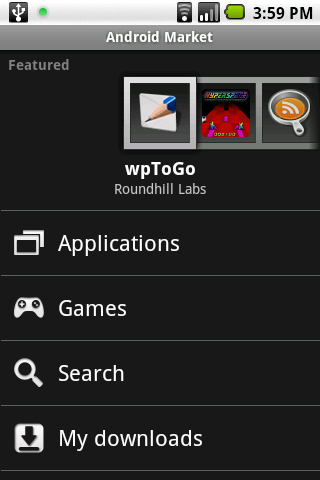 Android Market. All of these applications didn’t necessarily come with the phone. Google’s Android Market has been set up for developers to display their wares. You can become a developer, too. And, unlike the iPhone apps, most of the Android apps still are free. Just another advantage to open source technology. To access the Market from your phone, just choose the Market app and follow the intuitive menus. There’s a great Search function. Again, unlike the iPhone, these applications get stored on a MicroSD card. A 2GB card comes with the phone. Do yourself a favor and start with a $50 16GB card.
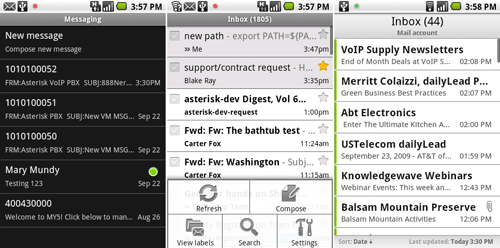
Messaging. As you might expect from Google, the Android platform excels at messaging of all flavors. Whether it’s text messaging, Gmail, or POP3/IMAP email connectivity, Android has you covered (see above). And the support for Microsoft Exchange is nothing short of brilliant. In the social networking department, there’s full-featured support for Twitter and Facebook, among others. Using the Search function in the Android Market, you can have your phone set up with your favorite tools in just a few minutes.
 Android Security. Securing your phone is also nothing short of brilliant on the Android 1.5 platform. Simply draw an unlock code pattern using your finger, and that becomes the signature for future access to your cellphone. Also works pretty well as a sobriety test. 🙂 If you can’t unlock your phone, don’t unlock your car! You also can lock your SIM card to your phone and set a password if you’re nervous about losing your $500 crown jewel. What the security system really demonstrates is that the open source community has nothing to apologize for. The quality of this software is every bit as good if not better than the software produced by the other cellphone players.
Placing Calls. Yes, we hear you. What about making phone calls? You’ll be pleased to know that the HTC Magic can do that, too. We were just saving the best for last. In fact, this phone can make calls in three different ways: through your cellphone provider, through SIP using your Asterisk server or another provider, and through Google Voice. Once you install the Google Voice application from the Android Market, simply configure it with either your cellphone number or an intermediate provider such as SIPgate or IPkall. You then have a choice of whether to make Google Voice the primary or secondary calling source. Or you can choose to be prompted for each call as shown above. Google Voice calls that go out through your WiFi data network connection incur no charges in the U.S. and Canada.
 SIP calls are placed using the SIPdroid application which also is available in the Android Market. Shown to the left is a sample setup for SIPdroid to connect to your Asterisk server on a private home network. In the SIPdroid Call Options, specify whether to use WiFi and/or 3G/EDGE for the SIP calls. And set a preference for how your calls should be placed, i.e. cellphone carrier or SIP. The only tricky part is the Extension Settings on your Asterisk server. Just create an extension in the usual way using FreePBX. But make sure your settings include the following entries: canreinvite=no, nat=yes, and qualify=no.
To route outbound calls through SipDroid instead of your cellphone provider, just append + to the end of the phone number. You can generate a + symbol on your phone keypad with a long press of the 0 button.

Android Backups. No article would be complete without some mention of backups. The Android platform currently supports four options: Android images, MyBackup, and Google and Exchange Synchronization. Android images can only be created if you gain root access to your phone or load a different image on your phone. MyBackup is a $9.95 app from the Android Market that lets you backup your Applications and Data separately onto your MicroSD card. Unless you’re a techie, it’s well worth the money. Google and Exchange Synchronization you will find under Settings, Data Synchronization. With Google Sync, you can back up your Gmail, Calendar, and Contacts data automatically and as a background task. Be sure to activate it. Finally, you’ll see displayed above a browser display from mundy.org/whereib that you may find helpful from time to time. It displays not only a map of your current location based upon your IP address, but also shows your public IP address.
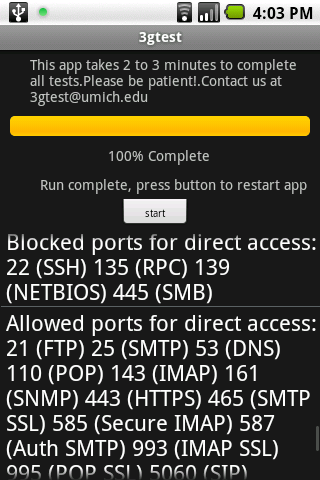 Android 3Gtest. We’ll leave you with a hot tip about one additional application: 3Gtest. Just download and install it from the Android Market and then run it. You’ll be amazed by the results. Not only will it tell you how good your upload and download speeds are, it also will tell you some interesting tidbits about whether your provider is living up to their oft-repeated promise of Net Neutrality. Our download 3G speed in Charleston, South Carolina was actually close to T-1 performance. Interestingly, our upload speed was pitiful… about as fast as a circa 1860’s telegraph machine.
Android System Backup. We said we weren’t going to cover rooting your phone, but we do want to point you in the right direction and also show you how to get a perfect image backup of your phone. If you’re not comfortable entering system commands, stop here! We are Mac snobs so what follows is the Mac way of doing things which is incredibly simple compared to the hassle with Windows in getting the correct USB driver loaded to make things function properly. If you’re determined to use Windows, be sure to install the Android SDK before you connect your phone to your PC. And read up on how to install the appropriate USB driver for Windows. With a Mac, all of this just works… out of the box. As we mentioned previously, we’ve only tested this with Leopard and Snow Leopard, and Snow Leopard does NOT work!
Before proceeding, you must enable USB Debugging on your phone. You’ll find it here: Settings->Applications->Development->USB Debugging
To get your Mac set up with the proper toolkit, do the following. There’s nothing tricky here. Just don’t skip any steps. And you only have to do this once! First, download the Android 1.5 SDK for the Mac from here. Unzip android-sdk-mac_x86-1.5_r3.zip on your Desktop and rename the folder to android-sdk. Now drag that folder into your Applications directory. Next, open a Terminal window and create/edit .bash_profile: nano -w .bash_profile. Add the following entry: export PATH=${PATH}:/Applications/android-sdk/tools. Then save the file: Ctrl-X, Y, Enter. Now run the same command from the CLI prompt to update your PATH now: export PATH=${PATH}:/Applications/android-sdk/tools. Next, download fastboot-mac onto your Desktop from the HTC Support site. Unzip the file and rename the file to fastboot. Then, download recovery-new.img to your Desktop. Drag both fastboot and recovery-new.img into the Applications/android-sdk/tools folder.
Now we’re ready to make your backup. Plug your phone into your Mac using the USB cable that came with the phone. Open a terminal window on your Mac and change to the SDK tools directory: cd /applications/android-sdk/tools. Run the following command and make certain your phone shows up in the listing: adb devices. You should get a display with the serial number of your phone:
List of devices attached
HT95RNK02843 device
Assuming your phone shows up in the list, you’re ready to proceed with a backup. Turn off your phone. Then, while pressing the Volume Down button, turn your phone back on. Hold down both buttons until you see a screen that says <BACK> FastBoot Mode with dancing Androids on skateboards at the bottom of the display. Press the BACK button (←) and the FASTBOOT USB menu will display. In your computer’s Terminal window (NOT on your phone), type: fastboot boot recovery-new.img. Your phone will reboot and display a screen with several options in blue. Use your phone’s trackball to carefully scroll down to the Nandroid Backup 2.1 option. Then depress the Trackball button to begin the backup. You’ll see a yellow display message indicating that the backup is proceeding. When the backup completes, choose the Reboot System Now option to restart your phone normally.
You’ll find the new backup on the SD card. To copy it to a safe place on your Mac, drag down the Message Bar at the top of the display after your phone has rebooted. Tap the USB Connected Select to copy files to/from your computer option. Then tap the Mount button. A new drive NO NAME will appear on your Desktop. Double-click on it and drag the nandroid folder to a safe place for permanent storage of your backup. To unmount the phone, do it on your Mac desktop first. Then reverse the mount process we initially used on the phone to mount it. Simple!
Rooting Your Phone. We have NOT done this so you’re on your own. You’ll probably void the warranty on your phone by proceeding. The best article we could find on the procedure for rooting and restoring your phone is here. But it doesn’t have the correct backup image. If you restore the wrong image, your phone’s radio may no longer work on your provider’s network. The consensus seems to be that the proper image for a rooted Rogers HTC Magic is here. The best tutorial for actually performing the magic appears to be here. But we would stress again that we have not actually tried this, and you really, really are on your own if you proceed past reading this article. It’s your $500 phone… or brick as the case may be. Before doing anything further, we would strongly recommend you make several backup images as outlined above and also spend some time doing a careful review of the postings in this forum until you are very comfortable with all of the wrinkles and procedures. If something goes wrong, post your problems there, not here. 🙂 We’re handing you the map, but it’s your choice whether to jump off the cliff. Enjoy!
Update: The unlocked Rogers HTC Magic phone used for this review is now available for purchase from Nerd Vittles. It supports 3G networks of both Rogers in Canada and AT&T in the United States. Just make us an offer we can’t refuse. It’s still a terrific phone!

The Future of Android. For a glimpse of what the future holds for Android, see this Giga OM article published on October 7.
 Web Site of the Week. For all of your favorite Nerd gifts, don’t miss the new Mashable collection.
Articles of the Week. For another excellent technical review of the HTC Magic, check out TechRadar UK’s review. And be sure to check out Justin West’s Free Homebrew VoIP with Google Voice and Intel Atom.
Enhanced Google Maps. In case you haven’t noticed, we’ve added yet another Google Map to Nerd Vittles. Now, in addition to showing our location with Google Latitude, we also are displaying your location based upon your IP address. We’ll show you how to add something similar to any LAMP-based Linux system in coming weeks. It’s a powerful technology that has enormous potential. If you’re unfamiliar with Google Maps, click on the Hybrid and Satellite buttons and then check out the scaling and navigation options. Double-click to zoom. Incredible!
whos.amung.us If you’re wondering what your fellow man is reading on Nerd Vittles these days, wonder no more. Visit our new whos.amung.us statistical web site and check out what’s happening. It’s a terrific resource both for us and for you.
Need help with Asterisk? Visit the PBX in a Flash Forum.
Or Try the New, Free PBX in a Flash Conference Bridge.
Special Thanks to Our Generous Sponsors
FULL DISCLOSURE: ClearlyIP, Skyetel, Vitelity, DigitalOcean, Vultr, VoIP.ms, 3CX, Sangoma, TelecomsXchange and VitalPBX have provided financial support to Nerd Vittles and our open source projects through advertising, referral revenue, and/or merchandise. As an Amazon Associate and Best Buy Affiliate, we also earn from qualifying purchases. We’ve chosen these providers not the other way around. Our decisions are based upon their corporate reputation and the quality of their offerings and pricing. Our recommendations regarding technology are reached without regard to financial compensation except in situations in which comparable products at comparable pricing are available from multiple sources. In this limited case, we support our sponsors because our sponsors support us.
BOGO Bonaza: Enjoy state-of-the-art VoIP service with a $10 credit and half-price SIP service on up to $500 of Skyetel trunking with free number porting when you fund your Skyetel account. No limits on number of simultaneous calls. Quadruple data center redundancy. $25 monthly minimum spend required. Tutorial and sign up details are here.
![]() The lynchpin of Incredible PBX 2020 and beyond is ClearlyIP components which bring management of FreePBX modules and SIP phone integration to a level never before available with any other Asterisk distribution. And now you can configure and reconfigure your new Incredible PBX phones from the convenience of the Incredible PBX GUI.
The lynchpin of Incredible PBX 2020 and beyond is ClearlyIP components which bring management of FreePBX modules and SIP phone integration to a level never before available with any other Asterisk distribution. And now you can configure and reconfigure your new Incredible PBX phones from the convenience of the Incredible PBX GUI.
VitalPBX is perhaps the fastest-growing PBX offering based upon Asterisk with an installed presence in more than 100 countries worldwide. VitalPBX has generously provided a customized White Label version of Incredible PBX tailored for use with all Incredible PBX and VitalPBX custom applications. Follow this link for a free test drive!
Special Thanks to Vitelity. Vitelity is now Voyant Communications and has halted new registrations for the time being. Our special thanks to Vitelity for their unwavering financial support over many years and to the many Nerd Vittles readers who continue to enjoy the benefits of their service offerings. We will keep everyone posted on further developments.
Some Recent Nerd Vittles Articles of Interest…
VoIP Prioritizing The World’s Best Traveling Phone
We follow a lot of really smart geeks on Twitter. As you might imagine, there’s a good bit of chatter about the world’s best cellphones. About half are die-hard iPhone users, and the rest are all over the map. Our iPhone is now a glorified iPod and, when you finish reading today, you’ll understand why.
 What always has set Macs apart from PCs in our humble opinion is flexibility. So why is it that Apple has gone out of its way to strip that feature from the iPhone? Well, we all know the answer. AT&T and the iTunes Store. Or in a word, money. So what’s missing? For openers, there’s no tethering, the ability to connect your PC to your cellphone when the power goes out so you can send an emergency message or check on your servers at work. And then there’s free calling: the ability to place free SIP calls or Google Voice calls using your cellphone from almost anywhere. And then there’s the money thing. If you’ve traveled to foreign countries with an AT&T-powered iPhone, we don’t have to finish this story. For everyone else, let’s just say the cost of using your iPhone in a foreign country or on a cruise ship is stratospheric.
 We’ve watched our friends and colleagues purchase all sorts of add-on gizmos to make up for the shortcomings in the iPhone. These have included secondary cellphones and more recently the MiFi devices which let you pay one of the companies in the American cellphone oligopoly another $60++ per month to tether your notebook and netbook to the cellular data network. Let’s get this straight. We pay a cellphone provider for an unlimited data plan as part of our service, but to transmit data to or from our PC through the plan, add another $60 a month for another data plan with a bandwidth cap. Huh? This is for a service that most of us use intermittently and would prefer to never use because of the lousy performance. Here’s our #1 traveling rule. Never stay in a hotel that doesn’t have WiFi, period. Why would you? The one next door has it!
So let’s go about this by the book… with a requirements analysis first! We want a cellphone that makes cellular calls from most locations, and we want the ability to decide which cell provider we use depending upon where we are. We want the option to make phone calls through our own SIP provider, or Asterisk® server, or Google Voice whenever we feel like it with or without a Wi-Fi connection. And, of course, we want VoIP Prioritization. This means we want our cell phone to prioritize incoming and outgoing calls by attempting to use VoIP services first, cellphone carrier second. Good luck with that one! We also want to be able to check our email using POP3 or IMAP servers. And, when we need to send or receive something on our notebook computer and there’s no WiFi around, we want our cellphone to provide data connectivity. We’re not going to be downloading movies and 1,000-page books all day long. We just want to get an important file attachment from the office so we can read it on a normal screen. And, finally, we’d like a QWERTY keyboard for messaging, and we want to be able to change our own battery, add a memory chip, and swap out SIM cards whenever we’d like. And the music, camera, and GPS functionality would be nice-to-haves on a phone.
 Is this so hard? Well, if you’re in the United States and you’re planning to purchase a phone through Sprint, T-Mobile, AT&T, or Verizon to get one of those sign-away-your-life phone discounts, the answer is IMPOSSIBLE! And, to those that are chomping at the bit to tell us how they’ve accomplished some of these miracles with their hacked iPhone, let me just remind you that Apple considers it a national security threat to hack your iPhone thus explaining why Apple also considers it honorable to brick your hacked iPhone at any time despite the fact that you paid for it. Ask yourself if you really want to invest your cellphone dollars with a company spewing forth this kind of
 bullshit stuff.
And the answer is…
 The unlocked U.S. version of the Nokia E71 costs $289.99 at NewEgg, and it’s worth every penny. We’ve been using ours all day, every day for the better part of a year. We’re not going to do a full review of the phone when there’s already an excellent one out there. Start with the allaboutsymbian review and then pick up again here. What isn’t covered in that review is the critical component that we believe sets this phone apart from everything else out there: incredibly simple SIP connectivity and VoIP setup with an Asterisk server because of the native SIP stack and SIP client which is built into the E71’s firmware. And, as you will soon discover, this transforms the E71 into the perfect traveling companion because it makes the E71 just another telephone extension on your home office Asterisk PBX. If secure communications matters, there’s VPN support as well.
 Implementing Incoming VoIP Prioritization. Here’s how we’ve set up connectivity to our E71. First, create an extension on your Asterisk server that will be dedicated to remote SIP access from your E71. Let’s use extension 371 in this example. Give it a very secure password because the IP address of your E71 will change as you move from place to place so we can’t really lock down the extension with anything other than a secure password, or you won’t be able to connect. Next, create another extension (372) and forward all incoming calls to that extension to the regular phone number of your E71, i.e. the one provided by your cellphone provider. Then create a Ring Group on your Asterisk server (373) and set up 371 as the only number in the ring group extension list. For the destination if no answer, choose extension 372. Finally, set up your Google Voice number with a destination extension that forwards calls to ring group 373. So the way this will work is that incoming calls to your Google Voice number will ring the SIP connection on your E71 (371) if your E71 is registered to your Asterisk server via SIP. And, when it’s not registered, the calls will be forwarded to the regular phone number of your E71 (372) without any delay since extension 371 isn’t registered with your server. If you get in the habit of searching for WiFi wherever you happen to light and connecting back to your Asterisk server, (as you’ll see, this is a one-click operation), then you’ll have dirt-cheap remote cellphone service on your E71 almost all of the time. And, if you travel to foreign countries, it means that any time your E71 is registered with a WiFi HotSpot, all incoming calls will be free instead of costing an arm-and-a-leg in per minute international roaming fees.
 SIP Setup for Nokia E71. John Rogers over at geek.com has written an excellent piece with lots of pretty pictures to show you how to configure your E71 with Asterisk. Rather than reinvent the wheel, here’s the link. It only takes a couple of minutes. We do have a few tips to get you started on the right foot. Make certain that the IP address you enter for your Asterisk server is the public IP address or fully-qualified domain name for your server, not the private IP address inside your firewall. As you roam from one WiFi network to the next, the E71 will automatically configure the phone for the new networks as soon as you choose WLAN Scanning, select a WiFi network, and choose to Connect to your Asterisk server. This is performed from the default screen on your phone so there’s no wading through layer upon layer of menus. After linking and unlinking to different networks about a dozen times, we have found it’s a good idea to shut down the phone, remove the battery momentarily, and then restart the phone. It keeps awkward connect problems from ever occurring. To enable VoIP Prioritization for outbound calling, all you have to do is change one default setting on the Nokia E71: Menu, Tools, Settings, Phone, Call, Default Call Type: Internet Call.
 Depending upon your choice of router, using the public IP address of your Asterisk server may cause connectivity issues when you attempt to make a connection through the same WiFi network on which your Asterisk server resides. You can solve this by investing in one of dLink’s Gaming Routers which also provide the necessary tools to prioritize VoIP traffic on your network. Second, make sure you load the latest Nokia firmware for the E71 before you begin configuring your phone. You can check which firmware is installed on your phone by pressing *#0000#. If it’s less than 200.21.118, you need to upgrade, and you’ll need a Windows machine to do it. Here’s the link to Nokia’s upgrade site.
![]() Where To Go From Here. Once you have your E71 performing as a remote Asterisk extension, there are some other must-have’s for your phone. First, you’ll want to purchase JoikuSpot Premium for 15.00€ (about $20). It turns your phone into a WiFi HotSpot whenever you need tethering. Next you’ll want to load Nokia’s OVI store which includes a number of free downloads including Internet Radio, Fring, Nimbuzz, and Web Server. With the web server, you can actually create a blog and let visitors share photos and take pictures using your E71. Try ours to get a taste of what’s available. We think you’ll also find Google Latitude to be a fascinating addition. It lets you produce a free, GPS-enabled map with your current location just like Where In the World Is Nerd Uno. In fact, that map is produced from GPS data generated on our Nokia E71.
Where To Go From Here. Once you have your E71 performing as a remote Asterisk extension, there are some other must-have’s for your phone. First, you’ll want to purchase JoikuSpot Premium for 15.00€ (about $20). It turns your phone into a WiFi HotSpot whenever you need tethering. Next you’ll want to load Nokia’s OVI store which includes a number of free downloads including Internet Radio, Fring, Nimbuzz, and Web Server. With the web server, you can actually create a blog and let visitors share photos and take pictures using your E71. Try ours to get a taste of what’s available. We think you’ll also find Google Latitude to be a fascinating addition. It lets you produce a free, GPS-enabled map with your current location just like Where In the World Is Nerd Uno. In fact, that map is produced from GPS data generated on our Nokia E71.
 A Word of Caution. Finally, we’ll close on a cautionary note. Tempting as it may be to buy Nokia’s latest and greatest cellphone, DON’T! Nokia quietly has dropped the native SIP stack and SIP client on almost all of its newest cellphones presumably to win the love and affection of companies like AT&T. These are the same companies that continue to claim in FCC filings that they have nothing against VoIP on cellphones.
 ![]() The list of VoIP-impaired Nokia cellphones includes the N97 as well as the AT&T-branded E71x. Nokia also has been less than clear about the new N900. Historically, this has meant that SIP functionality has disappeared. So beware of shiny new things… that may not work worth a damn. It’s too bad. Nokia was one of our favorite companies, but it looks like they’re ceding the VoIP technology business to Google’s Android which happens to be next on the Nerd Vittles Radar. Here’s a complete list of Nokia’s SIP-compatible phones. Enjoy!
The list of VoIP-impaired Nokia cellphones includes the N97 as well as the AT&T-branded E71x. Nokia also has been less than clear about the new N900. Historically, this has meant that SIP functionality has disappeared. So beware of shiny new things… that may not work worth a damn. It’s too bad. Nokia was one of our favorite companies, but it looks like they’re ceding the VoIP technology business to Google’s Android which happens to be next on the Nerd Vittles Radar. Here’s a complete list of Nokia’s SIP-compatible phones. Enjoy!
Enhanced Google Maps. In case you haven’t noticed, we’ve added yet another Google Map to Nerd Vittles. Now, in addition to showing our location with Google Latitude, we also are displaying your location based upon your IP address. We’ll show you how to add something similar to any LAMP-based Linux system in coming weeks. It’s a powerful technology that has enormous potential. If you’re unfamiliar with Google Maps, click on the Hybrid and Satellite buttons and then check out the scaling and navigation options. Double-click to zoom. Incredible!
whos.amung.us If you’re wondering what your fellow man is reading on Nerd Vittles these days, wonder no more. Visit our new whos.amung.us statistical web site and check out what’s happening. It’s a terrific resource both for us and for you.
Need help with Asterisk? Visit the PBX in a Flash Forum.
Or Try the New, Free PBX in a Flash Conference Bridge.
Special Thanks to Our Generous Sponsors
FULL DISCLOSURE: ClearlyIP, Skyetel, Vitelity, DigitalOcean, Vultr, VoIP.ms, 3CX, Sangoma, TelecomsXchange and VitalPBX have provided financial support to Nerd Vittles and our open source projects through advertising, referral revenue, and/or merchandise. As an Amazon Associate and Best Buy Affiliate, we also earn from qualifying purchases. We’ve chosen these providers not the other way around. Our decisions are based upon their corporate reputation and the quality of their offerings and pricing. Our recommendations regarding technology are reached without regard to financial compensation except in situations in which comparable products at comparable pricing are available from multiple sources. In this limited case, we support our sponsors because our sponsors support us.
BOGO Bonaza: Enjoy state-of-the-art VoIP service with a $10 credit and half-price SIP service on up to $500 of Skyetel trunking with free number porting when you fund your Skyetel account. No limits on number of simultaneous calls. Quadruple data center redundancy. $25 monthly minimum spend required. Tutorial and sign up details are here.
![]() The lynchpin of Incredible PBX 2020 and beyond is ClearlyIP components which bring management of FreePBX modules and SIP phone integration to a level never before available with any other Asterisk distribution. And now you can configure and reconfigure your new Incredible PBX phones from the convenience of the Incredible PBX GUI.
The lynchpin of Incredible PBX 2020 and beyond is ClearlyIP components which bring management of FreePBX modules and SIP phone integration to a level never before available with any other Asterisk distribution. And now you can configure and reconfigure your new Incredible PBX phones from the convenience of the Incredible PBX GUI.
VitalPBX is perhaps the fastest-growing PBX offering based upon Asterisk with an installed presence in more than 100 countries worldwide. VitalPBX has generously provided a customized White Label version of Incredible PBX tailored for use with all Incredible PBX and VitalPBX custom applications. Follow this link for a free test drive!
Special Thanks to Vitelity. Vitelity is now Voyant Communications and has halted new registrations for the time being. Our special thanks to Vitelity for their unwavering financial support over many years and to the many Nerd Vittles readers who continue to enjoy the benefits of their service offerings. We will keep everyone posted on further developments.
Some Recent Nerd Vittles Articles of Interest…
Welcome to IP Country: A New Layer of Asterisk Security
 One of the problems with writing a blog like Nerd Vittles is it's more than double the work of your typical blog where a writer pontificates about something and then moves on. What makes Nerd Vittles a little different is that, with help from a number of very gifted developers, we actually create useful applications and then write about how to use them. So you get a bonus for the same low price: free! This obviously imposes some time constraints in order to get fresh material into your hot little hands every week.
This week we turn our attention to Asterisk® Security again and unfortunately the Whole Enchilada is not yet ready. So today you get Chapter I of this topic with a comment that we're still mulling over some enhancements. When those pieces are finished or at least properly evaluated, we'll produce a sequel. Software houses spend years developing applications. And sometimes it takes us more than a week. 🙂
Let's start with a few observations which should be quite obvious to those who have wrestled with VoIP or Asterisk for a while. Internet security is a bitch. And Asterisk security is much, much worse. When a few disgruntled people can bring Twitter to its knees because they're mad about some particular tweet or Twitter user, it tells you what we're all up against. Hate to say it but we can all thank Microsoft for years of security neglect that rendered the Windows operating system less than optimum in preventing the spread and deployment of BOTs. And the tools have gotten more dangerous as well. Strangers (our euphemism for these folks) write new software, too. 
If you're using PBX in a Flash (and you really should be!), you know that we've devoted enormous resources to Asterisk security. Two years ago when PBX in a Flash was introduced, the majority of people using Asterisk still were using 1234 as the extension password on all or most of their extensions. A couple $100,000 phone bills and lots of public education, and that situation hopefully is behind us. Two years ago, no Asterisk aggregation included a firewall... except PBX in a Flash. Believe it or not, there were individuals running Asterisk servers on the public Internet with a default root password of password. That added more than a few more BOTs to the Internet kettle of fish. Then there were the brute force password hacks that hit Asterisk servers thousands of times per minute guessing passwords. Nothing stood in the way of these attacks until PBX in a Flash introduced Fail2Ban which automatically blacklisted IP addresses after a certain number of failed login attempts. We followed Fail2Ban with our Atomic Flash product which provided a turnkey Hamachi VPN implementation for rock-solid safe remote computing. And, of course, there was a one-minute Hamachi VPN install script for standard PBX in a Flash systems. No other aggregation has it to this day.
The purpose of the history lesson isn't to crow about PBX in a Flash although we're mighty proud of it. Rather we wanted to make you aware that precious little development effort is actually going into security while enormous resources are devoted to things such as Internet faxing, Skype, and Google Voice integration. We'll be the first to admit that we love the latest gee whiz gizmos as much as anybody. But come on. A handful of us who do this purely for fun somehow manage to turn out loads of security enhancements while huge, for-profit companies are devoting virtually zero resources to making Asterisk, SIP, and the VoIP community safer. SIP is about as secure as whispering at a movie theater. Google releases Google Voice with SIP access protected by a 4-digit password. 🙄 That approach to security needs to change, or we're all going to wake up sorry one day soon. If this is preaching to the choir, then feel free to pass this article on to one of your brethren who has not yet seen the light! Start by reading our Primer on Asterisk Security.
If you have extremely secure passwords on your Asterisk extensions and trunks, and you have deployed a properly configured firewall with Fail2Ban to protect against brute force attacks, then you're ahead of the curve insofar as Asterisk security is concerned. But what we think is still missing is access restrictions based upon what the military calls a "need to know." Simply stated, it means folks shouldn't get access of any kind to your Asterisk server unless they have a need to be there. And, if we find someone there that doesn't belong, they should be kicked off and banned from further access.
So today we have a new security tool for your Asterisk toolbox: IP Country, country-based network filtering by IP address. In a nutshell, it means configuring your Asterisk server to dramatically reduce the number of IP addresses which can reach your server at all. If you receive anonymous SIP connections from all around the globe that you actually need or if you're attacked from a BOT running on grandma's Windows machine down the block, this may not work for you, but it's another tool in your quiver of arrows. For most servers, it has the potential to reduce the vulnerability from random outside threats substantially. It's taken a lot of research to come up with much of what follows, and we want to express our special thanks to Sandro Gauci and Joe Roper for their assistance. Some of this technology has been around for many years, but unfortunately it was expensive. So we also want to express our special appreciation to MaxMind for releasing their open source GeoLite Country database which is now free for downloading. That is the critical ingredient in much of what follows. So here's a word from our sponsor:
This product includes GeoLite data created by MaxMind, available from http://www.maxmind.com/.
Scope of Protection. An obvious question is just exactly what are we trying to protect. In our view, it's several things. First, we don't want strangers logging in to extensions on our server and making free calls around the globe using pilfered or hacked passwords. We also don't want strangers using our extensions to masquerade as us for any other purpose. Second, we don't want strangers randomly calling our server using SIP URI's that they've dreamed up. And third, we don't want strangers accessing any other applications on our server including SSH and FTP as well as web and email services.
IP Country Design. As with other security features in Asterisk, FreePBX, and IPtables, our implementation of IP Country uses permit and deny access tables that consist of authorized and unauthorized ranges of IP addresses. There's also a table with the latest GeoLite Country information which is used as the data source for your permit table. When a connection to the server is made, the IP address is checked against the permit table of authorized addresses. If there's no match, we'll consider the connection a stranger. If there is a match, then we'll check the deny table to make certain this particular IP address hasn't been banned. Unless you alter all of our scripts, your system must be using the default MySQL account name of root with a password of passw0rd. As configured in PBX in a Flash, this is NOT a security risk since MySQL access is limited to your server, and your server requires root credentials to log in.
Today's Objective. To get everyone started, we're going to tackle the first two objectives today. The solutions offered should work fine on any FreePBX-based Asterisk system... even those that hide the existence of FreePBX.
For outgoing calls, we'll introduce a new script which runs periodically to examine the IP addresses attached to every SIP and IAX extension and trunk on your Asterisk server. If a stranger's IP address is identified (as explained above), we'll add an IPtables firewall rule to permanently block access to your server from this IP address. These rules are stored in /etc/sysconfig/iptables should you ever need to remove an IP address that has been blocked. You can adjust the script execution frequency based upon the thickness of your wallet. After all, it's your phone bill. This functionality is mutually independent from the incoming call protection outlined below so you can use either or both of the functions to meet your own requirements. For systems that use enormous numbers of SIP URI's for communications around the globe, you might choose to implement just this piece for extension and trunk IP Country protection without altering your incoming dialplan at all. Keep in mind that FreePBX now supports permit and deny IP address filters on extensions, something you really should be using even if you decide against implementing the IP Country security protection layer.
For incoming calls, we're going to modify FreePBX's existing Blacklist functionality to also look up the calling IP address in our IP Country permit and deny tables. If the IP address is authorized, the call will go through. Otherwise, the call will be treated just as if the caller's number were blacklisted. Be aware that incoming calls to one of your commercial DIDs may reflect the IP address of your provider since the caller may be calling from a Plain Old Telephone rather than an IP address. The existing Blacklist functionality can be used to block these unwanted callers. If you live in the United States, you'll probably also want to call 888-382-1222 and place your DIDs in the Do Not Call database. Just call from a phone using the CallerID of the number you wish to block.
Installing GeoLite Country. To get started, log into your server as root and issue the following commands:
cd /
wget http://bestof.nerdvittles.com/applications/ipcountry/ipcountry.tgz
tar zxvf ipcountry.tgz
rm ipcountry.tgz
cd /root/ipcountry
./nv-ipcountry
Once the nv-ipcountry script begins to run, it will download and install the GeoLite Country database into MySQL. You then will be asked whether to add countries to your permit table. Since your permit table is empty at this point, the answer should be yes. You'll then get a list of country codes. Choose the two-character country code desired and type it in UPPERCASE, e.g. US. If you want to add one or more additional countries, just rerun ./nv-ipcountry and do NOT initialize the permit table (which erases all of its contents).
New GeoLite Country databases are released every month or two so get used to the procedure. You'll be using it periodically to keep your list of IP addresses current. We'll cover the update procedure after we get you up and running.
Remember: If no IP addresses for any country are added to the permit table, you will not be able to make calls or register trunks with your providers! The only default entries added to the permit table are the non-routable, private IP address ranges, e.g. 192.168.0, etc. The geolite table is merely a data repository of the latest GeoLite Country database and has no effect on the daily operation of your system! You use it only as a data source for populating your permit table.
Testing IP Country. Before we actually turn anything on, we need to be sure we're not going to blow your Asterisk system out of the water! In short, we want to make sure that every extension that's supposed to be able to make a connection to your PBX still can. And we need to make sure all of your trunk registrations still are working. While you're still in the /root/ipcountry directory, issue the following command: ./test.sh. This script will display all of your SIP and IAX connections and then will tell you whether each connection will pass muster with IP Country security in place. Each IP address should display ok. If any of them show ko, you have a problem. This means that you have an extension or trunk with an IP address that is not included in your permit table. You can scan through the show peers listings in the display to figure out which providers or extensions are associated with any problem IP addresses. Be sure it's not a bad guy first. Then you have a couple of options. You can either manually add the IP address to the permit table as outlined below. Or you can add additional countries which include the missing IP address(es). To decipher the country of any problem IP address, go to this link and plug in the IP address. Once you've made entries in your permit table to cover all of your needed IP addresses, run the test script again just to be sure everything shows ok. Do NOT proceed until you get all ok's, and don't write us if you do.
Manually Adding IP Addresses to IP Country. We've provided a command-line utility which makes it easy to add IP addresses and address ranges to either the permit or deny tables of IP Country. Be very careful using this tool! There's limited error-checking which means it's easy to create a mess. You'll find iputility.php in the /root/ipcountry folder. Since all IP addresses are stored as integers, you can use it to merely discover the integer value of an IP address, or you can actually insert IP addresses into either the permit or deny tables. Here are a few examples to show how the utility works:
./iputility.php 156.130.20.10
Returns the integer value for this IP address; no database update
./iputility.php 156.130.20.10 156.130.20.255
Returns integer values for this IP address range; no database update
./iputility.php 156.130.20.10 deny
Adds this IP address to IP Country deny table
./iputility.php 156.130.20.10 156.130.20.255 permit
Adds this address range to IP Country permit table)
A couple of points worth noting. First, all custom entries in your permit and deny tables using iputility will show a country code of AA. This makes them easy to find using phpMyAdmin if you make a mistake. Second, if you attempt to enter the same IP address range more than once, you'll get a database error since all entries in the tables must be unique. Third, remember that entries in the deny table take precedence over entries in the permit table. So, if the same IP address or address range is in both tables, access will be denied. The reason for this is to make it easy to exclude a few bad apples from a country that you might otherwise find unobjectionable. Finally, keep in mind that manual entries added to the permit table will have to be added again each time you initialize the table and insert new country IP codes after a GeoLite Country refresh. The deny table is unaffected by database refreshes. So make yourself a list of entries you manually insert into the permit table and keep it in a safe place for future reference.
Activating the IP Address Checker. In the /root/ipcountry directory, you'll find the script that we'll use to check your system periodically to be sure all of the extensions and trunks are registered at permitted IP addresses. To run the script manually, log into your server as root and type: /root/ipcountry/ip-checker.sh. When you run it, you shouldn't see any modifications to IPtables, just a string of ok's. So now we want to added the script as a cron job that will be run periodically to watch your system. Edit /etc/crontab and insert the following line at the bottom of the file:
*/1 means run the script once a minute, all day and night, every day. */5 means every 5 minutes. You make the call on how safe you'd like your system to be. If you'd like to receive an email or text message every time an IP address is blocked by ip-checker.sh, just edit the filecheck.php script, uncomment the two lines that begin with // and replace yourname@gmail.com with your email or text message address.
WARNING: For ip-checker.sh to work properly with IPtables, there are a couple of prerequisites. First, IPtables must be running on your system with the iptables file located in /etc/sysconfig. Second, your IPtables setup must include an SSH permit rule that looks like this:
-A INPUT -p tcp -m tcp --dport ssh -j ACCEPT We use this rule as a place finder to determine where to insert new rules to block stranger's IP addresses. If you don't have the above rule, filecheck.php (used by ip-checker.sh) won't be able to insert new rules. So you'll need to manually edit filecheck.php to provide a "hook" that can be used to insert rules into your iptables file. PBX in a Flash systems come preconfigured to support this. With other aggregations, YMMV!
Activating the Incoming Call Checker. To screen incoming calls using your IP Country permit and deny tables, the setup is straight-forward assuming you are running the latest version of FreePBX 2.5. We're going to adjust the Blacklist context to also perform IP address lookups from IP Country when new calls arrive on your PBX. Just log into your server as root and add the following lines to the bottom of the extensions_override_freepbx.conf file in /etc/asterisk:
[app-blacklist-check]
include => app-blacklist-check-custom
exten => s,1,LookupBlacklist()
exten => s,n,GotoIf($["${LOOKUPBLSTATUS}"="FOUND"]?blacklisted)
exten => s,n,Set(TESTAT=${CUT(SIP_HEADER(From),@,2)})
exten => s,n,GotoIf($["${TESTAT}" != ""]?hasat)
exten => s,n,Set(FROM_IP=${CUT(CUT(SIP_HEADER(From),>,1),:,2)})
exten => s,n,Goto(gotip)
exten => s,n(hasat),Set(FROM_IP=${CUT(CUT(CUT(SIP_HEADER(From),@,2),>,1),:,1)})
exten => s,n(gotip),NoOp(Gateway IP is ${FROM_IP})
exten => s,n,NoOp(IP Country Lookup in Progress...)
; put authorized special calls like sipgate's Google Voice ringbacks below
exten => s,n,GotoIf($["${FROM_IP}"="sipgate.com"]?keepon)
exten => s,n,AGI(nv-ipcountry.php|${FROM_IP})
exten => s,n,GotoIf($["${STRANGER}"="true"]?blacklisted)
exten => s,n(keepon),NoOp(** AUTHORIZED CALLER **)
exten => s,n,Return()
exten => s,n(blacklisted),Answer
exten => s,n,Wait(1)
exten => s,n,Zapateller()
exten => s,n,Playback(ss-noservice)
exten => s,n,Hangup
Make sure you remove the line-wrap in the s,n(hasat) line and any others that may have wrapped in the display above! Then save the file and reload your Asterisk dialplan: asterisk -rx "dialplan reload". You're all set! If you'd like email notices when a stranger calls and is blacklisted, edit nv-ipcountry.php in /var/lib/asterisk/agi-bin. Plug in your actual email address in the $email variable and set $emailalerts = 1.
Housekeeping 101. As we mentioned above, the pool and location of IP addresses continues to change so periodic updates are necessary, or you'll end up blocking calls that otherwise should be permitted. MaxMind updates GeoLite Country on the first day of every month so add it to your TO-DO list. We strongly recommend that you perform these steps through an SSH connection from a remote PC. Why? Because, if you forget step 1 while logged directly into your server, you could inadvertently lock yourself out of your own system if the ip-checker script happens to run while your permit table is empty. If you do it from a remote machine, you can simply move to another machine and follow these instructions properly. Otherwise, you've got a serious problem on your main server. If this server provides phones to your business, do the update when the server is idle. So here's the drill:
- Comment out the ip-checker.sh /etc/crontab entry
- Download new GeoLite Country database from MaxMind
- Initialize the ipcountry.permit table
- Add authorized countries back into ipcountry.permit table
- Add back any custom entries to permit table
- Test your IP Country system to make sure you get all ok's
- Reactivate ip-checker.sh in /etc/crontab
1. Log into your server as root. To comment out the ip-checker.sh line in /etc/crontab, just add # as the first character on the line and save the file.
2. Change to the /root/ipcountry directory and run ./nv-GeoIPrefresh.
3. While still in the /root/ipcountry directory, run ./nv-ipcountry and choose 1-Yes to initialize your ipcountry.permit table.
4. Continue running or rerun ./nv-ipcountry to add each desired country to your ipcountry.permit table.
5. Run ./iputility.php to add custom IP address entries to your ipcountry.permit table. You do NOT need to reenter addresses in the deny table. It is unaffected by this update procedure.
6. Test your system again to make sure all extensions and trunks get an ok by running ./test.sh.
7. Edit /etc/crontab and remove the # at the beginning of the ip-checker.sh line and save the file.
What's Next. We're still exploring another possibility with IP Country, and that is integrating GeoLite Country directly into IPtables. This would validate every packet coming into your firewall using IP Country-like rules in IPtables. If you want to look at how it could be done, see this excellent writeup. Well, not so fast. Unfortunately, it won't compile under CentOS 5.2. Here's a link to the problem code if there are any Linux gurus in the house. Our reluctance in doing this has to do with performance. Keep in mind that, without stateful packet inspection, every single packet coming into your server would presumably trigger a database lookup. On a busy telephony system generating hundreds of thousands of packets per second, it would take a beast of a server with sufficient memory to cache the entire IP Country database in order to handle the processing load. So now we've got to either learn about or find an expert on the IPtables State Machine. If anyone wants to experiment, please share your expertise with the rest of us. There's a Google Voice invite in it for you, too.
whos.amung.us If you're wondering what your fellow man is reading on Nerd Vittles these days, wonder no more. Visit our new whos.amung.us statistical web site and check out what's happening. It's a terrific resource both for us and for you.
Need help with Asterisk? Visit the PBX in a Flash Forum.
Or Try the New, Free PBX in a Flash Conference Bridge.
Special Thanks to Our Generous Sponsors
FULL DISCLOSURE: ClearlyIP, Skyetel, Vitelity, DigitalOcean, Vultr, VoIP.ms, 3CX, Sangoma, TelecomsXchange and VitalPBX have provided financial support to Nerd Vittles and our open source projects through advertising, referral revenue, and/or merchandise. As an Amazon Associate and Best Buy Affiliate, we also earn from qualifying purchases. We’ve chosen these providers not the other way around. Our decisions are based upon their corporate reputation and the quality of their offerings and pricing. Our recommendations regarding technology are reached without regard to financial compensation except in situations in which comparable products at comparable pricing are available from multiple sources. In this limited case, we support our sponsors because our sponsors support us.
BOGO Bonaza: Enjoy state-of-the-art VoIP service with a $10 credit and half-price SIP service on up to $500 of Skyetel trunking with free number porting when you fund your Skyetel account. No limits on number of simultaneous calls. Quadruple data center redundancy. $25 monthly minimum spend required. Tutorial and sign up details are here.
![]() The lynchpin of Incredible PBX 2020 and beyond is ClearlyIP components which bring management of FreePBX modules and SIP phone integration to a level never before available with any other Asterisk distribution. And now you can configure and reconfigure your new Incredible PBX phones from the convenience of the Incredible PBX GUI.
The lynchpin of Incredible PBX 2020 and beyond is ClearlyIP components which bring management of FreePBX modules and SIP phone integration to a level never before available with any other Asterisk distribution. And now you can configure and reconfigure your new Incredible PBX phones from the convenience of the Incredible PBX GUI.
VitalPBX is perhaps the fastest-growing PBX offering based upon Asterisk with an installed presence in more than 100 countries worldwide. VitalPBX has generously provided a customized White Label version of Incredible PBX tailored for use with all Incredible PBX and VitalPBX custom applications. Follow this link for a free test drive!
Special Thanks to Vitelity. Vitelity is now Voyant Communications and has halted new registrations for the time being. Our special thanks to Vitelity for their unwavering financial support over many years and to the many Nerd Vittles readers who continue to enjoy the benefits of their service offerings. We will keep everyone posted on further developments.
Some Recent Nerd Vittles Articles of Interest...
Free Asterisk Solutions
