
Home » Search results for 'sip uri' (Page 46)
Search Results for: sip uri
The Most Versatile VoIP Provider: FREE PORTING

 JUST RELEASED: Visit the Incredible PBX Wiki
Incredible Fax: Free Faxing Returns to Incredible PBX 1.8
It’s been a rocky road getting an open source (free) faxing alternative to work reliably with Asterisk® 1.8. To further complicate things, CentOS 5.6 was finally released which brought us a few more Asterisk 1.8 headaches and updates finally leading up to an all-new and nearly perfect PBX in a Flash 1.7.5.6 thanks in large part to Tom King. The new release also forced some under-the-covers modifications in Incredible PBX. Now you’re caught up on last week’s news. But what have we done for you lately?

Well, one alternative was to shift gears to the commercial Fax for Asterisk from Digium® which is supported in FreePBX 2.8 and 2.9 and includes one free license. But we’re open source fans and, of course, nothing beats free. Thanks to the efforts of a number of folks on the PBX in a Flash forums including our old pal, Joe Roper, there is an alternative that folks have been wrestling with for over two years. The combination of Hylafax, Avantfax, and IAXmodem is a compelling open source solution if you don’t need T.38-compatible faxing.1 The drawback has been the learning curve to install all the components and get them working reliably together. Well, for those using Incredible PBX 1.8 with PIAF-Purple and Asterisk 1.8, today we have a newly minted installation script that is simple enough that even a monkey can use it. If you know your own email address and your local area code AND you can find the Enter key on your keyboard, you are fully qualified to perform today’s installation. It’ll take you under 5 minutes! We’ve also got a nice little surprise for you toward the end of this article.
Prerequisites. You’ll first need to install the latest version of PBX in a Flash with the PIAF-Purple (Asterisk 1.8) payload. Then sign up for a free Google Voice account and install Incredible PBX 1.8. You’ll find complete installation instructions for everything here. Can you just wing it and run this installation script on a garden-variety Asterisk 1.8 machine? No. And the reason is that all of these components have dependencies which are too complex to cover in a 5-minute article. You might want to have a look at the A-Fax Project which is where we started. Suffice it to say, the combination of PIAF-Purple and Incredible PBX 1.8 provides the ideal platform on which to install Incredible Fax. If you prefer to do-it-yourself, by all means have at it. We lost about 10 years worth of hair even starting with the work of a dozen very talented Linux gurus who have been wrestling with this for over two years! But, hey, YMMV! We never claimed to be the sharpest tool in the shed. 😉
Installing Incredible Fax. Once you have your Incredible PBX 1.8 platform up and running, adding Incredible Fax is a stroll in the park. Just log into your server as root and issue the following commands. If you’ve downloaded Incredible PBX in the last few days, the script may already be on your system. In this case, just type /root/incrediblefax.sh to run it.
cd /root
wget http://incrediblepbx.com/incrediblefax.sh
chmod +x incrediblefax.sh
./incrediblefax.sh
After checking to make sure Incredible PBX 1.8 is installed, the script will prompt you to enter an email address where incoming faxes should be delivered. Then all of the necessary components will be installed after which the Avantfax install script will be run. With the exception of entering your local area code when prompted to do so, the correct response to every other question is to press the Enter key if you live in the U.S. or Canada. Don’t "improve" anything if you expect the end product to work reliably. For those outside North America, you’ll need to also make the usual adjustments to account for your country and city codes.
Avantfax has its own security model, but we’ve grown to appreciate the Apache authentication model which is built into PBX in a Flash so it’s been incorporated into Incredible Fax as well. When the install completes, just reboot your server to get everything working. On the PBX in a Flash web GUI, there will be a new Admin icon for Faxing. Or you can access Avantfax with a browser by going to http://serverIPaddress/avantfax. When prompted for your username and password, use maint and whatever your maint password happens to be. These can be reset with passwd-master. Literally everything has been preconfigured in Avantfax to get you going. Here’s a 3-minute video to show you how easy it is. Just don’t forget to reboot once the install completes.
If you want to be able to print to fax from Windows-based machines, then you’ll need to make one addition. Click on the small Toolbar icon in the upper right corner of the AvantFax home screen and choose New User from the pull-down Menu. For the user, enter Fax for the Name, fax for the Username, a secure password for Password, and an email address that is DIFFERENT from the one you used to set up Incredible Fax. Check the boxes for User Can Delete Faxes and User Can Fax From Any Modem. Finally, check the boxes for all four IAXmodems. Then click the Save button to add this new user.
A Word About Reliable Faxing. Suffice it to say that analog faxing over VoIP trunks is something less than ideal. If you want reliable analog faxing, then you’ll need a PSTN line from your favorite local telephone company. It doesn’t need any fancy add-ons like CallerID which doubles the price in many cities. Then you’ll need a properly configured analog telephone adapter (ATA) with at least one FXO port to support your Ma Bell phone line. Our favorite is the OBi110 which also can double as an additional Google Voice trunk for your PBX. But an SPA3102 will work equally well. It just costs more and gives you less.
Now that we’ve covered the obligatory warnings… will Incredible Fax work with a pure VoIP connection? Absolutely. We do it all the time. Is it flawless? No. Are there certain providers that are better than others? You bet. Do some providers not support faxing at all? Correct. Based on our 5+ years wrestling with this, here’s our recommendation. First, you’ll need a DID (i.e. phone number) from one of our recommended providers to handle inbound faxes. With the latest release of Asterisk 1.8, you no longer need a DID dedicated to faxing. In other words, you can use the same DID to receive incoming voice calls as well. The good news is that pay-as-you-go DIDs are dirt cheap. Some providers such as voip.ms offer DIDs for under $1 a month with 1¢ per minute calls. VoIP.ms also has unlimited inbound calling DIDs for under $4 a month. Other providers whose trunks we have found work reliably for VoIP faxing include Vitelity (see our special sign up deal below), Axvoice, Teliax, VoIPMyWay ($45 for first year with unlimited outbound and inbound calling with a local DID), and Future-Nine2. Google Voice trunks are hit and miss. We’re batting about .250 in our testing with Google Voice lines. Bottom Line: If VoIP faxing doesn’t work after you complete the install, it’s probably the fault of your VoIP trunk, not the setup. To make absolutely sure, connect a standard fax machine to an extension using an FXS telephone adapter and send a fax to that extension from the Avantfax web interface. You’ll find it works every time!
Configuring FreePBX for Incredible Fax. Here are the steps you’ll need to complete to get analog faxing working reliably with FreePBX. First, set up an account with one of the companies we’ve mentioned above. With voip.ms, create a subaccount on their site with credentials to use with the DID you purchased to link to that subaccount.
Unless you’re using today’s release of Incredible PBX, you’ll need to activate FreePBX’s Fax Configuration Module if you want to take advantage of Asterisk 1.8’s fax detection capabilities. It didn’t work reliably in previous Asterisk 1.8 releases. This module already is either available or already installed on your server. In the FreePBX GUI using a browser, choose Tools, Module Admin and then click on Fax Configuration. A drop-down list will provide several choices. Choose either Install or Enable depending upon the version of Incredible PBX you currently are running. Then click the Process button and finally Reload the settings when prompted.
Unless you installed Incredible PBX today, you’ll need to create a SIP trunk for your new provider in FreePBX using the credentials you set up on the provider’s web site. The VoIP.ms template now is included in Incredible PBX so you can just edit the existing one to add your credentials. And, at least with VoIP.ms, you can set the outbound CallerID to anything you like (as long as it’s legal). Unless you want a knock at your door, we wouldn’t recommend using the main number at the White House. Then put all of the settings below in the Outgoing Settings PEER Details where 1234567 is your main account number, subacctname is the name of the subaccount you created, and atlanta is your closest voip.ms server location:
username=1234567_subacctname
type=friend
trustrpid=yes
sendrpid=yes
secret=subacctpassword
nat=yes
insecure=port,invite
host=atlanta.voip.ms
fromuser=1234567_subacctname
disallow=all
context=from-trunk
canreinvite=nonat
allow=ulaw
For the registration string, it should look like the following. If you’re planning to only use the trunk for outbound faxing, then you can leave off the trailing DID number.
username:password@atlanta.voip.ms:5060/10-digit-DID
In addition to setting up the Trunk for your provider, you’ll also need to create an Outbound Route for sending faxes out through this trunk AND an Inbound Route to receive incoming faxes on the DID you purchased from your provider.
For the Outbound Route, we recommend setting the Dial Pattern with a prefix not otherwise used on your Incredible PBX so that you can make fax calls easily by dialing this prefix. For example, on our sample system, we used 7 so that fax calls could be made by dialing 7 plus a 10-digit number in the U.S. and Canada. Here’s how our Outbound Route for VoIP.ms looks in FreePBX, and the latest Incredible PBX release already has it in place as shown below:

For the Inbound Route, you want to specify the DID from your provider which must match the 10-digit number you affixed to the end of the trunk registration string above. If you don’t want to share this number for voice and fax calls, then simply direct these inbound fax calls to the Fax Custom Destination. Extension (329 spells F-A-X) also can be used to process incoming faxes and route them to your email address as well as the Avantfax web GUI.
Our experience suggests that using a single trunk for both voice and fax delivery is hit and miss so you may wish to consider adding an additional trunk just to support faxing. You’ll find the templates for adding a second Google Voice trunk in the /tmp directory, and complete instructions are available on the PIAF Forums. We’ve also provided preconfigured trunk settings for both Vitelity and VoIP.ms if you’d like to try those options as well. Just plug in your credentials and configure an inbound route to map incoming faxes to the Fax Custom Destination.

AvantFax in a Nutshell. Here’s a quick summary of the main features in the AvantFax web GUI. You can access the GUI by pointing a browser to the IP address of your server + /avantfax. After you enter your maint account name and maint password, the following screen will display with your Inbox. As noted, all of these incoming faxes also will be emailed to the account you set up when you ran the Incredible Fax install script.

The icons to the right of each thumbnail fax let you View, Rotate, Download PDF, Reply to Fax, Email PDF, Add a Note, Archive the Fax, and Permanently Delete the Fax.
At the top of the screen just to the right of Inbox is the option to Send a Fax. Here you’d specify the phone number to dial. Don’t forget the 7 and then a 10-digit number. Next you can attach a document from your local disk. Finally, fill in the blanks for the Fax Cover Sheet, and then click Send. Your fax will be on its way. You can monitor the progress of the fax transmission by clicking on Outbox. It’s also a good idea to fire up an SSH session to your server and run asterisk -rvvvvvvvvvv to monitor the first few calls to be sure all is well in Incredible FaxLand.
 Where to Go Next. HylaFax and AvantFax are very mature open source products with a huge international following. We apologize for focusing primarily on U.S. and Canadian users today, but anything is possible with this software. The first piece you probably will want to tackle is adding Print to Fax capability on your Windows machine. The software you’ll need can be downloaded here. You’ll find excellent documentation on the setup by visiting the PBX in a Flash Forum. One little footnote for those using Windows 7. Microsoft and Apple are back to their old tricks so there are no Apple postscript print drivers in Windows 7. We’ve had equally good results using Dell’s 3100cn PS driver. Incidentally, there’s a similar print-to-fax utility for Mac OS X, but it’ll set you back $36. Here’s the link. HylaFax also maintains a terrific resource list for those that want additional goodies for PCs, Macs and Linux systems.
Originally published: Monday, May 2, 2011
Changes in PBX in a Flash Distribution. In light of the events outlined in our recent Nerd Vittles article and the issues with Asterisk 1.8.4, the PIAF Dev Team has made some changes in our distribution methodology. As many of you know, PBX in a Flash is the only distribution that compiles Asterisk from source code during the install. This has provided us enormous flexibility to distribute new releases with the latest Asterisk code. Unfortunately, Asterisk 1.8 is still a work in progress to put it charitably. We also feel some responsibility to insulate our users from show-stopping Asterisk releases. Going forward, the plan is to reserve the PIAF-Purple default install for the most stable version of Asterisk 1.8. As of June 1, Asterisk 1.8.4.1 is the new PIAF-Purple default install. Other versions of Asterisk 1.8 (newer and older) will be available through a new configuration utility which now is incorporated into the PIAF 1.7.5.6.2 ISO.
Here’s how it works. Begin the install of a new PIAF system in the usual way by booting from your USB flash drive and pressing Enter to load the most current version of CentOS 5.6. When the CentOS install finishes, your system will reboot. Accept the license agreement, and choose the PIAF-Purple option to load the latest stable version of Asterisk 1.8. Or exit to the Linux CLI if you want a different version. Log into CentOS as root. Then issue a command like this: piafdl -p beta_1841 (loads Asterisk 1.8.4.1), piafdl -p 184 (loads Asterisk 1.8.4), piafdl -p 1833 (loads Asterisk 1.8.3.3), or piafdl -p 1832 (loads Asterisk 1.8.3.2). If there should ever be an outage on one of the PBX in a Flash mirrors, you can optionally choose a different mirror for the payload download by adding piafdl -c for the .com site, piafdl -d for the .org site, or piafdl -e for the .net site. Then add the payload switch, e.g. piafdl -c -p beta_1841.

Bottom Line: If you use the piafdl utility to choose a particular version of Asterisk 1.8, you are making a conscious decision to accept the consequences of your particular choice. We would have preferred implementation of a testing methodology at Digium before distribution of new Asterisk releases; however, that doesn’t appear to be in the cards. So, as new Asterisk 1.8 releases hit the street, they will be made available through the piafdl utility until such time as our PIAF Pioneers independently establish their reliability.

Need help with Asterisk? Visit the PBX in a Flash Forum or Wiki.
Or Try the New, Free PBX in a Flash Conference Bridge.
whos.amung.us If you’re wondering what your fellow man is reading on Nerd Vittles these days, wonder no more. Visit our new whos.amung.us statistical web site and check out what’s happening. It’s a terrific resource both for us and for you.
Special Thanks to Our Generous Sponsors
FULL DISCLOSURE: ClearlyIP, Skyetel, Vitelity, DigitalOcean, Vultr, VoIP.ms, 3CX, Sangoma, TelecomsXchange and VitalPBX have provided financial support to Nerd Vittles and our open source projects through advertising, referral revenue, and/or merchandise. As an Amazon Associate and Best Buy Affiliate, we also earn from qualifying purchases. We’ve chosen these providers not the other way around. Our decisions are based upon their corporate reputation and the quality of their offerings and pricing. Our recommendations regarding technology are reached without regard to financial compensation except in situations in which comparable products at comparable pricing are available from multiple sources. In this limited case, we support our sponsors because our sponsors support us.
 BOGO Bonaza: Enjoy state-of-the-art VoIP service with a $10 credit and half-price SIP service on up to $500 of Skyetel trunking with free number porting when you fund your Skyetel account. No limits on number of simultaneous calls. Quadruple data center redundancy. $25 monthly minimum spend required. Tutorial and sign up details are here.
![]() The lynchpin of Incredible PBX 2020 and beyond is ClearlyIP components which bring management of FreePBX modules and SIP phone integration to a level never before available with any other Asterisk distribution. And now you can configure and reconfigure your new Incredible PBX phones from the convenience of the Incredible PBX GUI.
The lynchpin of Incredible PBX 2020 and beyond is ClearlyIP components which bring management of FreePBX modules and SIP phone integration to a level never before available with any other Asterisk distribution. And now you can configure and reconfigure your new Incredible PBX phones from the convenience of the Incredible PBX GUI.
 VitalPBX is perhaps the fastest-growing PBX offering based upon Asterisk with an installed presence in more than 100 countries worldwide. VitalPBX has generously provided a customized White Label version of Incredible PBX tailored for use with all Incredible PBX and VitalPBX custom applications. Follow this link for a free test drive!
 Special Thanks to Vitelity. Vitelity is now Voyant Communications and has halted new registrations for the time being. Our special thanks to Vitelity for their unwavering financial support over many years and to the many Nerd Vittles readers who continue to enjoy the benefits of their service offerings. We will keep everyone posted on further developments.
Some Recent Nerd Vittles Articles of Interest…
- Yes, we’re aware that HylaFax theoretically supports T.38 with the right hardware. Feel free to point us to someone who has it actually working with Asterisk 1.8. 🙄 [↩]
- Vitelity, Teliax, VoIPMyWay, and Future-Nine trunks require the following additional entries in your Inbound trunk settings: t38pt_rtp=no, t38pt_tcp=no, t38pt_udptl=no [↩]
Tips, Tricks & Apps to Get the Most Out of Your iPad 2
Rather than providing another glowing review of the iPad 2®, we thought it might be more helpful to sketch out the daily use potential of this incredible device based upon our experience and that of our 10-year old daughter. Yes, we’re one of the 30% who purchased an iPad 2 having already owned a number of first generation iPads. With double the RAM and nearly double the processing power of the first generation device, the one cautionary note that potential purchasers should heed is don’t buy the $499 model. Our daughter has survived a year with a $499 iPad only to find it completely full when she attempted to load Garage Band. And you will want Garage Band which is a storage hog by iPad standards. That’s not to suggest that Katherine’s iPad hasn’t served her well. She has almost 150 applications plus substantial collections of photos and music. What she doesn’t have is movies and video clips. With the addition of two cameras on the iPad 2 as well as Camera, AutoStitch, Movie, and Photo Booth apps and once you see what’s possible with iMovie, you’ll be begging for more storage capacity. Keep in mind that your storage capacity choice is irrevocable! There’s no way to add more storage later unless you buy a new device. And there’s no external storage other than removing apps and data through the iTunes interface. Perhaps more than anything else, that’s why the absence of a microSD slot on the iPad 2 is both a significant shortcoming and a huge disappointment.
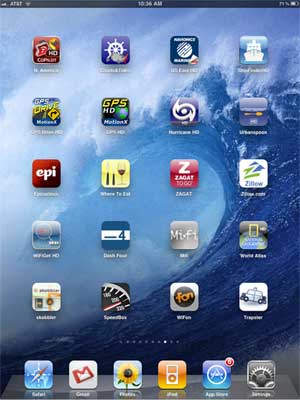
The other suggestion we would offer to first-time iPad 2 purchasers is this. Get organized early. What we mean is decide early on how you’re going to use the 10 screens to organize your applications. Before the year is out, you will use all 10 screens assuming your bank account survives. At least now you can also create folders within a screen if you run out of room. Here’s our methodology, and it has served us pretty well. Screen 1 is reserved for the apps we use every day. The other screens are reserved for categories of applications: business, news and books, social, drawing and graphics, music, games, location-based services, and system/network management. If you’re a big gamer, artist, or musician, you may want to reserve two screens for your favorite category. The point is to spend a little time up front deciding how to organize applications. And, fortunately, you can move things around with the iTunes interface down the road so long as you leave one screen available for reorganizing.
You can also place six apps at the bottom of the display, and these are accessible from all 10 screens. Here’s where you’d want your browser, email or Gmail buttons, App Store, and Settings. That leaves you two more must-have apps. If you play music all the time, you’d probably want the iPod app. If you look at Photos all the time, you’d want the Photo app. But you get the idea, use Screen 1 for Daily Use Apps and the 6 bottom slots for your must-have at all times apps. If you don’t heed this advice, then you’ll find yourself having to search for apps on Screen 0 every time you want to use an application.
Favorite Apps. That brings us to our favorite apps. For ease of reference, we’ll cover these in the same way they are organized on our iPad 2. And, we’d love to hear about your favorite apps, too. Just post a comment. In the Daily Use category, here’s our list:
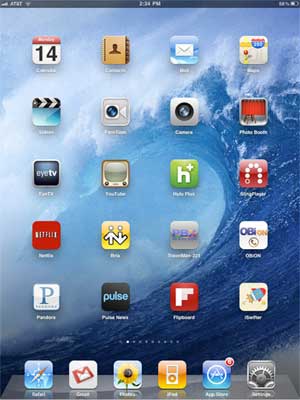 Calendar
Contacts
Mail
Maps
Videos
FaceTime
Camera
Photo Booth
EyeTV
YouTube
Hulu Plus
SlingPlayer
NetFlix
Bria
Travelin’ Man
OBiON
Pandora
Pulse News
Flipboard
iSWiFTER
Most of the above applications are self-explanatory, but we’ll mention a few. If you have a Mac, then EyeTV is a must-have addition. It lets you play and record all your favorite TV shows. Removing commercials from a one-hour show is about a 2-minute click-and-drag operation. And it’s incredibly easy to export your favorite recordings in either iPhone or iPad format. So long as iTunes is running on your Mac desktop, you can play your recordings or live TV at any time using either a WiFi or 3G network connection. SlingPlayer does much the same thing (only worse) with no recording capability, but it works with Windows machines as well as Macs, and it’s a standalone device. The Netflix app lets you stream movies and TV shows to your iPad for $7.99 a month, and it supports 6 simultaneous devices including many current generation HDTVs. OBiON is the VoIP app that lets you make free Google Voice calls in the U.S. and Canada using your $49 OBi device. You can read all about it here. If you have an Asterisk® PBX, then you’ll want Bria and our Travelin’ Man app for secure, remote, and free SIP communications. Finally, there’s the new iSWiFTER app which brings Flash video back from the dead on the iPad platform. It’s free for a limited time and, believe it or not, it’s available in the App Store.
Books & News. We spend every morning at the breakfast table with the Books & News page on our iPad. Here’s our list:
 Kindle
iBooks
Friendly (Facebook)
Twitterific
AccuWeather
ABC News
ABC Player
CBS News
CNBC RT
CNN
Huff Post
Newsy
NYTimes
News Pro
USA Today
WSJ
Wash Post
The Daily
TV Guide
Tweetdeck
We don’t watch much Faux News which has become more akin to Incitement TV. We really hoped The Daily would be different. It’s not. But… to each his own.
Business Apps. This is kind of a catch-all page for stuff we use frequently as well as some apps we’ll probably never use again. Here’s our list:
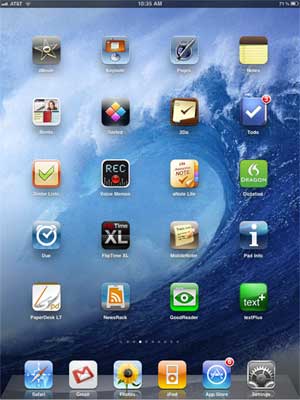 iMovie
Keynote
Pages
Notes
Bento
Sorted
2Do
Todo
Zenbe Lists
Voice Memos
aNote Lite
Dictation
Due
FlipTime XL
MobileNoter
Pad Info
PaperDesk LT
News Rack
GoodReader
textPlus
Of all the ToDo applications that are available (and we’ve tried most of them), we like Todo the best. But, for quick reminders, you can’t beat Due. GoodReader, Keynote, and Pages are must have business apps, and iMovie is every bit as good as the app on the Mac. It’s about perfect for an on-the-go, need-it-in-a-hurry project.
Navigation & Wi-Fi Apps. When we’re on the road or looking for a WiFi Hot Spot or good place to eat, here’s our list:
 CoPilot HD
Charts & Tides
Navionics Marines
ShipFinder HD
GPS Drive HD
GPS HD
Hurricane HD
UrbanSpoon
Epicurious
Where To Eat
ZAGAT
Zillow.com
WiFiGet HD
Dash Four
Mifi
World Atlas
Skobbler
SpeedBox
WiFon
Trapster
GPS navigation on the roads is hit and miss on the iPad. Nothing comes close to Google Maps navigation. CoPilot could be a contender except for the outdated maps and copy protection paranoia. On the water, both Charts & TIdes and Navionics Marine are fantastic. We compared both of them to a $10,000 Nav system on a very fine boat only yesterday. There was virtually no difference in the information available with the exception of the radar-enhanced features. If you’re always shopping for real estate, there is no finer app than Zillow, period. If you’re in to fast cars, there is no finer app than Trapster.
Games. Last but not least, everybody needs a diversion once in a while. Here’s a list of some of our favorite iPad games:
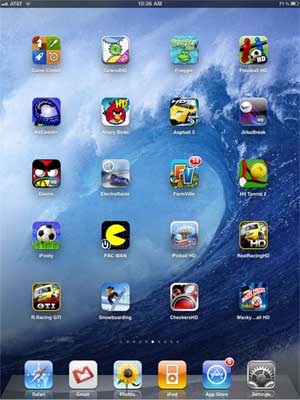 Game Center
GearedHD
Frogger
Foosball HD
AirCoaster
Angry Birds
Asphalt 5
JirboBreak
Doons HD
ElectroRacer
FarmVille (WAF)
Hit Tennis 2
iFooty
Pac-Man
Pinball HD
RealRacing HD
RealRacing GTI
Snowboarding
Checkers HD
Wacky Circus HD
This will probably be the category that changes the quickest with the new lightening-fast graphics and dual core processor on the iPad 2. Stay tuned!
Originally published: Monday, March 14, 2011
Need help with Asterisk? Visit the PBX in a Flash Forum or Wiki.
Or Try the New, Free PBX in a Flash Conference Bridge.
whos.amung.us If you’re wondering what your fellow man is reading on Nerd Vittles these days, wonder no more. Visit our new whos.amung.us statistical web site and check out what’s happening. It’s a terrific resource both for us and for you.
Special Thanks to Our Generous Sponsors
FULL DISCLOSURE: ClearlyIP, Skyetel, Vitelity, DigitalOcean, Vultr, VoIP.ms, 3CX, Sangoma, TelecomsXchange and VitalPBX have provided financial support to Nerd Vittles and our open source projects through advertising, referral revenue, and/or merchandise. As an Amazon Associate and Best Buy Affiliate, we also earn from qualifying purchases. We’ve chosen these providers not the other way around. Our decisions are based upon their corporate reputation and the quality of their offerings and pricing. Our recommendations regarding technology are reached without regard to financial compensation except in situations in which comparable products at comparable pricing are available from multiple sources. In this limited case, we support our sponsors because our sponsors support us.
BOGO Bonaza: Enjoy state-of-the-art VoIP service with a $10 credit and half-price SIP service on up to $500 of Skyetel trunking with free number porting when you fund your Skyetel account. No limits on number of simultaneous calls. Quadruple data center redundancy. $25 monthly minimum spend required. Tutorial and sign up details are here.
![]() The lynchpin of Incredible PBX 2020 and beyond is ClearlyIP components which bring management of FreePBX modules and SIP phone integration to a level never before available with any other Asterisk distribution. And now you can configure and reconfigure your new Incredible PBX phones from the convenience of the Incredible PBX GUI.
The lynchpin of Incredible PBX 2020 and beyond is ClearlyIP components which bring management of FreePBX modules and SIP phone integration to a level never before available with any other Asterisk distribution. And now you can configure and reconfigure your new Incredible PBX phones from the convenience of the Incredible PBX GUI.
VitalPBX is perhaps the fastest-growing PBX offering based upon Asterisk with an installed presence in more than 100 countries worldwide. VitalPBX has generously provided a customized White Label version of Incredible PBX tailored for use with all Incredible PBX and VitalPBX custom applications. Follow this link for a free test drive!
Special Thanks to Vitelity. Vitelity is now Voyant Communications and has halted new registrations for the time being. Our special thanks to Vitelity for their unwavering financial support over many years and to the many Nerd Vittles readers who continue to enjoy the benefits of their service offerings. We will keep everyone posted on further developments.
Some Recent Nerd Vittles Articles of Interest…
The Perfect Valentine: $149 Android + $25 Virgin Mobile Plan
 Just when AT&T and Verizon thought they’d suckered everyone on the planet into paying $100 a month for 24 months to get a functional cellphone with either an iPhone or Android phone, along comes a breath of fresh air. Close your eyes and try to picture Google’s Nexus One paired with a $25 3G cellphone plan with unlimited data, unlimited messaging and 300 minutes a month. Did we mention NO CONTRACT? Flash support? Nope.1 But tethering is possible for talented geeks and nerds as well. For those that don’t spend their whole life yacking on a telephone, this combination hits the sweet spot. It’s especially appealing for both the older generation who need the security of a cellphone but rarely use it and those under 25 that seldom converse other than in sparkling text messages.
With the addition of the free CSipSimple app from the Android Market, you can place SIP calls through your favorite SIP provider or PBX in a Flash server for little or no cost using either a WiFi or 3G data connection. Or you can use the free OBiTalk for Android app in conjunction with a $49 OBi device we previously reviewed to make free Google Voice calls in the U.S. and Canada.
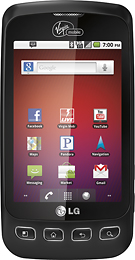
First, the bad news. It’s not a Nexus One. And now the good news. It’s even better. It’s LG’s new $149 Optimus V for Virgin Mobile. Yes, it weighs an ounce more and is perhaps a few millimeters thicker than a Nexus One, but in return you get Android Froyo 2.2. Aside from that, the phones are virtually identical: beautiful screen, quality feel, 3.2 megapixel camera, Facebook, Twitter, full integration of Google Apps including Google Market, Gmail, Google Voice, Maps, Latitude, Voice-Enabled Navigation with GPS, WiFi, Bluetooth (cell phone and audio pairing finally work reliably in Froyo!), and 3G service on Sprint’s rock-solid nationwide network. The phone is rated at 6 hours talk time and 168 hours standby… and it can be rooted in a couple of minutes if you hurry. The phones went on sale this week at Best Buy, Radio Shack, and other Virgin Mobile retailers. But they won’t last long at least without a patch to close the rooting door. So, yes, it is the Perfect Valentine’s Day gift. Stop reading and start calling until you find one. They’re that good, and they’re available on line as well. Best Buy currently has them for $129.99. Be sure to check out the Comments to this article for late-breaking discounts.
Virgin Mobile actually offers three cellphone plans for the Optimus V. All are contract-free! And all include unlimited messaging, email, data and web services. The only difference is in the cellphone minutes per month. $25 a month gets you 300 minutes. $40 gets you 1200 minutes. And $60 gets you unlimited minutes. The signup process only takes a couple of minutes, and you have the option of recurring billing by credit card only if you choose it. Unlike AT&T and Verizon, international calling is downright reasonable. The big cities in Mexico are 2¢ a minute, most of Europe is 25¢ and other countries are all over the map (literally). Pakistan, for example, is 5¢. So there are no gotchas, at least that we could find.
Once the phone is enabled, you’ll want to hurry over to the Android Central Forum which will walk you through rooting the phone using your favorite Windows machine. The only trick is finding the Windows USB drivers for LG phones. HINT: Look here. Once you get Sun’s JRE and the Android SDK installed, SuperOneClick handles the heavy lifting in a few seconds. Once the phone is rooted, you can download SuperUser, TitaniumBackup, and Barnacle WiFi Tethering from the Google Market. The only trick to Barnacle is to choose Skip wpa_supplicant in Settings. Finally, you’ll want to disable over-the-air (OTA) updates so that the provider doesn’t mess up your perfect phone down the road. Here’s how. Renaming the keys file is all that is required, and the easiest way to do it is using Root Explorer (available in the Google Market for a couple bucks) which is money well spent. Happy Valentine’s Day to all. We’ve listed a few of our favorite Android apps below to get your started. Enjoy!
Originally published: Friday, February 11, 2011
Need help with Asterisk®? Visit the PBX in a Flash Forum or Wiki.
Or Try the New, Free PBX in a Flash Conference Bridge.
whos.amung.us If you’re wondering what your fellow man is reading on Nerd Vittles these days, wonder no more. Visit our new whos.amung.us statistical web site and check out what’s happening. It’s a terrific resource both for us and for you.
Special Thanks to Our Generous Sponsors
FULL DISCLOSURE: ClearlyIP, Skyetel, Vitelity, DigitalOcean, Vultr, VoIP.ms, 3CX, Sangoma, TelecomsXchange and VitalPBX have provided financial support to Nerd Vittles and our open source projects through advertising, referral revenue, and/or merchandise. As an Amazon Associate and Best Buy Affiliate, we also earn from qualifying purchases. We’ve chosen these providers not the other way around. Our decisions are based upon their corporate reputation and the quality of their offerings and pricing. Our recommendations regarding technology are reached without regard to financial compensation except in situations in which comparable products at comparable pricing are available from multiple sources. In this limited case, we support our sponsors because our sponsors support us.
BOGO Bonaza: Enjoy state-of-the-art VoIP service with a $10 credit and half-price SIP service on up to $500 of Skyetel trunking with free number porting when you fund your Skyetel account. No limits on number of simultaneous calls. Quadruple data center redundancy. $25 monthly minimum spend required. Tutorial and sign up details are here.
![]() The lynchpin of Incredible PBX 2020 and beyond is ClearlyIP components which bring management of FreePBX modules and SIP phone integration to a level never before available with any other Asterisk distribution. And now you can configure and reconfigure your new Incredible PBX phones from the convenience of the Incredible PBX GUI.
The lynchpin of Incredible PBX 2020 and beyond is ClearlyIP components which bring management of FreePBX modules and SIP phone integration to a level never before available with any other Asterisk distribution. And now you can configure and reconfigure your new Incredible PBX phones from the convenience of the Incredible PBX GUI.
VitalPBX is perhaps the fastest-growing PBX offering based upon Asterisk with an installed presence in more than 100 countries worldwide. VitalPBX has generously provided a customized White Label version of Incredible PBX tailored for use with all Incredible PBX and VitalPBX custom applications. Follow this link for a free test drive!
Special Thanks to Vitelity. Vitelity is now Voyant Communications and has halted new registrations for the time being. Our special thanks to Vitelity for their unwavering financial support over many years and to the many Nerd Vittles readers who continue to enjoy the benefits of their service offerings. We will keep everyone posted on further developments.
Some Recent Nerd Vittles Articles of Interest…
- Incompatible processor precludes Flash. Sorry. [↩]
Incredible PBX 1.8: New OpenVZ and Cloud Editions

Another exciting week in the Asterisk® community with the introduction of Asterisk 1.8.2 last Friday. It's now the official PIAF-Purple payload so you can simply download the current ISO to take it for a spin. Most of the pesky bugs in Asterisk 1.8.0 and 1.8.1 now have been addressed. Let us know if you find some new ones.
While the Asterisk Dev Team has been hard at work on Asterisk 1.8.2, we've turned our attention to the cloud and VoIP virtualization. We have three new products to introduce today. The first lets you install PIAF-Purple with Asterisk 1.8.2 using a new OpenVZ template. The second lets you run Incredible PBX 1.8 as a virtual machine using the new PIAF-Purple 1.8.2 OpenVZ template. Finally, we'll show you how to run Incredible PBX 1.8 in the cloud with hosted VoIP service from RentPBX.com for $15 a month with a free local phone number and free Google Voice calling in the U.S. and Canada. So let's get started.
Using the OpenVZ PIAF-Purple Template. If you haven't heard of OpenVZ templates before, you've missed one of the real technological breakthroughs of the last decade. Rather than wading through the usual 30-minute ISO installation drill, with an OpenVZ template, all of the work is done for you. And it's quick. You can build a dozen PIAF-Purple systems using an OpenVZ template in about 15 minutes with a per system cost of less than $50. See Comment #2 below for an extra special Dell half-price server deal this week. And it's incredibly easy to then tie all of these systems together using either SIP or IAX trunks. Just follow our previous tutorial. For resellers and developers that want to try various Asterisk configurations before implementation and for trainers and others that want to host dedicated Asterisk systems for customers, the OpenVZ platform is a perfect fit. Read our original two-part article to get up to speed on Proxmox, virtualization, and IPtables with OpenVZ. Then continue on here.
Thanks to Darrell Dillman (aka dad311 on the PIAF Forums), there already is a 64-bit OpenVZ template of PIAF-Purple with Asterisk 1.8.2. Just download the template to your Desktop and then, using the Proxmox console, choose Appliance Templates, Upload File to upload the OpenVZ template into your Proxmox server platform. Once installed, you can build Asterisk 1.8.2 virtual machines to your heart's content... in less than a minute apiece. Just choose Virtual Machine, Create to create a new virtual machine using the OpenVZ template you just uploaded. In the Configuration section, choose OpenVZ for the Type and pick your new OpenVZ template from the pulldown list. Fill in a Host Name, Disk Space maximum (in GB), and (root) Password. The other defaults should be fine. In the Network section of the form, change to the Bridged Ethernet (veth) option which means the VM will obtain its IP address from your DHCP server. Make sure your DNS settings are correct for your LAN. Here's how a typical OpenVZ creation form will look:
Once the image is created, start up the virtual machine, wait about 70 seconds for the system to load, and then click on Open VNC Console. Asterisk will be loaded and running. You can verify this on the status display. You can safely ignore the status messages pertaining to IPtables assuming iptables -nL shows that IPtables is functioning properly. With the exception of text-to-speech (TTS), you now have a PIAF-Purple base platform running Asterisk 1.8.2 and FreePBX 2.8. Be sure you always run it behind a hardware-based firewall with no port exposure to the Internet.
Before you do anything else, run passwd-master to secure the passwords for FreePBX GUI access to your system. Don't forget!
If you're planning to install Incredible PBX below or if you don't need text-to-speech on your system, you can skip this next step which gets 64-bit TTS installed. Otherwise, here are the commands to get it working:
cd /root
./install-flite
Note to Our Pioneers. To those that tested the new OpenVZ template this past week, THANK YOU! Be advised that we now have incorporated several of the recommended tweaks which were documented in the PIAF Forums. The install procedure outlined above explains the new behavior of the slightly improved OpenVZ template which now is available for download. We recommend you switch.
Asterisk CLI Change. Finally, just a heads up that (once again) the Asterisk Dev Team appears to have changed the default behavior of the Asterisk CLI. With Asterisk 1.8.2, if you make outbound calls after loading the CLI, you will notice that call progress no longer appears in the CLI. To restore the standard behavior (since Moses), issue the following command: core set verbose 3. 🙄

Installing Incredible PBX on OpenVZ Systems. We won't repeat the entire Incredible PBX article here. If you want the background on the product, read the latest article. To get everything working with an OpenVZ system, there are only three steps:
1. Set Up Your Google Voice Account
2. Run the Incredible PBX VM Installer
3. Configure a Softphone
Configuring Google Voice. You'll need a dedicated Google Voice account to support The Incredible PBX. The more obscure the username (with some embedded numbers), the better off you will be. This will keep folks from bombarding you with unsolicited Gtalk chat messages, and who knows what nefarious scheme will be discovered using Google messaging six months from now. So why take the chance. Keep this account a secret!
We've tested this extensively using an existing Gmail account, and inbound calling is just not reliable. The reason seems to be that Google always chooses Gmail chat as the inbound call destination if there are multiple registrations from the same IP address. So, be reasonable. Do it our way! Set up a dedicated Gmail and Google Voice account, and use it exclusively with The Incredible PBX. Google Voice no longer is by invitation only so, if you're in the U.S. or have a friend that is, head over to the Google Voice site and register. If you're living on another continent, see MisterQ's posting for some tips on getting set up.
You must choose a telephone number (aka DID) for your new account, or Google Voice calling will not work... in either direction. Google used to permit outbound Gtalk calls using a fake CallerID, but that obviously led to abuse so it's over! You also have to tie your Google Voice account to at least one working phone number as part of the initial setup process. Your cellphone number will work just fine. Don't skip this step either. Just enter the provided 2-digit confirmation code when you tell Google to place the test call to the phone number you entered. Once the number is registered, you can disable it if you'd like in Settings, Voice Setting, Phones. But...
IMPORTANT: Be sure to enable the Google Chat option as one of your phone destinations in Settings, Voice Setting, Phones. That's the destination we need for The Incredible PBX to work its magic! Otherwise, all inbound and outbound calls will fail. If you don't see this option, you may need to call up Gmail and enable Google Chat there first. Then go back to the Google Voice Settings.
While you're still in Google Voice Settings, click on the Calls tab. Make sure your settings match these:
- Call Screening - OFF
- Call Presentation - OFF
- Caller ID (In) - Display Caller's Number
- Caller ID (Out) - Don't Change Anything
- Do Not Disturb - OFF
Click Save Changes once you adjust your settings. Under the Voicemail tab, plug in your email address so you get notified of new voicemails. Down the road, receipt of a Google Voice voicemail will be a big hint that something has come unglued on your PBX.
Running The Incredible PBX Installer. Log into your server as root and issue the following commands to set up The Incredible PBX:
cd /root
rm incrediblepbx18-vm.x
wget http://incrediblepbx.com/incrediblepbx18-vm.x
chmod +x incredible*
./incrediblepbx18-vm.x
passwd-master
When The Incredible PBX install begins, you'll be prompted for the following:
Google Voice Account Name
Google Voice Password
Google Voice 10-digit Phone Number
Gmail Notification Address
FreePBX maint Password
The Google Voice Account Name is the Gmail address for your new dedicated account, e.g. joeschmo@gmail.com. Don't forget @gmail.com! The Google Voice Password is the password for this dedicated account. The Google Voice Phone Number is the 10-digit DID for this dedicated account. We need this if we ever need to go back to the return call methodology for outbound calling. For now, it's not necessary. But who knows what the future holds. 🙄 The Gmail Notification Address is the email address where you wish to receive alerts when incoming and outgoing Google Voice calls are placed using The Incredible PBX. And your FreePBX maint Password is the password you'll use to access FreePBX. You'll actually set it by running passwd-master after The Incredible PBX completes. We need this password to properly configure the CallerID Superfecta for you. By the way, none of this confidential information ever leaves your machine... just in case you were wondering.
Now have another 5-minute cup of coffee, and consider a modest donation to Nerd Vittles... for all of our hard work. 😉 You'll find a link at the top of the page. While you're waiting (and so you don't forget), go ahead and configure your hardware-based firewall to support Google Voice. See the next section for what's required. Without completing this firewall configuration step, no calls will work! When the installer finishes, READ THE SCREEN just for grins.
Here's a short video demonstration of the original Incredible PBX installer process. It still works just about the same way except there's no longer a second step to get things working.
One final word of caution is in order regardless of your choice of providers: Do NOT use special characters in any provider passwords, or nothing will work!
Before you do anything else, run passwd-master again to resecure the passwords for FreePBX GUI access to your system. Don't forget!
Firewall Configuration. We hope you've taken our advice and installed a hardware-based firewall in front of The Incredible PBX. It's your phone bill. You'll need to make one adjustment on the firewall. Map UDP 5222 traffic to the internal IP address of The Incredible PBX. This is the port that Google Voice uses for phone calls and Google chat. You can decipher the IP address of your server by logging into the server as root and typing status.
Extension Password Discovery. If you're too lazy to look up your extension 701 password using the FreePBX GUI, you can log into your server as root and issue the following command to obtain the password for extension 701 which we'll need to configure your softphone or color videophone in the next step:
mysql -uroot -ppassw0rd -e"select id,data from asterisk.sip where id='701' and keyword='secret'"
The result will look something like the following where 701 is the extension and 18016 is the randomly-generated extension password exclusively for your Incredible PBX:
+-----+-------+
id data
+-----+-------+
701 18016
+-----+-------+
 Configuring a SIP Phone. There are hundreds of terrific SIP telephones and softphones for Asterisk-based systems. Once you get things humming along, you'll want a real SIP telephone such as the $50 Nortel color videophone we've recommended above. You'll also find lots of additional recommendations on Nerd Vittles and in the PBX in a Flash Forum. If you're like us, we want to make damn sure this stuff works before you shell out any money. So, for today, let's download a terrific (free) softphone to get you started. We recommend X-Lite because there are versions for Windows, Mac, and Linux. So download your favorite from this link. Install and run X-Lite on your Desktop. At the top of the phone, click on the Down Arrow and choose SIP Account Settings, Add. Enter the following information using your actual password for extension 701 and the actual IP address of your Incredible PBX server instead of 192.168.0.251. Click OK when finished. Your softphone should now show: Available.
 Incredible PBX Test Flight. The proof is in the pudding as they say. So let's try two simple tests. First, let's place an outbound call. Using the softphone, dial your 10-digit cellphone number. Google Voice should transparently connect you. Answer the call and make sure you can send and receive voice on both phones. Second, from another phone, call the Google Voice number that you've dedicated to The Incredible PBX. Your softphone should begin ringing shortly. If not, make certain you are not logged into Google Chat on a Gmail account with these same credentials. If everything is working, congratulations!
Here's a brief video demonstration showing how to set up a softphone to use with your Incredible PBX, and it also walks you through several of the dozens of Asterisk applications included in your system.
Solving One-Way Audio Problems. If you experience one-way audio on some of your phone calls, you may need to adjust the settings in /etc/asterisk/sip_custom.conf. Just uncomment the first two lines by removing the semicolons. Then replace 173.15.238.123 with your public IP address, and replace 192.168.0.0 with the subnet address of your private network. There are similar settings in gtalk.conf that can be activated although we've never had to use them. In fact, we've never had to use any of these settings. After making these changes, save the file(s) and restart Asterisk: amportal restart.
 Running Incredible PBX in the Cloud. We've saved the best for last today. For many folks, you may want to experiment with VoIP technology without making a hardware investment and without having to master the intricacies of managing your own server and network. That's what Cloud Computing is all about. And we've searched far and wide to find you the perfect platform. As with many of you, one of our top priorities is always cost. While many providers were willing to provide Nerd Vittles with a few sheckles for pitching their product, only one stepped forward with a price point that we think is irresistible. And, for the record, we waived any compensation other than a few test accounts to get things working properly, so that all of the savings could be passed on to you! So here's the deal. $15 a month gets you your own PIAF-Purple server in the cloud at RentPBX.com. Just use this coupon code: BACK10, pick an east coast or west coast server to host your new system, choose the PIAF-Purple 1.7.5.5.4 install option, set up a username and very secure password, and you're off to the races. Once your account is established, here's the 5-minute procedure to install the special RentPBX-edition of Incredible PBX to begin making free calls in the U.S. and Canada through Google Voice.
Begin by Configuring Google Voice as outlined above. Then log into your RentPBX account using SSH and the port assigned to your account. For Windows users, download Putty from here. The SSH command will look something like this:
ssh -p 21422 root@209.249.149.108
Issue the following commands to download and run The Incredible PBX installer for RentPBX:
cd /root
wget http://incrediblepbx.com/incrediblepbx18-rentpbx.x
chmod +x incrediblepbx18-rentpbx.x
./incrediblepbx18-rentpbx.x
passwd-master
Now just follow along in the Incredible PBX virtual machine tutorial which we've included above. Remember that your new Incredible PBX is sitting directly on the Internet! So don't forget to run passwd-master when you finish the install, or your system is vulnerable. Ours was attacked within minutes!
 Securing Your RentPBX Server. With the exception of our WhiteList application, everything is working on your RentPBX server. While we continue to work on the WhiteList component (reread this section of the article in a week or so to get the latest updates), you need to secure your system to avoid endless hack attempts on your SIP resources. Here's how. First, write down the IP addresses of your RentPBX server and your home network. Second, print out your existing IPtables configuration. The file to print is /etc/sysconfig/iptables. Third, make a backup copy of the file. While logged into your server with SSH, the easiest way is like this:
cd /etc/sysconfig
cp iptables iptables.bak
Now we need to edit the iptables file itself: nano -w iptables. Then search for the line that contains 5060: Ctrl-W, 5060, Enter. At the beginning of this line, add # to comment out the line. With the cursor still on this line, press Ctrl-K then Ctrl-U twice. This will duplicate the line. Move to the second commented line and remove #. Use the right cursor to move across the line to --dport. Then insert the following using the IP address of your RentPBX server, e.g.
-s 229.149.129.248
Be sure there's at least one space before and after the new text. Now duplicate that line with Ctrl-K and Ctrl-U twice. Change the IP address on the second line to the public IP address of your home or office network. Repeat this process for every IP address where you intend to use a SIP phone connected to your RentPBX server. Make additional entries for your SIP providers as well. If you want to sleep better, you can make similar changes to the SSH port entry to restrict it to your home/office IP address. It's the line immediately above the 5060 entry. Ditto for port 80 which is web access. Be very careful here. A typo will lock you out of your own server! When you're finished, save the changes: Ctrl-X, Y, Enter. Then restart IPtables: service iptables restart.
As always, we strongly recommend that you not put all of your VoIP eggs in one basket. Google Voice does go down from time to time. Vitelity is a perfect complement because the costs are low and you only pay for the service you use. A discount sign up link is below. And Vitelity has contributed generously to both the Nerd Vittles and PBX in a Flash projects. So please support them. Enjoy!
Originally published: Monday, January 17, 2011
Need help with Asterisk? Visit the PBX in a Flash Forum.
Or Try the New, Free PBX in a Flash Conference Bridge.
whos.amung.us If you're wondering what your fellow man is reading on Nerd Vittles these days, wonder no more. Visit our new whos.amung.us statistical web site and check out what's happening. It's a terrific resource both for us and for you.
Special Thanks to Our Generous Sponsors
FULL DISCLOSURE: ClearlyIP, Skyetel, Vitelity, DigitalOcean, Vultr, VoIP.ms, 3CX, Sangoma, TelecomsXchange and VitalPBX have provided financial support to Nerd Vittles and our open source projects through advertising, referral revenue, and/or merchandise. As an Amazon Associate and Best Buy Affiliate, we also earn from qualifying purchases. We’ve chosen these providers not the other way around. Our decisions are based upon their corporate reputation and the quality of their offerings and pricing. Our recommendations regarding technology are reached without regard to financial compensation except in situations in which comparable products at comparable pricing are available from multiple sources. In this limited case, we support our sponsors because our sponsors support us.
BOGO Bonaza: Enjoy state-of-the-art VoIP service with a $10 credit and half-price SIP service on up to $500 of Skyetel trunking with free number porting when you fund your Skyetel account. No limits on number of simultaneous calls. Quadruple data center redundancy. $25 monthly minimum spend required. Tutorial and sign up details are here.
![]() The lynchpin of Incredible PBX 2020 and beyond is ClearlyIP components which bring management of FreePBX modules and SIP phone integration to a level never before available with any other Asterisk distribution. And now you can configure and reconfigure your new Incredible PBX phones from the convenience of the Incredible PBX GUI.
The lynchpin of Incredible PBX 2020 and beyond is ClearlyIP components which bring management of FreePBX modules and SIP phone integration to a level never before available with any other Asterisk distribution. And now you can configure and reconfigure your new Incredible PBX phones from the convenience of the Incredible PBX GUI.
VitalPBX is perhaps the fastest-growing PBX offering based upon Asterisk with an installed presence in more than 100 countries worldwide. VitalPBX has generously provided a customized White Label version of Incredible PBX tailored for use with all Incredible PBX and VitalPBX custom applications. Follow this link for a free test drive!
Special Thanks to Vitelity. Vitelity is now Voyant Communications and has halted new registrations for the time being. Our special thanks to Vitelity for their unwavering financial support over many years and to the many Nerd Vittles readers who continue to enjoy the benefits of their service offerings. We will keep everyone posted on further developments.
Some Recent Nerd Vittles Articles of Interest...
Avoiding a $100,000 Phone Bill: VoIP WhiteList for IPtables
 It’s been almost a year since we last wrestled with VoIP security for Asterisk®. With Christmas just around the corner, it seemed like a fitting time for a report card. Suffice it to say, the bad guys have not stood still. Attacks have become much more frequent and more sophisticated as VoIP systems have proliferated. A year ago we saw brute force attacks with thousands of password attempts on VoIP servers. These attacks could easily be detected by Fail2Ban. What we are seeing today are one and two hit drive-bys that usually are initiated from Windows zombies or hosted accounts established with stolen credit cards. These VoIP attacks fly under the radar unless you review your logs every day. Have the creeps gotten more patient? No, just smarter. They now understand the VoIP security model that has been deployed on systems like PBX in a Flash, and they simply work around it. Two hits per server, and they’re off to the next IP address only to return in a few hours to try two more. Are these attempts successful? Well, here’s the latest recipient of a $100,000 phone bill so the answer would appear to be affirmative.
We continue to wrestle with new security approaches to better protect Asterisk VoIP systems, and we’ve stumbled upon another golden arrow for your security quiver. Our Incredible PBX platform continues to offer the very best security solution because it is designed to sit safely behind a hardware-based firewall with virtually no exposure to the Internet. But such deployments assume that both your server and your phones are all safely ensconced behind a hardware-based firewall. If it turns out that you want to deploy a SIP phone for use by grandma or you’ve decided you’d like to try hosted PBX service from a provider such as rentpbx.com,1 then there either need to be holes opened in the firewall or there is no hardware firewall protection in the case of hosted service.
Over the past few weeks, we’ve explored a number of new security approaches to better protect your Asterisk server. These include The SunshineNetworks Knock as well as VoIP Black Lists and VoIP White Lists. If you’re technically savvy, you’ll want to carefully consider "The Knock" for all of your SIP phones exposed to the Internet.
We spent a good bit of time considering various VoIP BlackList solutions. As the name implies, a list of the bad guys’ IP addresses is fed into IPtables which then blocks access to your server from these addresses. Sounds good, right? One approach with a BlackList is to block all IP addresses from "problem countries." The methodology to implement this solution can be found in this thread on the PIAF Forums. The problem, of course, is identifying the "problem countries." Another option was to implement an IPtables Blacklist based upon the work of the VoIP Blacklist Project. Perhaps ironically, the VoIP Blacklist Project actually blocks the IP addresses of both Nerd Vittles and PBX in a Flash, and emails requesting removal of our IP address were ignored. To save time, the VoIP Blacklist Project employs CIDR Masks which can blacklist hundreds of thousands of IP addresses in one fell swoop. Problem is that a lot of innocent people get caught in the net, and there’s no easy way out without maintaining the blacklist yourself. The final dagger in the black list approach is zombies. Insecure Windows machines have been compromised by the droves worldwide and particularly in the United States. So identifying all of these now-malicious systems is not unlike playing Whack-a-Mole. When you block one of them, six more pop up. So, after giving it the good old college try, our view of VoIP Blacklists should be obvious. No, thanks. There are very real risks that the bad guys can and have poisoned existing blacklists with safe IP addresses, and the number of Windows zombies grows geometrically making it all but impossible to have or maintain a blacklist that affords any real protection.
These results with black lists led us to the conclusion that the only real security mechanism that could protect many VoIP servers today was a VoIP WhiteList for IPtables. As the name implies, we want to identify the IP addresses of every SIP and IAX trunk and extension on your server and then feed those addresses into IPtables so that the only access to VoIP resources on your server is from these addresses. Today’s VoIP WhiteList for IPtables consists of two bash scripts: one queries the MySQL database in which FreePBX stores all of the trunk and extension information for your server and the other populates IPtables with the results of the queries. We would hasten to add that a similar white list is equally important for SSH access to your server although we think it is better to implement an SSH WhiteList on your hardware-based firewall. In this way, you can adjust the SSH white list via web browser while traveling without locking yourself out of your Asterisk server.
Prerequisites. To use today’s VoIP WhiteList for IPtables, you’ll need either a current version of PBX in a Flash or Incredible PBX. Other aggregations will also work provided your system is FreePBX-based (version 2.6 or later), has IPtables already installed and functioning properly, and has an /etc/sysconfig/iptables configuration file that closely matches the stock PBX in a Flash design. We’ll leave it to you to make that call after reviewing the scripts.
VoIP WhiteList Design. We’ve designed the VoIP WhiteList for IPtables to be modular. There’s a firewall-whitelist-gen.sh script which extracts from MySQL the list of IP addresses used by your trunks and extensions. This text-based list is stored in /etc/firewall.whitelist. You can manually add and delete entries from the list once it is populated.You also can rerun the script at any time to generate a fresh catalog of WhiteList IP addresses based upon your current trunk and extension settings. This script also enables access to your server from the public IP address of your server as well as all non-routable IP addresses. Finally, it modifies /etc/sudoers slightly so that Travelin’ Man can be used to add dynamic IP addresses on the fly. We’ll cover that below.
The second script is firewall-whitelist.sh, and it is used to actually implement your new VoIP WhiteList in IPtables. The changes take effect immediately. It also can be run again to update these entries if you manually add or delete IP addresses in /etc/firewall.whitelist. This script always creates a backup copy of your previous /etc/sysconfig/iptables file and names it iptables.timestamp where the timestamp is the date and time of your last update, e.g. iptables.12012010-083841 was created on Dec. 1, 2010 at 08:38:41. If you should ever shoot yourself in the foot, simply copy one of the iptables backup files to /etc/sysconfig/iptables and then restart IPtables: service iptables restart.
WARNINGS: In order to implement the WhiteList, the script removes the existing IPtables entries which permit SIP and IAX access from anywhere using UDP ports 4569 and 5000 to 5082. If you have edited these entries in any way, you’ll need to remove them and restart IPtables before running firewall-whitelist.sh. Otherwise, your more general firewall entries will leave your system vulnerable to access from IP addresses not in your VoIP WhiteList.
If your system is running on a hosted server, you’ll need to make a couple of additions to /etc/sysconfig/iptables and restart IPtables (service iptables restart) before running firewall-whitelist.sh, or you may lock yourself out of your own server. Be sure to add the public IP address of your server, and also add the IP address from which you are making changes to your server. Each entry should look like the following example using your actual IP addresses. And the entries should be added above the COMMIT line in the same section of the iptables file as the existing UDP 10000:20000 ACCEPT entry:
-A INPUT -s 222.222.222.222 -j ACCEPT
Installing the VoIP WhiteList for IPtables. Installation is easy. Just log into your server as root and issue the following commands:
cd /root
wget http://incrediblepbx.com/firewall-whitelist.tar.gz
tar zxvf firewall-whitelist.tar.gz
./firewall-whitelist-gen.sh
./firewall-whitelist.sh
If you installed one of the beta versions of the VoIP WhiteList from the PIAF Forums, then you’ll need to do a little housecleaning before actually running either of the scripts. Just edit /etc/sysconfig/iptables and clean out all of the entries that contain 5000:5082 as well as any entries nearby that include the non-routable IP addresses, e.g. 192.168.0.0. Finally, if there are entries beginning with -A WHITELIST, delete those as well. Then restart IPtables: service iptables restart. Thank you for your testing and feedback!
Deploying Remote SIP Phones. What remains is some method for connecting remote SIP phones with dynamic IP addresses. Our Travelin’ Man application was specifically designed to provide this support although the initial version only opened the necessary IP address for Asterisk access. The latest release also provides the necessary IPtables support. You have two options: either remove the old version and supporting directories under /var/www/travelman or edit the index.php file in each subdirectory you’ve created and make the change shown in this post on the PIAF Forums. Enjoy!
Need help with Asterisk? Visit the PBX in a Flash Forum.
Or Try the New, Free PBX in a Flash Conference Bridge.
whos.amung.us If you’re wondering what your fellow man is reading on Nerd Vittles these days, wonder no more. Visit our new whos.amung.us statistical web site and check out what’s happening. It’s a terrific resource both for us and for you.
Special Thanks to Our Generous Sponsors
FULL DISCLOSURE: ClearlyIP, Skyetel, Vitelity, DigitalOcean, Vultr, VoIP.ms, 3CX, Sangoma, TelecomsXchange and VitalPBX have provided financial support to Nerd Vittles and our open source projects through advertising, referral revenue, and/or merchandise. As an Amazon Associate and Best Buy Affiliate, we also earn from qualifying purchases. We’ve chosen these providers not the other way around. Our decisions are based upon their corporate reputation and the quality of their offerings and pricing. Our recommendations regarding technology are reached without regard to financial compensation except in situations in which comparable products at comparable pricing are available from multiple sources. In this limited case, we support our sponsors because our sponsors support us.
BOGO Bonaza: Enjoy state-of-the-art VoIP service with a $10 credit and half-price SIP service on up to $500 of Skyetel trunking with free number porting when you fund your Skyetel account. No limits on number of simultaneous calls. Quadruple data center redundancy. $25 monthly minimum spend required. Tutorial and sign up details are here.
![]() The lynchpin of Incredible PBX 2020 and beyond is ClearlyIP components which bring management of FreePBX modules and SIP phone integration to a level never before available with any other Asterisk distribution. And now you can configure and reconfigure your new Incredible PBX phones from the convenience of the Incredible PBX GUI.
The lynchpin of Incredible PBX 2020 and beyond is ClearlyIP components which bring management of FreePBX modules and SIP phone integration to a level never before available with any other Asterisk distribution. And now you can configure and reconfigure your new Incredible PBX phones from the convenience of the Incredible PBX GUI.
VitalPBX is perhaps the fastest-growing PBX offering based upon Asterisk with an installed presence in more than 100 countries worldwide. VitalPBX has generously provided a customized White Label version of Incredible PBX tailored for use with all Incredible PBX and VitalPBX custom applications. Follow this link for a free test drive!
Special Thanks to Vitelity. Vitelity is now Voyant Communications and has halted new registrations for the time being. Our special thanks to Vitelity for their unwavering financial support over many years and to the many Nerd Vittles readers who continue to enjoy the benefits of their service offerings. We will keep everyone posted on further developments.
Some Recent Nerd Vittles Articles of Interest…
- We gratefully acknowledge the contributions of rentpbx.com to the PBX in a Flash Development Team. In addition to hosted accounts to test PBX in a Flash in the hosted environment, rentpbx.com also has contributed technical assistance particularly as it relates to our Google Voice-Asterisk integration efforts. [↩]
The Incredible PBX: Remote Phone Meets the Travelin’ Man
 Ever wrestled with one of those thorny problems for weeks only to wake up in the middle of the night with the answer? Thus was born Travelin’ Man, a web- based, one-click Asterisk® application that automatically reconfigures your Asterisk PBX to enable remote SIP phone access from your cellphone, iPad, remote PC, NetBook, or desktop telephone.
News Flash: Be sure to read our latest article introducing Travelin’ Man 3, a completely new security methodology based upon FQDN Whitelists and DDNS. In a nutshell, you get set-it-and-forget-it convenience and rock-solid VoIP security for your Cloud-based PBX or any PBX in a Flash server that’s lacking a hardware-based firewall and you get both transparent connectivity and security for your mobile or remote workforce.
If you’ve read the Incredible PBX series of articles on Nerd Vittles, you already know what a thorny problem remote phone access is if you want to preserve the overall security of your server. Indeed, our recommendation has been to leave SIP access closed on your hardware-based firewall because of the dangers inherent in activating remote SIP access. Now we have a better idea!
Today’s new approach works like this. First, we’ll run a little script that secures all of your extensions with permit entries locking down all these connections to the IP address range within your private network. Then we’ll open the SIP and RTP ports on your hardware and software firewalls and map these ports to your Asterisk server’s private IP address. With this setup, no one can attempt remote SIP logins to your server because Asterisk blocks all SIP extension connection attempts except those originating inside your LAN. To manage external phone connections to your server, the install script creates a new virtual Apache web server on your Incredible PBX using port 83. We’ll enable and map TCP port 83 on your hardware and software firewalls to your server as well. Web access with port 83 is limited to running the Travelin’ Man app to activate external phones.
Now we’re ready to set up access to your server for remote devices. For each extension you wish to enable for remote access, we’ll create a special web directory using an obscure, random file name which will serve as the web link for the Travelin’ Man web app. For example, in the diagram above, directory 184778 manages extension 501, directory 2389957h manages extension 701, and directory 6993h5j manages extension 702. This is accomplished by simply changing the extension number in the index.php script stored in each directory.
When one of these web links is accessed remotely, the PHP script will automatically reconfigure Asterisk to enable access to the designated SIP extension on your server using the remote IP address from which the web page was accessed. And, of course, there’s an additional layer of SIP security as well. You still need your extension credentials to actually log in to your server with a softphone to place and receive calls. The Travelin’ Man installation process takes only a couple minutes, and the remote SIP activation procedure takes just a couple seconds each time you want remote access from a different location. Here’s a quick example of how it actually works.

Let’s assume we want to use the new $3.95 Bria SIP softphone on an iPad to connect as extension 501 on our Incredible PBX back at home. The problem is that the dynamic IP address of your iPad changes at each new site on your itinerary. Some locations have WiFi while others only have 3G connections.
First, we’ll generate an icon to run Travelin’ Man from your iPad desktop. Use the same procedure with an iPhone or iPod Touch, and there’s a similar procedure for Android devices.1 You only have to do this once. Start up Safari on the iPad to access the new port 83 web server at the random web address the installer created to support extension 501. That web address is something like this using your own FQDN2: http://myserver.dyndns.org:83/184778. After establishing the link once, we’ll hit the + button in Safari and choose Add to Home Screen. This creates the TravelMan icon on the iPad. See the screenshot below of our demo iPad setup which used extension 221 instead of 501.
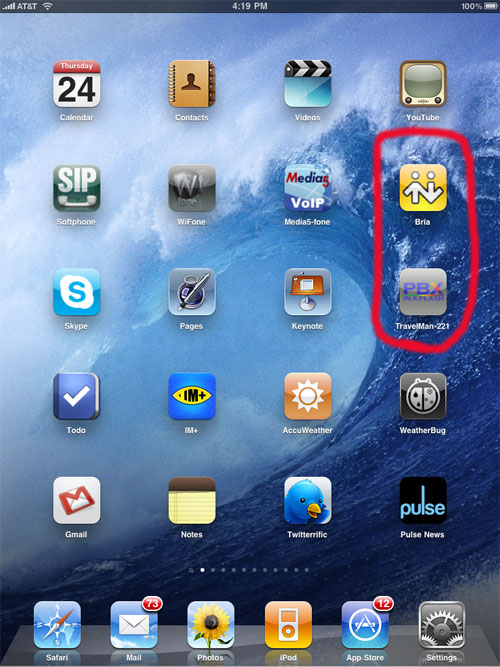
Once configured, it’s just two clicks to enable your remote phone anywhere: click once on the TravelMan icon. When your IP address is confirmed, return to your Home Screen and click the Bria softphone icon to establish a SIP connection back to your server. Behind the scenes, the Travelin’ Man application will generate the required permit entry for your remote IP address mapping it to the designated extension on your server, and then it will reload your SIP settings to make your Asterisk server accessible to the Bria softphone in your hotel room. The entire process takes only a couple seconds.
If your company happens to have a dozen traveling salesmen, then you’d simply assign a dedicated extension to each employee and create secure directory names for each person (e.g. 2389957h and 6993h5j in diagram above) with a copy of the Travelin’ Man app configured for that employee’s extension number. Now your entire mobile workforce has connectivity back to the home office from any location on the globe. And, when an employee leaves the company and another arrives, just create a new name for the old employee’s web directory to preserve the security of your system (e.g. 184778 in our example becomes 78hd773). Keep in mind that each time the Travelin’ Man app is run for any extension, it wipes out any previously authorized IP address entry for that extension. Thus, the security of your Incredible PBX is always preserved.
Prerequisites. Before proceeding with today’s install, you must be running a stock install of Incredible PBX with PBX in a Flash behind a properly-secured, hardware-based firewall3. We recommend the latest version of Asterisk 1.4 because it addresses a SIP vulnerability that might cause you problems if malformed SIP packets are targeted at your server. The current release of PBX in a Flash (1.7.5.5 Silver) is ideal, but any version of PBX in a Flash can be brought current with Asterisk using the update-source and update-fixes tools. Travelin’ Man assumes that you have the Incredible PBX base install of extensions: 501 plus 701-715. You can obviously add more or remove some, but you’ll need to manually adjust sip_custom_post.conf to reflect your actual extension list after the install completes.
The installer has been encrypted for your/our own protection. In source form, the script would allow anyone to defeat the Incredible PBX requirement. Doing so would mean the required IPtables security component would not be in place and properly configured to protect the underlying system from attack. So we’ve opted to play Big Brother to avoid potential security problems for all of us down the road. This article clearly explains all the necessary components if some folks want to roll their own version. We just don’t want the responsibility if something goes horribly wrong. As Forrest Gump would say, "Shit Happens." 🙂 If you don’t believe it, check out the latest security scramble in the trixbox forums.
Installation. Now we’re ready to get started. So log into your Incredible PBX as root and issue the following commands:
cd /root
wget http://incrediblepbx.com/travelinman.tar.gz
tar zxvf travelinman.tar.gz
./travelinman.x
NOTE: If you’re using PIAF2 with CentOS 6.2, you’ll need to use the updated version of Travelin’ Man because of a syntax change in the Apache config file:
cd /root
wget http://incrediblepbx.com/travelinman2.tar.gz
tar zxvf travelinman2.tar.gz
./travelinman2
The first step in the install procedure is to lock down access to all of your extensions to your private LAN subnet. In case you ever want to do this on another server not running the Incredible PBX, here’s a link to our privip.sh shell script that shows how to do it. This should work on most FreePBX-based Asterisk systems.
Once the extensions are locked down, the script will modify your IPtables and Apache configurations to permit web access on port 83. Next, it will adjust your Asterisk setup to support the Travelin’ Man permit scheme. This involves reworking of sip_custom_post.conf so that permit settings for individual extensions can be stored in files named 501.inc, 701.inc, etc. Finally, the installation procedure will set up a single web site to support extension 501 with a randomized directory name for remote access.4 This setup will be stored in /var/www/travelman. To activate support for additional extensions, you would simply copy the subdirectory giving it a new random name: cp -r dir1 dir2. Then edit config.php in the new subdirectory and change the $extension entry.
To complete the install, you must reconfigure your hardware-based firewall and map the following ports to the private IP address of your server:
TCP 83
UDP 5060
UDP 10000-20000
When the installation is completed, it will show you how to access the new web site for extension 501 using either a fully-qualified domain name or a public or private IP address. Now just follow the steps at the beginning of this article to set up your Android or iDevice, and test things out. Enjoy!
 Reminders: Be sure to review the comments to this article and the related support forum thread for a week or two for late-breaking enhancements and issues. Also, Incredible PBX comes preconfigured with call forwarding activated for extension 501. Don’t forget to either disable it or set up a real call forwarding number for extension 501 if you want your cellphone to ring. From any extension on your server, just dial *72501 to set up call forwarding. To cancel call forwarding and pass calls directly to the registered 501 softphone, dial *74 and enter 501. Also be aware that the default RingAll ring group (700) configuration on Incredible PBX systems does not include extension 501. So add 501 if you want your remote extension to ring for incoming calls.
The Incredible PBX: Basic Installation Guide
Adding Skype to The Incredible PBX
Adding Incredible Backup… and Restore to The Incredible PBX
Adding Multiple Google Voice Trunks to The Incredible PBX
Adding Remotes, Preserving Security with Incredible PBX
Continue reading Basic Installation Guide, Part II.
Continue reading Basic Installation Guide, Part III.
Continue reading Basic Installation Guide, Part IV.
 Support Issues. With any application as sophisticated as this one, you’re bound to have questions. Blog comments are a terrible place to handle support issues although we welcome general comments about our articles and software. If you have particular support issues, we encourage you to get actively involved in the PBX in a Flash Forums. It’s the best Asterisk tech support site in the business, and it’s all free! We maintain a thread with the latest Patches and Bug Fixes for Incredible PBX. Please have a look. Unlike some forums, ours is extremely friendly and is supported by literally hundreds of Asterisk gurus and thousands of ordinary users just like you. So you won’t have to wait long for an answer to your questions.
Need help with Asterisk? Visit the PBX in a Flash Forum.
Or Try the New, Free PBX in a Flash Conference Bridge.
whos.amung.us If you’re wondering what your fellow man is reading on Nerd Vittles these days, wonder no more. Visit our new whos.amung.us statistical web site and check out what’s happening. It’s a terrific resource both for us and for you.
Special Thanks to Our Generous Sponsors
FULL DISCLOSURE: ClearlyIP, Skyetel, Vitelity, DigitalOcean, Vultr, VoIP.ms, 3CX, Sangoma, TelecomsXchange and VitalPBX have provided financial support to Nerd Vittles and our open source projects through advertising, referral revenue, and/or merchandise. As an Amazon Associate and Best Buy Affiliate, we also earn from qualifying purchases. We’ve chosen these providers not the other way around. Our decisions are based upon their corporate reputation and the quality of their offerings and pricing. Our recommendations regarding technology are reached without regard to financial compensation except in situations in which comparable products at comparable pricing are available from multiple sources. In this limited case, we support our sponsors because our sponsors support us.
BOGO Bonaza: Enjoy state-of-the-art VoIP service with a $10 credit and half-price SIP service on up to $500 of Skyetel trunking with free number porting when you fund your Skyetel account. No limits on number of simultaneous calls. Quadruple data center redundancy. $25 monthly minimum spend required. Tutorial and sign up details are here.
![]() The lynchpin of Incredible PBX 2020 and beyond is ClearlyIP components which bring management of FreePBX modules and SIP phone integration to a level never before available with any other Asterisk distribution. And now you can configure and reconfigure your new Incredible PBX phones from the convenience of the Incredible PBX GUI.
The lynchpin of Incredible PBX 2020 and beyond is ClearlyIP components which bring management of FreePBX modules and SIP phone integration to a level never before available with any other Asterisk distribution. And now you can configure and reconfigure your new Incredible PBX phones from the convenience of the Incredible PBX GUI.
VitalPBX is perhaps the fastest-growing PBX offering based upon Asterisk with an installed presence in more than 100 countries worldwide. VitalPBX has generously provided a customized White Label version of Incredible PBX tailored for use with all Incredible PBX and VitalPBX custom applications. Follow this link for a free test drive!
Special Thanks to Vitelity. Vitelity is now Voyant Communications and has halted new registrations for the time being. Our special thanks to Vitelity for their unwavering financial support over many years and to the many Nerd Vittles readers who continue to enjoy the benefits of their service offerings. We will keep everyone posted on further developments.
Some Recent Nerd Vittles Articles of Interest…
- To create a desktop icon for Travelin’ Man on Android devices, navigate to the link with your browser. Then save the link as a Bookmark by clicking the Star icon in your browser then click Add. Return to the Home Screen and, from the screen on which you wish to add the icon, touch and hold your finger on the screen. When the Add to Home Screen menu appears, choose Shortcuts then Bookmarks and select the link you previously saved. As with iDevices, you only have to do this once. [↩]
- FQDN = Fully-qualified domain name [↩]
- We recommend the dLink Router/Firewall. Low Cost: $35 WBR-2310 Best: DGL-4500 [↩]
- If you’d like to download the web site code independently from the Travelin’ Man install procedure, here’s the link. [↩]
The Incredible PBX: Adding Multiple Google Voice Trunks
 About the only drawback to Google Voice's free U.S. and Canada calling with the Incredible PBX has been the fact that you could only make one outbound call at a time... at least on Google's nickel. So today we'll fix that, and you can enjoy simultaneous outbound calls using as many Google Voice trunks as you have signed up for. If you're in the U.S., you're eligible and no invitation is required. Just head over to the Google Voice site to register.
Today's Incredible PBX enhancement also will permit you to set up multiple inbound DIDs for different area codes across the country which may save your out-of-town friends and relatives a little change when they want to contact you. And to think we had $200 a month phone bills in our college days just to call the hometown honey. The wonders of modern technology!
Prerequisites. Here's what you'll need to get started today. First, you need a functioning Incredible PBX. So start by installing Incredible PBX. Second, you'll need a second Google Voice account. And finally, you'll need an additional SIPgate One number.
Installation Assumptions. We'll walk you through the steps to get a second account activated with the Incredible PBX. If you need more than two, just repeat the steps below and substitute a new number for 2 in every step. As with baking cookies, if you skip a step, the cookies taste like crap. 🙂 For security reasons, we're using an additional SIPgate One account for the second setup. This avoids having to open up SIP access in your firewall which would require additional locking down of IPtables to specific SIP IP addresses.
Setting Up New SIPgate and Google Voice Accounts. As was true with the initial Incredible PBX setup, the first steps in activating a second line are to create and configure your SIPgate account and then tie that number into your new Google Voice account. For ease of reference, we've repeated below the pertinent portions of the original Nerd Vittles article.
 Configuring SIPgate. If you live in the U.S. and have a cellphone, we'd recommend the SIPgate option since no adjustment of your hardware-based firewall is required. Otherwise, skip to the IPkall setup below. Step #1 is to request a SIPgate invite at this link. You'll need to enter your U.S. cellphone number to receive the SMS message with your invitation code. Don't worry. You can erase your cellphone number from your account once it is set up and working properly. Once you receive the invite code, enter it and choose the option to set up a residential account. Next, choose a phone number and write it down. The area code really doesn't matter because Google Voice is the only one that will be calling this number after we get things set up. For now, leave your cellphone number in place so that you can receive your confirmation call from Google Voice in the next step. After that, you'll want to revisit SIPgate and remove all parallel calling numbers. Finally, click on the Settings link and write down your SIP ID and SIP Password. You'll need these in a few minutes to complete the configuration of The Incredible PBX. Now place a call to your new SIPgate number and make certain that your cellphone rings before proceeding.
Configuring Google Voice. Once you've signed up for a new Google Voice account, choose a telephone number and plug in your new SIPgate number as the destination for your Google Voice calls and choose Office as the Phone Type.
Google Voice will place a test call to your number which SIPgate will forward to your cellphone. Enter the two-digit code that's displayed when you're prompted to do so.
While you're still in Google Voice Settings, click on the Calls tab. Make sure your settings match these:
- Call Screening - OFF
- Call Presentation - OFF
- Caller ID (In) - Display Caller's Number
- Caller ID (Out) - Don't Change Anything
- Do Not Disturb - OFF
Click Save Changes once you adjust your settings. Under the Voicemail tab, plug in your email address so you get notified of new voicemails. Down the road, receipt of a Google Voice voicemail will be a big hint that something has come unglued on your PBX.
Once you've confirmed your Google Voice number, revisit SIPgate and remove all parallel calling numbers including your cell number. Be sure you've written down your SIPid and SIPpassword while you're there!
FreePBX Overview. Don't be intimidated by the FreePBX setup instructions which follow. All we're really doing is cloning the original pieces of information that made Google Voice work in the initial Incredible PBX setup. For most of the items, we'll just tack a 2 onto the names previously used. Nothing prevents your adding 3, 4, and 5 accounts down the road if you have additional Google Voice and SIPgate accounts to support each iteration.
To begin, use a web browser to open FreePBX on your Incredible PBX. Using the actual private IP address of your server, go to the following link: http://192.168.0.33/admin.
Adding Parking Lot Slots. As originally configured, the Incredible PBX provides 5 parking lot slots for use on your PBX. These are numbers that let you temporarily "park" calls so that they can be picked up on another extension. One of those slots (75) is used by the Incredible PBX to place outbound Google Voice calls. If you want the ability to place simultaneous outbound Google Voice calls using multiple trunks, then we need additional parking lot slots for each simultaneous call. We recommend bumping up the number of parking lot slots from 5 to 9. Then you can use 75-79 for up to 5 simultaneous outbound calls with Google Voice. Here's how. In FreePBX, choose Setup, Parking Lot, Number of Slots: 9. Your entries should look like this screen shot:
When you've made the change, click Submit Changes, Apply Configuration Changes, Continue with Reload.
Creating Additional Custom Destinations. You'll recall that Google Voice actually places two calls when you make an outbound call. First, Google Voice calls you back. Then Google Voice places a call to your desired destination. The callback to you is handled transparently in Incredible PBX using pygooglevoice and Asterisk®'s parking lot feature. To handle multiple simultaneous calls, you'll need additional custom destinations. Here's how. In FreePBX, choose Tools, Custom Destinations, Add Custom Destination. Then make your new entries for custom-park2 look like this:
When you've made the entries and carefully checked them, click Submit Changes, Apply Configuration Changes, Continue with Reload.
Creating Additional Inbound Routes. Now we need an additional Inbound Route to handle the second incoming call generated by Google Voice. Here's how. In FreePBX, choose Setup, Inbound Routes, Add Incoming Route, gv-ringback2. Make the entries shown in the screenshot below substituting your 10-digit SIPgate/IPkall and Google Voice numbers in the appropriate fields. Be sure to choose Custom GV-Park2 as the Custom Destination for this Inbound Route. Check your entries carefully, a typo here will kill completion of the calls!
When you've made the entries and carefully checked them, click Submit, Apply Configuration Changes, Continue with Reload.
Creating Additional Custom Trunks. With every telephony provider, Asterisk needs a Trunk. In the case of Google Voice, we need a Custom Trunk for each Google Voice number to be used on your Incredible PBX. Think of a trunk as the bucket where Asterisk dumps an outbound call for processing. Two calls require two buckets. Three calls, three buckets. And so on. Well, that's almost true. Some providers can handle multiple calls, but Google Voice doesn't. So we need to make two changes in your trunk setup. First, we'll adjust the original Custom Trunk for Google Voice and limit it to one simultaneous call at a time. Then, we'll add a new Custom Trunk to support the second Google Voice account. Here's how.
In FreePBX, choose Setup, Trunks. In the right column, you'll see a list of all your existing trunks. Click on the second entry that looks like this: local/$OUTNUM$@ (custom). Be sure the Custom Dial String looks like what is shown below. If not, choose another trunk until you find the right one. Then make an entry of 1 in the Maximum Channels field:
When you've made the entry and carefully checked it, click Submit Changes, Apply Configuration Changes, Continue with Reload.
Now we're ready to Add the additional Custom Trunk. In FreePBX, choose Setup, Trunks, Add Custom Trunk. Make your entries look like what's shown below:

When you've made the Maximum Channels and Custom Dial String entries shown above and carefully checked them, click Submit Changes, Apply Configuration Changes, Continue with Reload.
Creating Additional Outbound Routes. FreePBX uses Outbound Routes to do just what the name implies: to route outbound calls to their destination. Outbound Routes are processed in the order in which they appear in the FreePBX Outbound Routes listing. We need to make three changes in the Outbound Routes processing to support a second Google Voice call path. First, we want to modify the existing Default Outbound Route to accommodate the second Google Voice account. Second, we want to add a new Outbound Route for the second Google Voice account so that calls can be placed directly with this route using a different dialing prefix. You'll recall that Google Voice calls in the Incredible PBX can optionally be dialed using the 48 prefix followed by a 10-digit number. The 48 spells GV on the phone key pad. So we'll add a new Outbound Route with a 482 (GV2) prefix which will tell Asterisk to route these calls out using the second Google Voice account. These prefixes can be anything you desire incidentally. Third, we'll need to move this new route UP the routes list so that it appears above and gets processed before the Default route. Here's how.
In FreePBX, choose Setup, Outbound Routes, Default. In the blank Trunk Sequence pulldown, choose the following entry: local/$OUTNUM#@custom-gv2. Now click the Add button. This should leave you with 3 outbound routes numbered 0, 1, and 2. Be sure your entries match the following:
When you've made the entry and carefully checked it, click Submit Changes, Apply Configuration Changes, Continue with Reload.
Now we're ready to add a new Outbound Route to support a custom dialing prefix for the second Google Voice account. In FreePBX, choose Setup, Outbound Routes. In the Add Route form, make the following entries:
When you've made the entries, click Submit Changes, Apply Configuration Changes, Continue with Reload.
Finally, look at the listing of Routes in the Right Margin. Using the arrow beside GoogleVoice2, move it up until it is just beneath the GoogleVoice entry. Then click Apply Config Changes, Continue with Reload.
Adding Additional SIPgate Trunks. If you set up your Incredible PBX originally using IPkall, then there already will be a sipgate trunk that can be used for this second line. Otherwise, you'll need to create a new sipgate2 trunk and clone the setup from the original sipgate trunk. Within FreePBX, goto Setup, Trunks and either Add a new SIP trunk or edit the existing sipgate trunk if it isn't already in use. If this is a newly added trunk, enter sipgate2 as the Trunk Name. The PEER Details under Outgoing Settings should be added so they look like this (substituting your actual SIPid and SIPpassword that were obtained from the SIPgate registration page:
type=peer
username=SIPid
fromuser=SIPid
secret=SIPpassword
context=from-trunk
host=sipgate.com
fromdomain=sipgate.com
insecure=very
caninvite=no
canreinvite=no
nat=yes
disallow=all
allow=ulaw&alaw
Blank out any data that's entered in the Incoming Settings section of the form. Then enter a Registration String with your actual SIPid, SIPpassword, and 10-digit SIPgate phone number:
SIPid:SIPpassword@sipgate.com/SIPphonenumber
Check your entries carefully for typos. Then click Submit Changes, Apply Configuration Changes, Continue with Reload.
Now is a good time to check and be sure the new SIPgate trunk registered with SIPgate. In FreePBX, choose Tools, Asterisk Info, SIP Info. Your newly created SIPgate trunk should display as Registered. If it says Request Sent, then you've got a typo in your credentials.
That takes care of all the FreePBX settings needed to support a second Google Voice number. Now we just need to add a chunk of dialplan code to Asterisk and restart Asterisk. Then you'll be ready to go. All of this is handled by a simple Nerd Vittles script so... not to worry! It's easy.
Adding Dialplan Code for Additional Trunks. Log into your server as root, and issue the following commands to download and run the dialplan configuration script. For future reference, be advised that there are configuration scripts for gv2, gv3, gv4, and gv5 with corresponding names.
cd /root
wget http://incrediblepbx.com/configure-gv2
chmod +x configure-gv2
./configure-gv2
When prompted, enter your 10-digit Google Voice phone number, your Google Voice email address, your Google Voice password, and your 10-digit SIPgate RingBack number. Check your work and then press the Enter key to adjust your dialplan and reload Asterisk. You now have a 2-line Incredible PBX. Enjoy!
The Incredible PBX: Basic Installation Guide
Adding Skype to The Incredible PBX
Adding Incredible Backup... and Restore to The Incredible PBX
Adding Remotes, Preserving Security with The Incredible PBX
Remote Phone Meets Travelin' Man with The Incredible PBX
Continue reading Basic Installation Guide, Part II.
Continue reading Basic Installation Guide, Part III.
Continue reading Basic Installation Guide, Part IV.
Support Issues. With any application as sophisticated as this one, you're bound to have questions. Blog comments are a terrible place to handle support issues although we welcome general comments about our articles and software. If you have particular support issues, we encourage you to get actively involved in the PBX in a Flash Forums. It's the best Asterisk tech support site in the business, and it's all free! We maintain a thread with the latest Patches and Bug Fixes for Incredible PBX. Please have a look. Unlike some forums, ours is extremely friendly and is supported by literally hundreds of Asterisk gurus and thousands of ordinary users just like you. So you won't have to wait long for an answer to your questions.
Need help with Asterisk? Visit the PBX in a Flash Forum.
Or Try the New, Free PBX in a Flash Conference Bridge.
whos.amung.us If you're wondering what your fellow man is reading on Nerd Vittles these days, wonder no more. Visit our new whos.amung.us statistical web site and check out what's happening. It's a terrific resource both for us and for you.
Special Thanks to Our Generous Sponsors
FULL DISCLOSURE: ClearlyIP, Skyetel, Vitelity, DigitalOcean, Vultr, VoIP.ms, 3CX, Sangoma, TelecomsXchange and VitalPBX have provided financial support to Nerd Vittles and our open source projects through advertising, referral revenue, and/or merchandise. As an Amazon Associate and Best Buy Affiliate, we also earn from qualifying purchases. We’ve chosen these providers not the other way around. Our decisions are based upon their corporate reputation and the quality of their offerings and pricing. Our recommendations regarding technology are reached without regard to financial compensation except in situations in which comparable products at comparable pricing are available from multiple sources. In this limited case, we support our sponsors because our sponsors support us.
BOGO Bonaza: Enjoy state-of-the-art VoIP service with a $10 credit and half-price SIP service on up to $500 of Skyetel trunking with free number porting when you fund your Skyetel account. No limits on number of simultaneous calls. Quadruple data center redundancy. $25 monthly minimum spend required. Tutorial and sign up details are here.
![]() The lynchpin of Incredible PBX 2020 and beyond is ClearlyIP components which bring management of FreePBX modules and SIP phone integration to a level never before available with any other Asterisk distribution. And now you can configure and reconfigure your new Incredible PBX phones from the convenience of the Incredible PBX GUI.
The lynchpin of Incredible PBX 2020 and beyond is ClearlyIP components which bring management of FreePBX modules and SIP phone integration to a level never before available with any other Asterisk distribution. And now you can configure and reconfigure your new Incredible PBX phones from the convenience of the Incredible PBX GUI.
VitalPBX is perhaps the fastest-growing PBX offering based upon Asterisk with an installed presence in more than 100 countries worldwide. VitalPBX has generously provided a customized White Label version of Incredible PBX tailored for use with all Incredible PBX and VitalPBX custom applications. Follow this link for a free test drive!
Special Thanks to Vitelity. Vitelity is now Voyant Communications and has halted new registrations for the time being. Our special thanks to Vitelity for their unwavering financial support over many years and to the many Nerd Vittles readers who continue to enjoy the benefits of their service offerings. We will keep everyone posted on further developments.
Some Recent Nerd Vittles Articles of Interest...
Incredible PBX Now Does Incredible Backups… and Restores
 Along with many of you, we have wrestled with getting reliable backups of our Asterisk®-based PBXs since the Asterisk@Home days. Flawless backups, of course, are worthless unless there's an accompanying flawless restore to get you back in business. Therein lies the rub. The number of minefields we've discovered along Restoration Way is legendary. A quick list includes incompatible hardware, changing device drivers, incompatible file storage systems, and on and on.
Update: Just released Incredible Backup 2 for PIAF2 systems.
What's really disturbing about all of this is that lack of adequate backups is the single component, in our opinion, that has kept open source PBXs from being a true match for commercial systems. People can't live without their phone systems... even if they're old and out of date. So, regardless of age, there has to be a way to bring your system back from the dead, or it's of little use in a production environment.
When we set out to create The Incredible PBX, one of our primary design goals was to come up with a system architecture that would let you use this new system for a decade. Yes, a decade! Not six months, not next year, but ten years from now your Incredible PBX would still be humming along. One way was to totally insulate the system from the Internet. Another key ingredient was rock-solid dependability. Remember that black phone in your grandma's house. It wasn't designed for replacement every six months. Nor was its underlying phone system. As the old adage goes: "If it ain't broke, don't fix it!"
In order to reach these design goals, we not only needed a backup system but also a way to separate your critical data from the underlying hardware. Why? Because the hardware continues to change every six months. What this backup solution is not is a full disk backup. Every full system backup solution we've tried simply isn't reliable unless the hardware on the new system is virtually identical to the hardware on the old one, a most unlikely scenario two or more years down the road.
 How It Works. The Incredible Backup and Restore works like this. You built a working Incredible PBX from a base PBX in a Flash install so we start there. To restore a system, you'll first reinstall PBX in a Flash on your new server. The actual version doesn't really matter so long as it works. And newer versions with the latest CentOS releases support newer hardware. This avoids most of the hardware pitfalls that usually accompany a failed restore process.
The next slippery slope was incompatible versions of FreePBX between your original system and your current server. We can always update Asterisk from source after the restore, but FreePBX was problematic because the structure of the MySQL database tables associated with different versions of FreePBX changes frequently. And your backup MySQL data might very well be in MySQL tables that don't match your original PBX in a Flash build. So Incredible Restore provides the option of first restoring the version of FreePBX that existed at the time you made your last backup.
Then there's the problem of incompatible network and email implementations. Incredible Restore provides options to let you choose whether to restore your old network and email settings. If your newly built PBX in a Flash server has functioning network and email connectivity, don't restore the old settings. Simple as that.
What we really care about is getting your data back including a functioning PBX. There's got to be a catch, right? For a pure VoIP PBX, everything should be fine. The gotcha is that there are hundreds of add-on cards to support all sorts of proprietary hardware as well as to access Ma Bell's PSTN network. You're on your own there. Just be sure you have copies of the software pieces needed to make your special hardware function again once we've completed the restore to your new server. The same goes for custom software such as Cepstral TTS and Amazon S3. The components necessary to reinstall these add-ons should still be in your /root directory after the restore so it's not really a big deal to put Humpty back together again. Our tutorial links are just above.
Before we get to the installation, we want to put in a plug for PogoPlug. Not only is this the best thing since sliced bread, but it doesn't cost much more. You add this $99 (if you hurry) device to your LAN at home, at your office, or at a friend's house. Then connect one to four USB hard drives, and you have your own Cloud Computing Solution that also happens to be absolutely perfect for Incredible Backups and Restores. In fact, the setup software can be installed as part of the restore process. And the software already is included with every Incredible PBX. Just insert your login credentials, and the PogoPlug disk drives (regardless of location) are transparently added in the /mnt/pogoplug directory tree.
 It's GPL2! Last but not least, we've released both Incredible Backup and Incredible Restore as GPL2 open source modules. That means you not only can learn some bash scripting in your spare time but you also can embellish the scripts in any way you like to support your favorite add-ons. All we'd ask is that you upload a copy with your enhancements so that we can share your good deeds with the rest of the Asterisk community and incorporate your good ideas into the next release. Keep an eye on the comments to this article and the PIAF Forum for the most recent additions. Better yet, subscribe to the RSS Feed for Comments at the top of this page, and they'll be delivered to your door as they occur.
Overview. Here's the quick step-by-step to get things working:
1. Download the software onto Incredible PBX
2. Install your PogoPlug (optional)
3. Create a directory for backups
4. Enter directory location in IncredibleBackup script
5. Run IncredibleBackup to make backup
6. Purchase Machine #2 OR create new Proxmox KVM
7. Install latest PBX in a Flash
8. Run update-scripts and update-fixes
9. Download the software onto Machine #2
10. Create a directory to house backups AND
11. Copy backup tarballs to directory OR
12. Use PogoPlug and skip #10 and #11
13. Enter directory location in IncredibleRestore script
14. Run IncredibleRestore to restore backup
Using Incredible Backup. Installation couldn't be easier. On your Incredible PBX server, log in as root and issue the following commands:
cd /root
wget http://incrediblepbx.com/incredible.tar.gz
tar zxvf incredible.tar.gz
Once you decompress the tarball, you'll be left with two files: incrediblebackup and incrediblerestore. With both scripts, you'll need to edit them and insert the location of your backup directory. Before doing that, you need a dedicated backup directory which is not in the /root or /var/www directory trees. We don't need to tell you what a dumb idea it is to store your backups on the same machine you're backing up... so we won't. As noted, our recommendation is to use a PogoPlug and preferably at a location different from the site of your server. Whatever directory you choose, it needs to be accessible from your server. SAMBA also is available on PBX in a Flash systems to access other drives in your LAN, but it needs to be activated. Incredible PBX systems are totally insulated from the Internet by a hardware-based firewall so you're safe using SAMBA provided you trust other users on your LAN. Once the directory exists, edit the scripts and insert the location in backuploc: nano -w incrediblebackup. Save your change: Ctrl-X, Y, then Enter. Repeat process for incrediblerestore. To create an Incredible Backup, execute this command: /root/incrediblebackup. All of the backups are stored in compressed tarballs with a current time stamp, e.g. 1273067177.tgz. You can decipher the actual time of the backup with a command like this: date -d "@1273067177" --> Wed May 5 09:46:17 EDT 2010
REMINDERS: If you're using a PogoPlug, don't forget to run pogo-start.sh before running incrediblebackup.
If you wish to run incrediblebackup as a cron job, remember to comment out the following line in the script with a leading #:
read -p "To proceed at your own risk and agree to license, press Enter. Otherwise Ctrl-C."
Don't forget to also activate your PogoPlug as a cron job before the time that incrediblebackup is scheduled to run!
What To Back Up? As we mentioned previously, backups are the easy part. It's the restore process that causes premature aging. The best time to plan your restore strategy is before you need it! Always assume the worst case, i.e. that nothing is recoverable from your primary server. Then ask yourself whether the backup is capturing and saving in a safe location everything you'll need to put Humpty back together again. Currently, Incredible Backup captures the following files and directory trees:
/var/www/html /var/lib/asterisk /var/lib/mysql /root /etc/asterisk /tftpboot
/etc/pbx /etc/wanpipe /etc/sudoers /etc/odbc.ini /etc/odbcinst.ini
/var/lib/asterisk/sounds/tts /var/lib/asterisk/sounds/custom
/var/spool/asterisk /etc/amportal.conf /etc/wanpipe
/etc/hosts /etc/resolv.conf /etc/sysconfig/network-scripts/ifcfg* /etc/sysconfig/iptables /etc/sysconfig/network /etc/mail
/usr/local/bin /usr/local/sbin /usr/src and portions of /usr/sbin
Keep in mind that an Incredible Restore always begins with a functioning PBX in a Flash server. And you will have the option of restoring all Incredible PBX applications. With the exception of these applications, ask yourself whether the backup list above captures everything you've added to your server and is sufficient to meet your needs. With most Incredible PBX implementations, it should adequately restore an existing Incredible PBX together with your FreePBX customizations. But the beauty of open source software is that you can and should customize it to meet your specific needs. You can add any additional directories... so long as you do it and save the backup to some off-site location before your server dies. 😉
The other important question to ask yourself is what is your Incredible PBX as presently configured worth to you. If the answer is more than $200, perhaps the time is ripe to purchase a second system for emergencies and test your restore strategy in advance.
Using Incredible Restore. Let's get the cautionary notes out of the way up front. First, by using this software, you have agreed to assume all risks including the risk of losing all your data. Second, don't experiment with restores to your primary system. Third, in the most emphatic way we can, we encourage you to test a restore before D-Day arrives... but not on your live system! If it means borrowing a friend's old clunker for the afternoon, then by all means do so. If you can afford a second system, that's even better. If you have a virtual platform at the office, borrow a little space for the weekend and try a restore. Proxmox works and so does VMware and most other virtual platforms. We don't mean to be all doom and gloom about this, but unfortunately backups are all about doom and gloom. Now's the time to find out something didn't work quite right, not when you really, really need it.
The first step in using Incredible Restore is to install PBX in a Flash on the new server. We recommend you also run update-scripts and update-fixes once the PIAF install is complete. As with Incredible Backup, the next step in using Incredible Restore is to log into your new server and download the application:
cd /root
wget http://incrediblepbx.com/incredible.tar.gz
tar zxvf incredible.tar.gz
Unless you're using a backup tarball from external location supported by SAMBA or PogoPlug, Step #3 is to create a directory on your new server and copy the backup tarball to that directory. Step #4 is to configure the incrediblerestore script with the directory location of the backup tarball to be restored. Once you've saved the location, run the script: /root/incrediblerestore. You'll be given the following options to tailor how the restoration process should proceed:
1. Whether to enable PogoPlug functionality on the server
2. Whether to restore FreePBX application from the backup
3. Whether to restore Incredible PBX apps to new server
4. Whether to restore Network Settings from the backup
5. Whether to restore SendMail Setup from the backup
6. Whether to restore Asterisk binaries and source code
7. Whether to disable outbound SIP/IAX connectivity
1. Enabling PogoPlug. If you're using a PogoPlug for your backups, you'll be prompted whether to install the PogoPlug software as first option when you run the IncredibleRestore script. Choosing Y will load the necessary software. Then it's a simple matter of entering your login credentials in pogo-start.sh and running pogo-start.sh to activate the PogoPlug. Then just rerun the IncredibleRestore script to continue.
2. Restoring FreePBX Application. Unless you are absolutely certain that the version of FreePBX in your backup matches the version on your new server, choosing Y for this option is highly recommended. Otherwise, the structure of the FreePBX MySQL tables may differ and cause all sorts of difficult to diagnose problems.
3. Restoring Incredible PBX Applications. If your backup was made on an Incredible PBX server, then the Incredible PBX apps should be restored to your new server. We've made this optional only to accommodate those who may wish to tailor the scripts to support other Asterisk distributions.
4. Restoring Network Configuration. If you're recovering from a catastrophic failure and want to make certain that a static IP address is preserved when you restore your backup, then you obviously would want to restore your network configuration. If you're building a duplicate system to be kept off line or if you're moving your server to a virtual machine platform, then you probably do NOT want to restore the network configuration from your primary machine. A good rule of thumb probably goes like this. If network connectivity already is working on your new server, don't restore the network setup from your backup.
5. Restoring SendMail Setup. The only situation in which you would want to restore the SendMail setup from your primary server is if you have specially tailored SendMail on the primary server in order to send email. This typically would happen where an Internet service provider blocks outbound SMTP traffic, e.g. Comcast residential Internet service.
6. Restoring Asterisk Binaries and Source. This functionality is EXPERIMENTAL AND BARELY TESTED!! It only works (at all) with Asterisk implementations still using Zaptel, not DAHDI. Unless your primary server was running a version of Asterisk that differs from the default PBX in a Flash build, the correct answer to this prompt is N. Never use this option if you are restoring from a catastrophic failure. Instead, run update-source and update-fixes on the newly restored server. It's safer! We'll keep you posted on future developments.
7. Disabling Outbound SIP/IAX Connectivity. This option allows you to disable outbound SIP and IAX traffic on the new server. Typically, you would use this if the server on which the backup was made is still on line. The reason is to avoid having two identical servers compete for connections to SIP and IAX providers. If this option is chosen and you subsequently take your primary server off line, then you will need to enable SIP and IAX connectivity on the newly restored server before it can take over primary duties. To do this, log into your new server as root and issue the following commands:
cd /etc/sysconfig
cp iptables.sip iptables
service iptables restart
To again disable SIP and IAX outbound traffic, issue the following commands:
cd /etc/sysconfig
cp iptables.nosip iptables
service iptables restart
Feedback and Suggestions Encouraged. Incredible Backup and Incredible Restore are still very much works in progress. A number of folks on the PBX in a Flash Forums have assisted us in getting version 1.0 out the door today, but don't bet the farm on this software until you have carefully tested it using a redundant server! We will continue to improve/enhance the functionality for weeks and perhaps months to come. And, until the kinks are all worked out, we would strongly encourage you to download the latest and greatest version each time you make a backup or undertake to restore a backup to a new system. During this development period, we also would encourage you to make suggestions and to offer enhancements. After all, that's what open source is all about. Enjoy!
Need help with Asterisk? Visit the PBX in a Flash Forum.
Or Try the New, Free PBX in a Flash Conference Bridge.
whos.amung.us If you're wondering what your fellow man is reading on Nerd Vittles these days, wonder no more. Visit our new whos.amung.us statistical web site and check out what's happening. It's a terrific resource both for us and for you.
Special Thanks to Our Generous Sponsors
FULL DISCLOSURE: ClearlyIP, Skyetel, Vitelity, DigitalOcean, Vultr, VoIP.ms, 3CX, Sangoma, TelecomsXchange and VitalPBX have provided financial support to Nerd Vittles and our open source projects through advertising, referral revenue, and/or merchandise. As an Amazon Associate and Best Buy Affiliate, we also earn from qualifying purchases. We’ve chosen these providers not the other way around. Our decisions are based upon their corporate reputation and the quality of their offerings and pricing. Our recommendations regarding technology are reached without regard to financial compensation except in situations in which comparable products at comparable pricing are available from multiple sources. In this limited case, we support our sponsors because our sponsors support us.
BOGO Bonaza: Enjoy state-of-the-art VoIP service with a $10 credit and half-price SIP service on up to $500 of Skyetel trunking with free number porting when you fund your Skyetel account. No limits on number of simultaneous calls. Quadruple data center redundancy. $25 monthly minimum spend required. Tutorial and sign up details are here.
![]() The lynchpin of Incredible PBX 2020 and beyond is ClearlyIP components which bring management of FreePBX modules and SIP phone integration to a level never before available with any other Asterisk distribution. And now you can configure and reconfigure your new Incredible PBX phones from the convenience of the Incredible PBX GUI.
The lynchpin of Incredible PBX 2020 and beyond is ClearlyIP components which bring management of FreePBX modules and SIP phone integration to a level never before available with any other Asterisk distribution. And now you can configure and reconfigure your new Incredible PBX phones from the convenience of the Incredible PBX GUI.
VitalPBX is perhaps the fastest-growing PBX offering based upon Asterisk with an installed presence in more than 100 countries worldwide. VitalPBX has generously provided a customized White Label version of Incredible PBX tailored for use with all Incredible PBX and VitalPBX custom applications. Follow this link for a free test drive!
Special Thanks to Vitelity. Vitelity is now Voyant Communications and has halted new registrations for the time being. Our special thanks to Vitelity for their unwavering financial support over many years and to the many Nerd Vittles readers who continue to enjoy the benefits of their service offerings. We will keep everyone posted on further developments.
Some Recent Nerd Vittles Articles of Interest...
Free Asterisk Solutions
