
Home » Posts tagged 'freepbx' (Page 17)
Tag Archives: freepbx
The Most Versatile VoIP Provider: FREE PORTING

 JUST RELEASED: Visit the Incredible PBX Wiki
Adding CallerID Names to VitalPBX Inbound & Outbound Calls

In the early days of Asterisk®, it was not unlike the Wild West. Extension passwords of 1234 were pretty safe, and "anything goes" was the only rule when it came to scraping other folks’ web sites for data that you needed. And the master scraper of them all, Google, even had a phone: function (until they didn’t) that let you look up almost anyone’s name or telephone number. Ma Bell pretty much had a monopoly on CallerID Name (CNAM) data for phone numbers which is probably the reason the Google feature suddenly disappeared. Since the telecom industry universally discarded CNAM data when routing calls to destinations, it was up to the DID provider to look up the associated names out of their proprietary databases before connecting the call. Ma Bell called it a feature. It was more like a revenue generator.
For VoIP users, there were no CNAM services to speak of. Thus was born our CallerID Trifecta and later CallerID Superfecta projects more than a decade ago. Superfecta was later elevated to the stratosphere by some of the early FreePBX® pioneers including Lorne Gaetz and Andrew Nagy. The real beauty of CallerID Superfecta was the ability to search a cache for a CNAM match before scouring and scraping the web, a process which took a lot more time.
Much has changed in the last 10 years. One of the early lessons in CNAM lookups obtained by scraping web sites was that most of the site owners didn’t appreciate their newfound popularity. As a result, they continually modified their sites to discourage scraping, and this in turn regularly broke CallerID Superfecta. The other major change is that there now are multiple CNAM services for VoIP users. Almost all VoIP providers also include a CNAM lookup option, and there are dirt-cheap standalone services such as OpenCNAM and BulkCNAM.
In introducing CallerID Superfecta to the VitalPBX community, we wanted to take advantage of what we’ve learned as well as the new CNAM landscape. There still are limitations. All of the CNAM lookup services don’t mind charging you to return a CNAM result of Los Angeles, CA which you could have deciphered by simply examining the area code of the incoming call. And, if your girlfriend calls you twenty times a day, the CNAM services are more than happy to charge you for the same CNAM dip twenty times. And at least one VoIP provider charges for CNAM lookups whether you want them or not. That adds another half a cent to the cost of every incoming call. Most providers charge between $.002 (new BulkCNAM rate) and $.005 per dip1 so the charges can add up particularly with a lot of calls of short duration.
We previously mentioned using VitalPBX’s native OpenCNAM functionality to add CallerID Names to incoming calls. But there are three possible concerns with this approach. First, there’s the frequently calling girlfriend issue. Depending upon how much you like your girlfriend, that may or may not be acceptable. A second issue is the CNAM dips that only return the city and state of the call. For frequent callers, you obviously would like actual names associated with these callers. And a third issue is the absence of CNAM data in your CDR logs and on your SIP phone for outbound calls.
In considering a modern CallerID Superfecta design, we’ve concluded that you really only need three components. First, you need to examine whether an actual name was passed with the incoming call. Second, you need to check whether your local database already has a CNAM entry for the caller. And, third, if those two sources don’t bear fruit, you need a lookup from a stand-alone CNAM provider. We believe the prudent design for the local component is to consolidate all available CNAM information into a single local CNAM database with import tools from other servers for apps such as the Asterisk Phonebook, AsteriDex, and Google Contacts. The local Asterisk Phonebook included in AstDB’s SQLite3 database is perfectly suited to serve as a local CNAM repository.
Legal Disclaimer: Most CNAM providers have restrictions regarding caching of CNAM data. The courts consistently have ruled that phonebook data is not copyrightable. And every PBX caches CNAM data. After all, that’s what CDR logs are all about. Consult with your own attorney if you have concerns, or simply stop reading here. 🙂

Now that VitalPBX has included unlimited Custom Contexts at no cost, our tasks today are easy. The plan of attack goes like this. When an incoming call hits your PBX, we’ll check whether a CallerID name accompanied the call. Next, we’ll check the Asterisk Phonebook to see if we have a name associated with that phone number. If there’s no CNAM entry after checking both sources, then we’ll perform an OpenCNAM lookup using your credentials. For outgoing calls, we’ll check the Asterisk Phonebook for a CNAM match on the number being called and, if there is no match, we’ll perform an OpenCNAM lookup using your credentials. You have the option of using either, both, or neither of these CNAM scripts.
Before we get started, it’s worth noting that finding a "hook" for outbound calls was not a simple task with VitalPBX. The trick was to find a subroutine that could be replaced without damaging the native functionality of the PBX. We finally found a spot, but we were limited to just two lines of code. The solution was to use one of those lines to execute a separate subroutine which had no restrictions on size. So let’s get started.
As with FreePBX, a config file is used to manage custom contexts. With VitalPBX, extensions__80-custom.conf in /etc/asterisk/ombutel is the file you need. If it doesn’t exist, simply create it. This file has two parts which again are similar to the FreePBX design. The [cos-all-custom](+) context is used for extension code in exactly the same way that the [from-internal-custom] context is used in FreePBX. In addition to extension dialplan code, you also can embed additional contexts just as you could with FreePBX. If you’ve installed Incredible PBX for VitalPBX, then you already have a number of extension components in the [cos-all-custom](+) context. So we’ll be adding some additional contexts at the bottom of the file. If you don’t already have an extensions__80-custom.conf file, create it and add [cos-all-custom](+) as the first line in the file. All of today’s code is licensed for your use pursuant to the terms of the GPLv2 license available here.
Adding CallerID Superfecta for Incoming Calls
Log into your server as root and navigate to /etc/asterisk/ombutel. Edit extensions__80-custom.conf and cut-and-paste the following code to the bottom of the file. Be sure to insert your actual OpenCNAM credentials in the SID and TOKEN entries near the top of the code replacing xxxx and yyyy.
;# // BEGIN CallerID Superfecta
[superfecta]
exten => s,1,NoOp(Executing CID Superfecta)

; insert OpenCNAM credentials below
  same => n,Set(SID=xxxx)
  same => n,Set(TOKEN=yyyy)

  same => n,NoOp(CID Number: ${CALL_SOURCE})
  same => n,Set(CID_NAME=${CALLERID(name)})
  same => n,NoOp(AstDB lookup underway)
  same => n,Set(CID_NAME2=${DB(cidname/${CALL_SOURCE})})
  same => n,GotoIf($["foo${CID_NAME2}" = "foo"]?runOpenCNAM:skipOpenCNAM)
  same => n(runOpenCNAM),NoOp(OpenCNAM lookup underway)
  same => n,Set(DB(cidname/${CALL_SOURCE})=${CID_NAME})
  same => n,Set(CID_NAME3=${SHELL(curl https://${SID}:${TOKEN}@api.opencnam.com/v2/phone/${CALL_SOURCE}?format=pbx)})
; for BulkCNAM, comment out line above and uncomment line below after inserting your APIkey
; same => n,Set(CID_NAME3=${SHELL(curl -X GET "https://cnam.bulkCNAM.com/?id=APIkey&did=${CALL_SOURCE}")})
  same => n,GotoIf($["foo${CID_NAME3}" = "foo"]?skipBOTH
  same => n,Set(DB(cidname/${CALL_SOURCE})=${CID_NAME3})
  same => n,Set(CALLERID(name)=${CID_NAME3})
  same => n,Goto(skipBOTH)
  same => n(skipOpenCNAM),Set(CALLERID(name)=${CID_NAME2})
  same => n(skipBOTH),Set(ICALL=yes)
  same => n,Answer

;  same => n,Wait(2)
;; requires addition of nv-GenericWelcome.ulaw in /var/lib/asterisk/sounds/custom
;  same => n,Background(custom/nv-GenericWelcome&silence/1&continue-in-english&press-7,nm)
;  same => n,WaitExten(.)
;; exten => 7,1,Goto(cos-all,701,1)
;; exten => 7,1,Goto(cos-all-trunk,8436060555,1)
;; exten => 7,1,Goto(newcontext,s,1)
;  exten => 7,1,Goto(incrediblepbx,s,1)
;  same => n,Return()
; exten => t,1,Hangup
;  same => n,Return()
; exten => i,1,Hangup
;  same => n,Return()

; same => n,Goto(cos-all,701,1)
; same => n,Goto(cos-all-trunk,8436060555,1)
; same => n,Goto(newcontext,s,1)
; same => n,ExecIf($["${DID}" = "8436060555"]?Goto(incrediblepbx,s,1))
  same => n,Goto(incrediblepbx,s,1)
  same => n(return),Return()
;# // END CallerID Superfecta
Replacing OpenCNAM with BulkCNAM for Queries
With the recent price drop, you may prefer to use BulkVS.com for your CNAM queries. You’ll need to obtain your APIkey from their portal in API:API Credentials. Then locate the Set(CID_NAME3… line in the script above and replace it with the following line using your actual APIkey:
same => n,Set(CID_NAME3=${SHELL(curl -X GET "https://cnam.bulkCNAM.com/?id=APIkey&did=${CALL_SOURCE}")})
Choosing a Destination for Incoming Calls
We want to spend a minute on the last several lines of the Superfecta dialplan code:
; same => n,Goto(cos-all,701,1)
; same => n,Goto(cos-all-trunk,8436060555,1)
; same => n,Goto(newcontext,s,1)
  same => n,ExecIf($["${DID}" = "8436060555"]?Goto(cos-all,701,1))
  same => n,Goto(incrediblepbx,s,1)
These five lines demonstrate how to redirect incoming calls to five different destinations: an extension, an external phone number, another custom context, a DID-specific routing, or the Incredible PBX Demo IVR. As shown, the calls would be routed to the default Demo IVR unless the DID matches 8436060555 in which case the call would be routed to extension 701. You can modify the destination scenario simply by uncommenting a different line in the dialplan examples. Keep in mind that a Goto command permanently redirects calls to that destination outside the Custom Context so the first uncommented Goto line will always take precedence. Also note that you can have multiple ExecIf lines preceding a Goto line to route calls to different destinations depending upon the DID of the incoming call. Stated another way, multiple ExecIf commands can be followed by a Goto command that serves as the default destination for any non-matching DIDs. You could also redirect by CallerID number.
Blocking Telemarketers with CallerID Superfecta
As election season heats up in the United States, be advised that your favorite legislators have exempted themselves from the robocall rules so dinnertime will get more interesting in coming months. One simple solution is to prompt the caller to enter a number before actually connecting the call. This kills most robocalls. We’ve included the code to do this in CallerID Superfecta. Just uncomment the code so that it looks like the following after choosing a call destination as documented in the previous section:
  same => n,Wait(2)
; requires addition of nv-GenericWelcome.ulaw in /var/lib/asterisk/sounds/custom
  same => n,Background(custom/nv-GenericWelcome&silence/1&continue-in-english&press-7,nm)
  same => n,WaitExten(.)
; exten => 7,1,Goto(cos-all,701,1)
; exten => 7,1,Goto(cos-all-trunk,8436060555,1)
; exten => 7,1,Goto(newcontext,s,1)
  exten => 7,1,Goto(incrediblepbx,s,1)
  same => n,Return()
 exten => t,1,Hangup
  same => n,Return()
 exten => i,1,Hangup
  same => n,Return()
Before this will work, you’ll need to download the nv-GenericWelcome.ulaw recording:
cd /var/lib/asterisk/sounds/custom
wget http://incrediblepbx.com/nv-GenericWelcome.ulaw
Adding CallerID Superfecta for Outgoing Calls
If CNAM data for outgoing calls is also desired for your CDR logs, here’s the dialplan code to cut-and-paste into the bottom of the Custom Contexts file. Insert your OpenCNAM credentials in the code replacing xxxx and yyyy just as you did in the previous section:
[cos-all-custom]
exten => _.,1,NoOp(*** Custom Outbound CNAM Code ***))
    same => n,GoSub(cnam-out,s,1)

[cnam-out]
exten => s,1,NoOp(*** Outbound CNAM context for Incredible PBX ***)
  same => n,Set(SID=xxxx)
  same => n,Set(TOKEN=yyyy)
  same => n,NoOp(Calling: ${EXTENSION})
  same => n,Set(CID_NUM=${EXTENSION})
  same => n,NoOp(AstDB lookup underway)
  same => n,Set(CID_NAME=${DB(cidname/${CID_NUM})})
  same => n,GotoIf($["foo${CID_NAME}" = "foo"]?runOpenCNAM:skipOpenCNAM)
  same => n(runOpenCNAM),NoOp(OpenCNAM lookup underway)
  same => n,Set(CID_NAME=${SHELL(curl https://${SID}:${TOKEN}@api.opencnam.com/v2/phone/${CID_NUM}?format=pbx)})
; for BulkCNAM, comment out line above and uncomment line below after inserting your APIkey
;  same => n,Set(CID_NAME=${SHELL(curl -X GET "https://cnam.bulkCNAM.com/?id=APIkey&did=${CID_NUM}")})
  same => n,Set(DB(cidname/${CID_NUM})=${CID_NAME})
  same => n(skipOpenCNAM),Set(CDR(customer_code)=${CID_NAME})
  same => n,Set(ICALL=yes)
  same => n,NoOp(*** Outbound CNAM context ends here ***)
  same => n,Return()
Activating CallerID Superfecta with VitalPBX
As with any dialplan changes, you first must reload the dialplan: asterisk -rx "dialplan reload". Next, we need to create a Custom Context within the VitalPBX GUI and point any desired Inbound Routes to that custom context. Using a web browser, log in to the VitalPBX GUI as admin. Navigate to PBX:Applications:Custom Contexts and create a new custom context for CallerID Superfecta:
Description: CID Superfecta
Context: superfecta
Extension: s
Priority: 1
Destination: Terminate Call -> Hangup
Next, identify the Trunks that you want to use with CallerID Superfecta and create an Inbound Route for those trunks pointing to CallerID Superfecta as the Destination for those calls.
If you want different destinations within CallerID Superfecta context for different trunks, then you’ll need to use ExecIf commands as shown in the dialplan to identify each trunk and to route the calls to the desired locations. Note that you can have multiple ExecIf commands followed by an uncommented default destination for any incoming calls that do not have a DID match.
Importing Asterisk Phonebook Data from Another PBX
To supplement your local Asterisk Phonebook which will serve as the local CNAM repository for VitalPBX, you can easily import data from other sources. And, as those sources change, you can export the entire database again and repeat the import procedure without worrying about duplicating data in your local Asterisk Phonebook. Imported data always overwrites existing entries which have a match on the phone number. To import an Asterisk Phonebook from another PBX, here are the steps to run on that PBX to create the import script which should be copied and run on the VitalPBX platform: import-asterisk-phonebook.sh
CAUTION: Carefully review the generated import script for anomalies before running it.
cd /var/lib/asterisk
sqlite3 astdb.sqlite3 "select key,value from astdb \\
 where key LIKE '%cidname/%'" > /root/import.sh
cd /root
sed -i 's|/cidname|asterisk -rx "database put cidname "|' import.sh
sed -i 's| "/| |' import.sh
sed -i 's|\\|| "|' import.sh
sed -i 's|$|"|' import.sh
sed -i "s|\"d|'d|" import.sh
sed -i "s|$|'|" import.sh
chmod +x import.sh
mv import.sh import-asterisk-phonebook.sh
Importing AsteriDex Data from Another PBX
Here are the steps to export existing AsteriDex data from another Incredible PBX platform. Once the steps have been completed, copy import-asteridex.sh to VitalPBX, make the script executable, and run it.
mysql -u root -ppassw0rd asteridex -N -s -e 'select "*",`out`,`name` from user1' | \\
 sed 's|\\t|, |g' > tmp.txt
sed -i "s|*,|asterisk -rx 'database put|" tmp.txt
sed -i 's|, | "|' tmp.txt
sed -i 's|$|"|' tmp.txt
sed -i "s|$|'|" tmp.txt
mv tmp.txt import-asteridex.sh
Importing Google Contacts into Asterisk Phonebook
Here are the steps to import existing Google Contacts into the VitalPBX Asterisk Phonebook:
- From within Google Contacts, export your contacts into a vcard format file: contacts.vcf
- Copy the contacts.vcf file to the /root folder of your PBX
wget http://incrediblepbx.com/googlecontacts-importer.tar.gztar zxvf googlecontacts-importer.tar.gzrm -f googlecontacts-importer.tar.gz- Run the main script:
/root/vcard-import.sh - Edit the shell script that is generated:
nano -w import-google-contacts.sh - Make any changes to clean up the entries from Google Contacts
chmod +x /root/import-google-contacts.sh- Run the script to import your Google Contacts:
/root/import-google-contacts.sh
Managing the Asterisk Phonebook with VitalPBX
To add or replace entries in the Asterisk Phonebook from the Linux CLI, here’s the syntax:
asterisk -rx 'database put cidname 8005551212 "Directory Assistance"'
To remove an entry from the Asterisk Phonebook, the syntax looks like this:
asterisk -rx "database del cidname 8005551212"
To display all entries in your Asterisk Phonebook, issue the following command:
asterisk -rx "database show cidname"
Originally published: Monday, November 4, 2019

Need help with Asterisk? Visit the VoIP-info Forum.
Special Thanks to Our Generous Sponsors
FULL DISCLOSURE: ClearlyIP, Skyetel, Vitelity, DigitalOcean, Vultr, VoIP.ms, 3CX, Sangoma, TelecomsXchange and VitalPBX have provided financial support to Nerd Vittles and our open source projects through advertising, referral revenue, and/or merchandise. As an Amazon Associate and Best Buy Affiliate, we also earn from qualifying purchases. We’ve chosen these providers not the other way around. Our decisions are based upon their corporate reputation and the quality of their offerings and pricing. Our recommendations regarding technology are reached without regard to financial compensation except in situations in which comparable products at comparable pricing are available from multiple sources. In this limited case, we support our sponsors because our sponsors support us.
 BOGO Bonaza: Enjoy state-of-the-art VoIP service with a $10 credit and half-price SIP service on up to $500 of Skyetel trunking with free number porting when you fund your Skyetel account. No limits on number of simultaneous calls. Quadruple data center redundancy. $25 monthly minimum spend required. Tutorial and sign up details are here.
 VitalPBX is perhaps the fastest-growing PBX offering based upon Asterisk with an installed presence in more than 100 countries worldwide. VitalPBX has generously provided a customized White Label version of Incredible PBX tailored for use with all Incredible PBX and VitalPBX custom applications. Follow this link for a free test drive!
 Special Thanks to Vitelity. Vitelity is now Voyant Communications and has halted new registrations for the time being. Our special thanks to Vitelity for their unwavering financial support over many years and to the many Nerd Vittles readers who continue to enjoy the benefits of their service offerings. We will keep everyone posted on further developments.
- BulkCNAM previously charged $.005 per CNAM dip but recently sent out an email indicating they were dropping the rate to $.002. Our CNAM charges continued to be billed at $.005 with the daily charges being rounded up to the whole penny. So… you may want to check your CNAM charges for a bit to verify that you are being billed at the new rate. If not, open a ticket and they will correct it. [↩]
Meet Incredible PBX 16 with VitalPBX for VirtualBox
If you’re new to the VoIP world and want to kick the tires to see what you’re missing, then today’s one minute setup is for you. You’ll get a $10 credit to try out some penny-a-minute calls and to purchase a $1 a month phone number in your choice of area codes. If you decide VoIP is not for you, you don’t have to buy anything ever. And you can use almost any desktop computer you already own to bring up the VirtualBox® edition of Incredible PBX® 16 with VitalPBX 2.3.8.
If you’ve followed Nerd Vittles over the years, you already know that VirtualBox from Oracle® is one of our favorite platforms. Once VirtualBox is installed on your desktop computer, adding Incredible PBX is a snap. Download the latest Incredible PBX .ova image from SourceForge, double-click on the downloaded image, check the initialize MAC address box, and boom. Instant PBX! In less than a minute, your PBX will be ready to use. Just sign up for an account with our Platinum provider, Skyetel, and you can start making free calls. Of course, the Incredible PBX feature set is included and VitalPBX is preconfigured to introduce you to a truly revolutionary communications platform. Speech-to-text, voice recognition, and a Siri-like telephony interface are as close as your SIP phone.
Installing Oracle VM VirtualBox

Oracle’s virtual machine platform inherited from Sun is amazing. It’s not only free, but it’s pure GPL2 code. VirtualBox gives you a virtual machine platform that runs on top of any desktop operating system. In terms of limitations, we haven’t found any. We even tested this on an Atom-based Windows 7 machine with 2GB of RAM, and it worked without a hiccup. So step #1 today is to download one or more of the VirtualBox installers from VirtualBox.org or Oracle.com. Our recommendation is to put all of the 100MB installers on a 4GB thumb drive.1 Then you’ll have everything in one place whenever and wherever you happen to need it. Once you’ve downloaded the software, simply install it onto your favorite desktop machine. Accept all of the default settings, and you’ll be good to go. For more details, here’s a link to the Oracle VM VirtualBox User Manual.
Installing Incredible PBX 16 with VitalPBX 2.3.8
To begin, download the Incredible PBX 16 .ova image (1.1 GB) onto your desktop.
Next, double-click on the Incredible PBX .ova image on your desktop. Be sure to check the box to initialize the MAC address of the image and then click Import. Once the import is finished, you’ll see a new Incredible PBX virtual machine in the VM List of the VirtualBox Manager Window. Let’s make a couple of one-time adjustments to the Incredible PBX configuration to account for possible differences in sound and network cards on different host machines.
(1) Click once on the Incredible PBX virtual machine in the VM List. Then (2) click the Settings button. In the Audio tab, check the Enable Audio option and choose your sound card. In the Network tab for Adapter 1, check the Enable Network Adapter option. From the Attached to pull-down menu, choose Bridged Adapter. Then select your network card from the Name list. Then click OK. That’s all the configuration that is necessary for Incredible PBX.
Running Incredible PBX 16 with VitalPBX in VirtualBox
Once you’ve imported and configured the Incredible PBX Virtual Machine, you’re ready to go. Highlight the Incredible PBX virtual machine in the VM List on the VirtualBox Manager Window and click the Start button. The standard Linux boot procedure will begin and, within a few seconds, you’ll get the familiar Linux login prompt. During the bootstrap procedure, you’ll see a couple of dialogue boxes pop up that explain the keystrokes to move back and forth between your host operating system desktop and your virtual machine. Remember, you still have full access to your desktop computer. Incredible PBX is merely running as a task in a VM window. Always gracefully halt Incredible PBX just as you would on any computer.
Here’s what you need to know. To work in the Incredible PBX virtual machine, just left-click your mouse while it is positioned inside the VM window. To return to your host operating system desktop, press the right Option key on Windows machines or the left Command key on any Mac. For other operating systems, read the dialogue boxes for instructions on moving around. To access the Linux CLI, login as root with the default password: password. Change your root password immediately by typing: passwd. Make note of the IP address of your PBX. Then point your favorite browser to the IP address. Update your admin password for web access when prompted. Register your PBX with the VitalPBX folks, and you’re ready to go. You’ll need this admin password each time you access the web GUI to manage your PBX.
Should you ever forget your admin password, log into your server as root and issue the following command to reset it. The next time you access the GUI with a browser, you’ll be prompted to create a new admin password.
mysql ombutel -e 'update ombu_settings set value = "yes" where name = "reset_pwd"'
Setting the Date and Time with VirtualBox
On some platforms, VirtualBox has a nasty habit of mangling the date and time of your virtual machine. Typing date will tell you whether your VM is affected. If it’s a problem, manually set the date and time and then update the hardware clock. Here’s how assuming 08130709 is the month, day, and correct time of your server:
date 08130709
clock -w
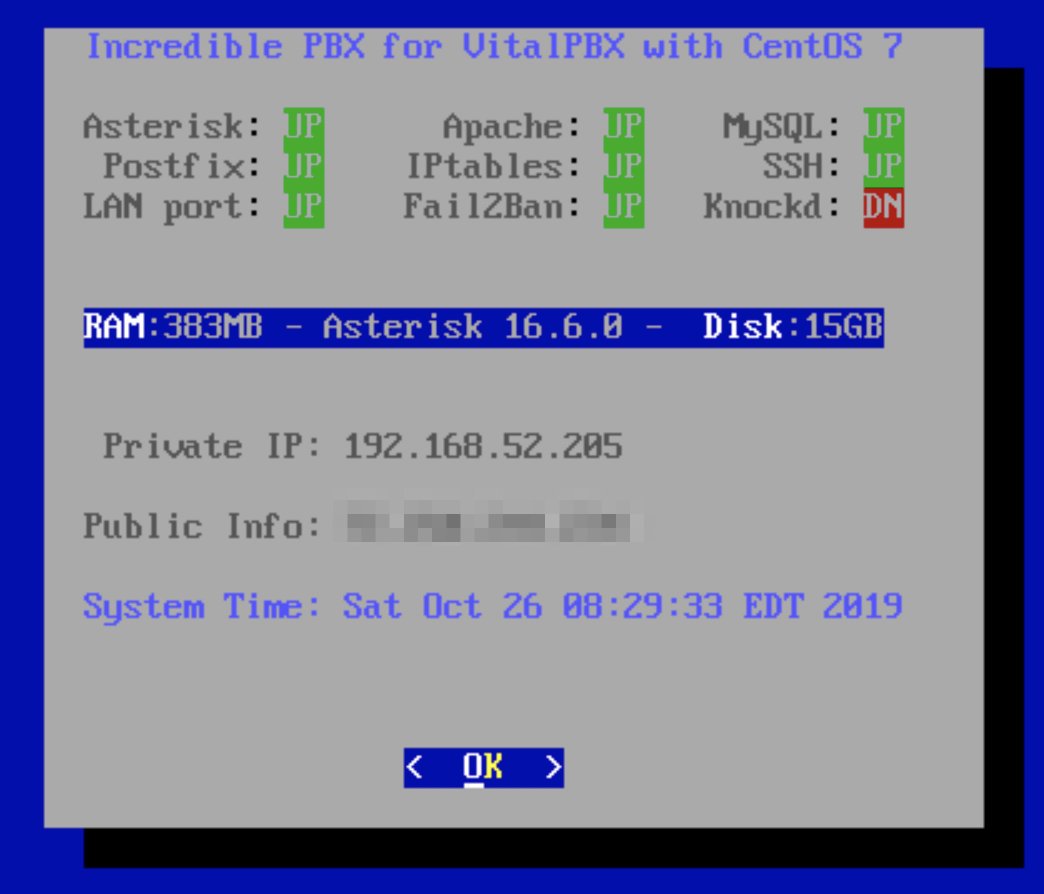
BUG FIXES: Only two bugs to report and that’s an inaccurate display of available disk space in the pbxstatus utility (shown above) and a permissions issue that prevented writing data to AsteriDex. Here are the fixes:
sed -i 's| /"|/centos"|' /usr/local/sbin/pbxstatus
chown asterisk:apache /var/lib/asterisk/agi-bin
Configuring Skyetel for Incredible PBX 16
If you’d like to try out the Skyetel service at no charge, here’s the drill. Sign up for Skyetel service to take advantage of the Nerd Vittles specials. First, complete the Prequalification Form here. You then will be provided a link to the Skyetel site to complete your registration. Once you have registered on the Skyetel site and your account has been activated, open a support ticket and request the $10 credit for your account by referencing the Nerd Vittles special offer. Once you are satisfied with the service, fund your account as desired, and Skyetel will match your deposit of up to $250 simply by opening another ticket. That gets you up to $500 of half-price calling. Credit is limited to one per person, company, and address. Effective 10/1/2023, $25/month minimum spend required.
Skyetel does not use SIP registrations to make connections to your PBX. Instead, Skyetel utilizes Endpoint Groups to identify which servers can communicate with the Skyetel service. An Endpoint Group consists of a Name, an IP address, a UDP or TCP port for the connection, and a numerical Priority for the group. For incoming calls destined to your PBX, DIDs are associated with an Endpoint Group to route the calls to your PBX. For outgoing calls from your PBX, a matching Endpoint Group is required to authorize outbound calls through the Skyetel network. Thus, the first step in configuring the Skyetel side for use with your PBX is to set up an Endpoint Group. Here’s a typical setup for Incredible PBX 16-15:
- Name: MyPBX
- Priority: 1
- IP Address: PBX-Public-IP-Address
- Port: 5060
- Protocol: UDP
- Description: my.incrediblepbx.com
To receive incoming PSTN calls, you’ll need at least one DID. On the Skyetel site, you acquire DIDs under the Phone Numbers tab. You have the option of Porting in Existing Numbers (free for the first 60 days after you sign up for service) or purchasing new ones under the Buy Phone Numbers menu option.
Once you have acquired one or more DIDs, navigate to the Local Numbers or Toll Free Numbers tab and specify the desired SIP Format and Endpoint Group for each DID. Add SMS/MMS and E911 support, if desired. Call Forwarding and Failover are also supported. That completes the VoIP setup on the Skyetel side.
Incredible PBX already is configured to connect with Skyetel. However, for security, your virtual machine should be running behind a router or firewall. That means you will have to redirect the Skyetel SIP traffic to the private IP address of your PBX. In your router, reserve the assigned DHCP private LAN address of your PBX so that it will not change. Then map incoming SIP and RTP traffic (TCP/UDP 5060-5080 and UDP 10000-20000) to the private LAN address of your PBX.
Configuring Incredible PBX 16 for VirtualBox
There are 10 Quick Steps to Customize Incredible PBX for your environment. Here’s how.
1. In the web GUI, navigate to PBX:Extensions:Extensions. Click the Extensions Options bar and choose 701. Reset your extension 701 Password and enter your Email Address. In the Voicemail tab, you can either leave the default voicemail password as 701 which means you’ll be prompted to set a new one the first time you access 701 voicemail, OR you can set one while you’re here. Click Save and then Reload Dialplan when you’re finished.
2. Before your PBX can receive calls, you’ll need at least one Inbound Route. This tells the PBX how to route calls from one or more phone numbers (DIDs) that you own to a destination on your PBX, e.g. an extension, a ring group, an IVR, or custom context. We’ve preconfigured a Default route which directs all incoming calls to the Demo IVR. To change it, navigate to PBX:External:Inbound Routes and choose the Default route from the Options bar. If you’d prefer that incoming calls be routed to extension 701, simply change the Inbound Destination. Then SAVE and Reload Dialplan.
3. Outbound email functionality is essential on your PBX. The easiest solution is to configure PostFix as an SMTP Relay using a Gmail account. You can do this easily from within the VitalPBX GUI. Navigate to Admin:System Settings:Email Settings and click the External Mail Server tab. Be sure that Gmail is selected and enter your Gmail name and password in the fields provided. Save your settings and send yourself an email using the field provided.
4. In order to take advantage of all the Incredible PBX applications, you’ll need to obtain IBM text-to-speech (TTS) and speech-to-text (STT) credentials. This Nerd Vittles tutorial will walk you through getting your IBM account set up and obtaining both your TTS and STT credentials. Be sure to write down BOTH sets of credentials which you’ll need in a minute. For home and SOHO use, IBM access and services are mostly FREE even though you must provide a credit card when signing up. The IBM signup process explains their pricing plans.
5. If you only wish to receive recorded voicemails by email, you can skip this step. Once you have obtained IBM TTS and STT passwords, here’s how to set up Voicemail Transcription with Email Message Delivery:
a. After logging into your VitalPBX server as root using SSH/Putty:
cd /tmp
mkdir sendmail
cd sendmail
wget http://incrediblepbx.com/sendmailibm-vitalpbx.tar.gz
tar zxvf sendmailibm-vitalpbx.tar.gz
rm -f sendmailibm-vitalpbx.tar.gz
mv usr/sbin/sendmailibm /usr/sbin
cd /etc/asterisk/ombutel
echo "[general](+)" > voicemail__60-1-transcript.conf
echo "; format=wav|wav49|gsm" >> voicemail__60-1-transcript.conf
echo "mailcmd=/usr/sbin/sendmailibm" >> voicemail__60-1-transcript.conf
chown apache:apache voicemail__60-1-transcript.conf
rm -rf /tmp/sendmail
b. Restart Asterisk core services: asterisk -rx "core reload"
c. Edit /usr/sbin/sendmailibm and insert your IBM Watson STT APIkey on line 23. Change the language on line 31 if you don’t want en-US. Then save the file.
d. Log back into the VitalPBX GUI and configure the extensions desired for email delivery of voicemail. For each extension in PBX:Extensions:General, enter an Email Address for delivery of voicemails. In PBX:Extensions:Voicemail, verify the VM settings from step #20.
6. Associating CallerID Names (CNAM) with inbound calls for display on SIP phones and in the CDR logs is an often-requested PBX feature. There are a few ways to do it. First, for less than a penny a call, you can activate the feature with your DIDs in the Skyetel Dashboard. Or, for about half the cost, you can acquire an OpenCNAM account and activate it in VitalPBX by navigating to PBX:Incoming Calls:CID Lookup. Choose OpenCNAM as the Source and enter your credentials. Then SAVE your settings and reload the dialplan. Then, for each of your Inbound Routes, add OpenCNAM as the CID Lookup source and Update your configuration.
7. To use Wolfram Alpha, sign up for a free Wolfram Alpha API account. Just provide your email address and set up a password. It takes less than a minute. Log into your account and click on Get An App ID. Make up a name for your application and write down (and keep secret) your APP-ID code. That’s all there is to getting set up with Wolfram Alpha. If you want to explore costs for commercial use, there are links to let you get more information.
8. In addition to your Wolfram Alpha APPID, there are two sets of IBM credentials to plug into the Asterisk AGI scripts. Keep in mind that there are different usernames and passwords for the IBM Watson TTS and STT services. The TTS credentials will look like the following: $IBM_username and $IBM_password. The STT credentials look like this: $API_USERNAME and $API_PASSWORD. Don’t mix them up. 🙂
All of the scripts requiring credentials are located in /var/lib/asterisk/agi-bin so switch to that directory after logging into your server as root. Edit each of the following files and insert your TTS credentials in the variables already provided: nv-today2.php, ibmtts.php, and ibmtts2.php. Edit each of the following files and insert your STT credentials in the variables already provided: getquery.sh, getnumber.sh, and getnumber2.sh. Finally, edit 4747 and insert your Wolfram Alpha APPID.
9. Before you do anything else, navigate to Admin:Admin:Backup & Restore, configure and run a Full Backup, and then download the file and keep it in a safe place. Be advised that Backup/Restore doesn’t restore Add-Ons, /var/lib/asterisk/agi-bin, custom contexts (extensions__80*.conf) in /etc/asterisk/ombutel, custom MySQL databases (mysqldump -u root yourDB > yourDB.sql), custom and lenny sound directories in /var/lib/asterisk/sounds, phpMyAdmin, /usr/local/sbin, and /etc/crontab.
10. AsteriDex is a web-based dialer and address book application for Asterisk and Incredible PBX. It lets you store and manage phone numbers of all your friends and business associates in an easy-to-use SQLite3 database. You simply call up the application with your favorite web browser: http://pbx-ip-address/asteridex4/. When you click on a contact that you wish to call, AsteriDex first calls you at extension 701, and then AsteriDex connects you to your contact through another outbound call made using your default outbound trunk that supports numbers in the 1NXXNXXXXXX format.
Configuring a Softphone for Incredible PBX
We’re in the home stretch now. You can connect virtually any kind of telephone to your new PBX. Plain Old Phones require an analog telephone adapter (ATA) which can be a separate board in your computer from a company such as Digium. Or it can be a standalone SIP device such as ObiHai’s OBi100 or OBi110 (if you have a phone line from Ma Bell to hook up as well). SIP phones can be connected directly so long as they have an IP address. These could be hardware devices or software devices. We’ll start with some free ones today so you can begin making calls. You can find dozens of recommendations for hardware-based SIP phones both on Nerd Vittles and the PIAF Forum when you’re ready to get serious about VoIP telephony.
For Windows, iOS, and Android platforms, we recommend the free VitalPBX Communicator.
For the Mac platform, we recommend the free Telephone app available in the App Store.
Managing the AsteriDex SQLite3 Database
We’ve alluded to the AsteriDex database in a couple of VitalPBX articles but never mentioned how to access it. Using a browser, point it to http://server-ip/asteridex4. You can add, edit, display, and delete entries from there. Before you can make changes in the database, issue the following command after logging into your server as root:
chown asterisk:apache /var/lib/asterisk/agi-bin
Taking Incredible PBX for a Test Drive
You can take Incredible PBX for VitalPBX on a test drive in two ways. You can call our server, and then you can try things out on your own server and compare the results. Call our IVR by dialing 1-843-606-0555. For our international friends, you can use the following SIP URI for a free call: 10159591015959@atlanta.voip.ms. For tips on setting up your own secure, hybrid SIP URI with VitalPBX, see our original tutorial. The FreePBX® setup is virtually identical except for the location of the custom SIP setting for match_auth_username=yes. On a VitalPBX server, you will enter it here: Settings:Technology Settings:SIP Settings:CUSTOM.
With Allison’s Demo IVR, you can choose from the following options:
- 0. Chat with Operator — connects to extension 701
- 1. AsteriDex Voice Dialer (412) – say "Delta Airlines" or "American Airlines" to connect
- 2. Conferencing (2663) – log in using 1234 as the conference PIN
- 3. Wolfram Alpha Almanac (4747) – say "What planes are flying overhead now?"
- 4. Lenny (53669) – The Telemarketer’s Worst Nightmare
- 5. Today’s News Headlines (951) — courtesy of Yahoo! News
- 6. Weather by ZIP Code (947) – enter any 5-digit ZIP code for today’s weather
- 7. Today in History (86329) — courtesy of OnThisDay.com
- 8. Call Extension 701 — on your local PBX
- 9. DISA Voice Dialer (3172) — say any 10-digit number to be connected
- *. Current TIME and Date (8463) — courtesy of VitalPBX
CAUTION: We have intentionally disabled outbound calls using Option #9 and redirected callers to Lenny. The reason is that an unscrupulous caller could easily run up your phone bill by entering a number with expensive destination charges. If you wish to enable the feature, despite the risks, you can edit extensions__80-1-incrediblepbx.conf and make the change.
You can call your own IVR in a few ways. From an internal VitalPBX phone, dial D-E-M-O (2663) to be connected. Or simply dial the number of the DID you routed to the Incredible PBX Custom Context. Local users can also dial the individual feature codes shown in parentheses above. Be sure that you heed AND test the CAUTION documented above.
Originally published: Monday, October 28, 2019
Need help with Asterisk? Visit the VoIP-info Forum.
Special Thanks to Our Generous Sponsors
FULL DISCLOSURE: ClearlyIP, Skyetel, Vitelity, DigitalOcean, Vultr, VoIP.ms, 3CX, Sangoma, TelecomsXchange and VitalPBX have provided financial support to Nerd Vittles and our open source projects through advertising, referral revenue, and/or merchandise. As an Amazon Associate and Best Buy Affiliate, we also earn from qualifying purchases. We’ve chosen these providers not the other way around. Our decisions are based upon their corporate reputation and the quality of their offerings and pricing. Our recommendations regarding technology are reached without regard to financial compensation except in situations in which comparable products at comparable pricing are available from multiple sources. In this limited case, we support our sponsors because our sponsors support us.
BOGO Bonaza: Enjoy state-of-the-art VoIP service with a $10 credit and half-price SIP service on up to $500 of Skyetel trunking with free number porting when you fund your Skyetel account. No limits on number of simultaneous calls. Quadruple data center redundancy. $25 monthly minimum spend required. Tutorial and sign up details are here.VitalPBX is perhaps the fastest-growing PBX offering based upon Asterisk with an installed presence in more than 100 countries worldwide. VitalPBX has generously provided a customized White Label version of Incredible PBX tailored for use with all Incredible PBX and VitalPBX custom applications. Follow this link for a free test drive!Special Thanks to Vitelity. Vitelity is now Voyant Communications and has halted new registrations for the time being. Our special thanks to Vitelity for their unwavering financial support over many years and to the many Nerd Vittles readers who continue to enjoy the benefits of their service offerings. We will keep everyone posted on further developments.- Many of our purchase links refer users to Amazon when we find their prices are competitive for the recommended products. Nerd Vittles receives a small referral fee from Amazon to help cover the costs of our blog. We never recommend particular products solely to generate Amazon commissions. However, when pricing is comparable or availability is favorable, we support Amazon because Amazon supports us. [↩]
Going Public with Incredible PBX 16 and VitalPBX 2.3.8

As part of our ongoing development efforts, we maintain about a dozen honeypot servers across the U.S. and Canada to monitor the latest adventures of the bad guys. Security becomes especially important for those wishing to live on the bleeding edge and deploy a cloud-based, public-facing VoIP server. Today we want to walk you through our latest suggestions to set up and secure a VitalPBX platform using just the built-in FirewallD, IPset, and Fail2Ban components. If you opt to deploy VitalPBX in the Cloud, a KVM-based VPS is absolutely essential in order to take advantage of the security mechanisms we will introduce today.
Here are 6 Key Security Features in today’s public design:
- SIP Registration Lockdown by FQDN
- Extension Lockdown by IP Address
- Trunk Provider Lockdown by IP Address
- Web Access Lockdown by WhiteList
- Disguised Ports for SIP and SSH Access
- 100,000+ VOIP Blacklist for FirewallD
Is it 100% safe? Nothing ever is. That’s what backups are for. 😉
FYI: The CentOS folks reintroduced a previous FirewallD bug on October 22 which (again) broke new VitalPBX installs. On October 23, the VitalPBX developers fixed the bug (again). There should be no problems with new installs. For previous installs, see this thread on the PIAF Forum for the fix.
Taking Incredible PBX with VitalPBX to the Cloud
Because Incredible PBX with VitalPBX 2.3.8 was originally distributed as an ISO, getting it installed in the cloud was a challenge. A few cloud providers let you bring your own ISO to install on their VPS platforms, but it was still a tedious process. So today we’re pleased to introduce a new install script that can be run on any CentOS 7 platform.
We have a few cloud providers that we recommend without reservation. Both Vultr and Digital Ocean provide referral credits to Nerd Vittles to support our VoIP project development efforts. We’ve used both of them for many years with no problems. Either of the platforms works well using the $5 a month option in your choice of cities. Just be sure to choose the CentOS 7 platform, not CentOS 8. For an extra buck, you can add automatic backups.
Our favorite bargain is now CrownCloud in Los Angeles. For $25 a year, they offer a KVM VPS that is ideal as a VoIP platform. And the offering includes a free snapshot image as well. As you might imagine, it’s very popular and goes Out of Stock from time to time so check back often. For our international friends, CrownCloud offers similar platforms at the same price point in both Germany and the Netherlands.
Installing Incredible PBX with VitalPBX on CentOS 7
Once your CentOS 7 platform is up and running, here’s how to install Incredible PBX for VitalPBX. Log into your server as root using SSH or Putty. Then issue these commands:
cd /root
passwd
yum -y install net-tools wget nano tar
wget http://incrediblepbx.com/incrediblepbx.sh
chmod +x incrediblepbx.sh
./incrediblepbx.sh
Incredible PBX Cloud Setup Recipe for VitalPBX
We think the easiest way to configure your new VitalPBX platform is to follow the simple steps outlined below. This will avoid your having to jump back and forth between tutorials to get all the pieces in place. When you’re finished, you’ll have a secure VitalPBX cloud platform. Don’t be intimidated by the number of steps. If you can handle slice-and-bake cookies, you can do this!
1. Point your browser to the IP address of your server. You’ll be prompted to set a password for admin access to the GUI. Fill in the blanks to proceed. Should you ever forget your admin password, here’s how as root user to force a reset on your next login from a browser:
mysql ombutel -e 'update ombu_settings set value = "yes" where name = "reset_pwd"'
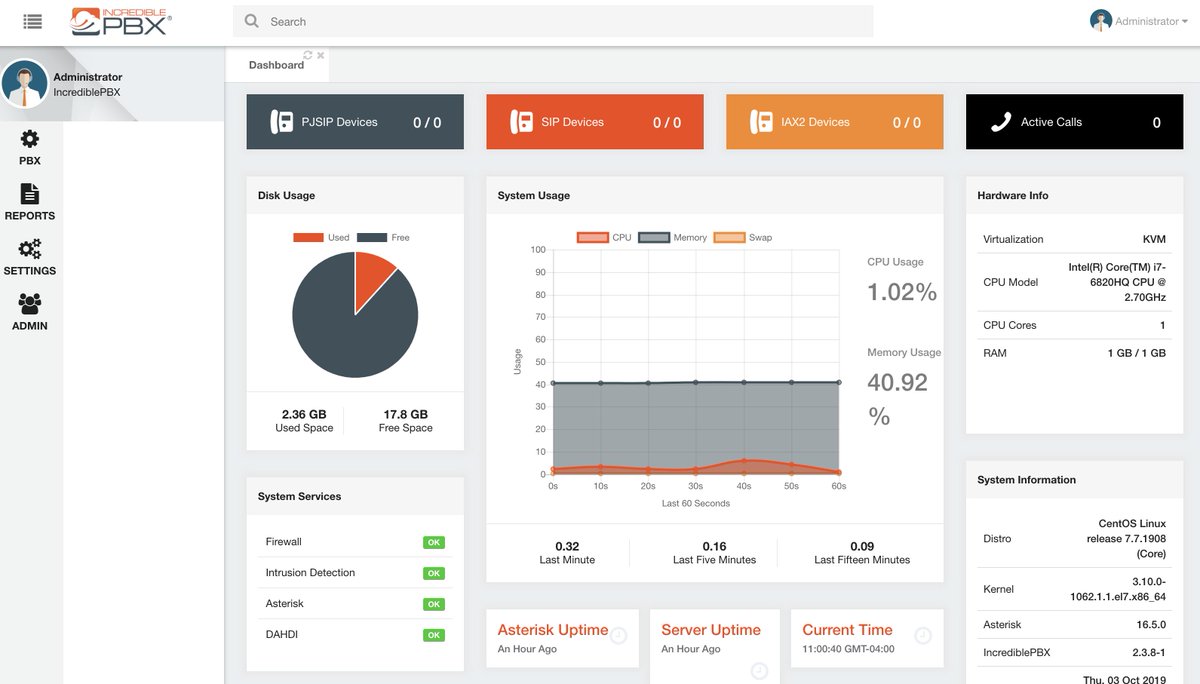
2. Register your server when prompted. The VitalPBX Dashboard will appear.
3. Decipher the public IP address of your desktop machine and any other PCs that will be used to manage your server.
4. From the VitalPBX Dashboard, navigate to Admin:Security:Firewall:WhiteList. Enter each of your IP addresses from step #3 and click Save button.
5. From the VitalPBX Dashboard, navigate to Admin:Security:Intrusion Detection:WhiteList. Enter each of your IP addresses from step #3 and click Save button.
6. Modify the default SSH port by logging in to your server as root and issuing the following commands using the year you were born in the first line replacing 2000:
sed -i 's|#Port 22|Port 2000|' /etc/ssh/sshd_config
systemctl restart sshd
7. From the VitalPBX Dashboard, navigate to Admin:Security:Firewall:Services. Change the SIP port to 5080 or some other port number not in the 5060-5065 range. Change the SSH port to a 4-digit number matching the year you were born. Click Save button. Monitor your SSH log for attempted breaches and change your port if necessary:
cat /var/log/secure | grep password
8. Verify that you can log back into your server with SSH using the new SSH port number you assigned in step #6: ssh -p 2000 root@server-IP-address
9. From the VitalPBX Dashboard, navigate to Admin:Security:Firewall:Rules. Delete the HTTP and HTTPS items by clicking the Trash icon beside each entry. In the GENERAL tab, set Block ICMP Requests to YES. Click Save button. This blocks web access to everyone except those you’ve whitelisted in step #4 above. If you ever lock yourself out of web access, login to your server as shown in step #8 and temporarily whitelist the public IP address desired. This gets removed automatically the next time you save your Firewall settings from within the VitalPBX GUI.
iptables -A vpbx_white_list -s 12.34.56.78 -j ACCEPT
10. Before we get too far along, let’s put another layer of security in place for your new server. We’re going to add the VoIP Blacklist which blocks about 100,000 bad guys from around the globe. We’ll also add a cron job to update the blacklist every night. Log back into your server as root and issue these commands to put the pieces in place and enable the VoIP Blacklist.
TIP: The cron job below is scheduled to run at 20 minutes after 3 a.m. Change the time to something else so we don’t all bombard the VoIP Blacklist site for downloads at exactly the same time every night.
cd /etc
wget http://incrediblepbx.com/voipbl-firewalld.tar.gz
tar zxvf voipbl-firewalld.tar.gz
rm -f voipbl-firewalld.tar.gz
echo "20 3 * * * root /etc/update-voipbl.sh >/dev/null 2>&1" >> /etc/crontab
/etc/update-voipbl.sh
11. From the VitalPBX Dashboard, navigate to Admin:Add-Ons:Add-Ons. Click Check Online button. Click Install button beside Custom Contexts. Click Install button beside Phonebooks. Click Install button beside Domotic.
12. From the VitalPBX Dashboard, navigate to Settings:Tech Settings:SIP Settings.
a. In the GENERAL tab, set the Bind Address port to 5080 or whatever port you chose in step #7 above. This is the port number together with the FQDN of your PBX (set in the next step) that any SIP phone will need to successfully register to an extension.
b. In the SECURITY tab, set Allow Guest to NO, set Auto-Domain to NO, set Allow External Domains to NO, and enter a fully-qualified domain name (FQDN) pointing to the IP address of your server in the Domain field. We cannot stress enough how important this FQDN is to the security of your cloud-based server. It limits SIP registrations to this FQDN only, and all SIP registration attempts by IP address are automatically blocked. Don’t skip this step!
c. In the NETWORK tab, enter the IP address of your server in External Address. Click the ADD button in the Local Networks section and enter the private IP addresses associated with your LAN and VPN, e.g. 192.168.0.0/255.255.0.0 and 10.0.0.0/255.240.0.0. Change NAT to Force,Comedia if your server is behind a NAT-based router.
d. In the CODECS tab, enable ULAW, ALAW, G722, and G729.
e. In the OTHERS tab, set SRV LOOKUPS to Yes. Click SAVE button.
13. From the VitalPBX Dashboard, navigate to Settings:Tech Settings:Profiles. Click Show All Profiles bar and choose Default PJSIP Profile. In the GENERAL tab, set the following entries to YES: Force rport, Rewrite Contact, Direct Media, RTP Symmetric, and Send Diversion Header. Click UPDATE button.
14. From the VitalPBX Dashboard, navigate to PBX:Applications:Parking. Click Show All Parking Profiles bar and choose Default. Change Code from 700 to 7000 and click Update button. This changes your Parking Lot extensions to the 7000 range so that 700 range can be used for Extensions, just like other versions of Incredible PBX.
15. Log out of your Dashboard and then log back in so that the menus get refreshed with the Custom Contexts addition.
16. From the VitalPBX Dashboard, navigate to PBX:Applications:Custom Contexts. Create the new sample IVR context with the following entries. Then click Save button.
- Description: IncrediblePBX
- Context: incrediblepbx
- Extension: s
- Priority: 1
- Destination: Terminate Call -> Hangup
17. From the VitalPBX Dashboard, navigate to PBX:Applications:Custom Applications. Create the custom application for the sample IVR and Save it.
- Code: 3366
- Name: DEMO
- Enabled: YES
- Destination: Custom Contexts -> IncrediblePBX
18. From the VitalPBX Dashboard, navigate to PBX:Applications:Conferences. Create the new sample conference application and Save it.
- Code: 2663
- Description: CONF
- Music on Hold When Empty: YES
- User Count: YES
- Announce Join/Leave: YES
- Announce Only User: YES
- User PIN: 1234
- Leader PIN: 4321
- Drop Silence: YES
19. If you didn’t read last week’s article on Custom Contexts, now would be a good time to do so. Here are the commands to put all those pieces in place on your new cloud-based server:
cd /
yum -y install dialog wget nano tar mailx
cp -p /etc/crontab /etc/crontab.bak
wget http://incrediblepbx.com/incrediblepbx-vitalpbx.tar.gz
tar zxvf incrediblepbx-vitalpbx.tar.gz
rm -f incrediblepbx-vitalpbx.tar.gz
chown asterisk:asterisk /var/lib/asterisk
cd /etc/asterisk/ombutel
echo "[cos-all-custom](+)" >> extensions__80-custom.conf
echo "exten => 412,1,NoOp(Voice Dialer)" >> extensions__80-custom.conf
echo " same => n,Answer" >> extensions__80-custom.conf
echo " same => n,Goto(incrediblepbx,1,1)" >> extensions__80-custom.conf
echo " same => n,Hangup()" >> extensions__80-custom.conf
echo "" >> extensions__80-custom.conf
echo "exten => 951,1,NoOp(News)" >> extensions__80-custom.conf
echo " same => n,Answer" >> extensions__80-custom.conf
echo " same => n,Goto(incrediblepbx,5,1)" >> extensions__80-custom.conf
echo " same => n,Hangup()" >> extensions__80-custom.conf
echo "" >> extensions__80-custom.conf
echo "exten => 947,1,NoOp(Weather by ZIP)" >> extensions__80-custom.conf
echo " same => n,Answer" >> extensions__80-custom.conf
echo " same => n,Goto(incrediblepbx,6,1)" >> extensions__80-custom.conf
echo " same => n,Hangup()" >> extensions__80-custom.conf
echo "" >> extensions__80-custom.conf
echo "exten => 3172,1,NoOp(DISA Voice Dialer)" >> extensions__80-custom.conf
echo " same => n,Answer" >> extensions__80-custom.conf
echo " same => n,Goto(incrediblepbx,9,1)" >> extensions__80-custom.conf
echo " same => n,Hangup()" >> extensions__80-custom.conf
echo "" >> extensions__80-custom.conf
echo "exten => 4747,1,NoOp(Wolfram Alpha)" >> extensions__80-custom.conf
echo " same => n,Answer" >> extensions__80-custom.conf
echo " same => n,Goto(incrediblepbx,3,1)" >> extensions__80-custom.conf
echo " same => n,Hangup()" >> extensions__80-custom.conf
echo "" >> extensions__80-custom.conf
echo "exten => 8463,1,NoOp(Time of Day)" >> extensions__80-custom.conf
echo " same => n,Answer" >> extensions__80-custom.conf
echo " same => n,Goto(incrediblepbx,*,1)" >> extensions__80-custom.conf
echo " same => n,Hangup()" >> extensions__80-custom.conf
echo "" >> extensions__80-custom.conf
echo "exten => 53669,1,NoOp(Lenny)" >> extensions__80-custom.conf
echo " same => n,Answer" >> extensions__80-custom.conf
echo " same => n,Goto(incrediblepbx,53669,1)" >> extensions__80-custom.conf
echo " same => n,Hangup()" >> extensions__80-custom.conf
echo "" >> extensions__80-custom.conf
echo "exten => 86329,1,NoOp(Today in History)" >> extensions__80-custom.conf
echo " same => n,Answer" >> extensions__80-custom.conf
echo " same => n,Goto(incrediblepbx,7,1)" >> extensions__80-custom.conf
echo " same => n,Hangup()" >> extensions__80-custom.conf
echo "" >> extensions__80-custom.conf
systemctl restart asterisk
chown asterisk:asterisk /var/lib/asterisk
chown asterisk:apache /var/lib/asterisk/agi-bin
20. Create new Extensions for your PBX by navigating to PBX:Extensions:Extensions. You only need to fill in the Extension, Name, and Email Address fields. We recommend extension numbers beginning with 701. If the extension will be used from a phone behind a NAT-based router, change the NAT entry to Force,Comedia. If the phone associated with the extension has a static IP address, enter it in the Permit field for an extra layer of security. In the VOICEMAIL tab, you will note that voicemail is enabled by default with a password matching the extension number. This forces the user to set the voicemail password the first time they access voicemail with their phone. We recommend the YES setting for Attach Voicemail, Ask Password, Say CID, Say Duration, and Envelope. Then press SAVE.
21. Once you have created your extensions, you can create Ring Groups to assign multiple extensions and external numbers to a designated number which will ring all of the extensions and external numbers in the ring group either simultaneously or serially. Navigate to PBX:Call Center:Ring Groups to set this up.
22. Trunk Setup. While we don’t recommend it, if you just want to play around with some toll-free calls using option 1 in the DEMO IVR to see how everything works, here’s a simple trunk setup to get you started. First, navigate to Settings:Telephony:Channel Groups and save a group named Default with no entries. Then navigate to PBX:External:Trunks:CUSTOM. Create TollFree trunk with this Dial String: SIP/1${EXTEN}@ovh.starcompartners.com. No other entries are required. Click SAVE and reload your dialplan. Finally, create an Outbound Route for these calls in PBX:External:Outbound Routes like this:
- Description: TollFree
- Trunks: TollFree
- Dial Pattern: Pattern=NXXNXXXXXX
Save your settings and reload the dialplan. You now can skip down to step #25. NOTE: You will not be able to receive outside calls or make calls to numbers other than toll-free ones.
Our preference is that you use our Platinum Provider, Skyetel, for your default trunk and DID because they offer quadruple redundancy so you never miss a call. Sign up for Skyetel service and take advantage of the Nerd Vittles specials which include a $10 credit to kick the tires. First, complete the Prequalification Form here. You then will be provided a link to the Skyetel site to complete your registration. Once you have registered on the Skyetel site and your account has been activated, open a support ticket and request the $10 credit for your account by referencing the Nerd Vittles special offer. Once you are satisfied with the service, fund your account as desired, and Skyetel will match your deposit of up to $250 simply by opening another ticket. That gets you up to $500 of half-price calling. You can also port in your DIDs at no cost for 60 days after funding your account. Credit is limited to one per person/company/address/location. Effective 10/1/2023, $25/month minimum spend required.
We don’t recommend trunk registrations with a publicly exposed server because it creates a potential attack vector for intruders and any intrusion would be undetectable from the PBX since the attacker could make unauthorized calls after registering directly with your SIP provider. For this reason, Skyetel does not use SIP registrations to make connections to your PBX. Instead, Skyetel utilizes Endpoint Groups to identify which servers can communicate with the Skyetel service. An Endpoint Group consists of a Name, an IP address, a UDP or TCP port for the connection, and a numerical Priority for the group. For incoming calls destined to your PBX, DIDs are associated with an Endpoint Group to route the calls to your PBX. For outgoing calls from your PBX, a matching Endpoint Group is required to authorize outbound calls through the Skyetel network. Thus, the first step in configuring the Skyetel side for use with your PBX is to set up an Endpoint Group. Here’s a typical setup for Incredible PBX 16 for VitalPBX:
- Name: IncrediblePBX
- Priority: 1
- IP Address: IncrediblePBX-Public-IP-Address
- Port: 5062
- Protocol: UDP
- Description: my.incrediblepbx.com
To receive incoming PSTN calls, you’ll need at least one DID. On the Skyetel site, you acquire DIDs under the Phone Numbers tab. You have the option of Porting in Existing Numbers (free for the first 60 days after you sign up for service and fund your account) or purchasing new ones under the Buy Phone Numbers menu option.
Once you have acquired one or more DIDs, navigate to the Local Numbers or Toll Free Numbers tab and specify the desired SIP Format and Endpoint Group for each DID. Add SMS/MMS and E911 support, if desired. Call Forwarding and Failover are also supported. That completes the VoIP setup on the Skyetel side. System Status is always available here.
If you’d like additional details on why we recommend Skyetel, see this Nerd Vittles article.
On the VitalPBX side, we need to add a new Skyetel trunk. Navigate to PBX:External:Trunks:PJSIP. The VitalPBX Trunk setup should look like the following for Skyetel. If you’d like to cut-and-paste the entries for the Match field, here you go:
52.41.52.34,52.8.201.128,52.60.138.31,50.17.48.216,35.156.192.164
[popup url="https://pbs.twimg.com/media/EGDhgsXWsAIbmw1?format=jpg&name=medium" width="1200″ height="700″]
 [/popup]
In Admin:Security:Firewall:WHITELIST, you’ll need to individually Add the five Skyetel IP addresses used in the Match field above and then SAVE your firewall settings.
Finally in PBX:Incoming Calls:CID Modifiers, add a new entry for Skyetel with Skip/Length = 2/10 and Save your settings.
23. Before your PBX can receive calls, you’ll need at least one Inbound Route. This tells the PBX how to route calls from one or more phone numbers (DIDs) that you own to a destination on your PBX, e.g. an extension, a ring group, an IVR, or custom context. Navigate to PBX:External:Inbound Routes to get started. Let’s set up a default inbound route for all the DIDs you have acquired from Skyetel in step #22. Fill in the fields shown below. Then SAVE.
- Routing Method: Default
- Description: Default Skyetel
- DID Pattern: [leave blank for ALL DIDs]
- CallerID Modifier: Skyetel
- Inbound Destination: Custom Contexts -> IncrediblePBX
24. Before you can make outbound calls from extensions on your PBX, you’ll need at least one Outbound Route. This tells the PBX which provider to use to complete calls dialed with a certain sequence of numbers. For example, you probably would want 10-digit numbers routed to Skyetel. And, if users dial 1 and then a 10-digit number, you’d probably want those calls routed to Skyetel as well. To create this outbound route, navigate to PBX:External:Outbound Routes. Fill in the fields shown below. Click ADD to add a second Dial Pattern. Click SAVE and Reload Dialplan when finished.
NOTE: While you can "spoof" any CallerID number here, it is only legal to assign CallerID numbers that you actually own. Most carriers do not forward CallerID names to destinations regardless of what you enter here. The CallerID name and number will be shown in your CDR logs: Reports:CDR Reports:CDR.
- Description: Skyetel-OUT
- Trunks: Skyetel
- Outbound CID: [Your Name and CallerID Number]
- Overwrite CID: YES
- Dial Pattern: Prepend=1 Pattern=NXXNXXXXXX
- Dial Pattern: Pattern=1NXXNXXXXXX
25. For the time being, we strongly recommend disabling IPv6 simply because we don’t have the necessary confidence that all of the security mechanisms are in place for IPv6. Here’s how on the CentOS 7 platform:
echo "net.ipv6.conf.all.disable_ipv6 = 1" >> /etc/sysctl.conf
echo "net.ipv6.conf.default.disable_ipv6 = 1" >> /etc/sysctl.conf
sysctl -p
sed -i 's|#AddressFamily any|AddressFamily inet|' /etc/ssh/sshd_config
systemctl restart sshd
sed -i 's|inet_protocols = all|inet_protocols = ipv4|' /etc/postfix/main.cf
systemctl restart postfix
26. Outbound email functionality is essential on your PBX. You’ll need it to be alerted to potential issues with VitalPBX, and you’ll need it for delivery of voicemail messages to users. There are a couple ways to implement it, and both are easy. If you want to use the native capabilities of Postfix to send the emails assuming your provider is not blocking outbound SMTP mail from downstream servers, then follow these steps:
- Insert your FQDN from step #12b into /etc/hosts immediately after 127.0.0.1
- Replace the contents of /etc/hostname with the same FQDN
- Issue the following command using your actual FQDN: hostname FQDN
- Sending yourself an email: echo "test" | mail -s test you@your-domain.com
If you don’t receive the test email message, then the easiest solution is to configure PostFix as an SMTP Relay using a Gmail account. You can do this easily from within the VitalPBX GUI. Navigate to Admin:System Settings:Email Settings and click the External Mail Server tab. Be sure that Gmail is selected and enter your Gmail name and password in the fields provided. Save your settings and send yourself an email using the field provided.
27. Once you get outbound email flowing, jump down to the next section and obtain IBM TTS and STT passwords. Now set up Voicemail Transcription with Email Message Delivery:
a. After logging into your VitalPBX server as root using SSH/Putty:
cd /tmp
mkdir sendmail
cd sendmail
wget http://incrediblepbx.com/sendmailibm-vitalpbx.tar.gz
tar zxvf sendmailibm-vitalpbx.tar.gz
rm -f sendmailibm-vitalpbx.tar.gz
mv usr/sbin/sendmailibm /usr/sbin
cd /etc/asterisk/ombutel
echo "[general](+)" > voicemail__60-1-transcript.conf
echo "; format=wav|wav49|gsm" >> voicemail__60-1-transcript.conf
echo "mailcmd=/usr/sbin/sendmailibm" >> voicemail__60-1-transcript.conf
chown apache:apache voicemail__60-1-transcript.conf
rm -rf /tmp/sendmail
b. Restart Asterisk core services: asterisk -rx "core reload"
c. Edit /usr/sbin/sendmailibm and insert your IBM Watson STT APIkey on line 23. Change the language on line 31 if you don’t want en-US. Then save the file.
d. Log back into the VitalPBX GUI and configure the extensions desired for email delivery of voicemail. For each extension in PBX:Extensions:General, enter an Email Address for delivery of voicemails. In PBX:Extensions:Voicemail, verify the VM settings from step #20.
28. We hesitate to even mention (free) Festival TTS as a text-to-speech alternative because it is so bad compared to IBM TTS. But for those that like always free, here’s how to install it. Once installed, you can issue Festival commands in your dialplan using the keyword Festival followed by the text to be spoken in parentheses.
yum -y install festival
echo "[general]" > /etc/asterisk/festival.conf
asterisk -rx "dialplan reload"
festival_server &
systemctl restart asterisk
echo "/usr/bin/festival_server &" >> /etc/rc.d/rc.local
29. If you’d like to test the performance of your cloud-based server, here’s how to deploy and run SpeedTest:
cd /root
wget -O speedtest-cli https://raw.githubusercontent.com/sivel/speedtest-cli/master/speedtest.py
chmod +x speedtest-cli
/root/speedtest-cli
30. Associating CallerID Names (CNAM) with inbound calls for display on SIP phones and in the CDR logs is an often-requested PBX feature. There are a few ways to do it. First, for less than a penny a call, you can activate the feature with your DIDs in the Skyetel Dashboard. Or, for about half the cost, you can acquire an OpenCNAM account and activate it in VitalPBX by navigating to PBX:Incoming Calls:CID Lookup. Choose OpenCNAM as the Source and enter your credentials. Then SAVE your settings and reload the dialplan. Then, for each of your Inbound Routes, add OpenCNAM as the CID Lookup source and Update your configuration.
31. Unless you want a full-time job monitoring the size of your logs, remove the fail2ban Asterisk log which grows every 5 seconds. Navigate to Settings:PBX Settings:Log Files and click the Trash icon beside fail2ban. It’s probably a good idea to turn OFF the Notice option for the full log while you’re at it. Then SAVE your changes.
32. Before you do anything else, navigate to Admin:Admin:Backup & Restore, configure and run a Full Backup, and then download the file and keep it in a safe place. Be advised that Backup/Restore doesn’t restore Add-Ons, /var/lib/asterisk/agi-bin, custom contexts (extensions__80*.conf) in /etc/asterisk/ombutel, custom MySQL databases (mysqldump -u root yourDB > yourDB.sql), custom and lenny sound directories in /var/lib/asterisk/sounds, phpMyAdmin, /usr/local/sbin, and /etc/crontab.
Obtaining IBM Watson TTS and STT Credentials
Incredible PBX uses IBM Watson® for TTS and STT support. This Nerd Vittles tutorial will walk you through getting your IBM account set up and obtaining both your TTS and STT credentials. Be sure to write down BOTH sets of credentials which you’ll need in a minute. For home and SOHO use, IBM access and services generally is FREE even though you must provide a credit card when signing up. Details are provided when you sign up. If you ever forget your passwords, you can retrieve them by navigating to Resource List:Services:TTS or STT:View Full Details:Show Credentials.
Obtaining Wolfram Alpha Credentials
When people ask what exactly Wolfram Alpha is, our favorite answer was provided by Ed Borasky.
It’s an almanac driven by a supercomputer.
That’s an understatement. It’s a bit like calling Google Search a topic index. Unlike Google which provides links to web sites that can provide answers to queries, Wolfram Alpha provides specific and detailed answers to almost any question. Here are a few examples (with descriptions of the functionality) to help you wrap your head around the breadth of information. For a complete list of what’s available, visit Wolfram Alpha’s Examples by Topic. Type a sample query here. Some of our favorites include:
Weather in Charleston South Carolina
Weather forecast for Washington D.C.
Next solar eclipse
Otis Redding
Define politician
Who won the 1969 Superbowl? (Broadway Joe)
What planes are flying overhead now? (flying over your server’s location)
Ham and cheese sandwich (nutritional information)
Holidays 2012 (summary of all holidays for 2012 with dates and DOW)
Medical University of South Carolina (history of MUSC)
Star Trek (show history, air dates, number of episodes, and more)
Apollo 11 (everything you ever wanted to know)
Cheapest Toaster (brand and price)
Battle of Gettysburg (sad day 🙂 )
Daylight Savings Time 2012 (date ranges and how to set your clocks)
Tablets by Motorola (pricing, models, and specs from Best Buy)
Doughnut (you don’t wanna know)
Snickers bar (ditto)
Weather (local weather at your server’s location)
Before you can actually use our TTS implementation of Wolfram Alpha, you’ll need to obtain a free Wolfram Alpha account. As you can imagine, there have to be some rules when you’re using someone else’s supercomputer for free. So here’s the deal. It’s free for non-commercial, personal use once you sign up for an account. But you’re limited to 2,000 queries a month which works out to almost 70 queries a day. Every query requires your personal application ID, and that’s how Wolfram Alpha keeps track of your queries. Considering the price, we think you’ll find the query limitation generous compared to other web resources.
To get started, sign up for a free Wolfram Alpha API account. Just provide your email address and set up a password. It takes less than a minute. Log into your account and click on Get An App ID. Make up a name for your application and write down (and keep secret) your APP-ID code. That’s all there is to getting set up with Wolfram Alpha. If you want to explore costs for commercial use, there are links to let you get more information.
Configuring Your Incredible PBX Credentials
In addition to your Wolfram Alpha APPID, there are two sets of IBM credentials to plug into the Asterisk AGI scripts. Keep in mind that there are different passwords for the IBM Watson TTS and STT services. The TTS credentials will look like the following: $IBM_password. The STT credentials look like this: $API_PASSWORD. Don’t mix them up. The username for both TTS and STT is now the single word: apikey
All of the scripts requiring credentials are located in /var/lib/asterisk/agi-bin so switch to that directory after logging into your server as root. Edit each of the following files and insert your TTS credentials in the variables already provided: nv-today2.php, ibmtts.php, and ibmtts2.php. Edit each of the following files and insert your STT credentials in the variables already provided: getquery.sh, getnumber.sh, and getnumber2.sh. Finally, edit 4747 and insert your Wolfram Alpha APPID.
If you ever want to learn how to develop applications for Asterisk, these scripts coupled with the dialplan code included in /etc/asterisk/ombutel/extensions__80-1-incrediblepbx.conf will point you in the right direction with easy to follow examples.
Managing the AsteriDex SQLite3 Database
We’ve alluded to the AsteriDex database in a couple of VitalPBX articles but never mentioned how to access it. Using a browser, point it to http://server-ip/asteridex4. You can add, edit, display, and delete entries from there. Before you can make changes in the database, issue the following command after logging into your server as root:
chown asterisk:apache /var/lib/asterisk/agi-bin
Taking Incredible PBX for a Test Drive
You can take Incredible PBX for VitalPBX on a test drive in two ways. You can call our server, and then you can try things out on your own server and compare the results. Call our IVR by dialing 1-843-606-0555. For our international friends, you can use the following SIP URI for a free call: 10159591015959@atlanta.voip.ms. For tips on setting up your own secure, hybrid SIP URI with VitalPBX, see our original tutorial. The FreePBX® setup is virtually identical except for the location of the custom SIP setting for match_auth_username=yes. On a VitalPBX server, you will enter it here: Settings:Technology Settings:SIP Settings:CUSTOM.
With Allison’s Demo IVR, you can choose from the following options:
- 0. Chat with Operator — connects to extension 701
- 1. AsteriDex Voice Dialer (412) – say "Delta Airlines" or "American Airlines" to connect
- 2. Conferencing (2663) – log in using 1234 as the conference PIN
- 3. Wolfram Alpha Almanac (4747) – say "What planes are flying overhead now?"
- 4. Lenny (53669) – The Telemarketer’s Worst Nightmare
- 5. Today’s News Headlines (951) — courtesy of Yahoo! News
- 6. Weather by ZIP Code (947) – enter any 5-digit ZIP code for today’s weather
- 7. Today in History (86329) — courtesy of OnThisDay.com
- 8. Call Extension 701 — on your local PBX
- 9. DISA Voice Dialer (3172) — say any 10-digit number to be connected
- *. Current TIME and Date (8463) — courtesy of VitalPBX
CAUTION: We have intentionally disabled outbound calls using Option #9 and redirected callers to Lenny. The reason is that an unscrupulous caller could easily run up your phone bill by entering a number with expensive destination charges. If you wish to enable the feature, despite the risks, you can edit extensions__80-1-incrediblepbx.conf and make the change.
You can call your own IVR in a few ways. From an internal VitalPBX phone, dial D-E-M-O (2663) to be connected. Or simply dial the number of the DID you routed to the Incredible PBX Custom Context. Local users can also dial the individual feature codes shown in parentheses above. Be sure that you heed AND test the CAUTION documented above.
Originally published: Monday, October 21, 2019
Got Friends? 7 Countries Have Never Visited Nerd Vittles. 2018 Is Calling! https://t.co/wMfmlhAr16 #asterisk #freepbx #wazo #issabel #IncrediblePBX #3CX pic.twitter.com/kAmAEnwVIw
— Ward Mundy (@NerdUno) January 9, 2018
Need help with Asterisk? Visit the VoIP-info Forum.
Special Thanks to Our Generous Sponsors
FULL DISCLOSURE: ClearlyIP, Skyetel, Vitelity, DigitalOcean, Vultr, VoIP.ms, 3CX, Sangoma, TelecomsXchange and VitalPBX have provided financial support to Nerd Vittles and our open source projects through advertising, referral revenue, and/or merchandise. As an Amazon Associate and Best Buy Affiliate, we also earn from qualifying purchases. We’ve chosen these providers not the other way around. Our decisions are based upon their corporate reputation and the quality of their offerings and pricing. Our recommendations regarding technology are reached without regard to financial compensation except in situations in which comparable products at comparable pricing are available from multiple sources. In this limited case, we support our sponsors because our sponsors support us.
BOGO Bonaza: Enjoy state-of-the-art VoIP service with a $10 credit and half-price SIP service on up to $500 of Skyetel trunking with free number porting when you fund your Skyetel account. No limits on number of simultaneous calls. Quadruple data center redundancy. $25 monthly minimum spend required. Tutorial and sign up details are here.
![]() The lynchpin of Incredible PBX 2020 and beyond is ClearlyIP components which bring management of FreePBX modules and SIP phone integration to a level never before available with any other Asterisk distribution. And now you can configure and reconfigure your new Incredible PBX phones from the convenience of the Incredible PBX GUI.
The lynchpin of Incredible PBX 2020 and beyond is ClearlyIP components which bring management of FreePBX modules and SIP phone integration to a level never before available with any other Asterisk distribution. And now you can configure and reconfigure your new Incredible PBX phones from the convenience of the Incredible PBX GUI.
VitalPBX is perhaps the fastest-growing PBX offering based upon Asterisk with an installed presence in more than 100 countries worldwide. VitalPBX has generously provided a customized White Label version of Incredible PBX tailored for use with all Incredible PBX and VitalPBX custom applications. Follow this link for a free test drive!
Special Thanks to Vitelity. Vitelity is now Voyant Communications and has halted new registrations for the time being. Our special thanks to Vitelity for their unwavering financial support over many years and to the many Nerd Vittles readers who continue to enjoy the benefits of their service offerings. We will keep everyone posted on further developments.

Introducing Incredible PBX Custom Contexts for VitalPBX
Last week we introduced Incredible PBX for VitalPBX 2.3.8 to the Asterisk® community. And today we’re pleased to present the first of many Incredible PBX® add-ons, Allison’s DEMO IVR featuring text-to-speech and voice recognition utilities that take your Asterisk PBX to a whole new level. When we’re finished, you’ll have Headlines News, Weather Reports, Today in History, Wolfram Alpha, Voice Recognition apps to call people in your AsteriDex phonebook and to call anyone else by simply speaking the number to dial, and good ol’ Lenny, the Telemarketer’s Worst Nightmare. We’ll utilize a single custom context to harness the power of 11 Asterisk utilities using an easily configurable Interactive Voice Response (IVR) interface. Last week, VitalPBX released a new Custom Contexts module that has no limitations on the number of contexts you can create for free. But, for today, we’ll do it the old-fashioned way just to demonstrate what’s possible. And it’s pure GPL code.
Prerequisites. Before deploying the Incredible PBX components, you’ll need to install VitalPBX on a platform of your choice behind a hardware-based firewall. You’ll need to add an extension 701 where you can receive calls on a softphone or SIP phone, and you’ll need at least one SIP trunk to make and receive calls from those not connected to your PBX. The Outbound Route for this trunk must support 10 and 11-digit calls in the following formats: NXXNXXXXXX and 1NXXNXXXXXX. You’ll also need to install the Custom Contexts add-on to VitalPBX and then configure the (free) Custom Context for use by the Incredible PBX add-ons. The Inbound Route for at least one of your trunks must send calls to this new Incredible PBX Custom Context. Our previous tutorial will walk you through the setup steps for all of this.
In the VitalPBX GUI, navigate to PBX:Applications:Custom Applications and add a new 3366 (D-E-M-O) application for the Incredible PBX Demo IVR. Make it look like the following. Save your entries and Reload your dialplan when you’re finished.
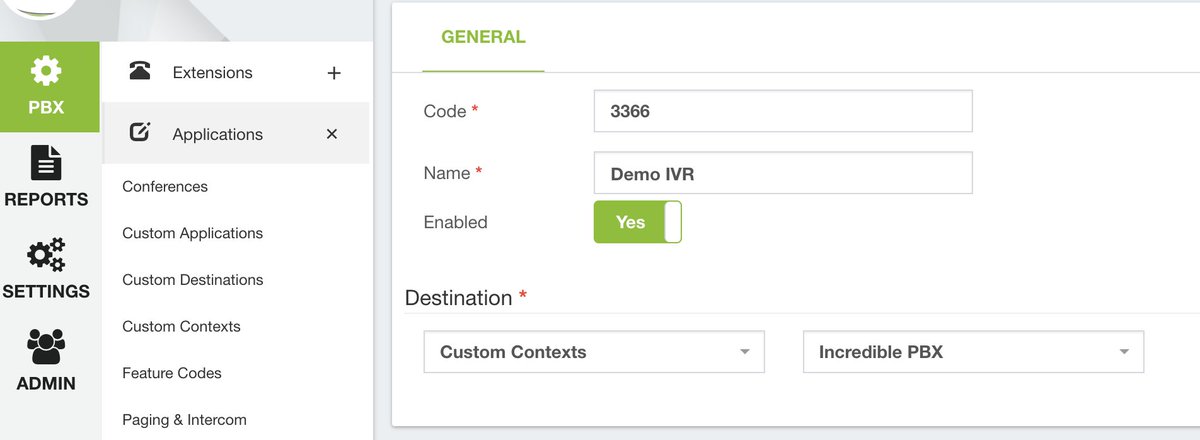
In the VitalPBX GUI, navigate to PBX:Applications:Conference and add a 2663 (C-O-N-F) conference that looks like the following using PINs of your choice for participants and the conference leader. Save your entries and Reload your dialplan when you’re finished.
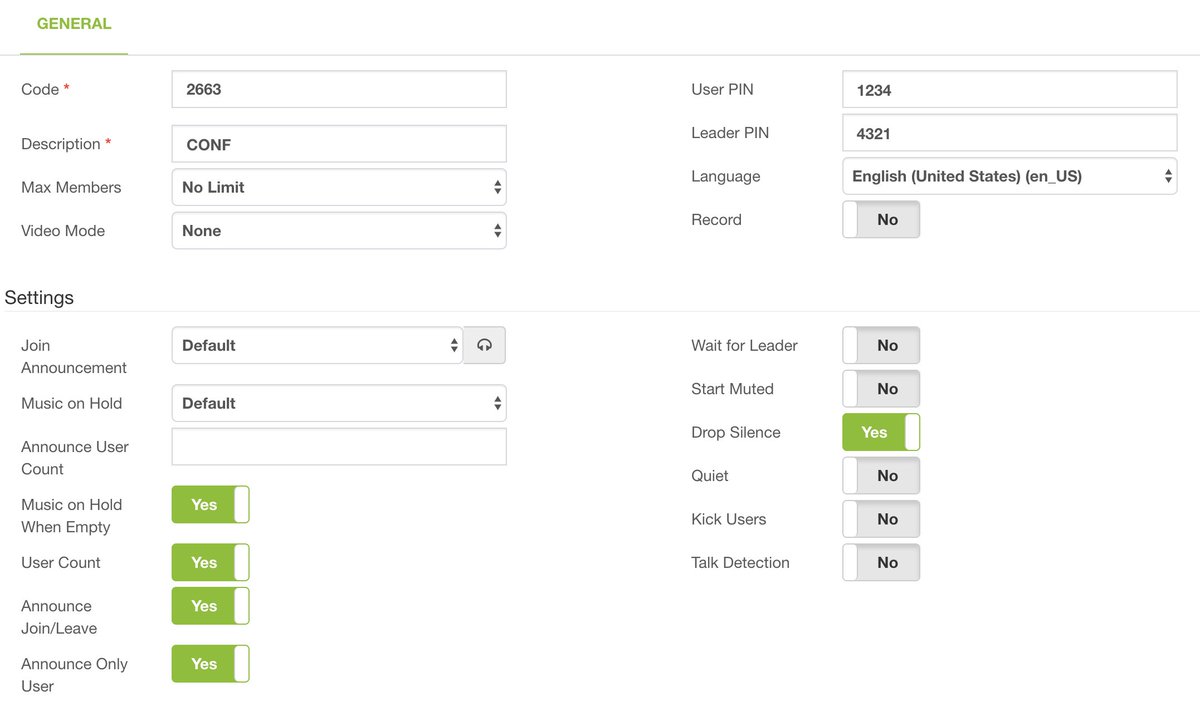
Finally, navigate to Settings:Technology Settings:SIP Settings:OTHERS and set SRV Lookups to YES. Save your settings and reload the dialplan.
Obtaining IBM Watson TTS and STT Credentials
Incredible PBX uses IBM Watson® for TTS and STT support. This Nerd Vittles tutorial will walk you through getting your IBM account set up and obtaining both your TTS and STT credentials. Be sure to write down BOTH sets of credentials which you’ll need in a minute. For home and SOHO use, IBM access and services generally is FREE even though you must provide a credit card when signing up. Details are provided when you sign up. If you ever forget your passwords, you can retrieve them by navigating to Watson:ExistingServices:TTS or STT:View Full Details:Show Credentials.
Obtaining Wolfram Alpha Credentials
When people ask what exactly Wolfram Alpha is, our favorite answer was provided by Ed Borasky.
It’s an almanac driven by a supercomputer.
That’s an understatement. It’s a bit like calling Google Search a topic index. Unlike Google which provides links to web sites that can provide answers to queries, Wolfram Alpha provides specific and detailed answers to almost any question. Here are a few examples (with descriptions of the functionality) to help you wrap your head around the breadth of information. For a complete list of what’s available, visit Wolfram Alpha’s Examples by Topic. Type a sample query here. Some of our favorites include:
Weather in Charleston South Carolina
Weather forecast for Washington D.C.
Next solar eclipse
Otis Redding
Define politician
Who won the 1969 Superbowl? (Broadway Joe)
What planes are flying overhead now? (flying over your server’s location)
Ham and cheese sandwich (nutritional information)
Holidays 2012 (summary of all holidays for 2012 with dates and DOW)
Medical University of South Carolina (history of MUSC)
Star Trek (show history, air dates, number of episodes, and more)
Apollo 11 (everything you ever wanted to know)
Cheapest Toaster (brand and price)
Battle of Gettysburg (sad day 🙂 )
Daylight Savings Time 2012 (date ranges and how to set your clocks)
Tablets by Motorola (pricing, models, and specs from Best Buy)
Doughnut (you don’t wanna know)
Snickers bar (ditto)
Weather (local weather at your server’s location)
Before you can actually use our TTS implementation of Wolfram Alpha, you’ll need to obtain a free Wolfram Alpha account. As you can imagine, there have to be some rules when you’re using someone else’s supercomputer for free. So here’s the deal. It’s free for non-commercial, personal use once you sign up for an account. But you’re limited to 2,000 queries a month which works out to almost 70 queries a day. Every query requires your personal application ID, and that’s how Wolfram Alpha keeps track of your queries. Considering the price, we think you’ll find the query limitation generous compared to other web resources.
To get started, sign up for a free Wolfram Alpha API account. Just provide your email address and set up a password. It takes less than a minute. Log into your account and click on Get An App ID. Make up a name for your application and write down (and keep secret) your APP-ID code. That’s all there is to getting set up with Wolfram Alpha. If you want to explore costs for commercial use, there are links to let you get more information.
Installing Incredible PBX Components
To install the Incredible PBX components on your VitalPBX server, login to your server as root and issue the following commands:
# on VitalPBX 3.x servers only, issue next 2 commands:
ln -s /etc/asterisk/vitalpbx /etc/asterisk/ombutel
ln -s /usr/share/vitalpbx /usr/share/ombutel

cd /
yum -y install dialog wget nano tar mailx
cp -p /etc/crontab /etc/crontab.bak
wget http://incrediblepbx.com/incrediblepbx-vitalpbx.tar.gz
tar zxvf incrediblepbx-vitalpbx.tar.gz
rm -f incrediblepbx-vitalpbx.tar.gz
chown asterisk:asterisk /var/lib/asterisk
chown asterisk:apache /var/lib/asterisk/agi-bin
/etc/init.d/asterisk restart
The GPL3 license for all of the Incredible PBX components is available for review in /root/COPYING.
Configuring Your Incredible PBX Credentials
In addition to your Wolfram Alpha APPID, there are two sets of IBM credentials to plug into the Asterisk AGI scripts. Keep in mind that there are different passwords for the IBM Watson TTS and STT services. The TTS credentials will look like the following: $IBM_password. The STT credentials look like this: $API_PASSWORD. Don’t mix them up. The username for both TTS and STT is now the single word: apikey
All of the scripts requiring credentials are located in /var/lib/asterisk/agi-bin so switch to that directory after logging into your server as root. Edit each of the following files and insert your TTS credentials in the variables already provided: nv-today2.php, ibmtts.php, and ibmtts2.php. Edit each of the following files and insert your STT credentials in the variables already provided: getquery.sh, getnumber.sh, and getnumber2.sh. Finally, edit 4747 and insert your Wolfram Alpha APPID.
If you ever want to learn how to develop applications for Asterisk, these scripts coupled with the dialplan code included in /etc/asterisk/ombutel/extensions__80-1-incrediblepbx.conf will point you in the right direction with easy to follow examples.
Using Asteridex with VitalPBX
AsteriDex is a web-based dialer and address book application for Asterisk and VitalPBX. It lets you store and manage phone numbers of all your friends and business associates in an easy-to-use SQLite3 database. You simply call up the application with your favorite web browser: http://vitalpbx-ip-address/asteridex4/. When you click on a contact that you wish to call, AsteriDex first calls you at extension 701, and then AsteriDex connects you to your contact through another outbound call made using your default outbound trunk that supports numbers in the 1NXXNXXXXXX format.
Before AsteriDex Click-to-Call will work, you must authorize AsteriDex to access Asterisk from your browser. After logging into your server as root, edit the following file in /etc/asterisk/ombutel: manager__50-ombutel-user.conf. For each browser IP address you wish to authorize, add an entry like the following immediately below the existing permit entry in the file. Then reload the Asterisk dialplan: asterisk -rx "dialplan reload"
permit=12.34.56.78
permit=192.168.0.0/255.255.255.0
Taking Incredible PBX for a Test Drive
You can take Incredible PBX for VitalPBX on a test drive in two ways. You can call our server, and then you can try things out on your own server and compare the results. Call our IVR by dialing 1-843-606-0555. For our international friends, you can use the following SIP URI for a free call: 10159591015959@atlanta.voip.ms. For tips on setting up your own secure, hybrid SIP URI with VitalPBX, see our original tutorial. The FreePBX® setup is virtually identical except for the location of the custom SIP setting for match_auth_username=yes. On a VitalPBX server, you will enter it here: Settings:Technology Settings:SIP Settings:CUSTOM.
With Allison’s Demo IVR, you can choose from the following options:
- 0. Chat with Operator — connects to extension 701
- 1. AsteriDex Voice Dialer – say "Delta Airlines" or "American Airlines" to connect
- 2. Conferencing – log in using 1234 as the conference PIN
- 3. Wolfram Alpha Almanac – say "What planes are flying overhead now?"
- 4. Lenny – The Telemarketer’s Worst Nightmare
- 5. Today’s News Headlines — courtesy of Yahoo! News
- 6. Weather by ZIP Code – enter any 5-digit ZIP code for today’s weather
- 7. Today in History — courtesy of OnThisDay.com
- 8. Chat with Nerd Uno — courtesy of SIP URI connection to 3CX iPhone Client
- 9. DISA Voice Dialer — say any 10-digit number to be connected
- *. Current Date and Time — courtesy of VitalPBX
CAUTION: We have intentionally disabled outbound calls using Option #9 and redirected callers to Lenny. The reason is that an unscrupulous caller could easily run up your phone bill by entering a number with expensive destination charges. If you wish to enable the feature, despite the risks, you can edit extensions__80-1-incrediblepbx.conf and make the change.
You can call your own IVR in two ways. From an internal VitalPBX phone, dial D-E-M-O (2663) to be connected. Or simply dial the number of the DID you routed to the Incredible PBX Custom Context. Either way, you should be connected to the Incredible PBX IVR running on your VitalPBX server. Be sure that you heed AND test the CAUTION documented above.
Using Incredible PBX Features Independently of IVR
Now that we have some of the Incredible PBX applications in place using the IVR, there may be situations in which you want callers to be able to access the individual components without navigating through the IVR. For example, you may want to let users contact LENNY (53669) directly. There are three steps to do this: (1) add a new Custom Context for the feature desired, (2) add a new Custom Application with the number to associate with the application, and (3) add a snippet of dialplan code to extensions__80-custom.conf redirecting the Custom Context to the matching IVR priority. Then reload Asterisk dialplan.
For the new Lenny Custom Context, here are the entries:
Description: Lenny
Context: lenny
Extension: s
Priority: 1
Destination: Terminate Call -> Hangup
For the new Lenny Custom Application, here are the entries:
Code: 53669
Name: Lenny
Enabled: Yes
Destination:  Custom Contexts -> Lenny
In /etc/asterisk/ombutel/extensions__80-custom.conf, add the following dialplan code and reload the Asterisk dialplan: asterisk -rx "dialplan reload"
[lenny]
exten => s,1,NoOp(Lenny)
 same => n,Answer
 same => n,Goto(incrediblepbx,53669,1)
Let’s walk through one more example to be sure you get the hang of it. To mimic the News Headlines (951) setup on other Incredible PBX platforms, here are the steps:
For the News Custom Context, here are the entries:
Description: News
Context: news
Extension: s
Priority: 1
Destination: Terminate Call -> Hangup
For the News Custom Application, here are the entries:
Code: 951
Name: News
Enabled: Yes
Destination:  Custom Contexts -> News
In /etc/asterisk/ombutel/extensions__80-custom.conf, add the following dialplan code and reload the Asterisk dialplan: asterisk -rx "dialplan reload"
[news]
exten => s,1,NoOp(News)
 same => n,Answer
 same => n,Goto(incrediblepbx,5,1)
Coming Events. We still plan to address security for those that want to deploy this terrific platform in the cloud. And we’re already working on a new version of CallerID Superfecta for VitalPBX that will let you use OpenCNAM to associate names with CallerID numbers. You can follow our progress and offer suggestions on the PIAF Forum.
Originally published: Monday, October 14, 2019
Got Friends? 7 Countries Have Never Visited Nerd Vittles. 2018 Is Calling! https://t.co/wMfmlhAr16 #asterisk #freepbx #wazo #issabel #IncrediblePBX #3CX pic.twitter.com/kAmAEnwVIw
— Ward Mundy (@NerdUno) January 9, 2018
Need help with Asterisk? Visit the VoIP-info Forum.
Special Thanks to Our Generous Sponsors
FULL DISCLOSURE: ClearlyIP, Skyetel, Vitelity, DigitalOcean, Vultr, VoIP.ms, 3CX, Sangoma, TelecomsXchange and VitalPBX have provided financial support to Nerd Vittles and our open source projects through advertising, referral revenue, and/or merchandise. As an Amazon Associate and Best Buy Affiliate, we also earn from qualifying purchases. We’ve chosen these providers not the other way around. Our decisions are based upon their corporate reputation and the quality of their offerings and pricing. Our recommendations regarding technology are reached without regard to financial compensation except in situations in which comparable products at comparable pricing are available from multiple sources. In this limited case, we support our sponsors because our sponsors support us.
BOGO Bonaza: Enjoy state-of-the-art VoIP service with a $10 credit and half-price SIP service on up to $500 of Skyetel trunking with free number porting when you fund your Skyetel account. No limits on number of simultaneous calls. Quadruple data center redundancy. $25 monthly minimum spend required. Tutorial and sign up details are here.
![]() The lynchpin of Incredible PBX 2020 and beyond is ClearlyIP components which bring management of FreePBX modules and SIP phone integration to a level never before available with any other Asterisk distribution. And now you can configure and reconfigure your new Incredible PBX phones from the convenience of the Incredible PBX GUI.
The lynchpin of Incredible PBX 2020 and beyond is ClearlyIP components which bring management of FreePBX modules and SIP phone integration to a level never before available with any other Asterisk distribution. And now you can configure and reconfigure your new Incredible PBX phones from the convenience of the Incredible PBX GUI.
VitalPBX is perhaps the fastest-growing PBX offering based upon Asterisk with an installed presence in more than 100 countries worldwide. VitalPBX has generously provided a customized White Label version of Incredible PBX tailored for use with all Incredible PBX and VitalPBX custom applications. Follow this link for a free test drive!
Special Thanks to Vitelity. Vitelity is now Voyant Communications and has halted new registrations for the time being. Our special thanks to Vitelity for their unwavering financial support over many years and to the many Nerd Vittles readers who continue to enjoy the benefits of their service offerings. We will keep everyone posted on further developments.
Introducing Incredible PBX 16 with VitalPBX 2.3.8
On the heels of the mass exodus of talent from the FreePBX® team at Sangoma® and as Oktoberfest comes to a close, we couldn’t think of a better time to introduce a new state-of-the-art VoIP project. We are thrilled to be broadening our offerings today with the introduction of a white-labeled version of Incredible PBX®. Meet Incredible PBX 16 featuring VitalPBX 2.3.8, a terrific alternative to FreePBX with the latest Asterisk® 16 engine. We’re also delighted to welcome VitalPBX as a Platinum Sponsor of Nerd Vittles and our open source and freeware projects which now include both VitalPBX and PIAF5 from 3CX. Today, we’ll get your new platform up and running. And, in coming weeks, we have a limitless supply of goodies for this exciting new platform to share with the VoIP community.
Why freeware and not open source? The answer is that, like the FreePBX Distro, the VitalPBX folks are trying to earn a living through sale of an impressive collection of commercial modules. The silver lining for you is a (free) Unified Communications Platform with the slickest user interface in the VoIP industry, and it includes support for PJsip, DPMA and Digium phones, XMPP chat, video conferencing, WebRTC, G.729, and our favorite, Custom Contexts. If you love Features, this platform has no equal:
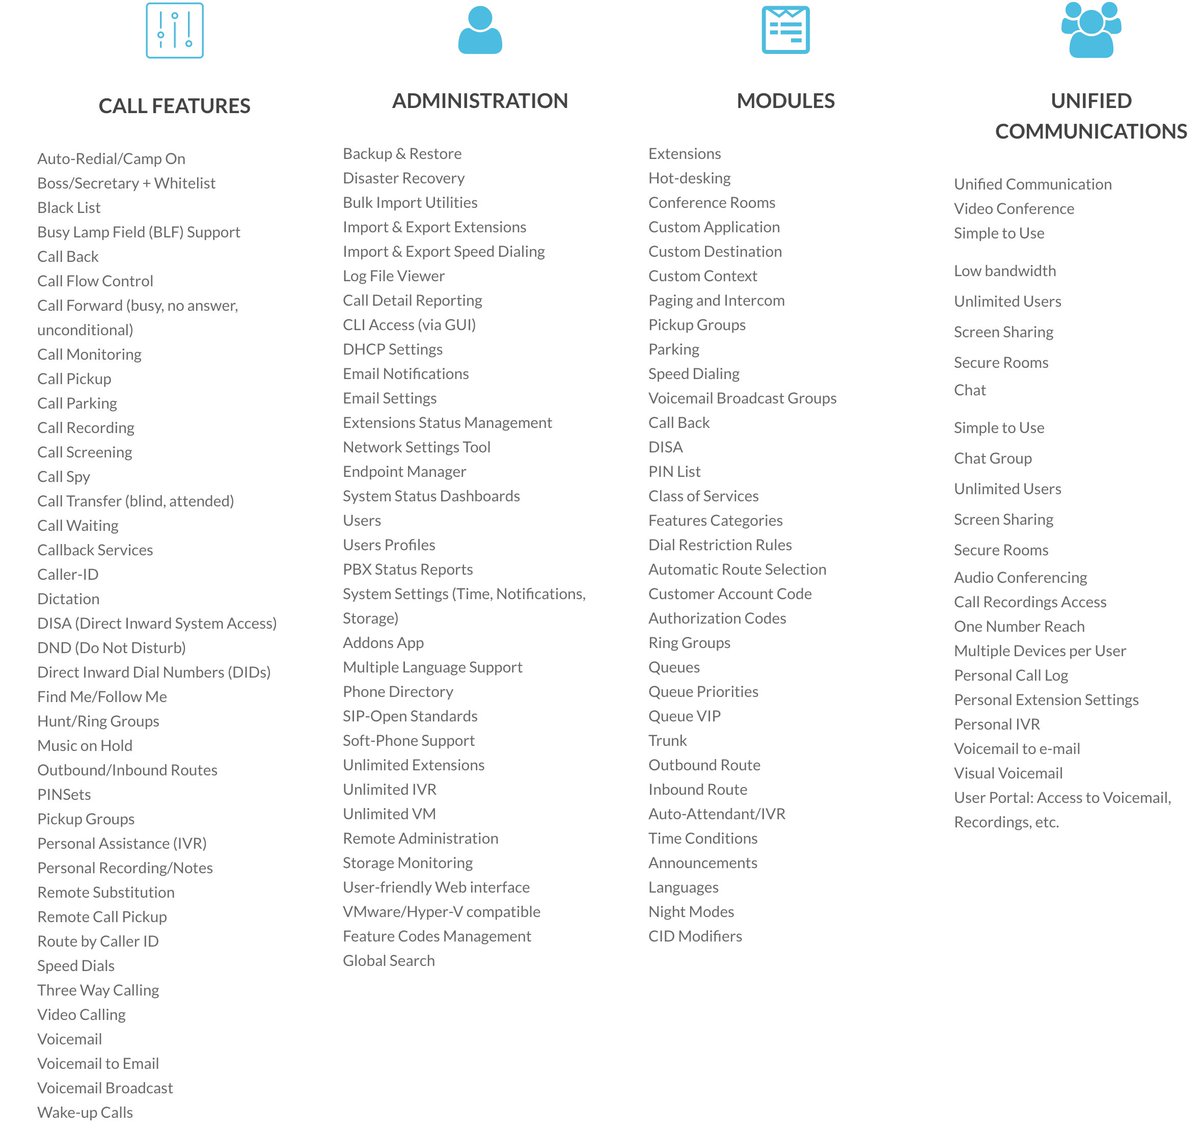
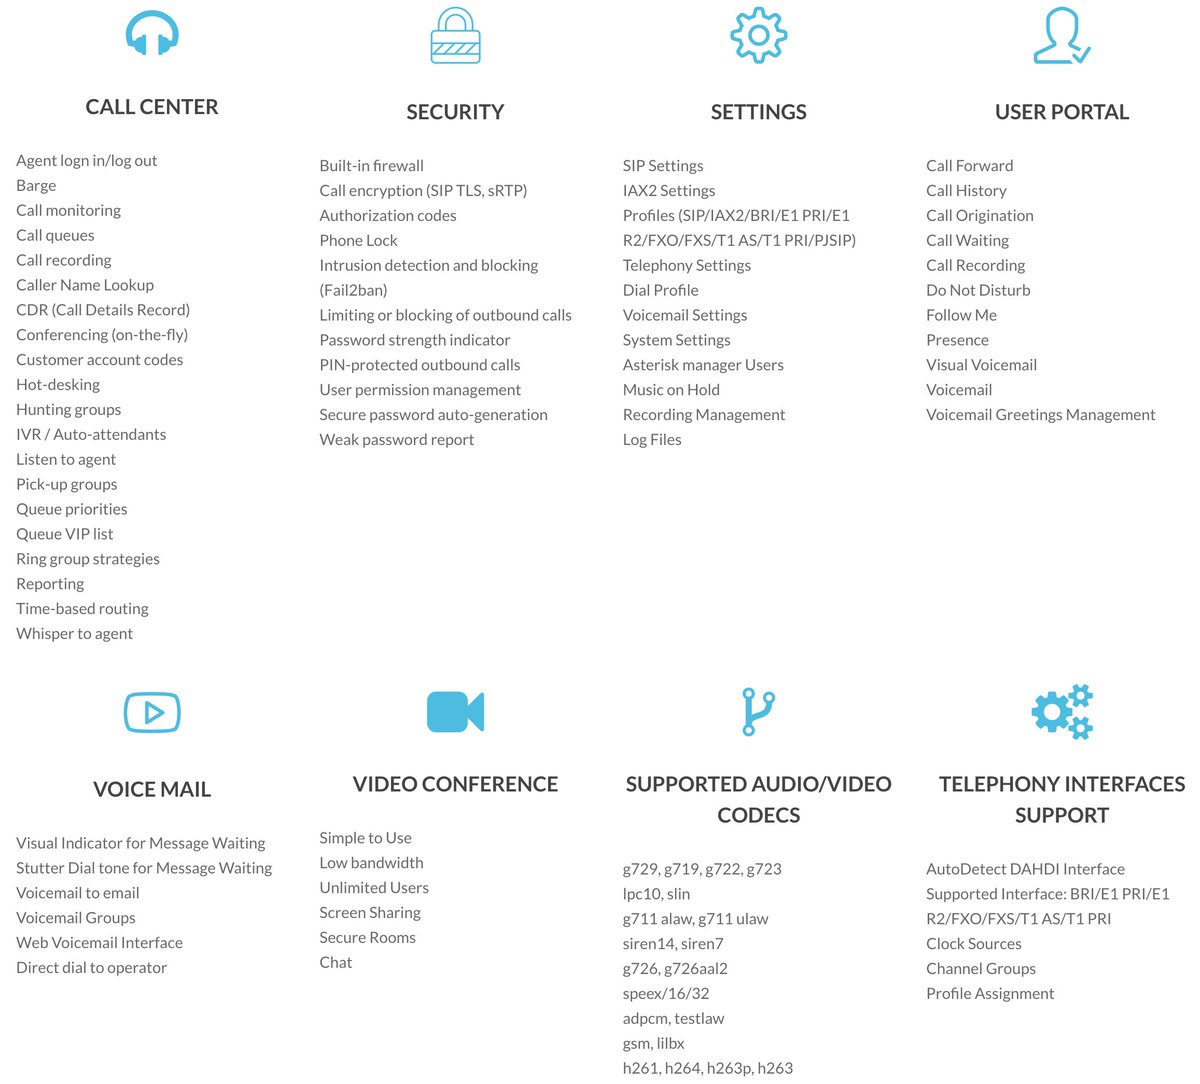
Today’s release has many open source and GPL components including Asterisk 16.5.0, however, the VitalPBX components are freeware much like the FreePBX Distro which blends commercial modules and proprietary components into its distribution. It’s not our favorite business model, but we certainly understand the rationale given the disappointing GPL history in the VoIP space. No features requiring payment were used in this article or in the demo applications accompanying it. We will cover the commercial applications separately.
October 8 NEWS FLASH: Our one wish for VitalPBX is coming true today according to reliable sources. Custom Contexts 2.3.0-1 will be entirely free with no limitations as to number of contexts you can create! If you’ve previously installed VitalPBX, just click Admin:Add-ons and then Check Online. When the download finishes, click the Update icon in the Custom Contexts line.
Incidentally, when you get around to exploring the commercial offerings, keep in mind that most of them come with a free tier to let you try things out, and we’ll use the free Custom Context to incorporate many of the Incredible PBX applications available on other platforms.
- Multi-Tenant – Main + 1 additional free tenant ($500/5 to $2,000/100)
- Custom Contexts –
1 free context; $50 unlimitedcompletely free - IVR Stats – 1 free IVR; $50 unlimited
- Sonata Switchboard – 1 free layout for 15 extensions ($65)
- Sonata Billing – free for 8 extensions ($100-$650)
- Sonata Recordings – free for 8 extensions ($125-$650)
- Geo Firewall – whitelist & blacklist by country $75
- Queues Callback – callback when agent is available $150
- Maintenance Module – tidy up your PBX with ease $50
- Virtual Faxes – send and receive faxes from the GUI $100
- Rebranding Module – customized for your business $45
- OpenVPN Module – server & client support $35
- Video Conferencing with Jitsi – completely free
- Domotic – completely free
- Phone Books – completely free
- Bulk Extensions – completely free
Today we want to walk you through getting your new Incredible PBX platform set up so that you can kick the tires for yourself. If you are accustomed to setting up FreePBX-based Asterisk servers, today’s installation and configuration will be a walk in the park. Currently, you install Incredible PBX with VitalPBX from an ISO so you have a choice of platforms: dedicated hardware, VMware ESXi, VirtualBox, or a limited number of cloud platforms such as Vultr that support custom ISO installs. Be sure to read our security warnings below before choosing a cloud-based platform without a hardware-based firewall.
A Word About Security. VitalPBX platforms include both an IPtables firewall configurator for firewalld and a Fail2Ban intrusion detection setup that is impressive. Having said that, the IPtables firewall is activated but allows unrestricted SIP and web access with no rules to thwart SipVicious-style attacks. Unless you’re an expert in firewall design, we strongly recommend initial deployment on a private LAN behind a hardware-based firewall or home router with minimal port forwarding. That will block intrusion attempts without encountering NAT problems which VitalPBX and Asterisk 16 now handle with ease. In coming weeks, we will introduce a safer methodology to deploy VitalPBX on cloud-based platforms.
Getting Started. Begin by downloading the Incredible PBX 2.3.8 ISO to your desktop. The ISO installation process is a traditional CentOS® 7 procedure so you can follow one of our existing VoIP tutorials to get things set up on the platform of your choice.
NEWS FLASH: In lieu of using the Incredible PBX ISO, an Incredible PBX install script is now available for use with CentOS 7 cloud platforms and CentOS 7 minimal installs on dedicated hardware or local VM platforms. Here’s the procedure using the install script once you have your CentOS 7 platform running. Log into your server as root and issue these commands:
cd /root
yum -y install net-tools wget nano tar
wget http://incrediblepbx.com/incrediblepbx.sh
chmod +x incrediblepbx.sh
./incrediblepbx.sh
Once the install finishes, use a web browser to access the IP address of your new server. You’ll be prompted to set up an admin password for GUI access and then to register your server. Should you ever forget your admin password, here’s how to force a reset on your next login from a browser:
mysql ombutel -e 'update ombu_settings set value = "yes" where name = "reset_pwd"'
After logging in, you’ll be presented with the VitalPBX Dashboard (shown above).
Navigation Tips. The GUI is incredibly intuitive, but there’s always a learning curve with something new. We’ll save you a little stumbling around looking for things or wondering why your settings in the UI didn’t take. Here’s a quick cheat sheet. All of the UI features are housed under menus in the left column. When you choose an option, it opens a submenu. And, when you click + beside an item on the submenu, it exposes additional choices. For example, to work on Outbound Routes, you’d choose PBX, External +, Outbound Routes:

Two other important icons are housed in the upper right corner of the GUI. Whenever you add or make changes to settings in the GUI, you need to reload the Asterisk dialplan by clicking on (1) the flashing icon. Otherwise, your settings will not be available. Ask us how we know. 🙂
After you add a new extension, trunk, or route, you’ll see (2) the four-bar icon which you click to access existing settings which you’ve already entered. Otherwise, you’ll be staring at a blank screen without your new entries. There’s nothing more disconcerting than adding a few extensions only to have them disappear the next time you navigate to PBX:Extensions. 🙂
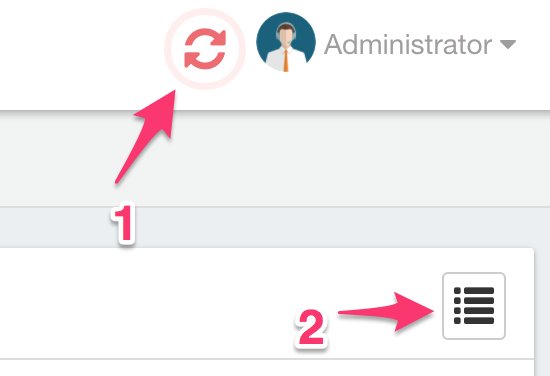
Finally, at the top of the center panel of the GUI, VitalPBX (literally) keeps tabs on items you’ve recently worked on. These breadcrumb tabs make it extremely convenient to return to items you’ve previously used without having to once again drill down through the menus:

Initial Setup. As with most PBXs, the initial setup involves creating some Extensions, connecting some Trunks, and setting up Outbound and Inbound Routes to process calls to and from your PBX. The other hundreds of features are pure gravy which you can explore at your leisure. If we covered them all, you’d be reading a book instead of an article.
SIP Settings Configuration. Before we configure your extensions, trunks, and routes, we first need to help Asterisk decipher your network setup. We do this by specifying the public IP address of your server as well as any local area networks that house either your PBX or endpoints. After logging into the GUI, navigate to Settings:Technology Settings:SIP Settings. Under the SECURITY tab, set Allow Guest to YES. You need this for trunks using IP-based Authentication. Then click the NETWORK tab. If your PBX is behind a NAT-based firewall or router, set NAT to Force,Comedia. In the External Address field, enter the public IP address of your PBX. In the Local Networks section, enter the private IP addresses associated with your LAN and VPN, e.g. 192.168.0.0/255.255.0.0 and 10.0.0.0/255.240.0.0. Save your entries and reload the dialplan when prompted.
Extension Setup looks like what is shown below. All you need to fill in is the Extension number and Name. Incredible PBX will handle the rest. If you want voicemail for the extension, click on the VOICEMAIL tab and enable it. Leaving the voicemail password as the extension number tells Incredible PBX to ask the user to set the voicemail password the first time voicemail is accessed for the extension.
CAUTION: If you use the default Incredible PBX setup with extension numbers starting at 701, then you’ll need to adjust the default Parking Lot in VitalPBX which uses these same extensions. Simply navigate to PBX:Applications:Parking and change the default extension from 700 to 7000. Then save your settings and reload the dialplan.
[popup url="https://pbs.twimg.com/media/EF9-b6-X0AIvES_?format=jpg&name=medium" width="1200″ height="600″]
 [/popup]
Trunk Setup. We recommend using our Platinum Provider, Skyetel, for your default trunk and DID because they offer quadruple redundancy so you never miss a call. Sign up for Skyetel service and take advantage of the Nerd Vittles specials which include a $10 credit to kick the tires. First, complete the Prequalification Form here. You then will be provided a link to the Skyetel site to complete your registration. Once you have registered on the Skyetel site and your account has been activated, open a support ticket and request the $10 credit for your account by referencing the Nerd Vittles special offer. Once you are satisfied with the service, fund your account as desired, and Skyetel will match your deposit of up to $250 simply by opening another ticket. That gets you up to $500 of half-price calling. Credit is limited to one per person/company/address/location. Effective 10/1/2023, $25/month minimum spend required.
Skyetel does not use SIP registrations to make connections to your PBX. Instead, Skyetel utilizes Endpoint Groups to identify which servers can communicate with the Skyetel service. An Endpoint Group consists of a Name, an IP address, a UDP or TCP port for the connection, and a numerical Priority for the group. For incoming calls destined to your PBX, DIDs are associated with an Endpoint Group to route the calls to your PBX. For outgoing calls from your PBX, a matching Endpoint Group is required to authorize outbound calls through the Skyetel network. Thus, the first step in configuring the Skyetel side for use with your PBX is to set up an Endpoint Group. Here’s a typical setup for Incredible PBX 16 for VitalPBX:
- Name: MyPBX
- Priority: 1
- IP Address: IncrediblePBX-Public-IP-Address
- Port: 5062
- Protocol: UDP
- Description: my.incrediblepbx.com
To receive incoming PSTN calls, you’ll need at least one DID. On the Skyetel site, you acquire DIDs under the Phone Numbers tab. You have the option of Porting in Existing Numbers (free for the first 60 days after you sign up for service and fund your account) or purchasing new ones under the Buy Phone Numbers menu option.
Once you have acquired one or more DIDs, navigate to the Local Numbers or Toll Free Numbers tab and specify the desired SIP Format and Endpoint Group for each DID. Add SMS/MMS and E911 support, if desired. Call Forwarding and Failover are also supported. That completes the VoIP setup on the Skyetel side. System Status is always available here.
If you’d like additional details on why we recommend Skyetel, see this Nerd Vittles article.
On the VitalPBX side, we need to add a new Skyetel trunk. Navigate to PBX:External:Trunks:PJSIP. The VitalPBX Trunk setup should look like the following for Skyetel. If you’d like to cut-and-paste the entries for the Match field, here you go:
52.41.52.34,52.8.201.128,52.60.138.31,50.17.48.216,35.156.192.164
[popup url="https://pbs.twimg.com/media/EGDhgsXWsAIbmw1?format=jpg&name=medium" width="1200″ height="700″]
[/popup]If you’re behind a hardware-based firewall or router, you will need to forward external UDP 5062 traffic to internal UDP 5060 at the private LAN address of your PBX. Also forward UDP 10000-20000 to the same ports at the private LAN address of your PBX. And, if using DHCP, don’t forget to reserve this private LAN address for your PBX in the router.
One additional tip if you plan to use PJsip to register some of your phones. Make the following adjustments to the default PJsip configuration in Settings:Technology Settings:Profile. Next choose Default PJSIP Profile from the pull-down and make the following changes. Then SAVE your settings and reload the dialplan. Special thanks to Jared Busch on MangoLassi.it for the tip.
Rewrite Contact = YES
RTP Symmetric = YES
Outbound Route Setup is virtually identical to the FreePBX format. Access it in the GUI at PBX:External:Outbound Routes. Here’s a typical setup to let users dial both 10-digit and 11-digit NANPA calls: NXXNXXXXXX and 1NXXNXXXXXX.
[popup url="https://pbs.twimg.com/media/EGDkzq2WsAAw3xV?format=jpg&name=medium" width="1200″ height="300″]
 [/popup]
Inbound Route Setup also is similar to FreePBX. A default route can be configured by simply defining the Route Description as Default and specifying a Destination for all incoming calls that don’t otherwise have a matching inbound route: PBX:External:Inbound Routes.
Email Configuration. One of the other things you’ll want to get working is email delivery for Voicemails. The VitalPBX solution is the best in the business. It supports Gmail as a RelayHost out of the box; however, you will need a legitimate hostname for your server before Gmail will deliver outbound mail. First, login to your server as root and edit /etc/hosts. In the 127.0.0.1 line immediately after the 127.0.0.1 entry, add noreply.incrediblepbx.com and save the file. Next, in the GUI, navigate to Admin:System Settings:Email Settings. For Server, click Use External Mail Server. For Provider, click Gmail and enter your full Gmail account name and password. Click Save and Reload your Dialplan. Then send yourself a test message by entering an email address and clicking the Envelope icon.

Updating Time Zone. If the date command incorrectly displays the time on your server, you can change it with the following commands using your correct zone in the second command:
timedatectl list-timezones
timedatectl set-timezone America/New_York
What’s Next? You now have a perfectly functioning PBX. Connect one or more softphones or SIP phones, and you’re ready to go. As we mentioned at the outset, the next step is to explore all of the menu options and review the VitalPBX Reference Guide. It really is a book!
The Fun Stuff. The icing on the VitalPBX cake is the add-on applications. Some are free, some are limited in some way, and some are commercial. You can review what’s available here. Then load the currently available listing into the GUI by choosing Admin:Add-ons:Add-ons:Check Online. To get started, install Bulk Extensions (free), Custom Contexts (now FREE), and Phone Books (free). Once you’ve installed all three, refresh your browser and go to PBX:Applications:Custom Contexts.
Step #1. Set up a Custom Context like this. Then click Save/Update and Reload Dialplan.
[popup url="https://pbs.twimg.com/media/DYaugdDWAAA_CBj.jpg" width="1200″ height="400″]
 [/popup]
Step #2. Adjust the Destination of Inbound Route to point to Incredible PBX Custom Context.
[popup url="https://pbs.twimg.com/media/EGDn_L1W4AAvuw4?format=jpg&name=medium" width="900″ height="400″]
 [/popup]
Step #3. From the Linux CLI while logged in as root, use nano to create the following file: /etc/asterisk/ombutel/extensions__80-1-incrediblepbx.conf:
[incrediblepbx]
exten => s,1,Answer
exten => s,n,NoOp(My custom context)
exten => s,n,Goto(cos-all,701,1)
exten => s,n,return()
If you wanted a Custom Context that would call your cellphone, here’s the adjusted code to do that:
[incrediblepbx]
exten => s,1,Answer
exten => s,n,NoOp(My custom context)
exten => s,n,Goto(cos-all-trunk,8881234567,1)
exten => s,n,return()
Step #4. Reload your Asterisk dialplan: asterisk -rx "dialplan reload"
Step #5. Place a call to an incoming trunk on your PBX while watching the Asterisk CLI. The tail of the incoming call should look something like the following which shows the incoming call directed to the Custom Context and from there to extension 701.

We’ll briefly mention some other VitalPBX tricks that will be covered in detail in coming weeks. First, be sure to check out the Search bar at the top of the Dashboard. It will save you a lot of hunting in the menus. Second, you’re not going to have to cough up $50 to use multiple custom contexts as you could do for free with FreePBX. Beginning October 8, there are no limitations on the number you can create for free. Add as many as desired in extensions__80-custom.conf. For those just arriving from FreePBX and extensions_custom.conf, the VitalPBX equivalent to [from-internal-custom] is [cos-all-custom](+). Simply add extension-based dialplan code in this context. For other custom contexts, add them just as you did in Step #1 above.
[cos-all-custom](+)
exten => 123,1,NoOP(Reminders)
 same => n,Answer
 same => n,Hangup()

[sub-reminders]
exten => s,1,NoOP(new Reminders context goes here)
 same => n,Answer
 same => n,Hangup
The $50 add-on allows you to You now can access more than one custom context from within the VitalPBX GUI itself so this simple workaround using Feature Codes is no longer required:
mysql ombutel -e "insert into ombu_feature_codes \\
 VALUES(NULL,11,'Reminders','123',NULL,'sub-reminders','no',NULL,NULL,\\
 'no',NULL,NULL,NULL,NULL,NULL,'yes','yes','yes','yes') ;"
asterisk -rx "dialplan reload"
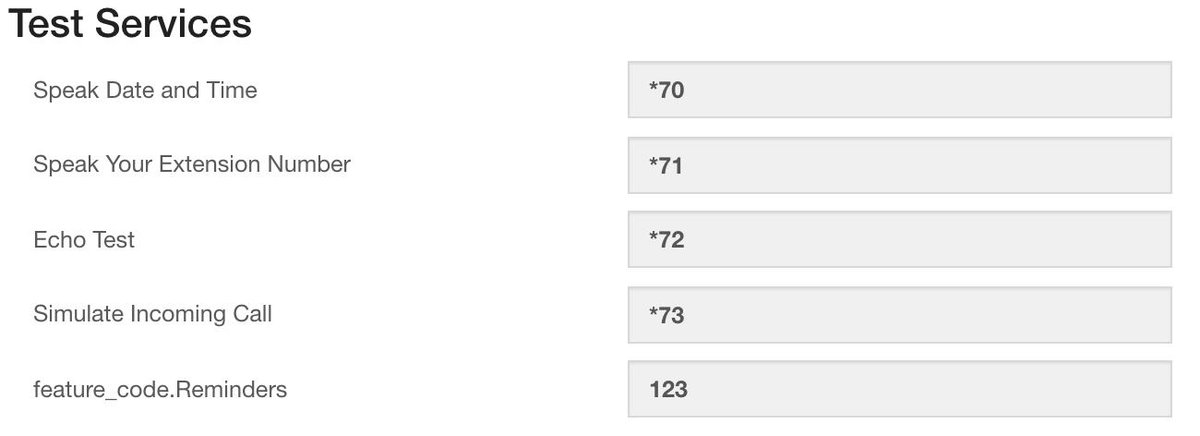
UPDATE: This workaround is no longer required since Custom Contexts are now free. The wrinkle in using Feature Codes for custom applications WAS that VitalPBX did not support Feature Codes as a destination for IVRs and some other functions in the GUI. The only real workaround for that was to create an additional extension, e.g. 1123, and then forward calls from that extension to the desired feature code, e.g. 123. Then you could use extension 1123 as the destination for almost any function. NOW YOU CAN USE AS MANY FEATURE CODES AS YOU LIKE WITHOUT COST! Here are the commands to implement this in the Asterisk CLI assuming database show revealed your Tenant ID for extension 1123 to be 94247999c5d9030b:
database show devices SIP/1123/tenant
database put 94247999c5d9030b diversions/1123/CFI/has_enable_diversions yes
database put 94247999c5d9030b diversions/1123/CFI/destination 123
database put 94247999c5d9030b diversions/1123/CFI/enable yes
Here’s a better idea. Cough up the $50 for unlimited Custom Contexts and Please help keep the VitalPBX developers in business now that the Custom Contexts add-on is free. Now that you understand the VitalPBX theory behind Custom Contexts and Feature Codes, you’ll be ready to dive into Incredible PBX applications in coming weeks. Stay tuned!
Homework. Yes. Everyone needs a little homework once in a while. Before our next chapter in this VitalPBX saga, you’re going to need an IBM Cloud account with access to Watson TTS and Watson STT. There’s a free tier. These services will be used for the Incredible PBX TTS and Voice Recognition apps for Asterisk including News and Weather reports as well as Voice Dialing with AsteriDex. This Nerd Vittles tutorial will walk you through getting your IBM account set up. For home and business use, our scripts are always FREE.
Continue Reading: Going Public with Incredible PBX 16 and VitalPBX 2.3.8
Originally published: Monday, October 7, 2019 Updated: Tuesday, October 8, 2019
Got Friends? 7 Countries Have Never Visited Nerd Vittles. 2018 Is Calling! https://t.co/wMfmlhAr16 #asterisk #freepbx #wazo #issabel #IncrediblePBX #3CX pic.twitter.com/kAmAEnwVIw
— Ward Mundy (@NerdUno) January 9, 2018
Need help with Asterisk? Visit the VoIP-info Forum.
Special Thanks to Our Generous Sponsors
FULL DISCLOSURE: ClearlyIP, Skyetel, Vitelity, DigitalOcean, Vultr, VoIP.ms, 3CX, Sangoma, TelecomsXchange and VitalPBX have provided financial support to Nerd Vittles and our open source projects through advertising, referral revenue, and/or merchandise. As an Amazon Associate and Best Buy Affiliate, we also earn from qualifying purchases. We’ve chosen these providers not the other way around. Our decisions are based upon their corporate reputation and the quality of their offerings and pricing. Our recommendations regarding technology are reached without regard to financial compensation except in situations in which comparable products at comparable pricing are available from multiple sources. In this limited case, we support our sponsors because our sponsors support us.
BOGO Bonaza: Enjoy state-of-the-art VoIP service with a $10 credit and half-price SIP service on up to $500 of Skyetel trunking with free number porting when you fund your Skyetel account. No limits on number of simultaneous calls. Quadruple data center redundancy. $25 monthly minimum spend required. Tutorial and sign up details are here.
![]() The lynchpin of Incredible PBX 2020 and beyond is ClearlyIP components which bring management of FreePBX modules and SIP phone integration to a level never before available with any other Asterisk distribution. And now you can configure and reconfigure your new Incredible PBX phones from the convenience of the Incredible PBX GUI.
The lynchpin of Incredible PBX 2020 and beyond is ClearlyIP components which bring management of FreePBX modules and SIP phone integration to a level never before available with any other Asterisk distribution. And now you can configure and reconfigure your new Incredible PBX phones from the convenience of the Incredible PBX GUI.
VitalPBX is perhaps the fastest-growing PBX offering based upon Asterisk with an installed presence in more than 100 countries worldwide. VitalPBX has generously provided a customized White Label version of Incredible PBX tailored for use with all Incredible PBX and VitalPBX custom applications. Follow this link for a free test drive!
Special Thanks to Vitelity. Vitelity is now Voyant Communications and has halted new registrations for the time being. Our special thanks to Vitelity for their unwavering financial support over many years and to the many Nerd Vittles readers who continue to enjoy the benefits of their service offerings. We will keep everyone posted on further developments.
Some Tips & Tricks to Supercharge Incredible PBX 16-15

As September comes to a close, we wanted to offer up some simple tips and tricks to get the most out of Incredible PBX® 16-15. Many of these already have been covered on the PIAF Forum so, if you’re not already a subscriber, sign up to keep up with the latest information. Perhaps the most frequently asked question concerns the painfully slow restarts that some folks experience with SendMail and/or Fail2Ban. So let’s start there.
Assigning an FQDN to Your Server
Many system services depend upon identification of the fully-qualified domain name (FQDN) assigned to your server. If you don’t have one, services such as Fail2Ban and SendMail have a difficult time starting and restarting. This includes the iptables-restart script which includes a restart of the Fail2Ban service. With SendMail, you not only will have difficulty restarting the service, but outbound email delivery also will fail since SendMail always checks for a valid sender email address before sending out a message.
If you don’t have a domain that you control, you can always use a free dynamic DNS service such as No-IP which has the added advantage of managing changes in your host’s IP address if you don’t have a static IP address.
Once you have an FQDN for your server, here are the simple steps to assign it to your server. First, edit /etc/hosts, add the FQDN immediately after 127.0.0.1, and then save the file. Next, edit /etc/hostname and replace the default entry with your FQDN. Finally, issue the following command using your actual FQDN: hostname FQDN.
Now you can test restarting Fail2Ban and SendMail with the following commands:
systemctl restart sendmail
systemctl restart fail2ban
And you can check the status of the two services with the following commands:
systemctl status sendmail
systemctl status fail2ban
Configuring SendMail/Exim with Incredible PBX 16-15
You’re not out of the woods yet if you wish to use SendMail (CentOS) or Exim (Raspbian) to deliver email and voicemail messages. Unless your PBX is in the Cloud with a public IP address on the Internet, be advised that many hosting providers such as Comcast, Spectrum, and AT&T block downstream mail servers from sending email. If you’re using one of these services in your home or office, the solution is to use Gmail or your local ISP as a smart relay host to send mail from your server. Setup instructions for SendMail on the CentOS 7 platform are available here. Setup instructions for Exim on the Raspberry Pi are available here.
Blocking Call Scammers and Robocalls
As election season kicks into high gear, expect robocalls to go through the roof. Not that the diehard scammers care but Congress exempted all politicians from the rules pertaining to robocalls. And then there are those that spoof a phone number similar to yours in order to treat you to the latest car warranty deal or Caribbean vacation. So here’s a way to block 99% of these callers, almost all of whom depend upon autodialers and call center software to distribute calls to live operators once you answer the call.
The design is simple to implement with Incredible PBX. Instead of answering incoming calls with a standard AutoAttendant or IVR, we’ll play a brief announcement followed by a request that the caller "press 7″ or some other number to be connected. When the caller doesn’t press the requested number within a brief number of seconds, Incredible PBX will hangup the call.
Many SIP providers support the early media feature which lets two SIP user agents communicate before a call is actually answered. If your provider supports this and you pay by the minute for inbound call traffic, then we’ll show you how to use the early media feature to block these callers without ever answering the calls and incurring charges. The easiest way to determine whether your SIP provider supports early media is to implement the early media code below and try a test call. If you hear the greeting message after dialing your own number, then early media is supported. If not, use the other dialplan code.
Incredible PBX already includes all the tools you’ll need to implement this. We’ll use a little modified Announcement dialplan code to greet the caller with Allison’s Generic Welcome message: "Thank you for calling. Please hold a moment while we locate someone to take your call." Then we’ll tack on an extra message which says: "To continue in English, press 7." If you’d prefer a different number, you can modify the dialplan code below accordingly.
Add this early media dialplan code to the end of /etc/asterisk/extensions_custom.conf. If you prefer a number other than 7, then replace "7″ in both lines 4 and 6 below:
[hello-caller]
exten => s,1,Progress
exten => s,n(begin),Noop(Playing announcement Howdy as Early Media)
exten => s,n,Set(TIMEOUT(response)=10)
exten => s,n,Playback(custom/nv-GenericWelcome&silence/1&continue-in-english&press-7,noanswer)
exten => s,n,WaitExten(,)
exten => 7,1,Goto(ivr-1,s,1)
exten => t,1,Hangup
exten => i,1,Hangup
exten => fax,1,Noop(Fax detected!)
exten => fax,2,Goto(custom-fax-iaxmodem,s,1)
;--== end of [hello-caller] ==--;
In the FreePBX GUI, add a new Custom Destination:
Target: hello-caller,s,1
Description: Scam Blocker
In the FreePBX GUI, modify the Inbound Route for each DID and set the Destination to Custom Destination: Scam Blocker. Save your settings and reload your dialplan.
Now place a test call to your DID and see if you hear the greeting message. If so, you’re done.
If not, edit /etc/asterisk/extensions_custom.conf and replace the [hello-caller] context at the bottom of the file with the following. You can replace "7″ on lines 6 and 8, if desired. Then reload your dialplan: asterisk -rx "dialplan reload". Then place another test call.
[hello-caller]
exten => s,1,GotoIf($["${CHANNEL(state)}" = "Up"]?begin)
exten => s,n,Answer
exten => s,n,Wait(1)
exten => s,n(begin),Noop(Playing announcement Howdy)
exten => s,n,Set(TIMEOUT(response)=10)
exten => s,n(play),Background(custom/nv-GenericWelcome&silence/1&continue-in-english&press-7,nm)
exten => s,n,WaitExten(,)
exten => 7,1,Goto(ivr-1,s,1)
exten => t,1,Hangup
exten => i,1,Hangup
exten => fax,1,Noop(Fax detected!)
exten => fax,2,Goto(custom-fax-iaxmodem,s,1)
;--== end of [hello-caller] ==--;
Separating Friends from Foes with Fail2Ban
If you’ve ever locked yourself out of your server when Fail2Ban mistakenly believed you were one of the bad guys, welcome to the club. Here’s the simple way to make sure it never happens again. First, deploy a NeoRouter Server and activate the NeoRouter Client on both your PBX and desktop machines. Always login to your PBX using the 10.0.0.x NeoRouter Client IP address of your PBX. Next, edit /etc/fail2ban/jail.conf. Scroll down to the [DEFAULT] section and edit the line which begins with ignoreip. Make certain the line includes the following entries. Then save the file and restart Fail2Ban: systemctl restart fail2ban
ignoreip = 127.0.0.1/8 10.0.0.0/24
You can always check who is currently banned with the command: iptables -nL
And you can unban an IP address by logging in to SSH from a different IP address and using the chain name and banned IP address shown in iptables -nL with the following command:
fail2ban-client set apache-forbidden unbanip xx.xx.xx.xx
Adding Outbound CNAM Data to CDRs
In many implementations, it’s useful in Call Detail Records (CDRs) to be able to associate names (CNAM) with outbound calls just as we do with incoming calls. One of our earliest Asterisk applications, CallerID Superfecta, provides an easy way to do that with just a little tweaking in Incredible PBX 16-15.
1. Open the FreePBX GUI in a browser and go to Admin -> CID Superfecta. There should be one Default setup but it’ll show as disabled. For some quirky reason, you can’t make enabling it stick so click on the third (COPY) option under Actions to create a second setup. Then go down to that one and click the first button (Enable) under Actions. Make future setup changes to CallerID Superfecta by clicking on that setup.
2. Next, log into your server as root and issue the following commands:
cd /root
wget http://incrediblepbx.com/dialout-cnam.tar.gz
tar zxvf dialout-cnam.tar.gz
rm -f dialout-cnam.tar.gz
3. Run the script: /root/install-dialout-cnam.sh. Choose the number of the new CID Superfecta setup (probably will be a negative number which is fine). No idea why.
4. Once the script completes, make a call from extension 701 to an outside number. The new CNAM info should be shown in the ACCOUNT column of your CDR listing.
Originally published: Monday, September 30, 2019
Need help with Asterisk? Visit the VoIP-info Forum.
Special Thanks to Our Generous Sponsors
FULL DISCLOSURE: ClearlyIP, Skyetel, Vitelity, DigitalOcean, Vultr, VoIP.ms, 3CX, Sangoma, TelecomsXchange and VitalPBX have provided financial support to Nerd Vittles and our open source projects through advertising, referral revenue, and/or merchandise. As an Amazon Associate and Best Buy Affiliate, we also earn from qualifying purchases. We’ve chosen these providers not the other way around. Our decisions are based upon their corporate reputation and the quality of their offerings and pricing. Our recommendations regarding technology are reached without regard to financial compensation except in situations in which comparable products at comparable pricing are available from multiple sources. In this limited case, we support our sponsors because our sponsors support us.
BOGO Bonaza: Enjoy state-of-the-art VoIP service with a $10 credit and half-price SIP service on up to $500 of Skyetel trunking with free number porting when you fund your Skyetel account. No limits on number of simultaneous calls. Quadruple data center redundancy. $25 monthly minimum spend required. Tutorial and sign up details are here.VitalPBX is perhaps the fastest-growing PBX offering based upon Asterisk with an installed presence in more than 100 countries worldwide. VitalPBX has generously provided a customized White Label version of Incredible PBX tailored for use with all Incredible PBX and VitalPBX custom applications. Follow this link for a free test drive!Special Thanks to Vitelity. Vitelity is now Voyant Communications and has halted new registrations for the time being. Our special thanks to Vitelity for their unwavering financial support over many years and to the many Nerd Vittles readers who continue to enjoy the benefits of their service offerings. We will keep everyone posted on further developments.Desktop Dream Machine: Incredible PBX 16-15 for VirtualBox
If you’re new to the VoIP world and want to kick the tires to see what you’re missing, then today’s one minute setup is for you. You’ll get a $10 credit to try out some penny-a-minute calls and to purchase a $1 a month phone number in your choice of area codes. If you decide VoIP is not for you, you don’t have to buy anything ever. And you can use almost any desktop computer you already own to bring up the VirtualBox® edition of Incredible PBX® 16-15.
If you’ve followed Nerd Vittles over the years, you already know that VirtualBox from Oracle® is one of our favorite platforms. Once VirtualBox is installed on your desktop computer, adding Incredible PBX is a snap. Download the latest Incredible PBX image from SourceForge, double-click on the downloaded image, check the initialize MAC address box, and boom. In less than a minute, your PBX is ready to use. There are no hidden fees or crippleware to hinder your use of Incredible PBX for as long as you like. Just set up an account with our Platinum provider, Skyetel, and you can start making calls in minutes. Of course, the Incredible PBX feature set is included as well which brings you nearly three dozen applications for Asterisk® that will revolutionize your communications platform. Speech-to-text, voice recognition, and a Siri-like telephony interface are as close as your SIP phone.
Installing Oracle VM VirtualBox
Oracle’s virtual machine platform inherited from Sun is amazing. It’s not only free, but it’s pure GPL2 code. VirtualBox gives you a virtual machine platform that runs on top of any desktop operating system. In terms of limitations, we haven’t found any. We even tested this on an Atom-based Windows 7 machine with 2GB of RAM, and it worked without a hiccup. So step #1 today is to download one or more of the VirtualBox installers from VirtualBox.org or Oracle.com. Our recommendation is to put all of the 100MB installers on a 4GB thumb drive.1 Then you’ll have everything in one place whenever and wherever you happen to need it. Once you’ve downloaded the software, simply install it onto your favorite desktop machine. Accept all of the default settings, and you’ll be good to go. For more details, here’s a link to the Oracle VM VirtualBox User Manual.
Installing the Incredible PBX 16-15 Image
To begin, download the Incredible PBX 16-15 image (3.2 GB) onto your desktop.
Next, double-click on the Incredible PBX .ova image on your desktop. Be sure to check the box to initialize the MAC address of the image and then click Import. Once the import is finished, you’ll see a new Incredible PBX virtual machine in the VM List of the VirtualBox Manager Window. Let’s make a couple of one-time adjustments to the Incredible PBX configuration to account for possible differences in sound and network cards on different host machines.
(1) Click once on the Incredible PBX virtual machine in the VM List. Then (2) click the Settings button. In the Audio tab, check the Enable Audio option and choose your sound card. In the Network tab for Adapter 1, check the Enable Network Adapter option. From the Attached to pull-down menu, choose Bridged Adapter. Then select your network card from the Name list. Then click OK. That’s all the configuration that is necessary for Incredible PBX.
Running Incredible PBX 16-15 in VirtualBox
Once you’ve imported and configured the Incredible PBX Virtual Machine, you’re ready to go. Highlight the Incredible PBX virtual machine in the VM List on the VirtualBox Manager Window and click the Start button. The standard Linux boot procedure will begin and, within a few seconds, you’ll get the familiar Linux login prompt. During the bootstrap procedure, you’ll see a couple of dialogue boxes pop up that explain the keystrokes to move back and forth between your host operating system desktop and your virtual machine. Remember, you still have full access to your desktop computer. Incredible PBX is merely running as a task in a VM window. Always gracefully halt Incredible PBX just as you would on any computer.
Here’s what you need to know. To work in the Incredible PBX virtual machine, just left-click your mouse while it is positioned inside the VM window. To return to your host operating system desktop, press the right Option key on Windows machines or the left Command key on any Mac. For other operating systems, read the dialogue boxes for instructions on moving around. To access the Linux CLI, login as root with the default password: password. Change your root password immediately by typing: passwd. Then update your admin password for web access by typing: ./admin-pw-change. You’ll need the admin password to access the web GUI and manage your PBX. You can update all of your other passwords using the scripts provided in /root.
Setting the Date and Time with VirtualBox
On some platforms, VirtualBox has a nasty habit of mangling the date and time of your virtual machine. Typing date will tell you whether your VM is affected. If it’s a problem, manually set the date and time and then update the hardware clock. Here’s how assuming 08130709 is the month, day, and correct time of your server:
date 08130709
clock -w

Configuring Skyetel for Incredible PBX 16-15
If you’d like to try out the Skyetel service at no charge, here’s the drill. Sign up for Skyetel service to take advantage of the Nerd Vittles specials. First, complete the Prequalification Form here. You then will be provided a link to the Skyetel site to complete your registration. Once you have registered on the Skyetel site and your account has been activated, open a support ticket and request the $10 credit for your account by referencing the Nerd Vittles special offer. Once you are satisfied with the service, fund your account as desired, and Skyetel will match your deposit of up to $250 simply by opening another ticket. That gets you up to $500 of half-price calling. Credit is limited to one per person, company, and address. Effective 10/1/2023, $25/month minimum spend required.
Skyetel does not use SIP registrations to make connections to your PBX. Instead, Skyetel utilizes Endpoint Groups to identify which servers can communicate with the Skyetel service. An Endpoint Group consists of a Name, an IP address, a UDP or TCP port for the connection, and a numerical Priority for the group. For incoming calls destined to your PBX, DIDs are associated with an Endpoint Group to route the calls to your PBX. For outgoing calls from your PBX, a matching Endpoint Group is required to authorize outbound calls through the Skyetel network. Thus, the first step in configuring the Skyetel side for use with your PBX is to set up an Endpoint Group. Here’s a typical setup for Incredible PBX 16-15:
- Name: MyPBX
- Priority: 1
- IP Address: PBX-Public-IP-Address
- Port: 5060
- Protocol: UDP
- Description: my.incrediblepbx.com
To receive incoming PSTN calls, you’ll need at least one DID. On the Skyetel site, you acquire DIDs under the Phone Numbers tab. You have the option of Porting in Existing Numbers (free for the first 60 days after you sign up for service) or purchasing new ones under the Buy Phone Numbers menu option.
Once you have acquired one or more DIDs, navigate to the Local Numbers or Toll Free Numbers tab and specify the desired SIP Format and Endpoint Group for each DID. Add SMS/MMS and E911 support, if desired. Call Forwarding and Failover are also supported. That completes the VoIP setup on the Skyetel side. System Status is always available here.
Configuring VoIP.ms for Incredible PBX 16-15
To sign up for VoIP.ms service, may we suggest you use our signup link so that Nerd Vittles gets a referral credit for your signup. Once your account is set up, you’ll need to set up a SIP SubAccount and, for Authentication Type, choose Static IP Authentication and enter your Incredible PBX 16-15 server’s public IP address. For Transport, choose UDP. For Device Type, choose Asterisk, IP PBX, Gateway or VoIP Switch. Order a DID in their web panel, and then point the DID to the SubAccount you just created. Be sure to specify atlanta1.voip.ms as the POP from which to receive incoming calls.
Configuring V1VoIP for Incredible PBX 16-15
To sign up for V1VoIP service, sign up on their web site. Then login to your account and order a DID under the DIDs tab. Once the DID has been assigned, choose View DIDs and click on the Forwarding button beside your DID. For Option #1, choose Forward to IP Address/PBX. For the Forwarding Address, enter the public IP address of your server. For the T/O (timeout) value, set it to 2o seconds. Then click the Update button. Under the Termination tab, create a new Endpoint with the public IP address of your server so that you can place outbound calls through V1VoIP.
Configuring Anveo Direct for Incredible PBX 16-15
To sign up for Anveo Direct service, sign up on their web site and then login. After adding funds to your account, purchase a DID under Inbound Service -> Order DID. Next, choose Configure Destination SIP Trunk. Give the Trunk a name. For the Primary SIP URI, enter $[E164]$@server-IP-address. For Call Options, select your new DID from the list. You also must whitelist your public IP address under Outbound Service -> Configure. Create a new Call Termination Trunk and name it to match your server. For Dialing Prefix, choose six alphanumeric characters beginning with a zero. In Authorized IP Addresses, enter the public IP address of your server. Set an appropriate rate cap. We like $0.01 per minute to be safe. Set a concurrent calls limit. We like 2. For the Call Routing Method, choose Least Cost unless you’re feeling extravagant. For Routes/Carriers, choose Standard Routes. Write down your Dialing Prefix and then click the Save button.
Before you can make outbound calls through Anveo Direct from your PBX, you first must configure the Dialing Prefix that you wrote down in the previous step. Log into the GUI as admin using a web browser and edit the Anveo-Out trunk in Connectivity -> Trunks. Click on the custom-Settings tab and replace anveo-pin with your actual Dialing Prefix. Click Submit and Apply Config to complete the setup.
By default, incoming Anveo Direct calls will be processed by the Default inbound route on your PBX. If you wish to redirect incoming Anveo Direct calls using DID-specific inbound routes, then you’ve got a bit more work to do. In addition to creating the inbound route using the 11-digit Anveo Direct DID, enter the following commands after logging into your server as root using SSH/Putty:
cd /etc/asterisk
echo "[from-anveo]" >> extensions_custom.conf
echo "exten => _.,1,Ringing" >> extensions_custom.conf
echo "exten => _.,n,Goto(from-trunk,\\${SIP_HEADER(X-anveo-e164)},1)" >> extensions_custom.conf
asterisk -rx "dialplan reload"
Configuring a Softphone for Incredible PBX 16-15
We’re in the home stretch now. You can connect virtually any kind of telephone to your new PBX. Plain Old Phones require an analog telephone adapter (ATA) which can be a separate board in your computer from a company such as Digium. Or it can be a standalone SIP device such as ObiHai’s OBi100 or OBi110 (if you have a phone line from Ma Bell to hook up as well). SIP phones can be connected directly so long as they have an IP address. These could be hardware devices or software devices such as the YateClient softphone. We’ll start with a free one today so you can begin making calls. You can find dozens of recommendations for hardware-based SIP phones both on Nerd Vittles and the PIAF Forum when you’re ready to get serious about VoIP telephony.
We recommend YateClient which is free. Download it from here. Run YateClient once you’ve installed it and enter the credentials for the 701 extension on Incredible PBX. You can find them by running /root/show-passwords. You’ll need the IP address of your server plus your extension 701 password. In the YateClient, fill in the blanks using the IP address of your Server, 701 for your Username, and whatever Password was assigned to the extension when you installed Incredible PBX. Click OK to save your entries.

Configuring Incredible PBX for VirtualBox
In order to take advantage of all the Incredible PBX applications, you’ll need to obtain IBM text-to-speech (TTS) and speech-to-text (STT) credentials as well as a (free) Application ID for Wolfram Alpha.
This Nerd Vittles tutorial will walk you through getting your IBM account set up and obtaining both your TTS and STT credentials. Be sure to write down BOTH sets of credentials which you’ll need in a minute. For home and SOHO use, IBM access and services are mostly FREE even though you must provide a credit card when signing up. The IBM signup process explains their pricing plans.
To use Wolfram Alpha, sign up for a free Wolfram Alpha API account. Just provide your email address and set up a password. It takes less than a minute. Log into your account and click on Get An App ID. Make up a name for your application and write down (and keep secret) your APP-ID code. That’s all there is to getting set up with Wolfram Alpha. If you want to explore costs for commercial use, there are links to let you get more information.
In addition to your Wolfram Alpha APPID, there are two sets of IBM credentials to plug into the Asterisk AGI scripts. Keep in mind that there are different usernames and passwords for the IBM Watson TTS and STT services. The TTS credentials will look like the following: $IBM_username and $IBM_password. The STT credentials look like this: $API_USERNAME and $API_PASSWORD. Don’t mix them up. 🙂
All of the scripts requiring credentials are located in /var/lib/asterisk/agi-bin so switch to that directory after logging into your server as root. Edit each of the following files and insert your TTS credentials in the variables already provided: nv-today2.php, ibmtts.php, and ibmtts2.php. Edit each of the following files and insert your STT credentials in the variables already provided: getquery.sh, getnumber.sh, and getnumber2.sh. Finally, edit 4747 and insert your Wolfram Alpha APPID.
Using Asteridex with Incredible PBX
AsteriDex is a web-based dialer and address book application for Asterisk and Incredible PBX. It lets you store and manage phone numbers of all your friends and business associates in an easy-to-use SQLite3 database. You simply call up the application with your favorite web browser: http://pbx-ip-address/asteridex4/. When you click on a contact that you wish to call, AsteriDex first calls you at extension 701, and then AsteriDex connects you to your contact through another outbound call made using your default outbound trunk that supports numbers in the 1NXXNXXXXXX format.
Taking Incredible PBX for a Test Drive
You can take Incredible PBX on a test drive by dialing D-E-M-O (3366) from any phone connected to your PBX.
With Allison’s Demo IVR, you can choose from the following options:
- 0. Chat with Operator — connects to extension 701
- 1. AsteriDex Voice Dialer – say "Delta Airlines" or "American Airlines" to connect
- 2. Conferencing – log in using 1234 as the conference PIN
- 3. Wolfram Alpha Almanac – say "What planes are flying overhead"
- 4. Lenny – The Telemarketer’s Worst Nightmare
- 5. Today’s News Headlines — courtesy of Yahoo! News
- 6. Weather by ZIP Code – enter any 5-digit ZIP code for today’s weather
- 7. Today in History — courtesy of OnThisDay.com
- 8. Chat with Nerd Uno — courtesy of SIP URI connection to 3CX iPhone Client
- 9. DISA Voice Dialer — say any 10-digit number to be connected
- *. Current Date and Time — courtesy of Incredible PBX
Originally published: Monday, September 23, 2019
Need help with Asterisk? Visit the VoIP-info Forum.
Special Thanks to Our Generous Sponsors
FULL DISCLOSURE: ClearlyIP, Skyetel, Vitelity, DigitalOcean, Vultr, VoIP.ms, 3CX, Sangoma, TelecomsXchange and VitalPBX have provided financial support to Nerd Vittles and our open source projects through advertising, referral revenue, and/or merchandise. As an Amazon Associate and Best Buy Affiliate, we also earn from qualifying purchases. We’ve chosen these providers not the other way around. Our decisions are based upon their corporate reputation and the quality of their offerings and pricing. Our recommendations regarding technology are reached without regard to financial compensation except in situations in which comparable products at comparable pricing are available from multiple sources. In this limited case, we support our sponsors because our sponsors support us.
BOGO Bonaza: Enjoy state-of-the-art VoIP service with a $10 credit and half-price SIP service on up to $500 of Skyetel trunking with free number porting when you fund your Skyetel account. No limits on number of simultaneous calls. Quadruple data center redundancy. $25 monthly minimum spend required. Tutorial and sign up details are here.VitalPBX is perhaps the fastest-growing PBX offering based upon Asterisk with an installed presence in more than 100 countries worldwide. VitalPBX has generously provided a customized White Label version of Incredible PBX tailored for use with all Incredible PBX and VitalPBX custom applications. Follow this link for a free test drive!Special Thanks to Vitelity. Vitelity is now Voyant Communications and has halted new registrations for the time being. Our special thanks to Vitelity for their unwavering financial support over many years and to the many Nerd Vittles readers who continue to enjoy the benefits of their service offerings. We will keep everyone posted on further developments.- Many of our purchase links refer users to Amazon when we find their prices are competitive for the recommended products. Nerd Vittles receives a small referral fee from Amazon to help cover the costs of our blog. We never recommend particular products solely to generate Amazon commissions. However, when pricing is comparable or availability is favorable, we support Amazon because Amazon supports us. [↩]
Honeymoon Time: Meet Incredible PBX 16-15.2 for CentOS 7

After two months of development, we are pleased to announce the production-ready release of Incredible PBX 16-15 on the CentOS 7 platform with the latest Asterisk® 16 and FreePBX® 15 components. After years of frustrating upgrades, we are equally pleased to announce that those running Incredible PBX 13-13 can upgrade to the new Incredible PBX 16-15 platform with a handful of button clicks. And you’ll never miss a beat. What are you waiting for?
In addition to the latest Asterisk 16 release, you also get the entire FreePBX 15 GPL module collection including their new User Control Panel (UCP) and a much enhanced web GUI plus the entire Incredible PBX feature set. As with Incredible PBX LITE, it’s plug-and-play with immediate calling capability using any of four commercial SIP providers. Or you can choose one of 16 other preconfigured SIP providers, enter your credentials, and enjoy instant connectivity without worrying about SIP settings. Last, but not least, you can easily turn your Incredible PBX 16-15 server into a secure public-facing PBX or interconnect a Raspberry Pi for traveling so that you never miss a call.
What’s Included? Incredible PBX 16-15 serves up a VoIP powerhouse featuring Asterisk 16, the FreePBX 15 GPL platform including User Control Panel (UCP), an Apache web server, the latest MariaDB SQL server (formerly MySQL), SendMail, and the Incredible PBX feature set including SIP, SMS, Opus, voice recognition, PicoTTS Text-to-Speech VoIP applications plus fax support, Click-to-Dial, News, Weather, Reminders, ODBC, and hundreds of features that typically are found in commercial PBXs: Conferencing, IVRs and AutoAttendants, Email Delivery of Voicemails, and much more.
Choosing a SIP Provider. Incredible PBX 16-15 comes preconfigured with support for five SIP extensions and four of the major SIP providers: Skyetel, VoIP.ms, V1VoIP, and Anveo Direct. We obviously hope you’ll choose Skyetel not only because they financially support Nerd Vittles and our open source projects, but also because it is a clearly superior platform offering crystal-clear communications and triple-redundancy so you never miss a call. Skyetel also sets itself apart from the other providers in the support department. They actually respond to issues, and there’s never a charge. As the old saying goes, they may not be the cheapest, but you get what you pay for. Even without taking advantage of Nerd Vittles half-price offer on up to $500 of Skyetel services, they’re still dirt cheap compared to the Bell Sisters and cable companies. Skyetel is so sure you’ll love their service that they give you a $10 credit to kick the tires before you ever spend a dime. Traditional DIDs are $1 per month. Outbound conversational calls are $0.012 per minute. Incoming conversational calls are a penny a minute, and CallerID lookups are $0.004. You only pay for minutes you use. Once you’re satisfied with the service and fund your account, you can port in your existing DIDs at no cost for 60 days after signup. In short, you have nothing to lose by trying out the Skyetel service. Effective 10/1/2023, $25/month minimum spend required.
Choosing a Platform for Incredible PBX 16-15
As with our other open source offerings, the platform choice for Incredible PBX 16-15 depends upon a number of factors. For most folks, you’d be crazy to go out and purchase hardware to use in your home or office when cloud-based platforms are available for about a dollar a month. Unless you plan to publicly expose your server on the Internet to facilitate remote SIP connections, the OpenVZ offerings below are perfectly adequate while in business with the cautionary note that you need off-site backups AND a tested backup plan. Three providers previously listed have closed their doors in 2019. You’ve been warned.
| Provider | RAM | Disk | Bandwidth | Performance as of 12/1/19 | Cost |
|---|---|---|---|---|---|
| CrownCloud KVM (LA) | 1GB | 20GB + Snapshot | 1TB/month | 598Mb/DN 281Mb/UP 2CPU Core | $25/year Best Buy! |
| Naranjatech KVM (The Netherlands) | 1GB | 20GB | 1TB/month | Hosting since 2005 VAT: EU res. | 20€/year w/code: SBF2019 |
| BudgetNode KVM (LA) | 1GB | 40GB RAID10 | 1TB/month | Also available in U.K PM @Ishaq on LET before payment | $24/year |
| FreeRangeCloud KVM (Ashburn VA, Winnipeg, Freemont CA) | 1GB | 20GB SSD | 3TB/month | Pick EGG loc'n Open ticket for last 5GB SSD | $30/year w/code: LEBEGG30 |
Installing Incredible PBX 16-15 with CentOS 7
9/21 ALERT UPDATE: A recent SolusVM update has broken systemd upon which Incredible PBX and Asterisk depend. SolusVM is the virtualizer used by many of the bargain-basement cloud providers. For the time being, these installs fail so you are cautioned to avoid any SolusVM-based cloud platform. Vultr, Digital Ocean, and OVH are your best bets at the moment. And Vultr and Digital Ocean both support Nerd Vittles through referral credits. We will post an update when the situation changes.
If you’ve installed previous iterations of Incredible PBX, today’s drill is similar. Here is a thumbnail sketch of the install procedure for Incredible PBX 16-15. Begin by installing a minimal CentOS 7 (64-bit) platform or pick the CentOS 7 option with 1GB RAM and 20GB of storage from your cloud provider’s menu of choices. Then log into your server as root and issue the following commands:
passwd
yum -y update
yum -y install net-tools nano wget tar
wget http://incrediblepbx.com/incrediblepbx16-15.2.tar.gz
tar zxvf incrediblepbx16-15.2.tar.gz
rm -f incrediblepbx16-15.2.tar.gz
# to add swap file on non-OpenVZ cloud platforms with no swap file
./create-swapfile-DO
# kick off Phase I install
./IncrediblePBX16-15.sh
# after reboot, kick off Phase II install
./IncrediblePBX16-15.sh
# add HylaFax/AvantFax, if desired
./incrediblefax16.sh
# set desired timezone
./timezone-setup
# display your passwords
./show-passwords
# remember to enable TUN/TAP if using VPS Control Panel with OpenVZ
# reconfigure PortKnocker if installing on an OpenVZ platform
echo 'OPTIONS="-i venet0:0"' >> /etc/sysconfig/knockd
service knockd restart
# set up NeoRouter VPN client, if desired
nrclientcmd
# check network speed
wget -O speedtest-cli https://raw.githubusercontent.com/sivel/speedtest-cli/master/speedtest.py
chmod +x speedtest-cli
./speedtest-cli
WebMin is also installed and configured as part of the base install. The root password for access is the same as your Linux root password. We strongly recommend that you not use WebMin to make configuration changes to your server. You may inadvertently damage the operation of your PBX beyond repair. WebMin is an excellent tool to LOOK at how your server is configured. When used for that purpose, we highly recommend WebMin as a way to become familiar with your Linux configuration.
Planning Ahead for That Rainy Day
If you haven’t already learned the hard way, let us save you from a future shock. Hardware fails. All of it. So spend an extra hour now so that you’ll be prepared when (not if) disaster strikes. First, once you have your new PBX configured the way you plan to use it, make a backup of your PBX by running the Incredible Backup script: /root/incrediblebackup16
Copy down the name of the backup file that was created. You’ll need it in a few minutes.
Second, build yourself an identical VirtualBox platform on your desktop PC. It’s the same steps as outlined above.
Next, create a /backup folder on your VirtualBox PBX and copy the backup file from your main server to your VirtualBox server and restore it after logging in to VirtualBox PBX as root:
mkdir /backup
scp root@main-pbx-ip-address:/backup/backup-file-name.tar.gz /backup/.
/root/incrediblerestore16 /backup/backup-file-name.tar.gz
Complaints that you "forgot" to make a backup and your hardware has failed or your provider has gone out of business are not welcomed. We’re sorry for your loss. Case closed.
Completing the Incredible PBX Setup Procedure
Unless your desktop PC and server are both on the same private LAN, the install procedure should be performed from a desktop PC using SSH or Putty. This will insure that your desktop PC is also whitelisted in the Incredible PBX firewall. Using the console to perform the install is NOT recommended as your desktop PC will not be whitelisted in the firewall. This may result in your not being able to log in to your server. Once you have network connectivity, log in to your server as root from a desktop PC using your root password. Accept the license agreement by pressing ENTER.
Kick off the Phase I install. Once your server reboots and you log back in as root, start the Phase II install. All of your passwords will be randomly assigned with the exception of the root user Linux password. You can set it at any time by issuing the command: passwd. You also must set up an admin password to access the FreePBX web GUI with the command: /root/admin-pw-change. With the exception of your root user and FreePBX admin passwords, most of the remaining passwords can be displayed using the command: /root/show-passwords.
Finally, if your PBX is sitting behind a NAT-based router, you’ll need to redirect incoming UDP 5060 and UDP 10000-20000 traffic to the private IP address of your PBX. This is required for all of the SIP providers included in the Incredible PBX 16-15 default build that don’t require a SIP registration. Otherwise, inbound calls will fail.
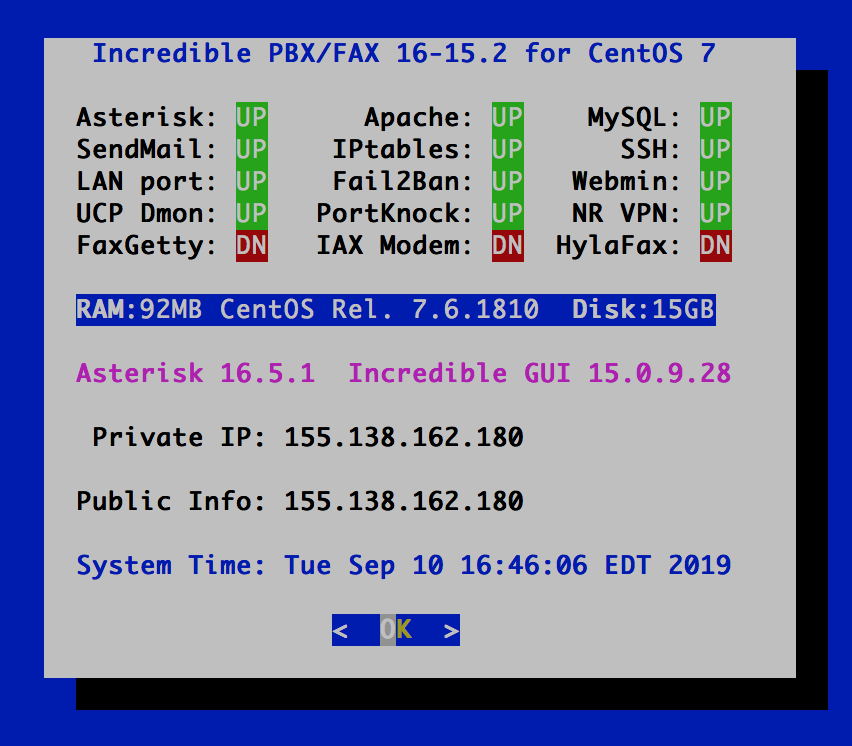
Configuring Skyetel for Incredible PBX 16-15
If you’ve decided to go with Skyetel, here’s the drill. Sign up for Skyetel service and take advantage of the Nerd Vittles specials. First, complete the Prequalification Form here. You then will be provided a link to the Skyetel site to complete your registration. Once you have registered on the Skyetel site and your account has been activated, open a support ticket and request the $10 credit for your account by referencing the Nerd Vittles special offer. Once you are satisfied with the service, fund your account as desired, and Skyetel will match your deposit of up to $250 simply by opening another ticket. That gets you up to $500 of half-price calling. Credit is limited to one per person/company/address/location.
Skyetel does not use SIP registrations to make connections to your PBX. Instead, Skyetel utilizes Endpoint Groups to identify which servers can communicate with the Skyetel service. An Endpoint Group consists of a Name, an IP address, a UDP or TCP port for the connection, and a numerical Priority for the group. For incoming calls destined to your PBX, DIDs are associated with an Endpoint Group to route the calls to your PBX. For outgoing calls from your PBX, a matching Endpoint Group is required to authorize outbound calls through the Skyetel network. Thus, the first step in configuring the Skyetel side for use with your PBX is to set up an Endpoint Group. Here’s a typical setup for Incredible PBX 16-15:
- Name: MyPBX
- Priority: 1
- IP Address: PBX-Public-IP-Address
- Port: 5060
- Protocol: UDP
- Description: my.incrediblepbx.com
To receive incoming PSTN calls, you’ll need at least one DID. On the Skyetel site, you acquire DIDs under the Phone Numbers tab. You have the option of Porting in Existing Numbers (free for the first 60 days after you sign up for service) or purchasing new ones under the Buy Phone Numbers menu option.
Once you have acquired one or more DIDs, navigate to the Local Numbers or Toll Free Numbers tab and specify the desired SIP Format and Endpoint Group for each DID. Add SMS/MMS and E911 support, if desired. Call Forwarding and Failover are also supported. That completes the VoIP setup on the Skyetel side. System Status is always available here.
Configuring VoIP.ms for Incredible PBX 16-15
To sign up for VoIP.ms service, may we suggest you use our signup link so that Nerd Vittles gets a referral credit for your signup. Once your account is set up, you’ll need to set up a SIP SubAccount and, for Authentication Type, choose Static IP Authentication and enter your Incredible PBX 16-15 server’s public IP address. For Transport, choose UDP. For Device Type, choose Asterisk, IP PBX, Gateway or VoIP Switch. Order a DID in their web panel, and then point the DID to the SubAccount you just created. Be sure to specify atlanta1.voip.ms as the POP from which to receive incoming calls.
Configuring V1VoIP for Incredible PBX 16-15
To sign up for V1VoIP service, sign up on their web site. Then login to your account and order a DID under the DIDs tab. Once the DID has been assigned, choose View DIDs and click on the Forwarding button beside your DID. For Option #1, choose Forward to IP Address/PBX. For the Forwarding Address, enter the public IP address of your server. For the T/O (timeout) value, set it to 2o seconds. Then click the Update button. Under the Termination tab, create a new Endpoint with the public IP address of your server so that you can place outbound calls through V1VoIP.
Configuring Anveo Direct for Incredible PBX 16-15
To sign up for Anveo Direct service, sign up on their web site and then login. After adding funds to your account, purchase a DID under Inbound Service -> Order DID. Next, choose Configure Destination SIP Trunk. Give the Trunk a name. For the Primary SIP URI, enter $[E164]$@server-IP-address. For Call Options, select your new DID from the list. You also must whitelist your public IP address under Outbound Service -> Configure. Create a new Call Termination Trunk and name it to match your server. For Dialing Prefix, choose six alphanumeric characters beginning with a zero. In Authorized IP Addresses, enter the public IP address of your server. Set an appropriate rate cap. We like $0.01 per minute to be safe. Set a concurrent calls limit. We like 2. For the Call Routing Method, choose Least Cost unless you’re feeling extravagant. For Routes/Carriers, choose Standard Routes. Write down your Dialing Prefix and then click the Save button.
Before you can make outbound calls through Anveo Direct from your PBX, you first must configure the Dialing Prefix that you wrote down in the previous step. Log into the GUI as admin using a web browser and edit the Anveo-Out trunk in Connectivity -> Trunks. Click on the custom-Settings tab and replace anveo-pin with your actual Dialing Prefix. Click Submit and Apply Config to complete the setup.
By default, incoming Anveo Direct calls will be processed by the Default inbound route on your PBX. If you wish to redirect incoming Anveo Direct calls using DID-specific inbound routes, then you’ve got a bit more work to do. In addition to creating the inbound route using the 11-digit Anveo Direct DID, enter the following commands after logging into your server as root using SSH/Putty:
cd /etc/asterisk
echo "[from-anveo]" >> extensions_custom.conf
echo "exten => _.,1,Ringing" >> extensions_custom.conf
echo "exten => _.,n,Goto(from-trunk,\\${SIP_HEADER(X-anveo-e164)},1)" >> extensions_custom.conf
asterisk -rx "dialplan reload"
Configuring a Softphone for Incredible PBX 16-15
We’re in the home stretch now. You can connect virtually any kind of telephone to your new PBX. Plain Old Phones require an analog telephone adapter (ATA) which can be a separate board in your computer from a company such as Digium. Or it can be a standalone SIP device such as ObiHai’s OBi100 or OBi110 (if you have a phone line from Ma Bell to hook up as well). SIP phones can be connected directly so long as they have an IP address. These could be hardware devices or software devices such as the YateClient softphone. We’ll start with a free one today so you can begin making calls. You can find dozens of recommendations for hardware-based SIP phones both on Nerd Vittles and the PIAF Forum when you’re ready to get serious about VoIP telephony.
We recommend YateClient which is free. Download it from here. Run YateClient once you’ve installed it and enter the credentials for the 701 extension on Incredible PBX. You can find them by running /root/show-passwords. You’ll need the IP address of your server plus your extension 701 password. In the YateClient, fill in the blanks using the IP address of your Server, 701 for your Username, and whatever Password was assigned to the extension when you installed Incredible PBX. Click OK to save your entries.
Once you are registered to extension 701, close the Account window. Then click on YATE’s Telephony Tab and place some test calls to the numerous apps that are preconfigured on Incredible PBX. Dial a few of these to get started:
DEMO - Apps Demo
123 - Reminders
947 - Weather by ZIP Code
951 - Yahoo News
TODAY - Today in History
LENNY - The Telemarketer's Worst Nightmare
If you are a Mac user, another great no-frills softphone is Telephone. Just download and install it from the Mac App Store. For Android users, check out the terrific new VitalPBX Communicator. Works flawlessly with Incredible PBX.
Audio Issues with Incredible PBX 16-15
If you experience one-way or no audio on some calls, add your external IP address and LAN subnet in the GUI by navigating to Settings -> Asterisk SIP Settings. In the NAT Settings section, click Detect Network Settings. Click Submit and Apply Settings to save your changes.
Incredible PBX 16-15 Administration
We’ve eased the pain of administering your new PBX with a collection of scripts which you will find in the /root folder after logging in with SSH or Putty. Here’s a quick summary of what each of the scripts does.
add-fqdn is used to whitelist a fully-qualified domain name in the firewall. Because Incredible PBX 16-15 blocks all traffic from IP addresses that are not whitelisted, this is what you use to authorize an external user for your PBX. The advantage of an FQDN is that you can use a dynamic DNS service to automatically update the IP address associated with an FQDN so that you never lose connectivity.
add-ip is used to whitelist a public IP address in the firewall. See the add-fqdn explanation as to why this matters.
del-acct is used to remove an IP address or FQDN from the firewall’s whitelist.
admin-pw-change is used to set the admin password for access to the FreePBX/Incredible PBX web GUI using a browser pointed to the local IP address of your server.
apache-pw-change is used to set the admin password for access to Apache/Incredible PBX apps including AsteriDex and Reminders. This provides a password layer of protection for access to these applications.
reset-conference-pins is a script that automatically and randomly resets the user and admin pins for access to the preconfigured conferencing application. Dial C-O-N-F from any registered SIP phone to connect to the conference.
reset-extension-passwords is a script that automatically and randomly resets ALL of the SIP passwords for extensions 701-705. Be careful using this one, or you may disable existing registered phones and cause Fail2Ban to blacklist the IP addresses of those users. HINT: You can place a call to the Ring Group associated with all five extensions by dialing 777.
reset-reminders-pin is a script that automatically and randomly resets the pin required to access the Telephone Reminders application by dialing 123. It’s important to protect this application because a nefarious user could set up a reminder to call a number anywhere in the world assuming your SIP provider’s account was configured to allow such calls.
show-feature-codes is a cheat sheet for all of the feature codes which can be dialed from any registered SIP phone. It documents how powerful a platform Incredible PBX 16-15 actually is. A similar listing is available in the GUI at Admin -> Feature Codes.
show-passwords is a script that displays most of the passwords associated with Incredible PBX 16-15. This includes SIP extension passwords, voicemail pins, conference pins, telephone reminders pin, and your Anveo Direct outbound calling pin (if configured). Note that voicemail pins are configured by the user of a SIP extension the first time the user accesses the voicemail system by dialing *97.
update-IncrediblePBX is the Automatic Update Utility which checks for server updates from incrediblepbx.com every time you log into your server as root using SSH or Putty. Do NOT disable it as it is used to load important fixes and security updates when necessary. We recommend logging into your server at least once a week.
pbxstatus (shown above) displays status of all major components of Incredible PBX 16-15.
Forwarding Calls to Your Cellphone. Keep in mind that inbound calls to your DIDs automatically ring all five SIP extensions, 701-705. The easiest way to also ring your cellphone is to set one of these five extensions to forward incoming calls to your cellphone. After logging into your PBX as root, issue the following command to forward calls from extension 705 to your cellphone: asterisk -rx "database put CF 705 6781234567"
To remove call forwarding: asterisk -rx "database del CF 705"
Configuring SendMail with Incredible PBX 16-15
In order to receive voicemails by email delivery, outbound mail functionality from your server obviously is required. If you’ve deployed your server in your home, your Internet Service Provider probably blocks downstream mail servers such as Incredible PBX from sending mail. This is done to reduce SPAM. In this case, you will need to configure SendMail using either your ISP or Gmail as an SMTP Relay Host. Here are the steps using a Gmail account:
cd /etc/mail
yum -y install sendmail-cf
hostname -f > genericsdomain
touch genericstable
cd /usr/bin
rm -f makemap
ln -s ../sbin/makemap.sendmail makemap
cd /etc/mail
makemap -r hash genericstable.db < genericstable
mv sendmail.mc sendmail.mc.original
wget http://incrediblepbx.com/sendmail.mc.gmail
cp sendmail.mc.gmail sendmail.mc
mkdir -p auth
chmod 700 auth
cd auth
echo AuthInfo:smtp.gmail.com \\"U:smmsp\\" \\"I:user_id\\" \\"P:password\\" \\"M:PLAIN\\" > client-info
echo AuthInfo:smtp.gmail.com:587 \\"U:smmsp\\" \\"I:user_id\\" \\"P:password\\" \\"M:PLAIN\\" >> client-info
echo AuthInfo:smtp.gmail.com:465 \\"U:smmsp\\" \\"I:user_id\\" \\"P:password\\" \\"M:PLAIN\\" >> client-info
# Stop here and edit client-info (nano -w client-info) in all three lines.
# Replace  user_id with your gMail account name without @gmail.com
# Replace password with your real gMail password OR
#  use your Gmail App Key if 2-step verification is enabled
# Be sure to replace the double-quotes shown above if they don't appear in the file!!!
# Save your changes (Ctrl-X, Y, then Enter)
chmod 600 client-info
makemap -r hash client-info.db < client-info
cd ..
make
systemctl restart sendmail
If your server is hosted in the cloud and your provider does not block TCP port 25, then you can send mail without using a SmartHost; however, your server's hostname must actually be real or downstream mail servers will reject your mail. You can set your server's hostname like this: hostname myserver.myhost.com. This is usually sufficient; however, it's a good idea to also add the hostname in /etc/hostname and in /etc/hosts as the first entry on 127.0.0.1 line:
127.0.0.1 myserver.myhost.com pbx.local localhost localhost.localdomain
Next, test outbound mail using this command with your actual email address:
echo "test" | mail -s testmessage yourname@youremaildomain.com
Once you are sure your emails are being delivered reliably, here's a sample GUI voicemail configuration for an extension:
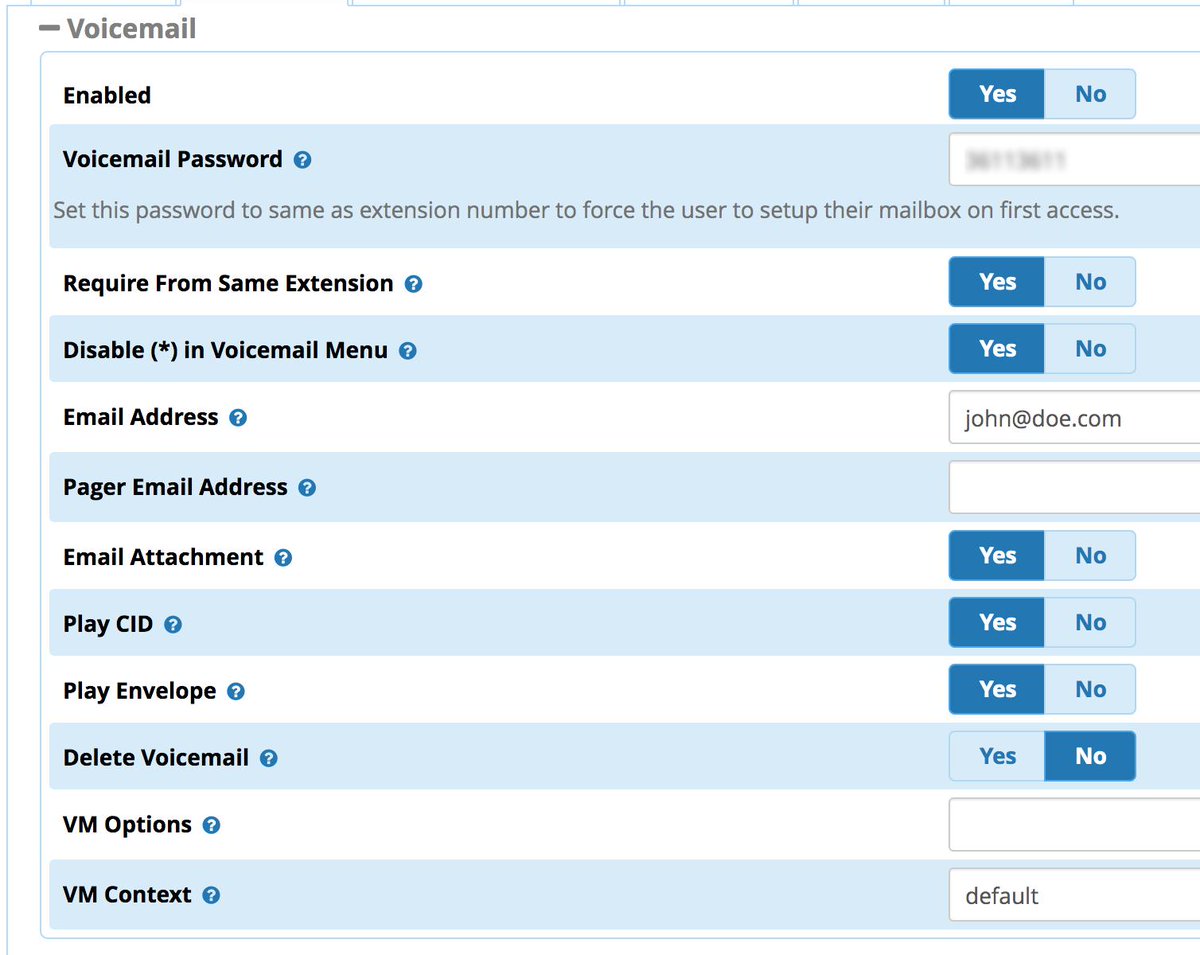
Getting Started with Incredible Fax 16
Believe it or not, there still are lots of folks that use faxes in their everyday lives. If you're one of them, Incredible PBX has your back. Begin by logging into your server as root and running incrediblefax16.sh to install HylaFax and AvantFax on your server. You'll be prompted a dozen or more times for information. Answer no to the secure fax question. For the rest of the prompts, just press ENTER to accept the default entries. Rebooting your server is required when the install finishes. Once your server is back on line, there will be a new AvantFax tab in the GUI. Before proceeding, be sure to set an Apache web apps password by running /root/apache-pw-change. Next, login to AvantFax with your browser. You first will be prompted for your Apache credentials. Enter admin for the username and whatever password you set up in the previous step. Then you will be prompted for your AvantFax credentials. The default is admin:password. After you enter the username and password, you will be prompted to change your admin password. The old password is still password. Then enter your desired password twice and save the setting. The AvantFax dashboard then will display. If nothing has come unglued, you should see four green Idle icons:
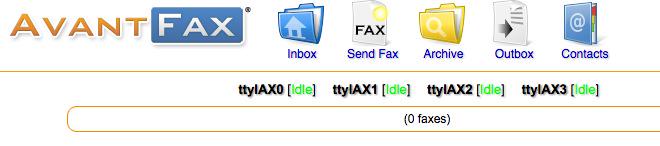
You can Send Faxes from within AvantFax by choosing the Send Fax tab, or you can use one of many HylaFax clients. Google is your friend.
Receiving faxes currently has issues not the least of which are fax detection being broken and incoming faxes never reaching the specified destination. We will continue to work on this and provide updates when they become available. For the time being, the simple workaround if you're using Skyetel as your provider is to designate a DID as a fax line (Call Routing: vFax) in the Skyetel Dashboard. Then Skyetel will manage the incoming faxes without any additional configuration on your PBX. You still can send faxes from within the AvantFax GUI.
Getting Started with ODBC for Asterisk
If you're new to the ODBC World, here's a quick primer. The idea behind Open Data Base Connectivity is to simplify the task of connecting up any flavor database management system so that it can talk to applications and foreign databases without having to write custom code to support every different DBMS. ODBC serves in much the same way as a translator who sits between you and foreign visitors. With the benefit of a translator, whatever is spoken is understood on both ends of the conversation. The real beauty of ODBC is that it is conversant with almost every DBMS offering on the planet including Oracle, Informix, SAS, MS Access, DB2, SQL Server, MySQL, MariaDB, PostgreSQL, Sybase, and even dBase, FoxPro, and XDB. All you really need is the ODBC connector for your operating system plus one or more database drivers for the DBMS data sources you wish to use.
Because the FreePBX modules are driven by MySQL tables, we've included the MySQL connector for Asterisk in Incredible PBX 16-15 together with two sample applications to get you started. If you add your own MySQL databases, it's easy to connect them with ODBC by simply running the odbc-gen.sh script in /root again. The two sample applications we've included will show you how to integrate ODBC queries into your Asterisk dialplan. The code is available in odbc.conf in the /etc/asterisk folder. The first sample is a typical employee database. By dialing 222, you will be prompted to enter the employee number (12345), and the ODBC app then will look up the employee number and read you the name of the employee. The second sample is a speed dialer using the AsteriDex database. The sample entries in the database include a 3-numeric-digit DIALCODE which simply matches the first three letters of each AsteriDex name spelled out on a phone, e.g. 335 = DELta Airlines and 263 = AMErican Airlines. As you add new entries to AsteriDex, you can add dialcodes in the same way or in any other scheme you prefer. Once you have signed up with a provider so that you can make outbound calls, just dial 223 and enter the AsteriDex dialcode to place the call. Think of it as a Speed Dialer on Steroids.
Beginning the Incredible PBX 13-13 Migration
For anyone that's been involved with Asterisk and FreePBX, you already know what a pain it was to move from one release to another. It's still not quite automatic, but it's damn close. You can't perform an in-place migration to move from Asterisk 13 and FreePBX 13 to Asterisk 16 with FreePBX 15. So you'll need to first bring up an Incredible PBX 16-15.2 platform as documented above. It must be separate and apart from your already functioning Incredible PBX 13-13.10 server. Once you've done that, use add-ip to whitelist the IP address of your 13-13 server on the 16-15 PBX and whitelist the IP address of your 16-15 server on the 13-13 PBX. This will make it easy to copy files between the two servers.
In addition to the whitelisting procedure above, there are three more steps to complete on the Incredible PBX 13-13 server. First, you'll need to update the backup module:
cd /root
./gpl-install-fpbx backup
Next, login to the GUI as admin using a browser and make a backup of your FreePBX components. Access Admin -> Backup & Restore and click Backup Wizard. Give the backup a name and description: incrediblepbx. Choose to run the backup Monthly. Choose Yes for voicemails, recordings, and CDR data. Choose Email Notifications and enter your email address. For Remote Save, choose No. Your backup will be saved locally in /var/spool/asterisk/backup/incrediblepbx. Click Finish.
Click the Pencil icon under incrediblepbx Actions to edit the files to be backed up. Using the + icon, make your Items list look like the following:
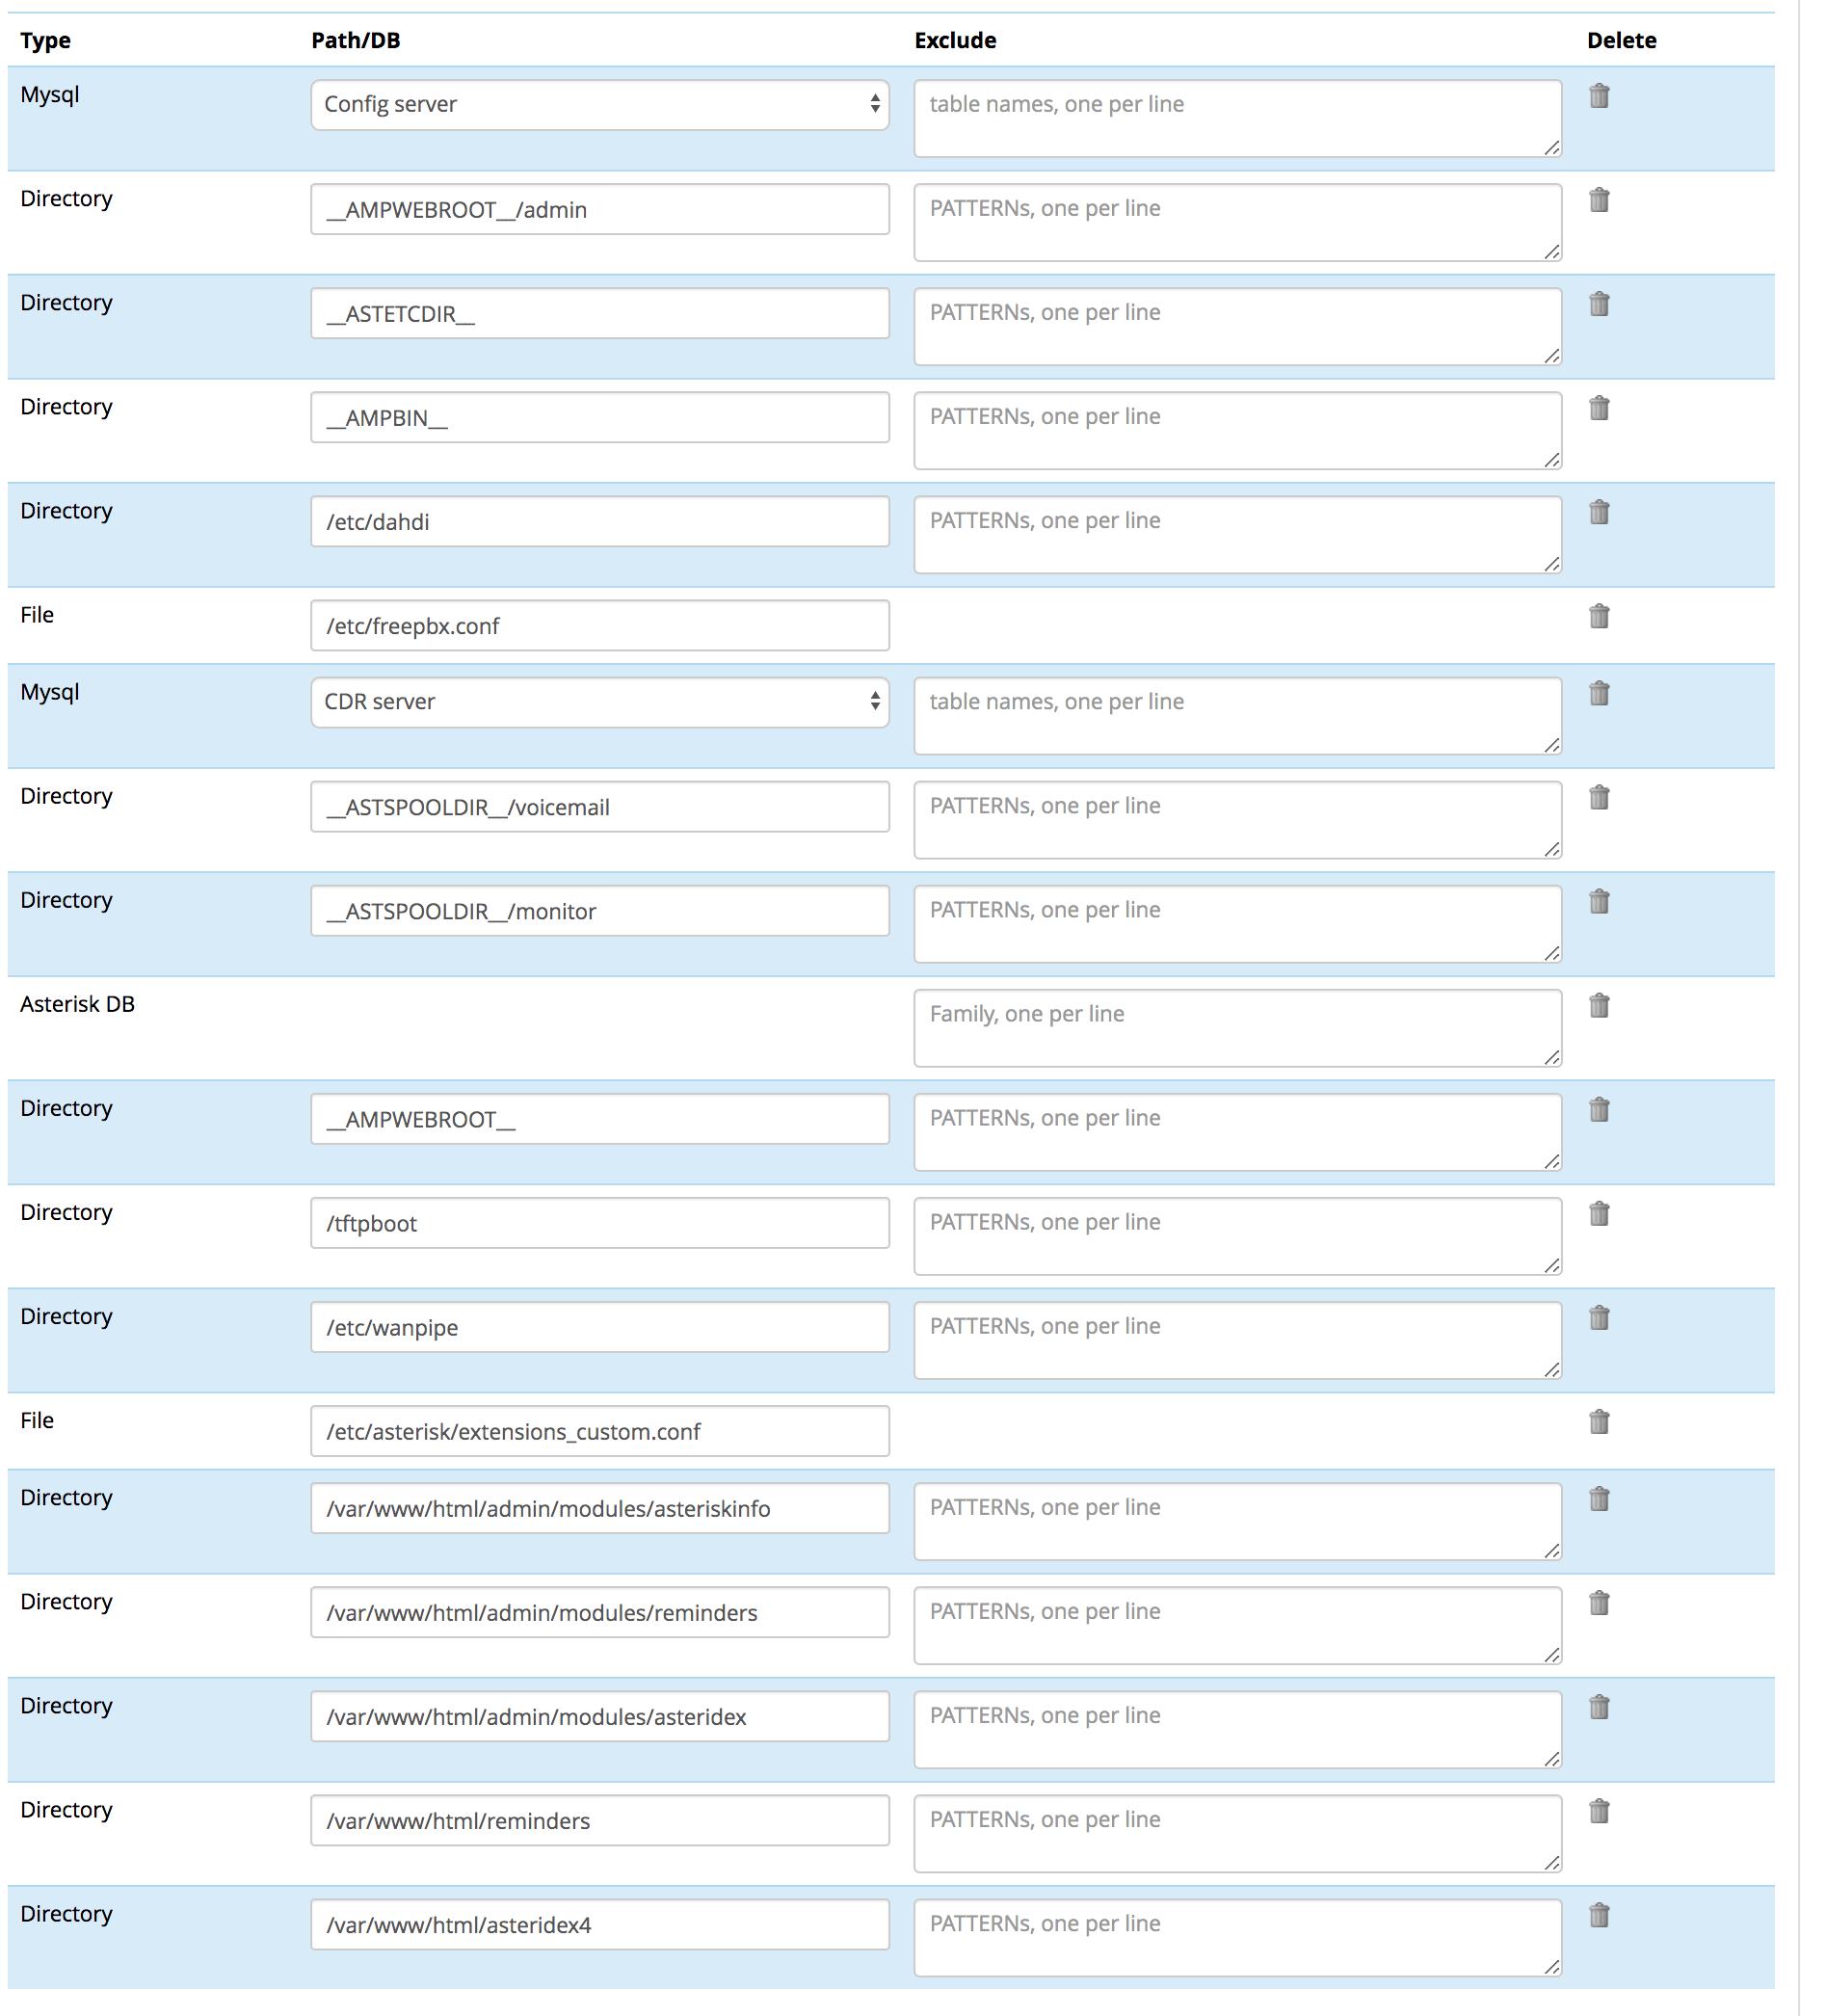
Click Save & Run button when you've made the necessary changes to kick off the backup. Unless you want monthly backups, you can click the trashcan icon under incrediblepbx Actions to remove the task we just created once the backup completes.
Copy the backup file from /var/spool/asterisk/backup/incrediblepbx to your desktop PC.
Restoring Your Data to Incredible PBX 16-15
Now let's continue on the Incredible PBX 16-15.2 server. Login to the GUI as admin using your favorite browser. From the FreePBX Dashboard, choose Admin -> Backup & Restore. Click the Restore tab. Click on Upload a Backup File and choose the backup file from your desktop. Once the backup is loaded, click Restore with CDR Data button to begin. When the whirring stops, there may be an error message. Just ignore it. Return to the Dashboard. Clear the warning about Bind Ports. It's incorrect. Your setup was copied correctly with chan_SIP on UDP 5060 and PJsip on UDP 5061 (unless you changed them). You now can use your browser to review your setup and verify that your 13-13 data came over correctly. Finally, verify that voicemail settings for your extensions got properly configured, and you should be good to go with Incredible PBX 16-15. Enjoy!
Where To Go From Here
Complete documentation on the FreePBX GPL Modules is available here.
Complete documentation on the Incredible PBX additions is available here.
An introduction to configuring extensions, trunks, and routes is available here.
Originally published: Monday, September 16, 2019
Need help with Asterisk? Visit the VoIP-info Forum.
Special Thanks to Our Generous Sponsors
FULL DISCLOSURE: ClearlyIP, Skyetel, Vitelity, DigitalOcean, Vultr, VoIP.ms, 3CX, Sangoma, TelecomsXchange and VitalPBX have provided financial support to Nerd Vittles and our open source projects through advertising, referral revenue, and/or merchandise. As an Amazon Associate and Best Buy Affiliate, we also earn from qualifying purchases. We’ve chosen these providers not the other way around. Our decisions are based upon their corporate reputation and the quality of their offerings and pricing. Our recommendations regarding technology are reached without regard to financial compensation except in situations in which comparable products at comparable pricing are available from multiple sources. In this limited case, we support our sponsors because our sponsors support us.
BOGO Bonaza: Enjoy state-of-the-art VoIP service with a $10 credit and half-price SIP service on up to $500 of Skyetel trunking with free number porting when you fund your Skyetel account. No limits on number of simultaneous calls. Quadruple data center redundancy. $25 monthly minimum spend required. Tutorial and sign up details are here.
![]() The lynchpin of Incredible PBX 2020 and beyond is ClearlyIP components which bring management of FreePBX modules and SIP phone integration to a level never before available with any other Asterisk distribution. And now you can configure and reconfigure your new Incredible PBX phones from the convenience of the Incredible PBX GUI.
The lynchpin of Incredible PBX 2020 and beyond is ClearlyIP components which bring management of FreePBX modules and SIP phone integration to a level never before available with any other Asterisk distribution. And now you can configure and reconfigure your new Incredible PBX phones from the convenience of the Incredible PBX GUI.
VitalPBX is perhaps the fastest-growing PBX offering based upon Asterisk with an installed presence in more than 100 countries worldwide. VitalPBX has generously provided a customized White Label version of Incredible PBX tailored for use with all Incredible PBX and VitalPBX custom applications. Follow this link for a free test drive!
Special Thanks to Vitelity. Vitelity is now Voyant Communications and has halted new registrations for the time being. Our special thanks to Vitelity for their unwavering financial support over many years and to the many Nerd Vittles readers who continue to enjoy the benefits of their service offerings. We will keep everyone posted on further developments.
Free Asterisk Solutions
