
Home » Posts tagged 'iptables' (Page 2)
Tag Archives: iptables
The Most Versatile VoIP Provider: FREE PORTING

 JUST RELEASED: Visit the Incredible PBX Wiki
SIP Happens! Deploying a Publicly-Accessible Asterisk PBX – replaced

We’ve previously documented the benefits of SIP URI calling. Because the calls are free from and to anywhere in the world, the use case is compelling. The drawbacks, particularly with Asterisk® servers, have primarily centered around the security implications of exposing SIP on a publicly-accessible server. Today we want to take a fresh look at a possible SIP implementation for Asterisk based upon the pioneering work of Dr. Lin Song back in the PBX in a Flash heyday. We’ve embellished Lin’s original IPtables creation with additional security mechanisms now available with Fail2Ban, Asterisk, FreePBX®, and Travelin’ Man 3 as well as a terrific tutorial from JavaPipe. All of Lin’s work and ours is open source GPL3 code which you are more than welcome to use or improve pursuant to the terms of the GPL3 license.
Consider this. If everyone in the world had an accessible SIP address instead of a phone number, every call to every person in the world via the Internet would be free. That pretty much sums up why SIP URIs are important. The syntax for SIP URIs depends upon your platform. With Asterisk they look like this: SIP/somebody@FQDN.yourdomain.com. On SIP phones, SIP URIs look like this: sip:somenameORnumber@FQDN.yourdomain.com. Others use somenameORnumber@FQDN.yourdomain.com. Assuming you have a reliable Internet connection, once you have “dialed” a SIP URI, the destination SIP device will ring just as if the called party had a POTS phone. Asterisk® processes SIP URIs in much the same way as calls originating from commercial trunk providers, but anonymous SIP calls are blocked.
Before we get too deep in the weeds, let us take a moment to stress that we don’t recommend this SIP design for mission-critical PBXs because there still are some security risks with denial of service attacks and other vulnerabilities. For these deployments, Incredible PBX® coupled with the Travelin’ Man 3 firewall which blocks SIP access except from whitelisted IP addresses and FQDNs has no equal. When properly deployed, the bad guys cannot even see your server much less attack it. A typical use case for today’s new SIP design would be a public Asterisk server that provides anonymous SIP access to the general public without any exposure to corporate jewels. For example, we’ve put up a demonstration server that provides news and weather reports. In the corporate world, an equivalent deployment might provide access to a product database with pricing and availability details. Our rule of thumb before deploying today’s platform would be to ask yourself what damage could be inflicted if your server were totally compromised. If the answer is zero, then proceed. Otherwise, stick with Incredible PBX and the Travelin’ Man 3 firewall. The ideal platform for deployment using the same rule of thumb as above is one of these $7 to $15/year OpenVZ cloud platforms.
Overview. There are a number of moving parts in today’s implementation. So let’s briefly go through the steps. Begin with a cloud-based installation of Incredible PBX. Next, we’ll upgrade the Fail2Ban setup to better secure a publicly-accessible Asterisk server. We’ll also customize the port for SSH access to reduce the attack rate on the SSH port. You’ll need a fully-qualified domain name (FQDN) for your server because we’ll be blocking all access to your server by IP address. If you want to allow SIP URI calls to your server, you’ll need this FQDN. If you want to also allow SIP registrations from this same FQDN, then a single FQDN will suffice; however, with OpenVZ platforms, we recommend using a different (and preferably more obscure) FQDN for SIP registrations since registered users have an actual extension on your PBX that is capable of making outbound calls which usually cost money. In this case, the obscure FQDN performs double-duty as the equivalent of a password to your PBX. For example, an FQDN such as hk76dl34z.yourdomain.com would rarely be guessed by an anonymous person while sip.yourdomain.com would be fairly obvious to attempted intruders. But that’s your call.
Using whatever FQDN you’ve chosen for SIP registrations, we’ll add an entry to /etc/asterisk/sip_custom.conf that looks like this: domain=hk76dl34z.yourdomain.com. That will block all SIP registration attempts except from that domain. It will not block SIP invitations! The next step will be to add a new [from-sip-external] context to extensions_override_freepbx.conf. Inside that context, we’ll specify the FQDN used for public SIP URI connections to your server, e.g. sip.yourdomain.com. This will block SIP invitations except SIP URIs containing that domain name. We’ll also define all of the extensions on your Asterisk server which can be reached with SIP URI invitations. These could be actual extensions, or ring groups, or IVRs, or Asterisk applications. The choice is yours. These SIP URI authorizations can be either numeric (701@sip.yourdomain.com) or alpha (weather@sip.yourdomain.com) or alphanumeric (channel7@sip.abc.com). Finally, we’ll put the new IPtables firewall rules in place and adjust your existing iptables-custom setup to support the new publicly-accessible PBX. For example, we’ll still use whitelist entries for web access to your server since anonymous users would cause nothing but mischief if TCP ports 80 and 443 were exposed. It’s worth noting that KVM platforms provide a more robust implementation of IPtables that can block more types of nefarious traffic. We’ve supplemented the original article with a KVM update below. With OpenVZ platforms, we have to rely upon Asterisk to achieve IP address blocking and some types of packet filtering. So why not choose a KVM platform? It’s simple. These platforms typically cost twice as much as equivalent OpenVZ offerings. With this type of deployment, KVM is worth it.
Installing Incredible PBX Base Platform
Today’s design requires an Incredible PBX platform on a cloud-based server. Start by following this tutorial to put the pieces in place. We recommend you also install the Whole Enchilada addition once the base install is finished. Make sure everything is functioning reliably before continuing.
Upgrading the Fail2Ban Platform
Because this will be a publicly-accessible server, we’re going to tighten up the Asterisk configuration in Fail2Ban and lengthen the bantime and findtime associated with Fail2Ban’s Asterisk log monitoring. We also recommend that you whitelist the IP addresses associated with your server and PCs from which you plan to access your server so that you don’t inadvertently block yourself.
Log into your server as root and issue the following commands. When the jail.conf file opens in the nano editor, scroll down to line 34 and add the IP addresses you’d like to whitelist to the existing ignoreip settings separating each IP address with a space. Then press Ctrl-X, Y, then Enter to save your changes. Verify that Fail2Ban restarts successfully.
cd /etc/fail2ban
wget http://incrediblepbx.com/fail2ban-public.tar.gz
tar zxvf fail2ban-public.tar.gz
rm -f fail2ban-public.tar.gz
nano -w jail.conf
service fail2ban restart
If you ever get locked out of your own server, you can use the Serial Console in your VPS Control Panel to log into your server. Then verify that your IP address has been blocked by issuing the command: iptables -nL. If your IP is shown as blocked, issue this command with your address to unblock it: fail2ban-client set asterisk unbanip 12.34.56.78
Obtaining an FQDN for Your Server
Because we’ll be blocking IP address SIP access to your server, you’ll need to obtain one or perhaps two FQDNs for your server. If you manage DNS for a domain that you own, this is easy. If not, you can obtain a free FQDN from ChangeIP here. Thanks, @mbellot.
For the FQDN that you’ll be using for SIP registrations on your server, configure Asterisk to use it by logging into your server as root and issuing the following command using your new FQDN, e.g. xyz.yourdomain.com. Thanks, @ou812.
echo "domain=xyz.yourdomain.com" >> /etc/asterisk/sip_custom.conf
SECURITY ALERT: Never use the SIP URI MOD on a server such as this one with a publicly-exposed SIP port as it is possible for some nefarious individual to spoof your FQDN in the headers of a SIP packet and easily gain outbound calling access using your server’s trunk credentials.
Customizing the [sip-external-custom] Context
All FreePBX-based servers include a sip-external-custom context as part of the default installation; however, we need a customized version to use for a publicly-accessible PBX. You can’t simply update the context in /etc/asterisk/extensions.conf because FreePBX will overwrite the changes the next time you reload your dialplan. Instead we have to copy the context into extensions_override_freepbx.conf and make the changes there. So let’s start by copying the new template there with the following commands:
cd /tmp
wget http://incrediblepbx.com/from-sip-external.txt
cd /etc/asterisk
cat /tmp/from-sip-external.txt >> extensions_override_freepbx.conf
rm -f /tmp/from-sip-external.txt
nano -w extensions_override_freepbx.conf
When the nano editor opens the override file, navigate to line #10 of the [from-sip-external] context and replace xyz.domain.com with the FQDN you want to use for SIP invites to your server. These are the connections that are used to actually connect to an extension on your server (NOT to register). As noted previously, this can be a different FQDN than the one used to actually register to an extension on your server. Next, scroll down below line #24, and you will see a series of lines that actually authorize anonymous SIP connections with your server. There are two numeric entries and also two alpha entries to access the News and Weather apps on your server. The 13th position in the dialplan is required for all authorized calls.
exten => 947,13,Dial(local/947@from-internal)
exten => 951,13,Dial(local/951@from-internal)
exten => news,13,Dial(local/951@from-internal)
exten => weather,13,Dial(local/947@from-internal)
You can leave these in place, remove them, or add new entries depending upon which extensions you want to make publicly accessible on your server. Here are some syntax examples for other types of server access that may be of interest.
; Call VoIP Users Conference
exten => 882,13,Dial(SIP/vuc@vuc.me)
exten => vuc,13,Dial(SIP/vuc@vuc.me)
; Call Default CONF app
exten => 2663,13,Dial(local/${EXTEN}@from-internal)
exten => conf,13,Dial(local/2663@from-internal)
; Call Bob at Local Extension 701
exten => 701,13,Dial(local/${EXTEN}@from-internal)
exten => bob,13,Dial(local/701@from-internal)
; Call Default Inbound Route thru Time Condition
exten => home,13,Goto(timeconditions,1,1)
; Call Inbound Trunk 8005551212
exten => 8005551212,13,Goto(from-trunk,${DID},1)
; Call Lenny
exten => 53669,13,Dial(local/${EXTEN}@from-internal)
exten => lenny,13,Dial(SIP/2233435945@sip2sip.info)
; Call any toll-free number (AT&T Directory Assistance in example)
exten => information,13,Dial(SIP/18005551212@switch.starcompartners.com)
Once you’ve added your FQDN and authorized SIP URI extensions, save the file: Ctrl-X, Y, then Enter.
One final piece is required to enabled anonymous SIP URI connections to your server:
echo "allowguest=yes" >> /etc/asterisk/sip_general_custom.conf
Now restart Asterisk: amportal restart
UPDATE for DialPlan Junkies: We received a few inquiries following publication inquiring about the dialplan design. We’ve taken advantage of a terrific feature of Asterisk which lets calls fall through to the next line of a dialplan if there is no match on a Goto(${EXTEN},13) command. For example, if a caller dials ward@sip.domain.com and there is a line 12 in the dialplan directing the call to ward,13 which exists, call processing will continue there. However, if the extension does not exist, the call will not be terminated. Instead, if there exists a more generic line 13 in the dialplan, e.g. exten => _X.,13,Goto(s,1), call processing will continue there. We use this trick to then redirect the call to an ‘s’ extension sequence to announce that the called extension could not be reached. It’s the reason all of the whitelisted extensions have to have the same line 13 designation so that call processing can continue with the generic line 13 when a specific extension match fails.
Configuring IPtables for Public SIP Access
You may recall that, with Incredible PBX, we bring up the basic IPtables firewall using the /etc/sysconfig/iptables rules. Then we add a number of whitelist entries using /usr/local/sbin/iptables-custom. We’re going to do much the same thing with today’s setup except the rule sets are a bit different. Let’s start by putting the default iptables-custom file in place:
cd /usr/local/sbin
wget http://incrediblepbx.com/iptables-custom-public.tar.gz
tar zxvf iptables-custom-public.tar.gz
rm -f iptables-custom-public.tar.gz
nano -w iptables-custom
When the nano editor opens, scroll to the bottom of the file. You’ll note that we’ve started a little list of notorious bad guys to get you started. Fail2Ban will actually do a pretty good job of managing these, but for the serious recidivists, blocking them permanently is probably a good idea. In addition to the bad guys, you’ll want to whitelist your own IP addresses and domains so that you don’t get blocked from FreePBX web access to your server. The syntax looks like the following two examples:
/usr/sbin/iptables -I INPUT -s pbxinaflash.dynamo.org -j ACCEPT
/usr/sbin/iptables -I INPUT -s 8.8.8.8                -j ACCEPT
Whenever you make changes to your IPtables configuration, remember to restart IPtables using the following command ONLY: iptables-restart
Now let’s put the final IPtables piece in place with the default IPtables config file:
cd /etc/sysconfig
wget http://incrediblepbx.com/iptables-public.tar.gz
tar zxvf iptables-public.tar.gz
rm -f iptables-public.tar.gz
nano -w iptables
When the nano editor opens the file, scroll down to line 51 which controls the TCP port for SSH access to your server. We strongly recommend you change this from 22 to something in the 1000-2000 range. HINT: Your birth year is easy to remember. In the next step, we’ll make the change in your SSH configuration as well.
Next, scroll down to lines 143 and 144. Replace YOUR_HOSTNAME.no-ip.com on both lines with the FQDN of your server that will be used to accept SIP invitations (connections) on your server. These entries have no effect on SIP registrations which we covered above!
Once you’ve made these changes, save the file BUT DO NOT RESTART IPTABLES JUST YET.
Securing the SSH Access Port
TCP port 22 is probably one of the most abused ports on the Internet because it controls access to SSH and the crown jewels by default. Assuming you changed this port in the IPtables firewall setup above, we now need to change it in your SSH config file as well. Edit /etc/ssh/sshd_config and scroll down to line 12. Change the entry to: Port 1999 assuming 1999 is the port you’ve chosen. Be sure to remove the comment symbol (#) at the beginning of the line if it exists. Then save the file. Now reboot your server, and you should be all set.
Dealing with the Bad Guys
You’ll be amazed how quickly and how many new friends you’ll make on the public Internet within the first few hours. You can watch the excitement from the Asterisk CLI by logging into your server as root and issuing the command: asterisk -rvvvvvvvvvv. Another helpful tool is to monitor your IPtables status which will show IP addresses that have been temporarily blocked by Fail2Ban: iptables -nL. This will catch most of the bad guys and block them. But some are smarter than others, and many know how to spoof IP addresses in SIP packets as you will quickly see. Unlike on KVM platforms, IPtables on most OpenVZ platforms cannot search packets for text strings which is a simple way to block many of these attackers. HINT: You get what you pay for. And, in some cases, attackers disguise their address or use yours. We’ve now found that ${SIPURI} holds the caller’s true identity so we’ve updated the code accordingly. Whether to permanently block these guys is completely up to you. A typical SIP INVITE before such a call is dropped only consumes about 100 bytes so it’s usually not a big deal. You also can manually block callers using the Fail2Ban client with the desired IP address: fail2ban-client set asterisk banip 12.34.56.78.
Additional Security on KVM Platforms
As we mentioned above, a KVM platform provides considerably more security for your public-facing server because you can block entire countries using the ipset extension to IPtables. You can read all about it here. After considerable discussion and suggestions on the PIAF Forum, we would offer the following code which blocks the countries we have identified as causing the majority of problems. First, modify your /etc/sysconfig/iptables configuration and insert the following code in the IPSPF section of the script around line 93. You can change the list of blocked countries to meet your own needs. Just be sure to make the same country-code changes in the blockem.sh script which we will cover in step 2. A list of available country codes can be found here. Save your changes, but do NOT restart IPtables just yet.
-A IPSPF -m set --match-set cn src -j DROP
-A IPSPF -m set --match-set ru src -j DROP
-A IPSPF -m set --match-set ps src -j DROP
-A IPSPF -m set --match-set kp src -j DROP
-A IPSPF -m set --match-set ua src -j DROP
-A IPSPF -m set --match-set md src -j DROP
-A IPSPF -m set --match-set nl src -j DROP
-A IPSPF -m set --match-set fr src -j DROP
Second, we want to add a new /etc/blockem.sh script and make it executable (chmod +x /etc/blockem.sh). Make sure the country list in line #5 matches the dropped countries list you added to IPtables in step #1 above.
#!/bin/bash
cd /etc
wget -qO - http://www.ipdeny.com/ipblocks/data/countries/all-zones.tar.gz| tar zxvf -
for i in \\
cn ru ps kp ua md nl fr
do
/usr/sbin/ipset create -exist $i hash:net
for j in $(cat $i.zone); do /usr/sbin/ipset add -exist $i $j; done
done
wait
sleep 5
service iptables restart
wait
service fail2ban restart
exit 0
Third, try things out by running the script: /etc/blockem.sh. Verify that IPtables is, in fact, blocking the listed countries: iptables -nL.
BUG: Some early releases had a missing line which caused the IPSPF section of code in the IPtables script not to be executed. You can test whether you’re missing the necessary line by issuing the following command:
grep "INPUT -j IPSPF" /etc/sysconfig/iptables
If the result is a blank line, then issue the following command to fix the problem:
sed -i 's|-A INPUT -j ASIP|-A INPUT -j IPSPF\\n-A INPUT -j ASIP|' /etc/sysconfig/iptables
Finally, we recommend adding the script to /etc/rc.d/rc.local so that it gets run whenever you reboot your server.
In choosing a KVM platform, we’ve had good luck with the $5/month Digital Ocean platform where you still can get a $100 credit to kick the tires for 60 days, Vultr (similar pricing to D.O. without the 60-day credit). With either of these providers, you can add automatic backups for an extra dollar a month. In the bargain basement (may not be here tomorrow) category, we like (and use) both the SnowVPS KVM $15/year and AlphaRacks KVM $22/year offerings. Many other low-cost options are documented on the LowEndBox site. Just don’t invest more than you can afford to lose… and make a backup.1
Connecting a SIP Phone to Kamailio or LinPhone
If you followed along in our initial Kamailio adventure, then it’s easy to test some SIP URI calls to your new server. You can connect virtually any kind of SIP telephone or endpoint to Kamailio. Another easy way to try out SIP calling is to first set up a free LinPhone SIP Account.
You can find dozens of recommendations for hardware-based SIP phones both on Nerd Vittles and the PIAF Forum. For today we’ll get you started with one of our favorite (free) softphones, YateClient. It’s available for almost all desktop platforms. Download YateClient from here. Run YateClient once you’ve installed it and enter the credentials for your Kamailio or LinPhone account you’ve previously created. You’ll need the IP address of your Kamailio server or LinPhone’s FQDN (sip.linphone.org) plus your account’s password. Fill in the Yate Client template using the IP address or FQDN as well as your Username and whatever Password you assigned to the account when you created it. Click OK to save your entries.
Once the Yate softphone shows that it is registered, try a test call to one of the SIP URIs you authorized on your new Asterisk server: sip:947@sip.yourdomain.com.
If you don’t happen to have a Kamailio server or a LinPhone SIP account to play with but you have another Asterisk server, then the simple way to enable SIP URI extensions is by editing /etc/asterisk/extensions_custom.conf. In the [from-internal-custom] context, add an extension that can be used to contact any desired SIP URI. Then reload your dialplan: asterisk -rx "dialplan reload". Now dial that extension (2468 in the following example) from any phone connected to your Asterisk server. The entry would look something like this to call the SIP URI on your new server for the latest weather forecast:
exten => 2468,1,Dial(SIP/weather@sip.yourdomain.com)
Originally published: Monday, January 28, 2019 Updated: Wednesday, February 6, 2019

Need help with Asterisk? Visit the VoIP-info Forum.
Special Thanks to Our Generous Sponsors
FULL DISCLOSURE: ClearlyIP, Skyetel, Vitelity, DigitalOcean, Vultr, VoIP.ms, 3CX, Sangoma, TelecomsXchange and VitalPBX have provided financial support to Nerd Vittles and our open source projects through advertising, referral revenue, and/or merchandise. As an Amazon Associate and Best Buy Affiliate, we also earn from qualifying purchases. We’ve chosen these providers not the other way around. Our decisions are based upon their corporate reputation and the quality of their offerings and pricing. Our recommendations regarding technology are reached without regard to financial compensation except in situations in which comparable products at comparable pricing are available from multiple sources. In this limited case, we support our sponsors because our sponsors support us.
 BOGO Bonaza: Enjoy state-of-the-art VoIP service with a $10 credit and half-price SIP service on up to $500 of Skyetel trunking with free number porting when you fund your Skyetel account. No limits on number of simultaneous calls. Quadruple data center redundancy. $25 monthly minimum spend required. Tutorial and sign up details are here.
![]() The lynchpin of Incredible PBX 2020 and beyond is ClearlyIP components which bring management of FreePBX modules and SIP phone integration to a level never before available with any other Asterisk distribution. And now you can configure and reconfigure your new Incredible PBX phones from the convenience of the Incredible PBX GUI.
The lynchpin of Incredible PBX 2020 and beyond is ClearlyIP components which bring management of FreePBX modules and SIP phone integration to a level never before available with any other Asterisk distribution. And now you can configure and reconfigure your new Incredible PBX phones from the convenience of the Incredible PBX GUI.
 VitalPBX is perhaps the fastest-growing PBX offering based upon Asterisk with an installed presence in more than 100 countries worldwide. VitalPBX has generously provided a customized White Label version of Incredible PBX tailored for use with all Incredible PBX and VitalPBX custom applications. Follow this link for a free test drive!
 Special Thanks to Vitelity. Vitelity is now Voyant Communications and has halted new registrations for the time being. Our special thanks to Vitelity for their unwavering financial support over many years and to the many Nerd Vittles readers who continue to enjoy the benefits of their service offerings. We will keep everyone posted on further developments.

- Digital Ocean and Vultr provide modest referral credits to Nerd Vittles for those that use our referral code. It in no way colors our recommendations regarding these two providers, both of whom we use extensively. [↩]
One Minute Wonder: Introducing VitalPBX for VirtualBox
Last week we took VitalPBX to the Cloud with our rock-solid firewall. And this week we’ll show you how to get VitalPBX up and running on any desktop computer in less than a minute using VirtualBox®. If you’ve followed Nerd Vittles over the years, you already know that VirtualBox from Oracle® is one of our favorite platforms. Almost any desktop computer can serve as a VirtualBox hosting platform. And once VirtualBox is installed, adding VitalPBX is a snap. Download the VitalPBX image, initialize your MAC address, start up the VM, and boom. Instant PBX perfection! The really nice thing about our tutorials is it doesn’t cost you a dime to try things out for yourself. And the Incredible PBX® feature set is included as well. Just add your credentials and speech-to-text, voice recognition, and a Siri-like interface are as close as your nearest SIP phone. Splurge with a $4.99 one-time purchase to add Google Voice, and you’ve got unlimited free calling in the U.S. and Canada. So why wait? Let’s get started.
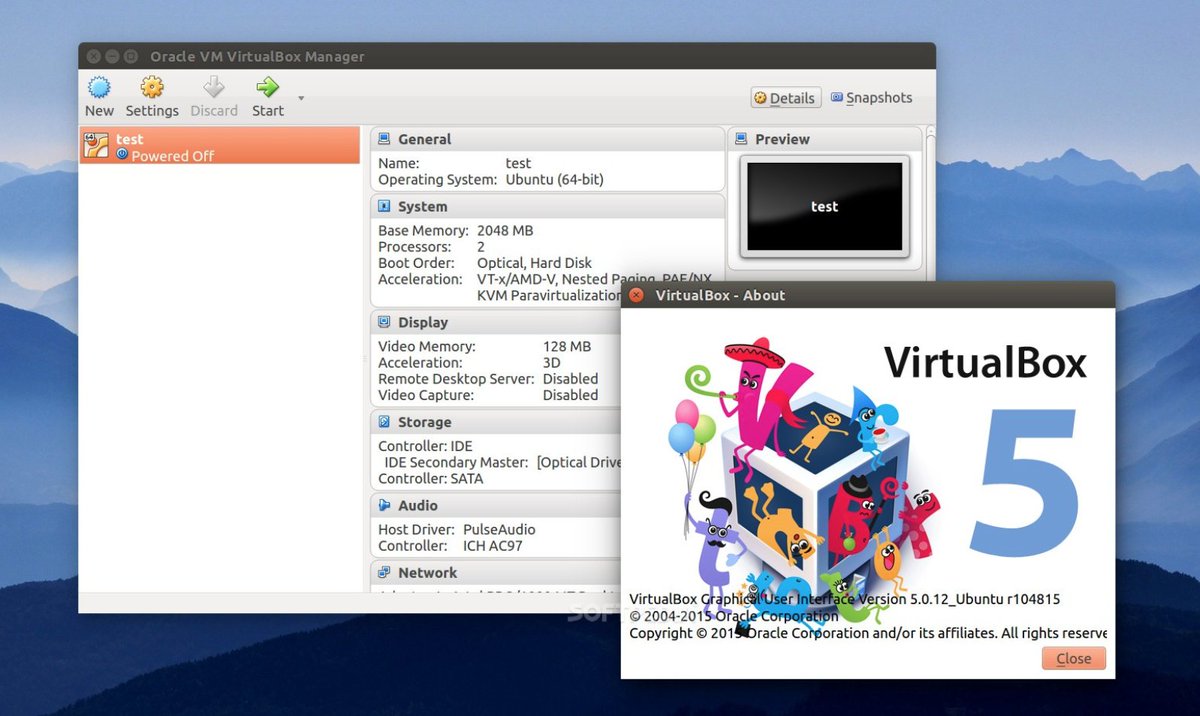
Installing Oracle VM VirtualBox

Oracle’s virtual machine platform inherited from Sun is amazing. It’s not only free, but it’s pure GPL2 code. VirtualBox gives you a virtual machine platform that runs on top of any desktop operating system. In terms of limitations, we haven’t found any. We even tested this on an Atom-based Windows 7 machine with 2GB of RAM, and it worked without a hiccup. So step #1 today is to download one or more of the VirtualBox installers from VirtualBox.org or Oracle.com. Our recommendation is to put all of the 100MB installers on a 4GB thumb drive.1 Then you’ll have everything in one place whenever and wherever you happen to need it. Once you’ve downloaded the software, simply install it onto your favorite desktop machine. Accept all of the default settings, and you’ll be good to go. For more details, here’s a link to the Oracle VM VirtualBox User Manual.
Installing Incredible PBX for VitalPBX VM
To begin, download the Incredible PBX for VitalPBX .ova image (1.0 GB) to the computer on which you installed VirtualBox.
Next, double-click on the VitalPBX .ova image on your desktop. Be sure to check the box to initialize the MAC address of the image and then click Import. Once the import is finished, you’ll see a new VitalPBX virtual machine in the VM List of the VirtualBox Manager Window. Let’s make a couple of one-time adjustments to the VitalPBX configuration to account for differences in sound and network cards on different host machines.
(1) Click once on the VitalPBX virtual machine in the VM List. Then (2) click the Settings button. In the Audio tab, check the Enable Audio option and choose your sound card. In the Network tab for Adapter 1, check the Enable Network Adapter option. From the Attached to pull-down menu, choose Bridged Adapter. Then select your network card from the Name list. Then click OK. That’s all the configuration that is necessary for VitalPBX.
Running VitalPBX in VirtualBox
Once you’ve imported and configured the VitalPBX Virtual Machine, you’re ready to go. Highlight the VitalPBX virtual machine in the VM List on the VirtualBox Manager Window and click the Start button. The standard CentOS boot procedure will begin and, within a few seconds, you’ll get the familiar Linux login prompt. During the bootstrap procedure, you’ll see a couple of dialogue boxes pop up that explain the keystrokes to move back and forth between your host operating system desktop and your virtual machine. Remember, you still have full access to your desktop computer. Incredible PBX for VitalPBX is merely running as a task in a VM window. Always gracefully halt VitalPBX just as you would on any computer.
Here’s what you need to know. To work in the VitalPBX virtual machine, just left-click your mouse while it is positioned inside the VM window. To return to your host operating system desktop, press the right Option key on Windows machines or the left Command key on any Mac. For other operating systems, read the dialogue boxes for instructions on moving around. To access the Linux CLI, login as root with the default password: password. Change your root password immediately by typing: passwd.
VitalPBX comes preconfigured so we need to login to the virtual machine for one primary reason, to obtain the IP address of VitalPBX. Once you’ve deciphered the IP address, point your favorite web browser at the IP address you wrote down. You’ll be prompted to create an admin password for your PBX and then you’ll be asked to register the PBX with Telesoft.
We’re assuming your VitalPBX VM is set up behind a hardware-based firewall. If not, you should immediately configure the firewall as documented in our VitalPBX in the Cloud article.
First, you’ll need to change the password for Extension 701: PBX:Extensions:Edit:701. The Edit option is the four-bar icon in the upper right corner of the VitalPBX dialog window. Click Save and Reload your Dialplan.
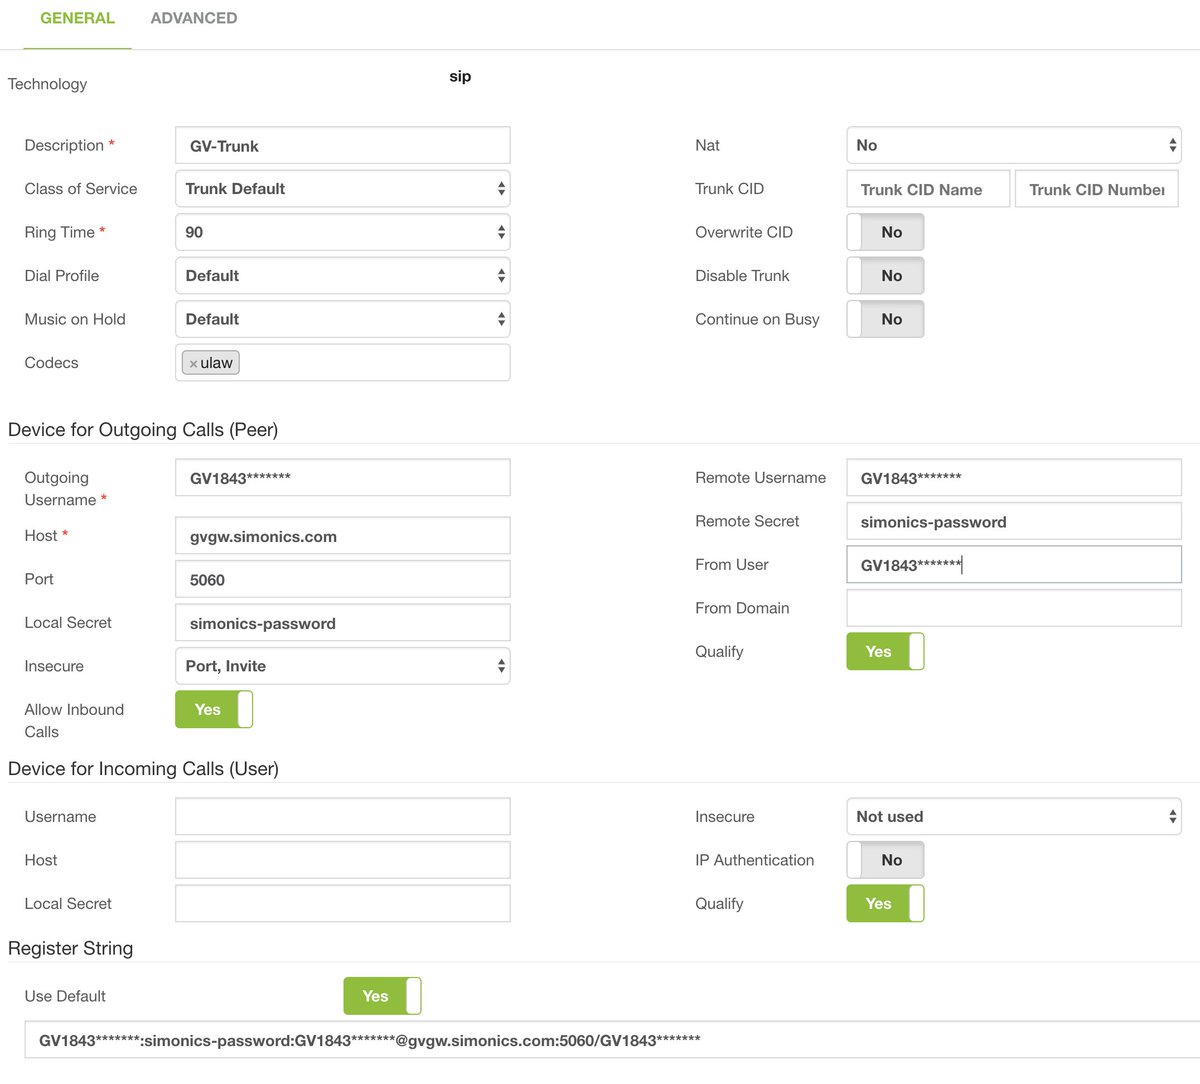
Next, you’ll need to register a Google Voice trunk with the Simonics SIP/GV Gateway for a one-time fee of $4.99. This gets you unlimited incoming and outgoing calls to the U.S. and Canada if you live in the U.S. Otherwise, set up a SIP trunk and enter your credentials in PBX:External:Trunks:SIP. If you’re using the Simonics gateway, the SIP trunk already has been set up. Just enter your credentials and change Disable Trunk to NO as shown below:
CAUTION: In choosing a DID for outbound calls with Incredible PBX, we strongly recommend that you use a Google Voice trunk. The reason is that, as long as your Google Voice account has no money allocated to it, Google will manage outbound calls to 10 and 11-digit phone numbers and block those that may incur enormous long distance charges from unscrupulous "merchants" in certain Caribbean countries. If you don’t heed our recommendation, we urge you NOT to link an Inbound Route to the Incredible PBX custom context. It’s your phone bill.
If you plan to use VitalPBX for "real work," then you’ll also want to change the Conference credentials for 2663 (C-O-N-F): PBX:Applications:Conference.
The VitalPBX virtual machine comes preconfigured to direct all incoming calls to Allison’s Demo IVR for Incredible PBX. If you’d prefer some other setup, change the Destination of the Default Inbound Route: PBX:External:Inbound Route:Default.
Configuring Incredible PBX for VitalPBX
In order to take advantage of all the Incredible PBX applications, you’ll need to obtain IBM text-to-speech (TTS) and speech-to-text (STT) credentials as well as a (free) Application ID for Wolfram Alpha.
NOV. 1 UPDATE: IBM has moved the goal posts effective December 1, 2018:
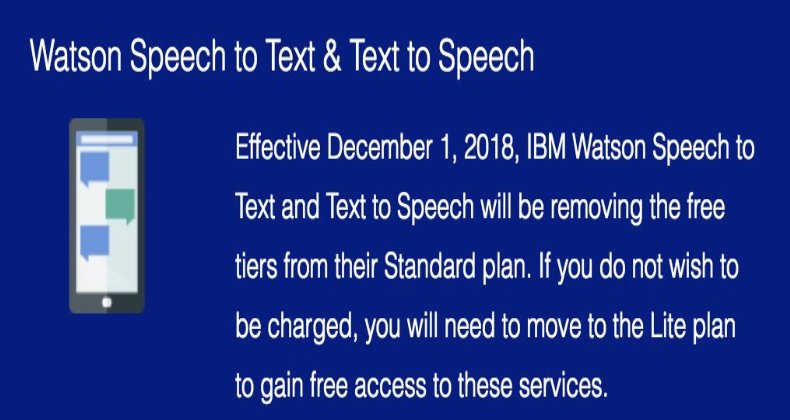
This Nerd Vittles tutorial will walk you through getting your IBM account set up and obtaining both your TTS and STT credentials. Be sure to write down BOTH sets of credentials which you’ll need in a minute. For home and SOHO use, IBM access and services are FREE even though you must provide a credit card when signing up. The IBM signup process explains their pricing plans.
To use Wolfram Alpha, sign up for a free Wolfram Alpha API account. Just provide your email address and set up a password. It takes less than a minute. Log into your account and click on Get An App ID. Make up a name for your application and write down (and keep secret) your APP-ID code. That’s all there is to getting set up with Wolfram Alpha. If you want to explore costs for commercial use, there are links to let you get more information.
In addition to your Wolfram Alpha APPID, there are two sets of IBM credentials to plug into the Asterisk AGI scripts. Keep in mind that there are different usernames and passwords for the IBM Watson TTS and STT services. The TTS credentials will look like the following: $IBM_username and $IBM_password. The STT credentials look like this: $API_USERNAME and $API_PASSWORD. Don’t mix them up. 🙂
All of the scripts requiring credentials are located in /var/lib/asterisk/agi-bin so switch to that directory after logging into your server as root. Edit each of the following files and insert your TTS credentials in the variables already provided: nv-today2.php, ibmtts.php, and ibmtts2.php. Edit each of the following files and insert your STT credentials in the variables already provided: getquery.sh, getnumber.sh, and getnumber2.sh. Finally, edit 4747 and insert your Wolfram Alpha APPID.
Using Asteridex with VitalPBX
AsteriDex is a web-based dialer and address book application for Asterisk and VitalPBX. It lets you store and manage phone numbers of all your friends and business associates in an easy-to-use SQLite3 database. You simply call up the application with your favorite web browser: http://vitalpbx-ip-address/asteridex4/. When you click on a contact that you wish to call, AsteriDex first calls you at extension 701, and then AsteriDex connects you to your contact through another outbound call made using your default outbound trunk that supports numbers in the 1NXXNXXXXXX format.
Before AsteriDex Click-to-Call will work, you must authorize AsteriDex to access Asterisk from your browser. After logging into your server as root, edit the following file in /etc/asterisk/ombutel: manager__50-ombutel-user.conf. For each public IP address you wish to authorize, add an entry like the following immediately below the existing permit entry in the file. The non-routable IP address subnets already have been configured so, if you’re using a browser behind the same firewall as VitalPBX, you can skip this step. Otherwise reload the dialplan after adding public IP addresses: asterisk -rx "dialplan reload"
permit=12.34.56.78
Taking Incredible PBX for a Test Drive
You can take Incredible PBX for VitalPBX on a test drive in two ways. You can call our server, and then you can try things out on your own server and compare the results. Call our IVR by dialing 1-843-606-0555. For our international friends, you can use the following SIP URI for a free call: 10159591015959@atlanta.voip.ms. For tips on setting up your own secure, hybrid SIP URI with VitalPBX, see our original tutorial. The FreePBX® setup is virtually identical except for the location of the custom SIP setting for match_auth_username=yes. On a VitalPBX server, you will enter it here: Settings:Technology Settings:SIP Settings:CUSTOM.
With Allison’s Demo IVR, you can choose from the following options:
- 0. Chat with Operator — connects to extension 701
- 1. AsteriDex Voice Dialer – say "Delta Airlines" or "American Airlines" to connect
- 2. Conferencing – log in using 1234 as the conference PIN
- 3. Wolfram Alpha Almanac – say "What planes are flying overhead"
- 4. Lenny – The Telemarketer’s Worst Nightmare
- 5. Today’s News Headlines — courtesy of Yahoo! News
- 6. Weather by ZIP Code – enter any 5-digit ZIP code for today’s weather
- 7. Today in History — courtesy of OnThisDay.com
- 8. Chat with Nerd Uno — courtesy of SIP URI connection to 3CX iPhone Client
- 9. DISA Voice Dialer — say any 10-digit number to be connected
- *. Current Date and Time — courtesy of VitalPBX
You can call your own IVR in two ways. From an internal VitalPBX phone, dial D-E-M-O (2663) to be connected. Or simply dial the number of the DID you routed to the Incredible PBX Custom Context. Either way, you should be connected to the Incredible PBX IVR running on your VitalPBX server. Be sure that you heed AND test the CAUTION documented above. Enjoy!
Originally published: Monday, April 9, 2018
Got Friends? 7 Countries Have Never Visited Nerd Vittles. 2018 Is Calling! https://t.co/wMfmlhAr16 #asterisk #freepbx #wazo #issabel #IncrediblePBX #3CX pic.twitter.com/kAmAEnwVIw
— Ward Mundy (@NerdUno) January 9, 2018
Need help with VitalPBX? Visit the VitalPBX Forum.
Special Thanks to Our Generous Sponsors
FULL DISCLOSURE: ClearlyIP, Skyetel, Vitelity, DigitalOcean, Vultr, VoIP.ms, 3CX, Sangoma, TelecomsXchange and VitalPBX have provided financial support to Nerd Vittles and our open source projects through advertising, referral revenue, and/or merchandise. As an Amazon Associate and Best Buy Affiliate, we also earn from qualifying purchases. We’ve chosen these providers not the other way around. Our decisions are based upon their corporate reputation and the quality of their offerings and pricing. Our recommendations regarding technology are reached without regard to financial compensation except in situations in which comparable products at comparable pricing are available from multiple sources. In this limited case, we support our sponsors because our sponsors support us.
BOGO Bonaza: Enjoy state-of-the-art VoIP service with a $10 credit and half-price SIP service on up to $500 of Skyetel trunking with free number porting when you fund your Skyetel account. No limits on number of simultaneous calls. Quadruple data center redundancy. $25 monthly minimum spend required. Tutorial and sign up details are here.
![]() The lynchpin of Incredible PBX 2020 and beyond is ClearlyIP components which bring management of FreePBX modules and SIP phone integration to a level never before available with any other Asterisk distribution. And now you can configure and reconfigure your new Incredible PBX phones from the convenience of the Incredible PBX GUI.
The lynchpin of Incredible PBX 2020 and beyond is ClearlyIP components which bring management of FreePBX modules and SIP phone integration to a level never before available with any other Asterisk distribution. And now you can configure and reconfigure your new Incredible PBX phones from the convenience of the Incredible PBX GUI.
VitalPBX is perhaps the fastest-growing PBX offering based upon Asterisk with an installed presence in more than 100 countries worldwide. VitalPBX has generously provided a customized White Label version of Incredible PBX tailored for use with all Incredible PBX and VitalPBX custom applications. Follow this link for a free test drive!
Special Thanks to Vitelity. Vitelity is now Voyant Communications and has halted new registrations for the time being. Our special thanks to Vitelity for their unwavering financial support over many years and to the many Nerd Vittles readers who continue to enjoy the benefits of their service offerings. We will keep everyone posted on further developments.
- Many of our purchase links refer users to Amazon when we find their prices are competitive for the recommended products. Nerd Vittles receives a small referral fee from Amazon to help cover the costs of our blog. We never recommend particular products solely to generate Amazon commissions. However, when pricing is comparable or availability is favorable, we support Amazon because Amazon supports us. [↩]
VitalPBX in the Cloud: Providers, Backups, & Airtight Security

Last month we introduced VitalPBX, a terrific new (free) VoIP platform that’s about as intuitive as software can get. We followed up with a dozen Incredible PBX applications that really showed off the flexibility of this new Asterisk® platform. And today we’re pleased to introduce two new cloud solutions that offer our whitelist firewall design for security plus automatic backups. Both Digital Ocean and Vultr offer terrific performance coupled with a $5/month price point that is easy on your wallet. Our tip of the hat goes to Digital Ocean this month because they are again offering a $10 credit on new accounts while also generously supporting Nerd Vittles. That translates into two free months of VitalPBX in the Cloud service for you to kick the tires. If you like what you see, you can spring for the extra $1 a month and add automatic backups to your $5/mo. bill going forward. With a $10 credit, what’s to lose?
To get started, set up an account with one of these cloud providers and create a $5 a month server with 64-bit CentOS 7 in your choice of cities. Once you have your root password, log into your new server as root using SSH or Putty. On Digital Ocean, you will be prompted to change your password the first time you login. On Vultr, you have to manually do it by issuing the command: passwd. Then you’re ready to begin the VitalPBX install. Just issue the following commands and then grab a cup of coffee.
cd /root
yum -y install wget nano tar
wget https://raw.githubusercontent.com/wardmundy/VPS/master/vps.sh
chmod +x vps.sh
./vps.sh
The base install takes less than 15 minutes to complete. When it’s finished, use a web browser from your desktop PC and log into the IP address of your new VitalPBX server. You’ll be prompted to set up an admin password for GUI access and then you register your server with Telesoft. Should you ever forget your admin password, here’s how to force a reset on your next login from a browser:
mysql ombutel -e 'update ombu_settings set value = "yes" where name = "reset_pwd"'
After logging in, you’ll be presented with the VitalPBX Dashboard:
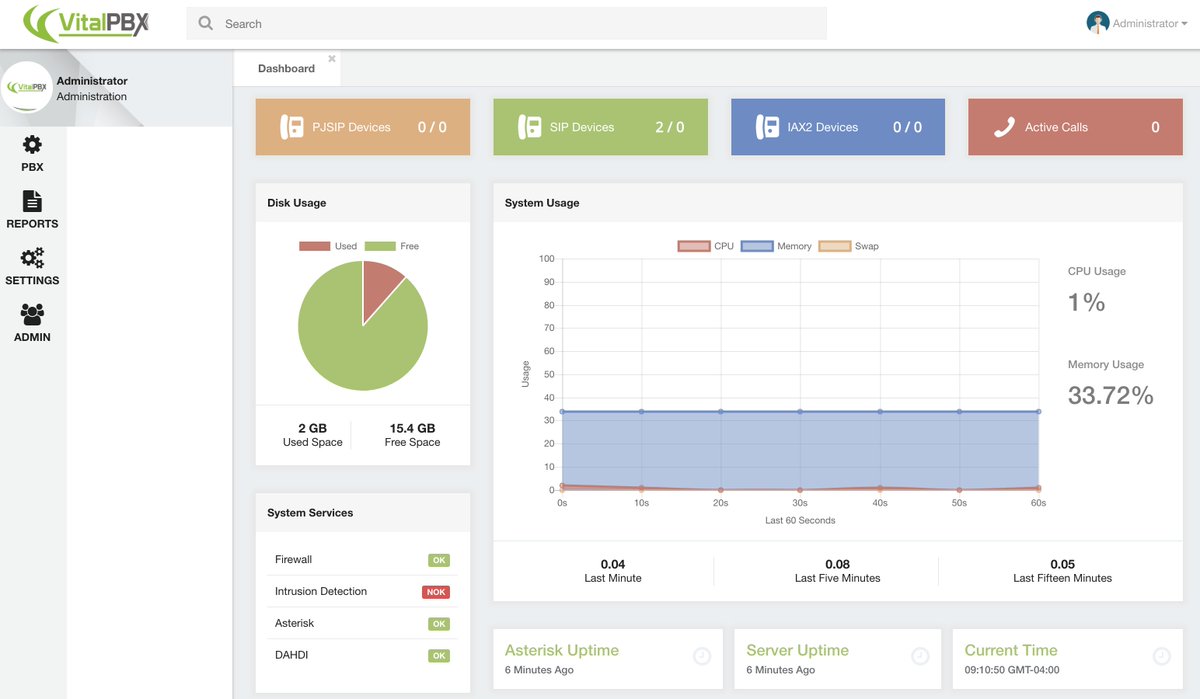
From here, the drill is pretty much the same as what was outlined in our original VitalPBX tutorial. So jump over there to complete your set up and configure extensions, trunks, routes, and a few other settings for your new PBX. Then pick back up here to secure your server!
Security Methodology. What is different on the cloud platform is you don’t have a hardware-based firewall to protect your server. So we’ll need to configure VitalPBX using its built-in firewalld and Fail2Ban applications. Our preference is to use a whitelist of IP addresses to access your server and its resources. In that way, the Bad Guys never even see your server on the Internet. Our security philosophy is simple. If you can’t see it, you can’t hack it.
In addition to a WhiteList of public IP addresses, we also will enable a secure NeoRouter VPN front door to your server as well as a PortKnocker backdoor thereby providing three separate and secure ways to gain server access without publicly exposing VitalPBX to the Internet. If you have a better way, by all means go for it. After all, it’s your phone bill.
Firewall and Fail2Ban Setup. To begin, login to the VitalPBX GUI with a browser using your admin credentials. Then do the following:
(1.) Add NeoRouter VPN Protocol TCP Port 32976 in Admin:Security:Firewall:Services.
(2.) Add NeoRouter VPN Action ACCEPT rule in Admin:Security:Firewall:Rules.
(3.a.) WhiteList your client and server IP addresses in Admin:Security:Firewall:WhiteList.
(3.b.) WhiteList 127.0.0.1 (for localhost) and 10.0.0.0/24 (for NeoRouter VPN).
(3.c.) WhiteList the IP addresses of any potential unregistered trunk providers.
(3.d.) WhiteList the public IP addresses of any extensions you plan to install.
(4.) Enable Fail2Ban in Admin:Security:Intrusion Detection.
(5.a.) WhiteList your client IP address(es) in Admin:Security:Intrusion Detection:Whitelist.
(5.b.) WhiteList the NeoRouter VPN subnet, 10.0.0.0/24, as well.
(6.) Remove the following rules from Admin:Security:Firewall:Rules
SIP
HTTP
HTTPS
SSH
IAX2
PJSIP
(7.) Reload the VitalPBX dialplan by clicking the Red indicator (upper right of the GUI).
(8.) Verify IPtables WhiteList: iptables -nL | grep ACCEPT
(9.) Verify Fail2Ban WhiteList: grep -r ignoreip /etc/fail2ban/jail.d/*
Travelin’ Man 3 Addition. One of the major shortcomings in the firewalld implementation of IPtables is the lack of any support for fully-qualified domain names in their WhiteList. For those that want to use dynamic DNS updating services with custom FQDNs to manage remote user access to your server, this is a serious limitation even though PortKnocker alleviates some of the misery. So here’s our solution. We have reworked the Travelin’ Man 3 toolkit for VitalPBX so that you can use command line scripts to add (add-ip and add-fqdn), remove (del-acct), and manage (ipchecker) your WhiteList using either IP addresses (add-ip) or FQDNs (add-fqdn). The automatic update utility (ipchecker) will keep your FQDNs synchronized with your dynamic IP address service by updating the WhiteList every 10 minutes between 5 a.m. and 10 p.m. daily. Keep in mind that this is a supplement to the existing VitalPBX firewall setup documented above. And we only recommend that you add it if you plan to implement automatic management of dynamic IP addresses with FQDNs for your extensions and remote users.
If you plan to use the TM3 addition, you are strongly urged to not make further firewall changes using the VitalPBX GUI unless (1) you can also remember to keep your desktop PC’s IP address whitelisted in VitalPBX and (2) you remember to restart IPtables (iptables-restart) in the CLI after having made firewall changes in the VitalPBX GUI. Otherwise, you will lose your Travelin’ Man 3 WhiteList entries which means folks will get locked out of your server until the TM3 WhiteList is updated by running iptables-restart. All TM3 WhiteListed entries are stored and managed in individual text files in /root with a file extension of .iptables. Do not manually delete them!
To install the TM3 addition, issue the following commands:
cd /
wget http://incrediblepbx.com/tm3-vitalpbx.tar.gz
tar zxvf tm3-vitalpbx.tar.gz
rm -f tm3-vitalpbx.tar.gz
echo "/usr/local/sbin/iptables-boot" >> /etc/rc.d/rc.local
chmod +x /etc/rc.d/rc.local
systemctl enable rc-local
echo "*/10 5-22 * * * root /usr/local/sbin/ipchecker > /dev/null 2>&1" >> /etc/crontab
Using DynDNS to Manage FQDNs. The key ingredient with Travelin’ Man 3 is automatic management of dynamic IP addresses. When a user or even the administrator moves to a different location or IP address, we don’t want to have to manually adjust anything. So what you’ll first need is a DynDNS account. Other free providers are available but are less flexible. For $40 a year, DynDNS lets you set up 30 FQDNs and keep the IP addresses for those hostnames current. That’s more than ample for almost any small business but, if you need more horsepower, DynDNS.com can handle it. What we recommend is setting up a separate FQDN for each phone on your system that uses a dynamic IP address. This can include the administrator account if desired because it works in exactly the same way. When the administrator extension drops off the radar, a refresh of IPtables will bring all FQDNs back to life including the administrator’s account. Sounds simple? It is.
Getting Started with Travelin’ Man 3. Here are the 5 tools that are included in the TM3 suite for VitalPBX:
- add-ip some-label ip-address – Allows you to add an IP address to the WhiteList
- add-fqdn some-label FQDN – Allows you to add an FQDN to the WhiteList
- del-acct some-label.iptables – Deletes an IP address or FQDN from WhiteList
- ipchecker – Runs every 10 minutes to synchronize FQDNs; do NOT run manually
- iptables-restart – Restarts IPtables and adds TM3 WhiteListed IPs and FQDNs
- iptables-boot – Loads TM3 WhiteListed IPs and FQDNs on boot only
- show-whitelist – Displays contents of both VitalPBX and TM3 WhiteLists
Using Email to Manage Your WhiteList. We have one new addition to Travelin’ Man 3 for the VitalPBX platform. Now your authorized users can send an email to the VitalPBX server to whitelist an IP address and gain access. Two different passwords are supported and can be handed out to different classes of PBX users, e.g. administrators and ordinary users. Using the "permanent" password lets someone add an IP address to the VitalPBX whitelist permanently. Using the "temporary" password lets a user add an IP address to the whitelist until the next reboot or firewall restart. In both cases, the administrator gets an immediate email showing the whitelisted IP address, who requested it, and the type of whitelist entry that was requested. The syntax for the email request is straight-forward. Just send an email to the special email account set up to handle these requests and include a Subject for the message that looks exactly like this where 8.8.8.8 is the IP address to be whitelisted and some-password is one of the two passwords: WhiteList 8.8.8.8 PW some-password
As most of you know, we’re sticklers for security, and there’s plenty of it here. First, we recommend you use an obscure FQDN for your server so that it is not easily guessed by someone wanting to do harm. Second, we assume your IP address also won’t be published. Third, the email account name also should be obscure. Think of it as another password. For example, martin432 would be a good choice while whitelist would be pretty lousy. Keep in mind that the only people sending mail to this account will be folks that need immediate access to your PBX. Finally, BOTH of the passwords to use the email feature need to be long and difficult to decipher. A mix of alphanumeric characters and upper and lowercase letters is strongly recommended because it makes successful penetration nearly impossible.
To begin, we need to reconfigure your VitalPBX Firewall to accept incoming email on TCP port 25. In Admin:Security:Firewall:Services, Add a new service that looks like the following: Name: SMTP Protocol: TCP Port: 25. Then SAVE your entry.
Next, we need to add a VitalPBX Firewall Rule that allows incoming SMTP traffic. In Admin:Security:Firewall:Rules, Add a new rule: Service: SMTP Action: Accept. Then SAVE.
Next, we need to log into the Linux CLI as root to do a couple of things. First, we need to reconfigure Postfix to accept emails from outside our server. Replace 8.8.8.8 with the actual IP address of your server. Replace smtp.myserver.com with the actual FQDN of your server. If you don’t have one, simply remove the FQDN from the command.
yum -y install mailx
postconf -e "mynetworks = 127.0.0.0/8, 8.8.8.8"
postconf -e "mydestination = smtp.myserver.com, localhost.localdomain, localhost"
postconf -e "inet_interfaces = all"
postconf -e "recipient_delimiter = +"
service postfix restart
Second, we need to add an email account to process the incoming emails. Replace someuser on each line with that obscure account name you plan to use for incoming emails. Then send yourself a test email and be sure it arrives. The last command cleans out the mail account.
adduser someuser --shell=/bin/false --no-create-home --system -U
echo "test" | mail -s "Hello World" someuser
mail -u someuser
> /var/mail/someuser
Finally, we need to set up your passwords and admin email address in /root/mailcheck. To begin, insert your actual mail account name in the following command by replacing realuser and then execute the command:
sed -i 's|someuser|realuser|' /root/mailcheck
Now edit /root/mailcheck with nano or your favorite editor and change the TempPW, PermPW, and MyEMail entries. Then save the file and add the following entry to /etc/crontab:
*/3 5-22 * * * root /root/mailcheck > /dev/null 2>&1
CAUTION: Because of the bifurcated nature of the integration of TM3’s WhiteList into the VitalPBX firewall setup, be advised that you never want to make a change in the VitalPBX GUI’s firewall configuration without assuring that the desktop machine from which you are making that change is already included in the VitalPBX Whitelist (see #3.a., above). The same applies to issuing an iptables-restart from the Linux CLI. The reason is there are two separate whitelists and either of these actions would temporarily disable the TM3 WhiteList until the iptables-restart procedure was executed AND completed. In both situations, you most probably would be locked out of web and SSH access to your own server. A VitalPBX firewall reload only restarts firewalld with the VitalPBX WhiteList, and an iptables-restart from the CLI first restarts firewalld without the TM3 WhiteList rules and then adds the TM3 WhiteList rules after the firewalld reload is completed. We have added safeguards to some of the TM3 utilities to keep you from shooting yourself in the foot by requiring the VitalPBX WhiteList addition before you can use the TM3 iptables-restart and del-acct utilities; however, this is not the case with ipchecker which typically runs as a cron job from localhost. Because there is no safeguard mechanism, do NOT run it manually unless you’re sure you first have whitelisted your desktop PC’s IP address in the VitalPBX GUI (see #3.a., above). Without getting down in the weeds, we also have no ability to control the internal workings of the VitalPBX firewall. Should you get locked out of your server, there are three remedies. The first is the email solution documented above. The second is to use PortKnocker to regain access. The third is to use the localhost console in the Digital Ocean or Vultr control panel to issue the iptables-restart command. You might want to print this out for a rainy day. 🙂
PortKnocker Installation. You may not know the remote IP addresses of everyone using your PBX, and some of your users may travel to different sites and need a temporary IP address whitelisted while using a WiFi hotspot. And, not that it would happen to you, but once in a while an administrator locks himself out of his own server by changing IP addresses without first whitelisting the new address. The solution to all of these problems is easy with PortKnocker. The user simply sends three sequential pings to ports known only by you and your users using the machine or smartphone that needs access. You can read our original tutorial for more detail. For today, let’s get PortKnocker installed and configured with your three random ports. You can review the assignment at any time by displaying /root/knock.FAQ which also explains how to send the knocks using a desktop machine or a smartphone.
cd /root
wget http://incrediblepbx.com/knock-vitalpbx.sh
chmod +x knock-vitalpbx.sh
./knock-vitalpbx.sh
As with other Incredible PBX Travelin’ Man 3 implementations, IP addresses whitelisted using PortKnocker only last until the next reboot, or until you issue the following command firewall-cmd --reload (does not reload TM3 WhiteList), or until you execute a firewall update from within the VitalPBX GUI (does not reload TM3 WhiteList), or until you issue the command iptables-restart which restarts the firewall AND loads the TM3 WhiteList entries. To permanently WhiteList IP addresses, follow the procedure in Step #3 above or add the entries using the TM3 utilities documented in the previous section.
NeoRouter Installation. A virtual private network (VPN) is perhaps the safest way to access any server including VitalPBX. All of your communications is securely encrypted and you connect to the server through a network tunnel using a non-routable, private IP address. There are many VPNs from which to choose. Our personal favorite is NeoRouter because up to 256 devices can be interconnected at zero cost, and you can set the whole thing up in minutes with virtually no networking expertise. If you want all of the background on NeoRouter, see our latest tutorial.
NeoRouter uses a star topology which means you must run the NeoRouter Server application on a computer platform that is accessible over the Internet all the time. Then each of the remote devices or servers runs the NeoRouter Client application, connects to the server to obtain a private IP address, and then can communicate with all of the other devices connected to the VPN. If you already have a NeoRouter Server in place, then you can skip the server installation step and skip down to installing the NeoRouter Client on your VitalPBX server.
NeoRouter Server Setup. If you’re just getting started with NeoRouter, the first step is setting up the NeoRouter Server on a platform of your choice. If you’re using the Automatic Backup feature of Digital Ocean or Vultr, then your VitalPBX server is probably as good a site as any. NeoRouter Server uses minimal resources, and outages shouldn’t be a problem except for hurricanes, tornados, and bombs. But, just so you know, if the NeoRouter Server is down, none of the NeoRouter Clients can access the VPN or any other clients so you’d have to resort to public IP addresses for network access.
To install NeoRouter Server on your VitalPBX platform, log into your server as root and issue the following commands:
cd /root
wget http://download.neorouter.com/Downloads/NRFree/Update_2.3.1.4360/Linux/CentOS/nrserver-2.3.1.4360-free-centos-x86_64.rpm
rpm -Uvh nrserver-2.3.1.4360-free-centos-x86_64.rpm
Next, create at least one account with administrator privileges and one account with user privileges to your NeoRouter VPN:
nrserver -adduser admin-name admin-password admin
nrserver -adduser user-name user-password user
The commands to manage NeoRouter Server are a little different on the CentOS 7 platform. Here’s what you’ll need:
Start on boot: systemctl enable nrserver.service
Check status: systemctl status nrserver.service
Restart server: systemctl restart nrserver.service
Change settings: nrserver -help
NeoRouter Client Setup. Whether you’re running NeoRouter Server on your VitalPBX platform or not, you’ll still need to install and configure the NeoRouter Client software in order to access the server through the VPN using a remote computer, smartphone, or tablet. NeoRouter Clients for Linux, Windows, Macs, FreeBSD, Mobile, OpenWRT, Tomato, and HTML5 are available here. Be sure to choose the NRFree V2 platform tab before downloading a client, or you’ll get the wrong client software and nothing will work! Ask us how we know.
To install NeoRouter Client on your VitalPBX platform, log into your server as root and issue the following commands:
cd /root
wget http://download.neorouter.com/Downloads/NRFree/Update_2.3.1.4360/Linux/CentOS/nrclient-2.3.1.4360-free-centos-x86_64.rpm
rpm -Uvh nrclient-2.3.1.4360-free-centos-x86_64.rpm
As with NeoRouter Server, the commands to manage NeoRouter Client are a little different on the CentOS 7 platform. Here’s what you’ll need:
Start on boot: systemctl enable nrservice.service
Check status: systemctl status nrservice.service
Restart client: systemctl restart nrservice.service
Login to VPN: nrclientcmd
The main requirement after installing the software is to login to your VPN: nrclientcmd. You’ll be prompted for the FQDN or IP address of your NeoRouter Server and then the admin or user credentials. If successful, you’ll get a display of all the machines logged into the VPN, including the VitalPBX server.
NeoRouter Network Explorer – somebody@vultr.guest
> My Computers
10.0.0.2 vultr.guest
Available Commands: changeview, wakeonlan, setproxy, changepassword, quit
Enter command:
The next step is to download and install NeoRouter Client software on your desktop computer and smartphone. Then you can remotely connect to your VitalPBX server from those platforms. In our example above, you could login to 10.0.0.2 with either SSH or your web browser and never have to worry about whitelisting your remote machines with VitalPBX.
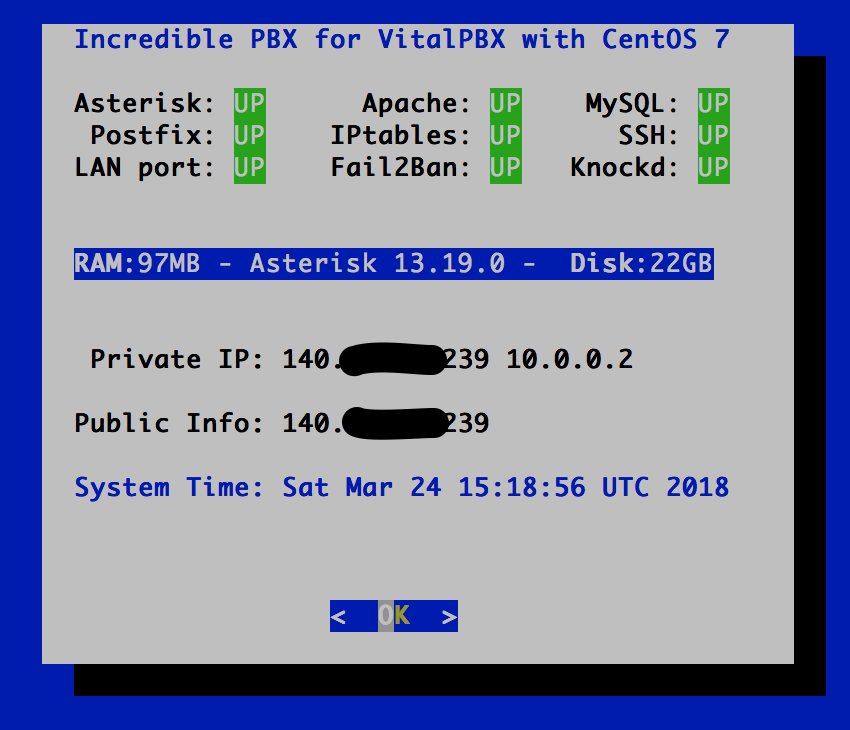
Checking VitalPBX Status. As with other Incredible PBX platforms, we have reworked the pbxstatus utility to support VitalPBX. Running it from the command prompt will display the status of all of the key services on your PBX. Note the addition of the VPN’s IP address which tells you that NeoRouter Client is alive and well:
Configuring Automatic Backups. When you’re ready to enable backups for a Digital Ocean droplet, navigate to the list of droplets for your account. Click the Droplet name for which you’d like to enable backups, and then click the Backups menu item. This will display the cost of backups for the given droplet. Click the Enable Backups button to enable backups.
The Vultr setup is similar. Automatic backup settings are managed through the Vultr control panel. Once you log into your account, visit the server’s management area, click on your server in the dialog, and then click on the "Backups" tab for your VPS. Click Enable Backups. On either platform, the backup option adds a $1 a month to the cost of the $5 server. That’s pretty cheap insurance.
Originally published: Monday, April 2, 2018
Got Friends? 7 Countries Have Never Visited Nerd Vittles. 2018 Is Calling! https://t.co/wMfmlhAr16 #asterisk #freepbx #wazo #issabel #IncrediblePBX #3CX pic.twitter.com/kAmAEnwVIw
— Ward Mundy (@NerdUno) January 9, 2018
Need help with VitalPBX? Visit the VitalPBX Forum.
Special Thanks to Our Generous Sponsors
FULL DISCLOSURE: ClearlyIP, Skyetel, Vitelity, DigitalOcean, Vultr, VoIP.ms, 3CX, Sangoma, TelecomsXchange and VitalPBX have provided financial support to Nerd Vittles and our open source projects through advertising, referral revenue, and/or merchandise. As an Amazon Associate and Best Buy Affiliate, we also earn from qualifying purchases. We’ve chosen these providers not the other way around. Our decisions are based upon their corporate reputation and the quality of their offerings and pricing. Our recommendations regarding technology are reached without regard to financial compensation except in situations in which comparable products at comparable pricing are available from multiple sources. In this limited case, we support our sponsors because our sponsors support us.
BOGO Bonaza: Enjoy state-of-the-art VoIP service with a $10 credit and half-price SIP service on up to $500 of Skyetel trunking with free number porting when you fund your Skyetel account. No limits on number of simultaneous calls. Quadruple data center redundancy. $25 monthly minimum spend required. Tutorial and sign up details are here.
![]() The lynchpin of Incredible PBX 2020 and beyond is ClearlyIP components which bring management of FreePBX modules and SIP phone integration to a level never before available with any other Asterisk distribution. And now you can configure and reconfigure your new Incredible PBX phones from the convenience of the Incredible PBX GUI.
The lynchpin of Incredible PBX 2020 and beyond is ClearlyIP components which bring management of FreePBX modules and SIP phone integration to a level never before available with any other Asterisk distribution. And now you can configure and reconfigure your new Incredible PBX phones from the convenience of the Incredible PBX GUI.
VitalPBX is perhaps the fastest-growing PBX offering based upon Asterisk with an installed presence in more than 100 countries worldwide. VitalPBX has generously provided a customized White Label version of Incredible PBX tailored for use with all Incredible PBX and VitalPBX custom applications. Follow this link for a free test drive!
Special Thanks to Vitelity. Vitelity is now Voyant Communications and has halted new registrations for the time being. Our special thanks to Vitelity for their unwavering financial support over many years and to the many Nerd Vittles readers who continue to enjoy the benefits of their service offerings. We will keep everyone posted on further developments.
RTPbleed Security Alert: Asterisk Calls Can Be Intercepted

If you’ve installed Asterisk® during the past 4½ years, your server has a MAJOR security problem. If you didn’t already know, with Asterisk, your VoIP conversations actually are carried over a random UDP port using the Real Time Protocol (RTP), not the SIP port (UDP 5060) which handles the setup and teardown of your VoIP connections. It turns out that, since March 2013, all of that RTP traffic and thus your conversations could be intercepted and redirected by anyone on the Internet. As this recent article in The Register noted:
The problem occurs when [communications] systems like IP telephony have to get past network address translation (NAT) firewalls. The traffic has to find its way from the firewall’s public IP address to the internal address of the device or server, and to do that, RTP learns the IP and port addresses to associate with a call.
The problem is, the process doesn’t use any kind of authentication.
This is exacerbated by the fact that, by default, Asterisk and FreePBX® traditionally use the NAT=yes setting (whether needed or not) to enable this navigational magic just in case your calls need it. Without it, you may end up with no audio or one-way audio on your calls. Traditional wisdom was that an attacker needed to be positioned between the caller and the Asterisk server in order to intercept this media stream. As luck would have it, it turns out the man in the middle didn’t need to be in the middle after all. He could be anywhere on the Internet. The old adage to talk on the phone as if someone else were listening turns out to have been pretty good advice in the case of Asterisk communications. Even if you had a firewall, chances are you protected UDP port 5060 while exposing and forwarding UDP 10000-20000 to Asterisk without any safeguards.
According to last week’s Asterisk advisory, “To exploit this issue, an attacker needs to send RTP packets to the Asterisk server on one of the ports allocated to receive RTP. When the target is vulnerable, the RTP proxy responds back to the attacker with RTP packets relayed from the other party. The payload of the RTP packets can then be decoded into audio.” Specifically, if UDP ports 10000-20000 are publicly exposed to the Internet, anybody and everybody can intercept your communications without credentials of any kind. WOW!
So, there’s a patch to fix this, right? Well, not exactly:
Note that as for the time of writing, the official Asterisk fix is vulnerable to a race condition. An attacker may continuously spray an Asterisk server with RTP packets. This allows the attacker to send RTP within those first few packets and still exploit this vulnerability.
The other recommended "solutions" aren’t much better:
- When possible the nat=yes option should be avoided
- To protect against RTP injection, encrypt media streams with SRTP
- Add config option for SIP peers to prioritize RTP packets
The nat=no option doesn’t work if you or your provider employs NAT-based routers. The SRTP option only works on more recent releases of Asterisk, and it also requires SRTP support on every SIP phone. Prioritizing RTP packets is not a task for mere mortals.
Surprisingly, the one solution that is not even mentioned is hardening your firewall to block incoming UDP 10000-20000 traffic that originates outside your server. Our recognized SIP expert on the PIAF Forum had the simple solution. Bill Simon observed:
If the SDP in the INVITE or subsequent re-INVITE contains routable IP addresses, then use them for media. If the SDP contains non-routable IP addresses, then the client is behind a NAT and not using any NAT traversal techniques like SIP ALG, ICE/STUN, so send to the originating IP. Why are we making allowances here for media to come from anywhere? I think you can probably clamp down your firewall as much as you want, because symmetric RTP should allow media to get through by way of establishing an outbound stream (inbound stream comes back on the same path).
Our testing confirms that simply blocking incoming RTP traffic on your firewall solves the problem without any Asterisk patch. In short, RTP traffic cannot originate from anonymous sources on the Internet.
For those using Incredible PBX® or Travelin’ Man 3 or an IPtables firewall, the fix is easy. Simply remove or comment out the INPUT rule that looks like this and restart IPtables:
-A INPUT -p udp -m udp --dport 10000:20000 -j ACCEPT
On RedHat/CentOS servers, the rule is in /etc/sysconfig/iptables. On Debian/Ubuntu and Raspbian servers, you’ll find the rule in /etc/iptables/rules.v4. On Incredible PBX for Issabel servers, you’ll find the rule in /usr/local/sbin/iptables-custom. On all Incredible PBX platforms, remember to restart IPtables using only this command: iptables-restart.
Published: Friday, September 8, 2017
Need help with Asterisk? Visit the PBX in a Flash Forum.
Special Thanks to Our Generous Sponsors
FULL DISCLOSURE: ClearlyIP, Skyetel, Vitelity, DigitalOcean, Vultr, VoIP.ms, 3CX, Sangoma, TelecomsXchange and VitalPBX have provided financial support to Nerd Vittles and our open source projects through advertising, referral revenue, and/or merchandise. As an Amazon Associate and Best Buy Affiliate, we also earn from qualifying purchases. We’ve chosen these providers not the other way around. Our decisions are based upon their corporate reputation and the quality of their offerings and pricing. Our recommendations regarding technology are reached without regard to financial compensation except in situations in which comparable products at comparable pricing are available from multiple sources. In this limited case, we support our sponsors because our sponsors support us.
BOGO Bonaza: Enjoy state-of-the-art VoIP service with a $10 credit and half-price SIP service on up to $500 of Skyetel trunking with free number porting when you fund your Skyetel account. No limits on number of simultaneous calls. Quadruple data center redundancy. $25 monthly minimum spend required. Tutorial and sign up details are here.
![]() The lynchpin of Incredible PBX 2020 and beyond is ClearlyIP components which bring management of FreePBX modules and SIP phone integration to a level never before available with any other Asterisk distribution. And now you can configure and reconfigure your new Incredible PBX phones from the convenience of the Incredible PBX GUI.
The lynchpin of Incredible PBX 2020 and beyond is ClearlyIP components which bring management of FreePBX modules and SIP phone integration to a level never before available with any other Asterisk distribution. And now you can configure and reconfigure your new Incredible PBX phones from the convenience of the Incredible PBX GUI.
VitalPBX is perhaps the fastest-growing PBX offering based upon Asterisk with an installed presence in more than 100 countries worldwide. VitalPBX has generously provided a customized White Label version of Incredible PBX tailored for use with all Incredible PBX and VitalPBX custom applications. Follow this link for a free test drive!
Special Thanks to Vitelity. Vitelity is now Voyant Communications and has halted new registrations for the time being. Our special thanks to Vitelity for their unwavering financial support over many years and to the many Nerd Vittles readers who continue to enjoy the benefits of their service offerings. We will keep everyone posted on further developments.
Some Recent Nerd Vittles Articles of Interest…
Twofer Tuesday: 2 Cloud Servers for the Price of a RasPi
It’s been more than a year since we last chatted about Cloud At Cost. Because they’re in the midst of yet another 50% off Fire Sale and to close out February with a bang, it seemed like a good time to take a fresh look at a terrific way to get started with Linux. For today’s $35 cloud project, we’re going to build a free WordPress server and a free commercial PBX compliments of 3CX. For what it’s worth, we’ve been running a PIAF5 server at CloudAtCost for more than four months without a single hiccup. It provides flawless Google Voice calling from either a connected SIP phone or from the 3CX Client running on a SIM-free Android phone or iPhone. See our recent article for tips on setting up a SIM-free mobile phone.
For those coming from the Windows World, Linux can be a little intimidating. Learning with a Cloud-based server presents its own challenges because of the security issues when your server sits on the public Internet. And then there’s the cost factor. Not everyone has several hundred dollars to buy hardware and, frankly, learning about Linux on a $35 Raspberry Pi can drive most folks to drink. So today we’ll show you another way. It’s not necessarily a better way. But it’s different, and it’s loads of fun for not much money. Today’s project takes about an hour, and you’ll have two terrific Linux applications to play with for life when we’re finished.
There’s lots to hate at Cloud At Cost, a Canadian provider that offers virtual machines in the cloud for a one-time fee with no recurring charges. For $35, you currently get two virtual machine platforms, and each has 512MB of RAM, 10GB of storage, and a gigabit Internet connection FOR LIFE. We haven’t seen a week go by when Cloud at Cost didn’t offer some sort of discount. Today it’s 50% off which brings the per server cost down to $17.50 each. That’s less than most lunches these days. If you don’t like half off and would prefer to wait for a better discount, check their Twitter feed every few days. So that’s the good news. But, if 99.999% reliability, performance, and excellent customer support are your must-haves, then look elsewhere. So why would anyone in their right mind sign up for a cloud solution that didn’t offer those things? Did we mention it’s $17.50 for a lifetime cloud server!
If you take our recommendation, you’ll need to go into this with the right attitude. It’s not going to be flawless perfection computing. It’s a sandbox on which to experiment with Linux, and VoIP, and Cloud Computing. Will your virtual machine disintegrate at some juncture? Maybe so. We’ve had about a third of ours fail at some point. But you can rebuild them easily, especially if you keep a backup. Our experience is that the first couple days are critical. If you start seeing sluggish performance which degenerates to zero, don’t waste your time. Take good notes as you go along, delete the virtual machine, and rebuild a new one. It won’t cost you a dime, and it’ll save you hours of frustration. We suspect that bad folks get onto some of the servers and delight in bringing the machines to their knees. So the quicker you cut your losses, the better off you will be. Is CloudAtCost a good solution for production use? Don’t risk it unless waterboarding is your favorite sport. It’s probably not gonna work, and you WILL be disappointed. Repeat after me: IT’S A SANDBOX!
Building a LAMP Server in the Cloud
Our first objective today is to show you how to build a rock-solid, secure Linux server in the Cloud with all the bells and whistles that make Linux the server platform of choice for almost every organization in the world. We’ll continue by showing you how to embellish the platform with WordPress to do something that’s special for you whether it’s your own blog like Nerd Vittles, or a school newspaper, or an on-line shopping site to sell comic books. The basic foundation for most Linux platforms is called a LAMP server which stands for Linux, Apache, MySQL, and PHP. Linux is an open source operating system that includes contributions from thousands of developers around the world. Apache is the web server platform on which most commercial businesses stake their reputation. MySQL is the open source database management system now owned by Oracle. If it’s good enough for Facebook, it’s good enough for you. And PHP is THE web-based programming language that will let you build almost any application using Linux, Apache, and MySQL.
So what’s the big deal? There are thousands of online tutorials that will show you how to build a LAMP server. For long time readers of Nerd Vittles, you already know that the component we continually stress is security. Without that, the rest really doesn’t matter. You’ll be building a platform for someone else to hijack and use for nefarious purposes. When we’re finished with today’s Project #1, you’ll have a cloud-based LAMP server that is totally invisible to the rest of the world with the exception of its web interface. And we’ll show you a simple way to reduce the exposure of that web interface to some of its most likely attackers. Will it be 100% secure? Nope. If you have a web server on the public Internet, it’s never going to be 100% secure because there’s always the chance of a software bug that nobody has yet discovered and corrected. THAT’S WHAT BACKUPS ARE FOR!
Creating a CentOS Machine in the Cloud
To get started, you’ve got to plunk down your $35 at Cloud at Cost. This buys you two server platforms while they’re cheap! Once you’ve paid the piper, they will send you credentials to log into the Cloud at Cost Management Portal. Change your password IMMEDIATELY after logging in. Just go to SETTINGS and follow your nose.
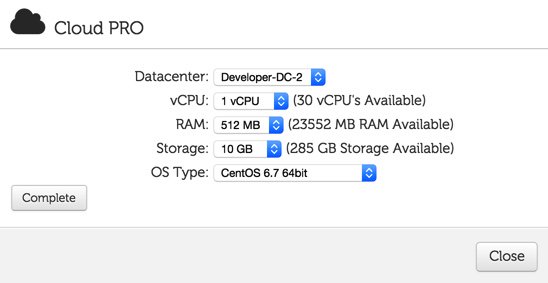
To create your first virtual machine, click on the CLOUDPRO button and click Add New Server. If you’ve only purchased the $17.50 CloudPRO 1 platform, then you’ll need all of the available resources shown in the pick list. Otherwise, choose 1 CPU, 512MB RAM, and 10GB storage for your first server. Leave CentOS 6.7 64bit selected as the OS Type and click Complete. Depending upon the type of special pricing that Cloud at Cost is offering when you sign up, the time to build your virtual machine can take anywhere from a minute to the better part of a day. We’ve learned to build new virtual machines at night, and they’re usually available for use by the next morning. Luckily, this slow performance does not impact existing virtual machines that already are running in their hosting facility.
Initial Configuration of Your CentOS 6 VM
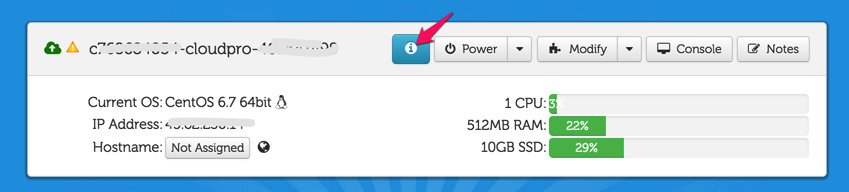
With a little luck, your virtual machine soon will appear in your Cloud at Cost Management Portal and look something like what’s shown above. The red arrow points to the i button you’ll need to click to decipher the password for your new virtual machine. You’ll need both the IP address and the password for your new virtual machine in order to log into the server which is now up and running with a barebones CentOS 6.7 operating system. Note the yellow caution flag. That’s telling you that Cloud at Cost will automatically shut down your server in a week to save (them) computing resources. You can change the setting to keep your server running 24/7. Click Modify, Change Run Mode, and select Normal – Leave Powered On. Click Continue and OK to save your new settings.

Finally, you’ll want to change the Host Name for your server to something more descriptive than c7…cloudpro.92… Click the Modify button again and click Rename Server to make the change. Your management portal then will show the new server name as shown above.
Logging into Your CentOS 6 VM
In order to configure and manage your new CentOS 6 virtual machine, you’ll need to log into the new server using either SSH or, for Windows users, Putty. After installing Putty, run it and log in to the IP address of your VM with username root and the password you deciphered above. On a Mac, open a Terminal session and issue a command like this using the actual IP address of your new virtual machine:
ssh root@12.34.56.78
Before you do anything else, reset your root password to something very secure: passwd
Installing the LAMP Server Basics
Now we’re ready to build your LAMP server platform. We’ve chopped this up into lots of little steps so we can explain what’s happening as we go along. There’s nothing hard about this, but we want to document the process so you can repeat it at any time. As we go along, just cut-and-paste each clump of code into your SSH or Putty session and review the results to make sure nothing comes unglued. If something does, the beauty of virtual machines is you can delete them instantly within your management portal and just start over whenever you like. So here we go…
We’ll begin by permanently turning off SELINUX which causes more problems than it solves. The first command turns it off instantly. The second line assures that it’ll stay off whenever you reboot your virtual machine.
setenforce 0
sed -i s/SELINUX=enforcing/SELINUX=disabled/g /etc/selinux/config
First, let’s address a couple of CloudAtCost quirks that may cause problems down the road. CloudAtCost has a nasty habit of not cleaning up after itself with fresh installs. The net result is your root password gets reset every time you reboot.
killall plymouthd
echo killall plymouthd >> /etc/rc.local
rm -f /etc/rc3.d/S97*
Now let’s bring CentOS 6.7 up to current CentOS 6.8 specs and add a few important applications:
yum -y update
yum -y install nano wget expect net-tools dialog git xz
yum -y install kernel-headers
yum -y install kernel-devel
reboot
After reboot, log back in as root. Now we’ll set up your Apache web server and configure it to start whenever you reboot your server:
yum -y install httpd
service httpd start
chkconfig httpd on
Next, let’s set up your MySQL server, bring it on line, and make sure it restarts after server reboots. Unless you plan to add Asterisk® and FreePBX® to your server down the road, you’ll want to uncomment the two commands that begin with # by removing the # symbol and replacing new-password with a very secure password for your root user account in MySQL. Be sure to run the last command to secure your server. After logging in, the correct answers are n,Y,Y,Y,Y.
yum -y install mysql mysql-server
service mysqld start
chkconfig mysqld on
#/usr/bin/mysqladmin -u root password 'new-password'
#/usr/bin/mysqladmin -u root -p -h localhost.localdomain password 'new-password'
mysql_secure_installation
Next, we’ll set up PHP and configure it to work with MySQL:
yum -y install php
yum -y install php-mysql
service httpd restart
Finally let’s get SendMail installed and configured. Insert your actual email address in the last line and send yourself a test message to be sure it’s working. Be sure to check your spam folder since the message will show a sender address of localhost which many email systems including Gmail automatically identify as spam.
yum -y install sendmail
rpm -e postfix
service sendmail restart
yum -y install mailx
echo "test" | mail -s testmessage youracctname@yourmailserver.com
Installing Supplemental Repositories
One of the beauties of Linux is not being totally dependent upon CentOS for all of your packaged applications. Let’s add a few other repositories that can be used when you need to add a special package that is not in the CentOS repository. Let’s start with EPEL. We’ll disable it by default and only use it when we need it.
yum -y install http://download.fedoraproject.org/pub/epel/6/x86_64/epel-release-6-8.noarch.rpm
sed -i 's|enabled=1|enabled=0|' /etc/yum.repos.d/epel.repo
We actually need the EPEL repo to install Fail2Ban for monitoring of attacks on certain Linux services such as SSH:
yum --enablerepo=epel install fail2ban -y
cd /etc
wget http://incrediblepbx.com/fail2ban-lamp.tar.gz
tar zxvf fail2ban-lamp.tar.gz
Another important repository is REMI. It is especially helpful if you decide to upgrade PHP from the default version 5.3 to one of the newer releases: 5.5 or 5.6. In this case, you’ll want to activate the specific repository to support the release you choose in /etc/yum.repos.d/remi-safe.repo.
yum -y install http://rpms.famillecollet.com/enterprise/remi-release-6.rpm
sed -i 's|enabled=1|enabled=0|' /etc/yum.repos.d/remi-safe.repo
One final repository to have on hand is RPMForge, now renamed RepoForge. We’ll use it in a bit to install a dynamic DNS update utility which you actually won’t need at CloudAtCost since your server is assigned a static IP address. But it’s handy to have in the event you wish to assign a free FQDN to your server anyway.
yum -y install http://incrediblepbx.com/rpmforge-release-0.5.3-1.el6.rf.x86_64.rpm
sed -i 's|enabled = 1|enabled = 0|' /etc/yum.repos.d/rpmforge.repo
Country Blocking with IPSET
We’ll use the EPEL repo to install ipset, a terrific addition to the IPtables Linux firewall that lets you quickly block entire countries from accessing your server:
yum --enablerepo=epel install ipset -y
Next, we’ll add a sample script that documents how the country blocking mechanism works with ipset. For a complete list of countries that can be blocked, go here. If you need a decoder badge to match abbreviations against country names, you’ll find it here. To add other countries, simply edit the shell script and clone lines 4-7 using the names of the countries and country zone files that you wish to add. Be sure to insert the new lines before the commands to restart iptables and fail2ban. This script will need to be run each time your server reboots and before IPtables is brought on line. We’ll handle that a little later.
echo "#\\!/bin/bash" > /etc/block-china.sh
echo " " >> /etc/block-china.sh
echo "cd /etc" >> /etc/block-china.sh
echo "ipset -N china hash:net" >> /etc/block-china.sh
echo "rm cn.zone" >> /etc/block-china.sh
echo "wget -P . http://www.ipdeny.com/ipblocks/data/countries/cn.zone" >> /etc/block-china.sh
echo "for i in \$(cat /etc/cn.zone ); do ipset -A china \$i; done" >> /etc/block-china.sh
echo "service iptables restart" >> /etc/block-china.sh
echo "service fail2ban restart" >> /etc/block-china.sh
sed -i 's|\\\\||' /etc/block-china.sh
chmod +x /etc/block-china.sh
Adding a Few Handy Utilities
If you’re like us, you’ll want to test the speed of your Internet connection from time to time. Let’s install a free script that you can run at any time by logging into your server as root and issuing the command: /root/speedtest.py. Here were our results from last year. Running speedtest on a new server we built today showed a vast improvement in performance. Downloads were over ten times as fast, and upload speeds more than tripled. In fact, we now are using two CloudAtCost servers to host the old PIAF3 repositories.
cd /root
wget https://raw.githubusercontent.com/sivel/speedtest-cli/master/speedtest.py
chmod +x speedtest.py
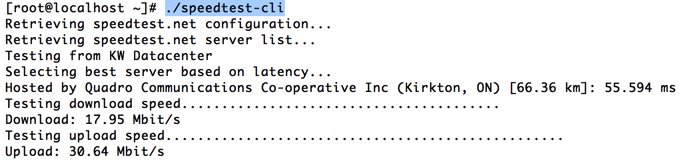
Next, let’s put in place a simple status display which will quickly tell you what’s running and what’s not. We’ve borrowed some GPL code from Incredible PBX to help you out. Run status-lamp at any time for a snapshot of your server.
cd /usr/local/sbin
wget http://incrediblepbx.com/status-lamp.tar.gz
tar zxvf status-lamp.tar.gz
rm -f status-lamp.tar.gz
sed -i 's|myip.pbxinaflash.com|myip.incrediblepbx.com|' /usr/local/sbin/status-lamp
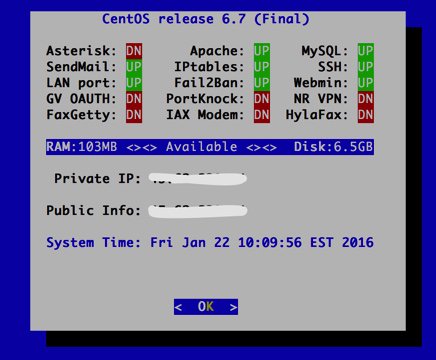
Now we’ll put the Linux Swiss Army Knife in place. It’s called WebMin, and it provides a GUI to configure almost everything in Linux. Pick up a good WebMin book from your public library to get started. Once installed, you access WebMin from your browser at the IP address of your server on the default port of 10000: https://serverIPaddress:10000. It’s probably a good idea to change this port number and the commented out line shows how to do it with the new port being 9001 in the example. The way in which we typically configure the Linux firewall will block all access to WebMin except from an IP address which you have whitelisted, e.g. your home computer’s public IP address.
cd /root
yum -y install perl perl-Net-SSLeay openssl perl-IO-Tty
yum -y install http://prdownloads.sourceforge.net/webadmin/webmin-1.831-1.noarch.rpm
#sed -i 's|10000|9001|g' /etc/webmin/miniserv.conf
service webmin restart
chkconfig webmin on
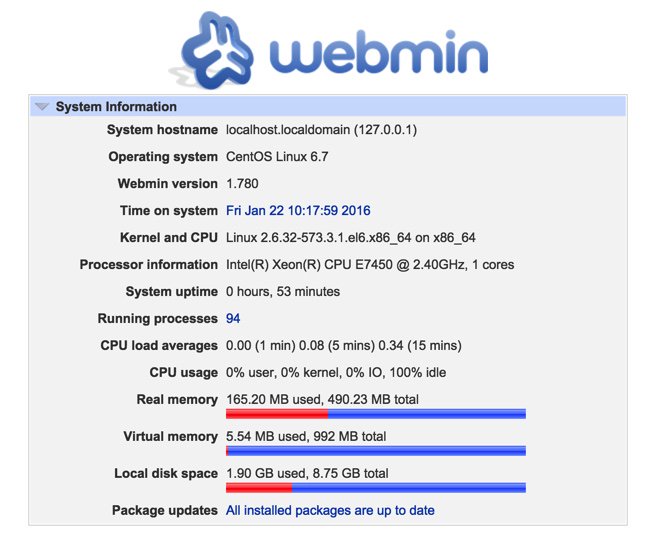
Configuring the Linux IPtables Firewall
RULE #1: DON’T BUILD SERVERS EXPOSED TO THE INTERNET WITHOUT SECURITY!
As installed by CloudAtCost, your server provides ping and SSH access from a remote computer and nothing else. The good news: it’s pretty safe. The bad news: it can’t do anything useful for anybody because all web access to the server is blocked. We want to fix that, tighten up SSH access to restrict it to your IP address, and deploy country blocking to show you how.
As we implement the firewall changes, you need to be extremely careful in your typing so that you don’t accidentally lock yourself out of your own server. A typo in an IP address is all it takes. The good news is that, if you do lock yourself out, you still can gain access via the CloudAtCost Management Portal by clicking the Console button of your virtual machine. Because the console is on the physical machine and the lo interface is whitelisted, you can log in and disable the firewall temporarily: service iptables stop. Then fix the typo and restart the firewall: service iptables start.
First, let’s download the new IPtables config file into your root folder and take a look at it.
cd /root
wget http://incrediblepbx.com/iptables-lamp.tar.gz
tar zxvf iptables-lamp.tar.gz
Now edit the /root/iptables-lamp file by issuing the command: nano -w /root/iptables-lamp
You can scroll up and down through the file with Ctl-V and Ctl-Y. Cursor keys work as well. Once you make changes, save your work: Ctl-X, Y, ENTER. You’re now an expert with the nano text editor, an absolutely essential Linux tool.
Here’s what that file actually looks like:
*filter
:INPUT DROP [0:0]
:FORWARD ACCEPT [0:0]
:OUTPUT ACCEPT [0:0]
-A INPUT -p tcp -m tcp --tcp-flags ACK ACK -j ACCEPT
-A INPUT -m state --state ESTABLISHED,RELATED -j ACCEPT
-A INPUT -p icmp -j DROP
-A INPUT -i lo -j ACCEPT
-A INPUT -p tcp ! --syn -m state --state NEW -j DROP
-A INPUT -m state --state INVALID -j DROP
-A INPUT -p tcp -m tcp --tcp-flags FIN,SYN,RST,PSH,ACK,URG NONE -j DROP
-A INPUT -p tcp -m tcp --tcp-flags SYN,FIN SYN,FIN              -j DROP
-A INPUT -p tcp -m tcp --tcp-flags SYN,RST SYN,RST              -j DROP
-A INPUT -p tcp -m tcp --tcp-flags FIN,RST FIN,RST              -j DROP
-A INPUT -p tcp -m tcp --tcp-flags ACK,FIN FIN                  -j DROP
-A INPUT -p tcp -m tcp --tcp-flags ACK,URG URG                  -j DROP
-A INPUT -p tcp -m set --match-set china src                    -j DROP
-A INPUT -p udp -m udp --dport 53 -j ACCEPT
-A INPUT -p tcp -m tcp --dport 53 -j ACCEPT
-A INPUT -p tcp -m tcp --dport 113 -j ACCEPT
-A INPUT -p udp -m udp --dport 123 -j ACCEPT
-A INPUT -p tcp -m tcp --dport 123 -j ACCEPT
-A INPUT -m state --state NEW -m tcp -p tcp --dport 22 -j ACCEPT
#-A INPUT -s 12.34.56.78 -j ACCEPT
#-A INPUT -s yourFQDN.dyndns.org -j ACCEPT
-A INPUT -p tcp -m tcp --dport 80 -j ACCEPT
-A INPUT -j REJECT --reject-with icmp-host-prohibited
-A FORWARD -j REJECT --reject-with icmp-host-prohibited
COMMIT
Reminder: If you add another country to your block-china script, don’t forget to add a corresponding new country entry to your iptables file. See line 17 above that includes the word "china" for the syntax. There’s nothing much else to tweak except the two commented out (brown) lines that begin with #. First, remove the # symbol by moving the cursor to the right of the first one and hitting the backspace/delete key on your keyboard. Replace 12.34.56.78 with the public IP address of the computer from which you will be accessing your virtual machine. If you need multiple entries for multiple computers at different addresses, clone the line by pressing Ctrl-K and then Ctrl-U twice. Yes, we know. Some folks IP addresses change from time to time. In the next section, we’ll show you how to set up a Dynamic DNS entry with a utility that will keep track of your current IP address. In this case, uncomment the second commented line and replace yourFQDN.dyndns.org with your dynamic DNS address. Be very careful to assure that your FQDN is always on line. If the firewall cannot verify your DNS entry when it starts, the IPtables firewall will not start which means your server will be left unprotected. HINT: IP addresses are much safer because they are never verified.
Once you have your whitelisted addresses configured, comment out the port 22 line to keep the bad guys from trying to break into your server with SSH. Then save the file: Ctl-X, Y, ENTER. Next, issue the following commands to copy everything into place and restart the firewall.
mv /etc/sysconfig/iptables /etc/sysconfig/iptables.orig
cp -p /root/iptables-lamp /etc/sysconfig/iptables
echo "/etc/block-china.sh" >> /etc/rc.local
/etc/block-china.sh
Always, always, always check to be sure your firewall is functioning: iptables -nL. If you don’t see your desktop computer’s public IP address near the end of the listing, then the firewall is dead. status-lamp should also show IPtables down. Check for an error message which will tell you the problematic line so you can correct it.
Implementing Dynamic DNS Service
There are a number of free and paid Dynamic DNS providers. The way this works is you choose a fully-qualified domain name (FQDN) to identify your computer. Then you run a dynamic DNS update utility periodically from that computer. It reports back the current public IP address of your computer and your provider updates the IP address assigned to your FQDN if it has changed. In addition to supporting sites with ever changing IP addresses, it also allows you to permanently assign an FQDN to your computer or server so that it can be accessed without using a cryptic IP address.
If that computer happens to be an Incredible PBX server or a LAMP server that you’ve set up using this tutorial, then the following will get the DNS client update utility loaded using the RPM Forge repository that we previously installed:
yum --enablerepo=rpmforge install ddclient -y
Similar DNS update clients are available for Windows, Mac OS X, and many residential routers. Then it’s just a matter of plugging in the credentials for your dynamic DNS provider and your FQDN. In the case of the CentOS client, the config file is /etc/ddclient/ddclient.conf. Now reboot your server and pick up a good book on Linux to begin your adventure.
Now For Some Fun…
First, let’s check things out and make sure everything is working as it should. With your favorite web browser, visit the IP address of your new server. You should see the default Apache page:
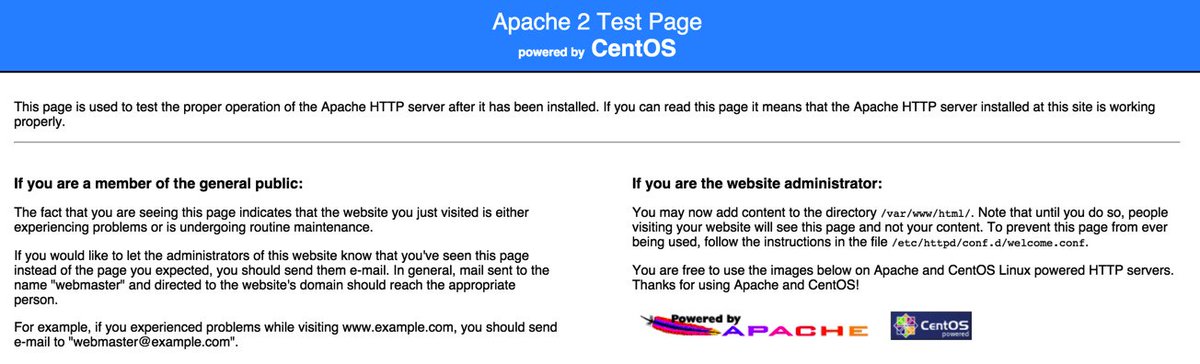
Next, let’s be sure that PHP is working as it should. While still logged into your server as root using SSH or Putty, issue the following commands and make up some file name to replace test4567 in both lines. Be sure to keep the .php file name extension. Note to gurus: Yes, we know the second line below is unnecessary if you remove the space after the less than symbol in the first line. Unfortunately, WordPress forces the space into the display which left us no alternative.
echo "< ?php phpinfo(); ?>" > /var/www/html/test4567.php
sed -i 's|< |<|' /var/www/html/test4567.php
Now jump back to your web browser and access the new page you just created using the IP address of your server and the file name you made up: http://12.34.56.78/test4567.php
The PHPinfo listing will tell you everything you ever wanted to know about your web server setup including all of the PHP functions that have been enabled. That's why you want an obscure file name for the page. You obviously don't want to share that information with every bad guy on the planet. Remember. This is a public-facing web site that anyone on the Internet can access if they know or guess your IP address.

When you're ready to set up your own web site, just name it index.php and store the file in the /var/www/html directory of your server. In the meantime, issuing the following command will assure that anyone accessing your site gets a blank page until you're ready to begin your adventure:
echo " " > /var/www/html/index.php
Ready to learn PHP programming? There's no shortage of books to get you started.
Adding WordPress to Your LAMP Server
Where to begin with WordPress? What used to be a simple platform for bloggers has morphed into an all-purpose tool that makes building virtually any type of web site child's play. If you want to see what's possible, take a look at the templates and sample sites shown on WPZOOM. Unless you're an art major and savvy web designer, this will be the best $70 you ever spent. One of these templates will have your site up and running in minutes once we put the WordPress pieces in place. For the big spenders, $149 will give you access to over 50 gorgeous templates which you can download and use to your heart's content on multiple sites. And, no, your sites don't blow up after a year. You just can't download any additional templates or updates unless you renew your subscription. The other alternative is choose from thousands of templates that are provided across the Internet as well as in the WordPress application itself.
WordPress templates run the gamut from blogs to newsletters to photographer sites to e-commerce to business portfolios to video to travel to magazines to newspapers to education to food to recipes to restaurants and more. Whew! There literally is nothing you can't put together in minutes using a WordPress template. But, before you can begin, we need to get WordPress installed on your server. This is optional, of course. And, if you follow along and add WordPress, we've set it up in such a way that WordPress becomes the primary application for your site. Stated differently, when people use a browser to access your site, your WordPress template will immediately display. When we finish the basic WordPress setup and once you upload an image or two, you'll have a site that looks something like this:

Before you begin, we strongly recommend that you acquire a domain for your site if you plan to use it for anything but experimentation. The reason is because it can be complicated to migrate a WordPress site from one location to another.1 Once you've acquired your domain, point the domain to the IP address of your new server. With a dirt cheap registrar such as Omnis.com, it's easy:
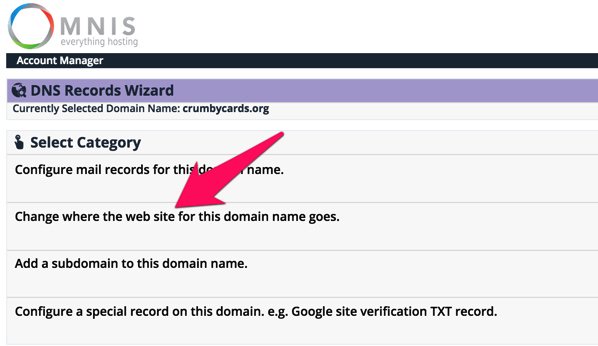
Now let's get started. To begin, we need to load the WordPress application onto your server:
cd /root
mkdir wordpress
cd wordpress
wget http://wordpress.org/latest.tar.gz
tar -xvzf latest.tar.gz -C /var/www/html
Next, we'll configure MySQL to support WordPress. We're assuming that you have NOT already created root passwords for MySQL. If you have, you'll need to add -pYourPassword to the various commands below immediately after root. There is no space between -p and your root password. Also edit the first line and make up a new password (replacing XYZ below) for the wordpress user account that will manage WordPress on your server before you cut and paste the code:
mysql -u root -e 'CREATE USER wordpress@localhost IDENTIFIED BY "XYZ";'
mysql -u root -e 'CREATE DATABASE wordpress;'
mysql -u root -e 'GRANT ALL ON wordpress.* TO wordpress@localhost;'
mysql -u root -e 'FLUSH PRIVILEGES;'
Next, we need to configure WordPress with your new MySQL credentials. Before you cut and paste, replace XYZ in the fourth line with the password you assigned in the preceding MySQL step:
cp /var/www/html/wordpress/wp-config-sample.php /var/www/html/wordpress/wp-config.php
sed -i 's|database_name_here|wordpress|' /var/www/html/wordpress/wp-config.php
sed -i 's|username_here|wordpress|' /var/www/html/wordpress/wp-config.php
sed -i 's|password_here|XYZ|' /var/www/html/wordpress/wp-config.php
chown -R apache:apache /var/www/html/wordpress
Before you forget, take a moment and create a very secure password for your MySQL root user accounts. Here are the commands. Just replace new-password with your new password before you cut and paste. Note that you also will be prompted for this password when you execute the second command because you will now have a root user password in place from executing the first command.
/usr/bin/mysqladmin -u root password 'new-password'
/usr/bin/mysqladmin -u root -p -h localhost.localdomain password 'new-password'
Finally, we need to modify your Apache web server to support WordPress as the primary application. Be sure to enter your actual email address in the third line before you cut and paste the code below:
echo " " >> /etc/httpd/conf/httpd.conf echo "" >> /etc/httpd/conf/httpd.conf echo 'ServerAdmin somebody@somedomain.com' >> /etc/httpd/conf/httpd.conf echo "DocumentRoot /var/www/html/wordpress" >> /etc/httpd/conf/httpd.conf echo "ServerName wordpress" >> /etc/httpd/conf/httpd.conf echo "ErrorLog /var/log/httpd/wordpress-error-log" >> /etc/httpd/conf/httpd.conf echo "CustomLog /var/log/httpd/wordpress-acces-log common" >> /etc/httpd/conf/httpd.conf echo " " >> /etc/httpd/conf/httpd.conf echo " " >> /etc/httpd/conf/httpd.conf service httpd restart
That should do it. Open a browser and navigate to the IP address of your server. You should be greeted with the following form. Fill in the blanks as desired. The account you're setting up will be the credentials you use to add and modify content on your WordPress site when you click Log In (as shown above). Make the username obscure and the password even more so. Remember, it's a public web site accessible worldwide! When you click Install WordPress, you'll be off to the races.
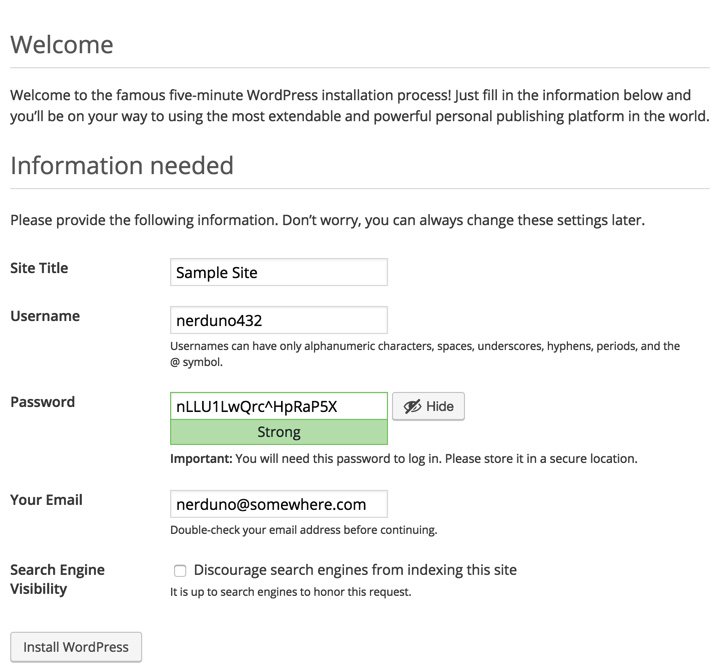
After your server whirs away for a minute or two, you will be greeted with the WordPress login prompt. With the username and password you entered above, you'll be ready to start configuring your WordPress site.

Once you're logged in, navigate to Appearance -> Themes and click Add New Theme. There's you will find literally hundreds of free WordPress templates that can be installed in a matter of seconds if WPZOOM is too rich for your blood. For a terrific all-purpose (free) theme, try Atahualpa. We'll leave our actual demo site running for a bit in case you want to explore and check out its performance. Installing and configuring the new theme took less than a minute:

A Final Word to the Wise. WordPress is relatively secure but new vulnerabilities are discovered regularly. Keep your templates, plug-ins, AND the WordPress application up to date at all times! The WordFence plug-in is a must-have. And we strongly recommend adding the following lines to your WordPress config file which then will let WordPress update everything automatically. Microsoft has given automatic updates a bad name, but in the case of WordPress, they work well.
echo "define('WP_AUTO_UPDATE_CORE', true);" >> /var/www/html/wordpress/wp-config.php
echo "add_filter( 'auto_update_plugin', '__return_true' );" >> /var/www/html/wordpress/wp-config.php
echo "add_filter( 'auto_update_theme', '__return_true' );" >> /var/www/html/wordpress/wp-config.php

Building a 3CX Server in the Cloud
Now we're ready for our second cloud project. In less than 10 minutes, we're going to build a free 3CX commercial PBX using the remaining Cloud resources from our $35 purchase. To create your second virtual machine, click on the CLOUDPRO button in the CloudAtCost control panel and then click Add New Server. Choose 1 CPU, 512MB RAM, and 10GB storage for your second server. Choose Debian 8 64bit as the OS Type and click Complete.
Obtain a free license key for 3CX. Next, log in to your new Debian server as root using SSH or Putty and issue these commands. We'll begin by changing your root password.
NOTE: What appears as the fourth line below needs to be added to line #3!
passwd
wget -O- http://downloads.3cx.com/downloads/3cxpbx/public.key | apt-key add -
echo "deb http://downloads.3cx.com/downloads/3cxpbx/ /" | tee /etc/apt/sources.list.d/3cxpbx.list
apt-get update
rm -f /zang-debian.sh
apt-get -y install 3cxpbx
apt-get -y install sendmail sendmail-bin
When the initial setup finishes, choose the Web Interface Wizard and complete the install using your favorite web browser. Enter your 3CX license key when prompted. Make up a very secure Username and Password to access your 3CX portal. Specify that your IP address is Dynamic when prompted (even though it isn't). This tells 3CX to generate an FQDN for your server. Accept the default ports for HTTP (5000) and HTTPS (5001) access to your server. We recommend choosing 4-digit extensions numbers so you'll be ready for next week's project interconnecting your 3CX server to a Raspberry Pi for the best of both worlds. While logged into the 3CX management portal, adjust Settings → Email to Mail Server → 127.0.0.1 and Reply to → noreply@YourActual3CX-FQDN. Leave the other settings blank and click TEST then OK. Set up a SIP trunk with inbound and outbound call routes. Now download your favorite 3CX smartphone client, send yourself the Welcome Email for your default extension, and start calling. It really doesn't get much easier in the VoIP World. Come join the PIAF Forum if you need a helping hand!
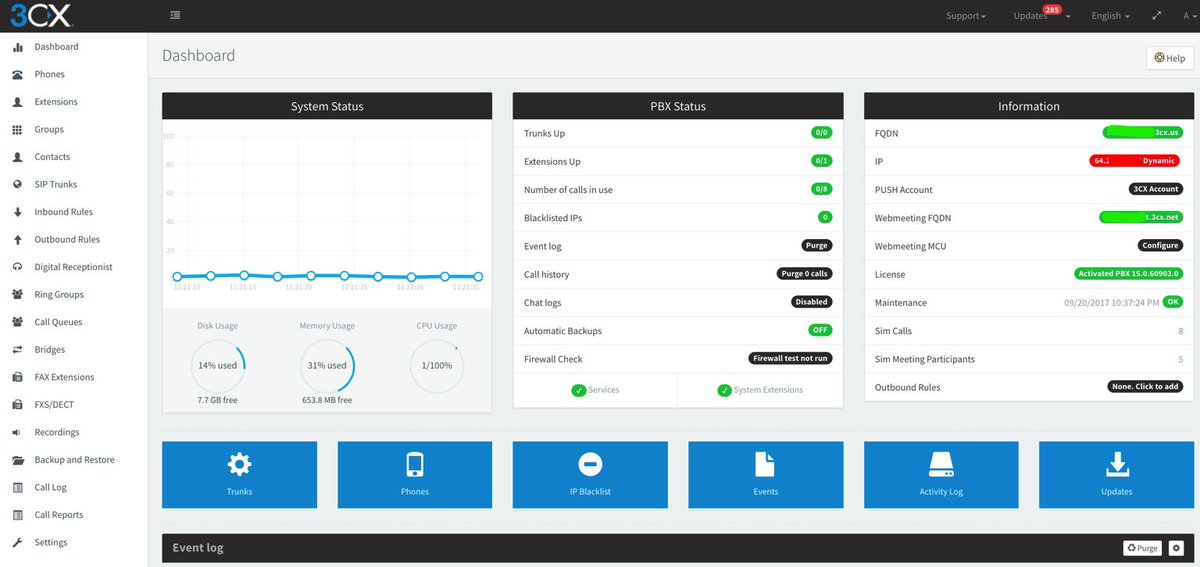
Free Calling in the U.S. and Canada with PIAF5. We know our more frugal U.S. residents are wondering if there's a way to make free calls even with 3CX. You didn't really think there would be a release of PBX in a Flash without Google Voice support, did you? It's easy using the Simonics SIP to Google Voice gateway service. Setup time is about a minute, and the one-time cost is $4.99 using this Nerd Vittles link. Setup instructions for the 3CX side are straight-forward as well, and we've documented the procedure on the PIAF Forum.

Free Calling Worldwide with SIP URIs. There's another free calling option as well. PIAF5 and 3CX support worldwide SIP URI calling at no cost. As part of the PIAF5 install procedure, 3CX registers an FQDN for you with one of the 3CX domains if you indicate that your server has a dynamic IP address. Unless you really know what you're doing with DNS, it's a good idea to tell 3CX you have a dynamic IP address whether you do or not. Here's why. Once you have an assigned FQDN in the 3CX universe, one very slick feature is the ease with which you can publish a SIP URI address for any or all of your 3CX extensions thereby allowing PIAF5 users to receive calls from any SIP client worldwide at no cost. Setup takes less than a minute. It's as easy as 1-2-3. Here's how:
1. Login to the 3CX GUI and go to Settings → Network → FQDN. Tick "Allow calls from/to external SIP URIs" and make note of your FQDN, e.g. mypiaf5server.3cx.us. Click OK.
2. For an extension to enable (e.g. 001), go to Extensions → Edit 001 → Options → SIP ID and create any desired SIP URI alias for this extension, e.g. billybob. Click OK.
3. Anyone with a SIP client anywhere worldwide can now call extension 001 using SIP URI: billybob@mypiaf5server.3cx.us.
Special Thanks: Our special tip of the hat goes to a few web sites that we found helpful in putting this article together especially Unixmen and Matt Wilcox & friends and Programming-Review.
Originally published: Tuesday, February 28, 2017
9 Countries Have Never Visited Nerd Vittles. Got a Friend in Any of Them https://t.co/wMfmlhiQ9y #asterisk #freepbx pic.twitter.com/TPFGZbqWB6
— Ward Mundy (@NerdUno) April 22, 2016
Need help with Asterisk? Visit the PBX in a Flash Forum.
Special Thanks to Our Generous Sponsors
FULL DISCLOSURE: ClearlyIP, Skyetel, Vitelity, DigitalOcean, Vultr, VoIP.ms, 3CX, Sangoma, TelecomsXchange and VitalPBX have provided financial support to Nerd Vittles and our open source projects through advertising, referral revenue, and/or merchandise. As an Amazon Associate and Best Buy Affiliate, we also earn from qualifying purchases. We’ve chosen these providers not the other way around. Our decisions are based upon their corporate reputation and the quality of their offerings and pricing. Our recommendations regarding technology are reached without regard to financial compensation except in situations in which comparable products at comparable pricing are available from multiple sources. In this limited case, we support our sponsors because our sponsors support us.
BOGO Bonaza: Enjoy state-of-the-art VoIP service with a $10 credit and half-price SIP service on up to $500 of Skyetel trunking with free number porting when you fund your Skyetel account. No limits on number of simultaneous calls. Quadruple data center redundancy. $25 monthly minimum spend required. Tutorial and sign up details are here.
![]() The lynchpin of Incredible PBX 2020 and beyond is ClearlyIP components which bring management of FreePBX modules and SIP phone integration to a level never before available with any other Asterisk distribution. And now you can configure and reconfigure your new Incredible PBX phones from the convenience of the Incredible PBX GUI.
The lynchpin of Incredible PBX 2020 and beyond is ClearlyIP components which bring management of FreePBX modules and SIP phone integration to a level never before available with any other Asterisk distribution. And now you can configure and reconfigure your new Incredible PBX phones from the convenience of the Incredible PBX GUI.
VitalPBX is perhaps the fastest-growing PBX offering based upon Asterisk with an installed presence in more than 100 countries worldwide. VitalPBX has generously provided a customized White Label version of Incredible PBX tailored for use with all Incredible PBX and VitalPBX custom applications. Follow this link for a free test drive!
Special Thanks to Vitelity. Vitelity is now Voyant Communications and has halted new registrations for the time being. Our special thanks to Vitelity for their unwavering financial support over many years and to the many Nerd Vittles readers who continue to enjoy the benefits of their service offerings. We will keep everyone posted on further developments.
Some Recent Nerd Vittles Articles of Interest...
- Should you ever have to migrate your WordPress site from one domain to another, here are two helpful tools to consider: the Automatic Domain Name Changer Plugin and our favorite: WordPress-Domain-Changer. [↩]
Raspberry Pi One-Minute Wonder: A Turnkey and Truly Incredible PBX for XiVO
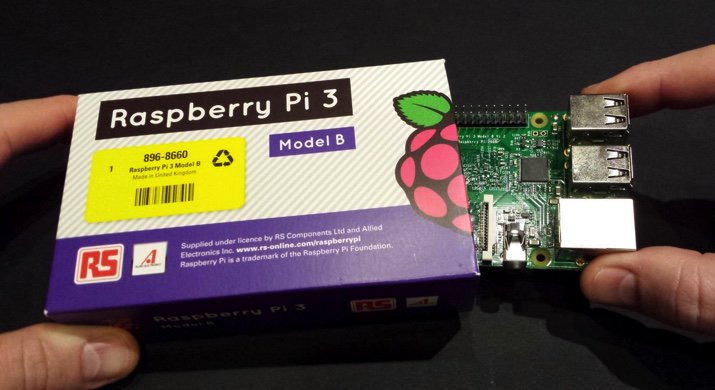
Hard to believe it’s been 4½ years since the introduction of the original Raspberry Pi®. We love half-birthdays, and we’ve got a blockbuster gift for you today as we celebrate the fact that almost 10 million RasPi’s have been shipped. Yes, our love affair with the Raspberry Pi lives on. The sensational Raspberry Pi 3 sports a 1.2GHz 64-bit quad-core ARM Cortex-A53 CPU with ten times the performance of the original Raspberry Pi. Of particular interest to the VoIP community will be the RasPi 3’s integrated 802.11n wireless LAN and Bluetooth 4.1 hardware. And, of course, the RasPi 3 retains its compatibility with the Raspberry Pi 1 and 2. Did we mention it’s still just $35? Because we like to celebrate half birthdays, too, we’re pleased to introduce a brand new Incredible PBX™ for XiVO image for the Raspberry Pi 3 featuring Raspbian 8, the latest release of Asterisk® 13, and XiVO. This one installs in under a minute. And, yes, it’s still FREE with pure open source GPL code.
Special Thanks. First things first. We want to extend our extra special thanks to Iris-Network for their awesome Raspivo – XiVO build. Without it and their repositories, none of this would have been possible.
Raspberry Pi 3 Performance. Gone are the days of worrying about Raspberry Pi performance. Both the user interface and call quality now match what you’d expect to find on a $300-$500 VoIP server. For best results, we recommend 32GB Class 10 microSD cards which now are plentiful at the $10 price point.1
Raspberry Pi 3 Shopping List. Before you can install Incredible PBX for XiVO, you’ll need a compatible Raspberry Pi 3 platform. Here’s the short list that, when coupled with the Incredible PBX image, turns today’s adventure into kid’s play:
$35* Raspberry Pi 3 from MCM or Newark or Amazon $10 Power Adapter (2.5 amps minimum!) $10 32GB microSDHC Class 10 card (Don’t use SanDisk Ultra!) £12.95 Pibow 3 case or $7.50 Official RasPi 3 case
About That Asterisk. We write about Asterisk® regularly, but the asterisk we’re talking about is the one accompanying the $35* price tag for the Raspberry Pi 3. Yes, that’s the advertised price. And, no, if you want one quickly, you may pay a bit more. Right now you can snag one on Amazon for $35.99 with two-day Prime shipping. We’re assuming you already own a USB keyboard and an HDMI-compatible monitor. If so, today’s going rate for all of our recommended pieces is under $65, not bad for a fully-equipped, quad-core computer. Did we mention that Incredible PBX for XiVO is FREE with NoGotchas!
Incredible PBX Feature Set. Where to begin? Let’s start with the Alphabet Stew: IAX, SIP, SMS, FAX, SRTP, and OAuth functionality. Voice Recognition and Text-to-Speech VoIP application support using Festival and Google. Free calling with Google Voice, Simonics SIP gateway, or RingPlus cellular service. And all of your Nerd Vittles favorites: AsteriDex, Click-to-Dial, News, Weather, Reminders, and even an Alarm Clock. Plus hundreds of features that typically are found in commercial PBXs: Conferencing, IVRs and AutoAttendants, Simultaneous Ringing on your Smartphone, Email Delivery of Voicemail, Voicemail Blasting, Automatic Backups, High Availability Support, Automatic Phone Setups, and much more…
Incredible PBX Network Security Model. Most phone calls cost money. Unlike many of the other "free" VoIP solutions, our most important criteria for VoIP is rock-solid security. If your free server ends up costing you thousands of dollars in phone bills due to fraud, it isn’t free at all. Once you plug in that network cable, you’ve painted a bullseye on your checkbook.
No single network security system can protect you against zero-day vulnerabilities that no one has ever seen. Deploying multiple layers of security is not only smart, it’s essential with today’s Internet topology. It works much like the Bundle of Sticks from Aesop’s Fables. The more sticks there are in your bundle, the more difficult it is to break them apart. If a vulnerability suddenly appears in the Linux kernel, or in Asterisk, or in your web server, or in your favorite web GUI, you can continue to sleep well knowing that other layers of security have your back. No one else in the telecommunications industry has anything close. You can’t hack what you can’t see, and the Incredible PBX automatically configures a WhiteList as part of the one-minute setup. And it’s all open source GPL code that you can share with anybody and everybody unlike the so-called "freeware" products. Freeware with Asterisks is anything but free!
Do your part and do your homework. Comparison shop as if your phone bill matters! 😉 Incredible PBX provides:
- Preconfigured IPtables Linux Firewall
- Preconfigured Travelin’ Man 3 WhiteLists
- Randomized Port Knocker for Remote Access
- Fail2Ban Log Monitoring for SSH, Apache, Asterisk
- Randomized Ultra-Secure Passwords
- Automatic Update Utility for Security & Bug Fixes
- Asterisk Manager Lockdown to localhost
- Security Alerts via the PIAF Forum
Incredible PBX for XiVO Installation & Setup Tutorial
Here’s everything need to know about installation and setup of Incredible PBX for XiVO. "Automatic" means you just watch.
- Download and unzip Incredible PBX for XiVO image from SourceForge (includes GV OAuth support)
- Transfer Incredible PBX image to microSD card
- Boot Raspberry Pi from new microSD card
- Login to RasPi console as root:password to initialize your server (Automatic) and expand image to match SD card
- Reboot after writing down your server IP address (Automatic)
- Login via SSH as root:password to set up passwords (You Pick ’em) & configure firewall (Automatic)
- Enjoy!
Running Incredible PBX for XiVO on the Raspberry Pi
The standard XiVO boot procedure will begin once you insert your microSD card into the Raspberry Pi 3 and apply power. Within a short time, you’ll get the familiar Linux login prompt. Login as root with a password of password.
Once you log in, a startup script will briefly configure a few things and then advise you that it’s time to reboot. Write down the IP address provided because for Phase 2 of the setup, we need to use SSH or Putty on the desktop that you will actually be using to manage your server. The reason for this is that Incredible PBX automatically creates a whitelist of IP addresses that the firewall will allow to access your server. If the IP address isn’t in your whitelist, you may lock yourself out except from the RasPi’s console window.
Once the console window shows that your server has rebooted by displaying the Linux login prompt, switch to SSH or Putty and login as root using the IP address you wrote down. You’ll then be prompted to change your root password for Linux as well as your root password for XiVO GUI access using a web browser. You’ll also need to set a PIN that will be used to authorize access to extension 123 to schedule Telephone Reminders on your server. This completes the configuration. You’ll get a final screen showing the credentials for the preconfigured extension 701 as well as a reminder that your PortKnocker credentials are stored in /root/knock.FAQ in the event you ever lock yourself out of your machine. It’s a good idea to leave this screen displayed while you install and configure a softphone since you can cut-and-paste your extension 701 credentials without having to type anything.
Once you complete the SIP softphone setup below, you can return to the SSH window and press ENTER to finish the install. The Incredible PBX Automatic Update Utility will run, and then you will be presented with the pbxstatus display. You can access the Asterisk CLI by typing: asterisk -rvvvvvvvvvv. Exit from the CLI by typing quit. As mentioned previously, always shut down your server gracefully by typing halt. When prompted for the hostname, type xivo. Once the shutdown procedure finishes, it’s safe to disconnect the power cord from your Raspberry Pi.
Beginning with the September 1 release, many of the log files have been disabled to help prolong the life of microSD cards since XiVO tends to be very chatty. If you are running an earlier release, you can follow this tutorial to disable most logging on your Raspberry Pi.
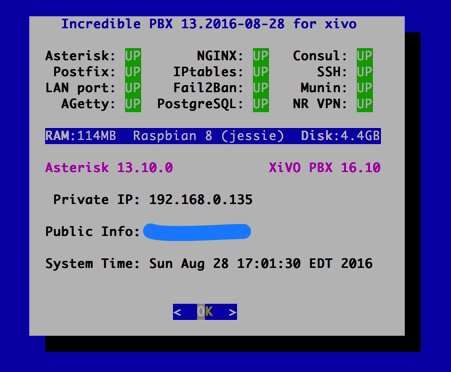
Enabling WiFi on the Raspberry Pi 3
With the Raspberry Pi 3, wi-fi hardware is included. The next step is configuring it to connect to your WiFi router. Simply open /etc/wpa_supplicant/wpa_supplicant.conf with nano and (1) edit the SSID name and password fields to authorize access to your local, password-protected WiFi router as well as any open WiFi network. (2) Also update the country code for your WiFi region, e.g. country=US. Then (3) save your changes: Ctrl-X, Y, then press ENTER.
network={
 ssid="YourSSID"
 psk="YourSSIDpassword"
 key_mgmt=WPA-PSK
 scan_ssid=1
 priority=5
}

network={
 key_mgmt=NONE
 priority=1
}
Next, enable automatic startup of the wlan0 network interface:
sed -i 's|#allow-hotplug wlan0|allow-hotplug wlan0|' /etc/network/interfaces
Finally, stop and restart the wlan0 interface, count to 15, and check pbxstatus to decipher the added private IP address for your WiFi connection:
ifdown wlan0
ifup wlan0
pbxstatus
If you want to run your Raspberry Pi exclusively off the WiFi connection going forward, simply unplug the network cable from your RasPi and reboot your server.
Choosing a SIP Softphone for Incredible PBX for XiVO
Softphones tend to be a matter of taste for most folks so we’ll keep our suggestions to a minimum. On the Windows platform, it’s hard to go wrong with X-Lite. It works out of the box by simply plugging in the IP address of your server and your SIP username and password. It also happens to be free. The only downside is that X-Lite has a nasty habit of embedding time bombs in their free software so you may have to reinstall it from time to time. If you know what you’re doing Zoiper is another alternative but be advised that it doesn’t work out of the box on servers behind NAT-based routers.
On the Mac platform, our favorite free softphone is Telephone. It’s a barebones SIP client that just works. As with X-Lite, you plug in your server’s IP address and SIP credentials, and you’re in business.
On the Linux or Solaris platforms, we assume that you know what you’re doing and that you are perfectly capable of choosing and installing a SIP phone that meets your requirements.
Incredible PBX Application Quick Start Guide
We’ve finished the basic Incredible PBX for XiVO setup. You now have a functioning PBX with dozens of applications for Asterisk that work out of the box. It’s probably a good idea to spend a little time getting acquainted with Incredible PBX for XiVO before you add trunks to communicate with the outside world.
Here’s a handy cheat sheet for some of the Incredible PBX applications that have been installed or are available as add-ons. There’s also a link for more information. This remains a work-in-progress so expect more applications in coming weeks.
- Google Voice CLI interface and SMS Message Blasting
- CallerID Superfecta – Match Names to CallerID Numbers
- CallerID Blacklist – Block Calls from Spammers and Old Girlfriends
- CDR Reports in CSV Format
- CDR Reports in SQLite3 Format
- Asteridex – The Poor Man’s Rolodex (SQLite3 version)
- AsteriDex Click-to-Dial with XiVO Phonebook
- NeoRouter VPN for XiVO
- FCC RoboCall BlackList
- CallerID WhiteList Override
- Dial 123 – Telephone Reminders
- Dial 411 – Call by Name from AsteriDex
- Dial 947 – Weather Forecasts by ZIP Code
- Dial 951 – Latest Yahoo News
- Dial 2663 – Conference Call
- Dial 3472 – DISA Access
- Dial 4871 – Allison’s Sample IVR
- Dial *61 – Time of Day
- Dial *65 – Decipher Your Extension #
- Dial 8463 – Time of Day
- Dial *881400 – Schedule an Alarm for 2 p.m. (1400 military time)
- Dial 53669 – Meet Lenny, the Robocaller’s Worst Nightmare
How To Make Easily Compressed Backups of Incredible PBX
MicroSD cards WILL wear out especially on XiVO servers with lots of activity. So it’s important to make regular backups of your media so you don’t get surprised when things come unglued down the road. After considerable discussion on the PIAF Forum, here’s the collective wisdom.
You’ll need another machine (such as a Mac or Linux box) on which to plug in the microSD card in order to make a backup image of it since you can’t back up a card that is actually providing the live platform for your PBX. The recommended methodology goes like this. Before shutting down your PBX and removing the microSD card to make the backup, convert all of the unused space on the card to zeros so that the unused space can be easily compressed when you create the backup image. You do this by issuing the following command after logging into the Linux CLI as root on your RasPi 3. Be sure to do it during a period of inactivity on your PBX as it is processor intensive. Then halt the machine and remove the microSD card.
xivo-service stop
cat /dev/zero > wipe.it ; rm wipe.it
halt
Insert the card into an SD card slot on the machine you will use to make the backup image and issue the following commands after deciphering the correct device name for your card (/dev/disk4 in this example) using the df utility:
sudo df -h
sudo dd bs=1m if=/dev/disk4 | gzip -c > incrediblepbx-xivo.img.gz
sudo sync
sudo diskutil eject /dev/disk4s1
echo "It's safe to remove the microSD card now."
Now return the microSD card to your Raspberry Pi 3 and boot. Store your backups in a safe place!
Configuring Trunks and Routes with Incredible PBX for XiVO
The next step in your XiVO adventure is connecting your PBX to the outside world so that you can make and receive phone calls from anywhere in the world. For this you’ll need one or more trunks. Unlike the Ma Bell world, there’s no reason to put all your eggs in one basket. You can use one or more trunk providers for incoming calls with separate phone numbers for each. And you can use one or more trunk providers for outgoing calls and save money on calls to certain countries by choosing the best provider for where you want to call. And, of course, if you live in the United States, you can set up one or more Google Voice trunks and make calls to the U.S. and Canada for free. We’ve written a number of tutorials to make it easy to set up these trunks.
To get started, point a web browser to the IP address of your PBX. Login as root with the XiVO GUI password you set up above. If you ever forget your password, you can run /root/admin-pw-change to reconfigure it.
XIVO Trunk Implementation Tutorials
- XiVO Trunks Tutorial: Installing a Vitelity SIP Trunk2
- XiVO Trunks Tutorial: Installing a VoIP.ms SIP Trunk
- XiVO Trunks Tutorial: Installing a RingPlus SIP Trunk
- XiVO Trunks Tutorial: Installing a FreeVoipDeal (Betamax) SIP Trunk
- XiVO Trunks Tutorial: Installing a Google Voice-Simonics SIP Trunk
- XiVO Trunks Tutorial: Deploying Native Google Voice with OAuth Trunks
- XiVO Trunks Tutorial: Installing an Anveo Direct Outbound SIP Trunk
- XiVO Trunks Tutorial: Installing a Skype Connect SIP Trunk
Once you’ve added one or more trunks, you’ll need to tell XiVO how to route outgoing and incoming calls. Here are our step-by-step tutorials on setting up Outbound Calling Routes and Incoming Call Routes:
XIVO Call Routing Tutorials
- XiVO Call Routing Tutorial: Creating Outbound Routes for PSTN Calling
- XiVO Call Routing Tutorial: Creating Inbound Routes for DIDs
Enabling Bluetooth & Proximity Detection on the Raspberry Pi
Implementing Bluetooth Proximity Detection with Smartphone and your #RaspberryPi3 https://t.co/TYFrcqcLux #asterisk pic.twitter.com/QqGNjqG3Ag
— Ward Mundy (@NerdUno) March 4, 2016
Where To Go Next with Incredible PBX for XiVO
Now you’re ready to explore. We recommend you pick up here in our Incredible PBX for XiVO tutorial. And be sure to check out the Last Minute Fixes that didn’t make it into the current build. Enjoy the ride!
Originally published: Monday, August 29, 2016
9 Countries Have Never Visited Nerd Vittles. Got a Friend in Any of Them https://t.co/wMfmlhiQ9y #asterisk #freepbx pic.twitter.com/TPFGZbqWB6
— Ward Mundy (@NerdUno) April 22, 2016
Need help with Asterisk? Visit the PBX in a Flash Forum.
Special Thanks to Our Generous Sponsors
FULL DISCLOSURE: ClearlyIP, Skyetel, Vitelity, DigitalOcean, Vultr, VoIP.ms, 3CX, Sangoma, TelecomsXchange and VitalPBX have provided financial support to Nerd Vittles and our open source projects through advertising, referral revenue, and/or merchandise. As an Amazon Associate and Best Buy Affiliate, we also earn from qualifying purchases. We’ve chosen these providers not the other way around. Our decisions are based upon their corporate reputation and the quality of their offerings and pricing. Our recommendations regarding technology are reached without regard to financial compensation except in situations in which comparable products at comparable pricing are available from multiple sources. In this limited case, we support our sponsors because our sponsors support us.
BOGO Bonaza: Enjoy state-of-the-art VoIP service with a $10 credit and half-price SIP service on up to $500 of Skyetel trunking with free number porting when you fund your Skyetel account. No limits on number of simultaneous calls. Quadruple data center redundancy. $25 monthly minimum spend required. Tutorial and sign up details are here.
![]() The lynchpin of Incredible PBX 2020 and beyond is ClearlyIP components which bring management of FreePBX modules and SIP phone integration to a level never before available with any other Asterisk distribution. And now you can configure and reconfigure your new Incredible PBX phones from the convenience of the Incredible PBX GUI.
The lynchpin of Incredible PBX 2020 and beyond is ClearlyIP components which bring management of FreePBX modules and SIP phone integration to a level never before available with any other Asterisk distribution. And now you can configure and reconfigure your new Incredible PBX phones from the convenience of the Incredible PBX GUI.
VitalPBX is perhaps the fastest-growing PBX offering based upon Asterisk with an installed presence in more than 100 countries worldwide. VitalPBX has generously provided a customized White Label version of Incredible PBX tailored for use with all Incredible PBX and VitalPBX custom applications. Follow this link for a free test drive!
Special Thanks to Vitelity. Vitelity is now Voyant Communications and has halted new registrations for the time being. Our special thanks to Vitelity for their unwavering financial support over many years and to the many Nerd Vittles readers who continue to enjoy the benefits of their service offerings. We will keep everyone posted on further developments.
Some Recent Nerd Vittles Articles of Interest…
- Many of our purchase links refer users to Amazon when we find their prices are competitive for the recommended products. Nerd Vittles receives a small referral fee from Amazon to help cover the costs of our blog. We never recommend particular products solely to generate Amazon commissions. However, when pricing is comparable or availability is favorable, we support Amazon because Amazon supports us. [↩]
- Vitelity is a platinum sponsor of Nerd Vittles, and they also happen to be the best in the business. You’ll find a discount coupon to get a great deal on a DID and 4-channel trunk toward the end of this article. [↩]
It’s Back: $10.50 Buys an Incredible PBX in the Cloud For Life… If You Hurry
In January, we began our new series on Cloud Computing by documenting how to build an awesome LAMP server in the Cloud using Linux. Today we’re again going to show you how to use the same Cloud platform and take advantage of the $10.50 coupon code TAKE70 to build an Incredible PBX in the Cloud FOR LIFE. When you’re finished, you’ll have a state-of-the-art Incredible PBX 13 server with hundreds of PBX features including free calling to the U.S. and Canada using any (free) Google Voice account. Keep in mind this isn’t $10.50 a month for your cloud server. It’s $10.50, period! The whole project takes less than an hour. Before we begin, let’s revisit our cautionary note for those that missed it in the previous article. It’s important.
There’s lots to hate at Cloud At Cost, a Canadian provider that offers virtual machines in the cloud for a one-time fee with no recurring charges. For
$35$10.50, you get a virtual machine with 512MB of RAM, 10GB of storage, and a gigabit Internet connection FOR LIFE. We haven’t seen a week go by when Cloud at Cost didn’t offer some sort of discount. Today it’s 70% which brings the total cost down to $10.50. That’s less than a burger at Five Guys. That’s the good news. But, if security, 99.999% reliability, performance, and excellent customer support are your must-haves, then look elsewhere. So why would anyone in their right mind sign up for a cloud solution that didn’t offer those four things? Did we mention it’s $10.50 for a lifetime cloud server?If you take our recommendation and plunk down your $10.50, you’ll need to go into this with the right attitude. It’s not going to be flawless perfection computing. It’s a sandbox on which to experiment with [VoIP] and Cloud Computing. Will your virtual machine disintegrate at some juncture? Probably. Our experience is that the first couple days are critical. If you start seeing sluggish performance which degenerates to zero, don’t waste your time. Take good notes as you go along, delete the virtual machine, and rebuild a new one. It won’t cost you a dime, and it’ll save you hours of frustration. We suspect that bad folks get onto some of the servers and delight in bringing the machines to their knees. So the quicker you cut your losses, the better off you will be. Is CloudAtCost a good solution for production use?
AbsolutelyProbably not so don’t try to fit a square peg in the round hole. It’s not gonna work, and you WILL be disappointed.
Today’s experiment will give you a platform on which to learn before you decide upon a more permanent deployment solution. And it will give you a terrific home for a backup server once you do move to a long-term solution so your $10.50 won’t be wasted.
TAKE70: Build a VoIP Server in the Cloud FOR LIFE w/ Free US/CAN calling https://t.co/l9It2xq14S #asterisk #freepbx pic.twitter.com/UYuCMcfEn8
— Ward Mundy (@NerdUno) January 31, 2016
The objective today is to show you how to build a rock-solid, secure VoIP server in the Cloud with all the bells and whistles you’d typically find on a PBX costing tens of thousands of dollars. Incredible PBX is pure GPL, open source code with one major difference. It’s FREE! And it’s supported by thousands of users on the PIAF Forum that started just like you.
Some of you are probably wondering why you would want a PBX at all. Hearing is believing as they say. Spend a couple minutes and call our CloudAtCost demo server. We preconfigured it using everything provided in today’s tutorial. It’ll let you play with some of the features that a PBX offers such a voice dialing from a directory, news and weather forecasts, and much more. And, in case you’re wondering, it’s been running 24/7 for two full months without a single hiccup. To try it for yourself, just dial: 
Nerd Vittles Demo IVR Options
1 – Call by Name (say “Delta Airlines” or “American Airlines” to try it out)
2 – MeetMe Conference (password is 1234)
3 – Wolfram Alpha (say “What planes are flying overhead now?”)
4 – Lenny (The Telemarketer’s Worst Nightmare)
5 – Today’s News Headlines
6 – Weather Forecast (Just enter your ZIP Code!)
7 – Today in History
8 – Speak to a Real Person (or maybe just voicemail if we’re out)
For long time readers of Nerd Vittles, you already know that the component we continually stress is security. Without that, the rest really doesn’t matter. You’ll be building a platform for someone else to hijack and use for nefarious purposes. When we’re finished today, you’ll have a cloud-based VoIP server that is totally invisible to the rest of the world except a short list of VoIP providers that have been thoroughly vetted by Nerd Vittles staff. You can whitelist additional locations and phones to meet your individual needs without worrying about your server being compromised.
Creating Your Virtual Machine Platform in the Cloud
To get started, you’ve got to cough up your $10.50 at Cloud at Cost using coupon code TAKE70. Once you’ve signed up, CloudAtCost will send you credentials to log into the Cloud at Cost Management Portal. Change your portal password IMMEDIATELY after logging in. Just go to SETTINGS and follow your nose. HINT: DC2 is the preferred data center!
To create your virtual machine, click on the CLOUDPRO button and click Add New Server. If you’ve only purchased the $10.50 CloudPRO 1 platform, then you’ll need all of the available resources shown in the pick list. Leave CentOS 6.7 64bit selected as the OS Type and click Complete. Depending upon the type of special pricing that Cloud at Cost is offering when you sign up, the time to build your virtual machine can take anywhere from a minute to the better part of a day. Things have settled down since the 90% off week so new servers typically are ready in a few minutes. However, we’ve learned to build new virtual machines at night where possible. Then they’re usually available for use by the next morning. Luckily, this slow performance does not impact existing virtual machines that already are running in the CloudAtCost hosting facilities.
Initial Configuration of Your CentOS 6.7 Virtual Machine
With a little luck, your virtual machine soon will appear in your Cloud at Cost Management Portal and look something like what’s shown above. The red arrow points to the i button you’ll need to click to decipher the password for your new virtual machine. You’ll need both your IP address and the password for the new virtual machine in order to log into the server which is now up and running with a barebones CentOS 6.7 operating system. Note the yellow caution flag. That’s telling you that Cloud at Cost will automatically shut down your server in a week to save (them) computing resources. You can change the setting to keep your server running 24/7. Click Modify, Change Run Mode, and select Normal – Leave Powered On. Click Continue and OK to save your new settings.
Finally, you’ll want to change the Host Name for your server to something more descriptive than c7…cloudpro.92… Click the Modify button again and click Rename Server to change it. IncrediblePBX13 has a nice ring to it, but to each his own.
Logging into Your New CentOS 6.7 Virtual Machine
In order to configure and manage your new CentOS 6.7 virtual machine, you’ll need to log into the new server using either SSH or, for Windows users, Putty. After installing Putty, run it and log in to the IP address of your VM with username root and the password you deciphered above. On a Mac, open a Terminal session and issue a command like this using the actual IP address of your new virtual machine:
ssh root@12.34.56.78
Before you do anything else, reset your Virtual Machine’s root password to something very secure: passwd
Next, let’s address a couple of CloudAtCost quirks that may cause problems down the road. CloudAtCost has a nasty habit of not cleaning up after itself with fresh installs. The net result is your root password may get reset every time you reboot even though you changed it.
sed -i '/exit 0/d' /etc/rc.local
killall plymouthd
echo killall plymouthd >> /etc/rc.local
rm -f /etc/rc3.d/S97*
echo "exit 0" >> /etc/rc.local
Installing Incredible PBX 13 with CentOS 6.7
Now we’re ready to build your VoIP server platform. There aren’t many steps so just cut-and-paste the code into your SSH or Putty session and review the results to make sure nothing comes unglued. If something does, the beauty of virtual machines is you can delete them instantly within your management portal and just start over whenever you like. So here we go…
We’ll begin by permanently turning off SELINUX which causes more problems than it solves. The first command turns it off instantly. The second line assures that it’ll stay off whenever you reboot your virtual machine.
setenforce 0
sed -i s/SELINUX=enforcing/SELINUX=disabled/g /etc/selinux/config
Now let’s bring CentOS 6.7 up to current specs and add a few important applications:
yum -y update
yum -y install net-tools nano wget tar
reboot
Once your server reboots, we’re ready to kick off the Incredible PBX 13 install:
cd /root
wget http://incrediblepbx.com/incrediblepbx13-12.2-centos.tar.gz
tar zxvf incrediblepbx*
./IncrediblePBX*
When the install begins, read the license agreement and press ENTER to agree to the terms and get things rolling. Now would be a great time to go have breakfast or lunch. Come back in about an hour and your server should be ready to go.
Implementing Dynamic DNS Service on Your Client Machines
Unlike some other PBX offerings that leave your server exposed to the Internet, Incredible PBX is different. Unless the IP address from which you are accessing the server has been whitelisted, nobody on the Internet can see your server. The only exception is the preferred providers list and those on the same local area network (which is nobody in the case of CloudAtCost). As part of the Incredible PBX install, the IP address of the computer you used to perform the install was whitelisted automatically. But there may be other computers from which you wish to allow access to the PBX in order to deploy telephones at remote sites. Some of these sites may have dynamic IP addresses that change from time to time. Or you may have traveling salesman that land in a new hotel almost every night with a new IP address. Fortunately, there are a number of free and paid Dynamic DNS providers. For sites with dynamic IP addresses, simply choose a fully-qualified domain name (FQDN) to identify each location where you need computer access or need to deploy a phone. Then run a dynamic DNS update utility periodically from a computer or router at that site. It reports back the current public IP address of the site and your DNS provider updates the IP address assigned to that FQDN whenever there are changes.
DNS update clients are available for Windows, Mac OS X, and many residential routers. They’re also available for Android devices. Then it’s just a matter of plugging in the remote users’ FQDNs so Incredible PBX knows to give them server access via the whitelist. You implement this in seconds using the add-ip and add-fqdn utilities in the /root directory.
There are other ways to gain access as well using the PortKnocker utility or Travelin’ Man 4 from a telephone. Both of these are covered in the Incredible PBX 13 tutorial so we won’t repeat it here.
Incredible PBX Preliminary Setup Steps
First, let’s check things out and make sure everything is working as it should. With your favorite web browser, visit the IP address of your new server. You should see the default Incredible PBX page, the Kennonsoft Menu. It’s divided into two parts, a Users tab (shown below) and an Admin tab with additional options that we’ll cover shortly.
Now we need to jump back to SSH or Putty and log back into your server as root. You’ll note that the Incredible PBX Automatic Update Utility is run each time you log in. This is how important security updates are pushed to your server so do it regularly. And, no, you don’t need to contribute to our open source projects unless you want to. You’ll still get the updates as they are released.
After the Automatic Update Utility runs, the login script will execute status which tells you everything you need to know about the health of your server. After the initial install, it will look something like this with your server’s IP address obviously. We’ll cover the RED items down the road a bit.
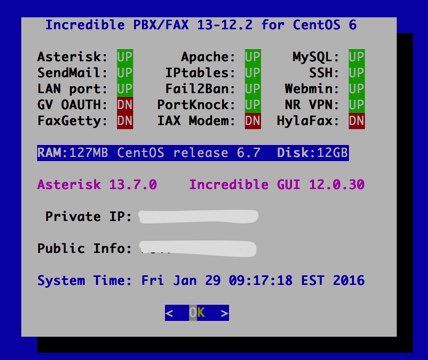
For now, we need to complete a few preliminary setup steps for Incredible PBX to make sure you can log into the various components which have been installed on your computer. There are several different credentials you will need. Most of these are configured using scripts in the /root folder of your server. First, you need your root password for the server itself, and you should have already set that up with a very secure password using passwd. These same credentials are used to login to WebMin.
Next you’ll need an admin password for the Incredible PBX GUI. This is the management utility and Asterisk® code generator which consists of FreePBX® GPL modules that are open source and free to use. The admin password is set by running admin-pw-change in the /root directory.
There are also a number of web-based applications such as Telephone Reminders, AsteriDex, phpMyAdmin, and VoiceMail & Recordings (User Control Panel). You obviously don’t want everyone with a telephone using all of these applications so they are protected using a couple different Apache web server credentials. First, you set up an admin password for the administrator-level applications using the htpasswd utility. Then you set up an end-user account and password for access to AsteriDex, Reminders, and the User Control Panel. With the User Control Panel, end users also will need a username and password for their particular phone extension and this is configured with the Incredible PBX GUI using Admin -> User Management -> Add New User. If this sounds convoluted, it’s really not. Apache credentials can be entered once in an administrator’s or end user’s browser and they’re stored permanently.
Here is a checklist of the preliminary steps to complete before using your server:
Make your root password very secure: passwd
Create admin password for Incredible PBX GUI access: /root/admin-pw-change
Create admin password for web apps: htpasswd /etc/pbx/wwwpasswd admin
Create joeuser password for web apps: htpasswd /etc/pbx/wwwpasswd joeuser
Set up UCP accounts for Voicemail & Recordings access using Incredible PBX GUI
Make a copy of your Knock codes: cat /root/knock.FAQ
Decipher IP address and other info about your server: status
Set your correct time zone: /root/timezone-setup
Activating Incredible Fax on Your Server
Incredible PBX also includes an optional (and free) faxing component that lets you send and receive faxes that are delivered to your email address. To activate Incredible Fax, run the following script and plug in your email address for delivery of incoming faxes: /root/incrediblefax11.sh. After entering your email address, you’ll be prompted for all sorts of additional information. Unless you have unusual requirements, pressing the ENTER key at every prompt is the appropriate response. You’ll need to reboot your server again when the fax installation is complete. Once you log back into your server as root, the bottom line of the status display should now be green UP entries.
Managing Your Server with the Incredible PBX GUI
About 99% of your time managing your server will be spent in the Incredible PBX GUI. To access it, fire up your browser and point to the IP address of your server. At the Kennonsoft menu, click on the Users tab which will change to Admin and bring up the Admin menu shown here:
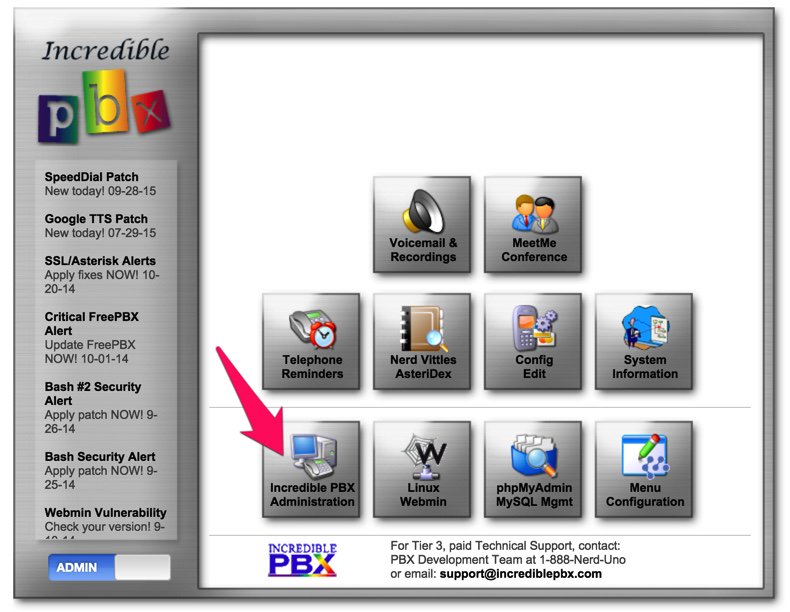
From the Administrator menu in the Kennonsoft GUI, click on Incredible PBX Administration. This will bring up the following menu:
Click on the first icon to access the Incredible PBX GUI. You’ll be prompted for your credentials. For the username, enter admin. For the password, enter the password you set up using admin-pw-change above. You should then be greeted by the main status display in the Incredible GUI:
If you’re new to Asterisk and FreePBX, here’s the one paragraph primer on what needs to happen before you can make free calls with Google Voice. You’ll obviously need a free Google Voice account. This gets you a phone number for people to call you and a vehicle to place calls to plain old telephones throughout the U.S. and Canada at no cost. You’ll also need a softphone or SIP phone (NOT a regular POTS telephone) to actually place and receive calls. YATE makes a free softphone for PCs, Macs, and Linux machines so download your favorite and install it on your desktop. Phones connect to extensions to work with Incredible PBX. Extensions talk to trunks (like Google Voice) to make and receive calls. We use outbound routes to direct outgoing calls from extensions to trunks, and we use inbound routes to route incoming calls from trunks to extensions to make your phones ring. In a nutshell, that’s how a PBX works. There are lots of bells and whistles that you can explore down the road.
As configured after installation, you have everything you’ll need except a Google Voice trunk, and we’ll cover that next. Then we’ll add a softphone with your extension 701 credentials, and you’ll be ready to make and receive calls. Before we move on, let’s decipher your extension 701 password so that you’ll have it for later. Choose Applications -> Extensions -> 701 and scroll down the screen to the Secret field and write down your password. You can also change it if you like and click Submit and then the Red button to update your settings. While you’re here, write down your extension 701 Voicemail Password.
Deploying Google Voice on Your Server
That leaves one RED entry on your status display, GV OAUTH. Whether to use plain text passwords or OAUTH 2 credentials with Google Voice accounts presently is a matter of choice although Google regularly threatens to discontinue access to Google Voice without OAUTH authentication. We suggest you play with Google Voice using plain text passwords just to get your feet wet because OAUTH implementation gets complicated. When you get ready to deploy a permanent Incredible PBX server, that would be the appropriate time to switch to OAUTH. This tutorial (beginning at step 1b) will guide you through the process.
If you want to use Google Voice, you’ll need a dedicated Google Voice account to support Incredible PBX. If you want to use the inbound fax capabilities of Incredible Fax, then you’ll need an additional Google Voice line that can be routed to the FAX custom destination using the GUI. The more obscure the username (with some embedded numbers), the better off you will be. This will keep folks from bombarding you with unsolicited Gtalk chat messages, and who knows what nefarious scheme will be discovered using Google messaging six months from now. So keep this account a secret!
We’ve tested this extensively using an existing Gmail account, and inbound calling is just not reliable. The reason seems to be that Google always chooses Gmail chat as the inbound call destination if there are multiple registrations from the same IP address. So, be reasonable. Do it our way! Set up a dedicated Gmail and Google Voice account, and use it exclusively with Incredible PBX. It’s free at least through 2013. Google Voice no longer is by invitation only so, if you’re in the U.S. or have a friend that is, head over to the Google Voice site and register.
You must choose a telephone number (aka DID) for your new account, or Google Voice calling will not work… in either direction. Google used to permit outbound Gtalk calls using a fake CallerID, but that obviously led to abuse so it’s over! You also have to tie your Google Voice account to at least one working phone number as part of the initial setup process. Your cellphone number will work just fine. Don’t skip this step either. Just enter the provided 2-digit confirmation code when you tell Google to place the test call to the phone number you entered. Once the number is registered, you can disable it if you’d like in Settings, Voice Setting, Phones. But…
IMPORTANT: Be sure to enable the Google Chat option as one of your phone destinations in Settings, Voice Setting, Phones. That’s the destination we need for The Incredible PBX to work its magic! Otherwise, all inbound and outbound calls will fail. If you don’t see this option, you may need to call up Gmail and enable Google Chat there first. Then go back to the Google Voice Settings.
While you’re still in Google Voice Settings, click on the Calls tab. Make sure your settings match these:
- Call Screening – OFF
- Call Presentation – OFF
- Caller ID (In) – Display Caller’s Number
- Caller ID (Out) – Don’t Change Anything
- Do Not Disturb – OFF
- Call Options (Enable Recording) – OFF
- Global Spam Filtering – ON
Click Save Changes once you adjust your settings. Under the Voicemail tab, plug in your email address so you get notified of new voicemails. Down the road, receipt of a Google Voice voicemail will be a big hint that something has come unglued on your PBX.
One final word of caution is in order regardless of your choice of providers: Do NOT use special characters in any provider passwords, or nothing will work!
Once you have your Google Voice account properly configured with Google, here is the proper sequence to get a Google Voice account working with Incredible PBX. First, using a browser, login to your Google Voice account. Second, make sure that Google Chat is activated in your Phone -> Settings. Third, in a separate browser tab, enable Less Secure Apps for your Google account. Fourth, in another separate browser tab, activate the Google Voice reset procedure. Fifth, in the Incredible PBX GUI, choose Connectivity -> Google Voice (Motif) and enter your Google Voice credentials:
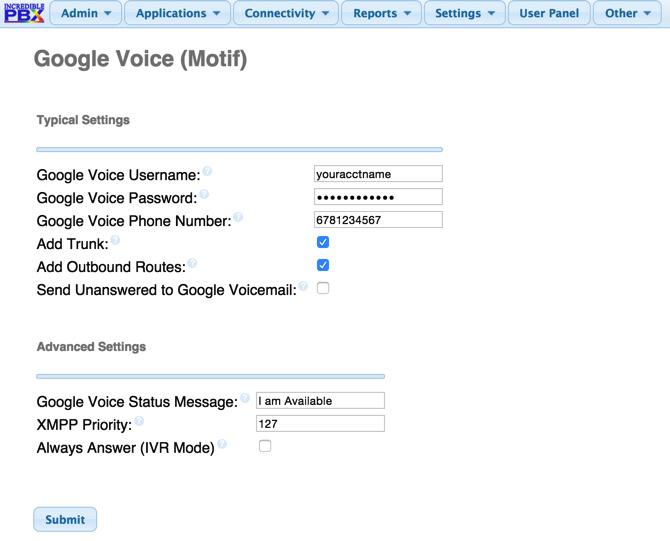
Sixth, save your settings by clicking Submit and the Red Button to reload the GUI. Finally, using SSH or Putty, log into your server as root and restart Asterisk: amportal restart.
Setting Up a Soft Phone to Use with Incredible PBX
Now you’re ready to set up a telephone so that you can play with Incredible PBX. We recommend YateClient which is free. Download it from here. Run YateClient once you’ve installed it and enter the credentials for the 701 extension on Incredible PBX. You’ll need the IP address of your server plus your extension 701 password. Choose Settings -> Accounts and click the New button. Fill in the blanks using the IP address of your server, 701 for your account name, and your extension 701 password. Click OK.
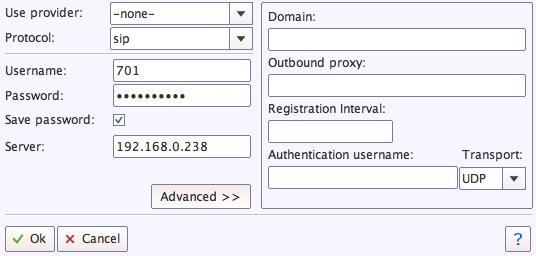
Once you are registered to extension 701, close the Account window. Then click on YATE’s Telephony Tab and place some test calls to the numerous apps that are preconfigured on Incredible PBX. Dial a few of these to get started:
DEMO - Allison's IVR Demo

947 - Weather by ZIP Code

951 - Yahoo News

*61 - Time of Day

*68 - Wakeup Call

TODAY - Today in History
Now you’re ready to connect to the telephones in the rest of the world. If you live in the U.S., the easiest way (at least for now) is to use the free Google Voice account we set up above. Unlike traditional telephone service where you were 100% dependent upon MaBell, there is no such limitation with VoIP. The smarter long-term solution is to choose several SIP providers and set up redundant trunks for your incoming and outbound calls. The PIAF Forum includes dozens of recommendations to get you started. Here are a few of our favorites:
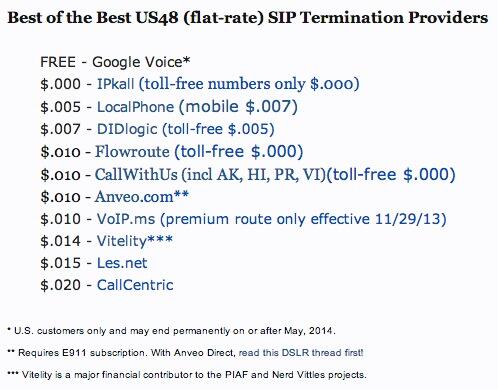
Originally published: Friday, January 29, 2016 Republished: Monday, March 14, 2016
9 Countries Have Never Visited Nerd Vittles. Got a Friend in Any of Them https://t.co/wMfmlhiQ9y #asterisk #freepbx pic.twitter.com/TPFGZbqWB6
— Ward Mundy (@NerdUno) April 22, 2016
Need help with Asterisk? Visit the PBX in a Flash Forum.
Special Thanks to Our Generous Sponsors
FULL DISCLOSURE: ClearlyIP, Skyetel, Vitelity, DigitalOcean, Vultr, VoIP.ms, 3CX, Sangoma, TelecomsXchange and VitalPBX have provided financial support to Nerd Vittles and our open source projects through advertising, referral revenue, and/or merchandise. As an Amazon Associate and Best Buy Affiliate, we also earn from qualifying purchases. We’ve chosen these providers not the other way around. Our decisions are based upon their corporate reputation and the quality of their offerings and pricing. Our recommendations regarding technology are reached without regard to financial compensation except in situations in which comparable products at comparable pricing are available from multiple sources. In this limited case, we support our sponsors because our sponsors support us.
BOGO Bonaza: Enjoy state-of-the-art VoIP service with a $10 credit and half-price SIP service on up to $500 of Skyetel trunking with free number porting when you fund your Skyetel account. No limits on number of simultaneous calls. Quadruple data center redundancy. $25 monthly minimum spend required. Tutorial and sign up details are here.
![]() The lynchpin of Incredible PBX 2020 and beyond is ClearlyIP components which bring management of FreePBX modules and SIP phone integration to a level never before available with any other Asterisk distribution. And now you can configure and reconfigure your new Incredible PBX phones from the convenience of the Incredible PBX GUI.
The lynchpin of Incredible PBX 2020 and beyond is ClearlyIP components which bring management of FreePBX modules and SIP phone integration to a level never before available with any other Asterisk distribution. And now you can configure and reconfigure your new Incredible PBX phones from the convenience of the Incredible PBX GUI.
VitalPBX is perhaps the fastest-growing PBX offering based upon Asterisk with an installed presence in more than 100 countries worldwide. VitalPBX has generously provided a customized White Label version of Incredible PBX tailored for use with all Incredible PBX and VitalPBX custom applications. Follow this link for a free test drive!
Special Thanks to Vitelity. Vitelity is now Voyant Communications and has halted new registrations for the time being. Our special thanks to Vitelity for their unwavering financial support over many years and to the many Nerd Vittles readers who continue to enjoy the benefits of their service offerings. We will keep everyone posted on further developments.
Some Recent Nerd Vittles Articles of Interest…
The Ultimate Linux Sandbox in the Cloud for Less Than a $35 Raspberry Pi 2
Every few years we like to drop back and take a fresh look at the best way to get started with Linux. For those coming from the Windows World, it can be a painful process. Learning with a Cloud-based server can be especially dangerous because of the security risks. And then there’s the cost factor. Not everyone has several hundred dollars to buy hardware and, frankly, learning about Linux on a $35 Raspberry Pi can drive most newbies to drink. So today we’ll show you another way. It’s not necessarily a better way. But it’s different, and it’s loads of fun for not much money. Today’s project only takes 30 minutes.
There’s lots to hate at Cloud At Cost, a Canadian provider that offers virtual machines in the cloud for a one-time fee with no recurring charges. For $35 or less, you get a virtual machine with 512MB of RAM, 10GB of storage, and a gigabit Internet connection FOR LIFE. We haven’t seen a week go by when Cloud at Cost didn’t offer some sort of discount. Today it’s 70% off with coupon code TAKE70 which brings the total cost down to $10.50. That’s less than a burger at Five Guys. That’s the good news. But, if security, 99.999% reliability, performance, and excellent customer support are your must-haves, then look elsewhere. So why would anyone in their right mind sign up for a cloud solution that didn’t offer those four things? Did we mention it’s $10.50 for a lifetime cloud server?
If you take our recommendation and plunk down your Alexander Hamilton, you’ll need to go into this with the right attitude. It’s not going to be flawless perfection computing. It’s a sandbox on which to experiment with Linux and Cloud Computing. Will your virtual machine disintegrate at some juncture? Probably. Our experience is that the first couple days are critical. If you start seeing sluggish performance which degenerates to zero, don’t waste your time. Take good notes as you go along, delete the virtual machine, and rebuild a new one. It won’t cost you a dime, and it’ll save you hours of frustration. We suspect that bad folks get onto some of the servers and delight in bringing the machines to their knees. So the quicker you cut your losses, the better off you will be. Is CloudAtCost a good solution for production use? Absolutely not so don’t try to fit a square peg in the round hole. It’s not gonna work, and you WILL be disappointed. You’ve been warned. Let’s get started. ENJOY THE RIDE!
Our objective today is to show you how to build a rock-solid, secure Linux server in the Cloud with all the bells and whistles that make Linux the server platform of choice for almost every organization in the world. We’ll finish up by showing you how to embellish the platform with WordPress to do something that’s special for you whether it’s your own blog like Nerd Vittles, or a school newspaper, or an on-line shopping site to sell comic books. The basic foundation for most Linux platforms is called a LAMP server which stands for Linux, Apache, MySQL, and PHP. Linux is an open source operating system that includes contributions from thousands of developers around the world. Apache is the web server platform on which most commercial businesses stake their reputation. MySQL is the open source database management system now owned by Oracle. If it’s good enough for Facebook, it’s good enough for you. And PHP is THE web-based programming language that will let you build almost any application using Linux, Apache, and MySQL.
So what’s the big deal? There are thousands of online tutorials that will show you how to build a LAMP server. For long time readers of Nerd Vittles, you already know that the component we continually stress is security. Without that, the rest really doesn’t matter. You’ll be building a platform for someone else to hijack and use for nefarious purposes. When we’re finished today, you’ll have a cloud-based server that is totally invisible to the rest of the world with the exception of its web interface. And we’ll show you a simple way to reduce the exposure of your web interface to some of its most likely attackers. Will it be 100% secure? Nope. If you have a web server on the public Internet, it’s never going to be 100% secure because there’s always the chance of a software bug that nobody has yet discovered and corrected. THAT’S WHAT BACKUPS ARE FOR!
Creating Your Virtual Machine Platform in the Cloud
To get started, you’ve got to plunk down your $10.50 at Cloud at Cost using coupon code TAKE70. Once you’ve paid the piper, they will send you credentials to log into the Cloud at Cost Management Portal. Change your password IMMEDIATELY after logging in. Just go to SETTINGS and follow your nose.
To create your virtual machine, click on the CLOUDPRO button and click Add New Server. If you’ve only purchased the $10.50 CloudPRO 1 platform, then you’ll need all of the available resources shown in the pick list. Leave CentOS 6.7 64bit selected as the OS Type and click Complete. Depending upon the type of special pricing that Cloud at Cost is offering when you sign up, the time to build your virtual machine can take anywhere from a minute to the better part of a day. We’ve learned to build new virtual machines at night, and they’re usually available for use by the next morning. Luckily, this slow performance does not impact existing virtual machines that already are running in their hosting facility.
Initial Configuration of Your CentOS 6.7 Virtual Machine
With a little luck, your virtual machine soon will appear in your Cloud at Cost Management Portal and look something like what’s shown above. The red arrow points to the i button you’ll need to click to decipher the password for your new virtual machine. You’ll need both the IP address and the password for your new virtual machine in order to log into the server which is now up and running with a barebones CentOS 6.7 operating system. Note the yellow caution flag. That’s telling you that Cloud at Cost will automatically shut down your server in a week to save (them) computing resources. You can change the setting to keep your server running 24/7. Click Modify, Change Run Mode, and select Normal – Leave Powered On. Click Continue and OK to save your new settings.
Finally, you’ll want to change the Host Name for your server to something more descriptive than c7…cloudpro.92… Click the Modify button again and click Rename Server to make the change. Your management portal then will show the new server name as shown above.
Logging into Your CentOS 6.7 Virtual Machine
In order to configure and manage your new CentOS 6.7 virtual machine, you’ll need to log into the new server using either SSH or, for Windows users, Putty. After installing Putty, run it and log in to the IP address of your VM with username root and the password you deciphered above. On a Mac, open a Terminal session and issue a command like this using the actual IP address of your new virtual machine:
ssh root@12.34.56.78
Before you do anything else, reset your root password to something very secure: passwd
Installing the LAMP Server Basics with CentOS 6.7
Now we’re ready to build your LAMP server platform. We’ve chopped this up into lots of little steps so we can explain what’s happening as we go along. There’s nothing hard about this, but we want to document the process so you can repeat it at any time. As we go along, just cut-and-paste each clump of code into your SSH or Putty session and review the results to make sure nothing comes unglued. If something does, the beauty of virtual machines is you can delete them instantly within your management portal and just start over whenever you like. So here we go…
We’ll begin by permanently turning off SELINUX which causes more problems than it solves. The first command turns it off instantly. The second line assures that it’ll stay off whenever you reboot your virtual machine.
setenforce 0
sed -i s/SELINUX=enforcing/SELINUX=disabled/g /etc/selinux/config
Now let’s bring CentOS 6.7 up to current specs and add a few important applications:
yum -y update
yum -y install nano wget expect net-tools dialog git xz
yum -y install kernel-headers
yum -y install kernel-devel
reboot
After reboot, log back in as root. Now we’ll set up your Apache web server and configure it to start whenever you reboot your server:
yum -y install httpd
service httpd start
chkconfig httpd on
Now let’s set up your MySQL server, bring it on line, and make sure it restarts after server reboots. Unless you plan to add Asterisk® and FreePBX® to your server down the road, you’ll want to uncomment the two commands that begin with # by removing the # symbol and replacing new-password with a very secure password for your root user account in MySQL. Be sure to run the last command to secure your server. After logging in, the correct answers are n,Y,Y,Y,Y.
yum -y install mysql mysql-server
service mysqld start
chkconfig mysqld on
#/usr/bin/mysqladmin -u root password 'new-password'
#/usr/bin/mysqladmin -u root -p -h localhost.localdomain password 'new-password'
mysql_secure_installation
Next, we’ll set up PHP and configure it to work with MySQL:
yum -y install php
yum -y install php-mysql
service httpd restart
Finally let’s get SendMail installed and configured. Insert your actual email address in the last line and send yourself a test message to be sure it’s working. Be sure to check your spam folder since the message will show a sender address of localhost which many email systems including Gmail automatically identify as spam.
yum -y install sendmail
rpm -e postfix
service sendmail restart
yum -y install mailx
echo "test" | mail -s testmessage youracctname@yourmailserver.com
Installing Supplemental Repositories for CentOS 6.7
One of the beauties of Linux is not being totally dependent upon CentOS for all of your packaged applications. Let’s add a few other repositories that can be used when you need to add a special package that is not in the CentOS repository. Let’s start with EPEL. We’ll disable it by default and only use it when we need it.
yum -y install http://download.fedoraproject.org/pub/epel/6/x86_64/epel-release-6-8.noarch.rpm
sed -i 's|enabled=1|enabled=0|' /etc/yum.repos.d/epel.repo
We actually need the EPEL repo to install Fail2Ban for monitoring of attacks on certain Linux services such as SSH:
yum --enablerepo=epel install fail2ban -y
cd /etc
wget http://incrediblepbx.com/fail2ban-lamp.tar.gz
tar zxvf fail2ban-lamp.tar.gz
We also need the EPEL repo to install ipset, a terrific addition to the IPtables Linux firewall that lets you quickly block entire countries from accessing your server:
yum --enablerepo=epel install ipset -y
Next, we’ll add a sample script that documents how the country blocking mechanism works with ipset.1 For a complete list of countries that can be blocked, go here. If you need a decoder badge to match abbreviations against country names, you’ll find it here. To add other countries, simply edit the shell script and clone lines 4-7 using the names of the countries and country zone files that you wish to add. Be sure to insert the new lines before the commands to restart iptables and fail2ban. This script will need to be run each time your server reboots and before IPtables is brought on line. We’ll handle that a little later.
echo "#\\!/bin/bash" > /etc/block-china.sh
echo " " >> /etc/block-china.sh
echo "cd /etc" >> /etc/block-china.sh
echo "ipset -N china hash:net" >> /etc/block-china.sh
echo "rm cn.zone" >> /etc/block-china.sh
echo "wget -P . http://www.ipdeny.com/ipblocks/data/countries/cn.zone" >> /etc/block-china.sh
echo "for i in \$(cat /etc/cn.zone ); do ipset -A china \$i; done" >> /etc/block-china.sh
echo "service iptables restart" >> /etc/block-china.sh
echo "service fail2ban restart" >> /etc/block-china.sh
sed -i 's|\\\\||' /etc/block-china.sh
chmod +x /etc/block-china.sh
Another important repository is REMI. It is especially helpful if you decide to upgrade PHP from the default version 5.3 to one of the newer releases: 5.5 or 5.6. In this case, you’ll want to activate the specific repository to support the release you choose in /etc/yum.repos.d/remi-safe.repo.
yum -y install http://rpms.famillecollet.com/enterprise/remi-release-6.rpm
sed -i 's|enabled=1|enabled=0|' /etc/yum.repos.d/remi-safe.repo
One final repository to have on hand is RPMForge, now renamed RepoForge. We’ll use it in a bit to install a dynamic DNS update utility which you actually won’t need at CloudAtCost since your server is assigned a static IP address. But it’s handy to have in the event you wish to assign a free FQDN to your server anyway.
yum -y install http://incrediblepbx.com/rpmforge-release-0.5.3-1.el6.rf.x86_64.rpm
sed -i 's|enabled = 1|enabled = 0|' /etc/yum.repos.d/rpmforge.repo
Adding a Few Utilities to Round Out Your LAMP Server Deployment
If you’re like us, you’ll want to test the speed of your Internet connection from time to time. Let’s install a free script that you can run at any time by logging into your server as root and issuing the command: /root/speedtest-cli
cd /root
wget https://raw.githubusercontent.com/sivel/speedtest-cli/master/speedtest.py
chmod +x speedtest.py
Next, let’s put in place a simple status display which will quickly tell you what’s running and what’s not. We’ve borrowed some GPL code from Incredible PBX to help you out. Run status-lamp at any time for a snapshot of your server.
cd /usr/local/sbin
wget http://incrediblepbx.com/status-lamp.tar.gz
tar zxvf status-lamp.tar.gz
rm -f status-lamp.tar.gz
sed -i 's|myip.pbxinaflash.com|myip.incrediblepbx.com|' /usr/local/sbin/status-lamp
Now we’ll put the Linux Swiss Army Knife in place. It’s called WebMin, and it provides a GUI to configure almost everything in Linux. Pick up a good WebMin book from your public library to get started. Once installed, you access WebMin from your browser at the IP address of your server on the default port of 10000: https://serverIPaddress:10000. It’s probably a good idea to change this port number and the commented out line shows how to do it with the new port being 9001 in the example. The way in which we typically configure the Linux firewall will block all access to WebMin except from an IP address which you have whitelisted, e.g. your home computer’s public IP address.
cd /root
yum -y install perl perl-Net-SSLeay openssl perl-IO-Tty
yum -y install http://prdownloads.sourceforge.net/webadmin/webmin-1.780-1.noarch.rpm
#sed -i 's|10000|9001|g' /etc/webmin/miniserv.conf
service webmin restart
chkconfig webmin on
Tweaking Your CloudAtCost Setup Improves Performance and Improves Security
Finally, let’s address a couple of CloudAtCost quirks that may cause problems down the road. CloudAtCost has a nasty habit of not cleaning up after itself with fresh installs. The net result is your root password gets reset every time you reboot.
killall plymouthd
echo killall plymouthd >> /etc/rc.local
rm -f /etc/rc3.d/S97*
With the exception of firewall configuration, which is so important that we’re covering it separately below, you now have completed the LAMP server installation. After completing the firewall steps in the next section, simply reboot your server and you’re ready to go.
The Most Important Step: Configuring the Linux IPtables Firewall
RULE #1: DON’T BUILD SERVERS EXPOSED TO THE INTERNET WITHOUT ROCK-SOLID SECURITY!
As installed by CloudAtCost, your server provides ping and SSH access from a remote computer and nothing else. The good news: it’s pretty safe. The bad news: it can’t do anything useful for anybody because all web access to the server is blocked. We want to fix that, tighten up SSH access to restrict it to your IP address, and deploy country blocking to show you how.
As we implement the firewall changes, you need to be extremely careful in your typing so that you don’t accidentally lock yourself out of your own server. A typo in an IP address is all it takes. The good news is that, if you do lock yourself out, you still can gain access via the CloudAtCost Management Portal by clicking the Console button of your virtual machine. Because the console is on the physical machine and the lo interface is whitelisted, you can log in and disable the firewall temporarily: service iptables stop. Then fix the typo and restart the firewall: service iptables start.
First, let’s download the new IPtables config file into your root folder and take a look at it.
cd /root
wget http://incrediblepbx.com/iptables-lamp.tar.gz
tar zxvf iptables-lamp.tar.gz
Now edit the /root/iptables-lamp file by issuing the command: nano -w /root/iptables-lamp
You can scroll up and down through the file with Ctl-V and Ctl-Y. Cursor keys work as well. Once you make changes, save your work: Ctl-X, Y, ENTER. You’re now an expert with the nano text editor, an absolutely essential Linux tool.
Here’s what that file actually looks like:
*filter
:INPUT DROP [0:0]
:FORWARD ACCEPT [0:0]
:OUTPUT ACCEPT [0:0]
-A INPUT -p tcp -m tcp --tcp-flags ACK ACK -j ACCEPT
-A INPUT -m state --state ESTABLISHED,RELATED -j ACCEPT
-A INPUT -p icmp -j DROP
-A INPUT -i lo -j ACCEPT
-A INPUT -p tcp ! --syn -m state --state NEW -j DROP
-A INPUT -m state --state INVALID -j DROP
-A INPUT -p tcp -m tcp --tcp-flags FIN,SYN,RST,PSH,ACK,URG NONE -j DROP
-A INPUT -p tcp -m tcp --tcp-flags SYN,FIN SYN,FIN              -j DROP
-A INPUT -p tcp -m tcp --tcp-flags SYN,RST SYN,RST              -j DROP
-A INPUT -p tcp -m tcp --tcp-flags FIN,RST FIN,RST              -j DROP
-A INPUT -p tcp -m tcp --tcp-flags ACK,FIN FIN                  -j DROP
-A INPUT -p tcp -m tcp --tcp-flags ACK,URG URG                  -j DROP
-A INPUT -p tcp -m set --match-set china src                    -j DROP
-A INPUT -p udp -m udp --dport 53 -j ACCEPT
-A INPUT -p tcp -m tcp --dport 53 -j ACCEPT
-A INPUT -p tcp -m tcp --dport 113 -j ACCEPT
-A INPUT -p udp -m udp --dport 123 -j ACCEPT
-A INPUT -p tcp -m tcp --dport 123 -j ACCEPT
-A INPUT -m state --state NEW -m tcp -p tcp --dport 22 -j ACCEPT
#-A INPUT -s 12.34.56.78 -j ACCEPT
#-A INPUT -s yourFQDN.dyndns.org -j ACCEPT
-A INPUT -p tcp -m tcp --dport 80 -j ACCEPT
-A INPUT -j REJECT --reject-with icmp-host-prohibited
-A FORWARD -j REJECT --reject-with icmp-host-prohibited
COMMIT
Reminder: If you add another country to your block-china script, don’t forget to add a corresponding new country entry to your iptables file. See line 17 above that includes the word "china" for the syntax. There’s nothing much else to tweak except the two commented out (brown) lines that begin with #. First, remove the # symbol by moving the cursor to the right of the first one and hitting the backspace/delete key on your keyboard. Replace 12.34.56.78 with the public IP address of the computer from which you will be accessing your virtual machine. If you need multiple entries for multiple computers at different addresses, clone the line by pressing Ctrl-K and then Ctrl-U twice. Yes, we know. Some folks IP addresses change from time to time. In the next section, we’ll show you how to set up a Dynamic DNS entry with a utility that will keep track of your current IP address. In this case, uncomment the second commented line and replace yourFQDN.dyndns.org with your dynamic DNS address. Be very careful to assure that your FQDN is always on line. If the firewall cannot verify your DNS entry when it starts, the IPtables firewall will not start which means your server will be left unprotected. HINT: IP addresses are much safer because they are never verified.
Once you have your addresses configured, save the file: Ctl-X, Y, ENTER. Then issue the following commands to copy everything into place and restart the firewall.
mv /etc/sysconfig/iptables /etc/sysconfig/iptables.orig
cp -p /root/iptables-lamp /etc/sysconfig/iptables
echo "/etc/block-china.sh" >> /etc/rc.local
/etc/block-china.sh
Always, always, always check to be sure your firewall is functioning: iptables -nL. If you don’t see your desktop computer’s public IP address near the end of the listing, then the firewall is dead. status-lamp should also show IPtables down. Check for an error message which will tell you the problematic line so you can correct it.
Implementing Dynamic DNS Service on Your Virtual Machine
There are a number of free and paid Dynamic DNS providers. The way this works is you choose a fully-qualified domain name (FQDN) to identify your computer. Then you run a dynamic DNS update utility periodically from that computer. It reports back the current public IP address of your computer and your provider updates the IP address assigned to your FQDN if it has changed. In addition to supporting sites with ever changing IP addresses, it also allows you to permanently assign an FQDN to your computer or server so that it can be accessed without using a cryptic IP address.
If that computer happens to be an Incredible PBX server or a LAMP server that you’ve set up using this tutorial, then the following will get the DNS client update utility loaded using the RPM Forge repository that we previously installed:
yum --enablerepo=rpmforge install ddclient -y
Similar DNS update clients are available for Windows, Mac OS X, and many residential routers. Then it’s just a matter of plugging in the credentials for your dynamic DNS provider and your FQDN. In the case of the CentOS client, the config file is /etc/ddclient/ddclient.conf. Now reboot your server and pick up a good book on Linux to begin your adventure.
Now For Some Fun…
First, let’s check things out and make sure everything is working as it should. With your favorite web browser, visit the IP address of your new server. You should see the default Apache page:
Next, let’s be sure that PHP is working as it should. While still logged into your server as root using SSH or Putty, issue the following commands and make up some file name to replace test4567 in both lines. Be sure to keep the .php file name extension. Note to gurus: Yes, we know the second line below is unnecessary if you remove the space after the less than symbol in the first line. Unfortunately, WordPress forces the space into the display which left us no alternative.
echo "< ?php phpinfo(); ?>" > /var/www/html/test4567.php
sed -i 's|< |<|' /var/www/html/test4567.php
Now jump back to your web browser and access the new page you just created using the IP address of your server and the file name you made up: http://12.34.56.78/test4567.php
The PHPinfo listing will tell you everything you ever wanted to know about your web server setup including all of the PHP functions that have been enabled. That's why you want an obscure file name for the page. You obviously don't want to share that information with every bad guy on the planet. Remember. This is a public-facing web site that anyone on the Internet can access if they know or guess your IP address.
When you're ready to set up your own web site, just name it index.php and store the file in the /var/www/html directory of your server. In the meantime, issuing the following command will assure that anyone accessing your site gets a blank page until you're ready to begin your adventure:
echo " " > /var/www/html/index.php
Ready to learn PHP programming? There's no shortage of books to get you started.
Adding WordPress to Your LAMP Server
Where to begin with WordPress? What used to be a simple platform for bloggers has morphed into an all-purpose tool that makes building virtually any type of web site child's play. If you want to see what's possible, take a look at the templates and sample sites shown on WPZOOM. Unless you're an art major and savvy web designer, this will be the best $70 you ever spent. One of these templates will have your site up and running in minutes once we put the WordPress pieces in place. For the big spenders, $149 will give you access to over 50 gorgeous templates which you can download and use to your heart's content on multiple sites. And, no, your sites don't blow up after a year. You just can't download any additional templates or updates unless you renew your subscription. The other alternative is choose from thousands of templates that are provided across the Internet as well as in the WordPress application itself.
WordPress templates run the gamut from blogs to newsletters to photographer sites to e-commerce to business portfolios to video to travel to magazines to newspapers to education to food to recipes to restaurants and more. Whew! There literally is nothing you can't put together in minutes using a WordPress template. But, before you can begin, we need to get WordPress installed on your server. This is optional, of course. And, if you follow along and add WordPress, we've set it up in such a way that WordPress becomes the primary application for your site. Stated differently, when people use a browser to access your site, your WordPress template will immediately display. When we finish the basic WordPress setup and once you upload an image or two, you'll have a site that looks something like this:
Before you begin, we strongly recommend that you acquire a domain for your site if you plan to use it for anything but experimentation. The reason is because it can be complicated to migrate a WordPress site from one location to another.2 Once you've acquired your domain, point the domain to the IP address of your new server. With a dirt cheap registrar such as Omnis.com, it's easy:
Now let's get started. To begin, we need to load the WordPress application onto your server:
cd /root
mkdir wordpress
cd wordpress
wget http://wordpress.org/latest.tar.gz
tar -xvzf latest.tar.gz -C /var/www/html
Next, we'll configure MySQL to support WordPress. We're assuming that you have NOT already created root passwords for MySQL. If you have, you'll need to add -pYourPassword to the various commands below immediately after root. There is no space between -p and your root password. Also edit the first line and make up a new password (replacing XYZ below) for the wordpress user account that will manage WordPress on your server before you cut and paste the code:
mysql -u root -e 'CREATE USER wordpress@localhost IDENTIFIED BY "XYZ";'
mysql -u root -e 'CREATE DATABASE wordpress;'
mysql -u root -e 'GRANT ALL ON wordpress.* TO wordpress@localhost;'
mysql -u root -e 'FLUSH PRIVILEGES;'
Next, we need to configure WordPress with your new MySQL credentials. Before you cut and paste, replace XYZ in the fourth line with the password you assigned in the preceding MySQL step:
cp /var/www/html/wordpress/wp-config-sample.php /var/www/html/wordpress/wp-config.php
sed -i 's|database_name_here|wordpress|' /var/www/html/wordpress/wp-config.php
sed -i 's|username_here|wordpress|' /var/www/html/wordpress/wp-config.php
sed -i 's|password_here|XYZ|' /var/www/html/wordpress/wp-config.php
chown -R apache:apache /var/www/html/wordpress
Before you forget, take a moment and create a very secure password for your MySQL root user accounts. Here are the commands. Just replace new-password with your new password before you cut and paste. Note that you also will be prompted for this password when you execute the second command because you will now have a root user password in place from executing the first command.
/usr/bin/mysqladmin -u root password 'new-password'
/usr/bin/mysqladmin -u root -p -h localhost.localdomain password 'new-password'
Finally, we need to modify your Apache web server to support WordPress as the primary application. Be sure to enter your actual email address in the third line before you cut and paste the code below:
echo " " >> /etc/httpd/conf/httpd.conf echo "" >> /etc/httpd/conf/httpd.conf echo 'ServerAdmin somebody@somedomain.com' >> /etc/httpd/conf/httpd.conf echo "DocumentRoot /var/www/html/wordpress" >> /etc/httpd/conf/httpd.conf echo "ServerName wordpress" >> /etc/httpd/conf/httpd.conf echo "ErrorLog /var/log/httpd/wordpress-error-log" >> /etc/httpd/conf/httpd.conf echo "CustomLog /var/log/httpd/wordpress-acces-log common" >> /etc/httpd/conf/httpd.conf echo " " >> /etc/httpd/conf/httpd.conf echo " " >> /etc/httpd/conf/httpd.conf service httpd restart
That should do it. Open a browser and navigate to the IP address of your server. You should be greeted with the following form. Fill in the blanks as desired. The account you're setting up will be the credentials you use to add and modify content on your WordPress site when you click Log In (as shown above). Make the username obscure and the password even more so. Remember, it's a public web site accessible worldwide! When you click Install WordPress, you'll be off to the races.
After your server whirs away for a minute or two, you will be greeted with the WordPress login prompt. With the username and password you entered above, you'll be ready to start configuring your WordPress site.
Once you're logged in, navigate to Appearance -> Themes and click Add New Theme. There's you will find literally hundreds of free WordPress templates that can be installed in a matter of seconds if WPZOOM is too rich for your blood. For a terrific all-purpose (free) theme, try Atahualpa. We'll leave our actual demo site running for a bit in case you want to explore and check out its performance. Installing and configuring the new theme took less than a minute:
A Final Word to the Wise. WordPress is relatively secure but new vulnerabilities are discovered regularly. Keep your templates, plug-ins, AND the WordPress application up to date at all times! The WordFence plug-in is a must-have. And we strongly recommend adding the following lines to your WordPress config file which then will let WordPress update everything automatically. Microsoft has given automatic updates a bad name, but in the case of WordPress, they work well.
echo "define('WP_AUTO_UPDATE_CORE', true);" >> /var/www/html/wordpress/wp-config.php
echo "add_filter( 'auto_update_plugin', '__return_true' );" >> /var/www/html/wordpress/wp-config.php
echo "add_filter( 'auto_update_theme', '__return_true' );" >> /var/www/html/wordpress/wp-config.php
Special Thanks: Our special tip of the hat goes to a few web sites that we found helpful in putting this article together especially Unixmen and Matt Wilcox & friends and Programming-Review.
Wondering What to Build Next with your new $10.50 Server in the Sky? Check out the latest Nerd Vittles tutorial. Turn it into a VoIP server FOR LIFE with free calling to/from the U.S. and Canada. Call for free demo:
TAKE70: Build a VoIP Server in the Cloud FOR LIFE w/ Free US/CAN calling https://t.co/l9It2xq14S #asterisk #freepbx pic.twitter.com/UYuCMcfEn8
— Ward Mundy (@NerdUno) January 31, 2016
Originally published: Monday, January 25, 2016
9 Countries Have Never Visited Nerd Vittles. Got a Friend in Any of Them https://t.co/wMfmlhiQ9y #asterisk #freepbx pic.twitter.com/TPFGZbqWB6
— Ward Mundy (@NerdUno) April 22, 2016
Need help with Asterisk? Visit the PBX in a Flash Forum.
Special Thanks to Our Generous Sponsors
FULL DISCLOSURE: ClearlyIP, Skyetel, Vitelity, DigitalOcean, Vultr, VoIP.ms, 3CX, Sangoma, TelecomsXchange and VitalPBX have provided financial support to Nerd Vittles and our open source projects through advertising, referral revenue, and/or merchandise. As an Amazon Associate and Best Buy Affiliate, we also earn from qualifying purchases. We’ve chosen these providers not the other way around. Our decisions are based upon their corporate reputation and the quality of their offerings and pricing. Our recommendations regarding technology are reached without regard to financial compensation except in situations in which comparable products at comparable pricing are available from multiple sources. In this limited case, we support our sponsors because our sponsors support us.
BOGO Bonaza: Enjoy state-of-the-art VoIP service with a $10 credit and half-price SIP service on up to $500 of Skyetel trunking with free number porting when you fund your Skyetel account. No limits on number of simultaneous calls. Quadruple data center redundancy. $25 monthly minimum spend required. Tutorial and sign up details are here.
![]() The lynchpin of Incredible PBX 2020 and beyond is ClearlyIP components which bring management of FreePBX modules and SIP phone integration to a level never before available with any other Asterisk distribution. And now you can configure and reconfigure your new Incredible PBX phones from the convenience of the Incredible PBX GUI.
The lynchpin of Incredible PBX 2020 and beyond is ClearlyIP components which bring management of FreePBX modules and SIP phone integration to a level never before available with any other Asterisk distribution. And now you can configure and reconfigure your new Incredible PBX phones from the convenience of the Incredible PBX GUI.
VitalPBX is perhaps the fastest-growing PBX offering based upon Asterisk with an installed presence in more than 100 countries worldwide. VitalPBX has generously provided a customized White Label version of Incredible PBX tailored for use with all Incredible PBX and VitalPBX custom applications. Follow this link for a free test drive!
Special Thanks to Vitelity. Vitelity is now Voyant Communications and has halted new registrations for the time being. Our special thanks to Vitelity for their unwavering financial support over many years and to the many Nerd Vittles readers who continue to enjoy the benefits of their service offerings. We will keep everyone posted on further developments.
Some Recent Nerd Vittles Articles of Interest...
- It doesn't take long for the probing to begin. So watch your logs, look up the IP addresses to identify the countries, and block them unless you happen to be expecting visitors from that part of the world:
[Sun Jan 24 00:36:12 2016] [error] [client 40.114.202.60] File does not exist: /var/www/html/wordpress/w00tw00t.at.blackhats.romanian.anti-sec:)[↩]
[Sun Jan 24 00:36:12 2016] [error] [client 40.114.202.60] File does not exist: /var/www/html/wordpress/phpMyAdmin
[Sun Jan 24 00:36:13 2016] [error] [client 40.114.202.60] File does not exist: /var/www/html/wordpress/phpmyadmin
[Sun Jan 24 00:36:13 2016] [error] [client 40.114.202.60] File does not exist: /var/www/html/wordpress/pma
[Sun Jan 24 00:36:13 2016] [error] [client 40.114.202.60] File does not exist: /var/www/html/wordpress/myadmin
[Sun Jan 24 00:36:14 2016] [error] [client 40.114.202.60] File does not exist: /var/www/html/wordpress/MyAdmin
[Mon Jan 25 00:29:29 2016] [error] [client 137.116.220.182] File does not exist: /var/www/html/wordpress/w00tw00t.at.blackhats.romanian.anti-sec:)
[Mon Jan 25 00:29:29 2016] [error] [client 137.116.220.182] File does not exist: /var/www/html/wordpress/phpMyAdmin
[Mon Jan 25 00:29:29 2016] [error] [client 137.116.220.182] File does not exist: /var/www/html/wordpress/phpmyadmin
[Mon Jan 25 00:29:30 2016] [error] [client 137.116.220.182] File does not exist: /var/www/html/wordpress/pma
[Mon Jan 25 00:29:30 2016] [error] [client 137.116.220.182] File does not exist: /var/www/html/wordpress/myadmin
[Mon Jan 25 00:29:30 2016] [error] [client 137.116.220.182] File does not exist: /var/www/html/wordpress/MyAdmin
- Should you ever have to migrate your WordPress site from one domain to another, here are two helpful tools to consider: the Automatic Domain Name Changer Plugin and the one we use, WordPress-Domain-Changer. [↩]
Free Asterisk Solutions
