
Home » Posts tagged 'virtualization' (Page 4)
Tag Archives: virtualization
The Most Versatile VoIP Provider: FREE PORTING

 JUST RELEASED: Visit the Incredible PBX Wiki
Virtual Paradise: It’s Incredible PBX 13-13.10 for VMware

Let’s face it. Virtual Machines are the future of server administration. Whether you prefer your own dedicated hardware or cloud-based resources managed by you or someone else, virtual platforms are the way to go. You get more bang for the buck out of your hardware by pooling resources for multiple tasks. VMware® and VirtualBox® make it easy. Today we’re pleased to introduce our latest build for VMware. It provides the latest Asterisk® 13 and FreePBX® 13 GPL components from source in about 15 minutes.
Just download the VMware .zip image from SourceForge to your desktop and unzip it. Fire up your browser and login to your VMware Web Console. With a few mouse clicks, you’ll have a CentOS 6.10 platform in place with Incredible PBX® just a single keystroke away. It doesn’t get much easier. And, you get the very latest release of Asterisk 13 compiled from source code that you can actually examine, enhance, and share… just like the GPL license says.
Choosing a Virtual Machine Platform
Making the right deployment choice for your virtual machine platform depends upon a number of factors. We initially started out with Proxmox 4 which looked promising. After all, we had used and recommended earlier releases of Proxmox for many years until some security vulnerabilities caused us to look elsewhere. Those kernel issues are now a thing of the past, but Proxmox 4 introduced some new wrinkles. First, to stay current with software fixes and updates, you have to pay the piper by signing up for the annual support license. This turned out to be a deal breaker for a couple of reasons. It was expensive since it’s based upon the number of CPUs in your platform. In the case of the hardware shown below, that turned out to be 4 CPUs (by Proxmox’s calculation) which meant the annual support license would run nearly $400 per year. That buys an enormous number of cloud-based virtual machines without having to babysit hardware at all. So we’ve reluctantly concluded that Proxmox 4 isn’t a particularly good fit for development or production use.
We’ve already sung the praises of VirtualBox so we wont’ repeat it here. VMware also is rock-solid and has been for more than fifteen years. VMware typically runs on dedicated hardware. If you don’t have the funds for a hardware purchase to support your virtualization requirements, then VirtualBox on your desktop machine is a no-brainer. For many, however, some separation of the virtualization environment from your desktop computing environment is desirable. That choice is equally easy. VMware wins, hands down. Better yet, you can make snapshot backups of your virtual machines in seconds with a single button click. If you’ve wrestled with backups on standalone hardware with Linux, you’ll quickly appreciate the difference.
Getting Started with VMware ESXi
Many of you have VMware platforms already in place at work. For you, installing Incredible PBX 13-13.10 is as simple as downloading the image to your desktop and importing it into your existing platform. Better yet, your system administrator can do it for you. If you’re new to VMware, here’s an easy way to get started, and the software won’t cost you a dime. VMware offers a couple of free products that will give you everything you need to run a robust VMware platform on relatively inexpensive hardware. The choice is up to you.
A Free VMware Platform for SOHO Apps
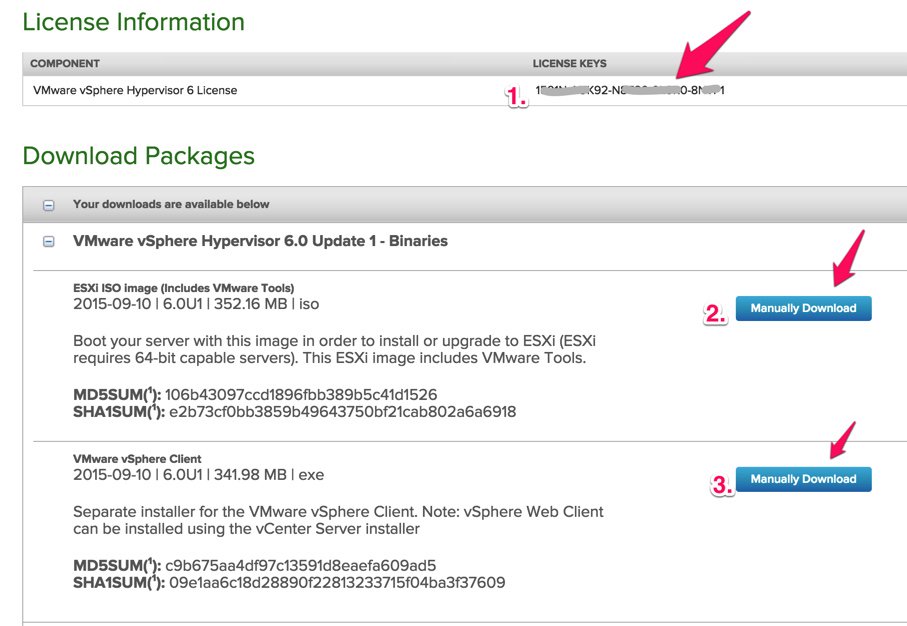
Before you can download the components for the free VMware ESXi platform, you’ll need to sign up for a free account at my.vmware.com. Once you’re signed up, log in and follow these simple steps to sign up for a free ESXi license key and download the ESXi version 6 software:
- Write down your assigned License Key
- Manually download the VMware vSphere Hypervisor 6.5 ISO
- Manually download the VMware vSphere Client 6.5
Next, burn the ISO to a CD/DVD and boot your dedicated VM hardware platform with it. Follow the instructions to complete the install. Next install the vSphere Client on a Windows computer. Don’t forget to add your ESXi License Key when you complete the installation. Once the ESXi server is up and running, you can stick the hardware on a shelf somewhere out of the way. You will rarely interact with it. That’s all handled using either the VMware vSphere Client on your Windows Desktop or the VMware Web Console. Don’t forget to apply your License Key once VMware ESXi is up: Virtual Machines -> Licensing -> Apply License.
Deploy VMware Template with vSphere Client

Deploying an Incredible PBX template takes about two minutes, but first you need to download the Incredible PBX 13-13.10 template from SourceForge onto your Windows Desktop and unzip it.
Once the Incredible PBX template components are on your desktop, here are the deployment steps:
1. Login to the vSphere Client on your Windows Desktop using the root account you set up when you installed ESXi. Choose File, Deploy OVF Template.
2. Select the two Incredible PBX components from your desktop PC.
3. Click Next.
4. Give the new Virtual Machine a name.
5. IMPORTANT: Choose Thin Provision option and click Next.
6. Review your entries and click Next to create the new Virtual Machine.
7. It only takes a couple minutes to create the new Virtual Machine.
8. The Main Client window will redisplay and your new VM should now be shown in the left panel. (1) Click on it. (2) Then click the Green start icon. (3) Then click the Console Window icon.
9. When the VM’s Console Window opens, click in the window in the black area. Log into your virtual machine as root using the default password: password.
10. To complete the Incredible PBX setup, you will automatically be walked through the short installation procedure when you start the virtual machine. Following the automatic reboot, just log in a second time as root and the install will complete.
11. To add Incredible Fax support with HylaFax and AvantFax, run: /root/incrediblefax13.sh.
12. Set up the proper time zone for your server: /root/timezone-setup.
13. Next, reset your root password and make it very secure: passwd.
14. Finally reset your admin password for web access to your server: /root/admin-pw-change.
15. Reset Enchilada passwords at any time by running: /root/update-passwords.
Press Ctrl-Alt to get your mouse and keyboard out of the console window.
Installing the vSphere Web Client
If you’re lucky, you may not have a Windows machine. The downside is that the vSphere Client described above only works on the Windows platform. After a good bit of searching, we finally uncovered a simple way to install the latest vSphere Web Client. It is pure HTML5 with no Flash code! While still under development, VMware has made progress, and it shows. Most of the feature set of vSphere Client now is available from the convenience of your browser. Just point it to the IP address of your VMware server like this: https://ip-address/ui/.
Here’s how to install the vSphere Web Client:
1. Log into the console of your ESXi server as root using your root password.
2. Press F2 to Customized System.
3. Choose Troubleshooting Options.
4. Choose Enable SSH.
5. Using a Terminal window on a Mac or Linux machine or using Putty with Windows, log into the IP address of your ESXi server as root.
6. Issue the following commands to install the latest vSphere Web Client vib and disable http firewall blockage:
esxcli software vib install -v http://download3.vmware.com/software/vmw-tools/esxui/esxui-signed-latest.vib
esxcli network firewall ruleset set -e true -r httpClient
7. Using a web browser, login to the web client as root at https://ESXi-server-IP-address/ui/
8. Should you ever wish to remove the web client from your server:
esxcli software vib remove -n esx-ui
9. You may wish to disable SSH access when you’re finished. Just repeat steps 1-4 above.
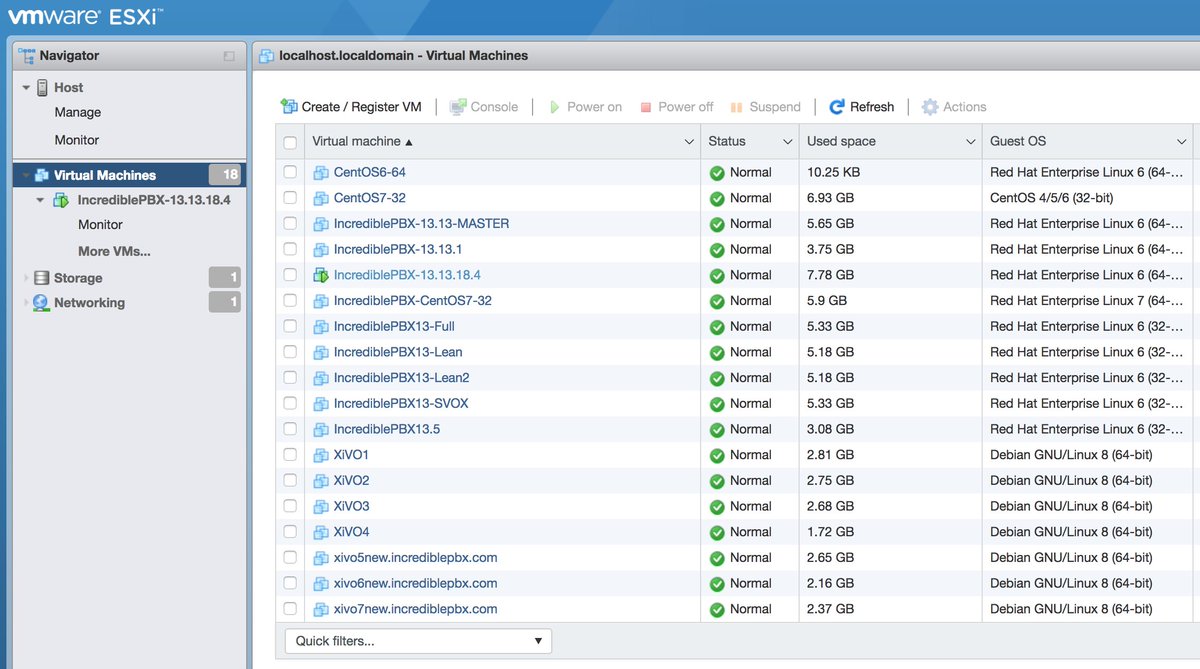
Here’s what a typical Incredible PBX Virtual Machine looks like in the web client once you’ve added the VMware Tools to your virtual machine as documented below. There’s even a Console window.
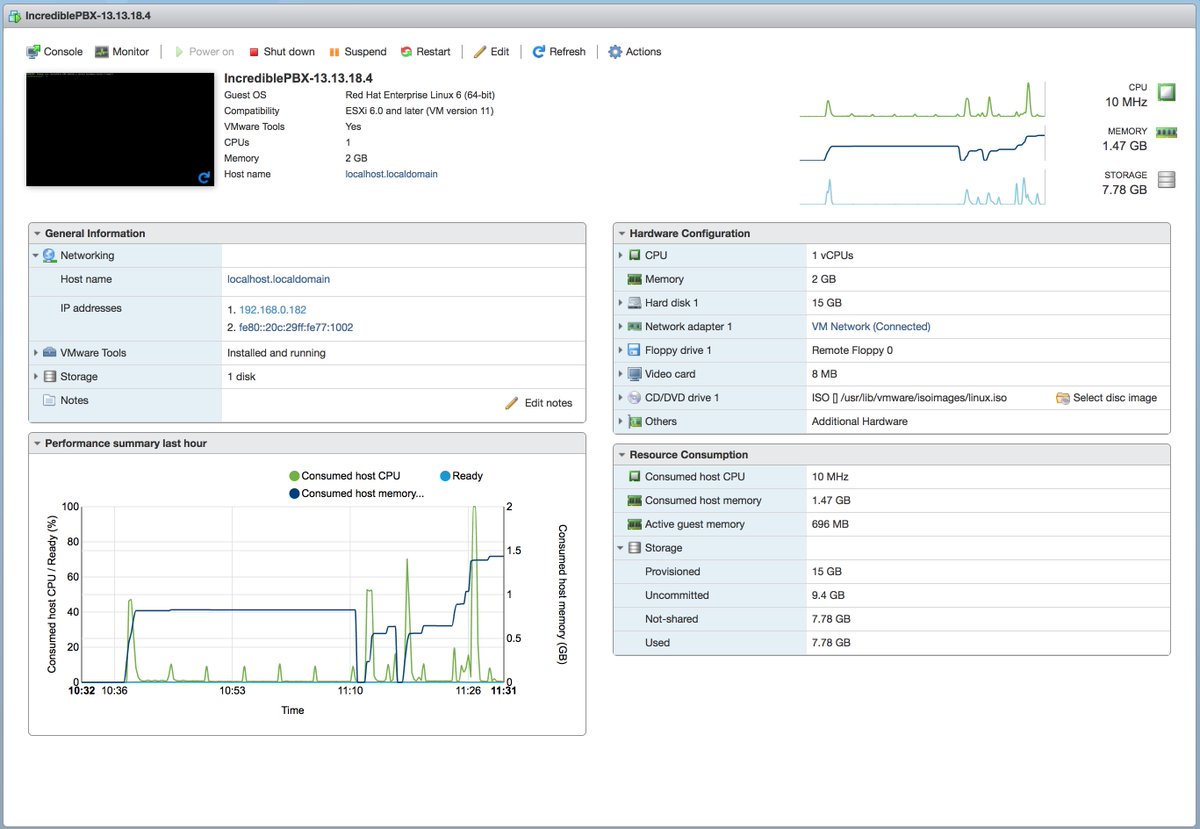
Under the Virtual Machines tab, you now can manage and add new VMs directly.
Installing VMware Tools in a Virtual Machine
If you plan to manage your virtual machines using the vSphere Web Client and a browser, then you definitely will want to install the VMware Tools in each of your virtual machines.
For ESXi 6.0, your only choice is VMwareTools. Here’s how to install:
1. Start up your VM and login as root.
2. From the Windows vSphere Client, right click on virtual machine you started.
3. Choose Guest:Install VMware Tools.
4. Return to the Linux CLI of your virtual machine and issue the following commands. Accept all of the defaults in the installation script when it is run in the final step below:
mkdir /mnt/cdrom
mount /dev/cdrom /mnt/cdrom
ls /mnt/cdrom
cd /tmp
tar -zxvf /mnt/cdrom/VMwareTools*
umount /mnt/cdrom
cd vmware-tools-distrib
./vmware-install.pl
For ESXi 6.5, we prefer the new GPL VMware open-vm-tools. Here’s how to install:
1. Start up your VM and login to the VM as root using SSH or Putty.
2. From the Linux CLI, issue the following commands:
yum -y install --enablerepo=epel open-vm-tools
reboot
Special thanks to John Borhek (@unsichtbarre on the PIAF Forum) for the VMware lessons. 🙂
That should be enough tutorial for today. Enjoy your new VMware platform.
Continue Reading: Configuring Extensions, Trunks & Routes
Don’t Miss: Incredible PBX Application User’s Guide covering the 31 Whole Enchilada apps
Originally published: Monday, December 18, 2017 Updated: Monday, June 17, 2019

Need help with Asterisk? Visit the VoIP-info Forum.
Special Thanks to Our Generous Sponsors
FULL DISCLOSURE: ClearlyIP, Skyetel, Vitelity, DigitalOcean, Vultr, VoIP.ms, 3CX, Sangoma, TelecomsXchange and VitalPBX have provided financial support to Nerd Vittles and our open source projects through advertising, referral revenue, and/or merchandise. As an Amazon Associate and Best Buy Affiliate, we also earn from qualifying purchases. We’ve chosen these providers not the other way around. Our decisions are based upon their corporate reputation and the quality of their offerings and pricing. Our recommendations regarding technology are reached without regard to financial compensation except in situations in which comparable products at comparable pricing are available from multiple sources. In this limited case, we support our sponsors because our sponsors support us.
 BOGO Bonaza: Enjoy state-of-the-art VoIP service with a $10 credit and half-price SIP service on up to $500 of Skyetel trunking with free number porting when you fund your Skyetel account. No limits on number of simultaneous calls. Quadruple data center redundancy. $25 monthly minimum spend required. Tutorial and sign up details are here.
![]() The lynchpin of Incredible PBX 2020 and beyond is ClearlyIP components which bring management of FreePBX modules and SIP phone integration to a level never before available with any other Asterisk distribution. And now you can configure and reconfigure your new Incredible PBX phones from the convenience of the Incredible PBX GUI.
The lynchpin of Incredible PBX 2020 and beyond is ClearlyIP components which bring management of FreePBX modules and SIP phone integration to a level never before available with any other Asterisk distribution. And now you can configure and reconfigure your new Incredible PBX phones from the convenience of the Incredible PBX GUI.
 VitalPBX is perhaps the fastest-growing PBX offering based upon Asterisk with an installed presence in more than 100 countries worldwide. VitalPBX has generously provided a customized White Label version of Incredible PBX tailored for use with all Incredible PBX and VitalPBX custom applications. Follow this link for a free test drive!
 Special Thanks to Vitelity. Vitelity is now Voyant Communications and has halted new registrations for the time being. Our special thanks to Vitelity for their unwavering financial support over many years and to the many Nerd Vittles readers who continue to enjoy the benefits of their service offerings. We will keep everyone posted on further developments.

Finding Utopia: In Search of the Perfect VoIP Server Platform

Over the past decade, there is no subject that we have devoted more resources to than searching for the best platform on which to run a VoIP server. While our experience primarily has focused on finding the perfect fit for Incredible PBX®, much of what follows applies equally to any other Linux-based VoIP server including Wazo, Issabel, VitalPBX, and 3CX. Today we’d like to share what we’ve learned. Incredible PBX is a complex application. With close to a thousand moving parts, it requires major computing resources to support not only Asterisk® and FreePBX® but also an Apache web server, a MySQL database server, a SendMail server, a HylaFax server, and a Linux firewall with both IPtables and Fail2Ban.
Let’s begin by ticking off the platforms that Incredible PBX currently supports. These include stand-alone dedicated hardware from beefy Dell servers to the Intel NUC and Raspberry Pi. Then there are the virtual machine platforms including VirtualBox, VMware ESXi, and Proxmox. In the Cloud space we’ve covered the stratosphere from the high end with $25/month Google Cloud and Amazon EC2 instances to the dedicated $15/month VoIP platform with RentPBX to the $5/month KVM platforms including Digital Ocean and Vultr to the $2.25/month OVH KVM offering to the $1/month OpenVZ providers including HostedSimply, HostFlyte, Hosting73, HostBRZ, SnowVPS, and AlphaRacks. Have there been some train wrecks along the way? Absolutely. Just search the PIAF Forum for the threads on CloudAtCost, WootHosting, and HiFormance for the war stories and our battle scars. We would be remiss if we didn’t thank the dozens of PIAF Forum volunteers who have endured years of suffering at the hands of some of these providers to make today’s article possible.
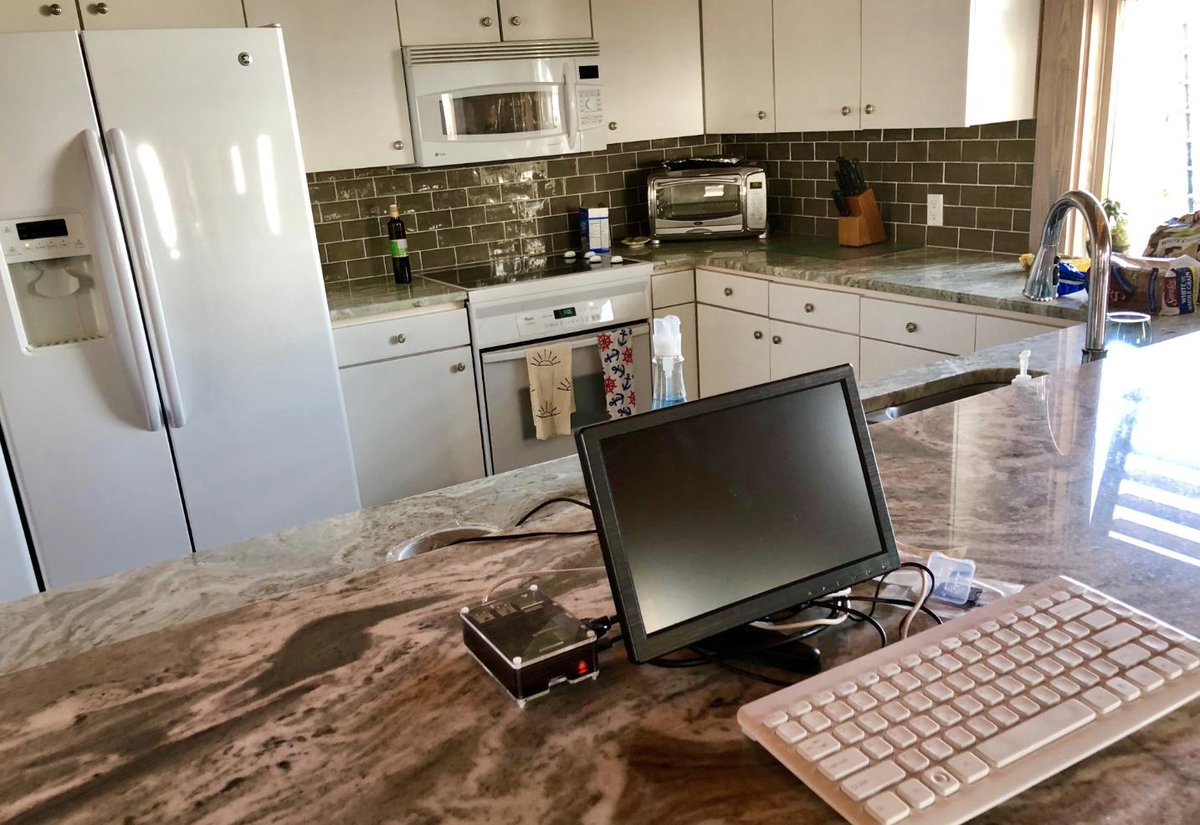
So what have we learned? Unless you’re building a VoIP platform as a tinkerer to support just your family, there is zero reason to choose dedicated hardware. And, for home use, with the availability of the $35 Raspberry Pi 3B+, buying a beefier piece of hardware to host your VoIP platform makes no sense. Not only will it be considerably more expensive both to purchase and to operate, but the performance of your VoIP server will be indistinguishable from what you’d see using a Raspberry Pi 3B+. Exhibit A is our $125 RasPi WiFi setup for traveling.![]()
The downsides of dedicated hardware are numerous. In addition to the expense of the platform itself and the monthly cost of electricity, there also are other challenges. First, outages from most Internet service providers are frequent occurrences of unpredictable duration. Second, ISPs typically provide a dynamic IP address which is not a good fit for VoIP platforms that rely upon your IP address to reliably make and receive VoIP calls. Third, making backups using dedicated hardware is typically more expensive and less frequent than performing similar tasks with a cloud-based server. Recovery is easy with a spare SD card.![]()
The virtual machine platforms certainly have their place in the corporate world. And, if your company already has a server farm full of VMware servers, then taking advantage of that platform to host your PBX makes perfect sense. Performance will probably never be an issue, and you’ll avoid the task of babysitting the hardware leaving that to a staff of dedicated employees. And, hopefully, someone else is making frequent backups of your VoIP server. For home users that already have a beefy desktop machine, a VirtualBox-based PBX is certainly an option worth considering although it again puts you in the driver’s seat of dealing with backups, Internet outages, and performance hiccups when your desktop machine is being used for tasks that consume substantial computing resources.

If you haven’t already guessed, our recommended VoIP platform will almost always be cloud-based. Not only does it offload most server and network management headaches, but more often than not, it’s a more dependable platform with better performance at a comparable or less expensive cost than using your own hardware. So here’s the Golden Nugget of our findings. When it comes to cloud providers, you can forget the old adage that you get what you pay for. You don’t. Our experience suggests it’s just the opposite when it comes to running a VoIP server. With cloud providers, what you typically get by paying more is an improvement in the odds that your provider will still be around when next year rolls around. Getting over that hurdle is simple. Make frequent backups. If there are a multitude of available providers offering similar services, backups are the best insurance you can have, and they cost you almost nothing. In fact, Incredible Backup handles the task with ease AND reliability. Once you get past the vendor longevity issue, the only things that really matter with a cloud platform are stability and performance. While the high-end providers certainly deliver stability, our experience suggests their performance is nothing short of abysmal unless you’re willing to pay through the nose. By way of example, our experimental Google Cloud server running as a $25/month Standard VPS instance with zero daily calls still receives regular alerts from Google recommending that the instance be upgraded to the next pricing tier which starts at $48.95/month. Performance-wise, our subjective comparison of the $25/month Google Cloud instance is virtually identical to what we are seeing on a stand-alone $35 Raspberry Pi. As a VoIP server platform, the so-called free tier with Google Cloud that provides 600K of RAM and a shared virtual CPU is laughable, and that’s being charitable.

We haven’t spent a lot of time using Amazon EC2 in the past couple years primarily because their platform was even more expensive than Google’s. But, if money is no object, it’s certainly a hosting platform worth exploring. For most VoIP applications, it doesn’t make good financial sense.
That narrows our search for the perfect VoIP platform down to two categories: the KVM and OpenVZ platforms. As a general rule of thumb, with a given provider’s offerings you can expect performance to be comparable but you typically will pay at least double for a KVM platform as opposed to an OpenVZ platform with similar RAM, storage, and bandwidth. In a nutshell, KVM servers provide your virtual machine with its own Linux kernel while OpenVZ servers share a kernel over which you have no control. If you run a VoIP application that requires kernel access, this matters. If you plan to expose your server to the public Internet, the KVM option also is desirable because it allows you to run ipset in conjunction with the Linux firewall to block entire countries from accessing your server. In the case of Incredible PBX servers which rely upon a firewall limiting access to whitelisted IP addresses, there is little reason to choose the KVM platform based solely upon performance or security.
The elephant in the room with providers below the Google and Amazon tier is reliability. In the case of Digital Ocean and Vultr, they both have been around for many years now with excellent ratings in virtually every category. Both provide financial support for our open source projects through referral revenue, but we’d use them anyway. The virtual machine pricing from the two companies is almost identical. Except for extremely busy VoIP implementations, their 1GB RAM offering has proven to be a perfect choice at $5 a month. If you don’t mind paying by the year, you can’t beat OVH’s current $2.25/month KVM offering with 2GB RAM and 20GB SSD. They, too, have been around for years. At one time or another, OVH hosted much of 3CX’s cloud infrastructure. All offer scaling options to meet even the most demanding requirements. On the D.O. and Vultr platforms, you can add automatic backups for an additional $1 a month (20% surcharge) which is dirt cheap insurance. We have run both Incredible PBX and 3CX servers on all of these platforms with no outages or other issues… and weekly backups. Both Digital Ocean and Vultr also provide excellent web tools to manage your server, and the chance of any of these providers going out of business is extremely remote. We highly recommend all of them.
FULL DISCLOSURE: We have no business relationship with OVH or any of the following VPS providers and receive no referral commissions of any kind from any of them.
For some users and especially those that just want to learn about VoIP and tinker, there is yet another tier of providers. At roughly $1/month, their VPS services are a fraction of the cost of Digital Ocean and Vultr, but backups become your responsibility and at least one previous provider that many of us used went out of business. Those without a backup lost everything.

Choosing one of these providers comes down to balancing the risks versus the financial savings. We have nearly a dozen of these $1/month servers in operation all across the United States. While the VPS providers are different, almost all of the servers are hosted by ColoCrossing in Los Angeles, New York, Chicago, Dallas, or Atlanta. These VPS providers typically rent machines directly from ColoCrossing, and the performance of their VPS offerings varies depending upon the number of users each provider authorizes on each server. Some are obviously more greedy than others. And we’ve actually done the hard work of finding the reliable ones while rejecting at least as many that proved to be pretty awful.
Server locations and special signup details for these VPS providers are documented in our previous article. Average cost is about $1/month on an annual contract with a 1Gbit port or *free 1Gbit port upgrade on request based upon LowEndBox offer. All offer money-back guarantees for at least 24 hours so you can do your own testing if you hurry. Protect yourself by paying with PayPal which gives you 6 months to dispute a charge if the provider happens to go belly up. NOTE: The sort order below reflects our subjective performance evaluation.
| Provider | RAM | Disk | Bandwidth | Performance as of 12/1/19 | Cost |
|---|---|---|---|---|---|
| CrownCloud KVM (LA) | 1GB | 20GB + Snapshot | 1TB/month | 598Mb/DN 281Mb/UP 2CPU Core | $25/year Best Buy! |
| Naranjatech KVM (The Netherlands) | 1GB | 20GB | 1TB/month | Hosting since 2005 VAT: EU res. | 20€/year w/code: SBF2019 |
| BudgetNode KVM (LA) | 1GB | 40GB RAID10 | 1TB/month | Also available in U.K PM @Ishaq on LET before payment | $24/year |
| FreeRangeCloud KVM (Ashburn VA, Winnipeg, Freemont CA) | 1GB | 20GB SSD | 3TB/month | Pick EGG loc'n Open ticket for last 5GB SSD | $30/year w/code: LEBEGG30 |
Do we recommend these providers? Absolutely, with a couple of caveats. First, there is no guarantee that one or more of them may not go out of business at some point. The odds of several of them going under at the same time are fairly slim since none are related that we’re aware of. Second, make frequent backups when you make changes to your PBX and copy the Incredible Backups to a different location. Third, bring up a second VPS platform in a different location and keep it current with your latest backup. You could bring up all six of these platforms for roughly the same monthly cost as one Digital Ocean or Vultr virtual machine that’s running with automatic backups. If you can’t afford a second $1/month VPS platform, then at least create a matching VirtualBox platform, restore your backup, and make sure it is functional before deploying your VPS in the Cloud. It’s in your hands now. Enjoy!
Originally published: Monday, April 8, 2019
Need help with Asterisk? Visit the VoIP-info Forum.
Special Thanks to Our Generous Sponsors
FULL DISCLOSURE: ClearlyIP, Skyetel, Vitelity, DigitalOcean, Vultr, VoIP.ms, 3CX, Sangoma, TelecomsXchange and VitalPBX have provided financial support to Nerd Vittles and our open source projects through advertising, referral revenue, and/or merchandise. As an Amazon Associate and Best Buy Affiliate, we also earn from qualifying purchases. We’ve chosen these providers not the other way around. Our decisions are based upon their corporate reputation and the quality of their offerings and pricing. Our recommendations regarding technology are reached without regard to financial compensation except in situations in which comparable products at comparable pricing are available from multiple sources. In this limited case, we support our sponsors because our sponsors support us.
BOGO Bonaza: Enjoy state-of-the-art VoIP service with a $10 credit and half-price SIP service on up to $500 of Skyetel trunking with free number porting when you fund your Skyetel account. No limits on number of simultaneous calls. Quadruple data center redundancy. $25 monthly minimum spend required. Tutorial and sign up details are here.
![]() The lynchpin of Incredible PBX 2020 and beyond is ClearlyIP components which bring management of FreePBX modules and SIP phone integration to a level never before available with any other Asterisk distribution. And now you can configure and reconfigure your new Incredible PBX phones from the convenience of the Incredible PBX GUI.
The lynchpin of Incredible PBX 2020 and beyond is ClearlyIP components which bring management of FreePBX modules and SIP phone integration to a level never before available with any other Asterisk distribution. And now you can configure and reconfigure your new Incredible PBX phones from the convenience of the Incredible PBX GUI.
VitalPBX is perhaps the fastest-growing PBX offering based upon Asterisk with an installed presence in more than 100 countries worldwide. VitalPBX has generously provided a customized White Label version of Incredible PBX tailored for use with all Incredible PBX and VitalPBX custom applications. Follow this link for a free test drive!
Special Thanks to Vitelity. Vitelity is now Voyant Communications and has halted new registrations for the time being. Our special thanks to Vitelity for their unwavering financial support over many years and to the many Nerd Vittles readers who continue to enjoy the benefits of their service offerings. We will keep everyone posted on further developments.
Double-NAT Blues: Tackling Asterisk’s Thorniest Problems

Whether you’re new to VoIP technology or an Old Timer, nothing is quite as frustrating as wrestling with one-way audio and no audio on SIP calls either because of poorly designed NAT-based routers or poorly implemented SIP ALG solutions on low-end residential routers. To make matters worse, you get to deal with calls originating behind not one, but two, NAT-based routers neither of which complies with the basic SIP Rules of the Road. In a perfect world, SIP and RTP packets arriving from the Internet would have their public IP address translated into a private LAN address upon arrival at the NAT-based router. And the departing packets would have their private IP addresses translated into the public IP address of the router when leaving. If your PBX and SIP phone happen to be behind different NAT-based routers and hardware from the likes of Comcast, Spectrum, and AT&T, the odds of SIP calls working reliably are somewhere between slim and none. Perhaps it’s no coincidence that each of these providers also happens to offer competing (expensive) telephony service.
Today we’d like to offer some Asterisk® solutions that resolve these issues. First, if you are the subscriber to cable or DSL Internet service, you may have some success by talking to your provider and persuading them to set up their hardware in bridged mode so that you can install your own NAT-based router that properly handles SIP traffic. Second, it’s almost always a good idea to disable SIP ALG service on routers that you control. The reason is because of the poor ALG implementations on almost all low-cost routers. Third, configuring the Public and Private IP NAT Settings for your PBX using the FreePBX® GUI (Settings->Asterisk SIP Settings->NAT Settings) often solves the problems. Fourth, make sure NAT=yes is set in your extension and trunk settings.
If you happen to be traveling and have no control over the network architecture, the chances of the above recommendations resolving your SIP problems are not likely. This includes offerings in hotels, rental units, cruise ships, and WiFi HotSpots worldwide. In most of these locations, you would want to use a SIP phone to connect back to your home or office PBX so that you could receive incoming calls and place outbound calls just as if you were sitting at your desk at home. In these situations, we have a failsafe solution for you, but it requires a little advance planning because you need to configure your home or office Asterisk server to support the design.
The easiest way to eliminate NAT problems is to take NAT out of the equation when making and receiving SIP calls. With Asterisk, this is easy. What we typically do is interconnect the home or office Asterisk PBX with a local Asterisk PBX using an IAX2 trunk. Thus, no SIP traffic passes between your local PBX and your home or office PBX regardless of the number of layers of routers that are present between the two servers. If you can make SIP calls through a provider while sitting at home, you have solved the SIP connectivity issues at the home/office end. If your local PBX and SIP phone or softphone are on the same local LAN whether wired or wireless, then there is no SIP connectivity issue locally either. So how?
Rule #1: Always travel with a notebook computer that includes VirtualBox and a reliable SIP softphone. We’re big fans of all of the Mac notebooks, any of them will suffice. Windows and Linux notebooks work as well. Steer clear of Chromebooks which lack a crucial Linux kernel driver required by VirtualBox. There’s a solution, but it’s painful. On the Mac platform, you can’t beat the free Telephone app for your SIP phone.
Rule #2: Set up a NeoRouter VPN to provide secure interconnectivity between your home or office PBX and your local PBX. With Incredible PBX platforms, the NeoRouter client is included. You’ll just need to install the NeoRouter server component on some server with a public IP address. Complete details are here. To obtain a NeoRouter private IP address on each PBX, run this command after logging in as root: nrclientcmd.
Configuring IAX Trunk on Home/Office Server. You’ll need the NeoRouter IP address and a secure password to set up the trunk that will interconnect your Home-PBX with your local PBX. We’re going to refer to the two servers as Home-PBX (10.0.0.1) and Travel-PBX (10.0.0.2) to keep things simple. On the Home-PBX, create an IAX trunk using the FreePBX GUI with a Trunk Name of Travel-PBX. The PEER Details should look like the following using a very secure password that will be used on the trunk at the other end as well:
type=friend
secret=very-secure-password
host=dynamic
context=from-internal
requirecalltoken=no
deny=0.0.0.0/0.0.0.0
permit=0.0.0.0/0.0.0.0
The Registration String would look like the following where very-secure-password is your actual shared secret for the two trunks and 10.0.0.2 is the actual VirtualBox IP address of the Travel-PBX: Home-PBX:very-secure-password@10.0.0.2
Configuring IAX Trunk on Travel-PBX Server. You’ll need the NeoRouter IP address and a secure password to set up the trunk that will interconnect your Travel-PBX server with your Home-PBX. On the Travel-PBX, create an IAX trunk using the FreePBX GUI with a Trunk Name of Home-PBX. The PEER Details should look like the following using a very secure password that will be used on the trunk at the other end as well:
type=friend
secret=very-secure-password
host=dynamic
context=from-internal
requirecalltoken=no
deny=0.0.0.0/0.0.0.0
permit=0.0.0.0/0.0.0.0
The Registration String would look like the following where very-secure-password is your actual shared secret for the two trunks and 10.0.0.1 is the actual VirtualBox IP address of the Home-PBX: Travel-PBX:very-secure-password@10.0.0.1
Once you get this far, log into both servers as root and start up the Asterisk CLI. On each server, issue the following command to be sure the two trunks are registered with each other: iax2 show registry
Routing Calls from Home-PBX to Travel-PBX. What follows is one scenario for call routing. We’re assuming calls to your Home-PBX are routed to a Ring Group consisting of various extensions in your home or office. We’re also assuming you want to now add an extension on Travel-PBX to that Ring Group so that incoming calls to your Home-PBX will also ring the softphone connected to an extension on your Travel-PBX. In the Asterisk/FreePBX world, we accomplish this by adding an Outbound Route for the Travel-PBX extension and then adding this number to the Ring Group with a # prefix to tell FreePBX that it’s a trunk call rather than a local extension. In our example, we’re assuming the softphone extension on Travel-PBX is 701, but we’re also assuming there is a different extension 701 on Home-PBX. To avoid confusing the Home-PBX, we’ll add a 7 prefix for the Travel-PBX extension and then strip it off before passing the call to Travel-PBX.
First, create an Outbound Route called Travel-PBX-Out. For the Dial Pattern, enter a Prefix of 7 and a Match Pattern of 701. For the Trunk Sequence, choose Travel-PBX. Move the Outbound Route near the top of your route list to assure that it gets processed before any other 4-digit extensions. Second, edit your Ring Group and add 7701# to the existing list.
Routing Calls from Travel-PBX to Home-PBX. On the Travel-PBX, we’re assuming you’d like calls placed from your softphone to be processed exactly as if you were calling from a local extension on Home-PBX. Create an Outbound Route called Home-PBX-Out. For the Dial Patterns, add one for 10-digit calls: NXXNXXXXXX. If you want to be able to reach 3-digit extensions on Home-PBX, add a second dial pattern with a 9 prefix and XXX for the Match Pattern so it doesn’t conflict with local extensions. For Trunk Sequence, choose Home-PBX.
Originally published: Monday, August 20, 2018
 Support Issues. With any application as sophisticated as this one, you’re bound to have questions. Blog comments are a terrible place to handle support issues although we welcome general comments about our articles and software. If you have particular support issues, we encourage you to get actively involved in the PBX in a Flash Forums. It’s the best Asterisk tech support site in the business, and it’s all free! Please have a look and post your support questions there. Unlike some forums, ours is extremely friendly and is supported by literally hundreds of Asterisk gurus and thousands of users just like you. You won’t have to wait long for an answer to your question.
Need help with Asterisk? Visit the PBX in a Flash Forum.
Special Thanks to Our Generous Sponsors
FULL DISCLOSURE: ClearlyIP, Skyetel, Vitelity, DigitalOcean, Vultr, VoIP.ms, 3CX, Sangoma, TelecomsXchange and VitalPBX have provided financial support to Nerd Vittles and our open source projects through advertising, referral revenue, and/or merchandise. As an Amazon Associate and Best Buy Affiliate, we also earn from qualifying purchases. We’ve chosen these providers not the other way around. Our decisions are based upon their corporate reputation and the quality of their offerings and pricing. Our recommendations regarding technology are reached without regard to financial compensation except in situations in which comparable products at comparable pricing are available from multiple sources. In this limited case, we support our sponsors because our sponsors support us.
BOGO Bonaza: Enjoy state-of-the-art VoIP service with a $10 credit and half-price SIP service on up to $500 of Skyetel trunking with free number porting when you fund your Skyetel account. No limits on number of simultaneous calls. Quadruple data center redundancy. $25 monthly minimum spend required. Tutorial and sign up details are here.
![]() The lynchpin of Incredible PBX 2020 and beyond is ClearlyIP components which bring management of FreePBX modules and SIP phone integration to a level never before available with any other Asterisk distribution. And now you can configure and reconfigure your new Incredible PBX phones from the convenience of the Incredible PBX GUI.
The lynchpin of Incredible PBX 2020 and beyond is ClearlyIP components which bring management of FreePBX modules and SIP phone integration to a level never before available with any other Asterisk distribution. And now you can configure and reconfigure your new Incredible PBX phones from the convenience of the Incredible PBX GUI.
VitalPBX is perhaps the fastest-growing PBX offering based upon Asterisk with an installed presence in more than 100 countries worldwide. VitalPBX has generously provided a customized White Label version of Incredible PBX tailored for use with all Incredible PBX and VitalPBX custom applications. Follow this link for a free test drive!
Special Thanks to Vitelity. Vitelity is now Voyant Communications and has halted new registrations for the time being. Our special thanks to Vitelity for their unwavering financial support over many years and to the many Nerd Vittles readers who continue to enjoy the benefits of their service offerings. We will keep everyone posted on further developments.
Some Recent Nerd Vittles Articles of Interest…
Desktop Dream Machine: It’s Incredible PBX for VirtualBox
If you’re new to the VoIP world or just getting started with Google’s latest Google Voice creation, then we have a one minute setup solution today that doesn’t require you to buy anything ever. You can use almost any desktop computer you already own to bring up the VirtualBox® edition of Incredible PBX® in less than 60 seconds. Take another minute or two to install a Google Voice trunk, and you’ll have free calling in the U.S. and Canada until the cows come home. If you’ve followed Nerd Vittles over the years, you already know that VirtualBox from Oracle® is one of our favorite platforms. Once VirtualBox is installed on your desktop computer, adding Incredible PBX is a snap. Download our new GVSIP vbox image from SourceForge, double-click on the downloaded image, check the initialize MAC address box, and boom. In less than a minute, your PBX is ready to use. The really nice thing about playing along today is it won’t cost you a dime to try things out for yourself. And, if you really love it and we think you will, there’s no hidden fee or crippleware to hinder your continued use of Incredible PBX for as long as you like. Of course, the Incredible PBX feature set is included as well which brings you nearly three dozen applications for Asterisk® that will revolutionize your communications platform. Just add your credentials and speech-to-text, voice recognition, and a Siri-like telephony interface are as close as your nearest SIP phone.
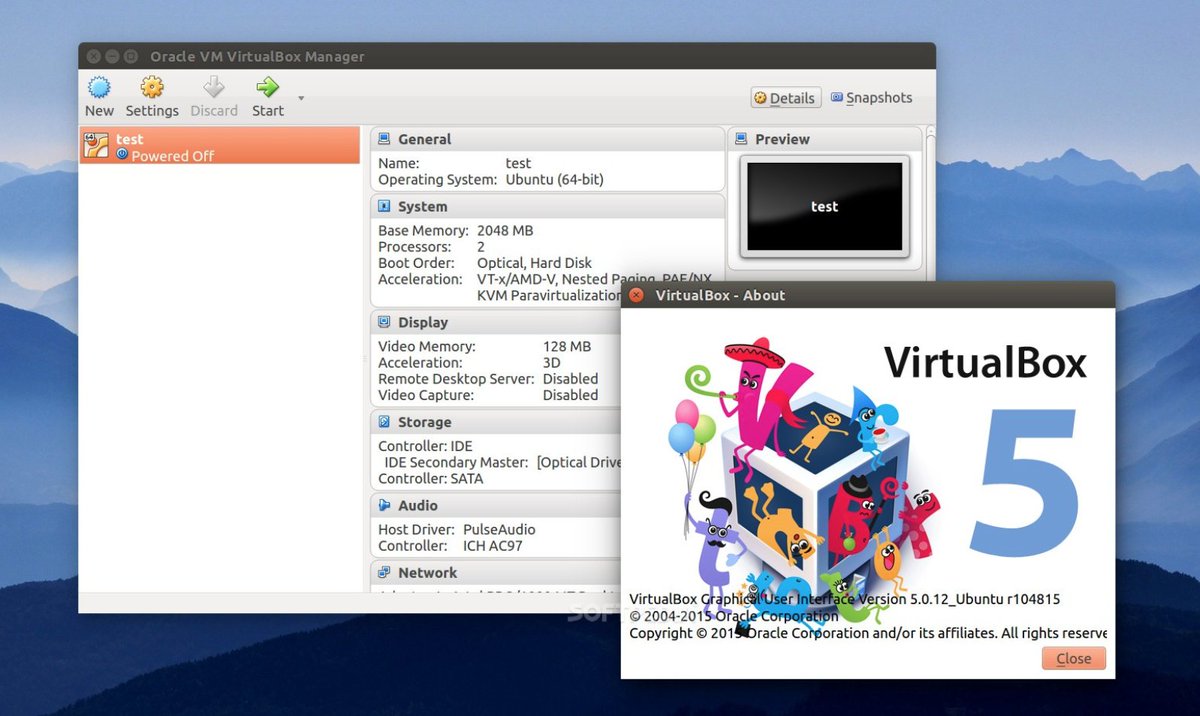
Installing Oracle VM VirtualBox

Oracle’s virtual machine platform inherited from Sun is amazing. It’s not only free, but it’s pure GPL2 code. VirtualBox gives you a virtual machine platform that runs on top of any desktop operating system. In terms of limitations, we haven’t found any. We even tested this on an Atom-based Windows 7 machine with 2GB of RAM, and it worked without a hiccup. So step #1 today is to download one or more of the VirtualBox installers from VirtualBox.org or Oracle.com. Our recommendation is to put all of the 100MB installers on a 4GB thumb drive.1 Then you’ll have everything in one place whenever and wherever you happen to need it. Once you’ve downloaded the software, simply install it onto your favorite desktop machine. Accept all of the default settings, and you’ll be good to go. For more details, here’s a link to the Oracle VM VirtualBox User Manual.
Installing Incredible PBX 13-13 with GVSIP
To begin, download the Incredible PBX vbox image (2.3 GB) onto your desktop.
Next, double-click on the Incredible PBX .ova image on your desktop. Be sure to check the box to initialize the MAC address of the image and then click Import. Once the import is finished, you’ll see a new Incredible PBX virtual machine in the VM List of the VirtualBox Manager Window. Let’s make a couple of one-time adjustments to the Incredible PBX configuration to account for possible differences in sound and network cards on different host machines.
(1) Click once on the Incredible PBX virtual machine in the VM List. Then (2) click the Settings button. In the Audio tab, check the Enable Audio option and choose your sound card. In the Network tab for Adapter 1, check the Enable Network Adapter option. From the Attached to pull-down menu, choose Bridged Adapter. Then select your network card from the Name list. Then click OK. That’s all the configuration that is necessary for Incredible PBX.
Running Incredible PBX in VirtualBox
Once you’ve imported and configured the Incredible PBX Virtual Machine, you’re ready to go. Highlight the Incredible PBX virtual machine in the VM List on the VirtualBox Manager Window and click the Start button. The standard Linux boot procedure will begin and, within a few seconds, you’ll get the familiar Linux login prompt. During the bootstrap procedure, you’ll see a couple of dialogue boxes pop up that explain the keystrokes to move back and forth between your host operating system desktop and your virtual machine. Remember, you still have full access to your desktop computer. Incredible PBX is merely running as a task in a VM window. Always gracefully halt Incredible PBX just as you would on any computer.
Here’s what you need to know. To work in the Incredible PBX virtual machine, just left-click your mouse while it is positioned inside the VM window. To return to your host operating system desktop, press the right Option key on Windows machines or the left Command key on any Mac. For other operating systems, read the dialogue boxes for instructions on moving around. To access the Linux CLI, login as root with the default password: password. Change your passwords immediately by typing: /root/update-passwords.
Setting the Date and Time with VirtualBox
On some platforms, VirtualBox has a nasty habit of mangling the date and time of your virtual machine. Typing date will tell you whether your VM is affected. If it’s a problem, manually set the date and time and then update the hardware clock. Here’s how assuming 08130709 is the month, day, and correct time of your server:
date 08130709
clock -w
Obtaining Google Voice Credentials for GVSIP
You’ll need at least one dedicated Google Voice account to use the new Incredible PBX implementation of GVSIP with Asterisk. If you’re new to all of this, our Getting Started with Google Voice tutorial will walk you through setting up an account and obtaining your OAuth 2 refresh token for GVSIP.
Creating GVSIP Trunks with Incredible PBX
With your Google Voice refresh token and 10-digit phone number in hand, you’re ready to add the GVSIP trunk to your PBX. While logged into the Linux CLI as root, issue the following command: gvsip-naf/install-gvsip
You’ll be prompted whether you wish to create a GVSIP trunk, Type y and enter your refresh_token and 10-digit phone number for your existing Google Voice trunk. For each trunk, the installer will create the necessary code to support a PJSIP trunk and a GVSIPn Custom Trunk to use for outbound routing. To add additional trunks, simply run the installer again. Adding a new trunk takes about 10 seconds.
Should you ever want to refresh the patched version of Asterisk, copy pjsip_custom.conf from /etc/asterisk to a safe place, delete the contents of pjsip_custom.conf, rerun the installer, and then copy your version of pjsip_custom.conf back to /etc/asterisk and restart Asterisk: amportal restart. That way you won’t lose your previously configured trunks.
If you ever need to delete a GVSIP trunk that you previously have added, we’ve included a script which will perform the task for you. Just run del-trunk and specify the trunk to delete.
Once you have multiple GVSIP trunks on your PBX, we’ve added a utility to make it easy to decipher which trunk number is associated with each Google Voice trunk. Simply run: gvsip-naf/show-trunks
Configuring an Inbound Route for GVSIP Trunks
By default, incoming calls to GVSIP trunks on Incredible PBX servers will be sent to the Default Inbound Route configured on your PBX. As initially installed, that Default route points to Allison’s Demo IVR. This can be changed easily in the FreePBX GUI by modifying the Destination for the Default inbound route in Connectivity:Inbound Routes.
On other server platforms, you may not have a Default inbound route configured so you will need to create an inbound route to handle calls from each GVSIP trunk. Regardless of your server platform, we strongly recommend adding an Inbound Route for every GVSIP trunk using the 10-digit GVSIP phone number as the DID for the inbound route. Here’s an example of an Inbound Route created in Connectivity:Inbound Routes:Add Inbound Route:
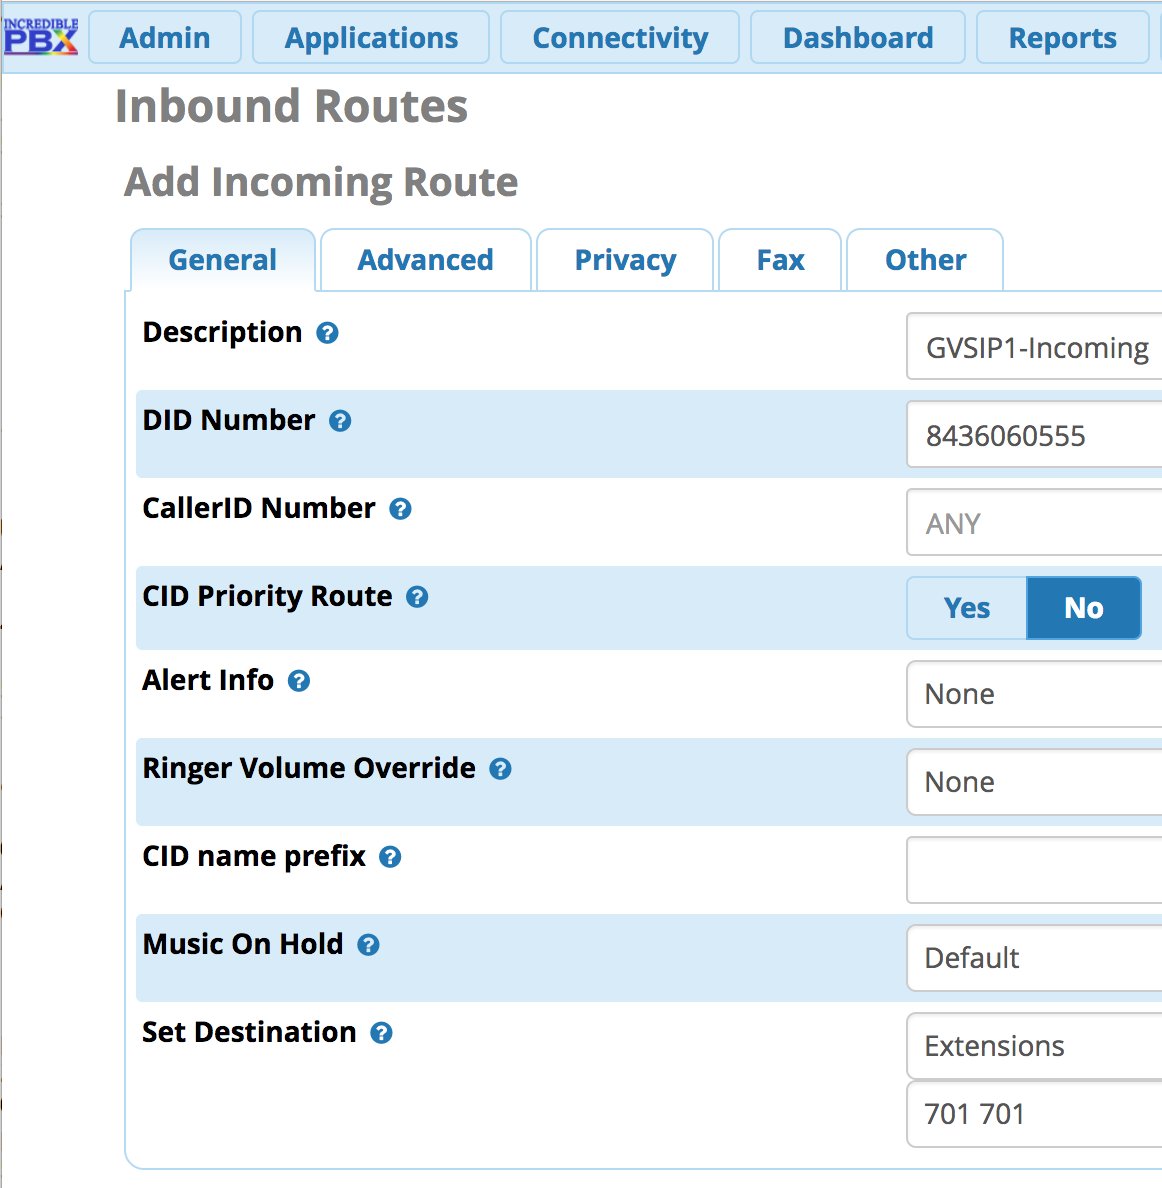
If you have installed the Incredible Fax add-on, you can enable Fax Detection under the Fax tab. And, if you’d like CallerID Name lookups using CallerID Superfecta, you can enable it under the Other tab before saving your setup and reloading your dialplan.
Configuring an Outbound Route for GVSIP Trunks
By default, you cannot place outbound calls using your new GVSIP trunks. For each trunk, you first will need to create an Outbound Route specifying a Dial Pattern to use with each GVSIP trunk in Connectivity:Outbound Routes:Add Outbound Route. If you only have a single Google Voice trunk on your PBX and no other trunks, then you would probably want to specify that outbound calls be routed out the GVSIP1 trunk with a Dial Pattern of NXXNXXXXXX with 1 as the Prepend. This tells FreePBX to dial 18005551212 using the GVSIP1 trunk when a PBX user dials 8005551212. Google only accepts calls that include a country code (1=US/CAN).

HINT: If you ever forget which GVSIP trunks are associated with which phone numbers, simply run /root/gvsip-naf/del-trunk for a list of your trunks. Just press ENTER to exit without deleting any of your trunks.
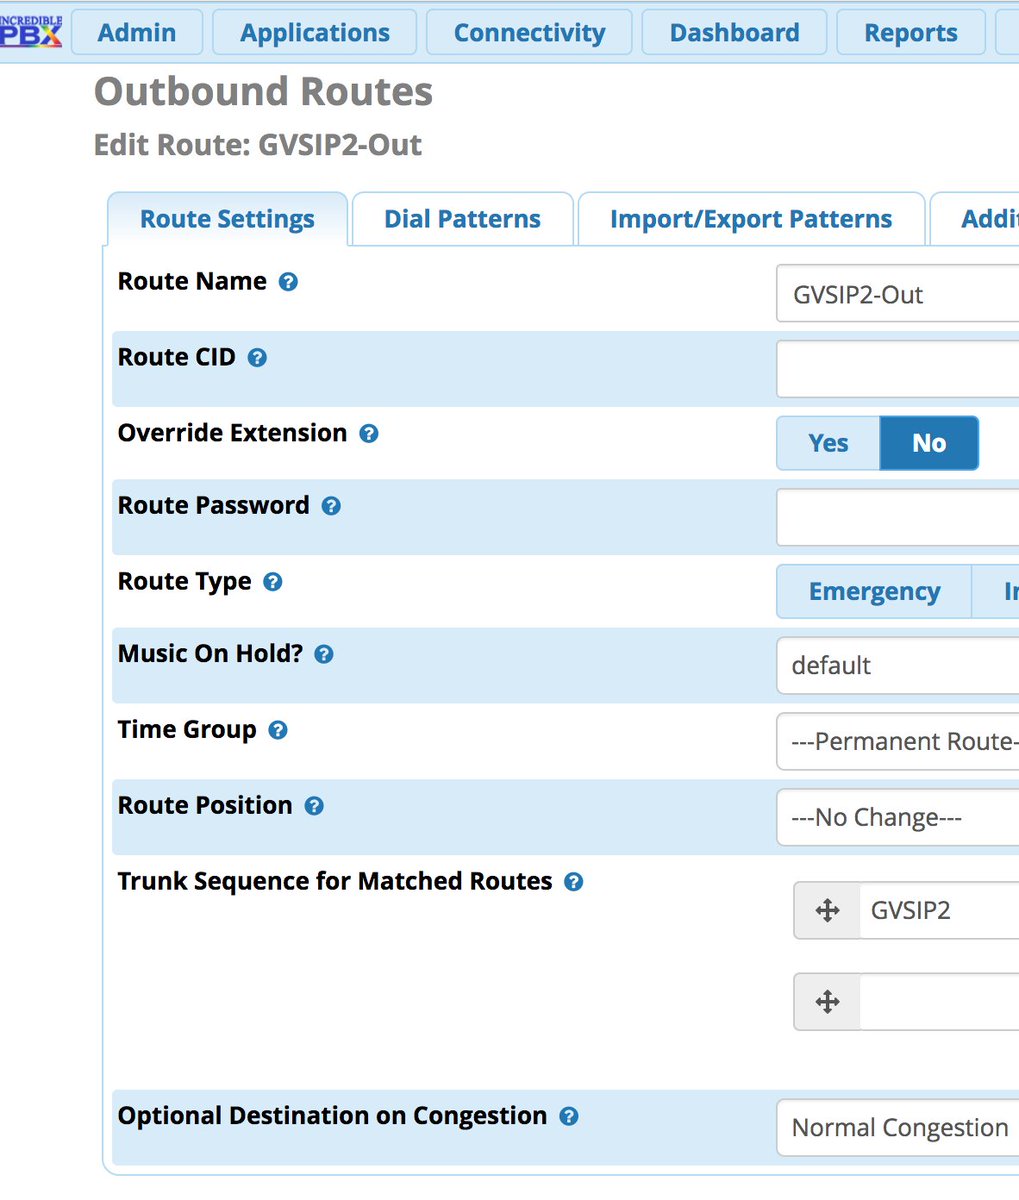
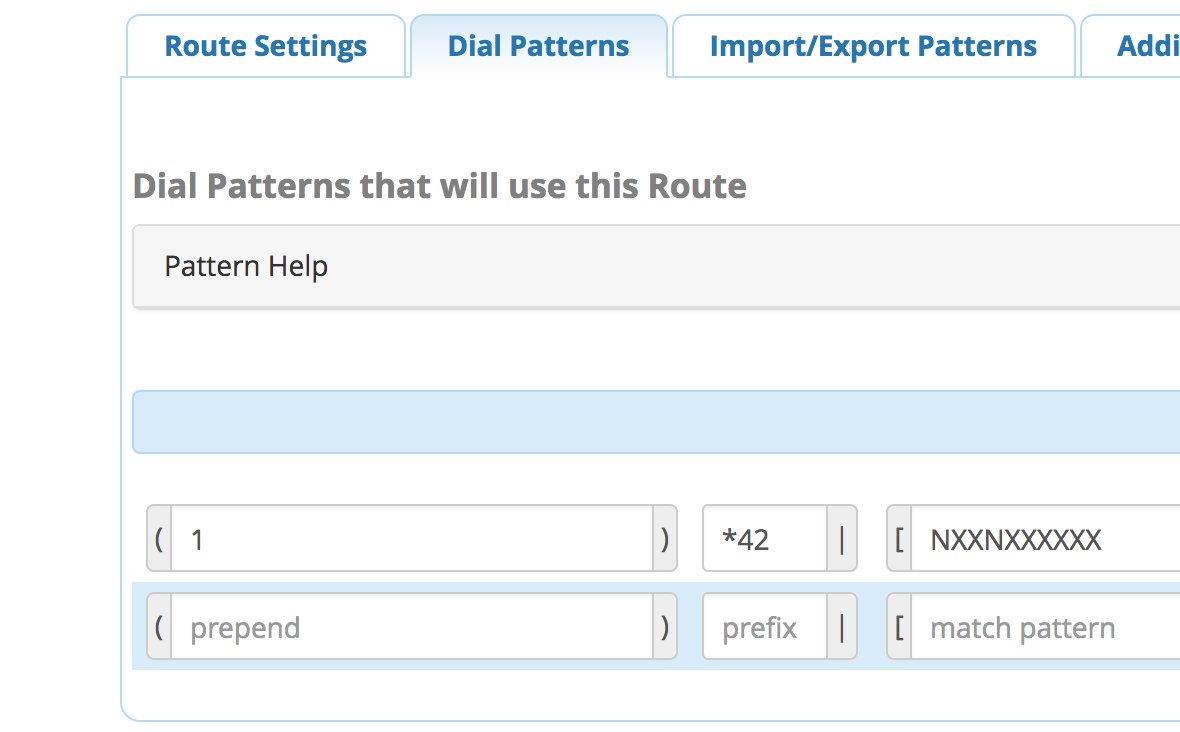
There are a million ways to design outbound calling schemes on PBXs with multiple trunks. One of the simplest ways is to use no dial prefix for the primary trunk and then use dialing prefixes for the remaining trunks. As part of the install, the dialing prefixes of *41 through *49 were reserved for GVSIP trunks if you would like to use them. That’s totally up to you. Here’s what an Outbound Route would look like using this scheme for the GVSIP2 trunk:
Another outbound calling scheme would be to assign specific DIDs to individual extensions on your PBX. Here you could use NXXNXXXXXX with the 1 Prepend as the Dial Pattern with every Outbound Route and change the Extension Number in the CallerID field of the Dial Pattern. With this setup, you’d need a separate Outbound Route for each group of extensions using a specific trunk on your PBX. Additional dial patterns can be added for each extension designated for a particular trunk. A lower priority Outbound Route then could be added without a CallerID entry to cover extensions that weren’t restricted or specified.
HINT: Keep in mind that Outbound Routes are processed by FreePBX in top-down order. The first route with a matching dial pattern is the trunk that is selected to place the outbound call. No other outbound routes are ever used even if the call fails or the trunk is unavailable. To avoid failed calls, consider adding additional trunks to the Trunk Sequence in every outbound route. In summary, if you have multiple routes with the exact same dial pattern, then the match nearest to the top of the Outbound Route list wins. You can rearrange the order of the outbound routes by dragging them into any sequence desired.
Configuring Incredible PBX for Incredible PBX
In order to take advantage of all the Incredible PBX applications, you’ll need to obtain IBM text-to-speech (TTS) and speech-to-text (STT) credentials as well as a (free) Application ID for Wolfram Alpha.
NOV. 1 UPDATE: IBM has moved the goal posts effective December 1, 2018:
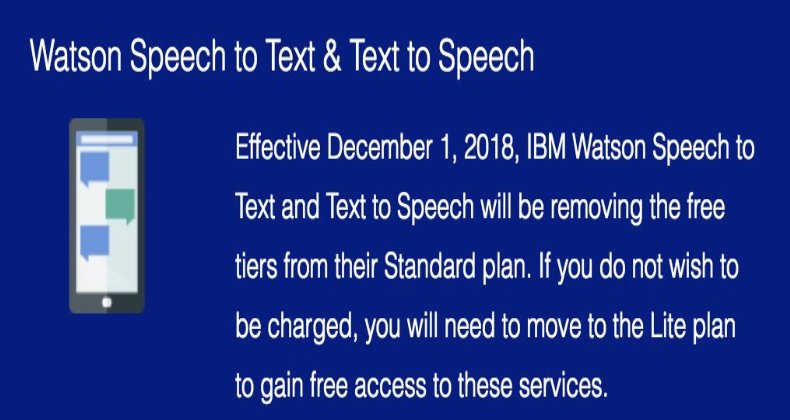
This Nerd Vittles tutorial will walk you through getting your IBM account set up and obtaining both your TTS and STT credentials. Be sure to write down BOTH sets of credentials which you’ll need in a minute. For home and SOHO use, IBM access and services are FREE even though you must provide a credit card when signing up. The IBM signup process explains their pricing plans.
To use Wolfram Alpha, sign up for a free Wolfram Alpha API account. Just provide your email address and set up a password. It takes less than a minute. Log into your account and click on Get An App ID. Make up a name for your application and write down (and keep secret) your APP-ID code. That’s all there is to getting set up with Wolfram Alpha. If you want to explore costs for commercial use, there are links to let you get more information.
In addition to your Wolfram Alpha APPID, there are two sets of IBM credentials to plug into the Asterisk AGI scripts. Keep in mind that there are different usernames and passwords for the IBM Watson TTS and STT services. The TTS credentials will look like the following: $IBM_username and $IBM_password. The STT credentials look like this: $API_USERNAME and $API_PASSWORD. Don’t mix them up. 🙂
All of the scripts requiring credentials are located in /var/lib/asterisk/agi-bin so switch to that directory after logging into your server as root. Edit each of the following files and insert your TTS credentials in the variables already provided: nv-today2.php, ibmtts.php, and ibmtts2.php. Edit each of the following files and insert your STT credentials in the variables already provided: getquery.sh, getnumber.sh, and getnumber2.sh. Finally, edit 4747 and insert your Wolfram Alpha APPID.
Using Asteridex with Incredible PBX
AsteriDex is a web-based dialer and address book application for Asterisk and Incredible PBX. It lets you store and manage phone numbers of all your friends and business associates in an easy-to-use SQLite3 database. You simply call up the application with your favorite web browser: http://pbx-ip-address/asteridex4/. When you click on a contact that you wish to call, AsteriDex first calls you at extension 701, and then AsteriDex connects you to your contact through another outbound call made using your default outbound trunk that supports numbers in the 1NXXNXXXXXX format.
Taking Incredible PBX for a Test Drive
You can take Incredible PBX on a test drive by dialing D-E-M-O (3366) from any phone connected to your PBX.
With Allison’s Demo IVR, you can choose from the following options:
- 0. Chat with Operator — connects to extension 701
- 1. AsteriDex Voice Dialer – say "Delta Airlines" or "American Airlines" to connect
- 2. Conferencing – log in using 1234 as the conference PIN
- 3. Wolfram Alpha Almanac – say "What planes are flying overhead"
- 4. Lenny – The Telemarketer’s Worst Nightmare
- 5. Today’s News Headlines — courtesy of Yahoo! News
- 6. Weather by ZIP Code – enter any 5-digit ZIP code for today’s weather
- 7. Today in History — courtesy of OnThisDay.com
- 8. Chat with Nerd Uno — courtesy of SIP URI connection to 3CX iPhone Client
- 9. DISA Voice Dialer — say any 10-digit number to be connected
- *. Current Date and Time — courtesy of Incredible PBX
Originally published: Tuesday, August 14, 2018
Need help with Asterisk? Join our new MeWe Support Site.
Special Thanks to Our Generous Sponsors
FULL DISCLOSURE: ClearlyIP, Skyetel, Vitelity, DigitalOcean, Vultr, VoIP.ms, 3CX, Sangoma, TelecomsXchange and VitalPBX have provided financial support to Nerd Vittles and our open source projects through advertising, referral revenue, and/or merchandise. As an Amazon Associate and Best Buy Affiliate, we also earn from qualifying purchases. We’ve chosen these providers not the other way around. Our decisions are based upon their corporate reputation and the quality of their offerings and pricing. Our recommendations regarding technology are reached without regard to financial compensation except in situations in which comparable products at comparable pricing are available from multiple sources. In this limited case, we support our sponsors because our sponsors support us.
BOGO Bonaza: Enjoy state-of-the-art VoIP service with a $10 credit and half-price SIP service on up to $500 of Skyetel trunking with free number porting when you fund your Skyetel account. No limits on number of simultaneous calls. Quadruple data center redundancy. $25 monthly minimum spend required. Tutorial and sign up details are here.VitalPBX is perhaps the fastest-growing PBX offering based upon Asterisk with an installed presence in more than 100 countries worldwide. VitalPBX has generously provided a customized White Label version of Incredible PBX tailored for use with all Incredible PBX and VitalPBX custom applications. Follow this link for a free test drive!Special Thanks to Vitelity. Vitelity is now Voyant Communications and has halted new registrations for the time being. Our special thanks to Vitelity for their unwavering financial support over many years and to the many Nerd Vittles readers who continue to enjoy the benefits of their service offerings. We will keep everyone posted on further developments.- Many of our purchase links refer users to Amazon when we find their prices are competitive for the recommended products. Nerd Vittles receives a small referral fee from Amazon to help cover the costs of our blog. We never recommend particular products solely to generate Amazon commissions. However, when pricing is comparable or availability is favorable, we support Amazon because Amazon supports us. [↩]
Twofer Tuesday: Incredible PBX 13 to the Rescue

With the Digium announcement last week that four and a half year’s worth of Asterisk® servers were vulnerable to the RTP eavesdropping bug, it prompted us to dust off our Incredible PBX® 13 for CentOS build and bring it up to current specs including the Digium patch for RTPbleed. And then along came Hurricane Issabel to remind us that sh*t happens, and it pays to have a backup plan for your telecommunications infrastructure. So today we’re pleased to introduce two new Asterisk solutions: a cloud-based server for $1 a month and a VirtualBox image that will run on any Windows or Mac computer. We would stress that these should be part of a comprehensive backup plan and may not be suitable to implement as your primary communications platform. But, for those impacted by Harvey’s or Issabel’s devastation, either of today’s solutions will get you a very stable PBX platform as soon as you have Internet or cellular connectivity.
Cloud Hosting for $1/month in NYC, Miami or LA
For today’s emergency cloud platform, we’ve chosen WootHosting which provides a rock-solid VPS in your choice of locations starting at $12 a year. That buys you the following:
2 CPU Core Allocations
1024MB Dedicated RAM
1024MB vSwap
50GB Secured Disk Space
3000GB Premium Bandwidth
1 IPv4 Address
100Mbps Port Speed
Choose New York Grand Opening Specials under the left tab. You still get your choice of cities for the $12/year VPS! Just configure the VPS as a CentOS 6, 64-bit platform. Login to the server as root using SSH or Putty and issue these commands:
setenforce 0
yum -y install net-tools nano wget tar
yum -y upgrade --skip-broken
wget http://incrediblepbx.com/incrediblepbx13-12.2-centos.tar.gz
tar zxvf incrediblepbx*
./create-swapfile-DO
./IncrediblePBX*
On some platforms (not WootHosting’s VPS), your server may automatically reboot midway through the install. On these platforms, log back in as root and run the installer a second time to complete the install:
./IncrediblePBX*
After restarting the server at the conclusion of the install, log back in as root and perform the following steps to complete your setup:
Make your root password very secure: passwd
Create admin password for GUI access: /root/admin-pw-change
Set your correct time zone: /root/timezone-setup
Create admin password for web apps: htpasswd /etc/pbx/wwwpasswd admin
Make a copy of your Knock codes: cat /root/knock.FAQ
Decipher your Reminders password: cat /root/reminders.FAQ
InsertOPTIONS="-i venet0:0"in /etc/sysconfig/knockd
Decipher IP address and other info about your server: status
Your server will be up and running in about an hour. Remember, we are compiling all of the components including Asterisk from source which means customization and updates are easy. Continue your adventure by following our previous tutorial.
Incredible PBX 13 with VirtualBox in Under 5 Minutes
If you’re in a time crunch or prefer to set up a PBX locally, there is no better solution than VirtualBox. It runs on any desktop PC, Mac, Linux or Solaris machine, and the new Incredible PBX 13 image for VirtualBox can be installed and configured in under 5 minutes. With a single button click, you can backup your entire PBX in a couple of minutes and save it for a rainy day.
Today’s release is built atop the CentOS 6.9 platform and features the latest release of Asterisk 13 and a terrific collection of GPL modules from FreePBX® 12. Think of Incredible PBX as the glue stick that assembles all the necessary VoIP components and holds them together seamlessly. As with all Incredible PBX builds, you also get the full complement of goodies including dozens of text-to-speech apps, voice recognition and dialing, SMS messaging, Google Voice and free fax support, reminders and wakeup calls, and SECURITY!
Is VirtualBox merely a sandbox for experimentation? Absolutely not. With any of the beefier desktop computers available today, running Incredible PBX as a 24/7 VirtualBox image is every bit as feature rich with stellar performance that’s equivalent to using dedicated hardware. And there are some added advantages. Obviously, deploying a turnkey VoIP platform in under 5 minutes is a major plus. But, unlike using a dedicated Linux platform, you also get the ability to take snapshots of your system and do full backups in minutes instead of the hours required to bring down dedicated hardware, load a different backup application using a different operating system, perform a backup, and then reboot your VoIP server. And your backups won’t just run on the one server on which the backup was performed. You can restore the backup to any other computer that can run VirtualBox. For any of you that came from a network management background, you know what a big deal that really is. And there’s one more bonus. With Incredible Backup and Restore, you can move your image to dedicated hardware running the same operating system with Asterisk 13 and the same GUI platform in minutes.
Are there security compromises using the VirtualBox platform? Not at all. Incredible PBX still comes preconfigured with the Linux IPtables firewall that is locked down to a whitelist of local area networks, preferred providers, and your own IP addresses. You can expand the whitelist using the add-ip and add-fqdn scripts or use PortKnocker and Travelin’ Man 4 tools to let remote users gain instant access.
Getting Started with VirtualBox. Step #1 today is to download one or more of the 64-bit VirtualBox installers from VirtualBox.org or Oracle.com. Our recommendation is to put all of the 100MB installers on a 4GB thumb drive.1 Then you’ll have everything in one place whenever and wherever you happen to need it. Once you’ve downloaded the software, simply install it onto your favorite desktop machine. Accept all of the default settings, and you’ll be good to go. And here’s a link to the latest Oracle VM VirtualBox User Manual.
Downloading the Incredible PBX 13 Virtual Machine. A word of warning on the front end. The new Incredible PBX image featuring Asterisk 13 for VirtualBox is huge, about 2.3GB! Download the image from SourceForge onto your desktop by clicking here.
Importing Incredible PBX 13 into VirtualBox. Double-click on the .ova file you downloaded to begin the import procedure and load it into VirtualBox. When prompted, be sure to check the Reinitialize the Mac address of all network cards box and then click the Import button. Once the import is finished, you’ll see a new Incredible PBX 13 for CentOS 6.9 virtual machine in your VM List on the VirtualBox Manager Window. We need to make a couple of one-time adjustments to the Incredible PBX VM configuration to account for differences in sound and network cards on different host machines.
Click on the Incredible PBX Virtual Machine in the VM List. Then click Settings -> Audio. Verify that Enable Audio option is checked and choose your sound card. Then click OK. Next click Settings -> Network. For Adapter 1, be sure the Enable Network Adapter option is checked. From the Attached to pull-down menu, choose Bridged Adapter. Then select your network card from the Name list. Then click OK. That’s all the configuration that is necessary for your Incredible PBX Virtual Machine.
Running Incredible PBX 13 on VirtualBox. Once you’ve imported and configured the Incredible PBX Virtual Machine, you’re ready to go. Highlight Incredible PBX 13 for CentOS 6.9 Virtual Machine in the VM List on the VirtualBox Manager Window and click the Start button. The CentOS 6.9 boot procedure will begin just as if you had installed Incredible PBX on a standalone machine. You’ll see a couple of dialogue boxes pop up that explain the keystrokes to move back and forth between your host operating system desktop and your virtual machine. Remember, you still have full access to your desktop computer. Incredible PBX is merely running as a task in a VirtualBox window. Always gracefully halt Incredible PBX just as you would on a dedicated computer.
Here’s what you need to know. To work in the Incredible PBX Virtual Machine, just left-click your mouse while it is positioned inside the VM window. To return to your host operating system desktop, press the right Option key on Windows machines or the left Command key on any Mac. For other operating systems, read the dialogue boxes for instructions on moving around. To access the Linux CLI, login as root with the default password: password.
When logging in for the first time, Incredible PBX will go through some setup steps and then reboot. Login again to complete the setup. status will always provide a snapshot of your system. To shut down Incredible PBX gracefully, click in the VM window with your mouse, log in as root, and type: halt. Be sure to complete the following setup steps from the Linux CLI:
- Change your root password: passwd
- Set your FreePBX admin password: /root/admin-pw-change
- Set your web apps admin password: htpasswd /etc/pbx/wwwpasswd admin
- Set your correct time zone: /root/timezone-setup
- Add WhiteList entries to firewall if needed: /root/add-ip or /root/add-fqdn
- Store PortKnocker credentials in a safe place: cat /root/knock.FAQ
- Decipher your Reminders password: cat /root/reminders.FAQ
- Login to your NeoRouter VPN server if desired: /root/nrclientcmd
To access the Incredible PBX GUI with a browser, point to the IP address of your virtual machine and login as admin with admin password set above. We recommend that you log in to the Linux CLI as root at least once a week so that Incredible PBX updates get applied to your server regularly. This is critically important if you care about your phone bill. Enjoy!
Published: Tuesday, September 12, 2017
Need help with Asterisk? Visit the PBX in a Flash Forum.
Special Thanks to Our Generous Sponsors
FULL DISCLOSURE: ClearlyIP, Skyetel, Vitelity, DigitalOcean, Vultr, VoIP.ms, 3CX, Sangoma, TelecomsXchange and VitalPBX have provided financial support to Nerd Vittles and our open source projects through advertising, referral revenue, and/or merchandise. As an Amazon Associate and Best Buy Affiliate, we also earn from qualifying purchases. We’ve chosen these providers not the other way around. Our decisions are based upon their corporate reputation and the quality of their offerings and pricing. Our recommendations regarding technology are reached without regard to financial compensation except in situations in which comparable products at comparable pricing are available from multiple sources. In this limited case, we support our sponsors because our sponsors support us.
BOGO Bonaza: Enjoy state-of-the-art VoIP service with a $10 credit and half-price SIP service on up to $500 of Skyetel trunking with free number porting when you fund your Skyetel account. No limits on number of simultaneous calls. Quadruple data center redundancy. $25 monthly minimum spend required. Tutorial and sign up details are here.
![]() The lynchpin of Incredible PBX 2020 and beyond is ClearlyIP components which bring management of FreePBX modules and SIP phone integration to a level never before available with any other Asterisk distribution. And now you can configure and reconfigure your new Incredible PBX phones from the convenience of the Incredible PBX GUI.
The lynchpin of Incredible PBX 2020 and beyond is ClearlyIP components which bring management of FreePBX modules and SIP phone integration to a level never before available with any other Asterisk distribution. And now you can configure and reconfigure your new Incredible PBX phones from the convenience of the Incredible PBX GUI.
VitalPBX is perhaps the fastest-growing PBX offering based upon Asterisk with an installed presence in more than 100 countries worldwide. VitalPBX has generously provided a customized White Label version of Incredible PBX tailored for use with all Incredible PBX and VitalPBX custom applications. Follow this link for a free test drive!
Special Thanks to Vitelity. Vitelity is now Voyant Communications and has halted new registrations for the time being. Our special thanks to Vitelity for their unwavering financial support over many years and to the many Nerd Vittles readers who continue to enjoy the benefits of their service offerings. We will keep everyone posted on further developments.
Some Recent Nerd Vittles Articles of Interest…
The 5-Minute PBX: Incredible PBX with Wazo for VirtualBox

We’ve sung the praises of VirtualBox for many years because it provides a wonderful platform for experimentation as well as production-ready systems using almost any hardware and any operating system. Versions of VirtualBox are available for Windows PCs, Macs, Linux desktops, and even Solaris machines. And, once you have VirtualBox in place, you can load gigabyte-sized turnkey virtual machines in a couple minutes. It literally transforms complex computer setups into child’s play.
We’ve received dozens of emails about Wazo, and many of them go something like this:
I’d love to experiment with Wazo as an Asterisk® platform, but I worry that the environment is just too different and the learning curve too steep. I just wish there were a simple way to get started so that I could learn the basics.
Today, your prayers have been answered. You don’t have to buy any hardware. You can use the desktop computer you already have. We’ve taken the Incredible PBX for Wazo tutorial and turned it into a turnkey virtual machine for VirtualBox. You can load it in a couple minutes and be ready to go. It’s got all of the Incredible PBX bells and whistles, and extensions already are configured for a SIP phone and WebRTC so that you can hit the ground running. Just install VirtualBox. Next, load the Incredible PBX for Wazo image. Install your favorite SIP phone or run WebRTC in your browser. A complete WebRTC tutorial is available here. Once you finish configuring your SIP or WebRTC client, you’re ready to start making calls. You can add a SIP trunk using one of preconfigured setups by following one of SIP provider tutorials we’ve provided. Or, if you live in the United States, you can add a Google Voice trunk and make free calls in the U.S. and Canada. Let’s get started!
Installing Oracle VM VirtualBox
Oracle’s virtual machine platform inherited from Sun is amazing. It’s not only free, but it’s pure GPL2 code. VirtualBox gives you a virtual machine platform that runs on top of any desktop operating system. In terms of limitations, we haven’t found any. We even tested this on an Atom-based Windows 7 machine with 2GB of RAM, and it worked without a hiccup. So step #1 today is to download one or more of the VirtualBox installers from VirtualBox.org or Oracle.com. Our recommendation is to put all of the 100MB installers on a 4GB thumb drive.1 Then you’ll have everything in one place whenever and wherever you happen to need it. Once you’ve downloaded the software, simply install it onto your favorite desktop machine. Accept all of the default settings, and you’ll be good to go. For more details, here’s a link to the Oracle VM VirtualBox User Manual.
Installing Incredible PBX for Wazo VM
To begin, download Incredible PBX for Wazo .ova image (1.9 GB) to the computer on which you installed VirtualBox.
When the download completes, double-click on the .ova file you downloaded to load it into VirtualBox. When prompted, be sure to check the Reinitialize the Mac address of all network cards box, agree to the license agreement, and then click the Import button. Once the import is finished, you’ll see a new (1) Incredible PBX for Wazo virtual machine in the VM List of the VirtualBox Manager Window. We need to make a couple of one-time adjustments to the Incredible PBX for Wazo configuration to account for differences in sound and network cards on different host machines.

(1) Click once on the Incredible PBX for Wazo virtual machine in the VM List. Then (2) click the Settings button. In the Audio tab, check the Enable Audio option and choose your sound card. In the Network tab for Adapter 1, check the Enable Network Adapter option. From the Attached to pull-down menu, choose Bridged Adapter. Then select your network card from the Name list. Then click OK. That’s all the configuration that is necessary for your Incredible PBX for Wazo.
Running Incredible PBX for Wazo VM
Once you’ve imported and configured the Incredible PBX for Wazo Virtual Machine, you’re ready to go. Highlight Incredible PBX for Wazo virtual machine in the VM List on the VirtualBox Manager Window and click the Start button. The standard Wazo boot procedure will begin and, within a short time, you’ll get the familiar Linux login prompt. During the bootstrap procedure, you’ll see a couple of dialogue boxes pop up that explain the keystrokes to move back and forth between your host operating system desktop and your virtual machine. Remember, you still have full access to your desktop computer. Incredible PBX for Wazo is merely running as a task in a VirtualBox window. Always gracefully halt Incredible PBX just as you would on a dedicated computer.
Here’s what you need to know. To work in the Incredible PBX for Wazo virtual machine, just left-click your mouse while it is positioned inside the VM window. To return to your host operating system desktop, press the right Option key on Windows machines or the left Command key on any Mac. For other operating systems, read the dialogue boxes for instructions on moving around. To access the Linux CLI, login as root with the default password: password.
Once you log into your virtual machine, a startup script will briefly configure a few things and then advise you that it’s time to reboot. If prompted for the hostname, type xivo. Write down the IP address provided because for Phase 2 of the setup, we need to use SSH or Putty on the desktop that you will actually be using to manage your server. The reason for this is that Incredible PBX automatically creates a whitelist of IP addresses that the firewall will allow to access your server. If the IP address isn’t in your whitelist, you may lock yourself out except from the VirtualBox console window.
Once the VirtualBox console window shows that your server has rebooted by displaying the Linux login prompt, switch to SSH or Putty and login as root using the IP address you wrote down. You’ll then be prompted to change your root password for Linux as well as your root password for Wazo GUI access using a web browser. You’ll also need to set a PIN that will be used to authorize access to extension 123 to schedule Telephone Reminders on your server. This completes the configuration. You’ll get a final screen showing the credentials for the preconfigured 701 and 702 extensions as well as a reminder that your PortKnocker credentials are stored in /root/knock.FAQ in the event you ever lock yourself out of your machine. It’s a good idea to leave this screen displayed while you install and configure a softphone since you can cut-and-paste your extension 702 credentials without having to type anything. Extension 701 comes preconfigured to support WebRTC using a Chrome or Firefox browser.
Once you complete the SIP or WebRTC setup below, you can return to the SSH window and press ENTER to finish the install. The Incredible PBX Automatic Update Utility will run, and then you will be presented with the pbxstatus display. You can access the Asterisk CLI by typing: asterisk -rvvvvvvvvvv. Exit from the CLI by typing quit. As mentioned previously, always shut down your server gracefully by typing halt. When prompted for the hostname, type xivo. Once the shutdown procedure finishes, it’s safe to turn off your virtual machine.
Choosing a SIP Softphone for Incredible PBX
Softphones tend to be a matter of taste for most folks so we’ll keep our suggestions to a minimum. On the Windows platform, it’s hard to go wrong with X-Lite. It works out of the box by simply plugging in the IP address of your server and your SIP username and password. It also happens to be free. The only downside is that X-Lite has a nasty habit of embedding time bombs in their free software so you may have to reinstall it from time to time. If you know what you’re doing, Zoiper is another alternative but be advised that it doesn’t work out of the box on servers behind NAT-based routers.
On the Mac platform, our favorite free softphone is Telephone. It’s a barebones SIP client that just works. As with X-Lite, you plug in your server’s IP address and SIP credentials, and you’re in business.
On the Linux or Solaris platforms, we assume that you know what you’re doing and that you are perfectly capable of choosing and installing a SIP phone that meets your requirements.
Incredible PBX Application Quick Start Guide
We’ve finished the basic Incredible PBX for Wazo setup. You now have a functioning PBX with dozens of applications for Asterisk that work out of the box. It’s probably a good idea to spend a little time getting acquainted with Incredible PBX for Wazo before you add trunks to communicate with the outside world.
Here’s a handy cheat sheet for some of the Incredible PBX applications that have been installed or are available as add-ons. There’s also a link for more information.
- Google Voice CLI interface and SMS Message Blasting (Add-On)
- CallerID Superfecta – Match Names to CallerID Numbers
- CallerID Blacklist – Block Calls from Spammers and Old Girlfriends
- CDR Reports in CSV Format
- CDR Reports in SQLite3 Format
- Asteridex – The Poor Man’s Rolodex (SQLite3 version)
- AsteriDex Click-to-Dial with Wazo Phonebook
- NeoRouter VPN for Wazo
- FCC RoboCall BlackList
- CallerID WhiteList Override
- Dial 123 – Telephone Reminders
- Dial 411 – Call by Name from AsteriDex
- Dial 947 – Weather Forecasts by ZIP Code
- Dial 951 – Latest Yahoo News
- Dial 2663 – Conference Call
- Dial 3472 – DISA Access
- Dial 4871 – Allison’s Sample IVR
- Dial *881400 – Schedule an Alarm for 2 p.m. (1400 military time)
- Dial 53669 – Meet Lenny, the Robocaller’s Worst Nightmare
Configuring Trunks and Routes with Wazo
The next step in your Wazo adventure is connecting your PBX to the outside world so that you can make and receive phone calls from anywhere in the world. For this you’ll need one or more trunks. Unlike the Ma Bell world, there’s no reason to put all your eggs in one basket. You can use one or more trunk providers for incoming calls with separate phone numbers for each. And you can use one or more trunk providers for outgoing calls and save money on calls to certain countries by choosing the best provider for where you want to call. And, of course, if you live in the United States, you can set up one or more Google Voice trunks and make calls to the U.S. and Canada for free. We’ve written a number of tutorials to make it easy to set up these trunks.
To get started, point a web browser to the IP address of your PBX. Login as root with the Wazo GUI password you set up above. If you ever forget your password, you can run /root/admin-pw-change to reconfigure it.
Wazo Trunk Implementation Tutorials
- Wazo Trunks Tutorial: Installing a Vitelity SIP Trunk2
- Wazo Trunks Tutorial: Installing a VoIP.ms SIP Trunk
- Wazo Trunks Tutorial: Installing a FreeVoipDeal (Betamax) SIP Trunk
- Wazo Trunks Tutorial: Installing a Google Voice-Simonics SIP Trunk
- Wazo Trunks Tutorial: Deploying Native Google Voice with OAuth Trunks
- Wazo Trunks Tutorial: Installing an Anveo Direct Outbound SIP Trunk
- Wazo Trunks Tutorial: Installing a Skype Connect SIP Trunk
Once you’ve added one or more trunks, you’ll need to tell Wazo how to route outgoing and incoming calls. Here are our step-by-step tutorials on setting up Outbound Calling Routes and Incoming Call Routes:
Wazo Call Routing Tutorials
- Wazo Call Routing Tutorial: Creating Outbound Routes for PSTN Calling
- Wazo Call Routing Tutorial: Creating Inbound Routes for DIDs
Now you’re ready to explore. We recommend you read through the Incredible PBX for Wazo tutorial to familiarize yourself with the inner workings of Wazo. Enjoy the ride!
Originally published: Monday, June 12, 2017
Need help with Asterisk? Visit the PBX in a Flash Forum.
Special Thanks to Our Generous Sponsors
FULL DISCLOSURE: ClearlyIP, Skyetel, Vitelity, DigitalOcean, Vultr, VoIP.ms, 3CX, Sangoma, TelecomsXchange and VitalPBX have provided financial support to Nerd Vittles and our open source projects through advertising, referral revenue, and/or merchandise. As an Amazon Associate and Best Buy Affiliate, we also earn from qualifying purchases. We’ve chosen these providers not the other way around. Our decisions are based upon their corporate reputation and the quality of their offerings and pricing. Our recommendations regarding technology are reached without regard to financial compensation except in situations in which comparable products at comparable pricing are available from multiple sources. In this limited case, we support our sponsors because our sponsors support us.
BOGO Bonaza: Enjoy state-of-the-art VoIP service with a $10 credit and half-price SIP service on up to $500 of Skyetel trunking with free number porting when you fund your Skyetel account. No limits on number of simultaneous calls. Quadruple data center redundancy. $25 monthly minimum spend required. Tutorial and sign up details are here.
![]() The lynchpin of Incredible PBX 2020 and beyond is ClearlyIP components which bring management of FreePBX modules and SIP phone integration to a level never before available with any other Asterisk distribution. And now you can configure and reconfigure your new Incredible PBX phones from the convenience of the Incredible PBX GUI.
The lynchpin of Incredible PBX 2020 and beyond is ClearlyIP components which bring management of FreePBX modules and SIP phone integration to a level never before available with any other Asterisk distribution. And now you can configure and reconfigure your new Incredible PBX phones from the convenience of the Incredible PBX GUI.
VitalPBX is perhaps the fastest-growing PBX offering based upon Asterisk with an installed presence in more than 100 countries worldwide. VitalPBX has generously provided a customized White Label version of Incredible PBX tailored for use with all Incredible PBX and VitalPBX custom applications. Follow this link for a free test drive!
Special Thanks to Vitelity. Vitelity is now Voyant Communications and has halted new registrations for the time being. Our special thanks to Vitelity for their unwavering financial support over many years and to the many Nerd Vittles readers who continue to enjoy the benefits of their service offerings. We will keep everyone posted on further developments.
Some Recent Nerd Vittles Articles of Interest…
- Many of our purchase links refer users to Amazon when we find their prices are competitive for the recommended products. Nerd Vittles receives a small referral fee from Amazon to help cover the costs of our blog. We never recommend particular products solely to generate Amazon commissions. However, when pricing is comparable or availability is favorable, we support Amazon because Amazon supports us. [↩]
- Vitelity is a platinum sponsor of Nerd Vittles, and they also happen to be the best in the business. You’ll find a discount coupon to get a great deal on a DID and 4-channel trunk toward the end of this article. [↩]
Twofer Tuesday: 2 Cloud Servers for the Price of a RasPi

It’s been more than a year since we last chatted about Cloud At Cost. Because they’re in the midst of yet another 50% off Fire Sale and to close out February with a bang, it seemed like a good time to take a fresh look at a terrific way to get started with Linux. For today’s $35 cloud project, we’re going to build a free WordPress server and a free commercial PBX compliments of 3CX. For what it’s worth, we’ve been running a PIAF5 server at CloudAtCost for more than four months without a single hiccup. It provides flawless Google Voice calling from either a connected SIP phone or from the 3CX Client running on a SIM-free Android phone or iPhone. See our recent article for tips on setting up a SIM-free mobile phone.
For those coming from the Windows World, Linux can be a little intimidating. Learning with a Cloud-based server presents its own challenges because of the security issues when your server sits on the public Internet. And then there’s the cost factor. Not everyone has several hundred dollars to buy hardware and, frankly, learning about Linux on a $35 Raspberry Pi can drive most folks to drink. So today we’ll show you another way. It’s not necessarily a better way. But it’s different, and it’s loads of fun for not much money. Today’s project takes about an hour, and you’ll have two terrific Linux applications to play with for life when we’re finished.
There’s lots to hate at Cloud At Cost, a Canadian provider that offers virtual machines in the cloud for a one-time fee with no recurring charges. For $35, you currently get two virtual machine platforms, and each has 512MB of RAM, 10GB of storage, and a gigabit Internet connection FOR LIFE. We haven’t seen a week go by when Cloud at Cost didn’t offer some sort of discount. Today it’s 50% off which brings the per server cost down to $17.50 each. That’s less than most lunches these days. If you don’t like half off and would prefer to wait for a better discount, check their Twitter feed every few days. So that’s the good news. But, if 99.999% reliability, performance, and excellent customer support are your must-haves, then look elsewhere. So why would anyone in their right mind sign up for a cloud solution that didn’t offer those things? Did we mention it’s $17.50 for a lifetime cloud server!
If you take our recommendation, you’ll need to go into this with the right attitude. It’s not going to be flawless perfection computing. It’s a sandbox on which to experiment with Linux, and VoIP, and Cloud Computing. Will your virtual machine disintegrate at some juncture? Maybe so. We’ve had about a third of ours fail at some point. But you can rebuild them easily, especially if you keep a backup. Our experience is that the first couple days are critical. If you start seeing sluggish performance which degenerates to zero, don’t waste your time. Take good notes as you go along, delete the virtual machine, and rebuild a new one. It won’t cost you a dime, and it’ll save you hours of frustration. We suspect that bad folks get onto some of the servers and delight in bringing the machines to their knees. So the quicker you cut your losses, the better off you will be. Is CloudAtCost a good solution for production use? Don’t risk it unless waterboarding is your favorite sport. It’s probably not gonna work, and you WILL be disappointed. Repeat after me: IT’S A SANDBOX!
Building a LAMP Server in the Cloud
Our first objective today is to show you how to build a rock-solid, secure Linux server in the Cloud with all the bells and whistles that make Linux the server platform of choice for almost every organization in the world. We’ll continue by showing you how to embellish the platform with WordPress to do something that’s special for you whether it’s your own blog like Nerd Vittles, or a school newspaper, or an on-line shopping site to sell comic books. The basic foundation for most Linux platforms is called a LAMP server which stands for Linux, Apache, MySQL, and PHP. Linux is an open source operating system that includes contributions from thousands of developers around the world. Apache is the web server platform on which most commercial businesses stake their reputation. MySQL is the open source database management system now owned by Oracle. If it’s good enough for Facebook, it’s good enough for you. And PHP is THE web-based programming language that will let you build almost any application using Linux, Apache, and MySQL.
So what’s the big deal? There are thousands of online tutorials that will show you how to build a LAMP server. For long time readers of Nerd Vittles, you already know that the component we continually stress is security. Without that, the rest really doesn’t matter. You’ll be building a platform for someone else to hijack and use for nefarious purposes. When we’re finished with today’s Project #1, you’ll have a cloud-based LAMP server that is totally invisible to the rest of the world with the exception of its web interface. And we’ll show you a simple way to reduce the exposure of that web interface to some of its most likely attackers. Will it be 100% secure? Nope. If you have a web server on the public Internet, it’s never going to be 100% secure because there’s always the chance of a software bug that nobody has yet discovered and corrected. THAT’S WHAT BACKUPS ARE FOR!
Creating a CentOS Machine in the Cloud
To get started, you’ve got to plunk down your $35 at Cloud at Cost. This buys you two server platforms while they’re cheap! Once you’ve paid the piper, they will send you credentials to log into the Cloud at Cost Management Portal. Change your password IMMEDIATELY after logging in. Just go to SETTINGS and follow your nose.
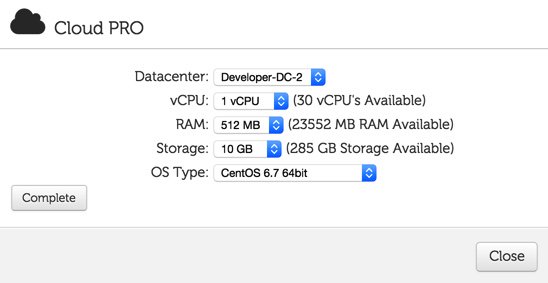
To create your first virtual machine, click on the CLOUDPRO button and click Add New Server. If you’ve only purchased the $17.50 CloudPRO 1 platform, then you’ll need all of the available resources shown in the pick list. Otherwise, choose 1 CPU, 512MB RAM, and 10GB storage for your first server. Leave CentOS 6.7 64bit selected as the OS Type and click Complete. Depending upon the type of special pricing that Cloud at Cost is offering when you sign up, the time to build your virtual machine can take anywhere from a minute to the better part of a day. We’ve learned to build new virtual machines at night, and they’re usually available for use by the next morning. Luckily, this slow performance does not impact existing virtual machines that already are running in their hosting facility.
Initial Configuration of Your CentOS 6 VM
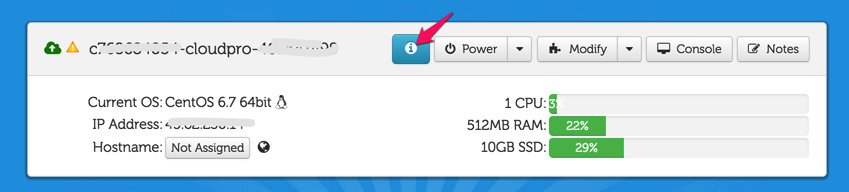
With a little luck, your virtual machine soon will appear in your Cloud at Cost Management Portal and look something like what’s shown above. The red arrow points to the i button you’ll need to click to decipher the password for your new virtual machine. You’ll need both the IP address and the password for your new virtual machine in order to log into the server which is now up and running with a barebones CentOS 6.7 operating system. Note the yellow caution flag. That’s telling you that Cloud at Cost will automatically shut down your server in a week to save (them) computing resources. You can change the setting to keep your server running 24/7. Click Modify, Change Run Mode, and select Normal – Leave Powered On. Click Continue and OK to save your new settings.

Finally, you’ll want to change the Host Name for your server to something more descriptive than c7…cloudpro.92… Click the Modify button again and click Rename Server to make the change. Your management portal then will show the new server name as shown above.
Logging into Your CentOS 6 VM
In order to configure and manage your new CentOS 6 virtual machine, you’ll need to log into the new server using either SSH or, for Windows users, Putty. After installing Putty, run it and log in to the IP address of your VM with username root and the password you deciphered above. On a Mac, open a Terminal session and issue a command like this using the actual IP address of your new virtual machine:
ssh root@12.34.56.78
Before you do anything else, reset your root password to something very secure: passwd
Installing the LAMP Server Basics
Now we’re ready to build your LAMP server platform. We’ve chopped this up into lots of little steps so we can explain what’s happening as we go along. There’s nothing hard about this, but we want to document the process so you can repeat it at any time. As we go along, just cut-and-paste each clump of code into your SSH or Putty session and review the results to make sure nothing comes unglued. If something does, the beauty of virtual machines is you can delete them instantly within your management portal and just start over whenever you like. So here we go…
We’ll begin by permanently turning off SELINUX which causes more problems than it solves. The first command turns it off instantly. The second line assures that it’ll stay off whenever you reboot your virtual machine.
setenforce 0
sed -i s/SELINUX=enforcing/SELINUX=disabled/g /etc/selinux/config
First, let’s address a couple of CloudAtCost quirks that may cause problems down the road. CloudAtCost has a nasty habit of not cleaning up after itself with fresh installs. The net result is your root password gets reset every time you reboot.
killall plymouthd
echo killall plymouthd >> /etc/rc.local
rm -f /etc/rc3.d/S97*
Now let’s bring CentOS 6.7 up to current CentOS 6.8 specs and add a few important applications:
yum -y update
yum -y install nano wget expect net-tools dialog git xz
yum -y install kernel-headers
yum -y install kernel-devel
reboot
After reboot, log back in as root. Now we’ll set up your Apache web server and configure it to start whenever you reboot your server:
yum -y install httpd
service httpd start
chkconfig httpd on
Next, let’s set up your MySQL server, bring it on line, and make sure it restarts after server reboots. Unless you plan to add Asterisk® and FreePBX® to your server down the road, you’ll want to uncomment the two commands that begin with # by removing the # symbol and replacing new-password with a very secure password for your root user account in MySQL. Be sure to run the last command to secure your server. After logging in, the correct answers are n,Y,Y,Y,Y.
yum -y install mysql mysql-server
service mysqld start
chkconfig mysqld on
#/usr/bin/mysqladmin -u root password 'new-password'
#/usr/bin/mysqladmin -u root -p -h localhost.localdomain password 'new-password'
mysql_secure_installation
Next, we’ll set up PHP and configure it to work with MySQL:
yum -y install php
yum -y install php-mysql
service httpd restart
Finally let’s get SendMail installed and configured. Insert your actual email address in the last line and send yourself a test message to be sure it’s working. Be sure to check your spam folder since the message will show a sender address of localhost which many email systems including Gmail automatically identify as spam.
yum -y install sendmail
rpm -e postfix
service sendmail restart
yum -y install mailx
echo "test" | mail -s testmessage youracctname@yourmailserver.com
Installing Supplemental Repositories
One of the beauties of Linux is not being totally dependent upon CentOS for all of your packaged applications. Let’s add a few other repositories that can be used when you need to add a special package that is not in the CentOS repository. Let’s start with EPEL. We’ll disable it by default and only use it when we need it.
yum -y install http://download.fedoraproject.org/pub/epel/6/x86_64/epel-release-6-8.noarch.rpm
sed -i 's|enabled=1|enabled=0|' /etc/yum.repos.d/epel.repo
We actually need the EPEL repo to install Fail2Ban for monitoring of attacks on certain Linux services such as SSH:
yum --enablerepo=epel install fail2ban -y
cd /etc
wget http://incrediblepbx.com/fail2ban-lamp.tar.gz
tar zxvf fail2ban-lamp.tar.gz
Another important repository is REMI. It is especially helpful if you decide to upgrade PHP from the default version 5.3 to one of the newer releases: 5.5 or 5.6. In this case, you’ll want to activate the specific repository to support the release you choose in /etc/yum.repos.d/remi-safe.repo.
yum -y install http://rpms.famillecollet.com/enterprise/remi-release-6.rpm
sed -i 's|enabled=1|enabled=0|' /etc/yum.repos.d/remi-safe.repo
One final repository to have on hand is RPMForge, now renamed RepoForge. We’ll use it in a bit to install a dynamic DNS update utility which you actually won’t need at CloudAtCost since your server is assigned a static IP address. But it’s handy to have in the event you wish to assign a free FQDN to your server anyway.
yum -y install http://incrediblepbx.com/rpmforge-release-0.5.3-1.el6.rf.x86_64.rpm
sed -i 's|enabled = 1|enabled = 0|' /etc/yum.repos.d/rpmforge.repo
Country Blocking with IPSET
We’ll use the EPEL repo to install ipset, a terrific addition to the IPtables Linux firewall that lets you quickly block entire countries from accessing your server:
yum --enablerepo=epel install ipset -y
Next, we’ll add a sample script that documents how the country blocking mechanism works with ipset. For a complete list of countries that can be blocked, go here. If you need a decoder badge to match abbreviations against country names, you’ll find it here. To add other countries, simply edit the shell script and clone lines 4-7 using the names of the countries and country zone files that you wish to add. Be sure to insert the new lines before the commands to restart iptables and fail2ban. This script will need to be run each time your server reboots and before IPtables is brought on line. We’ll handle that a little later.
echo "#\\!/bin/bash" > /etc/block-china.sh
echo " " >> /etc/block-china.sh
echo "cd /etc" >> /etc/block-china.sh
echo "ipset -N china hash:net" >> /etc/block-china.sh
echo "rm cn.zone" >> /etc/block-china.sh
echo "wget -P . http://www.ipdeny.com/ipblocks/data/countries/cn.zone" >> /etc/block-china.sh
echo "for i in \$(cat /etc/cn.zone ); do ipset -A china \$i; done" >> /etc/block-china.sh
echo "service iptables restart" >> /etc/block-china.sh
echo "service fail2ban restart" >> /etc/block-china.sh
sed -i 's|\\\\||' /etc/block-china.sh
chmod +x /etc/block-china.sh
Adding a Few Handy Utilities
If you’re like us, you’ll want to test the speed of your Internet connection from time to time. Let’s install a free script that you can run at any time by logging into your server as root and issuing the command: /root/speedtest.py. Here were our results from last year. Running speedtest on a new server we built today showed a vast improvement in performance. Downloads were over ten times as fast, and upload speeds more than tripled. In fact, we now are using two CloudAtCost servers to host the old PIAF3 repositories.
cd /root
wget https://raw.githubusercontent.com/sivel/speedtest-cli/master/speedtest.py
chmod +x speedtest.py
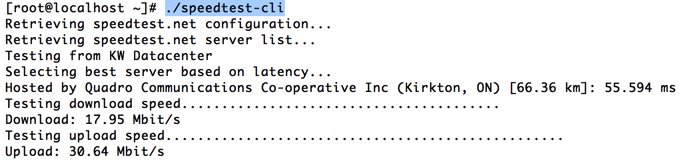
Next, let’s put in place a simple status display which will quickly tell you what’s running and what’s not. We’ve borrowed some GPL code from Incredible PBX to help you out. Run status-lamp at any time for a snapshot of your server.
cd /usr/local/sbin
wget http://incrediblepbx.com/status-lamp.tar.gz
tar zxvf status-lamp.tar.gz
rm -f status-lamp.tar.gz
sed -i 's|myip.pbxinaflash.com|myip.incrediblepbx.com|' /usr/local/sbin/status-lamp
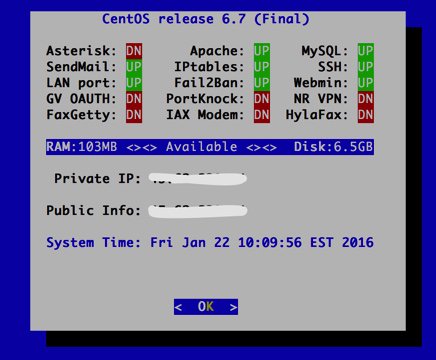
Now we’ll put the Linux Swiss Army Knife in place. It’s called WebMin, and it provides a GUI to configure almost everything in Linux. Pick up a good WebMin book from your public library to get started. Once installed, you access WebMin from your browser at the IP address of your server on the default port of 10000: https://serverIPaddress:10000. It’s probably a good idea to change this port number and the commented out line shows how to do it with the new port being 9001 in the example. The way in which we typically configure the Linux firewall will block all access to WebMin except from an IP address which you have whitelisted, e.g. your home computer’s public IP address.
cd /root
yum -y install perl perl-Net-SSLeay openssl perl-IO-Tty
yum -y install http://prdownloads.sourceforge.net/webadmin/webmin-1.831-1.noarch.rpm
#sed -i 's|10000|9001|g' /etc/webmin/miniserv.conf
service webmin restart
chkconfig webmin on
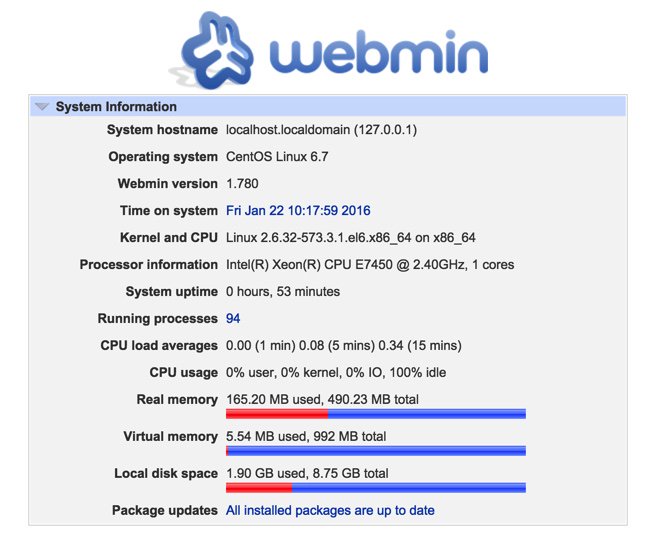
Configuring the Linux IPtables Firewall
RULE #1: DON’T BUILD SERVERS EXPOSED TO THE INTERNET WITHOUT SECURITY!
As installed by CloudAtCost, your server provides ping and SSH access from a remote computer and nothing else. The good news: it’s pretty safe. The bad news: it can’t do anything useful for anybody because all web access to the server is blocked. We want to fix that, tighten up SSH access to restrict it to your IP address, and deploy country blocking to show you how.
As we implement the firewall changes, you need to be extremely careful in your typing so that you don’t accidentally lock yourself out of your own server. A typo in an IP address is all it takes. The good news is that, if you do lock yourself out, you still can gain access via the CloudAtCost Management Portal by clicking the Console button of your virtual machine. Because the console is on the physical machine and the lo interface is whitelisted, you can log in and disable the firewall temporarily: service iptables stop. Then fix the typo and restart the firewall: service iptables start.
First, let’s download the new IPtables config file into your root folder and take a look at it.
cd /root
wget http://incrediblepbx.com/iptables-lamp.tar.gz
tar zxvf iptables-lamp.tar.gz
Now edit the /root/iptables-lamp file by issuing the command: nano -w /root/iptables-lamp
You can scroll up and down through the file with Ctl-V and Ctl-Y. Cursor keys work as well. Once you make changes, save your work: Ctl-X, Y, ENTER. You’re now an expert with the nano text editor, an absolutely essential Linux tool.
Here’s what that file actually looks like:
*filter
:INPUT DROP [0:0]
:FORWARD ACCEPT [0:0]
:OUTPUT ACCEPT [0:0]
-A INPUT -p tcp -m tcp --tcp-flags ACK ACK -j ACCEPT
-A INPUT -m state --state ESTABLISHED,RELATED -j ACCEPT
-A INPUT -p icmp -j DROP
-A INPUT -i lo -j ACCEPT
-A INPUT -p tcp ! --syn -m state --state NEW -j DROP
-A INPUT -m state --state INVALID -j DROP
-A INPUT -p tcp -m tcp --tcp-flags FIN,SYN,RST,PSH,ACK,URG NONE -j DROP
-A INPUT -p tcp -m tcp --tcp-flags SYN,FIN SYN,FIN              -j DROP
-A INPUT -p tcp -m tcp --tcp-flags SYN,RST SYN,RST              -j DROP
-A INPUT -p tcp -m tcp --tcp-flags FIN,RST FIN,RST              -j DROP
-A INPUT -p tcp -m tcp --tcp-flags ACK,FIN FIN                  -j DROP
-A INPUT -p tcp -m tcp --tcp-flags ACK,URG URG                  -j DROP
-A INPUT -p tcp -m set --match-set china src                    -j DROP
-A INPUT -p udp -m udp --dport 53 -j ACCEPT
-A INPUT -p tcp -m tcp --dport 53 -j ACCEPT
-A INPUT -p tcp -m tcp --dport 113 -j ACCEPT
-A INPUT -p udp -m udp --dport 123 -j ACCEPT
-A INPUT -p tcp -m tcp --dport 123 -j ACCEPT
-A INPUT -m state --state NEW -m tcp -p tcp --dport 22 -j ACCEPT
#-A INPUT -s 12.34.56.78 -j ACCEPT
#-A INPUT -s yourFQDN.dyndns.org -j ACCEPT
-A INPUT -p tcp -m tcp --dport 80 -j ACCEPT
-A INPUT -j REJECT --reject-with icmp-host-prohibited
-A FORWARD -j REJECT --reject-with icmp-host-prohibited
COMMIT
Reminder: If you add another country to your block-china script, don’t forget to add a corresponding new country entry to your iptables file. See line 17 above that includes the word "china" for the syntax. There’s nothing much else to tweak except the two commented out (brown) lines that begin with #. First, remove the # symbol by moving the cursor to the right of the first one and hitting the backspace/delete key on your keyboard. Replace 12.34.56.78 with the public IP address of the computer from which you will be accessing your virtual machine. If you need multiple entries for multiple computers at different addresses, clone the line by pressing Ctrl-K and then Ctrl-U twice. Yes, we know. Some folks IP addresses change from time to time. In the next section, we’ll show you how to set up a Dynamic DNS entry with a utility that will keep track of your current IP address. In this case, uncomment the second commented line and replace yourFQDN.dyndns.org with your dynamic DNS address. Be very careful to assure that your FQDN is always on line. If the firewall cannot verify your DNS entry when it starts, the IPtables firewall will not start which means your server will be left unprotected. HINT: IP addresses are much safer because they are never verified.
Once you have your whitelisted addresses configured, comment out the port 22 line to keep the bad guys from trying to break into your server with SSH. Then save the file: Ctl-X, Y, ENTER. Next, issue the following commands to copy everything into place and restart the firewall.
mv /etc/sysconfig/iptables /etc/sysconfig/iptables.orig
cp -p /root/iptables-lamp /etc/sysconfig/iptables
echo "/etc/block-china.sh" >> /etc/rc.local
/etc/block-china.sh
Always, always, always check to be sure your firewall is functioning: iptables -nL. If you don’t see your desktop computer’s public IP address near the end of the listing, then the firewall is dead. status-lamp should also show IPtables down. Check for an error message which will tell you the problematic line so you can correct it.
Implementing Dynamic DNS Service
There are a number of free and paid Dynamic DNS providers. The way this works is you choose a fully-qualified domain name (FQDN) to identify your computer. Then you run a dynamic DNS update utility periodically from that computer. It reports back the current public IP address of your computer and your provider updates the IP address assigned to your FQDN if it has changed. In addition to supporting sites with ever changing IP addresses, it also allows you to permanently assign an FQDN to your computer or server so that it can be accessed without using a cryptic IP address.
If that computer happens to be an Incredible PBX server or a LAMP server that you’ve set up using this tutorial, then the following will get the DNS client update utility loaded using the RPM Forge repository that we previously installed:
yum --enablerepo=rpmforge install ddclient -y
Similar DNS update clients are available for Windows, Mac OS X, and many residential routers. Then it’s just a matter of plugging in the credentials for your dynamic DNS provider and your FQDN. In the case of the CentOS client, the config file is /etc/ddclient/ddclient.conf. Now reboot your server and pick up a good book on Linux to begin your adventure.
Now For Some Fun…
First, let’s check things out and make sure everything is working as it should. With your favorite web browser, visit the IP address of your new server. You should see the default Apache page:
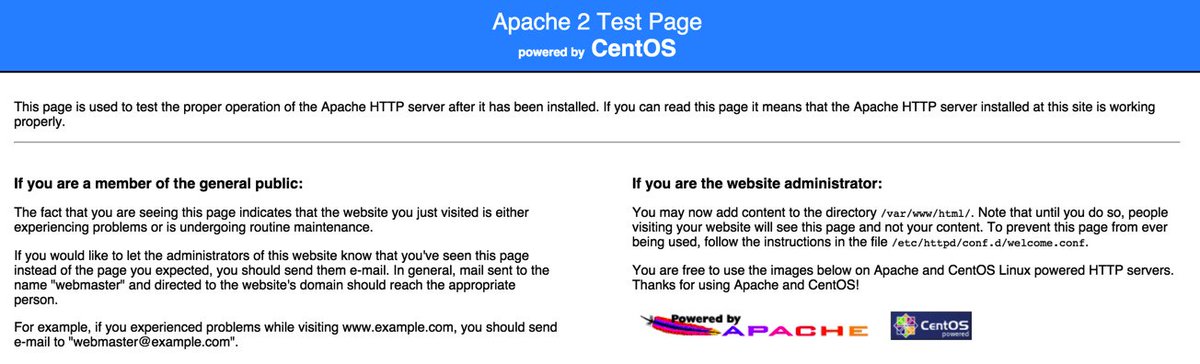
Next, let’s be sure that PHP is working as it should. While still logged into your server as root using SSH or Putty, issue the following commands and make up some file name to replace test4567 in both lines. Be sure to keep the .php file name extension. Note to gurus: Yes, we know the second line below is unnecessary if you remove the space after the less than symbol in the first line. Unfortunately, WordPress forces the space into the display which left us no alternative.
echo "< ?php phpinfo(); ?>" > /var/www/html/test4567.php
sed -i 's|< |<|' /var/www/html/test4567.php
Now jump back to your web browser and access the new page you just created using the IP address of your server and the file name you made up: http://12.34.56.78/test4567.php
The PHPinfo listing will tell you everything you ever wanted to know about your web server setup including all of the PHP functions that have been enabled. That's why you want an obscure file name for the page. You obviously don't want to share that information with every bad guy on the planet. Remember. This is a public-facing web site that anyone on the Internet can access if they know or guess your IP address.

When you're ready to set up your own web site, just name it index.php and store the file in the /var/www/html directory of your server. In the meantime, issuing the following command will assure that anyone accessing your site gets a blank page until you're ready to begin your adventure:
echo " " > /var/www/html/index.php
Ready to learn PHP programming? There's no shortage of books to get you started.
Adding WordPress to Your LAMP Server
Where to begin with WordPress? What used to be a simple platform for bloggers has morphed into an all-purpose tool that makes building virtually any type of web site child's play. If you want to see what's possible, take a look at the templates and sample sites shown on WPZOOM. Unless you're an art major and savvy web designer, this will be the best $70 you ever spent. One of these templates will have your site up and running in minutes once we put the WordPress pieces in place. For the big spenders, $149 will give you access to over 50 gorgeous templates which you can download and use to your heart's content on multiple sites. And, no, your sites don't blow up after a year. You just can't download any additional templates or updates unless you renew your subscription. The other alternative is choose from thousands of templates that are provided across the Internet as well as in the WordPress application itself.
WordPress templates run the gamut from blogs to newsletters to photographer sites to e-commerce to business portfolios to video to travel to magazines to newspapers to education to food to recipes to restaurants and more. Whew! There literally is nothing you can't put together in minutes using a WordPress template. But, before you can begin, we need to get WordPress installed on your server. This is optional, of course. And, if you follow along and add WordPress, we've set it up in such a way that WordPress becomes the primary application for your site. Stated differently, when people use a browser to access your site, your WordPress template will immediately display. When we finish the basic WordPress setup and once you upload an image or two, you'll have a site that looks something like this:

Before you begin, we strongly recommend that you acquire a domain for your site if you plan to use it for anything but experimentation. The reason is because it can be complicated to migrate a WordPress site from one location to another.1 Once you've acquired your domain, point the domain to the IP address of your new server. With a dirt cheap registrar such as Omnis.com, it's easy:
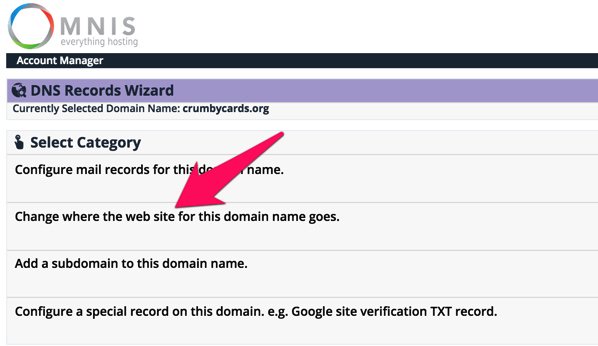
Now let's get started. To begin, we need to load the WordPress application onto your server:
cd /root
mkdir wordpress
cd wordpress
wget http://wordpress.org/latest.tar.gz
tar -xvzf latest.tar.gz -C /var/www/html
Next, we'll configure MySQL to support WordPress. We're assuming that you have NOT already created root passwords for MySQL. If you have, you'll need to add -pYourPassword to the various commands below immediately after root. There is no space between -p and your root password. Also edit the first line and make up a new password (replacing XYZ below) for the wordpress user account that will manage WordPress on your server before you cut and paste the code:
mysql -u root -e 'CREATE USER wordpress@localhost IDENTIFIED BY "XYZ";'
mysql -u root -e 'CREATE DATABASE wordpress;'
mysql -u root -e 'GRANT ALL ON wordpress.* TO wordpress@localhost;'
mysql -u root -e 'FLUSH PRIVILEGES;'
Next, we need to configure WordPress with your new MySQL credentials. Before you cut and paste, replace XYZ in the fourth line with the password you assigned in the preceding MySQL step:
cp /var/www/html/wordpress/wp-config-sample.php /var/www/html/wordpress/wp-config.php
sed -i 's|database_name_here|wordpress|' /var/www/html/wordpress/wp-config.php
sed -i 's|username_here|wordpress|' /var/www/html/wordpress/wp-config.php
sed -i 's|password_here|XYZ|' /var/www/html/wordpress/wp-config.php
chown -R apache:apache /var/www/html/wordpress
Before you forget, take a moment and create a very secure password for your MySQL root user accounts. Here are the commands. Just replace new-password with your new password before you cut and paste. Note that you also will be prompted for this password when you execute the second command because you will now have a root user password in place from executing the first command.
/usr/bin/mysqladmin -u root password 'new-password'
/usr/bin/mysqladmin -u root -p -h localhost.localdomain password 'new-password'
Finally, we need to modify your Apache web server to support WordPress as the primary application. Be sure to enter your actual email address in the third line before you cut and paste the code below:
echo " " >> /etc/httpd/conf/httpd.conf echo "" >> /etc/httpd/conf/httpd.conf echo 'ServerAdmin somebody@somedomain.com' >> /etc/httpd/conf/httpd.conf echo "DocumentRoot /var/www/html/wordpress" >> /etc/httpd/conf/httpd.conf echo "ServerName wordpress" >> /etc/httpd/conf/httpd.conf echo "ErrorLog /var/log/httpd/wordpress-error-log" >> /etc/httpd/conf/httpd.conf echo "CustomLog /var/log/httpd/wordpress-acces-log common" >> /etc/httpd/conf/httpd.conf echo " " >> /etc/httpd/conf/httpd.conf echo " " >> /etc/httpd/conf/httpd.conf service httpd restart
That should do it. Open a browser and navigate to the IP address of your server. You should be greeted with the following form. Fill in the blanks as desired. The account you're setting up will be the credentials you use to add and modify content on your WordPress site when you click Log In (as shown above). Make the username obscure and the password even more so. Remember, it's a public web site accessible worldwide! When you click Install WordPress, you'll be off to the races.
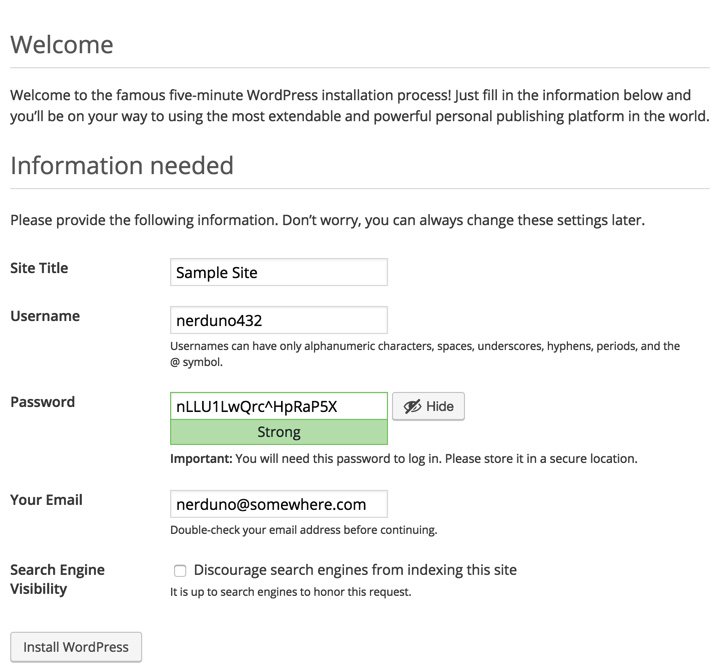
After your server whirs away for a minute or two, you will be greeted with the WordPress login prompt. With the username and password you entered above, you'll be ready to start configuring your WordPress site.

Once you're logged in, navigate to Appearance -> Themes and click Add New Theme. There's you will find literally hundreds of free WordPress templates that can be installed in a matter of seconds if WPZOOM is too rich for your blood. For a terrific all-purpose (free) theme, try Atahualpa. We'll leave our actual demo site running for a bit in case you want to explore and check out its performance. Installing and configuring the new theme took less than a minute:

A Final Word to the Wise. WordPress is relatively secure but new vulnerabilities are discovered regularly. Keep your templates, plug-ins, AND the WordPress application up to date at all times! The WordFence plug-in is a must-have. And we strongly recommend adding the following lines to your WordPress config file which then will let WordPress update everything automatically. Microsoft has given automatic updates a bad name, but in the case of WordPress, they work well.
echo "define('WP_AUTO_UPDATE_CORE', true);" >> /var/www/html/wordpress/wp-config.php
echo "add_filter( 'auto_update_plugin', '__return_true' );" >> /var/www/html/wordpress/wp-config.php
echo "add_filter( 'auto_update_theme', '__return_true' );" >> /var/www/html/wordpress/wp-config.php

Building a 3CX Server in the Cloud
Now we're ready for our second cloud project. In less than 10 minutes, we're going to build a free 3CX commercial PBX using the remaining Cloud resources from our $35 purchase. To create your second virtual machine, click on the CLOUDPRO button in the CloudAtCost control panel and then click Add New Server. Choose 1 CPU, 512MB RAM, and 10GB storage for your second server. Choose Debian 8 64bit as the OS Type and click Complete.
Obtain a free license key for 3CX. Next, log in to your new Debian server as root using SSH or Putty and issue these commands. We'll begin by changing your root password.
NOTE: What appears as the fourth line below needs to be added to line #3!
passwd
wget -O- http://downloads.3cx.com/downloads/3cxpbx/public.key | apt-key add -
echo "deb http://downloads.3cx.com/downloads/3cxpbx/ /" | tee /etc/apt/sources.list.d/3cxpbx.list
apt-get update
rm -f /zang-debian.sh
apt-get -y install 3cxpbx
apt-get -y install sendmail sendmail-bin
When the initial setup finishes, choose the Web Interface Wizard and complete the install using your favorite web browser. Enter your 3CX license key when prompted. Make up a very secure Username and Password to access your 3CX portal. Specify that your IP address is Dynamic when prompted (even though it isn't). This tells 3CX to generate an FQDN for your server. Accept the default ports for HTTP (5000) and HTTPS (5001) access to your server. We recommend choosing 4-digit extensions numbers so you'll be ready for next week's project interconnecting your 3CX server to a Raspberry Pi for the best of both worlds. While logged into the 3CX management portal, adjust Settings → Email to Mail Server → 127.0.0.1 and Reply to → noreply@YourActual3CX-FQDN. Leave the other settings blank and click TEST then OK. Set up a SIP trunk with inbound and outbound call routes. Now download your favorite 3CX smartphone client, send yourself the Welcome Email for your default extension, and start calling. It really doesn't get much easier in the VoIP World. Come join the PIAF Forum if you need a helping hand!
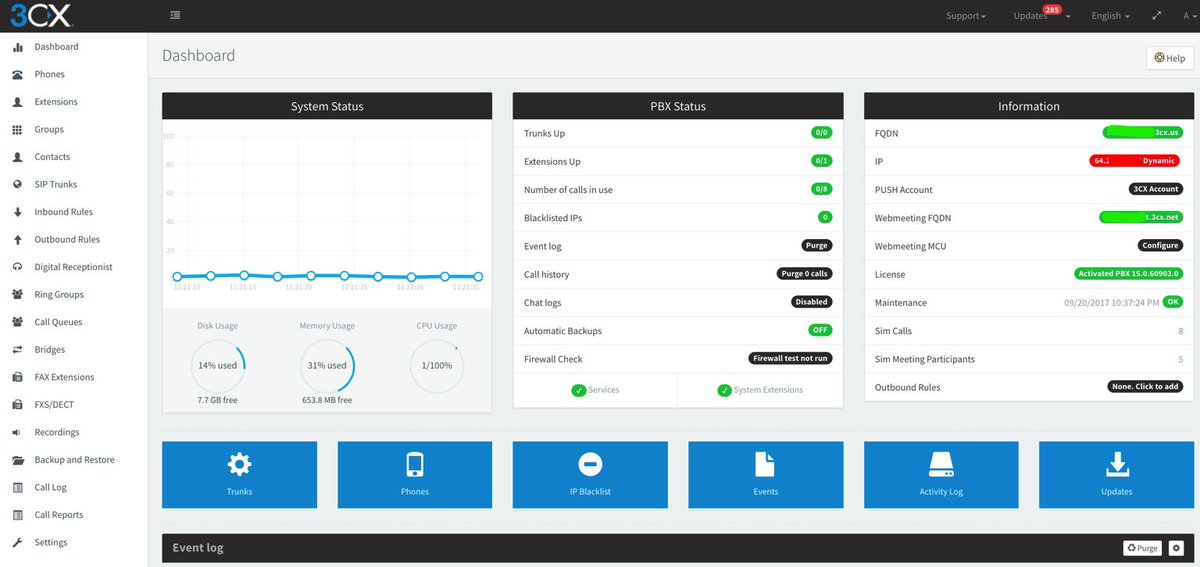
Free Calling in the U.S. and Canada with PIAF5. We know our more frugal U.S. residents are wondering if there's a way to make free calls even with 3CX. You didn't really think there would be a release of PBX in a Flash without Google Voice support, did you? It's easy using the Simonics SIP to Google Voice gateway service. Setup time is about a minute, and the one-time cost is $4.99 using this Nerd Vittles link. Setup instructions for the 3CX side are straight-forward as well, and we've documented the procedure on the PIAF Forum.

Free Calling Worldwide with SIP URIs. There's another free calling option as well. PIAF5 and 3CX support worldwide SIP URI calling at no cost. As part of the PIAF5 install procedure, 3CX registers an FQDN for you with one of the 3CX domains if you indicate that your server has a dynamic IP address. Unless you really know what you're doing with DNS, it's a good idea to tell 3CX you have a dynamic IP address whether you do or not. Here's why. Once you have an assigned FQDN in the 3CX universe, one very slick feature is the ease with which you can publish a SIP URI address for any or all of your 3CX extensions thereby allowing PIAF5 users to receive calls from any SIP client worldwide at no cost. Setup takes less than a minute. It's as easy as 1-2-3. Here's how:
1. Login to the 3CX GUI and go to Settings → Network → FQDN. Tick "Allow calls from/to external SIP URIs" and make note of your FQDN, e.g. mypiaf5server.3cx.us. Click OK.
2. For an extension to enable (e.g. 001), go to Extensions → Edit 001 → Options → SIP ID and create any desired SIP URI alias for this extension, e.g. billybob. Click OK.
3. Anyone with a SIP client anywhere worldwide can now call extension 001 using SIP URI: billybob@mypiaf5server.3cx.us.
Special Thanks: Our special tip of the hat goes to a few web sites that we found helpful in putting this article together especially Unixmen and Matt Wilcox & friends and Programming-Review.
Originally published: Tuesday, February 28, 2017
9 Countries Have Never Visited Nerd Vittles. Got a Friend in Any of Them https://t.co/wMfmlhiQ9y #asterisk #freepbx pic.twitter.com/TPFGZbqWB6
— Ward Mundy (@NerdUno) April 22, 2016
Need help with Asterisk? Visit the PBX in a Flash Forum.
Special Thanks to Our Generous Sponsors
FULL DISCLOSURE: ClearlyIP, Skyetel, Vitelity, DigitalOcean, Vultr, VoIP.ms, 3CX, Sangoma, TelecomsXchange and VitalPBX have provided financial support to Nerd Vittles and our open source projects through advertising, referral revenue, and/or merchandise. As an Amazon Associate and Best Buy Affiliate, we also earn from qualifying purchases. We’ve chosen these providers not the other way around. Our decisions are based upon their corporate reputation and the quality of their offerings and pricing. Our recommendations regarding technology are reached without regard to financial compensation except in situations in which comparable products at comparable pricing are available from multiple sources. In this limited case, we support our sponsors because our sponsors support us.
BOGO Bonaza: Enjoy state-of-the-art VoIP service with a $10 credit and half-price SIP service on up to $500 of Skyetel trunking with free number porting when you fund your Skyetel account. No limits on number of simultaneous calls. Quadruple data center redundancy. $25 monthly minimum spend required. Tutorial and sign up details are here.
![]() The lynchpin of Incredible PBX 2020 and beyond is ClearlyIP components which bring management of FreePBX modules and SIP phone integration to a level never before available with any other Asterisk distribution. And now you can configure and reconfigure your new Incredible PBX phones from the convenience of the Incredible PBX GUI.
The lynchpin of Incredible PBX 2020 and beyond is ClearlyIP components which bring management of FreePBX modules and SIP phone integration to a level never before available with any other Asterisk distribution. And now you can configure and reconfigure your new Incredible PBX phones from the convenience of the Incredible PBX GUI.
VitalPBX is perhaps the fastest-growing PBX offering based upon Asterisk with an installed presence in more than 100 countries worldwide. VitalPBX has generously provided a customized White Label version of Incredible PBX tailored for use with all Incredible PBX and VitalPBX custom applications. Follow this link for a free test drive!
Special Thanks to Vitelity. Vitelity is now Voyant Communications and has halted new registrations for the time being. Our special thanks to Vitelity for their unwavering financial support over many years and to the many Nerd Vittles readers who continue to enjoy the benefits of their service offerings. We will keep everyone posted on further developments.
Some Recent Nerd Vittles Articles of Interest...
- Should you ever have to migrate your WordPress site from one domain to another, here are two helpful tools to consider: the Automatic Domain Name Changer Plugin and our favorite: WordPress-Domain-Changer. [↩]
VirtualBox Magic: A Turnkey PBX in 5 Minutes Flat with XiVO
We’ve sung the praises of VirtualBox for many years because it provides a wonderful platform for experimentation as well as production-ready systems using almost any hardware and any operating system. Versions of VirtualBox are available for Windows PCs, Macs, Linux desktops, and even Solaris machines. And, once you have VirtualBox in place, you can load gigabyte-sized turnkey virtual machines in under a minute. It literally transforms complex computer setups into child’s play.
We’ve received dozens of emails about XiVO, and most of them go something like this:
I’d love to experiment with XiVO as an Asterisk® platform, but I worry that the environment is just too different and the learning curve too steep. I just wish there were a simple way to get started so that I could learn the basics.
Today, your prayers have been answered. You don’t have to buy any hardware. You can use the desktop computer you already have. We’ve taken the Incredible PBX for XiVO tutorial and turned it into a turnkey virtual machine for VirtualBox. You can load it in under a minute and be ready to go. It’s got all of the Incredible PBX bells and whistles, and an extension is already configured so that you can hit the ground running. Just install VirtualBox. Next, install Incredible PBX for XiVO. Install your favorite SIP phone. Plug in the SIP credentials provided. And you’re done in a few minutes. To make outgoing calls, you can add a SIP trunk using one of the numerous SIP provider tutorials we’ve provided. Or, if you live in the United States, you can add a Google Voice trunk in a couple minutes and make free calls in the U.S. and Canada. Let’s get started!
Installing Oracle VM VirtualBox
Oracle’s virtual machine platform inherited from Sun is amazing. It’s not only free, but it’s pure GPL2 code. VirtualBox gives you a virtual machine platform that runs on top of any desktop operating system. In terms of limitations, we haven’t found any. We even tested this on an Atom-based Windows 7 machine with 2GB of RAM, and it worked without a hiccup. So step #1 today is to download one or more of the VirtualBox installers from VirtualBox.org or Oracle.com. Our recommendation is to put all of the 100MB installers on a 4GB thumb drive.1 Then you’ll have everything in one place whenever and wherever you happen to need it. Once you’ve downloaded the software, simply install it onto your favorite desktop machine. Accept all of the default settings, and you’ll be good to go. For more details, here’s a link to the Oracle VM VirtualBox User Manual.
Downloading & Installing Incredible PBX for XiVO Virtual Machine
To begin, download Incredible PBX for XiVO .ova image (1.0 GB) to the computer on which you installed VirtualBox.
When the download completes, double-click on the .ova file you downloaded to load it into VirtualBox. When prompted, be sure to check the Reinitialize the Mac address of all network cards box, agree to the license agreement, and then click the Import button. Once the import is finished, you’ll see a new (1) Incredible PBX for XiVO virtual machine in the VM List of the VirtualBox Manager Window. We need to make a couple of one-time adjustments to the Incredible PBX for XiVO configuration to account for differences in sound and network cards on different host machines.
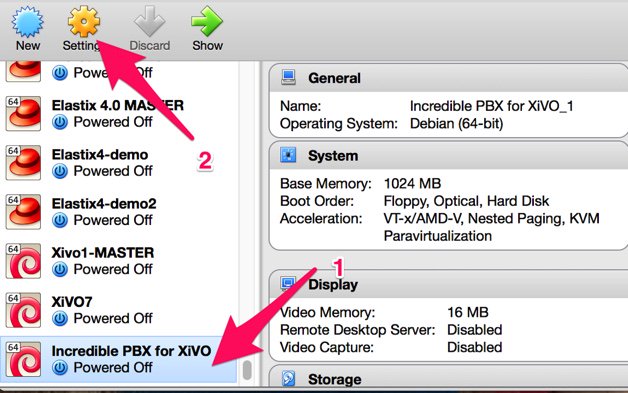
(1) Click once on the Incredible PBX for XiVO virtual machine in the VM List. Then (2) click the Settings button. In the Audio tab, check the Enable Audio option and choose your sound card. In the Network tab for Adapter 1, check the Enable Network Adapter option. From the Attached to pull-down menu, choose Bridged Adapter. Then select your network card from the Name list. Then click OK. That’s all the configuration that is necessary for your Incredible PBX for XiVO.
Running Incredible PBX for XiVO in VirtualBox
Once you’ve imported and configured the Incredible PBX for XiVO Virtual Machine, you’re ready to go. Highlight Incredible PBX for XiVO virtual machine in the VM List on the VirtualBox Manager Window and click the Start button. The standard XiVO boot procedure will begin and, within a short time, you’ll get the familiar Linux login prompt. During the bootstrap procedure, you’ll see a couple of dialogue boxes pop up that explain the keystrokes to move back and forth between your host operating system desktop and your virtual machine. Remember, you still have full access to your desktop computer. Incredible PBX for XiVO is merely running as a task in a VirtualBox window. Always gracefully halt Incredible PBX just as you would on a dedicated computer.
Here’s what you need to know. To work in the Incredible PBX for XiVO virtual machine, just left-click your mouse while it is positioned inside the VM window. To return to your host operating system desktop, press the right Option key on Windows machines or the left Command key on any Mac. For other operating systems, read the dialogue boxes for instructions on moving around. To access the Linux CLI, login as root with the default password: password.
Once you log into your virtual machine, a startup script will briefly configure a few things and then advise you that it’s time to reboot. Write down the IP address provided because for Phase 2 of the setup, we need to use SSH or Putty on the desktop that you will actually be using to manage your server. The reason for this is that Incredible PBX automatically creates a whitelist of IP addresses that the firewall will allow to access your server. If the IP address isn’t in your whitelist, you may lock yourself out except from the VirtualBox console window.
Once the VirtualBox console window shows that your server has rebooted by displaying the Linux login prompt, switch to SHH or Putty and login as root using the IP address you wrote down. You’ll then be prompted to change your root password for Linux as well as your root password for XiVO GUI access using a web browser. You’ll also need to set a PIN that will be used to authorize access to extension 123 to schedule Telephone Reminders on your server. This completes the configuration. You’ll get a final screen showing the credentials for the preconfigured extension 701 as well as a reminder that your PortKnocker credentials are stored in /root/knock.FAQ in the event you ever lock yourself out of your machine. It’s a good idea to leave this screen displayed while you install and configure a softphone since you can cut-and-paste your extension 701 credentials without having to type anything.
Once you complete the SIP softphone setup below, you can return to the SSH window and press ENTER to finish the install. The Incredible PBX Automatic Update Utility will run, and then you will be presented with the pbxstatus display. You can access the Asterisk CLI by typing: asterisk -rvvvvvvvvvv. Exit from the CLI by typing quit. As mentioned previously, always shut down your server gracefully by typing halt. When prompted for the hostname, type xivo. Once the shutdown procedure finishes, it’s save to turn off your virtual machine.
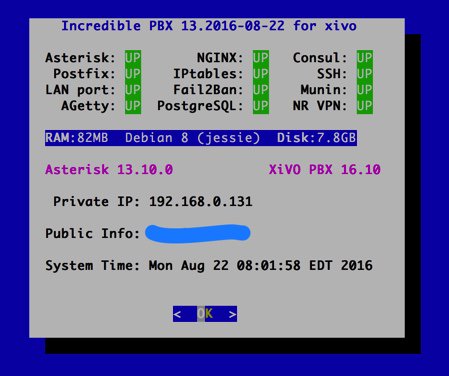
Choosing a SIP Softphone for Incredible PBX for XiVO
Softphones tend to be a matter of taste for most folks so we’ll keep our suggestions to a minimum. On the Windows platform, it’s hard to go wrong with X-Lite. It works out of the box by simply plugging in the IP address of your server and your SIP username and password. It also happens to be free. The only downside is that X-Lite has a nasty habit of embedding time bombs in their free software so you may have to reinstall it from time to time. If you know what you’re doing Zoiper is another alternative but be advised that it doesn’t work out of the box on servers behind NAT-based routers.
On the Mac platform, our favorite free softphone is Telephone. It’s a barebones SIP client that just works. As with X-Lite, you plug in your server’s IP address and SIP credentials, and you’re in business.
On the Linux or Solaris platforms, we assume that you know what you’re doing and that you are perfectly capable of choosing and installing a SIP phone that meets your requirements.
Incredible PBX Application Quick Start Guide
We’ve finished the basic Incredible PBX for XiVO setup. You now have a functioning PBX with dozens of applications for Asterisk that work out of the box. It’s probably a good idea to spend a little time getting acquainted with Incredible PBX for XiVO before you add trunks to communicate with the outside world.
Here’s a handy cheat sheet for some of the Incredible PBX applications that have been installed or are available as add-ons. There’s also a link for more information. This remains a work-in-progress so expect more applications in coming weeks.
- Google Voice CLI interface and SMS Message Blasting (Add-On)
- CallerID Superfecta – Match Names to CallerID Numbers
- CallerID Blacklist – Block Calls from Spammers and Old Girlfriends
- CDR Reports in CSV Format
- CDR Reports in SQLite3 Format
- Asteridex – The Poor Man’s Rolodex (SQLite3 version)
- AsteriDex Click-to-Dial with XiVO Phonebook
- NeoRouter VPN for XiVO
- FCC RoboCall BlackList
- CallerID WhiteList Override
- Dial 123 – Telephone Reminders
- Dial 411 – Call by Name from AsteriDex
- Dial 947 – Weather Forecasts by ZIP Code
- Dial 951 – Latest Yahoo News
- Dial 2663 – Conference Call
- Dial 3472 – DISA Access
- Dial 4871 – Allison’s Sample IVR
- Dial *881400 – Schedule an Alarm for 2 p.m. (1400 military time)
- Dial 53669 – Meet Lenny, the Robocaller’s Worst Nightmare
Configuring Trunks and Routes with Incredible PBX for XiVO
The next step in your XiVO adventure is connecting your PBX to the outside world so that you can make and receive phone calls from anywhere in the world. For this you’ll need one or more trunks. Unlike the Ma Bell world, there’s no reason to put all your eggs in one basket. You can use one or more trunk providers for incoming calls with separate phone numbers for each. And you can use one or more trunk providers for outgoing calls and save money on calls to certain countries by choosing the best provider for where you want to call. And, of course, if you live in the United States, you can set up one or more Google Voice trunks and make calls to the U.S. and Canada for free. We’ve written a number of tutorials to make it easy to set up these trunks.
To get started, point a web browser to the IP address of your PBX. Login as root with the XiVO GUI password you set up above. If you ever forget your password, you can run /root/admin-pw-change to reconfigure it.
XIVO Trunk Implementation Tutorials
- XiVO Trunks Tutorial: Installing a Vitelity SIP Trunk2
- XiVO Trunks Tutorial: Installing a VoIP.ms SIP Trunk
- XiVO Trunks Tutorial: Installing a RingPlus SIP Trunk
- XiVO Trunks Tutorial: Installing a FreeVoipDeal (Betamax) SIP Trunk
- XiVO Trunks Tutorial: Installing a Google Voice-Simonics SIP Trunk
- XiVO Trunks Tutorial: Deploying Native Google Voice with OAuth Trunks
- XiVO Trunks Tutorial: Installing an Anveo Direct Outbound SIP Trunk
- XiVO Trunks Tutorial: Installing a Skype Connect SIP Trunk
Once you’ve added one or more trunks, you’ll need to tell XiVO how to route outgoing and incoming calls. Here are our step-by-step tutorials on setting up Outbound Calling Routes and Incoming Call Routes:
XIVO Call Routing Tutorials
- XiVO Call Routing Tutorial: Creating Outbound Routes for PSTN Calling
- XiVO Call Routing Tutorial: Creating Inbound Routes for DIDs
Now you’re ready to explore. We recommend you pick up here in our Incredible PBX for XiVO tutorial. And be sure to check out the Last Minute Fixes that didn’t make it into the current build. Enjoy the ride!
Originally published: Monday, August 22, 2016
9 Countries Have Never Visited Nerd Vittles. Got a Friend in Any of Them https://t.co/wMfmlhiQ9y #asterisk #freepbx pic.twitter.com/TPFGZbqWB6
— Ward Mundy (@NerdUno) April 22, 2016
Need help with Asterisk? Visit the PBX in a Flash Forum.
Special Thanks to Our Generous Sponsors
FULL DISCLOSURE: ClearlyIP, Skyetel, Vitelity, DigitalOcean, Vultr, VoIP.ms, 3CX, Sangoma, TelecomsXchange and VitalPBX have provided financial support to Nerd Vittles and our open source projects through advertising, referral revenue, and/or merchandise. As an Amazon Associate and Best Buy Affiliate, we also earn from qualifying purchases. We’ve chosen these providers not the other way around. Our decisions are based upon their corporate reputation and the quality of their offerings and pricing. Our recommendations regarding technology are reached without regard to financial compensation except in situations in which comparable products at comparable pricing are available from multiple sources. In this limited case, we support our sponsors because our sponsors support us.
BOGO Bonaza: Enjoy state-of-the-art VoIP service with a $10 credit and half-price SIP service on up to $500 of Skyetel trunking with free number porting when you fund your Skyetel account. No limits on number of simultaneous calls. Quadruple data center redundancy. $25 monthly minimum spend required. Tutorial and sign up details are here.
![]() The lynchpin of Incredible PBX 2020 and beyond is ClearlyIP components which bring management of FreePBX modules and SIP phone integration to a level never before available with any other Asterisk distribution. And now you can configure and reconfigure your new Incredible PBX phones from the convenience of the Incredible PBX GUI.
The lynchpin of Incredible PBX 2020 and beyond is ClearlyIP components which bring management of FreePBX modules and SIP phone integration to a level never before available with any other Asterisk distribution. And now you can configure and reconfigure your new Incredible PBX phones from the convenience of the Incredible PBX GUI.
VitalPBX is perhaps the fastest-growing PBX offering based upon Asterisk with an installed presence in more than 100 countries worldwide. VitalPBX has generously provided a customized White Label version of Incredible PBX tailored for use with all Incredible PBX and VitalPBX custom applications. Follow this link for a free test drive!
Special Thanks to Vitelity. Vitelity is now Voyant Communications and has halted new registrations for the time being. Our special thanks to Vitelity for their unwavering financial support over many years and to the many Nerd Vittles readers who continue to enjoy the benefits of their service offerings. We will keep everyone posted on further developments.
Some Recent Nerd Vittles Articles of Interest…
- Many of our purchase links refer users to Amazon when we find their prices are competitive for the recommended products. Nerd Vittles receives a small referral fee from Amazon to help cover the costs of our blog. We never recommend particular products solely to generate Amazon commissions. However, when pricing is comparable or availability is favorable, we support Amazon because Amazon supports us. [↩]
- Vitelity is a platinum sponsor of Nerd Vittles, and they also happen to be the best in the business. You’ll find a discount coupon to get a great deal on a DID and 4-channel trunk toward the end of this article. [↩]
Free Asterisk Solutions
