
Getting Started with VMware ESXi
If your organization runs VMware or if you have your own VMware ESXi server, running Wazo as a virtual machine under VMware is easy.
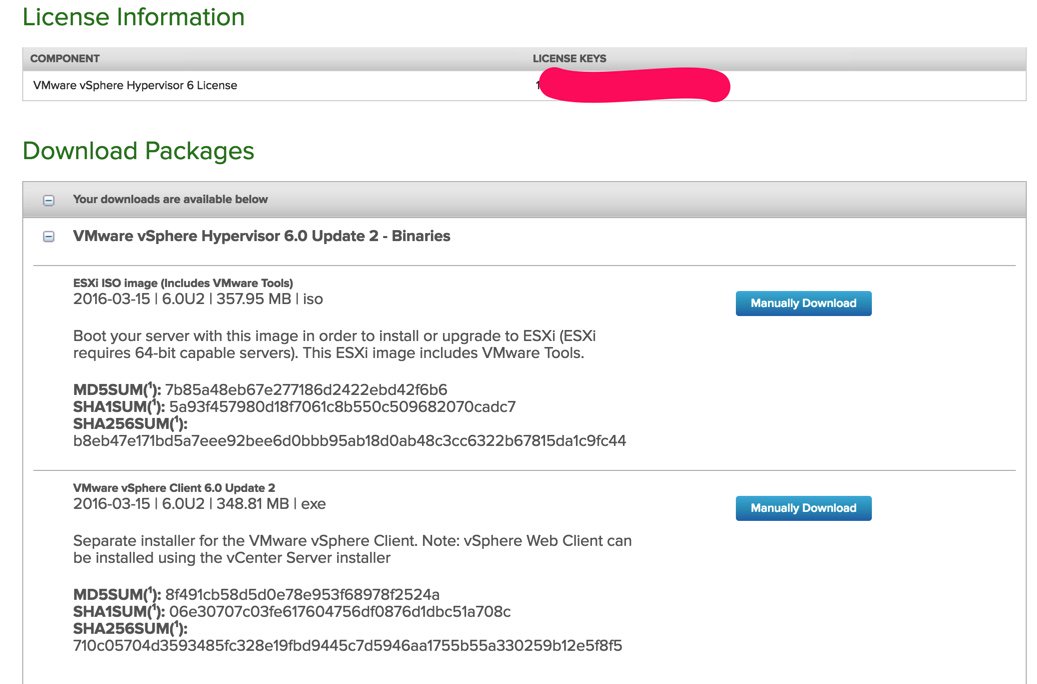
Before you can download either of the components for the free VMware ESXi platform, you’ll need to sign up for a free account at my.vmware.com. Once you’re signed up, log in and go to the ESXi 6 Download Center and sign up for a free ESXi license key:
- Write down your assigned License Key
- Manually download the VMware vSphere Hypervisor 6.0 Update 1 ISO
- Manually download the VMware vSphere Client 6.0U1
Next, burn the ISO to a CD/DVD and boot your dedicated VM hardware platform with it. Follow the instructions to complete the install. Next install the vSphere Client on a Windows computer. Don’t forget to add your ESXi License Key when you complete the installation. Once the ESXi server is up and running, you can stick the hardware on a shelf somewhere out of the way. You will rarely interact with it. That’s all handled using the VMware vSphere Client on your Windows Desktop. Yes, there is a web client as well, but you’ll have to pay for that one.
Getting Started with Wazo on VMware ESXi
Begin by downloading the 64-bit Wazo ISO to your Windows desktop. Then log into VMware vSphere Client on your Windows machine to access ESXi.
First, upload the Wazo ISO as a VMware guest operating system so that it can be used to create virtual machines at any time. From your inventory, click on the Configuration tab. Then click Storage under the Hardware listing. When your Datastore appears, right-click on datastore1 and choose Browse Datastore. Finally, click the Upload Files to this Datastore icon in your Datastore Browser and choose Upload File option. Choose the Wazo ISO from the Upload Items menu to upload it into your Datastore.
To create a Virtual Machine, right-click on the IP address of your VMware server and choose New Virtual Machine. Leave the Typical Configuration option selected and click Next. Give the virtual machine a name and click Next. Select the Destination Storage device and click Next. For the Operating System, choose Linux and pick Debian 9 (64-bit) then Next. Choose the NIC to use for the VM and click Next. Choose your Virtual Disk Size (20GB recommended) and Thin Provision option then Next. Check the box to Edit Virtual Machine Settings Before Completion and click Continue. Click the Options tab in Virtual Machine Properties and click Boot Options. Check the Force BIOS Setup option on next boot. Click Finish.
Starting your virtual machine the first time is not exactly intuitive so follow these steps carefully and in order. Keep in mind that, on the initial bootup of your virtual machine, what we want to do is run the Wazo ISO installer just as if we had booted a standalone machine using a CD on which we had burned the Wazo ISO. To begin the boot process correctly, first highlight your new VM by clicking on it and then choose Power on Virtual Machine. Next, click on the CD/DVD icon in the toolbar, choose CD/DVD Drive 1, choose connect to ISO image on Datastore. Double-click on datastore1 and then double-click on the Wazo ISO we uploaded previously. Now click on Launch Virtual Machine Console icon in the toolbar. When the BIOS setup utility appears, click in the window and use the Right Arrow key to move to the Boot tab. Move the CD-ROM option to the top of the list by highlighting it and pressing the + key to move it up. Press F10 to Save and Exit from the BIOS Setup and boot into your Wazo ISO.
Debian/Wazo Installation
Click Install option to begin the standard Wazo install procedure. Choose your language, pick your time zone, choose your keyboard map, create a very secure root password, choose a Debian mirror that’s close to your server, and choose your bootloader. Then sit back and relax. In about 15 minutes, the install will complete and your virtual machine will reboot.
Enabling Root SSH Access
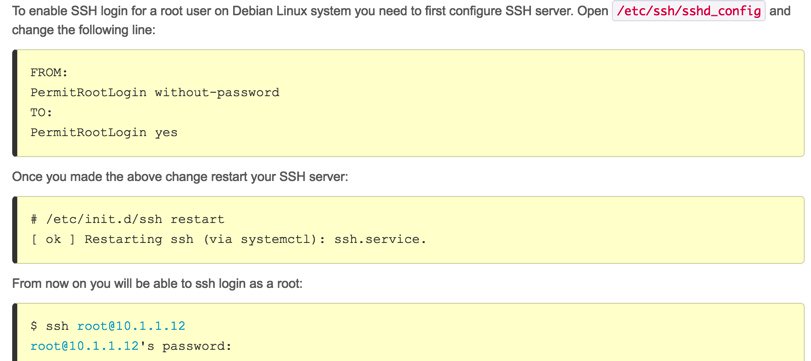
When you install Wazo from the Wazo ISO, root logins via SSH are disabled by default. Only enable it if you plan to also implement the firewall in the next step! To enable root logins via SSH, log into your VM console session again as root and edit the SSH config file: nano -w /etc/ssh/sshd_config. Find the line in the Authentication section that begins with PermitRootLogin and change it to: PermitRootLogin yes. Save your change (Ctrl-X, y, ENTER) and then restart SSH: /etc/init.d/ssh restart.
When the basic install is finished, use ifconfig to obtain the IP address of your server.
Now you can exit from the Console window by pressing Ctrl-Alt and use a browser to complete the install by pointing to the IP address of your virtual machine.
Incredible PBX Installation
Log into your server again as root via SSH/Putty and issue the following commands to complete the Wazo and Incredible PBX setup.
cd /root
wget http://incrediblepbx.com/IncrediblePBX15-Wazo.sh
chmod +x IncrediblePBX15-Wazo.sh
./IncrediblePBX15-Wazo.sh
Managing Your Wazo Server
Almost everything else you do with Wazo can be handled using a web browser pointed to this IP address.
Open a web browser to the IP address of your server. Ignore the https credentials warning to access your server. The default username for access is root, and the password is the one set during the Configuration step above.
You now can proceed to Incredible PBX Initial Configuration tutorial to continue your setup.

 JUST RELEASED: Visit the Incredible PBX Wiki
