Home » Posts tagged 'amazon s3'

Tag Archives: amazon s3

The Most Versatile VoIP Provider: FREE PORTING

Cloud Computing 101: Using Amazon’s S3 (Simple Storage Service) for Off-Site Asterisk Backups
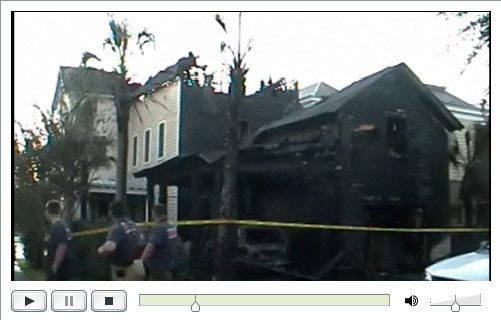

When we began the PBX in a Flash project, one of our key design requirements to distinguish our product from other Asterisk® aggregations was to include an automated, rock-solid reliable, backup solution that backed up not only Asterisk but your entire server in a way that could be restored painlessly without manually reinstalling the initial PBX in a Flash image. After almost a year in production, PBX in a Flash remains the only distribution with a complete backup solution. In the Orgasmatron builds of PBX in a Flash, we've gone a step further. Automated weekly backups to a flash drive are preconfigured. All it takes to get started is a $15 flash drive. Insert the stick and run the usbformat.sh script. Thereafter, a full backup is run each Sunday night, and the self-booting ISO images are conveniently placed on the flash drive for easy restoration of your entire system should the need ever arise.

We appreciate, however, that others running Asterisk and FreePBX need backup solutions as well. And, while today's tutorial won't get you a full system backup which is comparable to what's available on PBX in a Flash systems, what it will do is provide an automated off-site backup storage solution for all of your critical FreePBX data for pennies a day. Beginning last year, FreePBX started offering a backup solution for FreePBX data as an integral part of the FreePBX web interface. The FreePBX solution lets you define a schedule for backing up your voicemail, system recordings, system configuration, CDR, and operator panel. What the restore process won't do is put Humpty back together again without first reinstalling your operating system and Asterisk environment. For those using PBX in a Flash, you've got the best of all worlds with these two backup solutions. For everyone else, the FreePBX backup alternative is certainly better than nothing. It also is a terrific tool for moving from one distribution to another (hint!) or to a new server environment. So long as the versions of FreePBX on both systems match, users have reported excellent results.

In addition to the need to recreate your server environment from scratch, there's an additional problem with the FreePBX backup solution. It gets stored on the same drive as your Asterisk server. That works great until your hard disk dies or your house catches on fire. Backups are written to /var/lib/asterisk/backups and placed in subdirectories matching the Schedule Name you assign to the backup procedure. For reasons which will become obvious, it's a good idea to name your schedules without any spaces in the name, e.g. DailyBackup. The only thing we've really found missing in the FreePBX solution is an off-site storage option to protect you in the event of a catastrophe.

A Picture Is Worth A Thousand Words. We recently were reminded of the importance of off-site storage when a neighbor's house caught fire in the middle of the night. Fortunately, the entire family escaped without injury. But all of the contents of the home were destroyed either by the fire or by the water used to put out the fire. After being awakened by a neighbor in the middle of the night, there was less than 5 minutes to extract mom and dad and four young children from the house before it was totally engulfed in flames. Moving computers out of harm's way most assuredly was the furthest thing from their minds. Enter: Amazon S3 aka Cloud Storage. A recent InformationWeek poll found that "storage--including archiving and disaster recovery--was cited as the service category most likely to be outsourced to the cloud, ahead even of business applications."

If this is all news to you, here's a quick thumbnail on Amazon S3 from the Wikipedia:

"Amazon S3 (Simple Storage Service) is an online storage web service offered by Amazon Web Services. Amazon S3 provides unlimited storage through a simple web services interface. Amazon launched S3, its first publicly-available web service, in the United States in March 2006 and in Europe in November 2007. Since its inception, Amazon has charged end users $0.15 per gigabyte-month, with additional charges for bandwidth used in sending and receiving data. As of November 1, 2008, pricing will move to tiers where end users storing more than 50 terabytes per month will receive discounted pricing. Amazon claims that S3 uses the same scalable storage infrastructure that Amazon.com uses to run its own global e-commerce network. Amazon S3 is reported to store more than 29 billion objects as of October 2008. This is up from 14 billion objects as of January 2008, and from 10 billion in October 2007. S3 uses include web hosting, image hosting, and a back-up system. S3 comes with no guarantee that customer data will not be lost."

To give you some idea of pricing, our current FreePBX daily backups are roughly 50 megabytes in size. A new PBX in a Flash install yields a 20MB FreePBX backup. Using a cable modem connection, uploading our 50MB daily backup to Amazon S3 takes about 5 minutes and costs 2¢. Storage of a full month's worth of rotating backups would add another quarter to the monthly cost. Thus, the tab to upload and store 30 backups a month runs less than one dollar, pretty cheap insurance by any measure. And, unless you tinker with your system as much as we do, daily backups probably are overkill. The tab for weekly uploads and storage on Amazon S3 would run less than 25¢ a month assuming you remove all but the last five backups from S3 in each subsequent month. So... what are you waiting for?

Configuring Weekly Backups with FreePBX. The first step is to set up the automated backup process in FreePBX. Using a browser, open FreePBX and choose Tools, Backup & Restore. Click Add Backup Schedule and name the schedule WeeklyBackup. Select all of the radio buttons to backup everything possible with FreePBX. For the time of the backups, leave the Follow Schedule Below option selected. Choose a time for the backup by clicking on the appropriate settings. We recommend 3:05 a.m. which means you click on 5 in the minutes column and 3 in the hours column. Finally, click the Selected option button under Weekdays and then click Wednesday. Click Submit Changes to save your settings.

Creating an Amazon S3 Account. Before you can create backups on Amazon S3, you'll obviously need an account. Here's the link to sign up: http://www.amazon.com/s3. Once you sign up, you'll receive an email with this link to manage your new account. Log in using your Amazon username and password. Write down your Access Key ID. Next click on the button to generate a new Secret Access Key. Once it's generated, click on the link provided to display it. Write it down, too. You'll need both your Access Key and your Secret to use Amazon's S3 service.

Installing s3cmd to Manage Your S3 Backups. There are a number of tools available to interact with Amazon S3. We've chosen s3cmd which happens to be free and uses python which is preconfigured on PBX in a Flash systems. Another great tool is JungleDisk, but it costs $20. It uses s3sync and Ruby which you'd need to install: yum install ruby. It also requires SSL certificates which complicates things a bit. For an excellent tutorial, see Chris Sherwood's writeup. Of course, time marches on, and today we can do all of the same things at no cost. So let's get started.

To install and configure s3cmd, log into your server as root and issue the following commands:1

cd /root
wget http://downloads.sourceforge.net/s3tools/↩
s3cmd-0.9.8.3.tar.gz?modtime=1217338796&big_mirror=0
tar zxvf s3cmd*
mv s3cmd-0.9.8.3 s3cmd
cd s3cmd
./s3cmd --configure

You'll be prompted to enter your Access Key and Secret Key to access Amazon S3. Next you'll be asked to provide an encryption password to protect your data while being transmitted to Amazon. Make up a random collection of letters and numbers. For the path to the GPG program, press Enter to choose the default: /usr/bin/gpg. Choose whether to use HTTPS to transmit your data. It's a little slower, but it's secure so we recommend choosing it. We're going to automate the backup process so you're not going to be watching the file transmission process anyway. Next, you'll be asked whether to test S3 access using the credentials you've supplied, Type y and be sure you get a success message. Otherwise, recheck your Access Key and Secret Key for typos. Finally, you'll be asked whether to save the settings. Choose Y. Your settings will be saved in /root/.s3cfg. Be sure to erase the file if you give your server to someone else!

Using the s3cmd Command Line Interface. s3cmd is a command line tool so we'll walk you through the basics before we automate the weekly backup process. There's an excellent tutorial for s3cmd that is available here, and more S3 tools are on the way. What you really need to know about S3 file storage is that files are stored in disk volumes which S3 calls buckets. You can have up to 100 buckets. Wildcards don't work the way Linux wildcards do, and S3 is picky about the use of periods. Our recommendation: don't use them for the time being. Also be aware that bucket names are like domain names. They must be unique across the S3 cloud. So... daily-backup and weekly-backup won't work on your system because we already own those buckets. The easiest naming convention is probably to use your full name or company name for the bucket name and then create directories below there for your data. For other tips, see the S3 FAQ. Now let's run down the basic list of commands in the order you typically would use them:

Create a New Bucket: s3cmd mb s3://weekly-backup (Unique on S3!)
List Your Buckets: s3cmd ls
List Bucket Contents: s3cmd ls s3://weekly-backup
Upload a File: s3cmd put file.xyz s3://weekly-backup/file.xyz
Download a File: s3cmd get s3://weekly-backup/file.xyz file.xyz
Delete a File: s3cmd del s3://weekly-backup/file.xyz
Delete a Bucket: s3cmd rb s3://weekly-backup (NOTE: Bucket must be empty!)

Automating the Off-Site Backups to Amazon S3. We now have all the pieces we need build a weekly cron script to automate the backup process to our new Amazon S3 storage facility. So let's build the script. For purposes of this example, we will assume that you have followed our instructions above in setting up the backup process with FreePBX. We obviously need to know when new backups are made so that we can configure a cron script at the proper time to copy the backup file up to the Amazon S3 server. We also need to know the name of the FreePBX directory with the backups and will assume that it's /var/lib/asterisk/backups/WeeklyBackup. Finally we need to know the name of the bucket to be created on Amazon S3 to store the backups and we'll assume it's s3://weekly-backup as we used in the examples above.

Step 1 is to build the script. Using your favorite editor, create a file and name it /root/s3backup.sh: nano -w /root/s3backup.sh. Here's what should go in it:2

#!/bin/bash
cd /var/lib/asterisk/backups/WeeklyBackup
thisbackup=`find *.gz -mtime -1 | tail -n 1`
/root/s3cmd/s3cmd put ↩
/var/lib/asterisk/backups/WeeklyBackup/$thisbackup ↩
s3://weekly-backup/$thisbackup

Save the file: Ctrl-X, Y, then Enter and make the script executable: chmod +x s3backup.sh. Note that, for this script to actually work, you must run it on the same day AND after FreePBX has first generated a backup.

Step 2 is to create a cron job that will execute the above script shortly after 3:05 a.m. on Wednesday morning making sure we leave enough time for FreePBX to complete the backup task. To be safe, we'll set it up for 4 a.m. every Wednesday. Edit /etc/crontab and add an entry at the bottom of the file that looks like the following:

0 4 * * 3 root /root/s3backup.sh > /dev/null

If you just wanted a basic backup system using Amazon S3, congratulations! You've graduated. But there's so much more if you don't mind getting your hands a little dirty.


We're Getting Close. Before we tackle the techie stuff, let us pause for a moment and provide a progress report on the VPN in a Flash project. Thanks primarily to Tom King, we've made enormous progress in the last couple weeks. And, again, the accompanying picture says it better than words. We're also nearing completion of the documentation. The idea behind this project was to provide a mobile and transportable, full-featured VoIP PBX for under $500. For those with satellite offices or remote construction sites or branch offices, the Acer Aspire One is ideal. But it also can serve as a secure traveling companion for those that are often on the road. And, of course, it's an almost perfect fit for a home, a home office, a vacation home, or any hotel room with WiFi. Not only does it have an incredibly small footprint, but it also has computing power to spare with the new Intel Atom motherboard, a gig of RAM, and a 120GB hard disk. Yes, it's got wired AND wireless covered seamlessly, and it offers the Orgasmatron II build including fax capability plus the Hamachi VPN for secure connections within your own private network of servers and PCs. And our custom build offers the very latest KDE GUI with the brand-new Fedora 10 and performance to spare. The 1024x600 screen resolution you've simply got to see to believe. This photo doesn't do it justice. Plus we've added the Zoiper softphone which works nicely with the integrated microphone and speaker to let you place secure calls back through your home office PBX or directly through the fully-functional Asterisk 1.4 PBX which runs silently in the background with the new FreePBX 2.5 web interface. We hope to begin taking orders on or before the first anniversary of PBX in a Flash, November 14. For more details, click here or check out our forum posting. We now return you to your regularly scheduled program...


Using Fuse, s3fs, and Rsync with Amazon S3. At the outset, we want to express our special thanks to John Eberly for his article laying the foundation for much of what follows. The S3 technology has advanced dramatically since it first was introduced. So much so that you now can mount an Amazon S3 bucket as a local device on your server and use it like any other mounted device. This means you can use standard Linux tools to copy, list, delete, and move files. And you can use the built-in intelligence of tools such as rsync to actually keep directories in sync without recopying data that already exists in both locations and without manually deleting data which already has been removed from the source directory. For long time readers of Nerd Vittles, you know that rsync is one of our favorite Asterisk tools. It works flawlessly!

Unfortunately, with CentOS 5, the Linux Fuse file system installation process is a bit quirky, but here we go anyway. First, you'll need the Dag Wieers YUM repository to install some of these applications. The easiest way to activate the repository is to just execute the following commands while logged into your server as root. When we're finished with the repository, we'll delete /etc/yum.repos.d/dag.repo so that you don't accidentally use it unintentionally for other yum updates down the road:

cd /root
wget http://nerd.bz/q77p30
rpm -ivh fuse-devel*
wget http://downloads.sourceforge.net/fuse/fuse-2.7.4.tar.gz?↩
modtime=1217019944&big_mirror=0
tar zxvf fuse-2.7*
cd fuse-2.7.4
./configure
make
make install
cd ..

If you're a Linux whiz kid, you're probably scratching your head wondering why we would install an RPM version of fuse and then turn around and install it again by compiling it from source. The short answer is "hell if I know." The longer answer is that fuse won't work unless you do it this way. Sorry. If you really are a whiz kid, you can educate all of us as to why this is necessary by posting a comment.

Now that the Linux fuse file system is installed, we need one more application. It's the glue between Linux fuse and Amazon S3: s3fs. So let's download, compile, and install the s3 file system application:

cd /root
wget http://s3fs.googlecode.com/files/s3fs-r177-source.tar.gz
tar zxvf s3fs*
cd s3fs
make -f Makefile
mkdir /mnt/s3fs
cp s3fs /usr/bin/.
cd ..

Finally, to simplify mounting of your S3 file system, we need to store your Access Key and Secret Key in a config file just as was done with s3cmd above. So create a new file named /etc/passwd-s3fs and add your AccessKey:SecretKey in the file, e.g. 12345:67890


Mount S3 bucket (the unique one): s3fs weekly-backup /mnt/s3fs

Check available storage space: df -h /mnt/s3fs

Synch Backup directory with S3: rsync -avz --delete ↩
/var/lib/asterisk/backups/WeeklyBackup /mnt/s3fs

Dismount your S3 bucket: umount /mnt/s3fs

For the steps to integrate this directly into FreePBX to assure that your backups are automatically saved to S3, see Comment #1 below.


Hosting Provider Mega Deal. Just an FYI that the Nerd Vittles hosting provider, BlueHost, has raised the bar again on hosting services. For $6.95 a month, you can host unlimited domains with unlimited web hosting disk storage and unlimited monthly bandwidth. Free domain registration is included for as long as you have an account. It really doesn't get any better than that. And their hosting services are flawless! Just use our link. You get a terrific hosting service, and we get a little lunch money.


Special Thanks to Our Generous Sponsors


FULL DISCLOSURE: ClearlyIP, Skyetel, Vitelity, DigitalOcean, Vultr, VoIP.ms, 3CX, Sangoma, TelecomsXchange and VitalPBX have provided financial support to Nerd Vittles and our open source projects through advertising, referral revenue, and/or merchandise. As an Amazon Associate and Best Buy Affiliate, we also earn from qualifying purchases. We’ve chosen these providers not the other way around. Our decisions are based upon their corporate reputation and the quality of their offerings and pricing. Our recommendations regarding technology are reached without regard to financial compensation except in situations in which comparable products at comparable pricing are available from multiple sources. In this limited case, we support our sponsors because our sponsors support us.

BOGO Bonaza: Enjoy state-of-the-art VoIP service with a $10 credit and half-price SIP service on up to $500 of Skyetel trunking with free number porting when you fund your Skyetel account. No limits on number of simultaneous calls. Quadruple data center redundancy. $25 monthly minimum spend required. Tutorial and sign up details are here.

The lynchpin of Incredible PBX 2020 and beyond is ClearlyIP components which bring management of FreePBX modules and SIP phone integration to a level never before available with any other Asterisk distribution. And now you can configure and reconfigure your new Incredible PBX phones from the convenience of the Incredible PBX GUI.

VitalPBX is perhaps the fastest-growing PBX offering based upon Asterisk with an installed presence in more than 100 countries worldwide. VitalPBX has generously provided a customized White Label version of Incredible PBX tailored for use with all Incredible PBX and VitalPBX custom applications. Follow this link for a free test drive!
 

Special Thanks to Vitelity. Vitelity is now Voyant Communications and has halted new registrations for the time being. Our special thanks to Vitelity for their unwavering financial support over many years and to the many Nerd Vittles readers who continue to enjoy the benefits of their service offerings. We will keep everyone posted on further developments.


Some Recent Nerd Vittles Articles of Interest...

  1. Where you see ↩ means that you should join the text on the following line to the original line as a single line of text (usually with no intervening space). []
  2. In the following code, the ↩ character means to join the three lines of text into a single line with a single space between the code on each line. The difference in the two examples is you don't usually have spaces in http: requests while commands issued on the command line obviously have spaces between different parts of command. []