
Introducing Telephone Reminders for Asterisk 1.4 with Phone and Web Scheduling
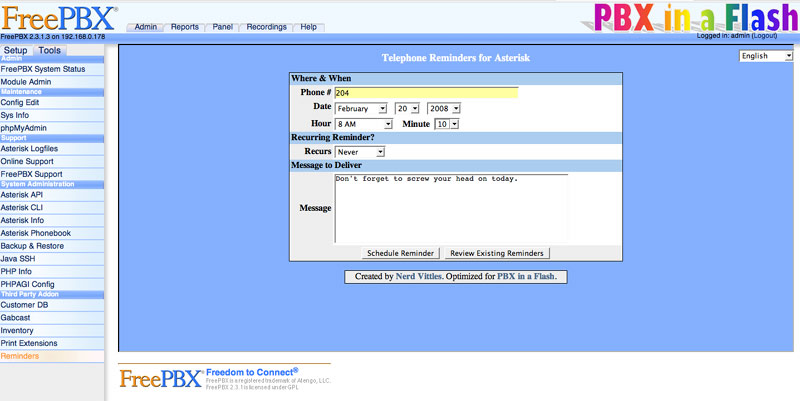
If you loved your ‘Speak and Spell,’ then Telephone Reminders for Asterisk 1.4 is for you. In addition to scheduling reminders by phone, now there’s a web interface as well. Just fill out a simple web form to set reminders or recurring reminders in motion and then Flite or Cepstral TTS will deliver your message to the phone destination of your choice at the appointed time.


 JUST RELEASED: Visit the Incredible PBX Wiki
