Getting Started
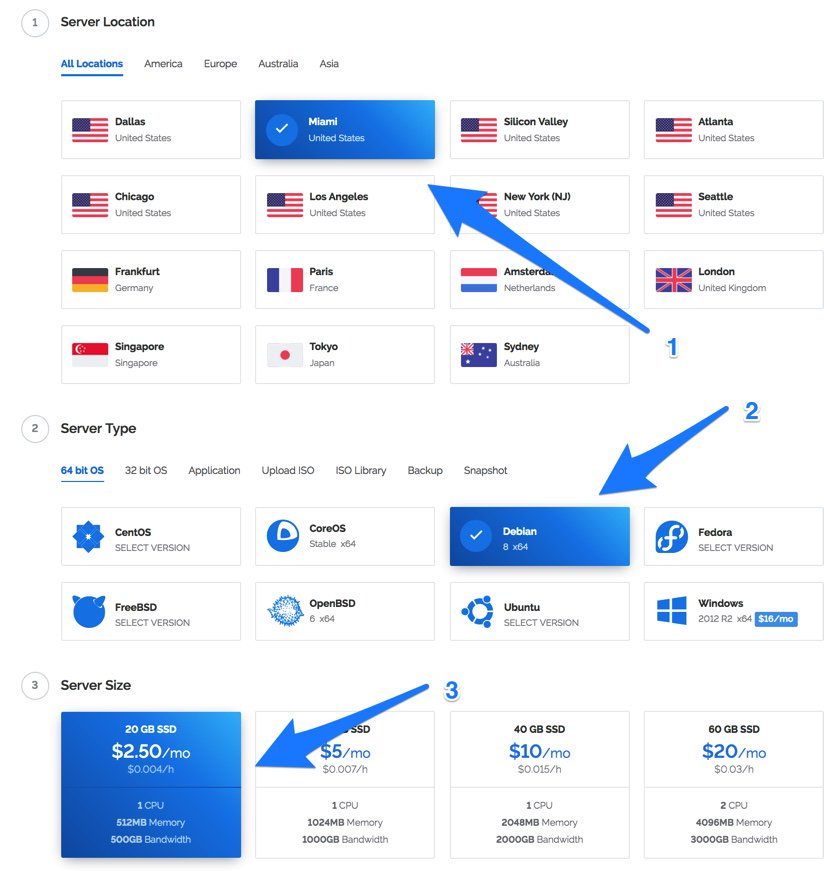
Begin by creating a Vultr account using our referral link. This provides a little lunch money for Nerd Vittles. And, for a limited time, it gets you a $20 credit to try out the service. Free signup credit has been discontinued, but pricing has been slashed by 50% on smallest server size.
An ISO can’t be used as the installation media at Vultr. Build a 64-bit Debian 8 virtual machine in any desired size.
IMPORTANT: Leave the Server Hostname & Label blank!
Once you’ve built and started the virtual machine, log into your server as root using SSH/Putty and immediately change your root password: passwd
Creating a SwapFile for VULTR $2.50 VMs
You can only use the $2.50 size VULTR virtual machine if you create a swapfile. Otherwise, the Wazo install will fail. While logged into your virtual machine as root, issue the following commands to create the swap file. This gives Wazo sufficient elbow room to function properly. The swap file is not needed on servers above the $5/month level although it’s still a good idea to accommodate future growth.
dd if=/dev/zero of=/swapfile bs=1024 count=1024k
chown root:root /swapfile
chmod 0600 /swapfile
mkswap /swapfile
swapon /swapfile
echo "/swapfile swap swap defaults 0 0">>/etc/fstab
sysctl vm.swappiness=10
echo vm.swappiness=10>>/etc/sysctl.conf
free -h
cat /proc/sys/vm/swappiness
Debian/Wazo/Incredible PBX Installation
While still logged into your server as root using SSH/Putty, issue the following commands to kick off the base install:
cd /root
apt-get -y install cloud-init
wget http://incrediblepbx.com/IncrediblePBX15-Wazo.sh
chmod +x IncrediblePBX15-Wazo.sh
./IncrediblePBX15-Wazo.sh
After rebooting, log into your server again as root and issue the following command to complete the Wazo and Incredible PBX installation and configuration:
./IncrediblePBX15-Wazo.sh
You now can proceed to Incredible PBX Initial Configuration tutorial to continue your setup.


 JUST RELEASED: Visit the Incredible PBX Wiki