

Now that we’ve gotten the price of cloud-based servers down to a respectable $1.50 to $2.50 or $3.50 per month, it’s time to cut the cord and kiss your home-grown server goodbye. The babysitting headaches and maintenance costs of running your own server and paying for electricity simply aren’t worth it. There’s another reason. NAT-based routers and firewalls complicate things when it comes to VoIP. Not only do you have to wrestle with SIP headers and ALG, but you also have to troubleshoot thorny one-way audio issues with VoIP calling. So bite the bullet and play along today. Skip that Starbucks coffee this week and you’ve all but paid for a full year’s worth of VoIP server hosting in the Cloud.

Getting Started with Vultr
If you just want to experiment in a cloud-based sandbox, then there’s no better option than Vultr. For less than a penny an hour, you can build a VoIP platform, tear it down, and build another one for less than the cost of a nickel candy bar. You remember those, don’t you? I actually tried to think of something that still costs a nickel, but that was the best I could do… and that was 50+ years ago.
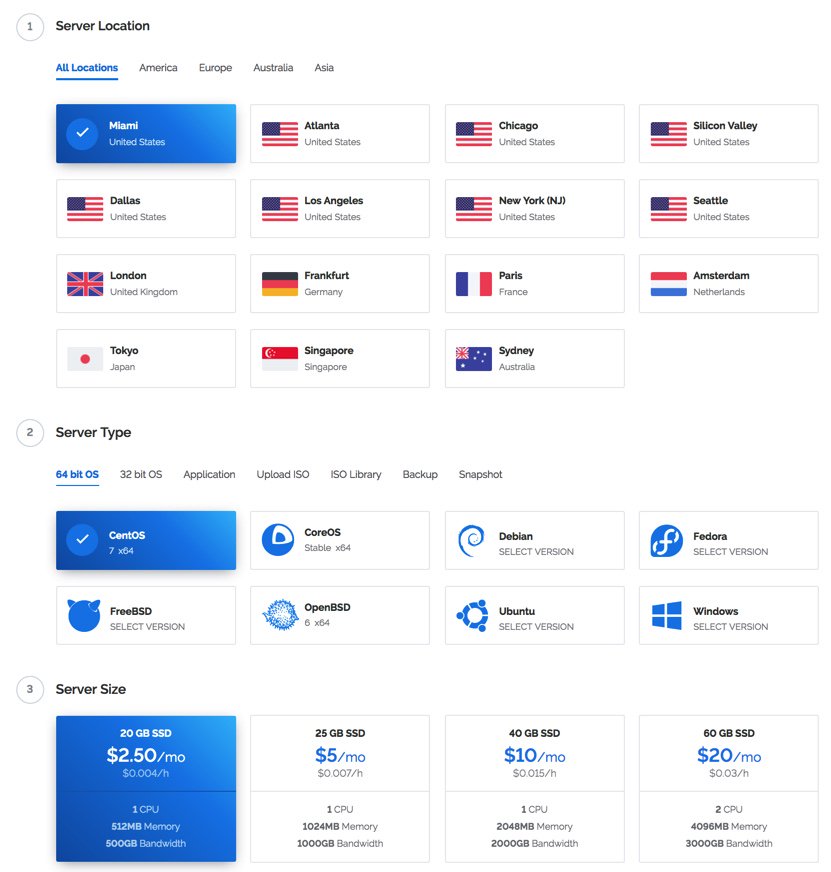
After you’ve created an account on Vultr with our referral link, the first step is to create your new cloud instance. Choose New York or Miami as your desired hosting site (they both have $2.50/month availability) and select 64-bit CentOS 7 as your server platform. An additional 50¢ a month buys you automatic daily, weekly, or monthly backups to a separate, fault tolerant storage system in the same data center. HINT!
(1) Once you’ve built and started your new virtual machine, log into your server as root using SSH/Putty and immediately change your root password: passwd.
(2) With the $2.50 size VULTR virtual machine, you must create a swapfile before beginning the Issabel installation. Here are the commands:
dd if=/dev/zero of=/swapfile bs=1024 count=1024k
chown root:root /swapfile
chmod 0600 /swapfile
mkswap /swapfile
swapon /swapfile
echo "/swapfile swap swap defaults 0 0">>/etc/fstab
sysctl vm.swappiness=10
echo vm.swappiness=10>>/etc/sysctl.conf
free -h
cat /proc/sys/vm/swappiness
(3) Now skip down to the Issabel installation section to continue.
Getting Started with OVH
Begin by creating an OVH account. $3.49 a month buys you an OpenStack KVM with 2GB RAM, 10GB of SSD storage, and RAID10 redundancy plus a 99.95% uptime SLA. For a high performance VPS, it’s a terrific bargain, and you can thank our friends at 3CX for the tip.
(1) Start by ordering the VPS SSD 1 package and choose CentOS 7 as your operating system.
(2) Once your credentials arrive, log into your server as root using SSH/Putty and immediately change your root password: passwd
(3) Now continue with the Issabel installation as documented below.
Getting Started with WootHosting
If $2.50 to $3.50 a month is too rich for your blood, there actually are two $1.50 a month options at WootHosting if you sign up for a year. With the New York special, you get a single VPS platform. With the twofer special, you actually get two VPS platforms in your choice of cities. WootHosting also offers considerably more horsepower with quadruple the RAM and more storage space. You can read our review of WootHosting here.
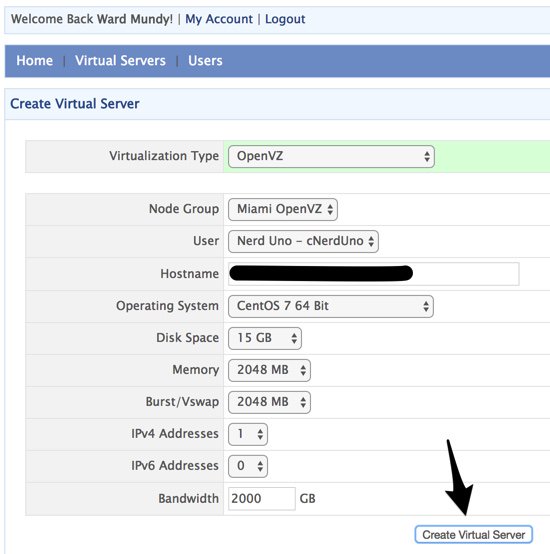
(1) Start by creating a CentOS 7 Minimal VPS platform in New York, Miami, or Los Angeles. If you opted for the WootHosting twofer special, then you’ll need to create a user and then a virtual server platform that looks something like this:
(2) Set a root password in the Root/Admin Password tab and enable TUN/TAP (needed for NeoRouter) in the Settings tab.
(3) Login to your server as root using SSH Terminal or Putty.
(4) Now continue with the Issabel installation as documented below.
Installing Issabel on Your VPS Platform
Issue the following commands to install Issabel. When prompted for a MariaDB (MySQL) and admin password, make certain to use passw0rd (with a zero) for your MariaDB password and a very secure password for your admin password, the one you’ll use to login as admin to Issabel’s web interface.
yum -y update
yum -y install wget nano openssh-server
wget -O - http://repo.issabel.org/issabel4-netinstall.sh | bash
When the Issabel install is complete, your server will automatically reboot.
Installing Incredible PBX for Issabel on Your VPS
After the reboot, log back into your server as root and issue the following commands to install Incredible PBX for Issabel. You will again be prompted for MariaDB and admin passwords. Do exactly as you did above using passw0rd as your MariaDB password. At the conclusion of the install, you will again be prompted for the same admin password you used above. This is actually used for Apache web security and will be the first prompt you see when you attempt to login to any web application including Issabel, AsteriDex, and Reminders.
wget http://repo.issabel.org/issabel4-netinstall.sh
wget http://incrediblepbx.com/IncrediblePBX11-Issabel4.sh
chmod +x IncrediblePBX11-Issabel4.sh
./IncrediblePBX11-Issabel4.sh
When the installation finishes, reboot your server once again and then log back in as root. The Automatic Update Utility will load current patches and then display pbxstatus.
For OpenVZ platforms such as WootHosting that use venet0 for Ethernet connectivity, you’ll need to modify the port setup for PortKnocker. The config file to modify is /etc/sysconfig/knockd. Change the entry to: OPTIONS="-i venet0:0" and restart PortKnocker: service knockd restart.
Using a browser, login to the Issabel web client at the IP address shown in pbxstatus. You’ll be prompted twice (http and https) for your Apache admin credentials which should be the same as your Issabel GUI admin credentials. Save your Apache credentials in your browser when prompted to do so. Then you won’t have to provide Apache credentials again. Next, login to the Issabel GUI with admin and your admin password.
That completes the basic install of Incredible PBX and Issabel. Our previous tutorial will walk you through the basics of setting up your trunks, extensions, and routes in Issabel.

 JUST RELEASED: Visit the Incredible PBX Wiki
