Speech-to-Text Directory Assistance Comes to Asterisk
Ever wished for your own directory assistance service where you could speak the name of a person or company to call and have Asterisk do the rest? Well, today’s your lucky day!

Ever wished for your own directory assistance service where you could speak the name of a person or company to call and have Asterisk do the rest? Well, today’s your lucky day!

Move over Siri! Today we’ll show you how to harness the power of a 10,000 CPU supercomputer to answer just about any question you can think up. And it’s all brought to you courtesy of Asterisk and your nearest telephone.

Today we are pleased to introduce the revolutionary new Incredible PBX for Asterisk 1.8 featuring instantaneous (and free) Google Voice calling in the U.S. and Canada via Gtalk. An intermediate provider is no longer required. All of the Nerd Vittles TTS apps now work reliably as well. And you get dozens of terrific new Asterisk 1.8.0 features.

Introducing TeleYapper 5.0: the ultimate RoboCaller and data collection system for Asterisk. Upload your data in CSV or XML files and generate personalized calls to a dozen or thousands of callees. Messages also can be tailored to differentiate between people and answering machines. Customizable data collection is built into every call, and CSV/XML reports provide the results of every calling campaign.

We’re pleased to introduce a new text-to-speech application for Asterisk. Today in History retrieves today’s historical events and birthdays and plays them back using Flite of Cepstral from any Asterisk phone. Just pick up any phone and dial T-O-D-A-Y.

In our last column, we introduced you to the new Orgasmatron Installer for PBX in a Flash. After a one-week break to prepare for our visit to the Atlanta Asterisk® Users Group 3d Annual InstallFest, we’re back in the saddle today to flesh out the new baby. For those that are new to all of this, let’s briefly review what the Orgasmatron Installer has added to your Lean, Mean Asterisk Machine. Faxing and email now work out of the box.… Read More ›
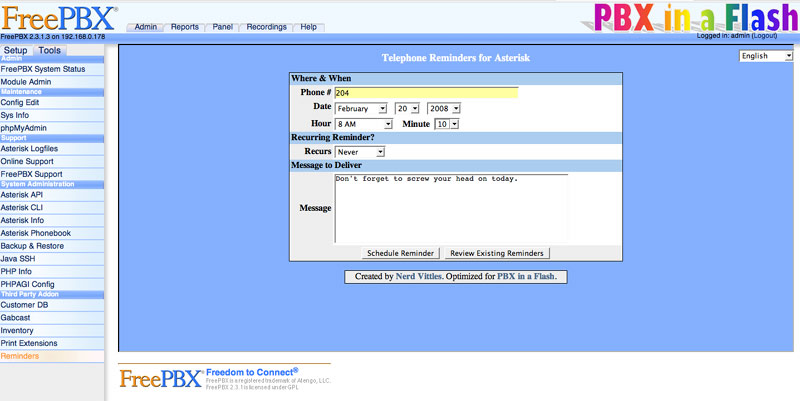
If you loved your ‘Speak and Spell,’ then Telephone Reminders for Asterisk 1.4 is for you. In addition to scheduling reminders by phone, now there’s a web interface as well. Just fill out a simple web form to set reminders or recurring reminders in motion and then Flite or Cepstral TTS will deliver your message to the phone destination of your choice at the appointed time.
In celebration of our three month anniversary with PBX in a Flash, Nerd Vittles today introduces new PBX in a Flash hosted service and five new applications using Cepstral’s Allison for text-to-speech with Asterisk 1.4…


 JUST RELEASED: Visit the Incredible PBX Wiki