Home » Posts tagged 'Skyetel'

Tag Archives: Skyetel

The Most Versatile VoIP Provider: FREE PORTING

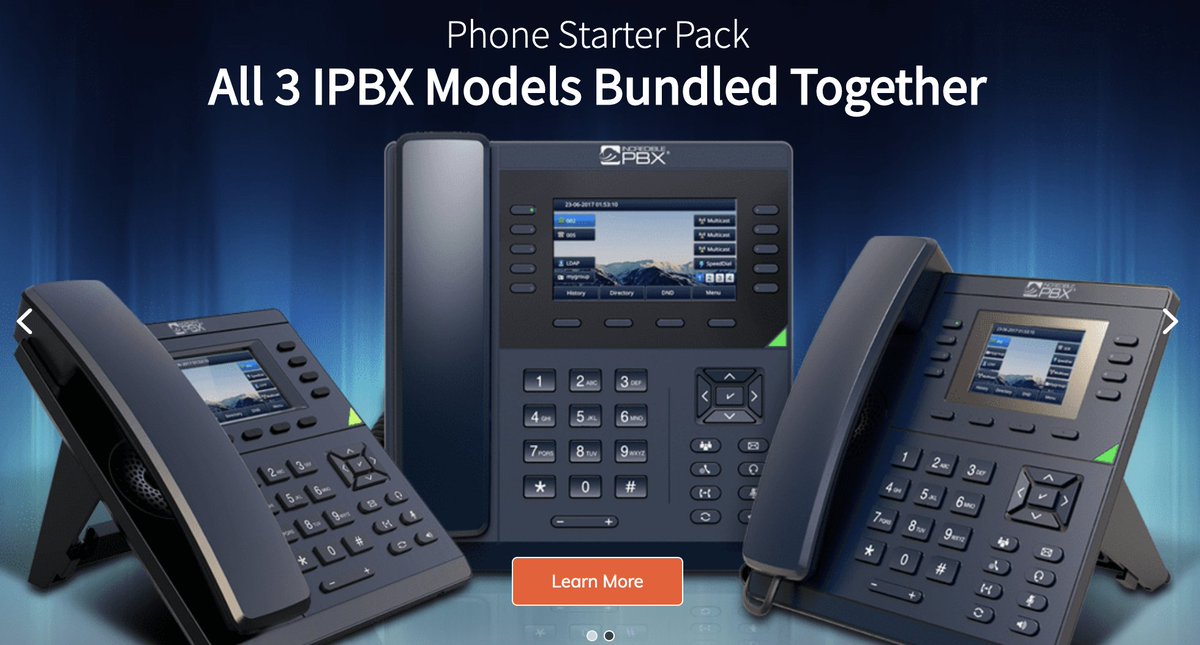
Deploying an Incredible PBX 2020 PUBLIC Server


With the almost overnight popularity of the new Clearly Anywhere softphone which provides Incredible PBX connectivity from virtually anywhere, we wanted to revisit our Incredible PBX 2020 PUBLIC tutorial to document some additional tips and tricks. And, because softphones need connectivity on both cellular networks and using Wi-Fi with dynamic IP addresses in multiple locations, exclusive whitelist-based access to Incredible PBX simply was no longer feasible. Additionally, due to Clearly Anywhere’s tight integration with the FreePBX® User Control Panel (UCP), remote access to UCP for mobile users has become more important particularly with the new QR Code auto-configuration option for Clearly Anywhere clients.

Safely deploying a public-facing Asterisk® server with full FreePBX functionality has become the Holy Grail for Nerd Vittles in 2019. Today we tackle it on the new Incredible PBX® 2020 platform featuring the latest releases of Asterisk 16 and FreePBX 15. The icing on today’s cake is an additional offer from Skyetel that supplements the current Nerd Vittles BOGO offer of up to $500 in half-priced VoIP services. Skyetel now starts you off with a $10 credit just for opening an account here. Then, after you have had an opportunity to kick the tires and perhaps purchase a DID for a buck, you can make $9 worth of phone calls before deciding whether to take advantage of the BOGO special by making a purchase of up to $250 and having Skyetel match your contribution. Once you have funded your account, you then can also take advantage of Skyetel’s free number porting offer for the next 60 days. To get your $10 credit, just open a ticket and request the $10 Nerd Vittles credit once you’ve signed up. To get the Nerd Vittles BOGO price match and take advantage of free number porting, simply open another ticket once you have added up to $250 to your account. Effective 10/1/2023, $25/month minimum spend required.

Making the Case for a Public-Facing PBX

We’ve had some of our pioneers trying out the Incredible PBX PUBLIC implementations for almost a year. Early on, the first question we got was why anyone would want to do this. After all, PBX in a Flash 3 and Incredible PBX for the better part of a decade have been deployed with a whitelist using the Travelin’ Man 3 firewall, and there’s never been a security issue. So why switch horses now? The short answer is mobile users with dynamic IP addresses. If all the users of your PBX are sitting behind the same NAT-based router with static IP addresses, the Travelin’ Man 3 design is perfect. The bad guys could never even see your server. But if some of your users either reside or travel outside your home base or if you want calls to follow you on your smartphone with Clearly Anywhere when you leave home or the office, then Travelin’ Man 3 blocked SIP access from these remote phones until their new IP addresses were whitelisted. Multiply this by dozens or hundreds of users, and network management suddenly became a full-time job. Yes, we’ve had tools such as dynamic DNS and PortKnocker to ease the pain, but it still was a knuckle-drill for mobile users. And, in today’s Covid world, much of the workforce is quickly morphing into mobile users without a traditional desk at any office. What we were also beginning to see were homegrown "improvements" to the IPtables firewall where users that didn’t appreciate the risks were exposing their servers to SIP attacks simply to ease the pain of connecting remotely.

The world also is becoming more SIP savvy. Just as folks are learning that a $35 antenna can provide an awesome collection of 4K Ultra HD TV channels without the expense of a monthly cable bill, others are learning that a SIP telephone or softphone app on your smartphone can provide free calls to and from anybody with a SIP URI without sharing your communications with Facebook or Microsoft. A public-facing PBX makes free worldwide SIP calling a reality.

Building the Base Platform for Incredible PBX PUBLIC

To get started today, begin by installing Incredible PBX 2020 using our latest tutorial. We strongly recommend a cloud-based KVM platform with a static IP address on the public Internet. We’ve even built an Incredible PBX 2020 image for our friends at CrownCloud. You won’t beat their pricing of $25/year which is about the same expense you will incur for electricity hosting your own server on premise. And you even get a snapshot backup at no additional cost.

Once you have set up your Incredible PBX 2020 server, the next step is to assign one or two fully-qualified domain names (FQDNs) to your server. You can have one FQDN for registering SIP extensions and a different one for anonymous SIP (invites) access to your server, or you can use the same FQDN for both. Security through obscurity provides an extra layer of protection for your server so choose your FQDNs carefully. sip.yourname.com provides almost no protection while f246g.yourname.com pretty much assures that nobody is going to guess your domain name. This is particularly important with the FQDN for SIP registrations because registered extensions on your PBX can obviously make phone calls that cost money. If you don’t have your own domain, you can always obtain a free FQDN from a service such as NoIP.com.

By default, Incredible PBX 2020 configures five extensions (701-705) and a Ring Group for those extensions (777) as well as four trunks. With Skyetel, your PBX is ready to make and receive calls as soon as you sign up. With the other three trunk providers, you only need to enable the trunk. You can add as many additional providers and extensions as you like and modify the ring group to meet your needs. To get started, be sure to configure the correct time zone for your server as this affects delivery of reminders. Run /root/timezone-setup. Next, set a secure password for admin access to the FreePBX GUI modules. Run /root/admin-pw-change. Then set a secure password for admin access to web applications such as AsteriDex, Reminders, and User Control Panel. Run /root/apache-pw-change. In addition to reviewing your extensions and ring group, review the default inbound route and choose the destination for the incoming calls from your provider. Finally, configure the outbound route to use the provider sequence desired. By default, it uses Skyetel for outbound calls.

If you plan to use Clearly Anywhere, you’ll need to add at least one PJsip extension on your PBX. Simply navigate to Applications -> Extensions in the FreePBX GUI. Choose Add Extension -> Add PJsip Extension. In the General tab, insert an extension number in User Extension and Display Name, e.g. 707. In the Advanced tab, set Max Contacts to 11 which will let you connect up to 5 Clearly Anywhere softphones to the extension. Click Submit and Reload Dialplan when prompted. Go back into the new extension and make note of your new credentials for User Manager. You’ll need these for Clearly Anywhere. Remember to also add the PJsip extension to the Inbound Route for your incoming calls.

Going Public with Incredible PBX 2020

Once you’ve tested making and receiving calls with your new server, you’re ready to convert it into a public-facing PBX. Before proceeding, remove any whitelist entries you’ve added using add-ip and add-fqdn by running del-acct. These can be added back after the GO-PUBLIC-2020 install script is run. In order to run the install script below, you’ll need your FQDNs that you chose above, plus a port number for future SSH/Putty access to your server, plus a list of the extensions you wish to make available for public access to your PBX. These whitelisted extensions can be reached via SIP URI from anywhere in the world by anybody. It works just like your old MaBell phone. Anybody, anywhere can dial your number. What’s changed is now the calls are free. So choose your list carefully. We recommend using the year you were born for your SSH port to keep things simple for you. Once the GO-PUBLIC-2020 script has been run, you can only access your PBX via SSH/Putty at the new port, for example: ssh -p 1990 root@yourFQDN.com

Now we’re ready to run the install script. It takes less than a minute. Before you begin, log out of ALL SIP extensions you have previously registered with Incredible PBX 2020 and change the server destination from an IP address to the FQDN you plan to assign to SIP registrations. Otherwise, these IP addresses will get banned while the install script is running below!

cd /root
wget http://incrediblepbx.com/go-public-2020.tar.gz
tar zxvf go-public-2020.tar.gz
rm -f go-public-2020.tar.gz
./GO-PUBLIC-2020

A Few Words About Incredible PBX PUBLIC Security

As with all Incredible PBX servers, Incredible PBX 2020-PUBLIC includes the Automatic Update Utility. Please don’t disable it. It’s our only way to push updates to you if some vulnerability is discovered down the road. It gets run whenever you login to your server as root using SSH/Putty. Do so regularly and follow us on Twitter for security alerts. There’s also an Incredible PBX RSS Feed that is displayed when you login to the Incredible PBX GUI with a browser. It, too, includes security alerts and should be checked regularly. It’s your phone bill.

Incredible PBX 2020-PUBLIC uses the ipset utility in conjunction with the IPtables firewall to block several countries that have inordinately high concentrations of folks that try to break into VoIP servers. In addition, your public PBX includes the VoIP Blacklist which includes another 100,000 bad guys from around the globe. These blacklists get updated every night by a script which is run from /etc/crontab. For your own safety, don’t disable or delete /etc/update-voipbl.sh or the other components upon which it relies.

Here are some other things you should do regularly to assure that your server remains secure. Login via SSH/Putty as root and check pbxstatus after the Automatic Update Utility is run. With the exception of the fax components, all the other items should be green all the time. From the Linux CLI, run: iptables -nL. This will show your firewall rules and whether any IP addresses have been banned by Fail2Ban. If there are banned IP addresses that are not your own, please open a thread on the VoIP-Info Forum and let us know about it. If there are dozens of banned IP addresses, shutdown your server immediately until the problem is identified and resolved. If the IP addresses happen to be your own users because of using incorrect passwords or because of using a server IP address instead of its FQDN for SIP registrations, unban the IP address:

fail2ban-client set asterisk unbanip xxx.xxx.xxx.xxx

Finally, watch the Asterisk CLI periodically for abnormal activity: asterisk -rvvvvvvvvvv

Tightening Up SSH Server Access

You obviously need a very secure root password for access to your server using SSH/Putty. Changing the TCP port for SSH access avoids the script kiddies, but it doesn’t offer much protection from a determined cracker. SSH login attempts are monitored by Fail2Ban, but Fail2Ban has issues when a determined intruder is using a powerful computing platform such as Amazon EC2. The more prudent solution is to disable SSH port access and use SSH Public Key Authentication as documented in the linked tutorial. Always, always use ssh-copy-id to copy your credentials to more than one desktop machine so that you don’t inadvertently lock yourself out of your PBX in the case of a hardware failure.

Web Access to Incredible PBX 2020 PUBLIC

By default, web access to all apps including FreePBX, UCP, AvantFax, AsteriDex, and Reminders is limited to whitelisted IP addresses. For some implementations, particularly those using Clearly Anywhere, this may not be ideal as UCP can assist with user management of the PBX as well as QR code provisioning of Clearly Anywhere. The Apache web server can be used to manage web access so long as you understand the need to apply Apache security patches in a timely manner.

Assign the same FQDN that you use for SIP access to port 80 for the UCP application. Deploy OpenVPN on your server and use the PBX’s OpenVPN IP address for general access to all web applications we listed above. If you’d like public access to the FreePBX GUI, assign web access for it to another random port, e.g. 8080 in our example below. Block web access to your server from the public IP address of your PBX on both port 80 and 8080 in our example below. Here’s how to accomplish that. Create a new file in /etc/pbx/httpdconf. Create public.conf with the following contents:

Listen 8080
 
<virtualhost *:80>
ServerAdmin you@gmail.com
ServerName 111.112.113.114
Redirect 403 /
UseCanonicalName Off
UserDir disabled
</virtualhost>

<virtualhost *:8080>
ServerAdmin you@gmail.com
ServerName 111.112.113.114
Redirect 403 /
UseCanonicalName Off
UserDir disabled
</virtualhost>

<virtualhost *:80>
ServerAdmin you@gmail.com
ServerName server-fqdn.com
DocumentRoot /var/www/html/ucp
ErrorLog /var/log/httpd/error_log
CustomLog /var/log/httpd/access_log common
</virtualhost>

<virtualhost *:80>
ServerAdmin you@gmail.com
ServerName 10.8.0.123
DocumentRoot /var/www/html
ErrorLog /var/log/httpd/error_log
CustomLog /var/log/httpd/access_log common
</virtualhost>

<virtualhost *:8080>
ServerAdmin you@gmail.com
ServerName server-fqdn.com
DocumentRoot /var/www/html
ErrorLog /var/log/httpd/error_log
CustomLog /var/log/httpd/access_log common
</virtualhost>

<virtualhost 127.0.0.1:80>
ServerAdmin you@gmail.com
ServerName 127.0.0.1
ServerAlias localhost
DocumentRoot /var/www/html
</virtualhost>

In the ServerAdmin lines, insert your email address. Replace 111.112.113.114 with the public IP address of your server. Replace server-fqdn.com with the FQDN assigned for SIP registration access to your PBX. Replace 10.8.0.123 with the OpenVPN private IP address of your PBX. Replace 8080 with the port you chose for FreePBX access to your server. Save the file and then restart Apache:  systemctl restart httpd.

Now it should be safe to open TCP port 80 and 8080 (or whatever port you chose) for web access to your server. Let’s also whitelist TCP 2267 for Clearly Anywhere access while we’re at it:

cd /etc/sysconfig
sed -i 's/10000:20000 -j ACCEPT/&\\n-A INPUT -p tcp -m tcp --dport 8080 -j ACCEPT/' iptables
sed -i 's/10000:20000 -j ACCEPT/&\\n-A INPUT -p tcp -m tcp --dport 80 -j ACCEPT/' iptables
sed -i 's/10000:20000 -j ACCEPT/&\\n-A INPUT -p tcp -m tcp --dport 2267 -j ACCEPT/' iptables
iptables-restart

Be sure to test all three access methods to verify that you haven’t left a security hole.

Keeping FreePBX 15 Modules Current

We strongly recommend that you periodically update all of your FreePBX modules to eliminate bugs and to reduce security vulnerabilities. From the Linux CLI, log into your server as root and issue the following commands:

rm -f /tmp/*
fwconsole ma upgradeall
fwconsole reload
/root/sig-fix
systemctl restart apache2
/root/sig-fix

Special Thanks: We want to give an extra special tip of the hat to the VoIP-Info Forum members who assisted in working the kinks out of the Incredible PBX PUBLIC offering. We also wish to thank JavaPipe LLC for a number of DDOS tips and tricks in securing CentOS 7 with IPtables.

Originally published: Monday, December 30, 2019    Updated: Monday, September 28. 2020


Need help with Asterisk? Visit the VoIP-info Forum.


Special Thanks to Our Generous Sponsors


FULL DISCLOSURE: ClearlyIP, Skyetel, Vitelity, DigitalOcean, Vultr, VoIP.ms, 3CX, Sangoma, TelecomsXchange and VitalPBX have provided financial support to Nerd Vittles and our open source projects through advertising, referral revenue, and/or merchandise. As an Amazon Associate and Best Buy Affiliate, we also earn from qualifying purchases. We’ve chosen these providers not the other way around. Our decisions are based upon their corporate reputation and the quality of their offerings and pricing. Our recommendations regarding technology are reached without regard to financial compensation except in situations in which comparable products at comparable pricing are available from multiple sources. In this limited case, we support our sponsors because our sponsors support us.

BOGO Bonaza: Enjoy state-of-the-art VoIP service with a $10 credit and half-price SIP service on up to $500 of Skyetel trunking with free number porting when you fund your Skyetel account. No limits on number of simultaneous calls. Quadruple data center redundancy. $25 monthly minimum spend required. Tutorial and sign up details are here.

The lynchpin of Incredible PBX 2020 and beyond is ClearlyIP components which bring management of FreePBX modules and SIP phone integration to a level never before available with any other Asterisk distribution. And now you can configure and reconfigure your new Incredible PBX phones from the convenience of the Incredible PBX GUI.

VitalPBX is perhaps the fastest-growing PBX offering based upon Asterisk with an installed presence in more than 100 countries worldwide. VitalPBX has generously provided a customized White Label version of Incredible PBX tailored for use with all Incredible PBX and VitalPBX custom applications. Follow this link for a free test drive!
 

Special Thanks to Vitelity. Vitelity is now Voyant Communications and has halted new registrations for the time being. Our special thanks to Vitelity for their unwavering financial support over many years and to the many Nerd Vittles readers who continue to enjoy the benefits of their service offerings. We will keep everyone posted on further developments.


The Next Best Thing to (formerly free) Google Voice

Today we want to once again shine the spotlight on LocalPhone, an oft-overlooked VoIP service that’s been around forever. You can call to and be called from any LocalPhone user at no cost. They also offer phone numbers (DIDs) of your choice almost anywhere in the world with free or almost free incoming calls. For those wanting a U.S. DID, the cost is 99¢ a month with a $3 setup fee. That gets you up to 100 free incoming calls a day to your PBX or any SIP phone. Additional calls are a penny per call. There are no limitations on the duration of the calls. If you prefer to forward the calls to your cellphone number in the contiguous U.S., there’s an additional fee of 0.5¢ per minute. But there’s little reason to do that when sending the calls to a SIP softphone on your Android device or iPhone is free. And now the mobile LocalPhone app supports PUSH Notifications. We’ll show you how.

FYI: Nerd Vittles receives a referral credit to keep the lights on when you sign up for service.

Deciphering Your SIP Credentials with LocalPhone

Once you have signed up for a LocalPhone account, the first thing you’ll want to do is make note of your Internet Phone credentials under My Account. These are what we typically refer to as SIP credentials consisting of a SIP ID, SIP password, and SIP server (localphone.com). That’s all you’ll need to configure an incoming LocalPhone trunk on any Incredible PBX® server. And these are the same settings you’d use to configure any SIP phone running on any Android or iOS device. As we noted, you and any other LocalPhone user can call any Internet Phone number worldwide at no cost without limitation. For world travelers, you’ll want to download the LocalPhone app for your smartphone (Android or iOS) and take advantage of their extremely competitive international calling rates.1

Ordering Incoming Numbers (DIDs) from LocalPhone

Begin by funding your account under My Account -> Add Credit. $10 will last you a long time.

The next step is to order one or more incoming phone numbers from LocalPhone.2 If you have friends in far away places that call you frequently, you can purchase DIDs in those locations to eliminate the cost of incoming calls both to them and to you. If you only want a dirt cheap U.S. DID for your home or small office, then LocalPhone is also a perfect fit. Navigate to My Account -> Incoming Numbers and choose the United States as the desired Country. Next, pick the State and City for the desired DID. For free incoming calls, set Call Forwarding and Caller ID for Internet Phone to your assigned Internet Phone SIP ID. You can also elect to forward calls to a SIP URI, if desired. Agree to the terms of use and make your purchase.

Configuring a LocalPhone Trunk with Incredible PBX

We’ve previously covered the LocalPhone trunk setup with Wazo. Most other releases of Incredible PBX include preconfigured LocalPhone trunks for incoming and outgoing calls. Login to the Incredible PBX GUI as admin using your favorite browser and navigate to Connectivity -> Trunks and edit the LocalPhone-In trunk. Set Disable Trunk to NO. Then click the sip-Settings tab. Insert your LocalPhone SIP ID in the username, fromuser, and authuser fields. Insert your LocalPhone SIP Password in the secret field. Change the context field entry to from-trunk. Click on the Incoming tab, and modify the Register String 9999999:yourpassword@localphone.com/9999999 replacing 9999999 with your LocalPhone SIP ID and yourpassword with your LocalPhone SIP Password. Click the Submit button and reload your dialplan when prompted.

Navigate to Connectivity -> Inbound Routes and create a new Inbound Route for LocalPhone using your SIP ID as the DID Number and choosing a desired Destination for incoming calls from your LocalPhone DID. Save your settings and reload the dialplan when prompted.

Configuring a LocalPhone Trunk with VitalPBX

Login to the VitalPBX GUI as admin using your favorite browser and navigate to PBX -> External -> Trunks. Create a new SIP trunk with the following settings replacing 999999 with your LocalPhone SIP ID and 1234 with the LocalPhone SIP Password. Leave the Device for Incoming Calls (User) section blank. Then click SAVE and reload your dialplan.

  • Description: LocalPhone
  • Codecs: ulaw,alaw
  • Local Username: 999999
  • Remote Host: localphone.com
  • Remote Port: 5060
  • Local Secret: 1234
  • Insecure: Port,Invite
  • Allow Inbound Calls: YES
  • Username: [leave blank]
  • Host: [leave blank]
  • Local Secret: [leave blank]
  • Remote Username: 999999
  • Remote Secret: 1234
  • From User: 999999
  • From Domain: localphone.com
  • Qualify: YES
  • Insecure: [leave blank]
  • IP Authentication: NO
  • Qualify: [leave default]
  • Register String: 999999:1234@localphone.com/999999

Navigate to PBX -> External -> Inbound Routes. Create a new Inbound Route for LocalPhone using your SIP ID as the DID Number and choosing a desired Destination for incoming calls from your LocalPhone DID. Save your settings and reload the dialplan when prompted.

Configuring a LocalPhone Trunk with FreePBX

Login to the FreePBX® GUI as admin using your favorite browser and navigate to Connectivity -> Trunks. Add a new chan_sip trunk named localphone. Then click on the sipSettings tab and enter the following replacing 999999 with your LocalPhone SIP ID and 1234 with the LocalPhone SIP Password.

  • username=9999999
  • type=friend
  • secret=1234
  • nat=no
  • insecure=port,invite
  • host=localphone.com
  • fromuser=9999999
  • fromdomain=localphone.com
  • dtmfmode=rfc2833
  • disallow=all
  • context=from-trunk
  • canreinvite=no
  • authuser=9999999
  • allow=ulaw&alaw

Next, click on the Incoming tab and enter the following Register String replacing 999999 with your LocalPhone SIP ID and 1234 with the LocalPhone SIP Password:

9999999:1234@localphone.com/9999999

Then click SUBMIT and reload your dialplan.

Navigate to Connectivity -> Inbound Routes and create a new Inbound Route for LocalPhone using your SIP ID as the DID Number and choosing a desired Destination for incoming calls from your LocalPhone DID. Save your settings and reload the dialplan when prompted.

Using Local Numbers for International Calls

LocalPhone has a unique feature that lets you dial a local number from a phone number you have whitelisted in your country and reach almost anyone in the world that you’ve added to your Contacts List. You only pay LocalPhone’s discounted international calling rate for the calls. For example, to call a landline in the U.K. from the U.S. using a LocalPhone-provided U.S. phone number, the calling rate is less than a penny a minute. A call to Cyprus by dialing a U.S. number assigned to your account for your whitelisted phone numbers is 4.5 cents per minute. To get started setting up your whitelisted phone numbers and contacts list, navigate to My Account -> Local Numbers in your LocalPhone account. In your Local Numbers list, first add and verify phone numbers you want to authorize to make calls on your nickel. Next, add the names and phone numbers of international destinations you wish to reach by dialing a local number. LocalPhone will immediately assign a local number for each destination. Simply add these local numbers to the contacts list on your smartphone, and you can call from anywhere in your country at the discounted LocalPhone international calling rates. There are no double-dialing or call menus to navigate. Dialing the assigned local number transparently connects you directly to your destination with no intermediate hurdles.

Using LocalPhone with Other Trunk Providers

So long as your PBX doesn’t have more than two incoming calls to a single DID at the same time, the most economical PBX design is to use LocalPhone DIDs as your published DIDs. This reduces the cost of incoming calls to less than a dollar a month per DID for up to 3,000 incoming calls of unlimited duration. Then use one of our Platinum Sponsors, Skyetel or our soon-to-be-available ClearlyIP SIP trunking service for outbound calls and spoof the outbound CallerID on those other trunks using your LocalPhone DID.

Enjoying the Best of All Worlds with LocalPhone

If you have an iPhone or Android smartphone in addition to a PBX, you can take advantage of LocalPhone’s ability to send incoming calls to multiple destinations. Just make sure your PBX isn’t routing the incoming calls to a destination that is automatically answered, e.g. an IVR. On your Android phone, download the VitalPBX Communicator from the Google Play Store and configure a SIP connection using your LocalPhone SIP credentials. Incoming calls from your LocalPhone DIDs and Internet Phone Number now will be sent to both destinations.

If you have followed one of our previous tutorials that document making SIP URI calls from either a PBX or a SIP client such as LinPhone on your smartphone, then you can take advantage of LocalPhone’s incoming SIP URI feature.3 Just dial 9999999@localphone.com where 9999999 is any LocalPhone SIP ID. You also can add Custom Extensions in Incredible PBX much like the Lenny extension using a Dial string of SIP/9999999@localphone.com to reach worldwide LocalPhone destinations from any PBX extension at no cost. Enjoy!

Originally published: Monday, December 9, 2019


Need help with Asterisk? Visit the VoIP-info Forum.


Special Thanks to Our Generous Sponsors


FULL DISCLOSURE: ClearlyIP, Skyetel, Vitelity, DigitalOcean, Vultr, VoIP.ms, 3CX, Sangoma, TelecomsXchange and VitalPBX have provided financial support to Nerd Vittles and our open source projects through advertising, referral revenue, and/or merchandise. As an Amazon Associate and Best Buy Affiliate, we also earn from qualifying purchases. We’ve chosen these providers not the other way around. Our decisions are based upon their corporate reputation and the quality of their offerings and pricing. Our recommendations regarding technology are reached without regard to financial compensation except in situations in which comparable products at comparable pricing are available from multiple sources. In this limited case, we support our sponsors because our sponsors support us.

BOGO Bonaza: Enjoy state-of-the-art VoIP service with a $10 credit and half-price SIP service on up to $500 of Skyetel trunking with free number porting when you fund your Skyetel account. No limits on number of simultaneous calls. Quadruple data center redundancy. $25 monthly minimum spend required. Tutorial and sign up details are here.

The lynchpin of Incredible PBX 2020 and beyond is ClearlyIP components which bring management of FreePBX modules and SIP phone integration to a level never before available with any other Asterisk distribution. And now you can configure and reconfigure your new Incredible PBX phones from the convenience of the Incredible PBX GUI.

VitalPBX is perhaps the fastest-growing PBX offering based upon Asterisk with an installed presence in more than 100 countries worldwide. VitalPBX has generously provided a customized White Label version of Incredible PBX tailored for use with all Incredible PBX and VitalPBX custom applications. Follow this link for a free test drive!
 

Special Thanks to Vitelity. Vitelity is now Voyant Communications and has halted new registrations for the time being. Our special thanks to Vitelity for their unwavering financial support over many years and to the many Nerd Vittles readers who continue to enjoy the benefits of their service offerings. We will keep everyone posted on further developments.


  1. Rates are based on the lowest pay as you go per-minute price to call a landline or a mobile. Skype is a registered trademark of Microsoft Corporation. []
  2. LocalPhone advises that DID fulfillment can take up to 14 days although our orders always have been completed in less than an hour. []
  3. LocalPhone offers call filtering for your Internet Phone number using either a blacklist or whitelist in addition to offering the option of blocking anonymous calls. []

Meet Incredible PBX 2020 for CentOS 7


We are pleased to introduce the production-ready release of Incredible PBX® 2020 for CentOS 7 with the latest version of Asterisk® 16 and the Clearly IP-enhanced FreePBX® 15 components supporting the new Incredible PBX line of SIP phones. Today’s the final day to score some incredible deals on Incredible PBX hardware (above) and, for those that prefer cloud-based platforms, the new Incredible PBX 2020 installer for CentOS 7 is now available as well. Complete documentation is provided below for do-it-yourselfers.

In addition to the latest Asterisk 16 release, you also get the entire FreePBX 15 GPL module collection including the ClearlyIP-enhanced User Control Panel (UCP) plus the Incredible PBX device management module which lets you provision the entire Incredible PBX phone line from within the GUI. The module also allows direct integration with PBX functions allowing your end-users to control their button maps, BLF, speed dials and applications such as presence control, follow-me settings and login-logout coming soon. As new applications are added or developed they will be available for use on the Incredible PBX phones.

Incredible PBX 2020 is plug-and-play with immediate calling capability using any of four commercial SIP providers. And ClearlyIP self-configuring trunks will be available later this month with native SMS capability as well as inbound AND outbound CNAM and E911 support. For do-it-yourselfers, you can choose one of 16 other preconfigured SIP providers, enter your credentials, and enjoy instant connectivity without worrying about SIP settings. Last, but not least, you can easily turn your Incredible PBX 2020 server into a secure public-facing PBX, add fax support, or interconnect a Raspberry Pi for traveling so that you never miss a call.


What’s Included? Incredible PBX 2020 serves up a VoIP powerhouse featuring Asterisk 16, the FreePBX 15 GPL platform including User Control Panel (UCP), an Apache web server, the latest MariaDB SQL server (formerly MySQL), SendMail, and the Incredible PBX feature set including SIP, SMS, Opus, voice recognition, PicoTTS Text-to-Speech VoIP applications plus fax support, Click-to-Dial, News, Weather, Reminders, ODBC, and hundreds of features that typically are found in commercial PBXs: Conferencing, IVRs and AutoAttendants, Email Delivery of Voicemails, and much more.

Choosing a SIP Provider. Incredible PBX 2020 comes preconfigured with support for five SIP extensions and four of the major SIP providers: Skyetel, VoIP.ms, V1VoIP, and Anveo Direct. We obviously hope you’ll choose Skyetel not only because they financially support Nerd Vittles and our open source projects, but also because it is a clearly superior platform offering crystal-clear communications and triple-redundancy so you never miss a call. Skyetel also sets itself apart from the other providers in the support department. They actually respond to issues, and there’s never a charge. As the old saying goes, they may not be the cheapest, but you get what you pay for. Even without taking advantage of Nerd Vittles half-price offer on up to $500 of Skyetel services, they’re still dirt cheap compared to the Bell Sisters and cable companies. Skyetel is so sure you’ll love their service that they give you a $10 credit to kick the tires before you ever spend a dime. Traditional DIDs are $1 per month. Outbound conversational calls are $0.012 per minute. Incoming conversational calls are a penny a minute, and CallerID lookups are $0.004. You only pay for minutes you use. Once you’re satisfied with the service and fund your account, you can port in your existing DIDs at no cost for 60 days after signup. In short, you have nothing to lose by trying out the Skyetel service. Effective 10/1/2023, $25/month minimum spend required.

Choosing a Platform for Incredible PBX 2020

As with our other open source offerings, the platform choice for Incredible PBX 2020 depends upon a number of factors. For on-premise installations, we recommend you consider the Incredible PBX server which works well for home or SOHO implementations. Cloud-based platforms are available for about $2-$5 a month. We no longer recommend the OpenVZ offerings below because of a bug in the SolusVM systemd implementation with CentOS 7. KVM platforms are much more robust and reliable, but you still need off-site backups AND a tested backup plan. Three providers previously listed have closed their doors in 2019. You’ve been warned.

Vultr, Digital Ocean, and OVH are your best bets at the moment. And Vultr and Digital Ocean both support Nerd Vittles through referral credits.

ProviderRAMDiskBandwidthPerformance as of 12/1/19Cost
CrownCloud KVM (LA)1GB20GB +
Snapshot
1TB/month598Mb/DN 281Mb/UP
2CPU Core
$25/year
Best Buy!
Naranjatech KVM (The Netherlands)1GB20GB1TB/monthHosting since 2005
VAT: EU res.
20€/year w/code:
SBF2019
BudgetNode KVM (LA)1GB40GB RAID101TB/monthAlso available in U.K PM @Ishaq on LET before payment$24/year
FreeRangeCloud KVM (Ashburn VA, Winnipeg, Freemont CA)1GB20GB SSD3TB/monthPick EGG loc'n
Open ticket for last 5GB SSD
$30/year w/code:
LEBEGG30

Installing Incredible PBX 2020 with CentOS 7

NOTE: The generic Incredible PBX 2020 tarball below is suitable for ALL CentOS 7 platforms. If you are installing Incredible PBX on dedicated hardware, a slightly enhanced implementation of Asterisk is possible using the BUILD_NATIVE flag. Do not use this option on virtual machine platforms or in environments where the processor may change if you may migrate to new hardware down the road as Asterisk will not load successfully. To download the enhanced version, replace the incrediblepbx2020.1.tar.gz lines below with this tarball: incrediblepbx2020.1.native.tar.gz.

If you’ve installed previous iterations of Incredible PBX, today’s drill is similar. Here is a thumbnail sketch of the install procedure for Incredible PBX 2020. Begin by installing a minimal CentOS 7 (64-bit) platform or pick the CentOS 7 option with 1GB RAM and 20GB of storage from your cloud provider’s menu of choices. Then log into your server as root using SSH or Putty from a desktop PC that you will use to manage your PBX. This assures that your desktop machine gets whitelisted in the firewall setup. Now issue the following commands:

passwd
yum -y update
yum -y install net-tools nano wget tar
cd /root
wget http://incrediblepbx.com/incrediblepbx2020.1.tar.gz
tar zxvf incrediblepbx2020.1.tar.gz
rm -f incrediblepbx2020.1.tar.gz
# to add swap file on non-OpenVZ cloud platforms with no swap file
./create-swapfile-DO
# kick off Phase I install
./IncrediblePBX2020.sh
# after reboot, kick off Phase II install
./IncrediblePBX2020.sh
# set desired timezone
./timezone-setup
# set FreePBX admin password
./admin-pw-change
# set Apache admin password for AsteriDex and Reminders
./apache-pw-change
# display your passwords
./show-passwords
# optionally install Incredible Fax 2020
./incrediblefax2020.sh
# remember to enable TUN/TAP if using VPS Control Panel with OpenVZ
# reconfigure PortKnocker if installing on an OpenVZ platform
echo 'OPTIONS="-i venet0:0"' >> /etc/sysconfig/knockd
service knockd restart
# set up NeoRouter VPN client, if desired
nrclientcmd
# check network speed
wget -O speedtest-cli https://raw.githubusercontent.com/sivel/speedtest-cli/master/speedtest.py
chmod +x speedtest-cli
./speedtest-cli

WebMin is also installed and configured as part of the base install. The root password for access is the same as your Linux root password. We strongly recommend that you not use WebMin to make configuration changes to your server. You may inadvertently damage the operation of your PBX beyond repair. WebMin is an excellent tool to LOOK at how your server is configured. When used for that purpose, we highly recommend WebMin as a way to become familiar with your Linux configuration.

Planning Ahead for That Rainy Day

If you haven’t already learned the hard way, let us save you from a future shock. Hardware fails. All of it. So spend an extra hour now so that you’ll be prepared when (not if) disaster strikes. First, once you have your new PBX configured the way you plan to use it, make a backup of your PBX by running the Incredible Backup script: /root/incrediblebackup16

Copy down the name of the backup file that was created. You’ll need it in a few minutes.

Second, build yourself an identical VirtualBox platform on your desktop PC. It’s the same steps as outlined above.

Next, create a /backup folder on your VirtualBox PBX and copy the backup file from your main server to your VirtualBox server and restore it after logging in to VirtualBox PBX as root:

mkdir /backup
scp root@main-pbx-ip-address:/backup/backup-file-name.tar.gz /backup/.
/root/incrediblerestore16 /backup/backup-file-name.tar.gz

Complaints that you "forgot" to make a backup and your hardware has failed or your provider has gone out of business are not welcomed. We’re sorry for your loss. Case closed.

Completing the Incredible PBX Setup Procedure

Unless your desktop PC and server are both on the same private LAN, the install procedure should be performed from a desktop PC using SSH or Putty. This will insure that your desktop PC is also whitelisted in the Incredible PBX firewall. Using the console to perform the install is NOT recommended as your desktop PC will not be whitelisted in the firewall. This may result in your not being able to log in to your server. Once you have network connectivity, log in to your server as root from a desktop PC using your root password. Accept the license agreement by pressing ENTER.

Kick off the Phase I install. Once your server reboots and you log back in as root, start the Phase II install. All of your passwords will be randomly assigned with the exception of the root user Linux password. You can set it at any time by issuing the command: passwd. You also must set up an admin password to access the FreePBX web GUI with the command: /root/admin-pw-change. With the exception of your root user and FreePBX admin passwords, most of the remaining passwords can be displayed using the command: /root/show-passwords.

Finally, if your PBX is sitting behind a NAT-based router, you’ll need to redirect incoming UDP 5060 and UDP 10000-20000 traffic to the private IP address of your PBX. This is required for all of the SIP providers included in the Incredible PBX 2020 default build that don’t require a SIP registration. Otherwise, inbound calls will fail.

Configuring Skyetel for Incredible PBX 2020

If you’ve decided to go with Skyetel, here’s the drill. Sign up for Skyetel service and take advantage of the Nerd Vittles specials. First, complete the Prequalification Form here. You then will be provided a link to the Skyetel site to complete your registration. Once you have registered on the Skyetel site and your account has been activated, open a support ticket and request the $10 credit for your account by referencing the Nerd Vittles special offer. Once you are satisfied with the service, fund your account as desired, and Skyetel will match your deposit of up to $250 simply by opening another ticket. That gets you up to $500 of half-price calling. Credit is limited to one per person/company/address/location.

Skyetel does not use SIP registrations to make connections to your PBX. Instead, Skyetel utilizes Endpoint Groups to identify which servers can communicate with the Skyetel service. An Endpoint Group consists of a Name, an IP address, a UDP or TCP port for the connection, and a numerical Priority for the group. For incoming calls destined to your PBX, DIDs are associated with an Endpoint Group to route the calls to your PBX. For outgoing calls from your PBX, a matching Endpoint Group is required to authorize outbound calls through the Skyetel network. Thus, the first step in configuring the Skyetel side for use with your PBX is to set up an Endpoint Group. Here’s a typical setup for Incredible PBX 2020:

  • Name: MyPBX
  • Priority: 1
  • IP Address: PBX-Public-IP-Address
  • Port: 5060
  • Protocol: UDP
  • Description: my.incrediblepbx.com

To receive incoming PSTN calls, you’ll need at least one DID. On the Skyetel site, you acquire DIDs under the Phone Numbers tab. You have the option of Porting in Existing Numbers (free for the first 60 days after you sign up for service) or purchasing new ones under the Buy Phone Numbers menu option.

Once you have acquired one or more DIDs, navigate to the Local Numbers or Toll Free Numbers tab and specify the desired SIP Format and Endpoint Group for each DID. Add SMS/MMS and E911 support, if desired. Call Forwarding and Failover are also supported. That completes the VoIP setup on the Skyetel side. System Status is always available here.

Configuring VoIP.ms for Incredible PBX 2020

To sign up for VoIP.ms service, may we suggest you use our signup link so that Nerd Vittles gets a referral credit for your signup. Once your account is set up, you’ll need to set up a SIP SubAccount and, for Authentication Type, choose Static IP Authentication and enter your Incredible PBX 2020 server’s public IP address. For Transport, choose UDP. For Device Type, choose Asterisk, IP PBX, Gateway or VoIP Switch. Order a DID in their web panel, and then point the DID to the SubAccount you just created. Be sure to specify atlanta1.voip.ms as the POP from which to receive incoming calls. In the Incredible PBX GUI, be sure to enable the VoIP.ms trunk.

Configuring V1VoIP for Incredible PBX 2020

To sign up for V1VoIP service, sign up on their web site. Then login to your account and order a DID under the DIDs tab. Once the DID has been assigned, choose View DIDs and click on the Forwarding button beside your DID. For Option #1, choose Forward to IP Address/PBX. For the Forwarding Address, enter the public IP address of your server. For the T/O (timeout) value, set it to 2o seconds. Then click the Update button. Under the Termination tab, create a new Endpoint with the public IP address of your server so that you can place outbound calls through V1VoIP. In the Incredible PBX GUI, be sure to enable all of the V1VoIP trunks.

Configuring Anveo Direct for Incredible PBX 2020

To sign up for Anveo Direct service, sign up on their web site and then login. After adding funds to your account, purchase a DID under Inbound Service -> Order DID. Next, choose Configure Destination SIP Trunk. Give the Trunk a name. For the Primary SIP URI, enter $[E164]$@server-IP-address. For Call Options, select your new DID from the list. You also must whitelist your public IP address under Outbound Service -> Configure. Create a new Call Termination Trunk and name it to match your server. For Dialing Prefix, choose six alphanumeric characters beginning with a zero. In Authorized IP Addresses, enter the public IP address of your server. Set an appropriate rate cap. We like $0.01 per minute to be safe. Set a concurrent calls limit. We like 2. For the Call Routing Method, choose Least Cost unless you’re feeling extravagant. For Routes/Carriers, choose Standard Routes. Write down your Dialing Prefix and then click the Save button.

Before you can make outbound calls through Anveo Direct from your PBX, you first must configure the Dialing Prefix that you wrote down in the previous step. Log into the GUI as admin using a web browser and edit the Anveo-Out trunk in Connectivity -> Trunks. Enable the Trunk. Then click on the custom-Settings tab and replace anveo-pin with your actual Dialing Prefix. Click Submit and Apply Config to complete the setup. In the Incredible PBX GUI, be sure to enable all of the remaining Anveo trunks.

By default, incoming Anveo Direct calls will be processed by the Default inbound route on your PBX. If you wish to redirect incoming Anveo Direct calls using DID-specific inbound routes, then you’ve got a bit more work to do. In addition to creating the inbound route using the 11-digit Anveo Direct DID, enter the following commands after logging into your server as root using SSH/Putty:

cd /etc/asterisk
echo "[from-anveo]" >> extensions_custom.conf
echo "exten => _.,1,Ringing" >> extensions_custom.conf
echo "exten => _.,n,Goto(from-trunk,\\${SIP_HEADER(X-anveo-e164)},1)" >> extensions_custom.conf
asterisk -rx "dialplan reload"

Configuring a Softphone for Incredible PBX 2020

We’re in the home stretch now. You can connect virtually any kind of telephone to your new PBX. Plain Old Phones require an analog telephone adapter (ATA) which can be a separate board in your computer from a company such as Digium. Or it can be a standalone SIP device such as ObiHai’s OBi100 or OBi110 (if you have a phone line from Ma Bell to hook up as well). SIP phones can be connected directly so long as they have an IP address. These could be hardware devices or software devices such as the YateClient softphone. We’ll start with a free one today so you can begin making calls. You can find dozens of recommendations for hardware-based SIP phones both on Nerd Vittles and the PIAF Forum when you’re ready to get serious about VoIP telephony.

We recommend YateClient which is free. Download it from here. Run YateClient once you’ve installed it and enter the credentials for the 701 extension on Incredible PBX. You can find them by running /root/show-passwords. You’ll need the IP address of your server plus your extension 701 password. In the YateClient, fill in the blanks using the IP address of your Server, 701 for your Username, and whatever Password was assigned to the extension when you installed Incredible PBX. Click OK to save your entries.

Once you are registered to extension 701, close the Account window. Then click on YATE’s Telephony Tab and place some test calls to the numerous apps that are preconfigured on Incredible PBX. Dial a few of these to get started:

DEMO - Apps Demo
123 - Reminders
947 - Weather by ZIP Code
951 - Yahoo News
TODAY - Today in History
LENNY - The Telemarketer's Worst Nightmare

If you are a Mac user, another great no-frills softphone is Telephone. Just download and install it from the Mac App Store. For Android users, check out the terrific new VitalPBX Communicator. Works flawlessly with Incredible PBX.

Audio Issues with Incredible PBX 2020

If you experience one-way or no audio on some calls, add your external IP address and LAN subnet in the GUI by navigating to Settings -> Asterisk SIP Settings. In the NAT Settings section, click Detect Network Settings. Click Submit and Apply Settings to save your changes.

Incredible PBX 2020 Administration

We’ve eased the pain of administering your new PBX with a collection of scripts which you will find in the /root folder after logging in with SSH or Putty. Here’s a quick summary of what each of the scripts does.

add-fqdn is used to whitelist a fully-qualified domain name in the firewall. Because Incredible PBX 2020 blocks all traffic from IP addresses that are not whitelisted, this is what you use to authorize an external user for your PBX. The advantage of an FQDN is that you can use a dynamic DNS service to automatically update the IP address associated with an FQDN so that you never lose connectivity.

add-ip is used to whitelist a public IP address in the firewall. See the add-fqdn explanation as to why this matters.

del-acct is used to remove an IP address or FQDN from the firewall’s whitelist.

admin-pw-change is used to set the admin password for access to the FreePBX/Incredible PBX web GUI using a browser pointed to the local IP address of your server.

apache-pw-change is used to set the admin password for access to Apache/Incredible PBX apps including AsteriDex and Reminders. This provides a password layer of protection for access to these applications.

reset-conference-pins is a script that automatically and randomly resets the user and admin pins for access to the preconfigured conferencing application. Dial C-O-N-F from any registered SIP phone to connect to the conference.

reset-extension-passwords is a script that automatically and randomly resets ALL of the SIP passwords for extensions 701-705. Be careful using this one, or you may disable existing registered phones and cause Fail2Ban to blacklist the IP addresses of those users. HINT: You can place a call to the Ring Group associated with all five extensions by dialing 777.

reset-reminders-pin is a script that automatically and randomly resets the pin required to access the Telephone Reminders application by dialing 123. It’s important to protect this application because a nefarious user could set up a reminder to call a number anywhere in the world assuming your SIP provider’s account was configured to allow such calls.

show-feature-codes is a cheat sheet for all of the feature codes which can be dialed from any registered SIP phone. It documents how powerful a platform Incredible PBX 2020 actually is. A similar listing is available in the GUI at Admin -> Feature Codes.

show-passwords is a script that displays most of the passwords associated with Incredible PBX 2020. This includes SIP extension passwords, voicemail pins, conference pins, telephone reminders pin, and your Anveo Direct outbound calling pin (if configured). Note that voicemail pins are configured by the user of a SIP extension the first time the user accesses the voicemail system by dialing *97.

update-IncrediblePBX is the Automatic Update Utility which checks for server updates from incrediblepbx.com every time you log into your server as root using SSH or Putty. Do NOT disable it as it is used to load important fixes and security updates when necessary. We recommend logging into your server at least once a week.

pbxstatus (shown above) displays status of all major components of Incredible PBX 2020.

Forwarding Calls to Your Cellphone. Keep in mind that inbound calls to your DIDs automatically ring all five SIP extensions, 701-705. The easiest way to also ring your cellphone is to set one of these five extensions to forward incoming calls to your cellphone. After logging into your PBX as root, issue the following command to forward calls from extension 705 to your cellphone: asterisk -rx "database put CF 705 6781234567"

To remove call forwarding: asterisk -rx "database del CF 705"

Configuring SendMail with Incredible PBX 2020

In order to receive voicemails by email delivery, outbound mail functionality from your server obviously is required. If you’ve deployed your server in your home, your Internet Service Provider probably blocks downstream mail servers such as Incredible PBX from sending mail. This is done to reduce SPAM. In this case, you will need to configure SendMail using either your ISP or Gmail as an SMTP Relay Host. NOTE: If you are using a Gmail account with 2-step verification enabled, you MUST use a Gmail App Key instead of your Gmail account password. You also must enable Less Secure Apps access to the Gmail account. Here are the steps using a Gmail account:

cd /etc/mail
yum -y install sendmail-cf
hostname -f > genericsdomain
touch genericstable
cd /usr/bin
rm -f makemap
ln -s ../sbin/makemap.sendmail makemap
cd /etc/mail
makemap -r hash genericstable.db < genericstable
mv sendmail.mc sendmail.mc.original
wget http://incrediblepbx.com/sendmail.mc.gmail
cp sendmail.mc.gmail sendmail.mc
mkdir -p auth
chmod 700 auth
cd auth
echo AuthInfo:smtp.gmail.com \\"U:smmsp\\" \\"I:user_id\\" \\"P:password\\" \\"M:PLAIN\\" > client-info
echo AuthInfo:smtp.gmail.com:587 \\"U:smmsp\\" \\"I:user_id\\" \\"P:password\\" \\"M:PLAIN\\" >> client-info
echo AuthInfo:smtp.gmail.com:465 \\"U:smmsp\\" \\"I:user_id\\" \\"P:password\\" \\"M:PLAIN\\" >> client-info
# Stop here and edit client-info (nano -w client-info) in all three lines.
# Replace  user_id with your gMail account name without @gmail.com
# Replace password with your real gMail password OR
#  use your Gmail App Key if 2-step verification is enabled
# Be sure to replace the double-quotes shown above if they don't appear in the file!!!
# Save your changes (Ctrl-X, Y, then Enter)
chmod 600 client-info
makemap -r hash client-info.db < client-info
cd ..
# on Debian servers, uncomment next line
# sed -i 's|sendmail-cf|sendmail/cf|' Makefile
make
systemctl restart sendmail

If your server is hosted in the cloud and your provider does not block TCP port 25, then you can send mail without using a SmartHost; however, your server's hostname must actually be real or downstream mail servers will reject your mail. You can set your server's hostname like this: hostname myserver.myhost.com. This is usually sufficient; however, it's a good idea to also add the hostname in /etc/hostname and in /etc/hosts as the first entry on 127.0.0.1 line:

127.0.0.1   myserver.myhost.com pbx.local localhost localhost.localdomain

Next, test outbound mail using this command with your actual email address:

echo "test" | mail -s testmessage yourname@youremaildomain.com

Once you are sure your emails are being delivered reliably, here's a sample GUI voicemail configuration for an extension:


Getting Started with Incredible Fax 2020

Believe it or not, there still are lots of folks that use faxes in their everyday lives. If you're one of them, Incredible PBX has your back. Begin by logging into your server as root and running incrediblefax2020.sh to install HylaFax and AvantFax on your server. You'll be prompted a dozen or more times for information. Answer no to the secure fax question. For the rest of the prompts, just press ENTER to accept the default entries. Rebooting your server is required when the install finishes. Once your server is back on line, there will be a new AvantFax tab in the GUI. Before proceeding, be sure to set an Apache web apps password by running /root/apache-pw-change. Next, login to AvantFax with your browser. You first will be prompted for your Apache credentials. Enter admin for the username and whatever password you set up in the previous step. Then you will be prompted for your AvantFax credentials. The default is admin:password. After you enter the username and password, you will be prompted to change your admin password. The old password is still password. Then enter your desired password twice and save the setting. The AvantFax dashboard then will display. If nothing has come unglued, you should see four green Idle icons:


You can Send Faxes from within AvantFax by choosing the Send Fax tab, or you can use one of many HylaFax clients. Google is your friend.

Getting Started with ODBC for Asterisk

If you're new to the ODBC World, here's a quick primer. The idea behind Open Data Base Connectivity is to simplify the task of connecting up any flavor database management system so that it can talk to applications and foreign databases without having to write custom code to support every different DBMS. ODBC serves in much the same way as a translator who sits between you and foreign visitors. With the benefit of a translator, whatever is spoken is understood on both ends of the conversation. The real beauty of ODBC is that it is conversant with almost every DBMS offering on the planet including Oracle, Informix, SAS, MS Access, DB2, SQL Server, MySQL, MariaDB, PostgreSQL, Sybase, and even dBase, FoxPro, and XDB. All you really need is the ODBC connector for your operating system plus one or more database drivers for the DBMS data sources you wish to use.

Because the FreePBX modules are driven by MySQL tables, we've included the MySQL connector for Asterisk in Incredible PBX 2020 together with two sample applications to get you started. If you add your own MySQL databases, it's easy to connect them with ODBC by simply running the odbc-gen.sh script in /root again. The two sample applications we've included will show you how to integrate ODBC queries into your Asterisk dialplan. The code is available in odbc.conf in the /etc/asterisk folder. The first sample is a typical employee database. By dialing 222, you will be prompted to enter the employee number (12345), and the ODBC app then will look up the employee number and read you the name of the employee. The second sample is a speed dialer using the AsteriDex database. The sample entries in the database include a 3-numeric-digit DIALCODE which simply matches the first three letters of each AsteriDex name spelled out on a phone, e.g. 335 = DELta Airlines and 263 = AMErican Airlines. As you add new entries to AsteriDex, you can add dialcodes in the same way or in any other scheme you prefer. Once you have signed up with a provider so that you can make outbound calls, just dial 223 and enter the AsteriDex dialcode to place the call. Think of it as a Speed Dialer on Steroids.

Keeping FreePBX 15 Modules Current

We strongly recommend that you periodically update all of your FreePBX modules to eliminate bugs and to reduce security vulnerabilities. From the Linux CLI, log into your server as root and issue the following commands:

mysql -u root -ppassw0rd asterisk -e "UPDATE freepbx_settings SET value = 'https://mirror.clearlyip.com' where keyword = 'MODULE_REPO';"
rm -f /tmp/*
fwconsole ma upgradeall
fwconsole reload
/root/sig-fix
service httpd restart
/root/sig-fix

Where To Go From Here

Complete documentation on the ClearlyIP Devices Module is available here.

Complete documentation on the FreePBX GPL Modules is available here.

Complete documentation on the Incredible PBX additions is available here.

An introduction to configuring extensions, trunks, and routes is available here.

Originally published: Monday, December 2, 2019


Need help with Asterisk? Visit the VoIP-info Forum.


Special Thanks to Our Generous Sponsors


FULL DISCLOSURE: ClearlyIP, Skyetel, Vitelity, DigitalOcean, Vultr, VoIP.ms, 3CX, Sangoma, TelecomsXchange and VitalPBX have provided financial support to Nerd Vittles and our open source projects through advertising, referral revenue, and/or merchandise. As an Amazon Associate and Best Buy Affiliate, we also earn from qualifying purchases. We’ve chosen these providers not the other way around. Our decisions are based upon their corporate reputation and the quality of their offerings and pricing. Our recommendations regarding technology are reached without regard to financial compensation except in situations in which comparable products at comparable pricing are available from multiple sources. In this limited case, we support our sponsors because our sponsors support us.

BOGO Bonaza: Enjoy state-of-the-art VoIP service with a $10 credit and half-price SIP service on up to $500 of Skyetel trunking with free number porting when you fund your Skyetel account. No limits on number of simultaneous calls. Quadruple data center redundancy. $25 monthly minimum spend required. Tutorial and sign up details are here.

The lynchpin of Incredible PBX 2020 and beyond is ClearlyIP components which bring management of FreePBX modules and SIP phone integration to a level never before available with any other Asterisk distribution. And now you can configure and reconfigure your new Incredible PBX phones from the convenience of the Incredible PBX GUI.

VitalPBX is perhaps the fastest-growing PBX offering based upon Asterisk with an installed presence in more than 100 countries worldwide. VitalPBX has generously provided a customized White Label version of Incredible PBX tailored for use with all Incredible PBX and VitalPBX custom applications. Follow this link for a free test drive!
 

Special Thanks to Vitelity. Vitelity is now Voyant Communications and has halted new registrations for the time being. Our special thanks to Vitelity for their unwavering financial support over many years and to the many Nerd Vittles readers who continue to enjoy the benefits of their service offerings. We will keep everyone posted on further developments.


The SMS Toolkit: Integrating Text Messaging into VitalPBX

Unless you’ve been living under a rock, you probably already know that most folks spend a lot more time texting on their smartphones rather than talking. So it only made sense to develop some useful SMS tools to get the most out of your VitalPBX platform. Today we’re pleased to introduce SMS Toolkit for VitalPBX using SMS-enabled DIDs from Skyetel, VoIP.ms, and Vitelity. Any SMS message sent to an SMS-enabled DID associated with your PBX will be processed by Incredible PBX which will do the heavy lifting and either call you back with the query results or reply to the text message. You can whitelist an IP address in your firewall, retrieve news headlines or a weather forecast, and look up a phone number in your AsteriDex phone book, or place a call through your PBX using the AsteriDex Voice Dialer. You can enable and disable call forwarding from your PBX extension to your smartphone, and a simple SMS command also brings the calling flexibility of DISA to your smartphone. Finally, there are commands to actually help you manage your PBX.

The SMS Toolkit provides two layers of security. First, you must whitelist the phone numbers from which to process queries. Second, for the more vulnerable queries, a PIN is required as well. Here are 15 SMS queries that let you harness the power of Incredible PBX via SMS:

  1. @help – Play a list of supported SMS commands
  2. @news – Retrieve latest news headlines from Yahoo
  3. @weather – Retrieve weather report by zip code
  4. @wolfram – Siri-like query to Wolfram Alpha
  5. @whitelist – Whitelist a new IP address in your firewall
  6. @disa – Use DISA calling from your smartphone with password
  7. @cf on – Enable call forwarding from PBX extension to smartphone
  8. @cf off – Disable call forwarding from PBX extension
  9. @asteridex – Use AsteriDex Voice Dialer to place a call from PBX
  10. @fail2ban+ XXXXX – Restart Fail2Ban with PIN: XXXXX
  11. @fail2ban- XXXXX – Stop Fail2Ban with PIN: XXXXX
  12. @firewall+ XXXXX – Restart FirewallD with PIN: XXXXX
  13. @firewall- XXXXX – Stop FirewallD with PIN: XXXXX
  14. @asterisk+ XXXXX – Restart Asterisk with PIN: XXXXX
  15. @pbxstatus – Returns status of Asterisk, Fail2Ban, and FirewallD

Prerequisites for SMS Toolkit Deployment

To get started, you’ll need a DID from Skyetel, Vitelity, or VoIP.ms that supports SMS messaging. You’ll be hard-pressed to beat our Skyetel special which is summarized at the end of this article, but the choice is all yours. The way this works is you provide a forwarding email address in the Skyetel, Vitelity, or VoIP.ms portal for delivery of incoming SMS messages. These emails will be sent to your PBX where we will use Postfix and our mailcall script to process the messages and deliver the results.

Since Skyetel, Vitelity, and VoIP.ms will be delivering incoming SMS messages by email, it means you’ll also need a dedicated account and fully-qualified domain name (FQDN) for your server, e.g. smsuser@mypbx.mydomain.com. While a dynamic IP address will work if you implement automatic FQDN updating on your PBX, a static IP address for your PBX is obviously preferable and our recommended VitalPBX cloud solution provides that.

Implementing the SMS Toolkit for VitalPBX

Let’s walk through the steps to put all the pieces in place for the SMS Toolkit:

  1. Add a Dedicated Account to Linux for SMS Messaging
  2. Configure VitalPBX for Receipt of Incoming SMS Emails
  3. Configure Postfix for Receipt of Incoming Emails
  4. Obtain and Configure DID with Skyetel, Vitelity, or VoIP.ms
  5. Install and Configure MailCall Components

1. Adding a Dedicated Account to VitalPBX

To simplify the task of sifting through incoming emails, we’ll want to create a new Linux user account that can be dedicated to receipt of SMS email messages. You can use any name you prefer instead of smsuser. The second and third commands will verify that the account has been created with support for incoming mail. Just log into your server as root and issue the following commands:

adduser smsuser --shell=/bin/false --no-create-home --system -U
ls /var/spool/mail/smsuser
mail -u smsuser


2. Configuring VitalPBX to Receive Inbound Email

By design, both Postfix and the VitalPBX firewall block incoming email. We’re going to change that but, in doing so, we wish to caution that we don’t want to turn your server into an open mail relay for the spammers of the world. Once we’ve opened up your server to receive email, it’s important to test it to be sure it’s not insecure. Because the SMS Toolkit is intended to be a dedicated application just for you as administrator of your server, it’s equally important not to publicize the FQDN of your server. Once the spammers find your email address, incoming email can be just a big a problem as serving as an open mail relay.

To add a firewall rule in VitalPBX to support incoming SMTP mail traffic, log in to VitalPBX GUI as admin and navigate to Admin:Security:Firewall:Services. Add a new service with the following entries. Then click Save.

  • Name: Email
  • Protocol: TCP
  • Port: 25

Next, click on the Rules tab and add a new service entry for Email with Action: Accept. Then click Save again.

3. Configuring Postfix to Receive Inbound Email

Configuring Postfix to receive incoming email requires a few additions. If you changed the user account (smsuser) above, then do the same in steps #2 and #4 below.

1. Issue the following commands to update Postfix to support incoming email:

cd /etc/postfix
cp -p master.cf master.cf.bak
wget http://incrediblepbx.com/postfix-master.tar.gz
tar zxvf postfix-master.tar.gz
rm -f postfix-master.tar.gz
postconf -e "inet_interfaces = all"

2. Using the fully-qualified domain name (FQDN) of your server, issue the following commands:

postconf -e "mydestination = your-FQDN, localhost.localdomain, localhost"
echo "smsuser:    smsuser@your-FQDN" >> /etc/aliases
systemctl restart postfix

3. Assuming you don’t mind discarding emails to the root user to avoid malicious spam attacks, enter the following commands. If you prefer to take your chances and preserve root email, omit the first line below:

echo "root:       /dev/null" >> /etc/aliases
echo "*:          /dev/null" >> /etc/aliases
newaliases

4. Test your new mail account by sending an email to smsuser@your-FQDN. Wait a bit and check for email: mail -u smsuser. Then delete the email: rm /var/spool/mail/smsuser/*

4a. Configuring Skyetel DID for SMS Email Relay

Effective 10/1/2023, $25/month minimum spend required.

1. In the VitalPBX GUI, navigate to Admin:Security:Firewall:WHITELIST and Add the IP address of the Skyetel SMTP server: 168.245.13.6.

2. Login to your Skyetel Portal and begin by deciphering your Username and Password for access to the Skyetel SMTP server in Tools:Voicemail Transcription.

3. While still in the Skyetel Portal, navigate to Phone Numbers:Local Numbers and click the Settings icon to the right of each DID you wish to enable for SMS messaging.

  a. Click on the SMS & MMS tab and fill in the template as shown below using the Email address you’ve assigned to VitalPBX for SMS messaging. Do NOT change the Subject and Body entries, and do NOT click SAVE at this time.

  b. Click on SMTP Settings at the bottom of the template. Fill in the SMTP template as shown below using the Username and Password you deciphered in Step #2 above. For the Sender, enter the email address to deliver SMS messages to your smartphone. For Default Recipient, enter the email address associated with your PBX.

  c. Finally, click the Save button in the SMTP Settings template and then Save again in the Email template.

  d. Repeat these steps for every DID to enable for delivery of SMS messages to VitalPBX.

4b. Configuring Vitelity DID for SMS Email Relay

With Vitelity DIDs, the first step is to order a DID that supports SMS, most do. Next, you need to decide whether this DID will be used for other purposes, such as serving as a trunk on your PBX for receipt of incoming calls. If you only want to use the DID to support SMS messaging, then there’s little reason to sign up for the unlimited calling plan. Instead, choose the pay-per-minute (PPM) plan for your DID. It costs $1.49 a month. Don’t even both registering the trunk which will save your having to pay for misdialed calls and spam. SMS messages are free.

Once your DID is set up, go to My Numbers -> Local in the Vitelity web portal and choose SMS from the Action pull-down menu of your new DID:

In the SMS dialog, set up a password for messaging, disable international messages, and enter the email forwarding address for your incoming SMS messages. Save your settings, and you’re good to go.

On the VitalPBX side, don’t forget to whitelist your Vitelity server’s IP address.

4c. Configuring VoIP.ms DID for SMS Email Relay

If you plan to dedicate a DID to SMS messaging, two advantages of the VoIP.ms offering are (1) the price ($0.85/month on the pay by the minute plan with $0.40 setup fee and (2) you can forward incoming SMS messages to another SMS number (such as your smartphone) in addition to an email address if you want to use the DID for traditional SMS messaging while also deploying our SMS Toolkit. As noted above, there’s no charge for SMS messages at this time although VoIP.ms has warned (for years) that they may begin charging a penny a message.

To get started, sign up for a VoIP.ms account and order a DID with SMS support. A cellphone is displayed beside each DID that supports SMS in their ordering page. As with Vitelity, there’s no need to register the trunk on your PBX if you only plan to use the SMS messaging component. Once your DID is provisioned, choose DID Numbers -> Manage DIDs in the VoIP.ms portal. Then edit the DID you just purchased. At the bottom of the form, fill in the SMS section as shown below:

On the VitalPBX side, don’t forget to whitelist your VoIP.ms POP’s IP address.

5. Installing and Configuring MailCall with VitalPBX

This version of MailCall was specifically designed for Incredible PBX for VitalPBX. Many of the MailCall features will not work until they are first configured on your server, e.g. Voice Dialing, Wolfram Alpha, and Voice SMS Messaging. All of the setups are covered in this VitalPBX tutorial.

After logging into your server as root, issue the following commands to install MailCall:

cd /
wget http://incrediblepbx.com/MailCall-VitalPBX.tar.gz
tar zxvf MailCall-VitalPBX.tar.gz
rm -f MailCall-VitalPBX.tar.gz
chown -R asterisk:asterisk /var/lib/asterisk
chown -R asterisk:asterisk /etc/asterisk


For a number of the queries, a 5-digit PIN is required for obvious reasons. This needs to be set in two places: (1) in two chunks of dialplan code (/tmp/sms-dialplan.txt) to be added and (2) at the top of the mailcall script itself (/root/mailcall). Just search for XXXXX and replace the five X’s with a 5-digit secure PIN in all three places. While editing the mailcall script, you’ll also need to whitelist the 10-digit or 11-digit phone numbers from which to accept calls in the AUTHORIZED field. Just separate each number with a space. Then issue the remainder of the commands below:

nano -w /tmp/sms-dialplan.txt
nano -w /root/mailcall
cat /tmp/sms-dialplan.txt >> /etc/asterisk/ombutel/extensions__80-custom.conf
echo "asterisk ALL = NOPASSWD: /usr/sbin/iptables" >> /etc/sudoers
echo "*/2 * * * * root /root/mailcall > /dev/null 2>&1" >> /etc/crontab
asterisk -rx "dialplan reload"


As a security precaution, you can only use SMS Toolkit to forward and unforward calls to your cellphone from a PBX extension designated for your use. You can associate more than one cellphone with a given extension, but you can’t associate multiple extensions with a single cellphone. To set up the association between your cellphone and an extension on your PBX, issue the following command while logged in as root where 8431234567 is your cell phone number and 701 is the associated extension:

asterisk -rx "database put CELL 8431234567 701"


Sending an SMS message of @CF ON to your DID from 8431234567 will automatically forward extension 701 calls to your cell. Sending @CF OFF will disable forwarding to extension 701.

Finally, a few words about the SMS @whitelist command. It can be used in two ways. If you just text whitelist, then you will get a call back that first prompts for your PIN. You then will be prompted for the IP address to whitelist. Using your cellphone, enter the IP address using * for periods, e.g. 1*2*3*4 becomes 1.2.3.4. The alternative whitelist option doesn’t require a callback. Just send a text message with @whitelist PIN ip-address using periods, not *, e.g. @WHITELIST 98765 1.2.3.4 would whitelist 1.2.3.4 if your PIN was correctly entered as 98765 and matches the entry in /root/mailcall.

Email Addresses for SMS Smartphone Delivery

United States:

  • AT&T – number@txt.att.net
  • Verizon – number@vtext.com
  • Sprint – number@messaging.sprintpcs.com
  • T-Mobile – number@tmomail.net
  • Mint Mobile – number@tmomail.net
  • Virgin Mobile – number@vmobl.com
  • Tracfone – number@mmst5.tracfone.com
  • Ting – number@message.ting.com
  • Boost Mobile – number@myboostmobile.com
  • U.S. Cellular – number@email.uscc.net
  • Metro PCS – number@mymetropcs.com

Canada:

  • Rogers Wireless: number@pcs.rogers.com
  • Fido: number@fido.ca
  • Telus: number@msg.telus.com
  • Bell Mobility: number@txt.bell.ca
  • Kudo Mobile: number@msg.koodomobile.com
  • MTS: number@text.mtsmobility.com
  • President’s Choice: number@txt.bell.ca
  • Sasktel: number@sms.sasktel.com
  • Solo: number@txt.bell.ca
  • Virgin: number@vmobile.ca

Managing the AsteriDex SQLite3 Database

We’ve alluded to the AsteriDex database in a couple of VitalPBX articles but never mentioned how to access it. Using a browser, point it to http://server-ip/asteridex4. You can add, edit, display, and delete entries from there. Before you can make changes in the database, issue the following command after logging into your server as root:

chown asterisk:apache /var/lib/asterisk/agi-bin

Published: Monday, November 18, 2018


Need help with Asterisk? Visit the VoIP-info Forum.


Special Thanks to Our Generous Sponsors


FULL DISCLOSURE: ClearlyIP, Skyetel, Vitelity, DigitalOcean, Vultr, VoIP.ms, 3CX, Sangoma, TelecomsXchange and VitalPBX have provided financial support to Nerd Vittles and our open source projects through advertising, referral revenue, and/or merchandise. As an Amazon Associate and Best Buy Affiliate, we also earn from qualifying purchases. We’ve chosen these providers not the other way around. Our decisions are based upon their corporate reputation and the quality of their offerings and pricing. Our recommendations regarding technology are reached without regard to financial compensation except in situations in which comparable products at comparable pricing are available from multiple sources. In this limited case, we support our sponsors because our sponsors support us.

BOGO Bonaza: Enjoy state-of-the-art VoIP service with a $10 credit and half-price SIP service on up to $500 of Skyetel trunking with free number porting when you fund your Skyetel account. No limits on number of simultaneous calls. Quadruple data center redundancy. $25 monthly minimum spend required. Tutorial and sign up details are here.

The lynchpin of Incredible PBX 2020 and beyond is ClearlyIP components which bring management of FreePBX modules and SIP phone integration to a level never before available with any other Asterisk distribution. And now you can configure and reconfigure your new Incredible PBX phones from the convenience of the Incredible PBX GUI.

VitalPBX is perhaps the fastest-growing PBX offering based upon Asterisk with an installed presence in more than 100 countries worldwide. VitalPBX has generously provided a customized White Label version of Incredible PBX tailored for use with all Incredible PBX and VitalPBX custom applications. Follow this link for a free test drive!
 

Special Thanks to Vitelity. Vitelity is now Voyant Communications and has halted new registrations for the time being. Our special thanks to Vitelity for their unwavering financial support over many years and to the many Nerd Vittles readers who continue to enjoy the benefits of their service offerings. We will keep everyone posted on further developments.


Skyetel SMS Smorgasbord for Incredible PBX with VitalPBX


Just in time for Thanksgiving, we’ve got a great treat for those of you that have taken advantage of the Nerd Vittles special offer from Skyetel which got you a $10 credit to kick the tires and up to $500 of half-price service on their quadruple-redundant VoIP platform. Effective 10/1/2023, $25/month minimum spend required. Today we’re adding not one, but three, SMS messaging utilities to the VitalPBX UC platform. In addition to a command line utility to send SMS messages, we’re also introducing SMS Message Blasting which lets you send an SMS message to as many recipients as you would like. It’s perfect for sports team and community group messaging. To round out the trifecta, we’ve updated our SMS Dictator utility by integrating Skyetel messaging with IBM’s powerful voice recognition software.1 Simply dial S-M-S (767) from any extension on your PBX and dictate an SMS message to send to a recipient of your choice. Gone are the days of wrestling with Google’s ever-changing voice recognition platform.

To get started, you’ll need to have an IBM Watson account with an APIkey for their Speech-to-Text (STT) engine. Next, you will need a Skyetel SMS-enabled DID. Before we install today’s SMS scripts, it should be noted that SMS messages must be sent from the PBX registered as the Skyetel Endpoint Group for the SMS-enabled DID specified in the Skyetel SMS scripts. So let’s begin with the configuration steps to put all the pieces in place.

Getting Started with IBM Watson STT Service

We’ve created a separate tutorial to walk you through obtaining and configuring your IBM Watson credentials. Start there.

Now let’s get IBM’s Speech to Text service activated. Log back in to the IBM Cloud. Click on the (upper left) Menu icon and select Dashboard. Click on the Speech to Text app. Choose a Region to deploy in, choose your Organization from the pull-down menu, and select STT as your Space. Choose the Standard Pricing Plan or LITE Plan. Then click Create. When Speech to Text Portal opens, click the Service Credentials tab. In the Actions column, click View Credentials and copy down your STT APIkey. Then logout of IBM Watson.

Getting Started with Skyetel Messaging

If you haven’t already signed up for a Skyetel account, read our tutorial and take advantage of the $10 coupon for free service. Sign up for a DID and activate the SMS feature for your number. Create an Endpoint Group with the public IP address of your PBX. Then edit your phone number and link it to the Endpoint Group of your server. If you want to forward incoming SMS messages to either an email address or to your smartphone’s messaging service, configure it under the SMS & MMS tab for each of your phone numbers. Finally, click on the settings icon beside your account name in the upper right corner of the Skyetel portal and then click the API Keys tab. Click the Create button and copy down your SID and SECRET for Skyetel’s API service. This secret is not retrievable once you close the window so put the credentials in a safe place for subsequent use. Once you’re happy with the Skyetel service, fund your account with up to $250 and open a ticket with Skyetel. They’ll match your deposit and also let you port any DIDs you’d like at no cost for 60 days. For now, logout of the Skyetel portal.

Installing the SMS Components on Your PBX

There are three separate applications which we will install in VitalPBX: (1) a stand-alone utility that lets you send SMS messages from the Linux CLI by entering a recipients 11-digit phone number and an SMS message surrounded by quotes, (2) an SMS message blasting utility that lets you send a previously prepared SMS message to a group of recipients whose 11-digit SMS numbers have been entered into a text file, and (3) the SMS Dictator application which lets you pick up any phone on your PBX and dial S-M-S (767) to dictate a message and send it to a recipient whose number you’ve keyed in from your phone. For those not residing in North America, the number of phone number digits can easily be changed in all of the scripts. After we install the three applications, we’ll edit each of the scripts to insert your IBM STT and Skyetel API credentials. Then you’re ready to start messaging.

First, let’s install the stand-alone and message blasting SMS utilities. Log into your server as root and issue the following commands:

cd /root
mkdir sms-skyetel
cd sms-skyetel
wget http://incrediblepbx.com/smsblast-skyetel.tgz
tar zxvf smsblast-skyetel.tgz
rm -f smsblast-skyetel.tgz

Next, let’s install the SMS Dictator application while still logged into your server:

cd /var/lib/asterisk/agi-bin
wget http://incrediblepbx.com/sms-767-vitalpbx.tgz
tar zxvf sms-767-vitalpbx.tgz
rm -f sms-767-vitalpbx.tgz
./install-sms-dictator.sh

Configuring the Skyetel SMS Components

The last step of the SMS Dictator install script will prompt you to edit smsgen.sh. Leave apikey as your API_USERNAME and insert your actual IBM STT APIkey as API_PASSWORD in the fields provided. Insert your Skyetel SID, SECRET, and 11-digit DID in the fields provided. Then save the file: Ctrl-X, Y, then ENTER.

Next, change directories to /root/sms-skyetel and edit BOTH sms-skyetel and smsblast and insert your Skyetel credentials and DID in the fields provided at the top of both files.

Finally, when you’re ready to use the message blasting application (smsblast), first insert your SMS message in the smsmsg.txt file. Then insert the list of SMS numbers in smslist.txt.

Installing Festival TTS with VitalPBX

If you have not already installed the Festival TTS engine, you’ll need it to use SMS Dictator. Here’s how to install it:

yum -y install festival
echo "[general]" > /etc/asterisk/festival.conf
asterisk -rx "dialplan reload"
festival_server &
systemctl restart asterisk
echo "/usr/bin/festival_server &" >> /etc/rc.d/rc.local

Testing the Skyetel SMS Components

To try out the SMS Dictator application, dial S-M-S (767) from a phone connected to your PBX. When prompted, enter the 11-digit number of the SMS recipient. When prompted, dictate the message to be sent and press #.

To try out the stand-alone SMS application, navigate to /root/sms-skyetel and issue the following command using the 11-digit number of the SMS recipient followed by a space and an SMS message to be sent surrounded by quotes: ./sms-skyetel 18005551212 "Howdy."

To try out the message blasting SMS application, navigate to /root/sms-skyetel. Enter the message to be sent in smsmsg.txt and enter the list of SMS numbers in smslist.txt. Kick off the message blast by entering the command: ./smsblast.

Originally published: Monday, November 11, 2019


Support Issues. With any application as sophisticated as this one, you’re bound to have questions. Blog comments are a difficult place to address support issues although we welcome general comments about our articles and software. If you have particular support issues, we encourage you to get actively involved in the PBX in a Flash Forum. It’s the best Asterisk tech support site in the business, and it’s all free! Please have a look and post your support questions there. Unlike some forums, the PIAF Forum is extremely friendly and is supported by literally hundreds of Asterisk gurus and thousands of users just like you. You won’t have to wait long for an answer to your question.


Need help with Asterisk? Visit the VoIP-info Forum.


Special Thanks to Our Generous Sponsors


FULL DISCLOSURE: ClearlyIP, Skyetel, Vitelity, DigitalOcean, Vultr, VoIP.ms, 3CX, Sangoma, TelecomsXchange and VitalPBX have provided financial support to Nerd Vittles and our open source projects through advertising, referral revenue, and/or merchandise. As an Amazon Associate and Best Buy Affiliate, we also earn from qualifying purchases. We’ve chosen these providers not the other way around. Our decisions are based upon their corporate reputation and the quality of their offerings and pricing. Our recommendations regarding technology are reached without regard to financial compensation except in situations in which comparable products at comparable pricing are available from multiple sources. In this limited case, we support our sponsors because our sponsors support us.

BOGO Bonaza: Enjoy state-of-the-art VoIP service with a $10 credit and half-price SIP service on up to $500 of Skyetel trunking with free number porting when you fund your Skyetel account. No limits on number of simultaneous calls. Quadruple data center redundancy. $25 monthly minimum spend required. Tutorial and sign up details are here.

The lynchpin of Incredible PBX 2020 and beyond is ClearlyIP components which bring management of FreePBX modules and SIP phone integration to a level never before available with any other Asterisk distribution. And now you can configure and reconfigure your new Incredible PBX phones from the convenience of the Incredible PBX GUI.

VitalPBX is perhaps the fastest-growing PBX offering based upon Asterisk with an installed presence in more than 100 countries worldwide. VitalPBX has generously provided a customized White Label version of Incredible PBX tailored for use with all Incredible PBX and VitalPBX custom applications. Follow this link for a free test drive!
 

Special Thanks to Vitelity. Vitelity is now Voyant Communications and has halted new registrations for the time being. Our special thanks to Vitelity for their unwavering financial support over many years and to the many Nerd Vittles readers who continue to enjoy the benefits of their service offerings. We will keep everyone posted on further developments.


  1. Skyetel outbound SMS messages are billed at 1¢/message plus a monthly SMS surcharge of 10¢ per SMS-enabled DID. With IBM’s STT service, users have a choice of the LITE tier providing 100 minutes a month of free transcription or the STANDARD tier providing unlimited message transcription at a cost of 2¢/minute. []

Adding CallerID Names to VitalPBX Inbound & Outbound Calls


In the early days of Asterisk®, it was not unlike the Wild West. Extension passwords of 1234 were pretty safe, and "anything goes" was the only rule when it came to scraping other folks’ web sites for data that you needed. And the master scraper of them all, Google, even had a phone: function (until they didn’t) that let you look up almost anyone’s name or telephone number. Ma Bell pretty much had a monopoly on CallerID Name (CNAM) data for phone numbers which is probably the reason the Google feature suddenly disappeared. Since the telecom industry universally discarded CNAM data when routing calls to destinations, it was up to the DID provider to look up the associated names out of their proprietary databases before connecting the call. Ma Bell called it a feature. It was more like a revenue generator.

For VoIP users, there were no CNAM services to speak of. Thus was born our CallerID Trifecta and later CallerID Superfecta projects more than a decade ago. Superfecta was later elevated to the stratosphere by some of the early FreePBX® pioneers including Lorne Gaetz and Andrew Nagy. The real beauty of CallerID Superfecta was the ability to search a cache for a CNAM match before scouring and scraping the web, a process which took a lot more time.

Much has changed in the last 10 years. One of the early lessons in CNAM lookups obtained by scraping web sites was that most of the site owners didn’t appreciate their newfound popularity. As a result, they continually modified their sites to discourage scraping, and this in turn regularly broke CallerID Superfecta. The other major change is that there now are multiple CNAM services for VoIP users. Almost all VoIP providers also include a CNAM lookup option, and there are dirt-cheap standalone services such as OpenCNAM and BulkCNAM.

In introducing CallerID Superfecta to the VitalPBX community, we wanted to take advantage of what we’ve learned as well as the new CNAM landscape. There still are limitations. All of the CNAM lookup services don’t mind charging you to return a CNAM result of Los Angeles, CA which you could have deciphered by simply examining the area code of the incoming call. And, if your girlfriend calls you twenty times a day, the CNAM services are more than happy to charge you for the same CNAM dip twenty times. And at least one VoIP provider charges for CNAM lookups whether you want them or not. That adds another half a cent to the cost of every incoming call. Most providers charge between $.002 (new BulkCNAM rate) and $.005 per dip1 so the charges can add up particularly with a lot of calls of short duration.

We previously mentioned using VitalPBX’s native OpenCNAM functionality to add CallerID Names to incoming calls. But there are three possible concerns with this approach. First, there’s the frequently calling girlfriend issue. Depending upon how much you like your girlfriend, that may or may not be acceptable. A second issue is the CNAM dips that only return the city and state of the call. For frequent callers, you obviously would like actual names associated with these callers. And a third issue is the absence of CNAM data in your CDR logs and on your SIP phone for outbound calls.

In considering a modern CallerID Superfecta design, we’ve concluded that you really only need three components. First, you need to examine whether an actual name was passed with the incoming call. Second, you need to check whether your local database already has a CNAM entry for the caller. And, third, if those two sources don’t bear fruit, you need a lookup from a stand-alone CNAM provider. We believe the prudent design for the local component is to consolidate all available CNAM information into a single local CNAM database with import tools from other servers for apps such as the Asterisk Phonebook, AsteriDex, and Google Contacts. The local Asterisk Phonebook included in AstDB’s SQLite3 database is perfectly suited to serve as a local CNAM repository.

Legal Disclaimer: Most CNAM providers have restrictions regarding caching of CNAM data. The courts consistently have ruled that phonebook data is not copyrightable. And every PBX caches CNAM data. After all, that’s what CDR logs are all about. Consult with your own attorney if you have concerns, or simply stop reading here. 🙂

Now that VitalPBX has included unlimited Custom Contexts at no cost, our tasks today are easy. The plan of attack goes like this. When an incoming call hits your PBX, we’ll check whether a CallerID name accompanied the call. Next, we’ll check the Asterisk Phonebook to see if we have a name associated with that phone number. If there’s no CNAM entry after checking both sources, then we’ll perform an OpenCNAM lookup using your credentials. For outgoing calls, we’ll check the Asterisk Phonebook for a CNAM match on the number being called and, if there is no match, we’ll perform an OpenCNAM lookup using your credentials. You have the option of using either, both, or neither of these CNAM scripts.

Before we get started, it’s worth noting that finding a "hook" for outbound calls was not a simple task with VitalPBX. The trick was to find a subroutine that could be replaced without damaging the native functionality of the PBX. We finally found a spot, but we were limited to just two lines of code. The solution was to use one of those lines to execute a separate subroutine which had no restrictions on size. So let’s get started.

As with FreePBX, a config file is used to manage custom contexts. With VitalPBX, extensions__80-custom.conf in /etc/asterisk/ombutel is the file you need. If it doesn’t exist, simply create it. This file has two parts which again are similar to the FreePBX design. The [cos-all-custom](+) context is used for extension code in exactly the same way that the [from-internal-custom] context is used in FreePBX. In addition to extension dialplan code, you also can embed additional contexts just as you could with FreePBX. If you’ve installed Incredible PBX for VitalPBX, then you already have a number of extension components in the [cos-all-custom](+) context. So we’ll be adding some additional contexts at the bottom of the file. If you don’t already have an extensions__80-custom.conf file, create it and add [cos-all-custom](+) as the first line in the file. All of today’s code is licensed for your use pursuant to the terms of the GPLv2 license available here.

Adding CallerID Superfecta for Incoming Calls

Log into your server as root and navigate to /etc/asterisk/ombutel. Edit extensions__80-custom.conf and cut-and-paste the following code to the bottom of the file. Be sure to insert your actual OpenCNAM credentials in the SID and TOKEN entries near the top of the code replacing xxxx and yyyy.

;# // BEGIN CallerID Superfecta
[superfecta]
exten => s,1,NoOp(Executing CID Superfecta)

; insert OpenCNAM credentials below
  same => n,Set(SID=xxxx)
  same => n,Set(TOKEN=yyyy)

  same => n,NoOp(CID Number: ${CALL_SOURCE})
  same => n,Set(CID_NAME=${CALLERID(name)})
  same => n,NoOp(AstDB lookup underway)
  same => n,Set(CID_NAME2=${DB(cidname/${CALL_SOURCE})})
  same => n,GotoIf($["foo${CID_NAME2}" = "foo"]?runOpenCNAM:skipOpenCNAM)
  same => n(runOpenCNAM),NoOp(OpenCNAM lookup underway)
  same => n,Set(DB(cidname/${CALL_SOURCE})=${CID_NAME})
  same => n,Set(CID_NAME3=${SHELL(curl https://${SID}:${TOKEN}@api.opencnam.com/v2/phone/${CALL_SOURCE}?format=pbx)})
; for BulkCNAM, comment out line above and uncomment line below after inserting your APIkey
; same => n,Set(CID_NAME3=${SHELL(curl -X GET "https://cnam.bulkCNAM.com/?id=APIkey&did=${CALL_SOURCE}")})
  same => n,GotoIf($["foo${CID_NAME3}" = "foo"]?skipBOTH
  same => n,Set(DB(cidname/${CALL_SOURCE})=${CID_NAME3})
  same => n,Set(CALLERID(name)=${CID_NAME3})
  same => n,Goto(skipBOTH)
  same => n(skipOpenCNAM),Set(CALLERID(name)=${CID_NAME2})
  same => n(skipBOTH),Set(ICALL=yes)
  same => n,Answer

;  same => n,Wait(2)
;; requires addition of nv-GenericWelcome.ulaw in /var/lib/asterisk/sounds/custom
;  same => n,Background(custom/nv-GenericWelcome&silence/1&continue-in-english&press-7,nm)
;  same => n,WaitExten(.)
;; exten => 7,1,Goto(cos-all,701,1)
;; exten => 7,1,Goto(cos-all-trunk,8436060555,1)
;; exten => 7,1,Goto(newcontext,s,1)
;  exten => 7,1,Goto(incrediblepbx,s,1)
;  same => n,Return()
; exten => t,1,Hangup
;  same => n,Return()
; exten => i,1,Hangup
;  same => n,Return()

; same => n,Goto(cos-all,701,1)
; same => n,Goto(cos-all-trunk,8436060555,1)
; same => n,Goto(newcontext,s,1)
; same => n,ExecIf($["${DID}" = "8436060555"]?Goto(incrediblepbx,s,1))
  same => n,Goto(incrediblepbx,s,1)
  same => n(return),Return()
;# // END CallerID Superfecta

Replacing OpenCNAM with BulkCNAM for Queries

With the recent price drop, you may prefer to use BulkVS.com for your CNAM queries. You’ll need to obtain your APIkey from their portal in API:API Credentials. Then locate the Set(CID_NAME3… line in the script above and replace it with the following line using your actual APIkey:

same => n,Set(CID_NAME3=${SHELL(curl -X GET "https://cnam.bulkCNAM.com/?id=APIkey&did=${CALL_SOURCE}")})

Choosing a Destination for Incoming Calls

We want to spend a minute on the last several lines of the Superfecta dialplan code:

; same => n,Goto(cos-all,701,1)
; same => n,Goto(cos-all-trunk,8436060555,1)
; same => n,Goto(newcontext,s,1)
  same => n,ExecIf($["${DID}" = "8436060555"]?Goto(cos-all,701,1))
  same => n,Goto(incrediblepbx,s,1)

 
These five lines demonstrate how to redirect incoming calls to five different destinations: an extension, an external phone number, another custom context, a DID-specific routing, or the Incredible PBX Demo IVR. As shown, the calls would be routed to the default Demo IVR unless the DID matches 8436060555 in which case the call would be routed to extension 701. You can modify the destination scenario simply by uncommenting a different line in the dialplan examples. Keep in mind that a Goto command permanently redirects calls to that destination outside the Custom Context so the first uncommented Goto line will always take precedence. Also note that you can have multiple ExecIf lines preceding a Goto line to route calls to different destinations depending upon the DID of the incoming call. Stated another way, multiple ExecIf commands can be followed by a Goto command that serves as the default destination for any non-matching DIDs. You could also redirect by CallerID number.

Blocking Telemarketers with CallerID Superfecta

As election season heats up in the United States, be advised that your favorite legislators have exempted themselves from the robocall rules so dinnertime will get more interesting in coming months. One simple solution is to prompt the caller to enter a number before actually connecting the call. This kills most robocalls. We’ve included the code to do this in CallerID Superfecta. Just uncomment the code so that it looks like the following after choosing a call destination as documented in the previous section:

  same => n,Wait(2)
; requires addition of nv-GenericWelcome.ulaw in /var/lib/asterisk/sounds/custom
  same => n,Background(custom/nv-GenericWelcome&silence/1&continue-in-english&press-7,nm)
  same => n,WaitExten(.)
; exten => 7,1,Goto(cos-all,701,1)
; exten => 7,1,Goto(cos-all-trunk,8436060555,1)
; exten => 7,1,Goto(newcontext,s,1)
  exten => 7,1,Goto(incrediblepbx,s,1)
  same => n,Return()
 exten => t,1,Hangup
  same => n,Return()
 exten => i,1,Hangup
  same => n,Return()

 
Before this will work, you’ll need to download the nv-GenericWelcome.ulaw recording:

cd /var/lib/asterisk/sounds/custom
wget http://incrediblepbx.com/nv-GenericWelcome.ulaw

Adding CallerID Superfecta for Outgoing Calls

If CNAM data for outgoing calls is also desired for your CDR logs, here’s the dialplan code to cut-and-paste into the bottom of the Custom Contexts file. Insert your OpenCNAM credentials in the code replacing xxxx and yyyy just as you did in the previous section:

[cos-all-custom]
exten => _.,1,NoOp(*** Custom Outbound CNAM Code ***))
    same => n,GoSub(cnam-out,s,1)

[cnam-out]
exten => s,1,NoOp(*** Outbound CNAM context for Incredible PBX ***)
  same => n,Set(SID=xxxx)
  same => n,Set(TOKEN=yyyy)
  same => n,NoOp(Calling: ${EXTENSION})
  same => n,Set(CID_NUM=${EXTENSION})
  same => n,NoOp(AstDB lookup underway)
  same => n,Set(CID_NAME=${DB(cidname/${CID_NUM})})
  same => n,GotoIf($["foo${CID_NAME}" = "foo"]?runOpenCNAM:skipOpenCNAM)
  same => n(runOpenCNAM),NoOp(OpenCNAM lookup underway)
  same => n,Set(CID_NAME=${SHELL(curl https://${SID}:${TOKEN}@api.opencnam.com/v2/phone/${CID_NUM}?format=pbx)})
; for BulkCNAM, comment out line above and uncomment line below after inserting your APIkey
;  same => n,Set(CID_NAME=${SHELL(curl -X GET "https://cnam.bulkCNAM.com/?id=APIkey&did=${CID_NUM}")})
  same => n,Set(DB(cidname/${CID_NUM})=${CID_NAME})
  same => n(skipOpenCNAM),Set(CDR(customer_code)=${CID_NAME})
  same => n,Set(ICALL=yes)
  same => n,NoOp(*** Outbound CNAM context ends here ***)
  same => n,Return()

Activating CallerID Superfecta with VitalPBX

As with any dialplan changes, you first must reload the dialplan: asterisk -rx "dialplan reload". Next, we need to create a Custom Context within the VitalPBX GUI and point any desired Inbound Routes to that custom context. Using a web browser, log in to the VitalPBX GUI as admin. Navigate to PBX:Applications:Custom Contexts and create a new custom context for CallerID Superfecta:

Description: CID Superfecta
Context: superfecta
Extension: s
Priority: 1
Destination: Terminate Call -> Hangup

Next, identify the Trunks that you want to use with CallerID Superfecta and create an Inbound Route for those trunks pointing to CallerID Superfecta as the Destination for those calls.

If you want different destinations within CallerID Superfecta context for different trunks, then you’ll need to use ExecIf commands as shown in the dialplan to identify each trunk and to route the calls to the desired locations. Note that you can have multiple ExecIf commands followed by an uncommented default destination for any incoming calls that do not have a DID match.

Importing Asterisk Phonebook Data from Another PBX

To supplement your local Asterisk Phonebook which will serve as the local CNAM repository for VitalPBX, you can easily import data from other sources. And, as those sources change, you can export the entire database again and repeat the import procedure without worrying about duplicating data in your local Asterisk Phonebook. Imported data always overwrites existing entries which have a match on the phone number. To import an Asterisk Phonebook from another PBX, here are the steps to run on that PBX to create the import script which should be copied and run on the VitalPBX platform: import-asterisk-phonebook.sh

CAUTION: Carefully review the generated import script for anomalies before running it.

cd /var/lib/asterisk
sqlite3 astdb.sqlite3 "select key,value from astdb \\
 where key LIKE '%cidname/%'" > /root/import.sh
cd /root
sed -i 's|/cidname|asterisk -rx "database put cidname "|' import.sh
sed -i 's| "/| |' import.sh
sed -i 's|\\|| "|' import.sh
sed -i 's|$|"|' import.sh
sed -i "s|\"d|'d|" import.sh
sed -i "s|$|'|" import.sh
chmod +x import.sh
mv import.sh import-asterisk-phonebook.sh

Importing AsteriDex Data from Another PBX

Here are the steps to export existing AsteriDex data from another Incredible PBX platform. Once the steps have been completed, copy import-asteridex.sh to VitalPBX, make the script executable, and run it.

mysql -u root -ppassw0rd asteridex -N -s -e 'select "*",`out`,`name` from user1' | \\
 sed 's|\\t|, |g' > tmp.txt
sed -i "s|*,|asterisk -rx 'database put|" tmp.txt
sed -i 's|, | "|' tmp.txt
sed -i 's|$|"|' tmp.txt
sed -i "s|$|'|" tmp.txt
mv tmp.txt import-asteridex.sh

Importing Google Contacts into Asterisk Phonebook

Here are the steps to import existing Google Contacts into the VitalPBX Asterisk Phonebook:

  1. From within Google Contacts, export your contacts into a vcard format file: contacts.vcf
  2. Copy the contacts.vcf file to the /root folder of your PBX
  3. wget http://incrediblepbx.com/googlecontacts-importer.tar.gz
  4. tar zxvf googlecontacts-importer.tar.gz
  5. rm -f googlecontacts-importer.tar.gz
  6. Run the main script: /root/vcard-import.sh
  7. Edit the shell script that is generated: nano -w import-google-contacts.sh
  8. Make any changes to clean up the entries from Google Contacts
  9. chmod +x /root/import-google-contacts.sh
  10. Run the script to import your Google Contacts: /root/import-google-contacts.sh

Managing the Asterisk Phonebook with VitalPBX

To add or replace entries in the Asterisk Phonebook from the Linux CLI, here’s the syntax:

asterisk -rx 'database put cidname 8005551212 "Directory Assistance"' 

To remove an entry from the Asterisk Phonebook, the syntax looks like this:

asterisk -rx "database del cidname 8005551212"

To display all entries in your Asterisk Phonebook, issue the following command:

asterisk -rx "database show cidname"

 
Originally published: Monday, November 4, 2019


Need help with Asterisk? Visit the VoIP-info Forum.


Special Thanks to Our Generous Sponsors


FULL DISCLOSURE: ClearlyIP, Skyetel, Vitelity, DigitalOcean, Vultr, VoIP.ms, 3CX, Sangoma, TelecomsXchange and VitalPBX have provided financial support to Nerd Vittles and our open source projects through advertising, referral revenue, and/or merchandise. As an Amazon Associate and Best Buy Affiliate, we also earn from qualifying purchases. We’ve chosen these providers not the other way around. Our decisions are based upon their corporate reputation and the quality of their offerings and pricing. Our recommendations regarding technology are reached without regard to financial compensation except in situations in which comparable products at comparable pricing are available from multiple sources. In this limited case, we support our sponsors because our sponsors support us.

BOGO Bonaza: Enjoy state-of-the-art VoIP service with a $10 credit and half-price SIP service on up to $500 of Skyetel trunking with free number porting when you fund your Skyetel account. No limits on number of simultaneous calls. Quadruple data center redundancy. $25 monthly minimum spend required. Tutorial and sign up details are here.

The lynchpin of Incredible PBX 2020 and beyond is ClearlyIP components which bring management of FreePBX modules and SIP phone integration to a level never before available with any other Asterisk distribution. And now you can configure and reconfigure your new Incredible PBX phones from the convenience of the Incredible PBX GUI.

VitalPBX is perhaps the fastest-growing PBX offering based upon Asterisk with an installed presence in more than 100 countries worldwide. VitalPBX has generously provided a customized White Label version of Incredible PBX tailored for use with all Incredible PBX and VitalPBX custom applications. Follow this link for a free test drive!
 

Special Thanks to Vitelity. Vitelity is now Voyant Communications and has halted new registrations for the time being. Our special thanks to Vitelity for their unwavering financial support over many years and to the many Nerd Vittles readers who continue to enjoy the benefits of their service offerings. We will keep everyone posted on further developments.


  1. BulkCNAM previously charged $.005 per CNAM dip but recently sent out an email indicating they were dropping the rate to $.002. Our CNAM charges continued to be billed at $.005 with the daily charges being rounded up to the whole penny. So… you may want to check your CNAM charges for a bit to verify that you are being billed at the new rate. If not, open a ticket and they will correct it. []

Going Public with Incredible PBX 16 and VitalPBX 2.3.8


As part of our ongoing development efforts, we maintain about a dozen honeypot servers across the U.S. and Canada to monitor the latest adventures of the bad guys. Security becomes especially important for those wishing to live on the bleeding edge and deploy a cloud-based, public-facing VoIP server. Today we want to walk you through our latest suggestions to set up and secure a VitalPBX platform using just the built-in FirewallD, IPset, and Fail2Ban components. If you opt to deploy VitalPBX in the Cloud, a KVM-based VPS is absolutely essential in order to take advantage of the security mechanisms we will introduce today.

Here are 6 Key Security Features in today’s public design:

  • SIP Registration Lockdown by FQDN
  • Extension Lockdown by IP Address
  • Trunk Provider Lockdown by IP Address
  • Web Access Lockdown by WhiteList
  • Disguised Ports for SIP and SSH Access
  • 100,000+ VOIP Blacklist for FirewallD

Is it 100% safe? Nothing ever is. That’s what backups are for. 😉

FYI: The CentOS folks reintroduced a previous FirewallD bug on October 22 which (again) broke new VitalPBX installs. On October 23, the VitalPBX developers fixed the bug (again). There should be no problems with new installs. For previous installs, see this thread on the PIAF Forum for the fix.

Taking Incredible PBX with VitalPBX to the Cloud

Because Incredible PBX with VitalPBX 2.3.8 was originally distributed as an ISO, getting it installed in the cloud was a challenge. A few cloud providers let you bring your own ISO to install on their VPS platforms, but it was still a tedious process. So today we’re pleased to introduce a new install script that can be run on any CentOS 7 platform.

We have a few cloud providers that we recommend without reservation. Both Vultr and Digital Ocean provide referral credits to Nerd Vittles to support our VoIP project development efforts. We’ve used both of them for many years with no problems. Either of the platforms works well using the $5 a month option in your choice of cities. Just be sure to choose the CentOS 7 platform, not CentOS 8. For an extra buck, you can add automatic backups.

Our favorite bargain is now CrownCloud in Los Angeles. For $25 a year, they offer a KVM VPS that is ideal as a VoIP platform. And the offering includes a free snapshot image as well. As you might imagine, it’s very popular and goes Out of Stock from time to time so check back often. For our international friends, CrownCloud offers similar platforms at the same price point in both Germany and the Netherlands.

Installing Incredible PBX with VitalPBX on CentOS 7

Once your CentOS 7 platform is up and running, here’s how to install Incredible PBX for VitalPBX. Log into your server as root using SSH or Putty. Then issue these commands:

cd /root
passwd
yum -y install net-tools wget nano tar
wget http://incrediblepbx.com/incrediblepbx.sh
chmod +x incrediblepbx.sh
./incrediblepbx.sh

Incredible PBX Cloud Setup Recipe for VitalPBX

We think the easiest way to configure your new VitalPBX platform is to follow the simple steps outlined below. This will avoid your having to jump back and forth between tutorials to get all the pieces in place. When you’re finished, you’ll have a secure VitalPBX cloud platform. Don’t be intimidated by the number of steps. If you can handle slice-and-bake cookies, you can do this!

1. Point your browser to the IP address of your server. You’ll be prompted to set a password for admin access to the GUI. Fill in the blanks to proceed. Should you ever forget your admin password, here’s how as root user to force a reset on your next login from a browser:

mysql ombutel -e 'update ombu_settings set value = "yes" where name = "reset_pwd"'


2. Register your server when prompted. The VitalPBX Dashboard will appear.

3. Decipher the public IP address of your desktop machine and any other PCs that will be used to manage your server.

4. From the VitalPBX Dashboard, navigate to Admin:Security:Firewall:WhiteList. Enter each of your IP addresses from step #3 and click Save button.

5. From the VitalPBX Dashboard, navigate to Admin:Security:Intrusion Detection:WhiteList. Enter each of your IP addresses from step #3 and click Save button.

6. Modify the default SSH port by logging in to your server as root and issuing the following commands using the year you were born in the first line replacing 2000:

sed -i 's|#Port 22|Port 2000|' /etc/ssh/sshd_config
systemctl restart sshd

 
7. From the VitalPBX Dashboard, navigate to Admin:Security:Firewall:Services. Change the SIP port to 5080 or some other port number not in the 5060-5065 range. Change the SSH port to a 4-digit number matching the year you were born. Click Save button. Monitor your SSH log for attempted breaches and change your port if necessary:

cat /var/log/secure | grep password

 
8. Verify that you can log back into your server with SSH using the new SSH port number you assigned in step #6: ssh -p 2000 root@server-IP-address

9. From the VitalPBX Dashboard, navigate to Admin:Security:Firewall:Rules. Delete the HTTP and HTTPS items by clicking the Trash icon beside each entry. In the GENERAL tab, set Block ICMP Requests to YES. Click Save button. This blocks web access to everyone except those you’ve whitelisted in step #4 above. If you ever lock yourself out of web access, login to your server as shown in step #8 and temporarily whitelist the public IP address desired. This gets removed automatically the next time you save your Firewall settings from within the VitalPBX GUI.

iptables -A vpbx_white_list -s 12.34.56.78 -j ACCEPT

10. Before we get too far along, let’s put another layer of security in place for your new server. We’re going to add the VoIP Blacklist which blocks about 100,000 bad guys from around the globe. We’ll also add a cron job to update the blacklist every night. Log back into your server as root and issue these commands to put the pieces in place and enable the VoIP Blacklist.

TIP: The cron job below is scheduled to run at 20 minutes after 3 a.m. Change the time to something else so we don’t all bombard the VoIP Blacklist site for downloads at exactly the same time every night.

cd /etc
wget http://incrediblepbx.com/voipbl-firewalld.tar.gz
tar zxvf voipbl-firewalld.tar.gz
rm -f voipbl-firewalld.tar.gz
echo "20 3 * * * root /etc/update-voipbl.sh >/dev/null 2>&1" >> /etc/crontab
/etc/update-voipbl.sh

11. From the VitalPBX Dashboard, navigate to Admin:Add-Ons:Add-Ons. Click Check Online button. Click Install button beside Custom Contexts. Click Install button beside Phonebooks. Click Install button beside Domotic.

12. From the VitalPBX Dashboard, navigate to Settings:Tech Settings:SIP Settings.

  a. In the GENERAL tab, set the Bind Address port to 5080 or whatever port you chose in step #7 above. This is the port number together with the FQDN of your PBX (set in the next step) that any SIP phone will need to successfully register to an extension.

  b. In the SECURITY tab, set Allow Guest to NO, set Auto-Domain to NO, set Allow External Domains to NO, and enter a fully-qualified domain name (FQDN) pointing to the IP address of your server in the Domain field. We cannot stress enough how important this FQDN is to the security of your cloud-based server. It limits SIP registrations to this FQDN only, and all SIP registration attempts by IP address are automatically blocked. Don’t skip this step!

  c. In the NETWORK tab, enter the IP address of your server in External Address. Click the ADD button in the Local Networks section and enter the private IP addresses associated with your LAN and VPN, e.g. 192.168.0.0/255.255.0.0 and 10.0.0.0/255.240.0.0. Change NAT to Force,Comedia if your server is behind a NAT-based router.

  d. In the CODECS tab, enable ULAW, ALAW, G722, and G729.

  e. In the OTHERS tab, set SRV LOOKUPS to Yes. Click SAVE button.

13. From the VitalPBX Dashboard, navigate to Settings:Tech Settings:Profiles. Click Show All Profiles bar and choose Default PJSIP Profile. In the GENERAL tab, set the following entries to YES: Force rport, Rewrite Contact, Direct Media, RTP Symmetric, and Send Diversion Header. Click UPDATE button.

14. From the VitalPBX Dashboard, navigate to PBX:Applications:Parking. Click Show All Parking Profiles bar and choose Default. Change Code from 700 to 7000 and click Update button. This changes your Parking Lot extensions to the 7000 range so that 700 range can be used for Extensions, just like other versions of Incredible PBX.

15. Log out of your Dashboard and then log back in so that the menus get refreshed with the Custom Contexts addition.

16. From the VitalPBX Dashboard, navigate to PBX:Applications:Custom Contexts. Create the new sample IVR context with the following entries. Then click Save button.

  • Description: IncrediblePBX
  • Context: incrediblepbx
  • Extension: s
  • Priority: 1
  • Destination: Terminate Call -> Hangup

17. From the VitalPBX Dashboard, navigate to PBX:Applications:Custom Applications. Create the custom application for the sample IVR and Save it.

  • Code: 3366
  • Name: DEMO
  • Enabled: YES
  • Destination: Custom Contexts -> IncrediblePBX

18. From the VitalPBX Dashboard, navigate to PBX:Applications:Conferences. Create the new sample conference application and Save it.

  • Code: 2663
  • Description: CONF
  • Music on Hold When Empty: YES
  • User Count: YES
  • Announce Join/Leave: YES
  • Announce Only User: YES
  • User PIN: 1234
  • Leader PIN: 4321
  • Drop Silence: YES

19. If you didn’t read last week’s article on Custom Contexts, now would be a good time to do so. Here are the commands to put all those pieces in place on your new cloud-based server:

cd /
yum -y install dialog wget nano tar mailx
cp -p /etc/crontab /etc/crontab.bak
wget http://incrediblepbx.com/incrediblepbx-vitalpbx.tar.gz
tar zxvf incrediblepbx-vitalpbx.tar.gz
rm -f incrediblepbx-vitalpbx.tar.gz
chown asterisk:asterisk /var/lib/asterisk
cd /etc/asterisk/ombutel
echo "[cos-all-custom](+)" >> extensions__80-custom.conf
echo "exten => 412,1,NoOp(Voice Dialer)" >> extensions__80-custom.conf
echo " same => n,Answer" >> extensions__80-custom.conf
echo " same => n,Goto(incrediblepbx,1,1)" >> extensions__80-custom.conf
echo " same => n,Hangup()" >> extensions__80-custom.conf
echo "" >> extensions__80-custom.conf
echo "exten => 951,1,NoOp(News)" >> extensions__80-custom.conf
echo " same => n,Answer" >> extensions__80-custom.conf
echo " same => n,Goto(incrediblepbx,5,1)" >> extensions__80-custom.conf
echo " same => n,Hangup()" >> extensions__80-custom.conf
echo "" >> extensions__80-custom.conf
echo "exten => 947,1,NoOp(Weather by ZIP)" >> extensions__80-custom.conf
echo " same => n,Answer" >> extensions__80-custom.conf
echo " same => n,Goto(incrediblepbx,6,1)" >> extensions__80-custom.conf
echo " same => n,Hangup()" >> extensions__80-custom.conf
echo "" >> extensions__80-custom.conf
echo "exten => 3172,1,NoOp(DISA Voice Dialer)" >> extensions__80-custom.conf
echo " same => n,Answer" >> extensions__80-custom.conf
echo " same => n,Goto(incrediblepbx,9,1)" >> extensions__80-custom.conf
echo " same => n,Hangup()" >> extensions__80-custom.conf
echo "" >> extensions__80-custom.conf
echo "exten => 4747,1,NoOp(Wolfram Alpha)" >> extensions__80-custom.conf
echo " same => n,Answer" >> extensions__80-custom.conf
echo " same => n,Goto(incrediblepbx,3,1)" >> extensions__80-custom.conf
echo " same => n,Hangup()" >> extensions__80-custom.conf
echo "" >> extensions__80-custom.conf
echo "exten => 8463,1,NoOp(Time of Day)" >> extensions__80-custom.conf
echo " same => n,Answer" >> extensions__80-custom.conf
echo " same => n,Goto(incrediblepbx,*,1)" >> extensions__80-custom.conf
echo " same => n,Hangup()" >> extensions__80-custom.conf
echo "" >> extensions__80-custom.conf
echo "exten => 53669,1,NoOp(Lenny)" >> extensions__80-custom.conf
echo " same => n,Answer" >> extensions__80-custom.conf
echo " same => n,Goto(incrediblepbx,53669,1)" >> extensions__80-custom.conf
echo " same => n,Hangup()" >> extensions__80-custom.conf
echo "" >> extensions__80-custom.conf
echo "exten => 86329,1,NoOp(Today in History)" >> extensions__80-custom.conf
echo " same => n,Answer" >> extensions__80-custom.conf
echo " same => n,Goto(incrediblepbx,7,1)" >> extensions__80-custom.conf
echo " same => n,Hangup()" >> extensions__80-custom.conf
echo "" >> extensions__80-custom.conf
systemctl restart asterisk
chown asterisk:asterisk /var/lib/asterisk
chown asterisk:apache /var/lib/asterisk/agi-bin

20. Create new Extensions for your PBX by navigating to PBX:Extensions:Extensions. You only need to fill in the Extension, Name, and Email Address fields. We recommend extension numbers beginning with 701. If the extension will be used from a phone behind a NAT-based router, change the NAT entry to Force,Comedia. If the phone associated with the extension has a static IP address, enter it in the Permit field for an extra layer of security. In the VOICEMAIL tab, you will note that voicemail is enabled by default with a password matching the extension number. This forces the user to set the voicemail password the first time they access voicemail with their phone. We recommend the YES setting for Attach Voicemail, Ask Password, Say CID, Say Duration, and Envelope. Then press SAVE.

21. Once you have created your extensions, you can create Ring Groups to assign multiple extensions and external numbers to a designated number which will ring all of the extensions and external numbers in the ring group either simultaneously or serially. Navigate to PBX:Call Center:Ring Groups to set this up.

22. Trunk Setup. While we don’t recommend it, if you just want to play around with some toll-free calls using option 1 in the DEMO IVR to see how everything works, here’s a simple trunk setup to get you started. First, navigate to Settings:Telephony:Channel Groups and save a group named Default with no entries. Then navigate to PBX:External:Trunks:CUSTOM. Create TollFree trunk with this Dial String: SIP/1${EXTEN}@ovh.starcompartners.com. No other entries are required. Click SAVE and reload your dialplan. Finally, create an Outbound Route for these calls in PBX:External:Outbound Routes like this:

  • Description: TollFree
  • Trunks: TollFree
  • Dial Pattern: Pattern=NXXNXXXXXX

Save your settings and reload the dialplan. You now can skip down to step #25. NOTE: You will not be able to receive outside calls or make calls to numbers other than toll-free ones.

Our preference is that you use our Platinum Provider, Skyetel, for your default trunk and DID because they offer quadruple redundancy so you never miss a call. Sign up for Skyetel service and take advantage of the Nerd Vittles specials which include a $10 credit to kick the tires. First, complete the Prequalification Form here. You then will be provided a link to the Skyetel site to complete your registration. Once you have registered on the Skyetel site and your account has been activated, open a support ticket and request the $10 credit for your account by referencing the Nerd Vittles special offer. Once you are satisfied with the service, fund your account as desired, and Skyetel will match your deposit of up to $250 simply by opening another ticket. That gets you up to $500 of half-price calling. You can also port in your DIDs at no cost for 60 days after funding your account. Credit is limited to one per person/company/address/location. Effective 10/1/2023, $25/month minimum spend required.

We don’t recommend trunk registrations with a publicly exposed server because it creates a potential attack vector for intruders and any intrusion would be undetectable from the PBX since the attacker could make unauthorized calls after registering directly with your SIP provider. For this reason, Skyetel does not use SIP registrations to make connections to your PBX. Instead, Skyetel utilizes Endpoint Groups to identify which servers can communicate with the Skyetel service. An Endpoint Group consists of a Name, an IP address, a UDP or TCP port for the connection, and a numerical Priority for the group. For incoming calls destined to your PBX, DIDs are associated with an Endpoint Group to route the calls to your PBX. For outgoing calls from your PBX, a matching Endpoint Group is required to authorize outbound calls through the Skyetel network. Thus, the first step in configuring the Skyetel side for use with your PBX is to set up an Endpoint Group. Here’s a typical setup for Incredible PBX 16 for VitalPBX:

  • Name: IncrediblePBX
  • Priority: 1
  • IP Address: IncrediblePBX-Public-IP-Address
  • Port: 5062
  • Protocol: UDP
  • Description: my.incrediblepbx.com

To receive incoming PSTN calls, you’ll need at least one DID. On the Skyetel site, you acquire DIDs under the Phone Numbers tab. You have the option of Porting in Existing Numbers (free for the first 60 days after you sign up for service and fund your account) or purchasing new ones under the Buy Phone Numbers menu option.

Once you have acquired one or more DIDs, navigate to the Local Numbers or Toll Free Numbers tab and specify the desired SIP Format and Endpoint Group for each DID. Add SMS/MMS and E911 support, if desired. Call Forwarding and Failover are also supported. That completes the VoIP setup on the Skyetel side. System Status is always available here.

If you’d like additional details on why we recommend Skyetel, see this Nerd Vittles article.

On the VitalPBX side, we need to add a new Skyetel trunk. Navigate to PBX:External:Trunks:PJSIP. The VitalPBX Trunk setup should look like the following for Skyetel. If you’d like to cut-and-paste the entries for the Match field, here you go:

52.41.52.34,52.8.201.128,52.60.138.31,50.17.48.216,35.156.192.164


[popup url="https://pbs.twimg.com/media/EGDhgsXWsAIbmw1?format=jpg&name=medium" width="1200″ height="700″][/popup]

In Admin:Security:Firewall:WHITELIST, you’ll need to individually Add the five Skyetel IP addresses used in the Match field above and then SAVE your firewall settings.

Finally in PBX:Incoming Calls:CID Modifiers, add a new entry for Skyetel with Skip/Length = 2/10 and Save your settings.

23. Before your PBX can receive calls, you’ll need at least one Inbound Route. This tells the PBX how to route calls from one or more phone numbers (DIDs) that you own to a destination on your PBX, e.g. an extension, a ring group, an IVR, or custom context. Navigate to PBX:External:Inbound Routes to get started. Let’s set up a default inbound route for all the DIDs you have acquired from Skyetel in step #22. Fill in the fields shown below. Then SAVE.

  • Routing Method: Default
  • Description: Default Skyetel
  • DID Pattern: [leave blank for ALL DIDs]
  • CallerID Modifier: Skyetel
  • Inbound Destination: Custom Contexts -> IncrediblePBX

24. Before you can make outbound calls from extensions on your PBX, you’ll need at least one Outbound Route. This tells the PBX which provider to use to complete calls dialed with a certain sequence of numbers. For example, you probably would want 10-digit numbers routed to Skyetel. And, if users dial 1 and then a 10-digit number, you’d probably want those calls routed to Skyetel as well. To create this outbound route, navigate to PBX:External:Outbound Routes. Fill in the fields shown below. Click ADD to add a second Dial Pattern. Click SAVE and Reload Dialplan when finished.

NOTE: While you can "spoof" any CallerID number here, it is only legal to assign CallerID numbers that you actually own. Most carriers do not forward CallerID names to destinations regardless of what you enter here. The CallerID name and number will be shown in your CDR logs: Reports:CDR Reports:CDR.

  • Description: Skyetel-OUT
  • Trunks: Skyetel
  • Outbound CID: [Your Name and CallerID Number]
  • Overwrite CID: YES
  • Dial Pattern: Prepend=1 Pattern=NXXNXXXXXX
  • Dial Pattern: Pattern=1NXXNXXXXXX

25. For the time being, we strongly recommend disabling IPv6 simply because we don’t have the necessary confidence that all of the security mechanisms are in place for IPv6. Here’s how on the CentOS 7 platform:

echo "net.ipv6.conf.all.disable_ipv6 = 1" >> /etc/sysctl.conf
echo "net.ipv6.conf.default.disable_ipv6 = 1" >> /etc/sysctl.conf
sysctl -p
sed -i 's|#AddressFamily any|AddressFamily inet|' /etc/ssh/sshd_config
systemctl restart sshd
sed -i 's|inet_protocols = all|inet_protocols = ipv4|' /etc/postfix/main.cf
systemctl restart postfix

 
26. Outbound email functionality is essential on your PBX. You’ll need it to be alerted to potential issues with VitalPBX, and you’ll need it for delivery of voicemail messages to users. There are a couple ways to implement it, and both are easy. If you want to use the native capabilities of Postfix to send the emails assuming your provider is not blocking outbound SMTP mail from downstream servers, then follow these steps:

  • Insert your FQDN from step #12b into /etc/hosts immediately after 127.0.0.1
  • Replace the contents of /etc/hostname with the same FQDN
  • Issue the following command using your actual FQDN: hostname FQDN
  • Sending yourself an email: echo "test" | mail -s test you@your-domain.com

If you don’t receive the test email message, then the easiest solution is to configure PostFix as an SMTP Relay using a Gmail account. You can do this easily from within the VitalPBX GUI. Navigate to Admin:System Settings:Email Settings and click the External Mail Server tab. Be sure that Gmail is selected and enter your Gmail name and password in the fields provided. Save your settings and send yourself an email using the field provided.

27. Once you get outbound email flowing, jump down to the next section and obtain IBM TTS and STT passwords. Now set up Voicemail Transcription with Email Message Delivery:

  a. After logging into your VitalPBX server as root using SSH/Putty:

cd /tmp
mkdir sendmail
cd sendmail
wget http://incrediblepbx.com/sendmailibm-vitalpbx.tar.gz
tar zxvf sendmailibm-vitalpbx.tar.gz
rm -f sendmailibm-vitalpbx.tar.gz
mv usr/sbin/sendmailibm /usr/sbin
cd /etc/asterisk/ombutel
echo "[general](+)" > voicemail__60-1-transcript.conf 
echo "; format=wav|wav49|gsm" >> voicemail__60-1-transcript.conf
echo "mailcmd=/usr/sbin/sendmailibm" >> voicemail__60-1-transcript.conf
chown apache:apache voicemail__60-1-transcript.conf
rm -rf /tmp/sendmail

 
  b. Restart Asterisk core services: asterisk -rx "core reload"

  c. Edit /usr/sbin/sendmailibm and insert your IBM Watson STT APIkey on line 23. Change the language on line 31 if you don’t want en-US. Then save the file.

  d. Log back into the VitalPBX GUI and configure the extensions desired for email delivery of voicemail. For each extension in PBX:Extensions:General, enter an Email Address for delivery of voicemails. In PBX:Extensions:Voicemail, verify the VM settings from step #20.

28. We hesitate to even mention (free) Festival TTS as a text-to-speech alternative because it is so bad compared to IBM TTS. But for those that like always free, here’s how to install it. Once installed, you can issue Festival commands in your dialplan using the keyword Festival followed by the text to be spoken in parentheses.

yum -y install festival
echo "[general]" > /etc/asterisk/festival.conf
asterisk -rx "dialplan reload"
festival_server &
systemctl restart asterisk
echo "/usr/bin/festival_server &" >> /etc/rc.d/rc.local


29. If you’d like to test the performance of your cloud-based server, here’s how to deploy and run SpeedTest:

cd /root
wget -O speedtest-cli https://raw.githubusercontent.com/sivel/speedtest-cli/master/speedtest.py
chmod +x speedtest-cli
/root/speedtest-cli

 
30. Associating CallerID Names (CNAM) with inbound calls for display on SIP phones and in the CDR logs is an often-requested PBX feature. There are a few ways to do it. First, for less than a penny a call, you can activate the feature with your DIDs in the Skyetel Dashboard. Or, for about half the cost, you can acquire an OpenCNAM account and activate it in VitalPBX by navigating to PBX:Incoming Calls:CID Lookup. Choose OpenCNAM as the Source and enter your credentials. Then SAVE your settings and reload the dialplan. Then, for each of your Inbound Routes, add OpenCNAM as the CID Lookup source and Update your configuration.

31. Unless you want a full-time job monitoring the size of your logs, remove the fail2ban Asterisk log which grows every 5 seconds. Navigate to Settings:PBX Settings:Log Files and click the Trash icon beside fail2ban. It’s probably a good idea to turn OFF the Notice option for the full log while you’re at it. Then SAVE your changes.

32. Before you do anything else, navigate to Admin:Admin:Backup & Restore, configure and run a Full Backup, and then download the file and keep it in a safe place. Be advised that Backup/Restore doesn’t restore Add-Ons, /var/lib/asterisk/agi-bin, custom contexts (extensions__80*.conf) in /etc/asterisk/ombutel, custom MySQL databases (mysqldump -u root yourDB > yourDB.sql), custom and lenny sound directories in /var/lib/asterisk/sounds, phpMyAdmin, /usr/local/sbin, and /etc/crontab.

Obtaining IBM Watson TTS and STT Credentials

Incredible PBX uses IBM Watson® for TTS and STT support. This Nerd Vittles tutorial will walk you through getting your IBM account set up and obtaining both your TTS and STT credentials. Be sure to write down BOTH sets of credentials which you’ll need in a minute. For home and SOHO use, IBM access and services generally is FREE even though you must provide a credit card when signing up. Details are provided when you sign up. If you ever forget your passwords, you can retrieve them by navigating to Resource List:Services:TTS or STT:View Full Details:Show Credentials.

Obtaining Wolfram Alpha Credentials

When people ask what exactly Wolfram Alpha is, our favorite answer was provided by Ed Borasky.

It’s an almanac driven by a supercomputer.

That’s an understatement. It’s a bit like calling Google Search a topic index. Unlike Google which provides links to web sites that can provide answers to queries, Wolfram Alpha provides specific and detailed answers to almost any question. Here are a few examples (with descriptions of the functionality) to help you wrap your head around the breadth of information. For a complete list of what’s available, visit Wolfram Alpha’s Examples by Topic. Type a sample query here. Some of our favorites include:

Weather in Charleston South Carolina
Weather forecast for Washington D.C.
Next solar eclipse
Otis Redding
Define politician
Who won the 1969 Superbowl? (Broadway Joe)
What planes are flying overhead now? (flying over your server’s location)
Ham and cheese sandwich (nutritional information)
Holidays 2012 (summary of all holidays for 2012 with dates and DOW)
Medical University of South Carolina (history of MUSC)
Star Trek (show history, air dates, number of episodes, and more)
Apollo 11 (everything you ever wanted to know)
Cheapest Toaster (brand and price)
Battle of Gettysburg (sad day 🙂 )
Daylight Savings Time 2012 (date ranges and how to set your clocks)
Tablets by Motorola (pricing, models, and specs from Best Buy)
Doughnut (you don’t wanna know)
Snickers bar (ditto)
Weather (local weather at your server’s location)

Before you can actually use our TTS implementation of Wolfram Alpha, you’ll need to obtain a free Wolfram Alpha account. As you can imagine, there have to be some rules when you’re using someone else’s supercomputer for free. So here’s the deal. It’s free for non-commercial, personal use once you sign up for an account. But you’re limited to 2,000 queries a month which works out to almost 70 queries a day. Every query requires your personal application ID, and that’s how Wolfram Alpha keeps track of your queries. Considering the price, we think you’ll find the query limitation generous compared to other web resources.

To get started, sign up for a free Wolfram Alpha API account. Just provide your email address and set up a password. It takes less than a minute. Log into your account and click on Get An App ID. Make up a name for your application and write down (and keep secret) your APP-ID code. That’s all there is to getting set up with Wolfram Alpha. If you want to explore costs for commercial use, there are links to let you get more information.

Configuring Your Incredible PBX Credentials

In addition to your Wolfram Alpha APPID, there are two sets of IBM credentials to plug into the Asterisk AGI scripts. Keep in mind that there are different passwords for the IBM Watson TTS and STT services. The TTS credentials will look like the following: $IBM_password. The STT credentials look like this: $API_PASSWORD. Don’t mix them up. The username for both TTS and STT is now the single word: apikey

All of the scripts requiring credentials are located in /var/lib/asterisk/agi-bin so switch to that directory after logging into your server as root. Edit each of the following files and insert your TTS credentials in the variables already provided: nv-today2.php, ibmtts.php, and ibmtts2.php. Edit each of the following files and insert your STT credentials in the variables already provided: getquery.sh, getnumber.sh, and getnumber2.sh. Finally, edit 4747 and insert your Wolfram Alpha APPID.

If you ever want to learn how to develop applications for Asterisk, these scripts coupled with the dialplan code included in /etc/asterisk/ombutel/extensions__80-1-incrediblepbx.conf will point you in the right direction with easy to follow examples.

Managing the AsteriDex SQLite3 Database

We’ve alluded to the AsteriDex database in a couple of VitalPBX articles but never mentioned how to access it. Using a browser, point it to http://server-ip/asteridex4. You can add, edit, display, and delete entries from there. Before you can make changes in the database, issue the following command after logging into your server as root:

chown asterisk:apache /var/lib/asterisk/agi-bin

Taking Incredible PBX for a Test Drive

You can take Incredible PBX for VitalPBX on a test drive in two ways. You can call our server, and then you can try things out on your own server and compare the results. Call our IVR by dialing 1-843-606-0555. For our international friends, you can use the following SIP URI for a free call: 10159591015959@atlanta.voip.ms. For tips on setting up your own secure, hybrid SIP URI with VitalPBX, see our original tutorial. The FreePBX® setup is virtually identical except for the location of the custom SIP setting for match_auth_username=yes. On a VitalPBX server, you will enter it here: Settings:Technology Settings:SIP Settings:CUSTOM.

With Allison’s Demo IVR, you can choose from the following options:

  • 0. Chat with Operator — connects to extension 701
  • 1. AsteriDex Voice Dialer (412) – say "Delta Airlines" or "American Airlines" to connect
  • 2. Conferencing (2663) – log in using 1234 as the conference PIN
  • 3. Wolfram Alpha Almanac (4747) – say "What planes are flying overhead now?"
  • 4. Lenny (53669) – The Telemarketer’s Worst Nightmare
  • 5. Today’s News Headlines (951) — courtesy of Yahoo! News
  • 6. Weather by ZIP Code (947) – enter any 5-digit ZIP code for today’s weather
  • 7. Today in History (86329) — courtesy of OnThisDay.com
  • 8. Call Extension 701 — on your local PBX
  • 9. DISA Voice Dialer (3172) — say any 10-digit number to be connected
  • *. Current TIME and Date (8463) — courtesy of VitalPBX

CAUTION: We have intentionally disabled outbound calls using Option #9 and redirected callers to Lenny. The reason is that an unscrupulous caller could easily run up your phone bill by entering a number with expensive destination charges. If you wish to enable the feature, despite the risks, you can edit extensions__80-1-incrediblepbx.conf and make the change.

You can call your own IVR in a few ways. From an internal VitalPBX phone, dial D-E-M-O (2663) to be connected. Or simply dial the number of the DID you routed to the Incredible PBX Custom Context. Local users can also dial the individual feature codes shown in parentheses above. Be sure that you heed AND test the CAUTION documented above.

Originally published: Monday, October 21, 2019


Need help with Asterisk? Visit the VoIP-info Forum.


Special Thanks to Our Generous Sponsors


FULL DISCLOSURE: ClearlyIP, Skyetel, Vitelity, DigitalOcean, Vultr, VoIP.ms, 3CX, Sangoma, TelecomsXchange and VitalPBX have provided financial support to Nerd Vittles and our open source projects through advertising, referral revenue, and/or merchandise. As an Amazon Associate and Best Buy Affiliate, we also earn from qualifying purchases. We’ve chosen these providers not the other way around. Our decisions are based upon their corporate reputation and the quality of their offerings and pricing. Our recommendations regarding technology are reached without regard to financial compensation except in situations in which comparable products at comparable pricing are available from multiple sources. In this limited case, we support our sponsors because our sponsors support us.

BOGO Bonaza: Enjoy state-of-the-art VoIP service with a $10 credit and half-price SIP service on up to $500 of Skyetel trunking with free number porting when you fund your Skyetel account. No limits on number of simultaneous calls. Quadruple data center redundancy. $25 monthly minimum spend required. Tutorial and sign up details are here.

The lynchpin of Incredible PBX 2020 and beyond is ClearlyIP components which bring management of FreePBX modules and SIP phone integration to a level never before available with any other Asterisk distribution. And now you can configure and reconfigure your new Incredible PBX phones from the convenience of the Incredible PBX GUI.

VitalPBX is perhaps the fastest-growing PBX offering based upon Asterisk with an installed presence in more than 100 countries worldwide. VitalPBX has generously provided a customized White Label version of Incredible PBX tailored for use with all Incredible PBX and VitalPBX custom applications. Follow this link for a free test drive!
 

Special Thanks to Vitelity. Vitelity is now Voyant Communications and has halted new registrations for the time being. Our special thanks to Vitelity for their unwavering financial support over many years and to the many Nerd Vittles readers who continue to enjoy the benefits of their service offerings. We will keep everyone posted on further developments.


Honeymoon Time: Meet Incredible PBX 16-15.2 for CentOS 7


After two months of development, we are pleased to announce the production-ready release of Incredible PBX 16-15 on the CentOS 7 platform with the latest Asterisk® 16 and FreePBX® 15 components. After years of frustrating upgrades, we are equally pleased to announce that those running Incredible PBX 13-13 can upgrade to the new Incredible PBX 16-15 platform with a handful of button clicks. And you’ll never miss a beat. What are you waiting for?

In addition to the latest Asterisk 16 release, you also get the entire FreePBX 15 GPL module collection including their new User Control Panel (UCP) and a much enhanced web GUI plus the entire Incredible PBX feature set. As with Incredible PBX LITE, it’s plug-and-play with immediate calling capability using any of four commercial SIP providers. Or you can choose one of 16 other preconfigured SIP providers, enter your credentials, and enjoy instant connectivity without worrying about SIP settings. Last, but not least, you can easily turn your Incredible PBX 16-15 server into a secure public-facing PBX or interconnect a Raspberry Pi for traveling so that you never miss a call.

What’s Included? Incredible PBX 16-15 serves up a VoIP powerhouse featuring Asterisk 16, the FreePBX 15 GPL platform including User Control Panel (UCP), an Apache web server, the latest MariaDB SQL server (formerly MySQL), SendMail, and the Incredible PBX feature set including SIP, SMS, Opus, voice recognition, PicoTTS Text-to-Speech VoIP applications plus fax support, Click-to-Dial, News, Weather, Reminders, ODBC, and hundreds of features that typically are found in commercial PBXs: Conferencing, IVRs and AutoAttendants, Email Delivery of Voicemails, and much more.

Choosing a SIP Provider. Incredible PBX 16-15 comes preconfigured with support for five SIP extensions and four of the major SIP providers: Skyetel, VoIP.ms, V1VoIP, and Anveo Direct. We obviously hope you’ll choose Skyetel not only because they financially support Nerd Vittles and our open source projects, but also because it is a clearly superior platform offering crystal-clear communications and triple-redundancy so you never miss a call. Skyetel also sets itself apart from the other providers in the support department. They actually respond to issues, and there’s never a charge. As the old saying goes, they may not be the cheapest, but you get what you pay for. Even without taking advantage of Nerd Vittles half-price offer on up to $500 of Skyetel services, they’re still dirt cheap compared to the Bell Sisters and cable companies. Skyetel is so sure you’ll love their service that they give you a $10 credit to kick the tires before you ever spend a dime. Traditional DIDs are $1 per month. Outbound conversational calls are $0.012 per minute. Incoming conversational calls are a penny a minute, and CallerID lookups are $0.004. You only pay for minutes you use. Once you’re satisfied with the service and fund your account, you can port in your existing DIDs at no cost for 60 days after signup. In short, you have nothing to lose by trying out the Skyetel service. Effective 10/1/2023, $25/month minimum spend required.

Choosing a Platform for Incredible PBX 16-15

As with our other open source offerings, the platform choice for Incredible PBX 16-15 depends upon a number of factors. For most folks, you’d be crazy to go out and purchase hardware to use in your home or office when cloud-based platforms are available for about a dollar a month. Unless you plan to publicly expose your server on the Internet to facilitate remote SIP connections, the OpenVZ offerings below are perfectly adequate while in business with the cautionary note that you need off-site backups AND a tested backup plan. Three providers previously listed have closed their doors in 2019. You’ve been warned.

ProviderRAMDiskBandwidthPerformance as of 12/1/19Cost
CrownCloud KVM (LA)1GB20GB +
Snapshot
1TB/month598Mb/DN 281Mb/UP
2CPU Core
$25/year
Best Buy!
Naranjatech KVM (The Netherlands)1GB20GB1TB/monthHosting since 2005
VAT: EU res.
20€/year w/code:
SBF2019
BudgetNode KVM (LA)1GB40GB RAID101TB/monthAlso available in U.K PM @Ishaq on LET before payment$24/year
FreeRangeCloud KVM (Ashburn VA, Winnipeg, Freemont CA)1GB20GB SSD3TB/monthPick EGG loc'n
Open ticket for last 5GB SSD
$30/year w/code:
LEBEGG30

Installing Incredible PBX 16-15 with CentOS 7

9/21 ALERT UPDATE: A recent SolusVM update has broken systemd upon which Incredible PBX and Asterisk depend. SolusVM is the virtualizer used by many of the bargain-basement cloud providers. For the time being, these installs fail so you are cautioned to avoid any SolusVM-based cloud platform. Vultr, Digital Ocean, and OVH are your best bets at the moment. And Vultr and Digital Ocean both support Nerd Vittles through referral credits. We will post an update when the situation changes.

If you’ve installed previous iterations of Incredible PBX, today’s drill is similar. Here is a thumbnail sketch of the install procedure for Incredible PBX 16-15. Begin by installing a minimal CentOS 7 (64-bit) platform or pick the CentOS 7 option with 1GB RAM and 20GB of storage from your cloud provider’s menu of choices. Then log into your server as root and issue the following commands:

passwd
yum -y update
yum -y install net-tools nano wget tar
wget http://incrediblepbx.com/incrediblepbx16-15.2.tar.gz
tar zxvf incrediblepbx16-15.2.tar.gz
rm -f incrediblepbx16-15.2.tar.gz
# to add swap file on non-OpenVZ cloud platforms with no swap file
./create-swapfile-DO
# kick off Phase I install
./IncrediblePBX16-15.sh
# after reboot, kick off Phase II install
./IncrediblePBX16-15.sh
# add HylaFax/AvantFax, if desired
./incrediblefax16.sh
# set desired timezone
./timezone-setup
# display your passwords
./show-passwords
# remember to enable TUN/TAP if using VPS Control Panel with OpenVZ
# reconfigure PortKnocker if installing on an OpenVZ platform
echo 'OPTIONS="-i venet0:0"' >> /etc/sysconfig/knockd
service knockd restart
# set up NeoRouter VPN client, if desired
nrclientcmd
# check network speed
wget -O speedtest-cli https://raw.githubusercontent.com/sivel/speedtest-cli/master/speedtest.py
chmod +x speedtest-cli
./speedtest-cli

WebMin is also installed and configured as part of the base install. The root password for access is the same as your Linux root password. We strongly recommend that you not use WebMin to make configuration changes to your server. You may inadvertently damage the operation of your PBX beyond repair. WebMin is an excellent tool to LOOK at how your server is configured. When used for that purpose, we highly recommend WebMin as a way to become familiar with your Linux configuration.

Planning Ahead for That Rainy Day

If you haven’t already learned the hard way, let us save you from a future shock. Hardware fails. All of it. So spend an extra hour now so that you’ll be prepared when (not if) disaster strikes. First, once you have your new PBX configured the way you plan to use it, make a backup of your PBX by running the Incredible Backup script: /root/incrediblebackup16

Copy down the name of the backup file that was created. You’ll need it in a few minutes.

Second, build yourself an identical VirtualBox platform on your desktop PC. It’s the same steps as outlined above.

Next, create a /backup folder on your VirtualBox PBX and copy the backup file from your main server to your VirtualBox server and restore it after logging in to VirtualBox PBX as root:

mkdir /backup
scp root@main-pbx-ip-address:/backup/backup-file-name.tar.gz /backup/.
/root/incrediblerestore16 /backup/backup-file-name.tar.gz

Complaints that you "forgot" to make a backup and your hardware has failed or your provider has gone out of business are not welcomed. We’re sorry for your loss. Case closed.

Completing the Incredible PBX Setup Procedure

Unless your desktop PC and server are both on the same private LAN, the install procedure should be performed from a desktop PC using SSH or Putty. This will insure that your desktop PC is also whitelisted in the Incredible PBX firewall. Using the console to perform the install is NOT recommended as your desktop PC will not be whitelisted in the firewall. This may result in your not being able to log in to your server. Once you have network connectivity, log in to your server as root from a desktop PC using your root password. Accept the license agreement by pressing ENTER.

Kick off the Phase I install. Once your server reboots and you log back in as root, start the Phase II install. All of your passwords will be randomly assigned with the exception of the root user Linux password. You can set it at any time by issuing the command: passwd. You also must set up an admin password to access the FreePBX web GUI with the command: /root/admin-pw-change. With the exception of your root user and FreePBX admin passwords, most of the remaining passwords can be displayed using the command: /root/show-passwords.

Finally, if your PBX is sitting behind a NAT-based router, you’ll need to redirect incoming UDP 5060 and UDP 10000-20000 traffic to the private IP address of your PBX. This is required for all of the SIP providers included in the Incredible PBX 16-15 default build that don’t require a SIP registration. Otherwise, inbound calls will fail.

Configuring Skyetel for Incredible PBX 16-15

If you’ve decided to go with Skyetel, here’s the drill. Sign up for Skyetel service and take advantage of the Nerd Vittles specials. First, complete the Prequalification Form here. You then will be provided a link to the Skyetel site to complete your registration. Once you have registered on the Skyetel site and your account has been activated, open a support ticket and request the $10 credit for your account by referencing the Nerd Vittles special offer. Once you are satisfied with the service, fund your account as desired, and Skyetel will match your deposit of up to $250 simply by opening another ticket. That gets you up to $500 of half-price calling. Credit is limited to one per person/company/address/location.

Skyetel does not use SIP registrations to make connections to your PBX. Instead, Skyetel utilizes Endpoint Groups to identify which servers can communicate with the Skyetel service. An Endpoint Group consists of a Name, an IP address, a UDP or TCP port for the connection, and a numerical Priority for the group. For incoming calls destined to your PBX, DIDs are associated with an Endpoint Group to route the calls to your PBX. For outgoing calls from your PBX, a matching Endpoint Group is required to authorize outbound calls through the Skyetel network. Thus, the first step in configuring the Skyetel side for use with your PBX is to set up an Endpoint Group. Here’s a typical setup for Incredible PBX 16-15:

  • Name: MyPBX
  • Priority: 1
  • IP Address: PBX-Public-IP-Address
  • Port: 5060
  • Protocol: UDP
  • Description: my.incrediblepbx.com

To receive incoming PSTN calls, you’ll need at least one DID. On the Skyetel site, you acquire DIDs under the Phone Numbers tab. You have the option of Porting in Existing Numbers (free for the first 60 days after you sign up for service) or purchasing new ones under the Buy Phone Numbers menu option.

Once you have acquired one or more DIDs, navigate to the Local Numbers or Toll Free Numbers tab and specify the desired SIP Format and Endpoint Group for each DID. Add SMS/MMS and E911 support, if desired. Call Forwarding and Failover are also supported. That completes the VoIP setup on the Skyetel side. System Status is always available here.

Configuring VoIP.ms for Incredible PBX 16-15

To sign up for VoIP.ms service, may we suggest you use our signup link so that Nerd Vittles gets a referral credit for your signup. Once your account is set up, you’ll need to set up a SIP SubAccount and, for Authentication Type, choose Static IP Authentication and enter your Incredible PBX 16-15 server’s public IP address. For Transport, choose UDP. For Device Type, choose Asterisk, IP PBX, Gateway or VoIP Switch. Order a DID in their web panel, and then point the DID to the SubAccount you just created. Be sure to specify atlanta1.voip.ms as the POP from which to receive incoming calls.

Configuring V1VoIP for Incredible PBX 16-15

To sign up for V1VoIP service, sign up on their web site. Then login to your account and order a DID under the DIDs tab. Once the DID has been assigned, choose View DIDs and click on the Forwarding button beside your DID. For Option #1, choose Forward to IP Address/PBX. For the Forwarding Address, enter the public IP address of your server. For the T/O (timeout) value, set it to 2o seconds. Then click the Update button. Under the Termination tab, create a new Endpoint with the public IP address of your server so that you can place outbound calls through V1VoIP.

Configuring Anveo Direct for Incredible PBX 16-15

To sign up for Anveo Direct service, sign up on their web site and then login. After adding funds to your account, purchase a DID under Inbound Service -> Order DID. Next, choose Configure Destination SIP Trunk. Give the Trunk a name. For the Primary SIP URI, enter $[E164]$@server-IP-address. For Call Options, select your new DID from the list. You also must whitelist your public IP address under Outbound Service -> Configure. Create a new Call Termination Trunk and name it to match your server. For Dialing Prefix, choose six alphanumeric characters beginning with a zero. In Authorized IP Addresses, enter the public IP address of your server. Set an appropriate rate cap. We like $0.01 per minute to be safe. Set a concurrent calls limit. We like 2. For the Call Routing Method, choose Least Cost unless you’re feeling extravagant. For Routes/Carriers, choose Standard Routes. Write down your Dialing Prefix and then click the Save button.

Before you can make outbound calls through Anveo Direct from your PBX, you first must configure the Dialing Prefix that you wrote down in the previous step. Log into the GUI as admin using a web browser and edit the Anveo-Out trunk in Connectivity -> Trunks. Click on the custom-Settings tab and replace anveo-pin with your actual Dialing Prefix. Click Submit and Apply Config to complete the setup.

By default, incoming Anveo Direct calls will be processed by the Default inbound route on your PBX. If you wish to redirect incoming Anveo Direct calls using DID-specific inbound routes, then you’ve got a bit more work to do. In addition to creating the inbound route using the 11-digit Anveo Direct DID, enter the following commands after logging into your server as root using SSH/Putty:

cd /etc/asterisk
echo "[from-anveo]" >> extensions_custom.conf
echo "exten => _.,1,Ringing" >> extensions_custom.conf
echo "exten => _.,n,Goto(from-trunk,\\${SIP_HEADER(X-anveo-e164)},1)" >> extensions_custom.conf
asterisk -rx "dialplan reload"

Configuring a Softphone for Incredible PBX 16-15

We’re in the home stretch now. You can connect virtually any kind of telephone to your new PBX. Plain Old Phones require an analog telephone adapter (ATA) which can be a separate board in your computer from a company such as Digium. Or it can be a standalone SIP device such as ObiHai’s OBi100 or OBi110 (if you have a phone line from Ma Bell to hook up as well). SIP phones can be connected directly so long as they have an IP address. These could be hardware devices or software devices such as the YateClient softphone. We’ll start with a free one today so you can begin making calls. You can find dozens of recommendations for hardware-based SIP phones both on Nerd Vittles and the PIAF Forum when you’re ready to get serious about VoIP telephony.

We recommend YateClient which is free. Download it from here. Run YateClient once you’ve installed it and enter the credentials for the 701 extension on Incredible PBX. You can find them by running /root/show-passwords. You’ll need the IP address of your server plus your extension 701 password. In the YateClient, fill in the blanks using the IP address of your Server, 701 for your Username, and whatever Password was assigned to the extension when you installed Incredible PBX. Click OK to save your entries.

Once you are registered to extension 701, close the Account window. Then click on YATE’s Telephony Tab and place some test calls to the numerous apps that are preconfigured on Incredible PBX. Dial a few of these to get started:

DEMO - Apps Demo
123 - Reminders
947 - Weather by ZIP Code
951 - Yahoo News
TODAY - Today in History
LENNY - The Telemarketer's Worst Nightmare

If you are a Mac user, another great no-frills softphone is Telephone. Just download and install it from the Mac App Store. For Android users, check out the terrific new VitalPBX Communicator. Works flawlessly with Incredible PBX.

Audio Issues with Incredible PBX 16-15

If you experience one-way or no audio on some calls, add your external IP address and LAN subnet in the GUI by navigating to Settings -> Asterisk SIP Settings. In the NAT Settings section, click Detect Network Settings. Click Submit and Apply Settings to save your changes.

Incredible PBX 16-15 Administration

We’ve eased the pain of administering your new PBX with a collection of scripts which you will find in the /root folder after logging in with SSH or Putty. Here’s a quick summary of what each of the scripts does.

add-fqdn is used to whitelist a fully-qualified domain name in the firewall. Because Incredible PBX 16-15 blocks all traffic from IP addresses that are not whitelisted, this is what you use to authorize an external user for your PBX. The advantage of an FQDN is that you can use a dynamic DNS service to automatically update the IP address associated with an FQDN so that you never lose connectivity.

add-ip is used to whitelist a public IP address in the firewall. See the add-fqdn explanation as to why this matters.

del-acct is used to remove an IP address or FQDN from the firewall’s whitelist.

admin-pw-change is used to set the admin password for access to the FreePBX/Incredible PBX web GUI using a browser pointed to the local IP address of your server.

apache-pw-change is used to set the admin password for access to Apache/Incredible PBX apps including AsteriDex and Reminders. This provides a password layer of protection for access to these applications.

reset-conference-pins is a script that automatically and randomly resets the user and admin pins for access to the preconfigured conferencing application. Dial C-O-N-F from any registered SIP phone to connect to the conference.

reset-extension-passwords is a script that automatically and randomly resets ALL of the SIP passwords for extensions 701-705. Be careful using this one, or you may disable existing registered phones and cause Fail2Ban to blacklist the IP addresses of those users. HINT: You can place a call to the Ring Group associated with all five extensions by dialing 777.

reset-reminders-pin is a script that automatically and randomly resets the pin required to access the Telephone Reminders application by dialing 123. It’s important to protect this application because a nefarious user could set up a reminder to call a number anywhere in the world assuming your SIP provider’s account was configured to allow such calls.

show-feature-codes is a cheat sheet for all of the feature codes which can be dialed from any registered SIP phone. It documents how powerful a platform Incredible PBX 16-15 actually is. A similar listing is available in the GUI at Admin -> Feature Codes.

show-passwords is a script that displays most of the passwords associated with Incredible PBX 16-15. This includes SIP extension passwords, voicemail pins, conference pins, telephone reminders pin, and your Anveo Direct outbound calling pin (if configured). Note that voicemail pins are configured by the user of a SIP extension the first time the user accesses the voicemail system by dialing *97.

update-IncrediblePBX is the Automatic Update Utility which checks for server updates from incrediblepbx.com every time you log into your server as root using SSH or Putty. Do NOT disable it as it is used to load important fixes and security updates when necessary. We recommend logging into your server at least once a week.

pbxstatus (shown above) displays status of all major components of Incredible PBX 16-15.

Forwarding Calls to Your Cellphone. Keep in mind that inbound calls to your DIDs automatically ring all five SIP extensions, 701-705. The easiest way to also ring your cellphone is to set one of these five extensions to forward incoming calls to your cellphone. After logging into your PBX as root, issue the following command to forward calls from extension 705 to your cellphone: asterisk -rx "database put CF 705 6781234567"

To remove call forwarding: asterisk -rx "database del CF 705"

Configuring SendMail with Incredible PBX 16-15

In order to receive voicemails by email delivery, outbound mail functionality from your server obviously is required. If you’ve deployed your server in your home, your Internet Service Provider probably blocks downstream mail servers such as Incredible PBX from sending mail. This is done to reduce SPAM. In this case, you will need to configure SendMail using either your ISP or Gmail as an SMTP Relay Host. Here are the steps using a Gmail account:

cd /etc/mail
yum -y install sendmail-cf
hostname -f > genericsdomain
touch genericstable
cd /usr/bin
rm -f makemap
ln -s ../sbin/makemap.sendmail makemap
cd /etc/mail
makemap -r hash genericstable.db < genericstable
mv sendmail.mc sendmail.mc.original
wget http://incrediblepbx.com/sendmail.mc.gmail
cp sendmail.mc.gmail sendmail.mc
mkdir -p auth
chmod 700 auth
cd auth
echo AuthInfo:smtp.gmail.com \\"U:smmsp\\" \\"I:user_id\\" \\"P:password\\" \\"M:PLAIN\\" > client-info
echo AuthInfo:smtp.gmail.com:587 \\"U:smmsp\\" \\"I:user_id\\" \\"P:password\\" \\"M:PLAIN\\" >> client-info
echo AuthInfo:smtp.gmail.com:465 \\"U:smmsp\\" \\"I:user_id\\" \\"P:password\\" \\"M:PLAIN\\" >> client-info
# Stop here and edit client-info (nano -w client-info) in all three lines.
# Replace  user_id with your gMail account name without @gmail.com
# Replace password with your real gMail password OR
#  use your Gmail App Key if 2-step verification is enabled
# Be sure to replace the double-quotes shown above if they don't appear in the file!!!
# Save your changes (Ctrl-X, Y, then Enter)
chmod 600 client-info
makemap -r hash client-info.db < client-info
cd ..
make
systemctl restart sendmail

If your server is hosted in the cloud and your provider does not block TCP port 25, then you can send mail without using a SmartHost; however, your server's hostname must actually be real or downstream mail servers will reject your mail. You can set your server's hostname like this: hostname myserver.myhost.com. This is usually sufficient; however, it's a good idea to also add the hostname in /etc/hostname and in /etc/hosts as the first entry on 127.0.0.1 line:

127.0.0.1   myserver.myhost.com pbx.local localhost localhost.localdomain

Next, test outbound mail using this command with your actual email address:

echo "test" | mail -s testmessage yourname@youremaildomain.com

Once you are sure your emails are being delivered reliably, here's a sample GUI voicemail configuration for an extension:


Getting Started with Incredible Fax 16

Believe it or not, there still are lots of folks that use faxes in their everyday lives. If you're one of them, Incredible PBX has your back. Begin by logging into your server as root and running incrediblefax16.sh to install HylaFax and AvantFax on your server. You'll be prompted a dozen or more times for information. Answer no to the secure fax question. For the rest of the prompts, just press ENTER to accept the default entries. Rebooting your server is required when the install finishes. Once your server is back on line, there will be a new AvantFax tab in the GUI. Before proceeding, be sure to set an Apache web apps password by running /root/apache-pw-change. Next, login to AvantFax with your browser. You first will be prompted for your Apache credentials. Enter admin for the username and whatever password you set up in the previous step. Then you will be prompted for your AvantFax credentials. The default is admin:password. After you enter the username and password, you will be prompted to change your admin password. The old password is still password. Then enter your desired password twice and save the setting. The AvantFax dashboard then will display. If nothing has come unglued, you should see four green Idle icons:


You can Send Faxes from within AvantFax by choosing the Send Fax tab, or you can use one of many HylaFax clients. Google is your friend.

Receiving faxes currently has issues not the least of which are fax detection being broken and incoming faxes never reaching the specified destination. We will continue to work on this and provide updates when they become available. For the time being, the simple workaround if you're using Skyetel as your provider is to designate a DID as a fax line (Call Routing: vFax) in the Skyetel Dashboard. Then Skyetel will manage the incoming faxes without any additional configuration on your PBX. You still can send faxes from within the AvantFax GUI.

Getting Started with ODBC for Asterisk

If you're new to the ODBC World, here's a quick primer. The idea behind Open Data Base Connectivity is to simplify the task of connecting up any flavor database management system so that it can talk to applications and foreign databases without having to write custom code to support every different DBMS. ODBC serves in much the same way as a translator who sits between you and foreign visitors. With the benefit of a translator, whatever is spoken is understood on both ends of the conversation. The real beauty of ODBC is that it is conversant with almost every DBMS offering on the planet including Oracle, Informix, SAS, MS Access, DB2, SQL Server, MySQL, MariaDB, PostgreSQL, Sybase, and even dBase, FoxPro, and XDB. All you really need is the ODBC connector for your operating system plus one or more database drivers for the DBMS data sources you wish to use.

Because the FreePBX modules are driven by MySQL tables, we've included the MySQL connector for Asterisk in Incredible PBX 16-15 together with two sample applications to get you started. If you add your own MySQL databases, it's easy to connect them with ODBC by simply running the odbc-gen.sh script in /root again. The two sample applications we've included will show you how to integrate ODBC queries into your Asterisk dialplan. The code is available in odbc.conf in the /etc/asterisk folder. The first sample is a typical employee database. By dialing 222, you will be prompted to enter the employee number (12345), and the ODBC app then will look up the employee number and read you the name of the employee. The second sample is a speed dialer using the AsteriDex database. The sample entries in the database include a 3-numeric-digit DIALCODE which simply matches the first three letters of each AsteriDex name spelled out on a phone, e.g. 335 = DELta Airlines and 263 = AMErican Airlines. As you add new entries to AsteriDex, you can add dialcodes in the same way or in any other scheme you prefer. Once you have signed up with a provider so that you can make outbound calls, just dial 223 and enter the AsteriDex dialcode to place the call. Think of it as a Speed Dialer on Steroids.

Beginning the Incredible PBX 13-13 Migration

For anyone that's been involved with Asterisk and FreePBX, you already know what a pain it was to move from one release to another. It's still not quite automatic, but it's damn close. You can't perform an in-place migration to move from Asterisk 13 and FreePBX 13 to Asterisk 16 with FreePBX 15. So you'll need to first bring up an Incredible PBX 16-15.2 platform as documented above. It must be separate and apart from your already functioning Incredible PBX 13-13.10 server. Once you've done that, use add-ip to whitelist the IP address of your 13-13 server on the 16-15 PBX and whitelist the IP address of your 16-15 server on the 13-13 PBX. This will make it easy to copy files between the two servers.

In addition to the whitelisting procedure above, there are three more steps to complete on the Incredible PBX 13-13 server. First, you'll need to update the backup module:

cd /root
./gpl-install-fpbx backup

Next, login to the GUI as admin using a browser and make a backup of your FreePBX components. Access Admin -> Backup & Restore and click Backup Wizard. Give the backup a name and description: incrediblepbx. Choose to run the backup Monthly. Choose Yes for voicemails, recordings, and CDR data. Choose Email Notifications and enter your email address. For Remote Save, choose No. Your backup will be saved locally in /var/spool/asterisk/backup/incrediblepbx. Click Finish.

Click the Pencil icon under incrediblepbx Actions to edit the files to be backed up. Using the + icon, make your Items list look like the following:

Click Save & Run button when you've made the necessary changes to kick off the backup. Unless you want monthly backups, you can click the trashcan icon under incrediblepbx Actions to remove the task we just created once the backup completes.

Copy the backup file from /var/spool/asterisk/backup/incrediblepbx to your desktop PC.

Restoring Your Data to Incredible PBX 16-15

Now let's continue on the Incredible PBX 16-15.2 server. Login to the GUI as admin using your favorite browser. From the FreePBX Dashboard, choose Admin -> Backup & Restore. Click the Restore tab. Click on Upload a Backup File and choose the backup file from your desktop. Once the backup is loaded, click Restore with CDR Data button to begin. When the whirring stops, there may be an error message. Just ignore it. Return to the Dashboard. Clear the warning about Bind Ports. It's incorrect. Your setup was copied correctly with chan_SIP on UDP 5060 and PJsip on UDP 5061 (unless you changed them). You now can use your browser to review your setup and verify that your 13-13 data came over correctly. Finally, verify that voicemail settings for your extensions got properly configured, and you should be good to go with Incredible PBX 16-15. Enjoy!

Where To Go From Here

Complete documentation on the FreePBX GPL Modules is available here.

Complete documentation on the Incredible PBX additions is available here.

An introduction to configuring extensions, trunks, and routes is available here.

Originally published: Monday, September 16, 2019


Need help with Asterisk? Visit the VoIP-info Forum.


Special Thanks to Our Generous Sponsors


FULL DISCLOSURE: ClearlyIP, Skyetel, Vitelity, DigitalOcean, Vultr, VoIP.ms, 3CX, Sangoma, TelecomsXchange and VitalPBX have provided financial support to Nerd Vittles and our open source projects through advertising, referral revenue, and/or merchandise. As an Amazon Associate and Best Buy Affiliate, we also earn from qualifying purchases. We’ve chosen these providers not the other way around. Our decisions are based upon their corporate reputation and the quality of their offerings and pricing. Our recommendations regarding technology are reached without regard to financial compensation except in situations in which comparable products at comparable pricing are available from multiple sources. In this limited case, we support our sponsors because our sponsors support us.

BOGO Bonaza: Enjoy state-of-the-art VoIP service with a $10 credit and half-price SIP service on up to $500 of Skyetel trunking with free number porting when you fund your Skyetel account. No limits on number of simultaneous calls. Quadruple data center redundancy. $25 monthly minimum spend required. Tutorial and sign up details are here.

The lynchpin of Incredible PBX 2020 and beyond is ClearlyIP components which bring management of FreePBX modules and SIP phone integration to a level never before available with any other Asterisk distribution. And now you can configure and reconfigure your new Incredible PBX phones from the convenience of the Incredible PBX GUI.

VitalPBX is perhaps the fastest-growing PBX offering based upon Asterisk with an installed presence in more than 100 countries worldwide. VitalPBX has generously provided a customized White Label version of Incredible PBX tailored for use with all Incredible PBX and VitalPBX custom applications. Follow this link for a free test drive!
 

Special Thanks to Vitelity. Vitelity is now Voyant Communications and has halted new registrations for the time being. Our special thanks to Vitelity for their unwavering financial support over many years and to the many Nerd Vittles readers who continue to enjoy the benefits of their service offerings. We will keep everyone posted on further developments.