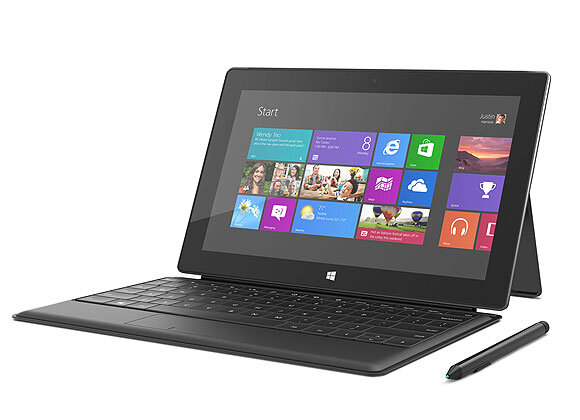
Home » Posts tagged 'vm' (Page 3)

Tag Archives: vm

The Most Versatile VoIP Provider: FREE PORTING

The 5-Minute PBX: It’s Incredible PBX 11 Virtual Machine for VirtualBox

In our last article, we introduced the PBX in a Flash Virtual Machine for Oracle’s VirtualBox. To commemorate the end of the world today, we wanted to go out with a bang. So we’re pleased to introduce Incredible PBX 11 Virtual Machine. As with the PIAF-Green Virtual Machine, this new appliance features CentOS 6.3, Asterisk® 11, and FreePBX® 2.11 beta. In addition, it includes Incredible Fax with HylaFax and AvantFax, SMS speech-to-text messaging as well as SMS message blasting with Google Voice, and several dozen turnkey Asterisk applications including a speech-to-text phonebook dialer, text-to-speech news, weather, tide, and stock reports, a conference bridge for MeetMe conferencing, NeoRouter and PPTP VPN support, SAMBA for Windows Networking, ODBC database integration, Telephone Reminders and Hotel-Style Wakeup Calls, CallerID Superfecta, PBX End Point Manager, and Wolfram Alpha to name but a few. With the addition of free Google Voice accounts, you still get free voice and fax calling in 2013 throughout the United States and Canada. And, yes, Incredible PBX 11 still installs and is ready to go in under 5 minutes on any Windows, Mac, Linux, or Solaris desktop.

The Ultimate VoIP Appliance: Incredible PBX 11 Virtual Machine for VirtualBox

We broke new ground in the virtual machine development arena last week with the introduction of the PIAF Virtual Machine. Today we take it to the next plateau with a turnkey VoIP appliance that can be deployed and functional in less time than it takes you to shave. Today’s Incredible PBX Virtual Machine still gives you everything a bare metal install from source code would have provided. And, most importantly, the components are truly portable. They can be copied to a 4GB flash drive1 for the price of a good hamburger and installed from there onto any type of machine that happens to be in front of you. Five minutes later, you have a fully functional Asterisk server with FreePBX and exactly the same feature set and source code that you would have had installing Incredible PBX onto a dedicated server. Before you ask any questions, we urge you to try this VoIP appliance for yourself. The install process is as easy as 1-2-3:

  1. Download and install VirtualBox onto a Desktop Machine of your choice
  2. Download and double-click on Incredible PBX 11 Virtual Machine to import it into VirtualBox
  3. Select the Incredible PBX 11 Virtual Machine in VirtualBox Manager Window and click the Start button

Introducing Oracle VM VirtualBox

Here’s a quick review if you missed our last article. VirtualBox®, Oracle’s virtual machine platform inherited from Sun, is really something. It’s not only free, but it’s pure GPL2 code. VirtualBox gives you a virtual machine platform that runs on top of any desktop operating system. In terms of limitations, we haven’t found any. We even tested this on an Atom-based Windows 7 machine with 2GB of RAM, and it worked without a hiccup. So step #1 is to download one or more of the VirtualBox installers from VirtualBox.org or Oracle.com. As mentioned, our recommendation is to put all of the 100MB installers on a 4GB thumb drive. Then you’ll have everything in one place whenever and wherever you happen to need it. Once you’ve downloaded the software, simply install it onto your favorite desktop machine. Accept all of the default settings, and you’ll be good to go. For details, here’s a link to Oracle’s VM VirtualBox User Manual.

Introducing Incredible PBX Virtual Machine

To get Incredible PBX VM installed on your desktop is quick and easy. Because the image tips the scales at over 2GB and due to the 2GB file size limit on many systems, we’ve chosen to split this download into two pieces. You need both of them. Just download them onto any flavor desktop from SourceForge. Once you’ve downloaded the two files, reassemble them into a single file known as an Open Virtualization Appliance (.ova). Then verify the checksums for the reassembled file to be sure everything is in its proper place. Finally, double-click on the .ova file which will initiate the import process into VirtualBox.

So let’s begin by downloading the two halves from SourceForge: INCREDIBLEPBX11aa and INCREDIBLEPBX11ab.

The reassembly procedure depends upon your desktop operating system. For Windows PCs, you’ll need to drop down to the Command Prompt, change to the directory in which you downloaded the two files, and type the following command:
 
copy /b INCREDIBLEPBX11aa + INCREDIBLEPBX11ab IncrediblePBX11.ova

To check the MD5/SHA1 checksums in Windows, download and run Microsoft’s File Checksum Integrity Verifier.

For Mac or Linux desktops, open a Terminal window, change to the directory in which you downloaded the two files, and type the following commands:
 
cat INCREDIBLEPBX11a{a..b} > IncrediblePBX11.ova
md5 IncrediblePBX11.ova (use md5sum for Linux)
openssl sha1 IncrediblePBX11.ova

The MD5 checksum for IncrediblePBX11.ova is b17655785ef00381ffd70899a19375f9. The SHA1 checksum is 86ccd31d64d3b51e10a8e7429548be6ce15ecd9b. If you have a match, proceed. Otherwise, rinse and repeat.

Importing Incredible PBX 11 Virtual Machine into VirtualBox

You only perform the import step one time. Once imported into VirtualBox, Incredible PBX is ready to use. There’s no further installation required, just like an OpenVZ template… only better. Double-click on the .ova file you downloaded to begin the procedure and load VirtualBox. When prompted, be sure to check the Reinitialize the Mac address of all network cards box. Read and accept the license agreement. Then click the Import button. Once the import is finished, you’ll see a new IncrediblePBX11 virtual machine in your VM List on the VirtualBox Manager Window. You need to make a couple of one-time adjustments to the IncrediblePBX11 Virtual Machine configuration to account for differences in sound and network cards on different host machines.

Click on IncrediblePBX11 Virtual Machine in the VM List. Then click Settings -> Audio and check the Enable Audio option and choose your sound card. Save your setup by clicking the OK button. Next click Settings -> Network. For Adapter 1, check the Enable Network Adapter option. From the Attached to pull-down menu, choose Bridged Adapter. Then select your network card from the Name list. Then click OK to save your setup. Finally, click Settings -> System, uncheck Hardware clock in UTC time, and click OK. That’s all the configuration that is necessary for Incredible PBX Virtual Machine. If you blinked, you probably missed it.

Running Incredible PBX Virtual Machine in VirtualBox

Once you’ve imported and configured Incredible PBX Virtual Machine, you’re ready to go. Highlight the appliance in the VM List on the VirtualBox Manager Window and click the Start button. The boot procedure with CentOS 6.3 will begin just as if you had installed PBX in a Flash and Incredible PBX on a standalone machine. You’ll see a couple of dialogue boxes pop up that explain the keystrokes to move back and forth between your host operating system desktop and Incredible PBX.

Here’s what you need to know. To work in the Incredible PBX Virtual Machine, just left-click your mouse while it is positioned inside the VM window. To return to your host operating system desktop, press the right Option key on Windows machines or the left Command key on any Mac. For other operating systems, read the dialogue boxes for instructions on moving around. Always shut down Incredible PBX gracefully! Click in the VM window with your mouse, log in as root, and type: shutdown -h now. Or, from the VirtualBox Manager Window, Ctl-Click on the IncrediblePBX11 VM and choose Close -> ACPI Shutdown.

Always run Incredible PBX VM behind a hardware-based firewall with no Internet port exposure!

Linux CLI Setup. To begin, position your mouse over the VM window and left-click. Once the virtual machine has booted, log in as root with password as the password. Change your root password immediately by typing passwd at the command prompt. Now set up a secure maint password for FreePBX as well. Type passwd-master. If you’re not in the Eastern U.S. time zone, then you’ll want to adjust your timezone setting so that reminders and other time-sensitive events happen at the correct time. Issue the following command to pick your time zone: /root/timezone-setup. If you plan to use Incredible Fax to send and receive faxes, set an email address for delivery of incoming faxes: /root/incrediblefax-setup. To use SMS messaging in Incredible PBX, you’ll need a Google Voice account which is covered below. Once you have your credentials, edit extensions_custom.conf in /etc/asterisk and insert your username and password in the 767 extension. To use SAMBA for Windows networking, replace the Interfaces IP address in /etc/samba/smb.conf with your actual IP address. Next, run smbpasswd and assign a password for root access to your server. Then restart SAMBA: service smb restart.

FreePBX Setup. Use a browser to log into your Incredible PBX server by pointing to the IP address of the virtual machine displayed in the status window of the CLI. Click on the User button to display the Admin choices in the Main PIAF Menu. Click on the FreePBX Admin option to load the FreePBX GUI. You will be prompted for a username and password. For the username, use maint. For the password, use whatever password you set up with passwd-master above.

You’ll want to keep FreePBX up to date. The easiest way is to configure FreePBX for email notifications when there are updates. In the FreePBX GUI, choose Admin -> Module Admin -> Upgrade Notifications and plug in your email address. Updates are installed in this same window. Click Check Online -> Upgrade All -> Process and Confirm. Scroll to the bottom of the Status window and click Return. Then click Apply Config. Now you try it.

GOOGLE VOICE ALERT: For old-timers that used the previous Google Voice module in FreePBX 2.x, it’s a little different in FreePBX 2.11. It now is called Google Voice (Motif), and you’ll find it under the Connectivity tab instead of the Other tab. More importantly, the form has changed. Do NOT check all 3 checkboxes as you did previously, or your incoming calls won’t be answered. Leave last checkbox "Send Unanswered to GoogleVoice Voicemail" UNCHECKED!!

Incredible PBX supports SIP, IAX, and Google Voice trunks to handle your outbound and incoming calls. The easiest way to get started it to set up a couple of Google Voice trunks, one for voice calls and one for faxing. These trunks must be dedicated for exclusive use with Incredible PBX. If you’re logged into these Google Voice accounts elsewhere, Incredible PBX won’t receive incoming calls. Read our Incredible PBX Quick Start Guide for the procedure to register for new Google Voice accounts. Once you have your credentials and phone numbers, choose Connectivity -> Google Voice in FreePBX to set up the accounts in FreePBX. For each trunk, you also need to set up an Inbound Route to tell FreePBX how to route the incoming calls. For your Fax trunk, here’s the drill. Choose Connectivity -> Inbound Routes. Insert your 10-digit Google Voice number in the DID Number field. Check Enable CID Superfecta and, for Set Destination, choose Custom Destinations -> Fax (HylaFax). Click Submit and then click Apply Config.

Before your Google Voice trunks will work reliably, there are two final steps. First, restart Asterisk from the Linux CLI: amportal restart. Then, make at least one outbound call using each Google Voice trunk.

We’ve preconfigured SIP trunks for all of the major VoIP providers in Incredible PBX. All you have to do is sign up for a few accounts. This isn’t like the old Ma Bell days so take advantage of the redundancy that using multiple VoIP providers gives you. There’s a very special offer from one of the major sponsors of the PBX in a Flash and Nerd Vittles projects below. Take advantage of it and support our open source projects.

1-7-13 Security Alert: We’ve just released Incredible PBX 11.1.2 which includes Asterisk 11.1.2 and the latest FreePBX 2.11 beta. The Asterisk Dev Team announced a serious security vulnerability in Asterisk 1.8, 10, and 11 late last week. This update addresses that. You can read all about it in the readme file on SourceForge. If you still are using an earlier version of Incredible PBX 11, make certain that it is behind a hardware-based firewall with no Internet port exposure. And you should immediately patch your server or, better yet, switch to this new release.

Now read the latest Incredible PBX Quick Start Guide and begin your VoIP adventure. Then you’ll want to do some reading on VirtualBox. We’ve barely scratched the surface. Setting up Headless VMs that run in the background on any server is a breeze. From the command line, here’s an article to get you started. But you also can start Headless VMs from within the GUI by highlighting the VM and clicking Shift->Start. REMEMBER: Always shut down VMs gracefully: Close->ACPI Shutdown. You’ll find more great tips at virtualbox.org and GitHub.

One of the real beauties of VirtualBox is you don’t have to use a GUI at all. The entire process can be driven from the command line. Other than on a Mac, here is the procedure to import, configure, and run Incredible PBX 11 Virtual Machine:
 
VBoxManage import IncrediblePBX11.ova
VBoxManage modifyvm "IncrediblePBX11" --nic1 nat
VBoxManage modifyvm "IncrediblePBX11" --acpi on --nic1 bridged
VBoxHeadless --startvm "IncrediblePBX11" &
# Wait 1 minute for IncrediblePBX11 to load. Then decipher IP address like this:
VBoxManage guestproperty get "IncrediblePBX11" /VirtualBox/GuestInfo/Net/0/V4/IP
# Now you can use SSH to login to IncrediblePBX11 at the displayed IP address
# Shutdown the IncrediblePBX11 Virtual Machine with the following command:
VBoxManage controlvm "IncrediblePBX11" acpipowerbutton

On a Mac, everything works the same way except for deciphering the IP address. Download our findip script for that.

Have a very Merry Christmas!

Originally published: Friday, December 21, 2012 Updated: Saturday, December 22, 2012


Need help with Asterisk? Visit the PBX in a Flash Forum.


Special Thanks to Our Generous Sponsors


FULL DISCLOSURE: ClearlyIP, Skyetel, Vitelity, DigitalOcean, Vultr, VoIP.ms, 3CX, Sangoma, TelecomsXchange and VitalPBX have provided financial support to Nerd Vittles and our open source projects through advertising, referral revenue, and/or merchandise. As an Amazon Associate and Best Buy Affiliate, we also earn from qualifying purchases. We’ve chosen these providers not the other way around. Our decisions are based upon their corporate reputation and the quality of their offerings and pricing. Our recommendations regarding technology are reached without regard to financial compensation except in situations in which comparable products at comparable pricing are available from multiple sources. In this limited case, we support our sponsors because our sponsors support us.

BOGO Bonaza: Enjoy state-of-the-art VoIP service with a $10 credit and half-price SIP service on up to $500 of Skyetel trunking with free number porting when you fund your Skyetel account. No limits on number of simultaneous calls. Quadruple data center redundancy. $25 monthly minimum spend required. Tutorial and sign up details are here.

The lynchpin of Incredible PBX 2020 and beyond is ClearlyIP components which bring management of FreePBX modules and SIP phone integration to a level never before available with any other Asterisk distribution. And now you can configure and reconfigure your new Incredible PBX phones from the convenience of the Incredible PBX GUI.

VitalPBX is perhaps the fastest-growing PBX offering based upon Asterisk with an installed presence in more than 100 countries worldwide. VitalPBX has generously provided a customized White Label version of Incredible PBX tailored for use with all Incredible PBX and VitalPBX custom applications. Follow this link for a free test drive!
 

Special Thanks to Vitelity. Vitelity is now Voyant Communications and has halted new registrations for the time being. Our special thanks to Vitelity for their unwavering financial support over many years and to the many Nerd Vittles readers who continue to enjoy the benefits of their service offerings. We will keep everyone posted on further developments.


Some Recent Nerd Vittles Articles of Interest…

  1. Many of our purchase links refer users to Amazon when we find their prices are competitive for the recommended products. Nerd Vittles receives a small referral fee from Amazon to help cover the costs of our blog. We never recommend particular products solely to generate Amazon commissions. However, when pricing is comparable or availability is favorable, we support Amazon because Amazon supports us. []

Virtual Utopia: 1-Minute Asterisk Installs with PIAF2-OpenVZ

Thanks to the terrific work of Darrell Dillman, today we have a new OpenVZ template for PBX in a Flash 2â„¢ to introduce. It features the very latest 64-bit CentOSâ„¢ 6.2 with Asterisk® 1.8 and FreePBX® 2.9. Using the new OpenVZ template, you can create unlimited virtual machines in about one minute per server! And you can boot your new virtual machines in about the same time. This new PIAF2-OpenVZ template includes the usual PIAF2â„¢ Feature Set including Google Voice for free calling in the U.S. and Canada. Once installed, you can add Incredible PBX 3â„¢ and Incredible Fax 2â„¢ in a few clicks.

One of the real beauties of hosting your own Proxmox server is the flexibility it gives you to create and load a wide variety of virtual machines that each appear to users to be dedicated servers. This could include a dozen Asterisk servers, or it might be a mix of a dedicated Apache server, a Windows Server, an Asterisk server or two, as well as Joomla, Drupal, Zimbra, and many others from this list. The other obvious advantage is cost. Individual Asterisk servers can be had for $300 or less to host a small branch office. But a Proxmox server such as Dell's current offering can host a dozen dedicated systems for about $50 per server.

If you haven't heard of OpenVZ templates before, you've missed one of the real technological breakthroughs of the last decade. Rather than wading through the usual 30-60 minute ISO installation drill, with an OpenVZ template, all of the work is done for you. And it's quick. You can build a dozen PIAF2-Purple systems using an OpenVZ template in the time it takes to bake a pan of slice-and-bake cookies. And it's incredibly easy to then tie all of these systems together using either SIP or IAX trunks. Just follow our previous tutorial. For developers that want to try various Asterisk configurations before implementation and for trainers and others that want to host dedicated Asterisk systems for students, the OpenVZ platform is a perfect fit.

We'll start with the bad news before we get to the really exciting new Asterisk platform we're introducing today. All of the current Proxmox server software that supports OpenVZ virtual machines has a serious security flaw. For that reason, you would only want to run Proxmox behind a hardware-based firewall with no Internet port exposure. If you fail to heed this warning, you run the very real risk of having not only your Promox server compromised but also all of the virtual machines running on it. The good news is that this security flaw does not appear to affect the PBX in a Flash virtual machines which we are introducing today. Since no direct Internet access is required to have a perfectly functioning PIAF2 server, we still strongly recommend never exposing any server to direct Internet access. MORAL: No Internet port exposure for any of your servers means you can sleep like a baby. We recommend Proxmox 1.8 which is a free download from the Proxmox VE web site. To get optimum use from Proxmox, you'll also want a processor in your server that supports Kernel-based Virtual Machines (KVMs). This full virtualization solution requires an x86 processor containing virtualization extensions (Intel VT1 or AMD-V CPU2 is needed). HINT: Most of Dell's servers are not a problem. Regardless of the server you choose, make certain that you check the CPU specs before you buy. Also be aware that, in addition to Proxmox, there are many other OpenVZ platforms from which to choose.

Installing Proxmox. If you go the Dell route, you'll need an external USB CD or DVD drive to install Proxmox. Dell's optical drives aren't supported in the Proxmox boot image. So begin by downloading the Proxmox VE 1.8 ISO image and create your CD. Then boot your new server from the CD (by pressing F11 for the boot selection screen and choosing your USB external drive on Dell servers). Press Return to begin the install, agree to the license agreement, and click Next on the installer screen to begin. Choose your country, time zone, and keyboard layout. Next choose a secure password and provide a valid email address which is used to send you critical alerts from your Proxmox server. Finally, choose a hostname, specify a fixed IP address, netmask, gateway, and DNS servers and then press Next. Three minutes later, you'll have a new Proxmox server. Log in to your server as root and create a directory for your backups: mkdir /backup.

Enabling IPtables Firewall. IPtables works a little differently in the OpenVZ environment. It actually runs on the Proxmox host. There are just two steps to get it working. First, shut down every running VM on your Proxmox server using the web interface. When you're sure they're all stopped and while logged into your Proxmox server as root carefully enter the following two commands. Note that, because of the length, the sed command stretches to several lines which should be unraveled into a single line for the command to execute properly! Using a block-copy from a desktop machine to your SSH session is the safest method.

sed -i 's|ipt_REJECT ipt_tos ipt_limit ipt_multiport iptable_filter iptable_mangle ipt_TCPMSS ipt_tcpmss ipt_ttl ipt_length|ipt_REJECT ipt_tos ipt_TOS ipt_LOG ip_conntrack ipt_limit ipt_multiport iptable_filter iptable_mangle ipt_TCPMSS ipt_tcpmss ipt_ttl ipt_length ipt_state iptable_nat ip_nat_ftp|' /etc/vz/vz.conf

/etc/init.d/vz restart

Don't forget to set the system time on your server: dpkg-reconfigure tzdata

You're finished with the CLI at this point. Now you'll be able to configure IPtables within each of your OpenVZ virtual machines as explained below.

OpenVZ vs. ISO Images. One of the beauties of Proxmox is that it supports two different types of images to create virtual machines. An OpenVZ template is akin to a snapshot of an existing system while an ISO image is identical to the installer you normally would burn onto a CD in order to install a software application on your server. In short, you still have to go through the installation scenario when you create a virtual machine (KVM) from an ISO image. A virtual machine created from an OpenVZ image is ready for use the moment it is created. If you remember when instant-on televisions first were introduced, you'll also appreciate the difference in boot times between OpenVZ and KVM machines which boot an application installed from an ISO in much the same manner as you would experience on a standalone machine.

As with life, there's a dark cloud lurking behind every silver lining, and this is especially true in the Asterisk environment. OpenVZ containers rely upon a shared kernel, the one that actually boots the Proxmox server. KVM containers created from ISO images are self-contained with their own complete operating system and kernel. Thus, zaptel or dahdi cannot be loaded directly from an OpenVZ container. Instead one must rely upon a shared version of zaptel or dahdi loaded on the Proxmox server itself. As it turns out, this is no small feat and certainly not a task for mere mortals. Bottom Line: If you need conferencing or otherwise need a timing source for your Asterisk deployment, you will not want to use the OpenVZ approach at least for now. If you want to try it later, here is the message thread on the PBX in a Flash Forum. On the other hand, if you have more traditional VoIP requirements for your PBX, then the ease of installation and use of the OpenVZ image makes perfect sense. So let's start there assuming you understand the limitations.

Installing PIAF-OpenVZ Template. Using a web browser, download the new PIAF2-OpenVZ image to your Desktop. Once you have the OpenVZ image in hand, point your web browser to your Proxmox server: https://ipaddress. Accept the default certificate and login as root. You'll get a Welcome screen that looks something like what's shown above. Click on the Appliance Template option. In the Upload File section, choose the PIAF2-OpenVZ image on your Desktop and click Upload. Be patient. It's a big file. So go have a cup of coffee. You'll get a prompt when it's completed. You can also do this directly within the Proxmox server by logging in as root and issuing these commands to install the latest PIAF2-OpenVZ template:

cd /var/lib/vz/template/cache/
wget http://nerd.bz/zwU8zb
mv zwU8zb centos-6.2-purple1.8.8-piaf_2.0.6.2-5_amd64.tar.gz

Creating OpenVZ Virtual Machines. Once installed, you can build Asterisk 1.8.8.0 virtual machines to your heart's content... in about a minute apiece. Just choose Virtual Machine, Create to create a new virtual machine using the OpenVZ template you just uploaded. In the Configuration section, choose OpenVZ for the Type and pick your new OpenVZ template from the pulldown list. Fill in a Host Name, Disk Space maximum (in GB), Memory Allocation (1024 recommended), and a very secure (root) Password. The other defaults should be fine. In the Network section of the form, change to the Bridged Ethernet (veth) option which means the VM will obtain its IP address from your DHCP server. Make sure your DNS settings are correct for your LAN or use Google's DNS servers: 8.8.8.8 and 8.8.4.4. Here's how a typical OpenVZ creation form will look. Just click on the image to enlarge.

Once the image is created, start up the virtual machine, wait at least 60 seconds for the system to load, and then click on Open VNC Console. Asterisk will be loaded and running. Verify this on the status display. You can safely ignore the status messages pertaining to IPtables assuming iptables -nL shows that IPtables is functioning properly. You now have a PIAF-Purple base platform running Asterisk 1.8.8.0 and FreePBX 2.9. REMINDER: Be sure you always run both Proxmox AND your virtual machines behind a hardware-based firewall with no port exposure to the Internet!

Before you do anything else, log into your virtual machine using SSH and run passwd-master to secure the passwords for FreePBX GUI access to your system. Also be sure to set the correct time zone3 on your virtual machine:4

mv /etc/localtime /etc/localtime.bak
ln -s /usr/share/zoneinfo/America/Indianapolis /etc/localtime
date

Once you have secured your passwords, you're ready to set up Asterisk to make and receive calls. For the complete 5-minute tutorial, see this Nerd Vittles article. REMINDER: Once you have set up a Google Voice account, created an extension with a secure password, and created an inbound route for your incoming calls, don't forget to reload Asterisk from the CLI or Google Voice calling will fail: amportal restart.

Installing Incredible PBX and Incredible Fax. An alternative before configuring your system is to first install Incredible PBX and Incredible Fax. We recommend it. This gives you a turnkey, full-featured PBX with almost every Asterisk feature available on the planet. While logged into your server as root, issue this command to install Incredible PBX: install-incredpbx3. When the install completes, issue the following command to install Incredible Fax: install-incredfax2. Restart your virtual machine to complete the install.

Asterisk CLI Change. Finally, just a heads up that (once again) the Asterisk Dev Team appears to have changed the default behavior of the Asterisk CLI. With Asterisk 1.8, if you make outbound calls after loading the CLI, you will notice that call progress no longer appears in the CLI. To restore the standard behavior (since Moses), issue the following command: core set verbose 3. 🙄

Securing IPtables with a WhiteList. If you're running your virtual machines behind a hardware-based firewall with no Internet port exposure AND all of those on your private LAN are trusted, you can quit here. Otherwise, you need to lock down the IPtables firewall on your virtual machines to only permit access from trusted IP addresses. As delivered with Incredible PBX, all private IP addresses are authorized and a number of dangerous Internet services also are accessible. Here's how to fix it. Log into each VM and edit /etc/sysconfig/iptables: nano -w iptables. Change the section of entries that look like the following by inserting a # at the beginning of each entry. Once you've added the # characters, your entries should look like this:

#-A INPUT -p tcp -m tcp --dport 22 -j ACCEPT
#-A INPUT -p tcp -m tcp --dport 113 -j ACCEPT
#-A INPUT -p tcp -m tcp --dport 80 -j ACCEPT
#-A INPUT -p tcp -m tcp --dport 443 -j ACCEPT
#-A INPUT -p tcp -m tcp --dport 21 -j ACCEPT
#-A INPUT -p tcp -m tcp --dport 9001 -j ACCEPT
#-A INPUT -p tcp -m tcp --dport 9080 -j ACCEPT
#-A INPUT -p udp -m udp --dport 4569 -j ACCEPT
#-A INPUT -p udp -m udp --dport 5000:5082 -j ACCEPT
#-A INPUT -p udp -m udp --dport 10000:20000 -j ACCEPT
#-A INPUT -p tcp -m tcp --dport 4445 -j ACCEPT
#-A INPUT -p tcp -m tcp --dport 5038 -j ACCEPT

Now scroll down a bit in the file and find the entries that look like the following. NOTE: If you didn't install Incredible PBX, you'll need to manually add these entries:

-A INPUT -s 192.168.0.0/255.255.0.0 -j ACCEPT
-A INPUT -s 172.16.0.0/255.240.0.0 -j ACCEPT
-A INPUT -s 10.0.0.0/255.0.0.0 -j ACCEPT
-A INPUT -s 127.0.0.0/255.0.0.0 -j ACCEPT

Immediately below these private network entries, add additional entries using the actual IP addresses that are needed to administer your virtual machine. Also include the IP addresses of any remote telephones that are not covered by the private LAN entries above. Each entry should look like the following using the actual IP addresses needed:

-A INPUT -s 111.222.111.222 -j ACCEPT

IMPORTANT: Save your changes after making sure you've included an entry for the IP address from which you currently are accessing your server. Otherwise, you will lock yourself out of your server. Then restart IPtables: service iptables restart. Verify that the entries are the way you expect: iptables -nL. Now, with a browser, attempt to access the IP address of your virtual machine from an untrusted IP address, e.g. your cellphone. Then repeat from a trusted IP address. If all is well, you're done.

Solving One-Way Audio Problems. If you experience one-way audio on some of your phone calls, you may need to adjust the settings in /etc/asterisk/sip_custom.conf. Just uncomment the first two lines by removing the semicolons. Then replace 173.15.238.123 with your public IP address, and replace 192.168.0.0 with the subnet address of your private network. There are similar settings in gtalk.conf that can be activated although we've never had to use them. In fact, we've never had to use any of these settings. After making these changes, save the file(s) and restart Asterisk: amportal restart.

Quirks, Gotchas, and Updates. The only quirk you will notice in the current virtual machines is that IP6tables may not be running. We're working on it. For the latest breaking news and updates about PIAF2-OpenVZ, visit this thread on the PIAF Forum. Don't forget your Valentine tomorrow. Enjoy!

Originally published: Monday, February 13, 2012


Need help with Asterisk? Visit the PBX in a Flash Forum.
Or Try the New, Free PBX in a Flash Conference Bridge.


whos.amung.us If you're wondering what your fellow man is reading on Nerd Vittles these days, wonder no more. Visit our new whos.amung.us statistical web site and check out what's happening. It's a terrific resource both for us and for you.


Special Thanks to Our Generous Sponsors


FULL DISCLOSURE: ClearlyIP, Skyetel, Vitelity, DigitalOcean, Vultr, VoIP.ms, 3CX, Sangoma, TelecomsXchange and VitalPBX have provided financial support to Nerd Vittles and our open source projects through advertising, referral revenue, and/or merchandise. As an Amazon Associate and Best Buy Affiliate, we also earn from qualifying purchases. We’ve chosen these providers not the other way around. Our decisions are based upon their corporate reputation and the quality of their offerings and pricing. Our recommendations regarding technology are reached without regard to financial compensation except in situations in which comparable products at comparable pricing are available from multiple sources. In this limited case, we support our sponsors because our sponsors support us.

BOGO Bonaza: Enjoy state-of-the-art VoIP service with a $10 credit and half-price SIP service on up to $500 of Skyetel trunking with free number porting when you fund your Skyetel account. No limits on number of simultaneous calls. Quadruple data center redundancy. $25 monthly minimum spend required. Tutorial and sign up details are here.

The lynchpin of Incredible PBX 2020 and beyond is ClearlyIP components which bring management of FreePBX modules and SIP phone integration to a level never before available with any other Asterisk distribution. And now you can configure and reconfigure your new Incredible PBX phones from the convenience of the Incredible PBX GUI.

VitalPBX is perhaps the fastest-growing PBX offering based upon Asterisk with an installed presence in more than 100 countries worldwide. VitalPBX has generously provided a customized White Label version of Incredible PBX tailored for use with all Incredible PBX and VitalPBX custom applications. Follow this link for a free test drive!
 

Special Thanks to Vitelity. Vitelity is now Voyant Communications and has halted new registrations for the time being. Our special thanks to Vitelity for their unwavering financial support over many years and to the many Nerd Vittles readers who continue to enjoy the benefits of their service offerings. We will keep everyone posted on further developments.


Some Recent Nerd Vittles Articles of Interest...

  1. Be very careful choosing Intel processors. Even some high-end processors do not support Intel Virtualization Technology. Here's the official list. []
  2. And here is a useful reference for AMD-compatible processors. The AMD WIKI provides the following list of AMD-V compatible processors: "AMD's x86 virtualization extension to the 64-bit x86 architecture is named AMD Virtualization, also known by the abbreviation AMD-V, and is sometimes referred to by the code name 'Pacifica'. AMD processors using Socket AM2, Socket S1, and Socket F include AMD Virtualization support. AMD Virtualization is also supported by release two (8200, 2200 and 1200 series) of the Opteron processors. The third generation (8300 and 2300 series of Opteron processors) will see an update in virtualization technology..." []
  3. Look in /usr/share/zoneinfo for correct time zone name for your closest city. []
  4. Getting the correct time in your VMs can be problematic with Proxmox. If you continually see the wrong time when you issue the date command after starting up your VMs, try this. Log into the Proxmox host and issue the following commands using the correct container number and your local time zone city for your virtual machine:

    vzctl stop 108
    vzctl set 108 --capability sys_time:on --save
    vzctl start 108
    vzctl enter 108
    mv /etc/localtime /etc/localtime.old
    ln -s /usr/share/zoneinfo/America/New_York /etc/localtime
    exit

    []

PBX in a Flash Rolls Out New CentOS 5.7 Releases

We are pleased to announce the release of new 32-bit and 64-bit versions of PBX in a Flash. The new PIAF-17571 ISOs are available now for free download from SourceForge. In addition to an updated release of our new 64-bit CentOS 5.7 OpenVZ virtual machine template available on SourceForge, we now have a 32-bit Thumb Drive installer up on SourceForge as well.

So PBX in a Flash continues to bring you the best of all worlds: a hardware-based bare metal install using either our 32-bit or 64-bit ISOs to build a bootable CD-ROM installer, a 32-bit thumb drive installer for use with any 1GB USB flash drive to create PIAF systems on machines that lack an optical drive, or a 1-minute install of a virtual machine using our new 64-bit OpenVZ template. Nobody else provides this flexibility much less support for CentOS 5.7 as well as every current and experimental flavor of Asterisk. So why wait? The price is definitely right!

Today's step-by-step guide will walk you through installing PIAF-Purple with Asterisk 1.8.6.0 on a dedicated machine with a CD/DVD drive using the new CentOS 5.7 ISOs. Instructions for installation of the OpenVZ template on a virtual machine are provided in this updated Nerd Vittles article. Instructions for use of the flash drive installer are available in this updated Nerd Vittles article. As always, we recommend installation of any new PIAF server or virtual host behind a secure, hardware-based firewall (such as dLink's Gaming Router) with NO INTERNET PORT EXPOSURE to your PIAF box!

Atom-based PC Platform. For the least expensive hardware alternative, pick up an Atom-based PC, preferably not an EEE PC because of the network driver incompatibility with CentOS. The refurbished Revos work fine. Someone has actually tested them! They can easily support a business with dozens of phones.

PIAF ISO Setup. Once you have your hardware connected to a reliable Internet source, you'll need to choose the appropriate ISO for your hardware. If you have a CD-ROM or DVD drive on your server, we'd recommend the 32-bit PIAF 1.7.5.7.1 ISO. Just download it from SourceForge or one of the PIAF mirror sites, burn it to a CD, and then boot your server from the CD. If your server lacks a CD-ROM and DVD drive, then download the brand new 32-bit PIAF 1.7.5.7.1 Flash-Only ISO from SourceForge and copy it to a 1GB or larger thumb drive following the instructions in this Nerd Vittles tutorial. Then boot your server from the thumb drive.

PIAF Installation. Once you've booted the PIAF installer, you'll be prompted to choose an installation method. For most users, simply pressing the Enter key will get things started. Choose a keyboard and time zone when prompted and then enter a very secure root password for your new server. The installer then will load CentOS 5.7 onto your server. When complete, your server will reboot. Remove the CD or Flash Drive at this point, and you'll be prompted to choose the version of Asterisk to install. If you don't get the CD out in time, the install process will start from scratch. At the first prompt, just reboot after removing the CD and everything will be fine. We recommend PIAF-Purple. It loads Asterisk 1.8.6.0, the only current version of Asterisk with long-term support.

During the final phase of the install, you will be prompted to choose a master password for FreePBX® and the other VoIP web utilities. Once your server reboots, log into the Linux CLI using your root password and write down the IP address of your server from the status display.

FreePBX Setup. Most of your life with PBX in a Flash will be spent using the FreePBX web GUI (click on image below to enlarge) and your favorite browser. To access the FreePBX GUI, point your browser at the IP address you wrote down. Read the RSS Feed in the PIAF GUI for late-breaking security alerts. Any alerts older than September, 2011 already are included in current PIAF builds. Now click on the Users button which will toggle to the Admin menu. Click the FreePBX icon. When prompted for your username and password, the username is maint. The password will be the FreePBX master password you chose during the PIAF install.

Got That Pioneer Spirit? If you like living on the wild side, it's a simple process to upgrade the default FreePBX 2.8 install to FreePBX 2.9. Here's a 5-minute video that will walk you through the process. If you should get stumped, don't worry! Just visit this thread on the PIAF Forum.
With either FreePBX 2.8 or 2.9, getting a minimal system operational is a 5-minute drill. You'll need to set up at least one extension with voicemail, configure a free Google Voice account for free calls in the U.S. and Canada, configure inbound and outbound routes to manage incoming and outgoing calls, and plug your maint password into CallerID Superfecta so that names arrive with your incoming calls. Now add a phone with your extension credentials and you're done.

Extension Setup. Let's start by setting up an extension. A good rule of thumb for systems with less than 50 extensions is to reserve the IP addresses from 192.x.x.201 to 192.x.x.250 for your phones. Then you can create extension numbers in FreePBX to match those IP addresses. This makes it easy to identify which phone on your system goes with which IP address and makes it easy for end-users to access the phone's GUI to add bells and whistles. To create extension 201 (don't start with 200), click Setup, Extensions, Generic SIP Device, Submit. Then fill in the following blanks USING VERY SECURE PASSWORDS and leaving the defaults in the other fields for the time being.

User Extension ... 201
Display Name ... Home
Outbound CID ... [your 10-digit phone number if you have one; otherwise, leave blank]
Emergency CID ... [your 10-digit phone number for 911 ID if you have one; otherwise, leave blank]

Device Options
secret ... 1299864Xyz [make this unique AND secure!]
dtmfmode ... rfc2833
Voicemail & Directory ... Enabled
voicemail password ... 14332 [make this unique AND secure!]
email address ... yourname@yourdomain.com [if you want voicemail messages emailed to you]
pager email address ... yourname@yourdomain.com [if you want to be paged when voicemail messages arrive]
email attachment ... yes [if you want the voicemail message included in the email message]
play CID ... yes [if you want the CallerID played when you retrieve a message]
play envelope ... yes [if you want the date/time of the message played before the message is read to you]
delete Vmail ... yes [if you want the voicemail message deleted after it's emailed to you]
vm options ... callback=from-internal [to enable automatic callbacks by pressing 3,2 after playing a voicemail message]
vm context ... default

Write down the passwords. You'll need them to configure your SIP phone.

Extension Security. We cannot overstress the need to make your extension passwords secure. All the firewalls in the world won't protect you from malicious phone calls on your nickel if you use your extension number or something like 1234 for your extension password if your SIP or IAX ports happen to be exposed to the Internet. Incredible PBX automatically randomizes all of the extension passwords for you. PBX in a Flash does not!

In addition to making up secure passwords, the latest versions of FreePBX also let you define the IP address or subnet that can access each of your extensions. Use it!!! Once the extensions are created, edit each one and modify the permit field to specify the actual IP address or subnet of each phone on your system. A specific IP address entry should look like this: 192.168.1.142/255.255.255.255. If most of your phones are on a private LAN, you may prefer to use a subnet entry in the permit field like this: 192.168.1.0/255.255.255.0 using your actual subnet.

Courtesy of wordle.net

Adding a Google Voice Trunk. There are lots of trunk providers, and one of the real beauties of having your own PBX is that you don't have to put all of your eggs in the same basket... unlike the AT&T days. We would encourage you to take advantage of this flexibility. With most providers, you don't pay anything except when you actually use their service so you have nothing to lose.

For today, we're going to take advantage of Google's current offer of free calling in the U.S. and Canada through the end of this year. You also get a free phone number in your choice of area codes. PBX in a Flash now installs a Google Voice module for FreePBX that lets you set up your Google Voice account with PBX in a Flash in just a few seconds once you have your credentials.

Signing Up for Google Voice. You'll need a dedicated Google Voice account to support PBX in a Flash. The more obscure the username (with some embedded numbers), the better off you will be. This will keep folks from bombarding you with unsolicited Gtalk chat messages, and who knows what nefarious scheme will be discovered using Google messaging six months from now. So keep this account a secret!

We've tested this extensively using an existing Gmail account rather than creating a separate account. Take our word for it. Inbound calling is just not reliable. The reason seems to be that Google always chooses Gmail chat as the inbound call destination if there are multiple registrations from the same IP address. So... set up a dedicated Gmail and Google Voice account, and use it exclusively with PBX in a Flash. Google Voice no longer is by invitation only. If you're in the U.S. or have a friend that is, head over to the Google Voice site and register. If you're living on another continent, see MisterQ's posting for some tips on getting set up.

You must choose a telephone number (aka DID) for your new account, or Google Voice calling will not work... in either direction. You also have to tie your Google Voice account to at least one working phone number as part of the initial setup process. Your cellphone number will work just fine. Don't skip this step either. Just enter the provided confirmation code when you tell Google to place the test call to the phone number you entered. Once the number is registered, you can disable it if you'd like in Settings, Voice Setting, Phones. But...

IMPORTANT: Be sure to enable the Google Chat option as one of your phone destinations in Settings, Voice Setting, Phones. That's the destination we need for PBX in a Flash to function with Google Voice! Otherwise, inbound and/or outbound calls will fail. If you don't see this option, you may need to call up Gmail and enable Google Chat there first. Then go back to the Google Voice Settings and enable it. Be sure to try one call each way from Google Chat in Gmail. Then disable Google Chat in GMail for this account. Otherwise, it won't work with PIAF.

While you're still in Google Voice Settings, click on the Calls tab. Make sure your settings match these:

  • Call Screening - OFF
  • Call Presentation - OFF
  • Caller ID (In) - Display Caller's Number
  • Caller ID (Out) - Don't Change Anything
  • Do Not Disturb - OFF
  • Call Options (Enable Recording) - OFF
  • Global Spam Filtering - ON

Click Save Changes once you adjust your settings. Under the Voicemail tab, plug in your email address so you get notified of new voicemails. Down the road, receipt of a Google Voice voicemail will be a big hint that something has come unglued on your PBX.

Configuring Google Voice Trunk in FreePBX. All trunk configurations now are managed within FreePBX, including Google Voice. This makes it easy to customize PBX in a Flash to meet your specific needs. Click the Setup tab and choose Google Voice in the Third Party Addons. To Add a new Google Voice account, just fill out the form:

Phone number is your 10-digit Google Voice number. Username is your Google Voice account name without @gmail.com. NOTE: You must use a Gmail.com address in the current version of this module! Password is your Google Voice password. NOTE: Don't use 2-stage password protection in this Google Voice account! Be sure to check all three boxes: Add trunk, Add routes, and Agree to TOS. Then click Submit Changes and reload FreePBX. Down the road, you can add additional Google Voice numbers by clicking Add GoogleVoice Account option in the right margin and repeating the drill. For Google Apps support, see this post on the PIAF Forum.

Outbound Routes. The idea behind multiple outbound routes is to save money. Some providers are cheaper to some places than others. It also provides redundancy which costs you nothing if you don't use the backup providers. The Google Voice module actually configures an Outbound Route for 10-digit Google Voice calling as part of the automatic setup. If this meets your requirements, then you can skip this step for today.

Inbound Routes. An Inbound Route tells PBX in a Flash how to route incoming calls. The idea here is that you can have multiple DIDs (phone numbers) that get routed to different extensions or ring groups or departments. For today, we'll build a simple route that directs your Google Voice calls to extension 201. Choose Inbound Routes, leave all of the settings at their default values except enter your 10-digit Google Voice number in the DID Number field. Enable CallerID lookups by choosing CallerID Superfecta in the CID Lookup Source pulldown. Then move to the Set Destination section and choose Extensions in the left pull-down and 201 in the extension pull-down. Now click Submit and save your changes. That will assure that incoming Google Voice calls are routed to extension 201.

IMPORTANT: Before Google Voice calling will actually work, you must restart Asterisk from the Linux command line interface. Log into your server as root and issue this command: amportal restart.

CallerID Superfecta Setup. CallerID Superfecta needs to know your maint password in order to access the necessary modules to retrieve CallerID information for inbound calls. Just click Setup, CID Superfecta, and click on Default in the Scheme listings in the right column. Scroll down to the General Options section and insert your maint password in the Password field. You may also want to enable some of the other providers and adjust the order of the lookups to meet your local needs. Click Agree and Save once you have the settings adjusted. One terrific feature of CID Superfecta is the ability to test a phone number and see what results are returned by different services. It also tells you how long the various lookups are taking. Use this tool to narrow down the number of services you need and minimize the delay in answering inbound calls.

General Settings. Last, but not least, we need to enter an email address for you so that you are notified when new FreePBX updates are released. Scroll to the bottom of the General Settings screen after selecting it from the left panel. Plug in your email address, click Submit, and save your changes. Done!

Adding Plain Old Phones. Before your new PBX will be of much use, you're going to need something to make and receive calls, i.e. a telephone. For today, you've got several choices: a POTS phone, a softphone, or a SIP phone. Option #1 and the best home solution is to use a Plain Old Telephone or your favorite cordless phone set (with 8-10 extensions) if you purchase a little device known as a Sipura SPA-3102. It's under $70. Be sure you specify that you want an unlocked device, meaning it doesn't force you to use a particular service provider. This device also supports connection of your PBX to a standard office or home phone line as well as a telephone.

Configuring a SIP Phone. There are hundreds of terrific SIP telephones and softphones for Asterisk-based systems. Once you get things humming along, you'll want a real SIP telephone such as the $50 Nortel color videophone we've recommended previously. You'll also find lots of additional recommendations on Nerd Vittles and in the PBX in a Flash Forum. If you're like us, we want to make damn sure this stuff works before you shell out any money. So, for today, let's download a terrific (free) softphone to get you started. We recommend X-Lite because there are versions for Windows, Mac, and Linux. So download your favorite from this link. Install and run X-Lite on your Desktop. At the top of the phone, click on the Down Arrow and choose SIP Account Settings, Add. Enter the following information using 201 for your extension and your actual password for extension 201. Then plug in the actual IP address of your PBX in a Flash server instead of 192.168.0.251. Click OK when finished. Your softphone should now show: Available.

Enabling Google Voicemail. Some have requested a way to retain Google's voicemail system for unanswered calls in lieu of using Asterisk voicemail. The advantage is that Google offers a free transcription service for voicemail messages. To activate this, you'll need to edit the [googlein] context in extensions_custom.conf in /etc/asterisk. Just modify the last four lines in the context so that they look like this and then restart Asterisk: amportal restart

;exten => s,n(regcall),Answer
;exten => s,n,SendDTMF(1)
exten => s,n(regcall),Set(DIAL_OPTIONS=${DIAL_OPTIONS}aD(:1))
exten => s,n,Goto(from-trunk,gv-incoming,1)

But I Don't Want to Use Google Voice. If you'd prefer not to use Google Voice at all with PBX in a Flash, that's okay, too. Here's how to disable it and avoid the chatter in the Asterisk CLI. Log into your server as root and edit /etc/asterisk/modules.conf. Change the first three lines in the [modules] context so that they look like this. Then restart Asterisk: amportal restart.

autoload=yes
noload => res_jabber.so
noload => chan_gtalk.so

Where To Go From Here. We've barely scratched the surface of what you can do with your new PBX in a Flash system. If you're new to all of this, then your next step probably should be the latest Incredible PBX 2.0 tutorial. It's a 5-minute addition that installs nearly 50 Asterisk applications that will keep you entertained for the rest of the year. If you'd prefer to do it yourself, that's okay, too. We'd also recommend you set up an alternate VoIP provider. You can't beat Vitelity, and they also happen to provide financial support to both Nerd Vittles and the PBX in a Flash projects. See the special pricing in the section below. Enjoy!

Originally published: Tuesday, September 27, 2011


Great News! Google Plus is available to everyone. Sign up here and circle us. Click these links to view the Asterisk feed or PBX in a Flash feed on Google+.


Need help with Asterisk? Visit the PBX in a Flash Forum.
Or Try the New, Free PBX in a Flash Conference Bridge.


whos.amung.us If you're wondering what your fellow man is reading on Nerd Vittles these days, wonder no more. Visit our new whos.amung.us statistical web site and check out what's happening. It's a terrific resource both for us and for you.


Special Thanks to Our Generous Sponsors


FULL DISCLOSURE: ClearlyIP, Skyetel, Vitelity, DigitalOcean, Vultr, VoIP.ms, 3CX, Sangoma, TelecomsXchange and VitalPBX have provided financial support to Nerd Vittles and our open source projects through advertising, referral revenue, and/or merchandise. As an Amazon Associate and Best Buy Affiliate, we also earn from qualifying purchases. We’ve chosen these providers not the other way around. Our decisions are based upon their corporate reputation and the quality of their offerings and pricing. Our recommendations regarding technology are reached without regard to financial compensation except in situations in which comparable products at comparable pricing are available from multiple sources. In this limited case, we support our sponsors because our sponsors support us.

BOGO Bonaza: Enjoy state-of-the-art VoIP service with a $10 credit and half-price SIP service on up to $500 of Skyetel trunking with free number porting when you fund your Skyetel account. No limits on number of simultaneous calls. Quadruple data center redundancy. $25 monthly minimum spend required. Tutorial and sign up details are here.

The lynchpin of Incredible PBX 2020 and beyond is ClearlyIP components which bring management of FreePBX modules and SIP phone integration to a level never before available with any other Asterisk distribution. And now you can configure and reconfigure your new Incredible PBX phones from the convenience of the Incredible PBX GUI.

VitalPBX is perhaps the fastest-growing PBX offering based upon Asterisk with an installed presence in more than 100 countries worldwide. VitalPBX has generously provided a customized White Label version of Incredible PBX tailored for use with all Incredible PBX and VitalPBX custom applications. Follow this link for a free test drive!
 

Special Thanks to Vitelity. Vitelity is now Voyant Communications and has halted new registrations for the time being. Our special thanks to Vitelity for their unwavering financial support over many years and to the many Nerd Vittles readers who continue to enjoy the benefits of their service offerings. We will keep everyone posted on further developments.


Some Recent Nerd Vittles Articles of Interest...

Virtual Paradise: 1-Minute Asterisk Installs with PIAF-OpenVZ

One of the real beauties of hosting your own Proxmox server is the flexibility it gives you to create and load a wide variety of virtual machines that each appear to users to be dedicated servers. This could include a dozen Asterisk servers, or it might be a mix of a dedicated Apache server, a Windows Server, an Asterisk server or two, as well as Joomla, Drupal, Zimbra, and many others from this list. The other obvious advantage is cost. Individual Asterisk servers can be had for $300 or less to host a small branch office. But a Proxmox server such as Dell's current offerings can host a dozen dedicated systems for about $50 per server.

Today we have two really terrific OpenVZ templates for PBX in a Flash to introduce. One features CentOS 5.5, and the other includes the just released CentOS 5.7. The choice is yours! Both allow you to create unlimited PIAF virtual machines in exactly 1 minute per server! And you can boot your new virtual machines in less than 90 seconds apiece. These new PIAF-OpenVZ templates include the usual PBX in a Flash Feature Set with some extra bells and whistles: Asterisk 1.8.6.0, FreePBX 2.8, Google Voice for free calling in the U.S. and Canada, Tom King's latest Apache, PHP, PHPMyAdmin security updates, Andrew Nagy's EndPoint Manager and CallerID Superfecta, as well as AsteriDex, Telephone Reminders, and Hotel WakeUp Call modules for FreePBX.

If you haven't heard of OpenVZ templates before, you've missed one of the real technological breakthroughs of the last decade. Rather than wading through the usual 30-60 minute ISO installation drill, with an OpenVZ template, all of the work is done for you. And it's quick. You can build a dozen PIAF-Purple systems using an OpenVZ template in the time it takes to bake a pan of slice-and-bake cookies. And it's incredibly easy to then tie all of these systems together using either SIP or IAX trunks. Just follow our previous tutorial. For resellers and developers that want to try various Asterisk configurations before implementation and for trainers and others that want to host dedicated Asterisk systems for customers, the OpenVZ platform is a perfect fit.

We'll start with the bad news before we get to the really exciting new Asterisk platform we're introducing today. All of the current Proxmox server software that supports OpenVZ virtual machines has a serious security flaw. For that reason, you would only want to run Proxmox behind a hardware-based firewall with no Internet port exposure. If you fail to heed this warning, you run the very real risk of having not only your Promox server compromised but also all of the virtual machines running on it. The good news is that this security flaw does not appear to affect the PBX in a Flash virtual machines which we are introducing today. Since no direct Internet access is required to have a perfectly functioning PIAF server, we still strongly recommend never exposing any server to direct Internet access. MORAL: No Internet port exposure for any of your servers means you can sleep like a baby. We recommend Proxmox 1.8 which is a free download from the Proxmox VE web site. To get optimum use from a Proxmox, you'll also want a processor in your server that supports Kernel-based Virtual Machines (KVMs). This full virtualization solution requires an x86 processor containing virtualization extensions (Intel VT1 or AMD-V CPU2 is needed). HINT: Most of Dell's servers are not a problem. Regardless of the server you choose, make certain that you check the CPU specs before you buy. Also be aware that, in addition to Proxmox, there are many other OpenVZ platforms from which to choose.

Installing Proxmox. If you go the Dell route, you'll need an external USB CD or DVD drive to install Proxmox. Dell's optical drives aren't supported in the Proxmox boot image. So begin by downloading the Proxmox VE 1.8 ISO image and create your CD. Then boot your new server from the CD (by pressing F11 for the boot selection screen and choosing your USB external drive on Dell servers). Press Return to begin the install, agree to the license agreement, and click Next on the installer screen to begin. Choose your country, time zone, and keyboard layout. Next choose a secure password and provide a valid email address which is used to send you critical alerts from your Proxmox server. Finally, choose a hostname, specify a fixed IP address, netmask, gateway, and DNS servers and then press Next. Three minutes later, you'll have a new Proxmox server. Log in to your server as root and create a directory for your backups: mkdir /backup.

Enabling IPtables Firewall. IPtables works a little differently in the OpenVZ environment. It actually runs on the Proxmox host. There are just two steps to get it working. First, shut down every running VM on your Proxmox server using the web interface. When you're sure they're all stopped and while logged into your Proxmox server as root carefully enter the following two commands. Note that, because of the length, the sed command stretches to several lines which should be unraveled into a single line for the command to execute properly! Using a block-copy from a desktop machine to your SSH session is the safest method.

sed -i 's|ipt_REJECT ipt_tos ipt_limit ipt_multiport iptable_filter iptable_mangle ipt_TCPMSS ipt_tcpmss ipt_ttl ipt_length|ipt_REJECT ipt_tos ipt_TOS ipt_LOG ip_conntrack ipt_limit ipt_multiport iptable_filter iptable_mangle ipt_TCPMSS ipt_tcpmss ipt_ttl ipt_length ipt_state iptable_nat ip_nat_ftp|' /etc/vz/vz.conf

/etc/init.d/vz restart

Don't forget to set the system time on your server: dpkg-reconfigure tzdata

You're finished on the CLI at this point. Now you'll be able to configure IPtables within each of your OpenVZ virtual machines as explained below.

OpenVZ vs. ISO Images. One of the beauties of Proxmox is that it supports two different types of images to create virtual machines. An OpenVZ template is akin to a snapshot of an existing system while an ISO image is identical to the installer you normally would burn onto a CD in order to install a software application on your server. In short, you still have to go through the installation scenario when you create a virtual machine (KVM) from an ISO image. A virtual machine created from an OpenVZ image is ready for use the moment it is created. If you remember when instant-on televisions first were introduced, you'll also appreciate the difference in boot times between OpenVZ and KVM machines which boot an application installed from an ISO in much the same manner as you would experience on a standalone machine.

As with life, there's a dark cloud lurking behind every silver lining, and this is especially true in the Asterisk environment. OpenVZ containers rely upon a shared kernel, the one that actually boots the Proxmox server. KVM containers created from ISO images are self-contained with their own complete operating system and kernel. Thus, zaptel or dahdi cannot be loaded directly from an OpenVZ container. Instead one must rely upon a shared version of zaptel or dahdi loaded on the Proxmox server itself. As it turns out, this is no small feat and certainly not a task for mere mortals. Bottom Line: If you need conferencing or otherwise need a timing source for your Asterisk deployment, you will not want to use the OpenVZ approach at least for now. If you want to try it later, here is the message thread on the PBX in a Flash Forum. On the other hand, if you have more traditional VoIP requirements for your PBX, then the ease of installation and use of the OpenVZ image makes perfect sense. So let's start there assuming you understand the limitations.

Installing PIAF-OpenVZ Template. Using a web browser, download one of the new PIAF-OpenVZ images to your Desktop. Once you have the OpenVZ image in hand, point your web browser to your Proxmox server: https://ipaddress. Accept the default certificate and login as root. You'll get a Welcome screen that looks something like what's shown above. Click on the Appliance Template option. In the Upload File section, choose the PIAF-OpenVZ image on your Desktop and click Upload. Be patient. It's a big file. So go have a cup of coffee. You'll get a prompt when it's completed. You can also do this directly within the Proxmox server by logging in as root and issuing the following commands to install the latest CentOS 5.7 PIAF-OpenVZ template:

cd /var/lib/vz/template/cache/
wget http://nerd.bz/p8UjwY

To install the CentOS 5.5 PIAF-OpenVZ template, here are the commands:

cd /var/lib/vz/template/cache/
wget http://nerd.bz/p45qzi

Creating OpenVZ Virtual Machines. Once installed, you can build Asterisk 1.8.6.0 virtual machines to your heart's content... in about a minute apiece. Just choose Virtual Machine, Create to create a new virtual machine using the OpenVZ template you just uploaded. In the Configuration section, choose OpenVZ for the Type and pick your new OpenVZ template from the pulldown list. Fill in a Host Name, Disk Space maximum (in GB), and a very secure (root) Password. The other defaults should be fine. In the Network section of the form, change to the Bridged Ethernet (veth) option which means the VM will obtain its IP address from your DHCP server. Make sure your DNS settings are correct for your LAN. Here's how a typical OpenVZ creation form will look. Just click on the image to enlarge.

Once the image is created, start up the virtual machine, wait about 90 seconds for the system to load, and then click on Open VNC Console. Asterisk will be loaded and running. You can verify this on the status display. You can safely ignore the status messages pertaining to IPtables assuming iptables -nL shows that IPtables is functioning properly. You now have a PIAF-Purple base platform running Asterisk 1.8.6.0 and FreePBX 2.8.1. REMINDER: Be sure you always run both Proxmox AND your virtual machines behind a hardware-based firewall with no port exposure to the Internet!

The FreePBX login credentials are username: maint and password: password11. This is anything but secure. Before you do anything else, log into your virtual machine using SSH and run passwd-master to secure the passwords for FreePBX GUI access to your system. Also be sure to set the correct time zone on your virtual machine: system-config-date.3 Don't forget!

Once you have secured your passwords, you're ready to set up Asterisk to make and receive calls. For the complete 5-minute tutorial, see this Nerd Vittles article. The steps are identical with Asterisk 1.8.6.0 and Asterisk 10. REMINDER: Once you have set up a Google Voice account, created an extension with a secure password, and created an inbound route for your incoming calls, don't forget to reload Asterisk from the CLI or Google Voice calling will fail: amportal restart.

Asterisk CLI Change. Finally, just a heads up that (once again) the Asterisk Dev Team appears to have changed the default behavior of the Asterisk CLI. With Asterisk 1.8, if you make outbound calls after loading the CLI, you will notice that call progress no longer appears in the CLI. To restore the standard behavior (since Moses), issue the following command: core set verbose 3. 🙄

Securing IPtables with a WhiteList. If you're running your virtual machines behind a hardware-based firewall with no Internet port exposure AND all of those on your private LAN are trusted, you can quit here. Otherwise, you need to lock down the IPtables firewall on your virtual machines to only permit access from trusted IP addresses. As delivered, all private IP addresses are authorized and a number of dangerous Internet services also are accessible. Here's how to fix it. Log into each VM and edit /etc/sysconfig/iptables: nano -w iptables. Change the section of entries that look like the following by inserting a # at the beginning of each entry. Once you've added the # characters, your entries should look like this:

#-A INPUT -p tcp -m tcp --dport 22 -j ACCEPT
#-A INPUT -p tcp -m tcp --dport 113 -j ACCEPT
#-A INPUT -p tcp -m tcp --dport 80 -j ACCEPT
#-A INPUT -p tcp -m tcp --dport 443 -j ACCEPT
#-A INPUT -p tcp -m tcp --dport 21 -j ACCEPT
#-A INPUT -p tcp -m tcp --dport 9001 -j ACCEPT
#-A INPUT -p tcp -m tcp --dport 9080 -j ACCEPT
#-A INPUT -p udp -m udp --dport 4569 -j ACCEPT
#-A INPUT -p udp -m udp --dport 5000:5082 -j ACCEPT
#-A INPUT -p udp -m udp --dport 10000:20000 -j ACCEPT
#-A INPUT -p tcp -m tcp --dport 4445 -j ACCEPT
#-A INPUT -p tcp -m tcp --dport 5038 -j ACCEPT

Now scroll down a bit in the file and find the entries that look like the following:

-A INPUT -s 192.168.0.0/255.255.0.0 -j ACCEPT
-A INPUT -s 172.16.0.0/255.240.0.0 -j ACCEPT
-A INPUT -s 10.0.0.0/255.0.0.0 -j ACCEPT
-A INPUT -s 127.0.0.0/255.0.0.0 -j ACCEPT

Immediately below these private network entries, enter the actual IP addresses that are needed to administer your virtual machine. Also include the IP addresses of any remote telephones that are not covered by the private LAN entries above. Each entry should look like the following using the actual IP addresses needed:

-A INPUT -s 111.222.111.222 -j ACCEPT

IMPORTANT: Make sure you've included an entry for the IP address from which you currently are accessing your server, or you will lock yourself out of your server. Then restart IPtables: service iptables restart. Verify that the entries are the way you expect: iptables -nL. Now, with a browser, attempt to access the IP address of your virtual machine from an untrusted IP address, e.g. your cellphone. Then repeat from a trusted IP address. If all is well, you're done.

Solving One-Way Audio Problems. If you experience one-way audio on some of your phone calls, you may need to adjust the settings in /etc/asterisk/sip_custom.conf. Just uncomment the first two lines by removing the semicolons. Then replace 173.15.238.123 with your public IP address, and replace 192.168.0.0 with the subnet address of your private network. There are similar settings in gtalk.conf that can be activated although we've never had to use them. In fact, we've never had to use any of these settings. After making these changes, save the file(s) and restart Asterisk: amportal restart.

Quirks, Gotchas, and Updates. The only quirk you will notice in the current virtual machines is that the status display incorrectly shows IPtables is not running. This is because it actually is hosted on the Proxmox host. For the latest breaking news and updates about PIAF-OpenVZ, visit this thread on the PIAF Forum. Enjoy!

Originally published: Tuesday, September 20, 2011


Breaking News. Google Plus is now available to everyone. Sign up here and join us. And wait 'til you read the Google Hangouts News. Now it's easy to view the Asterisk feed or PBX in a Flash feed on Google+.


Need help with Asterisk? Visit the PBX in a Flash Forum.
Or Try the New, Free PBX in a Flash Conference Bridge.


whos.amung.us If you're wondering what your fellow man is reading on Nerd Vittles these days, wonder no more. Visit our new whos.amung.us statistical web site and check out what's happening. It's a terrific resource both for us and for you.


Special Thanks to Our Generous Sponsors


FULL DISCLOSURE: ClearlyIP, Skyetel, Vitelity, DigitalOcean, Vultr, VoIP.ms, 3CX, Sangoma, TelecomsXchange and VitalPBX have provided financial support to Nerd Vittles and our open source projects through advertising, referral revenue, and/or merchandise. As an Amazon Associate and Best Buy Affiliate, we also earn from qualifying purchases. We’ve chosen these providers not the other way around. Our decisions are based upon their corporate reputation and the quality of their offerings and pricing. Our recommendations regarding technology are reached without regard to financial compensation except in situations in which comparable products at comparable pricing are available from multiple sources. In this limited case, we support our sponsors because our sponsors support us.

BOGO Bonaza: Enjoy state-of-the-art VoIP service with a $10 credit and half-price SIP service on up to $500 of Skyetel trunking with free number porting when you fund your Skyetel account. No limits on number of simultaneous calls. Quadruple data center redundancy. $25 monthly minimum spend required. Tutorial and sign up details are here.

The lynchpin of Incredible PBX 2020 and beyond is ClearlyIP components which bring management of FreePBX modules and SIP phone integration to a level never before available with any other Asterisk distribution. And now you can configure and reconfigure your new Incredible PBX phones from the convenience of the Incredible PBX GUI.

VitalPBX is perhaps the fastest-growing PBX offering based upon Asterisk with an installed presence in more than 100 countries worldwide. VitalPBX has generously provided a customized White Label version of Incredible PBX tailored for use with all Incredible PBX and VitalPBX custom applications. Follow this link for a free test drive!
 

Special Thanks to Vitelity. Vitelity is now Voyant Communications and has halted new registrations for the time being. Our special thanks to Vitelity for their unwavering financial support over many years and to the many Nerd Vittles readers who continue to enjoy the benefits of their service offerings. We will keep everyone posted on further developments.


Some Recent Nerd Vittles Articles of Interest...

  1. Be very careful choosing Intel processors. Even some high-end processors do not support Intel Virtualization Technology. Here's the official list. []
  2. And here is a useful reference for AMD-compatible processors. The AMD WIKI provides the following list of AMD-V compatible processors: "AMD's x86 virtualization extension to the 64-bit x86 architecture is named AMD Virtualization, also known by the abbreviation AMD-V, and is sometimes referred to by the code name 'Pacifica'. AMD processors using Socket AM2, Socket S1, and Socket F include AMD Virtualization support. AMD Virtualization is also supported by release two (8200, 2200 and 1200 series) of the Opteron processors. The third generation (8300 and 2300 series of Opteron processors) will see an update in virtualization technology..." []
  3. Getting the correct time in your VMs can be problematic with Proxmox. If you continually see the wrong time when you issue the date command after starting up your VMs, try this. Log into the Proxmox host and issue the following commands using the correct container number and your local time zone city for your virtual machine:

    vzctl stop 108
    vzctl set 108 --capability sys_time:on --save
    vzctl start 108
    vzctl enter 108
    mv /etc/localtime /etc/localtime.old
    ln -s /usr/share/zoneinfo/America/New_York /etc/localtime
    exit

    []

VoIP Over VPN: Securely Interconnecting Asterisk Servers

We’ve just returned from a week in the Pacific Northwest teaching an Asterisk® course for an organization that wants to interconnect satellite offices using Asterisk servers. This coincided with a support request from one of America’s premier airlines which wants to do much the same thing for all of its reservation counters in airports situated in feeder cities around the country. Suffice it to say, PBX in a Flash in conjunction with Asterisk and Hamachi VPNs is perfectly suited to let anyone build these interconnected systems in minutes rather than months. In fact, with less than a day’s worth of introduction to Asterisk and PBX in a Flash, a group of 16 network administrators with no previous Asterisk experience did just that in a one-hour lab session during our training seminar last week. At the risk of (further) destroying our ability to earn a living, here’s how we did it.

Proxmox as a Training Tool. Before we get into the nitty gritty of actually interconnecting Asterisk servers with Hamachi VPNs, let us provide the free tip of the week for those of you that want to experiment with interconnecting Asterisk servers or for those that like to test various Asterisk scenarios without rebuilding servers all day long. There is no finer tool for this than the Proxmox Virtual Environment, a free and easy to use Open Source virtualization platform for running Virtual Appliances and Virtual Machines. With a sale-priced Dell T105 with a Quad Core AMD Opteron processor and 8 gigs of RAM, you’ll have a perfect platform to run about 16 simultaneous PBX in a Flash servers. The trick is finding the machines on sale for half price which is about every other week. Our lab system which matches this configuration was less than $600 with RAM purchased from a third party. You can save most of the shipping cost by using our coupon link in the right column to shop at Dell’s small business site.

Proxmox lets you build virtual machines in two ways: OpenVZ templates or Qemu/KVM Templates and ISO images. While we intend to offer an OpenVZ template for PBX in a Flash soon, currently it’s easy to create your own ISO template using the standard PBX in a Flash ISO image. Once you’ve uploaded your ISO image into Proxmox, simply create a new virtual machine by giving it a name, specifying 512MB of RAM and a 30GB partition. In 10 seconds or less, your new VM will be ready to boot. Start your VM and then open the VNC console window within the Proxmox web interface and install PBX in a Flash just as if you were building a stand-alone machine. When the 15-minute install completes, run through the Orgasmatron Installer setup, and you’ll have your turnkey PBX in a Flash system ready for production in less than 30 minutes.

You don’t have to repeat this drill for every virtual machine. Instead, use the built-in Proxmox backup utility to make a backup image of what you built. Shut down the VM, create a /backup directory, and then schedule the compressed backup in the web browser. When the backup completes, you’ll have a backup image in /backup with a file name like this: vzdump-101.tgz.

To create a new virtual machine, you issue the following command while positioned in the /backup directory specifying the number for the new virtual machine:

vzdump --restore vzdump-101.tgz 102

In about 3 minutes, you’ll have a second virtual machine that’s a clone of the first one. Because it’s a true clone, it would obviously have the same MAC address for the virtual NIC. You don’t want that or all of your VMs would boot up using the same IP address. Using the Proxmox web interface, just edit the new VM 102 by switching from the Status tab to the Hardware tab, delete the existing Ethernet device, and then create a new Ethernet device under the hardware address list pulldown. This will create a new virtual NIC with a new MAC address. So, when you boot VM 102, it will be assigned a new IP address by your DHCP server. You can decipher the new IP address by opening the VNC console window for VM 102 after you boot it up. Now you’re an expert. You can create the additional Baker’s Dozen turnkey PBX in a Flash servers in about an hour. Start all of them up, and you’ve got an instant training facility and PBX in a Flash playground.

April, 2012 Update. See our new article for a current state-of-the-art VoIP VPN.

Creating Hamachi VPN. You obviously don’t need a virtual private network in order to interconnect Asterisk servers. But, as easy as the Hamachi VPN is to set up, especially with PBX in a Flash servers, why wouldn’t you want all of your inter-Asterisk communications secured and encrypted? In addition to the capacity limitation of the Proxmox server, there’s another reason we chose to build 16 PBX in a Flash VMs. That happens to be the number of servers you can interconnect with the Hamachi Virtual Private Network without incurring a charge.1 Why use the Hamachi VPN when OpenVPN is free with unlimited network connections and no strings? The short answer is it’s incredibly simple to set up without public and private key hassles, and it supports dynamic IP server addressing with zero configuration. We plan to cover OpenVPN in a subsequent article but, for many implementations, Hamachi VPNs offer a robust, flexible alternative that can be deployed in minutes.

If you’re not using PBX in a Flash, there are a million good Hamachi VPN tutorials available through a quick Google search. If you are using PBX in a Flash, we’ve done the work for you. With the Orgasmatron Installer build, you’ll find the Hamachi VPN installation script in /root/nv. For other PBX in a Flash systems, just download the install-hamachi.x script from here or, after logging into your server as root, issue the following commands:

wget http://pbxinaflash.net/source/hamachi/install-hamachi.x
chmod +x install-hamachi.x
./install-hamachi.x

Before beginning the Hamachi VPN install, it’s a good idea to make yourself a cheat sheet for the servers you plan to interconnect. We’re going to interconnect 3 servers today, but doing 16 is just more of the same. You’ll need a unique name for your virtual private network. Pick a name that distinguishes this VPN from others you may build down the road. For our example, we’re going to use piaf-vpn. Next, you need a very secure password for your VPN. We’re going to use password for demonstration purposes only. Finally, you need a unique nickname for each of your servers, e.g. piaf-server1, piaf-server2, and piaf-server3 for our example setup today.

For the first Hamachi install, we’ll need to create the new network. For the remaining installs, we’ll simply join the existing network. Keep in mind that you can only remove machines from the network using the same server that was used to create the other VPN accounts initially so build out your virtual private network by starting with your main server, piaf-server1 in our example.

To begin the Hamachi VPN install, run the script using the commands shown above. Type Y to agree to the installer license and then press the Enter key to kick off the install. For the piaf-server1 install, type N to create a new Hamachi network. For the remaining installs, you’d type J to join an existing Hamachi network. Enter the network name you chose above. For our sample, we used piaf-vpn. Type it twice when prompted. Now type your network password and then your nickname for this server when prompted to do so. Then standby while the Hamachi software is installed. It takes a few minutes depending upon the speed of your network connection. And remember, do NOT use our sample network name. Make up your own and don’t forget it. When the install completes, you can review the log if you’d like. Unless something has come unglued, Hamachi should now be running on your first server. Repeat the drill on your other servers.

The next step is to grab some of our scripts to make it easier to manage Hamachi on your servers.

cd /usr/local/bin
wget http://pbxinaflash.net/source/hamachi/hampiaf
wget http://pbxinaflash.net/source/hamachi/hamachi-servers
chmod +x ham*
cd /root
wget http://pbxinaflash.net/source/hamachi/hamachi.faq

The hamachi.faq document provides all of the commands you’ll need to manage Hamachi including the steps to start over with a totally new virtual private network. For now, let’s be sure your network is running. Type: hamachi-servers piaf-vpn using the network name you assigned to your own VPN. Then type it again, and it should display all of the servers on your VPN with their private VPN IP addresses:

root@pbx:~ $ hamachi-servers piaf-vpn
This server:
Identity 5.151.123.1
Nickname piaf-server1
AutoLogin yes
OnlineNet piaf-vpn

Going online in piaf-vpn .. failed, already online
Retrieving peers’ nicknames ..
* [piaf-vpn]
5.151.123.2 piaf-server2
5.151.123.3 piaf-server3

Finally, a word of caution about security. One of the drawbacks of the ease with which you can create Hamachi VPNs is the ease with which you can create Hamachi VPNs. Anyone that knows your network name and password can join your network with one simple command. You can kick them off from the main server where the VPN was created (hampiaf evict piaf-vpn 5.249.146.66), but you can’t keep them from joining. So, protect your network by making the password extremely secure. There currently is no way to change your network password. All you can do is create a new network with a new network name and a more secure password.

Interconnecting Asterisk Servers. Once your VPN is established and all of your servers are on line, then we’re ready to interconnect them with Asterisk and FreePBX. There are a number of ways to do this. For smaller networks, we’re going to show you the easy and secure way using IAX and the VPN you just created. As with the VPN setup, a cheat sheet comes in handy to avoid erroneous entries that would cause your calls between servers to fail. What we recommend is assigning and creating a block of extensions on each of your servers with different ranges of numbers. For example, we’re going to use four-digit extensions in the 1xxx range for piaf-server1, 2xxx for piaf-server2, and 3xxx for piaf-server3. The idea here is that the extensions are unique between your servers. This makes it easy to dial between offices without having to resort to dialing prefixes. So the first step in interconnecting your servers is to build the necessary extensions on each of your servers.

Now for the cheat sheet. Using the hamachi-servers tool above, decipher the VPN IP address of each of your servers and make a chart with the server names, the range of extension numbers, and the VPN IP address of each server. You’ll also need to think up a very secure password. We’re going to use the same one for all of the servers although you certainly don’t need to. So long as the password you choose is secure, there’s really no reason not to use the same one.

piaf-server1 1xxx 5.151.123.1 password
piaf-server2 2xxx 5.151.123.2 password
piaf-server3 3xxx 5.151.123.3 password

Creating Trunks. The next step is to create an IAX trunk on each server for each remaining server in your network. In our example, on piaf-server1, we’d want to create trunks for piaf-server2 and piaf-server3. On piaf-server2, we’d want to create trunks for piaf-server1 and piaf-server3. And so on.

NOTE: Because of a change in IAX design to fix a security issue that arose after this article was originally published, be sure to add the following line in the User Details of each trunk below:

requirecalltoken=no


On your first server (piaf-server1 in our example), using a web browser, open FreePBX and choose Admin, Setup, Trunks and then click Add IAX2 Trunk. Create the trunk to piaf-server2 with the following entries. Leave everything blank except the entries shown below:

While still on piaf-server1, repeat the process to create a trunk for piaf-server3:

On your second server (piaf-server2 in our example), using a web browser, open FreePBX and choose Admin, Setup, Trunks and then click Add IAX2 Trunk. Create the trunk to piaf-server1 with the following entries. Leave everything blank except the entries shown below:

While still on piaf-server2, repeat the process to create a trunk for piaf-server3:

On your third server (piaf-server3 in our example), using a web browser, open FreePBX and choose Admin, Setup, Trunks and then click Add IAX2 Trunk. Create the trunk to piaf-server1 with the following entries. Leave everything blank except the entries shown below:

While still on piaf-server3, repeat the process to create a trunk for piaf-server2:

Creating Outbound Routes. Now we need to tell Asterisk how to route the calls between the servers. In a nutshell, we want calls to extensions in the 1xxx range routed to extensions on piaf-server1, calls to 2xxx extensions routed to piaf-server2, and calls to 3xxx extensions routed to piaf-server3. On each server, create an outbound route for each of the remaining servers. Name the routes server1, server2, and server3 as appropriate. The critical pieces of information in each outbound route are the dial string (which should match the extensions on the server we’re connecting to) and the Trunk Sequence (which should be the appropriate IAX trunk for the server we’re connecting to).

On piaf-server1, we’d have a server2 outbound route with a Dial String of 2xxx and a Trunk Sequence of IAX2/piaf-server2. Then we’d have another server3 route with a Dial String of 3xxx and a Trunk Sequence of IAX2/piaf-server3. If you have a catch-all outbound route, be sure to move these routes above the catch-all in the right column. Then reload your dialplan.

On piaf-server2, we’d have a server1 outbound route with a Dial String of 1xxx and a Trunk Sequence of IAX2/piaf-server1. Then we’d have another server3 route with a Dial String of 3xxx and a Trunk Sequence of IAX2/piaf-server3. If you have a catch-all outbound route, be sure to move these routes above the catch-all in the right column. Then reload your dialplan.

On piaf-server3, we’d have a server1 outbound route with a Dial String of 1xxx and a Trunk Sequence of IAX2/piaf-server1. Then we’d have another server2 route with a Dial String of 2xxx and a Trunk Sequence of IAX2/piaf-server2. If you have a catch-all outbound route, be sure to move these routes above the catch-all in the right column. Then reload your dialplan.

If you’re setting this up with PRI or T1 connections between your servers, you might also want to specify at least secondary trunk sequences for each of the outbound routes to provide some redundancy. For example, on piaf-server1, you might want a secondary Trunk Sequence for server2 that specified IAX2/piaf-server3. Then, if the primary connection between server1 and server2 was down, Asterisk would attempt to complete calls to 2xxx extensions by routing them to server3 and then on to server2 from there. To the caller and call recipient, they’d never know that the direct link between server1 and server2 had failed.

Alternate routing might also be appropriate where you have more capacity between certain servers. For example, if you had a single T1 line between server1 and server3 but you had PRI connections between server1 and server2 and between server2 and server3, then it might make more sense to indirectly route 3xxx calls from server1 through server2 and then on to server3 rather than the direct route from server1 to server3. Enjoy!


Free DIDs While They Last. Sipgate is giving away a free U.S. DID with free incoming calls plus 200 free minutes for outbound calls. Better hurry. Here’s the trunk setup for FreePBX-based systems:

Trunk name: sipgate

type=peer
username=ACCTNO
fromuser=ACCTNO
secret=ACCTPW
context=from-trunk
host=sipgate.com
fromdomain=sipgate.com
insecure=very
caninvite=no
canreinvite=no
nat=no
disallow=all
allow=ulaw&alaw

Registration Strong: ACCTNO:ACCTPW@sipgate.com/YOUR-DID-NUMBER

ACCTNO is the account number assigned to your sipgate account. ACCTPW is the password for your account. YOUR-DID-NUMBER is your 10-digit DID.

Finally create an inbound route using your actual 10-digit DID and assign a destination for the inbound calls.


Need help with Asterisk? Visit the PBX in a Flash Forum.
Or Try the New, Free PBX in a Flash Conference Bridge.


Twitter Magic. If you haven’t noticed the right margin of Nerd Vittles lately, we’ve added a new link to our Twitter feed. If you explore a little, you’ll discover that the user interface now brings you instant access to every Twitter feed from the convenience of the Nerd Vittles desktop. Enjoy!


whos.amung.us If you’re wondering what your fellow man is reading on Nerd Vittles these days, wonder no more. Visit our new whos.amung.us statistical web site and check out what’s happening. It’s a terrific resource both for us and for you.


Special Thanks to Our Generous Sponsors


FULL DISCLOSURE: ClearlyIP, Skyetel, Vitelity, DigitalOcean, Vultr, VoIP.ms, 3CX, Sangoma, TelecomsXchange and VitalPBX have provided financial support to Nerd Vittles and our open source projects through advertising, referral revenue, and/or merchandise. As an Amazon Associate and Best Buy Affiliate, we also earn from qualifying purchases. We’ve chosen these providers not the other way around. Our decisions are based upon their corporate reputation and the quality of their offerings and pricing. Our recommendations regarding technology are reached without regard to financial compensation except in situations in which comparable products at comparable pricing are available from multiple sources. In this limited case, we support our sponsors because our sponsors support us.

BOGO Bonaza: Enjoy state-of-the-art VoIP service with a $10 credit and half-price SIP service on up to $500 of Skyetel trunking with free number porting when you fund your Skyetel account. No limits on number of simultaneous calls. Quadruple data center redundancy. $25 monthly minimum spend required. Tutorial and sign up details are here.

The lynchpin of Incredible PBX 2020 and beyond is ClearlyIP components which bring management of FreePBX modules and SIP phone integration to a level never before available with any other Asterisk distribution. And now you can configure and reconfigure your new Incredible PBX phones from the convenience of the Incredible PBX GUI.

VitalPBX is perhaps the fastest-growing PBX offering based upon Asterisk with an installed presence in more than 100 countries worldwide. VitalPBX has generously provided a customized White Label version of Incredible PBX tailored for use with all Incredible PBX and VitalPBX custom applications. Follow this link for a free test drive!
 

Special Thanks to Vitelity. Vitelity is now Voyant Communications and has halted new registrations for the time being. Our special thanks to Vitelity for their unwavering financial support over many years and to the many Nerd Vittles readers who continue to enjoy the benefits of their service offerings. We will keep everyone posted on further developments.


Some Recent Nerd Vittles Articles of Interest…

  1. See comment #1 below. []