

Today, we want to revisit our favorite client-server VPN, NeoRouter. It’s included with all versions of Incredible PBX® and eases the pain of setting up air-tight firewalls as well as High Availability (HA) redundant servers with VoIP. NeoRouter relies upon a central server and uses a star topology to connect remote nodes. The major difference between NeoRouter and PPTP VPNs is that only registered devices participate in the virtual private network so there is no direct access to other machines on the LANs of the registered devices. If you have servers or users scattered all over the countryside, NeoRouter is an excellent (and free) way to manage and interconnect them. All data and communications between the nodes can then be routed through the encrypted VPN tunnel for rock-solid security.

With NeoRouter’s latest 2.3 (free) software, you can set up your VPN server using a PC, a Mac, a Linux or FreeBSD machine, OpenWrt Backfire, Tomato, or even a Raspberry Pi. With all versions of Incredible PBX, the NeoRouter Free Client is automatically installed. To bring up NeoRouter, all you need to do is install the NeoRouter Free Server on one of your machines and then login to the server from each NeoRouter Client using your server credentials. VPN clients also are available for PCs, Macs, Linux and FreeBSD machines, Raspberry Pi, OpenWrt, Tomato as well as Android and iOS phones and tablets. There’s even an HTML5 web application in addition to a Chrome browser plug-in. With the OpenWrt and Tomato devices or if you’re an extreme techie, you can broaden your NeoRouter star configuration and bridge remote LANs. See pp. 58-63 of the NeoRouter User’s Manual.

You can interconnect up to 256 devices to the NeoRouter Free Server at no cost. For $999, you can enlarge your VPN to support 1,000 devices. Screen sharing, remote desktop connections, HTTP, and SSH access all work transparently using private IP addresses of the VPN nodes which are automatically assigned in the 10.0.0.0 private network.
Today we are introducing the second generation of the NeoRouter VPN solution. It’s suitable for use on a dedicated server or running as a virtual machine. Whether to run NeoRouter Free server on a dedicated machine is your call. We never do. And NeoRouter never requires exposure of your entire server to the Internet. Only a single TCP port needs to be opened in your hardware-based firewall or IPtables Linux firewall. The only real requirement is a dedicated IP address for your server so that the client nodes can always find the mothership. We typically run the NeoRouter server component on our failover VoIP server with Wazo HA. We’ll finish up today by showing you how to back up the critical components of NeoRouter Server so that, if your server platform ever should fail, it only takes a few minutes to get back in business on a new server platform. Let’s get started.
Creating Your NeoRouter Server Platform
We’re assuming you already have an Incredible PBX server of some flavor running on a dedicated IP address with the IPtables firewall. If not, start there.
First, on your IPtables firewall, make certain that TCP port 32976 has been whitelisted for public access. On Incredible PBX platforms, this is automatic. You can double-check by running iptables -nL and searching for an entry that looks like this:
ACCEPT tcp -- 0.0.0.0/0 0.0.0.0/0 tcp dpt:32976
Second, we need to download and install the NeoRouter Free Server for your platform. Be sure you choose the version that matches your operating system, CPU architecture, and type. Debian and Ubuntu servers use the same code. We do not recommend Raspberry Pi as a suitable platform for your NeoRouter server!
For RedHat/CentOS 64-bit platforms, here’s the download link. While logged into your server as root, issue the following command using the downloaded 64-bit RPM:
rpm -Uvh nrserver-2.3.1.4360-free-centos-x86_64.rpm
For Ubuntu/Debian 64-bit platforms, use this link. While logged into your server as root, issue the following command using the downloaded 64-bit .deb image:
dpkg -i nrserver-2.3.1.4360-free-ubuntu-amd64.deb
Third, each administrator (admin) and user is going to need a username to access your NeoRouter VPN. You can use the same credentials to log in from multiple client machines, something you may or may not want to do. Here are the commands to create admin and user accounts. Don’t use any special characters in the username and password!
nrserver -adduser username password admin
nrserver -adduser username password user
You’re done. Now let’s register your NeoRouter server with the mothership.
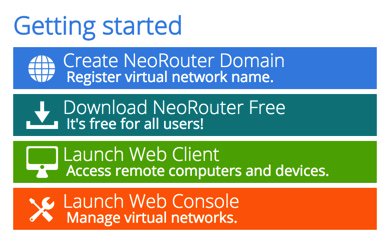
After your NeoRouter Free Server is installed, you can optionally go to the NeoRouter web site and register your new VPN by clicking Create Standalone Domain. Make up a name you can easily remember with no periods or spaces. You’ll be prompted for the IP address of your server in the second screen. FQDNs are NOT permitted.
When a VPN client attempts to login to your server, the server address is always checked against this NeoRouter database first before any attempt is made to resolve an IP address or FQDN using DNS. If no matching entry is found, it will register directly to your server using a DNS lookup of the FQDN. Whether to register your VPN is totally up to you. Logins obviously occur quicker using this registered VPN name, but logins won’t happen at all if your server’s dynamic IP address changes and you’ve hard-coded a different IP address into your registration at neorouter.com.
Configuring and Connecting Your NeoRouter Client
As mentioned previously, there are NeoRouter clients available for almost every platform imaginable, including iPhones, iPads, and our beloved Raspberry Pi. NeoRouter Client software is included in all Incredible PBX builds. If you’re using some other platform, Step #1 is to download whatever client is appropriate to meet your requirements. Here’s the NeoRouter Download Link. Make sure you choose a client for the Free version of NeoRouter. Obviously, the computing platform needs to match your client device. The clients can be installed in the traditional way with Windows machines, Macs, etc. Once enabled, you can use your NeoRouter Client to create a VPN tunnel to connect to any other resource in your virtual private network using SSH, VoIP clients, and web browsers.
To activate the NeoRouter client while logged in as root, type: nrclientcmd. You’ll be prompted for your Domain, Username, and Password. You can use the registered domain name from neorouter.com if you completed that step above. Otherwise, be sure to use the FQDN assigned to your NeoRouter Server. Once you’re logged in, you will be presented with the names and private IP addresses of all of your connected nodes.
To exit from NeoRouter Explorer, type: quit. The NeoRouter client will continue to run so you can use the displayed private IP addresses to connect to any other online devices in your NeoRouter VPN. All traffic from connections to devices in the 10.0.0.0 network will flow through NeoRouter’s encrypted VPN tunnel. This includes inter-office SIP and IAX communications between Asterisk® endpoints. These private IP addresses can also be used to create a High Availability (HA) platform with Wazo even if the servers are not colocated.
Admininistrative Tools to Manage NeoRouter
Here are a few helpful commands for monitoring and managing your NeoRouter VPN.
Browser access to NeoRouter Configuration Explorer (requires user with Admin privileges)
Browser access to NeoRouter Remote Access Client (user with Admin or User privileges)
Manage your account on line at this link
To access your NeoRouter Linux client: nrclientcmd
To restart NeoRouter Linux client: /etc/rc.d/init.d/nrservice.sh restart
To restart NeoRouter Linux server: /etc/rc.d/init.d/nrserver.sh restart
To set domain: nrserver -setdomain YOUR-VPN-NAME domainpassword
For a list of client devices: nrserver -showcomputers
For a list of existing user accounts: nrserver -showusers
For the settings of your NeoRouter VPN: nrserver -showsettings
To add a user account: nrserver -adduser username password user
To add admin account: nrserver -adduser username password admin
Test VPN access: http://www.neorouter.com/checkport.php
For a complete list of commands: nrserver –help
To change client name from default pbx.local: rename-server OR…
- Edit /etc/hosts
- Edit /etc/sysconfig/network
- Edit /etc/sysconfig/network-scripts/ifcfg-eth0
- Edit /etc/asterisk/vm_general.inc
- reboot
For the latest NeoRouter happenings, visit the NeoRouter blog and forum.
Backing Up NeoRouter Server for That Rainy Day
Yes, servers fail sooner or later. So it’s best to plan ahead and avoid having to recreate your NeoRouter VPN from scratch. Backing up your server is easy. Log into your server as root and issue the following command:
tar cvzf nr-server-db.tar.gz /usr/local/ZebraNetworkSystems/NeoRouter/NeoRouter_0_0_1.db /usr/local/ZebraNetworkSystems/NeoRouter/Feature.ini
Copy nr-server-db.tar.gz and your NeoRouter Server installer to a safe place!
When that sad day arrives, be sure that your original NeoRouter Server is off line. Then reinstall NeoRouter Server on a new server platform using your original NeoRouter Server installer. If necessary, change the DNS entry for your original NeoRouter server to the new IP address. Then shut down new NeoRouter Server, load your backup, and restart server:
/etc/rc.d/init.d/nrserver.sh stop
cd /
tar zxvf nr-server-db.tar.gz
/etc/rc.d/init.d/nrserver.sh start
Published: Monday, August 21, 2017

Need help with Asterisk? Visit the PBX in a Flash Forum.
Special Thanks to Our Generous Sponsors
FULL DISCLOSURE: ClearlyIP, Skyetel, Vitelity, DigitalOcean, Vultr, VoIP.ms, 3CX, Sangoma, TelecomsXchange and VitalPBX have provided financial support to Nerd Vittles and our open source projects through advertising, referral revenue, and/or merchandise. As an Amazon Associate and Best Buy Affiliate, we also earn from qualifying purchases. We’ve chosen these providers not the other way around. Our decisions are based upon their corporate reputation and the quality of their offerings and pricing. Our recommendations regarding technology are reached without regard to financial compensation except in situations in which comparable products at comparable pricing are available from multiple sources. In this limited case, we support our sponsors because our sponsors support us.
 BOGO Bonaza: Enjoy state-of-the-art VoIP service with a $10 credit and half-price SIP service on up to $500 of Skyetel trunking with free number porting when you fund your Skyetel account. No limits on number of simultaneous calls. Quadruple data center redundancy. $25 monthly minimum spend required. Tutorial and sign up details are here.
![]() The lynchpin of Incredible PBX 2020 and beyond is ClearlyIP components which bring management of FreePBX modules and SIP phone integration to a level never before available with any other Asterisk distribution. And now you can configure and reconfigure your new Incredible PBX phones from the convenience of the Incredible PBX GUI.
The lynchpin of Incredible PBX 2020 and beyond is ClearlyIP components which bring management of FreePBX modules and SIP phone integration to a level never before available with any other Asterisk distribution. And now you can configure and reconfigure your new Incredible PBX phones from the convenience of the Incredible PBX GUI.
 VitalPBX is perhaps the fastest-growing PBX offering based upon Asterisk with an installed presence in more than 100 countries worldwide. VitalPBX has generously provided a customized White Label version of Incredible PBX tailored for use with all Incredible PBX and VitalPBX custom applications. Follow this link for a free test drive!
 Special Thanks to Vitelity. Vitelity is now Voyant Communications and has halted new registrations for the time being. Our special thanks to Vitelity for their unwavering financial support over many years and to the many Nerd Vittles readers who continue to enjoy the benefits of their service offerings. We will keep everyone posted on further developments.
Some Recent Nerd Vittles Articles of Interest…


