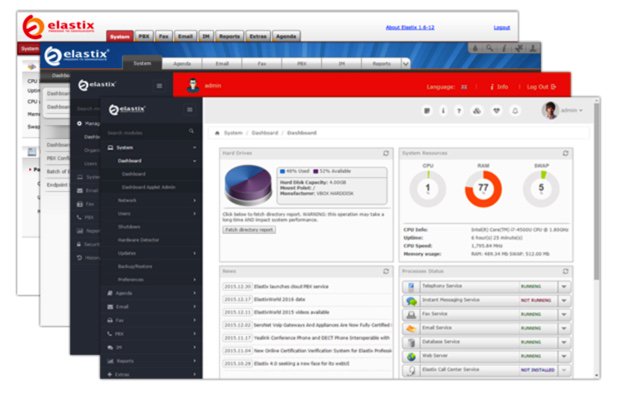
Home » Google Voice & Svcs (Page 11)

Category Archives: Google Voice & Svcs

The Most Versatile VoIP Provider: FREE PORTING

I Have A Dream: Free Cellular Service with Integrated Remote SIP Connectivity

As part of our Mobile Internet adventure this year, we’ve been scouring the countryside with two requirements in mind. First, we wanted a smartphone on which we could activate some type of free cellular service for making calls and sending text messages. Second, we wanted to integrate remote SIP connectivity using the same provider and phone number so that we could make and receive calls transparently using any SIP phone or Asterisk® server anywhere in the world. Sounds like a tall order, you say? Well, if you’ve enjoyed your Cloud@Cost Sandbox, you’re gonna love RingPlus!

Yes, you’ll have to buy a compatible cellphone, but there are thousands to choose from. And, yes, you’ll need Sprint service in your neighborhood. Then you’ll have to cough up $10 to activate your cellular account. RingPlus offers dozens of plans.1 We recommend the Michelangelo plan which best meets what we’re trying to accomplish today, but the choice is all yours.2 With the Michelangelo plan, you can make and receive 1,000 minutes of free calls a month to anywhere in the U.S. (calls to Canada are 3¢ a minute), you can send and receive 1,000 free text messages a month, and you can use 500MB of free data service every month. You also can use your same account credentials with any SIP phone, softphone, or Asterisk server anywhere in the world to make and receive phone calls transparently using the same phone number as your smartphone. In other words, you can travel anywhere and make and receive phone calls just as if you were sitting in Atlanta, Georgia dialing from your smartphone. The SIP calls are deducted from your free minutes. No cellular service required at all. Meet RingPlus!


So what’s the catch? How does RingPlus make money? Well, of course, they would prefer that you sign up for a plan with monthly fees. For those on the free plans, the only difference you will notice is an occasional ad which plays instead of a ring tone when you place outbound calls. This only occurs until the other party answers the call, and it can be all but eliminated by choosing a music selection in the RingPlus Radio feature in your RingPlus Dashboard.

Who are the ones most likely to use something like this? Well, for openers, all of your kids unless you like springing for a $500 phone and spending $40+ dollars a month for cellular service for each of them. One of the other real beauties of RingPlus is you can set up a whitelist of numbers that can be called from the phone. Blacklists are supported as well. It’s perfect for kids just getting started with a cellphone. A second potential user group would be those who travel outside the United States and prefer not to pay exorbitant roaming rates for calls. Using a SIP phone connected to your RingPlus account, all of the international calls suddenly are free. And the calls are delivered with the same CallerID number as calls placed from your actual smartphone. In fact, your smartphone doesn’t have to be in service at all. A third and perhaps most important use for us was to serve as a failover trunk on one or more Asterisk servers. When all else fails, you can route outbound calls to your RingPlus SIP trunk for free calling using your RingPlus account. Doesn’t get any better than that.

Official RingPlus WARNING: Starting April 17, 2016, per our carrier partner Sprint, Members and potential Members will no longer be able to activate prepaid devices which are not eligible under Sprint’s FED policies [Requires activation of prepaid phone on original Sprint MVNO network for at least one year!]. Such prepaid devices will no longer pass FED until actual eligibility date is met.

There are probably numerous ways to put all these pieces in place so that things function just as we’ve described. Today we’ll share with you the solution that actually worked for us. You can take it from there and avoid the thousands of horror stories about incompatible smartphones. Be advised that acquiring used cellphones or even incompatible cellphones is a very dangerous and expensive business. If you buy one that happens to be stolen, or that has a balance due on the account, or that is incompatible with RingPlus, then you’ve bought a tiny boat anchor and not much else. So, our best advice is buy one from the provider. That’s the one and only RingPlus, and the smartphones start at just under $100. Many Sprint post-paid phones also work, such as the new iPhone SE (Sprint Model) from any Apple Store.

If store employees will let you, find the Sprint postpaid phone that you like and look on the bottom of the box. There you will find the decimal value of the MEID. Log into http://nerd.bz/nvringplus and plug in the MEID to see if it is RingPlus compatible. If it passes, buy it. If it flunks, try another one. Whatever you do, DON’T BUY A PHONE IN AN OPENED BOX, AND DON’T OPEN THE BOX YET! Make certain there is a return policy in case things don’t work out as expected!

Funny story. The Radio Shack employees at our local store were very savvy and refused to let me look at the MEID claiming it was a security issue. Fair enough. Of course, they were also curious why I wanted a phone without letting them configure it. Once I told them the deal, they all wanted one, too. They asked for the link to the MEID verification site and said they’d do it for me. Once it worked, excitement broke out in the room with all the staff reading an early copy of this article. While Radio Shack typically charges a $35 restocking fee on cell phones, that fee is waived if you return the phone in an unopened box. So the only thing you’re wasting if they insist that you purchase the phone is a little bit of your time and a lot of Radio Shack employee time if, in fact, the MEID flunks the verification test.

Configuring Your Phone for RingPlus Service

Now sign up for a RingPlus free plan using the MEID and ICC ID you previously verified. Michelangelo is probably the best bet if you missed our Twitter tip this past weekend. Deposit $10 in your new account, and activate it. Log into your RingPlus Dashboard, click on your phone in the upper right frame, and choose Manage Device. Write down your MSID, your phone number, and MSL. Once your account is active, then and only then unbox and turn on your phone. Go through the minimal setup steps by choosing your Language and choosing an available WiFi network. During this setup, RingPlus should push a PRL update to your new phone, and it will reboot. Check in Settings -> General -> About Phone -> Status and see if you have a phone number. If so, you’re good to go. If not, open the Phone Dialer application and dial ##72786# which should force another PRL update to your phone with another reboot. When it finishes, check again for a phone number and place an outbound call.

Using a browser on your desktop computer, go back into the RingPlus Dashboard and sign in. Your phone device should show Active in the upper right corner of the screen. Click there and you’ll get a display like this:

While still in the Device Settings Menu, click on the WiFi FluidCall option to decipher your SIP credentials. You’ll need these to set up your SIP phone or a SIP trunk on your Asterisk server. Your username is your 10-digit phone number, the domain name is sip.ringplus.net, and the password is a system-generated entry which you can recreate whenever you like. That’s probably a very good idea whenever you use public WiFi services to make calls with your SIP phone or a softphone.

By the way, this isn’t some kludgy SIP-GSM gateway where the calls actually are routed out through your cellphone device. The RingPlus SIP gateway connects your SIP device directly to the Internet and simply uses your existing RingPlus CallerID to identify the calls. In short, you get the best of both worlds: a dirt cheap or free cellphone service plus a dirt cheap or free SIP trunk for use anywhere in the world.

Configuring a RingPlus SIP Trunk with Asterisk

If you’d like to set up your RingPlus number as a failover trunk on your Asterisk server, here is the setup that worked for us with Incredible PBX using your assigned 10-digit phone number for your username and fromuser settings and your assigned password for your secret. If you include a registration string and configure an inbound route using your RingPlus DID, then inbound calling will work as well. If you skip the registration step, then you can use the same RingPlus trunk on multiple Asterisk servers for emergency outbound calling. No firewall adjustments should be necessary.

There are all sorts of other magic tricks you can implement using the RingPlus API, but you probably won’t need any of the features in light of the robust SIP connectivity RingPlus provides to an existing Asterisk server where the feature set is virtually unlimited. Be advised that you must make a call out at least once every 60 days to keep your account active. The simple way to do this is to set up a monthly reminder using your RingPlus trunk. Schedule the reminder to call out once every month using Telephone Reminders in Incredible PBX.

RingPlus Gotcha Checklist

Free service wouldn’t be free without a few land mines. So here’s a checklist to keep things running smoothly without any problems down the road. First, link your account to one of the social media options (Twitter, Facebook, or LinkedIn) when you sign up for service. You’ll find the link on your Dashboard under the Your Social Networks icon. Second, make at least one outbound call a month on every line you activate. As noted, this can be accomplished automatically using the Telephone Reminders application in Incredible PBX. Third, keep a valid credit card on file in your account at all times. Fourth, keep a positive balance in your account for each phone that you activate to avoid automatic replenishment at the original rate when you signed up for your plan. Fifth, be mindful of the Domino Effect. With some plans, if you allow a related plan to end (for example, Queen of Hearts when you also have an Ace of Hearts plan), then your better plan will be demoted in its feature set. Enjoy the Free Ride!

Originally published: Monday, February 8, 2016


Need help with Asterisk? Visit the PBX in a Flash Forum.


Special Thanks to Our Generous Sponsors


FULL DISCLOSURE: ClearlyIP, Skyetel, Vitelity, DigitalOcean, Vultr, VoIP.ms, 3CX, Sangoma, TelecomsXchange and VitalPBX have provided financial support to Nerd Vittles and our open source projects through advertising, referral revenue, and/or merchandise. As an Amazon Associate and Best Buy Affiliate, we also earn from qualifying purchases. We’ve chosen these providers not the other way around. Our decisions are based upon their corporate reputation and the quality of their offerings and pricing. Our recommendations regarding technology are reached without regard to financial compensation except in situations in which comparable products at comparable pricing are available from multiple sources. In this limited case, we support our sponsors because our sponsors support us.

BOGO Bonaza: Enjoy state-of-the-art VoIP service with a $10 credit and half-price SIP service on up to $500 of Skyetel trunking with free number porting when you fund your Skyetel account. No limits on number of simultaneous calls. Quadruple data center redundancy. $25 monthly minimum spend required. Tutorial and sign up details are here.

The lynchpin of Incredible PBX 2020 and beyond is ClearlyIP components which bring management of FreePBX modules and SIP phone integration to a level never before available with any other Asterisk distribution. And now you can configure and reconfigure your new Incredible PBX phones from the convenience of the Incredible PBX GUI.

VitalPBX is perhaps the fastest-growing PBX offering based upon Asterisk with an installed presence in more than 100 countries worldwide. VitalPBX has generously provided a customized White Label version of Incredible PBX tailored for use with all Incredible PBX and VitalPBX custom applications. Follow this link for a free test drive!
 

Special Thanks to Vitelity. Vitelity is now Voyant Communications and has halted new registrations for the time being. Our special thanks to Vitelity for their unwavering financial support over many years and to the many Nerd Vittles readers who continue to enjoy the benefits of their service offerings. We will keep everyone posted on further developments.


Some Recent Nerd Vittles Articles of Interest…

  1. Be advised that future upgrades of these "free" plans may go away after February 15 unless you join the Member+ program, the cost of which changes almost weekly. This will not affect those that already are participating in the program according to RingPlus. []
  2. In case you’re curious, a plan equivalent to the free Michelangelo plan at RingPlus would run you $41.00 per month at Ting. Ouch! []

Mobile Internet: The 2016 Road Warrior’s Guide to Choosing New Wheels


OK. We’re not going to bring Mobile Computing down to the teepee level, but we have decided to dedicate a column regularly to Mobile Internet developments in the marketplace. Of course, our major focus will remain the impact on unified communications and especially Asterisk®, FreeSWITCH™, PBX in a Flash™, and Incredible PBX™. The idea here is to document a design that lets road warriors travel with the same communications dexterity that they have at home or in the home office. In other words, our vision is a mobile computing environment that makes travel status transparent. Things that worked a certain way in the office should work similarly on the road or in the comfort of your Motel 6 suite. 🙂

To get 2016 started on the right foot, we want to lay out some of the technology that’s available to the road warrior who spends a significant amount of time in an automobile. Our objective today is to help you choose that next set of wheels, the proverbial perfect vehicle. We began documenting some of what we’re looking for in our December Mobile Internet column. Today we’ll follow up with more details and some real-world feedback. What we’ll be covering in coming months applies equally to those that travel for pleasure as well as those that do it for a living. Unless you prefer hiding in your Man Cave, we hope you’ll find something useful that makes travel away from your home office amenities easier and less intimidating.

Let’s begin by documenting some of our inexpensive must-haves. These can round out your vehicle shopping list without much impact on the cost of a vehicle: cup holders (lots of them), cigarette lighter connections (lots of them), USB ports (lots of them), and compartments especially those with access to power or USB ports. Another must have for us was a fold down table for the back seat. These come standard in Mercedes S Class sedans as well as the Jaguar XJ. For other vehicles, you’ll need to consider aftermarket options which is a little surprising when you consider that every airline seat has had fold down tables FOREVER. In their haste to roll out the latest gee whiz features, many car manufacturers have forgotten the basic essentials that make all of this technology useful. But there’s hope. General Motors is among those that have finally awakened to the 21st century. Our best advice is this. Before you get swept away by the self-parking car, take a quick look inside the cabin and consider whether the vehicle has the road warrior essentials.

Now for the fun stuff. Take a quick look at this AutoBytel article which ticks off some of the more interesting high tech features that are available in the marketplace today: GPS-linked temperature control, a sensor that provides a text alert if someone is hiding in your car, a collection of audio and visual alerts if the car senses that you are distracted or falling asleep at the wheel, self-parking vehicles, night vision with pedestrian detection, adaptive cruise control that adjusts your speed based upon the speed of the vehicle in front of you, blind spot detection that provides visual warnings on your side view mirrors when a vehicle is cruising along beside you at 70+ mph, lane departure warnings which include console alerts, buzzing your seat, or adjusting your steering wheel to guide you back into your lane. And, last but not least, the latest Tesla which can drive itself under certain highway conditions. In case you haven’t guessed, none of this technology comes cheap. Typically, the features first appear in the high end cars and require the purchase of even higher priced, factory-installed options. Then they trickle down to less costly vehicles as the price of the technology drops.

Here’s our two cents worth of advice on some of these features. We happen to live in the southeastern United States so we really don’t need a GPS to tell us to turn on the air conditioner. Almost any road warrior’s dream machine will have automatic temperature control. That’s as much technology as you need to stay cool in the summer and warm in the winter.

A sensor to tell us someone is hiding inside our car is another clever idea, but we much prefer a vehicle that can lock itself when you leave the vehicle or when you place the vehicle in motion. Newer GM vehicles can also sound an alarm if someone sticks a hand into your window while you’re stopped at a traffic light. Works great unless people are passing you things while parked in a carpool line.

If you’re a road warrior that does a lot of night driving, all of the high tech features you can find that help you drive and stay awake at the wheel are terrific additions. Not mentioned in the AutoBytel article is one of our favorites that’s actually been around for decades. The head-up display (HUD) appears on the lower part of the driver’s windshield. It shows information such as your speed and the speed limit without taking your eyes off the road. For the science behind it, see this article.

If you’re a road warrior that spends considerable time commuting in heavy traffic or driving on interstates, adaptive cruise control is the best invention since sliced bread. It doesn’t completely drive the car for you, but it reduces your need to stay 99.9% focused on what’s in front of you every second of the trip. You simply set the separation distance between your vehicle and the vehicle in front of you, and radar in your vehicle does the rest, adjusting your speed to keep you at or below the cruise control speed you set for your vehicle while preserving the spacing you predefined. Newer versions of adaptive cruise control include support for bringing your vehicle to a complete stop at traffic signals. The best testimonial we can provide is this. Once you have a vehicle with adaptive cruise control, you’ll never buy another vehicle without it. It’s that good!

Blind spot detection is another radar-based feature. Visual side view mirror alerts are provided whenever something is hiding in your vehicle’s blind spot. Of course, you can accomplish much the same thing by adding supplemental wide-view (blindspot) mirrors to your existing side view mirrors at considerably less cost. However, the radar-enhanced version typically is bundled with features such as adaptive cruise control and lane departure alerts so there is no additional cost for the convenience. Just be sure to test them for accuracy before dispensing with turning your head to check for vehicles. We’ve actually had a vehicle in which the sensors were incorrectly positioned. Merging into traffic without any visual warning of what’s beside you is a quick ticket to the body shop, both for the car and for you.

Lane departure alerts and autocorrection are equally important for those that spend endless hours on long stretches of boring highway. The other essential ingredient for every road warrior is the smartphone app, Waze. Between hazard alerts, speed trap notifications, and directions, it’s the single-most important traveling enhancement that’s come along in a very long time. Think of it as you free copilot. It can watch for things up ahead and alert you to problems before you actually encounter them. Because its data is based upon real-time data and feedback from thousands of road warriors, it has no equal in terms of accuracy. See our first article in this series for more details.

Wireless charging is another feature that has been touted by many of the Android device manufacturers. In the case of Samsung, the technology was available in the Galaxy Note 4 except for the back cover which can be replaced easily. Surprisingly, Apple has completely ignored it thus far. There are, of course, aftermarket cases that will bring wireless charging to any smartphone including the iPhones. Beginning with some 2014 models, General Motors, Chrysler, and Toyota began integrating wireless charging stations into the center consoles of some of their vehicles. By 2017, most car manufacturers probably will support it either as an included or add-on accessory.

No review of automotive technology would be complete without mention of Apple CarPlay and Android Auto, the two smartphone integration systems from America’s finest software development companies. One can only hope that the car manufacturers see the light and drop their insistence upon their own proprietary consoles. Both Apple CarPlay and Android Auto provide navigation, messaging, and numerous music platforms including Spotify, Pandora, Google Play Music, and Apple Music. Many newer vehicles offer one or the other, and some offer both. The systems also are available as aftermarket add-ons. For an excellent review of the two competing systems, take a look at this CNET review. Our only complaint with Apple CarPlay at the moment is the inability to add applications other than those that Apple has chosen for you. That means no Google Maps and no Waze, at least for now. For an excellent interview with the man behind both technologies at General Motors, see this article from The Verge.

So which vehicle did we choose for our Mobile Internet Lab? Well, come back next month and we’ll take you for a ride as we review the best WiFi Hotspots to complement that new set of wheels. We’ll consider offerings from Sprint, T-Mobile, Verizon, and AT&T so there will be something for almost everybody with a smartphone.

Originally published: Monday, January 18, 2016


Need help with Asterisk? Visit the PBX in a Flash Forum.


Special Thanks to Our Generous Sponsors


FULL DISCLOSURE: ClearlyIP, Skyetel, Vitelity, DigitalOcean, Vultr, VoIP.ms, 3CX, Sangoma, TelecomsXchange and VitalPBX have provided financial support to Nerd Vittles and our open source projects through advertising, referral revenue, and/or merchandise. As an Amazon Associate and Best Buy Affiliate, we also earn from qualifying purchases. We’ve chosen these providers not the other way around. Our decisions are based upon their corporate reputation and the quality of their offerings and pricing. Our recommendations regarding technology are reached without regard to financial compensation except in situations in which comparable products at comparable pricing are available from multiple sources. In this limited case, we support our sponsors because our sponsors support us.

BOGO Bonaza: Enjoy state-of-the-art VoIP service with a $10 credit and half-price SIP service on up to $500 of Skyetel trunking with free number porting when you fund your Skyetel account. No limits on number of simultaneous calls. Quadruple data center redundancy. $25 monthly minimum spend required. Tutorial and sign up details are here.

The lynchpin of Incredible PBX 2020 and beyond is ClearlyIP components which bring management of FreePBX modules and SIP phone integration to a level never before available with any other Asterisk distribution. And now you can configure and reconfigure your new Incredible PBX phones from the convenience of the Incredible PBX GUI.

VitalPBX is perhaps the fastest-growing PBX offering based upon Asterisk with an installed presence in more than 100 countries worldwide. VitalPBX has generously provided a customized White Label version of Incredible PBX tailored for use with all Incredible PBX and VitalPBX custom applications. Follow this link for a free test drive!
 

Special Thanks to Vitelity. Vitelity is now Voyant Communications and has halted new registrations for the time being. Our special thanks to Vitelity for their unwavering financial support over many years and to the many Nerd Vittles readers who continue to enjoy the benefits of their service offerings. We will keep everyone posted on further developments.


Some Recent Nerd Vittles Articles of Interest…

The Last Sunset: Say Goodbye to Google TTS… Hello Pico TTS

Despite the heroic efforts of Lefteris Zafiris to keep GoogleTTS afloat for use with Asterisk®, Google has made it increasingly clear that they intend to blow everyone’s apps out of the water (except theirs) if you choose to use their text to speech engine, even in open source, non-commercial products. As much as we’ve loved the voice quality and Google’s previous generosity in sharing their work product with the open source community, there comes a time when the mud wrestling simply is no longer worth the effort. Thanks to the pioneering efforts of Steven Mirabito, we all now have a choice. Steven took the work of Lefteris on GoogleTTS and retrofitted it to support the free SVOX Pico TTS engine. While Pico lacks a bit of the voice quality of GoogleTTS, it’s a quantum leap improvement over Festival and FLITE and perfectly suitable for Incredible PBX TTS apps.


[soundcloud url="https://api.soundcloud.com/tracks/240804855″ params="auto_play=false&hide_related=false&show_comments=true&show_user=true&show_reposts=false&visual=true" width="500″ height="300″ iframe="true" /]

Unlike FLITE which has no voice alternatives to Lurch, Pico for Android has a rich assortment of 40+ male/female voices supporting 25+ languages. Many of them are free. Hopefully, it’s only a matter of time until someone documents how to move them over to the Linux platforms. For today, our default install includes support for US English, British English, French, Spanish, and German. After the install, you’ll find them in /usr/share/pico/lang. Changing voices and languages in your Asterisk scripts is simple. Replace the default language identifier, en-US, with the voice of your choice, e.g. en-GB for British accents, fr-FR for French, es-ES for Spanish, and de-DE for German. If you wish to generate wave files at the command prompt, the syntax is shown below. Here’s the command we used to generate the sample sound file above.

pico2wave --wave sample.wav -l en-US "Here is a sample, using the PICO text to speech engine."

We’re getting a little ahead of ourselves here. Before you can use Pico TTS, we first need to get it installed. There are two different procedures depending upon whether Incredible PBX is running on the CentOS/Scientific Linux platform or Debian/Ubuntu/Raspbian. The installation procedure below will install all of the necessary components for Pico TTS on an existing Incredible PBX platform. It also will modify the Incredible PBX apps that currently rely upon GoogleTTS. And, as of yesterday, all new Incredible PBX 13 installs include Pico TTS by default.

To get started, log into your server as root and choose the installation steps documented below for your particular platform.1

Installing Pico TTS on the CentOS/Scientific Linux Platforms

cd /
wget http://incrediblepbx.com/picotts.tar.gz
tar zxvf picotts.tar.gz
cd /root
./picotts-install.sh
sed -i 's|en)|en-US)|' /etc/asterisk/extensions_custom.conf
sed -i 's|googletts|picotts|' /etc/asterisk/extensions_custom.conf
asterisk -rx "dialplan reload"

Installing Pico TTS on the Debian/Ubuntu Platforms

cd /
wget http://incrediblepbx.com/picotts.tar.gz
tar zxvf picotts.tar.gz
cd /root
rm -f picotts-install.sh
apt-get update
apt-get install -y libttspico-utils
sed -i 's|en)|en-US)|' /etc/asterisk/extensions_custom.conf
sed -i 's|googletts|picotts|' /etc/asterisk/extensions_custom.conf
asterisk -rx "dialplan reload"

Installing Pico TTS on the Raspberry Pi Raspbian Platform

cd /
wget http://incrediblepbx.com/picotts-raspi.tar.gz
tar zxvf picotts-raspi.tar.gz
rm -f picotts-raspi.tar.gz
cd /root
echo "Installing Pico TTS..."
./picotts-install.sh

Post-Install Testing of Pico TTS with Incredible PBX

The easiest way to make sure everything is working properly is to pick up a phone on your server and dial 951 for the latest Yahoo News headlines. Keep in mind that Google Speech Recognition (Google STT) still works for apps such as Voice Dialing (411), Voice Messaging (767), Wolfram Alpha (4747), and Star (8). However, these apps require a free API key before use. The procedure to obtain and install one is documented in this Nerd Vittles article.

Changing the Pico TTS Voice with Incredible PBX

All of the Incredible PBX application scripts are saved in extensions_custom.conf in the /etc/asterisk directory. To change the default voice for Pico TTS apps, simply search and replace en-US with the desired voice: en-GB, fr-FR, es-ES, or de-DE. Save your changes. And then reload your Asterisk dialplan: asterisk -rx "dialplan reload"

Originally published: Monday, January 11, 2016


Need help with Asterisk? Visit the PBX in a Flash Forum.


Special Thanks to Our Generous Sponsors


FULL DISCLOSURE: ClearlyIP, Skyetel, Vitelity, DigitalOcean, Vultr, VoIP.ms, 3CX, Sangoma, TelecomsXchange and VitalPBX have provided financial support to Nerd Vittles and our open source projects through advertising, referral revenue, and/or merchandise. As an Amazon Associate and Best Buy Affiliate, we also earn from qualifying purchases. We’ve chosen these providers not the other way around. Our decisions are based upon their corporate reputation and the quality of their offerings and pricing. Our recommendations regarding technology are reached without regard to financial compensation except in situations in which comparable products at comparable pricing are available from multiple sources. In this limited case, we support our sponsors because our sponsors support us.

BOGO Bonaza: Enjoy state-of-the-art VoIP service with a $10 credit and half-price SIP service on up to $500 of Skyetel trunking with free number porting when you fund your Skyetel account. No limits on number of simultaneous calls. Quadruple data center redundancy. $25 monthly minimum spend required. Tutorial and sign up details are here.

The lynchpin of Incredible PBX 2020 and beyond is ClearlyIP components which bring management of FreePBX modules and SIP phone integration to a level never before available with any other Asterisk distribution. And now you can configure and reconfigure your new Incredible PBX phones from the convenience of the Incredible PBX GUI.

VitalPBX is perhaps the fastest-growing PBX offering based upon Asterisk with an installed presence in more than 100 countries worldwide. VitalPBX has generously provided a customized White Label version of Incredible PBX tailored for use with all Incredible PBX and VitalPBX custom applications. Follow this link for a free test drive!
 

Special Thanks to Vitelity. Vitelity is now Voyant Communications and has halted new registrations for the time being. Our special thanks to Vitelity for their unwavering financial support over many years and to the many Nerd Vittles readers who continue to enjoy the benefits of their service offerings. We will keep everyone posted on further developments.


Some Recent Nerd Vittles Articles of Interest…

  1. If you’re using an older version of CentOS, see the install tips documented on the PIAF Forum. []

Mobile Internet: A 2015 Update on Caribbean Cruising and WiFi-Enabled Travel

We decided to spend Christmas a little differently this year and joined 10,000 of our closest friends on cruises to the Western Caribbean taking in Cozumel and Grand Cayman with a few extra days at sea. If you haven’t tried it, put it on your bucket list. Christmas week is a bargain and about 50% cheaper than the same cruise to ring in the new year. Rates start at about $300 per person for the 5-day cruise. You’d be hard-pressed to dine out for a week in your home town at those prices. Today we want to provide an update on the dramatic changes in Internet connectivity not only aboard ship but also in navigating 1,000 miles of highway to get there. Let’s start with the glamorous part.

Surfing the Internet Aboard Ship

What a difference a couple years has made. On previous cruises to Alaska and the Eastern Caribbean, Internet service was spotty at best and cost prohibitive on sea days. Typical connection rates were $25 or more per hour. You found yourself scrambling to find a bar with cheap Internet service every time you hit a port. But that was then. Here’s our 2015 update.

Carnival which owns the majority of the cruise ship companies (9 different brands) prides itself on making cruising affordable for almost any traveler. So we qualified. They’ve also revolutionized Internet service with rates on some ships (including ours) as low as $5 a day for unlimited (but basic) Internet connectivity. Here’s a typical pricing plan, but ours was even less expensive. $70 got us unlimited premium Internet service including Skype (one user at a time) for the entire 5-day cruise, and performance was surprisingly good, roughly triple the speed of the $5 a day plan and equivalent to or better than cellular 3G service regardless of the time of day. During early mornings, dinner hours, and when docked at a port, the speed difference from DSL was barely noticeable. Part of this is due to Carnival’s new hybrid Internet technology which blends satellite service with strategically placed Internet towers along your itinerary. The way it works is simple. You login with your account number and birthday, and you can stay logged in as long as you like. If another member of your family wishes to use the service, they simply login on a different device with the same account number and birthday. They’ll be prompted whether to bump you off. Clicking YES transfers the Internet connection to their device and terminates your connection. With three people, it worked amazingly well and was a wonderful testament to what it means to share. Complete details of the WiFi@Sea Internet program are available here. The rollout will be complete by the end of the first quarter in 2016.

We made roughly a dozen Skype calls to test the quality of the calls. With a couple of exceptions, the calls were roughly equivalent to what you would expect using a cable modem connection. With the two bad calls, it was obvious within a couple seconds, and the simple solution was to hang up and try again.

If you’re an Asterisk user, connectivity to an office or home server was easy by making a free call with Skype Connect which we documented just last week. Once connected to an AutoAttendant on the home server, using DISA to make secondary calls to other destinations at minimal cost was a no-brainer. The setup is simple, and we showed how to do it over 10 years ago. Today, it’s built into the GUI. We routed the incoming Skype calls to a Stealth AutoAttendant on the Asterisk server. By pressing an unannounced key during the welcome message, we were prompted for our DISA password. After entering it successfully, we were prompted for a number to dial. In our setup, this includes any number supported by our dialplan: local extensions, 10-digit NANPA numbers throughout the U.S., Canada, and 18 other north American countries as well as special dial codes to retrieve voicemails and other Asterisk functions.

Bottom Line: Do your homework before you book a cruise. Decide what your must-have’s for the cruise are and then compare prices.

Surfing the Internet from Your Car or Motorhome

The other eye-opener was the advances in cellular service along America’s interstates. 4G service now is available almost everywhere. Average download speeds were in the 20-40 Mb range. We used 7.18GB of data during 16 hours of travel. That works out to roughly a half gig per hour of travel with three users. YMMV! Funny how quickly 4G service rolled out once the (not so) Baby Bells got their monopoly back and could charge by the megabyte. We were one of the lucky ones to snag one of the few remaining Verizon unlimited data plans on eBay. Verizon now has tightened the screws and doesn’t allow transfer of the plans to others. But, if you’re one of the lucky ones that still pays over $100 a month for an unlimited data plan (Verizon just quietly raised the monthly charge by $20), then here’s some information for you. First, as part of the FCC’s 4G spectrum auction, bidders (Verizon in this case) were required to agree to the following condition as laid out in 47 C.F.R. 27.16:

(b) Use of devices and applications. Licensees offering service on spectrum subject to this section shall not deny, limit, or restrict the ability of their customers to use the devices and applications of their choice on the licensee’s C Block network, except:
(1) Insofar as such use would not be compliant with published technical standards reasonably necessary for the management or protection of the licensee’s network, or
(2) As required to comply with statute or applicable government regulation.

When Verizon won the auction, they reluctantly acknowledged a customer’s ability to move a SIM card from one device to another so long as the new device was on Verizon’s approved devices list. It doesn’t mean Verizon hasn’t dragged its feet on adding new approved devices, however. The important takeaway from this is that moving between approved devices appears to be safe even though there have been some reported problems. You’ll know whether you’re using a Verizon-approved device by examining your Verizon account to see if a picture of the new device shows up once you insert your SIM card.

So what does all of this have to do with surfing the Internet from your vehicle? Well, you have two choices. You can use your existing smartphone, enable tethering, and have multiple passengers surfing the Internet at 4G speeds with unlimited bandwidth. Or you can purchase a Verizon-approved Novatel T1114 4G Router on eBay and move your SIM card there for trips. Just be sure you buy one with the required 3.5W power adapter. Then add a $20 150W Power Inverter, and you’ve got a Mobile WiFi powerhouse plus a POTS phone connection… in your car.

If you’re one of the unlucky ones that doesn’t have an unlimited data plan with Verizon Wireless, there’s now another option if you live in an area with Sprint service. HINT: Sprint works great along most interstate highways in the United States. For $50 or less per month, you can set up a WiFi HotSpot in your vehicle with unlimited data using Karma Go. If you use our signup link, you get $10 off, and we get a $10 referral credit. There’s a 45-day money-back guarantee. For a great review of Karma Go, go here. And 2016 promises more choices with most new GM vehicles sporting an integrated WiFi HotSpot.


UPDATE: Karma Go this week began backing off from its unlimited Internet pledge. Seems these companies never learn the bait-and-switch lessons from those that preceded them… or they don’t want to. You can read all about it here.

1/18 UPDATE: Karma Go today announced that they were restoring the original 5 Gbit performance of the product but would cap usage at 15GB/month after which performance would be throttled to "speeds good enough for emailing and messaging."

NEWS FLASH: Beginning January 12, 2016, unlimited Internet plans return to AT&T Wireless for those that also subscribe to DirecTV or U-Verse. Details available here.

There’s more good news from our 1,000 mile travel adventure. We were late to this party, but what an awesome addition for those that travel for a living or just for vacations. If you’ve never tried Waze, add it to your smartphone right now! Not only do you get turn-by-turn directions to any destinations, but you also get road hazard alerts, automatic traffic rerouting to avoid bottlenecks, cheap gas price alerts, and… did we mention that in 1,000 miles it didn’t miss alerting us to every single speed trap. Police departments are government bureaucracies that have grown just like the rest of federal, state, and local government agencies. We counted nearly 100 police vehicles doing nothing but traffic enforcement. On 70 mile per hour Interstate highways, our unscientific survey showed that speeds increased to 75 miles per hour with no police presence compared to 69 miles per hour when a speed trap had been identified. It was readily apparent that truckers and frequent travelers have been using Waze long before us. What we kept asking ourselves was whether the cost of 100 police officers + 100 police cars + an enormous fuel bill was really worth it to slow folks down (momentarily) by 6 miles per hour. We hear a lot about government waste, but the police seem to get a pass on frugality by claiming they’re saving lives. We just didn’t see much of a correlation. It looked more like a game of cat and mouse. Happy New Year everybody. Don’t Drink and Drive!

Originally published: Monday, December 28, 2015


Need help with Asterisk? Visit the PBX in a Flash Forum.


Special Thanks to Our Generous Sponsors


FULL DISCLOSURE: ClearlyIP, Skyetel, Vitelity, DigitalOcean, Vultr, VoIP.ms, 3CX, Sangoma, TelecomsXchange and VitalPBX have provided financial support to Nerd Vittles and our open source projects through advertising, referral revenue, and/or merchandise. As an Amazon Associate and Best Buy Affiliate, we also earn from qualifying purchases. We’ve chosen these providers not the other way around. Our decisions are based upon their corporate reputation and the quality of their offerings and pricing. Our recommendations regarding technology are reached without regard to financial compensation except in situations in which comparable products at comparable pricing are available from multiple sources. In this limited case, we support our sponsors because our sponsors support us.

BOGO Bonaza: Enjoy state-of-the-art VoIP service with a $10 credit and half-price SIP service on up to $500 of Skyetel trunking with free number porting when you fund your Skyetel account. No limits on number of simultaneous calls. Quadruple data center redundancy. $25 monthly minimum spend required. Tutorial and sign up details are here.

The lynchpin of Incredible PBX 2020 and beyond is ClearlyIP components which bring management of FreePBX modules and SIP phone integration to a level never before available with any other Asterisk distribution. And now you can configure and reconfigure your new Incredible PBX phones from the convenience of the Incredible PBX GUI.

VitalPBX is perhaps the fastest-growing PBX offering based upon Asterisk with an installed presence in more than 100 countries worldwide. VitalPBX has generously provided a customized White Label version of Incredible PBX tailored for use with all Incredible PBX and VitalPBX custom applications. Follow this link for a free test drive!
 

Special Thanks to Vitelity. Vitelity is now Voyant Communications and has halted new registrations for the time being. Our special thanks to Vitelity for their unwavering financial support over many years and to the many Nerd Vittles readers who continue to enjoy the benefits of their service offerings. We will keep everyone posted on further developments.


Some Recent Nerd Vittles Articles of Interest…

Free at Last: Incredible PBX 13.2 ISO Supporting Bootable DVD-ROM and USB Flash Drives


[iframe-popup id="5″]
The Incredible PBX 13 ISO was getting long in the tooth. It’s been on the street almost two months. So we’re pleased to accept the Sangoma challenge and introduce the second-generation Incredible PBX 13.2 ISO. Like its predecessor, it’s 100% open source and GPL code. Perhaps now Sangoma will follow suit with their closed source ISO.

The new Incredible PBX 13.2 ISO can be burned to either a DVD-ROM or a 1GB or larger USB flash drive using a Mac, a Windows PC, or almost any Linux machine. And, unlike the FreePBX Distro, you’re more than welcome to share our code and the ISO with all of your friends and business associates. In fact, next week we’re releasing the entire Incredible PBX build platform for those of you that want to roll your own ISO. Share your enhancements and tweaks or make a customized ISO for just your company and pass it around. We’d be delighted. And our previous tutorial will even show you how to set up and maintain your own Cloud Repository for Incredible PBX. FREEDOM: THAT’S WHAT OPEN SOURCE IS ALL ABOUT!

NEWS FLASH: Check out the new Incredible PBX 13-13 ISO. Complete tutorial available here.

Introducing the Incredible PBX 13.2 ISO

Overview. The Incredible PBX installation process couldn’t be easier. Download IncrediblePBX13.2.iso from SourceForge. Burn the ISO to a DVD-ROM or USB thumb drive. Four different methods are outlined below. Need some great hardware for under $200? Read our tutorial. Or, if you have an old PC lying around, that’ll work, too. Boot up the dedicated machine on which you want to install Incredible PBX. Choose whether you prefer the Incredible PBX Whole Enchilada with 30+ applications for Asterisk or the Lean & Mean version which has its own separate tutorial here. Press the ENTER key. Choose your time zone, create a really secure root password, and have a coffee break. When Scientific Linux 6.7 has been installed, your server will reboot. Accept the Incredible PBX license agreement and press the ENTER key. Go to lunch and, when you return, you should be good to go. Finish reading this tutorial to add the finishing touches and secure your server. Then read the Incredible PBX Application Users Guide to learn all about the three dozen FREE applications for Asterisk® that are included in the build. DONE!

Let us take a moment to explain the Incredible PBX installation process using this ISO. We don’t hide stuff in our ISO or play games with your security. We don’t give ourselves or our application any secret permissions. There are just two steps to an Incredible PBX ISO install. When the install begins, it loads pure Scientific Linux onto your server,1 not some homegrown concoction using proprietary repositories. Your server then reboots. After restarting, the very latest copy of the Incredible PBX 13-12 installer is downloaded and run (see the actual source code of the script below). You’ll find the source code for the Incredible PBX installer in your /root directory after the install is completed: IncrediblePBX13-12R.sh. You’ll also find some other helpful scripts in /root including the optional (free) Incredible Fax installer. If you ever have a question about what was installed on your server, feel free to examine the source code of our installers or post a note on the PIAF Forum. It’s unencrypted GPL2 code. You’re free to use it, enhance it, and share it. Try that with Sangoma. It’s your choice!

%post
###############################################################
#
# Post Script - this script runs on Incredible PBX server
# immediately after Scientific Linux 6.7 install finishes
#
###############################################################
/usr/sbin/ntpdate -su pool.ntp.org
rpm -e readahead
/bin/sed -i 's|rhgb quiet||' /boot/grub/grub.conf
/bin/echo "/tmp/firstboot" >> /etc/rc.d/rc.local
/bin/echo "#!/bin/bash" > /tmp/firstboot
/bin/echo " " >> /tmp/firstboot
/bin/echo "NETDN=\`/bin/ping -c 1 incrediblepbx.com | /bin/grep incrediblepbx.com\`" >> /tmp/firstboot
/bin/echo "if [[ -z \$NETDN ]]; then" >> /tmp/firstboot
/bin/echo " read -p 'Network is down. Please fix. Then press RETURN to reboot and retry.'" >> /tmp/firstboot
/bin/echo " /sbin/reboot" >> /tmp/firstboot
/bin/echo " exit" >> /tmp/firstboot
/bin/echo "fi" >> /tmp/firstboot
/bin/echo "sed -i '/firstboot/d' /etc/rc.d/rc.local" >> /tmp/firstboot
/bin/echo "sed -i 's|NO_DM |NO_DM rhgb quiet|' /boot/grub/grub.conf" >> /tmp/firstboot
/bin/echo "cd /root" >> /tmp/firstboot
/bin/echo "wget http://incrediblepbx.com/incrediblepbx13-12.2-centos.tar.gz" >> /tmp/firstboot
/bin/echo "tar zxvf incrediblepbx13-12.2-centos.tar.gz" >> /tmp/firstboot
/bin/echo "rm -f incrediblepbx13-12.2-centos.tar.gz" >> /tmp/firstboot
/bin/echo "./Inc*" >> /tmp/firstboot
/bin/chmod +x /tmp/firstboot
eject
%end

Incredible PBX 13.2 ISO Installation Guide

Downloading the Incredible PBX 13.2 ISO. On the machine you’ll be using to create your installation media, download IncrediblePBX13.2.iso from SourceForge. Update: The 11/29/2015 version of the ISO had a bug that prevented proper installation of Incredible PBX Full Enchilada. The 12/01/2015 release fixed the problem.

Burning a DVD-ROM from the ISO. If your server platform doesn’t have USB support, then burn the ISO to a DVD using a Mac or Windows machine.

Creating a USB Flash Drive Installer. If your server platform has USB ports, you have three ways to move the Incredible PBX 13.2 ISO to a 1GB or larger flash drive. You can use a Windows PC, a Mac, or a Linux machine to create the USB thumb drive installer.

Creating a USB Flash Drive Installer with a Windows PC. In order to create a USB thumb drive using an ISO image, you’ll first need to install Rufus. It’s free. Once you’ve installed it, insert a blank USB thumb drive and run Rufus. Make your settings look like what’s shown above. Be very careful in choosing your Device. You don’t want to accidentally erase the wrong drive on your Windows machine. The correct choice is the USB thumb drive you just inserted. Don’t guess!! Step 2 is choosing the IncrediblePBX13.2.iso file that you downloaded from SourceForge. Step 3 is clicking Start. The ISOHybrid Window will be presented. Step 4 is changing the default setting to "Write in DD image mode." Step 5 is pressing OK. In a few minutes, your ISO image transfer to the USB flash drive will be finished. Give it 15 seconds just to be safe. Then remove the USB thumb drive and you’re ready to begin the install on your dedicated Incredible PBX server.

Creating a USB Flash Drive Installer with a Mac. To create a USB thumb drive using an ISO image on a Mac, first insert the USB thumb drive and partition it with a single MS-DOS partition using Disk Utility. Next, open a Terminal window and issue the command: diskutil list. Review the device names and find the one that matches the size of your thumb drive. It will be something like /dev/disk9. Again, be careful. You don’t want to accidentally erase the wrong drive on your Mac! Next, change to the directory into which you downloaded IncrediblePBX13.2.iso, e.g. cd Desktop. Now issue the following commands substituting the actual device name for /dev/disk9 below:

diskutil unmountDisk /dev/disk9
sudo dd if=IncrediblePBX13.2.iso bs=1m of=/dev/disk9
sudo sync
diskutil eject /dev/disk9

When the install completes, remove the USB thumb drive and you’re ready to begin the install on your dedicated Incredible PBX server. NOTE: There will be no feedback during the dd step above. It can take 15 minutes or more depending upon the horsepower of your Mac. Be patient!

Creating a USB Flash Drive Installer on a Linux machine. To create a USB thumb drive using an ISO image on a Linux machine, first log into your server as root. Insert a blank USB thumb drive. From the CLI, decipher the device name of your thumb drive: fdisk -l. The device name will be something like /dev/sdb. Be careful. You don’t want to accidentally erase the wrong drive on your Linux server! Change to the directory into which you downloaded IncrediblePBX13.2.iso, e.g. cd /root. To transfer the ISO to your thumb drive, issue the following commands replacing /dev/sdb with the actual device name for your thumb drive in lines 1 and 3 below:

dd if=IncrediblePBX13.2.iso bs=4M of=/dev/sdb
sync
udisks --detach /dev/sdb

When the install completes, remove the USB thumb drive and you’re ready to begin the install on your dedicated Incredible PBX server. NOTE: There will be no feedback during the dd step above. It can take 5 to 15 minutes depending upon the horsepower of your Linux machine.

Kicking Off the Incredible PBX 13 Install. Now we’re ready to install Incredible PBX 13 on your dedicated server platform. Simply insert the DVD-ROM or USB thumb drive in your server-to-be and boot. During the POST boot process, press the function key that displays a Boot Device Menu and choose your DVD-ROM drive or USB device. When the Incredible PBX 13 installation menu displays, choose Basic Install and press ENTER. Choose your time zone, create a really secure root password, and have a coffee break. When Scientific Linux 6.7 has been installed, your server will reboot. Accept the Incredible PBX license agreement and press the ENTER key. Go to lunch and, when you return, you should be good to go. When the installation finishes, reboot your server and log in as root to apply the last minute updates for Incredible PBX.

To complete the install, perform the following from the Linux CLI while logged in as root:

  • Change your root password if it’s insecure: passwd
  • Set your Incredible GUI admin password: /root/admin-pw-change
  • Set your web apps admin password: htpasswd /etc/pbx/wwwpasswd admin
  • Set your correct time zone: /root/timezone-setup
  • Add WhiteList entries to firewall if needed: /root/add-ip or /root/add-fqdn
  • Store PortKnocker credentials in a safe place: cat /root/knock.FAQ
  • *** THE REMAINING FEATURES ARE OPTIONAL ADDITIONS ***
  • Login to your NeoRouter VPN server: /root/nrclientcmd
  • Download latest Incredible Fax installer: http://nerd.bz/2nSeHKs
  • To enable free faxing: /root/incrediblefax11.sh
  • Set admin password for AvantFax: /root/avantfax-pw-change
  • To enable PPTP VPN: /root/pptp-install
  • To enable Google Voice OAUTH authentication: http://nerd.bz/1JaO4ij (1b.)
  • To remove GPL Module Signature Checking in GUI: http://nerd.bz/1fpwZJL
  • To install FCC RoboCall BlackList: http://nerdvittles.com/?p=15412
  • To upgrade Asterisk to current release2: /root/upgrade-asterisk-to-current
  • To upgrade all FreePBX GPL Modules: /var/lib/asterisk/bin/module_admin upgradeall && rm -f /tmp/* && amportal a r

Managing Your Server with Incredible PBX Web-Based Tools

Most of your time initially configuring and managing your server will be spent using the web-based tools provided with Incredible PBX. Using any modern browser, go to the IP address of your server as shown in the status display above. This will bring up the Kennonsoft GUI that provides access to all of the web-based applications. Toggle between User and Admin apps by clicking on the blue tab in the lower left section of the display. This GUI also displays the latest security alerts and bug fixes from the PIAF RSS Feed. We recommend you check it at least once a week.

The other GUI to configure the FreePBX® GPL modules is accessed from the Admin menu in the Kennonsoft menus. Choose Incredible GUI Administration. The default username is admin and the password is what you set during the final installation steps above. Once the Incredible PBX GUI appears, edit extension 701 so you can figure out (or change) the randomized passwords that were set up for your 701 extension and voicemail account: Applications -> Extensions -> 701. If you’re behind a hardware-based firewall, verify the NAT setting is set to YES.

Setting Up a Soft Phone to Use with Incredible PBX

Now you’re ready to set up a telephone so that you can play with Incredible PBX. We recommend YateClient which is free. Download it from here. Run YateClient once you’ve installed it and enter the credentials for the 701 extension on Incredible PBX. You’ll need the IP address of your server plus your extension 701 password. Choose Settings -> Accounts and click the New button. Fill in the blanks using the IP address of your server, 701 for your account name, and whatever password you created for the extension. Click OK.

Once you are registered to extension 701, close the Account window. Then click on YATE’s Telephony Tab and place some test calls to the numerous apps that are preconfigured on Incredible PBX. Dial a few of these to get started:


DEMO - Allison's IVR Demo
947 - Weather by ZIP Code
951 - Yahoo News
*61 - Time of Day
*68 - Wakeup Call
TODAY - Today in History

Now you’re ready to connect to the telephones in the rest of the world. If you live in the U.S., the easiest way (at least for now) is to set up a free Google Voice account. Google has threatened to shut this down but as this is written, it still works. Upgrading your server for OAUTH authentication is covered here. Start at step #1b. The safer long-term solution is to choose several SIP providers and set up redundant trunks for your incoming and outbound calls. The PIAF Forum includes dozens of recommendations to get you started.

Configuring Google Voice

If you want to use Google Voice, you’ll need a dedicated Google Voice account to support Incredible PBX. If you want to use the inbound fax capabilities of Incredible Fax, then you’ll need an additional Google Voice line that can be routed to the FAX custom destination using the GUI. The more obscure the username (with some embedded numbers), the better off you will be. This will keep folks from bombarding you with unsolicited Gtalk chat messages, and who knows what nefarious scheme will be discovered using Google messaging six months from now. So keep this account a secret!

We’ve tested this extensively using an existing Gmail account, and inbound calling is just not reliable. The reason seems to be that Google always chooses Gmail chat as the inbound call destination if there are multiple registrations from the same IP address. So, be reasonable. Do it our way! Set up a dedicated Gmail and Google Voice account, and use it exclusively with Incredible PBX. It’s free at least through 2013. Google Voice no longer is by invitation only so, if you’re in the U.S. or have a friend that is, head over to the Google Voice site and register.

You must choose a telephone number (aka DID) for your new account, or Google Voice calling will not work… in either direction. Google used to permit outbound Gtalk calls using a fake CallerID, but that obviously led to abuse so it’s over! You also have to tie your Google Voice account to at least one working phone number as part of the initial setup process. Your cellphone number will work just fine. Don’t skip this step either. Just enter the provided 2-digit confirmation code when you tell Google to place the test call to the phone number you entered. Once the number is registered, you can disable it if you’d like in Settings, Voice Setting, Phones. But…

IMPORTANT: Be sure to enable the Google Chat option as one of your phone destinations in Settings, Voice Setting, Phones. That’s the destination we need for The Incredible PBX to work its magic! Otherwise, all inbound and outbound calls will fail. If you don’t see this option, you may need to call up Gmail and enable Google Chat there first. Then go back to the Google Voice Settings.

While you’re still in Google Voice Settings, click on the Calls tab. Make sure your settings match these:

  • Call ScreeningOFF
  • Call PresentationOFF
  • Caller ID (In)Display Caller’s Number
  • Caller ID (Out)Don’t Change Anything
  • Do Not DisturbOFF
  • Call Options (Enable Recording)OFF
  • Global Spam FilteringON

Click Save Changes once you adjust your settings. Under the Voicemail tab, plug in your email address so you get notified of new voicemails. Down the road, receipt of a Google Voice voicemail will be a big hint that something has come unglued on your PBX.

UPDATE: Google has improved things… again. You may not see the options documented above at all. Instead, you may be presented with the new Google Voice interface which does not include the Google Chat option. But fear not. At least for now there’s still a way to get there. After you have set up your new phone number, click on (1) Settings -> Phone Numbers and then click (2) Transfer (as shown below). That returned the old UI. Make sure the Google Chat option is selected and disable forwarding calls to default phone number.


One final word of caution is in order regardless of your choice of providers: Do NOT use special characters in any provider passwords, or nothing will work!

Now you’re ready to set up your Google Voice trunk in the GUI. After logging in with your browser, click the Connectivity tab and choose Google Voice/Motif. To Add a new Google Voice account, just fill out the form. Do NOT check the third box or incoming calls will never ring!

IMPORTANT LAST STEP: Google Voice will not work unless you restart Asterisk from the Linux command line at this juncture. Using SSH, log into your server as root and issue the following command: amportal restart.

If you have trouble getting Google Voice to work (especially if you have previously used your Google Voice account from a different IP address), try this Google Voice Reset Procedure. It usually fixes connectivity problems. If it still doesn’t work, enable Less Secure Apps using this Google tool.

Troubleshooting Audio and DTMF Problems

You can avoid one-way audio on calls and touchtones that don’t work with these simple settings in the GUI: Settings -> Asterisk SIP Settings. Just plug in your public IP address and your private IP subnet. Then set ULAW as the only Audio Codec.

A Few Words About Our Security Model

Incredible PBX for Scientific Linux joins our previous builds as our most secure turnkey PBX implementation. As configured, it is protected by both Fail2Ban and a hardened configuration of the IPtables Linux firewall. The latest release also includes Port Knocker for simple, secure access from any remote computer or smartphone. You can get up to speed on how the technology works by reading the Nerd Vittles tutorial. Your Port Knocker credentials are stored in /root/knock.FAQ together with activation instructions for your server and mobile devices. The NeoRouter VPN client also is included for rock-solid, secure connectivity to remote users. Read our previous tutorial for setup instructions. As configured, nobody can access your PBX without your credentials AND an IP address that is either on your private network or that matches the IP address of your server or the PC from which you installed Incredible PBX. You can whitelist additional IP addresses by running the command-line utility /root/add-ip. You can remove whitelisted IP addresses by running /root/del-acct. Incredible PBX is preconfigured to let you connect to many of the leading SIP hosting providers without additional firewall tweaking. We always recommend you also add an extra layer of protection by running your server behind a hardware-based firewall with no Internet port exposure, but that’s your call. And it’s your phone bill. 😉

The IPtables firewall is a complex piece of software. If you need assistance with configuring it, visit the PIAF Forum for some friendly assistance.

Incredible Backup and Restore

We’re pleased to introduce our latest backup and restore utilities for Incredible PBX. Running /root/incrediblebackup will create a backup image of your server in /tmp. This backup image then can be copied to any other medium desired for storage. To restore it to another Incredible PBX server, simply copy the image to a server running Asterisk 13 and the same version of the Incredible PBX GUI. Then run /root/incrediblerestore. Doesn’t get much simpler than that.

Incredible PBX Automatic Update Utility

Every time you log into your server as root, Incredible PBX will ping the IncrediblePBX.com web site to determine whether one or more updates are available to bring your server up to current specs. We recommend you log in at least once a week just in case some new security vulnerability should come along. We originally had planned to make our fortune off update fees, but we changed our mind. So… contrary to the language in some of our builds, contributions to our projects are PURELY VOLUNTARY. You’ll get every update as it’s released whether you financially support our projects or not. Why haven’t we fixed the language? Good question. The short answer is it’s buried deep in the GUI image that would have to be regenerated from scratch. We’ll get to it one of these days. In the meantime, sleep soundly. No one will be breaking down your door for a donation.

We also encourage you to sign up for an account on the PIAF Forum and join the discussion. In addition to providing first-class, free support, we think you’ll enjoy the camaraderie.

Incredible PBX Application Users Guide

Your next stop ought to be learning about the three dozen applications included in Incredible PBX. We’ve put together this tutorial to get you started. Enjoy!

Originally published: Sunday, November 22, 2015


Support Issues. With any application as sophisticated as this one, you’re bound to have questions. Blog comments are a terrible place to handle support issues although we welcome general comments about our articles and software. If you have particular support issues, we encourage you to get actively involved in the PBX in a Flash Forums. It’s the best Asterisk tech support site in the business, and it’s all free! Please have a look and post your support questions there. Unlike some forums, ours is extremely friendly and is supported by literally hundreds of Asterisk gurus and thousands of users just like you. You won’t have to wait long for an answer to your question.


Special Thanks to Our Generous Sponsors


FULL DISCLOSURE: ClearlyIP, Skyetel, Vitelity, DigitalOcean, Vultr, VoIP.ms, 3CX, Sangoma, TelecomsXchange and VitalPBX have provided financial support to Nerd Vittles and our open source projects through advertising, referral revenue, and/or merchandise. As an Amazon Associate and Best Buy Affiliate, we also earn from qualifying purchases. We’ve chosen these providers not the other way around. Our decisions are based upon their corporate reputation and the quality of their offerings and pricing. Our recommendations regarding technology are reached without regard to financial compensation except in situations in which comparable products at comparable pricing are available from multiple sources. In this limited case, we support our sponsors because our sponsors support us.

BOGO Bonaza: Enjoy state-of-the-art VoIP service with a $10 credit and half-price SIP service on up to $500 of Skyetel trunking with free number porting when you fund your Skyetel account. No limits on number of simultaneous calls. Quadruple data center redundancy. $25 monthly minimum spend required. Tutorial and sign up details are here.

The lynchpin of Incredible PBX 2020 and beyond is ClearlyIP components which bring management of FreePBX modules and SIP phone integration to a level never before available with any other Asterisk distribution. And now you can configure and reconfigure your new Incredible PBX phones from the convenience of the Incredible PBX GUI.

VitalPBX is perhaps the fastest-growing PBX offering based upon Asterisk with an installed presence in more than 100 countries worldwide. VitalPBX has generously provided a customized White Label version of Incredible PBX tailored for use with all Incredible PBX and VitalPBX custom applications. Follow this link for a free test drive!
 

Special Thanks to Vitelity. Vitelity is now Voyant Communications and has halted new registrations for the time being. Our special thanks to Vitelity for their unwavering financial support over many years and to the many Nerd Vittles readers who continue to enjoy the benefits of their service offerings. We will keep everyone posted on further developments.


Some Recent Nerd Vittles Articles of Interest…

  1. If you’re wondering what packages are installed with Scientific Linux, come back next week and download the entire Incredible PBX ISO build environment. All of the packages installed on your server are included in the build platform itself. Feel free to add to them or change them to your heart’s content. We don’t have a million dollar staff. That’s why we depend upon folks like you to offer suggestions and enhancements. In short, we treat Incredible PBX like a real open source project. Come join the fun! []
  2. This is unnecessary when you first install Incredible PBX because it automatically installs the latest version of Asterisk 13. []

Sleep Well: Deploy Certified Incredible PBX Builds for Mission Critical Systems

2015 marks the year we finally settled upon an Asterisk® platform that was not only feature rich but also easy to deploy and maintain. Incredible PBX™ began as an add-on feature set for PBX in a Flash™. But we really wanted a pure open source platform that was built from the ground up. So we introduced a number of stand-alone installers that could be deployed using existing Linux platforms: CentOS, Ubuntu, Debian, Raspbian, and even FreePBX® Distro’s SHMZ. These continue to be our "best sellers" even though we give them away. With the exception of SHMZ, the beauty of the other stand-alone installers is you can use them anywhere whether it’s a Raspberry Pi® or in the Cloud1 with RentPBX or Digital Ocean. But there were some that preferred either dedicated hardware or in-house virtual machine platforms such as VirtualBox and Proxmox. For these platforms, a two-step OS and Incredible PBX install procedure was a hassle. So we introduced an ISO build of Incredible PBX with a superset of Scientific Linux 6.7 preconfigured. And finally we added snapshot images for VirtualBox and Proxmox. What used to take hours has been reduced to less than 30 seconds on the Proxmox 4 KVM platform. With Incredible PBX, it’s all about choice and the FREEDOM to choose with NoGotchas!

Along the way, we experimented with a number of other hardware platforms, and we even tried several other management GUI’s for Asterisk. But there comes a time when you have to sharpen your focus and produce a product that is something other than experimental. And that’s why we are pleased to introduce the new Certified Incredible PBX Builds. These are robust unified communications solutions that we not only test regularly but also use ourselves. Yes, we eat our own dog food.

So where do you begin? We documented a simple, 3-Step Decision Tree to guide you through the process of choosing a GPL platform and VoIP communications solution that’s right for you. You can take it for a spin here or read the complete tutorial.

The more difficult question is deciding how to host your Unified Communications server. Do you want to maintain it yourself, or do you prefer that someone else maintain either the hardware or software or both? We can’t really answer that for you without a great deal of additional information. What we can tell you is that experimentation is a wonderful thing, and you’ll learn an awful lot in the process. Take advantage of the PIAF Forum. There are hundreds of VoIP experts and 10,000+ members to help with your new adventure. Building systems with Incredible PBX is a process that, in the worst case, takes under an hour. And, in the best case, it takes under 30 seconds. So our advice is try several Cloud approaches and, if you have some old hardware lying around the house, try that option as well. We would hasten to add that we don’t recommend running your phone system on old hardware permanently. If you choose the stand-alone server route, invest $200 and get our recommended Intel® NUC or invest $100 and put a Raspberry Pi 2 platform into production. Both are easy to back up and restore. If you’re a dedicated iMac user with processing power and RAM to spare, then the VirtualBox solution really is a no-brainer. It doesn’t cost you a dime, and you’ll never know your phone system is operating as a virtual machine.

The Incredible PBX Gold Standard

We get emails all the time that go something like this. "Cut the crap. You’re the expert. Just tell me the platform that you use and would recommend." Fair enough. Here you go. We experiment on Cloud-based servers almost daily. We have a virtual machine at RentPBX that has run non-stop for years without a hiccup. Use our $15/month coupon code if you sign up: NOGOTCHAS. We build and tear down systems at Digital Ocean and CloudAtCost and Wable almost daily. These three have the added advantage of letting you take snapshots of your virtual machines. Snapshots can be restored in minutes. While CloudAtCost is a good sandbox, don’t even think about using it in production!

The system we recommend for SOHO and small businesses is $200 dedicated hardware, an Intel NUC. The software is Incredible PBX 13 ISO. The server is powerful, quiet, tiny, and easy to back up using Clonezilla and an external USB drive. Our production machine doesn’t change much for months at a time. Once configured, yours probably won’t either. Don’t go update crazy! Apply updates and upgrades only when something doesn’t work or you need a new feature. If it ain’t broke…

A Few Words About Incredible PBX Applications for Asterisk

Asterisk is a complex telephony platform. Don’t expect to learn it all in a day. We’ve been at it for 10 years, and there’s still much that we don’t know. On top of Asterisk, we’ve added over three dozen Asterisk applications. And, yes, there is documentation. Spend a little time with the tutorial, and it will improve your appreciation for Asterisk 1000%.

A Few Words About Google Voice OAUTH Authentication

We have been a strong proponent of Google Voice for many years. Why? Because in the United States, you can make limitless calls to the U.S. and Canada for free. Faxes work, too. Just don’t put all of your eggs in the Google Voice basket. It does break, and Google regularly "improves" things. Thus far, we’ve always managed to get things going again thanks to some very talented telephony gurus around the globe. The one component of Google Voice that Google continues to threaten to shut down is the use of plain text passwords for authentication. With Incredible PBX, you can do something about that by implementing OAUTH authentication on your server. We’ve written a simple tutorial to guide you through implementation and use of OAUTH 2.0 with Google Voice. Please read it before your Google Voice trunks suddenly drop dead.

A Few Words About Security and Firewalls

If you have a phone system that is exposed to the Internet, the bad guys are going to attempt to make calls on your nickel forever. No firewall means sooner or later you’re going to get hit with a very expensive phone bill. Some of the horror stories include charges of over $100,000 in a single month.

Incredible PBX includes a sophisticated firewall that is locked down to private networks, preferred (by us) VoIP providers, and the IP addresses of your desktop computer and your server. Don’t disable it!

We do not recommend using Incredible PBX on the Amazon EC2 platform for the simple reason that Amazon treats all customers as part of the same private LAN. This defeats the security provided by the Incredible PBX firewall and leaves your extension and trunk passwords as your only line of defense. Yes, there are bad guys using Amazon. You’ve been warned.

If you opt to host your own dedicated server for Incredible PBX, we strongly recommend that you place the server behind a hardware-based firewall in addition to the IPtables firewall provided as part of every Incredible PBX build. Two firewalls are almost always better than one. It’s one more nut to crack for the bad guys.

Finally, a word about the new FreePBX Firewall. Don’t. Good network practices suggest that a firewall should be as separated from your applications as possible. The IPtables firewall used by Incredible PBX is only accessible through SSH or the console with root login. It also requires root permissions for any type of modification to its setup. The FreePBX firewall is an integral component of FreePBX and is accessible through the FreePBX GUI itself using the standard FreePBX admin credentials. In addition, during the first week, a vulnerability was reported which resulted in a root vulnerability. What’s puzzling about that is the fact that FreePBX itself traditionally has not operated with root permissions which suggests that other changes have been made in the GUI so that the user account separation between the asterisk user account and the root user account has now been compromised, a very dangerous new development. If this is ever explained, we will pass it on.


https://twitter.com/0x00string/status/655513518578339841

A Few Words About Module Repositories

FreePBX 12 GPL modules are an integral component of Incredible PBX. Why don’t we use "pure" FreePBX 12? The short answer is Sangoma® has integrated a hidden module repository into FreePBX 12. It is comprised of modified FreePBX 12 modules that are not provided on any publicly-accessible web site. Yes, FreePBX 12 GPL modules are available through their GIT repository, but these modules differ from the ones that actually make FreePBX 12 work properly (see next section). As a result, we have chosen to build and use a public module repository for FreePBX 12 GPL modules included in Incredible PBX. For further details, see this Nerd Vittles article. To access our public repository of FreePBX 12 GPL modules, go here.

A Few Words About Module Signatures

With FreePBX 12, Sangoma also has chosen to bar use of competitor’s commercial modules within the product. In addition, Sangoma has implemented a module signature scheme which results in nasty security alerts whenever a compatible FreePBX module is included in the GUI that was not produced or approved for inclusion by Sangoma giving the impression that your server has been compromised. As a result, we have chosen to disable module signature checking by default with Incredible PBX. As changes are made within the GUI, the nasty warnings reappear. We have included the gui-fix script to again disable signature checking. A permanent fix which eliminates signature checking permanently is available here.

A Few Words About Asterisk Upgrades

When you install Incredible PBX, you automatically get the latest and greatest version of Asterisk. Depending upon the installer used, you get either Asterisk 11 or 13. Both versions of Asterisk get regular upgrades provided by Digium®. As with updates, our recommendation is to not apply upgrades unless you actually need a new feature or your existing server is experiencing problems related to the version of Asterisk you are running. We have provided an upgrade utility to make the upgrade process painless. It will NOT move you from Asterisk 11 to 13. It only moves you to the latest release in the version of Asterisk you already have installed.2 In the case of Asterisk 13, the upgrade utility will preserve Google Voice OAUTH authentication if you have previously applied the Asterisk 13 patch as documented above. To upgrade your server, log in as root and issue the following commands:

cd /root
wget http://incrediblepbx.com/upgrade-asterisk-to-current.tar.gz
tar zxvf upgrade-asterisk-to-current.tar.gz
rm -f upgrade-asterisk-to-current.tar.gz
./upgrade-asterisk-to-current

A Few Words About Backups

There are two kinds of administrators in the world: those that make regular backups and those that don’t. Only the first category of administrators generally keep their jobs. Whether you do this for a living or for fun, you are strongly encouraged to make regular backups of your server. There are two types of backups: full system backups and incremental backups using the incrediblebackup script. You need both. For dedicated servers, we recommend you obtain the free Clonezilla application for full system backups. Used in conjunction with an external USB drive, it provides excellent results. For those using Incredible PBX in a virtualized environment, we recommend you use the snapshot utility included on your platform to make periodic backups. Backups should always be stored in a location separate from that of your server or virtual machine.

Originally published: Monday, October 26, 2015


Support Issues. With any application as sophisticated as this one, you’re bound to have questions. Blog comments are a terrible place to handle support issues although we welcome general comments about our articles and software. If you have particular support issues, we encourage you to get actively involved in the PBX in a Flash Forums. It’s the best Asterisk tech support site in the business, and it’s all free! Please have a look and post your support questions there. Unlike some forums, ours is extremely friendly and is supported by literally hundreds of Asterisk gurus and thousands of users just like you. You won’t have to wait long for an answer to your question.


Need help with Asterisk? Visit the PBX in a Flash Forum.


Special Thanks to Our Generous Sponsors


FULL DISCLOSURE: ClearlyIP, Skyetel, Vitelity, DigitalOcean, Vultr, VoIP.ms, 3CX, Sangoma, TelecomsXchange and VitalPBX have provided financial support to Nerd Vittles and our open source projects through advertising, referral revenue, and/or merchandise. As an Amazon Associate and Best Buy Affiliate, we also earn from qualifying purchases. We’ve chosen these providers not the other way around. Our decisions are based upon their corporate reputation and the quality of their offerings and pricing. Our recommendations regarding technology are reached without regard to financial compensation except in situations in which comparable products at comparable pricing are available from multiple sources. In this limited case, we support our sponsors because our sponsors support us.

BOGO Bonaza: Enjoy state-of-the-art VoIP service with a $10 credit and half-price SIP service on up to $500 of Skyetel trunking with free number porting when you fund your Skyetel account. No limits on number of simultaneous calls. Quadruple data center redundancy. $25 monthly minimum spend required. Tutorial and sign up details are here.

The lynchpin of Incredible PBX 2020 and beyond is ClearlyIP components which bring management of FreePBX modules and SIP phone integration to a level never before available with any other Asterisk distribution. And now you can configure and reconfigure your new Incredible PBX phones from the convenience of the Incredible PBX GUI.

VitalPBX is perhaps the fastest-growing PBX offering based upon Asterisk with an installed presence in more than 100 countries worldwide. VitalPBX has generously provided a customized White Label version of Incredible PBX tailored for use with all Incredible PBX and VitalPBX custom applications. Follow this link for a free test drive!
 

Special Thanks to Vitelity. Vitelity is now Voyant Communications and has halted new registrations for the time being. Our special thanks to Vitelity for their unwavering financial support over many years and to the many Nerd Vittles readers who continue to enjoy the benefits of their service offerings. We will keep everyone posted on further developments.


Some Recent Nerd Vittles Articles of Interest…

  1. Some of our links refer users to service providers when we find their prices are competitive for the recommended products. Nerd Vittles receives a small referral fee or advertising revenue from some of these providers to help cover the costs of our blog. We never recommend particular products solely to generate commissions. However, when pricing is comparable or availability is favorable, we support these providers because they support us. []
  2. Some of the FreePBX Distro cheerleaders have touted the beauty of their NagWare noting that you can move back and forth between Asterisk 11 and 13. The question is why would anyone ever want to move back to Asterisk 11 after migrating to Asterisk 13. So we’re talking about a one-time reinstall followed by a restore using Incredible Backup and Restore from your Asterisk 11 server. Can you say lunch break? []

The 30-Second PBX: Introducing Proxmox 4 for the Intel NUC and Asterisk 13

With the advent of cloud-based computing and desktop virtual machine platforms like VirtualBox, we haven’t played with dedicated hardware for Asterisk® in a couple of years. WOW! It’s just amazing the quantum leaps in miniaturization, price, and performance that have transpired during our absence. Last week, we introduced a dedicated server platform for under $200 that could serve as a small business PBX for almost any 20-30 person organization. Today, meet Big Brother. You’re looking at all the components that make up the $500 Intel® NUC D54250WYK with a Core i5 dual-core processor, a 250GB mSATA drive, and 16GB of RAM. While you install the RAM and disk drive yourself, if you can unscrew 5 screws and have 5 minutes to spare, you can handle this. With the addition of the just released (free) Proxmox 4 virtualization platform, it can run a half dozen powerful stand-alone applications without ever breaking a sweat. Little wonder that Digital Ocean and CloudAtCost are all but giving away server resources. They almost have to given the developments in stand-alone hardware.

Buying Your Hardware

So here’s how we started. Of course, you can adjust the components and the merchant to meet your own requirements. For us, Amazon1 works great, and the prices are competitive. Who else delivers on Sunday? Despite the notice that the computer would be here on Monday, we knew better. And sure enough it was in the box with the other Sunday goodies. Remove the four screws from the bottom feet of the computer, and the case opens easily. Next, unscrew the screw from the bottom of the motherboard that holds the SSD drive in place securely. Snap in the mSATA drive and the two memory sticks, replace the screws, and you’re in business.

Initial Setup of the Intel NUC Platform

Our unit actually came with the latest BIOS preinstalled, but you’ll want to always upgrade the BIOS on any Intel motherboard. Everything generally gets better with each new upgrade. The rest of the firmware is fine as is unless you plan to use the computer as a Windows machine. You’ll find all the downloads here. The firmware you want is version 0041, and the file you want is WY0041.BIO. Copy it to the top level directory of a DOS-formatted USB flash drive using any desktop computer. On the Intel NUC, plug in a USB keyboard and mouse as well as the USB flash drive and a USB CD/DVD drive. Then connect a network cable. Finally, connect a monitor using a microHDMI to HDMI cable, and you’re all set. Once we’re finished configuring the Intel NUC, you can stick it on a shelf that has power and a network connection. No other peripherals are necessary as everything can be managed through SSH or a web browser.

To upgrade the BIOS, boot the computer by plugging it in and pressing the power button on top. Press F7 during the initial POST, choose the USB flash drive, select the .BIO file, and press ENTER. Once the BIOS is loaded, the machine will reboot.

Introducing Proxmox 4.0 Virtual Environment

When it comes to virtualization, we’ve been big fans of Proxmox for a very long time. We introduced Proxmox for VoIP virtualization over six years ago. Things have come a long way since then. And Proxmox VE 4.0 is the culmination of years of hard work by a very talented development team. You can read all about the new feature set and support for KVM and Linux Containers here. Our own take on virtualization is that OpenVZ templates were appealing because they installed and loaded quickly. The downside was they shared a single (proprietary) kernel which often led to security issues and made firewall implementation at the virtual machine level difficult. Of course, any applications such as DAHDI that required kernel implementation were extremely complex to implement and use. Now that almost all of Intel’s and AMD’s processors support virtualization extensions (Intel VT or AMD-V), we were not one to shed tears when Proxmox dropped support for OpenVZ and replaced it with Linux Containers. In fact, for our purposes, they could have left out Linux Containers as well. They suffer from some of the same quirks that made OpenVZ implementations problematic. The platform we’ve chosen for VoIP implementation has full support for virtualization extensions which means you can load and run complex applications such as Windows and Incredible PBX just as if you were using standalone hardware. The only real difference is we’re going to provide a template for building KVM-based Incredible PBX virtual machines in under 30 seconds. So you’ll get the best of both worlds, standalone computer functionality coupled with jaw-dropping implementation speed. For those that train or support multiple independent organizations as well as those that love to tinker and experiment, our solution has no equal.

To begin, download the Proxmox VE 4.0 ISO and burn it to a CD or DVD.

As we mentioned last week, if you don’t happen to have one, LG’s tiny USB-powered DVD Writer is the best $25 you will ever spend. And they keep getting cheaper!

Installing Proxmox VE 4.0 on the Intel NUC

Now we’re ready to get started. Insert the Proxmox VE 4.0 CD into the drive connected to your Intel NUC and boot the machine. Press F10 during POST and choose the CD/DVD drive to start the Proxmox install. Accept the license agreement and fill in the blanks. The important piece is to give your server a hostname. Just be sure it starts with proxmox4, e.g. proxmox4.incrediblepbx.com or use your own domain: proxmox4.yourdomain.com. The actual domain becomes important only if your server will be directly connected to the Internet in which case the FQDN obviously matters. Otherwise, Proxmox needs the hostname to manage things internally. Assign a permanent IP address for your server or use DHCP to obtain an IP address and then reserve that IP address for use by Proxmox in your router’s settings. Either way works fine, but you don’t want the IP address changing down the road.

BIOS Adjustments to Support Proxmox VE 4.0

Once the Proxmox install completes, it’s time to reboot. During the POST, press F2 to access Intel’s Visual BIOS. If you followed along last week, you’ll recall that we made some changes to accommodate Legacy booting of the server in lieu of UEFI. This week we need a different approach because of some quirks in the Proxmox server implementation procedure. We pulled our hair out (what little is left) for a couple days wrestling with this because the server wouldn’t automatically boot in either Legacy boot mode OR UEFI mode. The reason is because Proxmox puts a GPT label on the drive signifying that it’s a UEFI-compatible device whether UEFI is disabled in the BIOS or not. This confuses the Intel NUC bootloader. So you end up with a boot failure and the cryptic message "No boot device found." Proxmox blames Intel for a buggy BIOS even though Intel developed the GPT specification. If you enjoy food fights, break out the popcorn and enjoy the dialog on the Proxmox Forum. Suffice it to say, there’s a difference of opinion about who should fix this. Here’s the easy way to resolve the impasse.

In Visual BIOS, click Advanced tab. Click Boot tab. Click Boot Priority. Make it look like this:

If the BuiltIn EFI Shell option doesn’t appear, don’t worry about it. Just press F10 to save your changes anyway. When your server reboots, it will drop into the EFI shell. Type the following commands pressing ENTER after each entry:

fs0:
echo "fs0:\EFI\proxmox\grubx64.efi" > fs0:\startup.nsh
startup.nsh

At this point, your server should boot into Proxmox. On reboot, the EFI shell will appear momentarily followed by an automatic boot into Proxmox. Solved!

Using Incredible PBX with Proxmox 4.0

You now have a functioning Proxmox server. When you reboot and login as root, the server will tell you how to access the Proxmox GUI with your browser. Before we put the necessary pieces in place to support Incredible PBX, we want to provide a very brief technical overview of how best to use Proxmox virtualization based upon our testing. Using a methodology similar to that demonstrated by AVOXI using Docker at this year’s AstriCon meeting, we use a backup image to instantiate "KVM containers." We hear some of you saying, "There’s no such animal." And right you are. The nomenclature is different, but the concept is similar. In fact, our simulated KVM Containers work exactly like OpenVZ and Linux Containers with none of the drawbacks of a shared kernel. And the good news is Proxmox 4 implements this perfectly through its backup and restore mechanisms. New kernel-based virtual machines can be created in under 30 seconds. Following initial login to a new KVM as root from the console, we individualize the KVM by randomizing passwords, creating new SSH credentials, and setting up a custom whitelist for the Incredible PBX IPtables firewall. The initialization procedure takes less than a minute and is only run the first time you log into your new KVM as root. The bash init script is here: /etc/profile.d/helloworld.sh.

Preliminary Setup Steps with Proxmox 4.0

The most important setup step is to put your Proxmox server behind a hardware-based firewall or configure the built-in firewall to keep out the bad guys. Proxmox has had their share of security vulnerabilities over the years so this is really critical. It’s beyond the scope of this article to walk through the entire firewall setup process, but you’ll find plenty of literature on the Proxmox Wiki and Forum as well as on the Internet. Each of your KVMs will have its own preconfigured whitelist using the IPtables firewall, and any of the Incredible PBX tutorials can walk you through adding and changing entries in those whitelists.

To use the backup and restore functionality of Proxmox, you’ll need to create a backup storage directory in the Proxmox GUI. After logging in as root, click Datacenter in the Server View, click the Storage tab, click the Add button, and choose Directory from the pulldown list. Fill in the blanks like this using VZDump Backup File for the Content type:

If you have access to a Cloud-based or local NFS device, it’s just as easy to create an additional backup directory on your NFS server. Follow the same steps and choose NFS from the Storage pulldown. With NFS, you must first set up a storage directory with NFS permissions for the IP address of your Proxmox server.

Last, but not least, you need to learn your way around in the GUI. proxmox4 is the name of your server if you followed our recommended setup for your hostname. Under the server, you will find entries for each of your KVM, Linux Containers (LXC), and other drives, e.g. local, backup, and synology.

To add a new LXC image to your server, choose local -> Content -> Templates, pick the desired LXC image, and click Download.

To add new ISO images to your server for building KVMs, choose local -> Content -> Upload, pick ISO Image as the Content type, choose the ISO from your desktop by pressing Select File, then click Upload button.

To start up Virtual Machines once you have created them, click on the VM number under proxmox and click Start. To access the virtual machine once it has begun booting, click Console.

To shutdown a KVM, click on the VM number under proxmox and click Shutdown. Or you can type halt after logging into the KVM as root from the KVM’s Console.

For a list of all available content, choose proxmox4 -> local -> Content.

Loading the Incredible PBX 13 Components into Proxmox 4.0

We need to put two pieces into place to get things rolling with Incredible PBX 13. There are two ways to create Incredible PBX 13 KVMs. You can do it manually from the IncrediblePBX13.iso just as you would on a stand-alone machine. Or you can restore from the IncrediblePBX13 KVM backup image to create a new KVM. The first method takes about 30 minutes. The second method takes less than 30 seconds. The choice is all yours. The results are exactly the same.

Before you can create KVMs, we need to put the Incredible PBX 13 backup image and the Incredible PBX 13 ISO in their proper places. To save some time and steps, we’re going to load the backup image by logging into the Proxmox server as root. For the ISO image, we’ll use the GUI.

To install the Incredible PBX 13 backup image, log into your server as root using SSH and issue these commands:

cd /
wget 'http://downloads.sourceforge.net/project/pbxinaflash/IncrediblePBX13-12 with Incredible PBX GUI/IncrediblePBX13-KVM.tar.gz'
tar zxvf IncrediblePBX13-KVM.tar.gz
rm IncrediblePBX13-KVM.tar.gz

To install the Incredible PBX 13 ISO image, first use a web browser to download IncrediblePBX13.iso to your desktop from SourceForge. Next, login to your Proxmox GUI and choose proxmox4 -> local -> Content -> Upload, pick ISO Image as the Content type, choose IncrediblePBX13.iso from your desktop by pressing Select File, then click the Upload button.

Your Incredible PBX 13 backup image should now appear under proxmox4 -> backup -> Content.

Your Incredible PBX 13 ISO image should now appear under proxmox4 -> local -> Content.

Building Your First Incredible PBX 13 Virtual Machine

To create a new Incredible PBX Virtual Machine, click the options in the order shown on the image above. Use any VM number desired. In less than 30 seconds, you’ll have your first 10GB Incredible PBX 13 Virtual Machine in place:

Initializing KVM Network Device MAC Address. If you ever create more than one KVM from the same backup image, you must initialize the network device’s MAC address before starting the KVM. Otherwise, you will get a conflicting network connection and a mess. Best practice: ALWAYS initialize the network device MAC address when you first create a new KVM from a backup. Click on the VM number in the left column under proxmox4. Then click the Hardware tab, click Network Device, and Edit. Erase the existing MAC address and click OK. Now it’s safe to start the KVM. The telltale sign that you forgot to do this will be a flaky network connection on one or more of your KVMs. If it happens, just delete the offending KVM and create a new one. You won’t forget but once. 😉

To start your new Incredible PBX Virtual Machine, click on the VM number in the left column under proxmox4. Then click the Start button on the right side of the Proxmox GUI header. The Tasks list at the bottom of the GUI will show it loading. Now click on the Console button at the top of the GUI to open a QEMU console session with your virtual machine. At the login prompt, login in as root with the default password: password. The startup script will complete the customization of your server in less than a minute. Then you’re ready to go. Complete the same configuration steps that you would on any new Incredible PBX server:

Change your root password and make it very secure: passwd
Create admin PW to access Incredible GUI and FreePBX® GPL modules: /root/admin-pw-change
Set your correct time zone: /root/timezone-setup
Create admin PW for web apps: htpasswd /etc/pbx/wwwpasswd admin
Make a copy of your Knock codes: cat /root/knock.FAQ
Decipher IP address and other info about your server: status

Now it’s time to pick up the Incredible PBX 13 tutorial for CentOS and continue on with your adventure if you’ve never done this before. Then take a good look at the Incredible PBX Application User’s Guide to get the most out of your new server.

Building a second, third, and fourth KVM is just as easy as building the first one.

Backing Up Incredible PBX 13 Virtual Machines

The real beauty of virtualization and Proxmox in particular is that you can make instantaneous backups of your virtual machine at any time whether the virtual machine is running or not. Those backups can be copied to off-site storage for safe keeping. The critical component of any server is the reliability of and ease with which you can recover from a catastrophic failure. It doesn’t get any easier than this.

To make a backup of your virtual machine to your backup directory, click on the VM ID number in the left column. Then click Backup -> Backup Now. Fill in the blanks of the backup template.

To make a backup of your virtual machine to a local or off-site NFS device, it’s just as easy. Click on the VM ID number in the left column. Then click Backup -> Backup Now. Fill in the blanks of the backup template. Makes you want to run right out and buy a Synology NAS/NFS device, doesn’t it?

Restoring a virtual machine from a backup is just as easy as it was to create the virtual machine image from our backup above. Just choose your backup image instead of the one we provided.

Backing up your virtual machines is only half the story, of course. It also is important to get a backup of the whole enchilada, i.e. the entire Proxmox server. Luckily, the latest version of Clonezilla works perfectly after you have applied the UEFI BIOS patch as documented above. Enjoy!

Originally published: Monday, October 19, 2015


Need help with Asterisk? Visit the PBX in a Flash Forum.


Special Thanks to Our Generous Sponsors


FULL DISCLOSURE: ClearlyIP, Skyetel, Vitelity, DigitalOcean, Vultr, VoIP.ms, 3CX, Sangoma, TelecomsXchange and VitalPBX have provided financial support to Nerd Vittles and our open source projects through advertising, referral revenue, and/or merchandise. As an Amazon Associate and Best Buy Affiliate, we also earn from qualifying purchases. We’ve chosen these providers not the other way around. Our decisions are based upon their corporate reputation and the quality of their offerings and pricing. Our recommendations regarding technology are reached without regard to financial compensation except in situations in which comparable products at comparable pricing are available from multiple sources. In this limited case, we support our sponsors because our sponsors support us.

BOGO Bonaza: Enjoy state-of-the-art VoIP service with a $10 credit and half-price SIP service on up to $500 of Skyetel trunking with free number porting when you fund your Skyetel account. No limits on number of simultaneous calls. Quadruple data center redundancy. $25 monthly minimum spend required. Tutorial and sign up details are here.

The lynchpin of Incredible PBX 2020 and beyond is ClearlyIP components which bring management of FreePBX modules and SIP phone integration to a level never before available with any other Asterisk distribution. And now you can configure and reconfigure your new Incredible PBX phones from the convenience of the Incredible PBX GUI.

VitalPBX is perhaps the fastest-growing PBX offering based upon Asterisk with an installed presence in more than 100 countries worldwide. VitalPBX has generously provided a customized White Label version of Incredible PBX tailored for use with all Incredible PBX and VitalPBX custom applications. Follow this link for a free test drive!
 

Special Thanks to Vitelity. Vitelity is now Voyant Communications and has halted new registrations for the time being. Our special thanks to Vitelity for their unwavering financial support over many years and to the many Nerd Vittles readers who continue to enjoy the benefits of their service offerings. We will keep everyone posted on further developments.


Some Recent Nerd Vittles Articles of Interest…

  1. Some of our purchase links refer users to Amazon and other sites when we find their prices are competitive for the recommended products. Nerd Vittles receives a small referral fee from merchants to help cover the costs of our blog. We never recommend particular products solely to generate commissions. However, when pricing is comparable or availability is favorable, we support Amazon and other merchants because they support us. []

The SOHO Dream Machine: A Unified Communications Platform for Under $200

Remember when you could buy an awesome server for under $200? Thanks to Intel® and Yogi Berra, it’s déjà vu all over again! Years ago we discovered a machine called the Acer Revo that could be had for about $200. It met all of the Unified Communications requirements that a home office or small office could dream of, but then they doubled in price. That led us to the Raspberry Pi 2. While it met the basic needs for most SOHO environments, it involved a bit more hardware tinkering than many folks were comfortable with. And it’s overall performance was something less than robust.

Say what you will about Intel hardware. They may not get things quite right out of the starting gate. But give them a little time, and issues get addressed and fixed. And you end up with incredible hardware at a terrific price. So it is with the $119 third-generation Intel NUC DN2820FYKH. Slip in a 4GB stick of RAM and an economical SSD drive to complement the built-in WiFi and Bluetooth, and you’ve got an amazing hardware platform that takes up 4″ x 4″ of real estate in your office. While its 2.4 GHz Celeron dual-core processor isn’t exactly a screamer compared to some Intel chips, it’s an energy-efficient rocketship compared to the Raspberry Pi 2. Intel VT-x virtualization support1 also is included. The average BOGOMIPS rating of the current Raspberry Pi is 96. The Intel NUC’s BOGOMIPS average is 5332! In Plain English, it would take 55 Raspberry Pi 2’s to match the processing power of one Intel NUC.

Performance, of course, is only half of the equation. There’s also price. Let’s be completely fair and spec out the Raspberry Pi with one-quarter of the RAM and disk storage of the Intel NUC. Cost of the board itself ($41+) + case ($10) + power adapter ($10) + 32GB microSD Type 10 card ($20) + WiFi Dongle ($10) comes to at least $90. Here’s what our Intel NUC set us back on Amazon2 with quadruple the RAM and disk storage, basically the cost of 2 RasPi setups. The FreePBX® Phone System 50 with similar specs starts at $579 and takes up a healthy chunk of your office space. With Incredible PBX and the Intel NUC, you not only save on space, but it’s also about a third of the cost of the FreePBX alternative. For power users, you’re probably wondering whether you can scale up from Celeron-based system. The answer is ABSOLUTELY. The Core i5 model with 16GB of RAM and a 250GB SSD drive runs about $500. And, of course, Incredible PBX imposes no artificial limitations on user accounts or number of simultaneous calls regardless of the hardware platform you choose. No Gotchas!

Initial Setup of the Intel NUC Platform

Once you receive your hardware, the first step is installation of the memory card and SATA drive. HINT: You’d be crazy not to use an SSD drive. They’re dirt cheap and FAST! Start your adventure by reviewing the User’s Guide from Intel. As you can see below, it walks you through the hardware installation process which takes about 10 minutes.

[gview file="https://downloadmirror.intel.com/23417/eng/DN2820FYKH_UserGuide02.pdf"]

The most important step comes next. Until you get the BIOS upgraded on the hardware, it will NOT boot. Visit the Download Page for the Intel NUC and grab the latest BIOS Update from here. The only piece you need is FY0051.BIO. Copy it to a DOS-formatted USB flash drive using any desktop computer. Once you’ve done that, insert the flash drive into the front slot on the Intel NUC, plug in a USB keyboard, HDMI monitor, USB DVD drive, and network cable. Turn on the machine. Press F7 after the beep. Follow the instructions to upgrade the BIOS and identify the firmware file you copied to your flash drive. Agree to the license and let the firmware update proceed. It takes about 10 minutes.

While you’re waiting, burn the Incredible PBX 13 ISO to a DVD to use with an external USB DVD drive and your Intel NUC. Tutorial is here.

Once the BIOS has been upgraded, your Intel NUC will reboot. You must change a few BIOS settings to complete the hardware setup, or nothing will work. After the machine reboots, press F2 to access Intel’s new Visual BIOS. First, enable the Legacy Boot Procedure, not UEFI (as shown above). Next, make certain that booting from the DVD drive has priority. And, last but not least, set the correct date and time for the computer. Without accurate time, Asterisk will not compile, and you’ll have to repeat the drill! Once you’ve made these changes, save your settings by pressing F10. Your machine will again reboot. Hardware setup is complete. To install Incredible PBX, reboot and press F10 for the boot menu. Pick your USB DVD drive.

If you don’t happen to have one, LG’s tiny USB-powered DVD Writer is the best $25 you will ever spend.

And, if you really want to splurge, take the plunge with this awesome 10″ HDMI (and everything else) monitor:

Installing Incredible PBX 13 on the Intel NUC

Choose the Basic Install, set your time zone, and create a very secure root password. It takes about 20 minutes to install the Scientific Linux 6.7 platform. After a reboot, press Enter to accept the Incredible PBX license agreement and complete the install. We initially were concerned that RedHat-based platforms would not load on the Intel NUC since they are not mentioned in the Intel compatibility chart. Not to worry. SL 6.7 works fine. This may very well be because of the latest BIOS upgrade. In any case, you can follow along in our Incredible PBX 13 ISO tutorial for the details. Adding free fax support with Incredible Fax is equally easy. Just run the Hylafax/AvantFax installer: /root/installfax11.sh. If you want to enable encrypted OAUTH2 authentication for your Google Voice accounts, follow this tutorial beginning at step #1b. When you get everything humming along, check out our tutorial for the three dozen Incredible Apps that are bundled with Incredible PBX.

Finally, tidy up the status display to accomodate the Intel NUC’s generous RAM and Disk sizes:

sed -i 's|$OSrelease|<> Sci Linux 6.7 <>|' /usr/local/sbin/status

Setting Up WiFi Connectivity on the Intel NUC

You probably noticed that two private IP addresses are listed on the status display shown above. The first is the wired network connection. The second is either the wireless network connection or the NeoRouter VPN address depending upon how you’ve set up your server. Incredible PBX can be run using either the eth0 or wlan0 interface. You really don’t want both, and we’ll show you how to turn one of them off. Here’s how to activate WiFi on your server. Follow the steps carefully and don’t be intimidated that you’re venturing down into the network weeds. It’s a number of steps but nothing difficult.

WARNING: We strongly recommend installing Incredible Fax before you enable WiFi connectivity to avoid problems. Trust us on this one. We learned the hard way, and you can only run the Incredible Fax installer once!

1. Install wpa_supplicant to manage WiFi access: yum -y install wpa_supplicant

2. Download and install the latest WiFi driver. Just cut-and-paste the code below while logged in as root:

cd /root
wget --no-check-certificate https://wireless.wiki.kernel.org/_media/en/users/drivers/iwlwifi-7260-ucode-25.30.14.0.tgz
tar zxvf iwlwifi-7260-ucode-25.30.14.0.tgz
cd iwlwifi-7260-ucode-25.30.14.0
cp iwlwifi-7260-14.ucode /lib/firmware/.
reboot

3. Edit /etc/sysconfig/wpa_supplicant. Modify line 3 to look like this: INTERFACES="-iwlan0"

4. Edit /etc/wpa_supplicant/wpa_supplicant.conf. Insert the following lines at the end of the file after replacing the ssid and psk entries below with the actual name and password needed to access your WiFi network:

update_config=1
network={
 ssid="yourSSID"
 psk="yourSSIDpassword"
 key_mgmt=WPA-PSK
 scan_ssid=1
}

5. Edit /etc/sysconfig/network-scripts/ifcfg-wlan0. Change ONBOOT=no to ONBOOT=yes

6. Edit /etc/sysconfig/network. Add CRDA_DOMAIN=US

7. Edit /etc/sysconfig/knockd. Add OPTIONS="-i wlan0"

8. Set up a couple services to start on bootup (default=off):

chkconfig messagebus on
chkconfig wpa_supplicant on

9. Edit /etc/rc.local. Add the following lines immediately above the iptables-restart line in the file:

/sbin/ifup wlan0
/usr/local/sbin/amportal kill
/usr/local/sbin/amportal start
/etc/init.d/knockd restart

For those that are curious, step #9 is necessary because the system attempts to start these services before the wireless network is properly configured. And they fail. So… we simply restart them at the end of the boot procedure.

10. Reboot to bring everything on line properly. Check status for results.

11. We have observed interference issues between the wired and wireless networks occasionally. For that reason, once you have verified that your wireless network is functioning properly, we strongly recommend disabling eth0. Edit /etc/sysconfig/network-scripts/ifcfg-eth0. Change ONBOOT=yes to ONBOOT=no. Then reboot your server, and the interference problems disappear.

12. Down the road, if you’d prefer to use the wired network, just undo the settings in steps 5 – 9 and 11. Then reboot.

Deploying a Mobile Office with the Intel NUC

Some are probably wondering why you’d ever need WiFi with a Unified Communications platform. One reason for those that travel regularly is that you might want your PBX to ride along with you. Still others might want to use the Intel NUC for demonstrations at events such as this week’s AstriCon in Orlando. Using the Mobile HotSpot feature on your smartphone, WiFi access is easy even when there’s no local WiFi connection. Once configured, there’s no need for a keyboard or monitor with the Intel NUC. You can use Putty or SSH to access the server. While the Intel NUC is now a 12 volt device, you may not want to wrestle with building the necessary cable to connect it directly to a vehicle. An easier solution is to install an inexpensive power inverter and then use the standard power brick that came with the Intel NUC. The inVERT 100 Watt Portable Power Inverter does the trick for $35, or you might prefer this 150-watt BESTEK inverter from Amazon for $19. Don’t forget to adjust your SmartHost setting to accommodate your cellphone carrier’s SMTP host! Better yet, use gMail as your SMTP Relay host and never have to worry about it again. Then add the following line to your /etc/rc.local startup file with your email address, and your DHCP address will be sent to you whenever and wherever your server boots up:

echo "`cat /etc/hostip`" | mail -s "Intel NUC is UP" yourname@youremailserver.net

Enjoy your new Unified Communications System…

Originally published: Monday, October 12, 2015


Need help with Asterisk? Visit the PBX in a Flash Forum.


Special Thanks to Our Generous Sponsors


FULL DISCLOSURE: ClearlyIP, Skyetel, Vitelity, DigitalOcean, Vultr, VoIP.ms, 3CX, Sangoma, TelecomsXchange and VitalPBX have provided financial support to Nerd Vittles and our open source projects through advertising, referral revenue, and/or merchandise. As an Amazon Associate and Best Buy Affiliate, we also earn from qualifying purchases. We’ve chosen these providers not the other way around. Our decisions are based upon their corporate reputation and the quality of their offerings and pricing. Our recommendations regarding technology are reached without regard to financial compensation except in situations in which comparable products at comparable pricing are available from multiple sources. In this limited case, we support our sponsors because our sponsors support us.

BOGO Bonaza: Enjoy state-of-the-art VoIP service with a $10 credit and half-price SIP service on up to $500 of Skyetel trunking with free number porting when you fund your Skyetel account. No limits on number of simultaneous calls. Quadruple data center redundancy. $25 monthly minimum spend required. Tutorial and sign up details are here.

The lynchpin of Incredible PBX 2020 and beyond is ClearlyIP components which bring management of FreePBX modules and SIP phone integration to a level never before available with any other Asterisk distribution. And now you can configure and reconfigure your new Incredible PBX phones from the convenience of the Incredible PBX GUI.

VitalPBX is perhaps the fastest-growing PBX offering based upon Asterisk with an installed presence in more than 100 countries worldwide. VitalPBX has generously provided a customized White Label version of Incredible PBX tailored for use with all Incredible PBX and VitalPBX custom applications. Follow this link for a free test drive!
 

Special Thanks to Vitelity. Vitelity is now Voyant Communications and has halted new registrations for the time being. Our special thanks to Vitelity for their unwavering financial support over many years and to the many Nerd Vittles readers who continue to enjoy the benefits of their service offerings. We will keep everyone posted on further developments.


Some Recent Nerd Vittles Articles of Interest…

  1. We’ll have much more to say about virtualization soon as Proxmox has just introduced Proxmox VE 4.0 with support for KVM and Linux Containers. Stay tuned! []
  2. Some of our links refer users to Amazon or other service providers when we find their prices are competitive for the recommended products. Nerd Vittles receives a small referral fee from these providers to help cover the costs of our blog. We never recommend particular products solely to generate commissions. However, when pricing is comparable or availability is favorable, we support these providers because they support us. []