Home » Incredible PBX » Raspberry Pi (Page 15)
Category Archives: Raspberry Pi
Choosing the Best (free) PBX for SOHO Deployments
[iframe-popup id="6″]
When it comes to choices in free PBXs, times have indeed changed. A decade ago your options went something like this. There was Asterisk@Home or Asterisk@Home. Then along came trixbox® and Elastix® and PBX in a Flash™ and AsteriskNOW®. What remained constant throughout this evolution was the underlying Asterisk® platform. With the exception of Digium’s offering, the remaining products all included the FreePBX® GUI. Then came a whole new way of looking at things with FreeSWITCH®. Another morphing occurred when the FreePBX developers introduced their own distribution which bundled free software with a collection of commercial demoware, better known as NagWare. Along the way we introduced Incredible PBX™ which let you choose an underlying platform and then an installer preconfigured the entire PBX together with dozens of applications. We also discovered an open source sleeper called XiVO that morphed into Wazo. It wasn’t long until commercial companies discovered that there might be gold in them hills. Sangoma® purchased FreePBX and 3CX acquired PBX in a Flash and Elastix. Digium’s AsteriskNOW product morphed into a rebranded FreePBX Distro®. Another popular commercial company that had been around the Asterisk community for more than a decade was Xorcom, and in 2016, they introduced their own freeware PBX called Ombutel. Another well-respected commercial provider, 3CX, quickly followed suit and introduced a collection of freeware PBXs1 including PBX in a Flash 5, Elastix 5, and a free edition of its popular 3CX UC platform running under Debian. Whew! What a ride it has been. But now what?
We’ve gone from rags to riches, but how do you sort out which solution is best for you? I’m reminded of some advice my dad gave me when I was trying to choose a college to attend. He said, "Make yourself a list of what’s important to you, and then rank each school from 1 to 10 on each of those criteria. Add up the columns, and there’s your answer." I would offer you the same advice in choosing a PBX. So let’s start with our list of 10 criteria in no particular order that should be considered in choosing a PBX. Then we’ll drill down on each of these and provide some tips on what to consider when you develop your own scorecard.
- Reputation of the Provider
- Reliability of the Product
- Feature Set
- Security
- Performance
- Redundancy
- Ease of Deployment
- Ease of Use
- Support Availability
- Long-Term Cost
A couple other factors will weigh into your ratings. First, your own level of expertise matters. And, second, the intended use for your PBX is critically important. If you’re deploying a PBX in your home where the only Happy Campers have to be you and the Little Mrs., that’s obviously a different use case than a business that relies upon telephones for its livelihood. If you have 30 years of telephony and networking experience, that makes some of these criteria less important than others. You can adjust your ratings scale accordingly or simply remove the criteria that don’t matter in your particular situation.
1. Reputation of the Provider
Depending upon whether you’ve chosen an open source PBX and your own level of expertise, the reputation of the provider matters. And, for those that aren’t do-it-yourselfers, the reputation of the installer or reseller is also important. There’s a reason that people pay big bucks for Cisco phone systems. Provider reputation becomes even more significant if you’re installing a closed source system and there’s a risk that the vendor won’t be around in a couple of years. If, on the other hand, you’re choosing a free PBX as a sandbox to learn about telephony, then provider reputation is obviously less important than some of the other factors. One of the real beauties of the Internet is that it’s easy to obtain information on and customer ratings of providers. So do your homework!
2. Reliability of the Product
Forums such as the PIAF Forum and DSL Reports provide a limitless supply of information about PBX offerings. Take the time to read user comments about their experience with the various offerings. Most of the free PBX products we’ve listed above have been around for many years, but that doesn’t always tell you everything you need to know. Visit the provider’s own forum so you can see for yourself what problems are being reported by their own users. If there are dozens of postings about bugs and non-working components with no proffered solutions, that’s usually a pretty good hint to start looking elsewhere.
3. Feature Set
Whenever we provide consulting services to companies, the first thing we do is ask everyone in the organization to provide a list of the top 10 features they need in an ideal phone system. You then can take that survey and match it against available offerings for free and commercial PBXs. If 90% of your users travel and need their smartphones integrated into the company’s PBX, that’s important. If your organization depends upon incoming phone calls for 90% of your new business, then deployment of a PBX that never hands out busy signals is critical. If IVRs need to be integrated into your existing corporate databases to check availability of product without employee intervention, then write it down as a "must have." You get the idea. Figure out what really matters to everyone that will actually be using phones connected to your PBX. Then find the offerings that are the best fit insofar as features are concerned.
4. Security
The last thing anyone wants to see is a whopping phone bill because some creep on the other side of the globe managed to make expensive calls on your nickel. Do all the research that time permits to discover which phone systems have a history of security breaches. Does the phone system you are considering have its own firewall? Is it self-configured or are you on your own? Will you need to hire a consultant just to keep your phone system secure? What’s your budget for security mistakes? A PBX isn’t free if you get an unexpected $100,000 phone bill. Visit the forums including the forums of the providers you are considering and look for any mentions of security breaches, hacking, and bugs related to software vulnerabilities. Google is your friend as well. Search for the name of the PBX you’re considering together with the word "vulnerability" and see how long a list you receive. Last, but not least, visit CVE Details and look up the scorecard of your vendor and product. One final consideration worth mentioning is the procedure required to update the PBX when security vulnerabilities are discovered. Is it a manual upgrade process or is it automatic when you log into your server? Do you have to keep abreast of security developments by regularly visiting some web site or are the alerts prominently displayed on the admin interface whenever you log into your PBX? Are you responsible for keeping the underlying operating system vulnerabilities patched or does your vendor handle that as well? Suffice it to say, you get what you pay for when it comes to a secure PBX. Do your homework and decide whether a free PBX really is the best choice for your situation.
5. Performance
There’s a big difference in a phone system for a home or SOHO deployment with a handful of phones versus a small business PBX with dozens of phones and hundreds or thousands of calls every day. Lots of external factors weigh into the actual performance you will see with any given phone system. For VoIP-based PBXs, your calls are only as good as your Internet connection and the ability of your server to handle the workload. Whether you plan to deploy your PBX on local hardware or in the Cloud also impacts performance. There are cloud providers and cloud providers. Some put you on an overloaded shared server to maximize profits while others (such as our own advertiser, RentPBX) carefully monitor the time slice that every PBX receives to assure reliable PBX performance all the time. As we’ve previously noted, you get what you pay for. Don’t expect a Cloud at Cost server for which you paid a one-time fee to provide the same level of performance and phone quality as a dedicated server or a provider such as RentPBX. Our best advice is to try your desired platform with your desired PBX. You’ll know quickly whether the combination will meet your performance requirements.
6. Redundancy
If your business depends upon reliable telephone calls, redundancy would be a requirement at the top of our list. How long can your business go without incoming or outgoing phone service? Do you have a dedicated administrator on staff? Does your support provider offer 24/7 assistance? Answers to those questions will narrow down your options. With a dedicated administrator on site and a hot standby server, you probably have all the redundancy you need unless criticality is judged in minutes. In the latter case, a High Availability failover system may be what you need. You can spend thousands of dollars on software and hardware to achieve an acceptable level of High Availability. What is your budget? Luckily, Wazo is a free alternative that also includes free HA support. All you need is a second server which could be a second hardware device on site or a Cloud-based server at minimal cost. We’ve documented the Wazo HA setup procedure here if you want to evaluate whether it will meet your requirements.
7. Ease of Deployment
Determining the ease with which you can deploy a new server is obviously subjective and depends upon your skill set, the expertise of others in your organization, and the complexity of the system you will be deploying. Bringing up and configuring the various systems is the only way you’re going to get an accurate picture of what’s involved. If you will be relying upon a vendor to perform the heavy lifting, then get some references and start making calls to judge the satisfaction level of similarly situated customers. Then ask yourself what the likelihood is that your vendor will still be around five years down the road. Is there a competitor that could step in and perform the same tasks? Are your available choices limited to telephone support or are on site services available to assist with or perform setup and configuration tasks? Be sure to get an accurate estimate of the overall cost of deployment including server and telephone configuration as well as staff training.
8. Ease of Use
Nothing holds a candle to letting employees at all levels in your organization actually use the system you’ve chosen before you purchase it. Particularly with a phone system, a free evaluation period is worth its weight in gold. The beauty of a free PBX is you can install it and kick the tires to your heart’s content. To end users, the ease of use determination is pretty simple. There’s a phone sitting on the desk. Does it do what I need it to do to get my job done?
9. Support Availability
There are three kinds of support: in-house, free, and paid. If you have in-house staff to manage and support your PBX, this criteria may be less important to you. If not, then the free and paid options are important. We have tens of thousands of administrators who have relied upon the PIAF Forum for support over the years. With the latest PBXs that have been around for a very long time, that’s probably all you need if you have made backups and have a recovery plan or a redundant system. As for paid support, the sky’s the limit quite literally. Telephone support does not equal on site support. If your business demands 24×7 phone service, then choose a support option that can make that happen.
10. Long-Term Cost
Last, but not least, is factoring in the overall cost of your phone system. Just because your PBX may be free, it doesn’t mean that add-ons and software maintenance and support are. Do the math and figure out what the long-term cost actually is to get the feature set and support level that your business requires. It may very well turn out that $395 a year for a fully-supported commercial PBX such as our corporate sponsor’s 3CX PBX may be a downright bargain compared to a free PBX for which you’d easily spend that much with a single call for commercial support. Do the math before you jump feet first into the free fire.
Originally published: Monday, May 8, 2017
SECURITY ALERT: The Sangoma® Portal reportedly has been compromised. According to Sangoma’s Chief Operating Officer, customers’ root passwords were stored on Sangoma servers as a favor to customers to facilitate future support access by Sangoma staff. That procedure now has been discontinued. Although not acknowledged, the root passwords were apparently stored in unencrypted format unbeknownst to customers. More than a dozen customers have since reported their servers were compromised using their own root credentials. Sangoma maintains there is a "theoretical possibility" that their portal was the culprit although the COO indicates that they have been unable to find any evidence of an intrusion. Rootkit appears to be a word missing from the Sangoma lexicon. If you do business with Sangoma through their web portal, you are well advised to check your server immediately to determine if your PBX also has been compromised. Full details regarding breach detection and a link to Sangoma’s response are available on the PIAF Forum. If your server has been hacked, prudence would dictate rebuilding your server from the ground up. There was no mention whether Sangoma did the same after a previous unauthorized intrusion. As this incident reinforces, attempting to patch a compromised server is extremely risky. |
Need help with Asterisk? Visit the PBX in a Flash Forum.
Special Thanks to Our Generous Sponsors
FULL DISCLOSURE: ClearlyIP, Skyetel, Vitelity, DigitalOcean, Vultr, VoIP.ms, 3CX, Sangoma, TelecomsXchange and VitalPBX have provided financial support to Nerd Vittles and our open source projects through advertising, referral revenue, and/or merchandise. As an Amazon Associate and Best Buy Affiliate, we also earn from qualifying purchases. We’ve chosen these providers not the other way around. Our decisions are based upon their corporate reputation and the quality of their offerings and pricing. Our recommendations regarding technology are reached without regard to financial compensation except in situations in which comparable products at comparable pricing are available from multiple sources. In this limited case, we support our sponsors because our sponsors support us.
BOGO Bonaza: Enjoy state-of-the-art VoIP service with a $10 credit and half-price SIP service on up to $500 of Skyetel trunking with free number porting when you fund your Skyetel account. No limits on number of simultaneous calls. Quadruple data center redundancy. $25 monthly minimum spend required. Tutorial and sign up details are here.
The lynchpin of Incredible PBX 2020 and beyond is ClearlyIP components which bring management of FreePBX modules and SIP phone integration to a level never before available with any other Asterisk distribution. And now you can configure and reconfigure your new Incredible PBX phones from the convenience of the Incredible PBX GUI.
VitalPBX is perhaps the fastest-growing PBX offering based upon Asterisk with an installed presence in more than 100 countries worldwide. VitalPBX has generously provided a customized White Label version of Incredible PBX tailored for use with all Incredible PBX and VitalPBX custom applications. Follow this link for a free test drive!
Special Thanks to Vitelity. Vitelity is now Voyant Communications and has halted new registrations for the time being. Our special thanks to Vitelity for their unwavering financial support over many years and to the many Nerd Vittles readers who continue to enjoy the benefits of their service offerings. We will keep everyone posted on further developments.
Some Recent Nerd Vittles Articles of Interest…
- Don’t confuse a free PBX with Sangoma’s FreePBX® GUI. The former means a truly free PBX. The latter is a code generator for Asterisk that commingles free components with commercial nagware for which you have to pay registration fees before use and maintenance fees annually after purchase. [↩]
IBM’s Speech Recognition Engine Comes to Asterisk
Eight years ago, we introduced transcription for Asterisk® voicemail messages. When the messages were delivered by email, you got both a recording and the transcribed text courtesy of Google. As with most things Google, the licensing terms changed regularly and voicemail transcription became more convoluted until it became next to worthless. Today we begin our new exploration of IBM’s Watson Developer Cloud. It offers a rich collection of services at unbelievably low price points. We’re kicking things off by introducing a better Speech-to-Text (STT) solution with IBM’s Bluemix. The STT API performs better than any speech recognition engine in the world. And you won’t have to worry about Google breaking our middleware every month. On the Lite plan, up to 100 minutes per month are free. Or you can opt for the Standard pay-as-you-go plan for 2¢ per minute and let your customers yack all they like. That works out to $1.20 an hour which still is pretty cheap secretarial help. In coming weeks, we will introduce IBM’s Text-to-Speech (TTS) offering and Lisa. Up to a million characters of TTS service monthly are free. Here’s a sample to give you a taste of the voice quality:
[soundcloud url="https://api.soundcloud.com/tracks/312693441″ params="auto_play=false&hide_related=false&show_comments=true&show_user=true&show_reposts=false&visual=true" width="100%" height="350″ iframe="true" /]
NOV. 1 UPDATE: IBM has moved the goal posts effective December 1, 2018:
For new deployments, your API Username will be apikey, and your API Password will be your actual APIkey.
Overview. What we’ve done today is integrate the STT Bluemix API directly into existing Asterisk voicemail systems. We started with Nicolas Bernaerts’ terrific sendmailmp3 script. It works on both the Wazo and FreePBX® platforms. If you have deployed Incredible PBX, then the setup takes a couple of minutes. For everyone else, there’s an additional configuration step using your favorite GUI. To get started, you’ll sign up for a Bluemix account and obtain your credentials. Next, you download today’s script for your platform and insert your credentials. Finally, you set up voicemail on the extensions desired and insert an email address for each voicemail account. On generic FreePBX systems, you’ll need to add the name of our script to manage your voicemail recordings.
What About the Quality? Here’s the bottom line. Speech recognition isn’t all that useful if it fails miserably in recognizing everyday speech. The good news is that IBM Watson’s speech recognition engine is now the best in the business. If you want more details, read the article below which will walk you through IBM’s latest speech recognition breakthrough:
Why IBM's speech recognition breakthrough matters for AI and IoT. Via @techrepublic https://t.co/AJi8MA3E20
— IBM Developer (@IBMDeveloper) March 15, 2017
Creating an IBM Bluemix Speech to Text Account
Follow this link to set up your IBM account and obtain credentials for both Speech to Text (STT) and Text to Speech (TTS) services. Please note that your STT and TTS API keys will NOT be the same. So don’t accidentally use the wrong one.
Installing STT Engine with Incredible PBX for Wazo
1. After logging into your Incredible PBX for Wazo server as root using SSH/Putty:
cd /usr/sbin wget http://incrediblepbx.com/sendmailibm.tar.gz tar zxvf sendmailibm.tar.gz rm -f sendmailibm.tar.gz
2. Edit sendmailibm and insert Bluemix STT credentials on lines 29 and 30. Save the file.
3. Edit bluemix-test and insert Bluemix STT credentials on first two lines. Save the file.
4. Copy the updated sendmailibm file to sendmail:
cd /usr/sbin cp -p sendmailibm sendmail
5. Test your Bluemix STT setup: bluemix-test
6. Result should be: please record your message after the beep
7. Set up voicemail account for a Wazo extension with your email address.
8. Place a test call to the extension and record a voicemail when prompted.
9. Your message will be transcribed and delivered via email.
Installing STT Engine with Incredible PBX for RasPi
1. After logging into your Raspberry Pi server as root using SSH/Putty:
cd /usr/sbin wget http://incrediblepbx.com/sendmailibm-raspi.tar.gz tar zxvf sendmailibm-raspi.tar.gz rm -f sendmailibm-raspi.tar.gz
2. Edit sendmailmp3.ibm and insert Bluemix STT credentials on lines 28 and 29. Save file.
3. Edit bluemix-test and insert Bluemix STT credentials on first two lines. Save the file.
4. Copy the updated sendmailmp3.ibm file to sendmailmp3:
cd /usr/sbin cp -p sendmailmp3.ibm sendmailmp3
5. Test your Bluemix STT setup: bluemix-test
6. Result should be: your dictation is now being processed and emailed please wait
7. Set up voicemail for a RasPi extension with your email address.
8. Place a test call to the extension and record a voicemail when prompted.
9. Your message will be transcribed and delivered via email.
Installing STT Engine with Incredible PBX 13
1. After logging into your Incredible PBX 13 server as root using SSH/Putty:
cd /usr/local/sbin wget http://incrediblepbx.com/sendmailibm-13.tar.gz tar zxvf sendmailibm-13.tar.gz rm -f sendmailibm-13.tar.gz
2. Edit sendmailmp3.ibm and insert Bluemix STT credentials on lines 28 and 29. Save file.
3. Edit bluemix-test and insert Bluemix STT credentials on first two lines. Save the file.
4. Copy the updated sendmailmp3.ibm file to sendmailmp3:
cd /usr/local/sbin cp -p sendmailmp3.ibm sendmailmp3
5. Test your Bluemix STT setup: bluemix-test
6. Result should be: we are now transferring you out of the company directory…
7. Set up voicemail for an extension and include your email address.
8. Place a test call to the extension and record a voicemail when prompted.
9. Your message will be transcribed and delivered via email.
Installing STT Engine with Legacy FreePBX® Servers
1. Follow steps #1 through #7 from the Incredible PBX 13 tutorial above.
2. Choose Settings -> Voicemail Admin -> Settings in the GUI.
3. In the format field, insert: wav|wav49
4. In the mailcmd field, insert: /usr/local/sbin/sendmailmp3
5. Click Submit to save your settings and then Reload the FreePBX Dialplan.
6. Place a test call to the extension and record a voicemail when prompted.
7. Your message will be transcribed and delivered via email.
Update: Matt Darnell reports that, depending upon your existing setup, you may need to add the unix2dos and lame packages with legacy FreePBX servers to get MP3 messages delivered correctly.
Originally published: Monday, March 20, 2017
9 Countries Have Never Visited Nerd Vittles. Got a Friend in Any of Them https://t.co/wMfmlhiQ9y #asterisk #freepbx pic.twitter.com/TPFGZbqWB6
— Ward Mundy (@NerdUno) April 22, 2016
Need help with Asterisk? Visit the PBX in a Flash Forum.
Special Thanks to Our Generous Sponsors
FULL DISCLOSURE: ClearlyIP, Skyetel, Vitelity, DigitalOcean, Vultr, VoIP.ms, 3CX, Sangoma, TelecomsXchange and VitalPBX have provided financial support to Nerd Vittles and our open source projects through advertising, referral revenue, and/or merchandise. As an Amazon Associate and Best Buy Affiliate, we also earn from qualifying purchases. We’ve chosen these providers not the other way around. Our decisions are based upon their corporate reputation and the quality of their offerings and pricing. Our recommendations regarding technology are reached without regard to financial compensation except in situations in which comparable products at comparable pricing are available from multiple sources. In this limited case, we support our sponsors because our sponsors support us.
BOGO Bonaza: Enjoy state-of-the-art VoIP service with a $10 credit and half-price SIP service on up to $500 of Skyetel trunking with free number porting when you fund your Skyetel account. No limits on number of simultaneous calls. Quadruple data center redundancy. $25 monthly minimum spend required. Tutorial and sign up details are here.
The lynchpin of Incredible PBX 2020 and beyond is ClearlyIP components which bring management of FreePBX modules and SIP phone integration to a level never before available with any other Asterisk distribution. And now you can configure and reconfigure your new Incredible PBX phones from the convenience of the Incredible PBX GUI.
VitalPBX is perhaps the fastest-growing PBX offering based upon Asterisk with an installed presence in more than 100 countries worldwide. VitalPBX has generously provided a customized White Label version of Incredible PBX tailored for use with all Incredible PBX and VitalPBX custom applications. Follow this link for a free test drive!
Special Thanks to Vitelity. Vitelity is now Voyant Communications and has halted new registrations for the time being. Our special thanks to Vitelity for their unwavering financial support over many years and to the many Nerd Vittles readers who continue to enjoy the benefits of their service offerings. We will keep everyone posted on further developments.
Some Recent Nerd Vittles Articles of Interest…
Best of Both Worlds: Marrying Asterisk to 3CX’s Free PBX with a $35 Raspberry Pi
One of the real beauties of Asterisk® has always been its flexibility in talking to other PBXs, both commercial and open source. There are numerous reasons why you might want to try this. First, it makes it easy to migrate to a commercial platform where you can get support for mission critical telephony requirements. Second, you may want a hybrid setup where servers with on-site support personnel can run Asterisk while remote satellite offices can take advantage of a commercial PBX and the support options it offers. Third, you may want to take advantage of specific features that are only available by relying upon multiple PBX solutions. In the case of 3CX, their integrated softphone clients with one-click setup simplicity, conferencing and WebRTC apps, and Call Center offerings are the best in the business while providing unmatched VoIP security. Asterisk on the other hand is light-years ahead of almost everybody in the text-to-speech and voice recognition fields while offering the most powerful VoIP toolkit to build any custom VoIP application imaginable.
Today we thought it would be fun to walk you through the easy way to tie an Incredible PBX server with all its features to a powerful (free) 3CX platform with its virtually flawless softphone clients.1 When we’re finished, you’ll have a free 3CX server in the Cloud at a one-time total cost of $17.50. And you’ll be able to place and receive free U.S./Canada calls from any iPhone, Android phone, or PC using the 3CX client from anywhere in the world with nothing more than a WiFi connection. The Google Voice trunk supporting the calls will reside on Incredible PBX for the Raspberry Pi. When you’re sold on the power of the 3CX platform, you can upgrade to the 3CX 4-simultaneous call commercial offering with unlimited users and trunks at an annual cost of just $149. Maintenance and upgrades are included. Large organizations have relied upon back office servers for custom applications forever. And now you can take advantage of the same flexibility using a tiny $35 Raspberry Pi and our free (as in really free) Incredible PBX software. No Gotchas!
Initial Raspberry Pi Platform Setup
Before we can interconnect 3CX’s Free PBX with a Raspberry Pi, you obviously have to set up both PBX platforms. For the Raspberry Pi, our recent Nerd Vittles tutorial will walk you through the setup process. In lieu of a Raspberry Pi, you can use any legacy FreePBX®-based Asterisk platform including Incredible PBX 13, PIAF3, Elastix®, AsteriskNOW®, or FreePBX Distro®. The setup procedure is exactly the same.
Building a 3CX Server in the Cloud
Building a 3CX server in the Cloud is equally easy. Let’s go through the process once again. If you’re just experimenting, a lifetime Cloud-based server at CloudAtCost for a one-time charge of $17.50 cannot be beat. We would hasten to add that we don’t recommend this platform for production use, but it’s a terrific proof-of-concept option. When you’re actually ready to deploy 3CX for production use, the least costly Cloud solution is the $3.49 per month OVH RAID offering with 2GB of RAM and 10GB storage. The $5 per month offerings from Digital Ocean and Vultr are other alternatives worth a look. Both of these platforms come with free credits ($10 and $20, respectively) to let you try things out.
To get started, sign up for a $17.50 server at Cloud at Cost. They will send you credentials to log into the Cloud at Cost Management Portal. Change your password IMMEDIATELY after logging in. Just go to SETTINGS and follow your nose.
To build your free 3CX PBX, create a virtual machine by clicking on the CLOUDPRO button in the CloudAtCost control panel. Then click Add New Server. Choose 1 CPU, 512MB RAM, and 10GB storage for your server. Choose Debian 8 64bit as the OS Type and click Complete.
While CloudAtCost is building your server platform, obtain a free license key for 3CX.
Once the Debian 8 server appears in your Control Panel, it will look something like what’s shown above, not CentOS obviously. The red arrow points to the i button you’ll need to click to decipher the password for your new virtual machine. You’ll need both the IP address and the password for your new virtual machine in order to log into the server which is now up and running with a barebones Debian 8 operating system. Note the yellow caution flag. That’s telling you that Cloud at Cost will automatically shut down your server in a week to save (them) computing resources. You can change the setting to keep your server running 24/7. Click Modify, Change Run Mode, and select Normal – Leave Powered On. Click Continue and OK to save your new settings.
Finally, you’ll want to change the Host Name for your server to something more descriptive than c7…cloudpro.92… Click the Modify button again and click Rename Server to make the change. Your management portal then will show the new server name as shown above.
Next, log in to your new Debian server as root using SSH or Putty and issue the commands below. Step #1 is to change your root password. What appears as the fourth line below is actually part of the third line and needs to be run as a single command. The last line to install SendMail will actually be run after you elect to use the Web Interface Wizard to configure 3CX. Just run it from the SSH command line before you switch to a browser to complete the 3CX setup.
passwd wget -O- http://downloads.3cx.com/downloads/3cxpbx/public.key | apt-key add - echo "deb http://downloads.3cx.com/downloads/3cxpbx/ /" | tee /etc/apt/sources.list.d/3cxpbx.list apt-get update rm -f /zang-debian.sh apt-get -y install 3cxpbx apt-get -y install sendmail sendmail-bin
When the initial setup finishes, choose the Web Interface Wizard and complete the install using your favorite web browser. Enter your 3CX license key when prompted. Make up a very secure Username and Password to access your 3CX portal. Specify that your IP address is Dynamic when prompted (even though it isn’t). This tells 3CX to generate an FQDN for your server. Accept the default ports for HTTP (5000) and HTTPS (5001) access to your server. We recommend choosing 4-digit extensions numbers which will make it easy to distinguish 3CX extension numbers from 3-digit extension numbers of the RasPi platform. While logged into the 3CX management portal, adjust Settings → Email to Mail Server → 127.0.0.1 and Reply to → noreply@YourActual3CX-FQDN. Leave the other settings blank and click TEST then OK. Now download your favorite 3CX smartphone client, send yourself the Welcome Email for your default extension, and your 3CX initial setup is complete.
Server Interconnection Overview
Now we’re ready to interconnect the two servers. What we’ll be doing is creating Trunks on both the Raspberry Pi and the 3CX server and tying them together. We’ll use this trunk to handle the call traffic between the two PBXs. Then we’ll add incoming and outgoing call routes on both servers to specify how the individual calls should be routed. Because the free version of 3CX limits the administrator to a single trunk, we’ll offload all of the provider trunks to the Raspberry Pi and reserve the one available 3CX trunk as the interconnect path to the Raspberry Pi. For today’s setup, we’ll use 3CX’s free softphone clients as the actual phone devices for end-users. Of course, you could also use your favorite SIP phones, and 3CX provides automatic configuration for dozens of devices. But we want to introduce the 3CX smartphone clients because they provide an incredibly easy way to get users connected without having to worry about punching holes in firewalls.
To place outbound calls on the 3CX side, 3CX provides enormous flexibility in call routing. Because we chose 4-digit local extensions when we set up the 3CX server, it will make it easy to route other calls through the outbound trunk to the Raspberry Pi using nothing more than the length of the dial string. For example, 3-digit calls line up perfectly with extension numbers on the Incredible PBX for RasPi platform. So 3CX users can easily reach extensions connected directly to the Raspberry Pi. And 10-digit 3CX calls will be forwarded to the Raspberry Pi as traditional outbound calls. They will be processed just as if you had dialed a 10-digit call from a Raspberry Pi extension. For example, if you have a registered Google Voice trunk to handle 10-digit calls on the Raspberry Pi, then the same call path would be used for calls originating from 3CX extensions. And, yes, calls to the U.S. and Canada would still be free and would display the CallerID associated with the Raspberry Pi’s Google Voice trunk. You could get more creative and add an additional dialing prefix on the 3CX side to route specific types of calls to a designated outbound trunk on the Raspberry Pi side based upon the dialing prefix, but we’ll leave that as a homework project for you.
For incoming calls on the 3CX side, in addition to 4-digit local extension-to-extension calling, we can define the destination for incoming calls that originate from either a Raspberry Pi extension or from outside calls coming in from one of the Raspberry Pi’s provider trunks. These are managed by assigning one or more DIDs in the 3CX trunk configuration and then creating 3CX Inbound DID Rules that tell 3CX where to route calls to each defined DID. For 3CX softphone clients registered to extensions, it means your cellphone will ring whenever a call is routed to that particular extension. On the Raspberry Pi side, we create Incoming Call Routes for each DID to be routed to 3CX and specify our defined 3CX trunk as the destination for incoming calls from those DIDs. Not all DIDs on the Raspberry Pi have to be routed to the 3CX server obviously. That is merely one of many call destination options available to the administrator on the Raspberry Pi server.
Here’s a typical call path for an outside call that is placed to a Google Voice number registered with your Raspberry Pi. The Asterisk server running on the Raspberry Pi would answer the call placed to the Google Voice Trunk. Asterisk then would check for an Incoming Route on the Raspberry Pi with a DID matching the number of your Google Voice trunk. Finding a match, Asterisk would check for the desired destination of the call and would note that it is listed as the registered 3CX trunk. Asterisk would pass the call through this trunk to the 3CX server including its associated DID and CallerID info. The 3CX server would answer the incoming call and would check for an Incoming Route matching the DID passed from Asterisk. Finding a match, it would pass the call to the Extension specified in the Incoming Route. When 3CX rings the extension, it would also detect that a softphone was registered to that extension and would also ring the 3CX client on the user’s smartphone. The user answers the call on the 3CX client of their smartphone and begins a conversation. The free version of the 3CX server supports 8 simultaneous calls so you are unlikely to ever run out of call paths for calls in the home and small office environment.
Firewall Setup for Server Interconnection
Because the 3CX server is sitting in the Cloud, its firewall is configured automatically as part of the setup process. If your Raspberry Pi is sitting behind a NAT-based firewall, then you would need to map port UDP 5060 from the router on your public IP address to the private IP address of your Raspberry Pi. In addition, login to your Raspberry Pi as root using SSH and run /root/add-ip to whitelist the public IP address of your 3CX server in the cloud. Otherwise, the 3CX server cannot establish a connection to your Raspberry Pi.
Raspberry Pi Trunk Configuration
Using a browser, login to the web interface for FreePBX on your Raspberry Pi and choose Connectivity → Trunks → Add SIP (chan_sip) Trunk. Name the trunk remote. In the Outgoing Settings, make the entries shown below naming the trunk remote and using a secure secret that will be used to interconnect the two servers. The Register String looks like the following: main:secret@3CX-IP-Address where main is the 3CX server trunk name, secret is your secure secret, and 3CX-IP-Address is the 3CX public IP address.
3CX Trunk Configuration
Using a browser, login to your 3CX server: https://3CX-IP-Address:5001 or http://3CX-IP-Address:5000. From your Dashboard, choose SIP Trunks → Add SIP Trunk. Create a Generic SIP Trunk and then fill in the blanks as shown below. For Registrar/Server/Gateway Hostname or IP, use the public IP address or FQDN of your Raspberry Pi. For Type of Authentication choose Outbound. The authentication credentials should be remote and the secure secret you chose, and the Main Trunk No should match the DID of the Google Voice trunk you set up on your Raspberry Pi. Then pick a default Destination for incoming calls.
3CX Outbound Rules Configuration
Next, we need to tell 3CX which outgoing calls to send out through the Raspberry Pi trunk we just set up. In our example today, we’re going to send all 10-digit calls and 3-digit calls. The 10-digit calls will be routed out the Google Voice trunk on the Raspberry Pi side. And the 3-digit calls will be sent directly to Raspberry Pi extensions. So we’ll need two Outbound Rules.
For the first rule, choose Outbound Rules → Add. For the Rule Name, specify StandardOut. Apply the rule to Calls to Numbers with a length: 10. For Route 1, choose Generic SIP Trunk as the Destination. Click OK to save the new rule.
For the second rule, choose Outbound Rules → Add. For Rule Name, specify StandardInt. Apply the rule to Calls to Numbers with a length: 3. For Route 1, choose Generic SIP Trunk as the Destination. Click OK to save the new rule.
If you already have configured a 3CX smartphone client for one of your 3CX extensions, you now should be able to dial any 3-digit or 10-digit number and have the call processed through your new 3CX→RasPi trunk without any further setup assuming you’ve created a Google Voice trunk on the Raspberry Pi side. That wasn’t too hard, was it?
Routing Incoming Google Voice Calls to 3CX
Depending upon your own requirements, you may want to route incoming Google Voice calls or other trunks directly to an extension and/or softphone on your 3CX server. You obviously could set up multiple trunks of any type on the Raspberry Pi side and have the calls to each trunk routed to a different extension or softphone on the 3CX side. To enable this on the 3CX side, edit your Generic SIP Trunk and click the DIDs tab. Then Add each of the 10-digit DIDs of the Raspberry Pi trunks you wish to redirect. Next, create an Inbound Rule for every DID and tell 3CX where to route the calls.
On the Raspberry Pi side, add each of your Google Voice Trunks. Then create an Inbound Route for each DID and specify the Destination as Trunks → Remote (sip). The 3CX server will take care of routing the various incoming calls to each of the Google Voice trunks to its predefined extension and/or softphone. Enjoy!
Originally published: Monday, March 6, 2017
9 Countries Have Never Visited Nerd Vittles. Got a Friend in Any of Them https://t.co/wMfmlhiQ9y #asterisk #freepbx pic.twitter.com/TPFGZbqWB6
— Ward Mundy (@NerdUno) April 22, 2016
Need help with Asterisk? Visit the PBX in a Flash Forum.
Special Thanks to Our Generous Sponsors
FULL DISCLOSURE: ClearlyIP, Skyetel, Vitelity, DigitalOcean, Vultr, VoIP.ms, 3CX, Sangoma, TelecomsXchange and VitalPBX have provided financial support to Nerd Vittles and our open source projects through advertising, referral revenue, and/or merchandise. As an Amazon Associate and Best Buy Affiliate, we also earn from qualifying purchases. We’ve chosen these providers not the other way around. Our decisions are based upon their corporate reputation and the quality of their offerings and pricing. Our recommendations regarding technology are reached without regard to financial compensation except in situations in which comparable products at comparable pricing are available from multiple sources. In this limited case, we support our sponsors because our sponsors support us.
BOGO Bonaza: Enjoy state-of-the-art VoIP service with a $10 credit and half-price SIP service on up to $500 of Skyetel trunking with free number porting when you fund your Skyetel account. No limits on number of simultaneous calls. Quadruple data center redundancy. $25 monthly minimum spend required. Tutorial and sign up details are here.
The lynchpin of Incredible PBX 2020 and beyond is ClearlyIP components which bring management of FreePBX modules and SIP phone integration to a level never before available with any other Asterisk distribution. And now you can configure and reconfigure your new Incredible PBX phones from the convenience of the Incredible PBX GUI.
VitalPBX is perhaps the fastest-growing PBX offering based upon Asterisk with an installed presence in more than 100 countries worldwide. VitalPBX has generously provided a customized White Label version of Incredible PBX tailored for use with all Incredible PBX and VitalPBX custom applications. Follow this link for a free test drive!
Special Thanks to Vitelity. Vitelity is now Voyant Communications and has halted new registrations for the time being. Our special thanks to Vitelity for their unwavering financial support over many years and to the many Nerd Vittles readers who continue to enjoy the benefits of their service offerings. We will keep everyone posted on further developments.
Some Recent Nerd Vittles Articles of Interest…
- A simpler Bridge setup is available in the paid versions of 3CX. [↩]
VoIPtopia 2017: Choosing the Best, Free VoIP Platform
[iframe-popup id="6″]
Once a year we like to step back and survey the latest and greatest VoIP developments for the coming year. And 2016 was certainly filled with surprises including the release of free versions of 3CX sporting the PIAF5 and Elastix 5.0 monikers. That, in turn, produced a wave of FUD from our friends at Sangoma® urging users to return to their open source roots. But guess what? Sangoma was pitching their FreePBX Distro®, another closed source product just like 3CX. Sure, the Sangoma distro has open source components… just like 3CX and your car for that matter. But it’s disingenuous to diss other products because they’re closed source platforms when yours is too. So today we want to cut through the sales pitches and compare apples to apples while offering our Elastix friends this New Year’s Day Resolution:
Ignore the Hype! Look Before You Leap and Avoid Jumping from the Kettle into the Fire.
Funny: Sangoma Reinforces Commitment to Open Source by Offering Migration Tool to its Closed Source Distro https://t.co/8QK22cWyi9 #asterisk
— Ward Mundy (@NerdUno) December 29, 2016
NEWS FLASH: For PIAF3 and Incredible PBX users who have registered on the PIAF Forum, you’ll be getting an invitation to upgrade to the 8-simultaneous-call 3CX commercial platform at no cost. In addition to unlimited extensions, this one-year license adds unlimited SIP trunks and gateways, 10-participant conferencing, G.729 support, custom FQDNs, BLF support, Call Parking, Call Queueing, Call Pickup, Call Recordings and Management, Call Reporting, Intercom/Paging, remote 3CX bridging support, as well as an integrated fax server and Office 365 and Microsoft Outlook integration. If you haven’t already joined the PIAF Forum, there’s still time. But you’d better hurry.
Choosing a VoIP platform is partially a subjective decision, but there also are some glaring red flags to consider. We suggest you begin by deciding whether your preferences include any must-have’s. Do your requirements mandate an open source solution? Do you need text-to-speech and voice recognition? Does the platform have to include Asterisk®, or are you open to alternatives? Does the operating system have to be Linux-based and, if so, must it be CentOS, Debian, or Ubuntu? If you’ll be using SIP phones, must the platform include phone provisioning software for your phones, or is the ability to purchase it as an add-on sufficient? Is paid support important in making your platform decision and how much are you prepared to pay? Are automatic or pain-free software updates critical in making your selection? Is migration from an existing platform a factor? Does a preconfigured, secure firewall matter, or are you prepared to do it yourself or take your chances? Before choosing to ignore security, read last month’s RIPS analysis of FreePBX®. Here’s a snippet from the article. Read it carefully. It’s your phone bill.
Since FreePBX is written completely in PHP, we decided to throw it into our code analysis tool RIPS. The results were more than surprising…
The total amount of detected vulnerabilities is very high. Luckily, the majority of the detected vulnerabilities are inside the administration control panel, such that attackers either need to steal a valid account or they have to trick an administrator into visiting a malicious website that triggers one of the critical vulnerabilities. For example, a remote command execution vulnerability could be triggered by a less critical cross-site scripting vulnerability. By chaining both vulnerabilities, the severity is increased drastically and can lead to full server compromise.
In choosing which platforms to include today, we eliminated platforms which we considered too complicated for the average new user to configure. We also eliminated any platform that did not offer at least a free tier of service with a reasonably complete feature set as part of their offering. If we’ve inadvertently missed one of your favorites, please feel free to leave a comment, and we will consider including it as well. Happy Hunting!
VoIP Platform Feature Summary
Aggregation: FreePBX Distro a.k.a. AsteriskNOW
License: Closed Source
VoIP Platform: Asterisk 13/14
GUI: FreePBX GPL and Commercial modules
O/S: CentOS-clone
Phone Provisioning: Open Source (minimal) or Commercial
Text-to-Speech/Voice Recognition: Optional/No
Software Updates: Manual
Migration Tools: Yes
Security: Fail2Ban + User-Configured Firewall
Security Rating (as delivered): see above
Comments: Extensive commercial NagWare preinstalled
Aggregation: Incredible PBX for Wazo
License: GPL3 Open Source
VoIP Platform: Asterisk 14 RealTime
GUI: Wazo GPL3 modules
O/S: Debian 8
Phone Provisioning: Extensive Open Source
Text-to-Speech/Voice Recognition: Yes/Yes
Software Updates: Automatic or 2-minute Manual
Migration Tools: No
Security: Fail2Ban + Preconfigured Firewall
Security Rating (as delivered): Secure WhiteList
Comments: High Availability & Call Center GPL3 Modules
Aggregation: Ombutel
License: Closed Source
VoIP Platform: Asterisk 13
GUI: Ombutel with external module support
O/S: Debian 8
Phone Provisioning: Closed Source
Text-to-Speech/Voice Recognition: No/No
Software Updates: Manual
Migration Tools: No
Security: FaiL2Ban + Do-It-Yourself Firewall
Security Rating (as delivered): Insecure
Aggregation: PIAF5 powered by 3CX
License: Closed Source
VoIP Platform: 3CX
GUI: 3CX
O/S: Debian 8
Phone Provisioning: Extensive Closed Source
Text-to-Speech/Voice Recognition: No/No
Software Updates: Semi-Automatic
Migration Tools: Yes
Security: Fail2Ban + Preconfigured Firewall
Security Rating (as delivered): Secure
Comments: Free upgrade provides unlimited SIP trunks with 8 simultaneous calls
Aggregation: Elastix 5.0 powered by 3CX
License: Closed Source
VoIP Platform: 3CX
GUI: 3CX
O/S: Debian 8
Phone Provisioning: Extensive Closed Source
Software Updates: Semi-Automatic
Migration Tools: Yes
Security: Fail2Ban + Preconfigured Firewall
Security Rating (as delivered): Secure
Comments: Free version limited to one SIP trunk & 8 simultaneous calls
Aggregation: Incredible PBX 3
License: GPL2 Open Source
VoIP Platform: Asterisk 13
GUI: FreePBX GPL modules only
O/S: CentOS 6/7, Ubuntu 14, or Raspbian 8
Phone Provisioning: Open Source (minimal)
Text-to-Speech/Voice Recognition: Yes/Yes
Software Updates: Automatic
Migration Tools: Yes
Security: Fail2Ban + Preconfigured Firewall
Security Rating (as delivered): Secure WhiteList
Comments: FreePBX GPL modules only; module signature verification disabled1
Aggregation: Elastix 4.0
License: Open Source GPL
Platform: Asterisk 13
O/S: CentOS 7
Phone Provisioning: Open Source
Text-to-Speech/Voice Recognition: No/No
Software Updates: Semi-Automatic
Migration Tools: No
Security: Fail2Ban + Unconfigured Firewall
Security Rating (as delivered): Insecure
Comments: Currently unavailable but fork announced
Aggregation: PIAF3
License: Open Source GPL with Closed Source Installer
Platform: Asterisk 11/13
O/S: CentOS 6
Phone Provisioning: Open Source (minimal)
Text-to-Speech/Voice Recognition: No/No
Software Updates: Manual
Migration Tools: No
Security: Fail2Ban + Unconfigured Firewall
Security Rating (as delivered): Insecure
Comments: No longer maintained
Published: Sunday, January 1, 2017
Need help with Asterisk? Visit the PBX in a Flash Forum.
Special Thanks to Our Generous Sponsors
FULL DISCLOSURE: ClearlyIP, Skyetel, Vitelity, DigitalOcean, Vultr, VoIP.ms, 3CX, Sangoma, TelecomsXchange and VitalPBX have provided financial support to Nerd Vittles and our open source projects through advertising, referral revenue, and/or merchandise. As an Amazon Associate and Best Buy Affiliate, we also earn from qualifying purchases. We’ve chosen these providers not the other way around. Our decisions are based upon their corporate reputation and the quality of their offerings and pricing. Our recommendations regarding technology are reached without regard to financial compensation except in situations in which comparable products at comparable pricing are available from multiple sources. In this limited case, we support our sponsors because our sponsors support us.
BOGO Bonaza: Enjoy state-of-the-art VoIP service with a $10 credit and half-price SIP service on up to $500 of Skyetel trunking with free number porting when you fund your Skyetel account. No limits on number of simultaneous calls. Quadruple data center redundancy. $25 monthly minimum spend required. Tutorial and sign up details are here.
The lynchpin of Incredible PBX 2020 and beyond is ClearlyIP components which bring management of FreePBX modules and SIP phone integration to a level never before available with any other Asterisk distribution. And now you can configure and reconfigure your new Incredible PBX phones from the convenience of the Incredible PBX GUI.
VitalPBX is perhaps the fastest-growing PBX offering based upon Asterisk with an installed presence in more than 100 countries worldwide. VitalPBX has generously provided a customized White Label version of Incredible PBX tailored for use with all Incredible PBX and VitalPBX custom applications. Follow this link for a free test drive!
Special Thanks to Vitelity. Vitelity is now Voyant Communications and has halted new registrations for the time being. Our special thanks to Vitelity for their unwavering financial support over many years and to the many Nerd Vittles readers who continue to enjoy the benefits of their service offerings. We will keep everyone posted on further developments.
Some Recent Nerd Vittles Articles of Interest…
- See RIPStech article explaining why FreePBX module signature verification is a very dangerous methodology. [↩]
Raspberry Pi One-Minute Wonder: A Turnkey and Truly Incredible PBX for XiVO
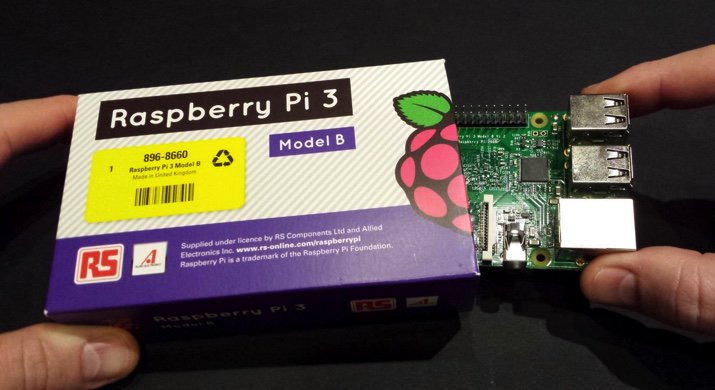
Hard to believe it’s been 4½ years since the introduction of the original Raspberry Pi®. We love half-birthdays, and we’ve got a blockbuster gift for you today as we celebrate the fact that almost 10 million RasPi’s have been shipped. Yes, our love affair with the Raspberry Pi lives on. The sensational Raspberry Pi 3 sports a 1.2GHz 64-bit quad-core ARM Cortex-A53 CPU with ten times the performance of the original Raspberry Pi. Of particular interest to the VoIP community will be the RasPi 3’s integrated 802.11n wireless LAN and Bluetooth 4.1 hardware. And, of course, the RasPi 3 retains its compatibility with the Raspberry Pi 1 and 2. Did we mention it’s still just $35? Because we like to celebrate half birthdays, too, we’re pleased to introduce a brand new Incredible PBX™ for XiVO image for the Raspberry Pi 3 featuring Raspbian 8, the latest release of Asterisk® 13, and XiVO. This one installs in under a minute. And, yes, it’s still FREE with pure open source GPL code.
Special Thanks. First things first. We want to extend our extra special thanks to Iris-Network for their awesome Raspivo – XiVO build. Without it and their repositories, none of this would have been possible.
Raspberry Pi 3 Performance. Gone are the days of worrying about Raspberry Pi performance. Both the user interface and call quality now match what you’d expect to find on a $300-$500 VoIP server. For best results, we recommend 32GB Class 10 microSD cards which now are plentiful at the $10 price point.1
Raspberry Pi 3 Shopping List. Before you can install Incredible PBX for XiVO, you’ll need a compatible Raspberry Pi 3 platform. Here’s the short list that, when coupled with the Incredible PBX image, turns today’s adventure into kid’s play:
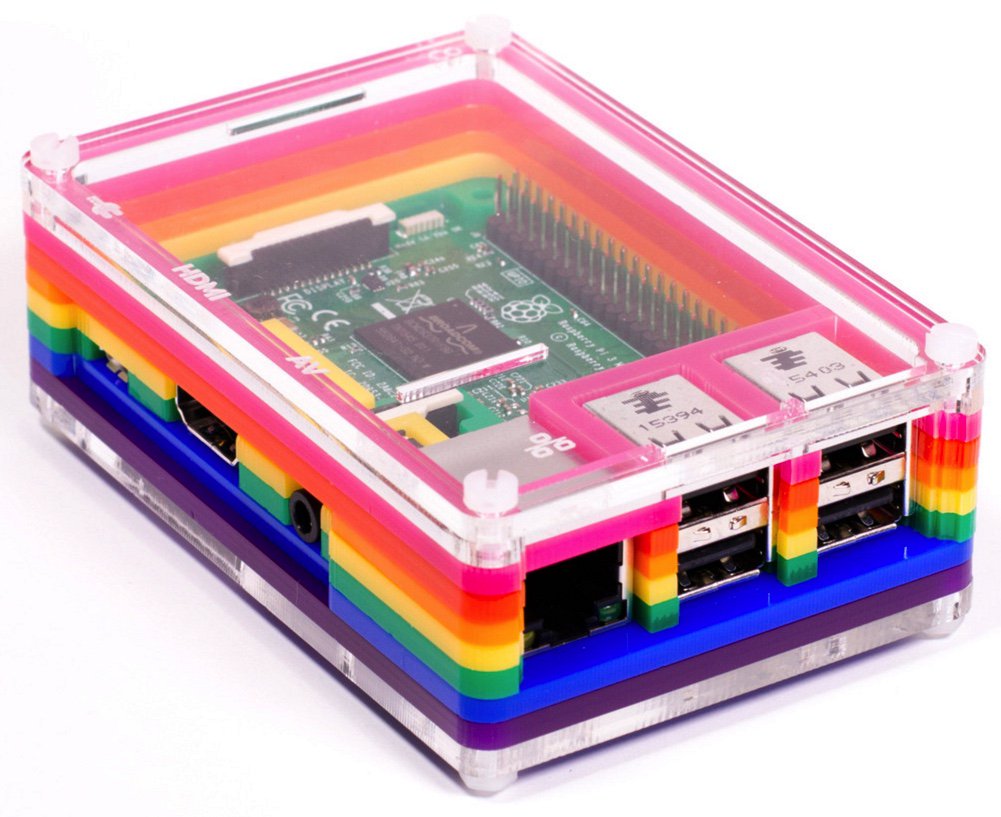
$35* Raspberry Pi 3 from MCM or Newark or Amazon $10 Power Adapter (2.5 amps minimum!) $10 32GB microSDHC Class 10 card (Don’t use SanDisk Ultra!) £12.95 Pibow 3 case or $7.50 Official RasPi 3 case
About That Asterisk. We write about Asterisk® regularly, but the asterisk we’re talking about is the one accompanying the $35* price tag for the Raspberry Pi 3. Yes, that’s the advertised price. And, no, if you want one quickly, you may pay a bit more. Right now you can snag one on Amazon for $35.99 with two-day Prime shipping. We’re assuming you already own a USB keyboard and an HDMI-compatible monitor. If so, today’s going rate for all of our recommended pieces is under $65, not bad for a fully-equipped, quad-core computer. Did we mention that Incredible PBX for XiVO is FREE with NoGotchas!
Incredible PBX Feature Set. Where to begin? Let’s start with the Alphabet Stew: IAX, SIP, SMS, FAX, SRTP, and OAuth functionality. Voice Recognition and Text-to-Speech VoIP application support using Festival and Google. Free calling with Google Voice, Simonics SIP gateway, or RingPlus cellular service. And all of your Nerd Vittles favorites: AsteriDex, Click-to-Dial, News, Weather, Reminders, and even an Alarm Clock. Plus hundreds of features that typically are found in commercial PBXs: Conferencing, IVRs and AutoAttendants, Simultaneous Ringing on your Smartphone, Email Delivery of Voicemail, Voicemail Blasting, Automatic Backups, High Availability Support, Automatic Phone Setups, and much more…
Incredible PBX Network Security Model. Most phone calls cost money. Unlike many of the other "free" VoIP solutions, our most important criteria for VoIP is rock-solid security. If your free server ends up costing you thousands of dollars in phone bills due to fraud, it isn’t free at all. Once you plug in that network cable, you’ve painted a bullseye on your checkbook.
No single network security system can protect you against zero-day vulnerabilities that no one has ever seen. Deploying multiple layers of security is not only smart, it’s essential with today’s Internet topology. It works much like the Bundle of Sticks from Aesop’s Fables. The more sticks there are in your bundle, the more difficult it is to break them apart. If a vulnerability suddenly appears in the Linux kernel, or in Asterisk, or in your web server, or in your favorite web GUI, you can continue to sleep well knowing that other layers of security have your back. No one else in the telecommunications industry has anything close. You can’t hack what you can’t see, and the Incredible PBX automatically configures a WhiteList as part of the one-minute setup. And it’s all open source GPL code that you can share with anybody and everybody unlike the so-called "freeware" products. Freeware with Asterisks is anything but free!
Do your part and do your homework. Comparison shop as if your phone bill matters! 😉 Incredible PBX provides:
- Preconfigured IPtables Linux Firewall
- Preconfigured Travelin’ Man 3 WhiteLists
- Randomized Port Knocker for Remote Access
- Fail2Ban Log Monitoring for SSH, Apache, Asterisk
- Randomized Ultra-Secure Passwords
- Automatic Update Utility for Security & Bug Fixes
- Asterisk Manager Lockdown to localhost
- Security Alerts via the PIAF Forum
Incredible PBX for XiVO Installation & Setup Tutorial
Here’s everything need to know about installation and setup of Incredible PBX for XiVO. "Automatic" means you just watch.
- Download and unzip Incredible PBX for XiVO image from SourceForge (includes GV OAuth support)
- Transfer Incredible PBX image to microSD card
- Boot Raspberry Pi from new microSD card
- Login to RasPi console as root:password to initialize your server (Automatic) and expand image to match SD card
- Reboot after writing down your server IP address (Automatic)
- Login via SSH as root:password to set up passwords (You Pick ’em) & configure firewall (Automatic)
- Enjoy!
Running Incredible PBX for XiVO on the Raspberry Pi
The standard XiVO boot procedure will begin once you insert your microSD card into the Raspberry Pi 3 and apply power. Within a short time, you’ll get the familiar Linux login prompt. Login as root with a password of password.
Once you log in, a startup script will briefly configure a few things and then advise you that it’s time to reboot. Write down the IP address provided because for Phase 2 of the setup, we need to use SSH or Putty on the desktop that you will actually be using to manage your server. The reason for this is that Incredible PBX automatically creates a whitelist of IP addresses that the firewall will allow to access your server. If the IP address isn’t in your whitelist, you may lock yourself out except from the RasPi’s console window.
Once the console window shows that your server has rebooted by displaying the Linux login prompt, switch to SSH or Putty and login as root using the IP address you wrote down. You’ll then be prompted to change your root password for Linux as well as your root password for XiVO GUI access using a web browser. You’ll also need to set a PIN that will be used to authorize access to extension 123 to schedule Telephone Reminders on your server. This completes the configuration. You’ll get a final screen showing the credentials for the preconfigured extension 701 as well as a reminder that your PortKnocker credentials are stored in /root/knock.FAQ in the event you ever lock yourself out of your machine. It’s a good idea to leave this screen displayed while you install and configure a softphone since you can cut-and-paste your extension 701 credentials without having to type anything.
Once you complete the SIP softphone setup below, you can return to the SSH window and press ENTER to finish the install. The Incredible PBX Automatic Update Utility will run, and then you will be presented with the pbxstatus display. You can access the Asterisk CLI by typing: asterisk -rvvvvvvvvvv. Exit from the CLI by typing quit. As mentioned previously, always shut down your server gracefully by typing halt. When prompted for the hostname, type xivo. Once the shutdown procedure finishes, it’s safe to disconnect the power cord from your Raspberry Pi.
Beginning with the September 1 release, many of the log files have been disabled to help prolong the life of microSD cards since XiVO tends to be very chatty. If you are running an earlier release, you can follow this tutorial to disable most logging on your Raspberry Pi.
Enabling WiFi on the Raspberry Pi 3
With the Raspberry Pi 3, wi-fi hardware is included. The next step is configuring it to connect to your WiFi router. Simply open /etc/wpa_supplicant/wpa_supplicant.conf with nano and (1) edit the SSID name and password fields to authorize access to your local, password-protected WiFi router as well as any open WiFi network. (2) Also update the country code for your WiFi region, e.g. country=US. Then (3) save your changes: Ctrl-X, Y, then press ENTER.
network={ ssid="YourSSID" psk="YourSSIDpassword" key_mgmt=WPA-PSK scan_ssid=1 priority=5 } network={ key_mgmt=NONE priority=1 }
Next, enable automatic startup of the wlan0 network interface:
sed -i 's|#allow-hotplug wlan0|allow-hotplug wlan0|' /etc/network/interfaces
Finally, stop and restart the wlan0 interface, count to 15, and check pbxstatus to decipher the added private IP address for your WiFi connection:
ifdown wlan0 ifup wlan0 pbxstatus
If you want to run your Raspberry Pi exclusively off the WiFi connection going forward, simply unplug the network cable from your RasPi and reboot your server.
Choosing a SIP Softphone for Incredible PBX for XiVO
Softphones tend to be a matter of taste for most folks so we’ll keep our suggestions to a minimum. On the Windows platform, it’s hard to go wrong with X-Lite. It works out of the box by simply plugging in the IP address of your server and your SIP username and password. It also happens to be free. The only downside is that X-Lite has a nasty habit of embedding time bombs in their free software so you may have to reinstall it from time to time. If you know what you’re doing Zoiper is another alternative but be advised that it doesn’t work out of the box on servers behind NAT-based routers.
On the Mac platform, our favorite free softphone is Telephone. It’s a barebones SIP client that just works. As with X-Lite, you plug in your server’s IP address and SIP credentials, and you’re in business.
On the Linux or Solaris platforms, we assume that you know what you’re doing and that you are perfectly capable of choosing and installing a SIP phone that meets your requirements.
Incredible PBX Application Quick Start Guide
We’ve finished the basic Incredible PBX for XiVO setup. You now have a functioning PBX with dozens of applications for Asterisk that work out of the box. It’s probably a good idea to spend a little time getting acquainted with Incredible PBX for XiVO before you add trunks to communicate with the outside world.
Here’s a handy cheat sheet for some of the Incredible PBX applications that have been installed or are available as add-ons. There’s also a link for more information. This remains a work-in-progress so expect more applications in coming weeks.
- Google Voice CLI interface and SMS Message Blasting
- CallerID Superfecta – Match Names to CallerID Numbers
- CallerID Blacklist – Block Calls from Spammers and Old Girlfriends
- CDR Reports in CSV Format
- CDR Reports in SQLite3 Format
- Asteridex – The Poor Man’s Rolodex (SQLite3 version)
- AsteriDex Click-to-Dial with XiVO Phonebook
- NeoRouter VPN for XiVO
- FCC RoboCall BlackList
- CallerID WhiteList Override
- Dial 123 – Telephone Reminders
- Dial 411 – Call by Name from AsteriDex
- Dial 947 – Weather Forecasts by ZIP Code
- Dial 951 – Latest Yahoo News
- Dial 2663 – Conference Call
- Dial 3472 – DISA Access
- Dial 4871 – Allison’s Sample IVR
- Dial *61 – Time of Day
- Dial *65 – Decipher Your Extension #
- Dial 8463 – Time of Day
- Dial *881400 – Schedule an Alarm for 2 p.m. (1400 military time)
- Dial 53669 – Meet Lenny, the Robocaller’s Worst Nightmare
How To Make Easily Compressed Backups of Incredible PBX
MicroSD cards WILL wear out especially on XiVO servers with lots of activity. So it’s important to make regular backups of your media so you don’t get surprised when things come unglued down the road. After considerable discussion on the PIAF Forum, here’s the collective wisdom.
You’ll need another machine (such as a Mac or Linux box) on which to plug in the microSD card in order to make a backup image of it since you can’t back up a card that is actually providing the live platform for your PBX. The recommended methodology goes like this. Before shutting down your PBX and removing the microSD card to make the backup, convert all of the unused space on the card to zeros so that the unused space can be easily compressed when you create the backup image. You do this by issuing the following command after logging into the Linux CLI as root on your RasPi 3. Be sure to do it during a period of inactivity on your PBX as it is processor intensive. Then halt the machine and remove the microSD card.
xivo-service stop cat /dev/zero > wipe.it ; rm wipe.it halt
Insert the card into an SD card slot on the machine you will use to make the backup image and issue the following commands after deciphering the correct device name for your card (/dev/disk4 in this example) using the df utility:
sudo df -h sudo dd bs=1m if=/dev/disk4 | gzip -c > incrediblepbx-xivo.img.gz sudo sync sudo diskutil eject /dev/disk4s1 echo "It's safe to remove the microSD card now."
Now return the microSD card to your Raspberry Pi 3 and boot. Store your backups in a safe place!
Configuring Trunks and Routes with Incredible PBX for XiVO
The next step in your XiVO adventure is connecting your PBX to the outside world so that you can make and receive phone calls from anywhere in the world. For this you’ll need one or more trunks. Unlike the Ma Bell world, there’s no reason to put all your eggs in one basket. You can use one or more trunk providers for incoming calls with separate phone numbers for each. And you can use one or more trunk providers for outgoing calls and save money on calls to certain countries by choosing the best provider for where you want to call. And, of course, if you live in the United States, you can set up one or more Google Voice trunks and make calls to the U.S. and Canada for free. We’ve written a number of tutorials to make it easy to set up these trunks.
To get started, point a web browser to the IP address of your PBX. Login as root with the XiVO GUI password you set up above. If you ever forget your password, you can run /root/admin-pw-change to reconfigure it.
XIVO Trunk Implementation Tutorials
- XiVO Trunks Tutorial: Installing a Vitelity SIP Trunk2
- XiVO Trunks Tutorial: Installing a VoIP.ms SIP Trunk
- XiVO Trunks Tutorial: Installing a RingPlus SIP Trunk
- XiVO Trunks Tutorial: Installing a FreeVoipDeal (Betamax) SIP Trunk
- XiVO Trunks Tutorial: Installing a Google Voice-Simonics SIP Trunk
- XiVO Trunks Tutorial: Deploying Native Google Voice with OAuth Trunks
- XiVO Trunks Tutorial: Installing an Anveo Direct Outbound SIP Trunk
- XiVO Trunks Tutorial: Installing a Skype Connect SIP Trunk
Once you’ve added one or more trunks, you’ll need to tell XiVO how to route outgoing and incoming calls. Here are our step-by-step tutorials on setting up Outbound Calling Routes and Incoming Call Routes:
XIVO Call Routing Tutorials
- XiVO Call Routing Tutorial: Creating Outbound Routes for PSTN Calling
- XiVO Call Routing Tutorial: Creating Inbound Routes for DIDs
Enabling Bluetooth & Proximity Detection on the Raspberry Pi
Implementing Bluetooth Proximity Detection with Smartphone and your #RaspberryPi3 https://t.co/TYFrcqcLux #asterisk pic.twitter.com/QqGNjqG3Ag
— Ward Mundy (@NerdUno) March 4, 2016
Where To Go Next with Incredible PBX for XiVO
Now you’re ready to explore. We recommend you pick up here in our Incredible PBX for XiVO tutorial. And be sure to check out the Last Minute Fixes that didn’t make it into the current build. Enjoy the ride!
Originally published: Monday, August 29, 2016
9 Countries Have Never Visited Nerd Vittles. Got a Friend in Any of Them https://t.co/wMfmlhiQ9y #asterisk #freepbx pic.twitter.com/TPFGZbqWB6
— Ward Mundy (@NerdUno) April 22, 2016
Need help with Asterisk? Visit the PBX in a Flash Forum.
Special Thanks to Our Generous Sponsors
FULL DISCLOSURE: ClearlyIP, Skyetel, Vitelity, DigitalOcean, Vultr, VoIP.ms, 3CX, Sangoma, TelecomsXchange and VitalPBX have provided financial support to Nerd Vittles and our open source projects through advertising, referral revenue, and/or merchandise. As an Amazon Associate and Best Buy Affiliate, we also earn from qualifying purchases. We’ve chosen these providers not the other way around. Our decisions are based upon their corporate reputation and the quality of their offerings and pricing. Our recommendations regarding technology are reached without regard to financial compensation except in situations in which comparable products at comparable pricing are available from multiple sources. In this limited case, we support our sponsors because our sponsors support us.
BOGO Bonaza: Enjoy state-of-the-art VoIP service with a $10 credit and half-price SIP service on up to $500 of Skyetel trunking with free number porting when you fund your Skyetel account. No limits on number of simultaneous calls. Quadruple data center redundancy. $25 monthly minimum spend required. Tutorial and sign up details are here.
The lynchpin of Incredible PBX 2020 and beyond is ClearlyIP components which bring management of FreePBX modules and SIP phone integration to a level never before available with any other Asterisk distribution. And now you can configure and reconfigure your new Incredible PBX phones from the convenience of the Incredible PBX GUI.
VitalPBX is perhaps the fastest-growing PBX offering based upon Asterisk with an installed presence in more than 100 countries worldwide. VitalPBX has generously provided a customized White Label version of Incredible PBX tailored for use with all Incredible PBX and VitalPBX custom applications. Follow this link for a free test drive!
Special Thanks to Vitelity. Vitelity is now Voyant Communications and has halted new registrations for the time being. Our special thanks to Vitelity for their unwavering financial support over many years and to the many Nerd Vittles readers who continue to enjoy the benefits of their service offerings. We will keep everyone posted on further developments.
Some Recent Nerd Vittles Articles of Interest…
- Many of our purchase links refer users to Amazon when we find their prices are competitive for the recommended products. Nerd Vittles receives a small referral fee from Amazon to help cover the costs of our blog. We never recommend particular products solely to generate Amazon commissions. However, when pricing is comparable or availability is favorable, we support Amazon because Amazon supports us. [↩]
- Vitelity is a platinum sponsor of Nerd Vittles, and they also happen to be the best in the business. You’ll find a discount coupon to get a great deal on a DID and 4-channel trunk toward the end of this article. [↩]
Taking a Fresh Look at the Asterisk, FreePBX, and Incredible PBX Security Models
About once a year, we try to shine the spotlight on Asterisk® security in hopes of saving lots of organizations and individuals a little bit (or a lot) of money. In light of last week’s major security lapse in the Asterisk® dialplan of those using FreePBX® since the Asterisk@Home days, now seemed like a good time for a review. As we’ve noted before, the problem with open source phone systems is they’re open source phone systems. So the bad guys can figure out how they work just like the good guys. Unfortunately, some of the bad guys are paying particular attention to Asterisk and FreePBX so it behooves all of us to remain vigilant and patch vulnerabilities quickly. The FreePBX Devs have done an admirable job in responding quickly to this issue.
Last week’s vulnerability involves the call transfer methodology that has been incorporated into FreePBX-based Asterisk servers for at least a decade. In a nutshell, it allows an internal or outside caller or called party to transfer a call using touchtones instead of a dedicated transfer button or hook flash. ## performs a blind transfer while *2 sets up an attended transfer where the person transferring the call can actually talk to the transfer recipient before executing the call transfer. Some of our foreign friends used this *2 methodology to initiate calls to Asterisk servers and then to transfer those calls to expensive destinations while the other party to the call listened to music on hold. Worse yet, it could be performed within an answering IVR on some servers so the administrator never knew the call transfer took place other than reviewing the call detail records. As with some previous vulnerabilities, this one had lain dormant since the inception of call transfer technology in Asterisk. The default settings in FreePBX permitted outside calling or called parties to initiate transfers using these feature codes. We’re reminded of a similar vulnerability that used to exist in many Asterisk voicemail systems that allowed callers to dialout to another number from within the voicemail system.
We hope to persuade you today that allowing transfer of calls using touch tones is a very bad idea to begin with. Even when you don’t get a surprise phone bill, it often results in unanticipated consequences such as depicted in this video shared on DSL Reports:
https://youtu.be/bnMVebywX6Y
Here’s how you can protect any server that uses all or some of the FreePBX GUI. First, be aware that the FreePBX developers are working on a rewrite of the Core component in versions 13 and 12. The fix would limit use of this technology to those on the internal side of a PBX. In other words, remote callers would be blocked from calling into an Asterisk server and transferring themselves to a phone on a cruise ship sailing in the Indian Ocean. In the meantime, issuing the following commands will patch things up:
mysql -uroot -ppassw0rd asterisk -e "update freepbx_settings set value = 'tr' where keyword = 'DIAL_OPTIONS' limit 1" mysql -uroot -ppassw0rd asterisk -e "update freepbx_settings set value = '' where keyword = 'TRUNK_OPTIONS' limit 1" amportal a r
For those using Incredible PBX™, the Automatic Update Utility will patch your server the next time you log in as root.
Olle Johansson has been one of the primary shakers and movers when it comes to educating folks on Asterisk security and inspiring developers to do a better job designing these systems. If you didn’t attend AstriCon 2013 and haven’t watched the Security Master Class, put these videos on your Bucket List. They’re all free and well worth your time.
When we began building out Incredible PBX on other platforms several years ago, we decided it was an opportune time to revisit our Asterisk security model and make it as bullet-proof as possible given the number of people now deploying Asterisk servers in the cloud. As a practical matter, there are no hardware-based firewalls to protect you with many of the cloud-based systems. So you literally live or die based upon the strength of your own software-based security model.
As in the past, security is all about layers of protection. A bundle of sticks is harder to break than a single stick. There now are Incredible PBX builds for CentOS, Scientific Linux, Ubuntu 14, and the latest Raspbian 8 for the Raspberry Pi 2 and 3. All of these releases include the new Incredible PBX security model. Here’s how it works…
The 7 Security Layers include the following, and we will go into the details below:
- Preconfigured IPtables Linux Firewall
- Preconfigured Travelin’ Man 3 WhiteLists
- Randomized Port Knocker for Remote Access
- TM4 WhiteListing by Telephone (optional)
- Fail2Ban
- Randomized Ultra-Secure Passwords
- Automatic Security Updates & Bug Fixes
1. IPtables Linux Firewall. Yes, we’ve had IPtables in place with PBX in a Flash for many years. And, yes, it was partially locked down in previous Incredible PBX releases if you chose to deploy Travelin’ Man 3. Now it’s automatically installed AND locked down, period. As installed, the new Incredible PBX limits login access to your server to those on your private LAN (if any) and anyone logging in from the server’s public or private IP address and the public IP address of the desktop machine used to install the Incredible PBX software. If you or your users need access from other computers or phones, those addresses can be added quickly using either the Travelin’ Man 3 tools (add-ip and add-fqdn) or using the Port Knocker application running on your desktop or smartphone. All you need is your randomized 3 codes for the knock. You can also enable a remote IP address by telephone. Keep reading!
2. Travelin’ Man 3 WhiteLists. As in the past, many of the major SIP providers have been whitelisted in the default setup so that you can quickly add new service without worrying about firewall access. These are providers that we’ve used over the years. The preconfigured providers include Vitelity (outbound1.vitelity.net and inbound1.vitelity.net), Google Voice (talk.google.com), VoIP.ms (city.voip.ms), DIDforsale (209.216.2.211), CallCentric (callcentric.com), and also VoIPStreet.com (chi-out.voipstreet.com plus chi-in.voipstreet.com), Les.net (did.voip.les.net), Future-Nine, AxVoice (magnum.axvoice.com), SIP2SIP (proxy.sipthor.net), VoIPMyWay (sip.voipwelcome.com), Obivoice/Vestalink (sms.intelafone.com), Teliax, and IPkall. You are, of course, free to add other providers or users using the whitelist tools being provided. add-ip lets you add an IP address to your whitelist. add-fqdn lets you add a fully-qualified domain name to your whitelist. del-acct lets you remove an entry from your whitelist. Because FQDNs cause problems with IPtables if the FQDN happens to be invalid or non-functional, we’ve provided a customized iptables-restart tool which will filter out bad FQDNs and start up IPtables without the problematic entries.
Be advised that whitelist entries created with PortKnocker are stored in RAM, not in your IPtables file. These RAM entries will get blown out of the water whenever your system is restarted OR if IPtables is restarted. Stated another way, PortKnocker should be used as a stopgap tool to get new IP addresses qualified quickly. If these addresses need access for more than a few hours, then the Travelin’ Man 3 tools should be used to add them to your IPtables whitelist. If your whitelist setup includes dynamic IP addresses, be aware that using ipchecker in a cron job to test for changing dynamic IP addresses will remove PortKnocker whitelist RAM entries whenever an IP address change triggers an iptables-restart.
For more detail on Travelin’ Man 3, review our original tutorial.
3. PortKnocker WhiteListing. We’ve previously written about PortKnocker so we won’t repeat the article here. Simply stated, it lets you knock on three ports on a host machine in the proper order to gain access. If you get the timing and sequence right, the IP address from which you knocked gets whitelisted for access to the server… with appropriate admin or root passwords, of course. The knocking can be accomplished with either a command line tool or an iOS or Android app using your smartphone or tablet. As noted above, it’s a terrific stopgap tool to let you or your users gain quick access to your server. For the reasons we’ve documented, don’t forget that it’s a stopgap tool. Don’t use it as a replacement for Travelin’ Man 3 whitelists unless you don’t plan to deploy dynamic IP address automatic updating. Just to repeat, PortKnocker whitelists get destroyed whenever IPtables is restarted or your server is rebooted. You’ve been warned.
4. TM4 WhiteListing by Telephone. Newer releases of Incredible PBX are preconfigured with ODBC support for telephony applications. One worth mentioning is our new Travelin’ Man 4 utility which lets a remote user dial into a dedicated DID and register an IP address to be whitelisted on the server. Within a couple minutes, the user will be sent an email confirming that the IP address has been whitelisted and remote access is now enabled. For phone systems and administrators supporting hundreds of remote users, this new feature will be a welcome addition. It can be configured in a couple minutes by following the Installation instructions in the Travelin’ Man 4 tutorial. Unlike PortKnocker, whitelisted IP addresses added with TM4 are permanent until modified by the remote user or deleted by the administrator.
5. Fail2Ban. We’ve never been a big fan of Fail2Ban which scans your logs and blacklists IP addresses after several failed attempts to log in or register with SSH or Apache or Asterisk. The reason is because of documented cases where attacks from powerful servers (think: Amazon) completely overpower a machine and delay execution of Fail2Ban log scanning until tens of thousands of registration attempts have been launched. The FreePBX folks are working on a methodology to move failed login attempts to a separate (smaller) log which would go a long way toward eliminating the log scanning bottleneck. In the the meantime, Fail2Ban is included, and it works when it works. But don’t count on it as your only security layer.
6. Randomized Passwords. With the new security model described above, we’ve dispensed with Apache security to protect FreePBX® access. These new Incredible PBX releases rely upon the FreePBX security model which uses encrypted passwords stored in MySQL or MariaDB. As part of the installation process, Incredible PBX randomizes ALL FreePBX passwords including those for the default 701 extension as well as the admin password. When your new Incredible PBX install completes, the most important things to remember are your (randomized) FreePBX admin password AND the (randomized) 3 ports required for Port Knocker access. Put them in a safe place. Sooner or later, you’ll need them. You can review your PortKnocker settings in /root/knock.FAQ. We’ve also included admin-pw-change in the /root folder for those that are too lazy to heed our advice. With the new security model, there is no way to look up your admin password. All you can do is change it… assuming you haven’t also forgotten your root password. 😉
7. Automatic Update Service. All new Incredible PBX builds include an automatic update service to provide security patches and bug fixes whenever you log into your server as root. It saved you just last week! If you don’t want the updates for some reason, you can delete the /root/update* file from your server. If the cost of maintaining this service becomes prohibitive, we may implement a pay-for-service fee, but it presently is supported by voluntary contributions from our users. It has worked extremely well and provided a vehicle for pushing out updates that affect the reliability and security of your server.
A Word About IPv6. Sooner or later Internet Protocol version 6 will be upon us because of the exhaustion of IPv4 IP addresses. Incredible PBX is IPv6-aware and IPtables has been configured to support it as well. As deployed, outbound IPv6 is not restricted. Inbound access is limited to localhost. You, of course, are free to modify it in any way desired. Be advised that disabling IPv6 localhost inbound access will block access to the FreePBX GUI. Don’t ask us how we know. 🙂
Originally published: Monday, April 18, 2016
9 Countries Have Never Visited Nerd Vittles. Got a Friend in Any of Them https://t.co/wMfmlhiQ9y #asterisk #freepbx pic.twitter.com/TPFGZbqWB6
— Ward Mundy (@NerdUno) April 22, 2016
Need help with Asterisk? Visit the PBX in a Flash Forum.
Special Thanks to Our Generous Sponsors
FULL DISCLOSURE: ClearlyIP, Skyetel, Vitelity, DigitalOcean, Vultr, VoIP.ms, 3CX, Sangoma, TelecomsXchange and VitalPBX have provided financial support to Nerd Vittles and our open source projects through advertising, referral revenue, and/or merchandise. As an Amazon Associate and Best Buy Affiliate, we also earn from qualifying purchases. We’ve chosen these providers not the other way around. Our decisions are based upon their corporate reputation and the quality of their offerings and pricing. Our recommendations regarding technology are reached without regard to financial compensation except in situations in which comparable products at comparable pricing are available from multiple sources. In this limited case, we support our sponsors because our sponsors support us.
BOGO Bonaza: Enjoy state-of-the-art VoIP service with a $10 credit and half-price SIP service on up to $500 of Skyetel trunking with free number porting when you fund your Skyetel account. No limits on number of simultaneous calls. Quadruple data center redundancy. $25 monthly minimum spend required. Tutorial and sign up details are here.
The lynchpin of Incredible PBX 2020 and beyond is ClearlyIP components which bring management of FreePBX modules and SIP phone integration to a level never before available with any other Asterisk distribution. And now you can configure and reconfigure your new Incredible PBX phones from the convenience of the Incredible PBX GUI.
VitalPBX is perhaps the fastest-growing PBX offering based upon Asterisk with an installed presence in more than 100 countries worldwide. VitalPBX has generously provided a customized White Label version of Incredible PBX tailored for use with all Incredible PBX and VitalPBX custom applications. Follow this link for a free test drive!
Special Thanks to Vitelity. Vitelity is now Voyant Communications and has halted new registrations for the time being. Our special thanks to Vitelity for their unwavering financial support over many years and to the many Nerd Vittles readers who continue to enjoy the benefits of their service offerings. We will keep everyone posted on further developments.
Some Recent Nerd Vittles Articles of Interest…
The Sensational Raspberry Pi 3 Featuring Incredible PBX GUI with Raspbian 8 Jessie
[iframe-popup id="3″]
Hard to believe it’s been four years since the introduction of the original Raspberry Pi®. Over eight million RasPi’s have been shipped. To celebrate its fourth birthday, Eben Upton has done it again. Meet the sensational Raspberry Pi 3 sporting a 1.2GHz 64-bit quad-core ARM Cortex-A53 CPU with ten times the performance of the original Raspberry Pi. Of particular interest to the VoIP community will be the RasPi 3’s integrated 802.11n wireless LAN and Bluetooth 4.1 hardware. And, of course, the RasPi 3 retains its compatibility with the Raspberry Pi 1 and 2. Did we mention it’s still just $35? Because we like to celebrate birthdays, too, we’re pleased to introduce a brand new Incredible PBX™ image for the Raspberry Pi 2 and 3 featuring Raspbian 8 and the latest release of Asterisk® 13. Unlike previous builds, this one installs in under a minute. Yes, it’s still FREE and features pure open source GPL code. No Gotchas!
07/01/2019 NEWS FLASH: Just released Incredible PBX LITE for the Raspberry Pi 2, 3, and 4 featuring Raspbian 10 Buster. Tutorial here.
Raspberry Pi 3 Performance. Gone are the days of worrying about Raspberry Pi performance. Both the user interface and call quality now match what you’d expect to find on a $300-$500 VoIP server. Even with a Raspberry Pi 2, we have detected no performance degradation thanks to the latest Raspbian 8 OS and a virtually flawless Asterisk 13 platform. For best results, we recommend 32GB Class 10 microSD cards which now are plentiful at the $10 price point.1
Raspberry Pi 3 Shopping List. Before you can install Incredible PBX, you’ll need a compatible Raspberry Pi 3 platform. Here’s the short list:
$35* Raspberry Pi 3 from MCM or Newark or Amazon $10 Power Adapter (2.5 amps minimum!) $9 32GB microSDHC Class 10 card £12.95 Rainbow Pibow case or $9.50 Official RasPi case
About That Asterisk. We write about Asterisk® regularly, but the asterisk we’re talking about is the one accompanying the $35* price tag for the Raspberry Pi 3. Yes, that’s the advertised price. And, no, if you want one this year, you’re not going to pay that. There are the marked up shipping prices, the bundled add-on’s that you don’t need or want, and the must-have accessories like a power adapter. We’re assuming you already own a USB keyboard and an HDMI-compatible monitor. If so, just plan on $100 and consider yourself lucky if you get all the pieces for less. Our order from Pimoroni in the U.K. with a case and 3-day shipping was £59.36 or $82.95 U.S. Our order from MCM for just the RasPi 3 with shipping was $46.99.
Incredible PBX Feature Set. Where to begin? Let’s start with the Alphabet Stew: IAX, SIP, GVSIP, SMS, and SRTP functionality. Voice Recognition and Text-to-Speech VoIP application support using FLITE, GoogleTTS, and PicoTTS. Free calling with Google Voice, Simonics SIP gateway, or RingPlus cellular service. And all of your Nerd Vittles favorites: Fax, AsteriDex, Click-to-Dial, News, Weather, Reminders, and Wakeup Calls. Plus hundreds of features that typically are found in commercial PBXs: Conferencing, IVRs and AutoAttendants, Email Delivery of Voicemail, Voicemail Blasting, and more…
10-Layer Network Security Model. Most phone calls cost money. Unlike many of the other "free" VoIP solutions, our most important criteria for VoIP is rock-solid security. If your free server ends up costing you thousands of dollars in phone bills due to fraud, it isn’t free at all. Once you plug in that network cable, you’ve painted a bullseye on your checkbook.
No single network security system can protect you against zero-day vulnerabilities that no one has ever seen. Deploying multiple layers of security is not only smart, it’s essential with today’s Internet topology. It works much like the Bundle of Sticks from Aesop’s Fables. The more sticks there are in your bundle, the more difficult it is to break them apart. If a vulnerability suddenly appears in the Linux kernel, or in Asterisk, or in Apache, or in your favorite web GUI, you can continue to sleep well knowing that other layers of security have your back. No one else in the telecommunications industry has anything close. Ours is all open source GPL code so we would encourage everyone to get on board and do their part to make the Internet a safer place!
Do your part and do your homework. Comparison shop as if your phone bill matters! 😉 Incredible PBX provides:
- Preconfigured IPtables Linux Firewall
- Preconfigured Travelin’ Man 3 WhiteLists
- Randomized Port Knocker for Remote Access
- TM4 WhiteListing by Telephone (optional)
- Fail2Ban Log Monitoring for SSH, Apache, Asterisk
- Randomized Ultra-Secure Passwords
- Automatic Update Utility for Security & Bug Fixes
- Asterisk Manager Lockdown to localhost
- Apache htaccess Security for Vulnerable Web Apps
- Security Alerts via RSS Feeds in Kennonsoft and Incredible PBX GUIs
Installation Tutorial. Here’s everything need to know about installation and setup. "Automatic" means you just watch.
- Download and unzip Incredible PBX image from SourceForge (with or without GV OAuth support)
- Transfer Incredible PBX image to microSD card
- Boot Raspberry Pi from new microSD card
- Login to RasPi console as pi:raspberry to initialize your server (Automatic)
- Reboot after writing down your server IP address (Automatic)
- Login via SSH as root:password to randomize passwords & configure firewall (Automatic)
- Optionally, install Incredible Fax: /root/incrediblefax13_raspi3.sh (Credentials: admin:password)
- Enjoy!
Configuring Trunks with Incredible PBX
Before you can actually make and receive calls, you’ll need to add one or more VoIP trunks with providers, create extensions for your phones, and add inbound and outbound routes that link your extensions to your trunks. Here’s how a PBX works. Phones connect to extensions. Extensions connect to outbound routes that direct calls to specific trunks, a.k.a. commercial providers that complete your outbound calls to any phone in the world. Coming the other way, incoming calls are directed to your phone number, otherwise known as a DID. DIDs are assigned by providers and you register your trunks using credentials handed out by these providers. Incoming calls are routed to your DIDs which use inbound routes telling the PBX how to direct the calls internally. A call could go to an extension to ring a phone, or it could go to a group of extensions known as a ring group to ring a group of phones. It could also go to a conference that joins multiple people into a single call. Finally, it could be routed to an IVR or AutoAttendant providing a list of options from which callers could choose by pressing various keys on their phone.
We’ve done most of the prep work for you with Incredible PBX. We’ve set up an Extension to which you can connect a SIP phone or softphone. We’ve set up an Inbound Route that, by default, sends all incoming calls to a Demo IVR. And we’ve built a dozen trunks for some of the best providers in the business. Sign up with the ones you prefer, plug in your credentials, and you’re good to go.
Unlike traditional telephone service, you need not and probably should not put all your eggs in one basket when it comes to telephone providers. In order to connect to Plain Old Telephones, you still need at least one provider. But there is nothing wrong with having several. And a provider that handles an outbound call (termination) need not be the same one that handles an incoming call (origination) and provides your phone number (DID). We cannot recommend Vitelity highly enough, and it’s not just because they have financially supported our projects for almost a decade. They’re as good as VoIP providers get, and we use lots of them. If you’re lucky enough to live in the U.S., you’d be crazy not to set up a Google Voice account. It’s free as are all phone calls to anywhere in the U.S. and Canada. The remaining preconfigured providers included in Incredible PBX are equally good, and we’ve used and continue to use almost all of them. So pick a few and sign up. You only pay for the calls you make with each provider so you have little to lose by choosing several. The PIAF Forum includes dozens of recommendations on VoIP providers if you want additional information.
With the preconfigured trunks in Incredible PBX, all you need are your credentials for each provider and the domain name of their server. Log into Incredible PBX GUI Administration as admin using a browser. From the System Status menu, click Connectivity -> Trunks. Click on each provider you have chosen and fill in your credentials including the host entry. Be sure to uncheck the Disable Trunk checkbox! Fill in the appropriate information for the Register String. Save your settings by clicking Submit Changes. Then click the red Apply Config button.
Configuring a Softphone for Incredible PBX
We’re in the home stretch now. You can connect virtually any kind of telephone to your new PBX. Plain Old Phones require an analog telephone adapter (ATA) which can be a separate board in your computer from a company such as Digium. Or it can be a standalone SIP device such as ObiHai’s OBi100 or OBi110 (if you have a phone line from Ma Bell to hook up as well). SIP phones can be connected directly so long as they have an IP address. These could be hardware devices or software devices such as the YateClient softphone. We’ll start with a free one today so you can begin making calls. You can find dozens of recommendations for hardware-based SIP phones both on Nerd Vittles and the PIAF Forum when you’re ready to get serious about VoIP telephony.
We recommend YateClient which is free. Download it from here. Run YateClient once you’ve installed it and enter the credentials for the 701 extension on Incredible PBX. You’ll need the IP address of your server plus your extension 701 password. Choose Applications _> Extensions -> 701 and write down your SIP/IAX Password. You can also find it in /root/passwords.FAQ. Fill in the blanks using the IP address of your Server, 701 for your Username, and whatever Password you assigned to the extension when you installed Incredible PBX. Click OK to save your entries.
Once you are registered to extension 701, close the Account window. Then click on YATE’s Telephony Tab and place some test calls to the numerous apps that are preconfigured on Incredible PBX. Dial a few of these to get started:
DEMO - Apps Demo
123 - Reminders
947 - Weather by ZIP Code
951 - Yahoo News
*61 - Time of Day
TODAY - Today in History
If you are a Mac user, another great no-frills softphone is Telephone. Just download and install it from the Mac App Store.
Configuring Google Voice
If you want to use Google Voice, you’ll need a dedicated Google Voice account to support Incredible PBX. The more obscure the username (with some embedded numbers), the better off you will be. This will keep folks from bombarding you with unsolicited Gtalk chat messages, and who knows what nefarious scheme will be discovered using Google messaging six months from now. So keep this account a secret!
IMPORTANT: Do NOT under any circumstances take Google’s bait to switch from Google Chat to Hangouts, or you will forever lose the ability to use Google Chat with Incredible PBX. Also be sure to enable the Google Chat option as one of your phone destinations in Settings, Voice Setting, Phones. That’s the destination we need for The Incredible PBX to work its magic! Otherwise, all inbound and outbound calls will fail. Good News! You’re in luck. Google has apparently had a change of heart on discontinuing Google Chat support so it’s enabled by default in all new Google Voice accounts. Once you’ve created a Gmail and Google Voice account, go to Google Voice Settings and click on the Calls tab. Make sure your settings match these:
- Call Screening – OFF
- Call Presentation – OFF
- Caller ID (In) – Display Caller’s Number
- Caller ID (Out) – Don’t Change Anything
- Do Not Disturb – OFF
- Call Options (Enable Recording) – OFF
- Global Spam Filtering – ON
Click Save Changes once you’ve adjusted your settings. Under the Voicemail tab, plug in your email address so you get notified of new voicemails. Down the road, receipt of a Google Voice voicemail will be a big hint that something has come unglued on your PBX.
One final word of caution is in order regardless of your choice of providers: Do NOT use special characters in any provider passwords, or nothing will work!
Now you’re ready to configure your Google Voice account in Incredible PBX. You can do it from within the Incredible PBX GUI by choosing Connectivity -> Google Voice. How you enter your credentials depends upon whether you have chosen the Incredible PBX image with OAuth 2 support. For a complete Google Voice OAuth tutorial, follow steps 8-10 in this Nerd Vittles tutorial. Once you’ve entered your credentials, you MUST restart Asterisk from the command line, or Google Voice calls will fail.
If you have trouble getting Google Voice to work (especially if you have previously used your Google Voice account from a different IP address), try this Google Voice Reset Procedure. It usually fixes connectivity problems. If it still doesn’t work, enable Less Secure Apps using this Google tool.
If you have difficulty finding the Google Chat option after setting up a new Google Voice account, follow this tutorial.
Another option is to use an inexpensive SIP Gateway to Google Voice. The Simonics trunk in the Incredible PBX GUI is preconfigured for this purpose. All you’ll need is your Google Voice credentials. Get started with this tutorial.
Adding Speech Recognition Support to Incredible PBX
To support many of our applications, Incredible PBX has included Google’s speech recognition service for years. These applications include Weather Reports by City (949), AsteriDex Voice Dialing by Name (411), and Wolfram Alpha for Asterisk (4747), all of which use Lefteris Zafiris’ terrific speech-recog AGI script. Unfortunately (for some), Google now has tightened up the terms of use for their free speech recognition service. Now you can only use it for "personal and development use." If you meet those criteria, keep reading. Here’s how to activate speech recognition on Incredible PBX. Don’t skip any steps!
To use Wolfram Alpha by phone, you first must obtain a free Wolfram Alpha APP-ID. Then issue the following command replacing APP-ID with your actual ID. Do NOT change the yourID portion of the command:
sed -i "s|yourID|APP-ID|" /var/lib/asterisk/agi-bin/4747
Now you’re ready to try out the speech recognition apps. Dial 949 and say the name of a city and state/province/country to get a current weather forecast from Yahoo. Dial 411 and say "American Airlines" to be connected to American.
To access Wolfram Alpha by phone, dial 4747 and enter your query, e.g. "What planes are overhead." Read the Nerd Vittles tutorial for additional examples and tips.
Enabling WiFi on the Raspberry Pi
With the Raspberry Pi 3, wi-fi hardware is included. With the Raspberry Pi 2, you’ll need to add an inexpensive wifi dongle. The next step is connecting to your WiFi router. Simply open /etc/wpa_supplicant/wpa_supplicant.conf with your favorite editor and insert the following code using the actual SSID name and password to access your local, password-protected WiFi router or any open WiFi network:
network={ ssid="YourSSID" psk="YourSSIDpassword" key_mgmt=WPA-PSK scan_ssid=1 priority=5 } network={ key_mgmt=NONE priority=1 }
Finally, stop and restart the wlan0 interface, count to 15, and check the status of your server to decipher the new IP address for your WiFi connection:
ifdown wlan0 ifup wlan0 pbxstatus
If you want to run your Raspberry Pi exclusively off the WiFi connection, simply unplug the network cable from your RasPi and reboot your server.
UPDATE: There still is a quirk with the wireless LAN driver on the Raspberry Pi 3. The problem has to do with the default power management of the wlan0 interface which results in it being powered off after very brief periods of inactivity. Special thanks to Matt Gemmell for this fix. Just cut-and-paste the lines below into a terminal window, and you’ll be good to go.
WARNING: Run pbxstatus first. If the top line shows Raspberry Pi 3, the following WiFi patch is already installed.
echo "options 8192cu rtw_power_mgnt=0 rtw_enusbss=0 rtw_ips_mode=1" > /etc/modprobe.d/8192cu.conf sed -i '/exit 0/d' /etc/rc.local echo "sleep 10" >> /etc/rc.local echo "iwconfig wlan0 power off" >> /etc/rc.local echo "exit 0" >> /etc/rc.local echo "[Unit]" > /etc/systemd/system/root-resume.service echo "Description=Turn off wlan power management" >> /etc/systemd/system/root-resume.service echo "After=suspend.target" >> /etc/systemd/system/root-resume.service echo "" >> /etc/systemd/system/root-resume.service echo "[Service]" >> /etc/systemd/system/root-resume.service echo "Type=simple" >> /etc/systemd/system/root-resume.service echo "ExecStartPre= /bin/sleep 10" >> /etc/systemd/system/root-resume.service echo "ExecStart= /sbin/iwconfig wlan0 power off" >> /etc/systemd/system/root-resume.service echo "" >> /etc/systemd/system/root-resume.service echo "[Install]" >> /etc/systemd/system/root-resume.service echo "WantedBy=suspend.target" >> /etc/systemd/system/root-resume.service systemctl enable root-resume reboot
After rebooting, if you issue the iwconfig wlan0 command, it should show: Power Management:off.
Update: Lessons Learned for Raspberry Pi 3 Road Warriors
As with all new devices, you learn some things as you go along. So we’re providing an update to our original article to offer a couple of additional tips and tricks for those that want to travel with a RasPi…
Alternative Power Sources. If you’re like us, you have a number of devices around the house or office that all require 5V power adapters of various amperages. The Raspberry Pi has traditionally been one of the most temperamental when it came to power adapters and, with the Raspberry Pi 3, the developers specifically mention a 2.5 amp minimum. If you travel and want to take devices such as the Raspberry Pi with you, the last thing you want to do is approach airport security with a bunch of wires hanging out of your carry-on bag. Well, there’s good news. The Anker device shown in the Amazon ad in the right column of Nerd Vittles can supply power to 6 devices including a Raspberry Pi 3. And we’ve given the RasPi a healthy workout with no adverse effects.
Deciphering the RasPi IP Address. As we mentioned, we travel a lot so obtaining a DHCP address for your RasPi in WiFi mode is not always the easiest thing to accomplish. If your smartphone supports tethering, that’s the easiest way to get connectivity on the road. A better way is to stick a WiFi HotSpot in your luggage and it, too, can be powered using the Anker device. See our recent article for WiFi HotSpot choices. Regardless of which option you choose, it will require some planning to use your RasPi sans monitor and keyboard. First, you need to preconfigure /etc/wpa_supplicant/wpa_supplicant.conf with the SSID of the device you’ll be using to hand out DHCP addresses. You’ll note from the discussion above that each entry in this file has a priority with higher numbers having higher priority. The way we typically do this is to assign our home network as the highest priority. Below that, we set up credentials for our MiFi Hotspot, then our smartphones, and finally open networks. So it looks like this:
- Home Network – 6
- MiFi HotSpot – 5
- Android phone – 4
- iPhone (AT&T) – 3
- Open Network – 1
Keep in mind that the Incredible PBX firewall probably will block you from accessing the RasPi from a computer on the public network. So you also must connect your computer to the same private WiFi network because private LAN addresses are whitelisted in the firewall by default.
Once you have connectivity for your RasPi and your laptop, the other wrinkle is figuring out the IP address of the Raspberry Pi. Our recommended approach goes like this. First, configure SendMail on the RasPi to use a Gmail account that you own as an SMTP smarthost to send emails. That should work almost anywhere you go. Second, modify /etc/rc.local to automatically send you an email with the IP address and SSID of your wireless network whenever the RasPi boots. Again, this takes some advance planning because you need to set all of this up and test it before you go on the road.
Here are the steps to modify SendMail to use an existing Gmail account as a SmartHost. Log into your RasPi as root and issue the following commands:
cd /etc/mail hostname -f > genericsdomain touch genericstable makemap -r hash genericstable.db < genericstable mv sendmail.mc sendmail.mc.original wget http://nerdvittles.dreamhosters.com/pbxinaflash/source/sendmail/sendmail.mc.gmail cp sendmail.mc.gmail sendmail.mc mkdir -p auth chmod 700 auth cd auth echo AuthInfo:smtp.gmail.com \"U:smmsp\" \"I:user_id\" \"P:password\" \"M:PLAIN\" > client-info echo AuthInfo:smtp.gmail.com:587 \"U:smmsp\" \"I:user_id\" \"P:password\" \"M:PLAIN\" >> client-info echo AuthInfo:smtp.gmail.com:465 \"U:smmsp\" \"I:user_id\" \"P:password\" \"M:PLAIN\" >> client-info nano -w client-info
When the nano editor opens the client-info file, change the 3 user_id entries to your Gmail account name without @gmail.com and change the 3 password entries to your actual Gmail password. Save the file: Ctrl-X, Y, then ENTER.
Now issue the following commands. In the last step, press ENTER to accept all of the default prompts:
chmod 600 client-info makemap -r hash client-info.db < client-info cd .. make sed -i 's|sendmail-cf|sendmail\/cf' /etc/mail/sendmail.mc sed -i 's|sendmail-cf|sendmail\/cf|' /etc/mail/sendmail.mc sed -i 's|sendmail-cf|sendmail\/cf|' /etc/mail/Makefile sed -i 's|sendmail-cf|sendmail\/cf|' /etc/mail/sendmail.cf sed -i 's|sendmail-cf|sendmail\/cf|' /etc/mail/databases sed -i 's|sendmail-cf|sendmail\/cf|' /etc/mail/sendmail.mc.gmail sed -i 's|sendmail-cf|sendmail\/cf|' /etc/mail/sendmail.cf.errors sendmailconfig
Next, edit /etc/hosts and /etc/hostname. Change the raspberypi3 entries to: raspberrypi3.incrediblepbx.com.
Finally, stop and restart SendMail and then send yourself a test message. Be sure to check your spam folder!
/etc/init.d/sendmail stop /etc/init.d/sendmail start apt-get install mailutils -y echo "test" | mail -s testmessage yourname@yourdomain.com
The last step is to add these commands to /etc/rc.local to send you an email with your IP address and SSID whenever the RasPi is rebooted. Insert the following commands just above the exit 0 line at the end of the file. Use an email address to which you have access on the road!
ESSID=`iwconfig | grep ESSID | tail -1 | cut -f 9 -d " "` echo "IP address: $(hostname -I) on $ESSID" | mail -s "RaspberryPi3 IP Address" yourname@yourdomain.com
Enabling Bluetooth on the Raspberry Pi
Implementing Bluetooth Proximity Detection with Smartphone and your #RaspberryPi3 https://t.co/TYFrcqcLux #asterisk pic.twitter.com/QqGNjqG3Ag
— Ward Mundy (@NerdUno) March 4, 2016
Incredible Fax Returns for the Raspberry Pi
PIONEERS: Free Faxing Returns for #RaspberryPi3 and Raspbian Jessie https://t.co/As1dMYPNLF #asterisk #IncrediblePBX pic.twitter.com/qDrJcy9cgn
— Ward Mundy (@NerdUno) March 7, 2016
Mastering the Incredible PBX Feature Set
Now would be a good time to explore the Incredible PBX applications. Continue reading there. If you have questions, join the PBX in a Flash Forums and take advantage of our awesome collection of gurus. There's an expert available on virtually any topic, and the price is right. As with Incredible PBX, it's absolutely free. Enjoy!
Originally published: Monday, March 7, 2016 Updated: Saturday, March 26, 2016
Support Issues. With any application as sophisticated as this one, you're bound to have questions. Blog comments are a difficult place to address support issues although we welcome general comments about our articles and software. If you have particular support issues, we encourage you to get actively involved in the PBX in a Flash Forum. It's the best Asterisk tech support site in the business, and it's all free! Please have a look and post your support questions there. Unlike some forums, the PIAF Forum is extremely friendly and is supported by literally hundreds of Asterisk gurus and thousands of users just like you. You won't have to wait long for an answer to your question.
Need help with Asterisk? Visit the PBX in a Flash Forum.
Special Thanks to Our Generous Sponsors
FULL DISCLOSURE: ClearlyIP, Skyetel, Vitelity, DigitalOcean, Vultr, VoIP.ms, 3CX, Sangoma, TelecomsXchange and VitalPBX have provided financial support to Nerd Vittles and our open source projects through advertising, referral revenue, and/or merchandise. As an Amazon Associate and Best Buy Affiliate, we also earn from qualifying purchases. We’ve chosen these providers not the other way around. Our decisions are based upon their corporate reputation and the quality of their offerings and pricing. Our recommendations regarding technology are reached without regard to financial compensation except in situations in which comparable products at comparable pricing are available from multiple sources. In this limited case, we support our sponsors because our sponsors support us.
BOGO Bonaza: Enjoy state-of-the-art VoIP service with a $10 credit and half-price SIP service on up to $500 of Skyetel trunking with free number porting when you fund your Skyetel account. No limits on number of simultaneous calls. Quadruple data center redundancy. $25 monthly minimum spend required. Tutorial and sign up details are here.
The lynchpin of Incredible PBX 2020 and beyond is ClearlyIP components which bring management of FreePBX modules and SIP phone integration to a level never before available with any other Asterisk distribution. And now you can configure and reconfigure your new Incredible PBX phones from the convenience of the Incredible PBX GUI.
VitalPBX is perhaps the fastest-growing PBX offering based upon Asterisk with an installed presence in more than 100 countries worldwide. VitalPBX has generously provided a customized White Label version of Incredible PBX tailored for use with all Incredible PBX and VitalPBX custom applications. Follow this link for a free test drive!
Special Thanks to Vitelity. Vitelity is now Voyant Communications and has halted new registrations for the time being. Our special thanks to Vitelity for their unwavering financial support over many years and to the many Nerd Vittles readers who continue to enjoy the benefits of their service offerings. We will keep everyone posted on further developments.
Some Recent Nerd Vittles Articles of Interest...
- Many of our purchase links refer users to Amazon when we find their prices are competitive for the recommended products. Nerd Vittles receives a small referral fee from Amazon to help cover the costs of our blog. We never recommend particular products solely to generate Amazon commissions. However, when pricing is comparable or availability is favorable, we support Amazon because Amazon supports us. [↩]
VoIP at Your Fingertips: Incredible PBX GUI for Raspberry Pi 2 with Asterisk 13
[iframe-popup id="3″]
NEWS FLASH: New Incredible PBX release with Raspbian 8 Jessie supports BOTH the Raspberry Pi 3 and the Raspberry Pi 2. Much improved installer and overall performance! Check out the new tutorial and download the new image here.
07/01/2019 NEWS FLASH: Just released Incredible PBX LITE for the Raspberry Pi 2, 3, and 4 featuring Raspbian 10 Buster. Tutorial here.
Today we’re pleased to introduce the ultimate hobbyist platform to learn about and then to deploy and use VoIP and unified communications in your home, home office, or small business. You’ll need a couple hours and a $35 Raspberry Pi 2 with its quad-core processor and gig of RAM.1 Everything else is free… as in beer. And what a collection it is. You’ll get the very latest, production-ready version of Asterisk® 13, the new Incredible PBX GUI featuring a superset of FreePBX®-compatible modules, the newest Google Voice refinements with secure OAUTH 2 authentication for free calling and faxing in the U.S. and Canada, a rock-solid, preconfigured, Linux firewall, a free virtual private network client for NeoRouter that’s ready for your credentials, preconfigured trunks for the very best SIP providers in the world, a turnkey GPL fax solution featuring a HylaFax/AvantFax combination that delivers incoming faxes in PDF format using the included SendMail email server, free SMS messaging, a free conference bridge, SCCP encrypted communications support, and literally dozens of free applications for Asterisk including a news service, weather reports, the world’s best on-line almanac, telephone reminders, voice recognition for hands-free calling, and more. Do you need to be a Linux, network, or communications engineer? Not at all. If you can read, you’ve met the only prerequisite to implement Incredible PBX. The sky’s the limit on where to go next. Enjoy!
Target Audience: Home or SOHO/SBO seeking a GPL PBX with a web-based Graphical User Interface Default Configuration: Asterisk 13 with Incredible PBX GUI, Kennonsoft GUI, and NANPA dialplan Platform: Raspbian 7 running on a Raspberry Pi 2 Standard Memory: 1024MB Recommended Disk: 16GB+ Default Trunks: Google Voice, CallCentric, DIDlogic, Future-Nine, IPcomms, Les.net, Vitelity, VoIP.ms2 Feature Set: SMS messaging, VPN, Reminders, ConfBridge Conferencing, AsteriDex, Voicemail, Email, IVR, News, Weather, Voice Dialer, Wolfram Alpha, Today in History, TM3 Firewall WhiteList, Speed Dialer, iNUM and SIP URI (free) worldwide calling, OpenCNAM CallerID lookups, DISA, Call Forwarding, SCCP, CDRs Administrator Utilities: Incredible Backup/Restore, Automatic Updater, Asterisk Upgrader, phpMyAdmin, Timezone Config, Plug-and-Play Trunk Configurator, WebMin, External IP Setup, Firewall WhiteList Tools |
As with all Incredible PBX products, your server is protected out of the box by our 10-Layer Network Security Model:
- Preconfigured IPtables Linux Firewall (IPv4)
- Preconfigured Travelin’ Man 3 WhiteLists
- Randomized Port Knocker for Remote Access
- TM4 WhiteListing by Telephone (optional)
- Fail2Ban Log Monitoring for SSH, Apache, Asterisk
- Randomized Ultra-Secure Passwords
- Automatic Security Updates & Bug Fixes
- Asterisk Manager Lockdown to localhost
- Apache htaccess Security for Vulnerable Web Apps
- Security Alerts via RSS Feeds in Kennonsoft and Incredible PBX GUIs
Getting Started with Incredible PBX and Incredible PBX GUI (RasPi 2 Edition)
Here’s a quick overview of the installation and setup process for Incredible PBX featuring the Incredible PBX GUI:
- Install the Raspberry Pi 2 OS in text mode (No GUI) – Raspbian Wheezy
- Configure Raspbian 7 – Optimize Raspbian Wheezy for Incredible PBX
- Download and Install Incredible PBX + Incredible PBX GUI
- Install Incredible Fax with HylaFax/AvantFax (optional)
- Set Up Passwords for Incredible PBX
- Configure Trunks using Incredible PBX GUI
- Connect a Softphone using Incredible PBX GUI
1. Install Raspbian 7 Platform for Raspberry Pi 2
For those with Raspberry Pi experience, this is the same drill you’ve performed a dozen times before. For newbies, here’s the procedure. You’ll need a microSD card of at least 8GB, and we strongly recommend a 16GB or 32GB Type 10 card for Incredible PBX. We’ve tested both the SanDisk and Transcend cards, and they both work great.
Begin by downloading the latest RASPBIAN Wheezy image from RaspberryPi.org to your desktop. For the time being, DO NOT USE Raspbian Jessie! After you’ve unzipped the image, you need to get it moved to your microSD card. RaspberryPi.org has excellent tutorials that will walk you through the process using a Linux, Mac, or Windows desktop platform. Don’t forget to unmount the card before removing it. Building the SD card with Raspbian 7 takes about 30 minutes.
Once you have your microSD card ready to go, plug it into the slot on the back of the Raspberry Pi 2 and then plug in the power cord. On your attached monitor, you can follow the boot up process. If a login prompt appears, log in as user pi with the password raspberry and run: raspi-config. Usually this isn’t necessary.
2. Optimizing Raspbian 7 for Incredible PBX
The first time you boot up your Raspberry Pi 2 with Raspbian 7, it will run the raspi-config script. This allows you to make a number of changes to your Raspberry Pi environment to maximize performance. Let’s take advantage of it. Choose text mode for the bootup since we don’t need the RasPi GUI at all.
Advanced Options. Enable Remote SSH access to your Raspberry Pi 2.
Option 1. Expand the File System to fill your SD card. Otherwise, there’s insufficient disk space to complete the install.
Tab to the Finish option and press ENTER. Then choose Reboot and NO.
At the Linux command prompt, set a very secure root password: sudo passwd root. Decipher your IP address so that you can log in as root via SSH: ifconfig. Now reboot the system: sudo reboot.
We strongly recommend completing the rest of the install by logging in as root using a desktop computer via SSH or Putty (for Windows). This gives you the ability to scroll back up and find errors if something happens to come unglued during the install. It also assures that your desktop computer will be whitelisted in the automated setup of the IPtables firewall for IPv4.
3. Install Incredible PBX on Your Raspberry Pi 2
Adding Incredible PBX to the Raspberry Pi 2 is easy. To restate the obvious, your server needs a reliable Internet connection to proceed. Using SSH (or Putty on a Windows machine), log into your Raspberry Pi 2 as root at the IP address you deciphered in the ifconfig step at the end of the Raspbian install procedure above.
Now let’s begin the Incredible PBX install. After logging in as root, issue the following commands. The install takes an hour or more and runs unattended so there’s no need to watch unless you’re curious about how sausage is made. Remember, as part of the build process, we compile all of the major components for Incredible PBX from source. That takes some time. If you’re curious, you can review the open source GPL script to see how it’s done or to embellish it. Incredible PBX is GPL open source, 100% Gotcha-Free code so go for it and share your discoveries. That’s what open source is all about!
cd /root wget http://incrediblepbx.com/incrediblepbx13-12.3.raspbian.tar.gz tar zxvf incrediblepbx13-12.3.raspbian.tar.gz rm -f incrediblepbx13-12.3.raspbian.tar.gz ./IncrediblePBX13-12.3-raspbian.sh
4. Install Incredible Fax for Incredible PBX (optional)
Administrators have been trying to stomp out faxing for at least two decades. Here’s a hint. It ain’t gonna happen. So go with the flow and add Gotcha-Free Faxing to your server. It’ll be there when you need it. And sooner or later, you’ll need it. This install script is simple enough for any monkey to complete. Run the script and enter the email address for delivery of your faxes. Then, press the Enter key to accept every default entry during the HylaFax and AvantFax installation steps.
cd /root ./incrediblefax11_raspi2.sh
When the installation finishes, reboot your server to bring faxing on line. After rebooting, you can access the AvantFax GUI with your browser by logging in as admin with the default password: password. Follow the prompts to update your admin password. You also can log into AvantFax from within the Incredible PBX GUI itself by clicking on the Other tab and choosing AvantFax.
Outgoing faxes using standard document attachments can be created using the AvantFax GUI. The faxes will be sent out using your default outbound dial rules. You can add a dial prefix for sending a fax with AvantFax to force the call out a particular trunk that has been preconfigured in the Incredible PBX GUI.
Incoming faxes will be delivered to the email address you specified when installing Incredible Fax; however, incoming faxes will be ignored until you configure a destination DID to accept the faxes. You’ll want a dedicated line for incoming faxes! A free Google Voice trunk works fine. Keep reading for DID setup instructions. For the incoming route of the destination DID for your faxes, specify:
If you ever forget your admin password for AvantFax, you can reset it by running the script: /root/avantfax-pw-change.
5. Initial Configuration of Incredible PBX
Incredible PBX is installed with the preconfigured IP4tables Linux firewall already in place. It implements WhiteList Security to limit server access to private LANs, your server’s IP address, your desktop computer’s IP address, and a few of our favorite SIP providers. You can add additional entries to this WhiteList whenever you like using the add-ip and add-fqdn tools in /root. There’s also an Apache security layer for our web applications. And the Incredible PBX GUI has its own security methodology. Finally, we randomize extension and DISA passwords as part of the initial install process. Out of the starting gate, you won’t find a more secure VoIP server implementation anywhere. After all, it’s your phone bill.
Even with all of these layers of security, here are 10 Quick Steps to better safeguard your server. You only do this once, but failing to do it may lead to security issues you don’t want to have to deal with down the road. So DO IT NOW!
First, log into your server as root with your root password and do the following:
Make your root password very secure: passwd
Set your correct time zone: /root/timezone-setup
Restart Asterisk: amportal restart
Create admin password for Incredible GUI: /root/admin-pw-change
Create admin password for web apps: htpasswd -b /etc/pbx/wwwpasswd admin newpassword
Make a copy of your Knock codes: cat /root/knock.FAQ
Decipher IP address and other info about your server: status
Second, use a web browser pointed to your server’s IP address. Click on the Users tab (bottom left below RSS Feed in Main Menu) to bring up the Administrator Menu. Click the Incredible GUI Administration button (bottom left). When the Incredible GUI Menu appears (shown above), click the Server Administration icon on the left. Login as admin with the password you set using admin-pw-change above. Now change your extension 701 extension and voicemail passwords.
Click Applications tab
Choose Extensions from the pull-down menu
Click on 701 in the far-right Extensions list
Don’t forget to click Submit and then Apply Settings to save your new entries.
Last but not least, Incredible PBX includes an Automatic Update Utility which downloads important updates whenever you log into your server as root. We recommend you log in once a week to keep your server current. Now would be a good time to log out and back into your server at the Linux command line to bring your Raspberry Pi 2 up to current specs.
6. Configure Trunks with Incredible PBX
Now for the fun part. If this is your first VoIP adventure, be advised that this ain’t your grandma’s phone system. You need not and should not put all your eggs in one basket when it comes to telephone providers. In order to connect to Plain Old Telephones, you still need at least one provider. But there is nothing wrong with having several. And a provider that handles an outbound call (termination) need not be the same one that handles an incoming call (origination) and provides your phone number (DID). We cannot recommend Vitelity highly enough, and it’s not just because they have financially supported our projects for almost a decade. They’re as good as VoIP providers get, and we use lots of them. If you’re lucky enough to live in the U.S., you’d be crazy not to set up a Google Voice account. It’s free as are all phone calls to anywhere in the U.S. and Canada. The remaining preconfigured providers included in Incredible PBX are equally good, and we’ve used and continue to use almost all of them. So pick a few and sign up. You only pay for the calls you make with each provider so you have little to lose by choosing several. The PIAF Forum includes dozens of recommendations on VoIP providers if you want additional information.
With the preconfigured trunks in Incredible PBX, all you need are your credentials for each provider and the FQDN of their server. Log into Incredible PBX GUI Administration as admin using a browser. From the System Status menu, click Connectivity -> Trunks. Click on each provider you have chosen and fill in your credentials including the host entry. Be sure to uncheck the Disable Trunk checkbox! Fill in the appropriate information for the Register String. Save your settings by clicking Submit Changes. Then click the red Apply Config button.
7. Configure a Softphone for Incredible PBX
We’re in the home stretch now. You can connect virtually any kind of telephone to your new PBX. Plain Old Phones require an analog telephone adapter (ATA) which can be a separate board in your computer from a company such as Digium. Or it can be a standalone SIP device such as ObiHai’s OBi100 or OBi110 (if you have a phone line from Ma Bell to hook up as well). SIP phones can be connected directly so long as they have an IP address. These could be hardware devices or software devices such as the YateClient softphone. We’ll start with a free one today so you can begin making calls. You can find dozens of recommendations for hardware-based SIP phones both on Nerd Vittles and the PIAF Forum when you’re ready to get serious about VoIP telephony.
We recommend YateClient which is free. Download it from here. Run YateClient once you’ve installed it and enter the credentials for the 701 extension on Incredible PBX. You’ll need the IP address of your server plus your extension 701 password. Choose Applications _> Extensions -> 701 and write down your SIP/IAX Password. You can also find it in /root/passwords.FAQ. Fill in the blanks using the IP address of your server, 701 for your account name, and whatever password is assigned to the extension. Click OK to save your entries.
Once you are registered to extension 701, close the Account window. Then click on YATE’s Telephony Tab and place some test calls to the numerous apps that are preconfigured on Incredible PBX. Dial a few of these to get started:
DEMO - Apps Demo
123 - Reminders
947 - Weather by City and State or Country*
951 - Yahoo News
*61 - Time of Day
TODAY - Today in History
* Voice recognition apps require Google credentials. Keep reading.
If you are a Mac user, another great no-frills softphone is Telephone. Just download and install it from the Mac App Store.
8. Configuring Google Voice on the Google Side
If you want to use Google Voice, you’ll need a dedicated Google Voice account to support Incredible PBX. The more obscure the username (with some embedded numbers), the better off you will be. This will keep folks from bombarding you with unsolicited Gtalk chat messages, and who knows what nefarious scheme will be discovered using Google messaging six months from now. So keep this account a secret!
IMPORTANT: Do NOT under any circumstances take Google’s bait to switch from Google Chat to Hangouts, or you will forever lose the ability to use Google Chat with Incredible PBX. Also be sure to enable the Google Chat option as one of your phone destinations in Settings, Voice Setting, Phones. That’s the destination we need for The Incredible PBX to work its magic! Otherwise, all inbound and outbound calls will fail. Good News! You’re in luck. Google has apparently had a change of heart on discontinuing Google Chat support so it’s enabled by default in all new Google Voice accounts. Once you’ve created a Gmail and Google Voice account, go to Google Voice Settings and click on the Calls tab. Make sure your settings match these:
- Call Screening – OFF
- Call Presentation – OFF
- Caller ID (In) – Display Caller’s Number
- Caller ID (Out) – Don’t Change Anything
- Do Not Disturb – OFF
- Call Options (Enable Recording) – OFF
- Global Spam Filtering – ON
Click Save Changes once you’ve adjusted your settings. Under the Voicemail tab, plug in your email address so you get notified of new voicemails. Down the road, receipt of a Google Voice voicemail will be a big hint that something has come unglued on your PBX.
One final word of caution is in order regardless of your choice of providers: Do NOT use special characters in any provider passwords, or nothing will work!
This release of Incredible PBX implements OAUTH2 authentication for Google Voice trunks. Even though it’s a bit more work on the front end, the good news is you won’t have to worry about your Google Voice trunks failing when Google phases out plain-text passwords. The other good news is you won’t be passing your plain-text Google Voice credentials across the open Internet for everyone in the world to see.
While you’re still logged into your Google Voice account, you need to obtain a refresh_token which is what you’ll use instead of a password when setting up your Google Voice account in the GUI. Here’s how.
1. Be sure you are still logged into your Google Voice account. If not, log back in at https://www.google.com/voice.
2. Go to the Google OAUTH Playground using your browser while still logged into your Google Voice account.
3. Once logged in to Google OAUTH Playground, click on the Gear icon in upper right corner (as shown below).
3a. Check the box: Use your own OAuth credentials
3b. Enter Incredible PBX OAuth Client ID:
466295438629-prpknsovs0b8gjfcrs0sn04s9hgn8j3d.apps.googleusercontent.com
3c. Enter Incredible PBX OAuth Client secret: 4ewzJaCx275clcT4i4Hfxqo2
3d. Click Close
4. Click Step 1: Select and Authorize APIs (as shown below)
4a. In OAUTH Scope field, enter: https://www.googleapis.com/auth/googletalk
4b. Click Authorize APIs (blue) button.
5. Click Step 2: Exchange authorization code for tokens
5a. Click Exchange authorization code for tokens (blue) button
5b. When the tokens have been generated, Step 2 will close.
6. Reopen Step 2 and copy your Refresh_Token. This is the "password" you will need to enter (together with your Gmail account name and 10-digit GV phone number) when you add your GV trunk in the Incredible PBX GUI. Store this refresh_token in a safe place. Google doesn’t permanently store it!
7. Authorization tokens NEVER expire! If you ever need to remove your authorization tokens, go here and delete Incredible PBX Google Voice OAUTH entry by clicking on it and choosing DELETE option.
Yes, this is a convoluted process. Setting up a secure computing environment often is. Just follow the steps and don’t skip any. It’s easy once you get the hang of it. And you’ll sleep better.
9. Configuring Google Voice in the Incredible PBX GUI
Now you’re ready to configure your Google Voice account in Incredible PBX. You do it from within the Incredible PBX GUI by choosing Connectivity -> Google Voice. Just plug in your Google Voice Username, enter your refresh_token from Step #6 above as your Google Voice Password, enter your 10-digit Google Voice Phone Number, and check the first two boxes: Add Trunk and Add Outbound Routes. Then click Submit and Apply Settings to save your new entries.
IMPORTANT: Once you’ve entered your credentials, you MUST restart Asterisk from the Linux command line, or Google Voice calls will fail: amportal restart
10. Troubleshooting Google Voice Connectivity Problems
If you have trouble getting Google Voice to work (especially if you have previously used your Google Voice account from a different IP address), try this Google Voice Reset Procedure. It usually fixes connectivity problems. If it still doesn’t work, enable Less Secure Apps using this Google tool.
If you have difficulty finding the Google Chat option after setting up a new Google Voice account, follow this tutorial.
Another option is to use one of the inexpensive SIP Gateways to Google Voice. HINT: The Simonics trunk in the Incredible PBX GUI is preconfigured. All you’ll need are your credentials.
Adding Speech Recognition Support to Incredible PBX
To support many of our applications, Incredible PBX has included Google’s speech recognition service for years. These applications include Weather Reports by City (949), AsteriDex Voice Dialing by Name (411), and Wolfram Alpha for Asterisk (4747), all of which use Lefteris Zafiris’ terrific speech-recog AGI script. Unfortunately (for some), Google now has tightened up the terms of use for their free speech recognition service. Now you can only use it for "personal and development use." If you meet those criteria, keep reading. Here’s how to activate speech recognition on Incredible PBX. Don’t skip any steps!
To use Wolfram Alpha by phone, you first must obtain a free Wolfram Alpha APP-ID. Then issue the following command replacing APP-ID with your actual ID. Do NOT change the yourID portion of the command:
sed -i "s|yourID|APP-ID|" /var/lib/asterisk/agi-bin/4747
Now you’re ready to try out the speech recognition apps. Dial 949 and say the name of a city and state/province/country to get a current weather forecast from Yahoo. Dial 411 and say "American Airlines" to be connected to American.
To access Wolfram Alpha by phone, dial 4747 and enter your query, e.g. "What planes are overhead." Read the Nerd Vittles tutorial for additional examples and tips.
Implementing WiFi on the Raspberry Pi 2
You don’t need to rely upon a wired network connection once you get your Raspberry Pi 2. WiFi works just as well. You’ll need a compatible USB WiFi Dongle. We recommend the AirLink 101 from Amazon or the Adafruit 814. Insert it into a free USB slot on your RasPi and boot up. Log in as root and edit /etc/wpa_supplicant/wpa_supplicant.conf. Add the following lines to the bottom of the file using your actual SSID and password. Then reboot after disconnecting your LAN cable.
network={ ssid="your-SSID" psk="SSID-password" }
You can test the performance of your WiFi connection by installing speedtest-cli and then running it:
easy_install speedtest-cli speedtest-cli
Implementing SCCP for Secure, Encrypted Communications with Asterisk
Today marks our first effort to include and support the extended SCCP Channel Driver for Asterisk 13. All you’ll need to do is add the SCCP and device configuration files, and the rest should work. For a good overview of SCCP, start here. For excellent documentation on SCCP setup, go here. For PIAF Forum support, start here.
Homework Assignment: Mastering the Incredible PBX Feature Set
Now would be a good time to explore the Incredible PBX applications. Continue reading there. If you have questions, join the PBX in a Flash Forums and take advantage of our awesome collection of gurus. There’s an expert available on virtually any topic, and the price is right. As with Incredible PBX, it’s absolutely free.
Originally published: Monday, September 7, 2015
Support Issues. With any application as sophisticated as this one, you’re bound to have questions. Blog comments are a terrible place to handle support issues although we welcome general comments about our articles and software. If you have particular support issues, we encourage you to get actively involved in the PBX in a Flash Forums. It’s the best Asterisk tech support site in the business, and it’s all free! Please have a look and post your support questions there. Unlike some forums, ours is extremely friendly and is supported by literally hundreds of Asterisk gurus and thousands of users just like you. You won’t have to wait long for an answer to your question.
Need help with Asterisk? Visit the PBX in a Flash Forum.
Special Thanks to Our Generous Sponsors
FULL DISCLOSURE: ClearlyIP, Skyetel, Vitelity, DigitalOcean, Vultr, VoIP.ms, 3CX, Sangoma, TelecomsXchange and VitalPBX have provided financial support to Nerd Vittles and our open source projects through advertising, referral revenue, and/or merchandise. As an Amazon Associate and Best Buy Affiliate, we also earn from qualifying purchases. We’ve chosen these providers not the other way around. Our decisions are based upon their corporate reputation and the quality of their offerings and pricing. Our recommendations regarding technology are reached without regard to financial compensation except in situations in which comparable products at comparable pricing are available from multiple sources. In this limited case, we support our sponsors because our sponsors support us.
BOGO Bonaza: Enjoy state-of-the-art VoIP service with a $10 credit and half-price SIP service on up to $500 of Skyetel trunking with free number porting when you fund your Skyetel account. No limits on number of simultaneous calls. Quadruple data center redundancy. $25 monthly minimum spend required. Tutorial and sign up details are here.
The lynchpin of Incredible PBX 2020 and beyond is ClearlyIP components which bring management of FreePBX modules and SIP phone integration to a level never before available with any other Asterisk distribution. And now you can configure and reconfigure your new Incredible PBX phones from the convenience of the Incredible PBX GUI.
VitalPBX is perhaps the fastest-growing PBX offering based upon Asterisk with an installed presence in more than 100 countries worldwide. VitalPBX has generously provided a customized White Label version of Incredible PBX tailored for use with all Incredible PBX and VitalPBX custom applications. Follow this link for a free test drive!
Special Thanks to Vitelity. Vitelity is now Voyant Communications and has halted new registrations for the time being. Our special thanks to Vitelity for their unwavering financial support over many years and to the many Nerd Vittles readers who continue to enjoy the benefits of their service offerings. We will keep everyone posted on further developments.
Some Recent Nerd Vittles Articles of Interest…
- If you don’t have an HDMI-compatible monitor, you now can add the official Raspberry Pi 7″ touch display for $60. [↩]
- Vitelity and Google provide financial support to Nerd Vittles and the Incredible PBX projects. [↩]