VoIP Prioritizing The World’s Best Traveling Phone
Today we present our 10-minute explanation of why we’ve shelved our iPhone and never looked back. In the process, you’ll discover the world’s best cordless SIP telephone…

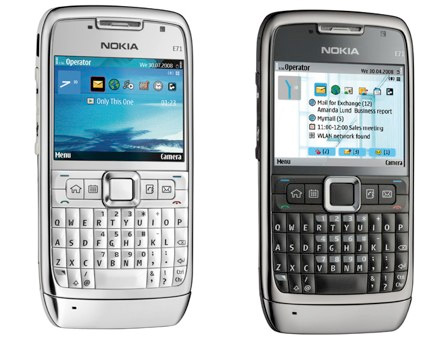
Today we present our 10-minute explanation of why we’ve shelved our iPhone and never looked back. In the process, you’ll discover the world’s best cordless SIP telephone…

Today we’ll walk you through the process of transforming any Apple TV into a feature-rich, open source media center platform with complete web, SSH, and SAMBA networking support. It’s simple enough that both you or your favorite Fifth Grader can do it in under 15 minutes! Can Asterisk be far behind?

If you’ve loved the iPod as a stand-alone music solution, then wait ’til you see this updated whole house audio system. It will have different music playing in every room of your house with the same ease of use and an even slicker user interface…

Today Nerd Vittles introduces a WiFi HotSpot Finder for Asterisk. Dial "WiFi" from any Asterisk phone, enter a zip code, and listen for the names and addresses of up to 10 WiFi HotSpots at or near your zip code. The code can easily be tailored to support commercial hotspots, free hotspots, or both.

A WiFi server, web server, streaming audio server, MP3 player, light show, RSS Feed fetcher, RFID proximity detection device, and Asterisk mailbox. It’s a bird. It’s a plane. No, it’s…

FON’s $5 WiFi Router Giveaway ends next Wednesday. Order yours NOW before it’s too late. Here’s how…

Today we provide a step-by-step Voice Over WiFi setup using Asterisk@Home. And it’ll work with almost any PC with a single USB port and a compatible WiFi USB stick.

Finally, the perfect companion for that morning commute or your daily fix from Starbucks … the Nokia 770 tablet.everything …


 JUST RELEASED: Visit the Incredible PBX Wiki