Home » Posts tagged 'asterisk' (Page 26)

Tag Archives: asterisk

The Most Versatile VoIP Provider: FREE PORTING

The SMS Toolkit: Integrating Text Messaging into Asterisk

blank

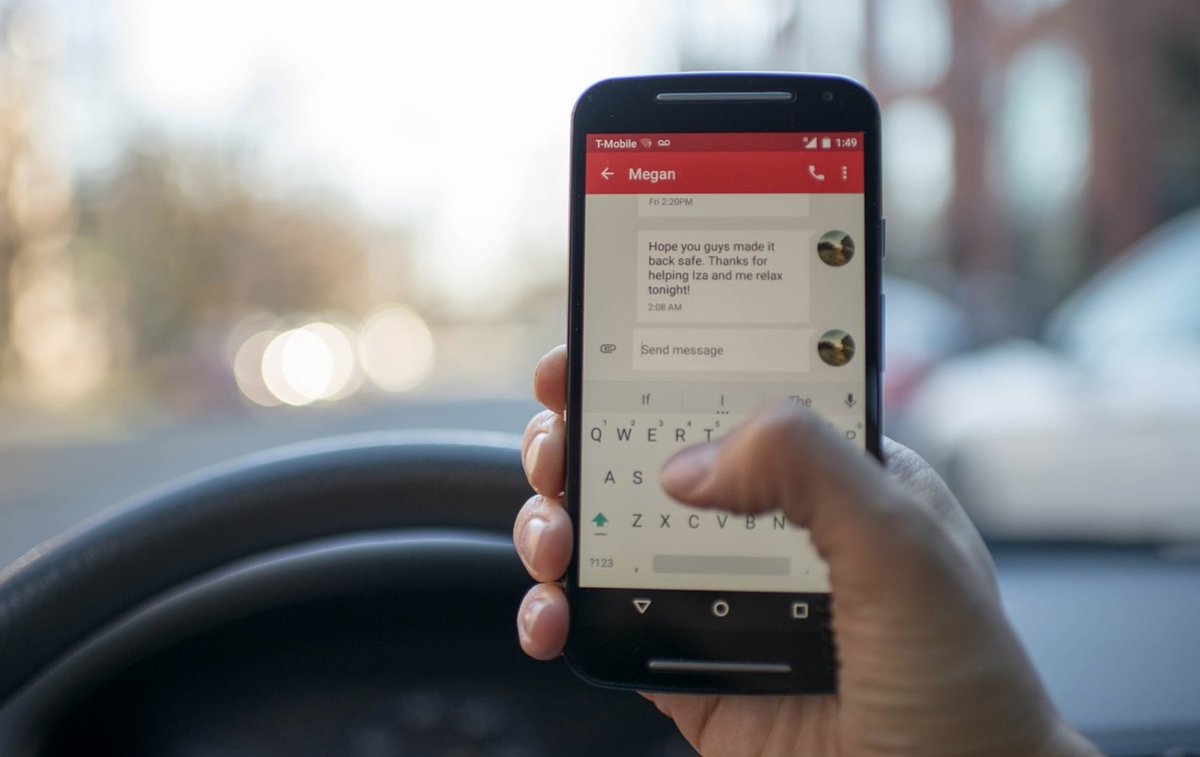
Unless you’ve been living under a rock, you probably already know that most folks spend a lot more time texting on their smartphones rather than talking. So it only made sense to develop some useful SMS tools to get the most out of your Asterisk® PBX. Today we’re pleased to introduce version 1 of an SMS Toolkit for Incredible PBX® using any SMS-enabled DID from either Vitelity or VoIP.ms. Just text a simple message to your PBX, and Incredible PBX will do the heavy lifting and either call you back with the results or reply to your text message. You can whitelist an IP address in your firewall or retrieve news headlines or a weather forecast. You can also look up a phone number in your AsteriDex phone book and place a call through your PBX using either the Voice Dialer or speed dial codes. You can enable call forwarding from your PBX extension to your smartphone, or a simple SMS command brings the calling flexibility of DISA to your smartphone. Here’s a list of supported SMS commands:

  • help – Plays a list of supported SMS commands
  • news – Retrieves latest news headlines from Yahoo
  • weather – Retrieves weather report by zip code
  • wolfram – Siri-like query to Wolfram Alpha
  • whitelist – Whitelist a new IP address in your firewall
  • disa – Use DISA calling from your smartphone with password
  • cf on – Enable call forwarding from PBX extension to smartphone
  • cf off – Disable call forwarding from PBX extension
  • cf status – Status of call forwarding on PBX extension
  • asteridex – Use AsteriDex Voice Dialer to place a call from PBX
  • odbc – Use AsteriDex speed dial codes to place a call from PBX
  • sms – Dictate an SMS message and deliver from Google Voice on PBX

Prerequisites for SMS Toolkit Deployment

To get started, you’ll need a DID from Vitelity or VoIP.ms that supports SMS messaging. You’ll be hard-pressed to beat our Vitelity DID special which is summarized at the end of this article, but the choice is all yours. The way this works is you provide a forwarding email address in the Vitelity or VoIP.ms portal for delivery of incoming SMS messages. These emails will be sent to your PBX where we will use SendMail and our mailcall script to process the messages and deliver the results. SMS messaging is a free add-on with both Vitelity and VoIP.ms DIDs unlike some other providers.

Since Vitelity or VoIP.ms will be delivering incoming SMS messages by email, it means you’ll also need a dedicated account and fully-qualified domain name (FQDN) for your server, e.g. smsuser@mypbx.mydomain.com. While a dynamic IP address will work if you implement automatic FQDN updating on your PBX, a static IP address for your PBX is obviously preferable and all of our recommended cloud solutions provide that including RentPBX, Digital Ocean, Vultr, and HiFormance.

Implementing the SMS Toolkit for Asterisk

Let’s walk through the steps to put all the pieces in place for the SMS Toolkit:

  1. Add a Dedicated Account to Linux for SMS Messaging
  2. Configure PBX for Receipt of Incoming SMS Emails
  3. Obtain and Configure DID with Vitelity or VoIP.ms
  4. Install and Configure MailCall Components

1. Adding a Dedicated Account to Linux

To simplify the task of sifting through incoming emails, we’ll want to create a new Linux user account that can be dedicated to receipt of SMS email messages. The second and third commands will verify that the account has been created with support for incoming mail. Just log into your server as root and issue the following commands:

adduser smsuser --shell=/bin/false --no-create-home --system -U
ls /var/mail/smsuser
mail -u smsuser


2. Configuring SendMail to Receive Inbound Email

By design, both SendMail and the Incredible PBX firewall block incoming email. We’re going to change that but, in doing so, we wish to caution that we don’t want to turn your server into an open mail relay for the spammers of the world. Once we’ve opened up your server to receive email, it’s important to test it to be sure it’s not insecure. Because the SMS Toolkit is intended to be a dedicated application just for you as administrator of your server, it’s equally important not to publicize the FQDN of your server. Once the spammers find your email address, incoming email can be just a big a problem as serving as an open mail relay.

To add a firewall rule in Incredible PBX to support incoming SMTP mail traffic, issue the following commands:

echo "iptables -A INPUT -p tcp -m tcp --dport 25 -j ACCEPT" >> /usr/local/sbin/iptables-custom
iptables-restart

Configuring SendMail to receive incoming email requires a few changes in /etc/mail/sendmail.mc followed by a restart of the SendMail service.

Using your favorite editor: nano -w /etc/mail/sendmail.mc

1a. Search for the following line:

DAEMON_OPTIONS(`Port=smtp,Addr=127.0.0.1, Name=MTA')dnl

1b. Replace that line with the following two lines:

dnl # DAEMON_OPTIONS(`Port=smtp,Addr=127.0.0.1, Name=MTA')dnl
FEATURE(`dnsbl',`dnsbl.njabl.org',`"550 Mail from " $&{client_addr} " rejected"')dnl


2a. Search for the following line:

FEATURE(`accept_unresolvable_domains')dnl

2b. Replace the line with the following and save the file:

dnl # FEATURE(`accept_unresolvable_domains')dnl

 
3. If you need an FQDN or dynamic DNS support, you can’t beat free. Here are some options.

4. Issue the following commands to complete the setup and restart SendMail:

yum -y install sendmail-cf
cd /etc/mail
make
echo "127.0.0.1 insert-your-server-FQDN-here" >> /etc/hosts
service sendmail restart

 
5. Using a browser from your desktop PC, test your server’s IP address to make certain it is not an open mail relay. All tests should report "Relaying Denied" or "Invalid route address."

6. Test your new mail account by sending an email to smsuser@your-server’s-fqdn. Wait a bit and check for email: mail -u smsuser. Then delete the email: > /var/mail/smsuser

3a. Configuring Vitelity DID for SMS Email Relay

With Vitelity DIDs, the first step is to order a DID that supports SMS, most do. Next, you need to decide whether this DID will be used for other purposes, such as serving as a trunk on your PBX for receipt of incoming calls. If this is your plan, then review the Vitelity offer at the bottom of this page. You’ll be hard-pressed to beat the price or the feature set. And you’ll also be providing support for our open source projects. Vitelity has been a Platinum Sponsor of Nerd Vittles for almost a decade.

If you only want to use the DID to support SMS messaging, then there’s little reason to sign up for the unlimited calling plan. Instead, choose the pay-per-minute (PPM) plan for your DID. It costs $1.49 a month. Don’t even both registering the trunk which will save your having to pay for misdialed calls and spam. SMS messages are free.

Once your DID is set up, go to My Numbers -> Local in the Vitelity web portal and choose SMS from the Action pull-down menu of your new DID:

blank

In the SMS dialog, set up a password for messaging, disable international messages, and enter the email forwarding address for your incoming SMS messages. Save your settings, and you’re good to go.

3b. Configuring VoIP.ms DID for SMS Email Relay

If you plan to dedicate a DID to SMS messaging, two advantages of the VoIP.ms offering are (1) the price ($0.85/month on the pay by the minute plan with $0.40 setup fee and (2) you can forward incoming SMS messages to another SMS number (such as your smartphone) in addition to an email address if you want to use the DID for traditional SMS messaging while also deploying our SMS Toolkit. As noted above, there’s no charge for SMS messages at this time although VoIP.ms has warned (for years) that they may begin charging a penny a message. As long as Vitelity is free, I wouldn’t worry. 🙂

To get started, sign up for a VoIP.ms account and order a DID with SMS support. A cellphone is displayed beside each DID that supports SMS in their ordering page. As with Vitelity, there’s no need to register the trunk on your PBX if you only plan to use the SMS messaging component. Once your DID is provisioned, choose DID Numbers -> Manage DIDs in the VoIP.ms portal. Then edit the DID you just purchased. At the bottom of the form, fill in the SMS section as shown below:

blank

4. Installing and Configuring MailCall on your PBX

MailCall was specifically designed for Incredible PBX 13-13 Full Enchilada but should work without modification with the latest version of Incredible PBX for Issabel 4. For other platforms including Debian, Ubuntu, and Raspbian, some adjustments may be necessary, and we have not yet had time to work out the kinks. There will be some so please hold off. Just to restate the obvious. Many of the MailCall features will not work until they are first configured on your server, e.g. Voice Dialing, Wolfram Alpha, and Voice SMS Messaging. All of the setups are covered in the Full Enchilada tutorial.

After logging into your server as root, issue the following commands to install MailCall:

cd /
wget http://incrediblepbx.com/MailCall.tar.gz
tar zxvf MailCall.tar.gz
rm -f MailCall.tar.gz


For the DISA and Firewall WhiteList components of MailCall, a 5-digit PIN is required for obvious reasons. This needs to be set in two places: (1) in two chunks of dialplan code (/tmp/sms-dialplan.txt) to be added and (2) at the top of the mailcall script itself (/root/mailcall). Just search for XXXXX and replace the five X’s with a 5-digit secure PIN in all three places. Then issue the remainder of the commands below:

nano -w /tmp/sms-dialplan.txt
nano -w /root/mailcall
cat /tmp/sms-dialplan.txt >> /etc/asterisk/extensions_custom.conf
echo "asterisk ALL = NOPASSWD: /sbin/iptables" >> /etc/sudoers
echo "*/2 * * * * root /root/mailcall > /dev/null 2>&1" >> /etc/crontab
asterisk -rx "dialplan reload"


As a security precaution, you can only use SMS Toolkit to forward and unforward calls to your cellphone from a PBX extension designated for your use. You can associate more than one cellphone with a given extension, but you can’t associate multiple extensions with a single cellphone. To set up the association between your cellphone and an extension on your PBX, issue the following command while logged in as root where 8431234567 is your cell phone number and 701 is the associated extension:

asterisk -rx "database put CELL 8431234567 701"


Sending an SMS message of CF ON to your DID from 8431234567 will automatically forward extension 701 calls to your cell. Sending CF OFF will disable call forwarding for extension 701. Sending CF STATUS will retrieve the current status of call forwarding for extension 701.

Finally, a few words about the SMS whitelist command. It can be used in two ways. If you just text whitelist, then you will get a call back that first prompts for your PIN. You then will be prompted for the IP address to whitelist. Using your cellphone, enter the IP address using * for periods, e.g. 1*2*3*4 becomes 1.2.3.4. The alternative whitelist option doesn’t require a callback. Just send a text message with whitelist pin ip-address using periods, not *, e.g. WHITELIST 98765 1.2.3.4 would whitelist 1.2.3.4 if your PIN was correctly entered as 98765 and matches the entry in /root/mailcall. Enjoy!

Published: Monday, February 26, 2018


blank

NEW YEAR’S TREAT: If you could use one or more free DIDs in the U.S. with unlimited inbound calls and unlimited simultaneous channels, then today’s your lucky day. TelecomsXChange and Bluebird Communications have a few hundred thousand DIDs to give away so you better hurry. You have your choice of DID locations including New York, New Jersey, California, Texas, and Iowa. The DIDs support Voice, Fax, Video, and even Text Messaging (by request). The only requirement at your end is a dedicated IP address for your VoIP server. Once you receive your welcome email with your number, be sure to whitelist the provider’s IP address in your firewall. For Incredible PBX servers, use add-ip to whitelist the UDP SIP port, 5060, using the IP address provided in your welcoming email.

Here’s the link to order your DIDs.

Your DID Trunk Setup in your favorite GUI should look like this:

Trunk Name: IPC
Peer Details:
type=friend
qualify=yes
host={IP address provided in welcome email}
context=from-trunk

Your Inbound Route should specify the 10-digit DID.

Why not add 300 New Wholesale Providers to Make Asterisk Shine while visiting TelecomsXchange. Enjoy!


blank
Need help with Asterisk? Visit the PBX in a Flash Forum.


Special Thanks to Our Generous Sponsors


FULL DISCLOSURE: ClearlyIP, Skyetel, Vitelity, DigitalOcean, Vultr, VoIP.ms, 3CX, Sangoma, TelecomsXchange and VitalPBX have provided financial support to Nerd Vittles and our open source projects through advertising, referral revenue, and/or merchandise. As an Amazon Associate and Best Buy Affiliate, we also earn from qualifying purchases. We’ve chosen these providers not the other way around. Our decisions are based upon their corporate reputation and the quality of their offerings and pricing. Our recommendations regarding technology are reached without regard to financial compensation except in situations in which comparable products at comparable pricing are available from multiple sources. In this limited case, we support our sponsors because our sponsors support us.

blankBOGO Bonaza: Enjoy state-of-the-art VoIP service with a $10 credit and half-price SIP service on up to $500 of Skyetel trunking with free number porting when you fund your Skyetel account. No limits on number of simultaneous calls. Quadruple data center redundancy. $25 monthly minimum spend required. Tutorial and sign up details are here.

blankThe lynchpin of Incredible PBX 2020 and beyond is ClearlyIP components which bring management of FreePBX modules and SIP phone integration to a level never before available with any other Asterisk distribution. And now you can configure and reconfigure your new Incredible PBX phones from the convenience of the Incredible PBX GUI.

blankVitalPBX is perhaps the fastest-growing PBX offering based upon Asterisk with an installed presence in more than 100 countries worldwide. VitalPBX has generously provided a customized White Label version of Incredible PBX tailored for use with all Incredible PBX and VitalPBX custom applications. Follow this link for a free test drive!
 

blankSpecial Thanks to Vitelity. Vitelity is now Voyant Communications and has halted new registrations for the time being. Our special thanks to Vitelity for their unwavering financial support over many years and to the many Nerd Vittles readers who continue to enjoy the benefits of their service offerings. We will keep everyone posted on further developments.


Some Recent Nerd Vittles Articles of Interest…

300 New Wholesale Providers Make Asterisk Shine

blank

For many years, we’ve offered Vitelity’s $3.99 Unlimited DID special with a DID, 4 channels, unlimited inbound calling, and free text messaging. It’s a deal no VoIP user should pass up. And today we have another revolutionary development for Asterisk® deployments. Once in a while we feature a carrier with great calling rates. Today we’re introducing a service providing access to 300+ wholesale carriers, all under one roof. Almost 30 BILLION billed minutes already have been logged through TCXC so you’re in good hands!1 You can choose from any or all of their 300 wholesale VoIP carriers worldwide to make outbound calls at the same wholesale rates offered to the very largest resellers. Simply pay a 13% surcharge in lieu of the $650 annual fee, and TelecomsXchange (TCXC) will provide you access to their entire suite of wholesale carriers together with state-of-the-art tools to manage all of the services.2 You’ll never have to haggle with individual carriers or provide funds on a piecemeal basis to use any of the services. TCXC already has done the negotiating for you and TCXC handles financial reimbursements to carriers based upon the services you use. There’s more good news. When compared to commercial providers, TCXC’s one-second billing increment on most routes will recoup a healthy portion of the 13% wholesale surcharge. Here are a few sample per minute wholesale rates (all with one-second billing) to whet your appetite:

  • $.0000 – U.S. TollFree
  • $.0009 – U.S.
  • $.0010 – Cyprus
  • $.0011 – Canada
  • $.0019 – Germany
  • $.0021 – U.K. (London)
  • $.0042 – China

What does a penny buy? 11-minute call to U.S., 10-minute call to Cyprus, 9-minute call to Canada, 5-minute call to Germany, 5 minute call to England, or 2½-minute call to China.

 
If you’re new to wholesale terminations, be advised that carriers change their rates regularly and, from time to time, every carrier experiences outages. Not to worry. For a modest additional charge, TelecomsXchange will manage rates and provide automatic failover for carrier outages. Simply choose TelecomsXchange as your preferred provider to the outbound destinations desired.

Before we get into the nuts and bolts of configuring Asterisk to use TCXC carriers for wholesale call terminations, let’s spend a minute discussing the architecture of the FreePBX® trunk and outbound routes model. In this design which you will find in most Incredible PBX® implementations including Issabel 4, Incredible PBX for CentOS and Ubuntu, and Incredible PBX for the Raspberry Pi as well as in other Asterisk distributions including AsteriskNOW® and the FreePBX Distro®, the administrator specifies Trunks for each provider and then assigns Outbound Routes for calls using those providers. When calls are placed, FreePBX chooses an Outbound Route based upon the dial string match specified in the route. If you have a dozen outbound routes, dialed numbers are analyzed against dial strings specified in each Outbound Route, and the routes are examined from the top to the bottom of the list. Once FreePBX chooses an Outbound Route to process a call, that ends the Outbound Route selection process. No other Outbound Route is ever considered whether it has a matching dial string or not. And it doesn’t matter whether the call fails or not, no other Outbound Route is attempted. The good news is that, within every Outbound Route, you can specify multiple Trunks which will be used in the order you’ve chosen to complete the call. If the ninth trunk happens to be the first trunk that doesn’t experience congestion, then the call will be routed to carrier #9. Keep in mind that calls to the previous eight carriers have to be attempted before we ever get to carrier #9. For this reason, it is important to create a Trunk for every carrier and specify multiple Trunks in every Outbound Route to avoid failed calls. Or, as noted above, you can specify TelecomsXchange as your final Trunk in every Outbound Route and leave it to TCXC to identify a working carrier to complete your call. In this way, you never have to worry about failed calls even though some may cost a little more depending upon carrier outages. So that’s how VoIP terminations work. You’re now an expert!

Getting Started with TelecomsXchange

The first step in your wholesale VoIP adventure is to sign up for an account with TelecomsXchange. Unless you’re chomping at the bit to pay the $650 annual fee, use our referral link. Your PBX will need a public IP address but, if it happens to be a dynamic IP address assigned by your provider, don’t worry. It’s easy to change it down the road, and we’ll show you how. Obviously, a cloud-based PBX makes this easier since you get a dedicated IP address, and this Nerd Vittles article provides several options.

blank

Once you receive your credentials, simply login to the TelecomsXchange web site. Just a few words about how the site is organized. Dashboard is where you’ll land when you login. Accounts let you specify more than one account to be associated with your credentials. If you manage multiple PBXs, this is where you set things up. Each account must have a unique IP address. This is also where you can change the IP address associated with your primary account if the need ever arises. My Interconnections displays each of your accounts and all of the carriers you’ve chosen to associate with each account. Market View is where you search for prices and choose carriers to associate with your account(s). We’ll cover this one in more detail a little later. Payment History tracks all of your payments to TelecomsXchange by date. Call Statistics lets you download CDR and Stats data by the day, week, or month. CDR gives you an instant snapshot of your calling history and the price of the calls based upon criteria you specify. It’s very similar to the same feature in the Incredible PBX or FreePBX GUI. Preferences let you change settings for your account.

The item you’ll need to use first is the plus sign (+) at the top of the form. This is how you fund your account. As noted previously, there is a 13% wholesale surcharge and this will be deducted from whatever amount you choose to add to your account. For example, if you add $100 using PayPal, the PayPal fee plus 13% will be deducted from the $100. So your account would show an available balance of approximately $84. Cash or bank wires also are accepted.

Finally, here’s a link to the TelecomsXchange Knowledge Base and Help Center. There’s lot of helpful information there to get you started.

Choosing a Carrier with TelecomsXchange

Let’s walk through the procedure to add new carriers to your account. This is the first thing you’ll want to do after you get your credentials and fund your account. Begin by making yourself a list of the countries or dialing prefixes you’d like to call using TCXC wholesale carriers. The easiest way to perform searches and find carriers is to decipher the dialing prefix for the calls you wish to make. For example, to call London, the Prefix would be the U.K. country code (44) plus the London city code (20).

blank

Now open the Market View tab to get started. Here’s how we’d fill in the form to find London carriers and to order the first hundred matches from least costly to most expensive: Prefix (4420), Results (100), Order By (PRICE), and Route Type (CLI) which means you can specify your own CallerID for the outgoing calls. Click Search to proceed. The results look like this:

blank

To add a carrier to your account, simply click on the plus sign (+) on the right side of the Action column beside the carrier of your choice. You then can choose whether to add it to all of your accounts, or you specify the account to which the carrier should be added. If you want to review the carrier’s history and ratings with TCXC, click on the Information icon in the Action column beside the carrier of your choice.

For NANPA call destinations, specify 1 plus the area code in the Prefix field. You can add the first 3 digits of the exchange to drill down further. Be advised that adding the 3-digit exchange may eliminate a number of carriers that only specify rates for an entire area code. For example, if a carrier specifies an area code rate for 1212 and no exchange limitations, then searching for 1212652 would not return that carrier.

If you already know which carriers you’d like to add, just search for them by specifying the carrier name in the Seller field and leaving the Prefix field blank. To get started, here are a few favorites for U.S./Int’l routes: IDT, LEXICO, TATA, VOXBEAM, and TELECOMSXCHANGE.

Placing Carrier-Specific Calls with TelecomsXchange

To set up the FreePBX Trunks and Outbound Routes, you first need to understand how calls are placed through TelecomsXchange carriers. In lieu of traditional trunk registrations on your PBX, TelecomsXchange uses the IP address that you registered for your account to determine whether SIP calls arriving at TCXC for routing to a carrier are authorized. Thus, it’s important that you keep your IP addresses updated whenever they change. Assuming your call passes the IP address check, the next hurdle is for TCXC to decipher which carrier should be used to route the call to its destination. This is handled by dialing prefixes which are unique to each TCXC carrier. For example, TATA has a dialing prefix of 32270#. To dial a U.S. call using the TATA carrier, the dial string would look like this: 32270#16785551212. A carrier must be assigned to your account before you can place calls from your PBX using that carrier’s dialing prefix. So there are two layers of protection on the TCXC side to prevent fraudulent calls. There must be both an IP address match and a carrier prefix match on your account before a call will be forwarded to a carrier.

Before we begin setting up your Trunks and Outbound Routes for Incredible PBX or one of the other Asterisk platforms, write down the names of each of the carriers you have chosen as well as their Dialing Prefixes. You’ll need them in the next steps. You can decipher carrier’s dialing prefixes assigned to your account under the My Interconnections tab in your TCXC Dashboard.

Setting Up TCXC Carrier Trunks in FreePBX

To begin, make certain that chan_SIP is assigned to UDP 5060 on your PBX. Particularly for trunks, there were just too many issues with PJsip in some releases of Asterisk so steer clear. With every TCXC carrier, the good news is the chan_SIP Trunk setup is virtually identical except for the carrier name and the carrier’s dialing prefix. For each carrier, start by adding a new chan_SIP Trunk in the Incredible PBX or FreePBX GUI. In the General tab, insert the carrier name in the Trunk Name field, e.g. TCXC. Leave the other default settings as they are.

blank

Switch to the Dialed Number Manipulation Rules tab. Leave the Dialing Rules empty and insert the carrier’s dialing prefix in the Outbound Dial Prefix field, e.g. 77379#.

Switch to the SIP Settings tab. In the Outgoing tab, insert the carrier name in the Trunk Name field. Insert the following in the PEER Details field:

type=peer
qualify=yes
progressinband=never
port=5060
nat=yes
insecure=port,invite
ignoresdpversion=yes
host=sip01.telecomsxchange.com
dtmfmode=rfc2833
disallow=all
context=from-trunk
allow=ulaw&alaw

 
While still in SIP Settings, switch to the Incoming tab, and clear out the default User Detail entries. Now click the Submit button and reload your dialplan when prompted.

Repeat this procedure for each of the carriers you set up in your TCXC profile.

Setting Up Outbound Routes for TCXC Calls

Our preferred Outbound Route setup for TCXC carriers is to create a new Outbound Route for each destination (typically a country) to which you wish to enable calling. Be advised that setting up a dialing prefix of just the number 1 authorizes considerably more calls than just those to destinations in the United States. For foreign countries, if all of your calls to the U.K are to destinations in London, then don’t authorize country-wide calling. Narrow it down to the country code and city code for London. Remember, it’s your phone bill.

For international calls, we prefer that callers enter a dialing prefix that specifies that it’s a long distance call plus a two-digit prefix representing the country abbreviation, not the dial code of the country. For example, for the U.K., we use 085 where 0 specifies long distance call and 85 is the phone representation for UK. We’ll then use the Outbound Route to strip off the caller’s dialed prefix and to insert the proper country code to complete the call.

Within each Outbound Route, we recommend you specify one or more low-cost carriers and a final TCXC carrier to catch calls that fail to all of your designated carriers. Otherwise, the caller will get a failed call. And you will get the next call. 🙂

So here’s what our Outbound Route setup for London, England looks like. You only need entries in the Route Settings and Dial Patterns tabs. Be sure to put your desired CallerID in the Route CID field and set the Override Extension option to YES. Then add your preferred Trunks in the order in which you want the calls attempted:

blank

In the Dial Patterns tab, we specify a Prefix of 4420 to tell Asterisk to add a dialing prefix to the call to get it to London. Then we enter 085 in the Prefix field to tell Asterisk to strip off those digits entered by the caller before sending the call to the designated Trunk for processing. The Match Pattern is 8 X’s which represents an 8-digit London telephone number. To get a match on this Outbound Route, Asterisk will be searching for a dial string that looks like this: 085 + XXXXXXXX

blank

Here’s an example of the Asterisk call flow using IDT as the primary trunk with this Outbound Route.

Caller Dials: 085-7499-0888
Outbound Route finds match on 085 Prefix + 8 X's and discards Prefix
Outbound Route sends 4420 (for London) + 74990888 to Trunk #1 (IDT)
IDT Trunk adds IDT Dialing Prefix 10729# before sending call to TCXC
TCXC receives: 10729#442074990888
TCXC strips IDT dialing prefix and sends call to IDT: 4420 + 74990888
IDT connects caller to Four Seasons Hotel in London

Adjustment with NAT-Based Implementations

Keep in mind that TCXC was designed primarily for commercial resellers, not for PBX-level implementations. If your PBX is sitting in the cloud or is directly connected to the Internet rather than sitting behind a NAT-based router, then you’re good to go now. If, on the other hand, your PBX is sitting on a private LAN behind a NAT-based router, make certain that your router forwards all UDP 5060 traffic to the private LAN address of your PBX. Otherwise, you may experience disconnect anomalies where the called party hangs up a call before your callers since there will be no call path for TCXC to return the disconnect alert (BYE) when the call is completed. For Incredible PBX servers, this isn’t really a problem because Incredible PBX will disconnect the call automatically after detecting 30 seconds of RTP traffic inactivity anyway. But we wanted to make you aware of the potential issue. The good news is you won’t be billed for the extra connection time since TCXC already has dropped the call with the carrier and turned off the billing meter.

Adding Trunk Information to Incredible PBX

Some may wish to include Trunk information in the CDR listings of Incredible PBX or FreePBX. This makes it much easier to spot problems when calls aren’t routed to the Trunk destinations you expect. It also makes it easy to generate trunk-specific reports within the GUI. In the FreePBX 12 and 13 implementations, the trunk information can be added painlessly by revising the [macro-dialout-trunk] context. However, you cannot make these changes directly in /etc/asterisk/extensions_additional.conf because your modifications will be overwritten the next time your dialplan is reloaded. Instead, the modified context must be added to extensions_override_freepbx.conf. Here’s how:

cd /tmp
wget http://incrediblepbx.com/cdr-trunk-info.tar.gz
tar zxvf cdr-trunk-info.tar.gz
rm -f cdr-trunk-info.tar.gz
cat cdr-trunk-info.txt >> /etc/asterisk/extensions_override_freepbx.conf
asterisk -rx "dialplan reload"

 
The modified CDR listing will look something like this:

blank

We also developed a handy utility to make it easy to list out all of your trunks and their status. Here’s how:

cd /root
wget http://incrediblepbx.com/list-trunks.tar.gz
tar zxvf list-trunks.tar.gz
rm -f list-trunks.tar.gz
./list-trunks

 
The listing will look something like this:

blank

Rate Queries Using the TCXC API

For those that want to query the TCXC rate tables locally, we’ve modified a TCXC sample JSON script slightly so that you can use Chrome (with JSONView) or FireFox (with JSON Lite viewer) to view JSON results. Using one of these browsers with the specified add-on, JSON results will be formatted automatically. The query results identity current providers and rates by entering a dialing prefix. The syntax for the web queries looks like the following where 192.168.0.224 is your server’s IP address and 357 is the dialing prefix rate table desired:

 
http://192.168.0.224/rates.php?prefix=357

 
The first 30 matching results will look something like this:

blank

To use this script, you’ll need to insert your account name and API key (found in your TCXC Profile) into rates.php before first use. To install the script in the root folder of Apache, issue the following commands:

 
cd /var/www/html
wget http://incrediblepbx.com/TCXC-rates.tar.gz
tar zxvf TCXC-rates.tar.gz
rm -f TCXC-rates.tar.gz


Published: Monday, February 12, 2018


blank

NEW YEAR’S TREAT: If you could use one or more free DIDs in the U.S. with unlimited inbound calls and unlimited simultaneous channels, then today’s your lucky day. TelecomsXChange and Bluebird Communications have a few hundred thousand DIDs to give away so you better hurry. You have your choice of DID locations including New York, New Jersey, California, Texas, and Iowa. The DIDs support Voice, Fax, Video, and even Text Messaging (by request). The only requirement at your end is a dedicated IP address for your VoIP server. Once you receive your welcome email with your number, be sure to whitelist the provider’s IP address in your firewall. For Incredible PBX servers, use add-ip to whitelist the UDP SIP port, 5060, using the IP address provided in your welcoming email.

Here’s the link to order your DIDs.

Your DID Trunk Setup in your favorite GUI should look like this:

Trunk Name: IPC
Peer Details:
type=friend
qualify=yes
host={IP address provided in welcome email}
context=from-trunk

Your Inbound Route should specify the 10-digit DID. Enjoy!


blank
Need help with Asterisk? Visit the PBX in a Flash Forum.


Special Thanks to Our Generous Sponsors


FULL DISCLOSURE: ClearlyIP, Skyetel, Vitelity, DigitalOcean, Vultr, VoIP.ms, 3CX, Sangoma, TelecomsXchange and VitalPBX have provided financial support to Nerd Vittles and our open source projects through advertising, referral revenue, and/or merchandise. As an Amazon Associate and Best Buy Affiliate, we also earn from qualifying purchases. We’ve chosen these providers not the other way around. Our decisions are based upon their corporate reputation and the quality of their offerings and pricing. Our recommendations regarding technology are reached without regard to financial compensation except in situations in which comparable products at comparable pricing are available from multiple sources. In this limited case, we support our sponsors because our sponsors support us.

blankBOGO Bonaza: Enjoy state-of-the-art VoIP service with a $10 credit and half-price SIP service on up to $500 of Skyetel trunking with free number porting when you fund your Skyetel account. No limits on number of simultaneous calls. Quadruple data center redundancy. $25 monthly minimum spend required. Tutorial and sign up details are here.

blankThe lynchpin of Incredible PBX 2020 and beyond is ClearlyIP components which bring management of FreePBX modules and SIP phone integration to a level never before available with any other Asterisk distribution. And now you can configure and reconfigure your new Incredible PBX phones from the convenience of the Incredible PBX GUI.

blankVitalPBX is perhaps the fastest-growing PBX offering based upon Asterisk with an installed presence in more than 100 countries worldwide. VitalPBX has generously provided a customized White Label version of Incredible PBX tailored for use with all Incredible PBX and VitalPBX custom applications. Follow this link for a free test drive!
 

blankSpecial Thanks to Vitelity. Vitelity is now Voyant Communications and has halted new registrations for the time being. Our special thanks to Vitelity for their unwavering financial support over many years and to the many Nerd Vittles readers who continue to enjoy the benefits of their service offerings. We will keep everyone posted on further developments.


Some Recent Nerd Vittles Articles of Interest…

  1. We obviously have not verified TCXC’s billed minutes counter. Don’t rely upon it in deciding whether to use the service. As with all VoIP providers, what matters is the quality and cost of the calls. []
  2. Our special thanks to TelecomsXchange. They have generously offered to contribute a portion of the wholesale surcharge to support the Incredible PBX open source project. []

Rolling Your Own: Building a Custom ISO with Incredible PBX

blank

We walked through the RedHat ISO creation procedure a couple years ago, but we wanted to revisit the issue using the 64-bit Scientific Linux 6.9 platform for those that want a current ISO image with Asterisk® 13 LTS. We recommend setting up your build environment on a VirtualBox virtual machine. Then you’ll have something to store away on your desktop computer in the event you ever want to create more customized ISOs. For today, you’ll need the 64-bit SL 6.9 DVD 1 ISO and the Nerd Vittles build environment and scripts. Should you ever decide to create all of the pieces from scratch, we’d recommend you begin with a careful review of Jason Priebe’s tutorial on Smorgasbork. But we’ll save you several hours of pain by providing the build environment and tools used to create the new Incredible PBX 13-13 ISO.

Getting Started. Begin by installing VirtualBox on your desktop computer. Then download the 64-bit SL 6.9 DVD 1 ISO. We chose Scientific Linux instead of CentOS or another RedHat derivative to minimize issues with copyrights and trademarks. Scientific Linux was partially developed with U.S. government employees and funding which imposes clear boundaries on attempts to limit redistribution of open source, GPL packages and packaging. Since we are merely adjusting the collection of GPL components in the ISO build and then adding our own GPL-licensed installation scripts in the kickstart files, the ISO is as close to worry-free as one can get in the litigious world in which we find ourselves.

Once you have created a virtual machine for Scientific Linux 6.9 and specified SL 6.9 DVD 1 ISO as your Virtual Drive in the Storage:Empty tree, start your VM and walk through the basic SL 6.9 install specifying a Minimal Install as your platform of choice. When the install finishes, reboot your server and login as root using SSH or Putty. Issue the following commands to add a few missing packages which we will need down the road:

cd /root
yum -y install net-tools nano wget tar
wget http://download.fedoraproject.org/pub/epel/6/x86_64/epel-release-6-8.noarch.rpm
rpm -Uvh epel-release-6-8.noarch.rpm

While it’s not normally good practice to build ISO images as the root user, we’ll do it anyway since we’ve built a virtual machine that will be dedicated exclusively to building ISO images. In the /root folder, the directory structure for our build environment will look like this:

/root
 -kickstart_build
  --isolinux
  --Packages  
  --repodata
  --images
    ---pxeboot 

Typically, most of the kickstart_build environment is populated from the isolinux directory on SL 6.9 disc 1. Then kickstart customizations are added to isolinux and the RPM packages to be loaded as part of the initial install are added to Packages. Finally, each of the kickstart files includes an opening install script, followed by a %packages section listing all of the main RPMs to be loaded (not the dependencies), followed by a %post section which specifies what tasks to complete once all of the RPM packages have been installed.

Our goodie bag for today sets all of this up for you. In addition, it adds a script (add-packages-tmp) which downloads all of the packages for the ISO as well as any required package dependencies. There’s also a text file (add-packages-kickstart) that lists all of the main packages that are going into the ISO build. This list will be used to populate the %packages section of each of the kickstart files (ks*.cfg) in isolinux. For the Incredible PBX 13-13 ISO, we’ve already moved the list of RPMs into each of the kickstart files so all you have to do is run /root/add-packages-tmp to download the RPMs and move them into place. Finally, there’s a script (create-ISO-new) in the /root folder that will actually generate the Incredible PBX 13-13 ISO file. Once it completes its tasks, the ISO file can be found in /root/kickstart_build.

Now let’s put the build environment and the Incredible PBX 13-13 ISO components into place and create our first ISO. While logged into your server as root, issue the following commands. NOTE: Over 1,000 packages make up the Incredible PBX 13-13 ISO so the add-packages-tmp script takes a good long while to run since each RPM has to be downloaded and moved into place in our build environment.

cd /root
wget http://incrediblepbx.com/create-ISO-6.9.tar.gz
tar zxvf create-ISO-6.9.tar.gz
./add-packages-tmp
./create-ISO-new
ls /root/kickstart_build/*.iso

To add your own RPMs to an ISO, simply edit add-packages-tmp and add each new RPM in two places, in the reinstall AND the install sections of the script. This assures that RPMs will be added whether they already exist on your virtual machine or not. For each new RPM you add, be sure to also add an entry in add-packages-kickstart. We prefer to keep the packages alphabetical which makes it easier to make changes down the road. Finally, cut and paste the add-packages-kickstart list into the %packages section of each of your kickstart files in kickstart_build/isolinux/ks*.cfg. The isolinux.cfg file is where you set up the install menu for the ISO and specify the names of the kickstart files to associate with each menu selection. Once you’ve customized things, simply rerun add-packages-tmp and create-ISO-new to generate a new ISO. Enjoy!

Published: Monday, January 29, 2018


blank

NEW YEAR’S TREAT: If you could use one or more free DIDs in the U.S. with unlimited inbound calls and unlimited simultaneous channels, then today’s your lucky day. TelecomsXChange and Bluebird Communications have a few hundred thousand DIDs to give away so you better hurry. You have your choice of DID locations including New York, New Jersey, California, Texas, and Iowa. The DIDs support Voice, Fax, Video, and even Text Messaging (by request). The only requirement at your end is a dedicated IP address for your VoIP server. Once you receive your welcome email with your number, be sure to whitelist the provider’s IP address in your firewall. For Incredible PBX servers, use add-ip to whitelist the UDP SIP port, 5060, using the IP address provided in your welcoming email.

Here’s the link to order your DIDs.

Your DID Trunk Setup in your favorite GUI should look like this:

Trunk Name: IPC
Peer Details:
type=friend
qualify=yes
host={IP address provided in welcome email}
context=from-trunk

Your Inbound Route should specify the 10-digit DID. Enjoy!


blank
Need help with Asterisk? Visit the PBX in a Flash Forum.


Special Thanks to Our Generous Sponsors


FULL DISCLOSURE: ClearlyIP, Skyetel, Vitelity, DigitalOcean, Vultr, VoIP.ms, 3CX, Sangoma, TelecomsXchange and VitalPBX have provided financial support to Nerd Vittles and our open source projects through advertising, referral revenue, and/or merchandise. As an Amazon Associate and Best Buy Affiliate, we also earn from qualifying purchases. We’ve chosen these providers not the other way around. Our decisions are based upon their corporate reputation and the quality of their offerings and pricing. Our recommendations regarding technology are reached without regard to financial compensation except in situations in which comparable products at comparable pricing are available from multiple sources. In this limited case, we support our sponsors because our sponsors support us.

blankBOGO Bonaza: Enjoy state-of-the-art VoIP service with a $10 credit and half-price SIP service on up to $500 of Skyetel trunking with free number porting when you fund your Skyetel account. No limits on number of simultaneous calls. Quadruple data center redundancy. $25 monthly minimum spend required. Tutorial and sign up details are here.

blankThe lynchpin of Incredible PBX 2020 and beyond is ClearlyIP components which bring management of FreePBX modules and SIP phone integration to a level never before available with any other Asterisk distribution. And now you can configure and reconfigure your new Incredible PBX phones from the convenience of the Incredible PBX GUI.

blankVitalPBX is perhaps the fastest-growing PBX offering based upon Asterisk with an installed presence in more than 100 countries worldwide. VitalPBX has generously provided a customized White Label version of Incredible PBX tailored for use with all Incredible PBX and VitalPBX custom applications. Follow this link for a free test drive!
 

blankSpecial Thanks to Vitelity. Vitelity is now Voyant Communications and has halted new registrations for the time being. Our special thanks to Vitelity for their unwavering financial support over many years and to the many Nerd Vittles readers who continue to enjoy the benefits of their service offerings. We will keep everyone posted on further developments.


Some Recent Nerd Vittles Articles of Interest…

Incredible PBX Backup & Restore for Cloud-Based Servers

blank

One of the perplexing realities with VoIP-based servers is how few people actually back up their systems. For anyone who has ventured into the IT world over the past 40 years, there’s one maxim worth remembering: "It’s not a question of whether your server will fail. It’s only a question of when." Incredible PBX® always has provided a backup mechanism in standalone servers to recover from disasters. But then cloud-based computing came along. Two of our favorite providers, Digital Ocean and Vultr, offer a backup snapshot option for 20% of the monthly cost of your platform. But many others do not. And snapshots in the same facility only insulate you from catastrophic failures that don’t take down the entire facility. Think: DNS, bombs, floods, earthquakes, hurricanes, and disgruntled employees.

We obviously can’t solve all of the world’s problems. But what we can do is provide a generic backup mechanism that will work with most cloud implementations of Incredible PBX. It allows you to make a complete backup of your server, copy the image off site, and restore it at another cloud location or by deploying a virtual machine in your home or office with VirtualBox®. Today we’ll show you how.

blank

Methodology. We’re assuming you are using the latest Incredible PBX 13-13 platform with either CentOS® or Scientific Linuxâ„¢ 6 or 7 running Asterisk® 13. We’re also assuming your primary server is cloud-based. Your backup server can be cloud-based or a virtual machine running under VirtualBox on a desktop PC. The trick is to build the backup platform at or near the creation time of your primary server so that both are using nearly identical Linux components, the same version of Asterisk, the same version of Incredible PBX, and the same versions of the 1,000+ packages that comprise an Incredible PBX VoIP platform. This is easy at the time you create your primary server. It’s much more difficult 5 or 10 years down the road. So don’t be a procrastinator. Build your backup platform. And do it now! In the case of VirtualBox, you can create the virtual machine and turn it off until that rainy day occurs. It won’t cost you a dime other than a little disk storage space.

Overview. Here are the 5 Steps to put your backup implementation plan into place:

  1. Build & Configure Incredible PBX 13-13 Primary Server in the Cloud
  2. Build Barebones Incredible PBX 13-13 Server at Secondary Site
  3. Make a Backup of Your Primary Server Every Week
  4. Copy Weekly Backup Image to One or More Off-Site Locations
  5. Periodically Test Restoring Backup to Secondary Server

1. Build & Configure Primary Server

We’ve covered the procedure for building an Incredible PBX 13-13 server starting from a CentOS platform or from the Incredible PBX 13-13 ISO. We continue to recommend the CentOS or Scientific Linux 6.9 platform. Whether to create a Lean, Mean implementation or the Whole Enchilada is your call to make. Configure your Extensions, Trunks, and Routes, and you’re ready for business.

2. Build a Barebones Secondary Server

The hardest part of Step #2 is deciding where to build your secondary Incredible PBX 13-13 server. It doesn’t need to be in the cloud unless you prefer that option. Part of this decision may turn on how many servers you actually support. If you have a dozen primary servers, then it probably makes sense to add #13 as your backup server. Then it will be available in case of a failure of any of the other servers. Just make sure it’s in a location 1,000+ miles away from the primary server which should provide ample protection from North Korea’s Rocket Man. You can install the Lean, Mean version of Incredible PBX 13-13 with no additional configuration. Make sure the version of CentOS or Scientific Linux matches your primary server. As noted, VirtualBox is a perfectly adequate backup platform.

3. Make a Weekly Backup of Primary Server

We’re offering the following script for your use pursuant to the GPL2 license. By using the script at no cost, you agree to assume all risks and absolve us from any liability regarding bugs, performance, or any other failure in the code. If that’s acceptable to you, copy the commands below and create a backup-full script in the /root folder of your primary server. After saving the script, make it executable: chmod +x backup-full.

#!/bin/bash
# backup-full for Incredible PBX, Copyright (c) 2008-2018, Ward Mundy & Associates, LLC
# Licensed pursuant to GPL2. See /root/COPYING on any Incredible PBX server for details
amportal stop
service mysqld stop
service httpd stop
service sendmail stop
cd /
tar -cf /tmp/backup.tar /bin /etc /home /lib /lib64 /media /mnt /opt /root /sbin /usr /var
service sendmail start
service httpd start
service mysqld start
amportal start
tar --delete -f /tmp/backup.tar etc/udev/rules.d
tar --delete -f /tmp/backup.tar etc/sysconfig/network-scripts
tar --delete -f /tmp/backup.tar var/lib/dhclient
tar --delete -f /tmp/backup.tar etc/fstab
tar --delete -f /tmp/backup.tar etc/resolv.conf
tar --delete -f /tmp/backup.tar etc/hosts
tar --delete -f /tmp/backup.tar etc/hostname
gzip /tmp/backup.tar
echo "Your backup is available: /tmp/backup.tar.gz"
echo "Copy it and test it in a safe place OFF SITE"
echo " "


To run the script, execute the following command: /root/backup-full

We recommend running the backup-full script during hours when your PBX is not in active use since Asterisk and other services typically are shut down for 5-10 minutes. Depending upon the size and performance of your server, the backup typically takes 15-20 minutes. Once the backup script finishes, copy /tmp/backup.tar.gz to a safe place away from the primary server every week. You can automate the backup and the copying procedure with a cron job if desired. If your primary PBX doesn’t change regularly, alter the backup schedule.

UPDATE: As many of you appreciate, VMware platforms are a very different beast. The same is true of some cloud platforms which don’t play nicely with full backups from other environments. The telltale sign is abrupt reboots when you attempt to login to the web GUI using a browser. If you will be backing up FROM or restoring TO a VMware virtual machine or some other incompatible platform, here’s a workaround. The backup methodology needs to be adjusted to collect all of your PBX configuration data without messing with the underlying operating system configuration. This is similar to the original Incredible Backup methodology. You may also find it handy whenever you have a backup cloud server that is similarly configured to your main cloud server.

First, you need to assure that your versions of the major components are the same on both your primary and backup server. As noted before, the easiest way to do this is to build the two platforms simultaneously. If you plan to use either the Full Enchilada or Incredible Fax add-ons on your primary server, then they also need to be installed and configured on your backup server. Once the two servers are operational, you can shut down the backup server for the time being. Then make your customizations on the primary server and make a backup. The backup script above will work with the exception of the tar command line which should be replaced with the following (as a single line command):

tar -cf /tmp/backup.tar /var/www /var/lib/mysql /var/lib/asterisk /root /etc/asterisk /etc/crontab /etc/pbx /var/spool/asterisk /etc/freepbx.conf /etc/amportal.conf

The restore scenario outlined below will be the same for VMware-style backups except your passwords on the restored platform will be your original backup server passwords with the exception of your FreePBX® GUI and Apache web passwords which will be inherited from the primary server at the time of the backup image.

4. Copy Backup Image to Off-Site Location(s)

Once the backup script finishes, copy /tmp/backup.tar.gz to a safe place away from the primary server every week. You can automate the backup and the copying procedure with a cron job if desired. If your primary PBX doesn’t change regularly, alter the backup schedule.

5. How to Restore Backup to Secondary Server

Before patting yourself on the back from having made a successful backup, let’s try restoring it to your secondary server to be sure everything still works. Here are a couple of tips before we get started. First, in the event of an actual emergency, you will find recovery is simplified if you use fully-qualified domain names in registering extensions to your primary server. In this way, you can simply alter the IP address of the FQDN in your DNS server to point to the backup server without having to reconfigure every extension on your PBX. Second, trunks that are registered from your primary PBX will automatically be registered from your secondary PBX when you bring it on line. For that reason, test your secondary server during non-working hours and always be sure to shut down Asterisk on the primary server (amportal stop) before bringing up your secondary server. Finally, trunks that are supported by IP address configuration rather than registration will need to be manually reconfigured with the secondary IP address before they will be available for use.

We’re offering the following script for your use pursuant to the GPL2 license. By using the script at no cost, you agree to assume all risks and absolve us from any liability regarding bugs, performance, or any other failure in the code. If that’s acceptable to you, copy the commands below and create a restore-full script in the /root folder of your backup server(s). After saving the script, make it executable: chmod +x restore-full.

#!/bin/bash
# restore-full for Incredible PBX, Copyright (c) 2008-2018, Ward Mundy & Associates, LLC
# Licensed pursuant to GPL2. See /root/COPYING on any Incredible PBX server for details
amportal stop
service mysqld stop
service httpd stop
service sendmail stop
chattr +i /etc/resolv.conf
cd /
tar zxvf /tmp/backup.tar.gz
echo "Shut off Asterisk on primary server now."
read -p "Press any key to continue with reboot..."
reboot

To restore the backup, begin by copying the backup.tar.gz file to /tmp on your backup server. Then run the script you created above: /root/restore-full.

Once the restore is completed, your server will reboot. Log back in using the credentials from your primary server and make sure everything is working.

NOTE: If your primary server is using eth0 for its Ethernet connection and your backup server is using venet0, then you’ll need to modify /etc/sysconfig/knockd and then restart PortKnocker on the backup platform: service knockd restart. The command to add looks like this:

OPTIONS="-i venet0:0"

If you’re backing up from a venet0 platform and restoring to an eth0 platform, then you’d need to reverse the process by removing the above entry from /etc/sysconfig/knockd and restarting PortKnocker. Enjoy!

Published: Tuesday, January 23, 2018


blank

NEW YEAR’S TREAT: If you could use one or more free DIDs in the U.S. with unlimited inbound calls and unlimited simultaneous channels, then today’s your lucky day. TelecomsXChange and Bluebird Communications have a few hundred thousand DIDs to give away so you better hurry. You have your choice of DID locations including New York, New Jersey, California, Texas, and Iowa. The DIDs support Voice, Fax, Video, and even Text Messaging (by request). The only requirement at your end is a dedicated IP address for your VoIP server. Once you receive your welcome email with your number, be sure to whitelist the provider’s IP address in your firewall. For Incredible PBX servers, use add-ip to whitelist the UDP SIP port, 5060, using the IP address provided in your welcoming email.

Here’s the link to order your DIDs.

Your DID Trunk Setup in your favorite GUI should look like this:

Trunk Name: IPC
Peer Details:
type=friend
qualify=yes
host={IP address provided in welcome email}
context=from-trunk

Your Inbound Route should specify the 10-digit DID. Enjoy!


blank
Need help with Asterisk? Visit the PBX in a Flash Forum.


Special Thanks to Our Generous Sponsors


FULL DISCLOSURE: ClearlyIP, Skyetel, Vitelity, DigitalOcean, Vultr, VoIP.ms, 3CX, Sangoma, TelecomsXchange and VitalPBX have provided financial support to Nerd Vittles and our open source projects through advertising, referral revenue, and/or merchandise. As an Amazon Associate and Best Buy Affiliate, we also earn from qualifying purchases. We’ve chosen these providers not the other way around. Our decisions are based upon their corporate reputation and the quality of their offerings and pricing. Our recommendations regarding technology are reached without regard to financial compensation except in situations in which comparable products at comparable pricing are available from multiple sources. In this limited case, we support our sponsors because our sponsors support us.

blankBOGO Bonaza: Enjoy state-of-the-art VoIP service with a $10 credit and half-price SIP service on up to $500 of Skyetel trunking with free number porting when you fund your Skyetel account. No limits on number of simultaneous calls. Quadruple data center redundancy. $25 monthly minimum spend required. Tutorial and sign up details are here.

blankThe lynchpin of Incredible PBX 2020 and beyond is ClearlyIP components which bring management of FreePBX modules and SIP phone integration to a level never before available with any other Asterisk distribution. And now you can configure and reconfigure your new Incredible PBX phones from the convenience of the Incredible PBX GUI.

blankVitalPBX is perhaps the fastest-growing PBX offering based upon Asterisk with an installed presence in more than 100 countries worldwide. VitalPBX has generously provided a customized White Label version of Incredible PBX tailored for use with all Incredible PBX and VitalPBX custom applications. Follow this link for a free test drive!
 

blankSpecial Thanks to Vitelity. Vitelity is now Voyant Communications and has halted new registrations for the time being. Our special thanks to Vitelity for their unwavering financial support over many years and to the many Nerd Vittles readers who continue to enjoy the benefits of their service offerings. We will keep everyone posted on further developments.


Some Recent Nerd Vittles Articles of Interest…

Happy New ISO: Incredible PBX 13-13 ISO Is Here

blank

We’re pleased to introduce the new, 64-bit Incredible PBX 13-13 ISO featuring the latest release of Asterisk® 13 and your favorite FreePBX® 13 GPL modules. Like its predecessor, it’s 100% open source and GPL code. The new Incredible PBX 13-13 ISO can be burned to either a DVD-ROM or a 1GB or larger USB flash drive using a Mac, a Windows PC, or almost any Linux machine. And, unlike some other distros, you’re more than welcome to share our code and the ISO with all of your friends and business associates. In fact, next week we’re releasing the new Incredible PBX build platform for those of you that want to roll your own ISO. Share your enhancements and tweaks or make a customized ISO for just your company and pass it around. We’d be delighted. And our previous tutorial will even show you how to set up and maintain your own Cloud Repository for Incredible PBX.

July 20 NEWS FLASH: Google now has discontinued support of their XMPP interface to Google Voice so the latest CentOS/SL versions of Incredible PBX 13-13 (including the Incredible PBX ISO) now incorporate NAF’s GVSIP interface to Google Voice. You can read all about it here. What has changed is you now add Google Voice trunks from the command line by running /root/gvsip-naf/install-gvsip. You can delete trunks by running /root/gvsip-naf/del-trunk. Once one or more trunks have been added, they are numbered GVSIP1 through GVSIPn. Using the GUI, you then add an Outbound Route and an Inbound Route for each trunk. You’ll need both your Google Voice 10-digit phone number and a Refresh Token to add a new trunk. This article will be updated in coming days to incorporate all of the latest changes which are documented in the referenced GVSIP tutorial.

blank

Introducing the Incredible PBX 13-13 ISO

Overview. The Incredible PBX installation process couldn’t be easier. Download IncrediblePBX13-13.iso from SourceForge. Burn the ISO to a DVD-ROM or USB thumb drive. Four different methods are outlined below. There’s lots of great hardware for about $200. Or, if you have an old PC lying around, that’ll work, too. Boot up the dedicated machine on which you want to install Incredible PBX. Choose whether you prefer the Incredible PBX Whole Enchilada with 31+ applications for Asterisk or the Lean & Mean version which is pure Asterisk compiled on the fly from source. Press the ENTER key. Choose your time zone, create a really secure root password, and have a coffee break. When Scientific Linux 6.9 has been installed, your server will reboot. Accept the Incredible PBX license agreement and press the ENTER key. Go to lunch and, when you return, you should be good to go. Finish reading this tutorial to add the finishing touches and secure your server. Then read the Incredible PBX Application User’s Guide to learn all about the dozens of FREE applications for Asterisk® that are included in the Enchilada build. DONE!

Let us take a moment to explain the Incredible PBX installation process using this ISO. We don’t hide stuff in our ISO or play games with your security. We don’t give ourselves or our application any secret permissions. There are just two steps to an Incredible PBX ISO install. When the install begins, it loads pure Scientific Linux 6.9 onto your server,1 not some homegrown concoction using proprietary repositories. Your server then reboots. After restarting, the very latest copy of the Incredible PBX 13-13 installer is downloaded and run (see the actual source code of the script below). You’ll find the source code for the Incredible PBX installer in your /root directory after the install is completed: IncrediblePBX-13-13R.sh. You’ll also find some other helpful scripts in /root including the optional (free) Incredible Fax installer. If you ever have a question about what was installed on your server, feel free to examine the source code of our installers or post a note on the PIAF Forum. It’s unencrypted GPL2 code. You’re free to use it, enhance it, and share it.

%post
###############################################################
#
# Post Script - this script runs on Incredible PBX server
# immediately after Scientific Linux 6.9 install finishes
#
###############################################################
/usr/sbin/ntpdate -su pool.ntp.org
rpm -e readahead
/bin/sed -i 's|rhgb quiet||' /boot/grub/grub.conf
/bin/echo "/tmp/firstboot" >> /etc/rc.d/rc.local
/bin/echo "#!/bin/bash" > /tmp/firstboot
/bin/echo " " >> /tmp/firstboot
/bin/echo "/etc/init.d/network restart" >> /tmp/firstboot
/bin/echo "wait" >> /tmp/firstboot
/bin/echo "export PATH=/usr/local/sbin:/usr/local/bin:/sbin:/bin:/usr/sbin:/usr/bin" >> /tmp/firstboot
/bin/echo "cd /root" >> /tmp/firstboot
/bin/echo "/usr/bin/wget http://incrediblepbx.com/favicon.ico" >> /tmp/firstboot
/bin/echo "if [ ! -f favicon.ico ]; then" >> /tmp/firstboot
/bin/echo " /bin/echo ' '" >> /tmp/firstboot
/bin/echo " /bin/echo 'WARNING: Network may be down. Download failed.'" >> /tmp/firstboot
/bin/echo " if [ ! -f /tmp/firstboot.msg ]; then" >> /tmp/firstboot
/bin/echo "  /bin/rpm -e NetworkManager" >> /tmp/firstboot
/bin/echo "  /bin/echo nameserver 8.8.8.8 >> /etc/resolv.conf" >> /tmp/firstboot
/bin/echo "  /bin/echo nameserver 8.8.4.4 >> /etc/resolv.conf" >> /tmp/firstboot
/bin/echo "  /bin/touch /tmp/firstboot.msg" >> /tmp/firstboot
/bin/echo "  /bin/echo 'Fix applied. Rebooting. One moment please...'" >> /tmp/firstboot
/bin/echo "  /usr/bin/reboot" >> /tmp/firstboot
/bin/echo "  exit" >> /tmp/firstboot
/bin/echo " fi" >> /tmp/firstboot
/bin/echo " echo 'We are going to exit now. What to do next:'" >> /tmp/firstboot
/bin/echo " echo ' '" >> /tmp/firstboot
/bin/echo " echo '**** WRITE THESE NEXT 6 STEPS DOWN... ****'" >> /tmp/firstboot
/bin/echo " echo ' '" >> /tmp/firstboot
/bin/echo " echo '1. Log into your server as root.'" >> /tmp/firstboot
/bin/echo " echo '2. Try this command: ping -c 1 incrediblepbx.com'" >> /tmp/firstboot
/bin/echo " echo '3. If it fails, fix your network and repeat ping test.'" >> /tmp/firstboot
/bin/echo " echo '     HINT: Before retest, try this: ifup eth0'" >> /tmp/firstboot
/bin/echo " echo '4. If it still fails: yum install NetworkManager. Then repeat ping test.'" >> /tmp/firstboot
/bin/echo " echo '5. When ping is successful, you may proceed.'" >> /tmp/firstboot
/bin/echo " echo '6. To continue install, run: /tmp/firstboot'" >> /tmp/firstboot
/bin/echo " echo ' '" >> /tmp/firstboot
/bin/echo " read -p 'Press RETURN key now to exit and login.'" >> /tmp/firstboot
/bin/echo " exit" >> /tmp/firstboot
/bin/echo "fi" >> /tmp/firstboot
/bin/echo "cd /root" >> /tmp/firstboot
/bin/echo "sed -i 's|NO_DM |NO_DM rhgb quiet|' /boot/grub/grub.conf" >> /tmp/firstboot
/bin/echo "/bin/touch incrediblepbx-install-log.txt" >> /tmp/firstboot
/bin/echo "/bin/touch oauth" >> /tmp/firstboot
/bin/echo "/usr/bin/wget http://incrediblepbx.com/incrediblepbx-13-13-LEAN.tar.gz" >> /tmp/firstboot
/bin/echo "/bin/tar zxvf incrediblepbx-13-13-LEAN.tar.gz" >> /tmp/firstboot
/bin/echo "/bin/rm -f incrediblepbx-13-13-LEAN.tar.gz" >> /tmp/firstboot
/bin/echo "sed -i '/firstboot/d' /etc/rc.d/rc.local" >> /tmp/firstboot
/bin/echo "./Inc*" >> /tmp/firstboot
/bin/echo "./Enc*" >> /tmp/firstboot
/bin/chmod +x /tmp/firstboot
eject
%end

Incredible PBX 13-13 ISO Installation Guide

Downloading the Incredible PBX 13-13 ISO. On the machine you’ll be using to create your installation media, download IncrediblePBX13-13.iso from SourceForge.

Burning a DVD-ROM from the ISO. If your server platform doesn’t have USB support, then burn the ISO to a DVD using a Mac or Windows machine.

Creating a USB Flash Drive Installer. If your server platform has USB ports, you have three ways to move the Incredible PBX 13-13 ISO to a 1GB or larger flash drive. You can use a Windows PC, a Mac, or a Linux machine to create the USB thumb drive installer.

blank

Creating a USB Flash Drive Installer with a Windows PC. In order to create a USB thumb drive using an ISO image, you’ll first need to install Rufus. It’s free. Once you’ve installed it, insert a blank USB thumb drive and run Rufus. Make your settings look like what’s shown above. Be very careful in choosing your Device. You don’t want to accidentally erase the wrong drive on your Windows machine. The correct choice is the USB thumb drive you just inserted. Don’t guess!! Step 2 is choosing the IncrediblePBX13-13.iso file that you downloaded from SourceForge. Step 3 is clicking Start. The ISOHybrid Window will be presented. Step 4 is changing the default setting to "Write in DD image mode." Step 5 is pressing OK. In a few minutes, your ISO image transfer to the USB flash drive will be finished. Give it 15 seconds just to be safe. Then remove the USB thumb drive and you’re ready to begin the install on your dedicated Incredible PBX server.

Creating a USB Flash Drive Installer with a Mac. To create a USB thumb drive using an ISO image on a Mac, first insert the USB thumb drive and partition it with a single MS-DOS partition using Disk Utility. Next, open a Terminal window and issue the command: diskutil list. Review the device names and find the one that matches the size of your thumb drive. It will be something like /dev/disk9. Again, be careful. You don’t want to accidentally erase the wrong drive on your Mac! Next, change to the directory into which you downloaded IncrediblePBX13-13.iso, e.g. cd Desktop. Now issue the following commands substituting the actual device name for /dev/disk9 below:

diskutil unmountDisk /dev/disk9
sudo dd if=IncrediblePBX13-13.iso bs=1m of=/dev/disk9
sudo sync
diskutil eject /dev/disk9

When the install completes, remove the USB thumb drive and you’re ready to begin the install on your dedicated Incredible PBX server. NOTE: There will be no feedback during the dd step above. It can take 15 minutes or more depending upon the horsepower of your Mac. Be patient!

Creating a USB Flash Drive Installer on a Linux machine. To create a USB thumb drive using an ISO image on a Linux machine, first log into your server as root. Insert a blank USB thumb drive. From the CLI, decipher the device name of your thumb drive: fdisk -l. The device name will be something like /dev/sdb. Be careful. You don’t want to accidentally erase the wrong drive on your Linux server! Change to the directory into which you downloaded IncrediblePBX13-13.iso, e.g. cd /root. To transfer the ISO to your thumb drive, issue the following commands replacing /dev/sdb with the actual device name for your thumb drive in lines 1 and 3 below:

dd if=IncrediblePBX13-13.iso bs=4M of=/dev/sdb
sync
udisks --detach /dev/sdb

When the install completes, remove the USB thumb drive and you’re ready to begin the install on your dedicated Incredible PBX server. NOTE: There will be no feedback during the dd step above. It can take 5 to 15 minutes depending upon the horsepower of your Linux machine.

Kicking Off the Incredible PBX 13-13 Install. Now we’re ready to install Incredible PBX 13-13 on your dedicated server platform. Simply insert the DVD-ROM or USB thumb drive in your server-to-be and boot. During the POST boot process, press the function key that displays a Boot Device Menu and choose your DVD-ROM drive or USB device. When the Incredible PBX 13-13 installation menu displays, choose the Default Install for Full Enchilada and press ENTER. Choose your time zone, create a really secure root password, and have a coffee break. When Scientific Linux 6.9 has been installed, your server will reboot. Accept the Incredible PBX license agreement and press the ENTER key. Go to lunch and, when you return, you should be good to go. When the installation finishes, reboot your server and log in as root to apply the last minute updates for Incredible PBX.

blank

To complete the install, perform the following from the Linux CLI while logged in as root:

  • Change your passwords: /root/update-passwords
  • Set your correct time zone: /root/timezone-setup
  • Add WhiteList entries to firewall if needed: /root/add-ip or /root/add-fqdn
  • Store PortKnocker credentials in a safe place: cat /root/knock.FAQ
  • *** THE REMAINING FEATURES ARE OPTIONAL ADDITIONS ***
  • Login to your NeoRouter VPN server: /root/nrclientcmd
  • To enable free faxing: /root/incrediblefax13.sh
  • Set admin password for AvantFax: /root/avantfax-pw-change
  • To enable PPTP VPN: /root/pptp-install

Managing Incredible PBX with a Browser

Most of your time initially configuring and managing your server will be spent using the web-based tools provided with Incredible PBX. Using any modern browser, go to the IP address of your server as shown in the status display above. This will bring up the login screen for the PBX Admin GUI. The default username is admin and the password is what you set during the final installation steps above. Once the Incredible PBX GUI appears, edit extension 701 so you can figure out (or change) the randomized passwords that were set up for your 701 extension and voicemail account: Applications -> Extensions -> 701. If you’re behind a hardware-based firewall, verify the NAT setting is set to YES.

Setting Up a Soft Phone for Incredible PBX

Now you’re ready to set up a telephone so that you can play with Incredible PBX. We recommend YateClient which is free. Download it from here. Run YateClient once you’ve installed it and enter the credentials for the 701 extension on Incredible PBX. You’ll need the IP address of your server plus your extension 701 password. Choose Settings -> Accounts and click the New button. Fill in the blanks using the IP address of your server, 701 for your account name, and whatever password you created for the extension. Click OK.

blank

Once you are registered to extension 701, close the Account window. Then click on YATE’s Telephony Tab and place some test calls to the numerous apps that are preconfigured on Incredible PBX. Dial a few of these to get started:


DEMO - Allison's IVR Demo
947 - Weather by ZIP Code
951 - Yahoo News
*61 - Time of Day
*68 - Wakeup Call
TODAY - Today in History

Now you’re ready to connect to the telephones in the rest of the world. If you live in the U.S., the easiest way (at least for now) is to set up a free Google Voice account. Your server is automatically configured for OAUTH authentication. The Incredible PBX 13-13 tutorial will walk you through the Google Voice setup procedure. The PIAF Forum includes dozens of recommendations to get you started.

blank

Troubleshooting Audio and DTMF Problems

You can avoid one-way audio on calls and touchtones that don’t work with these simple settings in the GUI: Settings -> Asterisk SIP Settings. Just plug in your public IP address and your private IP subnet. Then set ULAW as the only Audio Codec.

blank

A Few Words About Our Security Model

Incredible PBX for Scientific Linux joins our previous builds as our most secure turnkey PBX implementation. As configured, it is protected by both Fail2Ban and a hardened configuration of the IPtables Linux firewall. The latest release also includes Port Knocker for simple, secure access from any remote computer or smartphone. You can get up to speed on how the technology works by reading the Nerd Vittles tutorial. Your Port Knocker credentials are stored in /root/knock.FAQ together with activation instructions for your server and mobile devices. The NeoRouter VPN client also is included for rock-solid, secure connectivity to remote users. Read our previous tutorial for setup instructions. As configured, nobody can access your PBX without blank your credentials AND blank an IP address that is either on your private network or that matches the IP address of your server or the PC from which you installed Incredible PBX. You can whitelist additional IP addresses by running the command-line utility /root/add-ip. You can remove whitelisted IP addresses by running /root/del-acct. Incredible PBX is preconfigured to let you connect to many of the leading SIP hosting providers without additional firewall tweaking. We always recommend you also add an extra layer of protection by running your server behind a hardware-based firewall with no Internet port exposure, but that’s your call. And it’s your phone bill. 😉

The IPtables firewall is a complex piece of software. If you need assistance with configuring it, visit the PIAF Forum for some friendly assistance.

Incredible PBX Automatic Update Utility

Every time you log into your server as root, Incredible PBX will ping the IncrediblePBX.com web site to determine whether one or more updates are available to bring your server up to current specs. We recommend you log in at least once a week just in case some new security vulnerability should come along. We originally had planned to make our fortune off update fees, but we changed our mind. So… ignore the language in some earlier builds, contributions to our projects are PURELY VOLUNTARY. No one will be breaking down your door for a donation.

We also encourage you to sign up for an account on the PIAF Forum and join the discussion. In addition to providing first-class, free support, we think you’ll enjoy the camaraderie.

Incredible PBX Wholesale Providers Access

Nerd Vittles has negotiated a special offer that gives you instant access to 300+ wholesale carriers around the globe. In lieu of paying the $650 annual fee for the service, a 13% wholesale surcharge is assessed to cover operational costs of TelecomsXchange. In addition, TelecomsXchange has generously offered to contribute a portion of the surcharge to support the Incredible PBX open source project. See this Nerd Vittles tutorial for installation instructions and signup details.

Incredible PBX Application Users Guide

Your next stop ought to be learning about the three dozen applications included in Incredible PBX. We’ve put together this tutorial to get you started. There’s also a great tutorial to walk you through initial configuration of extensions, trunks, and routes. Enjoy!

Originally published: Monday, January 8, 2018


blankSupport Issues. With any application as sophisticated as this one, you’re bound to have questions. Blog comments are a terrible place to handle support issues although we welcome general comments about our articles and software. If you have particular support issues, we encourage you to get actively involved in the PBX in a Flash Forums. It’s the best Asterisk tech support site in the business, and it’s all free! Please have a look and post your support questions there. Unlike some forums, ours is extremely friendly and is supported by literally hundreds of Asterisk gurus and thousands of users just like you. You won’t have to wait long for an answer to your question.


blank

NEW YEAR’S TREAT: If you could use one or more free DIDs in the U.S. with unlimited inbound calls and unlimited simultaneous channels, then today’s your lucky day. TelecomsXChange and Bluebird Communications have a few hundred thousand DIDs to give away so you better hurry. You have your choice of DID locations including New York, New Jersey, California, Texas, and Iowa. The DIDs support Voice, Fax, Video, and even Text Messaging (by request). The only requirement at your end is a dedicated IP address for your VoIP server. Once you receive your welcome email with your number, be sure to whitelist the provider’s IP address in your firewall. For Incredible PBX servers, use add-ip to whitelist the UDP SIP port, 5060, using the IP address provided in your welcoming email.

Here’s the link to order your DIDs.

Your DID Trunk Setup in your favorite GUI should look like this:

Trunk Name: IPC
Peer Details:
type=friend
qualify=yes
host={IP address provided in welcome email}
context=from-trunk

Your Inbound Route should specify the 11-digit DID beginning with a 1. Enjoy!


Special Thanks to Our Generous Sponsors


FULL DISCLOSURE: ClearlyIP, Skyetel, Vitelity, DigitalOcean, Vultr, VoIP.ms, 3CX, Sangoma, TelecomsXchange and VitalPBX have provided financial support to Nerd Vittles and our open source projects through advertising, referral revenue, and/or merchandise. As an Amazon Associate and Best Buy Affiliate, we also earn from qualifying purchases. We’ve chosen these providers not the other way around. Our decisions are based upon their corporate reputation and the quality of their offerings and pricing. Our recommendations regarding technology are reached without regard to financial compensation except in situations in which comparable products at comparable pricing are available from multiple sources. In this limited case, we support our sponsors because our sponsors support us.

blankBOGO Bonaza: Enjoy state-of-the-art VoIP service with a $10 credit and half-price SIP service on up to $500 of Skyetel trunking with free number porting when you fund your Skyetel account. No limits on number of simultaneous calls. Quadruple data center redundancy. $25 monthly minimum spend required. Tutorial and sign up details are here.

blankThe lynchpin of Incredible PBX 2020 and beyond is ClearlyIP components which bring management of FreePBX modules and SIP phone integration to a level never before available with any other Asterisk distribution. And now you can configure and reconfigure your new Incredible PBX phones from the convenience of the Incredible PBX GUI.

blankVitalPBX is perhaps the fastest-growing PBX offering based upon Asterisk with an installed presence in more than 100 countries worldwide. VitalPBX has generously provided a customized White Label version of Incredible PBX tailored for use with all Incredible PBX and VitalPBX custom applications. Follow this link for a free test drive!
 

blankSpecial Thanks to Vitelity. Vitelity is now Voyant Communications and has halted new registrations for the time being. Our special thanks to Vitelity for their unwavering financial support over many years and to the many Nerd Vittles readers who continue to enjoy the benefits of their service offerings. We will keep everyone posted on further developments.


Some Recent Nerd Vittles Articles of Interest…

  1. If you’re wondering what packages are installed with Scientific Linux, come back next week and download the entire Incredible PBX ISO build environment. The 1,000+ packages installed on your server are included in the build platform itself. Feel free to add to them or change them to your heart’s content. We don’t have a million dollar staff. That’s why we depend upon folks like you to offer suggestions and enhancements. In short, we treat Incredible PBX like a real open source project. Come join the fun! []

Beginner’s Navigation Guide to VoIP PBXs and Nerd Vittles

blank

Here at Nerd Vittles, we cover a lot of VoIP territory over the course of a year. To kick off the new year, we thought it might be helpful for those just beginning their VoIP adventure to sketch out the VoIP lay of the land for you. We’re assuming that you came to our site because you wanted a VoIP solution that gives you something to play with and to learn from. That’s not for everybody, and there are less flexible, turnkey VoIP solutions that function pretty much like a toaster. At the top of that short list would be the Ooma Telo and OBi200. Both offer (almost) free calling in the U.S. and Canada.

Keep in mind that all of us started as beginners so there’s no reason to be intimidated if you choose to deploy your own PBX. We’ve gotten a dozen years of enjoyment out of our adventures with VoIP telephony, and there’s no reason you can’t do the same. Let’s begin.

Choosing a Hardware Platform for Your VoIP PBX

First, you’ll need to choose a platform for your VoIP-based PBX: dedicated hardware, virtual machine, or cloud-based PBX. In no small part, this choice depends upon the target audience for your PBX. If it’s for home use or a SOHO business, a $35 Raspberry Pi may suffice. On the other hand, if your PBX will be supporting more than a dozen users or more than a handful of simultaneous calls, we’d look elsewhere. Many of Intel’s Atom-based PCs work very well. And a VirtualBox virtual PBX running atop an iMac or beefy Dell PC can support dozens of users if you have the necessary Internet bandwidth to handle your call volume. Cloud-based servers come in all shapes and sizes as well. As prices have plummeted, cloud solutions have become our favorite. For $3 to $6 a month, you now can host your PBX in the cloud with automatic image backups of your entire server every week. If you’re willing to forfeit backups, here is a cloud solution that will only set you back about a dollar a month. If your server is primarily for business use, we strongly recommend our Platinum Sponsor, RentPBX, that offers dozens of VoIP choices for $14.99 a month with coupon code: NOGOTCHAS.

Choosing the Best PBX to Meet Your Requirements

Once you’ve nailed down your hardware platform, the next step is choosing an operating system and PBX to support your individual requirements. As you might have guessed, there are dozens from which to choose. In both the open source and commercial PBX world, most systems require a specific version of Linux so your operating system choice typically is dependent upon the PBX you choose. In the open source world, the PBX learning curve is often related to the feature set being offered. More sophisticated feature sets typically have a steeper learning curve. If you’re just getting started with VoIP and you want a platform for learning, experimenting, or home use, you can’t beat Incredible PBX 13-13 Whole Enchilada. It was designed by us to be a turnkey PBX for first-time users with rock-solid security and all of the features you will ever need. It includes 31 applications for Asterisk® that cover every imaginable function that can be performed with a telephone including faxing, voice dialing, SMS messaging, wakeup calls and telephone reminders, free calling, conferencing, text-to-speech applications such as News Headlines and Weather Forecasts, Wolfram Alpha for Siri-like queries, plus all the usual PBX features: blacklists, call forwarding, call waiting, call transfer, call parking, call recording, intercom, voicemail including voicemail transcription with email delivery, IVRs, paging, AutoAttendants, DISA, and many more.

If you’re an experienced Asterisk developer that just wants a lean PBX where you can customize it to meet individual customer’s requirements, then Incredible PBX 13-13 Lean should be just the ticket. All of its components are configurable including Asterisk which can be recompiled from the included source code.

At the sophisticated end of the spectrum is Incredible PBX for Wazo which is based upon the Wazo PBX, an Asterisk 15 realtime implementation with full support for High Availability redundancy, multi-party videoconferencing, WebRTC, and automatic nightly backups. It includes API libraries from which you literally can build your own customized PBX from the ground up. The Incredible PBX feature set provides a platform with virtually identical applications to those found in Incredible PBX 13-13.

Sandwiched in between Incredible PBX 13-13 and Incredible PBX for Wazo is Incredible PBX 13 for Issabel. Issabel is an enhanced fork of the previous Elastix 4.0 PBX. The 2018 release includes Asterisk 13, the LTS version of the Asterisk platform. With the new Incredible PBX 13 add-on, you get the best of all worlds with Google Voice support and dozens of applications for Asterisk. Issabel provides a Unified Communications platform that is second to none in the open source world.

Thus far, all of our recommendations have been to open source, GPL-licensed PBX platforms. But you’d be making a mistake to limit your search for business telephony platforms to open source offerings. Our corporate sponsor, 3CX, offers a full year of their commercial PBX running in the Google Cloud at no cost. It’s incredibly simple to install and configure. And the beauty of the 3CX commercial platform is it can scale to any size as your business grows. And the 3CX feature set can be expanded geometrically as your business requirements mature. We added free text-to-speech applications for News and Weather reports just last week. Our favorite open source deployment strategy is to install a 3CX PBX alongside Incredible PBX which yields literally the best of both worlds. The 3CX clients for Windows and Macs, Android, and iOS make VoIP telephony available from anywhere with a couple of button clicks, and 3CX users experience none of the traditional communications problems that invariably crop up on platforms deployed by novice VoIP users running Asterisk.

Getting Started with Extensions, Trunks, and Routes

The Big 3 when it comes to PBX configuration are extensions, trunks, and routes. Extensions carry calls between phones on the PBX and other phones either inside or outside your home or office. Trunks actually provide the links between your PBX and the outside telephony world. Inbound routes tell your PBX where to send incoming calls while Outbound routes tell your PBX which trunk to use when calls are made to numbers outside your PBX. We’ve covered this in more detail including dozens of trunk setups in this Nerd Vittles tutorial.

Making Free U.S./Canada Calls within the United States

There are three ways to make free calls using your PBX. If you’re in the United States, you can use Google Voice to make free calls to the U.S. and Canada if your PBX supports Google Voice trunks, e.g. Incredible PBX 13-13 Whole Enchilada and Incredible PBX for Issabel. An alternative, if your PBX does not directly support Google Voice trunks, e.g. Incredible PBX for Wazo and 3CX, is to use the Simonics SIP to Google Voice Gateway service. For Nerd Vittles users, there is a one-time $4.99 signup fee with no additional charges ever. Whether you live in the U.S or not, all the PBXs we’ve covered today can make free SIP calls to anyone in the world that has a SIP URI address and a SIP phone. Most SIP softphones are free.

Mastering the Incredible PBX Feature Set

Incredible PBX 13-13 Application User’s Guide

Configuring the Travelin’ Man 3 Firewall

All Incredible PBX servers include a firewall that is configured automatically as part of the installation process. On the 3CX platform, you’ll need to add the Travelin’ Man 3 firewall after installing your 3CX PBX. Here’s how:

3CX in the Cloud: 8 Great Ways to Secure Your Server

Configuring a Firewall WhiteList:

WhiteListing Users with Travelin’ Man 3 and IPtables Firewall

Learning to Build Effective IVRs

Interactive Voice Response (IVR) systems and AutoAttendants are the bread-and-butter applications for businesses. If you’ve ever called a business and actually spoken to a live person without encountering an IVR, lucky you! But, believe it or not, IVRs can actually be a useful tool including our Stealth AutoAttendant which lets you intercept incoming calls with a greeting which provides a slight delay to allow the caller (or you) to reroute the call to a specific destination before the default destination kicks in. Nerd Vittles and the Incredible PBX offerings provide all of the tools you’ll need to build any type of IVR imaginable. Mastering Allison Smith’s Top 15 is an excellent starting point.

Harnessing Nerd Vittles Resources

Google is your friend when it comes to finding tutorials of interest in the VoIP world. To narrow searches to just Nerd Vittles, use the following syntax:

stealth autoattendant site:nerdvittles.com

And the Nerd Vittles site itself provides several powerful ways to drill down into topics of interest. In the upper right column of any article, you’ll find a search function which will return a list of matching articles to peruse. At the bottom of every article, check out the all-new Articles of Interest section of Nerd Vittles arranged by topic. Also in the right column of Nerd Vittles, you’ll find a listing of Categories with Nerd Vittles articles conveniently grouped by topic. And, finally, you can quickly jump to the lead article on every major Incredible PBX implementation in the color-coded tabs labeled: GPL VOIP SOLUTIONS FOR ALL.

Happy New Year!

blank

Originally published: Monday, January 1, 2018


blankSupport Issues. With any application as sophisticated as a VoIP PBX, you’re bound to have questions. Blog comments are a terrible place to handle support issues although we welcome general comments about our articles and software. If you have particular support issues, we encourage you to get actively involved in the PBX in a Flash Forums. It’s the best Asterisk tech support site in the business, and it’s all free! Please have a look and post your support questions there. Unlike some forums, ours is extremely friendly and is supported by literally hundreds of Asterisk and 3CX gurus and thousands of users just like you. You won’t have to wait long for an answer to your question.


blank

NEW YEAR’S TREAT: If you could use one or more free DIDs in the U.S. with unlimited inbound calls and unlimited simultaneous channels, then today’s your lucky day. TelecomsXChange and Bluebird Communications have a few hundred thousand DIDs to give away so you better hurry. You have your choice of DID locations including New York, New Jersey, California, Texas, and Iowa. The DIDs support Voice, Fax, Video, and even Text Messaging (by request). The only requirement at your end is a dedicated IP address for your VoIP server. Once you receive your welcome email with your number, be sure to whitelist the provider’s IP address in your firewall. For Incredible PBX servers, use add-ip to whitelist the UDP SIP port, 5060, using the IP address provided in your welcoming email.

Here’s the link to order your DIDs.

Your DID Trunk Setup in your favorite GUI should look like this:

Trunk Name: IPC
Peer Details:
type=friend
qualify=yes
host={IP address provided in welcome email}
context=from-trunk

Your Inbound Route should specify the 11-digit DID beginning with a 1. Enjoy!


blank
Need help with Asterisk or 3CX? Visit the PBX in a Flash Forum.


Special Thanks to Our Generous Sponsors


FULL DISCLOSURE: ClearlyIP, Skyetel, Vitelity, DigitalOcean, Vultr, VoIP.ms, 3CX, Sangoma, TelecomsXchange and VitalPBX have provided financial support to Nerd Vittles and our open source projects through advertising, referral revenue, and/or merchandise. As an Amazon Associate and Best Buy Affiliate, we also earn from qualifying purchases. We’ve chosen these providers not the other way around. Our decisions are based upon their corporate reputation and the quality of their offerings and pricing. Our recommendations regarding technology are reached without regard to financial compensation except in situations in which comparable products at comparable pricing are available from multiple sources. In this limited case, we support our sponsors because our sponsors support us.

blankBOGO Bonaza: Enjoy state-of-the-art VoIP service with a $10 credit and half-price SIP service on up to $500 of Skyetel trunking with free number porting when you fund your Skyetel account. No limits on number of simultaneous calls. Quadruple data center redundancy. $25 monthly minimum spend required. Tutorial and sign up details are here.

blankThe lynchpin of Incredible PBX 2020 and beyond is ClearlyIP components which bring management of FreePBX modules and SIP phone integration to a level never before available with any other Asterisk distribution. And now you can configure and reconfigure your new Incredible PBX phones from the convenience of the Incredible PBX GUI.

blankVitalPBX is perhaps the fastest-growing PBX offering based upon Asterisk with an installed presence in more than 100 countries worldwide. VitalPBX has generously provided a customized White Label version of Incredible PBX tailored for use with all Incredible PBX and VitalPBX custom applications. Follow this link for a free test drive!
 

blankSpecial Thanks to Vitelity. Vitelity is now Voyant Communications and has halted new registrations for the time being. Our special thanks to Vitelity for their unwavering financial support over many years and to the many Nerd Vittles readers who continue to enjoy the benefits of their service offerings. We will keep everyone posted on further developments.


Some Recent Nerd Vittles Articles of Interest…

Creating Free IBM Voice Prompts for Asterisk and 3CX

blank

We frequently receive requests asking how best to create custom voice prompts to use with Asterisk® or 3CX® PBXs. Of course, our first recommendation is to always direct folks to Allison Smith whose voice prompts for Asterisk are legendary. But, for those on a tight budget, recordings by a professional voice talent may not be a viable option. So, today, in the Christmas spirit, we want to deliver the next best thing with synthesized voice prompts that are second to none. For regular readers of Nerd Vittles, you’re already aware of our enthusiasm for IBM’s new TTS offerings. You can try them out for yourself by clicking View Demo here. Or you can sample the Weather Report for 3CX that we uploaded to SoundCloud:


[soundcloud url="https://api.soundcloud.com/tracks/364353344″ params="auto_play=false&hide_related=false&show_comments=true&show_user=true&show_reposts=false&visual=true" width="80%" height="350″ iframe="true" /]

Cost issues aside, other users may need voice prompts for VoIP applications that require a language other than English. With IBM’s TTS offerings, you have quite a selection of voices and languages from which to choose:

blank

We already have delivered adaptations of some of our News and Weather TTS applications for both Asterisk and 3CX platforms. But there are other occasions where you may want to build interactive IVRs or custom applications that require custom voice prompts to obtain information from callers such as requests for a name, a phone number, a part number, a location, a department, or many other pieces of data that are used to formulate data base queries. And now there’s a simple, professional, and free way to create these voice prompts using IBM’s TTS platform and Incredible PBX® 13-13. The first million characters of TTS synthesis and the resultant voice files are free every month. That will be more than ample for almost all of our users. To get started, you’ll need to set up a free account with IBM Bluemix and install Incredible PBX 13-13 on a platform of your choice: a dedicated server, a virtual machine on your desktop PC using VirtualBox, or a cloud-based server.

Getting Started with IBM Bluemix TTS Service

NOV. 1 UPDATE: IBM has moved the goal posts effective December 1, 2018:

blank

You can start your free, 30-day trial of IBM Bluemix services without providing a credit card. Just sign up here. Once your account is activated, here’s how to obtain credentials for the TTS service to use with Incredible PBX 13-13. Start by logging in to your IBM Bluemix account. Once you’re logged in, click on your account name (1) in the upper right corner of your web page to reveal the pull-down to select your Region, Organization, and Space. Follow the blue links at the bottom of the pull-down menu to create an Organization and Space for TTS.


blank

Next, click the Menu icon which is displayed as three horizontal bars on the left side of the web page. Choose Watson. Click Create Watson Service and select Text to Speech from the applications listing. Watson will generate a new TTS service template and display it. Make certain that your Region, Organization, and Space are shown correctly. Then verify that the Standard Pricing Plan is selected. When everything is correct, click the Create button.

When your Text to Speech application displays, click Service Credentials and then click New Credential (+). When the Add New Credential dialog appears, leave the default settings as they are and click Add. Your Credentials Listing then will appear. Click View Credentials beside the new entry you just created. Write down your URL, username, and password. You’ll need these later to configure the IBM Bluemix TTS service. Logout of the IBM Cloud by clicking on the little face in the upper right corner of your browser window and choose Log Out. Confirm that you do, indeed, wish to log out.

Getting Started with Incredible PBX 13-13

We won’t repeat the tutorial that walks you through installation of Incredible PBX 13-13. Just follow the steps outlined here. Once your server is up and running, log into your server as root using SSH or Putty. We need to add MP3 support to the SOX application before we can create voice prompts reliably with IBM’s Bluemix TTS service. Here’s how:

yum -y remove sox
yum -y install libmad libmad-devel libid3tag libid3tag-devel lame lame-devel flac-devel
cd /usr/src
wget https://sourceforge.net/projects/sox/files/sox/14.4.2/sox-14.4.2.tar.gz
tar zxvf sox-14.4.2.tar.gz
rm -f sox-14.4.2.tar.gz
cd sox*
./configure
make -s
make install
ldconfig
ln -s /usr/local/bin/sox /usr/bin/sox

Installing the Voice Prompts Script for TTS

Now we’re ready to install the Nerd Vittles Voice Prompts script that we’ll use to actually create the custom voice prompts. While you’re still logged into your server as root with SSH or Putty, issue the following commands:

cd /root
wget http://incrediblepbx.com/ibmprompt.tar.gz
tar zxvf ibmprompt.tar.gz
rm -f ibmprompt.tar.gz

Adding Your Credentials to the Script

Using your favorite editor, it’s time to add your IBM TTS credentials to the Voice Prompt script: nano -w ibmprompt.php. Simply replace the x’s in $IBM_username and $IBM_password with your credentials from above. If you prefer a different voice for your voice prompts, update the $IBM_voice option using the examples shown below. For example, for the Brazilian Portuguese voice, use $IBM_voice = "pt-BR_IsabelaVoice". Verify that the $IBM_url matches what was provided with your credentials. Once you’ve updated the entries, save the file: Ctrl-X, Y, and ENTER.

blank

Taking Voice Prompts Script for a Test Drive

Now we’re ready to try thing out. The syntax while logged into the /root folder looks like this. If creating a prompt in a different language, text should be in native language, not English.

./ibmprompt.php "Text of your voice prompt"

Once the voice prompt is generated, you’ll find voiceprompt.wav in the /root folder. You can rename it and move it to a suitable location to meet your requirements. Enjoy!

Originally published: Wednesday, December 27, 2017


blankSupport Issues. With any application as sophisticated as this one, you’re bound to have questions. Blog comments are a terrible place to handle support issues although we welcome general comments about our articles and software. If you have particular support issues, we encourage you to get actively involved in the PBX in a Flash Forums. It’s the best Asterisk tech support site in the business, and it’s all free! Please have a look and post your support questions there. Unlike some forums, ours is extremely friendly and is supported by literally hundreds of Asterisk and 3CX gurus and thousands of users just like you. You won’t have to wait long for an answer to your question.


blank
Need help with Asterisk or 3CX? Visit the PBX in a Flash Forum.


Special Thanks to Our Generous Sponsors


FULL DISCLOSURE: ClearlyIP, Skyetel, Vitelity, DigitalOcean, Vultr, VoIP.ms, 3CX, Sangoma, TelecomsXchange and VitalPBX have provided financial support to Nerd Vittles and our open source projects through advertising, referral revenue, and/or merchandise. As an Amazon Associate and Best Buy Affiliate, we also earn from qualifying purchases. We’ve chosen these providers not the other way around. Our decisions are based upon their corporate reputation and the quality of their offerings and pricing. Our recommendations regarding technology are reached without regard to financial compensation except in situations in which comparable products at comparable pricing are available from multiple sources. In this limited case, we support our sponsors because our sponsors support us.

blankBOGO Bonaza: Enjoy state-of-the-art VoIP service with a $10 credit and half-price SIP service on up to $500 of Skyetel trunking with free number porting when you fund your Skyetel account. No limits on number of simultaneous calls. Quadruple data center redundancy. $25 monthly minimum spend required. Tutorial and sign up details are here.

blankThe lynchpin of Incredible PBX 2020 and beyond is ClearlyIP components which bring management of FreePBX modules and SIP phone integration to a level never before available with any other Asterisk distribution. And now you can configure and reconfigure your new Incredible PBX phones from the convenience of the Incredible PBX GUI.

blankVitalPBX is perhaps the fastest-growing PBX offering based upon Asterisk with an installed presence in more than 100 countries worldwide. VitalPBX has generously provided a customized White Label version of Incredible PBX tailored for use with all Incredible PBX and VitalPBX custom applications. Follow this link for a free test drive!
 

blankSpecial Thanks to Vitelity. Vitelity is now Voyant Communications and has halted new registrations for the time being. Our special thanks to Vitelity for their unwavering financial support over many years and to the many Nerd Vittles readers who continue to enjoy the benefits of their service offerings. We will keep everyone posted on further developments.


Some Recent Nerd Vittles Articles of Interest…

Free Calling Returns with Incredible PBX 15 for Wazo


blank

Since we began our XiVO/Wazo adventure 18 months ago, the most requested feature has been direct support for Google Voice with OAuth 2 authentication. For those in the United States, it remains the cheapest VoIP solution on the planet with unlimited free calls in the U.S. and Canada. When Wazo migrated to Asterisk® 15, the Asterisk platform natively supported Google Voice, but there was no direct support in either Wazo or Incredible PBX. Instead, over the past couple months, we’ve had Google Voice functionality through Simonics SIP to Google Voice Gateway. Well, today’s a new day. We’re pleased to announce Google Voice is back!

Overview. If you’re new to Google Voice, here’s how the installation scenario goes. First, you set up a Gmail account at gmail.com. Next, you create a Google Voice account. Then, you configure Google Voice for use with Asterisk®. Next, you obtain your Google Voice OAuth 2 Refresh Token which becomes your password to use in configuring Google Voice on the Wazo platform. Next, using SSH or Putty, you log into your Wazo server as root and run the add-gvtrunk script to get your Google Voice credentials set up in Wazo. Finally, you log into the Wazo GUI with a browser and set up a custom trunk as well as an outgoing and incoming route for Google Voice calls. To add more Google Voice trunks, you simply repeat the drill. You now should have a perfectly functioning, free VoIP platform compliments of Google and Sylvain Boily and his development team. Start by deploying Incredible PBX 15 for Wazo.

Configuring Google Voice for Wazo

If you’re one of the five people on Earth that does not yet have a Gmail account, start there. Once you’ve set up your Gmail account and logged in, open a new browser tab to access the Google Voice site. Accept the Google Terms and Privacy Policy. Then choose a new Phone Number in your favorite area code. NOTE: Before Google will assign you a number, you must enter an existing U.S. phone number to verify your identity and location as well as to use for initially forwarding calls. Once your account is set up, you will get an email asking that you verify your email address.

Google continues to tighten up on obtaining more than one Google Voice number from the same computer or the same IP address. If this is a problem for you, here’s a workaround. From your smartphone, install the Google Voice app from iPhone App Store or Google’s Play Store. Then open the app and login to your new Google account. Choose your new Google Voice number when prompted and provide a cell number with SMS as your callback number for verification. Once the number is verified, log out of Google Voice. Do NOT make any calls. Now head back to your PC’s browser and login to http://google.com/voice. You will be presented with the new Google Voice interface which does not include the Google Chat option. But fear not. At least for now there’s still a way to get there. After you have set up your new phone number and opened the Google Voice interface, click on the 3 vertical dots in the left sidebar (it’s labeled More). When it opens, click Legacy Google Voice in the sidebar. That will return you to the old UI. Now click on the Gear icon (upper right) and choose Settings. Make sure the Google Chat option is selected and disable forwarding calls to whatever default phone number you set up.

Next, click on the Calls tab. Make sure your settings match these:

  • Call ScreeningOFF
  • Call PresentationOFF
  • Caller ID (In)Display Caller’s Number
  • Caller ID (Out)Don’t Change Anything
  • Do Not DisturbOFF
  • Call Options (Enable Recording)OFF
  • Global Spam FilteringON

Under the Voicemail tab, plug in your email address so you get notified of new voicemails. Then click Save Settings. Down the road, receipt of a Google Voice voicemail will be a big hint that something has come unglued on your PBX.

One final word of caution is in order regardless of your choice of providers: Do NOT use special characters in your Google Voice password, and don’t enable two-step authentication.

Now it’s time to obtain your OAuth 2 credentials. Even though it’s a bit more work on the front end, the good news is you won’t have to worry about your Google Voice trunks failing when Google phases out plain-text passwords. The other good news is you won’t be passing your plain-text Google Voice credentials across the Internet for everyone in the world to see.

Obtaining Your Google Voice OAuth 2 Credentials

While you’re still logged into your Google Voice account, you need to obtain a refresh_token which is what you’ll use instead of a password when setting up your Google Voice account with XiVO. Here’s how.

1. Be sure you are still logged into your Google Voice account. If not, log back in at https://voice.google.com.

2. In a separate browser tab, go to the Google OAUTH Playground using your browser while still logged into your Google Voice account.

3. Once logged in to Google OAUTH Playground, click on the Gear icon in upper right corner (as shown below).

blank

  3a. Check the box: Use your own OAuth credentials

  3b. Enter Incredible PBX OAuth Client ID:

466295438629-prpknsovs0b8gjfcrs0sn04s9hgn8j3d.apps.googleusercontent.com

  3c. Enter Incredible PBX OAuth Client secret: 4ewzJaCx275clcT4i4Hfxqo2

  3d. Click Close

4. Click Step 1: Select and Authorize APIs (as shown below)

blank

  4a. In OAUTH Scope field, enter: https://www.googleapis.com/auth/googletalk

  4b. Click Authorize APIs (blue) button.

With a recent Google change, you then will be prompted to choose your Google account again. Click on the same account name that you logged into in Step #1. You then will be prompted whether to allow Google to view and send Chat messages. Click Allow.

5. Click Step 2: Exchange authorization code for tokens

  5a. Click Exchange authorization code for tokens (blue) button

  5b. When the tokens have been generated, Step 2 will close.

6. Reopen Step 2 and copy your Refresh_Token. This is the "password" you will need to enter (together with your Gmail account name and 10-digit GV phone number) when you add your GV trunk with the add-gvtrunk script. Store this refresh_token in a safe place. Google doesn’t permanently store it!

7. Authorization tokens NEVER expire! If you ever need to remove your authorization tokens, go here and delete Incredible PBX Google Voice OAUTH entry by clicking on it and choosing DELETE option.

Switch back to your Gmail account and click on the Phone icon at the bottom of the window to place one test call. Once you successfully place a call, you can log out of Google Voice and Gmail.

Yes, this is a convoluted process. Setting up a secure computing environment often is. Just follow the steps and don’t skip any. It’s easy once you get the hang of it. And you’ll sleep better.

Downloading and Installing Google Voice with OAuth 2

Installs of Incredible PBX 15 for Wazo beginning December 7 already have the necessary components in place to support Google Voice. If you have an earlier installation of Incredible PBX 15 for Wazo, you can easily upgrade your server to support Google Voice. Simply log into your server’s Linux CLI as root using SSH or Putty and issue the following commands:

cd /root
wget http://incrediblepbx.com/gvtrunk15.tar.gz
tar zxvf gvtrunk15.tar.gz
rm -f gvtrunk15.tar.gz

If you’re upgrading Wazo from a release before 17.15, you can follow the usual upgrade steps after first removing your existing Google Voice trunks from the configuration. Start by copying your Google Voice credentials from /etc/asterisk/oauth_xmpp.conf. Next, delete the following file: /etc/asterisk/extensions_extra.d/gv.conf. Then perform the upgrade:

cd /root
cp -pr /etc/postfix /root
cp -p /etc/nginx/sites-enabled/xivo /root
echo "noload => res_xmpp_oauth.so" >> /etc/asterisk/modules.conf
xivo-dist wazo-17.17
apt-get update
/etc/init.d/netfilter-persistent stop
wazo-upgrade
iptables-restart
# put the Incredible PBX web add-ons back in place
cd /
wget http://incrediblepbx.com/incredible-nginx.tar.gz
tar zxvf incredible-nginx.tar.gz
rm -f incredible-nginx.tar.gz
ln -s /etc/nginx/locations/https-available/01_incrediblepbx /etc/nginx/locations/https-enabled/.
cd /etc/nginx
wget http://incrediblepbx.com/nginx-config.tar.gz
tar zxvf nginx-config.tar.gz
rm -f /etc/nginx/sites-enabled/default
cp -p /root/xivo /etc/nginx/sites-enabled
/etc/init.d/nginx restart
cp -pr /root/postfix /etc
/etc/init.d/postfix restart
sed -i 's|fr|us|' /etc/asterisk/indications.d/99-general.conf
/etc/init.d/asterisk restart

Initial Google Voice OAuth Trunk Setup with Wazo

Now it’s time to create your Google Voice OAuth 2 trunk to use with Wazo. Log back into the Linux CLI as root. Be sure you have your 10-digit Google Voice phone number, your Google account name without @gmail.com, and your Refresh Token from the previous step. Then run the script to add your Google Voice trunk:

cd /root
./add-gvtrunk

Plug in your Google Voice phone number, your account name (without @gmail.com), and refresh token when prompted. Check your work carefully. When the install finishes, fire up your favorite browser to finish the setup using the settings displayed in the Linux CLI.

Configuring Wazo for Google Voice OAuth

From a browser pointed to your server’s IP address, log in to Wazo as root with your GUI password.

Choose Services.IPBX.Trunk Management.Customized. Click on + Add to create a new custom trunk. Configure the trunk using the settings provided in the previous step. Click the Save button when finished. The Trunk Name will be your actual gmailname (without @gmail.com). Interface will be Motif/gmailname (using your actual Gmail name). Interface suffix will be @voice.google.com. And the Context will be Outcalls (to-extern).

blank

Next, choose Services.IPBX.Call Management.Incoming Calls. Click on + Add to create a new inbound route for your Google Voice DID. This is where you tell Wazo how to route calls placed to your Google Voice number. For your DID, enter your 10-digit Google Voice number. For the Context, choose Incalls (from-extern). Then choose from the pick lists to select a Destination and Redirect option for the incoming calls. It could be an extension, a ring group, a conference room, or an IVR. Click Save when you’re finished.

blank

Finally, choose Services.IPBX.Call Management.Outgoing Calls. Click on + Add to create a new outbound route. Under the General tab, configure the route as shown below using a Name of out_gmailname (using your actual Gmail name). The Context should be Outcalls (to-extern). The Preprocess subroutine should be subr-gv-outcall. And the desired Custom Trunk should be dragged left to the selected column:

blank

Under the Exten tab, add the desired 10-digit Exten string that users will dial to place a call through the Google Voice trunk. Trim off any prefix (such as 9) that you assigned to the dial string using the Stripnum setting. Then click the Save button.

For example, for a first trunk, you might choose NXXNXXXXXX as the Exten with a Stripnum of 0. This would tell Wazo to route all 10-digit calls to this Custom GV Trunk. For a second Google Voice trunk, you might choose 9NXXNXXXXXX with a Stripnum of 1. This would tell Wazo to route 11-digit calls with a 9 prefix to this Custom Trunk AND to strip off the first digit (9) before sending the 10-digit call to Google Voice.

blank

SMS Messaging with Google Voice

Incredible PBX implementations include a separate Python-based component called pygooglevoice that allows SMS messaging using a Google Voice account. You’ll find the SMS Dictator and SMS message blasting scripts in the /root folder of your server. Be advised that the gvoice script used to send these SMS messages does NOT use OAuth 2 authentication and requires your traditional Google Voice account name and password. Because it uses plain text, you probably will experience failures using gvoice unless your PBX is housed on the same server from which you traditionally access this account. The workaround is to do the following immediately before attempting to use SMS messaging with Google Voice. Using a browser, log into the Gmail account that corresponds to the account you plan to use for SMS messaging. In a separate tab of your browser while still logged into Gmail, go to the following link and enable Less Secure Apps for this account. In a third tab, go to the following link and activate the Google Reset Procedure. Now, from the Linux CLI on your PBX, attempt to login to gvoice using your Gmail account name including @gmail.com AND your plain-text Gmail password. If it succeeds, you’re good to go and can now use the SMS messaging tools. Type quit to exit from gvoice. Google normally follows up insecure access attempts with an email requesting that you confirm this is a "safe IP address" for your account. If you fail to respond to that email, you probably will need to repeat this exercise every time you attempt to use SMS messaging.

Taking Google Voice for a Test Drive

That completes the Google Voice setup. You now should be able to place a call using your Google Voice trunk by dialing any 10-digit number. And calls placed to your Google Voice number should ring at the inbound destination you chose above.

If you have additional Google Voice trunks, simply run /root/add-gvtrunk again and insert the new credentials.

If you ever need to delete a Google Voice account, just run /root/del-gvtrunk with the name of the Google Voice trunk to delete. Enjoy your free phone service!

Originally published: Monday, December 11, 2016


blankSupport Issues. With any application as sophisticated as this one, you’re bound to have questions. Blog comments are a terrible place to handle support issues although we welcome general comments about our articles and software. If you have particular support issues, we encourage you to get actively involved in the PBX in a Flash Forums. It’s the best Asterisk tech support site in the business, and it’s all free! Please have a look and post your support questions there. Unlike some forums, ours is extremely friendly and is supported by literally hundreds of Asterisk and Wazo gurus and thousands of users just like you. You won’t have to wait long for an answer to your question.


blank
Need help with Asterisk or Wazo? Visit the PBX in a Flash Forum.


Special Thanks to Our Generous Sponsors


FULL DISCLOSURE: ClearlyIP, Skyetel, Vitelity, DigitalOcean, Vultr, VoIP.ms, 3CX, Sangoma, TelecomsXchange and VitalPBX have provided financial support to Nerd Vittles and our open source projects through advertising, referral revenue, and/or merchandise. As an Amazon Associate and Best Buy Affiliate, we also earn from qualifying purchases. We’ve chosen these providers not the other way around. Our decisions are based upon their corporate reputation and the quality of their offerings and pricing. Our recommendations regarding technology are reached without regard to financial compensation except in situations in which comparable products at comparable pricing are available from multiple sources. In this limited case, we support our sponsors because our sponsors support us.

blankBOGO Bonaza: Enjoy state-of-the-art VoIP service with a $10 credit and half-price SIP service on up to $500 of Skyetel trunking with free number porting when you fund your Skyetel account. No limits on number of simultaneous calls. Quadruple data center redundancy. $25 monthly minimum spend required. Tutorial and sign up details are here.

blankThe lynchpin of Incredible PBX 2020 and beyond is ClearlyIP components which bring management of FreePBX modules and SIP phone integration to a level never before available with any other Asterisk distribution. And now you can configure and reconfigure your new Incredible PBX phones from the convenience of the Incredible PBX GUI.

blankVitalPBX is perhaps the fastest-growing PBX offering based upon Asterisk with an installed presence in more than 100 countries worldwide. VitalPBX has generously provided a customized White Label version of Incredible PBX tailored for use with all Incredible PBX and VitalPBX custom applications. Follow this link for a free test drive!
 

blankSpecial Thanks to Vitelity. Vitelity is now Voyant Communications and has halted new registrations for the time being. Our special thanks to Vitelity for their unwavering financial support over many years and to the many Nerd Vittles readers who continue to enjoy the benefits of their service offerings. We will keep everyone posted on further developments.


Some Recent Nerd Vittles Articles of Interest…