Introducing: New PBX in a Flash Installer for USB Flash Drives
We’re pleased to introduce a new PBX in a Flash installer for USB Flash Drives. Creating your new installer takes less than 5 minutes once you download the new ISO. Merry Christmas!


We’re pleased to introduce a new PBX in a Flash installer for USB Flash Drives. Creating your new installer takes less than 5 minutes once you download the new ISO. Merry Christmas!
Today we are pleased to introduce the revolutionary new Incredible PBX for Asterisk 1.8.1 featuring instantaneous (and free) Google Voice calling in the U.S. and Canada via Gtalk. No intermediate provider or callback for outbound calls is required. All of the Nerd Vittles TTS apps now work reliably as well. And you get a version of Asterisk 1.8.1 that already has been patched to provide the Asterisk 1.8.2 feature set. Incredible!

Today we are pleased to introduce the revolutionary new Incredible PBX for Asterisk 1.8 featuring instantaneous (and free) Google Voice calling in the U.S. and Canada via Gtalk. An intermediate provider is no longer required. All of the Nerd Vittles TTS apps now work reliably as well. And you get dozens of terrific new Asterisk 1.8.0 features.
Incredible PBX for Asterisk 1.8 returns to the living today with the ability to once again make free outbound calls in the U.S. and Canada. We’ll walk you through how to upgrade your existing Incredible PBX 1.8 system to make it work once again. And we’ll show you how to add multiple Google Voice trunks to your Incredible PBX.

Today we introduce the VoIP WhiteList for IPtables, a simple automated solution for FreePBX-based Asterisk systems that blocks SIP and IAX access to your server from every IP address not included in your white list. Installation time: under 5 minutes.
Today’s HOW TO walks you through interconnecting any FreePBX-based Asterisk server with Incredible PBX to take advantage of free Google Voice calling in the U.S. and Canada. It’s a 5-minute project once you’ve read today’s article. Both SIP and IAX interconnectivity solutions are provided.
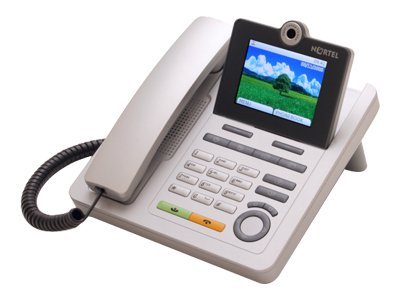
If you hurry, you can buy one of the world’s best color SIP videophones for about $42. The original price of these Nortel phones was over $700. And they work perfectly with Asterisk and sip2sip.info.

Introducing TeleYapper 5.0: the ultimate RoboCaller and data collection system for Asterisk. Upload your data in CSV or XML files and generate personalized calls to a dozen or thousands of callees. Messages also can be tailored to differentiate between people and answering machines. Customizable data collection is built into every call, and CSV/XML reports provide the results of every calling campaign.


 JUST RELEASED: Visit the Incredible PBX Wiki