Home » Posts tagged 'sip phone' (Page 6)

Tag Archives: sip phone

The Most Versatile VoIP Provider: FREE PORTING

R.I.P. RingPlus: Don’t Panic, Google Hangouts Is Your Friend

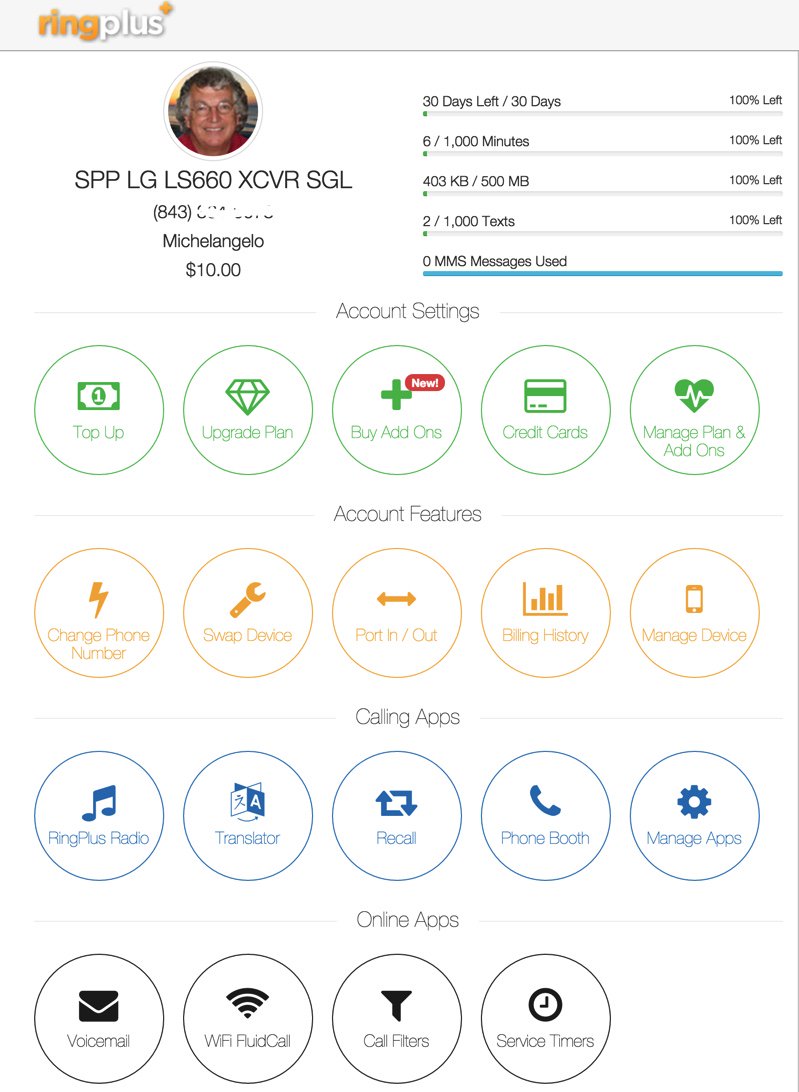
Three months ago, we warned you that RingPlus appeared to be on its last leg and to begin planning your exit strategy. February 11 appears to be their Drop Dead Date although Ting apparently will now absorb all RingPlus accounts that aren’t ported out but under markedly different terms. For openers, there’s a $6 per month charge per phone before you even turn it on. After that, it’s pay-as-you-go for minutes, messages, and data. While the buckets are pooled between all of your phones, the pricing is not cheap. 1,000 minutes will run you $18/month while 2100 minutes will set you back $35/month. 1,000 text messages costs $5/month while 2,000 will run $8/month. 2 gigs of data is $20/month with an additional $10/month for each additional gigabyte or fraction thereof. For a family of four with four phones and modest usage sharing 2100 minutes, 2000 messages, and 2 gigs of data per person, the monthly tab (not including taxes and fees) would be $123 which works out to over $30 per phone. To add insult to injury, Sprint automatically locks RingPlus phones to their network, but you’ll have to move heaven and earth to get them to unlock the devices, even those that were paid in full, without moving to Sprint for several months of "service." Thinking you’ll switch to Sprint’s unlimited 5 phones for $100 unlimited plan, think again. They’ve ended that promotion. So what is a guy or gal to do? We’ve dusted off some of our previous recommendations to provide you an extremely inexpensive solution if you have WiFi access most of the time and do modest mobile calling and texting without WiFi.

Feb. 11 Update: We have some good news and bad news. First, the bad news. It’s still the Sprint network. And now the good news. RingPlus has alerted users that their Drop Dead Date has been postponed until February 21. The migration to Ting is expected next week, well before the Feb. 21 date. And more good news. Sprint is not one to leave money sitting on the table, and yesterday they announced a new "Unlimited" Plan offering 5 lines with unlimited calls, texts, and data for $90 a month. The pricing is good through the end of March, 2018. This is good for a couple of reasons. First, it will keep you on the Sprint network for a month or two in order to qualify all of your existing phones for unlocking. Second, it’s a great deal despite the fine print explaining that unlimited doesn’t really mean unlimited: "Data deprioritization applies during times of congestion. Reqs ebill and new account." Don’t think you’re going to save money by moving fewer phones. The first phone is $50/month. The second is $40. And the next three are free. Our best advice is to wait until after your numbers have been ported to Ting which is better equipped to handle porting than RingPlus while the Titanic is sinking.

Feb. 13 News Flash Verizon introduces unlimited data plans including tethering…


When we introduced Google’s new Pixel phone, we noted that it seemed like a perfect candidate to determine whether we could do everything a normal mobile phone could do using no cellular service. In other words, we wanted to set up the mobile phone basically in Airplane Mode with no SIM card usage and just WiFi connectivity. The goal was to determine what, if anything, we couldn’t do that we’d normally expect to do using a top-of-the-line mobile phone. There was one obvious prerequisite. The mobile phone needed an Internet connection. This could be a normal WiFi network connection, or it could be a connection using an LTE-powered WiFi HotSpot, or it could be a WiFi connection established through tethering to an existing smartphone. It turned out that all three options let us make calls, send and receive text messages, and surf the web with no monthly cost for the additional phone other than the cost, if any, for the WiFi data used.

Why Would You Do Such a Thing? We can think of a number of reasons. The most important considerations for RingPlus users are it’s considerably cheaper than adding another mobile phone to your cellular plan and you’re not tied to Sprint’s lousy network. Typically, adding a mobile phone to many cellphone plans can cost upwards of $50 a month before you make the first call. Second, some may like the flexibility of having BOTH an iPhone and an Android phone because of differences in features and functionality. Finally, it’s a perfect way to introduce younger children to mobile phone technology without spending an arm and a leg on cellular service.

What’s a Typical Use Case for a Non-Cellular Mobile Phone? We can think of several scenarios where this makes perfect sense. We happen to have a Verizon HotSpot that’s still on an unlimited data plan. While it costs almost $100 a month, it lets 7 devices connect to blazing fast LTE service at zero additional cost. If you travel with a group of people that all need mobile phones and that typically travel or work together except when alternative WiFi service is available, this is a real deal. For those with a newer vehicle that includes a WiFi HotSpot or an OBD-II diagnostics port1 and AT&T’s $100 ZTE Mobley device, mobile phones and tablets in the car or truck work perfectly without a cellular connection. And AT&T now lets you add a vehicle’s WiFi hotspot or ZTE Mobley to their unlimited data plan for $40 a month.2 If you have four kids and a spouse, you can do the math. Finally, if you and your family or business associates spend 95% of the day either at home or in an office or car with WiFi, everyone now gets the flexibility of a mobile phone with no recurring cost just like the good ol’ days with RingPlus. Driving our daughter to the school bus stop in our old neighborhood recently, we happened to check for WiFi access because the cellular service was so horrible. There were 27 separate WiFi HotSpots, all of which were secured. Seems we weren’t the only ones having difficulty with cell service in the neighborhood.

VoIP Requirements for a Non-Cellular Mobile Phone. As we’ve said many times, the beauty of VoIP technology is not having to put all your eggs in one basket. So there’s really no reason to deploy a single technology. In the Google world, that means you can take advantage of Google’s rich collection of messaging applications such as Hangouts and Allo and Duo while also deploying Skype, Facebook Messenger, WebRTC and SIP-based services to connect to traditional hosting providers and PBXs such as Incredible PBX and PIAF5 powered by 3CX (shown below). Today we’ll walk through the setup process for all of these. When we’re finished, you’ll have crystal-clear phone calls as well as SMS messaging with something you never got with RingPlus, multiple layers of redundancy.

What Does All of this Really Cost? You obviously have to purchase a mobile phone but, if you’ve been with RingPlus, you already have one or more phones in hand. When we’re finished today, you’ll be able to make calls as well as send and receive SMS messages in multiple ways. Calls and SMS messages to U.S. and Canada destinations are free using Google’s services. Skype-to-Skype calls worldwide are free. SMS messages sent and received using Pinger/Textfree as well as Facebook Messenger are also free of charge. For calls made using a SIP softphone or WebRTC connection to an Incredible PBX or PIAF5 PBX, you only pay the standard VoIP tariff for the calls, typically less than a penny a minute for domestic calls. Calls to many international destinations are free using FreeVoipDeal.com.

Numerous SIP softphones for Android devices are available at no cost including Zoiper, CSipSimple and many others. Still others are available for less than $10 and can be installed on as many Android devices as you happen to own, e.g. Acrobits and Bria. And, of course, the 3CX softphone above is free with PIAF5. Stick with softphones with 4 stars or better!

Putting the VoIP Pieces in Place. Once you have your SIM-free phone in hand, switch to Airplane mode and then reactivate WiFi. Go through the basic setup to establish a WiFi connection in your home or office. Then it’s time to add the components you’ll need to turn your smartphone into a fully-functioning VoIP phone. If they’re not already on your phone, download the following apps from the Google Play Store or the iPhone App Store: Hangouts, Hangouts Dialer, Allo, Duo, Skype, Facebook Messenger, Textfree, Port Knocker,3 DynDNS or FreeDyn (not free!) Client,4 and the VoIP softphones of your choice.

We recommend reserving the Google Voice number associated with the primary Gmail account on your smartphone for use with Hangouts, Allo, and Duo. The reason is that you can’t really use these services satisfactorily while also using the same Google Voice number with Google Chat and the Asterisk® XMPP module. Our previous Nerd Vittles tutorial will walk you through obtaining multiple Google Voice numbers to use with with your smartphones or Incredible PBX and PIAF5.

Pictured above is the layout we actually use. Keep in mind that the bottom row stays in place as you scroll through other screens on your smartphone. Long-press on an existing icon on the bottom row and drag it off the row. Then long-press on the app you want to add and drag it onto the bottom row. We recommend replacing the default Phone and Messaging apps with the Hangouts Dialer and Allo (as shown). We also include a SIP softphone on the bottom row which gives you multiple ways to place and receive calls.


[soundcloud url="https://api.soundcloud.com/tracks/293184354″ params="auto_play=false&hide_related=false&show_comments=true&show_user=true&show_reposts=false&visual=true" width="400″ height="300″ iframe="true" /]

But I Really Want a Cellphone Provider. Yes, we hear you. Backup cellphone service has its virtues. Here are 3 Android phones from Google ranging in price from $199 to $649 with easy payment plans ranging from $8 to $27 a month. Each gives you unlimited domestic calling as well as unlimited domestic and international texting with multiple cellphone carriers. Rates start at $20 a month plus $10/GB for data. You even get bill credits for any data you don’t use. Project Fi is worth a careful look if you’re on a budget and limit most of your data usage to WiFi connections. Here’s a great article explaining the pro’s and con’s of Project Fi after six months of actual usage.

Bottom Line. On our smartphone we have the following services activated and functioning reliably: Google Voice with Hangouts, Allo and Pinger for SMS messaging, Bria for VoIP calling with Incredible PBX for XiVO, CSipSimple and Zoiper for SIP calling with Incredible PBX 13, Facebook Messenger, Skype, plus the 3CX Dialer for calling with PIAF5 powered by 3CX. That translates into 5 different phone lines supporting free incoming and outgoing voice calls, plus 2 additional lines for free SMS messaging, plus the Facebook and Skype services to reach over a billion people worldwide at no cost. And both the PIAF5 and XiVO lines can support calls via multiple trunks using customized dial prefixes. Even with all these services running, most smartphones have sufficient horsepower to make it through a busy day. What are you waiting for? Make the switch!

Update: Another WiFi HotSpot Option. We’ve now had an opportunity to test yet another WiFi HotSpot solution. This one uses AT&T’s Unite Pro, available from Amazon for $65. Rather than sign up for AT&T’s $50 monthly pay-as-you-go plan, you can use this with StraightTalk with minimal effort. That lets you purchase 2 months of service and 4GB of BYOT data for $40. Be sure to purchase the Mobile HotSpot Plan and not a cellphone plan! To get started, visit your neighborhood WalMart and pick up the StraightTalk Bring Your Own Tablet SIM Activation Kit. Do NOT mistakenly buy the BYO Phone Activation Kit. It won’t work! The kit includes a 1GB Data service plan that’s good for 30 days from activation. With your Unite Pro in hand, insert the AT&T SIM card that came with the tablet activation kit. Turn on the HotSpot and select it as your WiFi connection using your desktop PC. The name of the HotSpot and its WiFi password will be displayed on the main screen of the HotSpot. From your desktop, use a browser to log into 192.168.1.1. The default administrator password is attadmin. Goto Settings -> Mobile Broadband -> APN and add a new APN with name: StraightTalk and APN: tfdata. After saving it, select it as active APN.

Now switch back to your desktop PC and change your default WiFi connection so that you can access the Internet. Visit http://STBYOT.com to register your StraightTalk SIM card and activate your 1GB data plan. You’ll need your SIM card number (at the bottom of the big card from which you removed the MicroSIM). Then you’ll need your scratch-off data service PIN. Once you complete the setup and register with StraightTalk, activate your service. Now turn off your HotSpot and turn it back on. It should display a 4G connection at the top left of the screen. At this point, reselect the HotSpot as your WiFi connection for your desktop PC. Then try to make a connection to a web site on the Internet, and you should be in business. For conservative data usage, 4GB for $40 with 2 months of service is the best deal we’ve been able to find for those that prefer pre-paid cellular service.

Published: Thursday, February 9, 2017  Updated: Friday, February 17, 2017


Need help with Asterisk? Visit the PBX in a Flash Forum.


Special Thanks to Our Generous Sponsors


FULL DISCLOSURE: ClearlyIP, Skyetel, Vitelity, DigitalOcean, Vultr, VoIP.ms, 3CX, Sangoma, TelecomsXchange and VitalPBX have provided financial support to Nerd Vittles and our open source projects through advertising, referral revenue, and/or merchandise. As an Amazon Associate and Best Buy Affiliate, we also earn from qualifying purchases. We’ve chosen these providers not the other way around. Our decisions are based upon their corporate reputation and the quality of their offerings and pricing. Our recommendations regarding technology are reached without regard to financial compensation except in situations in which comparable products at comparable pricing are available from multiple sources. In this limited case, we support our sponsors because our sponsors support us.

BOGO Bonaza: Enjoy state-of-the-art VoIP service with a $10 credit and half-price SIP service on up to $500 of Skyetel trunking with free number porting when you fund your Skyetel account. No limits on number of simultaneous calls. Quadruple data center redundancy. $25 monthly minimum spend required. Tutorial and sign up details are here.

The lynchpin of Incredible PBX 2020 and beyond is ClearlyIP components which bring management of FreePBX modules and SIP phone integration to a level never before available with any other Asterisk distribution. And now you can configure and reconfigure your new Incredible PBX phones from the convenience of the Incredible PBX GUI.

VitalPBX is perhaps the fastest-growing PBX offering based upon Asterisk with an installed presence in more than 100 countries worldwide. VitalPBX has generously provided a customized White Label version of Incredible PBX tailored for use with all Incredible PBX and VitalPBX custom applications. Follow this link for a free test drive!
 

Special Thanks to Vitelity. Vitelity is now Voyant Communications and has halted new registrations for the time being. Our special thanks to Vitelity for their unwavering financial support over many years and to the many Nerd Vittles readers who continue to enjoy the benefits of their service offerings. We will keep everyone posted on further developments.


Some Recent Nerd Vittles Articles of Interest…

  1. OBD-II port is mandatory on vehicles sold in the U.S. since 1996. But you may not need a vehicle at all. 🙂 []
  2. DirecTV service is required to take advantage of AT&T’s Unlimited Data Plan offering. []
  3. We strongly recommend setting up PortKnocker with the credentials found in /root/knock.FAQ on your Incredible PBX server. This will provide a back door to assure that you aren’t inadvertently locked out of your server by the Incredible PBX firewall while you are traveling. []
  4. You’ll need to set up a dynamic DNS client on your Android phone in order to keep your IP address updated and whitelisted with the Incredible PBX firewall. Unfortunately, this feature requires the FreeDyn paid app on the iPhone. []

2016, The Year of VoIP Choice: Meet Wazo and XiVO 16.15

UPDATE: Wazo 17.01 has been officially released. The complete tutorial is available here.

And you thought the excitement was over for 2016. Well, not so fast. The core development team at XiVO has now forked the project so this will be the last XiVO-branded release until Wazo 16.16 hits the street. Nothing has changed except the name and a boatload of new features with more to come including a new GUI interface a little further down the road. And you’ll have a front row seat at Nerd Vittles. But lets save that discussion for coming weeks. For today, we’ll set the stage with the latest development release of XiVO featuring Incredible PBX and Asterisk® 14.1.2. Yes, there is an easy migration path for every existing XiVO server. That’s what the 2-minute xivo-upgrade is all about. In the meantime, anyone with the pioneering spirit can take a glimpse into the future. If you know XiVO, then you know that development releases normally are almost as stable as production releases because of their unique development methodology and enormous test suite which checks every change for naughty or nice. And, yes, the development team eats their own dog food! But please note that this is a Development Version of Wazo which means changes are happening regularly. The official release will be available in early December. For the pioneers installing now, be advised that there may be install hiccups from time to time as the developers migrate older components to Wazo. If an install fails for you, don’t get frustrated. Just wait 12 hours and try again.

Introducing the Opus Codec and Asterisk 14

We think you will enjoy this first release of Incredible PBX 14 featuring XiVO 16.15 and Asterisk 14 with integrated support for the Opus codec. If you haven’t heard of Opus, you’re in for a treat. You get the wideband voice quality of G.711U (ULAW) calls requiring 80-90kbps of bandwidth using only 16kbps. And, because it’s a variable bandwidth codec based upon your available Internet pipe, Opus can support narrowband calls with equivalent call quality to G.729 and Speex. Simply stated, you can squeeze FIVE wideband calls into the same bandwidth that one ULAW call used to consume. And, when you have the Internet capacity to support it, Opus calls can scale up to 128kbps for MP3-quality sound. Details.

There’s more good news with Opus. XiVO’s WebRTC client now is preconfigured with the Opus codec when you deploy Incredible PBX 14. And, as if that weren’t enough, the WebRTC client with XiVO 16.15 now includes integrated voicemail support so you can play and delete voicemails without ever leaving the WebRTC client. See our WebRTC tutorial for more.

Finally: A New CDR Reporting Module for XiVO

Here’s another important development that many have requested. The Incredible PBX 14 platform includes a terrific new CDR Reporting Module from Bart Fisher on the PIAF Forum. In the XiVO GUI, goto IPX → Call Management → Call Logs:

FLITE TTS Implemented with New Voices

We’re pleased to announce that FLITE 1.4 is now included in Incredible PBX 14 builds on or after November 26. For the first time, you now have a choice of four different voices:

kal (American male)
rms (American male)
awb (Scottish male)
slt (American female)

While it’s a matter of personal taste, the RMS and SLT voices are dramatic improvements over the previous FLITE implementation. To change the voice, edit /etc/asterisk/flite.conf and replace voice=slt with your favorite. Then restart Asterisk. This post on the PIAF Forum includes dialplan code and will walk you through installing FLITE on existing servers. There’s more good news. You now can build your own FLITE voice for use with FLITE.

The Future Vision for Wazo

We don’t want to spill the beans on everything that lies ahead, but let’s talk briefly about the API Framework behind what will soon be the Wazo Telephony Business Engine. With Incredible PBX 14, you will note that you now have direct access to all available XiVO APIs with more to come. Using a browser, head over to https://ServerIPaddress/api/. A series of tutorials on how to use these APIs will be forthcoming now that we’ve gotten a few lessons from Sylvain Boily. Suffice it to say, the idea behind these APIs is that any developer will be able to quickly produce a customized web GUI for Wazo using nothing but API calls in conjunction with open source web development tools such as Bootstrap and Smarty. Think of it as OpenStack for the Telephony Cloud. And a new Wazo GUI is in the works as well. Here are a few examples to give you some idea of what’s possible in just a matter of hours:

Rather than having a hard-coded GUI that uses spaghetti code to generate obscure Asterisk commands, you now will have a fully-documented development platform where the sky’s the limit. Think of it. You can actually contribute code back to the project while developing custom solutions for your organization. It’s what open source development is all about!

Update Your Address Book: New Wazo Links

Incredible PBX 14 for XiVO Installation Overview

Before we roll up our sleeves and walk you through the installation process, we wanted to provide a quick summary of the 10 Basic Steps in setting up Incredible PBX 14 for XiVO. By the way, the whole process takes less than an hour, half of that in the Cloud.

  1. Set Up Desired PBX Platform: Stand-alone PC, Virtual Machine, or Cloud-Based Server
  2. Run the Incredible PBX for XiVO installer and Activate All Options
  3. Set Up One or More SIP or Google Voice Trunks for Your PBX
  4. Tell XiVO Where to Direct Incoming Calls from Each Trunk
  5. Tell XiVO Which Trunk to Use for Every Outbound Calling Digit Sequence
  6. Set Up a SoftPhone or WebRTC Phone (or both)
  7. Decide Whether to Activate Simultaneous Ringing on your Cellphone
  8. Add Google Speech Recognition Key (if desired)
  9. Activating DISA with Incredible PBX for XiVO (if desired)
  10. Test Drive Incredible PBX for XiVO

1. Incredible PBX for XiVO Hardware Platform Setup

The first step is to choose your hardware platform and decide whether you want to babysit a server and network or leave those tasks to others. We’ve taken the guesswork out of the setups documented below. The last four options are cloud providers, each of whom provides a generous discount to let you kick the tires. So click on the links below to review the terms and our walkthrough of the setup process on each platform.

If your situation falls somewhere in between all of these, here’s a quick summary. For stand-alone systems and virtual machine platforms that you own (such as VirtualBox and VMware ESXi), download and install the 64-bit version of XiVO using the XiVO ISO. For most other virtual machine platforms in the Cloud, you’ll start by creating a 64-bit Debian 8 virtual machine with at least 1GB of RAM and a 20GB drive.

2. Running the Incredible PBX for XiVO Installer

Once you have your hardware platform up and running, the rest of the initial setup process is easy. Simply download and run the Incredible PBX 13 for XiVO installer. On some platforms, it first updates Debian 8 to current specs and reboots. Then log back in and rerun the installer a second time. You will be prompted whether to activate about a dozen applications for Incredible PBX. Choose Y for each option if you want to take advantage of the XiVO Snapshot with all components preconfigured. Otherwise, you’ll need to jump over to the original tutorial and manually configure all of the XiVO components.

cd /root
wget http://incrediblepbx.com/IncrediblePBX13-XiVO.sh
chmod +x IncrediblePBX13-XiVO.sh
./IncrediblePBX13-XiVO.sh

When you have completed the Incredible PBX 13 install, you then can log into your server as root and upgrade to Incredible PBX 14 with Asterisk 14 and the development version of XiVO/WAZO. Here are the steps:

xivo-dist xivo-dev
/etc/init.d/netfilter-persistent stop
xivo-upgrade
iptables-restart
# restore Incredible PBX module and ODBC configuration
cp -p /etc/asterisk/modules.conf /etc/asterisk/modules.conf-new
cp -p /etc/asterisk/res_odbc.conf /etc/asterisk/res_odbc.conf-new
cp -p /etc/asterisk/modules.conf.dpkg-old /etc/asterisk/modules.conf
cp -p /etc/asterisk/res_odbc.conf.dpkg-old /etc/asterisk/res_odbc.conf
# add Google Voice OAuth support for Asterisk 14
cd /usr/src
git clone https://github.com/sboily/asterisk-res-xmpp-oauth.git
cd asterisk*
make patch
make
make install
xivo-service restart
# put the Incredible PBX web add-ons back in place
cd /
wget http://incrediblepbx.com/incredible-nginx.tar.gz
tar zxvf incredible-nginx.tar.gz
rm -f incredible-nginx.tar.gz
ln -s /etc/nginx/locations/https-available/01_incrediblepbx /etc/nginx/locations/https-enabled/.
cd /etc/nginx
wget http://incrediblepbx.com/nginx-config.tar.gz
tar zxvf nginx-config.tar.gz
rm -f /etc/nginx/sites-enabled/default
/etc/init.d/nginx restart
sed -i 's|13.|14.|' /etc/pbx/.version

While this may sound convoluted, there’s a reason for it. The WAZO Development Version is undergoing some major plumbing changes which affect the PostGreSQL database structure. Because Incredible PBX uses database snapshots to preconfigure a number of components, there would be major breakage if the Dev version database structure was different than the Incredible PBX snapshot. By performing an upgrade, we avoid the problem while preserving all of the Incredible PBX settings.

3. Setting Up SIP and Google Voice Trunks with XiVO

There are two steps in setting up trunks to use with Incredible PBX. First, you have to sign up with the provider of your choice and obtain trunk credentials. These typically include the FQDN of the provider’s server as well as your username and password to use for access to that server. Second, you have to configure a trunk on the Incredible PBX for XiVO server so that you can make or receive calls outside of your PBX. As with the platform tutorials, we have taken the guesswork out of the trunk setup procedure for roughly a dozen respected providers around the globe. In addition, XiVO Snapshots goes a step further and actually creates the trunks for you, minus credentials, as part of the initial Incredible PBX install.

For Google Voice trunks, log into your server as root and run ./add-gvtrunk. When prompted, insert your 10-digit Google Voice number, your Google Voice email address and OAuth 2 token. The native Google Voice OAuth tutorial explains how to obtain it.

For the other providers, review the setup procedure below and then edit the preconfigured trunk for that provider by logging into the XiVO web GUI and choosing IPX → Trunk Management → SIP Protocol. Edit the setup for your provider (as shown above) and fill in your credentials and CallerID number in the General tab. Activate the trunk in the Register tab after again filling in your credentials. Save your settings when finished. No additional configuration for these providers is required when using the XiVO Snapshot.

4. Directing Incoming Calls from XiVO Trunks

Registered XiVO trunks typically include a DID number. With the exception of CallCentric, this is the number that callers would dial to reach your PBX. With CallCentric, it’s the 11-digit account number of your account, e.g. 17771234567. In the XiVO web GUI, we use IPX → Call Management → Incoming Calls to create inbound routes for every DID and trunk associated with your PBX. Two sample DIDs have been preconfigured to show you how to route calls to an extension or to an IVR. To use these, simply edit their settings and change the DID to match your trunk. Or you can create new incoming routes to send calls to dozens of other destinations on your PBX.

5. Routing Outgoing Calls from XiVO to Providers

Outgoing calls from extensions on your XiVO PBX must be routed to a trunk provider to reach call destinations outside your PBX. Outgoing call routing is managed in IPX → Call Management → Outgoing Calls. You tell XiVO which trunk provider to use in the General tab. Then you assign a Calling Digit Sequence to this provider in the Exten tab. For example, if NXXNXXXXXX were assigned to Vitelity, this would tell XiVO to send calls to Vitelity if the caller dialed a 10-digit number. XiVO has the flexibility to add and remove digits from a dialed number as part of the outbound call routing process. For example, you might want callers to dial 48NXXNXXXXXX to send calls to a Google Voice trunk where 48 spells "GV" on the phone keypad. We obviously don’t want to send the entire dial string to Google Voice so we tell XiVO to strip the first 2 digits (48) from the number before routing the call out your Google Voice trunk. We’ve included two examples in the XiVO Snapshot to get you started. Skype Connect (shown below) is an example showing how to strip digits and also add digits before sending a call on its way:

6. Setting Up Softphone & WebRTC to Connect to XiVO

If you’re a Mac user, you’re lucky (and smart). Download and install Telephone from the Mac App Store. Start up the application and choose Telephone:Preference:Accounts. Click on the + icon to add a new account. To set up your softphone, you need 3 pieces of information: the IP address of your server (Domain), and your Username and Password. In the World of XiVO, you’ll find these under IPBX → Services → Lines. Just click on the Pencil icon beside the extension to which you want to connect. Now copy or cut-and-paste your Username and Password into the Accounts dialog of the Telephone app. Click Done when you’re finished, and your new softphone will come to life and should show Available. Dial the IVR (4871) to try things out. With Telephone, you can use over two dozen soft phones simultaneously on your desktop.

For everyone else, we recommend the YateClient softphone which is free. Download it from here. Run YateClient once you’ve installed it and enter the credentials for the XiVO Line. You’ll need the IP address of your server plus your Line username and password associated with the 701 extension. On the XiVO platform, do NOT use an actual extension number for your username with XiVO. Go to IPBX Settings → Lines to decipher the appropriate username and password for the desired extension. Click OK to save your entries.

WebRTC allows you to use your Chrome or Firefox browser as a softphone. Extension 701 comes preconfigured for WebRTC access with Incredible PBX for XiVO. It shares the same password as the Line associated with extension 701, but the username is 701 rather than the username associated with the Line. You can decipher the password by accessing the XiVO Web GUI and then IPBX → Services → Users → Incredible PBX → XiVO Client Password. Or you can log into your server as root and run: /root/show-701-pw

To use WebRTC, you first need to accept the different SSL certificates associated with the WebRTC app. From your browser, go to the following site and click on each link to accept the certificates. Once you’ve completed this process, visit the Wazo WebRTC site. The Username is 701. The Password is the one you obtained above. The IP Address is the address of your XiVO PBX.

7. Setting Up a CellPhone Extension with XiVO

In addition to ringing your SIP extension when incoming calls arrive, XiVO can also ring your cellphone simultaneously. This obviously requires at least one outbound trunk. If that trunk provider also supports CallerID spoofing, then XiVO will pass the CallerID number of the caller rather than the DID associated with the trunk. Incredible PBX for XiVO comes preconfigured with cellphone support for extension 701. To enable it, access the XiVO Web GUI and go to IPBX → Services → Users → Incredible PBX and insert your Mobile Phone Number using the same dial string format associated with the trunk you wish to use to place the calls to your cellphone. You can answer the incoming calls on either your cellphone or the phone registered to extension 701.

8. Activating Voice Recognition for XiVO

Google has changed the licensing of their speech recognition engine about as many times as you change diapers on a newborn baby. Today’s rule restricts use to “personal and development use.” Assuming you qualify, the very first order of business is to enable speech recognition for your XiVO PBX. Once enabled, the Incredible PBX feature set grows exponentially. You’ll ultimately have access to the Voice Dialer for AsteriDex, Worldwide Weather Reports where you can say the name of a city and state or province to get a weather forecast for almost anywhere, Wolfram Alpha for a Siri-like encyclopedia for your PBX, and Lefteris Zafiris’ speech recognition software to build additional Asterisk apps limited only by your imagination. And, rumor has it, Google is about to announce new licensing terms, but we’re not there yet. To try out the Voice Dialer in today’s demo IVR, you’ll need to obtain a license key from Google. This Nerd Vittles tutorial will walk you through that process. Don’t forget to add your key to /var/lib/asterisk/agi-bin/speech-recog.agi on line 72.

9. Adding DISA Support to Your XiVO PBX

If you’re new to PBX lingo, DISA stands for Direct Inward System Access. As the name implies, it lets you make calls from outside your PBX using the call resources inside your PBX. This gives anybody with your DISA credentials the ability to make calls through your PBX on your nickel. It probably ranks up there as the most abused and one of the most loved features of the modern PBX.

There are three ways to implement DISA with Incredible PBX for XiVO. You can continue reading this section for our custom implementation with two-step authentication. There also are two native XiVO methods for implementing DISA using a PIN for security. First, you can dedicate a DID to incoming DISA calls. Or you can add a DISA option to an existing IVR. Both methods are documented in our tutorial on the PIAF Forum.

We prefer two-step authentication with DISA to make it harder for the bad guys. First, the outside phone number has to match the whitelist of numbers authorized to use your DISA service. And, second, you have to supply the DISA password for your server before you get dialtone to place an outbound call. Ultimately, of course, the monkey is on your back to create a very secure DISA password and to change it regularly. If all this sounds too scary, don’t install DISA on your PBX.

1. To get started, edit /root/disa-xivo.txt. When the editor opens the dialplan code, move the cursor down to the following line:

exten => 3472,n,GotoIf($["${CALLERID(number)}"="701"]?disago1)  ; Good guy

2. Clone the line by pressing Ctrl-K and then Ctrl-U. Add copies of the line by pressing Ctrl-U again for each phone number you’d like to whitelist so that the caller can access DISA on your server. Now edit each line and replace 701 with the 10-digit number to be whitelisted.

3. Move the cursor down to the following line and replace 12341234 with the 8-digit numeric password that callers will have to enter to access DISA on your server:

exten => 3472,n,GotoIf($["${MYCODE}" = "12341234"]?disago2:bad,1)

4. Save the dialplan changes by pressing Ctrl-X, then Y, then ENTER.

5. Now copy the dialplan code into your XiVO setup, remove any previous copies of the code, and restart Asterisk:

cd /root
sed -i '\:// BEGIN DISA:,\:// END DISA:d' /etc/asterisk/extensions_extra.d/xivo-extrafeatures.conf
cat disa-xivo.txt >> /etc/asterisk/extensions_extra.d/xivo-extrafeatures.conf
/etc/init.d/asterisk reload

6. The traditional way to access DISA is to add it as an undisclosed option in an IVR that is assigned to one of your inbound trunks (DIDs). For the demo IVR that is installed, edit the ivr-1.conf configuration file and change the "option 0″ line so that it looks like this. Then SAVE your changes.

exten => 0,1(ivrsel-0),Dial(Local/3472@default)

7. Adjust the inbound calls route of one of your DIDs to point to the demo IVR by changing the destination to Customized with the following Command:

Goto(ivr-1,s,1)

A sample is included in the XiVO Snapshot. Here’s how ours looks for the Nerd Vittles XiVO Demo IVR:


8. Now you should be able to call your DID and choose option 0 to access DISA assuming you have whitelisted the number from which you are calling. When prompted, enter the DISA password you assigned and press #. You then should be able to dial a 10-digit number to make an outside call from within your PBX.

SECURITY HINT: Whenever you implement a new IVR on your PBX, it’s always a good idea to call in from an outside number 13 TIMES and try every key from your phone to make sure there is no unanticipated hole in your setup. Be sure to also let the IVR timeout to see what result you get.

10. Test Drive Incredible PBX 14 for XiVO

To give you a good idea of what to expect with Incredible PBX for XiVO, we’ve set up a sample IVR using voice prompts from Allison. Give it a call and try out some of the features including voice recognition. Dial 1-843-606-0555.

Nerd Vittles Demo IVR Options
1 – Call by Name (say "Delta Airlines" or "American Airlines" to try it out)
2 – MeetMe Conference
3 – Wolfram Alpha (Coming Soon!)
4 – Lenny (The Telemarketer’s Worst Nightmare)
5 – Today’s News Headlines
6 – Weather Forecast (enter a 5-digit ZIP code)
7 – Today in History (Coming Soon!)
8 – Speak to a Real Person (or maybe just Lenny if we’re out)

What To Do and Where to Go Next?

Here are a Baker’s Dozen projects to get you started exploring XiVO on your own. Just plug the keywords into the search bar at the top of Nerd Vittles to find numerous tutorials covering the topics or simply follow our links. Note that all of these components already are in place so do NOT reinstall them. Just read the previous tutorials to learn how to configure each component. Be sure to also join the PIAF Forum to keep track of the latest tips and tricks with XiVO. There’s a treasure trove of information that awaits.

XiVO and Incredible PBX 14 Dial Code Cheat Sheets

Complete XiVO documentation is available here. But here are two cheat sheets in PDF format for XiVO Star Codes and Incredible PBX Dial Codes.

Published: Monday, November 28, 2016


Need help with Asterisk? Visit the PBX in a Flash Forum.


Coming Soon to Nerd Vittles: The Autonomous Car


Special Thanks to Our Generous Sponsors


FULL DISCLOSURE: ClearlyIP, Skyetel, Vitelity, DigitalOcean, Vultr, VoIP.ms, 3CX, Sangoma, TelecomsXchange and VitalPBX have provided financial support to Nerd Vittles and our open source projects through advertising, referral revenue, and/or merchandise. As an Amazon Associate and Best Buy Affiliate, we also earn from qualifying purchases. We’ve chosen these providers not the other way around. Our decisions are based upon their corporate reputation and the quality of their offerings and pricing. Our recommendations regarding technology are reached without regard to financial compensation except in situations in which comparable products at comparable pricing are available from multiple sources. In this limited case, we support our sponsors because our sponsors support us.

BOGO Bonaza: Enjoy state-of-the-art VoIP service with a $10 credit and half-price SIP service on up to $500 of Skyetel trunking with free number porting when you fund your Skyetel account. No limits on number of simultaneous calls. Quadruple data center redundancy. $25 monthly minimum spend required. Tutorial and sign up details are here.

The lynchpin of Incredible PBX 2020 and beyond is ClearlyIP components which bring management of FreePBX modules and SIP phone integration to a level never before available with any other Asterisk distribution. And now you can configure and reconfigure your new Incredible PBX phones from the convenience of the Incredible PBX GUI.

VitalPBX is perhaps the fastest-growing PBX offering based upon Asterisk with an installed presence in more than 100 countries worldwide. VitalPBX has generously provided a customized White Label version of Incredible PBX tailored for use with all Incredible PBX and VitalPBX custom applications. Follow this link for a free test drive!
 

Special Thanks to Vitelity. Vitelity is now Voyant Communications and has halted new registrations for the time being. Our special thanks to Vitelity for their unwavering financial support over many years and to the many Nerd Vittles readers who continue to enjoy the benefits of their service offerings. We will keep everyone posted on further developments.


Some Recent Nerd Vittles Articles of Interest…

Santa’s Secret: Deploying Google Pixel as a Free VoIP Phone

Nov. 21 UPDATE: As rumored, RingPlus has now announced the termination of ALL existing plans. Details here.

NEWS FLASH: We interrupt our normal editorial schedule to bring you this update. Many of our readers joined us in embracing RingPlus cellular service with the promise of free monthly calling in exchange for a modest upfront contribution. As with almost every something-for-nothing deal, it looks as if the death spiral may have begun with the abrupt termination of more than a dozen RingPlus plans. Even if your plan was not affected in Round #1, it’s probably a good time to begin making some contingency plans particularly if RingPlus is your only cellular provider. We already had prepared the article which follows when this news broke, but you can read between the lines to see that it makes even more sense should RingPlus leave you in the lurch with a smartphone and no cellular service. Here’s the email we received announcing the following RingPlus discontinued plans:

Commitment
Commitment (Member+)
Free Plan
Future – Phase 11
Future – Phase 3
Future – Phase 5
Future – Phase 6
Future – Phase 9
Leonardo 2
Leonardo 3
Michelangelo
Midsummer Night’s Dream
Seashore (Memorial Day)(Non-Member+ Upgrade)
Truly Free
Truly Free 2
Truly Free 3


We always like a challenge. And Google’s new Pixel phone seemed like a perfect candidate to determine whether we could do everything a normal mobile phone could do (and more) using no cellular service. In other words, we wanted to set up our Pixel without a SIM card and see if there was anything we couldn’t do that we’d normally expect out of a top-of-the-line mobile phone. There’s one obvious prerequisite. The Pixel needs an Internet connection. This could be a normal WiFi network connection, or it could be a connection using an LTE-powered WiFi HotSpot, or it could be a WiFi connection established through tethering to an existing smartphone.

Why Would You Do Such a Thing? We can think of a number of reasons. Most importantly, it’s considerably cheaper than adding another mobile phone to your cellular plan unless you happen to use AT&T’s "unlimited" plan where the fourth mobile phone is free. But, typically, adding a mobile phone to your cellphone plan will cost you $50 a month or more before you make the first call. Second, some of us like the flexibility of having BOTH an iPhone and an Android phone because of differences in features and functionality. Third, it’s a perfect way to introduce younger children to mobile phone technology without spending an arm and a leg on cellular service. No, you probably wouldn’t buy them a Pixel which is priced like an iPhone. But you get the idea.

What’s a Typical Use Case for a Non-Cellular Mobile Phone? We can think of several scenarios where this makes perfect sense. We happen to have a Verizon HotSpot that’s still on an unlimited data plan. While it costs almost $100 a month, it lets 7 devices connect to blazing fast LTE service at zero additional cost. If you travel with a group of people that all need mobile phones and that typically travel or work together except when alternative WiFi service is available, this is a real deal. For those with a newer vehicle that includes a WiFi HotSpot or an OBD-II diagnostics port1 and AT&T’s $100 ZTE Mobley device, mobile phones and tablets in the car or truck work perfectly without a cellular connection. And AT&T now lets you add a vehicle’s stand-alone WiFi hotspot or ZTE Mobley to their unlimited data plan for $40 $20 a month.2 If you have four kids and a spouse, you can do the math. Finally, if you and your family or business associates spend 95% of the day either at home or in an office or car with WiFi, everyone now gets the flexibility of a mobile phone with no recurring cost.3

VoIP Requirements for a Non-Cellular Mobile Phone. As we’ve said many times, the beauty of VoIP technology is not having to put all your eggs in one basket. So there’s really no reason to deploy a single technology. In the Google world, that means you can take advantage of Google’s rich collection of messaging applications such as Hangouts and Allo and Duo while also deploying Skype, Facebook Messenger, WebRTC and SIP-based services to connect to traditional hosting providers and PBXs such as Incredible PBX and PIAF5 powered by 3CX (shown below). Today we’ll walk through the setup process for all of these. When we’re finished, you’ll have crystal-clear phone calls as well as SMS messaging with something you don’t get with a cellular provider, multiple layers of redundancy.

What Does All of this Really Cost? You obviously have to purchase either a Pixel or some other Android phone. When we’re finished today, you’ll be able to make calls as well as send and receive SMS messages in multiple ways. Calls and SMS messages to U.S. and Canada destinations are free using Google’s services. Skype-to-Skype calls worldwide are free. SMS messages sent and received using Pinger/Textfree as well as Facebook Messenger are also free of charge. Calls placed and received using a RingPlus SIP account are free up to your monthly allocation of free minutes, typically 1,000 to 5,000+ minutes per month. With calls made using a SIP softphone or WebRTC connection to an Incredible PBX or PIAF5 PBX, you only pay the standard VoIP tariff for the calls, typically less than a penny a minute for domestic calls. Calls to many international destinations are free using FreeVoipDeal.com.

Numerous SIP softphones for Android devices are available at no cost including Zoiper, CSipSimple and many others. Still others are available for less than $10 and can be installed on as many Android devices as you happen to own, e.g. Acrobits and Bria. And, of course, the 3CX softphone above is free with PIAF5. Stick with softphones with 4 stars or better!

Putting the VoIP Pieces in Place on the Pixel. Once you have your SIM-free phone in hand and you’ve gone through the basic setup using a WiFi connection in your home or office, then it’s time to add the components you’ll need to turn your Pixel into a fully-functioning VoIP phone. If they’re not already on your phone, download the following apps from the Google Play Store: Hangouts, Hangouts Dialer, Allo, Duo, Skype, Facebook Messenger, Textfree, Port Knocker,4 DynDNS Client,5 and the VoIP softphones of your choice.

We recommend reserving the Google Voice number associated with the primary Gmail account on your Pixel for use with Hangouts, Allo, and Duo. The reason is that you can’t really use these services satisfactorily while also using the same Google Voice number with Google Chat and the Asterisk® XMPP module. Last week’s Nerd Vittles tutorial will walk you through obtaining a second Google Voice number to use with Incredible PBX or PIAF5.

Pictured above is the layout we actually use. Keep in mind that the bottom row stays in place as you scroll through other screens on your smartphone. Long-press on an existing icon on the bottom row and drag it off the row. Then long-press on the app you want to add and drag it onto the bottom row. We recommend replacing the default Phone and Messaging apps with the Hangouts Dialer and Allo (as shown). We also include a SIP softphone on the bottom row which gives you multiple ways to place and receive calls.


[soundcloud url="https://api.soundcloud.com/tracks/293184354″ params="auto_play=false&hide_related=false&show_comments=true&show_user=true&show_reposts=false&visual=true" width="400″ height="300″ iframe="true" /]

But I Really Want a Cellphone Provider. Yes, we hear you. Backup cellphone service has its virtues. Here are 3 Android phones from Google ranging in price from $199 to $649 with easy payment plans ranging from $8 to $27 a month. Each gives you unlimited domestic calling as well as unlimited domestic and international texting with multiple cellphone carriers. Rates start at $20 a month plus $10/GB for data. You even get bill credits for any data you don’t use. Project Fi is worth a careful look if you’re on a budget and limit most of your data usage to WiFi connections. Here’s a great article explaining the pro’s and con’s of Project Fi after six months of actual usage. Also check out HillClimber’s comment below which documents a terrific deal with T-Mobile that provides 100 talk minutes and 5GB of 4G data monthly plus unlimited streaming of music and video for $30 a month.

Bottom Line. On the Pixel phone we have the following services activated and functioning reliably: Google Voice with Hangouts, Allo and Pinger for SMS messaging, Bria for VoIP calling with Incredible PBX for XiVO, CSipSimple and Zoiper for SIP calling with RingPlus, Facebook Messenger, Skype, plus the 3CX Dialer for calling with PIAF5 powered by 3CX. That translates into 5 different phone lines supporting free incoming and outgoing voice calls, plus 2 additional lines for free SMS messaging, plus the Facebook and Skype services to reach over a billion people worldwide at no cost. And both the PIAF5 and XiVO lines can support calls via multiple trunks using customized dial prefixes. Even with all these services running, the Pixel has sufficient horsepower to make it through a busy day, and a 15-minute charge buys you another 7 hours of cellphone usage. What are you waiting for?

Published: Wednesday, November 16, 2016


Need help with Asterisk? Visit the PBX in a Flash Forum.


Special Thanks to Our Generous Sponsors


FULL DISCLOSURE: ClearlyIP, Skyetel, Vitelity, DigitalOcean, Vultr, VoIP.ms, 3CX, Sangoma, TelecomsXchange and VitalPBX have provided financial support to Nerd Vittles and our open source projects through advertising, referral revenue, and/or merchandise. As an Amazon Associate and Best Buy Affiliate, we also earn from qualifying purchases. We’ve chosen these providers not the other way around. Our decisions are based upon their corporate reputation and the quality of their offerings and pricing. Our recommendations regarding technology are reached without regard to financial compensation except in situations in which comparable products at comparable pricing are available from multiple sources. In this limited case, we support our sponsors because our sponsors support us.

BOGO Bonaza: Enjoy state-of-the-art VoIP service with a $10 credit and half-price SIP service on up to $500 of Skyetel trunking with free number porting when you fund your Skyetel account. No limits on number of simultaneous calls. Quadruple data center redundancy. $25 monthly minimum spend required. Tutorial and sign up details are here.

The lynchpin of Incredible PBX 2020 and beyond is ClearlyIP components which bring management of FreePBX modules and SIP phone integration to a level never before available with any other Asterisk distribution. And now you can configure and reconfigure your new Incredible PBX phones from the convenience of the Incredible PBX GUI.

VitalPBX is perhaps the fastest-growing PBX offering based upon Asterisk with an installed presence in more than 100 countries worldwide. VitalPBX has generously provided a customized White Label version of Incredible PBX tailored for use with all Incredible PBX and VitalPBX custom applications. Follow this link for a free test drive!
 

Special Thanks to Vitelity. Vitelity is now Voyant Communications and has halted new registrations for the time being. Our special thanks to Vitelity for their unwavering financial support over many years and to the many Nerd Vittles readers who continue to enjoy the benefits of their service offerings. We will keep everyone posted on further developments.


Some Recent Nerd Vittles Articles of Interest…

  1. OBD-II port is mandatory on vehicles sold in the U.S. since 1996. But you may not need a vehicle at all. 🙂 []
  2. DirecTV service is no longer required to take advantage of AT&T’s Unlimited Data Plan offering as of mid-March, 2017. []
  3. We drove our daughter to the school bus stop in I’On Village recently and happened to check for WiFi access because the cellular service was so horrible. There were 27 separate WiFi HotSpots, all of which were secured. Seems we weren’t the only ones having difficulty with cell service in the neighborhood. []
  4. We strongly recommend setting up PortKnocker with the credentials found in /root/knock.FAQ on your Incredible PBX server. This will provide a back door to assure that you aren’t inadvertently locked out of your server by the Incredible PBX firewall while you are traveling. []
  5. You’ll need to set up a dynamic DNS client on your Android phone in order to keep your IP address updated and whitelisted with the Incredible PBX firewall. []

Introducing Incredible PBX with XiVO Snapshots

If you’ve been following along in our XiVO adventure with Incredible PBX, you already know that there were a significant number of configuration hoops to jump through once the base install was finished. While these steps are well documented in the original Incredible PBX for XiVO tutorial, there still were plenty of opportunities for typos and skipping steps. Any misstep could spell the difference in a perfectly functioning PBX and one that couldn’t make or receive calls. Today we’re pleased to report that approach is now going the way of cars with a stick shift. If you want to continue to manually configure your XiVO PBX, you still have that option. Just jump to the original tutorial and run the installer choosing the options you wish to activate. But if you prefer a self-driving Tesla, that’s now an option as well. Continue reading, and we’ll walk you through using XiVO Snapshots.

A XiVO Snapshot is just what the name implies. It’s a snapshot of a working XiVO PBX that has virtually everything already configured: SIP settings to work with Asterisk®, a SIP extension to work with a SIP phone, or softphone, or WebRTC plus your cellphone, SIP and Google Voice trunk setups for most of the major commercial providers, and default inbound and outbound routes to ease the task of routing calls into and out of your PBX. Basically, you plug in your credentials from your favorite provider after running the Incredible PBX for XiVO installer with all Incredible PBX options enabled. Then you tell XiVO how to route the calls, and you’re done. You can have a stable and functional PBX making calls to anywhere in the world in a matter of minutes. Then you can review our numerous tutorials to add additional bells and whistles while you’re already enjoying a fully functional PBX.

Incredible PBX for XiVO Installation Overview

Before we roll up our sleeves and walk you through the installation process, we wanted to provide a quick summary of the 10 Basic Steps in setting up Incredible PBX for XiVO. By the way, the whole process takes less than an hour!

  1. Set Up Desired PBX Platform: Stand-alone PC, Virtual Machine, or Cloud-Based Server
  2. Run the Incredible PBX for XiVO installer and Activate All Options
  3. Set Up One or More SIP or Google Voice Trunks for Your PBX
  4. Tell XiVO Where to Direct Incoming Calls from Each Trunk
  5. Tell XiVO Which Trunk to Use for Every Outbound Calling Digit Sequence
  6. Set Up a SoftPhone or WebRTC Phone (or both)
  7. Decide Whether to Activate Simultaneous Ringing on your Cellphone
  8. Add Google Speech Recognition Key (if desired)
  9. Activating DISA with Incredible PBX for XiVO (if desired)
  10. Test Drive Incredible PBX for XiVO

1. Incredible PBX for XiVO Hardware Platform Setup

The first step is to choose your hardware platform and decide whether you want to babysit a server and network or leave those tasks to others. We’ve taken the guesswork out of the setups documented below. The last four options are cloud providers, each of whom provides a generous discount to let you kick the tires. So click on the links below to review the terms and our walkthrough of the setup process on each platform.

If your situation falls somewhere in between all of these, here’s a quick summary. For stand-alone systems and virtual machine platforms that you own (such as VirtualBox and VMware ESXi), download and install the 64-bit version of XiVO using the XiVO ISO. For most other virtual machine platforms in the Cloud, you’ll start by creating a 64-bit Debian 8 virtual machine with at least 1GB of RAM and a 20GB drive.

2. Running the Incredible PBX for XiVO Installer

Once you have your hardware platform up and running, the rest of the initial setup process is easy. Simply download and run the Incredible PBX for XiVO installer. On some platforms, it first updates Debian 8 to current specs and reboots. Then log back in and rerun the installer a second time. You will be prompted whether to activate about a dozen applications for Incredible PBX. Choose Y for each option if you want to take advantage of the XiVO Snapshot with all components preconfigured. Otherwise, you’ll need to jump over to the original tutorial and manually configure all of the XiVO components.

cd /root
wget http://incrediblepbx.com/IncrediblePBX13-XiVO.sh
chmod +x IncrediblePBX13-XiVO.sh
./IncrediblePBX13-XiVO.sh

3. Setting Up SIP and Google Voice Trunks with XiVO

There are two steps in setting up trunks to use with Incredible PBX. First, you have to sign up with the provider of your choice and obtain trunk credentials. These typically include the FQDN of the provider’s server as well as your username and password to use for access to that server. Second, you have to configure a trunk on the Incredible PBX for XiVO server so that you can make or receive calls outside of your PBX. As with the platform tutorials, we have taken the guesswork out of the trunk setup procedure for roughly a dozen respected providers around the globe. In addition, XiVO Snapshots goes a step further and actually creates the trunks for you, minus credentials, as part of the initial Incredible PBX install.

For Google Voice trunks, log into your server as root and run ./add-gvtrunk. When prompted, insert your 10-digit Google Voice number, your Google Voice email address and OAuth 2 token. The native Google Voice OAuth tutorial explains how to obtain it.

For the other providers, review the setup procedure below and then edit the preconfigured trunk for that provider by logging into the XiVO web GUI and choosing IPX → Trunk Management → SIP Protocol. Edit the setup for your provider (as shown above) and fill in your credentials and CallerID number in the General tab. Activate the trunk in the Register tab after again filling in your credentials. Save your settings when finished. No additional configuration for these providers is required when using the XiVO Snapshot.

4. Directing Incoming Calls from XiVO Trunks

Registered XiVO trunks typically include a DID number. With the exception of CallCentric, this is the number that callers would dial to reach your PBX. With CallCentric, it’s the 11-digit account number of your account, e.g. 17771234567. In the XiVO web GUI, we use IPX → Call Management → Incoming Calls to create inbound routes for every DID and trunk associated with your PBX. Two sample DIDs have been preconfigured to show you how to route calls to an extension or to an IVR. To use these, simply edit their settings and change the DID to match your trunk. Or you can create new incoming routes to send calls to dozens of other destinations on your PBX.

5. Routing Outgoing Calls from XiVO to Providers

Outgoing calls from extensions on your XiVO PBX must be routed to a trunk provider to reach call destinations outside your PBX. Outgoing call routing is managed in IPX → Call Management → Outgoing Calls. You tell XiVO which trunk provider to use in the General tab. Then you assign a Calling Digit Sequence to this provider in the Exten tab. For example, if NXXNXXXXXX were assigned to Vitelity, this would tell XiVO to send calls to Vitelity if the caller dialed a 10-digit number. XiVO has the flexibility to add and remove digits from a dialed number as part of the outbound call routing process. For example, you might want callers to dial 48NXXNXXXXXX to send calls to a Google Voice trunk where 48 spells "GV" on the phone keypad. We obviously don’t want to send the entire dial string to Google Voice so we tell XiVO to strip the first 2 digits (48) from the number before routing the call out your Google Voice trunk. We’ve included two examples in the XiVO Snapshot to get you started. Skype Connect (shown below) is an example showing how to strip digits and also add digits before sending a call on its way:

6. Setting Up Softphone & WebRTC to Connect to XiVO

If you’re a Mac user, you’re lucky (and smart). Download and install Telephone from the Mac App Store. Start up the application and choose Telephone:Preference:Accounts. Click on the + icon to add a new account. To set up your softphone, you need 3 pieces of information: the IP address of your server (Domain), and your Username and Password. In the World of XiVO, you’ll find these under IPBX → Services → Lines. Just click on the Pencil icon beside the extension to which you want to connect. Now copy or cut-and-paste your Username and Password into the Accounts dialog of the Telephone app. Click Done when you’re finished, and your new softphone will come to life and should show Available. Dial the IVR (4871) to try things out. With Telephone, you can use over two dozen soft phones simultaneously on your desktop.

For everyone else, we recommend the YateClient softphone which is free. Download it from here. Run YateClient once you’ve installed it and enter the credentials for the XiVO Line. You’ll need the IP address of your server plus your Line username and password associated with the 701 extension. On the XiVO platform, do NOT use an actual extension number for your username with XiVO. Go to IPBX Settings → Lines to decipher the appropriate username and password for the desired extension. Click OK to save your entries.

WebRTC allows you to use your Chrome or Firefox browser as a softphone. Extension 701 comes preconfigured for WebRTC access with Incredible PBX for XiVO. It shares the same password as the Line associated with extension 701, but the username is 701 rather than the username associated with the Line. You can decipher the password by accessing the XiVO Web GUI and then IPBX → Services → Users → Incredible PBX → XiVO Client Password.

To use WebRTC, you first need to accept the different SSL certificates associated with the WebRTC app. From your browser, go to the following site and click on each link to accept the certificates. Once you’ve completed this process, visit the XiVO WebRTC site. The Username is 701. The Password is the one you obtained above. The IP Address is the address of your XiVO PBX.

7. Setting Up a CellPhone Extension with XiVO

In addition to ringing your SIP extension when incoming calls arrive, XiVO can also ring your cellphone simultaneously. This obviously requires at least one outbound trunk. If that trunk provider also supports CallerID spoofing, then XiVO will pass the CallerID number of the caller rather than the DID associated with the trunk. Incredible PBX for XiVO comes preconfigured with cellphone support for extension 701. To enable it, access the XiVO Web GUI and go to IPBX → Services → Users → Incredible PBX and insert your Mobile Phone Number using the same dial string format associated with the trunk you wish to use to place the calls to your cellphone. You can answer the incoming calls on either your cellphone or the phone registered to extension 701.

8. Activating Voice Recognition for XiVO

Google has changed the licensing of their speech recognition engine about as many times as you change diapers on a newborn baby. Today’s rule restricts use to “personal and development use.” Assuming you qualify, the very first order of business is to enable speech recognition for your XiVO PBX. Once enabled, the Incredible PBX feature set grows exponentially. You’ll ultimately have access to the Voice Dialer for AsteriDex, Worldwide Weather Reports where you can say the name of a city and state or province to get a weather forecast for almost anywhere, Wolfram Alpha for a Siri-like encyclopedia for your PBX, and Lefteris Zafiris’ speech recognition software to build additional Asterisk apps limited only by your imagination. And, rumor has it, Google is about to announce new licensing terms, but we’re not there yet. To try out the Voice Dialer in today’s demo IVR, you’ll need to obtain a license key from Google. This Nerd Vittles tutorial will walk you through that process. Don’t forget to add your key to /var/lib/asterisk/agi-bin/speech-recog.agi on line 72.

9. Adding DISA Support to Your XiVO PBX

If you’re new to PBX lingo, DISA stands for Direct Inward System Access. As the name implies, it lets you make calls from outside your PBX using the call resources inside your PBX. This gives anybody with your DISA credentials the ability to make calls through your PBX on your nickel. It probably ranks up there as the most abused and one of the most loved features of the modern PBX.

There are three ways to implement DISA with Incredible PBX for XiVO. You can continue reading this section for our custom implementation with two-step authentication. There also are two native XiVO methods for implementing DISA using a PIN for security. First, you can dedicate a DID to incoming DISA calls. Or you can add a DISA option to an existing IVR. Both methods are documented in our tutorial on the PIAF Forum.

We prefer two-step authentication with DISA to make it harder for the bad guys. First, the outside phone number has to match the whitelist of numbers authorized to use your DISA service. And, second, you have to supply the DISA password for your server before you get dialtone to place an outbound call. Ultimately, of course, the monkey is on your back to create a very secure DISA password and to change it regularly. If all this sounds too scary, don’t install DISA on your PBX.

1. To get started, edit /root/disa-xivo.txt. When the editor opens the dialplan code, move the cursor down to the following line:

exten => 3472,n,GotoIf($["${CALLERID(number)}"="701"]?disago1)  ; Good guy

2. Clone the line by pressing Ctrl-K and then Ctrl-U. Add copies of the line by pressing Ctrl-U again for each phone number you’d like to whitelist so that the caller can access DISA on your server. Now edit each line and replace 701 with the 10-digit number to be whitelisted.

3. Move the cursor down to the following line and replace 12341234 with the 8-digit numeric password that callers will have to enter to access DISA on your server:

exten => 3472,n,GotoIf($["${MYCODE}" = "12341234"]?disago2:bad,1)

4. Save the dialplan changes by pressing Ctrl-X, then Y, then ENTER.

5. Now copy the dialplan code into your XiVO setup, remove any previous copies of the code, and restart Asterisk:

cd /root
sed -i '\:// BEGIN DISA:,\:// END DISA:d' /etc/asterisk/extensions_extra.d/xivo-extrafeatures.conf
cat disa-xivo.txt >> /etc/asterisk/extensions_extra.d/xivo-extrafeatures.conf
/etc/init.d/asterisk reload

6. The traditional way to access DISA is to add it as an undisclosed option in an IVR that is assigned to one of your inbound trunks (DIDs). For the demo IVR that is installed, edit the ivr-1.conf configuration file and change the "option 0″ line so that it looks like this. Then SAVE your changes.

exten => 0,1(ivrsel-0),Dial(Local/3472@default)

7. Adjust the inbound calls route of one of your DIDs to point to the demo IVR by changing the destination to Customized with the following Command:

Goto(ivr-1,s,1)

A sample is included in the XiVO Snapshot. Here’s how ours looks for the Nerd Vittles XiVO Demo IVR:


8. Now you should be able to call your DID and choose option 0 to access DISA assuming you have whitelisted the number from which you are calling. When prompted, enter the DISA password you assigned and press #. You then should be able to dial a 10-digit number to make an outside call from within your PBX.

SECURITY HINT: Whenever you implement a new IVR on your PBX, it’s always a good idea to call in from an outside number 13 TIMES and try every key from your phone to make sure there is no unanticipated hole in your setup. Be sure to also let the IVR timeout to see what result you get.

10. Test Drive Incredible PBX for XiVO

To give you a good idea of what to expect with Incredible PBX for XiVO, we’ve set up a sample IVR using voice prompts from Allison. Give it a call and try out some of the features including voice recognition. Dial 1-843-606-0555.

Nerd Vittles Demo IVR Options
1 – Call by Name (say "Delta Airlines" or "American Airlines" to try it out)
2 – MeetMe Conference
3 – Wolfram Alpha (Coming Soon!)
4 – Lenny (The Telemarketer’s Worst Nightmare)
5 – Today’s News Headlines
6 – Weather Forecast (enter a 5-digit ZIP code)
7 – Today in History (Coming Soon!)
8 – Speak to a Real Person (or maybe just Lenny if we’re out)

What To Do and Where to Go Next?

Here are a Baker’s Dozen projects to get you started exploring XiVO on your own. Just plug the keywords into the search bar at the top of Nerd Vittles to find numerous tutorials covering the topics or simply follow our links. Note that all of these components already are in place so do NOT reinstall them. Just read the previous tutorials to learn how to configure each component. Be sure to also join the PIAF Forum to keep track of the latest tips and tricks with XiVO. There’s a treasure trove of information that awaits.

XiVO and Incredible PBX Dial Code Cheat Sheets

Complete XiVO documentation is available here. But here are two cheat sheets in PDF format for XiVO Star Codes and Incredible PBX Dial Codes.

Published: Monday, October 10, 2016


Need help with Asterisk? Visit the PBX in a Flash Forum.


Special Thanks to Our Generous Sponsors


FULL DISCLOSURE: ClearlyIP, Skyetel, Vitelity, DigitalOcean, Vultr, VoIP.ms, 3CX, Sangoma, TelecomsXchange and VitalPBX have provided financial support to Nerd Vittles and our open source projects through advertising, referral revenue, and/or merchandise. As an Amazon Associate and Best Buy Affiliate, we also earn from qualifying purchases. We’ve chosen these providers not the other way around. Our decisions are based upon their corporate reputation and the quality of their offerings and pricing. Our recommendations regarding technology are reached without regard to financial compensation except in situations in which comparable products at comparable pricing are available from multiple sources. In this limited case, we support our sponsors because our sponsors support us.

BOGO Bonaza: Enjoy state-of-the-art VoIP service with a $10 credit and half-price SIP service on up to $500 of Skyetel trunking with free number porting when you fund your Skyetel account. No limits on number of simultaneous calls. Quadruple data center redundancy. $25 monthly minimum spend required. Tutorial and sign up details are here.

The lynchpin of Incredible PBX 2020 and beyond is ClearlyIP components which bring management of FreePBX modules and SIP phone integration to a level never before available with any other Asterisk distribution. And now you can configure and reconfigure your new Incredible PBX phones from the convenience of the Incredible PBX GUI.

VitalPBX is perhaps the fastest-growing PBX offering based upon Asterisk with an installed presence in more than 100 countries worldwide. VitalPBX has generously provided a customized White Label version of Incredible PBX tailored for use with all Incredible PBX and VitalPBX custom applications. Follow this link for a free test drive!
 

Special Thanks to Vitelity. Vitelity is now Voyant Communications and has halted new registrations for the time being. Our special thanks to Vitelity for their unwavering financial support over many years and to the many Nerd Vittles readers who continue to enjoy the benefits of their service offerings. We will keep everyone posted on further developments.


Some Recent Nerd Vittles Articles of Interest…

Integrating SIP URIs into XiVO for Free Worldwide Calling

It’s been a while since we’ve explored SIP URIs and all of the advantages that SIP URI calling brings to your PBX. Number one on that list is FREE calling to and from anyone on the planet so long as both of you have an Internet connection with a SIP phone or a VoIP server such as Incredible PBX for XiVO. SIP URIs are the fundamental building blocks for VoIP technology. Consider this. If everyone in the world had a SIP address instead of a phone number, every call to every person in the world via the Internet would be free. That pretty much sums up why SIP URIs are important. The syntax for SIP URIs depends upon your platform. With Asterisk® they look like this: SIP/somebody@FQDN.yourdomain.com. On SIP phones, SIP URIs look like this: sip:somenameORnumber@FQDN.yourdomain.com. Others use somenameORnumber@FQDN.yourdomain.com. Assuming you have a reliable Internet connection, once you have “dialed” a SIP URI, the destination SIP device will ring just as if the called party had a POTS phone. Asterisk® processes SIP URIs in much the same way as other calls originating from trunks and, as noted, SIP URI calls of any duration to anywhere are free. Today we’ll show you how to set things up on your XiVO PBX without exposing any ports to the Internet in a way that would jeopardize your server’s security.

Placing Outbound SIP URI Calls with a SIP Softphone

There are two ways to place outbound SIP calls. You can use a SIP phone or softphone that supports SIP URI calling to dial SIP URIs directly. If you have a Mac, the best free softphone for SIP URI calling is Telephone which you can download from the App Store. On other platforms as well as Macs, Zoiper is a great no-cost option. Both of these softphones support the sip:someone@FQDN.yourdomain.com syntax. An excellent way to test this is to call our friend Lenny and strike up a conversation: sip:2233435945@sip2sip.info.

Configuring Outbound SIP URIs with XiVO

The major drawback of SIP URIs is they’re difficult both to remember and to dial. It’s much simpler to dial a short number using a traditional phone. And, with Incredible PBX for XiVO, it’s easy to create custom extensions that can be accessed simply by dialing a few digits from any phone connected to your server. Here’s how to set it up in the XiVO GUI.

1. Create a User and assign the Customized Protocol and an Extension Number to that user:

TIP: If you’d prefer to use a different series of numbers for speeddials so you don’t get them mixed up with your standard extension numbers, just add a new range of numbers for XiVO: IPX Configuration → Contexts → Default → Users. Then choose one of them above.

2. Access the new Line that was generated for the new User:

3. Replace the Interface entry for the Line with the desired SIP URI for your speeddial, e.g. SIP/2233435945@sip2sip.info. Then SAVE your new Line settings.

4. Dial 750 from an Extension on your XiVO PBX to try out Lenny using your new SIP URI.

A Better Way to Create SpeedDials with XiVO

We’ve gone through the XiVO GUI approach to demonstrate that it is indeed possible to create speeddials for SIP URIs. However, there is a better way unless you’re one of the naysayers that believes everything is better in a GUI. If you have dozens or even hundreds of speeddials to create, you may change your mind. The GUI approach could obviously become tedious. Instead, with one line of Asterisk dialplan code, you can create as many speeddials as you like keeping in mind that it’s your responsibility to assure that SIP URI extension numbers don’t conflict with existing extensions on your server. Insert a new section of code at the bottom of /etc/asterisk/extensions_extra.d/xivo-extrafeatures.conf and reload your dialplan: asterisk -rx "dialplan reload".

You can also insert this code from within the XiVO GUI itself: IPX Configuration → Configuration Files. Edit xivo-extrafeatures.conf and insert the following code snippet at the end of the file and Save your entries. The dialplan will be reloaded automatically.

Some of our favorites include the following:

;# // BEGIN SpeedDials
exten = 882,1,Dial(SIP/200901@login.zipdx.com)     ; V-U-C on Fridays at noon EST
exten = 8378,1,Dial(SIP/thetestcall@getonsip.com)  ; T-E-S-T everything VoIP
exten = 53669,1,Dial(SIP/2233435945@sip2sip.info)  ; L-E-N-N-Y
exten = 68742,1,Dial(SIP/0289304@zero-nine.biz)    ; M-U-S-I-C
exten = 3733411,1,Dial(SIP/411@ideasip.com)        ; F-R-E-E-4-1-1 Directory Asst
;# // END SpeedDials

Creating a SIP URI Address for Your XiVO PBX

Free calls to other folks is only half of the story, of course. You’re also going to want a way for people to call you without incurring charges for the calls. There are many SIP URI approaches for inbound calls. Most of them are not safe with Asterisk. Let me say that again. Most of them are not safe with Asterisk. The reason is because most of them force you to open SIP access to your server for everybody in the world. Unfortunately, that means they can not only call you, but they can also attempt to use your extensions and trunks to place very expensive calls to others. Don’t even think about opening the SIP floodgate by exposing port 5060 unless Bill Gates sends you a check every week. You’ve been warned!

Setting Up an iNum SIP URI Trunk with XiVO

The better and safer way to add SIP URI connectivity to your XiVO server is to first obtain a freely available iNum DID from one of the many providers that support iNum and then use that provider as a SIP intermediary. All SIP calls pass only over your registered trunk with your provider. Our favorites in no particular order are VoIP.ms, LocalPhone and CallCentric. There are many, many others. In order to obtain a free iNum DID, you will need an account with one of these providers. All require some sort of minimal deposit, but you usually can get back unused funds if you decide to close your account down the road. Our XiVO tutorials for VoIP.ms, LocalPhone, and CallCentric will walk you through creating your SIP account and registering it with your XiVO server. Then verify that your SIP account is registered:

asterisk -rx "sip show registry"

Configuring an iNum DID with VoIP.ms

Our trunk tutorials for LocalPhone and CallCentric will walk you through their setup procedures for iNUM DIDs. VoIP.ms provides more flexibility in redirecting trunks so let us quickly walk you through their procedure. Log in to your VoIP.ms account and then order your free iNum DID at this link. Your iNum DID then will appear in your DID Listing here. Write down your iNum DID which you’ll need in a minute to configure the XiVO side of things. Then click on the Edit DID icon beside your iNum DID and assign the DID to your registered Main Account or the SubAccount that you’ve already registered with XiVO. Be sure to use the same DID POP that you used when you registered your VoIP.ms account with XiVO. Don’t enable VoiceMail and set the ring time to 60 seconds just to keep things simple.

Configuring XiVO to Support Your iNum DID

Now for the XiVO part. Using a browser, log into the XiVO GUI. Navigate to IPX Configuration → Contexts → Default → Users. For VoIP.ms and LocalPhone, add a new Number Range starting and ending with your iNum DID. Then click Save. For CallCentric, do the same thing but substitute your CallCentric username which will be an 11-digit number starting with 1777.

Repeat the above in IPX Configuration → Contexts → from-extern (Incalls) → Users.

For CallCentric only, also click on the Incoming Calls tab and add a new Number Range. For the Starting value, use your 11-digit LocalPhone username. For the DID length, set it to 11. You do NOT need to include a Number Range ending value. Click Save when you’re finished.

For VoIP.ms, navigate to IPX Settings → Users. Then Add a new User for your iNum DID. In the General tab, name the User VoIP.ms iNum. In the Lines tab, provide your actual iNum DID number. This must be the same number you added to the Number Range in the Default context above. In the No Answer tab, set the Fail option to the Destination of your choice, e.g. an extension, a ring group, an IVR, etc. Then click Save.

For LocalPhone, navigate to Call Management → Incoming Calls and Add a new Inbound Route for your DID specifying the destination for the calls using your iNum DID number:

For CallCentric, navigate to Call Management → Incoming Calls and Add a new Inbound Route using your 11-digit CallCentric username as the DID. Then specify the destination for the calls and click Save.

Calling Your XiVO PBX Using Your iNum SIP URI

To receive SIP URI calls safely on your iNum DID, your SIP URI is your iNum DID number followed by @sip.inum.net, e.g. 883510012345678@sip.inum.net. Neither the identity of your XiVO PBX or your SIP service provider is ever exposed. Enjoy your safe, free calling!

Originally published: Monday, September 26, 2016


Need help with Asterisk? Come join the PBX in a Flash Forum.


Special Thanks to Our Generous Sponsors


FULL DISCLOSURE: ClearlyIP, Skyetel, Vitelity, DigitalOcean, Vultr, VoIP.ms, 3CX, Sangoma, TelecomsXchange and VitalPBX have provided financial support to Nerd Vittles and our open source projects through advertising, referral revenue, and/or merchandise. As an Amazon Associate and Best Buy Affiliate, we also earn from qualifying purchases. We’ve chosen these providers not the other way around. Our decisions are based upon their corporate reputation and the quality of their offerings and pricing. Our recommendations regarding technology are reached without regard to financial compensation except in situations in which comparable products at comparable pricing are available from multiple sources. In this limited case, we support our sponsors because our sponsors support us.

BOGO Bonaza: Enjoy state-of-the-art VoIP service with a $10 credit and half-price SIP service on up to $500 of Skyetel trunking with free number porting when you fund your Skyetel account. No limits on number of simultaneous calls. Quadruple data center redundancy. $25 monthly minimum spend required. Tutorial and sign up details are here.

The lynchpin of Incredible PBX 2020 and beyond is ClearlyIP components which bring management of FreePBX modules and SIP phone integration to a level never before available with any other Asterisk distribution. And now you can configure and reconfigure your new Incredible PBX phones from the convenience of the Incredible PBX GUI.

VitalPBX is perhaps the fastest-growing PBX offering based upon Asterisk with an installed presence in more than 100 countries worldwide. VitalPBX has generously provided a customized White Label version of Incredible PBX tailored for use with all Incredible PBX and VitalPBX custom applications. Follow this link for a free test drive!
 

Special Thanks to Vitelity. Vitelity is now Voyant Communications and has halted new registrations for the time being. Our special thanks to Vitelity for their unwavering financial support over many years and to the many Nerd Vittles readers who continue to enjoy the benefits of their service offerings. We will keep everyone posted on further developments.


Some Recent Nerd Vittles Articles of Interest…

2016, The Year of VoIP Choice: Redundancy and Multi-Tenant with Wazo


As we celebrate Labor Day, it seemed appropriate to document why Wazo separates the men from the boys so your phones don’t end up as boat anchors buried in the sand. Today our focus is "High Availability (HA)" and "Multi-Tenant (MT)", two very expensive options for many PBXs including some that loosely tout their platforms as free.

In the PBX context, HA means that, when your server fails, there’s another one waiting in the wings to automatically take over. Much of this technology is based upon open source tools, but Sangoma sells a pair of limited term licenses as a FreePBX® add-on for a cool $3,000 not including hardware AND annual maintenance fees. With Wazo, it’s FREE! You can pair two Raspberry Pi’s or two Cloud servers, or you can mix-and-match with any combination of servers you choose. Here’s how we did it in 3 minutes flat:


Multi-tenant has been discussed for the FreePBX platform for the better part of a decade. As best we can tell, it’s still a pipe dream. Virtual machines running separate servers are the suggested solution even though this requires managing multiple Asterisk platforms forever. With Wazo’s FREE Entities module, MT is a cake walk. We’ll walk you through the 5-minute setup process thanks to the tips provided by Amy Grant on the PIAF Forum.

Deploying Wazo HA Servers with NeoRouter

Here’s the HA setup drill. First, you build two identical Wazo platforms running the same version of Incredible PBX for Wazo. Then you set the first server up as the Master and the second one as the Slave. As we said, these servers don’t need to be on the same hardware platform. And they need not be colocated although they have to share the same private LAN. We’ll handle that little detail by taking advantage of the NeoRouter client software that’s already installed as part of every Incredible PBX for Wazo build.

Unless both of your servers reside on the same local area network, you will need to deploy a NeoRouter server somewhere, but NOT on your Wazo Master since the NeoRouter server itself would become a single point of failure should it die along with your primary server. The Slave server would be a great choice. We covered the NeoRouter Server setup a long time ago in this tutorial, but don’t use the vintage install script. Instead you’ll need to deploy a current version of the Free NeoRouter Server that matches your server platform now that we support operating systems other than CentOS. Incidentally, all of the supported Cloud platforms that we’ve documented for Wazo also support NeoRouter.

We’ve made NeoRouter Server setup easy with this script which works with CentOS/SL, Ubuntu, Debian, and Raspbian. The actual setup steps covered in our original tutorial still are the same.

cd /root
wget http://incrediblepbx.com/install-neorouter-server
chmod +x install-neorouter-server
./install-neorouter-server

After you have your Free NeoRouter Server in place, the next step is to run nrclientcmd on each Wazo server and login to your NeoRouter Server with your credentials. The NeoRouter Server will assign a private IP address to each machine on the NeoRouter VPN. The addresses will be in the range 10.0.0.1 to 10.0.0.255. We’ll use these assigned addresses when setting up the Master and Slave Wazo HA servers.

High Availability Prerequisites with Wazo

In the Incredible PBX for Wazo context, the prerequisites list for your two HA servers is a short one. (1) You need two functioning Incredible PBX for Wazo machines on the same local area network. (2) Both the Master and Slave must be running the same version of Wazo. (3) All trunk registration timeouts (expiry) must be less than 300 seconds. (4) The Slave server must have no phone provisioning plugins installed.

For those using Google Voice trunks with OAuth in conjunction with Incredible PBX for Wazo, keep in mind that this is NOT an integral component of Wazo so it technically is not supported. However, you can easily make it work by configuring any desired Google Voice trunks on BOTH the Master and Slave machines using add-gvtrunk before enabling High Availability. Then the Google Voice trunks will continue to work even after a failover to Slave.

High Availability Limitations with Wazo

When the Master node fails, some features are not available on the Slave:

  • Call history / call records are not recorded.
  • Voicemail messages saved on the Master node are not available.
  • Custom voicemail greetings recorded on the Master node are not available.
  • Phone provisioning is disabled, i.e. a phone will always keep the same configuration, even after restarting it.
  • Phone remote directory is not accessible because the provisioned IP address points to the Master.

Configuring Your Servers for High Availability

Like most Wazo tasks, setting up High Availability on your Master and Slave servers is a 5-minute process. Begin by configuring HA in the Web interface: Configuration ‣ Management ‣ High Availability. (1) Configure the first server as Master with the Remote Address of the Slave. (2) Login to the Linux CLI of Master as root and restart Wazo: xivo-service restart. (3) For the second machine, configure the server as Slave with the Remote Address of the Master.

Next, return to the Linux CLI of Master while still logged in as root. (1) Set up file synchronization by running this script: xivo-sync -i. (2) Start configuration synchronization by running: xivo-master-slave-db-replication 192.168.1.2 using the actual IP address of your Slave. (3) Finally, synchronize the two servers by running xivo-sync on Master. Done! Isn’t it nice saving $3,000 for 5 minutes work using open source software? 🙂

If you love the nitty gritty details, you can read up on Wazo HA in their excellent documentation.

Here’s what pbxstatus will show on Master and Slave while both servers are operational:

And here’s what happens when you halt Master. Within a minute or two, your designated Slave server will come to life:

Choosing Compatible Phones for High Availability

That’s only half the story, of course. Now that you have HA up and running, the remaining trick is that you want your phones to continue to work when things switch over to Slave. To accomplish this, you’ll need to use SIP phones that are compatible with HA technology. Some are, and many are not. Wazo has made it easy for you by publishing a compatibility list. Their documentation includes Officially Supported Devices as well as Community Supported Devices. HINT: Snom, Yealink, and Aastra 6700i and 9000i series phones are your safest bets.1 Here’s what a SIP extension setup would look like on Yealink’s popular T46G:

Deploying Multi-Tenant Technology with Wazo

If you’re new to MT technology, the idea here is to provide separate extensions and trunks for use by different departments within an organization. The reasons should be obvious. These departments have separate budgets and separate clientele, and you probably don’t want the public calling a central number in order to reach everyone in an organization. And the organization wants to identify costs and log calls associated with its various departments.

Wazo handles MT using Entities. When you set up Incredible PBX for Wazo, it automatically created a single Entity named Incredible PBX. You can create additional ones and name them anything you like in the Wazo Web interface: Configuration ‣ Management ‣ Entities.

Next, create Contexts to support your new Entity. Mimic the existing contexts in IPX ‣ IPX Configuration ‣ Contexts and provide unique names for each of them. Be sure you associate each of the new contexts with the new entity you created. Then set up users, lines, trunks, and call routing for the new entity in the same way you did it for the original IncrediblePBX entity. Take a look at Amy Grant’s setup with Google Voice on the PIAF Forum for additional tips. Simple and it’s FREE!

Originally published: Monday, September 5, 2016  Updated: Saturday, January 28, 2017


Need help with Asterisk? Visit the PBX in a Flash Forum.


Special Thanks to Our Generous Sponsors


FULL DISCLOSURE: ClearlyIP, Skyetel, Vitelity, DigitalOcean, Vultr, VoIP.ms, 3CX, Sangoma, TelecomsXchange and VitalPBX have provided financial support to Nerd Vittles and our open source projects through advertising, referral revenue, and/or merchandise. As an Amazon Associate and Best Buy Affiliate, we also earn from qualifying purchases. We’ve chosen these providers not the other way around. Our decisions are based upon their corporate reputation and the quality of their offerings and pricing. Our recommendations regarding technology are reached without regard to financial compensation except in situations in which comparable products at comparable pricing are available from multiple sources. In this limited case, we support our sponsors because our sponsors support us.

BOGO Bonaza: Enjoy state-of-the-art VoIP service with a $10 credit and half-price SIP service on up to $500 of Skyetel trunking with free number porting when you fund your Skyetel account. No limits on number of simultaneous calls. Quadruple data center redundancy. $25 monthly minimum spend required. Tutorial and sign up details are here.

The lynchpin of Incredible PBX 2020 and beyond is ClearlyIP components which bring management of FreePBX modules and SIP phone integration to a level never before available with any other Asterisk distribution. And now you can configure and reconfigure your new Incredible PBX phones from the convenience of the Incredible PBX GUI.

VitalPBX is perhaps the fastest-growing PBX offering based upon Asterisk with an installed presence in more than 100 countries worldwide. VitalPBX has generously provided a customized White Label version of Incredible PBX tailored for use with all Incredible PBX and VitalPBX custom applications. Follow this link for a free test drive!
 

Special Thanks to Vitelity. Vitelity is now Voyant Communications and has halted new registrations for the time being. Our special thanks to Vitelity for their unwavering financial support over many years and to the many Nerd Vittles readers who continue to enjoy the benefits of their service offerings. We will keep everyone posted on further developments.


Some Recent Nerd Vittles Articles of Interest…

  1. HA failover even works great using $29 UTP-E62 if you can find one. []

Smartphone Trifecta: 2016’s Very Best Cellphones with Two Awesome Surprises


Every year we try to check out the latest and greatest smartphones with emphasis on finding those that are the best fit with Asterisk®. So this year is really special because our three favorite new phones all come with a couple of surprises. First, monthly cellular service can be FREE on all of them! Second, all of the phone numbers associated with the three phones can be used as free SIP trunks with Incredible PBX™ or your favorite Asterisk server.

If you’ve been following Nerd Vittles since early February of this year, then you already know that RingPlus, a Sprint MVNO, is the best bargain on the planet. Over the past six weeks of weekly specials from RingPlus, we’ve managed to update all of our free RingPlus accounts to either unlimited calling, texting, and 2GB of monthly data or 3,000 minutes of calling, 3,000 text messages, and 3GB of data. For anybody (except teenagers) that’s sufficient monthly capacity to do almost anything you’d like to do with a smartphone except stream movies all day.

We initially showed how to take dirt cheap Boost Mobile and Virgin Mobile prepaid phones and repurpose them for use with RingPlus. Sprint apparently read our article as well because that loophole is going away on April 17. However, you still have time to find one and activate it on RingPlus following our previous tutorial. The only catch is that, if you ever deactivate it, you will lose the ability to reactivate it without first using it with Boost or Virgin for a full year. The landfills will be so happy with all these cellphone bricks because of Sprint’s latest attempt to shoot itself in the foot. We think there also are some legal issues that the FCC needs to address. These phones are sold as "contract-free" when, in fact, there is a very specific and undisclosed contractual requirement. If you don’t keep service with the provider for a year, your phone becomes a brick. In antitrust terminology, it’s called tying. And some would argue that it also constitutes false advertising. We plan to file a complaint and would urge all of our readers to do the same. Here’s a link.

But enough about the Sprint mentality. It really is legendary, and it’s been the same for 20+ years. We doubt it will ever change unless the entire Sprint management team is replaced. So where do we go from here? Well we decided to upgrade most of our phones to the latest and greatest postpaid phones available, and we wanted to try out our 2016 favorites (pictured above). Here’s some really great news. Samsung’s new Galaxy S7 and S7 Edge as well as Apple’s new iPhone SE work swimmingly with RingPlus as long as you purchase the Sprint-branded models at full retail price from either Best Buy or an Apple Store. Sprint and Target will refuse to sell you one unless you activate it with Sprint in the store. You also can’t buy the Sprint-branded iPhones on line from Apple without activating Sprint service, but that restriction doesn’t apply if you visit an Apple Store.

It took a week to chase down a Galaxy S7 and almost two weeks to find a Galaxy S7 Edge at a Best Buy store. Don’t believe the store inventory on their web site. Neither of the phones we purchased was shown as available at the locations where we bought them. So you’ll need to call or visit a store at least while the new Galaxy phones remain a scarce commodity. As for the iPhone SE, it went on sale at Apple Stores this morning at 10 a.m. At the Charleston store, I was third in line and both of the people in front of me also were buying the Sprint-branded iPhone SE to use with RingPlus. The Apple sales folks said they had never before seen a run on Sprint phones. Guess why?

Here’s the drill. Purchase your favorite phone after you read our mini-reviews below. Don’t open the box just yet. Instead, look on the bottom of the box and decipher the IMEI/MEID of your phone. Immediately run that number through the RingPlus Device Checker to be sure it will work on the Sprint network using a RingPlus account. There shouldn’t be a problem with any of these three phones, and all of them come with a Sprint SIM card so you won’t have to worry about obtaining one from RingPlus. Some have reported that the Best Buy phones were locked. We can only surmise that the customer delayed activating the phone with RingPlus which gave Sprint time to block the serial number which Best Buy reported. If this happens to you, we are told that Sprint will unlock the phone once you provide proof that it was purchased at full retail price. If all else fails, Best Buy has a 14-day return policy. Remember, anything is possible when dealing with Sprint.

Once your phone passes the compatibility check, sign up for a new free RingPlus plan. These plans change weekly and sometimes are only offered for a couple of hours so you may want to hold off on signing up until a deal comes along that meets your requirements. Update: There are a number of excellent promotions at the moment which run through April 5. Our previous article explained in detail how these free plans work. Switching plans typically is limited to those that buy into the annual Member+ program. You can read all about the plans and programs on the RingPlus Community Forum. If you already have a RingPlus account with a registered phone, you can swap out the phone with one of these three new ones for a one-time charge of $1.99. All you’ll need is your new MEID and ICC ID numbers. The entire phone swap only takes a minute or two. Once it’s complete, turn on your phone. The rest is automagic!

Comparing the Phones. We don’t often glow about reviews, but the TechRadar review of the Galaxy S7 Edge is a must-read. There has never been a better phone than this one. And, only an inch behind it is the Galaxy S7 which bears an uncanny resemblance to the new iPhone SE except for its 50% larger screen size. We actually are more comfortable carrying the Galaxy S7 with its all-metal construction. For whatever reason, the S7 Edge always feels like its about a millisecond away from slipping out of your hand. You will most definitely want a case for the S7 Edge.

In terms of performance and camera quality, the new Galaxy phones are in a league of their own. Here’s a photo hurriedly snapped through a restaurant window with our Galaxy S7 earlier this week. If you’ve ever tried to take sunset pictures with an iPhone or cheapo Android device, you’ll appreciate what a challenge these shots can be. We’ll annotate this article with an iPhone SE photo if and when the opportunity presents itself. The other good news with the new Galaxy phones is they are at least waterproof for a few minutes. If you live near the water, that will come as a welcome addition as well. Finally, Samsung has closed the gap with Apple’s iPhones on backing up and restoring everything on your phone. For years, this has been Apple’s best feature in our humble opinion. Now Samsung goes Apple one better. If you happen to have two Samsung devices that you want clone, simply choose Backup and Reset from Settings. Then Open Smart Switch on both devices and hold the two phones back to back. It’s that easy. Or you can opt for the more traditional restore method that works precisely as it does with an iPhone using the Samsung Cloud. For some additional tips and tricks, visit the PCMag.com site and watch the video "Exploring the Galaxy S7″ which includes a number of comparisons with Apple iPhone devices including the iPhone SE. Enjoy!

We previously covered the SIP setup for RingPlus devices using their WiFi Fluidcall feature. It provides a free SIP trunk for Asterisk at a cost of zero dollars. For the complete tutorial, take a look at the original article. Enjoy!

Originally published: Thursday, March 31, 2016


Need help with Asterisk? Visit the PBX in a Flash Forum.


Special Thanks to Our Generous Sponsors


FULL DISCLOSURE: ClearlyIP, Skyetel, Vitelity, DigitalOcean, Vultr, VoIP.ms, 3CX, Sangoma, TelecomsXchange and VitalPBX have provided financial support to Nerd Vittles and our open source projects through advertising, referral revenue, and/or merchandise. As an Amazon Associate and Best Buy Affiliate, we also earn from qualifying purchases. We’ve chosen these providers not the other way around. Our decisions are based upon their corporate reputation and the quality of their offerings and pricing. Our recommendations regarding technology are reached without regard to financial compensation except in situations in which comparable products at comparable pricing are available from multiple sources. In this limited case, we support our sponsors because our sponsors support us.

BOGO Bonaza: Enjoy state-of-the-art VoIP service with a $10 credit and half-price SIP service on up to $500 of Skyetel trunking with free number porting when you fund your Skyetel account. No limits on number of simultaneous calls. Quadruple data center redundancy. $25 monthly minimum spend required. Tutorial and sign up details are here.

The lynchpin of Incredible PBX 2020 and beyond is ClearlyIP components which bring management of FreePBX modules and SIP phone integration to a level never before available with any other Asterisk distribution. And now you can configure and reconfigure your new Incredible PBX phones from the convenience of the Incredible PBX GUI.

VitalPBX is perhaps the fastest-growing PBX offering based upon Asterisk with an installed presence in more than 100 countries worldwide. VitalPBX has generously provided a customized White Label version of Incredible PBX tailored for use with all Incredible PBX and VitalPBX custom applications. Follow this link for a free test drive!
 

Special Thanks to Vitelity. Vitelity is now Voyant Communications and has halted new registrations for the time being. Our special thanks to Vitelity for their unwavering financial support over many years and to the many Nerd Vittles readers who continue to enjoy the benefits of their service offerings. We will keep everyone posted on further developments.


Some Recent Nerd Vittles Articles of Interest…

I Have A Dream: Free Cellular Service with Integrated Remote SIP Connectivity

As part of our Mobile Internet adventure this year, we’ve been scouring the countryside with two requirements in mind. First, we wanted a smartphone on which we could activate some type of free cellular service for making calls and sending text messages. Second, we wanted to integrate remote SIP connectivity using the same provider and phone number so that we could make and receive calls transparently using any SIP phone or Asterisk® server anywhere in the world. Sounds like a tall order, you say? Well, if you’ve enjoyed your Cloud@Cost Sandbox, you’re gonna love RingPlus!

Yes, you’ll have to buy a compatible cellphone, but there are thousands to choose from. And, yes, you’ll need Sprint service in your neighborhood. Then you’ll have to cough up $10 to activate your cellular account. RingPlus offers dozens of plans.1 We recommend the Michelangelo plan which best meets what we’re trying to accomplish today, but the choice is all yours.2 With the Michelangelo plan, you can make and receive 1,000 minutes of free calls a month to anywhere in the U.S. (calls to Canada are 3¢ a minute), you can send and receive 1,000 free text messages a month, and you can use 500MB of free data service every month. You also can use your same account credentials with any SIP phone, softphone, or Asterisk server anywhere in the world to make and receive phone calls transparently using the same phone number as your smartphone. In other words, you can travel anywhere and make and receive phone calls just as if you were sitting in Atlanta, Georgia dialing from your smartphone. The SIP calls are deducted from your free minutes. No cellular service required at all. Meet RingPlus!


So what’s the catch? How does RingPlus make money? Well, of course, they would prefer that you sign up for a plan with monthly fees. For those on the free plans, the only difference you will notice is an occasional ad which plays instead of a ring tone when you place outbound calls. This only occurs until the other party answers the call, and it can be all but eliminated by choosing a music selection in the RingPlus Radio feature in your RingPlus Dashboard.

Who are the ones most likely to use something like this? Well, for openers, all of your kids unless you like springing for a $500 phone and spending $40+ dollars a month for cellular service for each of them. One of the other real beauties of RingPlus is you can set up a whitelist of numbers that can be called from the phone. Blacklists are supported as well. It’s perfect for kids just getting started with a cellphone. A second potential user group would be those who travel outside the United States and prefer not to pay exorbitant roaming rates for calls. Using a SIP phone connected to your RingPlus account, all of the international calls suddenly are free. And the calls are delivered with the same CallerID number as calls placed from your actual smartphone. In fact, your smartphone doesn’t have to be in service at all. A third and perhaps most important use for us was to serve as a failover trunk on one or more Asterisk servers. When all else fails, you can route outbound calls to your RingPlus SIP trunk for free calling using your RingPlus account. Doesn’t get any better than that.

Official RingPlus WARNING: Starting April 17, 2016, per our carrier partner Sprint, Members and potential Members will no longer be able to activate prepaid devices which are not eligible under Sprint’s FED policies [Requires activation of prepaid phone on original Sprint MVNO network for at least one year!]. Such prepaid devices will no longer pass FED until actual eligibility date is met.

There are probably numerous ways to put all these pieces in place so that things function just as we’ve described. Today we’ll share with you the solution that actually worked for us. You can take it from there and avoid the thousands of horror stories about incompatible smartphones. Be advised that acquiring used cellphones or even incompatible cellphones is a very dangerous and expensive business. If you buy one that happens to be stolen, or that has a balance due on the account, or that is incompatible with RingPlus, then you’ve bought a tiny boat anchor and not much else. So, our best advice is buy one from the provider. That’s the one and only RingPlus, and the smartphones start at just under $100. Many Sprint post-paid phones also work, such as the new iPhone SE (Sprint Model) from any Apple Store.

If store employees will let you, find the Sprint postpaid phone that you like and look on the bottom of the box. There you will find the decimal value of the MEID. Log into http://nerd.bz/nvringplus and plug in the MEID to see if it is RingPlus compatible. If it passes, buy it. If it flunks, try another one. Whatever you do, DON’T BUY A PHONE IN AN OPENED BOX, AND DON’T OPEN THE BOX YET! Make certain there is a return policy in case things don’t work out as expected!

Funny story. The Radio Shack employees at our local store were very savvy and refused to let me look at the MEID claiming it was a security issue. Fair enough. Of course, they were also curious why I wanted a phone without letting them configure it. Once I told them the deal, they all wanted one, too. They asked for the link to the MEID verification site and said they’d do it for me. Once it worked, excitement broke out in the room with all the staff reading an early copy of this article. While Radio Shack typically charges a $35 restocking fee on cell phones, that fee is waived if you return the phone in an unopened box. So the only thing you’re wasting if they insist that you purchase the phone is a little bit of your time and a lot of Radio Shack employee time if, in fact, the MEID flunks the verification test.

Configuring Your Phone for RingPlus Service

Now sign up for a RingPlus free plan using the MEID and ICC ID you previously verified. Michelangelo is probably the best bet if you missed our Twitter tip this past weekend. Deposit $10 in your new account, and activate it. Log into your RingPlus Dashboard, click on your phone in the upper right frame, and choose Manage Device. Write down your MSID, your phone number, and MSL. Once your account is active, then and only then unbox and turn on your phone. Go through the minimal setup steps by choosing your Language and choosing an available WiFi network. During this setup, RingPlus should push a PRL update to your new phone, and it will reboot. Check in Settings -> General -> About Phone -> Status and see if you have a phone number. If so, you’re good to go. If not, open the Phone Dialer application and dial ##72786# which should force another PRL update to your phone with another reboot. When it finishes, check again for a phone number and place an outbound call.

Using a browser on your desktop computer, go back into the RingPlus Dashboard and sign in. Your phone device should show Active in the upper right corner of the screen. Click there and you’ll get a display like this:

While still in the Device Settings Menu, click on the WiFi FluidCall option to decipher your SIP credentials. You’ll need these to set up your SIP phone or a SIP trunk on your Asterisk server. Your username is your 10-digit phone number, the domain name is sip.ringplus.net, and the password is a system-generated entry which you can recreate whenever you like. That’s probably a very good idea whenever you use public WiFi services to make calls with your SIP phone or a softphone.

By the way, this isn’t some kludgy SIP-GSM gateway where the calls actually are routed out through your cellphone device. The RingPlus SIP gateway connects your SIP device directly to the Internet and simply uses your existing RingPlus CallerID to identify the calls. In short, you get the best of both worlds: a dirt cheap or free cellphone service plus a dirt cheap or free SIP trunk for use anywhere in the world.

Configuring a RingPlus SIP Trunk with Asterisk

If you’d like to set up your RingPlus number as a failover trunk on your Asterisk server, here is the setup that worked for us with Incredible PBX using your assigned 10-digit phone number for your username and fromuser settings and your assigned password for your secret. If you include a registration string and configure an inbound route using your RingPlus DID, then inbound calling will work as well. If you skip the registration step, then you can use the same RingPlus trunk on multiple Asterisk servers for emergency outbound calling. No firewall adjustments should be necessary.

There are all sorts of other magic tricks you can implement using the RingPlus API, but you probably won’t need any of the features in light of the robust SIP connectivity RingPlus provides to an existing Asterisk server where the feature set is virtually unlimited. Be advised that you must make a call out at least once every 60 days to keep your account active. The simple way to do this is to set up a monthly reminder using your RingPlus trunk. Schedule the reminder to call out once every month using Telephone Reminders in Incredible PBX.

RingPlus Gotcha Checklist

Free service wouldn’t be free without a few land mines. So here’s a checklist to keep things running smoothly without any problems down the road. First, link your account to one of the social media options (Twitter, Facebook, or LinkedIn) when you sign up for service. You’ll find the link on your Dashboard under the Your Social Networks icon. Second, make at least one outbound call a month on every line you activate. As noted, this can be accomplished automatically using the Telephone Reminders application in Incredible PBX. Third, keep a valid credit card on file in your account at all times. Fourth, keep a positive balance in your account for each phone that you activate to avoid automatic replenishment at the original rate when you signed up for your plan. Fifth, be mindful of the Domino Effect. With some plans, if you allow a related plan to end (for example, Queen of Hearts when you also have an Ace of Hearts plan), then your better plan will be demoted in its feature set. Enjoy the Free Ride!

Originally published: Monday, February 8, 2016


Need help with Asterisk? Visit the PBX in a Flash Forum.


Special Thanks to Our Generous Sponsors


FULL DISCLOSURE: ClearlyIP, Skyetel, Vitelity, DigitalOcean, Vultr, VoIP.ms, 3CX, Sangoma, TelecomsXchange and VitalPBX have provided financial support to Nerd Vittles and our open source projects through advertising, referral revenue, and/or merchandise. As an Amazon Associate and Best Buy Affiliate, we also earn from qualifying purchases. We’ve chosen these providers not the other way around. Our decisions are based upon their corporate reputation and the quality of their offerings and pricing. Our recommendations regarding technology are reached without regard to financial compensation except in situations in which comparable products at comparable pricing are available from multiple sources. In this limited case, we support our sponsors because our sponsors support us.

BOGO Bonaza: Enjoy state-of-the-art VoIP service with a $10 credit and half-price SIP service on up to $500 of Skyetel trunking with free number porting when you fund your Skyetel account. No limits on number of simultaneous calls. Quadruple data center redundancy. $25 monthly minimum spend required. Tutorial and sign up details are here.

The lynchpin of Incredible PBX 2020 and beyond is ClearlyIP components which bring management of FreePBX modules and SIP phone integration to a level never before available with any other Asterisk distribution. And now you can configure and reconfigure your new Incredible PBX phones from the convenience of the Incredible PBX GUI.

VitalPBX is perhaps the fastest-growing PBX offering based upon Asterisk with an installed presence in more than 100 countries worldwide. VitalPBX has generously provided a customized White Label version of Incredible PBX tailored for use with all Incredible PBX and VitalPBX custom applications. Follow this link for a free test drive!
 

Special Thanks to Vitelity. Vitelity is now Voyant Communications and has halted new registrations for the time being. Our special thanks to Vitelity for their unwavering financial support over many years and to the many Nerd Vittles readers who continue to enjoy the benefits of their service offerings. We will keep everyone posted on further developments.


Some Recent Nerd Vittles Articles of Interest…

  1. Be advised that future upgrades of these "free" plans may go away after February 15 unless you join the Member+ program, the cost of which changes almost weekly. This will not affect those that already are participating in the program according to RingPlus. []
  2. In case you’re curious, a plan equivalent to the free Michelangelo plan at RingPlus would run you $41.00 per month at Ting. Ouch! []