Home » Posts tagged 'Telephony'

Tag Archives: Telephony

The Most Versatile VoIP Provider: FREE PORTING

2023 Mobile Telephony: Fresh, New Ways to Skin a Cat

blank

We’ve covered many interesting mobile telephony solutions over the years including our most recent experience with Visible. But, as has been true with the Bell Sisters for decades, Verizon has continued to move the goal posts with Visible. The bottom line is the cost of Visible service is now virtually identical to the cost of Verizon. So today we’re putting on our creativity hat to consider some other options.

For those in the United States that pay a monthly fee to Comcast for Internet service, we’ve got some terrific news. As you probably know, Xfinity WiFi offers millions of free WiFi hotspots to all Comcast customers. You’d be hard pressed to find a metropolitan area or residential community where an Xfinity WiFi hotspot is not available. For mobile service, what you really need in these areas is a phone number and little else.

blank

If you happen to have an existing Google Voice number, both Android and iOS devices offer a Voice app that lets you make free calls and send free messages using Google Voice. One drawback of Google Voice is you need an existing phone number to qualify for a new Google Voice number so this is a bit like the chicken and the egg dilemma.

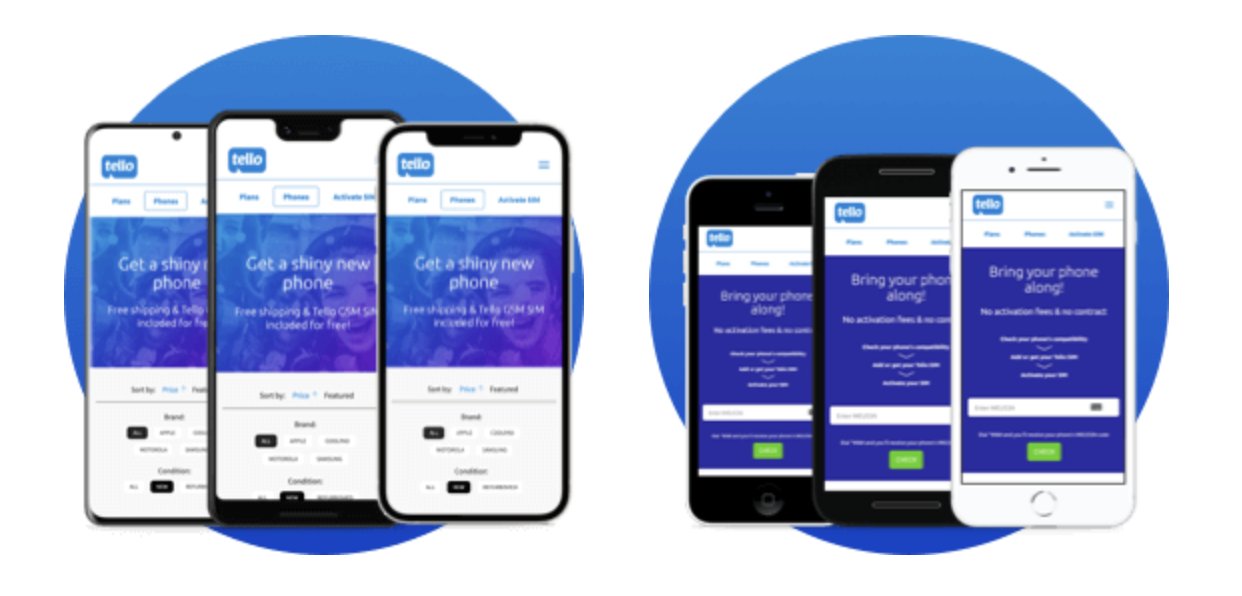
Today, we have a $6 a month solution that kills two birds with one stone. You not only get a cellular number on one of America’s best cellular networks, but you also get a small bucket of calling minutes and data to tide you over as you move between WiFi hotspots. Using our referral link with Tello, you and Nerd Vittles both get $10 of free service, ample time to let you kick the tires and see whether this solution can meet either some or all of your cellular needs. There are no contracts so your experiment is purely on a month-to-month basis.

The silver lining is that, while you have your assigned Tello number in an area code of your choice, you also can sign up for a free Google Voice number and add it to your cellphone and desktop phone as well. And, if you drop Tello after your $10 credit runs out, you still will have your new Google Voice number for unlimited calling and texting in the U.S. and Canada. What’s not to like? And here’s the free calling map while you’re with Tello:

blank

Tello’s $6 plan gives you 100 minutes of calls per month plus a 500MB data allowance. And, after exhausting your 500MB of data, you still get unlimited 2G data service which is more than ample for email. Tello also supports eSIMs, a mobile hotspot, free unlimited text messaging, and WiFi calling that lets you conserve your data bucket for emergencies. You also get calling support to 60+ countries. You can bump up the high speed data allowance to 1GB for an extra dollar a month, or you can add unlimited calling for just $3 more per month. In short, their $10 a month plan offers unlimited calling to 60+ countries, plus unlimited texting, and a gigabyte of high speed data every month. Coupling that with XFinity’s millions of hotspots would make this an ideal solution for almost every teenager.

Give it a try. The first month is on us.

Originally published: Thursday, February 16, 2023


blank
Need help with Asterisk? Visit the VoIP-info Forum.


Special Thanks to Our Generous Sponsors


FULL DISCLOSURE: ClearlyIP, Skyetel, Vitelity, DigitalOcean, Vultr, VoIP.ms, 3CX, Sangoma, TelecomsXchange and VitalPBX have provided financial support to Nerd Vittles and our open source projects through advertising, referral revenue, and/or merchandise. As an Amazon Associate and Best Buy Affiliate, we also earn from qualifying purchases. We’ve chosen these providers not the other way around. Our decisions are based upon their corporate reputation and the quality of their offerings and pricing. Our recommendations regarding technology are reached without regard to financial compensation except in situations in which comparable products at comparable pricing are available from multiple sources. In this limited case, we support our sponsors because our sponsors support us.

blankBOGO Bonaza: Enjoy state-of-the-art VoIP service with a $10 credit and half-price SIP service on up to $500 of Skyetel trunking with free number porting when you fund your Skyetel account. No limits on number of simultaneous calls. Quadruple data center redundancy. $25 monthly minimum spend required. Tutorial and sign up details are here.

blankThe lynchpin of Incredible PBX 2020 and beyond is ClearlyIP components which bring management of FreePBX modules and SIP phone integration to a level never before available with any other Asterisk distribution. And now you can configure and reconfigure your new Incredible PBX phones from the convenience of the Incredible PBX GUI.

blankVitalPBX is perhaps the fastest-growing PBX offering based upon Asterisk with an installed presence in more than 100 countries worldwide. VitalPBX has generously provided a customized White Label version of Incredible PBX tailored for use with all Incredible PBX and VitalPBX custom applications. Follow this link for a free test drive!
 

blankSpecial Thanks to Vitelity. Vitelity is now Voyant Communications and has halted new registrations for the time being. Our special thanks to Vitelity for their unwavering financial support over many years and to the many Nerd Vittles readers who continue to enjoy the benefits of their service offerings. We will keep everyone posted on further developments.


blank

An Electronics Home Makeover for the 21st Century

blank

It was a sad day when we finally sold our Bozak Concert Grand speakers this year after enjoying them for over half a century. They were a graduation present from "Papa Gene" Newsom of Newsom’s Music Center when I graduated from law school in 1971. The sale got me thinking that I really needed to write about what has changed in home entertainment now that we’ve turned the page to another century. Back then, there was no Internet or Spotify, just bootleg 8-track tapes, an Apple record label, and great home audio made by McIntosh.

For those living in the present, let me tick off what we hope will save you a boatload of money in the coming years. We’ll cover Internet service providers as well as telephony, home audio and TV options, and home automation. Our plan here is to show you how to replace your $200-$500 a month Comcast, Spectrum, and cellular bills with setups that are more robust and considerably less expensive for the whole family.

Choosing a Cell Provider in 2021

With the advent of 46/LTE and 5G cellular service, the cell phone landscape in the U.S. has changed dramatically in the past two years. Unless you live in a remote location, 5G service now is available from all of the major U.S. carriers: T-Mobile, Verizon, and AT&T. This is where looking at the overall family picture can pay off royally. For example, T-Mobile bundles Netflix, Apple TV, and In-Flight WiFi plus discounted YouTube TV service with many of their plans, and there are substantial discounts compared with other carriers particularly if you’re on a family plan or are a military veteran or age 55+. If you wrote off T-Mobile years ago, it’s time to have another look. Their 5G coverage area now is second to none and pricing is typically 30-50% less than Verizon or AT&T. If you’re looking for the least costly all-you-can-eat cellular plan, then take a careful look at the Nerd Vittles special with Visible, which is the Verizon discount carrier. Unless you need great cell service during major sporting events inside the stadium, our $25 plan has no equal. Here’s a link to our article with the details.

Choosing an Internet Service Provider in 2021

If your cable TV and Internet bill is in the $150+ range and most are, we’ve got some exciting news for you. T-Mobile now has unlimited 5G Home Internet service for $50 a month. While it’s still a little difficult to obtain in all areas, check often. We’ve been searching for eight months in four cities and had signed up for email notice when it was available. We never got an email but, lo and behold, it popped up as available in Asheville NC when we checked last week. Once you have the T-Mobile router, it will work anywhere there’s a T-Mobile 4G/LTE or 5G tower. The results below were in Charleston, SC where the T-Mobile site shows it’s unavailable. Our one-week report card gives T-Mobile an A+ for ease of setup, web access performance, streaming media reliability, and VoIP telephony. There literally have been zero hiccups. You can review our play-by-play adventure on the VoIP-Info.org Forum.

blank

To achieve similar performance from the service providers offering wired service, you’re looking at $100+ a month from Comcast or WOW and at least $50 a month from Spectrum. And, unfortunately, in most U.S. markets, there is zero competition between the major providers. You get Comcast or nothing in many cities and Spectrum or nothing in others.

Choosing a TV Provider in 2021

Even if you’re stuck with Comcast or Spectrum for the time being, there’s still a silver lining. Drop their TV service immediately. Our last (and final) Comcast bill included $55 for hardware rentals, $23.55 in TV broadcast fees, and $13.92 in taxes. That’s nearly $100/month just to get television delivered to your house! That’s before you sign up for a single channel. Here’s a better idea. Once you’ve invested $50 to $100 in your Internet service, sign up for YouTube TV and enjoy unlimited streaming with numerous simultaneous streams, unlimited DVR recordings, 85+ channels including your local TV channels, and almost every sporting event you can name for $65 a month with no additional fees or contracts. The picture quality with a smart TV looks exactly the same as watching cable television. CNET rated it the "best premium live TV streaming service." If you’ve taken our advice thus far, your total home entertainment bill is $50 for T-Mobile Home WiFi and $65 for YouTube TV and includes free Netflix at no additional charge.

Choosing a Music Provider in 2021

Now let’s suppose you still have a teenager in college. Rather than worry about your kids pirating music and movies, here’s a better idea. Sign them up for Spotify with unlimited music plus Showtime plus Hulu for $5 a month for four years! The good news is they’re rarely up when you are so you, too, can enjoy their Spotify, Showtime, and Hulu accounts while they’re sleeping. We’ve never been particularly big fans of Sirius/XM after they pulled their stunt of cancelling lifetime subscriptions. But that lawsuit got settled and they righted their wrong in a most generous way. You not only got your lifetime subscriptions back, but you also got free streaming. While you can’t take advantage of the lifetime subscription any longer, you still can snag the service for about $5 a month if you wait for a deal. That gets you hundreds of music channels for your car plus streaming to your favorite phone, PC, or Sonos device so it’s worth a careful look if you like music.

Home Automation Basics for 2021

If you haven’t dipped your toes into home automation, it’s finally time. An inexpensive Amazon Echo device will get you started. They range in price from under $50 to a couple hundred dollars. Our favorite is the Echo Show 8 for $99. This will bring Alexa into your home and in many of the newer automobiles as well. The next step is to purchase a few smart light bulbs so you can light up your house when the sun goes down and turn off the lights when you crawl into bed at 8:30. There are lots of lights to choose from. Our favorites are Sylvania’s WiFi Smart Lights which can bring every color of the rainbow to your lamps for under $10. For everyday use, you can pick your favorite shade of white, and for holidays, you can set them to orange for Halloween and red and green for Christmas. Now buy yourself a Nest WiFi thermostat and never worry about the proper setting again. It’s that smart. Then get yourself an August Door Lock, and you’ll never have to fumble for your house keys again. Finally, link Spotify with Alexa, and every song on the planet awaits your command. Get hip, dude!

TIP: Using our Amazon referral links helps keep the lights burning brightly at Nerd Vittles.

What About Telephony?

We saved the best for last. Hopefully, you don’t still have a Ma Bell telephone hanging on the wall in your kitchen. But, if you do, today’s your lucky day. You can dump Ma Bell and add a little gizmo called a Raspberry Pi to your home electronics collection. Then follow our tutorial and for about $100 and a monthly cost of a few dollars, you can enjoy home telephone service using your WiFi Internet connection forever. Welcome to the 21st century. Enjoy!

Originally published: Saturday, October 23, 2021


blank
Need help with Asterisk? Visit the VoIP-info Forum.


Special Thanks to Our Generous Sponsors


FULL DISCLOSURE: ClearlyIP, Skyetel, Vitelity, DigitalOcean, Vultr, VoIP.ms, 3CX, Sangoma, TelecomsXchange and VitalPBX have provided financial support to Nerd Vittles and our open source projects through advertising, referral revenue, and/or merchandise. As an Amazon Associate and Best Buy Affiliate, we also earn from qualifying purchases. We’ve chosen these providers not the other way around. Our decisions are based upon their corporate reputation and the quality of their offerings and pricing. Our recommendations regarding technology are reached without regard to financial compensation except in situations in which comparable products at comparable pricing are available from multiple sources. In this limited case, we support our sponsors because our sponsors support us.

blankBOGO Bonaza: Enjoy state-of-the-art VoIP service with a $10 credit and half-price SIP service on up to $500 of Skyetel trunking with free number porting when you fund your Skyetel account. No limits on number of simultaneous calls. Quadruple data center redundancy. $25 monthly minimum spend required. Tutorial and sign up details are here.

blankThe lynchpin of Incredible PBX 2020 and beyond is ClearlyIP components which bring management of FreePBX modules and SIP phone integration to a level never before available with any other Asterisk distribution. And now you can configure and reconfigure your new Incredible PBX phones from the convenience of the Incredible PBX GUI.

blankVitalPBX is perhaps the fastest-growing PBX offering based upon Asterisk with an installed presence in more than 100 countries worldwide. VitalPBX has generously provided a customized White Label version of Incredible PBX tailored for use with all Incredible PBX and VitalPBX custom applications. Follow this link for a free test drive!
 

blankSpecial Thanks to Vitelity. Vitelity is now Voyant Communications and has halted new registrations for the time being. Our special thanks to Vitelity for their unwavering financial support over many years and to the many Nerd Vittles readers who continue to enjoy the benefits of their service offerings. We will keep everyone posted on further developments.


blank

Introducing OpenSIPS 3 for Incredible PBX and Debian 10

blank

Today we’re pleased to introduce an updated OpenSIPS installer for Debian 10 featuring the latest release of OpenSIPS. Our previous tutorial with Debian 8 is now obsolete, an all-too-frequent occurrence in the open source world. Today’s open source SIP server lets you connect users to make and receive free as well as commercial calls worldwide. There’s excellent documentation making it easy to integrate into our existing Incredible PBX platform without hiring a consultant. It’s also straight-forward to secure without providing free phone service to every bad guy on the planet.

OpenSIPS is a multi-functional, multi-purpose signaling SIP server used by carriers, telecoms or ITSPs for solutions like Class4/5 Residential Platforms, Trunking / Wholesale, Enterprise / Virtual PBX Solutions, Session Border Controllers, Application Servers, Front-End Load Balancers, IMS Platforms, Call Centers, and many others. Source: opensips.org

We’ve often complained that the problem with many open source projects is that the developers get so focused on making money that they skimp on the documentation to encourage consulting work or participation in expensive conferences. We have found just the opposite with OpenSIPS. In fact, much of today’s implementation is based upon an excellent tutorial by the folks at PowerPBX. Down the road, if you find yourself in need of a consultant, their services would be a good place to start. What we’ve added to the PowerPBX design is security, support for clients behind NAT-based routers, and an integration scheme for Asterisk®, FreePBX®, and Incredible PBX® platforms so that you get the best of all worlds, a public facing SIP server with the UC feature set that most organizations expect. Last but not least, our turnkey GPLv2 installer will get you up and running in about 5 minutes.

Choosing an Appropriate Platform for OpenSIPS

Let’s begin by addressing the appropriate platform for an OpenSIPS server. The server needs to have a public IP address that is static, and the server should not be situated behind a NAT-based router. It only complicates things and is beyond the scope of what we plan to address. For those that are frequent visitors, you already know that we’ve been pushing everyone to kiss their local hardware goodbye and join the cloud revolution. When it comes to public-facing VoIP platforms like OpenSIPS, most of us don’t have a choice. You need a static IP address on the open Internet. And, for the sake of security, a KVM cloud platform is a must since older OpenVZ platforms don’t support the ipset component of IPtables which makes it easy to block hundreds of thousands of IP addresses without a performance hit on your server. Pure whitelist access simply isn’t an option if you wish to retain the functionality of a VoIP application such as OpenSIPS.

Ten to twenty gigabytes of disk space should be more than ample for OpenSIPS. The amount of RAM in your server depends upon the volume of calls your server will be handling. If it’s a dozen simultaneous calls then 1GB of RAM will suffice. If it’s 100,000 calls, then take a look at this article for tips on sizing your server. For today’s implementation, you’ll need a Debian 10 platform so a low-cost KVM provider including Digital Ocean, Vultr, and OVH should be fine.1

Choosing OpenSIPS Components to Deploy

We’ve divided up today’s tutorial into bite-sized pieces so that you can pick and choose where to stop implementing and start using. You do not need to have an Asterisk server to make and receive calls with OpenSIPS. However, OpenSIPS lacks voicemail and AutoAttendant/IVR components so, if those are a requirement, then you either need a VoIP service provider that offers them, or deploy a $50 Incredible PBX for the Raspberry Pi to add the missing pieces.

What OpenSIPS offers is a free server platform for worldwide SIP communications so that you, your friends, and business associates can call or connect from anywhere using freely available SIP softphones or any of dozens of SIP telephone instruments. We’ll stick with softphones for today, but hardware-based SIP telephones are equally simple to deploy.

This is not a criticism because it is one of the best tutorials we’ve ever used but, if you want to see how complex a typical OpenSIPS server deployment is, take a look at the PowerPBX tutorial we used as a starting point with OpenSIPS. We’ve compressed most of those procedures into a turnkey installer that only requires you to enter a MySQL root password of passw0rd (with a zero) once you have your Debian 10/64 platform up and running.

Deploying a Debian 10 Server Platform

Start by choosing a cloud provider that offers the 64-bit Debian 10 minimal platform as a deployment option. Most do. As noted, we recommend a KVM platform with support for ipset making it easy to block entire countries overrun with bad guys. Choose offerings with at least 1GB RAM and a 10GB drive to get started. Configure your Debian 10 server with a fully-qualified domain name (FQDN). This is critically important with our security design because we will assign all OpenSIPS users/extensions to this FQDN and reserve your server’s IP address purely for connections from service providers and Asterisk servers. This makes it all but impossible for anyone to hack into your server since most script kiddies launch attacks on IP addresses, not FQDNs. Using an unusual FQDN adds an extra layer of security, but that’s your call. If you lack the ability to assign FQDN aliases to a domain which you own, you can obtain a free FQDN from numerous sources including ChangeIP and point it to the IP address of your OpenSIPS server.

Installing OpenSIPS on a Debian 10 Server

Now the fun begins. Log into your Debian 8 server as root and issue the following commands to prepare for the OpenSIPS install:

cd /root
wget http://incrediblepbx.com/opensips3.tar.gz
tar zxvf opensips3.tar.gz
rm -f opensips3.tar.gz

Make sure you have logged into your Debian 10 server as root using SSH or Putty from a desktop PC that you will use to manage OpenSIPS with a browser. The reason is because this IP address automatically will be whitelisted in the OpenSIPS firewall as part of the install process. Otherwise, you will need to manually log into SSH and whitelist the IP address of your desktop PC using /root/add-ip each time you wish to access the OpenSIPS Control Panel since TCP port 80 (HTTP) is not exposed to the public Internet as a security precaution.

To begin the install, issue this command: /root/install

As the install progresses, you’ll first be prompted to choose the GRUB install device. Press the spacebar on the first entry. Then press TAB and ENTER. When prompted for the SSH configuration, choose "keep local version" and then press TAB and ENTER. For the MariaDB setup, press ENTER when prompted for the current password. Type N when prompted whether to switch to unix_socket authorization. Then type Y to change the root password. Be sure to use passw0rd (with a zero) as your MySQL password, or the install will fail. This is NOT a security risk unless your Debian 10 root user account is compromised. And, in that case, it won’t matter anyway since the MySQL password could easily be changed. Type Y to remove anonymous users. Type Y to disallow remote root logins. Type Y to reload the MySQL privilege tables.

Next you’ll be prompted to set your timezone and TZ entries. For East Coast U.S., it’s 2,49,1,1 then America/New_York. Later you’ll be prompted twice for the MySQL root password. You must enter passw0rd (with a zero). When the OpenSIPS status screen displays, type Q to exit the display. There are a couple of steps where you will be prompted for input. Correct responses are indicated before the various prompts. Pay particular attention when you are prompted to change the SSH port from TCP 22 to a port number in the 1000-2020 range as a security precaution. We recommend using the year you were born because it will be easy for you to remember. When the install finishes and you log out of your server, the next SSH login will look like this where XXXX is the SSH port you chose and yyy.yyy.yyy.yyy is the OpenSIPS server address: ssh -p XXXX root@yyy.yyy.yyy.yyy

blank

Although most of the configuration of your OpenSIPS server will be handled using a web browser and the OpenSIPS Control Panel GUI, we’ve included a few scripts in /root to assist with maintenance of your server platform. Here’s a brief summary of the script functions:

  • pbxstatus – Status of your OpenSIPS server (image sample above)
  • add-ip – Temporarily WhiteList IP address until next iptables-restart
  • ban-ip – Permanently Ban an IP address
  • unban-ip – Unban a previously banned IP address
  • log-purge – Zero out all of the major Linux log files
  • opensips-check – Assures OpenSIPS and RTPproxy are running (runs automatically)
  • Fail2Ban BlackListsiptables -nL | grep -A100000 "opensips ("
  • IPset BlackList (KVM/OVZ7 platforms only) – ipset list | sort

We secure your server in several ways: (1) by disguising the SSH port, (2) by locking down almost every port on your server with the IPtables firewall with the exception of the SIP ports, (3) by deploying Fail2Ban to scan your OpenSIPS log for errors and lock out attackers for an extended period of time, and (4) by deploying the IPset blacklist for KVM platforms. With this design, there is a symbiotic relationship between IPtables, Fail2Ban, and IPset. Therefore, it is critically important that you only restart these services using the iptables-restart command. NEVER issue other IPtables commands to restart or save your firewall settings.

Activating a SIP Server with OpenSIPS Control Panel

We don’t want to overload you on the first day with your new OpenSIPS 3 platform so we’ll walk you through the preliminary setup steps to create your SIP Domain. Then we’ll show you how to set up user accounts (also known as extensions). Finally we’ll walk you through setting up a trunk to make and receive calls from a commercial SIP provider. When we’re finished today, you’ll be able to make and receive calls using SIP URIs or DIDs which you have purchased from a provider. Then next week we’ll focus on integration of OpenSIPS with an Asterisk platform of your choice using Incredible PBX as an example. Once we’re finished, you’ll be able to handle user account registrations exclusively on your OpenSIPS server while leaving your Asterisk platform completely hidden from public exposure.

Logging into the OpenSIPS Control Panel

As deployed, the OpenSIPS Control Panel is accessible via web browser. As noted previously, HTTP Port 80 access is blocked by default unless the IP address of your desktop PC has been whitelisted either as part of the initial install or using the add-ip script in /root. Once your desktop PC’s IP address is whitelisted, point your browser to http://xxx.xxx.xxx.xxx/cp

blank

The default Username is admin, and the default password is opensips. Once you’re logged in, immediately click on the Users icon in the upper-right corner of the dashboard. Then click the Edit Info pencil icon for user Admin and change your password. Click Save when done.

Creating Domains with OpenSIPS Control Panel

In the Left column of the Dashboard, you’ll see two tabs: Users and System. Click on the System tab to expose the available choices. Then choose the Domains option.

blank

Domains are the essential building blocks in OpenSIPS. You can manage one or a hundred domains on a single OpenSIPS server, and each domain can have its own set of Users, Trunks/Gateways, and Dialplan rules. We’re actually going to create two domains, one for the IP Address of your OpenSIPS server and a second one for the FQDN of your OpenSIPS server. For added security, we will create all User accounts under the FQDN Domain. And we’ll reserve the IP Address Domain for DID Trunks/Gateways from registered, commercial SIP providers. This design allows attackers to attempt to register to accounts on your IP Address Domain until the cows come home, and they will never be successful because there are no existing SIP user accounts there. Keep it that way! With our OpenSIPS design, Fail2Ban will block attackers after a single failed registration attempt. And OpenSIPS itself will identify and block all SIP flood attacks using either Fail2Ban or IPset.

Now that you understand the design, let’s set up your domains. After choosing System -> Domains, enter the IP Address of your OpenSIPS server at the SIP Domain prompt. Then click Add New Domain followed by Reload on Server. Repeat the same steps to enter the fully-qualified domain name (FQDN) of your OpenSIPS server. When finished, you should see:

blank

Creating Users with OpenSIPS Control Panel

We’ve already explained the security implications and reason for creating User accounts with your FQDN Domain only. Click on Users -> User Management -> Add New to get started. You can use Numbers (what we call Extensions in Asterisk) or Names. Our preference is to use Numbers for the User accounts and then to create Alias Names (as desired) for each User account. You can’t dial names from most SIP telephones. This also keeps the design similar to what many are used to in the Asterisk environment. A completed dialog would look something like the following. Use the Domain pull-down to choose your FQDN. Obviously, the passwords must be secure and must match. Then the Register button will be enabled to save. The actual Numbers used for Usernames are completely up to you.

blank

Create at least a couple User accounts so that you can set up two SIP phones to call yourself and verify that everything is working. These User accounts become an integral part of the SIP URI to receive calls from any SIP phone in the world: 7701@opensips.yourdomain.com

Before you can actually answer an incoming call to your SIP URI, you’ll need to register the User account using either a softphone or SIP phone. We’ll do that next. But, first, let’s create an Alias to 7701 User so that folks can reach you by calling joe@opensips.yourdomain.com

Click on Users -> Alias Management -> Add New Alias to get started. Fill in the form using the example below. Make sure that you select your FQDN Domain using the pull-downs for BOTH the Domain and Alias Domain fields. Then click Add to save.

blank

Registering a Softphone to an OpenSIPS User Account

There are literally dozens of free SIP soft phones from which to choose. We covered some of our favorites for every platform in previous articles. For our purposes today, we recommend you choose one of the Linphone softphones which are available for the PC, Mac, Linux, Android, and iOS platforms. We also recommend signing up for a free Linphone.org SIP account which doesn’t cost you anything. For today, we will be configuring the softphone to register to your new OpenSIPS server.

Once you have downloaded and installed the Linphone client, go into the Preferences menu and make the following changes. Some depend upon your calling platform.

  • Audio Codecs: PCMU, G722, PCMA
  • Video Codecs: VP8, H264
  • Call Encryption: None
  • DTMF: RFC2833 only
  • Send InBand DTMF: OFF
  • Send SIP INFO DTMF: OFF
  • SIP UDP 5060: Enabled
  • SIP TCP 5060: Enabled
  • Allow IPv6: Disabled

Then set up a new SIP Proxy account: Username (7701), Password (as defined), Domain: your FQDN not IP address, Transport: UDP, Outbound Proxy: OFF, Stun Server: stun.linphone.org, ICE: ON, AVPF: OFF, Push Notification: ON, Country Code Prefix: 1 (if required by your commercial SIP provider), Register: YES, Account Enabled: YES. HINT: You can call Alias Names via SIP URI, but you can only register to a SIP account using its actual Username.

Avoiding Lockouts with NeoRouter VPN

By design, Fail2Ban is unforgiving when it comes to failed registrations. A single failed registration will get an IP address banned for a full week. The reason is because the new bad guy strategy is to hit your server once to determine whether anybody is home. Then the creep bombards you later with an endless stream of registration attempts. With our design, nobody will be home when they return. The bad news is a single failed registration attempt by you or your users will also trigger a ban. There are several workarounds. The easiest is to set up the NeoRouter client on each of your machines including your OpenSIPS server and use the 10.0.0.x private network for access. These IP addresses never get banned. Our previous tutorial will walk you through setting up a free NeoRouter server and installing the free NeoRouter clients on your machines. The client software already is installed and running on your OpenSIPS server. It only requires that you log in using nrclientcmd and register to your NeoRouter server to obtain a private IP address. The other option is to install OpenVPN. Our previous tutorial will walk you through that process. The advantage of OpenVPN is that it’s supported directly on many SIP telephone instruments. The 10.8.0.x addresses are already whitelisted by our OpenSIPS installer.

There are other options to unban an IP address which has accidentally been snagged. First, almost all of the cloud providers include a Console option in their web portals. Second, you can log into your server via SSH from any non-blacklisted IP address to remove the banned IP address. Once you’re logged in, simply run this command using the IP address you wish to unban: /root/unban-ip xxx.xxx.xxx.xxx

Choosing Commercial SIP Providers

Recall that you cannot register to a SIP alias on your OpenSIPS server. We’ll take advantage of this restriction in setting up incoming calls from commercial providers’ DIDs. To set up Trunks from commercial providers so that you can not only receive incoming calls but also make outbound calls over their PSTN network connections, you must use providers that support IP address authentication rather than a SIP registration. Many providers support this including our platinum sponsor, Skyetel, as well as providers such as VoIP.ms, Anveo Direct, V1VoIP, and many others. In our OpenSIPS design, you also can use DIDs from providers that support SIP URI forwarding such as CallCentric and LocalPhone; however, you are limited to receiving inbound calls only. VoIP communications really shines here because you don’t have to choose a single provider to meet all of your communications requirements.

Skyetel is by far the easiest provider to set up with OpenSIPS. See our earlier tutorial for a special offer that will get you half-price calling for up to $500. Effective 10/1/2023, $25/month minimum spend required. Once you’re registered on the Skyetel site, add a new EndPoint Group using the IP address of your OpenSIP server and designate UDP 5060 as the access port. Sign up for a DID and map it to the OpenSIPS Endpoint Group. Done. In the OpenSIPS Control Panel, navigate to System -> Dynamic Routing and click Add Gateway. Using the template below, create 5 Proxy gateways for the following Skyetel data centers:

  • skyetel-NW 52.41.52.34
  • skyetel-SW 52.8.201.128
  • skyetel-NE 52.60.138.31
  • skyetel-SE 50.17.48.216
  • skyetel-EU 35.156.192.164

Begin by whitelisting the IP addresses of your SIP providers in /etc/iptables/rules.v4 just below the existing 10.8.0.0/24 rule. The entries should look like this:

-I INPUT -s 52.41.52.34 -j ACCEPT

Once you’ve entered IP addresses for your providers, issue the command: iptables-restart

Next, we need to create what Asterisk users know as an Outbound Route. This tells OpenSIPS to send dialed numbers in 11-digit format to Skyetel for termination. We’ve already created the Dial Plan rule for calling out by dialing 1 plus a 10-digit number. So, while you’re still in the Dynamic Routing section of the OpenSIPS Control Panel, click on the Rules tab at the top of the template. Then click Add Rule. Begin by clicking Add ID button and choosing Group ID 0. In the Prefix field, type 1. Now click the Add GW button 3 times after choosing the Skyetel gateways in the following order from the GW pull-down list: skyetel-nw, skyetel-sw, and skyetel-se. Those are the three currently operational Skyetel gateways. When you’re finished, your template should look like the following. Then click the Add button to save the new rule. Click Reload Server to load the new rule into OpenSIPS. Then repeat this procedure leaving the Prefix field blank so that you can make 10-digit calls as well.

blank

Finally, we need to create what Asterisk users know as an Inbound Route. This tells OpenSIPS where to send incoming calls from our Skyetel DID. OpenSIPS handles inbound routes by defining a User Alias for the Username to which you want to route the incoming DID calls. Click on Users -> Alias Management -> Add New Alias to get started. Fill in the form using the following template and then click Add.

  • Username: 7701 (the extension to which to route the incoming calls)
  • Domain: opensips.xyz.com (the FQDN of your OpenSIPS server)
  • Alias Username: 18435551212 (the 11-digit Skyetel DID)
  • Alias Domain: 11.12.13.14 (the IP address of your OpenSIPS server)
  • Alias Type: dbaliases

Introducing the VoIP Blacklist

We’ve always dreamed of an effective VoIP Blacklist, and many have tried. But the crowd-sourced VoIP Blacklist at voipbl.org is the real deal. Everybody can post entries (including the bad guys) and, magically, most of the illegitimate entries get sifted out before the next day’s list is released. The list gets populated every night while you sleep. Here are the steps to install the VoIP Blacklist with IPset:

apt update && apt install ipset iptables netfilter-persistent ipset-persistent iptables-persistent
cd /usr/local/sbin
wget http://incrediblepbx.com/voipbl-update
chmod +x voipbl-update
sed -i 's|fail2ban restart|fail2ban restart\n/usr/local/sbin/voipbl-update|' iptables-restart
iptables-restart
ipset list voipbl
ipset list voipbl | wc -l

Then create a cron job in /etc/crontab to run /usr/local/sbin/voipbl-update every day to update the VoIP blacklist.

1 4 * * * root /usr/local/sbin/voipbl-update > /dev/null 2>&1

Congratulations! You now have a functioning OpenSIPS 3 server that can process incoming calls from SIP URIs as well as DIDs. And you can make SIP URI and 11-digit PSTN calls using your SIP softphone that’s registered to your OpenSIPS server. See you next week. Enjoy!

Continue Reading: Best of Both Worlds: Safely Marrying Asterisk to OpenSIPS

Originally published: Monday, October 4, 2021


blank
Need help with Asterisk? Visit the VoIP-info Forum.


Special Thanks to Our Generous Sponsors


FULL DISCLOSURE: ClearlyIP, Skyetel, Vitelity, DigitalOcean, Vultr, VoIP.ms, 3CX, Sangoma, TelecomsXchange and VitalPBX have provided financial support to Nerd Vittles and our open source projects through advertising, referral revenue, and/or merchandise. As an Amazon Associate and Best Buy Affiliate, we also earn from qualifying purchases. We’ve chosen these providers not the other way around. Our decisions are based upon their corporate reputation and the quality of their offerings and pricing. Our recommendations regarding technology are reached without regard to financial compensation except in situations in which comparable products at comparable pricing are available from multiple sources. In this limited case, we support our sponsors because our sponsors support us.

blankBOGO Bonaza: Enjoy state-of-the-art VoIP service with a $10 credit and half-price SIP service on up to $500 of Skyetel trunking with free number porting when you fund your Skyetel account. No limits on number of simultaneous calls. Quadruple data center redundancy. $25 monthly minimum spend required. Tutorial and sign up details are here.

blankThe lynchpin of Incredible PBX 2020 and beyond is ClearlyIP components which bring management of FreePBX modules and SIP phone integration to a level never before available with any other Asterisk distribution. And now you can configure and reconfigure your new Incredible PBX phones from the convenience of the Incredible PBX GUI.

blankVitalPBX is perhaps the fastest-growing PBX offering based upon Asterisk with an installed presence in more than 100 countries worldwide. VitalPBX has generously provided a customized White Label version of Incredible PBX tailored for use with all Incredible PBX and VitalPBX custom applications. Follow this link for a free test drive!
 

blankSpecial Thanks to Vitelity. Vitelity is now Voyant Communications and has halted new registrations for the time being. Our special thanks to Vitelity for their unwavering financial support over many years and to the many Nerd Vittles readers who continue to enjoy the benefits of their service offerings. We will keep everyone posted on further developments.


blank

  1. Nerd Vittles receives referral fees from some VoIP service providers to help cover the costs of our blog. We never recommend particular companies solely to generate commissions. We also test all services that we recommend. []

Lessons Learned: Circling Back for a Second Look at OpenSIPS

blank

Whenever we tackle a new VoIP platform especially for deployment on the open Internet, we think it’s prudent to circle back after a few weeks to review lessons learned and tie up all the loose ends. Today we’ll introduce a number of new KVM cloud providers around the globe at rock-bottom prices plus some new additions to enhance our OpenSIPS firewall design. If you’re just getting started with OpenSIPS, check out the new KVM offerings below and then hop over to our original article which now incorporates all of today’s enhancements. For those that already have deployed OpenSIPS using our previous tutorial, continue reading, and we’ll show you how to deploy the latest and greatest additions.

While we were in the midst of deploying OpenSIPS, Netflix also disclosed four TCP networking kernel vulnerabilities which are especially important to those of us using hosted cloud platforms. Depending upon your provider, these may or may not be patched promptly.

We were reminded this month that reinventing the wheel isn’t always the best solution when it comes to VoIP security. While we’re not throwing in the towel on our BadGuys list, we do want to show you how to supplement it with the VoIP Blacklist from voipbl.org. It adds over 80,000 crowd-sourced IP addresses from around the world. The other lesson learned was that blacklists invariably include some IP addresses of good guys that you actually depend upon. These typically are added to the blacklist by, you guessed it, the bad guys.

With IPtables, the first matching rule always wins so it’s important in structuring firewall rules to insert whitelisted IP addresses BEFORE the blacklist entries so you don’t inadvertently block yourself or some other resource that you actually need. This whitelist should include the IP addresses of your server and workstations as well as the IP addresses of VoIP providers upon whom you rely for communications services. With our OpenSIPS design, the firewall order of preference looks like this: (1) whitelisted IP addresses get full access, (2) blacklisted IP addresses are blocked and get no access, (3) everybody else gets SIP access.

Rather than attempting to patch the Linux kernel on all of the platforms that are being deployed, we think the prudent first step is to narrow the TCP footprint of all public-facing servers. As part of the original OpenSIPS deployment, we already had hidden web access behind the firewall except for specifically enumerated IP addresses. The second most likely TCP vulnerability would be the TCP SIP ports. While we prefer to use UDP ports for SIP access, some prefer TCP. Until the “SACK Panic” vulnerability is patched, we would strongly recommend at least temporarily discontinuing use of TCP as your SIP transport. After all, OpenSIPS is a SIP server, and the TCP SIP port would be the most likely target for mischief.

Turning back to blacklists for a moment, we’ve put together a few simple bash scripts which make it easy to deploy and update your VoIP blacklists. We’ve also developed a script that lets you move IP addresses flagged by Fail2Ban into the ipset SIPFLOOD blacklist while easing the pain of uploading your own blacklisted IP addresses to the voipbl.org site for inclusion in their list. In this way, they will be added in the next day’s blacklist collection for everyone to use. To give you a point of reference, on our half dozen, publicly-exposed honey pot servers, today’s additions to the OpenSIPS firewall have reduced attacks to less than one a day.

Choosing a KVM Platform for OpenSIPS

For those that are frequent visitors, you already know that we’ve been pushing everyone to kiss their local hardware goodbye and join the cloud revolution. When it comes to public-facing VoIP platforms like OpenSIPS, most of us don’t have a choice. You need a static IP address on the open Internet. And, for the sake of security, a KVM cloud platform is a must since OpenVZ platforms don’t support the ipset component of IPtables which makes it easy to block hundreds of thousands of IP addresses without a performance hit on your server. While we previously have identified OpenVZ providers for our Incredible PBX platforms protected by the Travelin’ Man 3 firewall, pure whitelist access simply isn’t an option if you wish to retain the functionality of a VoIP application such as OpenSIPS. So we went on the hunt to identify KVM cloud providers around the world that could offer a KVM VPS with 1GB RAM, 20GB storage, and 1TB of monthly bandwidth for about $25 a year. No small feat! But our friends at LowEndTalk have come through. Read the message thread and find an offer with a site that best meets your requirements. Many of the KVM offers require you to open a ticket to get the special pricing and configuration outlined above. Here’s a short list of our favorites, but remember to only use the KVM offerings below for OpenSIPS!

ProviderRAMDiskBandwidthPerformance as of 12/1/19Cost
CrownCloud KVM (LA)1GB20GB +
Snapshot
1TB/month598Mb/DN 281Mb/UP
2CPU Core
$25/year
Best Buy!
Naranjatech KVM (The Netherlands)1GB20GB1TB/monthHosting since 2005
VAT: EU res.
20€/year w/code:
SBF2019
BudgetNode KVM (LA)1GB40GB RAID101TB/monthAlso available in U.K PM @Ishaq on LET before payment$24/year
FreeRangeCloud KVM (Ashburn VA, Winnipeg, Freemont CA)1GB20GB SSD3TB/monthPick EGG loc'n
Open ticket for last 5GB SSD
$30/year w/code:
LEBEGG30

Introducing the VoIP Blacklist

We’ve always dreamed of an effective VoIP Blacklist, and many have tried. But the crowd-sourced VoIP Blacklist at voipbl.org is the real deal. Everybody can post entries (including the bad guys) and, magically, most of the illegitimate entries get sifted out before the next day’s list is released. We’ve made this easy in two ways. First, the list gets populated every night while you sleep. At last count, there were 84,504 IP addresses. And, second, to contribute to the blacklist, run iptables -nL weekly to see if Fail2Ban has snagged any bad guys. If so, simply run the new /root/blacklist utility which will move them into your local blacklist and also format the entries for easy submission to voip.bl whenever you feel the urge. Simply issue the command cat /root/blcklist.txt to display the entries you just blacklisted. Then cut-and-paste the results and post them to the VoIP Blacklist. The whole process takes less than a minute, and you’ll be contributing to a very valuable VoIP resource while also using it.

Upgrading Existing OpenSIPS KVM/OVZ7 Platforms

If you already have installed OpenSIPS using the previous Nerd Vittles tutorial on a KVM or OVZ7 platform, then the rest of today’s article is for you. If you’re just getting started, hop over to our original article which now incorporates all of today’s enhancements including the VoIP Blacklist.

We’ve made today’s upgrade easy. Just download the OpenSIPS upgrade tarball, untar it, and run the included installer. In less than a minute, you’ll have all the new pieces without disturbing your existing configuration.

To get started, log into your KVM or OVZ7 server as root using SSH or Putty and issue these commands:

cd /
wget http://incrediblepbx.com/opensips-upgrade1.tar.gz
tar zxvf opensips-upgrade1.tar.gz
rm -f opensips-upgrade1.tar.gz
/root/opensips-upgrade1

Originally published: Monday, June 24, 2019


blank
Need help with Asterisk? Visit the VoIP-info Forum.


Special Thanks to Our Generous Sponsors


FULL DISCLOSURE: ClearlyIP, Skyetel, Vitelity, DigitalOcean, Vultr, VoIP.ms, 3CX, Sangoma, TelecomsXchange and VitalPBX have provided financial support to Nerd Vittles and our open source projects through advertising, referral revenue, and/or merchandise. As an Amazon Associate and Best Buy Affiliate, we also earn from qualifying purchases. We’ve chosen these providers not the other way around. Our decisions are based upon their corporate reputation and the quality of their offerings and pricing. Our recommendations regarding technology are reached without regard to financial compensation except in situations in which comparable products at comparable pricing are available from multiple sources. In this limited case, we support our sponsors because our sponsors support us.

blankBOGO Bonaza: Enjoy state-of-the-art VoIP service with a $10 credit and half-price SIP service on up to $500 of Skyetel trunking with free number porting when you fund your Skyetel account. No limits on number of simultaneous calls. Quadruple data center redundancy. $25 monthly minimum spend required. Tutorial and sign up details are here.

blankThe lynchpin of Incredible PBX 2020 and beyond is ClearlyIP components which bring management of FreePBX modules and SIP phone integration to a level never before available with any other Asterisk distribution. And now you can configure and reconfigure your new Incredible PBX phones from the convenience of the Incredible PBX GUI.

blankVitalPBX is perhaps the fastest-growing PBX offering based upon Asterisk with an installed presence in more than 100 countries worldwide. VitalPBX has generously provided a customized White Label version of Incredible PBX tailored for use with all Incredible PBX and VitalPBX custom applications. Follow this link for a free test drive!
 

blankSpecial Thanks to Vitelity. Vitelity is now Voyant Communications and has halted new registrations for the time being. Our special thanks to Vitelity for their unwavering financial support over many years and to the many Nerd Vittles readers who continue to enjoy the benefits of their service offerings. We will keep everyone posted on further developments.


blank

The One-Minute Installer: Deploying Asterisk on the Internet

blank

Last week we introduced a new methodology for deploying Incredible PBX® and Asterisk® on the wide open Internet. And this week we’ve put all the pieces together in a One-Minute Installer that will transform any Incredible PBX 13-13.10 server into a public-facing server platform in under a minute. Today you not only get the cupcake, but also some of the sprinkles in the form of tips or scripts to whitelist providers and users, to adjust countries on the blacklists, to add IP addresses to the blacklist, and to update our default VoIP Blacklist which now blocks over 83,000 suspicious IP addresses worldwide. Stay tuned for more.

Is It Safe?

Let’s first cover our deployment strategy so you can decide whether a public facing PBX is the right choice for you or your organization. What we mean by "exposed to the Internet" is that all of your SIP traffic is opened for public access. It doesn’t mean everybody gets free admission, but it does allow everyone to come to the door and at least knock. We still protect web access to your server with a whitelist of IP addresses, and SSH access is hidden behind a port number of your choice to protect you from the script kiddies. Is it as safe as the traditional Incredible PBX platform that is totally hidden from public view by the Travelin’ Man 3 firewall whitelist? Obviously not. But what you gain is what we had with the traditional Ma Bell phone system. Anybody can call you, but it’s up to you to determine whether to answer or block the calls. The major difference is there was a cost of calling random numbers in the old days. With VoIP technology, all of the calls are free so long as the caller has an Internet connection and a SIP client. We believe the platform is relatively safe today, but there is always a chance of SIP flooding or some zero-day vulnerability that could put your server at risk. If you’re not comfortable with that risk, now would be a good time to stop reading. Stick with the traditional Incredible PBX platform and avoid the worries of SIP attacks. The bad guys can’t see your server, and you still can be reached by calls to your PSTN number.

Changing Your Mindset About Security

Deploying a public-facing PBX does require an attitude adjustment. Behind the security of an airtight firewall, passwords for extensions, voicemail, and trunks didn’t much matter because the bad guys couldn’t find you much less get the necessary access to attempt to decipher your passwords. THAT HAS NOW CHANGED! You should immediately create new passwords that are as secure as you would use for your bank account because some folks will be trying to figure them out shortly. And, once they do, if you have VoIP services that allow calls to anywhere, your phone bill can skyrocket in a matter of minutes. You’ve been warned. If you have automatic replenishment of funds with one or more VoIP providers, change that now. And set up low balance notifications instead. Fund your VoIP provider accounts with amounts you can stand to lose in a worst case scenario. Better safe than sorry… and broke!

Choosing FQDNs for Your Server

There’s another important safeguard in today’s implementation, and that’s fully-qualified domain names (FQDNs) for your server. Without knowing your FQDN, nobody will be able to make a SIP connection to your PBX. Guessing your IP address won’t help because we automatically block all of those calls. And, once any caller attempts to connect in that way, they will be blocked from further access for a very long time by the Fail2Ban service. You have the option of using a single FQDN for both incoming calls and for registering SIP phones to your extensions. You also may use two separate FQDNs, one for incoming calls from the public and another for SIP phone registrations. Despite what some pundits would say, security through obscurity matters. Using less obvious FQDNs dramatically reduces the likelihood that your server can be attacked. This is especially important in the case of a SIP registration FQDN. Making this FQDN as obscure as possible protects your server in much the same way that a password would. So give serious consideration to whether your FQDN will be known or guessed by the general public. If so, deploy a second obscure one for registrations.

Deployment Prerequisites

That’s all we’re going to say about security. We’re now going to turn our attention to deployment. Before running the One-Minute Installer, there are some prerequisites. Here’s the short list:

  1. Functioning Incredible PBX 13-13.10 server with CentOS 6
  2. KVM (not OpenVZ) Cloud Platform with 1GB+ RAM
  3. Public, Static IPv4 Address for your server
  4. One or two FQDNs pointed to your server
  5. Whole Enchilada installed, if desired
  6. Incredible Fax installed, if desired (requires reboot)
  7. Preconfigured extensions & voicemail accounts with SECURE PASSWORDS

We’ve provided the link above to get your Incredible PBX 13-13.10 server up and running. This must be deployed on a Cloud-based KVM platform using CentOS 6 on a KVM (not OpenVZ) platform with a static IP address and a minimum of 1GB of RAM and a 20GB disk. The KVM platform is mandatory because we’ll be using ipset (which won’t work with OpenVZ platforms) to block entire countries as well as to set up our VoIP Blacklist. You’ll need at least one and preferably two FQDNs pointed to the IP address of your PBX. If you plan to use the Incredible PBX apps, then make sure to install the Whole Enchilada and Incredible Fax components before you transform your PBX into a public-facing server. And, as previously mentioned, tighten up ALL of your passwords for SSH and web access as well as for all of your extension secrets and voicemail PINs. It’s also a good idea to create the extensions you plan to make available for incoming calls although these can be added later as well.

UPDATE: CentOS 7 support with Incredible PBX 13-13.10 now has been added.

Choosing a KVM Platform

There are numerous cloud providers that offer a KVM platform. Choosing one that’s a perfect fit depends upon your budget obviously. For rock-solid dependability and little risk of provider implosion, we recommend Digital Ocean, Vultr, and OVH.1 If you’re just experimenting and can recover if your provider happens to suddenly go out of business, then the LowEndBox KVM offerings will save you some money. We don’t recommend CloudAtCost.

Converting to a Public-Facing PBX

Once you’ve completed the steps above and verified that your PBX is functioning reliably, you’re ready to download and run the One-Minute Installer to convert Incredible PBX into a public-facing server.

WARNING: Before you proceed, make certain that you log out any extensions that are registered using the IP address of the PBX as opposed to the FQDN of your server. Otherwise, these extensions may find their IP addresses locked out by Fail2Ban since SIP extension registrations by IP address will be blocked once the conversion to a public server is finished. After the update, if you find extensions that won’t register, the first thing to do is to issue the command: iptables -nL. See if the extension’s IP address is blocked. If it is, change the extension’s SIP registration to point the FQDN of the server as opposed to its IP address. Then you can unblock the IP address with this command using the extension’s actual IP address:

fail2ban-client set asterisk unbanip xxx.xxx.xxx.xxx

Now let’s proceed. Log into your server as root with SSH/Putty and issue these commands:

cd /root
wget http://incrediblepbx.com/go-public.tar.gz
tar zxvf go-public.tar.gz
rm -f go-public.tar.gz
./GO-PUBLIC

blank

Modifying the Blocked Countries List

As part of the install, all of the IP addresses from a number of countries were blocked using ipset in conjunction with the IPtables firewall. You can add or change the countries being blocked by making modifications in two places: (1) /etc/sysconfig/iptables beginning at line #69 and (2) /etc/blockem.sh on line #7. Be advised that every country blocked in IPtables requires a separate DROP line and the same country must also be enumerated on line #7 in /etc/blockem.sh. Otherwise, the IPtables firewall startup will fail when your server is rebooted or when IPtables is restarted. If a country is blocked on line #7 in /etc/blockem.sh but a DROP line is not added to /etc/sysconfig/iptables, then that country’s IP addresses will NOT be blacklisted when IPtables is restarted or your server is rebooted. Simply stated, the countries blocked in IPtables must match the country list in /etc/blockem.sh. For a current list matching countries with their international country code abbreviations, go here.

Blacklist Update Methodology

As configured, the country blacklists are only updated when the /etc/blockem.sh script is run. This occurs whenever you reboot your server or when you manually run the script. The VoIP Blacklist is updated nightly by a cron job which runs the /etc/update-voipbl.sh script.

Adding Extensions to Your SIP WhiteList

For the time being, you can manually adjust the extension listing that controls incoming SIP call access to your PBX. Only extensions included in this list are made available to receive incoming calls using the SIP URI syntax of 701@your.fqdn.com. First, you will need to edit extensions_override_freepbx.conf in /etc/asterisk. Once you’ve saved your changes, reload your dialplan: asterisk -rx "dialplan reload"

Beginning on line 31 of extensions_override_freepbx.conf, you will see a series of lines that actually authorize anonymous SIP connections with your server. There are two numeric entries and also two alpha entries to access the News and Weather apps on your server. Below them are the extensions you whitelisted when you ran the One Minute Installer above. The 13 entry in each line of the dialplan is required for all extensions to be enabled. You can add additional extensions by cloning the syntax of one of the existing entries. Be sure to enter the new extension number in BOTH places on each line that you add. The first entry corresponds to the left side of the SIP URI, e.g. 947@your.FQDN.com. The second entry tells Asterisk the extension to which to send the incoming call. Samples also are provided in the comments for redirecting incoming calls to outbound destinations. See also last week’s article.

exten => 947,13,Dial(local/947@from-internal)
exten => 951,13,Dial(local/951@from-internal)
exten => news,13,Dial(local/951@from-internal)
exten => weather,13,Dial(local/947@from-internal)

Adding IP Addresses to Your IPtables BlackList

You can manually add BlackList entries to your server using ipset; however, keep in mind that these entries will be overwitten when the VoIP Blacklist is updated each night. The recommended procedure is to first add them to ipset using the following command with the actual IP address to be blacklisted: ipset add voipbl xx.xx.xx.xx

Then visit the VoIP BlackList site and add the same IP address in the Blacklist Submission form. Multiple IP addresses can be added by separating every entry with a space.

Adding IP Addresses to Your IPtables WhiteList

You can whitelist additional IP addresses to enable access to your PBX that takes precedence over the blacklists by using the existing add-ip and add-fqdn utilities included in the /root folder. These were both modified to accommodate the public-facing Incredible PBX design.

Last week we got bitten by the age-old problem with BlackLists, namely that the bad guys populate them with IP addresses of places you actually want to go, such as CallCentric and Skyetel. Without a whitelist of safe sites, a blacklist is worse than worthless. So the way this works in Incredible PBX is the whitelist entries are moved to the top of the pecking order so that they take precedence in IPtables processing. The IPtables design works like this. Once a packet qualifies as safe by being accepted, the rest of the IPtables rules are ignored. Enjoy!

Originally published: Monday, June 10, 2019


blank
Need help with Asterisk? Visit the VoIP-info Forum.


Special Thanks to Our Generous Sponsors


FULL DISCLOSURE: ClearlyIP, Skyetel, Vitelity, DigitalOcean, Vultr, VoIP.ms, 3CX, Sangoma, TelecomsXchange and VitalPBX have provided financial support to Nerd Vittles and our open source projects through advertising, referral revenue, and/or merchandise. As an Amazon Associate and Best Buy Affiliate, we also earn from qualifying purchases. We’ve chosen these providers not the other way around. Our decisions are based upon their corporate reputation and the quality of their offerings and pricing. Our recommendations regarding technology are reached without regard to financial compensation except in situations in which comparable products at comparable pricing are available from multiple sources. In this limited case, we support our sponsors because our sponsors support us.

blankBOGO Bonaza: Enjoy state-of-the-art VoIP service with a $10 credit and half-price SIP service on up to $500 of Skyetel trunking with free number porting when you fund your Skyetel account. No limits on number of simultaneous calls. Quadruple data center redundancy. $25 monthly minimum spend required. Tutorial and sign up details are here.

blankThe lynchpin of Incredible PBX 2020 and beyond is ClearlyIP components which bring management of FreePBX modules and SIP phone integration to a level never before available with any other Asterisk distribution. And now you can configure and reconfigure your new Incredible PBX phones from the convenience of the Incredible PBX GUI.

blankVitalPBX is perhaps the fastest-growing PBX offering based upon Asterisk with an installed presence in more than 100 countries worldwide. VitalPBX has generously provided a customized White Label version of Incredible PBX tailored for use with all Incredible PBX and VitalPBX custom applications. Follow this link for a free test drive!
 

blankSpecial Thanks to Vitelity. Vitelity is now Voyant Communications and has halted new registrations for the time being. Our special thanks to Vitelity for their unwavering financial support over many years and to the many Nerd Vittles readers who continue to enjoy the benefits of their service offerings. We will keep everyone posted on further developments.


blank

  1. Digital Ocean and Vultr provide modest referral credits to Nerd Vittles for those that use our referral code. It in no way colors our recommendations regarding these two providers, both of whom we use extensively. []

Safely Deploying Incredible PBX on the Wide Open Internet

blank

We’ve previously documented the benefits of SIP URI calling. Because the calls are free from and to anywhere in the world, the use case is compelling. The drawbacks, particularly with Asterisk® servers, have primarily centered around the security implications of exposing SIP on a publicly-accessible server. Today we want to take another look at an open Internet SIP implementation for Asterisk based upon the pioneering work of Dr. Lin Song back in the PBX in a Flash heyday. We’ve embellished Lin’s original IPtables creation and our original article with some additional security mechanisms for Fail2Ban, Asterisk, FreePBX®, and Travelin’ Man 3. Special thanks also for a terrific tutorial from JavaPipe. All of today’s implementation is open source code which you are more than welcome to use or improve pursuant to GPL3.

July 22 UPDATE: New Incredible PBX 16-15-PUBLIC deployment tutorial is now available here.

Consider this. If everyone in the world had an accessible SIP address instead of a phone number, every call to every person in the world via the Internet would be free. That pretty much sums up why SIP URIs are important. The syntax for SIP URIs depends upon your platform. With Asterisk they look like this: SIP/somebody@FQDN.yourdomain.com. On SIP phones, SIP URIs look like this: sip:somenameORnumber@FQDN.yourdomain.com. Others use somenameORnumber@FQDN.yourdomain.com. Assuming you have a reliable Internet connection, once you have “dialed” a SIP URI, the destination SIP device will ring just as if the called party had a POTS phone. Asterisk® processes SIP URIs in much the same way as calls originating from commercial trunk providers except anonymous SIP calls are blocked.

While we have tested today’s design extensively including implementation of a cloud-based server with no security issues since deployment over four months ago, we still don’t recommend this SIP design for mission-critical PBXs because there remain some security risks with denial of service attacks and zero-day vulnerabilities. For these deployments, Incredible PBX® coupled with the Travelin’ Man 3 firewall which blocks SIP access except from whitelisted IP addresses and FQDNs has no equal. When properly deployed, the bad guys cannot even see your server much less attack it. A typical use case for today’s new SIP design would be a public Asterisk server that provides anonymous SIP access to the general public without any exposure to the corporate jewels. For example, we’ve put up a demonstration server that provides news and weather reports. In the corporate world, an equivalent deployment might provide access to a product database with pricing and availability details. Our rule of thumb before deploying today’s platform would be to ask yourself what damage could be inflicted if your server were totally compromised. If the answer is zero, then proceed. Otherwise, stick with Incredible PBX and the Travelin’ Man 3 firewall. The ideal platform for deployment using the same rule of thumb as above is one of the $1 a month cloud platforms.

ProviderRAMDiskBandwidthPerformance as of 12/1/19Cost
CrownCloud KVM (LA)1GB20GB +
Snapshot
1TB/month598Mb/DN 281Mb/UP
2CPU Core
$25/year
Best Buy!
Naranjatech KVM (The Netherlands)1GB20GB1TB/monthHosting since 2005
VAT: EU res.
20€/year w/code:
SBF2019
BudgetNode KVM (LA)1GB40GB RAID101TB/monthAlso available in U.K PM @Ishaq on LET before payment$24/year
FreeRangeCloud KVM (Ashburn VA, Winnipeg, Freemont CA)1GB20GB SSD3TB/monthPick EGG loc'n
Open ticket for last 5GB SSD
$30/year w/code:
LEBEGG30

Overview. There are a number of moving parts in today’s implementation. So let’s briefly go through the steps. Begin with a cloud-based installation of Incredible PBX. Next, we’ll upgrade the Fail2Ban setup to better secure a publicly-accessible Asterisk server. We’ll also customize the port for SSH access to reduce the attack rate on the SSH port. You’ll need a fully-qualified domain name (FQDN) for your server because we’ll be blocking all access to your server by IP address. If you want to allow SIP URI calls to your server, you’ll need this FQDN. If you want to also allow SIP registrations from this same FQDN, then a single FQDN will suffice; however, with OpenVZ platforms, we recommend using a different (and preferably more obscure) FQDN for SIP registrations since registered users have an actual extension on your PBX that is capable of making outbound calls which usually cost money. In this case, the obscure FQDN performs double-duty as the equivalent of a password to your PBX. For example, an FQDN such as hk76dl34z.yourdomain.com would rarely be guessed by an anonymous person while sip.yourdomain.com would be fairly obvious to attempted intruders. But that’s your call.

Using whatever FQDN you’ve chosen for SIP registrations, we’ll add an entry to /etc/asterisk/sip_custom.conf that looks like this: domain=hk76dl34z.yourdomain.com. That will block all SIP registration attempts except from that domain. It will not block SIP invitations! The next step will be to add a new [from-sip-external] context to extensions_override_freepbx.conf. Inside that context, we’ll specify the FQDN used for public SIP URI connections to your server, e.g. sip.yourdomain.com. This will block SIP invitations except SIP URIs containing that domain name. We’ll also define all of the extensions on your Asterisk server which can be reached with SIP URI invitations. These could be actual extensions, or ring groups, or IVRs, or Asterisk applications. The choice is yours. These SIP URI authorizations can be either numeric (701@sip.yourdomain.com) or alpha (weather@sip.yourdomain.com) or alphanumeric (channel7@sip.abc.com). Finally, we’ll put the new IPtables firewall rules in place and adjust your existing iptables-custom setup to support the new publicly-accessible PBX. For example, we’ll still use whitelist entries for web access to your server since anonymous users would cause nothing but mischief if TCP ports 80 and 443 were exposed. It’s worth noting that KVM platforms provide a more robust implementation of IPtables that can block more types of nefarious traffic. We’ve supplemented the original article with a KVM update below. With OpenVZ platforms, we have to rely upon Asterisk to achieve IP address blocking and some types of packet filtering. So why not choose a KVM platform? It’s simple. These platforms typically cost twice as much as equivalent OpenVZ offerings. With this type of deployment, KVM is worth it.

Installing Incredible PBX Base Platform

Today’s design requires an Incredible PBX platform on a cloud-based server. Start by following this tutorial to put the pieces in place. We recommend you also install the Whole Enchilada addition once the base install is finished. Make sure everything is functioning reliably before continuing.

blank

Upgrading the Fail2Ban Platform

Because this will be a publicly-accessible server, we’re going to tighten up the Asterisk configuration in Fail2Ban and lengthen the bantime and findtime associated with Fail2Ban’s Asterisk log monitoring. We also recommend that you whitelist the IP addresses associated with your server and PCs from which you plan to access your server so that you don’t inadvertently block yourself.

Log into your server as root and issue the following commands. When the jail.conf file opens in the nano editor, scroll down to line 34 and add the IP addresses you’d like to whitelist to the existing ignoreip settings separating each IP address with a space. Then press Ctrl-X, Y, then Enter to save your changes. Verify that Fail2Ban restarts successfully.

cd /etc/fail2ban
wget http://incrediblepbx.com/fail2ban-public.tar.gz
tar zxvf fail2ban-public.tar.gz
rm -f fail2ban-public.tar.gz
nano -w jail.conf
service fail2ban restart

If you ever get locked out of your own server, you can use the Serial Console in your VPS Control Panel to log into your server. Then verify that your IP address has been blocked by issuing the command: iptables -nL. If your IP is shown as blocked, issue this command with your address to unblock it: fail2ban-client set asterisk unbanip 12.34.56.78

Obtaining an FQDN for Your Server

Because we’ll be blocking IP address SIP access to your server, you’ll need to obtain one or perhaps two FQDNs for your server. If you manage DNS for a domain that you own, this is easy. If not, you can obtain a free FQDN from ChangeIP here. Thanks, @mbellot.

For the FQDN that you’ll be using for SIP registrations on your server, configure Asterisk to use it by logging into your server as root and issuing the following command using your new FQDN, e.g. xyz.yourdomain.com. Thanks, @ou812.

echo "domain=xyz.yourdomain.com" >> /etc/asterisk/sip_custom.conf

SECURITY ALERT: Never use the SIP URI MOD on a server such as this one with a publicly-exposed SIP port as it is possible for some nefarious individual to spoof your FQDN in the headers of a SIP packet and easily gain outbound calling access using your server’s trunk credentials.

Customizing the [sip-external-custom] Context

All FreePBX-based servers include a sip-external-custom context as part of the default installation; however, we need a customized version to use for a publicly-accessible PBX. You can’t simply update the context in /etc/asterisk/extensions.conf because FreePBX will overwrite the changes the next time you reload your dialplan. Instead we have to copy the context into extensions_override_freepbx.conf and make the changes there. So let’s start by copying the new template there with the following commands:

cd /tmp
wget http://incrediblepbx.com/from-sip-external.txt
cd /etc/asterisk
cat /tmp/from-sip-external.txt >> extensions_override_freepbx.conf
rm -f /tmp/from-sip-external.txt
nano -w extensions_override_freepbx.conf

When the nano editor opens the override file, navigate to line #10 of the [from-sip-external] context and replace xyz.domain.com with the FQDN you want to use for SIP invites to your server. These are the connections that are used to actually connect to an extension on your server (NOT to register). As noted previously, this can be a different FQDN than the one used to actually register to an extension on your server. Next, scroll down below line #27, and you will see a series of lines that actually authorize anonymous SIP connections with your server. There are two numeric entries and also two alpha entries to access the News and Weather apps on your server. The 13th position in the dialplan is required for all authorized calls.

exten => 947,13,Dial(local/947@from-internal)
exten => 951,13,Dial(local/951@from-internal)
exten => news,13,Dial(local/951@from-internal)
exten => weather,13,Dial(local/947@from-internal)

You can leave these in place, remove them, or add new entries depending upon which extensions you want to make publicly accessible on your server. Here are some syntax examples for other types of server access that may be of interest.

; Call VoIP Users Conference
exten => 882,13,Dial(SIP/vuc@vuc.me)
exten => vuc,13,Dial(SIP/vuc@vuc.me)
; Call Default CONF app
exten => 2663,13,Dial(local/${EXTEN}@from-internal)
exten => conf,13,Dial(local/2663@from-internal)
; Call Bob at Local Extension 701
exten => 701,13,Dial(local/${EXTEN}@from-internal)
exten => bob,13,Dial(local/701@from-internal)
; Call Default Inbound Route thru Time Condition
exten => home,13,Goto(timeconditions,1,1)
; Call Inbound Trunk 8005551212
exten => 8005551212,13,Goto(from-trunk,${DID},1)
; Call Lenny
exten => 53669,13,Dial(local/${EXTEN}@from-internal)
exten => lenny,13,Dial(SIP/2233435945@sip2sip.info)
; Call any toll-free number (AT&T Directory Assistance in example)
exten => information,13,Dial(SIP/18005551212@switch.starcompartners.com)

Once you’ve added your FQDN and authorized SIP URI extensions, save the file: Ctrl-X, Y, then Enter.

One final piece is required to enabled anonymous SIP URI connections to your server:

echo "allowguest=yes" >> /etc/asterisk/sip_general_custom.conf

Now restart Asterisk: amportal restart

UPDATE for DialPlan Junkies: We received a few inquiries following publication inquiring about the dialplan design. We’ve taken advantage of a terrific feature of Asterisk which lets calls fall through to the next line of a dialplan if there is no match on a Goto(${EXTEN},13) command. For example, if a caller dials ward@sip.domain.com and there is a line 12 in the dialplan directing the call to ward,13 which exists, call processing will continue there. However, if the extension does not exist, the call will not be terminated. Instead, if there exists a more generic line 13 in the dialplan, e.g. exten => _X.,13,Goto(s,1), call processing will continue there. We use this trick to then redirect the call to an ‘s’ extension sequence to announce that the called extension could not be reached. It’s the reason all of the whitelisted extensions have to have the same line 13 designation so that call processing can continue with the generic line 13 when a specific extension match fails.

Configuring IPtables for Public SIP Access

You may recall that, with Incredible PBX, we bring up the basic IPtables firewall using the /etc/sysconfig/iptables rules. Then we add a number of whitelist entries using /usr/local/sbin/iptables-custom. We’re going to do much the same thing with today’s setup except the rule sets are a bit different. Let’s start by putting the default iptables-custom file in place:

cd /usr/local/sbin
wget http://incrediblepbx.com/iptables-custom-public.tar.gz
tar zxvf iptables-custom-public.tar.gz
rm -f iptables-custom-public.tar.gz
nano -w iptables-custom

When the nano editor opens, scroll to the bottom of the file. You’ll note that we’ve started a little list of notorious bad guys to get you started. Fail2Ban will actually do a pretty good job of managing these, but for the serious recidivists, blocking them permanently is probably a good idea. In addition to the bad guys, you’ll want to whitelist your own IP addresses and domains so that you don’t get blocked from FreePBX web access to your server. The syntax looks like the following two examples:

/usr/sbin/iptables -I INPUT -s pbxinaflash.dynamo.org -j ACCEPT
/usr/sbin/iptables -I INPUT -s 8.8.8.8                -j ACCEPT

Whenever you make changes to your IPtables configuration, remember to restart IPtables using the following command ONLY: iptables-restart

Now let’s put the final IPtables piece in place with the default IPtables config file:

cd /etc/sysconfig
wget http://incrediblepbx.com/iptables-public.tar.gz
tar zxvf iptables-public.tar.gz
rm -f iptables-public.tar.gz
nano -w iptables

When the nano editor opens the file, scroll down to line 55 which controls the TCP port for SSH access to your server. We strongly recommend you change this from 22 to something in the 1000-2000 range. HINT: Your birth year is easy to remember. In the next step, we’ll make the change in your SSH configuration as well.

Next, scroll down to lines 148 and 149. Replace YOUR_HOSTNAME.no-ip.com on both lines with the FQDN of your server that will be used to accept SIP invitations (connections) on your server. These entries have no effect on SIP registrations which we covered above!

Once you’ve made these changes, save the file BUT DO NOT RESTART IPTABLES JUST YET.

Securing the SSH Access Port

TCP port 22 is probably one of the most abused ports on the Internet because it controls access to SSH and the crown jewels by default. Assuming you changed this port in the IPtables firewall setup above, we now need to change it in your SSH config file as well. Edit /etc/ssh/sshd_config and scroll down to line 12. Change the entry to: Port 1999 assuming 1999 is the port you’ve chosen. Be sure to remove the comment symbol (#) at the beginning of the line if it exists. Then save the file.

You’ll also want to update the SSH port in Fail2Ban. Edit /etc/fail2ban/jail.conf and search for port=ssh. In the [ssh-iptables] context, change the entry to port=1999 assuming 1999 is your chosen port. Save the file and reboot your server. Then you should be all set.

Dealing with the Bad Guys

You’ll be amazed how quickly and how many new friends you’ll make on the public Internet within the first few hours. You can watch the excitement from the Asterisk CLI by logging into your server as root and issuing the command: asterisk -rvvvvvvvvvv. Another helpful tool is to monitor your IPtables status which will show IP addresses that have been temporarily blocked by Fail2Ban: iptables -nL. This will catch most of the bad guys and block them. But some are smarter than others, and many know how to spoof IP addresses in SIP packets as you will quickly see. Unlike on KVM platforms, IPtables on most OpenVZ platforms cannot search packets for text strings which is a simple way to block many of these attackers. HINT: You get what you pay for. And, in some cases, attackers disguise their address or use yours. We’ve now found that ${SIPURI} holds the caller’s true identity so we’ve updated the code accordingly. Whether to permanently block these guys is completely up to you. A typical SIP INVITE before such a call is dropped only consumes about 100 bytes so it’s usually not a big deal. You also can manually block callers using the Fail2Ban client with the desired IP address: fail2ban-client set asterisk banip 12.34.56.78.

Additional Security on KVM Platforms

As we mentioned above, a KVM platform provides considerably more security for your public-facing server because you can block entire countries using the ipset extension to IPtables. You can read all about it here. After considerable discussion and suggestions on the PIAF Forum, we would offer the following code which blocks the countries we have identified as causing the majority of problems. First, modify your /etc/sysconfig/iptables configuration and insert the following code in the IPSPF section of the script around line 93. You can change the list of blocked countries to meet your own needs. Just be sure to make the same country-code changes in the blockem.sh script which we will cover in step 2. A list of available country codes can be found here. Save your changes, but do NOT restart IPtables just yet.

-A IPSPF -m set --match-set cn src -j DROP
-A IPSPF -m set --match-set ru src -j DROP
-A IPSPF -m set --match-set ps src -j DROP
-A IPSPF -m set --match-set kp src -j DROP
-A IPSPF -m set --match-set ua src -j DROP
-A IPSPF -m set --match-set md src -j DROP
-A IPSPF -m set --match-set nl src -j DROP
-A IPSPF -m set --match-set fr src -j DROP
-A IPSPF -m set --match-set SIPFLOOD src -j DROP

Second, we want to add a new /etc/blockem.sh script and make it executable (chmod +x /etc/blockem.sh). With the exception of the SIPFLOOD entry which is our custom Bad Guys List, make sure the country list in line #5 below matches the dropped countries list you added to IPtables in step #1 above.

#!/bin/bash
cd /etc
wget -qO - http://www.ipdeny.com/ipblocks/data/countries/all-zones.tar.gz| tar zxvf -
for i in \\
cn ru ps kp ua md nl fr
do
/usr/sbin/ipset create -exist $i hash:net
for j in $(cat $i.zone); do /usr/sbin/ipset add -exist $i $j; done
done
wait
sleep 5
wget http://incrediblepbx.com/badguys.tar.gz
tar zxvf badguys.tar.gz
rm -f badguys.tar.gz
/usr/sbin/ipset restore -! < /etc/SIPFLOOD.zone
wait
sleep 5
service iptables restart
wait
sleep 5
/usr/local/sbin/iptables-custom
wait
sleep 5
service fail2ban restart
wait
exit 0

Third, try things out by running the script: /etc/blockem.sh. Verify that IPtables is, in fact, blocking the listed countries: iptables -nL.

Finally, we recommend adding the script to /etc/rc.d/rc.local replacing the existing iptables-restart line. In that way, it gets run whenever you reboot your server.

In choosing a KVM platform, we've had good luck with the $5/month Digital Ocean platform where you still can get a $50 credit to kick the tires for 60 days, Vultr (similar pricing to D.O. also with a $50 credit). With either of these providers, you can add automatic backups for an extra dollar a month. In the bargain basement (may not be here tomorrow) category, we like the following providers. Many other low-cost options are documented on the LowEndBox site. Just don't invest more than you can afford to lose... and make a backup.1

Connecting a SIP Phone to OpenSIPS or LinPhone

If you followed along in our OpenSIPS adventure, then it's easy to test some SIP URI calls to your new server. You can connect virtually any kind of SIP telephone or endpoint to OpenSIPS. Another easy way to try out SIP calling is to first set up a free LinPhone Account.

You can find dozens of recommendations for hardware-based SIP phones both on Nerd Vittles and the PIAF Forum. For today we'll get you started with one of our favorite (free) softphones, YateClient. It's available for almost all desktop platforms. Download YateClient from here. Run YateClient once you’ve installed it and enter the credentials for your OpenSIPS or LinPhone account you've previously created. You’ll need the IP address of your OpenSIPS server or LinPhone's FQDN (sip.linphone.org) plus your account’s password. Fill in the Yate Client template using the IP address or FQDN as well as your Username and whatever Password you assigned to the account when you created it. Click OK to save your entries.

Once the Yate softphone shows that it is registered, try a test call to one of the SIP URIs you authorized on your new Asterisk server or try ours: blank

If you don't happen to have an OpenSIPS server or a LinPhone SIP account to play with but you have another Asterisk server, then the simple way to enable SIP URI extensions is by editing /etc/asterisk/extensions_custom.conf. In the [from-internal-custom] context, add an extension that can be used to contact any desired SIP URI. Then reload your dialplan: asterisk -rx "dialplan reload". Now dial that extension (2468 in the following example) from any phone connected to your Asterisk server. The entry would look something like this to call our SIP URI for the latest weather forecast:

blank

NEWS FLASH: A new One-Minute Installer to use Incredible PBX on the open Internet is now available here.

Originally published: Monday, June 3, 2019


blank
Need help with Asterisk? Visit the VoIP-info Forum.


Special Thanks to Our Generous Sponsors


FULL DISCLOSURE: ClearlyIP, Skyetel, Vitelity, DigitalOcean, Vultr, VoIP.ms, 3CX, Sangoma, TelecomsXchange and VitalPBX have provided financial support to Nerd Vittles and our open source projects through advertising, referral revenue, and/or merchandise. As an Amazon Associate and Best Buy Affiliate, we also earn from qualifying purchases. We’ve chosen these providers not the other way around. Our decisions are based upon their corporate reputation and the quality of their offerings and pricing. Our recommendations regarding technology are reached without regard to financial compensation except in situations in which comparable products at comparable pricing are available from multiple sources. In this limited case, we support our sponsors because our sponsors support us.

blankBOGO Bonaza: Enjoy state-of-the-art VoIP service with a $10 credit and half-price SIP service on up to $500 of Skyetel trunking with free number porting when you fund your Skyetel account. No limits on number of simultaneous calls. Quadruple data center redundancy. $25 monthly minimum spend required. Tutorial and sign up details are here.

blankThe lynchpin of Incredible PBX 2020 and beyond is ClearlyIP components which bring management of FreePBX modules and SIP phone integration to a level never before available with any other Asterisk distribution. And now you can configure and reconfigure your new Incredible PBX phones from the convenience of the Incredible PBX GUI.

blankVitalPBX is perhaps the fastest-growing PBX offering based upon Asterisk with an installed presence in more than 100 countries worldwide. VitalPBX has generously provided a customized White Label version of Incredible PBX tailored for use with all Incredible PBX and VitalPBX custom applications. Follow this link for a free test drive!
 

blankSpecial Thanks to Vitelity. Vitelity is now Voyant Communications and has halted new registrations for the time being. Our special thanks to Vitelity for their unwavering financial support over many years and to the many Nerd Vittles readers who continue to enjoy the benefits of their service offerings. We will keep everyone posted on further developments.


blank

  1. Digital Ocean and Vultr provide modest referral credits to Nerd Vittles for those that use our referral code. It in no way colors our recommendations regarding these two providers, both of whom we use extensively. []

Skyetel Introduces a Spring Boatload of New VoIP Features

blank

Spring is sprung and what better time for our Platinum Sponsor, Skyetel, to introduce a boatload of new features for their already outstanding, triple-redundant VoIP platform. Better yet, you still can take advantage of their half-price VoIP offer on up to $500 of communications services. Whether your wish list included SMS and MMS messaging , or faxing, or SPAM call filtering, or endpoint monitoring, or call recording and transcription, today’s your lucky day. You get all of them in the same familiar Dashboard you’ve been using. Let’s begin with a quick pricing overview and the sign up procedure, then on to the good stuff.

Skyetel Pricing Overview

This summary is not intended to be an exhaustive listing of all Skyetel services. Follow this link for a complete summary of fees and services. Incoming conversational calls are a penny a minute. Traditional DIDs are $1 per month. Toll free numbers are an additional 20¢ per month. Outbound conversational calls are $0.012 per minute. DIDs can be SMS/MMS enabled for 10¢ per month. Incoming SMS messages are a half penny apiece. Outbound SMS messages are a penny. MMS messages are 2¢ each. E911 service is $1.50 per month. CallerID lookups are $0.004 per call. Spam call filtering is $0.006 per inbound call. Voicemail transcription is available for 10¢ per message. Call recording is $.0025/minute. Call transcription is an additional $.005/minute. Storage of call recordings for up to 30 days is free. Effective 10/1/2023, $25/month minimum spend required.

Divide all these prices by 2 when you take advantage of the Nerd Vittles BOGO special below.

Signing Up for Skyetel Service

So here’s the drill to sign up for Skyetel service and take advantage of the Nerd Vittles special. First, complete the Prequalification Form here. You then will be provided a link to the Skyetel site to complete your registration. Once you have registered on the Skyetel site and your account has been activated, open a support ticket and request the BOGO credit for your account by referencing the Nerd Vittles special offer. Greed will get you nowhere. Credit is limited to one per person/company/address/location. If you want to take advantage of the 10% discount on your current service, open another ticket and attach a copy of your last month’s bill. See footnote 1 for the fine print.1 If you have high call volume requirements, document these in your Prequalification Form, and Skyetel will be in touch.

Original Skyetel DepositSkyetel Deposit MatchAvailable SIP Service $'s
$20$20$40
$50$50$100
$100$100$200
$200$200$400
$250$250$500

SMS and MMS Messaging with Postcards

In our original Skyetel article, we documented a simple way to send and receive SMS messages using your Skyetel DIDs. Now Skyetel has released a terrific, open source Docker app, Postcards, that lets you build an SMS and MMS messaging platform for your entire organization. Suffice it to say, anything you ever wanted to do with SMS and MMS messaging, you can do with Postcards. We won’t repeat Skyetel’s excellent tutorial, but you certainly need to visit their site and take Postcards for a spin.

blank

Introducing Skyetel’s New Fax Platform

Every time we read an article predicting the demise of fax technology, we have to chuckle. We’ve been reading the articles for about 30 years now, and fax still is the goto solution for many organizations. Can you spell HIPPA? Finally, Skyetel has dipped its toes in the fax waters by offering an easy-to-use fax solution for receipt of traditional and T.38 faxes. Simply purchase a Skyetel DID and configure it for vFax routing. Enter an email address for delivery of the faxes, and you’re done.

blank

Sending faxes from the Skyetel portal still is on the drawing boards, but it’s coming. In the meantime, Incredible Fax™ which is bundled with all Incredible PBX® platforms will let you send faxes ’til the cows come home with our easy-to-use Hylafax/AvantFax implementation.

blank

Implementing the New Spam Call Filter

One of the most often requested features for any PBX is spam call filtering. Skyetel takes it to the next level by dealing with the spammers before the calls ever reach your PBX. For each of your Skyetel phone numbers, click on the Features tab and set the Spam Call Filter as desired.

blank

Recording and Transcribing Skyetel Calls

As with spam call filtering, recording and/or transcribing Skyetel calls is only a click away. For each of your Skyetel phone numbers, click on the Features tab and set the option desired for Recording and/or Transcribing calls. Recordings and Transcriptions can be managed from your Skyetel Dashboard. Storage is free for up to 30 days, after which they are deleted.

blank

Skyetel Expansion for Canadian Users

blank

Here’s some great news for our Canadian friends. Skyetel has been listening!

  • Porting to Skyetel in Canada now is significantly easier and faster
  • Awesome reductions in audio round trip times
  • Epic reductions in time-to-deliver
  • Faster response times to technical issues (and fewer of them!)
  • Audio for Canadian calls will now originate from Canadian data centers
  • SMS and MMS available on Canadian ported numbers

Skyetel Monitoring of Endpoint Health

In addition to monitoring and reporting the health of all Skyetel services in your web portal, today’s addition allows you to configure Skyetel to not only monitor the State of every registered endpoint but also its Health with realtime metrics of the Latency, Packet Loss, and Jitter of each of your endpoints. Simply check the Network QOS options desired.

blank

Don’t forget to whitelist all of the Skyetel data centers in Incredible PBX:

  • /root/add-ip Skyetel-NW 52.41.52.34
  • /root/add-ip Skyetel-SW 52.8.201.128
  • /root/add-ip Skyetel-NE 52.60.138.31
  • /root/add-ip Skyetel-SE 50.17.48.216
  • /root/add-ip Skyetel-EU 35.156.192.164

Continue reading the original Nerd Vittles Skyetel tutorial.

Originally published: Tuesday, May 28, 2019  Updated: Wednesday, June 12, 2019


blank
Need help with Asterisk? Visit the VoIP-info Forum.


Special Thanks to Our Generous Sponsors


FULL DISCLOSURE: ClearlyIP, Skyetel, Vitelity, DigitalOcean, Vultr, VoIP.ms, 3CX, Sangoma, TelecomsXchange and VitalPBX have provided financial support to Nerd Vittles and our open source projects through advertising, referral revenue, and/or merchandise. As an Amazon Associate and Best Buy Affiliate, we also earn from qualifying purchases. We’ve chosen these providers not the other way around. Our decisions are based upon their corporate reputation and the quality of their offerings and pricing. Our recommendations regarding technology are reached without regard to financial compensation except in situations in which comparable products at comparable pricing are available from multiple sources. In this limited case, we support our sponsors because our sponsors support us.

blankBOGO Bonaza: Enjoy state-of-the-art VoIP service with a $10 credit and half-price SIP service on up to $500 of Skyetel trunking with free number porting when you fund your Skyetel account. No limits on number of simultaneous calls. Quadruple data center redundancy. $25 monthly minimum spend required. Tutorial and sign up details are here.

blankThe lynchpin of Incredible PBX 2020 and beyond is ClearlyIP components which bring management of FreePBX modules and SIP phone integration to a level never before available with any other Asterisk distribution. And now you can configure and reconfigure your new Incredible PBX phones from the convenience of the Incredible PBX GUI.

blankVitalPBX is perhaps the fastest-growing PBX offering based upon Asterisk with an installed presence in more than 100 countries worldwide. VitalPBX has generously provided a customized White Label version of Incredible PBX tailored for use with all Incredible PBX and VitalPBX custom applications. Follow this link for a free test drive!
 

blankSpecial Thanks to Vitelity. Vitelity is now Voyant Communications and has halted new registrations for the time being. Our special thanks to Vitelity for their unwavering financial support over many years and to the many Nerd Vittles readers who continue to enjoy the benefits of their service offerings. We will keep everyone posted on further developments.


blank

  1. In the unlikely event that Skyetel cannot provide a 10% reduction in your current origination rate and/or DID costs, Skyetel will give you an additional $50 credit to use with the Skyetel service. []

Best of Both Worlds: Safely Marrying Asterisk to OpenSIPS


blank

Last week we introduced OpenSIPS, the multi-functional, multi-purpose signaling SIP server which can fulfill almost any communications function one can dream up except the unified communications tasks typically performed with a PBX such as Asterisk®. Today we want to marry the two platforms to give you the best of both worlds. For Incredible PBX® users, the primary advantage of adding an OpenSIPS front end is the elimination of the complexities associated with interacting with your PBX from remote sites with ever changing, dynamic IP addresses coupled with NAT firewalls over which you have no control. While there are many approaches to interconnecting the two platforms, we’re not comfortable with the exposure that a simple registration passthrough design introduces for many Asterisk users. Instead we prefer a model that lets everybody contact you and your users without providing the world the access necessary to allow anonymous strangers a platform from which to launch endless attempts to compromise your Asterisk server and individual Asterisk accounts.

Not all users on an Asterisk PBX need anonymous lurkers to have worldwide, public access to their individual phones. For most, DIDs suffice for public access. For users that do need such access, we will begin by creating a SIP account on your OpenSIPS server that is separate and apart from your Asterisk user account or extension. Also keep in mind that anonymous SIP calls require a match on the SIP URI to reach the person or function desired. You can enable and disable these SIP URI-accessible functions on your OpenSIPS server as desired. And you can determine how obscure to make each of the SIP URIs. Security through obscurity works and deters many SIP attacks. Now let’s address what you can and cannot do with this setup.

Using a SIP phone from anywhere in the world, any SIP user CAN:

  • Make SIP URI calls to authorized extensions and ring groups on your Asterisk PBX
  • Make SIP URI calls to authorized clients registered to a 3CX PBX with a SIP UUID
  • With a legitimate password, make DISA-like calls with Asterisk trunks, if enabled
  • With an invalid DISA password, converse with Lenny
  • With a legitimate password, check and manage authorized Asterisk voicemail accounts
  • With a legitimate password, participate in authorized Asterisk conferences
  • Access other authorized Asterisk applications available from Asterisk extensions

Using a SIP phone from anywhere in the world, an OpenSIPS-registered User also CAN:

  • Make PSTN calls from OpenSIPS-registered SIP phones, if enabled
  • Receive calls from Asterisk forwarded to any OpenSIPS-registered SIP phone
  • Receive calls from Asterisk forwarded to any 3CX-registered client or SIP phone

Using any SIP phone registered to a SIP proxy, you CANNOT:

  • Log into any Asterisk user account without whitelist permission and credentials
  • Make 911 calls

Prerequisites: To complete today’s setup, we’re assuming you have (1) an Incredible PBX server running Asterisk 13, (2) an OpenSIPS server built with version 1.2.0 or later of the Incredible PBX for OpenSIPS installer, and (3) either a registered SIP account and SIP URI on your OpenSIPS PBX or a SIP account with a provider such as a free linphone.org account.

Running pbxstatus on your OpenSIPS server will tell you which version you have. If you don’t have pbxstatus or the version is below 1.2.0, please initialize your Debian 8 platform, download the latest release, and reinstall following the our OpenSIPS tutorial here. There were major changes in the OpenSIPS configuration to support Asterisk connectivity which made an in place upgrade too complex. Our apologies.

Before creating user accounts on your OpenSIPS server, give some thought to a numbering scheme that won’t conflict with extension registrations on your Asterisk server. For example, if your Asterisk server uses extensions 701 through 750, then you may wish to consider using 7701 through 7750 on your OpenSIPS server. The one-to-one match keeps things simple without running into conflicts between the Asterisk extension numbers and the OpenSIPS user accounts. We’ll use the 700 (Asterisk) and 7700 (OpenSIPS) extension ranges in our examples which follow. And we’ve reworked the original OpenSIPS tutorial in keeping with this design to simplify Asterisk integration for new readers just joining the party.

We want to express our sincere appreciation to Bill Simon for his patient tutelage in walking us through some of the potential landmines in marrying an OpenSIPS server with Asterisk. Should your organization ever need professional help with a SIP deployment, there is no finer SIP authority than Simon Telephonics.

blank

1. Configuring Asterisk for Inbound OpenSIPS Calls

Assuming you have an Incredible PBX 13 platform, open the GUI as admin using a browser from your desktop. First, let’s create a Trunk for the OpenSIPS server. Choose Connectivity -> Trunks -> Add SIP (chan_sip) Trunk. For Trunk Name, use opensips. Next, click on the SIP Settings tab in the dialog. For Trunk Name, again use opensips. In PEER DETAILS, enter the following and replace xxx.xxx.xxx.xxx twice with the actual IP address of your OpenSIPS server. Then click Submit and Reload Dialplan when prompted.

type=peer
host=xxx.xxx.xxx.xxx
context=from-opensips
insecure=port,invite
disallow=all
allow=ulaw
deny=0.0.0.0/0.0.0.0
permit=xxx.xxx.xxx.xxx/255.255.255.255

Next, using SSH or Putty, login to your Asterisk server as root and issue these commands replacing xxx.xxx.xxx.xxx with the IP address of your OpenSIPS server (choose option 0 when prompted for access type):

cd /root
./add-ip opensips xxx.xxx.xxx.xxx
wget http://incrediblepbx.com/from-opensips.tar.gz
tar zxvf from-opensips.tar.gz
rm -f from-opensips.tar.gz
nano -w from-opensips.txt

When the editor opens, scroll down to line 16 and enter a very secure PIN (up to 10 digits) for access to the DISA-like service to make outbound calls via SIP URI. It’s your phone bill so make it long (up to 10 digits) and something that is not easily guessed. On line 20, we have configured DISA for numbers up to 11 digits. If your dialplan requires international dialing support, you can adjust 11 to the desired number of digits. Then save the file and copy the dialplan code into extensions_custom.conf and reload your dialplan:

cd /etc/asterisk
cat /root/from-opensips.txt >> extensions_custom.conf
asterisk -rx "dialplan reload"

IMPORTANT NOTE: Just because you have configured this DISA option on your Asterisk server does not mean it is available via SIP URI. In fact, no SIP URI access to your Asterisk server is enabled at this juncture. You still must set up the SIP URI connections on your OpenSIPS server. Whether to do that and which features to activate are completely up to you.

2. Configuring OpenSIPS for Asterisk Connectivity

Beginning with version 1.2.0 of the Incredible PBX installer for OpenSIPS, the server itself is preconfigured to support Asterisk connectivity using AVPs. Implementation only requires command line execution of an AVP script to enable each feature you wish to activate. A similar script can be used to deactivate any AVP feature previously activated. To install the scripts on your OpenSIPS server, log in as root using SSH or Putty and issue these commands:

cd /root
wget http://incrediblepbx.com/asterisk-features-for-opensips.tar.gz
tar zxvf asterisk-features-for-opensips.tar.gz
rm -f asterisk-features-for-opensips.tar.gz

The function of each of the Asterisk scripts is self-explanatory from the script names:

  • asterisk-add-forward
  • asterisk-delete-forward
  • asterisk-list-forwards

Three pieces of information are required to add a SIP URI forward from OpenSIPS to your Asterisk server using the AVP asterisk-add-forward script:

  • UUID of SIP URI (from any SIP phone, dial UUID@opensips.yourdomain.com to connect)
  • Asterisk Extension (destination where incoming OpenSIPS call should be forwarded)
  • Asterisk Public IP Address

To add a SIP URI for extension 701 on your Asterisk server at xx.xx.xx.xx reachable at 701@opensips.yourdomain.com, the command would look like this where xx.xx.xx.xx is the public IP address of your Asterisk server and opensips.yourdomain.com is the FQDN of your OpenSIPS server: /root/asterisk-add-forward 701 701 xx.xx.xx.xx

CAUTION: Other than for forwards like this, do NOT set up User accounts in the OpenSIPS Control Panel using the same numbers as existing extensions on your Asterisk server. Otherwise, if your SIP phone is registered to a 701 user account on your OpenSIPS server, you lose the ability to connect to any extension on your Asterisk server if a 701 account requiring registration also existed on the Asterisk platform.

To use a name in the SIP URI or enable a second SIP URI for the same Asterisk 701 extension (jdoe@opensips.yourdomain.com): /root/asterisk-add-forward jdoe 701 xx.xx.xx.xx

Simply repeat the steps above for every SIP URI you wish to enable for an Asterisk extension.

To enable DISA-like access via SIP URI using dial as UUID (dial@opensips.yourdomain.com): /root/asterisk-add-forward dial *1 xx.xx.xx.xx

Keep in mind that you need not use "dial" as the UUID. You can make up any name you like. So long *1 is the DISA extension, the UUID can be as obscure as desired e.g. disa5038now.

For voicemail access via SIP URI, you can do it in two ways. For generic access triggering prompts for both the voice mailbox number and the mailbox PIN, use the following: /root/asterisk-add-forward vm *98 xx.xx.xx.xx

For voicemail access to a specific mailbox (701) with only a prompt for the mail PIN, use: /root/asterisk-add-forward vm701 *98701 xx.xx.xx.xx

For access to a specified conference (2663) with a prompt for the conference PIN, use: /root/asterisk-add-forward conf2663 2663 xx.xx.xx.xx

For access to Weather Reports (947) with a prompt for the ZIP Code, use something like this: /root/asterisk-add-forward weather 947 xx.xx.xx.xx

For News Headlines (951), use: /root/asterisk-add-forward news 951 xx.xx.xx.xx

To delete any previously created UUID forward: /root/asterisk-delete-forward

To list existing UUID forwards for SIP URIs: /root/asterisk-list-forwards

Calling Tip: If your softphone is registered to an OpenSIPS User account, you can call any of the enabled forwarding entries by entering the UUID without @opensips.yourdomain.com, e.g. dialing vm would connect to the Asterisk voicemail system with a prompt for mailbox.

blank

3. Enabling Inbound Calls from Asterisk to a SIP Phone

In today’s design, incoming calls to your Asterisk PBX can be forwarded to a user account on your OpenSIPS server or a free linphone.org user account by (1) creating a free User account in the OpenSIPS Control Panel or at linphone.org, (2) logging into that user account with a SIP phone or softphone, (3) creating a custom extension in the Incredible PBX GUI that points to the SIP URI of your user account on the OpenSIPS server or your free linphone.org SIP user account or a 3CX client, and (4) adding that custom extension to either a Ring Group that includes your Asterisk extension or enabling FindMe/FollowMe for your Asterisk extension and designating the custom extension as the No Answer Destination. Need support for multiple Asterisk users? Not a problem. Repeat the drill for each user.

The procedure for adding a User Account in the OpenSIPS Control Panel was covered in last week’s article. The procedure for creating a free Linphone User Account was covered in an earlier article so we won’t repeat it here. Another obvious SIP URI destination is any 3CX Client if you’ve previously set up a free 3CX server following our 3CX tutorial. Refer back to those articles if you need a refresher.

On the Asterisk side, login to the Incredible PBX GUI as admin with your favorite browser. Then choose Applications -> Extensions -> Add Custom Extension. For the User Extension and Display Name, we recommend using the 7701 numbering scheme for remote accounts. Then click on the Advanced tab and enter the SIP URI of your OpenSIPS, Linphone, or 3CX User account as the Dial option, e.g. SIP/yourname@sip.linphone.org or SIP/7701@opensips.yourdomain.com. Click Submit and Apply Config to reload dialplan.

To assure that incoming calls ring on both your Asterisk phone (701) and your registered SIP phone, we recommend setting up a Ring Group on the Asterisk side that includes both the 701 extension and the new 7701 custom extension. Then adjust your Inbound Routes to point to the number of this Ring Group instead of to 701. In this way, you can preserve the voicemail functionality associated with your 701 extension. FYI: None of these servers proxy audio and video of your calls. They provide a SIP registration service only.

The other alternative to a Ring Group is to enable FindMe/FollowMe in the 701 extension settings and then specify Extension:701 as the No Answer Destination. With this approach, voicemail will never be triggered on calls sent to extension 701 on your PBX. Since OpenSIPS lacks voicemail, you would lose calls not answered on your registered SIP phone or softphone.

TIP: We use 3CX clients exclusively for inbound calls on iPhones and Android devices because we have found they are far superior in dealing with both push notifications and NAT routing. 3CX clients actually ring when someone calls AND you can hear both sides of every call.

4. Outbound PSTN Calling from OpenSIPS

The DISA setup documented above allows your existing Trunks to continue to be managed and secured exclusively on your Asterisk server with no trunk exposure on the OpenSIPS platform at all. Thus, if either your public-facing OpenSIPS server or Linphone is ever compromised, nobody will be able to make any calls on your nickel because there will be no trunks available to process the outbound calls. Your DISA password is never exposed.

For some (like us), a two-step outbound calling procedure is just too painful. In that case, with providers such as Skyetel, you can deploy a PSTN calling platform on both your Asterisk server and on OpenSIPS. We documented the Skyetel trunk setup for OpenSIPS in our tutorial last week. The good news is nothing precludes deployment of Skyetel at multiple sites even if you only use Skyetel on the OpenSIPS platform for outbound calling. And this completely avoids implementing a DISA solution which has security implications of its own. Effective 10/1/2023, $25/month minimum spend at Skyetel is required.

Enabling direct PSTN calling with OpenSIPS means nobody can ever make PSTN calls merely by guessing a SIP URI. It requires an actual SIP registration to OpenSIPS, and you have Fail2Ban to assist with securing that process. So the outbound calling design is completely up to you. Direct PSTN calling from OpenSIPS is no less safe so long as none of your OpenSIPS User account passwords are compromised.

5. Enabling Calls from Asterisk to OpenSIPS Users

For OpenSIPS AVP forwards that have been enabled to Asterisk extensions, you probably will also want to provide a way for Asterisk users to return those calls directly to OpenSIPS users since that will be the CallerID that displays when an OpenSIPS user places a call directly to a forwarded Asterisk extension. Assuming a SIP phone has been registered to User account 7709, when that OpenSIPS user places a call to a forwarded Asterisk extension 701, it means the Asterisk user will see 7709 displayed as the CallerID for the incoming call even though the User of the OpenSIPS 7709 extension may also be associated with extension 709 on the Asterisk side. If the Asterisk callee attempts to return the call by dialing 7709 instead of 709, the call would fail. To avoid confusion by Asterisk users, the simple solution is to add an additional Custom SIP extension for every OpenSIPS User account.

For example, on the Asterisk side, login to the Incredible PBX GUI as admin with your favorite browser. Then choose Applications -> Extensions -> Add Custom Extension. For the User Extension, enter 7709. For the Display Name, enter the name of the person using that OpenSIPS user account. Next, click on the Advanced tab and enter the SIP URI for this OpenSIPS User account as the Dial option, e.g. SIP/7709@opensips.yourdomain.com. Click Submit and Apply Config to reload dialplan.

FYI: Matching Custom Extension numbers on the Asterisk platform to identical extensions on your OpenSIPS server does not create the registration problems we cautioned against earlier. Only Asterisk extensions requiring actual SIP registration need to remain unique from accounts on your OpenSIPS platform.

6. A Few Words About Security blank

If you’ve been using Incredible PBX with its Travelin’ Man 3 firewall, it’s not unlike living in a gated community where most of the outside world doesn’t even know you exist. Adding a "second home" with OpenSIPS is not unlike buying a summer place next door to Fred Sanford in Watts. You might as well have set up shop in the middle of Russia because, for all intents and purposes, you have. Anybody in the world can guess your IP address and spend the day trying to break into your server. So the name of the game is vigilance. Especially for the first few weeks, you need to run iptables -nL regularly and see how quickly your Fail2Ban blacklist is filling up. If you heeded our advice and set up your OpenSIPS server on a KVM platform (instead of OpenVZ), we’ve got a handy little script that will let you move bad guys snagged by Fail2Ban to the permanent IPset blacklist. Just download the script and run it daily to move the Fail2Ban entries to permanent block status in the IPset blacklist:

cd /root
wget http://incrediblepbx.com/move-fail2bans-to-ipset.tar.gz
tar zxvf move-fail2bans-to-ipset.tar.gz
rm -f move-fail2bans-to-ipset.tar.gz
./move-fail2bans-to-ipset

Once you have verified that the IP addresses actually are being populated in the IPset blacklist table (ipset list | sort), you can add the script to /etc/crontab to run automatically each night:

echo "2 4 * * * root /root/move-fail2bans-to-ipset > /dev/null 2>&1" >> /etc/crontab

If you’d like a head start on your IPset blacklist, simply download our latest list and then reboot your server:

cd /etc
wget http://incrediblepbx.com/badguys.tar.gz
tar zxvf badguys.tar.gz
rm -f badguys.tar.gz 

Another potential vulnerability is SSH. This command will tell you who has attempted to login to your server as root: cat /var/log/auth.log | grep password. If you ever see a failed login and it wasn’t a mistake on your part, change your SSH access port immediately if not sooner: nano -w /etc/ssh/sshd_config. Then restart SSH: /etc/init.d/ssh restart. Better yet, set up SSH public key authentication.

The other major consideration is the number of holes you punch into the security of your Asterisk server using the OpenSIPS asterisk-add-forward script. Every time you add an extension to this list, you open another (read-only) window into your Asterisk communications world. And anybody can connect to these extensions using either the FQDN of your OpenSIPS server or its IP address. Even though we don’t practice what we preach, we strongly recommend using alphanumeric UUIDs instead of numbers for these access points. That at least avoids random calls from bad guys that are accustomed to numeric numbers only in SIP URIs. Regularly review your OpenSIPS log for unusual strings of forwarded calls and adjust your forwarding UUIDs accordingly: cat /var/log/opensips.log | grep forwarded.

In our previous article, we’ve already addressed how important it is to limit User accounts to your FQDN and never the IP address of your OpenSIPS server. In this way, you limit OpenSIPS registration exposure to your FQDN and never the IP address of your server. Fail2Ban also assists here by blocking failed login attempts after a single failure unless you have whitelisted the IP address in Fail2ban’s ignoreip list in /etc/fail2ban/jail.conf and restarted Fail2Ban with this command: /etc/init.d/fail2ban restart. These are the only entry points that offer the ability to actually register to your server. AVPs never do. Obviously, a successful SIP registration is much more dangerous than a random phone call on a SIP URI set up using AVP extension forwarding.

Finally, passwords now matter on your Asterisk PBX for any port forward you’ve established with OpenSIPS. For example, if you’ve set up a generic forward to access voicemail, then it means anybody guessing the SIP URI you created can spend the day (at no cost) attempting to break into ANY voicemail account on your Asterisk server by guessing the PIN. Fail2Ban will not protect you here. If you’ve set up DISA-like access to your Asterisk server on OpenSIPS, then the same applies except now the attacker gets a blank check to make commercial calls if they can guess your access PIN. Worried yet? We hope so. Sure beats a $100,000 phone bill.

7. Taking OpenSIPS for a Test Drive blank

We usually provide a Demo Line for readers to try out our latest creations. For obvious reasons, we prefer not to disclose our OpenSIPS FQDN to the general public. But we have set up a port forward from a DID that we temporarily configured on our OpenSIPS server. So, if you’d like to sample the voice quality of placing a call to a DID in Atlanta forwarded to an OpenSIPS server in New York forwarded to an Asterisk server in Miami and then back to you, try calling 843-606-0555 for a weather report in your favorite ZIP code. We’re betting you will be dumbfounded by the quality of the call. Enjoy!

Originally published: Monday, May 20, 2019


blank
Need help with Asterisk? Visit the VoIP-info Forum.


Special Thanks to Our Generous Sponsors


FULL DISCLOSURE: ClearlyIP, Skyetel, Vitelity, DigitalOcean, Vultr, VoIP.ms, 3CX, Sangoma, TelecomsXchange and VitalPBX have provided financial support to Nerd Vittles and our open source projects through advertising, referral revenue, and/or merchandise. As an Amazon Associate and Best Buy Affiliate, we also earn from qualifying purchases. We’ve chosen these providers not the other way around. Our decisions are based upon their corporate reputation and the quality of their offerings and pricing. Our recommendations regarding technology are reached without regard to financial compensation except in situations in which comparable products at comparable pricing are available from multiple sources. In this limited case, we support our sponsors because our sponsors support us.

blankBOGO Bonaza: Enjoy state-of-the-art VoIP service with a $10 credit and half-price SIP service on up to $500 of Skyetel trunking with free number porting when you fund your Skyetel account. No limits on number of simultaneous calls. Quadruple data center redundancy. $25 monthly minimum spend required. Tutorial and sign up details are here.

blankThe lynchpin of Incredible PBX 2020 and beyond is ClearlyIP components which bring management of FreePBX modules and SIP phone integration to a level never before available with any other Asterisk distribution. And now you can configure and reconfigure your new Incredible PBX phones from the convenience of the Incredible PBX GUI.

blankVitalPBX is perhaps the fastest-growing PBX offering based upon Asterisk with an installed presence in more than 100 countries worldwide. VitalPBX has generously provided a customized White Label version of Incredible PBX tailored for use with all Incredible PBX and VitalPBX custom applications. Follow this link for a free test drive!
 

blankSpecial Thanks to Vitelity. Vitelity is now Voyant Communications and has halted new registrations for the time being. Our special thanks to Vitelity for their unwavering financial support over many years and to the many Nerd Vittles readers who continue to enjoy the benefits of their service offerings. We will keep everyone posted on further developments.


blank