
Once you have activated SIP trunks on your XiVO server, incoming calls to phone numbers (DIDs) you have purchased from your trunk providers will begin arriving on your XiVO PBX doorstep. The next task is to tell XiVO how to process those calls. Otherwise the caller will simply get a busy signal when calling your DIDs.
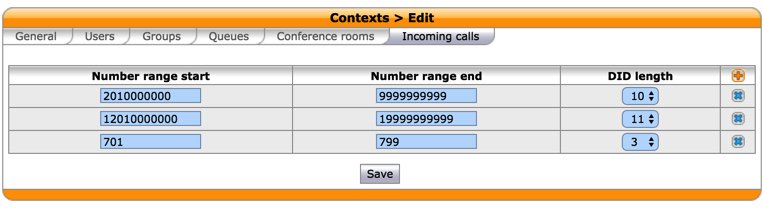
Incoming Calls typically are identified by the DID number associated with the registered trunk. Before you can build Incoming Call routes for these DIDs, the range of numbers associated with your DIDs must be authorized in the from-extern (Incalls) context which can be found in IPBX:IPBX Configuration:Contexts. Under the Incoming Calls tab, there should already be a listing of authorized DID ranges. If you’re registering DIDs from outside the U.S. and Canada, you may need to add additional entries before setting up Incoming Call routes.
For every DID registered with any of your Trunk Providers, you will need to create an Incoming Call Route which tells XiVO where to send the calls placed to each of those DIDs.
To begin, choose IPBX:Call Management:Incoming Calls and click + Add. For every DID, specify at least the phone number associated with the DID, accept the default Context for the calls, and choose the desired Destination for the calls.
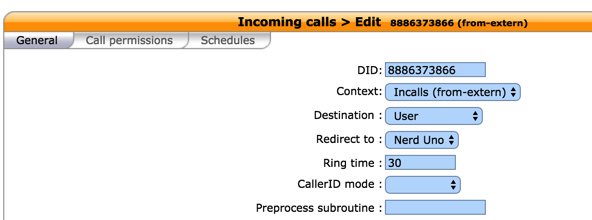
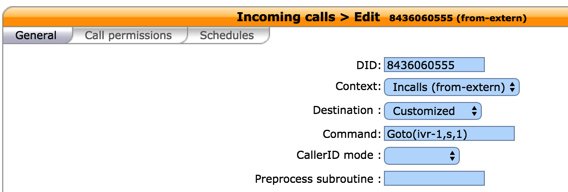
Incoming Call Routing can be as simple as sending the incoming calls to a User on your PBX (as shown above) or as complex as sending the calls to a Custom Context that might have been developed for an IVR (as shown below).
The list of available routing choices can be displayed by clicking the Destination field:
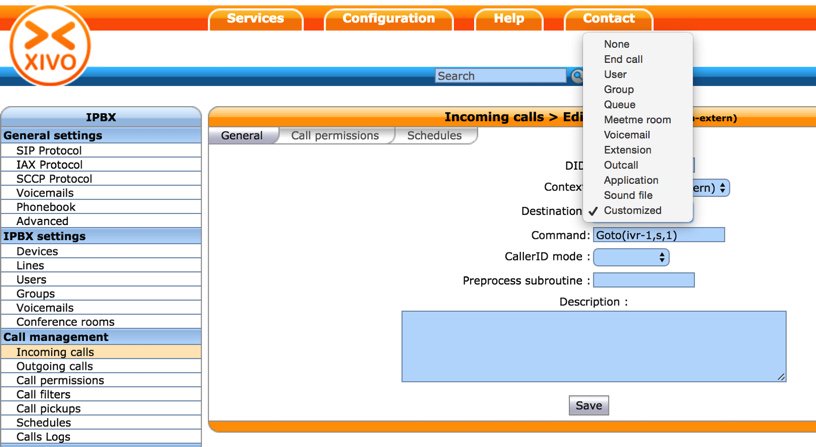
Press the SAVE button once you have filled in the required pieces. Then make a test call to the DID to verify that it is routed to the proper destination.

 JUST RELEASED: Visit the Incredible PBX Wiki
