

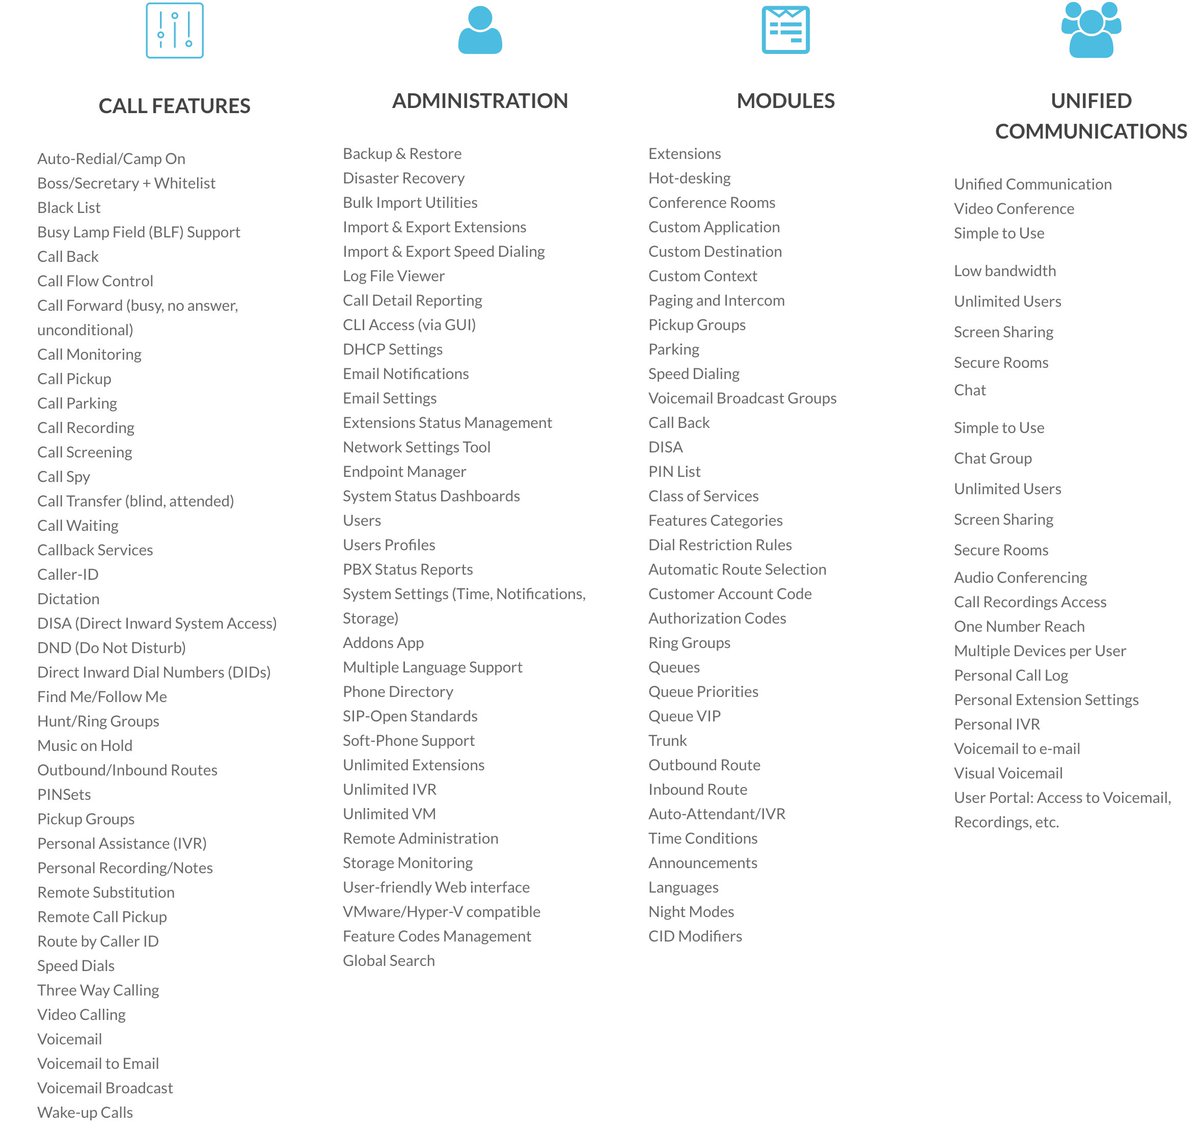
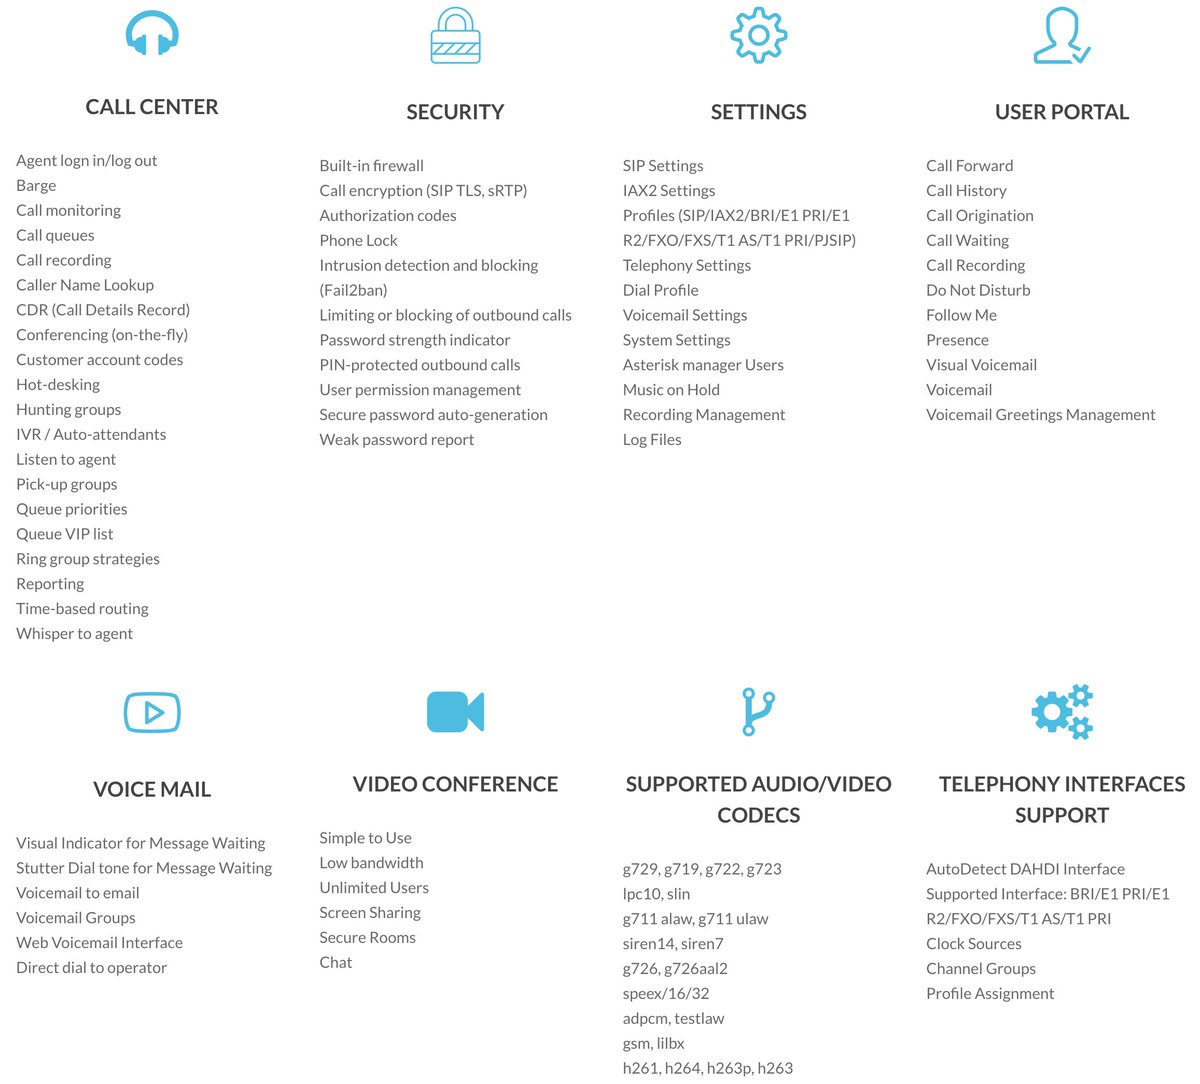
If you liked Ombutel, you’re going to love VitalPBX. If you’ve never heard of Ombutel but you live and breathe Asterisk®, you’re still going to love VitalPBX. For everyone else, you’re going to love VitalPBX. In addition to an impressive collection of commercial modules, this month’s release of the VitalPBX 2.0 Unified Communications Platform provides the slickest user interface in the VoIP universe. It includes new support for PJsip, DPMA and Digium phones, XMPP chat, video conferencing, WebRTC, and our favorite, Custom Contexts. What began several years ago as a joint development project between Telesoft and Xorcom is now an independent venture of Telesoft. If you love Features, VitalPBX has no equal:
VitalPBX has many open source and GPL components including Asterisk 13.19.0, however, VitalPBX is a freeware product much like FreePBX® which blends commercial modules and proprietary components into its distribution. It’s not our favorite business model, but we certainly understand the rationale given the disappointing GPL history in the VoIP space. For our testing purposes, Telesoft has generously provided free licenses to commercial modules. We would hasten to add that no features requiring payment were used in this article or in the demo applications accompanying it. We will cover the commercial applications requiring payment at a later date.
Incidentally, when you get around to exploring the commercial offerings, keep in mind that all of them come with a free tier to let you try things out:
- Custom Contexts – 1 free context
- IVR Stats – 1 free IVR
- Sonata Switchboard – 1 free layout for 15 extensions
- Sonata Billing – free for 8 extensions
- Sonata Recordings – free for 8 extensions
- Domotic – completely free
- Phone Books – completely free
- Bulk Extensions – completely free
Today we want to walk you through getting a VitalPBX server set up so that you can kick the tires for yourself. Down the road, we’ll demonstrate the ease with which you can add your own components including Incredible PBX® to the mix. If you are accustomed to setting up FreePBX-based Asterisk servers, then installation and configuration of VitalPBX will be a walk in the park. Currently, you install VitalPBX from an ISO so you have a choice of platforms: dedicated hardware, VMware ESXi, VirtualBox, or a limited number of cloud platforms such as Vultr that support custom ISO installs. Be sure to read our security warnings below before choosing a cloud-based platform without a hardware-based firewall.
A Word About Security. VitalPBX includes both an IPtables firewall configurator for firewalld and a Fail2Ban intrusion detection setup that is impressive. Having said that, the IPtables firewall is activated but allows unrestricted SIP and web access with no rules to thwart SipVicious-style attacks. Unless you’re an expert in firewall design, we strongly recommend deployment of VitalPBX on a private LAN behind a hardware-based firewall or home router with no port forwarding. That will block intrusion attempts without encountering NAT problems which VitalPBX and Asterisk 13 now handle with ease.
Getting Started. Begin by downloading the VitalPBX 2.0 ISO to your desktop. The ISO installation process is a traditional CentOS® 7 procedure so you can follow one of our existing VoIP tutorials to get things set up on the platform of your choice. Once the install finishes, use a web browser to access the IP address of your VitalPBX server. You’ll be prompted to set up an admin password for GUI access and then you register your server with Telesoft. Should you ever forget your admin password, here’s how to force a reset on your next login from a browser:
mysql ombutel -e 'update ombu_settings set value = "yes" where name = "reset_pwd"'
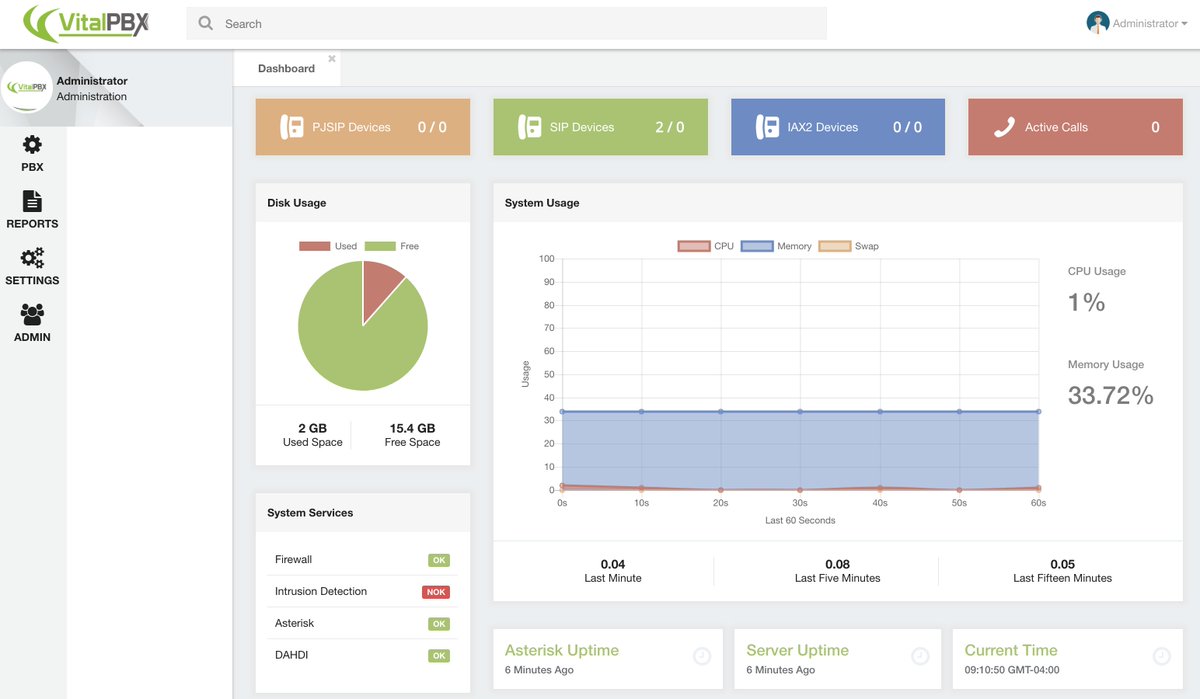
After logging in, you’ll be presented with the VitalPBX Dashboard:
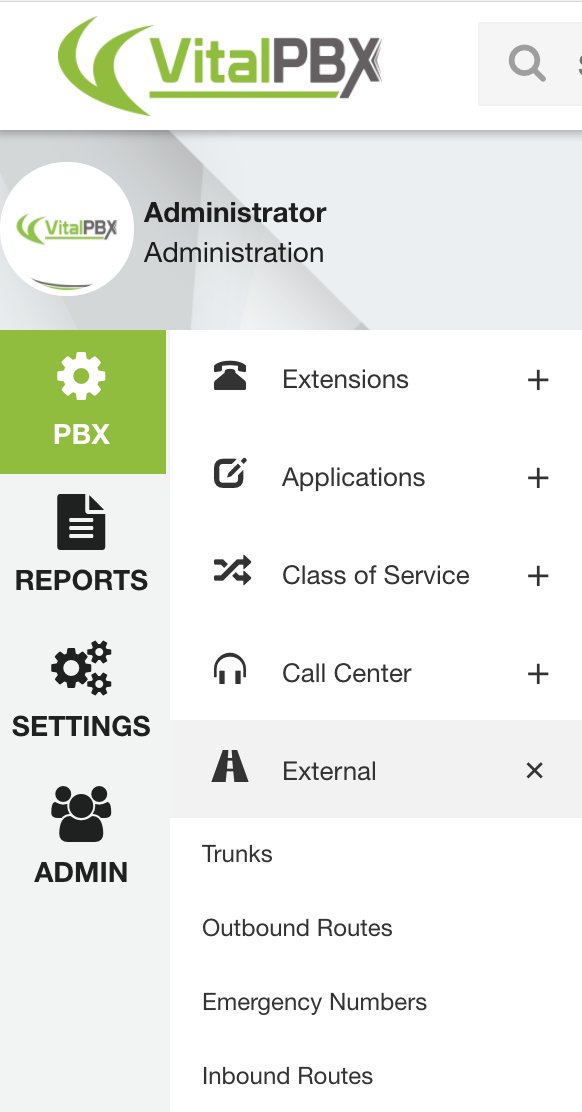
Navigation Tips. The GUI is incredibly intuitive, but there’s always a learning curve with something new. We’ll save you a little stumbling around looking for things or wondering why your settings in the UI didn’t take. Here’s a quick cheat sheet. All of the UI features are housed under menus in the left column. When you choose an option, it opens a submenu. And, when you click + beside an item on the submenu, it exposes additional choices. For example, to work on Outbound Routes, you’d choose PBX, External +, Outbound Routes:
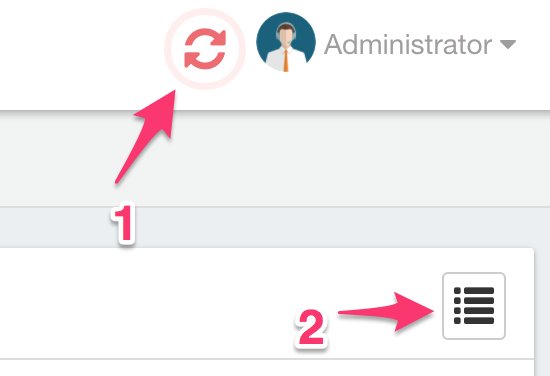
Two other important icons are housed in the upper right corner of the GUI. Whenever you add or make changes to settings in the GUI, you need to reload the Asterisk dialplan by clicking on (1) the flashing icon. Otherwise, your settings will not be available. Ask us how we know. 🙂
After you add a new extension, trunk, or route, you’ll see (2) the four-bar icon which you click to access existing settings which you’ve already entered. Otherwise, you’ll be staring at a blank screen without your new entries. There’s nothing more disconcerting than adding a few extensions only to have them disappear the next time you navigate to PBX:Extensions. 🙂
Finally, at the top of the center panel of the GUI, VitalPBX (literally) keeps tabs on items you’ve recently worked on. It makes it extremely convenient to return to the item without having to once again drill down through the menus:

Initial Setup. As with most PBXs, the initial setup involves creating some Extensions, connecting some Trunks, and setting up Outbound and Inbound Routes to process calls to and from your PBX. The other hundreds of features are pure gravy which you can explore at your leisure. If we covered them all, you’d be reading a book instead of an article.
Extension Setup looks like this using VitalPBX to generate the extension password:

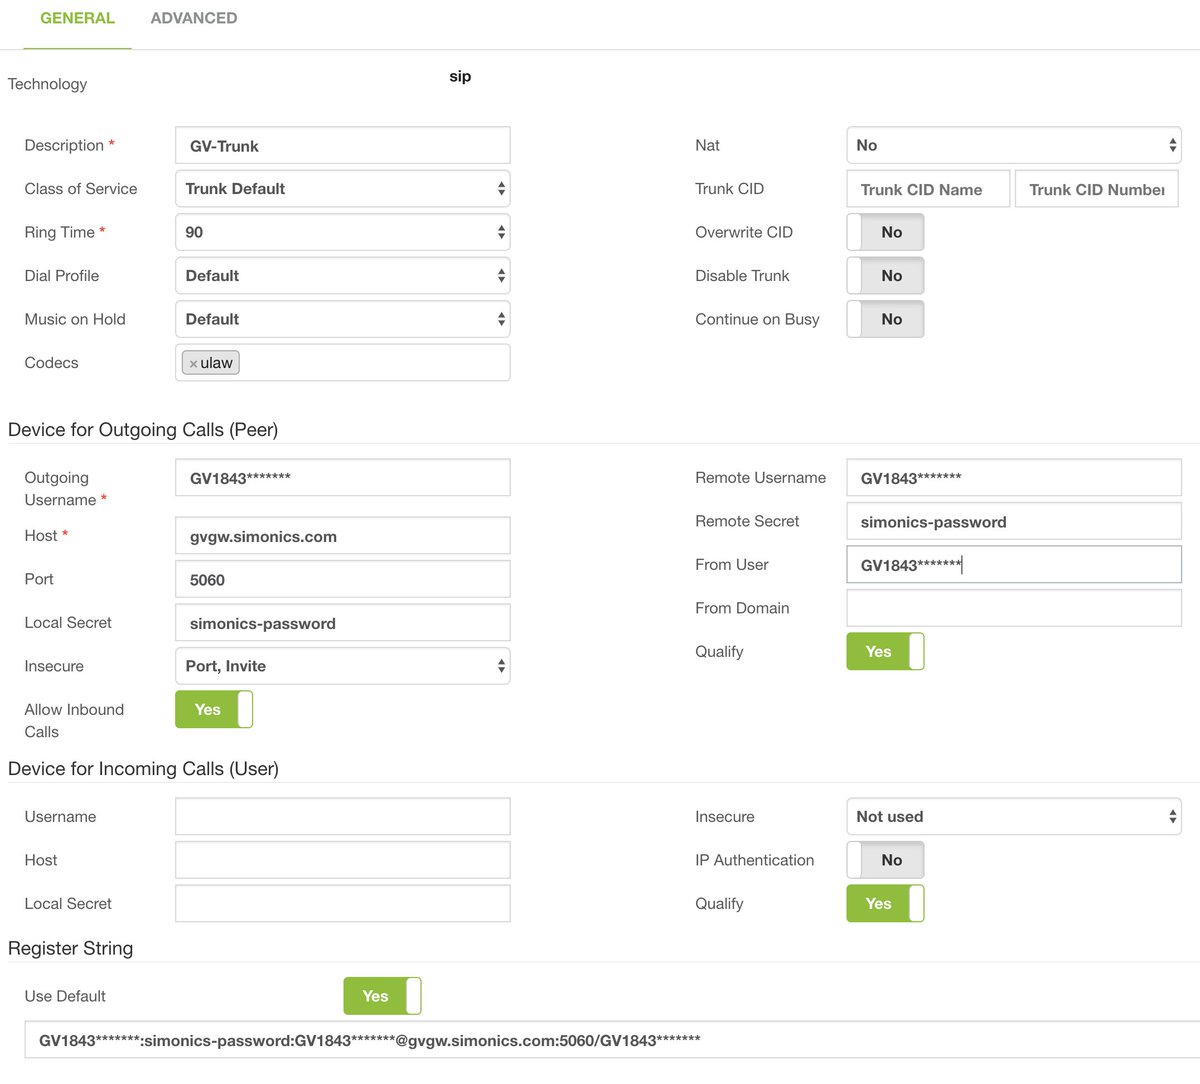
Trunk Setup. You can use Google Voice with the Simonics GV/SIP Gateway for free calling in the U.S. and Canada. There is a one-time setup charge of $4.99 if you follow this Nerd Vittles link. We recommend using Google Voice for outbound calls where possible. Then, for inbound calls and redundancy, add a separate trunk with a customized DID from a provider such as our platinum sponsor, Vitelity. See the end of this article for a deal you can’t refuse. The VitalPBX Trunk setup in PBX:External:Trunks:SIP would look like the following for the Simonics GV/SIP gateway:
Outbound Route Setup is virtually identical to the FreePBX format. Here’s a typical Google Voice route to let users dial 10-digit numbers while letting Google discard expensive NANPA calls to problematic area codes in the Caribbean and elsewhere. We actually recommend adding a second Dial Pattern for 1NXXNXXXXXX so that calls dialed with both 10 and 11-digits are supported. This will also facilitate implementation of some of the Incredible PBX add-ons down the road.

Inbound Route Setup also is similar to FreePBX. A default route can be configured by simply defining the Route Description as Default and specifying a Destination for all incoming calls that don’t otherwise have a matching inbound route.
Email Configuration. One of the other things you’ll want to get working is email delivery for Voicemails. The VitalPBX solution is the best in the business. It supports Gmail as a RelayHost out of the box. For residential users where your ISP blocks downstream SMTP mail servers, this is a godsend. Setup couldn’t be easier. Navigate to Admin:System Settings:Email Settings. For Server, click Use External Mail Server. For Provider, click Gmail and enter your full Gmail account name and password. Click Save and Reload your Dialplan. Then send yourself a test message by entering an email address and clicking the Envelope icon.

Updating Time Zone. If the date command incorrectly displays the time on your server, you can change it with the following commands using your correct zone in the second command:
timedatectl list-timezones
timedatectl set-timezone America/New_York
What’s Next? You now have a perfectly functioning PBX. Connect one or more softphones or SIP phones, and you’re ready to go. As we mentioned at the outset, the next step is to explore all of the menu options and review the VitalPBX Reference Guide. It really is a book!
The Fun Stuff. The icing on the VitalPBX cake is the add-on applications. Some are free, some are limited in some way, and some are commercial. You can review what’s available here. Then load the currently available listing into the GUI by choosing Admin:Add-ons:Add-ons:Check Online. To get started, install Bulk Extensions (free), Custom Contexts (one free context or $50 for unlimited), and Phone Books (free). Once you’ve installed all three, refresh your browser and go to PBX:Applications:Custom Contexts.
Step #1. Set up a Custom Context like this. Then click Save/Update and Reload Dialplan.
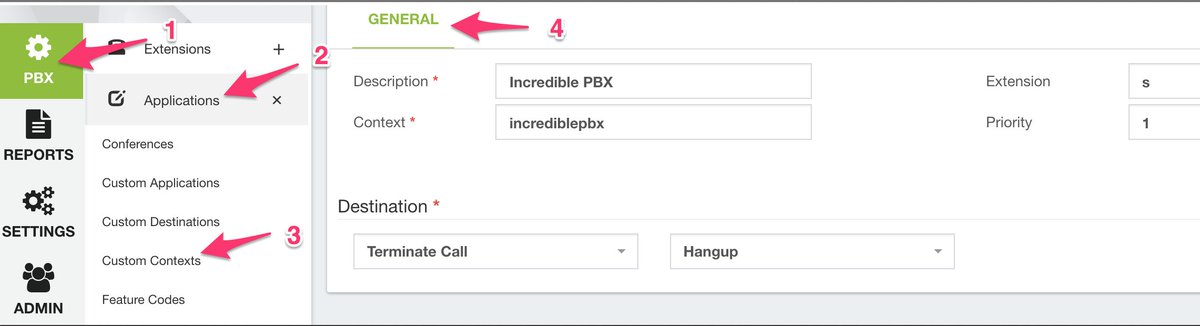
Step #2. Adjust Destination of Inbound Route to point to Incredible PBX Custom Context.
Step #3. From the Linux CLI while logged in as root, use nano to create the following file: /etc/asterisk/ombutel/extensions__80-1-incrediblepbx.conf:
[incrediblepbx]
exten => s,1,Answer
exten => s,n,NoOp(My custom context)
exten => s,n,Dial(SIP/701,30)
exten => s,n,return()
Step #4. Reload your Asterisk dialplan: asterisk -rx "dialplan reload"
Step #5. Place a call to an incoming trunk on your PBX while watching the Asterisk CLI. The tail of the incoming call should look something like the following which shows the incoming call directed to the Custom Context and from there to extension 701.

Now that you understand the VitalPBX theory behind Custom Contexts, you’ll be ready to dive into Incredible PBX applications which will be coming soon to a VitalPBX platform near you.
NOV. 1 UPDATE: IBM has moved the goal posts effective December 1, 2018:
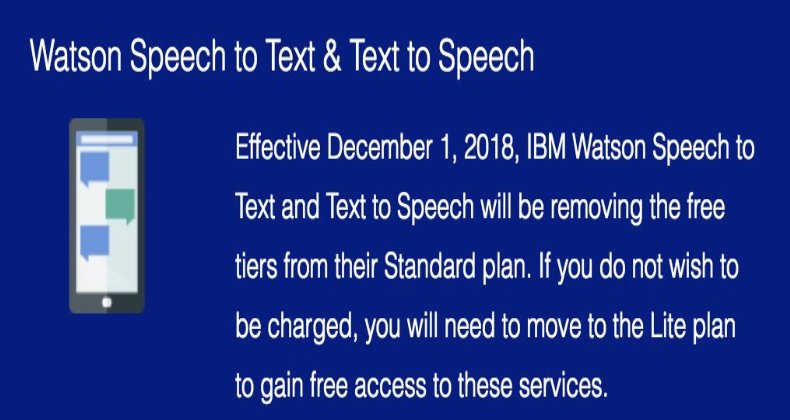
Homework. Yes. Everyone needs a little homework once in a while. Before our next chapter in the VitalPBX saga, you’re going to need an IBM Cloud account with access to Watson TTS and Watson STT. It’s free. These services will be used for the Incredible PBX TTS and Voice Recognition apps for Asterisk including News and Weather reports as well as Voice Dialing with AsteriDex. This Nerd Vittles tutorial will walk you through getting your IBM account set up. Don’t install any of the scripts in that tutorial. We’ll have fresh ones in coming weeks customized for VitalPBX. For home and SOHO use, both IBM access and our scripts are FREE.
Coming Attractions. We’ve set up a VitalPBX demo server with VMware ESXi running on our private LAN. Most of the Incredible PBX demo applications already are operational, and you’re more than welcome to try them out by calling the IVR at 1-843-606-0555. Many of these apps make use of the IBM Cloud services for voice recognition and text-to-speech content rendering so you can preview what you’ll be getting in our next VitalPBX chapter.
- 0. Chat with Operator — connects to extension 701
- 1. AsteriDex Voice Dialer – say "Delta Airlines" or "American Airlines" to connect
- 2. Conferencing – log in using 1234 as the conference PIN
- 3. Wolfram Alpha Almanac – say "What planes are flying overhead"
- 4. Lenny – The Telemarketer’s Worst Nightmare
- 5. Today’s News Headlines — courtesy of Yahoo! News
- 6. Weather by ZIP Code – enter any 5-digit ZIP code for today’s weather
- 7. Today in History — courtesy of OnThisDay.com
- 8. Chat with Nerd Uno — courtesy of SIP URI connection to 3CX iPhone Client
- 9. DISA Voice Dialer — say any 10-digit number to be connected
- *. Current Date and Time — courtesy of VitalPBX
Continue Reading:
Introducing the Incredible PBX Custom Context for VitalPBX
VitalPBX in the Cloud: Two $6/month Providers with Backups
VitalPBX Security: Firewall, PortKnocker, & NeoRouter VPN
VitalPBX on the Desktop: Introducing VitalPBX for VirtualBox
Originally published: Monday, March 19, 2018
Got Friends? 7 Countries Have Never Visited Nerd Vittles. 2018 Is Calling! https://t.co/wMfmlhAr16 #asterisk #freepbx #wazo #issabel #IncrediblePBX #3CX pic.twitter.com/kAmAEnwVIw
— Ward Mundy (@NerdUno) January 9, 2018

Need help with VitalPBX? Visit the VitalPBX Forum.
Special Thanks to Our Generous Sponsors
FULL DISCLOSURE: ClearlyIP, Skyetel, Vitelity, DigitalOcean, Vultr, VoIP.ms, 3CX, Sangoma, TelecomsXchange and VitalPBX have provided financial support to Nerd Vittles and our open source projects through advertising, referral revenue, and/or merchandise. As an Amazon Associate and Best Buy Affiliate, we also earn from qualifying purchases. We’ve chosen these providers not the other way around. Our decisions are based upon their corporate reputation and the quality of their offerings and pricing. Our recommendations regarding technology are reached without regard to financial compensation except in situations in which comparable products at comparable pricing are available from multiple sources. In this limited case, we support our sponsors because our sponsors support us.
 BOGO Bonaza: Enjoy state-of-the-art VoIP service with a $10 credit and half-price SIP service on up to $500 of Skyetel trunking with free number porting when you fund your Skyetel account. No limits on number of simultaneous calls. Quadruple data center redundancy. $25 monthly minimum spend required. Tutorial and sign up details are here.
![]() The lynchpin of Incredible PBX 2020 and beyond is ClearlyIP components which bring management of FreePBX modules and SIP phone integration to a level never before available with any other Asterisk distribution. And now you can configure and reconfigure your new Incredible PBX phones from the convenience of the Incredible PBX GUI.
The lynchpin of Incredible PBX 2020 and beyond is ClearlyIP components which bring management of FreePBX modules and SIP phone integration to a level never before available with any other Asterisk distribution. And now you can configure and reconfigure your new Incredible PBX phones from the convenience of the Incredible PBX GUI.
 VitalPBX is perhaps the fastest-growing PBX offering based upon Asterisk with an installed presence in more than 100 countries worldwide. VitalPBX has generously provided a customized White Label version of Incredible PBX tailored for use with all Incredible PBX and VitalPBX custom applications. Follow this link for a free test drive!
 Special Thanks to Vitelity. Vitelity is now Voyant Communications and has halted new registrations for the time being. Our special thanks to Vitelity for their unwavering financial support over many years and to the many Nerd Vittles readers who continue to enjoy the benefits of their service offerings. We will keep everyone posted on further developments.


VitalPBX is the best of the best softswitch IP-PBX. I’ve installed many sites without problems, but the most important thing here is the excellent support VitalPBX has. I’ve worked in Telematics for 36 years, expert in Nortel, Avaya and Cisco, and advanced knowledge in Asterisk and FreeSwitch, too.
I have been using Ombutel since it first came out and I love it. Do you think your Travelin Man script would work? I loved your system to remotely connect to the PBX, it would definitely be a good tool for my own PBX so I can continue to use my system while on the road with no worry. Any help would be much appreciated. Thank you.
[WM: TM3 is on our to-do list. Stay tuned!]
Is faxing supported at all? Searching for the word fax within this article yields nothing.
[WM: https://vitalpbx.org/es/community/general-discussion/fax-portal/ ]
An interesting integration with the IncrediblePBX would be Amazon’s Alexa. Keep up the great work.
[WM: Great idea. In the meantime, check out Wolfram Alpha. It has much of the same functionality if not more.]
Would you recommend going the Incredible 13 VitalPBX route over Wazo/IncrediblePBX? Just getting ready to rebuild my home PBX system from the ground up as a VM on my NAS. I’ve been running some flavor of Asterisk for years, just looking for something easy to setup this time around.
[WM: If you’re looking for a plug-and-play solution, VitalPBX is hard to beat. Wazo is much more complex with a steep learning curve.]