
It’s been a rocky road getting an open source (free) faxing alternative to work reliably with Asterisk® 1.8. To further complicate things, CentOS 5.6 was finally released which brought us a few more Asterisk 1.8 headaches and updates finally leading up to an all-new and nearly perfect PBX in a Flash 1.7.5.6 thanks in large part to Tom King. The new release also forced some under-the-covers modifications in Incredible PBX. Now you’re caught up on last week’s news. But what have we done for you lately?

Well, one alternative was to shift gears to the commercial Fax for Asterisk from Digium® which is supported in FreePBX 2.8 and 2.9 and includes one free license. But we’re open source fans and, of course, nothing beats free. Thanks to the efforts of a number of folks on the PBX in a Flash forums including our old pal, Joe Roper, there is an alternative that folks have been wrestling with for over two years. The combination of Hylafax, Avantfax, and IAXmodem is a compelling open source solution if you don’t need T.38-compatible faxing.1 The drawback has been the learning curve to install all the components and get them working reliably together. Well, for those using Incredible PBX 1.8 with PIAF-Purple and Asterisk 1.8, today we have a newly minted installation script that is simple enough that even a monkey can use it. If you know your own email address and your local area code AND you can find the Enter key on your keyboard, you are fully qualified to perform today’s installation. It’ll take you under 5 minutes! We’ve also got a nice little surprise for you toward the end of this article.
Prerequisites. You’ll first need to install the latest version of PBX in a Flash with the PIAF-Purple (Asterisk 1.8) payload. Then sign up for a free Google Voice account and install Incredible PBX 1.8. You’ll find complete installation instructions for everything here. Can you just wing it and run this installation script on a garden-variety Asterisk 1.8 machine? No. And the reason is that all of these components have dependencies which are too complex to cover in a 5-minute article. You might want to have a look at the A-Fax Project which is where we started. Suffice it to say, the combination of PIAF-Purple and Incredible PBX 1.8 provides the ideal platform on which to install Incredible Fax. If you prefer to do-it-yourself, by all means have at it. We lost about 10 years worth of hair even starting with the work of a dozen very talented Linux gurus who have been wrestling with this for over two years! But, hey, YMMV! We never claimed to be the sharpest tool in the shed. 😉
Installing Incredible Fax. Once you have your Incredible PBX 1.8 platform up and running, adding Incredible Fax is a stroll in the park. Just log into your server as root and issue the following commands. If you’ve downloaded Incredible PBX in the last few days, the script may already be on your system. In this case, just type /root/incrediblefax.sh to run it.
cd /root
wget http://incrediblepbx.com/incrediblefax.sh
chmod +x incrediblefax.sh
./incrediblefax.sh
After checking to make sure Incredible PBX 1.8 is installed, the script will prompt you to enter an email address where incoming faxes should be delivered. Then all of the necessary components will be installed after which the Avantfax install script will be run. With the exception of entering your local area code when prompted to do so, the correct response to every other question is to press the Enter key if you live in the U.S. or Canada. Don’t "improve" anything if you expect the end product to work reliably. For those outside North America, you’ll need to also make the usual adjustments to account for your country and city codes.
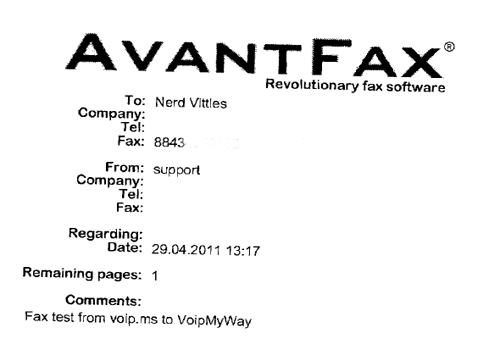
Avantfax has its own security model, but we’ve grown to appreciate the Apache authentication model which is built into PBX in a Flash so it’s been incorporated into Incredible Fax as well. When the install completes, just reboot your server to get everything working. On the PBX in a Flash web GUI, there will be a new Admin icon for Faxing. Or you can access Avantfax with a browser by going to http://serverIPaddress/avantfax. When prompted for your username and password, use maint and whatever your maint password happens to be. These can be reset with passwd-master. Literally everything has been preconfigured in Avantfax to get you going. Here’s a 3-minute video to show you how easy it is. Just don’t forget to reboot once the install completes.
If you want to be able to print to fax from Windows-based machines, then you’ll need to make one addition. Click on the small Toolbar icon in the upper right corner of the AvantFax home screen and choose New User from the pull-down Menu. For the user, enter Fax for the Name, fax for the Username, a secure password for Password, and an email address that is DIFFERENT from the one you used to set up Incredible Fax. Check the boxes for User Can Delete Faxes and User Can Fax From Any Modem. Finally, check the boxes for all four IAXmodems. Then click the Save button to add this new user.
A Word About Reliable Faxing. Suffice it to say that analog faxing over VoIP trunks is something less than ideal. If you want reliable analog faxing, then you’ll need a PSTN line from your favorite local telephone company. It doesn’t need any fancy add-ons like CallerID which doubles the price in many cities. Then you’ll need a properly configured analog telephone adapter (ATA) with at least one FXO port to support your Ma Bell phone line. Our favorite is the OBi110 which also can double as an additional Google Voice trunk for your PBX. But an SPA3102 will work equally well. It just costs more and gives you less.
Now that we’ve covered the obligatory warnings… will Incredible Fax work with a pure VoIP connection? Absolutely. We do it all the time. Is it flawless? No. Are there certain providers that are better than others? You bet. Do some providers not support faxing at all? Correct. Based on our 5+ years wrestling with this, here’s our recommendation. First, you’ll need a DID (i.e. phone number) from one of our recommended providers to handle inbound faxes. With the latest release of Asterisk 1.8, you no longer need a DID dedicated to faxing. In other words, you can use the same DID to receive incoming voice calls as well. The good news is that pay-as-you-go DIDs are dirt cheap. Some providers such as voip.ms offer DIDs for under $1 a month with 1¢ per minute calls. VoIP.ms also has unlimited inbound calling DIDs for under $4 a month. Other providers whose trunks we have found work reliably for VoIP faxing include Vitelity (see our special sign up deal below), Axvoice, Teliax, VoIPMyWay ($45 for first year with unlimited outbound and inbound calling with a local DID), and Future-Nine2. Google Voice trunks are hit and miss. We’re batting about .250 in our testing with Google Voice lines. Bottom Line: If VoIP faxing doesn’t work after you complete the install, it’s probably the fault of your VoIP trunk, not the setup. To make absolutely sure, connect a standard fax machine to an extension using an FXS telephone adapter and send a fax to that extension from the Avantfax web interface. You’ll find it works every time!
Configuring FreePBX for Incredible Fax. Here are the steps you’ll need to complete to get analog faxing working reliably with FreePBX. First, set up an account with one of the companies we’ve mentioned above. With voip.ms, create a subaccount on their site with credentials to use with the DID you purchased to link to that subaccount.
Unless you’re using today’s release of Incredible PBX, you’ll need to activate FreePBX’s Fax Configuration Module if you want to take advantage of Asterisk 1.8’s fax detection capabilities. It didn’t work reliably in previous Asterisk 1.8 releases. This module already is either available or already installed on your server. In the FreePBX GUI using a browser, choose Tools, Module Admin and then click on Fax Configuration. A drop-down list will provide several choices. Choose either Install or Enable depending upon the version of Incredible PBX you currently are running. Then click the Process button and finally Reload the settings when prompted.
Unless you installed Incredible PBX today, you’ll need to create a SIP trunk for your new provider in FreePBX using the credentials you set up on the provider’s web site. The VoIP.ms template now is included in Incredible PBX so you can just edit the existing one to add your credentials. And, at least with VoIP.ms, you can set the outbound CallerID to anything you like (as long as it’s legal). Unless you want a knock at your door, we wouldn’t recommend using the main number at the White House. Then put all of the settings below in the Outgoing Settings PEER Details where 1234567 is your main account number, subacctname is the name of the subaccount you created, and atlanta is your closest voip.ms server location:
username=1234567_subacctname
type=friend
trustrpid=yes
sendrpid=yes
secret=subacctpassword
nat=yes
insecure=port,invite
host=atlanta.voip.ms
fromuser=1234567_subacctname
disallow=all
context=from-trunk
canreinvite=nonat
allow=ulaw
For the registration string, it should look like the following. If you’re planning to only use the trunk for outbound faxing, then you can leave off the trailing DID number.
username:password@atlanta.voip.ms:5060/10-digit-DID
In addition to setting up the Trunk for your provider, you’ll also need to create an Outbound Route for sending faxes out through this trunk AND an Inbound Route to receive incoming faxes on the DID you purchased from your provider.
For the Outbound Route, we recommend setting the Dial Pattern with a prefix not otherwise used on your Incredible PBX so that you can make fax calls easily by dialing this prefix. For example, on our sample system, we used 7 so that fax calls could be made by dialing 7 plus a 10-digit number in the U.S. and Canada. Here’s how our Outbound Route for VoIP.ms looks in FreePBX, and the latest Incredible PBX release already has it in place as shown below:

For the Inbound Route, you want to specify the DID from your provider which must match the 10-digit number you affixed to the end of the trunk registration string above. If you don’t want to share this number for voice and fax calls, then simply direct these inbound fax calls to the Fax Custom Destination. Extension (329 spells F-A-X) also can be used to process incoming faxes and route them to your email address as well as the Avantfax web GUI.
Our experience suggests that using a single trunk for both voice and fax delivery is hit and miss so you may wish to consider adding an additional trunk just to support faxing. You’ll find the templates for adding a second Google Voice trunk in the /tmp directory, and complete instructions are available on the PIAF Forums. We’ve also provided preconfigured trunk settings for both Vitelity and VoIP.ms if you’d like to try those options as well. Just plug in your credentials and configure an inbound route to map incoming faxes to the Fax Custom Destination.

AvantFax in a Nutshell. Here’s a quick summary of the main features in the AvantFax web GUI. You can access the GUI by pointing a browser to the IP address of your server + /avantfax. After you enter your maint account name and maint password, the following screen will display with your Inbox. As noted, all of these incoming faxes also will be emailed to the account you set up when you ran the Incredible Fax install script.

The icons to the right of each thumbnail fax let you View, Rotate, Download PDF, Reply to Fax, Email PDF, Add a Note, Archive the Fax, and Permanently Delete the Fax.
At the top of the screen just to the right of Inbox is the option to Send a Fax. Here you’d specify the phone number to dial. Don’t forget the 7 and then a 10-digit number. Next you can attach a document from your local disk. Finally, fill in the blanks for the Fax Cover Sheet, and then click Send. Your fax will be on its way. You can monitor the progress of the fax transmission by clicking on Outbox. It’s also a good idea to fire up an SSH session to your server and run asterisk -rvvvvvvvvvv to monitor the first few calls to be sure all is well in Incredible FaxLand.
 Where to Go Next. HylaFax and AvantFax are very mature open source products with a huge international following. We apologize for focusing primarily on U.S. and Canadian users today, but anything is possible with this software. The first piece you probably will want to tackle is adding Print to Fax capability on your Windows machine. The software you’ll need can be downloaded here. You’ll find excellent documentation on the setup by visiting the PBX in a Flash Forum. One little footnote for those using Windows 7. Microsoft and Apple are back to their old tricks so there are no Apple postscript print drivers in Windows 7. We’ve had equally good results using Dell’s 3100cn PS driver. Incidentally, there’s a similar print-to-fax utility for Mac OS X, but it’ll set you back $36. Here’s the link. HylaFax also maintains a terrific resource list for those that want additional goodies for PCs, Macs and Linux systems.
Originally published: Monday, May 2, 2011
Changes in PBX in a Flash Distribution. In light of the events outlined in our recent Nerd Vittles article and the issues with Asterisk 1.8.4, the PIAF Dev Team has made some changes in our distribution methodology. As many of you know, PBX in a Flash is the only distribution that compiles Asterisk from source code during the install. This has provided us enormous flexibility to distribute new releases with the latest Asterisk code. Unfortunately, Asterisk 1.8 is still a work in progress to put it charitably. We also feel some responsibility to insulate our users from show-stopping Asterisk releases. Going forward, the plan is to reserve the PIAF-Purple default install for the most stable version of Asterisk 1.8. As of June 1, Asterisk 1.8.4.1 is the new PIAF-Purple default install. Other versions of Asterisk 1.8 (newer and older) will be available through a new configuration utility which now is incorporated into the PIAF 1.7.5.6.2 ISO.
Here’s how it works. Begin the install of a new PIAF system in the usual way by booting from your USB flash drive and pressing Enter to load the most current version of CentOS 5.6. When the CentOS install finishes, your system will reboot. Accept the license agreement, and choose the PIAF-Purple option to load the latest stable version of Asterisk 1.8. Or exit to the Linux CLI if you want a different version. Log into CentOS as root. Then issue a command like this: piafdl -p beta_1841 (loads Asterisk 1.8.4.1), piafdl -p 184 (loads Asterisk 1.8.4), piafdl -p 1833 (loads Asterisk 1.8.3.3), or piafdl -p 1832 (loads Asterisk 1.8.3.2). If there should ever be an outage on one of the PBX in a Flash mirrors, you can optionally choose a different mirror for the payload download by adding piafdl -c for the .com site, piafdl -d for the .org site, or piafdl -e for the .net site. Then add the payload switch, e.g. piafdl -c -p beta_1841.

Bottom Line: If you use the piafdl utility to choose a particular version of Asterisk 1.8, you are making a conscious decision to accept the consequences of your particular choice. We would have preferred implementation of a testing methodology at Digium before distribution of new Asterisk releases; however, that doesn’t appear to be in the cards. So, as new Asterisk 1.8 releases hit the street, they will be made available through the piafdl utility until such time as our PIAF Pioneers independently establish their reliability.

Need help with Asterisk? Visit the PBX in a Flash Forum or Wiki.
Or Try the New, Free PBX in a Flash Conference Bridge.
whos.amung.us If you’re wondering what your fellow man is reading on Nerd Vittles these days, wonder no more. Visit our new whos.amung.us statistical web site and check out what’s happening. It’s a terrific resource both for us and for you.
Special Thanks to Our Generous Sponsors
FULL DISCLOSURE: ClearlyIP, Skyetel, Vitelity, DigitalOcean, Vultr, VoIP.ms, 3CX, Sangoma, TelecomsXchange and VitalPBX have provided financial support to Nerd Vittles and our open source projects through advertising, referral revenue, and/or merchandise. As an Amazon Associate and Best Buy Affiliate, we also earn from qualifying purchases. We’ve chosen these providers not the other way around. Our decisions are based upon their corporate reputation and the quality of their offerings and pricing. Our recommendations regarding technology are reached without regard to financial compensation except in situations in which comparable products at comparable pricing are available from multiple sources. In this limited case, we support our sponsors because our sponsors support us.
 BOGO Bonaza: Enjoy state-of-the-art VoIP service with a $10 credit and half-price SIP service on up to $500 of Skyetel trunking with free number porting when you fund your Skyetel account. No limits on number of simultaneous calls. Quadruple data center redundancy. $25 monthly minimum spend required. Tutorial and sign up details are here.
![]() The lynchpin of Incredible PBX 2020 and beyond is ClearlyIP components which bring management of FreePBX modules and SIP phone integration to a level never before available with any other Asterisk distribution. And now you can configure and reconfigure your new Incredible PBX phones from the convenience of the Incredible PBX GUI.
The lynchpin of Incredible PBX 2020 and beyond is ClearlyIP components which bring management of FreePBX modules and SIP phone integration to a level never before available with any other Asterisk distribution. And now you can configure and reconfigure your new Incredible PBX phones from the convenience of the Incredible PBX GUI.
 VitalPBX is perhaps the fastest-growing PBX offering based upon Asterisk with an installed presence in more than 100 countries worldwide. VitalPBX has generously provided a customized White Label version of Incredible PBX tailored for use with all Incredible PBX and VitalPBX custom applications. Follow this link for a free test drive!
 Special Thanks to Vitelity. Vitelity is now Voyant Communications and has halted new registrations for the time being. Our special thanks to Vitelity for their unwavering financial support over many years and to the many Nerd Vittles readers who continue to enjoy the benefits of their service offerings. We will keep everyone posted on further developments.
Some Recent Nerd Vittles Articles of Interest…
- Yes, we’re aware that HylaFax theoretically supports T.38 with the right hardware. Feel free to point us to someone who has it actually working with Asterisk 1.8. 🙄 [↩]
- Vitelity, Teliax, VoIPMyWay, and Future-Nine trunks require the following additional entries in your Inbound trunk settings: t38pt_rtp=no, t38pt_tcp=no, t38pt_udptl=no [↩]


half windows + half mac = wack? windoc? mows? mindows? (second screenshot)
I agree that this install process is simple, but I am afraid it may be simple to the extreme that Albert Einstein warned. Is there specific equipment necessary to run this aside from the PBX install? There are references to T.38, but that appears to be not part of what is installed.
Where can further details be found on what is happening under the hood? Normally the source code would be sufficient, but most of the PBX in a Flash terms have item 3 (I agree not to request the source code for this script).
Can someone point to discussions that explain more of what is going on so that a better ability to trouble shoot the install can be gained?
[WM: The incrediblefax.sh shell script is open source. You’re welcome to review it and make any changes you desire. We haven’t found anyone who has had much success with T.38 using HylaFax and AvantFax, but YMMV. Post a link if you find a working model.]
This writeup implies Asterisk 1.8 is happier with Digium’s commercial fax offering than with spandsp. Can someone elaborate on that? I haven’t heard from people using 1.8, but I’ve helped a few people move from Digium’s engine to spandsp with 1.6.x, to improve their reliability.
Does this work with the proxmox ve version? I’ve run update-programs and update-fixes, but the incrediblefax.sh doesn’t run.
When I run the incrediblefax.sh script I get:
cat: /etc/pbx/.incredible: No such file or directory
Sorry. Please install Incredible PBX 1.8 before running Incredible Fax script.
When I run asterisk cli CORE SHOW VERSION:
"Asterisk 1.8.2 built by root @ XXXXX on a x86_64 running Linux on 2011-04-07 02:42:29 UTC"
[WM: The article explains how to download the script. You can comment out line 38 with a leading # sign and try it. We haven’t tried it, but you should be fine. No guarantees!!! And make a good backup first. Let us know how it goes.]
Thanks to gvtricks, both HylaFax and AvantFax have been updated to latest releases which appear to be more reliable with Google Voice.
If I use Avantfax with Google Voice, will it tell me when the faxes can’t be sent?
Do I simply have to resend the fax again [and again] until I get a confirmed delivery from AvantFax?
[WM: AvantFax manages retries on its own. After numerous attempts, you’ll get an email that the fax delivery failed. Sometimes it’s not a problem at your end. Other folks’ fax machines do run out of paper, or memory, or get unplugged from time to time. So this isn’t really new news. It never was an ideal communications platform to begin with.]
"half windows + half mac = wack?"
I’m not following what you are trying to get across? What’s half windows and half mac?
We have commented out the portion of the incrediblefax.sh that checks for the incredible pbx and it has installed fine with PIAF Gold. Here’s a downloadable copy of what we used:
http://www.i3techgroup.com/download/incrediblefax.sh
Say you have 3 different incoming fax #’s. Is there a way to have each of those 3 incoming lines email their fax notifications to different email addresses? Thanks!
[WM: Excellent question… for the PIAF Forum. 😉 ]