Home » Posts tagged 'iphone'

Tag Archives: iphone

The Most Versatile VoIP Provider: FREE PORTING

Interconnecting a Mobile PBX to the Asterisk Mothership

The Holy Grail for a mobile VoIP solution is a simple way to connect back to your primary Asterisk® PBX via Wi-Fi from anywhere in the world to make and receive calls as if you never left. Let’s tick off the potential problems. First, many home-based PBXs are sitting behind NAT-based routers. Second, almost all remote Wi-Fi connections are made through a NAT-based router. Third, chances are the remote hosting platform blocks outgoing email from downstream servers such as a mobile PBX. Fourth, deciphering the IP address of your remote connection can be problematic. Fifth, the chances of experiencing one-way audio or no audio on your VoIP calls is high because of NAT-based routers at both ends of your connection.

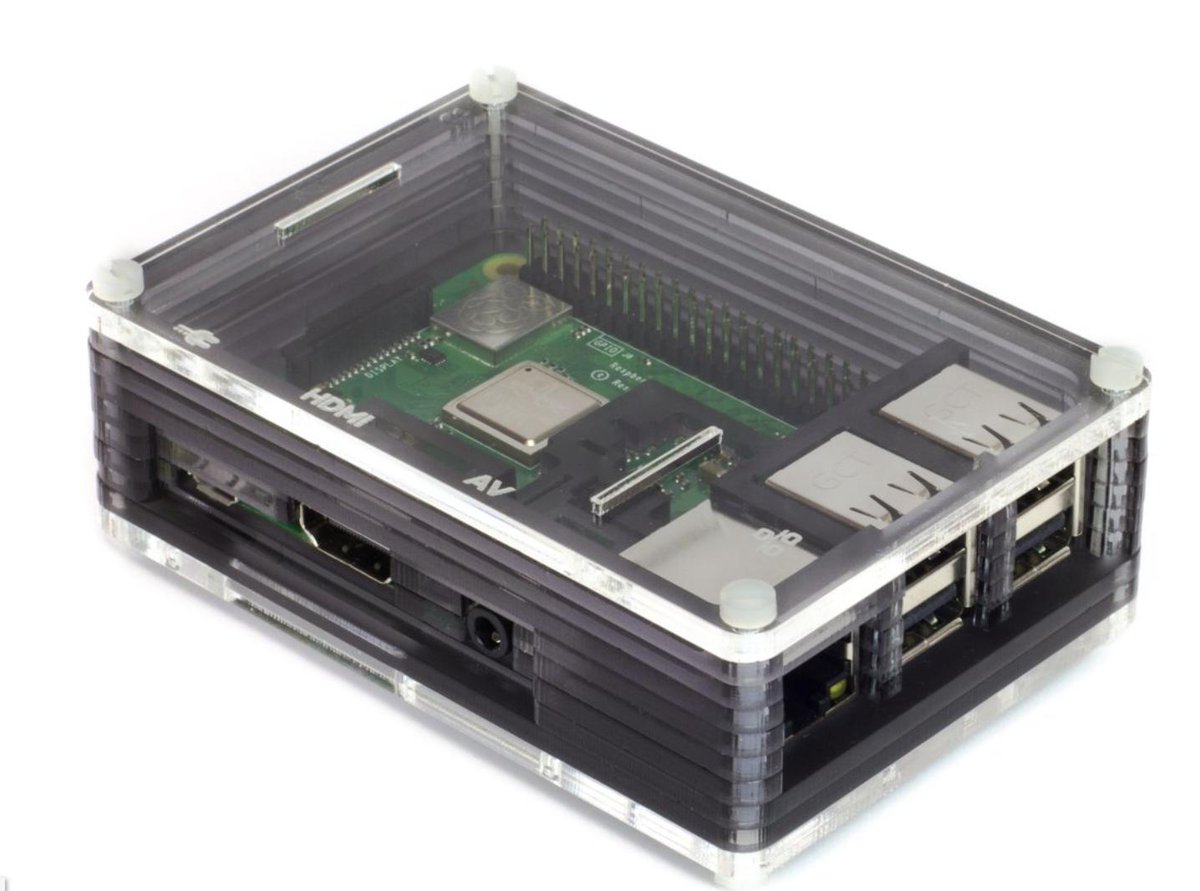
Last week we introduced OpenVPN as a solution for those with multiple VoIP sites to interconnect. But there’s a much simpler solution for those that travel regularly and want to avoid the complexity of configuring OpenVPN. Here is a quick thumbnail of the setup we recommend as your mobile companion, and you’ll never have a one-way audio problem again. In terms of hardware, you’ll need a Raspberry Pi 3B+ with its native WiFi support and a Windows or Mac notebook computer for traveling. You’ll also need a NeoRouter VPN server to make this process seamless. If you’ve already set up an OpenVPN server platform, it will work equally well. One advantage of NeoRouter is that clients can be added from the client side without having to create a config file on the VPN server. All you need is a username and password. But the choice of VPN platform is totally a matter of preference. The objective using either OpenVPN or NeoRouter is secure communications to your home base. We don’t want to have to reconfigure either your home PBX or your traveling PBX or your notebook PC based upon changes in your public and private IP addresses.

Today we’ll walk you through the easiest way to set up a (free) NeoRouter server on the Internet. It can be used to connect up to 254 devices on an encrypted private LAN. We’re delighted to have finally found a perfect use for the (free) Google Cloud instance.

Using a RaspberryPi 3B+, build an Incredible PBX 13-13.10 platform by following our previous tutorial. We’ll set this up on your home WiFi network so that you only have to throw the Raspberry Pi and its power supply in your suitcase when you travel. As part of the setup, we’ll download NeoRouter and activate private IP addresses for your notebook computer as well as both of your PBXs (using nrclientcmd). Next, we’ll interconnect the two PBXs using SIP trunks and the NeoRouter private LAN IP addresses. We’ll take advantage of a neat little Raspberry Pi trick by storing a wpa_supplicant.conf template on your PC for the remote WiFi setup even though we don’t yet know anything about the remote LAN. Once we know the SSID and password at the remote destination, we’ll use your notebook computer to edit the template and transfer the file to the /boot folder of your RasPi’s microSD card. When the card then is inserted and the RasPi is booted, it will automatically move the template to the proper /etc/wpa_supplicant folder to successfully activate your WiFi connection. We’ll also load links, a fast text-based browser, just in case you encounter a hotel that requires some sort of acknowledgement or password before establishing your WiFi connection to the Internet.

Setting Up a (free) NeoRouter Server in the Cloud

Because NeoRouter uses a star-based VPN architecture, that means the NeoRouter Server must always be available at the same IP address for all of the NeoRouter Clients (aka Nodes) to talk to. If you already have a cloud-based server that has a static IP address and can handle the traffic cop duties of NeoRouter Server, then that’s an ideal place to install NeoRouter Server. Simply download the Free flavor of NeoRouter Server that matches your existing platform and install it. Add an FQDN for your server’s IP address, and you’re all set. A detailed summary of available management options is included in our previous NeoRouter v2 article.

We devoted a couple weeks to Google Cloud instances last month, and it turned out to be a pretty awful platform for hosting Asterisk. But the free offering looks to be a perfect fit as a hosting platform for NeoRouter Server. You also won’t have to worry about Google going out of business anytime soon. So let us walk you through an abbreviated setup process on the Google Cloud platform. If you’re just getting started with Google Cloud, read our previous article to take advantage of Google’s generous $300 offer to get you started and to generally familiarize yourself with the mechanics of setting up an instance in the Google Cloud.

For NeoRouter Server, navigate to https://console.cloud.google.com. Click the 3-bar image in the upper left corner of your Dashboard. This exposes the Navigation Menu. In the COMPUTE section of the Dashboard, click Compute Engine -> VM Instances. Then click CREATE PROJECT and name it. Now click CREATE INSTANCE and Name it nrserver. The instance name becomes the hostname for your virtual machine. If you want to remain in the Free Tier, choose f1-micro instance as the Machine Type and choose a U.S. Region (us-central1, us-east1 or us-west1). For the Boot Disk, choose CentOS 6 and expand the disk storage to at least 20GB (30GB is available with the Free Tier). For the Firewall setting, leave HTTP and HTTPS disabled. Check your entries carefully and then click the Create button.

When your virtual machine instance comes on line, jot down the assigned public IP address. We’ll need it in a minute. Now click on the SSH pull-down tab and choose Open in a Browser Window. Now we need to set a root password and adjust the SSH settings so that you can login from your desktop computer using SSH or Putty:

sudo passwd root
su root
nano -w /etc/ssh/sshd_config

When the editor opens the SSH config file, add the following entries. Then save the file and restart SSH: service sshd restart

PermitRootLogin yes
PasswordAuthentication yes

You now should be able to log in to your instance as root from your desktop computer using SSH or Putty. Test it to be sure: ssh root@server-IP-address

Before we leave the Google Cloud Dashboard, let’s make the assigned public IP address permanent so that it doesn’t get changed down the road. Keep in mind that, if you ever delete your instance, you also need to remove the assigned static IP address so you don’t continue to get billed for it. From Home on the Dashboard, scroll down to the NETWORKING section and choose VPS Network -> External IP Addresses. Change the Type of your existing address to Static and Name it staticip. Next, choose Firewall Rules in the VPS Network section and click CREATE FIREWALL RULE. Fill in the template like the following leaving the other fields with their default entries. Then click CREATE.

  1. Name: neorouter
  2. Target Tags: neorouter
  3. Source IP Range: 0.0.0.0/0
  4. Protocols/Ports: check tcp: 32976

CAUTION: Before this firewall rule will be activated for your instance, it also must be specified in the Network Tags section for your instance. Shut down your instance and add the neorouter tag by editing your instance. Then restart your instance.

Now we’re ready to install NeoRouter Free v2 Server on your instance. Be sure to choose the Free v2 variety. Log back into your server as root using SSH/Putty and issue these commands:

yum -y update
yum -y install nano
wget http://download.neorouter.com/Downloads/NRFree/Update_2.3.1.4360/Linux/CentOS/nrserver-2.3.1.4360-free-centos-x86_64.rpm
rpm -Uvh nrserver-2.3.1.4360-free-centos-x86_64.rpm
/etc/rc.d/init.d/nrserver.sh restart
nrserver -setdomain <DOMAINNAME> <DOMAINPASSWORD>
nrserver -adduser <USERNAME> <PASSWORD> admin
nrserver -enableuser <USERNAME>
nrserver -showsettings

Finally, add the following command to /etc/rc.local so that NeoRouter Server gets started whenever your instance is rebooted:

echo "/etc/rc.d/init.d/nrserver.sh start" >> /etc/rc.local

Installing Incredible PBX 13-13.10 on a Raspberry Pi

We won’t regurgitate our Raspberry Pi tutorial. Simply follow the steps outlined there to acquire the necessary components and to get Incredible PBX 13-13.10 installed. We do want to stress the importance of getting WiFi working, configuring SendMail to use your Gmail credentials as a smarthost, and making sure you added the email addition to /etc/rc.local so that you receive IP address information about your PBX whenever it is rebooted. If you skipped any of these steps, stop here and revisit the RasPi tutorial to complete those items.

Configuring NeoRouter Client on Your Computers

All flavors of Incredible PBX come with the NeoRouter client preinstalled. If your Asterisk-based home PBX is of another variety, you can install the NeoRouter Client matching the architecture of your server from here. Be sure to click on the NeoRouter Free v2 tab before making your selection. The other varieties are incompatible with the Free NeoRouter v2 Server installed above and are not free. Also be sure you match both the operating system and architecture of your server platform. Finally, make certain that TCP 32976 is whitelisted in your firewalls.

On Linux-based (non-GUI) platforms, setting up the NeoRouter Client is done by issuing the command: nrclientcmd. You’ll be prompted for your NeoRouter Server FQDN as well as your username and password credentials. Perform this procedure on both your home PBX and the Raspberry Pi.

To add your Windows or Mac notebook to the NeoRouter VPN, download the appropriate client and run the application which will prompt for your NeoRouter Server FQDN as well as your NeoRouter credentials. Once completed, you should see all three machines in your NeoRouter Free Client Dashboard: your PC as well as your home PBX and Raspberry Pi-based Incredible PBX. Make note of the private VPN addresses (10.0.0.X) of both your home PBX and your Raspberry Pi. These VPN addresses never change, and we’ll need them to interconnect your PBXs and to set up a softphone on your notebook computer.

Admininistrative Tools to Manage NeoRouter

Here are a few helpful commands for monitoring and managing your NeoRouter VPN.

To access your NeoRouter Linux client: nrclientcmd

To restart NeoRouter Linux client: /etc/rc.d/init.d/nrservice.sh restart

To restart NeoRouter Linux server: /etc/rc.d/init.d/nrserver.sh restart

To set domain: nrserver -setdomain YOUR-VPN-NAME domainpassword

For a list of client devices: nrserver -showcomputers

For a list of existing user accounts: nrserver -showusers

For the settings of your NeoRouter VPN: nrserver -showsettings

To add a user account: nrserver -adduser username password user

To add admin account: nrserver -adduser username password admin

For a complete list of commands: nrserver –help


Interconnecting Your Raspberry Pi and Home PBX

To keep things simple, our setup examples below assume the following NeoRouter VPN addresses: Home PBX (10.0.0.1) and Raspberry Pi (10.0.0.2). Using a browser, you’ll need to login to the GUI of your Home PBX and Raspberry Pi and add a Trunk to each PBX. Be sure to use the same secret on BOTH trunk setups. We don’t recommend forwarding incoming calls from your Home PBX to your Raspberry Pi because most folks won’t be sitting in their hotel room all day to answer incoming calls. Instead, add the number of your smartphone to a Ring Group on the Home PBX and don’t forget the # symbol at the end of the number. On the Raspberry Pi side, we are assuming that whenever a call is dialed from a registered softphone with the 9 prefix, the call will be sent to the Home PBX for call processing (without the 9). For example, 98005551212 would send 800-555-1212 to the Home PBX for outbound routing and 9701 would send 701 to the Home PBX for routing to the 701 extension. You can obviously adjust your dialplan to meet your own local requirements.

On the Home PBX, the chan_sip trunk entries should look like this:

Trunk Name: raspi-remote

PEER DETAILS

host=10.0.0.2
type=friend
context=from-internal
username=home-pbx
fromuser=home-pbx
secret=some-password
canreinvite=no
insecure=port,invite
qualify=yes
nat=yes

On the Raspberry Pi, the chan_sip trunk entries should look like this:

Trunk Name: home-pbx

PEER DETAILS

host=10.0.0.1
type=friend
context=from-internal
username=raspi-remote
fromuser=raspi-remote
secret=some-password
canreinvite=no
insecure=port,invite
qualify=yes
nat=yes

On the Raspberry Pi, add an Outbound Route named Out9-home-pbx pointed to home-pbx Trunk with the following Dial Patterns. For each Dial Pattern, prepend=blank and prefix=9:

dial string: 1NXXNXXXXXX  
dial string: NXXNXXXXXX  
dial string: *98X.
dial string: XXX
dial string: XXXX
dial string: XXXXX
  

Tweaking Your Raspberry Pi for WiFi Mobility

Typically, you don’t know the WiFi SSID or password of your destination location before you travel. Because you won’t be traveling with a monitor and keyboard for your Raspberry Pi, we needed some way to adjust the WiFi credentials on the microSD card to accommodate the destination WiFi network when you arrive. Luckily, the Raspberry Pi folks thought of a clever way to handle this. You can simply plug your microSD card into your notebook PC (Mac ALERT: Don’t forget your SD card dongle!) and add a wpa_supplicant.conf config file to the /boot directory on the card once you arrive at your destination and know the SSID and password of the local WiFi network. When the Raspberry Pi is subsequently booted, the operating system will move the config file to the /etc/wpa_supplicant directory so that your WiFi network will come on line. Here’s what a typical wpa_supplicant.conf file should look like using your actual credentials. The last network section handles open WiFi network connections (think: McDonald’s) if you want to enable them:

country=US
update_config=1

network={
 ssid="your-SSID"
 psk="your-SSID-password"
 key_mgmt=WPA-PSK
 scan_ssid=1
 priority=5
}

network={
 key_mgmt=NONE
 priority=1
}

The other gotcha is that some public WiFi networks require some type of web login procedure before you can actually access the Internet even though an IP address may have been assigned to your Raspberry Pi. To handle this situation, you’ll need a text-based web browser on the Raspberry Pi that can be accessed through your notebook PC using SSH and your Raspberry Pi’s VPN address. Our favorite is links which can be installed on your Raspberry Pi before you pack up.

apt-get install links -y

Once you arrive at your destination, connect both your notebook PC and Raspberry Pi to the same WiFi network, login to the RasPi with SSH at the VPN address assigned to your RasPi, and run links to start the browser. Press <esc> to access the links menu options. If you can’t access your RasPi at the VPN IP address, try its WiFi-assigned local IP address.

Adding a Softphone to Your Notebook PC

Last, but not least, you obviously need a way to make and receive calls once your Raspberry Pi is up and running at the remote site. We recommend installing a softphone on your Mac or PC notebook that connects to an extension on your Raspberry Pi using the VPN IP address of the Raspberry Pi. Using the VPN address assures that the connection will always be available regardless of the WiFi network’s local IP addresses. Everyone has their own favorite softphone, but here are some suggestions.

We recommend YateClient which is free. Download it from here. Run YateClient once you’ve installed it and enter the credentials for an extension on your Raspberry Pi. Then enter the VPN IP address of your server plus your extension’s password. Click OK to save your entries.

If you are a Mac user, another great no-frills softphone is Telephone. Just download and install it from the Mac App Store.

Adding a Softphone to Your Smartphone

We actually prefer adding a free softphone app to our smartphone. There are a number of alternatives on both the iOS and Android platforms. With iPhones and iPads, we’ve had great success with Acrobits Softphone, Grandstream Wave, Linphone, and Zoiper Lite. All are available in the App Store. For Android devices, Acrobits Groundwire is our favorite. But Grandstream Wave, Linphone, and Zoiper Lite also are available. Keep in mind that Zoiper also supports IAX connections to simplify NAT connections. And, on both platforms, don’t forget that Google now lets you make and receive calls using the new Google Voice app using your old Google Voice numbers that no longer work directly with Asterisk.

Enjoy your pain-free traveling!

Originally published: Monday, April 22, 2019


Need help with Asterisk? Visit the VoIP-info Forum.


Special Thanks to Our Generous Sponsors


FULL DISCLOSURE: ClearlyIP, Skyetel, Vitelity, DigitalOcean, Vultr, VoIP.ms, 3CX, Sangoma, TelecomsXchange and VitalPBX have provided financial support to Nerd Vittles and our open source projects through advertising, referral revenue, and/or merchandise. As an Amazon Associate and Best Buy Affiliate, we also earn from qualifying purchases. We’ve chosen these providers not the other way around. Our decisions are based upon their corporate reputation and the quality of their offerings and pricing. Our recommendations regarding technology are reached without regard to financial compensation except in situations in which comparable products at comparable pricing are available from multiple sources. In this limited case, we support our sponsors because our sponsors support us.

BOGO Bonaza: Enjoy state-of-the-art VoIP service with a $10 credit and half-price SIP service on up to $500 of Skyetel trunking with free number porting when you fund your Skyetel account. No limits on number of simultaneous calls. Quadruple data center redundancy. $25 monthly minimum spend required. Tutorial and sign up details are here.

The lynchpin of Incredible PBX 2020 and beyond is ClearlyIP components which bring management of FreePBX modules and SIP phone integration to a level never before available with any other Asterisk distribution. And now you can configure and reconfigure your new Incredible PBX phones from the convenience of the Incredible PBX GUI.

VitalPBX is perhaps the fastest-growing PBX offering based upon Asterisk with an installed presence in more than 100 countries worldwide. VitalPBX has generously provided a customized White Label version of Incredible PBX tailored for use with all Incredible PBX and VitalPBX custom applications. Follow this link for a free test drive!
 

Special Thanks to Vitelity. Vitelity is now Voyant Communications and has halted new registrations for the time being. Our special thanks to Vitelity for their unwavering financial support over many years and to the many Nerd Vittles readers who continue to enjoy the benefits of their service offerings. We will keep everyone posted on further developments.


Cell Phone Tips for Spring Break and International Travel

With Spring Break upon us and Summer Vacations just around the corner, we wanted to briefly review some of your cellphone and data options for those that might be planning a trip outside the United States. If you’re only going as far as Mexico, Canada, or the U.S. Virgin Islands, then your existing cellular provider in the U.S. may have you covered at no additional cost. If your provider is not AT&T, then check with your carrier. And speaking of AT&T, if you’ll only be outside these covered areas for a brief time, then you may wish to consider enabling AT&T’s International Day Pass which costs you nothing until you use it. On days that you use it in over 100 countries, it’s $10/day with the same talk, text, and data options you currently have in the U.S. No, it’s not a bargain for a 60-day vacation, but it’s a pretty good deal for a week or so when you only need cell service for a few days. No changes in your current AT&T plan are necessary other than enabling the International Day Pass feature. Click on the Get Started Link to enable the service. Be sure to read the fine print.

Once you get past the options in the first paragraph, most of the other economical choices for cell phone and data coverage internationally involve swapping out the SIM card in your phone with a country-specific SIM card from a local provider. The first step is to make absolutely certain that your cell phone is unlocked before you hop on a plane. The procedure varies with different providers so you’ll need to investigate what steps are required. Be sure to also decipher how to verify that your phone is unlocked. Again, with AT&T, it’s a simple matter of visiting their web site and filling out a form. Within 24 hours, you should be good to go.

Now comes the hard part, choosing an alternate provider meeting your travel requirements. This turns on a number of factors such as whether callers in the U.S. need to contact you using a U.S. phone number. If so, then the first paragraph is your best bet if you need to be reached on your existing phone number. If any U.S. phone number will suffice (and you can always forward your cellphone number to this new number), then using an Android phone or iPhone, there’s an easy solution if you have Wi-Fi access or some cellphone data to burn. Simply use a Google Voice phone number and associate it with the new Android or iPhone Google Voice app on your phone. Be sure to enable WiFi/Mobile Data calling in GV Settings, and you’re good to go with almost any smart phone with 4G service. With Wi-Fi, no SIM card is required. Just put your phone in Airplane Mode and enjoy free calling back to the U.S. and Canada.

The next issue to consider is whether you need to make frequent calls or send frequent text messages to those in the U.S. while you are away. If so, then the best choice we’ve found without Wi-Fi access is Orange Holiday Europe.1 Simply buy the $50 card and put it in your cellphone on the day you wish to begin your service. It buys you 10GB of data, 2 hours of calls, and 1000 text messages to almost any phone in the world from 30 European countries including the U.K. Once activated, the card is good for 14 days and includes tethering. It can be renewed for an additional 21.70€ (about $25) which adds another 14 days with an additional 10GB of data, 120 minutes of calls, and another 1,000 SMS messages.

If the phone number of your calls doesn’t matter and you can also take advantage of Google Voice for free calling to and from the U.S., then all you really need is the cheapest SIM card you can find in the country you’re visiting. One word of advice from our frequent traveler friends is don’t buy the SIM card in the airport where they typically are two to five times as expensive. To give you an example, a SIM card with 5GB of data in Madrid can be had for about 10€ per week. For iPhone users, a more flexible SIM card that looked appealing to us was Gigsky which offers regional SIM cards for anywhere in the world. Enjoy your vacation!

Originally published: Monday, March 25, 2019


Special Thanks to Our Generous Sponsors


FULL DISCLOSURE: ClearlyIP, Skyetel, Vitelity, DigitalOcean, Vultr, VoIP.ms, 3CX, Sangoma, TelecomsXchange and VitalPBX have provided financial support to Nerd Vittles and our open source projects through advertising, referral revenue, and/or merchandise. As an Amazon Associate and Best Buy Affiliate, we also earn from qualifying purchases. We’ve chosen these providers not the other way around. Our decisions are based upon their corporate reputation and the quality of their offerings and pricing. Our recommendations regarding technology are reached without regard to financial compensation except in situations in which comparable products at comparable pricing are available from multiple sources. In this limited case, we support our sponsors because our sponsors support us.

BOGO Bonaza: Enjoy state-of-the-art VoIP service with a $10 credit and half-price SIP service on up to $500 of Skyetel trunking with free number porting when you fund your Skyetel account. No limits on number of simultaneous calls. Quadruple data center redundancy. $25 monthly minimum spend required. Tutorial and sign up details are here.

The lynchpin of Incredible PBX 2020 and beyond is ClearlyIP components which bring management of FreePBX modules and SIP phone integration to a level never before available with any other Asterisk distribution. And now you can configure and reconfigure your new Incredible PBX phones from the convenience of the Incredible PBX GUI.

VitalPBX is perhaps the fastest-growing PBX offering based upon Asterisk with an installed presence in more than 100 countries worldwide. VitalPBX has generously provided a customized White Label version of Incredible PBX tailored for use with all Incredible PBX and VitalPBX custom applications. Follow this link for a free test drive!
 

Special Thanks to Vitelity. Vitelity is now Voyant Communications and has halted new registrations for the time being. Our special thanks to Vitelity for their unwavering financial support over many years and to the many Nerd Vittles readers who continue to enjoy the benefits of their service offerings. We will keep everyone posted on further developments.


  1. Many of our purchase links refer users to Amazon when we find their prices are competitive for the recommended products. Nerd Vittles receives a small referral fee from Amazon to help cover the costs of our blog. We never recommend particular products solely to generate Amazon commissions. However, when pricing is comparable or availability is favorable, we support Amazon because Amazon supports us. []

Game Changer: Hooking Up Facebook with Incredible PBX

There aren’t many VoIP discoveries that get us this excited about the future of telecom. But merging with 1.5 billion users plus Facebook’s enormous talent pool and technology resources is definitely something worthy of your attention. What a Facebook marriage with the VoIP platform could mean for the future of telecommunications is nothing short of earth-shattering. Few people still have home phones. Almost everyone has a Facebook account and a cellphone. If VoIP solutions for businesses fail to take those last two sentences into account, commercial PBX’s days are numbered… and it’s not a big number.

So why integrate Facebook Messenger into your PBX? The screenshot above says it all.

Think of the possibilities. Using Facebook Messenger on your smartphone or desktop PC, you could query a CRM database running on your VoIP server and instantly connect to anyone in the world by making a free call or sending a free text message. Using Facebook Messenger, you or any designated employee could receive instant alerts when a new voicemail or fax arrived on your PBX. Using Facebook Messenger, the Call Center possibilities are virtually endless as documented here. Using Facebook Messenger, you as an administrator could literally manage your entire fleet of PBXs from the convenience of your smartphone… anywhere in the world. While the Facebook Messenger platform does not independently support phone calls between its users today, it’s just a matter of time. Look at the name of the product. Is there any doubt where this project is headed given the fact that Apple already supports free calling with Facetime, Microsoft supports free calling with Skype, Google supports free calling with Google Voice, and Amazon supports free calling with its Echo platform?

Facebook integration is revolutionary in another way as well. It heralds the arrival of chatbots to do the heavy lifting for telecom businesses as well as system administrators. Just as ATMs revolutionized banking, chatbots are poised to do much the same thing for communications and Internet support. Down the road, we’ll document how to take advantage of this chatbot technology using Facebook Messenger.

We need to learn to walk before we can run. So today we’ve developed a Facebook webhooks integration project for Incredible PBX® that is perfect for administrators, whether you manage a home PBX or a dozen PBXs for an organization. We’ll get to some of the other possibilities in future articles. Setting this up is the best way we can think of to get your creative juices flowing to consider what’s possible and to identify where to go next. When we’re finished, you’ll have a Facebook Messenger platform from which you can issue any Linux® or Asterisk® command to your server. And, you’ll be able to send messages from your PBX to Facebook Messenger to identify any events you wish to monitor, whether it’s phone calls, or voicemails, or receipt of faxes, or even VoIP provider outages. In addition, you can even reroute calls by entering simple call forwarding commands in Messenger.

Before we get started, let’s get all of the legal stuff out of the way up front. WE PROVIDE OPEN SOURCE, GPL CODE TO OUR READERS AT NO COST. ALWAYS HAVE. ALWAYS WILL. THE TRADEOFF IS YOU MUST AGREE TO ACCEPT ALL RISKS INHERENT IN USING THE SOFTWARE, WHETHER THOSE RISKS ARE KNOWN OR UNKNOWN TO YOU OR TO US. THE SOFTWARE IS PROVIDED "AS IS" AND MAY BE USED AS DELIVERED, OR YOU MAY MODIFY IT TO MEET YOUR OWN NEEDS SUBJECT TO THE TERMS OF THE GPL 2 LICENSE AVAILABLE HERE. IF YOU ARE UNWILLING TO AGREE TO THESE TERMS AND CONDITIONS, STOP READING HERE AND MOVE ON TO SOME OTHER WEB SITE. OTHERWISE, LET’S BEGIN WHAT WE PROMISE WILL BE A TERRIFIC ADVENTURE.

Overview of Facebook Messenger Webhooks Project

Here is a thumbnail sketch of what we’ll be covering today. Once you get an SSL certificate installed for your server, the remaining steps are a walk in the park. When we’re finished, you’ll have a Facebook Messenger platform that is seamlessly integrated with your PBX. The current software release supports Incredible PBX 13 with CentOS 6, Incredible PBX for Issabel, and Incredible PBX for Wazo. Minor tweaking required for other Asterisk platforms.

  • SSL Certificate – Obtaining and installing an SSL certificate for your web server
  • Security – Locking down your server for safe, secure Facebook Messenger access
  • Incredible PBX Webhooks App – Installing the server-side webhooks software
  • Facebook Integration – Interconnecting Facebook Messenger and Incredible PBX
  • Outbound Call Setup – Configuring Incredible PBX to make outbound calls from FB
  • Incoming Call Alerts – Configuring Incredible PBX for FB Messenger call alerts
  • Webhooks Feature Set – Our tutorial covering all supported webhook commands
  • SMS Messaging – Configuring Incredible PBX for SMS Messaging support with FB
  • Webhooks Tips & Tricks – Adjusting our code to meet your own requirements

Obtaining and Installing an SSL Certificate

Believe it or not, the hardest part of today’s project was covered in last week’s Nerd Vittles tutorial. It walked you through obtaining and installing an SSL Certificate on any of the major Incredible PBX platforms. This gets your server configured to use secure and encrypted web communications via HTTPS which is both a Facebook requirement and a smart idea. There’s no need to read further until you get your server working properly with an SSL certificate because the Facebook integration component will fail until you get HTTPS access squared away. So start there and return here when you’re finished.

The Most Important Piece of the Puzzle: SECURITY

If you’ve been following Nerd Vittles over the years, you already know that our most important consideration with any PBX deployment is security. A PBX without a secure firewall is an invitation for an astronomical phone bill. Today’s setup assumes you already have deployed Incredible PBX with its Travelin’ Man 3 firewall that provides a whitelist of IP addresses that may access (or even see) your server. By definition, Facebook Messenger is a public platform available to everyone in the world. So how do we safely integrate it into your PBX while preserving the security of your server and its telecom resources? We do it in several ways. First, Facebook Messenger Webhooks are tied to a commercial Facebook page even though you don’t need a business in order to create the page. As the owner of that Facebook Page, you have to authorize users to access the page. DON’T! Make this a page that is solely dedicated to managing your PBX through Messenger. DO NOT USE THIS FACEBOOK PAGE AS THE PUBLIC FACE FOR YOUR BUSINESS! Also make certain that your Facebook credentials include a very secure password… as if the integrity of your PBX depended upon it. IT DOES! So long as you follow these guidelines, Facebook’s own security mechanisms will protect your PBX from intrusion. If this discussion makes you nervous, our last topic today will show you how to remove components from the code to eliminate any functionality you wish to turn off.

As configured, Facebook Messenger Webhooks won’t work at all with Incredible PBX because the firewall should block all web access to your server. This requires a change on the Incredible PBX for Wazo platform which we will cover momentarily. The way we will provide Facebook access is by adding the Facebook server IP addresses to the existing whitelist, and then we’ll run a bash script every night to keep the Facebook IP addresses current.

In the past, we opened TCP port 443 (HTTPS) to public access on the firewall with Incredible PBX for Wazo. Instead, we relied upon web server authentication for access to the Wazo, Telephone Reminders, and AsteriDex services. That needs to be changed before you interconnect with Facebook Messenger, and we’ll include that in the commands to whitelist the Facebook servers below.

1. To secure port 443 in your firewall, be sure that the port is not exposed in /etc/sysconfig/iptables (CentOS) or /etc/iptables/rules.v4 (Debian/Ubuntu/Raspbian). And then restart the Incredible PBX firewall.

sed -i 's|443|450|' /etc/sysconfig/iptables
sed -i 's|443|450|' /etc/iptables/rules.v4
iptables-restart

2. Verify your new configuration: iptables -nL. Search for 443 and make certain it is NOT in the whitelist.

3. Verify that the whois package is installed on your server by issuing the command: whois. If you get a file not found error, install the package using the top line for CentOS and the bottom line for Debian/Ubuntu/Raspbian:

yum install whois
apt-get install whois

4a. For Issabel and Incredible PBX 13, add to the end of /usr/local/sbin/iptables-restart these lines to whitelist the FB servers. Then restart the firewall: iptables-restart

whois -h whois.radb.net -- '-i origin AS32934' | grep ^route: | sed "s|route:     |/usr/sbin/iptables -A INPUT -s |" | sed "s|$| -p tcp -m tcp --dport 443 -j ACCEPT|" > /usr/local/sbin/iptables-facebook
chmod +x /usr/local/sbin/iptables-facebook
/usr/local/sbin/iptables-facebook

4b. For Incredible PBX for Wazo, add to end of /usr/local/sbin/iptables-restart these lines to whitelist the FB servers. Then restart the firewall: iptables-restart

whois -h whois.radb.net -- '-i origin AS32934' | grep ^route: | sed "s|route:     |/sbin/iptables -A INPUT -s |" | sed "s|$| -p tcp -m tcp --dport 443 -j ACCEPT|" > /usr/local/sbin/iptables-facebook
chmod +x /usr/local/sbin/iptables-facebook
/usr/local/sbin/iptables-facebook

5. Verify your new configuration: iptables -nL. You should see numerous whitelist entries for port 443 at the end of the listing.

6. Add the following command at the bottom of /etc/crontab to assure that the Facebook server IP addresses are kept current:

20 0 * * * root /usr/local/sbin/iptables-restart >/dev/null 2>&1

7a. For Issabel and Incredible PBX 13, create new web directory, set ownership/permissions to house the Facebook Messenger webhooks, and add a sample web page:

mkdir /var/www/html/fb
echo "Hello World" > /var/www/html/fb/index2.php
chown -R asterisk:asterisk /var/www/html/fb

7b. For Incredible PBX for Wazo, create web directory, set ownership/permissions to house the Facebook Messenger webhooks, and add a sample web page:

mkdir /var/www/html/fb
echo "Hello World" > /var/www/html/fb/index2.php
chown -R asterisk:www-data /var/www/html/fb
chmod -R 775 /var/www/html/fb

8a. For Issabel and Incredible PBX 13, no further configuration is required.

8b. For Incredible PBX for Wazo, we need to enable access to the fb web directory. Edit /etc/nginx/locations/https-available/01_incrediblepbx:

At the top of the file, add the following:

location ~* ^/fb/. *\(?:ico|css|js|gif|jpe?g|png)${
 root /var/www/html;
}

At the bottom of the file, add the following:

location ~ /fb/ {
 root /var/www/html;
 index index.php;
 try_files $uri $uri/ =404;
 fastcgi_param SCRIPT_FILENAME $document_root$fastcgi_script_name;
 fasstcgi_index index.php;
 include fastcgi_params;
 fastcgi_pass unix:/var/run/php5-fpm.sock;
}

Finally, restart the NGINX web server: service nginx restart

9. Using a browser, verify access to sample page: https://SERVER-FQDN/fb/index2.php

Installing Incredible PBX Webhooks Application

Now it’s time to install the Incredible PBX webhooks application on your PBX:

cd /var/www/html/fb
wget http://incrediblepbx.com/incrediblewebhooks.tar.gz
tar zxvf incrediblewebhooks.tar.gz
rm incrediblewebhooks.tar.gz

For Issabel and Incredible PBX 13, adjust the file ownership and permissions like this:

chown -R asterisk:asterisk /var/www/html/fb
chmod -R 775 /var/www/html/fb

For Incredible PBX for Wazo, adjust the file ownership and permissions like this:

chown -R asterisk:www-data /var/www/html/fb
chmod -R 775 /var/www/html/fb

Hooking Up with Facebook

1. Visit the Facebook Developer’s Page and click Add a New App. Give your app a Display Name and provide your Contact Email. Match the letters in the box to get past the Security Check to display the Facebook Product List.

2. When the Facebook Product List appears, click Messenger and choose Setup.

3. In the Token Generation section, click Create a new Facebook Business Page to open a separate browser tab. Do NOT use a page that you use for other purposes! Company, Organization, or Institution is a good choice because there’s a Telecom Company category. Give your new page a Descriptive Name: incrediblepbx-podunk.

4. Return to your Token Generation browser tab and Select the Page you just created from the pull-down list (see Token Generation section of image below). Click Continue and OK to accept the default settings. Facebook then will generate a Page Access Token.

5. Copy the Page Access Token to your clipboard and paste it into the $access_token variable in the config.inc.php template in /var/www/html/fb. Write it down and keep it in a safe place. You’ll always need it to create new webhooks applications. This is the important link to talk to your Facebook Webhooks.

6. In the Webhooks section, click Setup Webhooks. In the Page Subscription form, enter the callback URL for your page. This is the https address to access your Facebook directory with a browser, e.g. https://YOUR-FQDN/fb. Make up a very secure Verify Token and enter it on the form and in the $verify_token variable in the config.inc.php template. This is the code Facebook will send to initially shake hands with your web page. The two entries must match to successfully set up your webhooks linkage. For Subscription Fields, check the Messages box. Then click Verify and Save. If it worked, you’ll get a Complete checkmark in the Webhooks section (see below). The last step is to again Select your Page in the Webhooks section to interconnect Facebook with your PBX. After choosing your page, be sure to click Subscribe or nothing will work. Here’s what a successful setup looks like:

7. To test things out, open Facebook Messenger on a desktop PC, Mac, or smartphone. Search Messenger for the Facebook page you linked to in the previous step. Then click on it to open it. Type howdy in the Message Box at the bottom of the dialog and click Send.

8. You should get an automated response that looks like this:

Hi there and welcome to BotWorld. SenderID:  13824822489535983

9. Copy the SenderID and paste it into cli-message.php together with Page Access Token from step #5, above.

Outbound Call Setup for Facebook Messenger

Outbound calling with Facebook Messenger works like this. You can connect to a specific number using the dial command. Or you can use the call command to look up an entry in your AsteriDex database. Messenger then will display the matching phone number and give you the option of placing the call. When the call is initiated, Incredible PBX will first call your designated CALL-PICKUP-NUMBER. It could be an extension or ring group of your choice. You could even specify a mobile phone number as the pickup destination provided your PBX supports at least two simultaneous outbound calls. Google Voice and many SIP providers can handle this with a single DID. Our personal preference is to route the pickup call to a trunk on a 3CX server which then sends the call to every 3CX client registered with the 3CX server. No NAT issues ever! Once you pick up the call on your designated phone, Incredible PBX will place the second call to the number you requested in Facebook Messenger. The two calls then are connected as if you had placed the call directly. The brief video below demonstrates how this works and the flexibility of using Acer’s $250 Chromebook Flip with Messenger and a 3CX client as a (free) WiFi-based web communications platform with Google Voice. It lets you place and take calls from anywhere in the world so long as you have Wi-Fi access. It’s a dirt cheap travel companion.


To make all of this work, you need to designate a phone in /var/www/html/fb/.cli-call to take outbound calls initiated from Facebook Messenger. This is either an extension number or a 10-digit CALL-PICKUP-NUMBER in the examples below. To set this up, edit .cli-call and choose one of the following examples. Comment out the other Channel options.

For Issabel and Incredible PBX 13, choose from the following:

#echo "Channel: SIP/701" > /tmp/cli.call
#echo "Channel: SIP/vitel-outbound/1CALL-PICKUP-NUMBER" > /tmp/cli-call
echo "Channel: Motif/gSOME-GV-NAMEgmailcom/1CALL-PICKUP-NUMBER@voice.google.com" > /tmp/cli.call

For Incredible PBX for Wazo, choose from the following:

echo "Channel: Local/701@default" > /tmp/cli.call
#echo "Channel: Local/CALL-PICKUP-NUMBER@default" > /tmp/cli.call

Incoming Call Alerts with Facebook Messenger

If you’ve always wished for screenpops to announce your incoming calls, you’re going to drool at the FB Messenger Webhooks implementation with Incredible PBX. It works (simultaneously) on desktop PCs, Macs, iPhones/iPads, Android devices, and Apple Watch:

To set up incoming call alerts with Facebook Messenger, just issue the commands for your platform as outlined below.

For Incredible PBX 13, add the following to the end of extensions_override_freepbx.conf in /etc/asterisk directory. Then reload Asterisk dialplan: asterisk -rx "dialplan reload"

[cidlookup]
include => cidlookup-custom
exten => cidlookup_1,1,Set(CURLOPT(httptimeout)=7)
exten => cidlookup_1,n,Set(CALLERID(name)=${CURL(https://api.opencnam.com/v2/phone/${CALLERID(num)}?format=pbx&ref=freepbx)})
exten => cidlookup_1,n,Set(current_hour=${STRFTIME(,,%Y-%m-%d %H)})
exten => cidlookup_1,n,Set(last_query_hour=${DB(cidlookup/opencnam_last_query_hour)})
exten => cidlookup_1,n,Set(total_hourly_queries=${DB(cidlookup/opencnam_total_hourly_queries)})
exten => cidlookup_1,n,ExecIf($["${last_query_hour}" != "${current_hour}"]?Set(DB(cidlookup/opencnam_total_hourly_queries)=0))
exten => cidlookup_1,n,ExecIf($["${total_hourly_queries}" = ""]?Set(DB(cidlookup/opencnam_total_hourly_queries)=0))
exten => cidlookup_1,n,Set(DB(cidlookup/opencnam_total_hourly_queries)=${MATH(${DB(cidlookup/opencnam_total_hourly_queries)}+1,i)})
exten => cidlookup_1,n,ExecIf($[${DB(cidlookup/opencnam_total_hourly_queries)} >= 60]?System(${ASTVARLIBDIR}/bin/opencnam-alert.php))
exten => cidlookup_1,n,Set(DB(cidlookup/opencnam_last_query_hour)=${current_hour})
exten => cidlookup_1,n,System(/usr/bin/php /var/www/html/fb/cli-message.php "Incoming call: ${CALLERID(number)} - ${CALLERID(name)}.")
exten => cidlookup_1,n,Return()

exten => cidlookup_return,1,ExecIf($["${DB(cidname/${CALLERID(num)})}" != ""]?Set(CALLERID(name)=${DB(cidname/${CALLERID(num)})}))
exten => cidlookup_return,n,Return()

;--== end of [cidlookup] ==--;

For Incredible PBX for Issabel, add this to the end of extensions_override_issabel.conf in /etc/asterisk directory. Then reload Asterisk dialplan: asterisk -rx "dialplan reload"

[cidlookup]
include => cidlookup-custom
exten => cidlookup_5,1,Set(CURLOPT(httptimeout)=7)
exten => cidlookup_5,n,Set(CALLERID(name)=${CURL(https://api.opencnam.com/v2/phone/${CALLERID(num)}?format=pbx&ref=issabelpbx)})
exten => cidlookup_5,n,Set(current_hour=${STRFTIME(,,%Y-%m-%d %H)})
exten => cidlookup_5,n,Set(last_query_hour=${DB(cidlookup/opencnam_last_query_hour)})
exten => cidlookup_5,n,Set(total_hourly_queries=${DB(cidlookup/opencnam_total_hourly_queries)})
exten => cidlookup_5,n,ExecIf($["${last_query_hour}" != "${current_hour}"]?Set(DB(cidlookup/opencnam_total_hourly_queries)=0))
exten => cidlookup_5,n,ExecIf($["${total_hourly_queries}" = ""]?Set(DB(cidlookup/opencnam_total_hourly_queries)=0))
exten => cidlookup_5,n,Set(DB(cidlookup/opencnam_total_hourly_queries)=${MATH(${DB(cidlookup/opencnam_total_hourly_queries)}+1,i)})
exten => cidlookup_5,n,ExecIf($[${DB(cidlookup/opencnam_total_hourly_queries)} >= 60]?System(${ASTVARLIBDIR}/bin/opencnam-alert.php))
exten => cidlookup_5,n,Set(DB(cidlookup/opencnam_last_query_hour)=${current_hour})
exten => cidlookup_5,n,System(/usr/bin/php /var/www/html/fb/cli-message.php "Incoming call: ${CALLERID(number)} - ${CALLERID(name)}.")
exten => cidlookup_5,n,Return()

exten => cidlookup_return,1,ExecIf($["${DB(cidname/${CALLERID(num)})}" != ""]?Set(CALLERID(name)=${DB(cidname/${CALLERID(num)})}))
exten => cidlookup_return,n,Return()

;--== end of [cidlookup] ==--;

For Incredible PBX for Wazo, edit /etc/asterisk/extensions_extra.d/cid-superfecta.conf. In the [xivo-subrgbl-did] context just below the n(keepon),Gosub(cid-superfecta,s,1) line, insert the following. Then reload the Asterisk dialplan: asterisk -rx "dialplan reload"

same = n,System(/usr/bin/php /var/www/html/fb/cli-message.php "Incoming call: ${XIVO_SRCNUM} - ${CALLERID(name)}.")

Incredible PBX Webhooks Feature Set

Now that we’ve got all the pieces in place and properly configured, let’s briefly walk through the various options that are available. With all commands, you use Facebook Messenger with your designated web page on any platform supported by Messenger.

dial 8005551212 – connects to designated extension and then calls 8005551212
call Delta – looks up Delta in AsteriDex and provides button to place the call
lookup Delta – looks up Delta in AsteriDex and provides button to place the call
!command – executes a Linux command, e.g. !asterisk -rx "sip show registry"
howdy – returns greeting and SENDER ID of your FB page (Hookup, item #9)
help – provides links to phone help as well as PIAF and Asterisk forums
sms 10-digit-SMS-number "Some message" – sends SMS message through GV
update – updates Messenger platform for Incredible PBX to the latest & greatest
anything else – returns whatever you typed as a response (for now)

Configuring Incredible PBX for SMS Messaging

We’ve implemented a traditional SMS messaging function in this build that let’s you send an SMS message to any phone if you have a Google Voice account and assuming you have pygooglevoice functioning properly on your PBX. The Google Voice account need not be registered as a trunk on the PBX. To use the feature, insert your Google Voice credentials including your plain-text password for a working Google Voice account in /var/www/html/fb/.smssend. Then test the SMS functionality by issuing the following command from the Linux CLI:

/var/www/html/fb/.smssend 10-DIGIT-SMS-NUMBER "Hello SMS World"

If an error occurs, the script will tell you what to try to fix it. Begin by Enabling Less Secure Apps. Then follow this link to relax Google Voice security on your account. If it still fails after trying both of these methods, you may have an old build of pygooglevoice. Here are the commands to bring your system up to current specs. Then try again.

cd /root
rm -r pygooglevoice
git clone https://github.com/wardmundy/pygooglevoice.git
cd pygooglevoice
python setup.py install
cp -p bin/gvoice /usr/bin/.

Once you’ve sent an SMS message successfully using .smssend, you can start sending SMS messages from within Messenger. Syntax: sms 10-digit-SMS-number "Some message"

Incredible PBX Webhooks Tips & Tricks

There’s lots to learn with Facebook Messenger Webhooks. When we started two weeks ago, there were no PHP resources on the web that offered much help. Lucky for you, our pain is your gain. The meat of the coconut is primarily stored in the index.php in your fb directory. Print it out and it will tell you everything you ever wanted to know about coding webhooks with PHP.

Disabling Shell Access. While shell access only provides asterisk or www-data permissions depending upon your platform, we’ve nevertheless heard from more than one source exclaiming what a dumb idea it is to put a webhooks shell command out in the wild. We trust our readers to use it responsibly and to always place it behind a firewall with public access to TCP port 443 blocked. If that design and the Facebook security mechanisms still leave you queasy, the short answer is to remove that block of code on your server or change the access code from ! to something much more obscure, e.g. YuKFoo!. This is easy to do but just be aware that if you change the access code or even remove the block of code, running the update command to load the latest release from Incredible PBX Headquarters will overwrite your changes. So it’s probably a better idea to rename the update command (line 248) as well so you don’t accidentally run it. You’ll find the shell command block of code beginning at line 64 in the 170928 version. If you change the access code to a different string, remember to change the substring "1″ reference in that line and the subsequent line to the actual length of your access code, e.g. YukFoo! is seven characters long so the number 1 would be replaced with 7 in BOTH lines 64 and 65.

Other Security Measures. We don’t trust anybody (and that includes Facebook) when it comes to accessing resources from our paid VoIP providers. We would encourage you to run this application on a dedicated Incredible PBX in the Cloud server that has only a single Google Voice trunk with no funds balance in that particular Google account. In this way, if your server is compromised, the worst thing that can happen is your Google account gets compromised or some stranger makes U.S. and Canadian calls without financial cost to you. Now that Cloud servers are available for less than $2 a month, it makes good sense to separate out applications that pose heightened security issues for you and yours. If you do decide to use a SIP provider rather than a Google Voice trunk, we strongly recommend restricting international calls and keeping a minimal balance in your account with no automatic replenishment enabled.

Getting Rid of Lenny. The help command included in the feature set provided is more of a traditional web page with buttons simulating hot links. We’ve included a nifty telephone option in the help features. It let’s you embed a phone number that is called using client-side integration whenever help is entered and the "Talk to Lenny" option is clicked:

What client-side integration means is the calls use any dialer available on the Messenger client’s platform. They are not sent to your PBX for processing. On a Mac or iPhone, Facetime provides free calls. On Windows, Skype provides paid calls. On Android devices, the Google Hangouts Dialer provides free calls. Facebook basically passes tel: +18005551212 to the client’s browser, and it’s up to the client’s browser to figure out how to process the call. We currently have the feature configured to "Talk to Lenny," but you could change it to Phone Home or Call the Office and enter your own phone number. Here are the commands to do it. Just replace "Phone Home" in the first command below with whatever label desired. Replace "8005551212″ in the second line with the number to be called. Leave the other Lenny entry and phone number as they are since they will be overwritten by these two commands. As noted above, your modifications will be overwritten whenever you execute the update command.

sed -i 's|Talk to Lenny|Phone Home|' /var/www/html/fb/index.php
sed -i 's|8436060444|8005551212|' /var/www/html/fb/index.php

Enhanced Calling Option. Beginning with the October 1 update which you can obtain by entering the update command in Messenger, you now have two calling options on some smartphone platforms. The call command still triggers an AsteriDex lookup on your PBX. But now you have a choice in how to place the call. (1) You can click the dial button to place the outbound call through your PBX, or (2) you can click on the retrieved phone number link to place the outbound call using the client-side resource available on your Messenger platform, e.g. Facetime, Skype, or Google Hangouts. In some circumstances, the client-side call may be preferable since it avoids the two-step calling procedure used by Asterisk. The choice is yours and may depend upon the availability and cost of the client-side call when placed from your calling location.

Special Thanks. Our special hat tip to Scott T. Tabor (@ABSGINC) for his pioneering work on Facebook Webhooks. You can visit the PIAF Forum and Scott’s blog to review how far we have come in just two weeks. Thanks, Scott.

Published: Monday, October 2, 2017  


Need help with Asterisk? Visit the PBX in a Flash Forum.


Special Thanks to Our Generous Sponsors


FULL DISCLOSURE: ClearlyIP, Skyetel, Vitelity, DigitalOcean, Vultr, VoIP.ms, 3CX, Sangoma, TelecomsXchange and VitalPBX have provided financial support to Nerd Vittles and our open source projects through advertising, referral revenue, and/or merchandise. As an Amazon Associate and Best Buy Affiliate, we also earn from qualifying purchases. We’ve chosen these providers not the other way around. Our decisions are based upon their corporate reputation and the quality of their offerings and pricing. Our recommendations regarding technology are reached without regard to financial compensation except in situations in which comparable products at comparable pricing are available from multiple sources. In this limited case, we support our sponsors because our sponsors support us.

BOGO Bonaza: Enjoy state-of-the-art VoIP service with a $10 credit and half-price SIP service on up to $500 of Skyetel trunking with free number porting when you fund your Skyetel account. No limits on number of simultaneous calls. Quadruple data center redundancy. $25 monthly minimum spend required. Tutorial and sign up details are here.

The lynchpin of Incredible PBX 2020 and beyond is ClearlyIP components which bring management of FreePBX modules and SIP phone integration to a level never before available with any other Asterisk distribution. And now you can configure and reconfigure your new Incredible PBX phones from the convenience of the Incredible PBX GUI.

VitalPBX is perhaps the fastest-growing PBX offering based upon Asterisk with an installed presence in more than 100 countries worldwide. VitalPBX has generously provided a customized White Label version of Incredible PBX tailored for use with all Incredible PBX and VitalPBX custom applications. Follow this link for a free test drive!
 

Special Thanks to Vitelity. Vitelity is now Voyant Communications and has halted new registrations for the time being. Our special thanks to Vitelity for their unwavering financial support over many years and to the many Nerd Vittles readers who continue to enjoy the benefits of their service offerings. We will keep everyone posted on further developments.


Some Recent Nerd Vittles Articles of Interest…

The Disappointing iPhone 6: Eight Generations of iOS and Bluetooth Still Sucks

Our technology reviews are a little different than the dozens of reviews you’ve probably already seen that read more like Apple press releases. First of all, we typically buy products to actually use. And second, we base our smartphone evaluations on real-world requirements rather than best case scenarios that you’re unlikely to ever experience in the real world.

So we begin our review of the iPhone 6 with the simple question: "Can it make calls?" Funny as this sounds, it’s been a huge problem with previous iPhone models if you planned to use a reasonably priced provider such as StraightTalk instead of one of America’s "Big Four." To Apple’s credit, they finally got it right in the AT&T model of the iPhone 6. StraightTalk works out of the box, something Android mastered years ago. You still cannot manually configure the cellphone provider specs, but at least it now works.

We’re not going to spend a lot of time on Apple’s continuing push to lock users into the Apple universe. Suffice it to say, the lock in marches on with each new release. To some it’s a good thing. To others, it’s not. If you’re going to fork over $1,0001 for an iPhone 6 in order to use StraightTalk for $45 a month, then you’re probably committed to and comfortable with Apple’s ways of doing things. We’re pretty much an observer of the iPhone cosmos except to assure that our VoIP products still work reliably on the platform. On the other hand, our teenager and all of her teenage friends have iPhones, period. Just the mention of Android conjures up visions of nerds hanging from trees to hear them tell it. In other words, lock in is a good thing in their view. All of their apps work exactly the same on every person’s smartphone. All of their emojis are compatible for texting. And messaging is pure Apple with no worries whether SMS and MMS work or not. By the way, messaging is still a mess if you switch between Apple and Android with your SIM card without first disabling iMessage on the iPhone. It’s almost as if Apple likes it this way. 😉

Did we mention that the iPhone 6 is gorgeous? Hands down, it is the best looking smartphone ever. We won’t get into whether it bends or not. Ours didn’t, and we carry it in our pocket like every other guy on the planet. Not sure I’d do it if I rode on a tractor all day but in typical everyday use, it holds it’s own.

We were especially curious about the camera given the numerous reviews documenting that the iPhone 6 is not the megapixel wonder you’ve come to expect with Android phones. We’ve typically been able to take much better real-world photos using Samsung’s Galaxy S4. So we’re including two marsh photos taken with a Galaxy S4 as well as iPhone 5c and iPhone 6 portrait shots to let you judge the quality for yourself. Keep in mind that all four of the images below are screen captures rather than the actual photographs. We came away from the experiment very impressed that the newer iPhones can hold their own against the Android devices with far better technical specs. While it’s still a bit of a knuckle drill to export a photo from your photo stream to iPhoto to email to a download to your desktop, it’s at least intuitive. Bottom Line: We no longer worry about photo quality when we don’t have an Android phone along for a trip.

With the camera testing behind us, that left us with two burning questions: how’s the WiFI and how’s the Bluetooth connectivity with cars?

Not to beat a dead horse, but WiFi typically hasn’t been Apple’s strong suit unless you happen to be using their access points. That seems to be resolved with iOS 8. 5G WiFi connectivity worked great with download and upload speeds matching the limits of our broadband service. That’s the good news.

The bad news is that Bluetooth is still a mess after years and years of problem reports. If anything, iOS 8 is a step backwards judging from the reports on Apple’s own support forum. Our results with one of the latest General Motors vehicles were terrible. While the iPhone 6 could be paired with the vehicle, nothing worked afterwards. No calls, no Pandora, nothing! When every $100 Android smartphone can pair with almost any vehicle and work, we get back to our initial question: "Can it make calls?" Unfortunately, unless you want to step back in time and hold your shiny, new iPhone 6 next to your ear, the answer is a resounding NO. And, yes, we jumped through all of the Apple hoops attempting to resolve the Bluetooth problems even though nobody should ever have to endure that! For $1,000, one would expect all of the basics on a smartphone to function correctly just as you expect your brakes and windshield wipers to work when you buy a new car. The fact that Apple has dropped the ball on Bluetooth for years is yet another reason we won’t be switching from Android anytime soon. In fact, the Bluetooth problem is a deal breaker for us so we’re returning the phone.

Finally, a word to the Apple fanboys. Don’t post comments. We won’t publish them. We are not Apple haters. Quite the contrary, we have more Apple hardware under our roof than any other brand. What Apple has done in the educational arena and to foster the image of technical support as a good thing is legendary. But you can’t drop the ball on the basics and expect people that depend upon technology to be impressed. Drop everything that deals with the shiny new watch for a few days and fix Bluetooth. It’s that important!

Originally published: Monday, October 13, 2014


Need help with Asterisk? Visit the PBX in a Flash Forum.


Special Thanks to Our Generous Sponsors


FULL DISCLOSURE: ClearlyIP, Skyetel, Vitelity, DigitalOcean, Vultr, VoIP.ms, 3CX, Sangoma, TelecomsXchange and VitalPBX have provided financial support to Nerd Vittles and our open source projects through advertising, referral revenue, and/or merchandise. As an Amazon Associate and Best Buy Affiliate, we also earn from qualifying purchases. We’ve chosen these providers not the other way around. Our decisions are based upon their corporate reputation and the quality of their offerings and pricing. Our recommendations regarding technology are reached without regard to financial compensation except in situations in which comparable products at comparable pricing are available from multiple sources. In this limited case, we support our sponsors because our sponsors support us.

BOGO Bonaza: Enjoy state-of-the-art VoIP service with a $10 credit and half-price SIP service on up to $500 of Skyetel trunking with free number porting when you fund your Skyetel account. No limits on number of simultaneous calls. Quadruple data center redundancy. $25 monthly minimum spend required. Tutorial and sign up details are here.

The lynchpin of Incredible PBX 2020 and beyond is ClearlyIP components which bring management of FreePBX modules and SIP phone integration to a level never before available with any other Asterisk distribution. And now you can configure and reconfigure your new Incredible PBX phones from the convenience of the Incredible PBX GUI.

VitalPBX is perhaps the fastest-growing PBX offering based upon Asterisk with an installed presence in more than 100 countries worldwide. VitalPBX has generously provided a customized White Label version of Incredible PBX tailored for use with all Incredible PBX and VitalPBX custom applications. Follow this link for a free test drive!
 

Special Thanks to Vitelity. Vitelity is now Voyant Communications and has halted new registrations for the time being. Our special thanks to Vitelity for their unwavering financial support over many years and to the many Nerd Vittles readers who continue to enjoy the benefits of their service offerings. We will keep everyone posted on further developments.


Some Recent Nerd Vittles Articles of Interest…

  1. Actually, the sales price for the 128GB iPhone 6 with AppleCare+ and sales tax came to a whopping $1,028.59 []

Picking the Best (and worst) Cellphone and Provider for 2012

We’ve delayed chiming in on favorite cellphones for the past six months because, quite frankly, we were on the fence about which way to jump. We still are. But we do have some things for you to consider now that we’ve tested and used three of the world’s best available cellphones. Along the way, we’ve also encountered more than a few roadblocks that we also want to warn you about.

Like many of you, we were eagerly anticipating the arrival of the iPhone 5. We hadn’t used an iPhone since the original was released, and this seemed like a good time to make the switch. Unfortunately, that was not to be, and we shared the disappointment of many others when the iPhone 4S was released. But read on. Our situation may not be unlike many of you. We travel about once month. It’s typically by car on the interstates. And our destinations are big cities in the U.S. such as Atlanta and Washington, D.C. But just as often our final destination is our beach house at Pawleys Island, South Carolina or our cabin in Balsam Mountain Preserve in the Smoky Mountains of North Carolina.

We have been generally thrilled with the Virgin Mobile Android and Blackberry offerings which provide excellent value (originally $25 $35 for 300 minutes and an unlimited text and data plan with no contract) and rock-solid Sprint service when you’re in a populated area or traveling down the interstate. Unlike normal Sprint phones which roam on Verizon when you enter an area without Sprint coverage, neither Boost Mobile nor Virgin Mobile has this option. So, once you enter a little beach town or the Smoky Mountains, all bets are off. In fact, you might as well turn your cellphone off. It’s not going to work.

Our solution was to acquire an ObiHai device (a link to Amazon appears in the right column) which provides Google Voice service in your choice of area codes and free calling in the U.S. and Canada for an investment of $50. The monthly cost: $0. You can configure your Google Voice account to also ring your cellphone, your home phone and a vacation home or two simultaneously so that you never miss a call. The only thing it won’t do is ring an extension in a hotel. But that’s what cellphones are for. This worked extremely well for us, but we still missed having a functioning cellphone when we were driving. We decided to leave the family phones on these inexpensive, contract-free plans and acquire one or more of the newer cellphones for business use and testing. By the way, if you root the LG Optimus V phone, you also can add free WiFi tethering for those road trips. So long as you don’t abuse it, Sprint doesn’t seem to mind. So… what to buy?

There have been dozens of good reviews of the best new phones, and we pretty much narrowed down the field to the iPhone 4S, the Samsung Galaxy Nexus, and the Samsung Galaxy S II Skyrocket from AT&T. If you haven’t used Siri, suffice it to say that it catapults the iPhone into a league of its own. The same holds true for the camera comparison. And, with a simple patch of an unrooted iPhone 4S, the camera even supports Panoramic mode.

<rant> We’ve never actually used Verizon, and their service is especially good at our remote sites so we began our quest by ordering an iPhone 4S on release day with a phone call to Verizon. Stacy was extremely helpful in outlining the various plans and indicated that they had a special underway for new iPhone 4S activations. She indicated that the $35 activation fee would be waived. She also provided her personal number (813-410-4413) so that we could contact her for assistance once the phone arrived. We were in a bit of a crunch because we were headed out of town on the same day the phone was supposed to arrive. She assured us the phone would ship overnight and arrive via FedEx before 2 p.m. You can guess the rest of the story. Rather than FedEx, UPS actually attempted to deliver the phone at 6:30 p.m. that evening, well after we had left town. No special handling had been requested by Verizon which meant end-of-day delivery was good enough in the eyes of UPS. Four days later we picked the phone up at UPS which had refused to reschedule delivery for a specific date without payment of an additional special handling charge. By letting them attempt delivery while we were out of town for four days would have meant the phone would have been returned to Verizon.

Setup of the iPhone 4S was uneventful although a call to Verizon was necessary to activate the data service. Two days use around our home office where 3G service was nowhere to be found, and we decided to return the phone. We still were within our 14-day return window without any cancellation penalty. Let the nightmare begin. The phone was returned using a shipping label included in the box, and it arrived back at Verizon within a couple days. We had prepaid for the phone by credit card to the tune of $433.99 so the only charges due were for two days of usage on a $100 a month plan. The first bill arrived before the phone had actually been received. It showed a balance of $134.65 due within 25 days. It included an activation fee. Upon calling Verizon, we were told to disregard the bill and wait on the next one which would clear everything up and remove the activation fee. Four days later, we received the new bill for $464.81 and a notice that payment was now "Past Due" despite the previous bill which indicated that payment was due within 25 days. The entire previous balance was on the bill including the activation fee. In addition, there was a $350 early termination fee and over $39 in fees and taxes. So, yes, they got the phone back. Another call to Verizon, and this time, of course, they could find no record of previous discussions or agreed terms with their sales agent. An hour later a supervisor agreed to take my word for it and, you guessed it, another bill would fix everything. A month later, the third bill arrived with most of the charges removed including a credit for the $74 payment I had made to protect my credit. Another $38 of fees had been added. Call #5 to Verizon, and they agreed to waive the balance due. We’ll see. That was 25 days ago. Bottom line: 11 minutes of rounded up test phone calls and 5 minutes of data usage rounded up to one gigabyte. Cost: $74 so far. Verizon did refund the cost of the phone. Nice!

To suggest that the design of Verizon’s ordering and billing system borders on fraudulent is about the kindest adjective we can muster. Not only is there no paper record of your order to review, but Verizon internally knew the phone had been returned within the 14-day, no termination fee window. And yet their billing system generated a $350 early termination fee in addition to other bogus charges. It’s hard to believe that any of this was accidental given the volume of customers that Verizon handles. And what do folks without a law degree do? Our guess is that more than a few may just pay the charges fearing that their credit will be ruined if they balk. By the third bill, no mortal could decipher the charges and fees including Verizon’s own agents. And, at least to us, that appears to be by design. Our advice is simple. Steer clear of Verizon until they either clean up their act or the Federal Trade Commission does it for them. </rant>

Our next adventure was an iPhone 4S for AT&T which we ordered from our local Apple store. While AT&T has a well earned reputation that’s not far off the Verizon mark, this time around it’s been a pleasant surprise. Apple handled all of the phone setup in minutes. To obtain a credit authorization from AT&T, an agent requested much of the same information you used to provide in buying your first home. Where do you live? How long have you lived there? What was the cost of your home? Where did you live before that? For how long, etc.? We passed.

We already had an AT&T Microcell device which provides AT&T cell access through your local area network. A quick call to AT&T support, and the device was reactivated. AT&T has gotten a bit greedy since we last had service with them. Not only is the unlimited data plan a thing of the past, but, unlike Verizon, your only text messaging option is all-you-can-eat for $20 a month or pay-as-you-go for 20¢ text and 30¢ photo per message. You’re well advised to choose the $20 plan at least for the first month until you’re sure the former owner of your phone number didn’t spend all day and night texting with 100 friends. There’s now a fee to change your phone number, too.

We really can’t say enough good things about the iPhone 4S. I tell folks that it’s like comparing your favorite pair of old shoes to a shiny new pair of boots. It may not be the latest and greatest, but it’s comfortable to use and reliable. If you don’t mind holding your nose because of Apple’s Soup Nazi mentality, then the iPhone 4S is hard to beat. Antennagate appears to be a thing of the past, the screen is spectacular, the camera is awesome (click on the image above and judge for yourself), and Siri is in a league of its own. Just after acquiring the phone, my mother-in-law came to visit. And, of course, I wanted to impress her with Siri by showing how quickly I could figure out my wife’s birthday. So I held the phone up to my ear and said, "When is Mary’s birthday?" Siri promptly responded, "I found six entries for Mary. Which one did you want?" Not cool, Siri. Mental note: Be careful what you ask.

Our adventure continued with the recent release of the new Google phone, Samsung’s Galaxy Nexus. Using a Micro SIM Adapter, we were able to quickly get the Galaxy Nexus up and running on AT&T’s network. We let the phone charge overnight with a WiFi connection to get all of our Google data migrated. The following day, we unplugged the phone and began using it in much the same way as our iPhone 4S: checking emails periodically, reviewing our Twitter stream, and snapping an occasional photo which gets uploaded to Picasa automatically. To make a long story short, the phone blazed through half of its battery life in about 2-1/2 hours. You can read our complete review of the phone on Google+. Suffice it to say, we weren’t impressed. The 5 megapixel camera is 2-year-old technology, the battery cover is not what you’d expect in a $500+ phone, and the face unlocking feature qualifies as gee-whiz stuff, but we unlocked the phone by displaying our own photo from an iPhone 4S. The real dealbreaker for us was the 16GB internal storage limitation on AT&T-compatible phones coupled with the absence of a microSD expansion slot. In short, this new Google phone is anything but state-of-the-art despite the addition of the Ice Cream Sandwich OS which was not that different than existing Android builds.

We’re a big believer in the open source Android platform. So we didn’t give up. AT&T had also announced a new version of Samsung’s Galaxy S II known as Skyrocket. In the past, we’ve been hesitant to try AT&T branded phones because of our experience with the original Samsung Galaxy Tab which was crippled in about every way a provider could cripple an Android device. The most serious limitation was that AT&T locked the device so that apps could only be downloaded from the Android Market. This meant downloads from Amazon’s App Store were barred which in some cases meant higher prices for identical software.

Unlike the Galaxy Nexus, Samsung’s Galaxy S II Skyrocket includes an 8 megapixel camera which rivals the iPhone 4S. See the link above for a photo comparison. We’ve had excellent results with both the iPhone 4S and the Skyrocket. And unlike AT&T’s Galaxy Tab, the Skyrocket was not crippled except insofar as tethering without a 4GB data plan is concerned. For those that can’t live without a rooted phone, this was a 5-minute operation on the Skyrocket device. And, unlike the Galaxy Nexus, we haven’t seen the extreme battery depletion. We easily get a full day’s use out of the Skyrocket.

The only wrinkle with the Galaxy Skyrocket was that the iPhone 4S data plan didn’t work at all with the device. Unlike some other features, this isn’t one you can change yourself using AT&T’s web portal. But a quick call to AT&T will get you switched to the DataPro for Smartphone 4G LTE Plan which is similarly priced. Be sure to follow up by checking their changes on the web portal. In our case, we were switched to the Enterprise version which added an additional $20 a month to already exorbitant data plan charges. Once a Bell Sister, always a Bell Sister. But at least we expect it.

The correct plan is identical to the iPhone 4S offerings except you also get access to AT&T’s new 4G network. Even in the hybrid 4G network areas (aka HSPA+) which roughly doubles 3G performance, the speeds are quite remarkable. The other good news is that, once you’re on the 4G LTE data plan, you can swap back and forth between the Skyrocket phone and 3G service with the iPhone 4S without another phone call since the 4G LTE plan is downward compatible with the 3G network supported by the iPhone 4S. So we’re happy campers at the moment. Both phones work for calling, data, and texting. Switching from one to the other is as easy as swapping the SIM card between the devices. When we’re in a real 4G metropolitan area (which AT&T expanded to 11 new markets today), the Skyrocket device will be our phone of choice. Its speed, performance, huge screen, and gorgeous display are second to none. Coupled with the $5 Groove IP app, you’ll have a perfect Google Voice experience using WiFi with or without a SIM card. In the meantime, we’re still enjoying our old pair of shoes.

Originally published: Thursday, January 5, 2012


Need help with Asterisk? Visit the PBX in a Flash Forum.
Or Try the New, Free PBX in a Flash Conference Bridge.


whos.amung.us If you’re wondering what your fellow man is reading on Nerd Vittles these days, wonder no more. Visit our new whos.amung.us statistical web site and check out what’s happening. It’s a terrific resource both for us and for you.


Special Thanks to Our Generous Sponsors


FULL DISCLOSURE: ClearlyIP, Skyetel, Vitelity, DigitalOcean, Vultr, VoIP.ms, 3CX, Sangoma, TelecomsXchange and VitalPBX have provided financial support to Nerd Vittles and our open source projects through advertising, referral revenue, and/or merchandise. As an Amazon Associate and Best Buy Affiliate, we also earn from qualifying purchases. We’ve chosen these providers not the other way around. Our decisions are based upon their corporate reputation and the quality of their offerings and pricing. Our recommendations regarding technology are reached without regard to financial compensation except in situations in which comparable products at comparable pricing are available from multiple sources. In this limited case, we support our sponsors because our sponsors support us.

BOGO Bonaza: Enjoy state-of-the-art VoIP service with a $10 credit and half-price SIP service on up to $500 of Skyetel trunking with free number porting when you fund your Skyetel account. No limits on number of simultaneous calls. Quadruple data center redundancy. $25 monthly minimum spend required. Tutorial and sign up details are here.

The lynchpin of Incredible PBX 2020 and beyond is ClearlyIP components which bring management of FreePBX modules and SIP phone integration to a level never before available with any other Asterisk distribution. And now you can configure and reconfigure your new Incredible PBX phones from the convenience of the Incredible PBX GUI.

VitalPBX is perhaps the fastest-growing PBX offering based upon Asterisk with an installed presence in more than 100 countries worldwide. VitalPBX has generously provided a customized White Label version of Incredible PBX tailored for use with all Incredible PBX and VitalPBX custom applications. Follow this link for a free test drive!
 

Special Thanks to Vitelity. Vitelity is now Voyant Communications and has halted new registrations for the time being. Our special thanks to Vitelity for their unwavering financial support over many years and to the many Nerd Vittles readers who continue to enjoy the benefits of their service offerings. We will keep everyone posted on further developments.


Some Recent Nerd Vittles Articles of Interest…

Choosing the World’s Best Mobile Phone… Again!

Up until now, we’ve resisted the temptation to wade into the iPhone vs. Nexus One battle. And there have been many thought-provoking contributions on both sides of the discussion. Our take on it is that, for many folks, it’s now come down to the Ford vs. Chevy debate. We know lots of Ford enthusiasts that would never set foot in a GM vehicle. And vice versa.

In the cellphone world, there are some differences between Apple and Google philosophically that you really don’t see in choosing between Ford and Chevy. If you’re looking for a cellphone that just works, that requires little involvement on your part, and that basically functions as a phone, a music player, and a handheld game device, then you’ll love the iPhone. Apple controls the entire user experience end-to-end, and they’ve gotten it just about right after three years of evolutionary development. If you’re looking for a cellphone that functions more as a mobile office, then the choice comes down to Blackberry vs. Nexus One at least in our book. The Blackberry still is the hands-down winner if your business runs on Microsoft Exchange although the Nexus One performs admirably. For everyone else, the Nexus One is your baby. That’s where we are today. But what about next year, and…

It’s Integration, Stupid! Unless you’ve been living under a rock, Cloud Computing should not be a new concept. The whole corporate world is moving there. Why? Because it’s too damn expensive to manage the complexities of modern data processing technology in house. And when it comes to Cloud Computing, there’s no one better at it than Google. The tight integration of email, messaging, voice communications, directories, calendaring/scheduling, and maps in the Google universe is legendary. And Google is damn close to Microsoft on the document preparation and spreadsheet front. Google’s search technology is simply the icing on the cake. But what icing! It ties all of these components together in a way that others only Bing about.

What the Nexus One brings to the table is a mobile computing platform that is fully capable of taking advantage of all of Google’s integration strengths. Email is always synchronized with your Gmail account. Your Address Book is always synchronized with your Google Address book. Your calendar is always synchronized with your Google Calendar and those of your coworkers. Your phone rings on your Nexus One at the same time it rings in your office or home. And your outbound calls, including your CallerID, can be processed just as if you were placing the same calls from your office or home. Simple, isn’t it? Can Apple do the same thing? To some extent, certainly. But the Apple MobileMe sync technology is archaic compared to the Google model. With Apple you’re synchronizing Address Books and Calendars from Apple-only desktop machines to a central server (for a fee) on a scheduled basis. That leaves 90% of corporate America out of the loop. With Google, there is only one Address Book and Calendar, and they’re both already stored in the Cloud. So you don’t have the endless problems associated with keeping a dozen or a hundred or thousands of users’ information in sync.

Long Live the Soup Nazi. For Seinfeld fans, no one can touch the Draconian deeds of the Soup Nazi. But Apple comes close: pushing out updates that reportedly bricked the iPhones of users that sought a bit more freedom in their software choices, telling the FCC that unlocked iPhones threaten the security of the national cellphone network, ruling the Apple Store with an iron fist. This is not acceptable corporate behavior in our book. For the average cellphone user, this conduct may not matter, but it should. The choice really comes down to spending your dollars with a company that fosters and encourages open source development versus a company that treats you as if you’re too dumb to know what’s good for you.

Our Pick: The Nexus One. We’ll leave you with our Baker’s Dozen reasons for choosing the Nexus One over the iPhone. YMMV! For the best and most balanced technical review to date, visit Ars Technica.

1. Google Apps Integration (see above)
2. Navigation integrated with Voice & Google Maps (video)
3. Phone-wide Speech-to-Text Voice Integration
4. Multitasking and Recent App Switcher Button
5. Back Button to non-destructively back out of anything
6. One-Touch App Directory plus 5 Custom Screens
7. Goggles & Dolphin Multi-Touch Browser
8. SIP and Google Voice integration with WiFi and Cell Nets
9. Intuitive store without corporate content control
10. Unlocked phone, easily rooted, Cyanogen
11. Replaceable battery
12. Expandable storage
13. Flash

In the immortal words of Bernie Mac, "Whatcha gonna do, America?"


Need help with Asterisk®? Visit the PBX in a Flash Forum.
Or Try the New, Free PBX in a Flash Conference Bridge.


whos.amung.us If you’re wondering what your fellow man is reading on Nerd Vittles these days, wonder no more. Visit our new whos.amung.us statistical web site and check out what’s happening. It’s a terrific resource both for us and for you.


Special Thanks to Our Generous Sponsors


FULL DISCLOSURE: ClearlyIP, Skyetel, Vitelity, DigitalOcean, Vultr, VoIP.ms, 3CX, Sangoma, TelecomsXchange and VitalPBX have provided financial support to Nerd Vittles and our open source projects through advertising, referral revenue, and/or merchandise. As an Amazon Associate and Best Buy Affiliate, we also earn from qualifying purchases. We’ve chosen these providers not the other way around. Our decisions are based upon their corporate reputation and the quality of their offerings and pricing. Our recommendations regarding technology are reached without regard to financial compensation except in situations in which comparable products at comparable pricing are available from multiple sources. In this limited case, we support our sponsors because our sponsors support us.

BOGO Bonaza: Enjoy state-of-the-art VoIP service with a $10 credit and half-price SIP service on up to $500 of Skyetel trunking with free number porting when you fund your Skyetel account. No limits on number of simultaneous calls. Quadruple data center redundancy. $25 monthly minimum spend required. Tutorial and sign up details are here.

The lynchpin of Incredible PBX 2020 and beyond is ClearlyIP components which bring management of FreePBX modules and SIP phone integration to a level never before available with any other Asterisk distribution. And now you can configure and reconfigure your new Incredible PBX phones from the convenience of the Incredible PBX GUI.

VitalPBX is perhaps the fastest-growing PBX offering based upon Asterisk with an installed presence in more than 100 countries worldwide. VitalPBX has generously provided a customized White Label version of Incredible PBX tailored for use with all Incredible PBX and VitalPBX custom applications. Follow this link for a free test drive!
 

Special Thanks to Vitelity. Vitelity is now Voyant Communications and has halted new registrations for the time being. Our special thanks to Vitelity for their unwavering financial support over many years and to the many Nerd Vittles readers who continue to enjoy the benefits of their service offerings. We will keep everyone posted on further developments.


Some Recent Nerd Vittles Articles of Interest…

Free At Last: The Emancipation of the Apple TV

We’ve never quite forgiven Apple1 for bricking some of the original iPhones because some owners chose to jailbreak their private property to learn how it worked or to add additional functionality. It may turn out to be Steve Jobs’ billion dollar blunder! The stunt was especially egregious when one considers that both the iPhone and much of Mac OS X are based upon open source software for which Apple didn’t pay a nickel. Apple certainly added a pretty wrapper, but the internals of both the iPhone and Mac OS X contain loads of pure open source code including dozens of Mach 3.0 and FreeBSD 5 applications. Destroying people’s cellular phones for accessing soft- ware that was licensed to Apple as open source code just doesn’t pass the smell test.

Courtesy of Apple, Inc.

Thus it was with mixed emotions that we unwrapped our Apple TV during Christmas 2007. Like the iPhone, it was locked up tighter than a drum even though the internals of the product read like a Who’s Who of the Open Source Movement: awk, bzip, cut, grep, find, ftp, finger, gzip, more, nano, openssl, perl, sed, tail, tar, touch, uname, whois, zip, and on and on. In fact, Mac OS X arguably is a better Linux than Linux. Suffice it to say, we read numerous articles outlining the lengths to which some talented users were going to unlock their Apple TVs. The process required disassembly of the unit, removal of the hard disk, and then a tedious unlocking scenario that was akin to breaking into Fort Knox. We chose to leave our Apple TV in its shrink wrap.

So what’s wrong with the Apple TV? Well, nothing… if you don’t mind paying Apple over and over again to reacquire media content which you already have licensed and if you don’t mind jumping through the iTunes hoops to transfer that content to a device which is perfectly capable of being self-sufficient. Let’s see. $1.99 to watch a TV show or play a music video that’s already sitting on your TIVO machine or that’s already freely (and legally) available from numerous sources on the Internet. Apple has added YouTube access, but the design really limits you to the most popular content. That makes it unsuitable (or worse) for anyone under the age of 13… or over the age of about 25. 🙄

Fast forward to 2009, and we decided it was time to take another look at the Apple TV landscape. WOW! What a difference a year makes. You now can create a bootable USB flash drive in a couple minutes, plug it into your Apple TV, and have a perfectly functioning, (true) open source appliance with DIVX and AVI support in less than 15 minutes. The FrontRow-enhanced Apple TV provides access to virtually all media content in every format imaginable with incredibly slick user interfaces thanks to the XBMC Media Center, Boxee Social Media Center, Nito TV, and Hulu. Most were originally designed for Microsoft’s Xbox. Uploads and downloads of media content can be performed using either your Apple TV controller and a television, or a web browser, or SAMBA networking, or SSH. So thanks to a resourceful bunch of talented, open source developers, we finally have an Apple TV worth owning that also happens to be fun to use. Incidentally, this whole metamorphosis can be accomplished without damaging the Apple TV’s existing user interface or its out-of-the-box functionality… at least until the next update from Apple. 🙂
So proceed at your own risk!

Freeing Your Apple TV. Since October, 2008, the emancipation of the Apple TV has become a simple, 5-minute exercise. What you’ll need to get started is an Apple TV2 with version 2 software, a 1GB USB Flash Drive, and ATVUSB-creator which is free. The drill here is to create a bootable flash drive that can be used to reboot the Apple TV and transform its closed and proprietary shell into an open source platform. The preferred machine for creating your bootable flash drive is a Mac running Tiger or Leopard although a Windows XP/Vista solution is also available now. The only precaution we would add is to unplug all of the USB drives connected to your PC before creating the bootable flash drive. Then you won’t accidentally reformat the wrong USB drive. The one-minute CNET tutorial is here. A better one is here.

Once you have your bootable USB flash drive in hand, unplug your Apple TV and plug the USB drive into the unit. Now connect your Apple TV to a television. Power up your Apple TV and marvel at the installation process which takes under a minute. Whatever you do, don’t boot your Apple TV with the flash drive more than once! When the install completes, you should see a message indicating that your Apple TV can be accessed with SSH within a few minutes at frontrow@appletv.local. The password is frontrow. The IP address for your Apple TV also can be used for SSH access as well. Remove the flash drive and reboot. You’ll see a new menu option for XBMC/Boxee. Just follow the menu items to install both applications. After another reboot, you’ll be all set. Click on the CNET video above to watch a demo.

After installing the apps, launch and then configure XBMC. If you get an error that reads "Cannot launch XBMC/Boxee from path," it means you forgot to install the software through your TV menu. If you enable the web interface, you’ll be able to go to any browser on your LAN and manage XBMC through the following link using the IP address of your Apple TV: http://192.168.0.180:8080. For complete documentation, check out the XBMC Wiki.


Before you can use Boxee, you’ll need to visit their web site and sign up for an account. A tutorial on the application is available at UberGizmo. As luck would have it, this application only became publicly available in Alpha last week so we’re just in time. Don’t sweat the Alpha status too much, it previously ran on the XBox platform as well as Windows, Macs, and Linux. There’s social networking support via Twitter, FriendFeed, Tumblr, and NetFlix. While it’s running on your Apple TV, you can access the interface remotely with a browser from anywhere on your LAN at http://ipaddress:8800 assuming you have enabled the web server interface.

Hulu is another terrific resource for movies, TV shows and music videos. It is available through Boxee. There are a few ads but not many. For a lot of the movies, you’ll also need to set yourself up an account there and configure your uncrippled Apple TV accordingly.

But What About Asterisk®? We knew someone would ask. Sure. An Asterisk for Mac solution should work on the Apple TV if you don’t plan to use it as a media center. For best results, compile everything on a separate Tiger Mac, and then move it over. Keep in mind that the device is limited to 256MB of RAM so simultaneously using the Apple TV as both an Asterisk PBX and a media center more than likely will cause unacceptable performance degradation in both your phone calls and your music and video streams. Someday perhaps we’ll give it a try. In the meantime, enjoy your new open source media center!


Want a Bootable PBX in a Flash Drive? Next week to celebrate the beginning of Nerd Vittles’ Fifth Year, we’ll be introducing our bootable USB flash installer for PBX in a Flash with all of the goodies in the VPN in a Flash system featured a few weeks ago on Nerd Vittles. You can build a complete turnkey system using almost any current generation PC with a SATA drive and our flash installer in less than 15 minutes!

If you’d like to put your name in the hat for a chance to win a free one delivered to your door, just post a comment at this link with your best PBX in a Flash story.3

Be sure to include your real email address which will not be posted. The winner will be chosen by drawing an email address out of a hat (the old fashioned way!) from all of the comments posted over the next couple weeks. Good luck to everyone!


Special Thanks to Our Generous Sponsors


FULL DISCLOSURE: ClearlyIP, Skyetel, Vitelity, DigitalOcean, Vultr, VoIP.ms, 3CX, Sangoma, TelecomsXchange and VitalPBX have provided financial support to Nerd Vittles and our open source projects through advertising, referral revenue, and/or merchandise. As an Amazon Associate and Best Buy Affiliate, we also earn from qualifying purchases. We’ve chosen these providers not the other way around. Our decisions are based upon their corporate reputation and the quality of their offerings and pricing. Our recommendations regarding technology are reached without regard to financial compensation except in situations in which comparable products at comparable pricing are available from multiple sources. In this limited case, we support our sponsors because our sponsors support us.

BOGO Bonaza: Enjoy state-of-the-art VoIP service with a $10 credit and half-price SIP service on up to $500 of Skyetel trunking with free number porting when you fund your Skyetel account. No limits on number of simultaneous calls. Quadruple data center redundancy. $25 monthly minimum spend required. Tutorial and sign up details are here.

The lynchpin of Incredible PBX 2020 and beyond is ClearlyIP components which bring management of FreePBX modules and SIP phone integration to a level never before available with any other Asterisk distribution. And now you can configure and reconfigure your new Incredible PBX phones from the convenience of the Incredible PBX GUI.

VitalPBX is perhaps the fastest-growing PBX offering based upon Asterisk with an installed presence in more than 100 countries worldwide. VitalPBX has generously provided a customized White Label version of Incredible PBX tailored for use with all Incredible PBX and VitalPBX custom applications. Follow this link for a free test drive!
 

Special Thanks to Vitelity. Vitelity is now Voyant Communications and has halted new registrations for the time being. Our special thanks to Vitelity for their unwavering financial support over many years and to the many Nerd Vittles readers who continue to enjoy the benefits of their service offerings. We will keep everyone posted on further developments.


Some Recent Nerd Vittles Articles of Interest…

  1. Disgruntled customers reportedly have filed over a billion dollars’ worth of lawsuits over their bricked iPhones claiming Apple did it intentionally. Great PR move there, Steve! []
  2. The Apple TV actually runs a modified version of Tiger (aka Mac OS X 10.4). []
  3. This offer does not extend to those in jurisdictions in which our offer or your participation may be regulated or prohibited by statute or regulation. []