
If you’re new to the VoIP world or just getting started with Google’s latest Google Voice creation, then we have a one minute setup solution today that doesn’t require you to buy anything ever. You can use almost any desktop computer you already own to bring up the VirtualBox® edition of Incredible PBX® in less than 60 seconds. Take another minute or two to install a Google Voice trunk, and you’ll have free calling in the U.S. and Canada until the cows come home. If you’ve followed Nerd Vittles over the years, you already know that VirtualBox from Oracle® is one of our favorite platforms. Once VirtualBox is installed on your desktop computer, adding Incredible PBX is a snap. Download our new GVSIP vbox image from SourceForge, double-click on the downloaded image, check the initialize MAC address box, and boom. In less than a minute, your PBX is ready to use. The really nice thing about playing along today is it won’t cost you a dime to try things out for yourself. And, if you really love it and we think you will, there’s no hidden fee or crippleware to hinder your continued use of Incredible PBX for as long as you like. Of course, the Incredible PBX feature set is included as well which brings you nearly three dozen applications for Asterisk® that will revolutionize your communications platform. Just add your credentials and speech-to-text, voice recognition, and a Siri-like telephony interface are as close as your nearest SIP phone.
Installing Oracle VM VirtualBox

Oracle’s virtual machine platform inherited from Sun is amazing. It’s not only free, but it’s pure GPL2 code. VirtualBox gives you a virtual machine platform that runs on top of any desktop operating system. In terms of limitations, we haven’t found any. We even tested this on an Atom-based Windows 7 machine with 2GB of RAM, and it worked without a hiccup. So step #1 today is to download one or more of the VirtualBox installers from VirtualBox.org or Oracle.com. Our recommendation is to put all of the 100MB installers on a 4GB thumb drive.1 Then you’ll have everything in one place whenever and wherever you happen to need it. Once you’ve downloaded the software, simply install it onto your favorite desktop machine. Accept all of the default settings, and you’ll be good to go. For more details, here’s a link to the Oracle VM VirtualBox User Manual.
Installing Incredible PBX 13-13 with GVSIP
To begin, download the Incredible PBX vbox image (2.3 GB) onto your desktop.
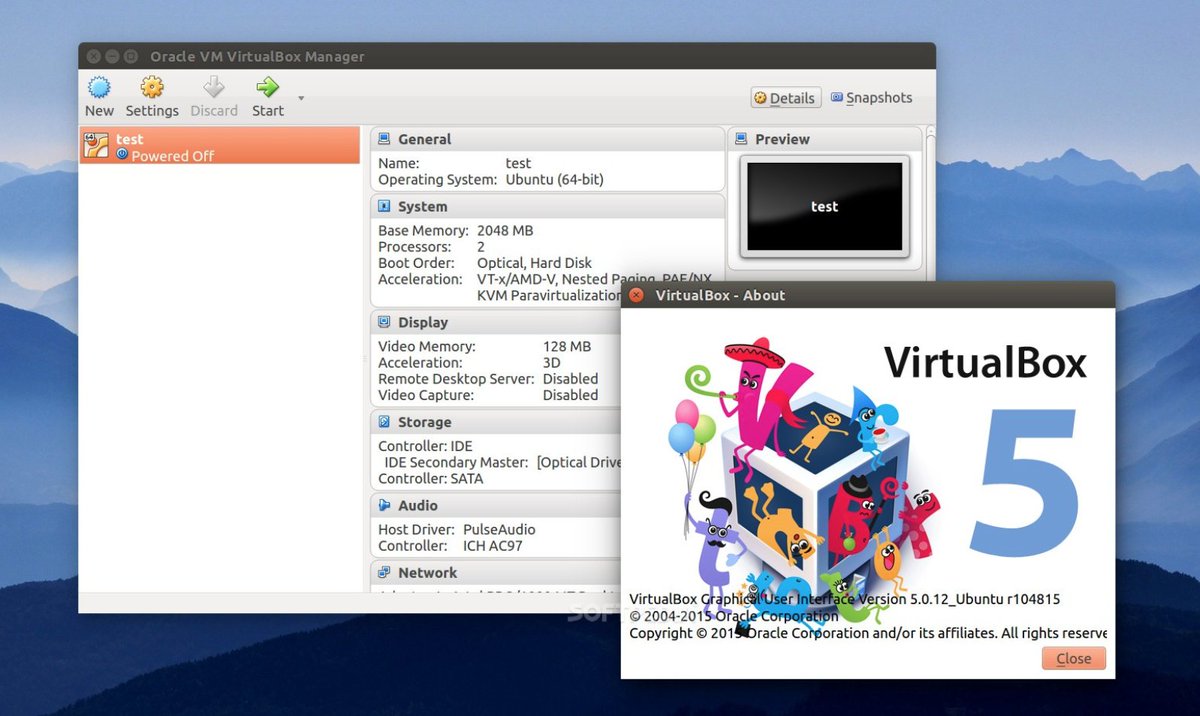
Next, double-click on the Incredible PBX .ova image on your desktop. Be sure to check the box to initialize the MAC address of the image and then click Import. Once the import is finished, you’ll see a new Incredible PBX virtual machine in the VM List of the VirtualBox Manager Window. Let’s make a couple of one-time adjustments to the Incredible PBX configuration to account for possible differences in sound and network cards on different host machines.
(1) Click once on the Incredible PBX virtual machine in the VM List. Then (2) click the Settings button. In the Audio tab, check the Enable Audio option and choose your sound card. In the Network tab for Adapter 1, check the Enable Network Adapter option. From the Attached to pull-down menu, choose Bridged Adapter. Then select your network card from the Name list. Then click OK. That’s all the configuration that is necessary for Incredible PBX.
Running Incredible PBX in VirtualBox
Once you’ve imported and configured the Incredible PBX Virtual Machine, you’re ready to go. Highlight the Incredible PBX virtual machine in the VM List on the VirtualBox Manager Window and click the Start button. The standard Linux boot procedure will begin and, within a few seconds, you’ll get the familiar Linux login prompt. During the bootstrap procedure, you’ll see a couple of dialogue boxes pop up that explain the keystrokes to move back and forth between your host operating system desktop and your virtual machine. Remember, you still have full access to your desktop computer. Incredible PBX is merely running as a task in a VM window. Always gracefully halt Incredible PBX just as you would on any computer.
Here’s what you need to know. To work in the Incredible PBX virtual machine, just left-click your mouse while it is positioned inside the VM window. To return to your host operating system desktop, press the right Option key on Windows machines or the left Command key on any Mac. For other operating systems, read the dialogue boxes for instructions on moving around. To access the Linux CLI, login as root with the default password: password. Change your passwords immediately by typing: /root/update-passwords.
Setting the Date and Time with VirtualBox
On some platforms, VirtualBox has a nasty habit of mangling the date and time of your virtual machine. Typing date will tell you whether your VM is affected. If it’s a problem, manually set the date and time and then update the hardware clock. Here’s how assuming 08130709 is the month, day, and correct time of your server:
date 08130709
clock -w
Obtaining Google Voice Credentials for GVSIP
You’ll need at least one dedicated Google Voice account to use the new Incredible PBX implementation of GVSIP with Asterisk. If you’re new to all of this, our Getting Started with Google Voice tutorial will walk you through setting up an account and obtaining your OAuth 2 refresh token for GVSIP.
Creating GVSIP Trunks with Incredible PBX
With your Google Voice refresh token and 10-digit phone number in hand, you’re ready to add the GVSIP trunk to your PBX. While logged into the Linux CLI as root, issue the following command: gvsip-naf/install-gvsip
You’ll be prompted whether you wish to create a GVSIP trunk, Type y and enter your refresh_token and 10-digit phone number for your existing Google Voice trunk. For each trunk, the installer will create the necessary code to support a PJSIP trunk and a GVSIPn Custom Trunk to use for outbound routing. To add additional trunks, simply run the installer again. Adding a new trunk takes about 10 seconds.
Should you ever want to refresh the patched version of Asterisk, copy pjsip_custom.conf from /etc/asterisk to a safe place, delete the contents of pjsip_custom.conf, rerun the installer, and then copy your version of pjsip_custom.conf back to /etc/asterisk and restart Asterisk: amportal restart. That way you won’t lose your previously configured trunks.
If you ever need to delete a GVSIP trunk that you previously have added, we’ve included a script which will perform the task for you. Just run del-trunk and specify the trunk to delete.
Once you have multiple GVSIP trunks on your PBX, we’ve added a utility to make it easy to decipher which trunk number is associated with each Google Voice trunk. Simply run: gvsip-naf/show-trunks
Configuring an Inbound Route for GVSIP Trunks
By default, incoming calls to GVSIP trunks on Incredible PBX servers will be sent to the Default Inbound Route configured on your PBX. As initially installed, that Default route points to Allison’s Demo IVR. This can be changed easily in the FreePBX GUI by modifying the Destination for the Default inbound route in Connectivity:Inbound Routes.
On other server platforms, you may not have a Default inbound route configured so you will need to create an inbound route to handle calls from each GVSIP trunk. Regardless of your server platform, we strongly recommend adding an Inbound Route for every GVSIP trunk using the 10-digit GVSIP phone number as the DID for the inbound route. Here’s an example of an Inbound Route created in Connectivity:Inbound Routes:Add Inbound Route:

If you have installed the Incredible Fax add-on, you can enable Fax Detection under the Fax tab. And, if you’d like CallerID Name lookups using CallerID Superfecta, you can enable it under the Other tab before saving your setup and reloading your dialplan.
Configuring an Outbound Route for GVSIP Trunks
By default, you cannot place outbound calls using your new GVSIP trunks. For each trunk, you first will need to create an Outbound Route specifying a Dial Pattern to use with each GVSIP trunk in Connectivity:Outbound Routes:Add Outbound Route. If you only have a single Google Voice trunk on your PBX and no other trunks, then you would probably want to specify that outbound calls be routed out the GVSIP1 trunk with a Dial Pattern of NXXNXXXXXX with 1 as the Prepend. This tells FreePBX to dial 18005551212 using the GVSIP1 trunk when a PBX user dials 8005551212. Google only accepts calls that include a country code (1=US/CAN).
HINT: If you ever forget which GVSIP trunks are associated with which phone numbers, simply run /root/gvsip-naf/del-trunk for a list of your trunks. Just press ENTER to exit without deleting any of your trunks.
There are a million ways to design outbound calling schemes on PBXs with multiple trunks. One of the simplest ways is to use no dial prefix for the primary trunk and then use dialing prefixes for the remaining trunks. As part of the install, the dialing prefixes of *41 through *49 were reserved for GVSIP trunks if you would like to use them. That’s totally up to you. Here’s what an Outbound Route would look like using this scheme for the GVSIP2 trunk:
Another outbound calling scheme would be to assign specific DIDs to individual extensions on your PBX. Here you could use NXXNXXXXXX with the 1 Prepend as the Dial Pattern with every Outbound Route and change the Extension Number in the CallerID field of the Dial Pattern. With this setup, you’d need a separate Outbound Route for each group of extensions using a specific trunk on your PBX. Additional dial patterns can be added for each extension designated for a particular trunk. A lower priority Outbound Route then could be added without a CallerID entry to cover extensions that weren’t restricted or specified.
HINT: Keep in mind that Outbound Routes are processed by FreePBX in top-down order. The first route with a matching dial pattern is the trunk that is selected to place the outbound call. No other outbound routes are ever used even if the call fails or the trunk is unavailable. To avoid failed calls, consider adding additional trunks to the Trunk Sequence in every outbound route. In summary, if you have multiple routes with the exact same dial pattern, then the match nearest to the top of the Outbound Route list wins. You can rearrange the order of the outbound routes by dragging them into any sequence desired.
Configuring Incredible PBX for Incredible PBX
In order to take advantage of all the Incredible PBX applications, you’ll need to obtain IBM text-to-speech (TTS) and speech-to-text (STT) credentials as well as a (free) Application ID for Wolfram Alpha.
NOV. 1 UPDATE: IBM has moved the goal posts effective December 1, 2018:
This Nerd Vittles tutorial will walk you through getting your IBM account set up and obtaining both your TTS and STT credentials. Be sure to write down BOTH sets of credentials which you’ll need in a minute. For home and SOHO use, IBM access and services are FREE even though you must provide a credit card when signing up. The IBM signup process explains their pricing plans.
To use Wolfram Alpha, sign up for a free Wolfram Alpha API account. Just provide your email address and set up a password. It takes less than a minute. Log into your account and click on Get An App ID. Make up a name for your application and write down (and keep secret) your APP-ID code. That’s all there is to getting set up with Wolfram Alpha. If you want to explore costs for commercial use, there are links to let you get more information.
In addition to your Wolfram Alpha APPID, there are two sets of IBM credentials to plug into the Asterisk AGI scripts. Keep in mind that there are different usernames and passwords for the IBM Watson TTS and STT services. The TTS credentials will look like the following: $IBM_username and $IBM_password. The STT credentials look like this: $API_USERNAME and $API_PASSWORD. Don’t mix them up. 🙂
All of the scripts requiring credentials are located in /var/lib/asterisk/agi-bin so switch to that directory after logging into your server as root. Edit each of the following files and insert your TTS credentials in the variables already provided: nv-today2.php, ibmtts.php, and ibmtts2.php. Edit each of the following files and insert your STT credentials in the variables already provided: getquery.sh, getnumber.sh, and getnumber2.sh. Finally, edit 4747 and insert your Wolfram Alpha APPID.
Using Asteridex with Incredible PBX
AsteriDex is a web-based dialer and address book application for Asterisk and Incredible PBX. It lets you store and manage phone numbers of all your friends and business associates in an easy-to-use SQLite3 database. You simply call up the application with your favorite web browser: http://pbx-ip-address/asteridex4/. When you click on a contact that you wish to call, AsteriDex first calls you at extension 701, and then AsteriDex connects you to your contact through another outbound call made using your default outbound trunk that supports numbers in the 1NXXNXXXXXX format.
Taking Incredible PBX for a Test Drive
You can take Incredible PBX on a test drive by dialing D-E-M-O (3366) from any phone connected to your PBX.
With Allison’s Demo IVR, you can choose from the following options:
- 0. Chat with Operator — connects to extension 701
- 1. AsteriDex Voice Dialer – say "Delta Airlines" or "American Airlines" to connect
- 2. Conferencing – log in using 1234 as the conference PIN
- 3. Wolfram Alpha Almanac – say "What planes are flying overhead"
- 4. Lenny – The Telemarketer’s Worst Nightmare
- 5. Today’s News Headlines — courtesy of Yahoo! News
- 6. Weather by ZIP Code – enter any 5-digit ZIP code for today’s weather
- 7. Today in History — courtesy of OnThisDay.com
- 8. Chat with Nerd Uno — courtesy of SIP URI connection to 3CX iPhone Client
- 9. DISA Voice Dialer — say any 10-digit number to be connected
- *. Current Date and Time — courtesy of Incredible PBX
Originally published: Tuesday, August 14, 2018
Need help with Asterisk? Join our new MeWe Support Site.
Special Thanks to Our Generous Sponsors
FULL DISCLOSURE: ClearlyIP, Skyetel, Vitelity, DigitalOcean, Vultr, VoIP.ms, 3CX, Sangoma, TelecomsXchange and VitalPBX have provided financial support to Nerd Vittles and our open source projects through advertising, referral revenue, and/or merchandise. As an Amazon Associate and Best Buy Affiliate, we also earn from qualifying purchases. We’ve chosen these providers not the other way around. Our decisions are based upon their corporate reputation and the quality of their offerings and pricing. Our recommendations regarding technology are reached without regard to financial compensation except in situations in which comparable products at comparable pricing are available from multiple sources. In this limited case, we support our sponsors because our sponsors support us.
BOGO Bonaza: Enjoy state-of-the-art VoIP service with a $10 credit and half-price SIP service on up to $500 of Skyetel trunking with free number porting when you fund your Skyetel account. No limits on number of simultaneous calls. Quadruple data center redundancy. $25 monthly minimum spend required. Tutorial and sign up details are here.The lynchpin of Incredible PBX 2020 and beyond is ClearlyIP components which bring management of FreePBX modules and SIP phone integration to a level never before available with any other Asterisk distribution. And now you can configure and reconfigure your new Incredible PBX phones from the convenience of the Incredible PBX GUI.VitalPBX is perhaps the fastest-growing PBX offering based upon Asterisk with an installed presence in more than 100 countries worldwide. VitalPBX has generously provided a customized White Label version of Incredible PBX tailored for use with all Incredible PBX and VitalPBX custom applications. Follow this link for a free test drive!Special Thanks to Vitelity. Vitelity is now Voyant Communications and has halted new registrations for the time being. Our special thanks to Vitelity for their unwavering financial support over many years and to the many Nerd Vittles readers who continue to enjoy the benefits of their service offerings. We will keep everyone posted on further developments.- Many of our purchase links refer users to Amazon when we find their prices are competitive for the recommended products. Nerd Vittles receives a small referral fee from Amazon to help cover the costs of our blog. We never recommend particular products solely to generate Amazon commissions. However, when pricing is comparable or availability is favorable, we support Amazon because Amazon supports us. [↩]
"In the Audio tab, check the Enable Audio option and choose your sound card "
Is this step mandatory, my server doesn’t have an audio card.
[WM:Shouldn’t matter at all.]
The size of the disk is dynamic meaning it will increase its capacity if needed ? Is there a limit on that?
[WM: There is a 20GB limit.]