
 NOTE: The system referenced in this article is no longer supported by Nerd Vittles as this version of Asterisk® has been phased out. For the latest and greatest, please consider our new PBX in a Flash offering.
As the old saying goes, "Third Time's the Charm!" It's almost Halloween at Nerd Vittles, and today you get a real treat as we introduce the third generation of the free turnkey (aka preconfigured) Asterisk system for Windows: nv-TrixBox-1.2.3. With a few minor changes, this version is about as rock-solid as any Asterisk system on the planet. Of course, the planets do continue to move so be sure to check back here from time to time and review all the newly posted comments. None of our readers are particularly shy when bugs are discovered. As with the prior versions, it runs on the desktop of any Windows XP home or office computer. If you want a state-of-the-art phone system, look no further. Out of the box, it supports eight extensions and two lines with integrated voicemail and immediate email delivery of your incoming voicemail messages. To add additional extensions takes about 5 seconds. This PBX features Asterisk 1.2.12.1 and is just the ticket for a small business or a school or even a fraternity or sorority house. It's also perfectly suited for your home. You get every imaginable PBX telephony feature including music on hold, call forwarding, and call transfer as well as a preconfigured AutoAttendant which lets your friends and colleagues direct an incoming call to any of your extensions or even your cellphone. For those with the magic password, you can even dial in and get dialtone to make five hours of free calls each week to dozens of countries around the world including all of the U.S. and Canada, most of Europe, South and Central America, Australia and all your Far East favorites including China, Taiwan, Russia, and Japan. And the total cost: about $12.50 for each three months of service. All incoming calls are free, and you even get your very own area code and phone number to pass out to your friends that are still chained to plain old telephones or cellphones. Update: Looking for a similar version for Linux? It's now available here.
And, yes, all your favorite Nerd Vittles applications are preinstalled and ready to go including weather forecasts for 1,000 airports, MailCall for Asterisk to read you your email messages, NewsClips for Asterisk to read you the news, the AsteriDex robodialer complete with a web interface to place your outbound calls and to serve up customized CallerIDs for your incoming calls, TeleYapper to broadcast reminders and messages to your clients or little league team, and our new GabCast (podcasting) Player for Asterisk. Last but not least, you get all of the bundled TrixBox 1.2.3 applications including SugarCRM, FTP and SSH support, PHP, MySQL, Perl, Apache, SendMail, integrated fax-to-email support, calling card billing, and more. Then we've rolled in the latest upgrades of freePBX (2.1.3) and WebMin. And it all runs quite peacefully in a CentOS 4.4 Linux wrapper with the 2.6.9-34 Linux kernel which doesn't appear to have the voice timing problem that reared its ugly head in TrixBox 1.2. To the Tinkerers of the World, a word of caution: don't attempt to run yum update or trixbox-update.sh on this build until you hear from us, or you may break it. freePBX updates still are safe using Tools->ModuleAdmin->Connect to Online Repository.
Prerequisites. To take advantage of all this magic, there are only three things you really need that aren't provided here. First, you'll want a desktop computer from a reputable manufacturer that is less than two years old. It should be running a fully-patched, current version of Windows XP with at least 384MB of RAM and 6 spare gigs of disk space. The more RAM the better, and 1GB is ideal if you'll be using your Windows desktop for other simultaneous tasks. Second, a broadband Internet connection with a network firewall/switch that hands out internal IP addresses using DHCP is required. Finally, you'll need to set up accounts with two Internet Telephony Hosting Providers (ITHPs). And we recommend you go for three! That's where the $12.50 comes in. Everything else you'll need can be downloaded at no cost using links in this article. So let's get started.
Installing the VMware Player. VMware is virtualization software which lets you run another operating system on your desktop. The TrixBox/Asterisk PBX application runs under CentOS Linux which is a RedHat Linux derivative. Your desktop is Windows XP, hence the need for VMware. The VMware Player software is free, and it lets you "play" the nv-trixbox-123 prebundled Linux application in a window on your Windows Desktop. On a current generation PC with plenty of RAM, this VMware application runs as fast as Asterisk on a dedicated Linux machine so don't worry too much about performance. Based upon our testing, it's a non-issue. We're going to provide the preconfigured application (561 megabytes!), but you'll first need to download the free VMware Player and install it on your Windows system. Just follow the prompts and accept the defaults. Once the install completes, reboot your Windows machine.
Overview. As was true in previous builds, what we've done is build a TrixBox system from the ground up. Then we loaded all the Linux, TrixBox, and freePBX updates through version 1.2.3 in addition to the latest build of freepBX. Then we added the dozens of enhancements which we write about each week. Finally we configured the system so that it's ready to go ... out of the box! This version of TrixBox is also unique in that no bugs have (yet) been reported so it should be rock-solid reliable as a production server. And we've even found a fix for the VMware timekeeping problem in previous releases. So, once you secure the system with your own passwords, plug in the account names and passwords provided by your ITHPs, and apply a minor security patch to Asterisk and address the VMware timekeeping problem (equally easy!), you're all set. We'll walk you through plugging in IP telephones, or regular cordless telephones such as our Vtech favorite (below) using a Sipura SPA-1001 (under $60 on Froogle), or downloading a free IP softphone. And, in about 15 minutes, you're done! Phones ring, voicemail works, voicemail messages get delivered to your email account, and music on hold works. We've even provided a working Stealth AutoAttendant that we'll tell you about shortly. And, for all our Mac fans, not to worry. VMware will have a player for your shiny, new Intel-based Mac shortly. Sign up for the beta here.
While you're enjoying your new phone system, you can read all about TrixBox and Asterisk and freePBX using our Quick Reference Guides, and then you can reconfigure the system to your heart's content. If you happen to break something, simply start over by reinstalling the VMware image (which hopefully you will zip up and burn to a CD for safekeeping). In exchange, you'll avoid the all-day knuckle drill of getting everything set up again from scratch. For those that are already TrixBox addicts, you may want to install this version just to take a look at how we've integrated most of the tips and tricks we've written about this past year. And feel free to share your own enhancements as comments to this article. We'll update the VMware image from time to time to take advantage of everyone's suggestions.
Let me also offer my usual apology to our foreign friends. This project necessarily required some assumptions in order to preconfigure everything. So here they are. We've assumed that you live in the United States, and that you place calls by dialing a 1 + a 3-digit area code + a 7-digit number or by dialing a 3-digit area code and a 7-digit number. Our out-of-the box configuration can be easily changed to support other telephone systems and dialplans around the world. Ninety per cent of our readers are in the United States so the system was built with that in mind. We've also left international calling out of the dialplan. It, too, can be added easily. The reason we left international calling out was to minimize the risk of abuse and associated financial problems. While many international calls are free or almost free with the providers we are recommending, there are numerous locations (including most countries surrounded by water not to mention cruise ships circling the globe) where telephone calls are still VERY expensive. Our recommendation is to adjust your dialplan to accommodate international calls where you know what the cost of the calls will be and you're willing to absorb those costs. One other cautionary note, and we'll get started. As configured, this system does not support 911 calls. Some ITHPs support 911, but the ones we're going to be talking about today do not. So plan accordingly NOW!
Finally, a word about bandwidth. This application is huge. The download weighs in at almost 600MB. Don't even try it with a modem! Bandwidth to cover downloads costs money. We've sprung for four terabytes of bandwidth each month just to support downloads of this application ... which is and always will be free. Funding for this bandwidth was provided by some generous readers of our past columns. Thank you! If there are sufficient future donations during the coming months, we'll buy additional bandwidth. Otherwise, the application will vanish when our bandwidth is exhausted. It will be available again on the second day of the coming month until the four terabytes are once again exhausted. So, as they say, the early bird ...
Installing nv-TrixBox 1.2.3. After you have the VMware Player installed, you're ready to download today's application. If you know how to use BitTorrent, please grab the torrent file from here and save our precious bandwidth. Otherwise, our good friends at MojoMonster.com and VMwarez.com have agreed to host this download. So just click on BubbaPCguy's mirror or Jim's VMwarez site, and download the file. If, for some reason, those sites are down or too busy, feel free to download the image from our site by clicking here. Then save the zipped file to your Windows Desktop.
Once the download finishes, click on the nv-trixbox-123.zip file on your Desktop. Choose extract all files. When prompted for the destination to unarchive the files, type C:trixbox and press Enter. Have a cup of coffee while the archive decompresses. When it's finished, run the VMware Player. Accept the license agreement and then browse to the trixbox folder on Drive C and select trixbox.vmx. If you get an error about a missing IDE drive, just tell VMware not to look for it again and continue. When prompted whether to create a new identifier, choose Create and click OK. The Linux Kudzu Configuration Utility may load advising you that it can't find my network card in your computer. Move your cursor to the VMware Player window and click once to give it focus. Then press Enter to run the utility. With Remove Configuration highlighted for the network card, press Enter again. When Configure your network card is highlighted, press Enter again. Finally, when the Configure TCP/IP screen appears, press the Space Bar to select Use Dynamic IP Configuration. Then tab to the OK button and press Enter. Linux will whir away for a minute or two and boot your TrixBox system.
At the Linux login prompt, type root for your username and press Enter. Then type password for your password and press Enter again. We're not going to remind you to press Enter any more. After entering commands in Linux, you press Enter to execute them. Now you're an expert! Once you're logged in, your TrixBox server will tell you the private IP address for your system (to access it with a web browser). Write it down! Now issue the command ifconfig and write down the MAC address of your network card: HWaddr. We'll need them both in a minute.
NOTE: If, for some reason, you get an error about a mismatched IP and MAC address when nv-trixbox-123 loads or if no IP address is shown once you log in as root, it means you've lost Internet connectivity. You can restore it easily once you're logged into your system as root. Just download the fixmacaddr script from here. Then copy it to the /root folder on your server. Now issue the following commands:
cd /root

chmod +x fixmacaddr

./fixmacaddr
If you'd prefer to create the script yourself using an editor (nano -w /root/fixmacaddr), log in as root and cut-and-paste the following code. Save the file (Ctrl-X, Y, then Enter) and then execute the commands above.
#!/bin/bash

mac=`ifconfig -a | grep "HWaddr" | cut -d " " -f 11`

echo "DEVICE=eth0" > /etc/sysconfig/network-scripts/ifcfg-eth0

echo "ONBOOT=yes" >> /etc/sysconfig/network-scripts/ifcfg-eth0

echo "BOOTPROTO=dhcp" >> /etc/sysconfig/network-scripts/ifcfg-eth0

echo "HWADDR=$mac" >> /etc/sysconfig/network-scripts/ifcfg-eth0

service network restart
Securing Your TrixBox System. You don't leave your keys in your car at a shopping center, and you don't run a Linux system with a root password of password. There are numerous passwords on this system. If you're going to be the one and only administrator, we recommend setting them all to the same, secure password. Don't forget it, or you go back to Go! Now enter the following commands to reset the passwords:
passwd

passwd admin

passwd-maint

passwd-amp

passwd-meetme
We don't recommend exposing your Asterisk system to the public Internet unless you are an expert in all things Internet ... especially security. This is even more true with this TrixBox system. There are lots of applications running that crackers love to attack: SendMail, FTP, Windows Networking, Apache Web Server, PHP, and even Asterisk. That's why you made a backup CD of the nv-trixbox-123.zip file. Right?
Securing Asterisk. Because of a security vulnerability in the (Cisco) Skinny module of Asterisk, it needs to be disabled. Log into your server as root and edit modules.conf: nano -w /etc/asterisk/modules.conf. Then insert the following line in the [modules] context. Save the file (Ctrl-X, Y, then press Enter) and restart Asterisk: amportal restart.
noload => chan_skinny.so
Securing AsteriDex. Because of a security vulnerability in our very own AsteriDex, you'll need to download and install this simple patch. Log into your Asterisk server as root and issue the following commands:
cd /var/www/html/asteridex

rm -f callboth.php

wget https://nerdvittles.com/trixbox11/callboth.zip

unzip callboth.zip

rm -f callboth.zip

chown asterisk:asterisk callboth.php

chmod 775 callboth.php
Securing and Activating A2Billing. This web-based application allows you to generate and issue calling cards to individuals so that they can place calls remotely through your Asterisk server. If you've always wanted to be just like AT&T, here's your Big Chance! There's very little that you can do with an AT&T calling card that can't be done as well or better by you using A2Billing. And, it won't take an M.B.A. to undercut AT&T's calling card rates and still make buckets of money. All you need now are a few customers. But first, a word of caution. Assuming your Asterisk server has web exposure on the Internet, you need to secure the admin and root passwords in this application whether you use it or not. To access the application, go to http://trixboxIPaddress/a2billing/ using the actual internal IP address of your Asterisk server which you wrote down. Log in as root with a password of myroot. Click on the ADMINISTRATOR tab in the left column and then click Show Administrator. Now click on the Edit button beside each of the two administrator accounts and change the passwords to something secure. If you really would like to learn more about it, documentation for the application is available here. And, if you decide to use the application, you'll need to uncomment six actual dialplan lines in extensions_trixbox.conf and reload Asterisk. But we'll save that for another day.
Securing SugarCRM Contact Management. TrixBox includes the best open source contact management application on the planet, SugarCRM. You access the application with a web browser: http://trixboxIPaddress/crm/ substituting the private IP address of your Asterisk box, of course. Specify admin for your username and password for your password. Whether you use the application or not, change the admin password. It's easy. Just click the Administrator link under Welcome admin. Then click the Change Password button. Complete documentation for the application is available here. If contact management is your thing, knock yourself out, and we'll talk to you next spring when you finish getting everything set up to run your business. It's a great product, but be prepared to invest lots of time in the project if you expect to use it productively.
MIME-Construct: Wherefore Art Thou? A Linux utility, MIME-Construct, made it easy to convert images (like faxes) to PDF documents and also facilitated the emailing of just about any document. Unfortunately, it came up missing in TrixBox, and it's difficult to install because of all the Linux dependencies. So here's a simple solution that restores the original functionality of MIME-construct thanks to the programming genius of Rob Thomas. Since Rob's fax-process.pl code (included in freePBX) mimics the old MIME-construct application, the simple solution was just to tweak it a bit for Nerd Vittles and TrixBox compatibility and then copy a renamed version into the PATH (remember the DOS PATH!) on your Linux box. Log in as root and issue these commands, and you'll be back in the fax-to-email business with TrixBox:
cd /usr/local/bin

wget https://nerdvittles.com/trixbox123/mime-construct

chmod +x mime-construct
Reserving An IP Address in Your Router. Your PBX has to consistently boot up with the same IP address or your phones (and calls) won't be able to find the Mother Ship. Since we're using DHCP to initially obtain the IP address, we need to tell your router to always hand out this same address to your TrixBox system. Almost all routers make it easy to preassign DHCP addresses. Use a web browser to access your router's configuration screens. What we're looking for is generally under the tab for LAN IP Setup or DHCP Configuration and is usually called something like Reserved IP table. Just add an entry and call it Asterisk PBX and specify the IP address and MAC address that you wrote down above. Now each time you reboot your Asterisk server, your router will assign it this same IP addreess.
Linux 101. If you're new to Linux and/or Asterisk, here are a few commands you'll need from time to time. And, if you didn't already know, you don't just pull the plug on a Linux system ... even if it's running in a window on your Windows Desktop. Linux caches lots of stuff to speed up processing. So always shut things down gracefully if your data matters.
df -h ... Free disk space remaining on your Linux system. Be sure you always have the required 6GB of Windows space for this app!

logout ... Logs you out of the Linux system.

Ctrl-Alt ... Gives your Windows cursor back and lets you run other Windows apps until you click again in the nv-TrixBox window.

asterisk -r ... Runs the Asterisk Command Line Interface (CLI) after you've logged in as root.

quit ... Exits gracefully from the Asterisk CLI

amportal restart ... Restarts Asterisk.

/etc/webmin/start ... Starts up WebMin, the Swiss Army Knife of Linux. Access it with a web browser: https://TrixBoxIPaddress:10000/

shutdown -h now ... Shut down your Linux system right now. Wait for VMware Player window to close!

shutdown -r now ... Reboot your Linux system right now.

nano -w filename ... Edit any file in your Linux system. Ctrl-X, Y, then Enter saves your changes.

cd dirname ... Changes to another directory below current directory.

cd /dirname ... Changes to another directory below the root directory.

ls ... The Linux equivalent of dir to get a directory listing.

cd /var/www/html ... Home of the TrixBox web server files accessed at http://TrixBoxIPaddress/ or https://TrixBoxIPaddress/

cd /var/lib/asterisk/agi-bin ... Home of the TrixBox and Asterisk scripts for Asterisk apps.

cd /var/lib/asterisk/sounds ... Home of Allison and all the voices prompts that make up the Asterisk system.

cd /etc/asterisk ... Home of all the Asterisk, TrixBox, and freePBX configuration files.
Adding Plain Old Phones. Before your new PBX will be of much use, you're going to need something to make and receive calls, i.e. a telephone. For today, you've got three choices. Option #1 and the best home solution is to use a Plain Old Telephone or your favorite cordless phone set (with 8-10 extensions) if you purchase a little device (the size of a pack if cigs) known as a Sipura SPA-1001. It's under $60. Be sure you specify that you want an unlocked device, meaning it doesn't force you to use a particular service provider. Once you get it, plug the SPA-1001 into your LAN, and then plug your phone instrument into the SPA-1001. Your router will hand out a private IP address for the SPA-1001 to talk on your network. You'll need the IP address of the SPA-1001 in order to configure it to work with Asterisk. After you connect the device to your network and a phone to the device, pick up the phone and dial ****. At the voice prompt, dial 110#. The Sipura will tell you its DHCP-assigned IP address. Write it down and then access the configuration utility by pointing your web browser to that IP address.
Once the configuration utility displays in your web browser, click Admin Login and then Advanced in the upper right corner of the web page. When the page reloads, click the Line1 tab. Scroll down the screen to the Proxy field in the Proxy and Registration section of the form. Type in the private IP address of your Asterisk system which you wrote down previously. Be sure the Register field is set to Yes and then move to the Subscriber Information section of the form. The preconfigured extensions are set up as 500 through 508 with voicemail activated for extension 500 presently. To keep things simple, enter House Phone as the Display Name. Enter 500 as the User ID. Enter 1234 as the Password, and set Use Auth ID to No. Click the Submit All Changes button and wait for your Sipura to reset. In the Line 1 Status section of the Info tab, your device should show that it's Registered. You're done. Pick up the phone and dial 611 to get a current weather report or dial 511 to get today's news headlines.
Using an IP Softphone. If you're like us, you've gone to all this trouble downloading your fancy new PBX, and you sure as hell don't want to wait a week for your Sipura 1001 to arrive before trying it out. So here's the quick and dirty solution. There's software that will run on your Windows, Mac, or Linux desktop that acts like a telephone. You obviously need speakers and a microphone on your system for this to work. Assuming you have those, go to CounterPath's web site and download X-Lite for your favorite OS. There's a manual there, too, but you probably won't need it. Once the download completes, click on it to start the install. Accept the obnoxious license agreement and install the software in the default directory. Unless you want X-Lite to load every time you restart your machine, uncheck the Launch on Startup checkbox. Reboot your system and, if it's also running your TrixBox system, restart it first. Then run the X-Lite application. Click No to turn off X-Lite's spyware. When the "SIP Accounts" window opens, click the Add button and fill in the following data:
Display Name ... House Phone

User name ... 500

Password ... 1234

Auth. User Name ... 500

Domain ... the IP address of your TrixBox system
Leave the other defaults and click on the Check Voicemail tab. For the Number to Dial to Check Voicemail, enter *97. Then click OK and Close. If your Windows Firewall is doing what it's supposed to, it will probably block the connection to your Asterisk system. When prompted, tell it to allow future connections. If this happens and X-Lite does not register with your Asterisk system, click the Down Arrow at the top of the softphone (Show Menu). Click SIP Account Settings, Properties, OK, and Close again. You now should be registered. Dial 611 and get your first weather report. To exit from X-Lite, click the Down Arrow and then Exit.
Using a SIP Phone with Your System. There's loads of SIP Phone hardware in the marketplace, some better than others. We've written about some of them on Nerd Vittles, and you can use Google or the Asterisk forums to get a good feel for which ones work and which ones are a waste of money. If you want the bleeding edge phone that supports virtually every feature that Asterisk has to offer, then the GrandStream GXP-2000 is the phone for you. We use one and love it. Some of my colleagues think it is better suited for the non-business environment. In any case, it's a great phone to learn about Asterisk. With careful shopping, you can find one for about $80. Don't buy support or an extended warranty. They're both a waste of money. You configure the phone almost identically to softphone shown above. For home use, we still think the SPA-1001 and a good 5.8 GHz cordless phone system with multiple handsets is the way to go.
Adding Internet Telephony Hosting Providers. Just as you need an account with an Internet Service Provider to reach Google or Yahoo or Dreadful AOL, if you want to make phone calls to folks with Plain Old Telephones outside your Asterisk system, then you've got to have telephone trunks to carry conversations from you to them and back again. For the default system today, we've preconfigured it to support an outbound trunk from VoipDiscount.com and an inbound and outbound trunk from StanaPhone.com. Before you sign up for anything, read our two articles about these providers by clicking on the links in this paragraph. In a nutshell, VoipDiscount.com provides incredibly cheap outbound calling to a number of countries. However, you have to cough up about $12.50 every three months to keep your account "current." They're also a little slick in that they frequently change calling rates and calling locations which are free. Having said all that, it's still the best calling deal on the planet. You just need to understand the ground rules and the slippery slope issues so you don't get blind-sided. StanaPhone provides free DID numbers in a New York area code and free incoming calls for those with an account. Even their charges for outbound calls are quite reasonable. To get your system working, you'll need to go to each of these providers' web sites using Internet Explorer on a Windows PC, sign up for an account, and download their softphones. That's the only way you can figure out what your account name and password are. We also recommend you put $10 in your StanaPhone account. Then, based upon reports from lots of users, you'll never have to worry about them disconnecting your free incoming service or your free phone number. Again, read our two articles which will tell you everything you need to know. Don't worry about all the settings, we've taken care of all of that for you. The objective is to get your free phone number and your account names and passwords. Then we'll plug those into your Asterisk system so you can start enjoying free incoming calls and mostly free outbound calls. Once you get your account numbers and passwords, move on to the next step, and we'll show you how to plug them into your Asterisk system and begin making and receiving calls.
There are others who want a local phone number and more reliable service. For them, we continue to recommend TelaSIP. $14.95 a month for 3 months than $19.95 gets you unlimited calling in the U.S. and two phone numbers (DIDs) in your choice of area codes. If you want to start out on a pay-as-you-go plan, $5.95 a month gets you a local phone number and 2¢ per minute outbound calls in the U.S. They don't provide a lot of hand-holding, but their service is rock-solid reliable. For a list of all our service provider reviews, go here. Or just read our Internet Telephony Provider Shootout to see why TelaSIP remains our top pick. If you decide to go with TelaSIP, our Newbie's Guide to TrixBox 1.2.3 will show you how to configure it.
Configuring Your TrixBox System. This should take you less than five minutes! We've eliminated most of the configuration hassles with your new Asterisk system by preconfiguring almost everything. About all that you'll need to do to get a fully-functioning system is to plug in your account names and passwords for your two ITHPs and enter your email address for delivery of your voicemails and faxes. Here's how.
Using a web browser, point it to the IP address of your new TrixBox system. When the TrixBox Main Menu appears, click System Administration. When prompted for your username, enter maint followed by the password you configured for your system above. When the Configuration and Administration Menu appears, click freePBX. freePBX is another open source project that puts an incredibly simple but complete web interface on your Asterisk PBX. When the freePBX Main Menu displays, click Setup. Now click Trunks in the left column of the display. On the Trunks setup screen in the right column, you'll see that we've preconfigured two trunks: one for voipdiscount and one for stanaphone. Click on SIP/voipdiscoun to display the voipdiscount setup screen. Scroll down to the PEER Details section. Replace yourname with your account name in three places: authuser, fromuser, and username. Replace yourpassword with your password in the line which reads secret=yourpassword. Now scroll to the Registrationsection at the bottom of the screen. Replace yourname:yourpassword@sip.sipdiscount.com with your actual account name and password. Leave everything else as it is. When you finish, click the Submit Changes button and then the Red Bar to reload Asterisk.
We're going to make similar changes in the Stanaphone trunk settings. Click on SIP/stanaphone to display the StanaPhone setup screen. In the Outbound Caller ID field, enter the 10-digit phone number you were assigned by Stanaphone. In the Peer Details section, replace youraccountnumber in username=youracctnumber with your assigned account number, not your phone number! Replace yourpassword in secret=yourpassword with your assigned password. Repeat the drill in the User Details section on the form. Then, in the Registration String, carefully plug in your account number, then a colon, then your password, then @sip.stanaphone.com/, then your assigned 10-digit phone number. Leave everything else as it is. When you finish, click the Submit Changes button and then the Red Bar to reload Asterisk.
If you want voicemails delivered to you by email, you'll need to plug in your email address. Click on Extensions in the left column of freePBX. Then click Home - 500 in the right column to display the settings for extension 500. Scroll down to the VoiceMail and Directory section of the form, and enter your email address in the email address field. Then change the Email Attachment field to Yes. If you'd like the system to automatically delete your voicemails after emailing them to you (with the message), change the Delete Vmail option to Yes. When you finish, click the Submit Changes button and then the Red Bar to reload Asterisk. Your system now is fully operational.
If you'd like to add support for transferring calls to your cellphone, click Misc Destinations in the left column of freePBX, and then click Cellphone in the right column. Enter your 10-digit cellphone number in the Dial field. When you finish, click the Submit Changes button and then the Red Bar to reload Asterisk.
If you'd like to add fax support so that incoming faxes to your Stanaphone number get emailed to you, click on General Settings in the left column. Scroll down to Email address to have faxes emailed to and plug in your email address. Do NOT change the origination email address, or you won't receive anything. When you finish, click the Submit Changes button and then the Red Bar to reload Asterisk.
Setting the Default Time Zone. Your TrixBox system is set to use Eastern daylight or standard time (depending upon the time of the year) as the default time zone. This matters when you're scheduling reminders and wake up calls. If it's not correct for your location, the easiest way to change the time zone is using WebMin. Log into your server as root and issue the following command to start WebMin: /etc/webmin/start. Then, using a web browser, go to: https://TrixBoxIPaddress:10000/. Log into WebMin with the username root and the password you assigned to your root account. At the WebMin Main Menu, click Hardware then System Time. Scroll down to the TimeZone section and use the pull-down menu to select the desired time zone. Then click the Save button immediately below the Time Zone field. When you restart your TrixBox system, the time zone will be correct, and WebMin will automatically be shut down.
Making VMware Keep Correct Time. Until recently, the only sure-fire way to make sure VMware kept the same time as your hardware clock was to use a cron job which polled a time server for the correct time and then reset the VMware/Linux clock every few minutes. That's been fixed, and we'll show you how to patch the boot loader to fix it. But, first, while you're using WebMin, let's disable the time-setting cron job. From the main WebMin menu, choose Hardware->System Clock. In about the middle of the page is an option to Synchronize (the time) on Schedule. Just set it to No and Save your change. Now go to the command prompt on your server and make certain you are logged in as root. Edit the boot loader (nano -w /boot/grub/grub.conf) and move down to line 16 which begins with the word "kernel." Edit that line so that it looks like the following and save your change (Ctrl-X, Y, then Enter). Then reboot your system (shutdown -r now). HINT: Everything after "noapic" is new stuff to be added, and it all must be appended to the end of the existing line.
kernel /vmlinuz-2.6.9-34.0.2.EL ro root=LABEL=/ acpi=off noapic nosmp nolapic clock=pit
Taking Your TrixBox For A Spin. For a list of Feature Codes supported by your new system, click on Feature Codes in freePBX and print the list. Pick up a phone and dial any one of them. To make an outgoing call, take a phone off-hook and dial either a 10-digit number in the U.S. or 1+10-digit number. Then, using a cellphone or someone else's POTS phone, dial your Stanaphone number to be sure it's working. You should get a welcome message, and then your phone or softphone will ring.
We call the welcome message a Stealth AutoAttendant. What that means is that, while the message is playing, you can do some other things with your system. For example, by pressing 1, your call will immediately ring extension 500 on your system. Pressing 2 will ring extension 501. Pressing 3 will ring your cellphone. Pressing 8 and entering 56789# will give you dial tone to make a long distance call through your PBX. Pressing nothing will cause all of the extensions on your system to ring two seconds after the message completes.
DISA Security. Getting remote dialtone can be a dangerous thing in the wrong hands so let's put your own password (of any length) on the DISA function that is triggered by pressing 8 above. Click DISA in the left column of freePBX and then DialTone in the right column. Now enter a PIN that will let you sleep well at night ... knowing that you are paying for all outbound DISA calls. When you finish, click the Submit Changes button and then the Red Bar to reload Asterisk.
The Nerd Vittles Collection. We'll wrap it up for this week by pointing you to some tutorials for the Nerd Vittles applications that are preloaded in this TrixBox build. AsteriDex and MailCall require some quick configuration so take a look at the tutorials. You also may want to change the Telephone Reminders default password of 123 in line 28 of /etc/asterisk/extensions_trixbox.conf. If you do, remember to restart Asterisk for the change to take effect.
AsteriDex - The Poor Man's Rolodex (http://TrixBoxIPaddress/asteridex/)
NewsClips for Asterisk - Get the News By Telephone (Dial 511)
MailCall for Asterisk - Get Your Email By Telephone (Dial 555)
Weather Reports by Airport Code - Get the Latest Weather Forecasts for 1,000 U.S. Cities (Dial 611)
Telephone Reminders for Asterisk - Appointment Reminders By Telephone (Dial 123)
GabCast Studio for Asterisk - Create and Play PodCasts Using Your Phone (Dial *422 and 422)
TeleYapper Message Broadcasting System - Deliver Appointment Reminders and Important Info to Any Custom Calling List (Dial 674)
What To Do Next. Once your new PBX is humming away, here are the next steps. First, you'll want to upgrade freePBX to version 2.2.x. The tutorial to walk you through the drill can be found here. Last but not least, you'll want to apply the latest Asterisk security patches to prevent a denial of service attack on your system. The tutorial for that can be found here.
Where To Go From There. If you're new to the Asterisk world, you have lots of fun (and learning) ahead of you. The best place to start is our Newbie's Tutorial. We've already done most of the work for you. It's an easy read which covers many topics that we didn't get to today. So start there. You'll also want to get plugged into the TrixBox Forums. That's the place to ask questions after you do some reading. Posting support questions on Nerd Vittles just doesn't work because of the cumbersome blog format. Don't email me questions either! About 20,000 pages of our tutorials get downloaded each day so we hope you'll understand why free, individualized tech support is not possible. We do accept thank you notes with or without donations to the site. Finally, take a look at our catalog of articles, projects, and Asterisk resource links. You'll find just about everything you'll ever need there. Enjoy!
 Nerd Vittles Demo Hot Line. You now can take a number of Nerd Vittles projects for a test drive... by phone! The current demos include NewsClips for Asterisk (latest news headlines in dozens of categories), MailCall for Asterisk with password 1111 (retrieve your email by phone), and Nerd Vittles Weather Forecasts by U.S. Airport Code. Just call our number (shown in the left margin) and take any or all of them for a spin. The sound quality may not be perfect due to performance limitations of our ancient Intel 386 demo machine. But the price is right.
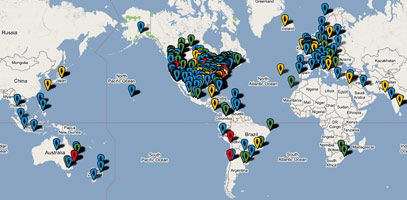
Nerd Vittles Fan Club Map. Thanks for visiting! We hope you'll take a second and add yourself to our Frappr World Map compliments of Google. In making your entry, you can choose an icon: guy, gal, nerd, or geek. For those that don't know the difference in the last two, here's the best definition we've found: "a nerd is very similar to a geek, but with more RAM and a faster modem." We're always looking for the best BBQ joints on the planet. So, if you know of one, add it to the map while you're visiting as well.
Hosting Provider Special. Just an FYI that the Nerd Vittles hosting provider, BlueHost, has raised the bar again on hosting services. For $6.95 a month, you can host up to 6 domains with 50GB of disk storage and 999GB of monthly bandwidth. Free domain registration is included for as long as you have an account. That almost doubles last month's deal, and it really doesn't get any better than that. Their hosting services are flawless! We oughta know. We've tried the best of them. If you haven't tried a web hosting provider, there's never been a better time. Just use our link. You get a terrific hosting service, and we get a little lunch money.
Some Recent Nerd Vittles Articles of Interest...


Chris, try the relaxdtmf=yes option.
It seems you have a dtmf recognition problem…unless dtmf works somewhere else…in that case, you have the same problem I have (read the comments previous to yours)
-guillermo
Newbie ALERT…Dumb question follows
Hi guys, am working with VOIP for the first time…and stumbled over this site after having some probs with VOIP in general…Here is a little background to the question….I work for a thin client manufacturer…we run XP Embedded as the thin-client OS…We want to include a VOIP soft client as part of the OS package….the problem is, we don’t have a lab VOIP infrastructure to use for testing client to client calls…hence why I stumbled over this website looking for free VOIP server software…the production VOIP systems at customer locations will be isolated… insert strange explanation for this here ….needless to say, we need a server package that we can use to test client to client calls….does this VM have everything we need to do this? Or is this some other component we are missing…Any help pointing me in the right direction would be much appreciated…
I need some help please. It sounds like I have finally landed in the right place for some help. I have gone through the forums on trix and did all they wanted me to do but I have one issue that is not working. I am running Trix 2.6+ under VM on Linux (Please do not laugh I am running a win2k3 on that same VM ) here is my issue. I am behind a PIX firewall and I have two remote clients using SJ phone ( nice IP soft phone ) trying to connect to my trix if I push the public onto the Trix box they register with no isses at all. but when I pull the IP back behind my firewall nothing. I have a 1:1 setup on my pix private:public. I have put in the lines in my the sip.general.conf file nat=yes externip=public localnet=private qualify=yes I have opened the correct ports 10000-20000 UDP and also 5060-5061 on the Pix for that Private IP still I get nothing when I runn * -r from the CLI I do not see it even trying to register at all. I am pulling my hair out HELP please. If this is the wrong place to put this please point me correctly.
[WM: Pay a visit to the forum. Lots of good stuff already on connecting remote phones.]