

It’s not every day that you get an opportunity to deploy an Incredible PBX® server on a cloud platform as robust as the one offered by Oracle®. And the fact that it won’t cost you a dime EVER makes this all the more appealing. This isn’t some bargain basement, crippled cloud platform with barely enough horsepower to get your server booted. Quite the contrary. This is an ARM-based Ubuntu 20.04 platform with 6GB of RAM, 45+ GB of storage, and a 1GB network pipe. The CPU capacity is equivalent to multiple physical cores of an Intel Xeon processor with hyper threading enabled. The word you’re looking for is WOW! Our further testing suggests that, by deploying 1 OCPU instances, you can actually create 4 separate servers in your free allocation from Oracle. So let’s jump right in and get your new server up and running.
Getting Started with Oracle Cloud
For openers, you’ll need to set yourself up with a free Oracle Cloud account here. You can read all about Oracle’s Free Tier, and today we’ll be setting up an Always Free Ampere A1 Compute Resource which never expires. It provides 3,000 OCPU hours and 18,000 GB hours per month for free for VM instances using the VM.Standard.A1.Flex shape. For Always Free tenancies, this is equivalent to 4 OCPUs and 24 GB of memory. Translation: You can build an Asterisk® server to handle thousands of users with this platform. In fact, you can now build FOUR of them.
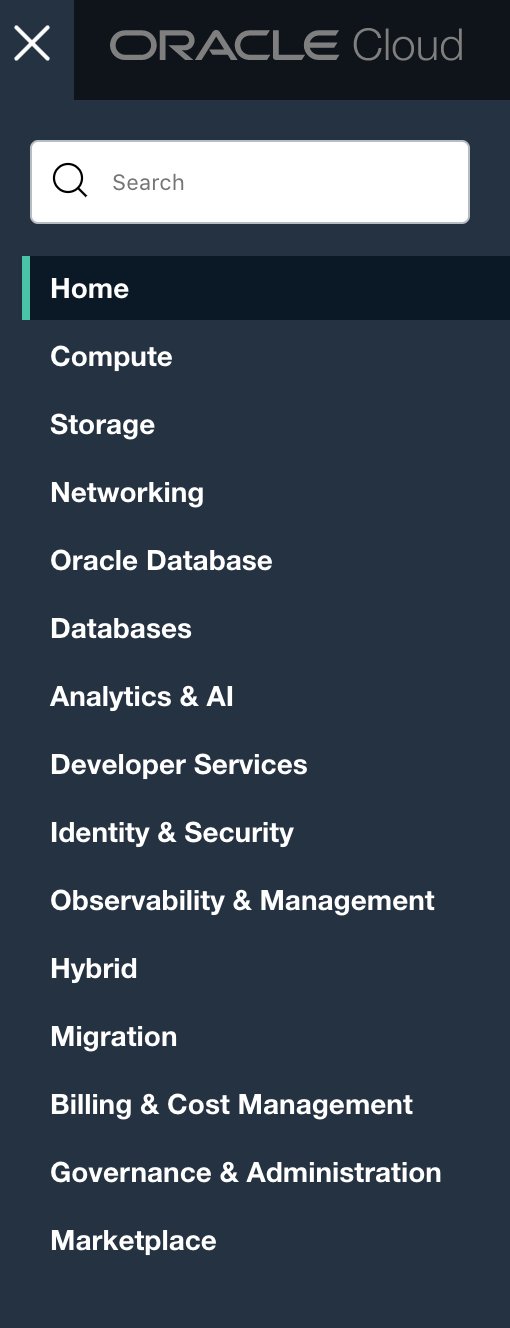
Once you’ve set up your account and accessed the Oracle Cloud Dashboard, click on the 3-bar Options Menu in the upper left column. You’ll be using two key options in the menus: Compute -> Instances and Networking -> Virtual Cloud Networks. We recommend you click the PIN icon on both of these so that they become available on your Home dashboard.
To begin, navigate to Identity -> Compartments and create a new incrediblepbx compartment. Then navigate to Compute -> Instances and click the Create Instance button. Accept the default Name and choose incrediblepbx as your Compartment. In the Image and shape section, click Edit. In the Image and Shape dialog, click the Change Image button and choose the Canonical Ubuntu 20.04 option. CAUTION: 22.04 is now the default so make sure you change it to 20.04 Image with the latest 20.04 Build Date! Next, click the Change Shape button and choose Virtual Machine, Ampere, check VM.Standard.A1.Flex) and select 1 OCPU with 6GB of RAM. In the Networking section, click Edit. Choose Public Subnet, Use network security groups to control traffic: No, Assign a public IPv4 address: Yes, and DNS record: Yes. Finally, in the Add SSH Keys section, leave the Generate a key pair for me option selected, and click Save Private Key then Save Public Key to download both keys to your desktop. Click Upload public key files (.pub) button and upload the Public Key you just downloaded into your instance. Finally, click the Create button to create your new instance. Once your instance is up and running, click on Public Subnet under Primary VNIC. In the Default Security List option, add Ingress and Egress Rules with an entry for Stateless=No, Source=0.0.0.0/0, IP Protocol=ALL, Source & Destination Port Range=ALL. In addition, add Ingress rules for UDP 5060:5069 and UDP 10000:20000. While appearing to be redundant, the UDP rules reportedly have been necessary to make and receive calls successfully.

Now copy the public IP address of your server which, together with your private key, you’ll need to login. From a Terminal window on your desktop PC, login to your server using the following commands where ssh-key-2022-05-24.key is the filename of your private key and 159.201.201.173 is the public IP address of your instance:
chmod 0600 ssh-key-2022-05-24.key
ssh -i ssh-key-2022-05-24.key ubuntu@159.201.201.173
Once you’re logged in, let’s configure the root account which you will need to install Incredible PBX. Begin by setting up a very secure password for root.
sudo passwd root
su root
cd ~
wget http://incrediblepbx.com/IncrediblePBX2021-Oracle.sh
chmod +x IncrediblePBX2021-Oracle.sh
./IncrediblePBX2021-Oracle.sh
We think you will find the performance is second to none. Here are our 1-OCPU results which far exceed the performance specs you’ll find at Vultr, Digital Ocean, or OVH on their 1-2 GB RAM platforms.
This is not a trivial install procedure so go have a long cup of coffee and return in about 40 minutes to press the ENTER key to kick off the Automatic Update Utility. Once that begins, you’ll need to press ENTER again in about 5 minutes when the updates are completed. Then your install will continue for a couple minutes when you will be prompted to press ENTER to reboot. Do so and you’re all set.
Managing Incredible PBX in the Oracle Cloud
All of the usual Incredible PBX features are available in the Oracle Cloud release. After rebooting, you now can login to your server as root using your root password. Be sure to login periodically so that the Automatic Update Utility is run to keep your server secure.
ssh -i ssh-key-2022-xx-xx.key ubuntu@public-IP-address
su root
cd ~
./update-IncrediblePBX
It’s also good practice to keep the FreePBX GPL modules up to date. Here’s how after logging in:
rm -f /tmp/*
fwconsole ma upgradeall
fwconsole reload
fwconsole restart
./sig-fix
./sig-fix
And don’t forget to…
Set your admin password for FreePBX GUI access: ./admin-pw-change
Set your admin password for Apache app access: ./apache-pw-change
Set your proper timezone: ./timezone-setup
Configure SendMail relay host: ./enable-gmail-smarthost-for-sendmail
Whitelist your IP addresses for access: ./add-ip and ./add-fqdn
Make a Backup and copy it off-site: ./incrediblebackup2021
Using Text-to-Speech Apps in the Oracle Cloud
Because the Oracle platform is ARM-based and most of the text-to-speech (TTS) apps are not, finding a TTS solution that actually worked was a challenge. But thanks to a tip from Dick Ollett, we’ve found a reliable alternative to PicoTTS. gTTS was easy to deploy with our existing applications and has restored the functionality of the Weather by ZIP Code (947) and News Headlines (951) applications using Incredible PBX on the Oracle Cloud platform.
Activating IBM Text-to-Speech for Oracle Cloud
IBM’s TTS offering still works reliably and, if you sign up for their LITE Pricing Plan, the first 10,000 characters per month are free. To get started, follow along in our previous IBM tutorial to sign up for service and the LITE TTS Pricing Plan which you will find by clicking on the Catalog tab in the toolbar, then choosing AI/Machine Learning, and then Text to Speech. Choose the Lite plan and make note of your API Key and access URL for the region you selected.
Next, log into your server as root and issue the following commands:
cd /var/lib/asterisk/agi-bin
wget http://incrediblepbx.com/ibmtts.tar.gz
tar zxvf ibmtts.tar.gz
rm -f ibmtts.tar.gz
./install-ibmtts-dialplan.sh
Finally, edit /var/lib/asterisk/agi-bin/ibmtts.php and insert your API Key and URL in the spaces provided. Then save the file.
Activating Amazon’s Polly TTS for Oracle Cloud
If you’d prefer to use Amazon’s Polly TTS, its pricing is incredibly reasonable, and the quality is second to none. For your first year of service, 5 million TTS characters a month are free. After that, the standard TTS cost is $4 per million characters per month prorated to actual usage. For example, with 300 TTS requests a month of 500 characters each, the monthly cost would be 60¢. We’ve previously documented the Polly TTS setup for Incredible PBX 2021 so you can follow that tutorial to deploy Polly TTS with Incredible PBX in the Oracle Cloud.
Using either service, you now should be able to obtain Weather Reports by ZIP Code by dialing 947 from any extension registered to your PBX. Get the latest News Headlines by dialing 951.
Deploying PicoTTS in the Oracle Cloud
Because Oracle Cloud runs on the ARM64 architecture, you’ll need the ARM64 version of PicoTTS:
cd /root
rm -f libttspico*
wget http://incrediblepbx.com/picotts-arm64.tar.gz
tar zxvf picotts-arm64.tar.gz
rm -f picotts-arm64.tar.gz
dpkg -i libttspico*
Activating OpenVPN Virtual Private Network
The OpenVPN Client software comes preinstalled with Incredible PBX. In order to activate OpenVPN, you simply need to copy your OpenVPN credentials to the server as /etc/incrediblepbx2021.ovpn. Then reboot. Your OpenVPN IP address will be shown in pbxstatus. For an overview of the OpenVPN setup procedure, read our original OpenVPN article. Then follow the simple steps on the Incredible PBX Wiki for OpenVPN Server and OpenVPN Client installs.
NOTE: Because of Oracle’s security zone policies, connecting extensions to your PBX using the public IP address may result in no audio on calls with some SIP clients. By connecting using the OpenVPN private IP address solves the problem in some cases.
Getting Started with Incredible Fax 2021
Believe it or not, there still are lots of folks that use faxes in their everyday lives. If you’re one of them, Incredible PBX has your back. Begin by logging into your server as root and running ./incrediblefax2021-ubuntu20.04.sh to install HylaFax and AvantFax on your server. You’ll be prompted a dozen or more times for information. Answer no to the secure fax question. For the rest of the prompts, just press ENTER to accept the default entries. Rebooting your server is required when the install finishes. Once your server is back on line, there will be a new AvantFax tab in the GUI. Before proceeding, be sure to set an Apache web apps password by running /root/apache-pw-change. Next, login to AvantFax with your browser. You first will be prompted for your Apache credentials. Enter admin for the username and whatever password you set up in the previous step. Then you will be prompted for your AvantFax credentials. The default is admin:password. After you enter the username and password, you will be prompted to change your admin password. The AvantFax dashboard then will display. If nothing has come unglued, you should see four green Idle icons:
You can Send Faxes from within AvantFax by choosing the Send Fax tab, or you can use one of many HylaFax clients. Google is your friend.
Configuring Inbound Routes for Fax Detection
Not all VoIP trunks support fax transmission, e.g. Vitelity. Assuming yours do and you’ll only know by trial and error, here’s how to configure FreePBX to automatically detect incoming faxes and process them for PDF delivery by email. First, make certain the Fax Configuration Module is enabled in Module Admin. Then, for each Inbound Route on which you wish to receive faxes, you’ll need to enable fax detection on each route.
Under the Fax tab of each Inbound Route, enter the following settings:
Detect Faxes: YES
Fax Detection Type: SIP
Fax Ring: YES
Fax Detect Time: 4
Fax Destination: Custom Destinations -> Fax (Hylafax)
To try things out, send yourself a fax at no cost in the U.S. from FaxZero.
Using the GraphQL API Tool with Incredible PBX
Begin by installing the required GraphQL components:
pip3 install --pre gql[all]
Next, open the FreePBX GUI and navigate to Connectivity -> API. Select the Scope Visualizer tab and check Read/Write for ALL GraphQL Modules. Then select the GraphQL Explorer tab and click Reload Explorer. In the GraphiQL dialog, enter the following and press the Start arrow to list all of your extensions:
query {
  fetchAllExtensions {
    status
    message
    totalCount
    extension {
      extensionId
    }
  }
}
For the complete tutorial on using GraphQL to list, edit, and populate virtually anything on your PBX, read this tutorial and review the Asterisk documentation for the GraphQL API.
Installing OPUS in the Oracle Cloud
Log into your server as root and issue the following commands:
rm /usr/lib64/asterisk/modules/codec_opus.so
rm /usr/lib64/asterisk/modules/codec_opus_open_source.so
rm /usr/lib64/asterisk/modules/res_format_attr_opus.so
rm /usr/lib/asterisk/modules/codec_opus.so
rm /usr/lib/asterisk/modules/format_ogg_opus*.so
rm /usr/lib/asterisk/modules/res_format_attr_opus.so
rm /usr/lib/asterisk/modules/codec_opus_open_source.so
cd /usr/lib64/asterisk/modules
wget http://incrediblepbx.com/opus-oracle.tar.gz
tar zxvf opus-oracle.tar.gz
rm opus-oracle.tar.gz
fwconsole restart
asterisk -rx "module show like opus"
asterisk -rx "core show translation paths opus"
How Sausage Is Made AND Special Thanks
While our name is associated with this build, I want to give a special tip of the hat to the important contributions from Dick Ollett on the text-to-speech deployment, Bill Simon on the CDR/CEL implementation with ODBC, and @knerd for his GraphQL tips. AArch64 is a different beast, and we couldn’t have pulled this off without their assistance. If you’re ever curious how sausage is actually made in the open source development world, you can read all about it in this VoIP-Info.org Forum thread. THANK YOU! Should you ever need paid Asterisk consulting, these are our two go-to guys. You can find them on the forum, or you can contact us for a referral.
Originally published: Monday, May 30, 2022 Updated: Sunday, September 25, 2022
Need help with Asterisk? Visit the VoIP-info Forum.
Special Thanks to Our Generous Sponsors
FULL DISCLOSURE: ClearlyIP, Skyetel, Vitelity, DigitalOcean, Vultr, VoIP.ms, 3CX, Sangoma, TelecomsXchange and VitalPBX have provided financial support to Nerd Vittles and our open source projects through advertising, referral revenue, and/or merchandise. As an Amazon Associate and Best Buy Affiliate, we also earn from qualifying purchases. We’ve chosen these providers not the other way around. Our decisions are based upon their corporate reputation and the quality of their offerings and pricing. Our recommendations regarding technology are reached without regard to financial compensation except in situations in which comparable products at comparable pricing are available from multiple sources. In this limited case, we support our sponsors because our sponsors support us.
BOGO Bonaza: Enjoy state-of-the-art VoIP service with a $10 credit and half-price SIP service on up to $500 of Skyetel trunking with free number porting when you fund your Skyetel account. No limits on number of simultaneous calls. Quadruple data center redundancy. $25 monthly minimum spend required. Tutorial and sign up details are here.
The lynchpin of Incredible PBX 2020 and beyond is ClearlyIP components which bring management of FreePBX modules and SIP phone integration to a level never before available with any other Asterisk distribution. And now you can configure and reconfigure your new Incredible PBX phones from the convenience of the Incredible PBX GUI.
VitalPBX is perhaps the fastest-growing PBX offering based upon Asterisk with an installed presence in more than 100 countries worldwide. VitalPBX has generously provided a customized White Label version of Incredible PBX tailored for use with all Incredible PBX and VitalPBX custom applications. Follow this link for a free test drive!
Special Thanks to Vitelity. Vitelity is now Voyant Communications and has halted new registrations for the time being. Our special thanks to Vitelity for their unwavering financial support over many years and to the many Nerd Vittles readers who continue to enjoy the benefits of their service offerings. We will keep everyone posted on further developments.
I’m not seeing a "Create Subnet" option on the Virtual Cloud Networks page. I see a "Create VCN" button, but when I click that, I don’t see any option to create anything public. I can’t imaging something’s changed since you published this yesterday–what am I missing?
[WM: Sorry for the confusion. Skip that step, and you’ll get to it in the step after you create your instance.]
Thanks for the article !
FYI, I managed to have calls AND Fax working using your fax script for ubuntu (incrediblefax2021-ubuntu20.04.sh) and the following in sip_general_custom.conf :
externip= YOUR_ORACLE_CLOUD_EXT_IP
media_address= YOUR_ORACLE_CLOUD_EXT_IP.
In my oracle firewall, I have the following opened :
ICMP : 0,3,4,11,12
TCP : 113,1723,123,4445,5353,32976
UDP: 4569,5060-5069,10000-2000,53:9999-65535
Cheers !
Now that Google has turned off less secure apps, what should be done about an email relay host?
http://nerdvittles.com/deploying-a-non-google-smtp-relayhost-with-asterisk/
OR
https://support.google.com/accounts/answer/185833?hl=en
When I try to reload the fwconsole I get a big red error saying:
In Cron.class.php line 281:
proc_open(/tmp/cron.error): failed to open stream: Permission denied.
I am logged in as root. Any suggestions?
[WM: Issue the command rm -f /tmp/* and then fwconsole reload]
Great article. I had already installed a PBX on an always free Oracle server before you posted your article. But, I am taking it down and installing anew since your PBX has more features. I always enjoy playing around with these PBXs, and you have made this stuff so easy to do. People think I am a telephony expert. Actually, I just read the instructions and follow along. Ward…you are simply the best.
After I finished this guide, i couldn’t log in via SSH, but oracle has a console connection and I was able to finish the guide, the thing is it seems that it is using the internal IP, so I can’t access the pbx or the web gui. Is there any way to fix this?
[WM: Set up an OpenVPN client on the Oracle platform and use the 10.8.0.x IP address to log in. In the alternative, make a console connection as root and run: /root/add-ip myhomeip x.x.x.x where x.x.x.x is the public IP address of the computer from which you are attempting to log in via SSH.]
Can’t figure out where i went wrong. the pbxstatus does show the correct public ip:
Incredible PBX for Oracle with Ubuntu 20.04
Asterisk: UP Apache/5.6: UP MySQL: UP
SendMail: UP IPtables: UP SSH: UP
LAN port: UP Fail2Ban: UP Webmin: UP
UCP Dmon: UP PortKnock: UP OpenVPN: DN
FaxGetty: DN IAX Modem: DN HylaFax: DN
RAM:3553792 Ubuntu Focal Fossa Disk:37G
Asterisk 18.13.0 Incredible GUI 15.0.22.9
LAN: 10.0.0.203
Public: 158.101.xxx.xxx
System Time: Fri Jul 29 11:29:59 MST 2022
But when i try to connect i get this on the browser:
This site can’t be reached. 158.101.xxx.xxx took too long to respond.
Try:
Checking the connection
Checking the proxy and the firewall
ERR_CONNECTION_TIMED_OUT
[WM: The Incredible PBX firewall blocks all access except from whitelisted IP addresses. One exception is the 10.8.0 subnet used by OpenVPN. If your desktop PC’s IP address is not whitelisted, Incredible PBX will block access. This is what you’re seeing.]
never mind, i figured it out, IPTABLES was not set up correctly. didnt have a rule for port 22 (SSH) nor 80,443
[WM: You never EVER want to open ports 22, 80, and 443 for public access to any Asterisk server. It will be compromised. It’s just a matter of time.]
They no longer offer 2022.04.19 image directly as part of the dropdown. If you require 2022.04.19, you can select: Image Source >> Image OCID >> and type "ocid1.image.oc1.phx.aaaaaaaakk6iqylelhulc7cspplvgxiwzo3l7ldnke4vp2h777j6jzrfioeq" (no quotes) to get the exact image referenced in this article.
Just an FYI – As I don’t know if a newer image will break install
Is OPUS codec not supported on the Oracle cloud versions of Incredible PBX?
Ran all the usual check commands and Opus is not showing up.
====
*CLI> module show like opus
Module Description Use Count Status Support Level
res_format_attr_opus.so Opus Format Attribute Module 1 Running core
1 modules loaded
====
*CLI> core show translation paths opus
— Translation paths SRC Codec "opus" sample rate 48000 —
opus:48000 To codec2:8000 : No Translation Path
opus:48000 To g723:8000 : No Translation Path
opus:48000 To ulaw:8000 : No Translation Path
opus:48000 To alaw:8000 : No Translation Path
opus:48000 To gsm:8000 : No Translation Path
[WM: See my recent post on the forum and let us know if it works for you.]
>>They no longer offer 2022.04.19 image directly as part of the dropdown. If you require 2022.04.19, you can select: Image Source >> Image OCID and then go to this link and copy-and-paste the Image OCID for US East (Ashburn) or region desired:

================
Newer images break the installation. Asterisk 18 refuses to install properly on the new images.
Just FYI I had my instance deleted with no notification and no support after two months of use. I had logged into it just a few days ago and have several phones set up and using the server. The use was basic home landline usage, maybe 15 calls a week.
There is no support for the free tier: "Always Free resources are not eligible for Oracle Support". The only mention in the FAQ of resources being reclaimed refers to paid services being stopped after the trial ends, which is not a factor here. My instance was working for a month after the trial ended.
Their forum has loads of people that have had their "Always Active" free-for-life servers deleted with no notice or recourse, and their forum posts remain unanswered. The forums are confusing and requires different logins for different forums. I would absolutely think three times about using the Oracle free tier option.