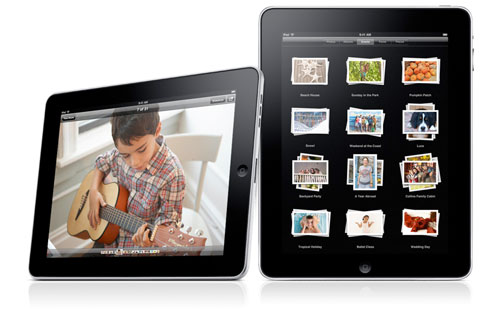
Home » Technology » MP3 Devices (Page 3)

Category Archives: MP3 Devices

The Most Versatile VoIP Provider: FREE PORTING

Motorola Xoom: A Disappointing Introduction to Android 3.0

As the old saying goes, "Beauty is only skin deep." And so it is with Motorola’s new overhyped Xoom tablet featuring Android 3.0. We really wanted to like this device. The form factor sounded appealing, Android 3.0 is awesome, and dual cameras plus a dual-core processor had us chomping at the bit for a chance to try out this bad boy. It’s hard to find a new toy we don’t like, but then along comes the Xoom. It may weigh the same as an iPad, but it feels much more bulky. We personally like the form factor of Samsung’s Galaxy Tab compared to this monstrosity. And the dual core processor was a disappointment as well. We noticed very little difference in performance during our real world testing. You’re not going to hold this device with one hand for very long. It’s too heavy in all the wrong places. So we kept asking ourselves, "Where would you use it?" And the most likely places would be in bed or sitting on it’s $149 speaker dock connected to a big monitor. For both of those options, there are better solutions with an Apple TV and an iMac. The biggest fail may be the power button, positioned on the back of the unit at the exact spot most folks will use to hold the device to watch a movie.

Vaporware: 3.0 Strikes & You’re Out. We’ve saved the real Parade of Horrors for last. Motorola basically ruined the introduction of Android 3.0, designed specifically for the tablet form factor, by prematurely releasing this half-baked product. They hyped Verizon’s 4G network, but there’s not one 4G component in the device. You’ll have to send it back to Motorola for a week to get that upgrade… someday. Motorola advertised Adobe Flash support which still is the Achilles’ Heel of the iPad. But there’s no Flash to be found. Talk about ironic, you can’t view Motorola’s XOOM web site from the device. Flash, too, will be an upgrade… someday. Then there’s the non-functional microSD slot. Yep, you guessed it. Someday. Sorry, but $800++ for a prototype device is insulting. It also says something about Google’s lack of control over manufacturers. Seems to us it wouldn’t be that difficult to write a license agreement that says, if you want to use our trademarks on your device, you won’t release the product until a specified list of functions actually work. And pardon us for stating the obvious but advertising should be something more than a big pile of bullsh*t.

For those that are silly enough to buy the Xoom, there is some good news. The device was rooted in a matter of hours. So you can load all your favorite utilities and functions easily. Here’s a link to the cookbook. Be aware that rooting the device may deprive you of the ability to ever get the vaporware upgraded for 4G, Flash, and a functioning microSD slot. Of course, maybe that was the plan all along.

There are many good reviews of the Xoom and Android 3.0 if you want the usual Silicon Valley PR fluff from the folks that received the evaluation units. Start here and here. Suffice it to say, it’s a major upgrade to Android. We like the new UI; however, we’re not all that keen on the lack of buttons and particularly the placement of the Home and Back icons in the lower left corner of the screen. 90% of the world is right-handed. So why you’d position the most used screen real estate in the most difficult place to access it with your right hand while holding the device in your left hand is a real head-scratcher.

Finally, a word about data plans. In order to purchase our unit at full retail from Best Buy, we had to buy at least one month of Verizon service. In our law school days, this used to be called tying in antitrust law. Since it makes corporations extra money, it’s probably fine today. Verizon, however, has taken greed to a whole new level. And this is just for 3G service. 4G reportedly will cost a few cents more. 1GB of data will cost you $20 a month. That’s about two 4-hour car trips with a teenager using the device. 3GB of data will cost you $35, 5GB runs $50, and 10GB is a whopping $80. As a point of reference, AT&T’s 2GB data plan with equivalent 3G service is $25 for the iPad. So, yes, you’ll be using WiFi a lot thanks to the greed of Verizon and AT&T. Of course, you can’t buy a WiFi-only unit. That’ll be available someday after Verizon has gotten their initial pound of flesh. And, at least for us, WiFi performance compared with the iPad and Galaxy Tab was no great shakes. What is certain is that, with this device, you probably will want to consider tethering from a cellphone that still has an unlimited data plan unless you’re willing to give up eating lunch in order to pay your monthly Verizon bill. HINT: Read our review of the Optimus V and Virgin Mobile’s $25 a month unlimited 3G data deal. Or Sprint’s Mobile HotSpot for the HTC Evo runs $1 a day and provides unlimited 4G data at a fraction of the cost of Verizon’s 3G offerings.

Footnote: Following our return of the device and cancellation of the service, we received a bill from Verizon which included an undisclosed $35 activation fee in addition to the prorated charges for data service. AT&T charges no activation fees on iPads and other tablets. With this addition, it boosts the cost of the Motorola Xoom sufficiently to make it more costly than even the top-of-the-line iPad 2. After 30 minutes on the phone with Verizon "customer care," a supervisor finally waived the $35 fee. And you thought no company could rival AT&T’s dismal track record. Think again.

My 10-year-old daughter echoed our sentiments about the Motorola Xoom: "Thanks. I’ll keep my iPad." In case you’ve forgotten, Apple will announce a new iPad later this week, and we wouldn’t be surprised to see a new processor and (working) microSD slot in addition to the oft-reported camera additions. We recommend you wait for a better alternative! There will be many, not someday, but very soon. And, indeed, there now are. See our recent article.

Originally published: Monday, February 28, 2011


Need help with Asterisk®? Visit the PBX in a Flash Forum or Wiki.
Or Try the New, Free PBX in a Flash Conference Bridge.


whos.amung.us If you’re wondering what your fellow man is reading on Nerd Vittles these days, wonder no more. Visit our new whos.amung.us statistical web site and check out what’s happening. It’s a terrific resource both for us and for you.


Special Thanks to Our Generous Sponsors


FULL DISCLOSURE: ClearlyIP, Skyetel, Vitelity, DigitalOcean, Vultr, VoIP.ms, 3CX, Sangoma, TelecomsXchange and VitalPBX have provided financial support to Nerd Vittles and our open source projects through advertising, referral revenue, and/or merchandise. As an Amazon Associate and Best Buy Affiliate, we also earn from qualifying purchases. We’ve chosen these providers not the other way around. Our decisions are based upon their corporate reputation and the quality of their offerings and pricing. Our recommendations regarding technology are reached without regard to financial compensation except in situations in which comparable products at comparable pricing are available from multiple sources. In this limited case, we support our sponsors because our sponsors support us.

BOGO Bonaza: Enjoy state-of-the-art VoIP service with a $10 credit and half-price SIP service on up to $500 of Skyetel trunking with free number porting when you fund your Skyetel account. No limits on number of simultaneous calls. Quadruple data center redundancy. $25 monthly minimum spend required. Tutorial and sign up details are here.

The lynchpin of Incredible PBX 2020 and beyond is ClearlyIP components which bring management of FreePBX modules and SIP phone integration to a level never before available with any other Asterisk distribution. And now you can configure and reconfigure your new Incredible PBX phones from the convenience of the Incredible PBX GUI.

VitalPBX is perhaps the fastest-growing PBX offering based upon Asterisk with an installed presence in more than 100 countries worldwide. VitalPBX has generously provided a customized White Label version of Incredible PBX tailored for use with all Incredible PBX and VitalPBX custom applications. Follow this link for a free test drive!
 

Special Thanks to Vitelity. Vitelity is now Voyant Communications and has halted new registrations for the time being. Our special thanks to Vitelity for their unwavering financial support over many years and to the many Nerd Vittles readers who continue to enjoy the benefits of their service offerings. We will keep everyone posted on further developments.


Some Recent Nerd Vittles Articles of Interest…


Incredible PBX for Asterisk 1.8: Back from the Brink

Photo courtesy of 
Blou_Aap. Artist unknown but terrific.Ever had one of those weeks? It was a wild ride these past 7 days with the introduction of Asterisk® 1.8.1 and some new Google Voice twists. And then there was our DNS provider Omnis.com that trashed name resolution for our primary domain, pbxinaflash.net, while claiming with a straight face that they didn't provide tech support for their own stupidity. Yikes! But where there's a will, there's always a way. And by Friday night, not only were all the issues sorted out but the Google Voice Gtalk interface in Asterisk 1.8 for free calling in the U.S. and Canada is now better than ever. Our special thanks to the Asterisk Dev Team and Tom King of the PIAF Dev Team for restoring peace in the valley. No more callback hoops for outbound calling. Free DIDs in most area codes. Instantaneous connections. Crystal clear calls. You can almost hear a pin drop. And Incredible PBX now brings you all this magic in a turnkey install that even a monkey could handle.

As if we needed another one, our other surprise last week was the Ebay appearance of a Nortel SIP Videophone labeled as a 1535, but it had no WiFi in either the hardware or in the particular software build. The merchant was as surprised as we were to discover the missing WiFi component and now has corrected the ad. But that won't make the WiFi reappear. For those of you still purchasing these phones (and they're worth it), read the fine print if WiFi or firmware upgrades matter to you. The Turkish models have neither. As anyone that tracks Ebay auctions will tell you, the law of supply and demand controls the price. These began in the $30 range and as recently as two weeks ago were selling for almost $80. They've now dropped back into the $50-$60 range. You're usually better off calling the merchant, and the more you buy, the better the price. Five Stars Telecom usually stocks the U.S. models. But ask to be sure.

So here's the drill today. Just download the brand new PBX in a Flash 1.7.5.5.4 ISO with the newly patched Asterisk 1.8 Purple payload. Then burn the ISO to a CD and boot your server from the PIAF CD. Choose the Purple Edition after CentOS installs which will load Asterisk 1.8.1 with FreePBX 2.8. Finally, run through the 5-minute install of Incredible PBX for Asterisk 1.8.1. In less than an hour, you'll have a turnkey, secure PBX with a local phone number and free calling in the U.S. and Canada via your own Google Voice account plus dozens and dozens of terrific Asterisk applications to keep your head spinning for months. Not only can you start enjoying free phone service immediately, but you'll have a robust PBX platform that will keep your eyes popping for months learning about all the features that would have cost you hundreds of thousands of dollars less than a decade ago. Did we mention that all of this telephone goodness is absolutely FREE!

Thanks to its Zero Internet Footprint™ design, The Incredible PBX also remains the most secure Asterisk-based PBX around. What this means is The Incredible PBX™ has been engineered to sit safely behind a NAT-based, hardware firewall with minimal port exposure to your actual server. And you won't find a more full-featured Personal Branch Exchange™ at any price.

The Incredible PBX Inventory. For those that have never heard of The Incredible PBX, here's a feature list of components you get in addition to the base install of PBX in a Flash with CentOS 5.5, Asterisk 1.8, FreePBX 2.8, and Apache, SendMail, MySQL, PHP, phpMyAdmin, IPtables Linux firewall, Fail2Ban, and WebMin. Cepstral TTS, Hamachi VPN, and Mondo Backups are just one command away and may be installed using some of the PBX in a Flash-provided scripts.

Prerequisites. Here's what we recommend to get started properly:

Installing The Incredible PBX. The installation process is simple and straight-forward. Here are the 5 Easy Steps to Free Calling, and The Incredible PBX will be ready to receive and make free U.S./Canada calls immediately:

1. Install PBX in a Flash 1.7.5.5.4 Purple Edition
2. Download & run The Incredible PBX 1.8 installer
3. Run passwd-master on your PIAF server
4. Map UDP 5222 on firewall to PIAF server
5. Configure a softphone or SIP telephone

Installing PBX in a Flash. Here's a quick tutorial to get PBX in a Flash installed. To use Incredible PBX for Asterisk 1.8, we recommend the very latest 32-bit version of PBX in a Flash 1.7.5.5.4.3 If you installed it last week, that's not new enough. The ISO hasn't changed, but the Purple payload is radically different since this morning! Unlike other Asterisk aggregations, PBX in a Flash utilizes a two-step install process. The ISO only installs the CentOS 5.5 operating system. That hasn't changed. But, once CentOS is installed, the server reboots and downloads a payload file that includes Asterisk, FreePBX, and many other VoIP and Linux utilities including all of the new Google Voice components. To get the patched version of Asterisk 1.8.1, use today's new 1.7.5.5.4 ISO. Choose the new Purple Payload, and our special Asterisk 1.8 patched release and all of the Google Voice goodies will be configured automatically. And you won't have to worry about the CDR crashing your new server either.

You can download the 32-bit PIAF 1.7.5.5.4 from SourceForge or one of our download mirrors. Burn the ISO to a CD. Then boot from the installation CD and press the Enter key to begin.

WARNING #1: This install will completely erase, repartition, and reformat EVERY DISK (including USB flash drives) connected to your system so disable any disk you wish to preserve! Press Ctrl-C to cancel the install.

WARNING #2: The PIAF Dev Team currently classifies PIAF-Purple and Asterisk 1.8 as E-X-P-E-R-I-M-E-N-T-A-L. Remember the Pioneers! If you have a low threshold for pain, if you depend upon your PBX to actually make and receive phone calls, or if you understand the WAF and prefer sleeping with both eyes closed, abort this install now and choose PIAF-Gold, PIAF-Silver, or PIAF-Bronze. Otherwise, enjoy the ride!

On some systems you may get a notice that CentOS can't find the kickstart file. Just tab to OK and press Enter. Don't change the name or location of the kickstart file! This will get you going. Think of it as a CentOS 'feature'. 🙂 If your system still won't boot, then you have an incompatible drive controller.

At the keyboard prompt, tab to OK and press Enter. At the time zone prompt, tab once, highlight your time zone, tab to OK and press Enter. At the password prompt, make up a VERY secure root password. Type it twice. Tab to OK, press Enter. Get a cup of coffee. Come back in about 5 minutes. When the system has installed CentOS, it will reboot. Remove the CD promptly. After the reboot, choose PIAF-Purple option. Have a 15-minute cup of coffee. After installation is complete, the machine will reboot a second time. You now have a PBX in a Flash base install. On a stand-alone machine, it takes about 30 minutes. On a virtual machine, it takes about half that time. Write down the IP address of your new PIAF server. You'll need it to configure your hardware-based firewall in a minute.

NOTE: For previous users of PBX in a Flash, be aware that this new version automatically runs update-programs and update-fixes for you. You still should set your FreePBX passwords by running passwd-master after The Incredible PBX installer finishes!

Configuring Google Voice. You'll need a dedicated Google Voice account to support The Incredible PBX. The more obscure the username (with some embedded numbers), the better off you will be. This will keep folks from bombarding you with unsolicited Gtalk chat messages, and who knows what nefarious scheme will be discovered using Google messaging six months from now. So why take the chance. Keep this account a secret!

We've tested this extensively using an existing Gmail account, and inbound calling is just not reliable. The reason seems to be that Google always chooses Gmail chat as the inbound call destination if there are multiple registrations from the same IP address. So, be reasonable. Do it our way! Set up a dedicated Gmail and Google Voice account, and use it exclusively with The Incredible PBX. Google Voice no longer is by invitation only so, if you're in the U.S. or have a friend that is, head over to the Google Voice site and register. If you're living on another continent, see MisterQ's posting for some tips on getting set up.

You must choose a telephone number (aka DID) for your new account, or Google Voice calling will not work... in either direction. Google used to permit outbound Gtalk calls using a fake CallerID, but that obviously led to abuse so it's over! You also have to tie your Google Voice account to at least one working phone number as part of the initial setup process. Your cellphone number will work just fine. Don't skip this step either. Just enter the provided 2-digit confirmation code when you tell Google to place the test call to the phone number you entered. Once the number is registered, you can disable it if you'd like in Settings, Voice Setting, Phones. But...

IMPORTANT: Be sure to enable the Google Chat option as one of your phone destinations in Settings, Voice Setting, Phones. That's the destination we need for The Incredible PBX to work its magic! Otherwise, all inbound and outbound calls will fail. If you don't see this option, you may need to call up Gmail and enable Google Chat there first. Then go back to the Google Voice Settings.

While you're still in Google Voice Settings, click on the Calls tab. Make sure your settings match these:

  • Call Screening - OFF
  • Call Presentation - OFF
  • Caller ID (In) - Display Caller's Number
  • Caller ID (Out) - Don't Change Anything
  • Do Not Disturb - OFF

Click Save Changes once you adjust your settings. Under the Voicemail tab, plug in your email address so you get notified of new voicemails. Down the road, receipt of a Google Voice voicemail will be a big hint that something has come unglued on your PBX.

Running The Incredible PBX Installer. Log into your server as root and issue the following commands to download and run The Incredible PBX installer:

cd /root
wget http://incrediblepbx.com/incrediblepbx18.x
chmod +x incrediblepbx18.x
./incrediblepbx18.x
passwd-master

If you've installed the previous version of The Incredible PBX, you'll recall that there was a two-step install process after configuring another trunk with either SIPgate or IPkall. That's now a thing of the past. All you need to do after The Incredible PBX script completes is run passwd-master to set up your master password for FreePBX.

When The Incredible PBX install begins, you'll be prompted for the following:

Google Voice Account Name
Google Voice Password
Google Voice 10-digit Phone Number
Gmail Notification Address
FreePBX maint Password

The Google Voice Account Name is the Gmail address for your new dedicated account, e.g. joeschmo@gmail.com. Don't forget @gmail.com! The Google Voice Password is the password for this dedicated account. The Google Voice Phone Number is the 10-digit DID for this dedicated account. We need this if we ever need to go back to the return call methodology for outbound calling. For now, it's not necessary. But who knows what the future holds. 🙄 The Gmail Notification Address is the email address where you wish to receive alerts when incoming and outgoing Google Voice calls are placed using The Incredible PBX. And your FreePBX maint Password is the password you'll use to access FreePBX. You'll actually set it by running passwd-master after The Incredible PBX completes. We need this password to properly configure the CallerID Superfecta for you. By the way, none of this confidential information ever leaves your machine... just in case you were wondering.

Now have another 5-minute cup of coffee, and consider a modest donation to Nerd Vittles... for all of our hard work. 😉 You'll find a link at the top of the page. While you're waiting (and so you don't forget), go ahead and configure your hardware-based firewall to support Google Voice. See the next section for what's required. Without completing this firewall configuration step, no calls will work! When the installer finishes, READ THE SCREEN just for grins.

Here's a short video demonstration of the original Incredible PBX installer process. It still works just about the same way except there's no longer a second step to get things working.

One final word of caution is in order regardless of your choice of providers: Do NOT use special characters in any provider passwords, or nothing will work!

Firewall Configuration. We hope you've taken our advice and installed a hardware-based firewall in front of The Incredible PBX. It's your phone bill. You'll need to make one adjustment on the firewall. Map UDP 5222 traffic to the internal IP address of The Incredible PBX. This is the port that Google Voice uses for phone calls and Google chat. You can decipher the IP address of your server by logging into the server as root and typing status.

Logging in to FreePBX. Using a web browser, you access the FreePBX GUI by pointing your browser to the IP address of your Incredible PBX. Click on the Admin tab and choose FreePBX. When prompted for a username, it's maint. When prompted for the password, it's whatever you set up as your maint password when you installed Incredible PBX. If you forget it, you can always reset it by logging into your server as root and running passwd-master.

Extension Password Discovery. If you're too lazy to look up your extension 701 password using the FreePBX GUI, you can log into your server as root and issue the following command to obtain the password for extension 701 which we'll need to configure your softphone or color videophone in the next step:

mysql -uroot -ppassw0rd -e"select id,data from asterisk.sip where id='701' and keyword='secret'"

The result will look something like the following where 701 is the extension and 18016 is the randomly-generated extension password exclusively for your Incredible PBX:

+-----+-------+
id         data
+-----+-------+
701      18016
+-----+-------+

Configuring a SIP Phone. There are hundreds of terrific SIP telephones and softphones for Asterisk-based systems. Once you get things humming along, you'll want a real SIP telephone such as the $50 Nortel color videophone we've recommended above. You'll also find lots of additional recommendations on Nerd Vittles and in the PBX in a Flash Forum. If you're like us, we want to make damn sure this stuff works before you shell out any money. So, for today, let's download a terrific (free) softphone to get you started. We recommend X-Lite because there are versions for Windows, Mac, and Linux. So download your favorite from this link. Install and run X-Lite on your Desktop. At the top of the phone, click on the Down Arrow and choose SIP Account Settings, Add. Enter the following information using your actual password for extension 701 and the actual IP address of your Incredible PBX server instead of 192.168.0.251. Click OK when finished. Your softphone should now show: Available.

Incredible PBX Test Flight. The proof is in the pudding as they say. So let's try two simple tests. First, let's place an outbound call. Using the softphone, dial your 10-digit cellphone number. Google Voice should transparently connect you. Answer the call and make sure you can send and receive voice on both phones. Second, from another phone, call the Google Voice number that you've dedicated to The Incredible PBX. Your softphone should begin ringing shortly. If not, make certain you are not logged into Google Chat on a Gmail account with these same credentials. If everything is working, congratulations!

Here's a brief video demonstration showing how to set up a softphone to use with your Incredible PBX, and it also walks you through several of the dozens of Asterisk applications included in your system.

Solving One-Way Audio Problems. If you experience one-way audio on some of your phone calls, you may need to adjust the settings in /etc/asterisk/sip_custom.conf. Just uncomment the first two lines by removing the semicolons. Then replace 173.15.238.123 with your public IP address, and replace 192.168.0.0 with the subnet address of your private network. There are similar settings in gtalk.conf that can be activated although we've never had to use them. In fact, we've never had to use any of these settings. After making these changes, save the file(s) and restart Asterisk with the command: amportal restart.

Learn First. Explore Second. Even though the installation process has been completed, we strongly recommend you do some reading before you begin your VoIP adventure. VoIP PBX systems have become a favorite target of the hackers and crackers around the world and, unless you have an unlimited bank account, you need to take some time learning where the minefields are in today's VoIP world. Start by reading our Primer on Asterisk Security. We've secured all of your passwords except your root password and your passwd-master password, and we're assuming you've put very secure passwords on those accounts as if your phone bill depended upon it. It does! Also read our PBX in a Flash and VPN in a Flash knols. If you're still not asleep, there's loads of additional documentation on the PBX in a Flash documentation web site.

Adding Multiple Google Voice Trunks. Thanks to rentpbx on our forums, adding support for multiple Google Voice trunks is now a five-minute operation. Once you have your initial setup running smoothly, hop on over to the forums and check out this Incredible solution.

Choosing a VoIP Provider for Redundancy. Nothing beats free when it comes to long distance calls. But nothing lasts forever. And, in the VoIP World, redundancy is dirt cheap. So we strongly recommend you set up another account with Vitelity using our special link below. This gives your PBX a secondary way to communicate with every telephone in the world, and it also gets you a second real phone number for your new system... so that people can call you. Here's how it works. You pay Vitelity a deposit for phone service. They then will bill you $3.99 a month for your new phone number. This $3.99 also covers the cost of unlimited inbound calls (two at a time) delivered to your PBX for the month. For outbound calls, you pay by the minute and the cost is determined by where you're calling. If you're in the U.S., outbound calls to anywhere in the U.S. are a little over a penny a minute. If you change your mind about Vitelity and want a refund of the balance in your account, all you have to do is ask. The trunks for Vitelity already are preconfigured with The Incredible PBX. Just insert your credentials using FreePBX. Then add the Vitelity trunk as the third destination for your default outbound route. That's it. Congratulations! You now have a totally redundant phone system.

Using ENUMPlus. Another terrific money-saving tool is ENUM. Your system comes with ENUMPlus installed. The advantage of ENUM is that numbers registered with any of the ENUM services such as e164.org can be called via SIP for free. You can read all about it in this Nerd Vittles' article. To activate ENUMPlus, you'll need to register and obtain an API Key at enumplus.org. It's free! Sign up, log in, and click on the Account tab to get your API key. Once you have your key, copy it to your clipboard and open FreePBX with your browser. Then choose SetUp, ENUMPlus and paste in your API Key. Save your entry, and you're all set. After entering your key, all outbound calls will be checked for a free ENUM calling path first before using other outbound trunks.

Stealth AutoAttendant. When incoming calls arrive, the caller is greeted with a welcoming message from Allison which says something like "Thanks for calling. Please hold a moment while I locate someone to take your call." To the caller, it's merely a greeting. To those "in the know," it's actually an autoattendant (aka IVR system) that gives you the opportunity to press a button during the message to trigger the running of some application on your Incredible PBX. As configured, the only option that works is 0 which fires up the Nerd Vittles Apps IVR. It's quite easy to add additional features such as voicemail retrieval or DISA for outbound calling. Just edit the MainIVR option in FreePBX under Setup, IVR. Keep in mind that anyone (anywhere in the world) can choose these options. So be extremely careful not to expose your system to security vulnerabilities by making certain that any options you add have very secure passwords! It's your phone bill. 😉

Configuring Email. You're going to want to be notified when updates are available for FreePBX, and you may also want notifications when new voicemails arrive. Everything already is set up for you except actually entering your email notification address. Using a web browser, open the FreePBX GUI by pointing your browser to the IP address of your Incredible PBX. Then click Administration and choose FreePBX. To set your email address for FreePBX updates, go to Setup, General Settings and scroll to the bottom of the screen. To configure emails to notify you of incoming voicemails, go to Setup, Extensions, 701 and scroll to the bottom of the screen. Then follow your nose. Be sure to reload FreePBX when prompted after saving your changes.

A Word About Security. Security matters to us, and it should matter to you. Not only is the safety of your system at stake but also your wallet and the safety of other folks' systems. Our only means of contacting you with security updates is through the RSS Feed that we maintain for the PBX in a Flash project. This feed is prominently displayed in the web GUI which you can access with any browser pointed to the IP address of your server. Check It Daily! Or add our RSS Feed to your favorite RSS Reader. We also recommend you follow @NerdUno on Twitter. We'll keep you entertained and provide immediate notification of security problems that we hear about. Be safe!

This latest version of Incredible PBX locks down your server to private networks and existing, registered Asterisk devices. Should you need to enable additional IP addresses for other devices or providers at a later date, simply add the new IP addresses to /etc/firewall.whitelist and then rerun /root/firewall-whitelist.sh. For additional background, read this article.

Enabling Google Voicemail. Some have requested a way to retain Google's voicemail system for unanswered calls in lieu of using Asterisk voicemail. The advantage is that Google offers a free transcription service for voicemail messages. To activate this, you'll need to edit the [googlein] context in extensions_custom.conf in /etc/asterisk. Just modify the last four lines in the context so that they look like this and then restart Asterisk: amportal restart

;exten => s,n(regcall),Answer
;exten => s,n,SendDTMF(1)
exten => s,n(regcall),Set(DIAL_OPTIONS=${DIAL_OPTIONS}aD(:1))
exten => s,n,Goto(from-trunk,gv-incoming,1)

Kicking the Tires. OK. That's enough tutorial for today. Let's play. Using your new softphone, begin your adventure by dialing these extensions:

  • D-E-M-O - Incredible PBX Demo (running on your PBX)
  • 1234*1061 - Nerd Vittles Demo via ISN FreeNum connection to NV
  • 17476009082*1089 - Nerd Vittles Demo via ISN to Google/Gizmo5
  • Z-I-P - Enter a five digit zip code for any U.S. weather report
  • 6-1-1 - Enter a 3-character airport code for any U.S. weather report
  • 5-1-1 - Get the latest news and sports headlines from Yahoo News
  • T-I-D-E - Get today's tides and lunar schedule for any U.S. port
  • F-A-X - Send a fax to an email address of your choice
  • 4-1-2 - 3-character phonebook lookup/dialer with AsteriDex
  • M-A-I-L - Record a message and deliver it to any email address
  • C-O-N-F - Set up a MeetMe Conference on the fly
  • 1-2-3 - Schedule regular/recurring reminder (PW: 12345678)
  • 2-2-2 - ODBC/Timeclock Lookup Demo (Empl No: 12345)
  • 2-2-3 - ODBC/AsteriDex Lookup Demo (Code: AME)
  • Dial *68 - Schedule a hotel-style wakeup call from any extension
  • 1061*1061 - PIAF Support Conference Bridge (Conf#: 1061)
  • 882*1061 - VoIP Users Conference every Friday at Noon (EST)

PBX in a Flash SQLite Registry. Last, but not least, we want to introduce you to the new PBX in a Flash Registry which uses SQLite, a zero-configuration SQL-compatible database engine. After logging into your server as root, just type show-registry for a listing of all of the applications, versions, and install dates of everything on your new server. Choosing the A option will generate registry.txt in the /root folder while the other options will let you review the applications by category on the screen. For example, the G option displays all of The Incredible PBX add-ons that have been installed. Here's the complete list of options:

  • A - Write the contents of the registry to registry.txt
  • B - PBX in a Flash install details
  • C - Extra programs install details
  • D - Update-fixes status and details
  • E - RPM install details
  • F - FreePBX modules install details
  • G - Incredible PBX install details
  • Q - Quit this program

And here's a sample from an install we just completed. We'll have more details and additional utilities for your use in coming weeks.


Click above. Enter your name and phone number. Press Connect to begin the call.


Special Thanks. It's hard to know where to start in expressing our gratitude for all of the participants that made today's incredibly simple-to-use product possible. Please bear with us. To Mark Spencer, Malcolm Davenport, and the rest of the Asterisk development team, thanks for a much improved Asterisk. To Philippe Sultan and his co-developers, thank you for getting the final kinks out of Jabber with Asterisk. To Philippe Lindheimer & Co., thanks for FreePBX 2.8 which really makes Asterisk shine. To Lefteris Zafiris, thank you for making Flite work with Asterisk 1.8 thereby preserving all of the Nerd Vittles text-to-speech applications. To Darren Sessions, thanks for whipping app_swift into shape and restoring Cepstral and commercial TTS applications to the land of the living with Asterisk 1.8. And to our pal, Tom King, we couldn't have done it without you. You rolled up your sleeves and really turned Asterisk 1.8.1 into something special. No one will quite understand what an endeavor that was until they try it themselves. And, finally, to our legion of beta testers, THANK YOU! We've implemented almost all of your suggestions.

Additional Goodies. Be sure to log into your server as root and look through the scripts added in the /root/nv folder. You'll find all sorts of goodies to keep you busy. The 32-bit install-cepstral script does just what it says. With Allison's Cepstral voice, you'll have the best TTS implementation for Asterisk available. ipscan is a little shell script that will tell you every working IP device on your LAN. trunks.sh tells you all of the Asterisk trunks configured on your system. purgeCIDcache.sh will clean out the CallerID cache in the Asterisk database. convert2gsm.sh shows you how to convert a .wav file to .gsm. munin.pbx will install Munin on your system while awstats.pbx installs AWstats. s3cmd.faq tells you how to quickly activate the Amazon S3 Cloud Computing service. All the other scripts and apps in /root/nv already have been installed for you so don't install them again.

If you've heeded our advice and purchased a PogoPlug, you can link to your home-grown cloud as well. Just add your credentials to /root/pogo-start.sh. Then run the script to enable the PogoPlug Cloud on your server. All of your cloud resources are instantly accessible in /mnt/pogoplug. It's perfect for off-site backups and is included as one of the backup options in the PBX in a Flash backup utilities.

Don't forget to List Yourself in Directory Assistance so everyone can find you by dialing 411. And add your new number to the Do Not Call Registry to block telemarketing calls. Or just call 888-382-1222 from your new number. Enjoy!

Originally published: Monday, December 13, 2010


Quirks & Bugs. Well, there aren't any that we know of. But we'll keep a running list here so you can check back from time to time if you don't participate in the PBX in a Flash Forums.


VoIP Virtualization with Incredible PBX: OpenVZ and Cloud Solutions

Safely Interconnecting Asterisk Servers for Free Calling

Adding Skype to The Incredible PBX

Adding Incredible Backup... and Restore to The Incredible PBX

Adding Remotes, Preserving Security with The Incredible PBX

Remote Phone Meets Travelin' Man with The Incredible PBX

Continue reading Part II.

Continue reading Part III.

Continue reading Part IV.


Support Issues. With any application as sophisticated as this one, you're bound to have questions. Blog comments are a terrible place to handle support issues although we welcome general comments about our articles and software. If you have particular support issues, we encourage you to get actively involved in the PBX in a Flash Forums. It's the best Asterisk tech support site in the business, and it's all free! We maintain a thread with the latest Patches and Bug Fixes for Incredible PBX. Please have a look. Unlike some forums, ours is extremely friendly and is supported by literally hundreds of Asterisk gurus and thousands of ordinary users just like you. So you won't have to wait long for an answer to your questions.


Need help with Asterisk? Visit the PBX in a Flash Forum.
Or Try the New, Free PBX in a Flash Conference Bridge.


whos.amung.us If you're wondering what your fellow man is reading on Nerd Vittles these days, wonder no more. Visit our new whos.amung.us statistical web site and check out what's happening. It's a terrific resource both for us and for you.


Special Thanks to Our Generous Sponsors


FULL DISCLOSURE: ClearlyIP, Skyetel, Vitelity, DigitalOcean, Vultr, VoIP.ms, 3CX, Sangoma, TelecomsXchange and VitalPBX have provided financial support to Nerd Vittles and our open source projects through advertising, referral revenue, and/or merchandise. As an Amazon Associate and Best Buy Affiliate, we also earn from qualifying purchases. We’ve chosen these providers not the other way around. Our decisions are based upon their corporate reputation and the quality of their offerings and pricing. Our recommendations regarding technology are reached without regard to financial compensation except in situations in which comparable products at comparable pricing are available from multiple sources. In this limited case, we support our sponsors because our sponsors support us.

BOGO Bonaza: Enjoy state-of-the-art VoIP service with a $10 credit and half-price SIP service on up to $500 of Skyetel trunking with free number porting when you fund your Skyetel account. No limits on number of simultaneous calls. Quadruple data center redundancy. $25 monthly minimum spend required. Tutorial and sign up details are here.

The lynchpin of Incredible PBX 2020 and beyond is ClearlyIP components which bring management of FreePBX modules and SIP phone integration to a level never before available with any other Asterisk distribution. And now you can configure and reconfigure your new Incredible PBX phones from the convenience of the Incredible PBX GUI.

VitalPBX is perhaps the fastest-growing PBX offering based upon Asterisk with an installed presence in more than 100 countries worldwide. VitalPBX has generously provided a customized White Label version of Incredible PBX tailored for use with all Incredible PBX and VitalPBX custom applications. Follow this link for a free test drive!
 

Special Thanks to Vitelity. Vitelity is now Voyant Communications and has halted new registrations for the time being. Our special thanks to Vitelity for their unwavering financial support over many years and to the many Nerd Vittles readers who continue to enjoy the benefits of their service offerings. We will keep everyone posted on further developments.


Some Recent Nerd Vittles Articles of Interest...

  1. For 64-bit systems with Asterisk 1.8, use the Cepstral install procedures outlined in this Nerd Vittles article. []
  2. If you use the recommended Acer Aspire Revo, be advised that it does NOT include a CD/DVD drive. You will need an external USB drive to load the software. Some of these work with CentOS, and some don't. Most HP and Sony drives work; however, we strongly recommend you purchase an external DVD drive from a merchant that will accept returns, e.g. Best Buy, WalMart, Office Depot, Office Max, Staples. You also can run The Incredible PBX on a virtual machine such as the free Proxmox server. Another less costly (but untested) option might be this Shuttle from NewEgg: $185 with free shipping. Use Promo Code: EMCYTZT220 []
  3. HINT: Version 1.7.5.5.3 ISO also works just fine. []

Avoiding a $100,000 Phone Bill: VoIP WhiteList for IPtables

It’s been almost a year since we last wrestled with VoIP security for Asterisk®. With Christmas just around the corner, it seemed like a fitting time for a report card. Suffice it to say, the bad guys have not stood still. Attacks have become much more frequent and more sophisticated as VoIP systems have proliferated. A year ago we saw brute force attacks with thousands of password attempts on VoIP servers. These attacks could easily be detected by Fail2Ban. What we are seeing today are one and two hit drive-bys that usually are initiated from Windows zombies or hosted accounts established with stolen credit cards. These VoIP attacks fly under the radar unless you review your logs every day. Have the creeps gotten more patient? No, just smarter. They now understand the VoIP security model that has been deployed on systems like PBX in a Flash, and they simply work around it. Two hits per server, and they’re off to the next IP address only to return in a few hours to try two more. Are these attempts successful? Well, here’s the latest recipient of a $100,000 phone bill so the answer would appear to be affirmative.

We continue to wrestle with new security approaches to better protect Asterisk VoIP systems, and we’ve stumbled upon another golden arrow for your security quiver. Our Incredible PBX platform continues to offer the very best security solution because it is designed to sit safely behind a hardware-based firewall with virtually no exposure to the Internet. But such deployments assume that both your server and your phones are all safely ensconced behind a hardware-based firewall. If it turns out that you want to deploy a SIP phone for use by grandma or you’ve decided you’d like to try hosted PBX service from a provider such as rentpbx.com,1 then there either need to be holes opened in the firewall or there is no hardware firewall protection in the case of hosted service.

Over the past few weeks, we’ve explored a number of new security approaches to better protect your Asterisk server. These include The SunshineNetworks Knock as well as VoIP Black Lists and VoIP White Lists. If you’re technically savvy, you’ll want to carefully consider "The Knock" for all of your SIP phones exposed to the Internet.

We spent a good bit of time considering various VoIP BlackList solutions. As the name implies, a list of the bad guys’ IP addresses is fed into IPtables which then blocks access to your server from these addresses. Sounds good, right? One approach with a BlackList is to block all IP addresses from "problem countries." The methodology to implement this solution can be found in this thread on the PIAF Forums. The problem, of course, is identifying the "problem countries." Another option was to implement an IPtables Blacklist based upon the work of the VoIP Blacklist Project. Perhaps ironically, the VoIP Blacklist Project actually blocks the IP addresses of both Nerd Vittles and PBX in a Flash, and emails requesting removal of our IP address were ignored. To save time, the VoIP Blacklist Project employs CIDR Masks which can blacklist hundreds of thousands of IP addresses in one fell swoop. Problem is that a lot of innocent people get caught in the net, and there’s no easy way out without maintaining the blacklist yourself. The final dagger in the black list approach is zombies. Insecure Windows machines have been compromised by the droves worldwide and particularly in the United States. So identifying all of these now-malicious systems is not unlike playing Whack-a-Mole. When you block one of them, six more pop up. So, after giving it the good old college try, our view of VoIP Blacklists should be obvious. No, thanks. There are very real risks that the bad guys can and have poisoned existing blacklists with safe IP addresses, and the number of Windows zombies grows geometrically making it all but impossible to have or maintain a blacklist that affords any real protection.

These results with black lists led us to the conclusion that the only real security mechanism that could protect many VoIP servers today was a VoIP WhiteList for IPtables. As the name implies, we want to identify the IP addresses of every SIP and IAX trunk and extension on your server and then feed those addresses into IPtables so that the only access to VoIP resources on your server is from these addresses. Today’s VoIP WhiteList for IPtables consists of two bash scripts: one queries the MySQL database in which FreePBX stores all of the trunk and extension information for your server and the other populates IPtables with the results of the queries. We would hasten to add that a similar white list is equally important for SSH access to your server although we think it is better to implement an SSH WhiteList on your hardware-based firewall. In this way, you can adjust the SSH white list via web browser while traveling without locking yourself out of your Asterisk server.

Prerequisites. To use today’s VoIP WhiteList for IPtables, you’ll need either a current version of PBX in a Flash or Incredible PBX. Other aggregations will also work provided your system is FreePBX-based (version 2.6 or later), has IPtables already installed and functioning properly, and has an /etc/sysconfig/iptables configuration file that closely matches the stock PBX in a Flash design. We’ll leave it to you to make that call after reviewing the scripts.

VoIP WhiteList Design. We’ve designed the VoIP WhiteList for IPtables to be modular. There’s a firewall-whitelist-gen.sh script which extracts from MySQL the list of IP addresses used by your trunks and extensions. This text-based list is stored in /etc/firewall.whitelist. You can manually add and delete entries from the list once it is populated.You also can rerun the script at any time to generate a fresh catalog of WhiteList IP addresses based upon your current trunk and extension settings. This script also enables access to your server from the public IP address of your server as well as all non-routable IP addresses. Finally, it modifies /etc/sudoers slightly so that Travelin’ Man can be used to add dynamic IP addresses on the fly. We’ll cover that below.

The second script is firewall-whitelist.sh, and it is used to actually implement your new VoIP WhiteList in IPtables. The changes take effect immediately. It also can be run again to update these entries if you manually add or delete IP addresses in /etc/firewall.whitelist. This script always creates a backup copy of your previous /etc/sysconfig/iptables file and names it iptables.timestamp where the timestamp is the date and time of your last update, e.g. iptables.12012010-083841 was created on Dec. 1, 2010 at 08:38:41. If you should ever shoot yourself in the foot, simply copy one of the iptables backup files to /etc/sysconfig/iptables and then restart IPtables: service iptables restart.

WARNINGS: In order to implement the WhiteList, the script removes the existing IPtables entries which permit SIP and IAX access from anywhere using UDP ports 4569 and 5000 to 5082. If you have edited these entries in any way, you’ll need to remove them and restart IPtables before running firewall-whitelist.sh. Otherwise, your more general firewall entries will leave your system vulnerable to access from IP addresses not in your VoIP WhiteList.

If your system is running on a hosted server, you’ll need to make a couple of additions to /etc/sysconfig/iptables and restart IPtables (service iptables restart) before running firewall-whitelist.sh, or you may lock yourself out of your own server. Be sure to add the public IP address of your server, and also add the IP address from which you are making changes to your server. Each entry should look like the following example using your actual IP addresses. And the entries should be added above the COMMIT line in the same section of the iptables file as the existing UDP 10000:20000 ACCEPT entry:

-A INPUT -s 222.222.222.222 -j ACCEPT

Installing the VoIP WhiteList for IPtables. Installation is easy. Just log into your server as root and issue the following commands:

cd /root
wget http://incrediblepbx.com/firewall-whitelist.tar.gz
tar zxvf firewall-whitelist.tar.gz
./firewall-whitelist-gen.sh
./firewall-whitelist.sh

If you installed one of the beta versions of the VoIP WhiteList from the PIAF Forums, then you’ll need to do a little housecleaning before actually running either of the scripts. Just edit /etc/sysconfig/iptables and clean out all of the entries that contain 5000:5082 as well as any entries nearby that include the non-routable IP addresses, e.g. 192.168.0.0. Finally, if there are entries beginning with -A WHITELIST, delete those as well. Then restart IPtables: service iptables restart. Thank you for your testing and feedback!

Deploying Remote SIP Phones. What remains is some method for connecting remote SIP phones with dynamic IP addresses. Our Travelin’ Man application was specifically designed to provide this support although the initial version only opened the necessary IP address for Asterisk access. The latest release also provides the necessary IPtables support. You have two options: either remove the old version and supporting directories under /var/www/travelman or edit the index.php file in each subdirectory you’ve created and make the change shown in this post on the PIAF Forums. Enjoy!


Need help with Asterisk? Visit the PBX in a Flash Forum.
Or Try the New, Free PBX in a Flash Conference Bridge.


whos.amung.us If you’re wondering what your fellow man is reading on Nerd Vittles these days, wonder no more. Visit our new whos.amung.us statistical web site and check out what’s happening. It’s a terrific resource both for us and for you.


Special Thanks to Our Generous Sponsors


FULL DISCLOSURE: ClearlyIP, Skyetel, Vitelity, DigitalOcean, Vultr, VoIP.ms, 3CX, Sangoma, TelecomsXchange and VitalPBX have provided financial support to Nerd Vittles and our open source projects through advertising, referral revenue, and/or merchandise. As an Amazon Associate and Best Buy Affiliate, we also earn from qualifying purchases. We’ve chosen these providers not the other way around. Our decisions are based upon their corporate reputation and the quality of their offerings and pricing. Our recommendations regarding technology are reached without regard to financial compensation except in situations in which comparable products at comparable pricing are available from multiple sources. In this limited case, we support our sponsors because our sponsors support us.

BOGO Bonaza: Enjoy state-of-the-art VoIP service with a $10 credit and half-price SIP service on up to $500 of Skyetel trunking with free number porting when you fund your Skyetel account. No limits on number of simultaneous calls. Quadruple data center redundancy. $25 monthly minimum spend required. Tutorial and sign up details are here.

The lynchpin of Incredible PBX 2020 and beyond is ClearlyIP components which bring management of FreePBX modules and SIP phone integration to a level never before available with any other Asterisk distribution. And now you can configure and reconfigure your new Incredible PBX phones from the convenience of the Incredible PBX GUI.

VitalPBX is perhaps the fastest-growing PBX offering based upon Asterisk with an installed presence in more than 100 countries worldwide. VitalPBX has generously provided a customized White Label version of Incredible PBX tailored for use with all Incredible PBX and VitalPBX custom applications. Follow this link for a free test drive!
 

Special Thanks to Vitelity. Vitelity is now Voyant Communications and has halted new registrations for the time being. Our special thanks to Vitelity for their unwavering financial support over many years and to the many Nerd Vittles readers who continue to enjoy the benefits of their service offerings. We will keep everyone posted on further developments.


Some Recent Nerd Vittles Articles of Interest…

  1. We gratefully acknowledge the contributions of rentpbx.com to the PBX in a Flash Development Team. In addition to hosted accounts to test PBX in a Flash in the hosted environment, rentpbx.com also has contributed technical assistance particularly as it relates to our Google Voice-Asterisk integration efforts. []

Orgasmatron 5.2: The Secure Swiss Army Knife for Asterisk

It’s been an exciting couple of weeks watching the overwhelmingly positive response to our release of Orgasmatron 5.1. With this version, we introduced a new Asterisk® security model that took into account the ever-increasing security risks posed by exposing web and telephony servers to direct Internet access. The bottom line is this. If your telecom requirements still can be accomplished by placing a server securely behind a $35 hardware-based Internet firewall with no Internet exposure, then it makes absolutely no sense to dangle such a tempting target in front of the world’s most nefarious creeps.

News Flash: Incredible PBX 4.0 is now available with FreePBX 2.10 support!

Coming January 19: Incredible PBX 11 & Incredible Fax for Asterisk 11 and FreePBX 2.11

Our experience suggests that the only trade off with this new approach is the inability to receive anonymous SIP calls… a small price to pay considering the potential financial and computer risks involved. You still can place outbound VoIP calls as well as placing and receiving calls using any of the phone numbers registered on your new PBX in a Flash server. And, thanks to Google Voice, SIPgate, and IPkall, all inbound calls are free, and all outbound calls to numbers in the U.S. and Canada are free as well.

If a SIP URI and your own Freenum/ISN number are simply features you can’t live without, sign up for a voip.ms IAX account, and you’ll get a SIP URI for free. Inbound SIP URI and Freenum/ISN calls will set you back $1 for every 1,000 minutes billed in 6 second increments.

Or you can sign up for a free IP Freedom CallCentric account and configure a new SIP trunk in FreePBX by following these directions. Once configured, your new server SIP URI will be 1777xxxxxxx@in.callcentric.com where xxxxxxx is your assigned 7-digit CallCentric number.

Keep in mind that a new security vulnerability has been found with either Asterisk or FreePBX almost monthly. The chart below tells you why. With virtually limitless attack surfaces because of the number of interrelated components in CentOS, Asterisk, and FreePBX comes enormous and recurring potential for remote compromise of these systems. Rather than play this cat-and-mouse security game with the underworld, the Orgasmatron design changes the paradigm. It lets you use any (secure or insecure) version of Asterisk and FreePBX without worrying about any outside attacks. Do passwords on your new server matter? Not really… unless there is someone inside your firewall that you don’t trust. 🙄 Are we going to secure them anyway? Absolutely. But instead of the constant worry over new security vulnerabilities, Orgasmatron 5.2 lets you enjoy exploring the world of Asterisk and VoIP telephony with an incredibly rich feature set that you won’t find anywhere else, period! We’ll resist making any other device analogies, but the idea here is to protect the good guy (you!) while keeping the bad guys out. No penetration. No worries. Simple as that.

In our former life working for a living, we actually procured and managed multimillion dollar PBXs as part of our "other duties as assigned." Without qualification, we can tell you that the feature set that Orgasmatron 5.2 brings to the table for free runs circles around anything you could buy (then or now) in the commercial marketplace. And, at one time or another, we purchased every Nortel feature good money could buy. There’s one other difference. Orgasmatron 5.2 runs swimmingly on a $200 Atom-based PC that you can purchase at any Best Buy as well as hundreds of other stores including Amazon, NewEgg, and Buy.com. We paid more than $200 to provision an additional extension on our Nortel switch! You, of course, can add as many extensions as you like. De nada.

So, why a new version of Orgasmatron in only a few weeks? Well, it’s not security-related. In fact, there is nothing wrong with continuing on with Orgasmatron 5.1. Unfortunately, it relied exclusively upon SIPgate to make free Google Voice calls in the U.S. and Canada. And SIPgate required an invite using an SMS message from a U.S.-based cellphone. That pretty well knocked out all of our friends living outside the United States. Today’s version fixes that by letting anyone sign up for a free IPkall phone number in Washington state. All you need is a valid email address. The setup process is a bit more complex because IPkall doesn’t support registered connections to their servers. But we’ll walk you through the additional steps and, once completed, your server will be just as secure as the SIPgate approach we set up with Orgasmatron 5.1. And few, if any, Linux skills are required to set up or manage Orgasmatron 5.2. As we’ve noted previously, if you can handle slice and bake cookies, you’ve got the necessary skillset! Be aware this is about a one-hour project, and you need to track through the article carefully, or the entire house of cards comes down.

New Asterisk Security Model. Orgasmatron 5.2 maintains our design goal of running an absolutely secure Asterisk PBX from behind a hardware-based firewall with either NO INBOUND PORTS exposed to the Internet with SIPgate or an IP-address-restricted IAX port for IPkall. Don’t defeat this security mechanism by exposing additional ports on your PBX in a Flash server to Internet access. And choose your NAT-based firewall/router carefully. All of these devices are not created equally. Not only do some perform better than others, but certain models are notoriously bad at handling NAT-based routing tasks, a critical requirement in the Asterisk VoIP environment. In almost every case of problems with one-way audio, the real culprit can be traced back to a crappy router. For $35, you really can’t go wrong with the dLink WBR-2310. If you want traffic shaping functionality as well, take a look at dLink’s Gaming Router, our personal favorite.

As long as your router, Google Voice, SIPgate, and IPkall passwords are secure, you can sleep like a baby. We use an intermediate SIP provider for Google Voice to set up free outbound Google Voice calls in the U.S. and Canada because Google Voice actually places two calls to connect you to your destination. First, you get a call back. And then the party you’re calling is connected. The SIPgate or IPkall trunk is used by Google Voice to call you back so the inbound call is always free. We handle the interconnection magic with Asterisk transparently so your calls appear to be processed as if you were using a standard telephone to dial out. Just refrain from using extension 75 in Asterisk for personal conferencing!

The choice is yours. You can use SIPgate with no incoming ports exposed to your server from the Internet. Or you can use IPkall and map UDP port 4569 (IAX2) on your hardware-based firewall to the internal IP address of your new PBX in a Flash server. Even with the IPkall setup, we’ve locked down IPtables (our Linux firewall) to restrict IAX access to several specific IP addresses so your server remains absolutely secure. We’ve also included support for FonicaTec’s IAX offering for those that want a backup IAX provider. We’ll have much more to say about IPtables in coming weeks.

If you’ve already installed Orgasmatron 5.1 and it’s working for you, do you need to upgrade? NO. With the exception of the new IAX support for IPkall, the code in Orgasmatron 5.2 is identical.

We, of course, continue to recommend that you sign up with Vitelity so you have an alternate communications vehicle in the event of a problem with your free service. Vitelity also can provide 911 emergency service for your home or home office. You can save a little money while supporting the PBX in a Flash project by using the links at the end of this article.

Swiss Army Knife Inventory. There’s no need for a Swiss Army Knife if you don’t know what all the blades are for. So, for those that are wondering what’s included in the Orgasmatron 5.2 build, here’s a feature list of the components you get in addition to the base PBX in a Flash build with CentOS 5.4, Asterisk 1.4, FreePBX 2.6, and Apache, SendMail, MySQL, PHP, phpMyAdmin, IPtables Linux firewall, Fail2Ban, and WebMin. Please note that A2Billing, Cepstral TTS, Hamachi VPN, and Mondo Backups are optional and may be installed using the scripts that are provided.

Prerequisites. Here’s what you’ll need to get started:

  • Broadband Internet connection
  • Rock-solid NAT router/firewall. Recommend: $35 dLink WBR-2310
  • $200 PC on which to run PBX in a Flash or a Proxmox Virtual Machine
  • Free Google Voice account (HINT: Under $2 on eBay)
  • Free SIPgateOne residential account (Use cell to get SMS invite) OR
  • Free IPkall IAX account

Learn First. Install Second. Even though the installation process is now a No-Brainer, you are well-advised to do some reading before you begin. VoIP PBX systems have become a favorite target of the hackers and crackers around the world and, unless you have an unlimited bank account, you need to take some time learning where the minefields are in today’s VoIP world. Start by reading our Primer on Asterisk Security. Then read our PBX in a Flash and VPN in a Flash knols. If you’re still not asleep, there’s loads of additional documentation on the PBX in a Flash documentation web site.

Today’s Drill. The installation process is straight-forward, but a little different than the Orgasmo 5.1 scenario because of the need to accommodate IPkall. Just don’t skip any steps. In a nutshell, here are the 6 Steps to Free Calling and an incredibly versatile, preconfigured Asterisk PBX:

1. Install the latest version of PBX in a Flash
2. Run the Orgasmatron 5.2 Installer
3. Configure a softphone or SIP telephone
4. Configure Providers for Orgasmatron 5.2
5. Enter your Google Voice and SIPgate/IPkall credentials
6. Change existing passwords to secure your system

Installing PBX in a Flash. Here’s a quick tutorial to get PBX in a Flash installed. We recommend you install the latest PIAF 1.6 beta on a new Atom-based PC. This beta is virtually identical to version 1.4 except it uses CentOS 5.4 instead of CentOS 5.2. This means it works better with newer hardware including Atom-based computers and newer network cards. Unlike other Asterisk aggregations, PBX in a Flash utilizes a two-step install process. The ISO only installs the CentOS operating system. Once installed, the server reboots and downloads a payload file that includes Asterisk, FreePBX, and many other VoIP and Linux utilities. We use the identical payload for versions 1.3, 1.4, 1.5, and 1.6 of PBX in a Flash. The beta label simply means we haven’t had time to sufficiently test CentOS. But this is not a Microsoft-style beta so fear not!

Download the 32-bit, PIAF 1.6 version from SourceForge, Vitelity, Cybernetic Networks, or AdHoc Electronics. The MD5 checksum for the file is e8a3fc96702d8aa9ecbd2a8afb934d36. Burn the ISO to a CD. Then boot from the installation CD and type ksalt to begin.

WARNING: This install will completely erase, repartition, and reformat ALL disks on your system! Press Ctrl-C to cancel the install.

On some systems you may get a notice that CentOS can’t find the kickstart file. Just tab to OK and press Enter. Don’t change the name or location of the kickstart file! This will get you going. Think of it as a CentOS ‘feature’. 🙂

At the keyboard prompt, tab to OK and press Enter. At the time zone prompt, tab once, highlight your time zone, tab to OK and press Enter. At the password prompt, make up a VERY secure root password. Type it twice. Tab to OK, press Enter. Get a cup of coffee. Come back in about 5 minutes. When the system has installed CentOS, it will reboot. Remove the CD promptly. After the reboot, choose A option. Have a 10-minute cup of coffee. After installation is complete, the machine will reboot a second time. Log in as root with your new password and execute the following commands:

update-scripts
update-fixes

When prompted, change the ARI password to something really obscure. You’re never going to use it! You now have a PBX in a Flash base install. On a stand-alone machine, it takes about 30 minutes. On a virtual machine, it takes about half that time.

NOTE: So long as your system is safely sitting behind a hardware-based firewall, we do NOT recommend running update-source on the Orgasmatron builds because of parking lot issues in the latest releases of Asterisk.

Running the Orgasmatron 5.2 Installer. Log into your server as root and issue the following commands to run the Orgasmatron 5.2 installer:

cd /root
wget http://pbxinaflash.net/orgasmo52.x
chmod +x orgasmo52.x
./orgasmo52.x

Have another 15-minute cup of coffee. It’s a great time to consider a modest donation to the Nerd Vittles project. You’ll find a link at the top of the page. When the installer finishes, READ THE SCREEN!

Now run passwd-master1. Set your FreePBX passwords to something very secure but different from your Linux root password.

Next, type status2 and press Enter. Write down the IP address of your new server.

If you’re using IPkall, now’s the time to log in to your hardware-based firewall/router and map UDP port 45693 to the private IP address that you just wrote down. This tells your firewall to pass all IAX2 traffic from the Internet directly to your new server. Don’t worry. We have severely restricted which IP addresses can actually send IAX data through the PBX in a Flash IPtables firewall which is an integral part of this build. And, remember, no hardware firewall adjustments are necessary if you’re using SIPgate instead of IPkall.

For good measure, we recommend you reboot your server at this point. The command to type is simple: reboot4

Configuring a SIP Phone. There are hundreds of terrific SIP telephones and softphones for Asterisk-based systems. Once you get things humming along, you’ll want a real SIP telephone, and you’ll find lots of recommendations on Nerd Vittles. For today, let’s download a terrific (free) softphone to get you started. We recommend X-Lite because there are versions for Windows, Mac, and Linux. So download your favorite from this link. Install and run X-Lite on your Desktop. At the top of the phone, click on the Down Arrow and choose SIP Account Settings, Add. Enter the following information using 82812661 as the password for extension 701 and the actual IP address of your PBX in a Flash server instead of 192.168.0.251. Click OK when finished. Your softphone should now show: Available.

Don’t Forget! After you change your extension passwords later in this tutorial, you will need to update the password entry in X-Lite, or you will no longer be able to place calls! In fact, you will get locked out of your server for 90 minutes after three failed password attempts. So put this on a sticky note so you don’t forget, or you’ll regret it in about 15 minutes.

Either a free SIPgate One residential phone number or an IPkall number is a key component in today’s project. And there’s really no reason you can’t use both if they’re available in your location. Do NOT use special characters in your provider passwords, or nothing will work! Continue reading whichever section below applies to you.

Configuring SIPgate. If you live in the U.S. and have a cellphone, we’d recommend the SIPgate option since no adjustment of your hardware-based firewall is required. Otherwise, skip to the IPkall setup below. Step #1 is to request a SIPgate invite at this link. You’ll need to enter your U.S. cellphone number to receive the SMS message with your invitation code. Don’t worry. You can erase your cellphone number from your account once it is set up. Once you receive the invite code, enter it and choose the option to set up a residential account. Next, choose a phone number and write it down. The area code really doesn’t matter because Google Voice is the only one that will be calling this number after we get things set up. For now, leave your cellphone number in place so that you can receive your confirmation call from Google Voice in the next step. After that, you’ll want to revisit SIPgate and remove all parallel calling numbers. Finally, click on the Settings link and write down your SIP ID and SIP Password. You’ll need these in a few minutes to configure PBX in a Flash. Now place a call to your new SIPgate number and make certain that your cellphone rings before proceeding.

Configuring IPkall. If you’ve opted to use IPkall, here’s the drill. First, you’ll need to register for a free IPkall number. This is actually a two-step process. Set it up as a SIP connection when you first register. Then we’ll change it to IAX once your new phone number is provided. So your initial IPkall request should look like this:

We recommend area code 425 for your requested number because IPkall appears to have lots of them. If they don’t have an available number, your request apparently goes in the bit bucket. You’ll know because IPkall typically turns these requests around in a few minutes. Don’t worry about the mothership entry. We’ll change it shortly. The other issue here is your public IP address. If you have a dedicated IP address, no worries. Just plug in the IP address for SIP Proxy. If it’s dynamic, then you’ll need to set up a fully-qualified domain name (FQDN) with a provider such as dyndns.com. Once you’ve got it set up, enter your credentials in the Dynamic DNS tab of your hardware-based firewall to assure that your dynamic IP address is always synchronized with your FQDN. Then enter the FQDN for your SIP Proxy address in the IPkall form. Be sure to make up a VERY secure password. Now send it off and wait for the return email with your new phone number.

When you receive your new phone number, you’ll need to revisit the IPkall site and log in with your phone number and the password you chose above. Make the changes shown below using your actual IPkall phone number instead of 4259876543:

It’s worth stressing that these settings are extremely important so check your work carefully. Be sure the IAX option is selected. Be sure there are no typos in your two phone number entries. And be sure your FQDN or public IP address is correct. Then save your new settings.

We’re going to be making some entries in FreePBX which is the web-GUI that manages PBX in a Flash. For now, we simply need to enter your new IPkall phone number so that incoming calls to your IPkall number will actually ring on your softphone. Later, we’ll make some further adjustments once we get Google Voice humming along.

Using a web browser from your desktop, log in to FreePBX 2.6 at the following link substituting your server’s private IP address for ipaddress: http://ipaddress/admin. You’ll be prompted for a user name (maint) and password (the one you just created with passwd-master).

When FreePBX loads, choose Setup, Trunks, ipkall (iax). In the USER Context field, enter your 10-digit IPkall phone number. Click Submit Changes, Apply Configuration Changes, Continue with Reload to save your settings.

TIP: Be aware that IPkall cancels an assigned phone number after 30 consecutive days of inactivity. If you will be using your number infrequently, it’s a good idea to schedule a Weekly Reminder to call the number with a prerecorded message. This will assure that your number stays functional.

Now let’s test your new phone number. Call your IPkall number from a cellphone or some other phone. Your softphone should ring. Answer the call, and be sure you have voice in both directions! Do not proceed without success here, or the rest of the adventure is a waste of your time.

Configuring Google Voice. Google Voice still is by invitation only so the first thing you’ll need is an invite. If you’re in a hurry, then stroll over to eBay where you’ll find lots of them for under $2. Once you have your invite in hand, click on the email link to set up your account. After you’ve chosen a telephone number, plug in your new SIPgate or IPkall number as the destination for your Google Voice calls and choose Office as the Phone Type. Trust us.

Google then will place a call to your number and ask you to enter a confirmation code that’s been provided. When your cellphone (SIPgate) or softphone (IPkall) rings, answer it and punch in the number. Wait for confirmation. Then hang up.

As we mentioned earlier, there’s no reason you can’t set up both SIPgate and IPkall forwarding numbers in Google Voice. Just repeat the drill with the other provider’s number if you wish to activate both numbers for use with Google Voice. They’re not both going to ring simultaneously as you will see in a minute.

While you’re still in Google Voice Settings, click on the Calls tab. Make sure your settings match these:

  • Call ScreeningOFF
  • Call PresentationOFF
  • Caller ID (In)Display Caller’s Number
  • Caller ID (Out)Don’t Change Anything
  • Do Not DisturbOFF

Click Save Changes once you adjust your settings. Under the Voicemail tab, plug in your email address so you get notified of new voicemails. Down the road, receipt of a Google Voice voicemail will be a big hint that something has come unglued on your PBX.

Finally, place a test call to your new Google Voice number and be sure your cellphone or softphone rings. Don’t move forward until you’ve been able to successfully place a call to your phone by dialing your Google Voice number. Once this is working, revisit SIPgate and remove all parallel calling numbers including your cell number.

Adding Your Credentials to PBX in a Flash. We’re ready to insert your Google Voice credentials and SIPgate/IPkall number into PBX in a Flash. You’ll need four pieces of information: your 10-digit Google Voice phone number, your Google Voice account name (which is the email address you used to set up your GV account), your GV password (no spaces!), and your 11-digit SIPgate or IPkall RingBack DID (beginning with a 1). Don’t get the 10-digit GV number mixed up with the 11-digit SIPgate/IPkall RingBack DID, or nothing will work. 🙂

Log back into your server as root and issue the following command: ./configure-gv. Check your entries carefully. If you make a typo in entering any of your data, press Ctrl-C to cancel the script and then run it again!!

Configuring FreePBX. Now shift back to your Desktop and, using a web browser, log in to FreePBX 2.6 at the following link substituting your actual IP address for ipaddress: http://ipaddress/admin. You’ll be prompted for a user name (maint) and password (the one you just created with passwd-master). Depending upon which intermediate provider you’re using, do the following:

SIPgate Setup. When FreePBX loads, choose Setup, Trunks, sipgate. In Peer Details, replace both instances of sipID with your actual SipGate SIP ID. In Peer Details, replace sipPassword with your actual SipGate SIP Password. In Register String, replace sipID with your SipGate SIP ID, replace sipPassword with your SipGate SIP Password, and replace 3333333333 with your 10-digit SipGate Phone Number. When finished, the Register String should look something like the following:

7004484f0:B8TTW3@sipgate.com/4155201234

Click Submit, Apply Configuration Changes, Continue with Reload to save your changes.

SIPgate and IPkall Setup. While still in FreePBX with your browser, click Setup, Inbound Routes, gv-ringback. In DID Number, replace 3333333333 with your 10-digit SIPGate or IPkall Phone Number. In CallerID Number, replace 7777777777 with your 10-digit Google Voice Number.

Click Submit, Apply Configuration Changes, Continue with Reload to save your changes.

Securing FreePBX. You’re almost done. While still in FreePBX, choose each of the 16 preconfigured extensions on your new server and change the extension AND voicemail passwords. Here’s the drill: Setup, Extensions, 501, Submit. After changing secret and Voicemail Password, repeat with the next extension number instead of 501. Then Apply Config Changes, Continue when you’ve finished with all of them.

Now change the default DISA password: Setup, DISA, DISAmain, PIN, Submit Changes, Apply Config Changes, Continue.

Don’t forget to adjust your X-Lite password to match the password entry you made for extension 701!

Orgasmatron Test Flight. The proof is in the pudding as they say. So let’s try two simple tests. First, from another phone, call your Google Voice number. Your softphone should begin ringing shortly. Answer the call and make sure you can send and receive voice on both phones. Hang up. Now let’s place an outbound call. Using the softphone, dial your cellphone number. Google Voice should transparently connect you. Answer the call and make sure you can send and receive voice on both phones. If everything is working, congratulations!

Solving One-Way Audio Problems. If you experience one-way audio on some of your phone calls, you may need to adjust the settings in /etc/asterisk/sip_custom.conf. Just uncomment the first two lines by removing the semicolons. Then replace 173.15.238.123 with your public IP address, and replace 192.168.0.0 with the subnet address of your private network. Save the file and restart Asterisk with the command: amportal restart.

Choosing a VoIP Provider. For this week, we’ll point you to some things to play with on your new server. Then, in the subsequent articles below, we’ll cover in detail how to customize every application that’s been loaded. Nothing beats free when it comes to long distance calls. But nothing lasts forever. So we’d recommend you set up another account with Vitelity using our special link below. This gives your PBX a secondary way to communicate with every telephone in the world, and it also gets you a second real phone number for your new system… so that people can call you. Here’s how it works. You pay Vitelity a deposit for phone service. They then will bill you $3.99 a month for your new phone number. This $3.99 also covers the cost of unlimited inbound calls (two at a time) delivered to your PBX for the month. For outbound calls, you pay by the minute and the cost is determined by where you’re calling. If you’re in the U.S., outbound calls to anywhere in the U.S. are a little over a penny a minute. If you change your mind about Vitelity and want a refund of the balance in your account, all you have to do is ask.

The VoIP world is new territory for some of you. Unlike the Ma Bell days, there’s really no reason not to have multiple VoIP providers especially for outbound calls. Depending upon where you are calling, calls may be cheaper using different providers for calls to different locations. So we recommend having at least two providers. Visit the PBX in a Flash Forum to get some ideas on choosing alternative providers.

Kicking the Tires. OK. That’s enough tutorial for today. Let’s play. Using your new softphone, begin your adventure by dialing these extensions:

  • D-E-M-O – Nerd Vittles Orgasmatron Demo (running on your PBX)
  • 1234*1061 – Nerd Vittles Demo via ISN FreeNum connection to NV
  • 17476009082*1089 – Nerd Vittles Demo via ISN to Google/Gizmo5
  • Z-I-P – Enter a five digit zip code for any U.S. weather report
  • 6-1-1 – Enter a 3-character airport code for any U.S. weather report
  • 5-1-1 – Get the latest news and sports headlines from Yahoo News
  • T-I-D-E – Get today’s tides and lunar schedule for any U.S. port
  • F-A-X – Send a fax to an email address of your choice
  • 4-1-2 – 3-character phonebook lookup/dialer with AsteriDex
  • M-A-I-L – Record a message and deliver it to any email address
  • C-O-N-F – Set up a MeetMe Conference on the fly
  • 1-2-3 – Schedule regular/recurring reminder (PW: 12345678)
  • 2-2-2 – ODBC/Timeclock Lookup Demo (Empl No: 12345)
  • 2-2-3 – ODBC/AsteriDex Lookup Demo (Code: AME)
  • Dial *68 – Schedule a hotel-style wakeup call from any extension
  • 1061*1061 – PBX in a Flash Support Conference Bridge
  • 882*1061VoIP Users Conference every Friday at Noon (EST)


Click above. Enter your name and phone number. Press Connect to begin the call.


Homework. Your homework for this week is to do some exploring. FreePBX is a treasure trove of functionality, and the Orgasmatron build adds a bunch of additional options. See if you can find all of them. For starters, you’ll want to activate CallerID Lookups in FreePBX. Choose Setup, CID Superfecta, Default and enter the maint password you created with passwd-master. Then choose Tools, Module Administration, CallerID Lookup, Enable, Process and Save the Settings. Then edit each of the Inbound Routes and choose CallerID Superfecta as the CID Lookup Source. Save your changes. Finally, choose Setup, CallerID Lookup Sources, CallerID Superfecta and be sure your maint password created with passwd-master is correct here, too. If not, update it. For additional tips, visit the forums.

Be sure to log into your server as root and look through the scripts added in the /root/nv folder. You’ll find all sorts of goodies to keep you busy. s3cmd.faq tells you how to quickly activate the Amazon S3 Cloud Computing service. And, if you’ve heeded our advice and purchased a PogoPlug, you can link to your home-grown cloud. Just add your credentials to /root/pogo-start.sh. Then run the script to enable the PogoPlug Cloud on your server. All of your cloud resources are instantly accessible in /mnt/pogoplug. It’s also perfect for off-site backups!

Also check out Tweet2Dial which lets you use Twitter to make Google Voice calls, send free SMS messages, and manage your new Asterisk server. Don’t forget to List Yourself in Directory Assistance so everyone can find you by dialing 411. And add your new number to the Do Not Call Registry to block telemarketing calls. Or just call 888-382-1222 from your new number. Finally, try out the included Stealth AutoAttendant by dialing your own number and pressing 0 while the greeting is played. This will reroute your call to the demo applications option in the IVR.

Continue reading Part II.

Continue reading Part III.

Continue reading Part IV.

Support Issues. With any application as sophisticated as this one, you’re bound to have questions. Blog comments are a terrible place to handle support issues although we welcome general comments about our articles and software. If you have particular support issues, we encourage you to get actively involved in the PBX in a Flash Forums. It’s the best Asterisk tech support site in the business, and it’s all free! We maintain a thread with the latest Patches for Orgasmatron 5.1 and 5.2. Please have a look. Unlike some forums, ours is extremely friendly and is supported by literally hundreds of Asterisk gurus and thousands of ordinary users just like you. So you won’t have to wait long for an answer to your questions.

Coming Attractions. In our next episode, we’ll walk you through the process of adding a second, third, fourth, and fifth Google Voice line to your server so that you’ll never run out of free calling on your server. Enjoy!


Need help with Asterisk? Visit the PBX in a Flash Forum.
Or Try the New, Free PBX in a Flash Conference Bridge.


whos.amung.us If you’re wondering what your fellow man is reading on Nerd Vittles these days, wonder no more. Visit our new whos.amung.us statistical web site and check out what’s happening. It’s a terrific resource both for us and for you.


Special Thanks to Our Generous Sponsors


FULL DISCLOSURE: ClearlyIP, Skyetel, Vitelity, DigitalOcean, Vultr, VoIP.ms, 3CX, Sangoma, TelecomsXchange and VitalPBX have provided financial support to Nerd Vittles and our open source projects through advertising, referral revenue, and/or merchandise. As an Amazon Associate and Best Buy Affiliate, we also earn from qualifying purchases. We’ve chosen these providers not the other way around. Our decisions are based upon their corporate reputation and the quality of their offerings and pricing. Our recommendations regarding technology are reached without regard to financial compensation except in situations in which comparable products at comparable pricing are available from multiple sources. In this limited case, we support our sponsors because our sponsors support us.

BOGO Bonaza: Enjoy state-of-the-art VoIP service with a $10 credit and half-price SIP service on up to $500 of Skyetel trunking with free number porting when you fund your Skyetel account. No limits on number of simultaneous calls. Quadruple data center redundancy. $25 monthly minimum spend required. Tutorial and sign up details are here.

The lynchpin of Incredible PBX 2020 and beyond is ClearlyIP components which bring management of FreePBX modules and SIP phone integration to a level never before available with any other Asterisk distribution. And now you can configure and reconfigure your new Incredible PBX phones from the convenience of the Incredible PBX GUI.

VitalPBX is perhaps the fastest-growing PBX offering based upon Asterisk with an installed presence in more than 100 countries worldwide. VitalPBX has generously provided a customized White Label version of Incredible PBX tailored for use with all Incredible PBX and VitalPBX custom applications. Follow this link for a free test drive!
 

Special Thanks to Vitelity. Vitelity is now Voyant Communications and has halted new registrations for the time being. Our special thanks to Vitelity for their unwavering financial support over many years and to the many Nerd Vittles readers who continue to enjoy the benefits of their service offerings. We will keep everyone posted on further developments.


Some Recent Nerd Vittles Articles of Interest…

  1. passwd-master is the PIAF utility for setting a master password for FreePBX access with the maint user account. []
  2. status is the PIAF utility program that displays the current status of most major applications running on your server. []
  3. Mapping a port on your firewall to a private IP address unblocks certain Internet packets and allows them to pass through your firewall directly to an IP device "inside" your firewall for further processing. []
  4. reboot is the Linux command for restarting your server. It’s functionally equivalent to shutdown -r now. []

Introducing PogoPlug: Cloud Computing for $100 per Terabyte

Introducing PogoPlug

Ever wished you could build and manage your own Cloud Computing Center with minimal cost and no recurring charges… ever? Well, today’s your lucky day.

It takes a lot to get us excited about a new product offering. But this one is a real winner! For under $130, Cloud Engines provides you your very own PogoPlug 2.0 device that connects to your router and shares up to four USB drives over the Internet. At today’s prices and ignoring sales tax, that means you can put eight terabytes of Cloud Storage on line for a one-time cost of about $100/terabyte. To give you a point of reference, Google will rent you the same space for $256/terabyte… per year. And Google is one of the least expensive Cloud Computing resources out there. Here’s the math for naysayers:

4 – WalMart1 2TB WD MyBook Drives @ $169 each = $676
1 – PogoPlug 2.0 Device @ $129 each = $129
ONE-TIME, NON-RECURRING COST: $805/8TB or $100/TB

For those that don’t need 8 terabytes, the 2 terabyte setup including the drive and PogoPlug device is still just over half the one-year rental rate of equivalent storage from Google. And, just to be clear, this isn’t merely a storage device (like Amazon S3) requiring downloads before the files can actually be used. PogoPlug’s software makes these USB drives an integral part of your Desktop just like any other attached storage devices. Think WebDAV! So it makes a perfect home for your music, movie, and photo collections. There also are loads of Open Source applications for PogoPlug for those that like to tinker. And you can use PogoPlug to keep synchronized backups of your important files.

Other Options. Be aware that for about $50 less, you can purchase the Seagate FreeAgent DockStar Network Adapter which includes a single year of PogoPlug Internet support. After that, it’s $30 annually. Translation: By the end of the second year, you’re better off with the PogoPlug. So the choice is a No-Brainer in our book. But, the fact that Seagate is also standing behind the PogoPlug design should make everyone sleep more soundly.

Deployment. After a one-minute, one-time setup over the Internet, you can securely access all of your USB drive resources via PogoPlug using either a web browser or one of several free desktop applications that are available for Windows, Mac OS X, Linux as well as Android phones, iPhones, and (earlier today) Blackberrys. And you get free support and a terrific forum. The device works flawlessly behind either a DSL or cable modem AND a NAT-based router so there are no firewall issues to address. Just enter the serial number on the bottom of your device when you access the PogoPlug web site, and configuration is automatic.

Uploading Files. One of PogoPlug’s slickest features is its automatic cataloging of files which are uploaded. Once uploaded, you can view your Music, Movies, and Pictures by simply clicking on one of the buttons. Photos are cataloged into directories by the month in which the photos were taken. Music is indexed by artist, album, and genre. In addition, music by artist, album and genre as well as photo albums can be shared by entering email addresses for those that can access the materials, by enabling public viewing (assuming you have legal rights to do so), or by sharing items using your Twitter, Facebook, and MySpace credentials. We’ve shared a photo album just to give you an idea of how this works. The security and logistical nuts and bolts all are managed by Cloud Engines’ servers. You can review and modify the materials you’re sharing by clicking on the Files I Share link in your browser. Finally you can automatically alert those with share privileges when folder content is updated. Very slick!

Give PogoPlug a try. By clicking on one of our links, you also help support the Nerd Vittles project. We think you’ll be as thrilled as we are with this terrific new creation. Enjoy!


Need help with Asterisk®? Visit the PBX in a Flash Forum.
Or Try the New, Free PBX in a Flash Conference Bridge.


whos.amung.us If you’re wondering what your fellow man is reading on Nerd Vittles these days, wonder no more. Visit our new whos.amung.us statistical web site and check out what’s happening. It’s a terrific resource both for us and for you.


Special Thanks to Our Generous Sponsors


FULL DISCLOSURE: ClearlyIP, Skyetel, Vitelity, DigitalOcean, Vultr, VoIP.ms, 3CX, Sangoma, TelecomsXchange and VitalPBX have provided financial support to Nerd Vittles and our open source projects through advertising, referral revenue, and/or merchandise. As an Amazon Associate and Best Buy Affiliate, we also earn from qualifying purchases. We’ve chosen these providers not the other way around. Our decisions are based upon their corporate reputation and the quality of their offerings and pricing. Our recommendations regarding technology are reached without regard to financial compensation except in situations in which comparable products at comparable pricing are available from multiple sources. In this limited case, we support our sponsors because our sponsors support us.

BOGO Bonaza: Enjoy state-of-the-art VoIP service with a $10 credit and half-price SIP service on up to $500 of Skyetel trunking with free number porting when you fund your Skyetel account. No limits on number of simultaneous calls. Quadruple data center redundancy. $25 monthly minimum spend required. Tutorial and sign up details are here.

The lynchpin of Incredible PBX 2020 and beyond is ClearlyIP components which bring management of FreePBX modules and SIP phone integration to a level never before available with any other Asterisk distribution. And now you can configure and reconfigure your new Incredible PBX phones from the convenience of the Incredible PBX GUI.

VitalPBX is perhaps the fastest-growing PBX offering based upon Asterisk with an installed presence in more than 100 countries worldwide. VitalPBX has generously provided a customized White Label version of Incredible PBX tailored for use with all Incredible PBX and VitalPBX custom applications. Follow this link for a free test drive!
 

Special Thanks to Vitelity. Vitelity is now Voyant Communications and has halted new registrations for the time being. Our special thanks to Vitelity for their unwavering financial support over many years and to the many Nerd Vittles readers who continue to enjoy the benefits of their service offerings. We will keep everyone posted on further developments.


Some Recent Nerd Vittles Articles of Interest…

  1. The in-store pricing at WalMart is actually cheaper than on line for these particular drives. []

Apple’s iPad: A Home Run for Education

We’ve been anything but a cheerleader for Apple lately. And that applies in spades to the iPad. If you follow us on Twitter, here’s a sampling of our comments since the iPad was introduced last week.

The Computer Illiterate’s Dream Machine: Meet the iPad. Thinking you’ll slip your existing AT&T or T-Mobile SIM into Apple’s new iPad? Think again.

iPad: The Good http://tr.im/ipadg, The Bad http://tr.im/ipadb, and The Ugly http://tr.im/ipadu

iPad: Uh, but wait, No Camera http://tr.im/ipadc, No Flash http://tr.im/ipadf, No Multitasking http://tr.im/ipadm. No thanks.

Funny: Hitler’s take on the iPad. http://tr.im/ipadah

Why Apple Doesn’t Want Flash on the iPhone and iPad? It Finally Makes $ense. http://tr.im/theflash

The Vote That Really Matters: A 16-year-old’s view of Apple’s iPad: iFail http://tr.im/ipad16 (via @scobleizer)

Michael Dell demos what the iPad coulda/woulda/shoulda been. http://bit.ly/czYPww (via @engadget) #android Mini5

iPad Web Surfing: Here’s what the future holds. http://tr.im/noflash (via @gadgetweb) #surfsdown

RT @cultofmac: "Pundits On The iPad’s Closed System: It’s Doom For PCs, No It’s Great" http://bit.ly/cpFV4v

Apple iPad Micro SIM guarantees that you’ll be paying for two wireless data plans instead of one. http://bit.ly/bYipZP

Funny: iPad v. A Rock http://bit.ly/b50XP2 (via @TechCrunch)

RT @TechmemeFH: Apple reinventing file access, wireless sharing for iPad (Prince McLean/AppleInsider) http://bit.ly/awHJzG

Today’s Math Lesson: Hulu + Flash = Free Internet Movies. iPad – Flash = Megabucks for Apple from iTunes Movie Store sales

RT @dcagle: The library of the future, courtesy of the iPad http://bit.ly/bFvDAE #apple #toon

So what’s with the headline? Have we changed our mind? Well, no. It’s a lousy machine for us and for anyone above the age of puberty. But sometimes you need to look beyond the forest to find the nugget in the trees. And we’ve found the iPad’s Sweet Spot: It’s Lower School Education, Stupid!

For all the reasons that make the iPad an undesirable computing device for adults, it turns out these same qualities make it an almost perfect learning platform for young children, ages 3 to 12. In fact, we think it has the potential to revolutionize preschool and elementary education.

For openers, we can all probably agree that the key to a good education is good teachers. And that’s especially true when it comes to computer education. The problem, of course, is that teachers of young children don’t have the time or the resources to keep up with computer technology because they’re so busy doing all the things that parents should actually be doing to raise their kids. So, other than turning kids loose with a computer game, PCs have been all but worthless in lower school education because the teachers never had time to master the devices themselves. The iPad fixes that because of its incredibly simple learning curve. Any teacher can master the richness of the iPad interface in an hour. And it turns out that’s probably true for young children as well. If you don’t believe it, hand a kid your iPhone and come back in an hour.

A computer is important in early education because it’s much more patient and individually focused than any teacher ever could be. A computer doesn’t care how many times it takes a kid to master a specific topic. And, for young children, they need the repetition at their own pace until they actually get it. The iPad can handle all of these repetitive tasks while freeing the teacher up for observation and pinpoint coaching. So it levels the playing field by getting the "slow learners" up to speed without the usual frustrations of dealing with kids with different levels of comprehension. And the iPad accomplishes this while making education fun instead of frustrating!

Young kids learn with their hands. Walk in any lower school classroom if you don’t believe it. The iPad is a hands-on device. You use your hands literally for everything: a mouse, a navigation instrument, a drawing tool, and for writing and typing. So it’s a natural for kids, just like a hammer.

If you’ve ever visited a Montessori school, you’ll come away appreciating how critically important group collaboration can be to early education. Working in teams enhances learning in so many ways. The iPad is a natural collaboration tool. It can be used to encourage kids to jointly develop rich multimedia reports pulling from the web, their textbooks, images, and their classmates. iWork for iPad at $9.95 per application is the perfect development tool. And, as Steve Jobs demonstrated, the iPad makes a perfect presentation tool. Teaching kids to stand in front of their peers and tell a story is probably the single most important thing kids can learn in elementary education. You learn a lot more teaching others than you’ll ever learn as a student. Most of today’s adults never got it… nor did they have the opportunity that the iPad presents.

We could write a book about the advantages which would flow from getting rid of hardback books. Not only would it save trees and natural resources, but it also could turn books into living, breathing educational tools with rich multimedia presentations instead of static images. Instead of kids lugging around a backpack full of textbooks which will be obsolete in a year or two, they could carry an iPad with all of their learning tools, their schedules, their homework, and their presentations. Think about the possibilities, and you’ll come to appreciate why the iPad really could revolutionize education as we know it. We hope so. Go talk to the educators in your community and get them excited about this Golden Opportunity. You’re only young once!

For a well-balanced, thought-provoking review of the iPad, head over to emergent by design.

We’ll leave you with Neil Curtis’ 3-minute, adjective-laced version of Steve Jobs’ iPad Introduction. And, just in case you missed the Grammy Awards last night, there was an iPad Presentation there as well. Funny stuff!


Some Recent Nerd Vittles Articles of Interest…

Surfing the Google Wave

Original image courtesy of Squidoo.com... with apologies We’ve spent a week getting to know Google Wave using Chrome along with 100,000 of our closest friends. We wanted to give you a status report. Hype aside, Google Wave is an incredible tool when used for the right purpose. If you’ve been asleep or hiding under a rock for the past two weeks and missed the party, here’s a quick summary of Google’s latest invention. It’s a bird, it’s a plane… actually it’s a collaboration and communications platform that brings the full richness of Web 2.0 to your desktop. Some have suggested that it’s what email would look like if it were invented today. Our discussion focuses on the web-based Wave client, but Google Wave also is an open source development toolkit, and we’ll get to that one day soon.

Much has been written about Google Wave’s capabilities, and we won’t repeat that here. Instead, we want to address Google Wave’s potential and what we see as some of the present shortcomings of the product. We fully appreciate that this is a preview, and many of our concerns may yet be addressed before Google Wave becomes available to the general public. We can’t help chuckling at the realization that, in less than 30 years, we’ve now come full circle in data processing. What began as mainframe computing evolved into personal computing. And now Google Wave brings us much closer to being back where we started except for a state-of-the-art user interface and a new name: Cloud Computing. If IBM had addressed the user interface issues with mainframe computing, they probably never would have lost their market in the first place.

The screenshot above really can’t do justice to the richness of the client interface because you truly need a monitor as wide as your desk to get the most out of Google Wave. No, you won’t be using this on your cellphone or PDA… at least not well. For openers, Google Wave provides real-time collaboration so you actually see folks typing into various message threads (called waves) in the Land of Google. When you create a new wave, you "invite" other people in your Contacts to the wave. This puts the wave at the top of their Inbox in bold-faced type, akin to what Gmail would do with an incoming email.

There’s another frame to the right of your Inbox which actually displays the complete wave that you have selected so you’re never really jumping back and forth between selecting waves and reading them. What takes a bit of getting used to is the fact that both your Inbox and the wave you are currently reading may be changing every second with input from literally dozens of your associates or strangers if the wave you’re reading happened to be designated as public.

There’s one other dramatic difference in waves and threads of email messages. Other folks can change your stuff. As a collaboration tool with close associates, this might be desirable. With public waves, it would be a nightmare in the real world. And we don’t consider the 100,000 Google Wave previewers the real world. They are for the most part well-behaved probably out of fear that they’d be booted out if they behaved badly. That isn’t the real world as we all know. And the current Google Wave design would let a single creep destroy virtually every public wave in minutes using bots and malicious changes to documents. As presently designed, there would be little recourse other than replaying what your wave used to look like. You really can’t put Humpty back together again as some have already discovered.

Richard Nixon learned the hard way that tape recorders can be a blessing and a curse. Much has been made of the capability Google Wave offers to replay a wave so that you can playback the development of a thread of messages and see who added or deleted what and when. Google has touted the fact that everything is preserved. Well, not quite. First, there’s no capability at least presently to scroll back to a certain place in the timeline and recreate a new wave up to there. The most you can retrieve is a single posting. Second, anybody with access to the wave can use this timeline feature so wave restoration wouldn’t necessarily be desirable unless it were restricted to the original author of the wave. And, third, at least at Google someone knows how to cheat the system and delete stuff from the timeline. We only discovered this in reviewing the first public porn wave which started out prim and proper enough but quickly gathered steam when someone posted a collection of NSFW (or anywhere else) photos from their favorite collection. Within a few minutes, the postings quietly disappeared. Being the careful reviewer that we are, we immediately reached for the Playback button to check the history of the wave. Sure enough, the raunchy photos were still there. But, by the next morning, they had completely vanished from the chronology. So much for the official stance that nothing ever disappears. The real disappointment with the replay function is the lack of any capability to restore an entire wave. Because only individual messages (known as blips) can be recovered, this would prove to be next to worthless in a complex wave with hundreds of postings.

That brings us to the issue of whether public waves really make sense given the world in which we live. The good news is it works much better than IRC because of the richness of the content with attachments and hyperlinks. But, at least for public waves, the ability to edit someone else’s stuff would have to go. We try not to focus on legal nightmares in reviewing new software, but one can’t help wondering what would happen if one were to post something complimentary about a neighbor in a public wave and then another neighbor altered your posting by falsely accusing the individual of sleeping around with half of the neighborhood. Obviously, there’s still a good bit of work to do on the security front and in deciding whether allowing others to amend someone else’s postings is a good idea. Whether Google gets the security piece right will ultimately determine the success of Google Wave.

For public waves, it’s a no-brainer. You just can’t! And, to be honest, in reviewing hundreds of public waves in the preview, we can’t recall a single instance where this functionality would have been necessary. In a true (private) collaborative project, it would be wonderful but color-coding of text or some other method of identifying who wrote what would be absolutely essential from both a practical and legal standpoint. Both Microsoft Word and WordPerfect have had this capability forever. The simple way in Google Wave would be to add user’s pictures with a colored border and matching colored text whenever they make changes to someone else’s posting. With this addition, Google Wave could become a wonderful collaborative tool in both legal and technical environments.

And, speaking of word processing, Google Wave falls a bit short on the word processing scale. Despite the richness of Google’s knol platform, some of that functionality still is not available in Google Wave. The text editing and formatting is much akin to what’s available in a typical email client. You can change fonts, adjust color, indent, add hyperlinks and images, but that’s about as far as it goes. There are no headers, footers, footnotes, etc. So you can’t easily transform a wave into a formatted document for printing at this juncture. But that may come as development continues.

There are a few other things still on our Wish List. First, we’d love for Google Wave to evolve into a tool that can replace today’s forums which are not much more functional than BBS software was two decades ago. Once there is administrator control of rollback and protection of waves by granular access rights to functions, bots, and gadgets as well as the ability to block users and ranges of IP addresses, this should happen. Second, we obviously want the ability to include either read-only or read-write access to waves in a blog or web site. We already have the web site functionality working (see below for a sample), but you currently need a Google Wave account to access it. Third, we really want to assimilate all of the tools we use into the Google Wave Desktop so that everything is accessible in one place. That’s what Cloud Computing is all about, and Google Wave comes closer than anything else in meeting that need. You already can access Gmail on your Google Wave desktop and any web site that can be framed can be included in a wave as an iFrame. That doesn’t leave much once the security feature set is in place to protect all the components.

Finally, we’ll close with a brief mention of the coolest feature of Google Wave. That is its expandability which is enabled by incorporating bots and gadgets into any wave. As you might imagine, these extensions can do almost anything… good or bad. Here’s a short list of what has been developed and what’s already on the radar in just a few short weeks:

Chatbots
Eliza – ogenex@appspot.com – An implementation of the Eliza chatbot borrowed from the NLTK.
Elize – elizarobot@appspot.com – Is one of the first robots that was created by non Googler and is very useful if you are feeling alone in your Google Wave client.
Rude chatbot – notatory@appspot.com – An obnoxious chatbot borrowed from the Natural Language Processing Toolkit.
TooAngel Wave – In Progress – tooangel-wave@appspot.com – A self learning robot, that will respond to a reply in a more humanoid way

Conversion
BotURL – boturl@appspot.com – A URL Linker that replaces full URLs with hyperlinks.
Calcbot – calcbot@appspot.com – This bot will do in place calculations for simple mathematical expressions and allow you to use user defined variables.
Cartoony – cartoonybot@appspot.com – Replaces the text of every submitted blip with a cartoon balloon that contains the text instead. Colors the balloons based on username.
Dice Bot – dice-bot@appspot.com – Dice-rolling bot. Dice Bot will replace XdY (X is the number of dice; Y is the number of sides) with the results of those rolls.
Flippy – flippy-wave@appspot.com – Turns text upside-down.
Fnordlinky – fnordlinks@appspot.com – Replaces "PMID <number>" with article information from PubMed.
Hearty Emobot – hearty-emobot@appspot.com – Replaces ASCII art with wingding characters.
i-cron – i-cron@appspot.com – Evaluates Python expressions. Looks at blips in event, searches for CALC() macros and executes Python code using exec().
Insulty – megabytemb123@appspot.com – Information Needed
IPA Bot – ipa-bot@appspot.com – Changes normal letters into special characters used for phonetics.
Piratify
– piratify@appspot.com – Turns whatever you type into "Pirate Speak" .. Arrrr.
Plotzie – plotzie@appspot.com – Plots sparklines from your data.
Shortee – Wish – Change “c u l8r” to “see you later” etc.
Swedish Chef – borkforceone@appspot.com – Changes english into Swedish-Chef Speak. Bork! Bork!
Syntaxy – kasyntaxy@appspot.com – Syntaxy does blip-by-blip syntax highlighting for a variety of languages including Python, Java, C, C++, html, css and javascript.
Watexy – watexy@appspot.com – Use LaTeX mathematical language in your Waves!
Wikify – wikifier@appspot.com – Replaces specific marked up text with a link to Wikipedia or a description relevant to the marked text.

Games
Hangman – wavehangman@appspot.com – Play Hangman.
Roshambo – roshambowave@appspot.com – Play Roshambo (Rock / Paper / Scissors).
Speedy – Wish – Track the words per minute of all participants, competitive typing!

Groups
Groupy – groupy-robot@appspot.com – Robot to manage groups.

Integration
drop.io – mikeswaverobot@appspot.com – Creates a drop and puts the info into the wave whenever the robot is added as a participant.
OpenAustralia – In Progress – A robot to allow interaction with the OpenAustralia web site.
PlonieBot – In Progress – ploniebot@appspot.com – Brings wave document editing capabilities to the Plone CMS
Poppy – In Progress – poppywave@appspot.com – Helps bridge Google Wave conversations to email users outside the Wave.
Rssybot – rssybot@appspot.com – Turn google wave into an RSS reader!
Starify – starifybot@appspot.com – Lets you star waves, in sort of bookmarking style.
Tweety the Twitbot – tweety-wave@appspot.com – You can access your Twitter account.
Twiliobot – twiliobot@appspot.com – Transforms phone numbers into click-to-call links. If user clicks a link, a call is placed to his phone and to the number in the link. The call can be transcribed and inserted into the wave as text with a link to the audio.
Wave-Email – In Progress – wave-email@appspot.com – Provide an extension to Google Wave which will allow the integration of both sending and receiving emails.
Wave Live Messenger – wavelivemessenger@appspot.com – Allows you to chat to your windows live messenger contacts from inside a wave.

Language
PhilBot – Wish – A suggested solution to the problem of waves with languages you can’t read.
Rosy Etta – rosy@wavesandbox.com – Translator (40 Languages).

Polling
Polly the Pollster – polly-wave@appspot.com – Poll Bot.

Search / Aggregation
Dr Maps – dr-maps@appspot.com – Updates a wave by inserting a map associated to an address.
Dr Weather – shiny-sky@appspot.com – Gives the weather for a City
Embedded Search Results – wave-sandbox@appspot.com – Web and Image searches inline.
FML Blipper – fmlblipper@appspot.com – displays random FML story from www.fmylife.com
Grauniady – grauniady@appspot.com – Searches the latest items from The Guardian for a given phrase.
Stocky – stocky-wave@appspot.com – Detects stock symbols from a wave and updates it with the live stock price.
Wavethingy – wavethingy@appspot.com – Searches Amazon for DVDs and books, and gives the author a cut of any purchases made off the links.
Yelpy – yelpful@appspot.com – Searches Yelp with a user defined location and category.

Utilities
AmazonBot – amazon-withwaves-com@appspot.com – Enables social product research and shopping on Amazon.com. Wave participants can share products & reviews with contacts in real-time thanks to automatic queries by the AmazonBot against conversation keywords. The AmazonBot gadget can detect products and return inline product links or a custom full product browser.
Bloggy
– blog-wave@appspot.com – Information Needed
Bit.ly Bot – bitly-bot@appspot.com – Shortens the url using bitly.
Botty – Wish – Will automatically add a set of useful bots to a wave according to a collection of bots (so they don’t have to individually be added when you use them all the time.
CountColon – countcolon@appspot.com – Adds text statistics to your blips (words, lines, etc.)
Companion Sphere – companionsphere@appspot.com – Collection of geek utils, first working verb is "lookup" for wikipedia/wiktionary one-line descriptions.
Databot – Wish – Will start as soon as the GData interface is published.
Emoticony – emoticonbot@appspot.com – Replaces text representations of emoticons with the relevant image.
JBREAKOUT – jbreakout@appspot.com – Debug utility that reports event triggers.
Maison – maison@appspot.com – Makes blips public at http://maison.appspot.com.
Multi – multi-wave@appspot.com – A quote collector. Reply a blip you want to quote with ‘quote this’ and randomly display a quote with ‘quote <wave @account.com>’. The bot is still being under development but you can try playing with it.
Natural Language Processing – knowledge-books@appspot.com – Adds blips with NLP analysis.
Nokar – lab2market@appspot.com – Has many features such as translations, image insertion, insert last tweets etc.
Posterous – posterous-robot@appspot.com – A robot for posterous.com user to post blog in Google Wave. Here is how to write a blog using Google Wave Robot for Posterous.
Publisher – wave-publisher@appspot.com – Information Needed
Skimmy – wave-skimmy@appspot.com – Converts text emoticons, from : ) to img. Has a bookmarklet which creates a popup menu to insert emoticons for which the code is unknown.
Smiley – smiley-bot@appspot.com – Changes the smiley symbols to smiley images.
Smiley – In Progress – smiley-robot@appspot.com – Changes the smiley symbols to smiley images.
Style Chart – stylechart@appspot.com – Inserts a chart into a wave.

Wave Management
Bouncy – bouncy-wave@appspot.com – Allows you to remove robots from a wave. Doesn’t seem to work on real people though, and laughs if you try to ask it to kick itself out. To get it to kick a bot out, type "bounce:name@domain.com"
Linear – Wish – Enforce all replies to be to the main wave. If a user replies to a reply, remove it and place it as a reply to the main wavelet.
Read Onlie – readonliebot@appspot.com – Records the original wave content. Whenever it’s edited, the content is replaced with the original. Simple as that.
Seekdroid – seekdroid@appspot.com – You can list Robots, add them and find them out, easy to use. In continuous development. Website with all the information seekdroid.appspot.com.
Sweepy – sweepy-wave@appspot.com – Remove empty, whitespace-only blips.
Taggy – taggy-wave@appspot.com – Recognize #hashtags and add them as tags to the wave.
Tocgen – tocgen@appspot.com – Table of Contents auto-generated and updated based on the h1,h2,h3,h4 in a wave.
Twitusernames – twitusernames@appspot.com – Replaces all Twitter @username with links to the Twitter accounts.

Gadget Utilities
Ajax Animator – In Progress – http://antimatter15.com/ajaxanimator/wave/manifest.xml – A fully integrated multi-user web based vector graphic animation authoring environment.
AmazonBot Gadgett – http://amazon-withwaves-com.appspot.com/gadgets/AmazonProductList.xml – The AmazonBot gadget can detect products and return inline product links or a custom full product browser.
Bidder – http://wave-api.appspot.com/public/gadgets/bidder.xml – Simple Auction.
Checky – http://wave-gadgets.appspot.com/checky.xml – Basecamp-like checklists with drag-and-drop.
Click me – http://wave-api.appspot.com/public/gadgets/hellowave.xml – Shows a button with a counter. Each time the button gets clicked, the counter is incremented by one. Shows off how the state interaction works.
HTML – http://wave-ide.appspot.com/html.xml – Embed any HTML into a wave.
iFrame – http://wave-ide.appspot.com/iframe.xml – Embed any web page into a wave.
iWave – http://gadget.wave.to/iWave/iWave.xml – Allows you to create a profile on wave to make wave just a little more personal. Uses facebook connect to retrieve your details if you sign in.
Licensing – In Progress – http://wave-license.appspot.com/license_gadget.xml – Creative Commons RDF Embedding – Planning Stage.
Maps – http://hosting.gmodules.com/ig/gadgets/file/101415471413908368316/mappy.xml -Embed Google Map.
Napkin – http://my-wave-gadgets.appspot.com/wave/NapkinGadget.xml – Example of Flash/Flex Wave Gadget, similar to Whiteboard gadget above – source on Google Code.
QuakeBot – In Progress – Server information on the Quake 3 protocol.
Raffly – http://raffly.googlecode.com/svn/trunk/sandbox/raffly-xml1/raffly.xml – Insert this gadget to select a random participant from your wave to be the winner. The winner of what? Well that’s up to you 🙂
Ratings – http://google-wave-resources.googlecode.com/svn/trunk/samples/extensions/gadgets/ratings/ratings.xml – Lets participants rate and review a topic (movie, restaurant, etc) in a wave and shows a tally of the result.
Slashdot Gadget – http://www.m1cr0sux0r.com/slashdot.xml – Loads latest Headlines from Slashdot.
Troco – An experimental peer-to-peer currency – http://troco.ourproject.org/gadget/org.ourproject.troco.client.TrocoWaveGadget.gadget.xml – Aims to provide a decentralized complementary community currency system, that is, a peer-to-peer currency system. Also you can see it as an IOU or promissory note based system. More info click here.
Vector Editor – http://jsvectoreditor.googlecode.com/svn/trunk/wave/vectoreditor.xml – A cross platform collaborative real time vector graphics editor.
Whiteboard – http://vps.michaelrose.id.au/canvas.xml – Draw on a virtual whiteboard.
Who is Coming? – http://wave-api.appspot.com/public/gadgets/areyouin/gadget.xml -Show a list of all people that have said whether they will come or not.

Gadget Games
Backgammon – Wish – Remove all of one’s own checkers from the board before one’s opponent can do the same. [Wikipedia]
Battleship – Wish – Displays different board based on user.
Boxes – In Progress – Connect lines to make boxes and win.
Connect 4/Four-in-a-row – In Progress – sdunster@wavesandbox.com – http://www.sdunster.com/wave/four.xml – 2 users + observers, turn locking, just waiting to write win-detection code.
Floodit – http://gadget.wave.to/floodit/game.xml – 2 player race to fill a board with colors.
Magnetic Poetry – http://hosting.gmodules.com/ig/gadgets/file/107558585548952247431/fridge-11.xml – Re-arrange random words to form poetry.
Match them colors! – In Progress – Match 3 / gem matching game.
Othello – Wish – Play Reversi.
Sudoku – http://blah.appspot.com/wave/sudoku/sudoku.xml – Play Sudoku.
The Button – http://hyperthese.net/wave-gadgets/the-button.xml – A useless (I mean USELESS) game.

Hooks
CVS integration – Wish – CVS history can be converted into a wave with playback.
GIT integration – Wish – GIT history can be imported and played back (dffs).
SVN integration – Wish – SVN History can be converted into a wave with playback.

Appearance
Google Wave Scrollbars – http://www.uniformedopinion.com/google-wave-native-scrollbars-extension/google-wave.crx – Changes the wave scrollbars to the default system scrollbars.


Enhanced Google Maps. In case you haven’t noticed, we’ve added yet another Google Map to Nerd Vittles. Now, in addition to showing our location with Google Latitude, we also are displaying your location based upon your IP address. We’ll show you how to add something similar to any LAMP-based Linux system in coming weeks. It’s a powerful technology that has enormous potential. If you’re unfamiliar with Google Maps, click on the Hybrid and Satellite buttons and then check out the scaling and navigation options. Double-click to zoom. Incredible!


whos.amung.us If you’re wondering what your fellow man is reading on Nerd Vittles these days, wonder no more. Visit our new whos.amung.us statistical web site and check out what’s happening. It’s a terrific resource both for us and for you.


Need help with Asterisk®? Visit the PBX in a Flash Forum.
Or Try the New, Free PBX in a Flash Conference Bridge.


Special Thanks to Our Generous Sponsors


FULL DISCLOSURE: ClearlyIP, Skyetel, Vitelity, DigitalOcean, Vultr, VoIP.ms, 3CX, Sangoma, TelecomsXchange and VitalPBX have provided financial support to Nerd Vittles and our open source projects through advertising, referral revenue, and/or merchandise. As an Amazon Associate and Best Buy Affiliate, we also earn from qualifying purchases. We’ve chosen these providers not the other way around. Our decisions are based upon their corporate reputation and the quality of their offerings and pricing. Our recommendations regarding technology are reached without regard to financial compensation except in situations in which comparable products at comparable pricing are available from multiple sources. In this limited case, we support our sponsors because our sponsors support us.

BOGO Bonaza: Enjoy state-of-the-art VoIP service with a $10 credit and half-price SIP service on up to $500 of Skyetel trunking with free number porting when you fund your Skyetel account. No limits on number of simultaneous calls. Quadruple data center redundancy. $25 monthly minimum spend required. Tutorial and sign up details are here.

The lynchpin of Incredible PBX 2020 and beyond is ClearlyIP components which bring management of FreePBX modules and SIP phone integration to a level never before available with any other Asterisk distribution. And now you can configure and reconfigure your new Incredible PBX phones from the convenience of the Incredible PBX GUI.

VitalPBX is perhaps the fastest-growing PBX offering based upon Asterisk with an installed presence in more than 100 countries worldwide. VitalPBX has generously provided a customized White Label version of Incredible PBX tailored for use with all Incredible PBX and VitalPBX custom applications. Follow this link for a free test drive!
 

Special Thanks to Vitelity. Vitelity is now Voyant Communications and has halted new registrations for the time being. Our special thanks to Vitelity for their unwavering financial support over many years and to the many Nerd Vittles readers who continue to enjoy the benefits of their service offerings. We will keep everyone posted on further developments.


Some Recent Nerd Vittles Articles of Interest…


For those of you that already have Google Wave accounts, here’s a sample of how a wave will look in a WordPress posting. You can even add content to the wave! This works in Safari and Chrome most of the time, Firefox some of the time (if you turn on Accept 3d Party Cookies), and IE almost never. For those of you that are not part of the Google Wave preview, you’ll just have to wait patiently until Google turns on at least read-only access to this functionality:

Tweaking Asterisk for Free Google Voice Calling

Lips from Google Now that the Asterisk® and Google Voice marriage is finally underway, we wanted to step back today and revise the original methodology a bit to take advantage of some of the terrific comments which were offered in response to our last article. First, the good news. U.S. calls through Google Voice using Asterisk work! They sound great, and they're free. The not so good news was that the MeetMe conferencing trick to join your outbound call with the Google Voice click-to-dial return call from your destination worked great so long as a real person answered the phone. But, if an answering machine picked up or no one answered the call at all, there were problems because these calls already had been transferred to the MeetMe conference and there was no simple way to disconnect them. And the need for two DIDs to support a single Google Voice interface just seemed a bit wasteful.

9/1/2010 Update: A good bit has changed with Google Voice since this article was first published. For the definitive guide and installation procedure, we highly recommend The Incredible PBX and accompanying article which can be found at this link. Google Voice (and much more) already is included in our new PBX which is literally Plug-and-Play. If you prefer to roll your own, be sure to also have a look at this excellent update on the Michigan Telephone Blog.

Today we want to try to eliminate these two quirks while stiill providing a seamless interface between Google Voice and Asterisk. We also appreciate that thousands of you already have implemented the previous approach. So we want your transition to the new way of doing things to be as painless as possible. On the other hand, for frequent readers, we hope you'll bear with us as we repeat some of what already has been covered in previous articles so new visitors don't have to jump around between articles to get the complete picture of what we're trying to accomplish.

The objective remains the same. We want a methodology that lets us make outbound calls from any Asterisk phone using the Google Voice service to take advantage of free calling in the United States and Canada. And we want calls to our Google Voice number delivered to our Asterisk system for transparent call processing. Yes, SIP is still on our wish list for both outbound and inbound calls with Google Voice, but we'll make do with PSTN calls particularly while Google is footing the bill for all of the calls.

Update: There's now a turnkey Asterisk solution that implements Google Voice calling without getting your hands dirty. Check out our new Orgasmatron V.

Tweaked Design. Here's the new design. You obviously still need a free Google Voice account. If you don't have one, you can request an invite here. At last report, it's only taking a few days from application to invite which is really great news. Don't use a space in your Google Voice password! Once you have a Google Voice account and phone number (Google has reserved a million of them so... not to worry!), then you'll need a DID that provides unlimited, free incoming calls. Once you get your DID set up on your Asterisk system, we'll set up a forwarding phone number for this DID in your Google Voice account so that Google Voice calls can be connected to your Asterisk server.

For outbound calls, we'll combine a little dialplan voodoo with pygooglevoice to instruct Asterisk to place a click-to-dial call using your Google Voice forwarding number. Then we'll stuff in the destination U.S. phone number. When you dial GV-678-1234567 from any of your Asterisk phones, Asterisk will park your initial call in a reserved parking lot slot and then join the called party to the originally parked call. The entire procedure is virtually transparent both to the caller and the callee. And, unlike the MeetMe conference, the parking lot fades out of the picture as soon as the call is connected. Thus, if either party hangs up, the active channel for the call is terminated on your Asterisk server.

For inbound calls from your Google Voice number, we'll tweak the dialplan so that it can distinguish between a RingBack call that Google Voice initiated and a true inbound call. We'll peel off the real inbound calls and route them to a separate Inbound Route in FreePBX for processing in any way you desire.

Finally, for those that implemented the methodology in our previous article, we'll walk you through the steps to revise your existing setup to take advantage of these new tweaks. You can skip over the initial installation process if you already have gone through the Google Voice setup from our earlier article. Just skip down to Tweaking Previous Setups.

Special Thanks. At the outset, we again want to express our sincere appreciation to Jacob Feisley and Paul Marks for their pioneering work on a Python interface to Google Voice. We also stumbled upon another Python development project, Google Voice for Python. While we originally had planned to rely upon Jacob and Paul's script, we ultimately decided to implement pygooglevoice because of the additional flexibility it provided for down the road. With pygooglevoice, you not only can make Google Voice calls, but you also can send SMS messages with no muss or fuss. Jacob Feisley has now joined that project as well. So, our special tip of the hat goes to the entire Google Voice for Python development team. It's a terrific product as you will see.

Prerequisites. Today's setup requires a CentOS-based Asterisk aggregation with a current version of FreePBX. Be aware that today's solution requires Python 2.4 or higher and reportedly will not work with Python 2.3 found in some Linux distributions. We've tested everything with PBX in a Flash and, on that platform, you're good to go. The install script should work equally well with the other CentOS-based Asterisk aggregations, but we haven't tested them. Be our guest, and let us know if you encounter any problems. Finally, a word of caution. We don't ordinarily distribute solutions using development tools we don't use. Our knowledge of Python wouldn't fill a thimble. We've made an exception today because of the extraordinary interest in Google Voice by the Asterisk community. But, if something comes unglued, we can't fix it. So have a backup plan in place just in case. 🙂

Today's Drill. To get everything working today, there are six steps: (1) obtaining and configuring a DID to manage calls between Google Voice and Asterisk, (2) configuring a Google Voice forwarding number for this DID to manage your outbound and inbound calls, (3) configuring FreePBX to route all outbound calls with a GV prefix to your special Google Voice dialplan context, (4) configuring an inbound route to manage incoming calls from your Google Voice number, (5) setting up a series of Parked Call extensions, one of which will be used to manage your outbound Google Voice calls, and (6) running our install script which adds the dialplan code for Google Voice calling with your credentials and puts the Python application into place on your server. It sounds more complicated than it is. So hang on to your hat. Here we go!

Dedicated DID. Before you can use Google Voice with Asterisk, you'll need a DID that can be dedicated to your Google Voice interface to Asterisk. We'd recommend a free IPkall or SIPgate DID. To get started, use one of the links above to obtain and configure the DID. Temporarily point the DID to an extension on your Asterisk system that can be used to verify your requests for the number. Since all of these calls are free, the area code of the DID really doesn't matter because you're never going to publish the fact that it exists.

The easiest method for setting up the DID is to first create a SIP URI for the DID on your Asterisk system. Next route the SIP URI to an Inbound Route in FreePBX where you can manage the destination for calls to that DID. Initially, you want the destination to be an extension on your Asterisk system that you can answer to verify both the DID setup and the GV setup below. Finally, point the DID you obtained to the SIP URI defined above.

HINT: The entry in extensions_override_freepbx.conf would look something like this for a SIP URI called ipkall-1:

exten => ipkall-1,1,Goto(from-trunk,${DID},1)

Then you would create an inbound route named ipkall-1 using FreePBX and designate some existing extension on your server as the destination for these inbound calls.

When you set up the SIP forwarding for the DID at ipkall.com, you'd specify the SIP URI as:

ipkall-1@ipaddress_of_your-Asterisk_server

We've previously covered in detail how to do this so read the article if you need a refresher course. To reiterate, the area code of this DID really doesn't matter because you're never going to give out the number. So use one of the free sources and save yourself some money. The real trick is you want to use a DID with unlimited, free inbound calls. Both IPkall and SIPgate provide that functionality at no cost.

Google Voice Setup. Log into your Google Voice account and click Settings, Phones, Add Another Phone. Add the area code and phone number of your DID. Be sure the DID is pointed to an extension on your PBX that you can answer since you have to go through Google's confirmation drill to successfully register the number. After the DID is confirmed, be sure there's a check mark beside this Google Voice destination so that incoming calls to your GV number will be routed to your Asterisk server.

While you're still in the Google Voice Setup, click on the General tab. Uncheck Enable Call Screening. Turn Call Presentation Off. And set CallerID to Display Caller's Number. Be aware that IPkall DIDs only forward your IPkall number as the CallerID number while SIPgate DIDs reportedly forward the actual number of the person calling you. If this matters to you, then you may prefer the SIPgate DID option. Finally, uncheck Do Not Disturb. Now click the Save Changes button.

Integrating Google Voice into Asterisk with FreePBX. Open FreePBX with a web browser and choose Setup, Trunks, Add Custom Trunk. Insert your GV number in the Outbound CallerID field and add the following Custom Dial String on the form and Submit Changes and reload the dialplan:

local/$OUTNUM$@custom-gv

Next, choose Setup, Outbound Routes, Add Route and fill in the following entries on the form:


Route Name: GoogleVoice
Dial Pattern: 48|NXXNXXXXXX
Trunk Seq: local/$OUTNUM$@custom-gv

Inbound Routes. Next, we need two Inbound Routes to get everything working. In setting up your DID with IPkall or SIPgate, you already should have created one inbound route for that provider. It already should be routing calls to an extension on your PBX. Now we need to create a Custom Destination for this inbound route and then reroute these calls there. In that way, your RingBack calls will be routed to some special dialplan code that drops these calls into a custom parking lot where the RingBack call is married up to the extension from which you placed the original call. Then we need to create another inbound route to manage normal incoming calls that are forwarded to your PBX whenever someone dials your Google Voice number.

To begin, choose Tools, Custom Destinations, Add Custom Destination and add an entry like this and then click the Submit Changes button:

Custom Destination: custom-park,s,1
Description: Custom GV-Park

Next choose Setup, Inbound Route and click on the inbound route you created previously for IPkall or SIPgate. Change the destination for these calls to Custom Destination: Custom GV-Park.

Now click on Add Incoming Route and create a new route for your incoming Google Voice calls. Give it any description you like but, for the DID number, it must be gv-incoming. You can leave most of the other defaults. Just be sure you set a destination for your incoming calls from Google Voice. It could be an extension, ring group, IVR, or whatever best meets your needs. The important entry here is gv-incoming for the DID number. Click the Submit button to save your entries. Ignore the warning that you've entered an oddball DID. We know what we're doing. 🙂

Setting Up the Parking Lot. While still in FreePBX, we need to create or adjust your existing settings in Setup, Parking Lot. The parking lot is used by FreePBX to simulate old key telephones where you could place a call on hold and then someone else in the office could pick up the call by clicking on the blinking key on their phone. The Asterisk equivalent is to press the flash hook and dial your Parking Lot Extension which then places the call in a Parking Lot space and tells you what the space number is. Someone else then can dial the number of that space to pick up the call. Our little trick today works like this. When you place an outbound call through Google Voice, your extension will be dumped into a reserved parking lot space. When Google Voice initiates the RingBack call before connecting the destination number you've dialed, that call will be sent to the same reserved parking lot space. The two calls then are joined, and you'll hear the parking lot number followed by ring tones as your call is connected by GV to its final destination. Our special thanks to Richard Bateman for his comment on the previous article and this terrific tip! He wins an Atomic Flash installer from Nerd Vittles. In addition, A. Godong wins an Atomic Flash installer for his tip on consolidating two DIDs into a single DID to manage both inbound and outbound GV calls. Just send us your addresses.

Now, where were we? Most FreePBX systems have a default setup for the Parking Lot. What we need to do is be sure you have reserved one more space in the parking lot than you actually need for day to day operation of your PBX. We'll use the last parking lot space number to manage outbound calling through Google Voice. Our entries look like the following:

Enable Parking Lot Feature: checked
Parking Lot Extension: 70
Number of Slots: 5
Parking Timeout: 30 seconds
Parking Lot Context: parkedcalls

Destination for Orphaned Calls: Terminate Call: Hangup

If you use our setup above, the Magic Number is 75 which is the fifth slot in the Parking Lot. If you use a different Parking Lot extension or number of slots, here's how to calculate the Magic Number. Start counting the slots beginning with one more than the Parking Lot Extension. When you get to the last slot in the number of slots you've specified, that's your Parking Lot Magic Number. Write it down. You'll need it in a second when you run our GV installation script.

Save your entries and reload the Asterisk dialplan when prompted.

Integrating pygooglevoice. Now we're ready to complete the setup by running our revised script which loads pygooglevoice and sets up your dialplan in extensions_custom.conf. You'll need 5 pieces of information to run the script so write them down before you begin:

1. Your 10-digit Google Voice phone number
2. Your Google Voice email address
3. Your Google Voice password (no spaces!)
4. Your 11-digit RingBack DID (16781234567)
5. Your Parking Lot Magic Number

A word of caution: If you used a gMail address to set up your Google Voice account, it's possible to have different gMail and Google Voice passwords. For this to work, you'll need to enter your gMail password, not your Google Voice password (assuming they're different).

Now log into your Asterisk server as root and issue the following commands:

cd /root
wget http://bestof.nerdvittles.com/applications/gv/install-gv-new
chmod +x install-gv-new
./install-gv-new

Google Voice Speed Dials. For frequently called numbers, you can add speed dials by inserting entries in the [from-internal-custom] context of extensions_custom.conf that look like the example below where 333 is the speed dial number and 6781234567 is the area code and number to call. Be sure to reload your Asterisk dialplan to activate them.

exten => 333,1,Dial(local/6781234567@custom-gv,300)

Congratulations! You now have what we hope will be flawless and free U.S. calling on your Asterisk system using Google Voice. No gimmicks, no strings, no cost. Enjoy!

Finally, one additional word of caution. Both Google Voice and this call design are set up for a single call at a time. There are no safeguards to prevent multiple calls, but that may violate the Google Voice terms of service.

Asterisk 1.6 Solution. Several readers now have documented the procedure for implementing the Asterisk 1.6 bridge technology to make outbound Google Voice calls. You can read all about it here.

Tweaking Previous Setups. If you installed pygooglevoice using our previous tutorial, here's what you need to do. First, log into your Asterisk server as root and issue the following commands:

cd /etc/asterisk
nano -w extensions_custom.conf

Scroll to the bottom of the file by pressing Ctrl-W then Ctrl-V. Move up the file using up arrow until you reach [custom-gv]. Press Ctrl-K repeatedly to delete all of the lines in the [custom-gv] context. If you get to another line that starts with a label in brackets like [this], STOP deleting. Once you've deleted all of the lines in the [custom-gv] context, save the file: Ctrl-X, Y, and press Enter.

Now continue reading this article by jumping up to the Google Voice Setup topic. The Custom Trunk entry and the GoogleVoice outbound route will already be in your FreePBX system so there's no need to repeat those two steps. You will need to perform the remaining FreePBX steps beginning at the Inbound Routes topic and continuing on with Setting Up the Parking Lot. Finally, when you run the new installation script, it will detect that pygooglevoice is already on your system and will skip that step but will install the new custom contexts in extensions_custom.conf using your new settings. Enjoy!


Thought for the Day. Which is more arbitrary: (1) Apple snubs Google Voice or (2) Google Voice snubs SIP? Pays to look in the mirror occasionally.


Best Read of the Week. Memo to Steve Jobs and Apple: Stop Being A Jerk!


Need help with Asterisk? Visit the PBX in a Flash Forum.
Or Try the New, Free PBX in a Flash Conference Bridge.


whos.amung.us If you're wondering what your fellow man is reading on Nerd Vittles these days, wonder no more. Visit our new whos.amung.us statistical web site and check out what's happening. It's a terrific resource both for us and for you.


Special Thanks to Our Generous Sponsors


FULL DISCLOSURE: ClearlyIP, Skyetel, Vitelity, DigitalOcean, Vultr, VoIP.ms, 3CX, Sangoma, TelecomsXchange and VitalPBX have provided financial support to Nerd Vittles and our open source projects through advertising, referral revenue, and/or merchandise. As an Amazon Associate and Best Buy Affiliate, we also earn from qualifying purchases. We’ve chosen these providers not the other way around. Our decisions are based upon their corporate reputation and the quality of their offerings and pricing. Our recommendations regarding technology are reached without regard to financial compensation except in situations in which comparable products at comparable pricing are available from multiple sources. In this limited case, we support our sponsors because our sponsors support us.

BOGO Bonaza: Enjoy state-of-the-art VoIP service with a $10 credit and half-price SIP service on up to $500 of Skyetel trunking with free number porting when you fund your Skyetel account. No limits on number of simultaneous calls. Quadruple data center redundancy. $25 monthly minimum spend required. Tutorial and sign up details are here.

The lynchpin of Incredible PBX 2020 and beyond is ClearlyIP components which bring management of FreePBX modules and SIP phone integration to a level never before available with any other Asterisk distribution. And now you can configure and reconfigure your new Incredible PBX phones from the convenience of the Incredible PBX GUI.

VitalPBX is perhaps the fastest-growing PBX offering based upon Asterisk with an installed presence in more than 100 countries worldwide. VitalPBX has generously provided a customized White Label version of Incredible PBX tailored for use with all Incredible PBX and VitalPBX custom applications. Follow this link for a free test drive!
 

Special Thanks to Vitelity. Vitelity is now Voyant Communications and has halted new registrations for the time being. Our special thanks to Vitelity for their unwavering financial support over many years and to the many Nerd Vittles readers who continue to enjoy the benefits of their service offerings. We will keep everyone posted on further developments.


Some Recent Nerd Vittles Articles of Interest...