Home » Posts tagged 'gui'

Tag Archives: gui

The Most Versatile VoIP Provider: FREE PORTING

Adding the Linux XFCE GUI to Incredible PBX 2021

blank

One of the most requested add-ons for Incredible PBX® is a graphical user interface for Linux. And today we’ll show you the quick and easy way to add XFCE 4 to your Debian 10 platform. What it gets you is simple access to a number of Linux applications and utilities which only run inside a GUI. These include the Firefox browser, LibreOffice with Microsoft Office compatibility, ImageMagick, media players, a FileManager GUI, and Linux utilities such as TimeShift and gparted.

None of these applications will run inside of SSH. So you’ll need an app such as VNC which is included with most cloud platforms by simply clicking on the Console option inside the cloud server’s management portal. To install XFCE on your Incredible PBX 2021 Debian platform, log in as root using SSH or Putty and issue the following commands:

apt-get update
apt-get install task-xfce-desktop
reboot

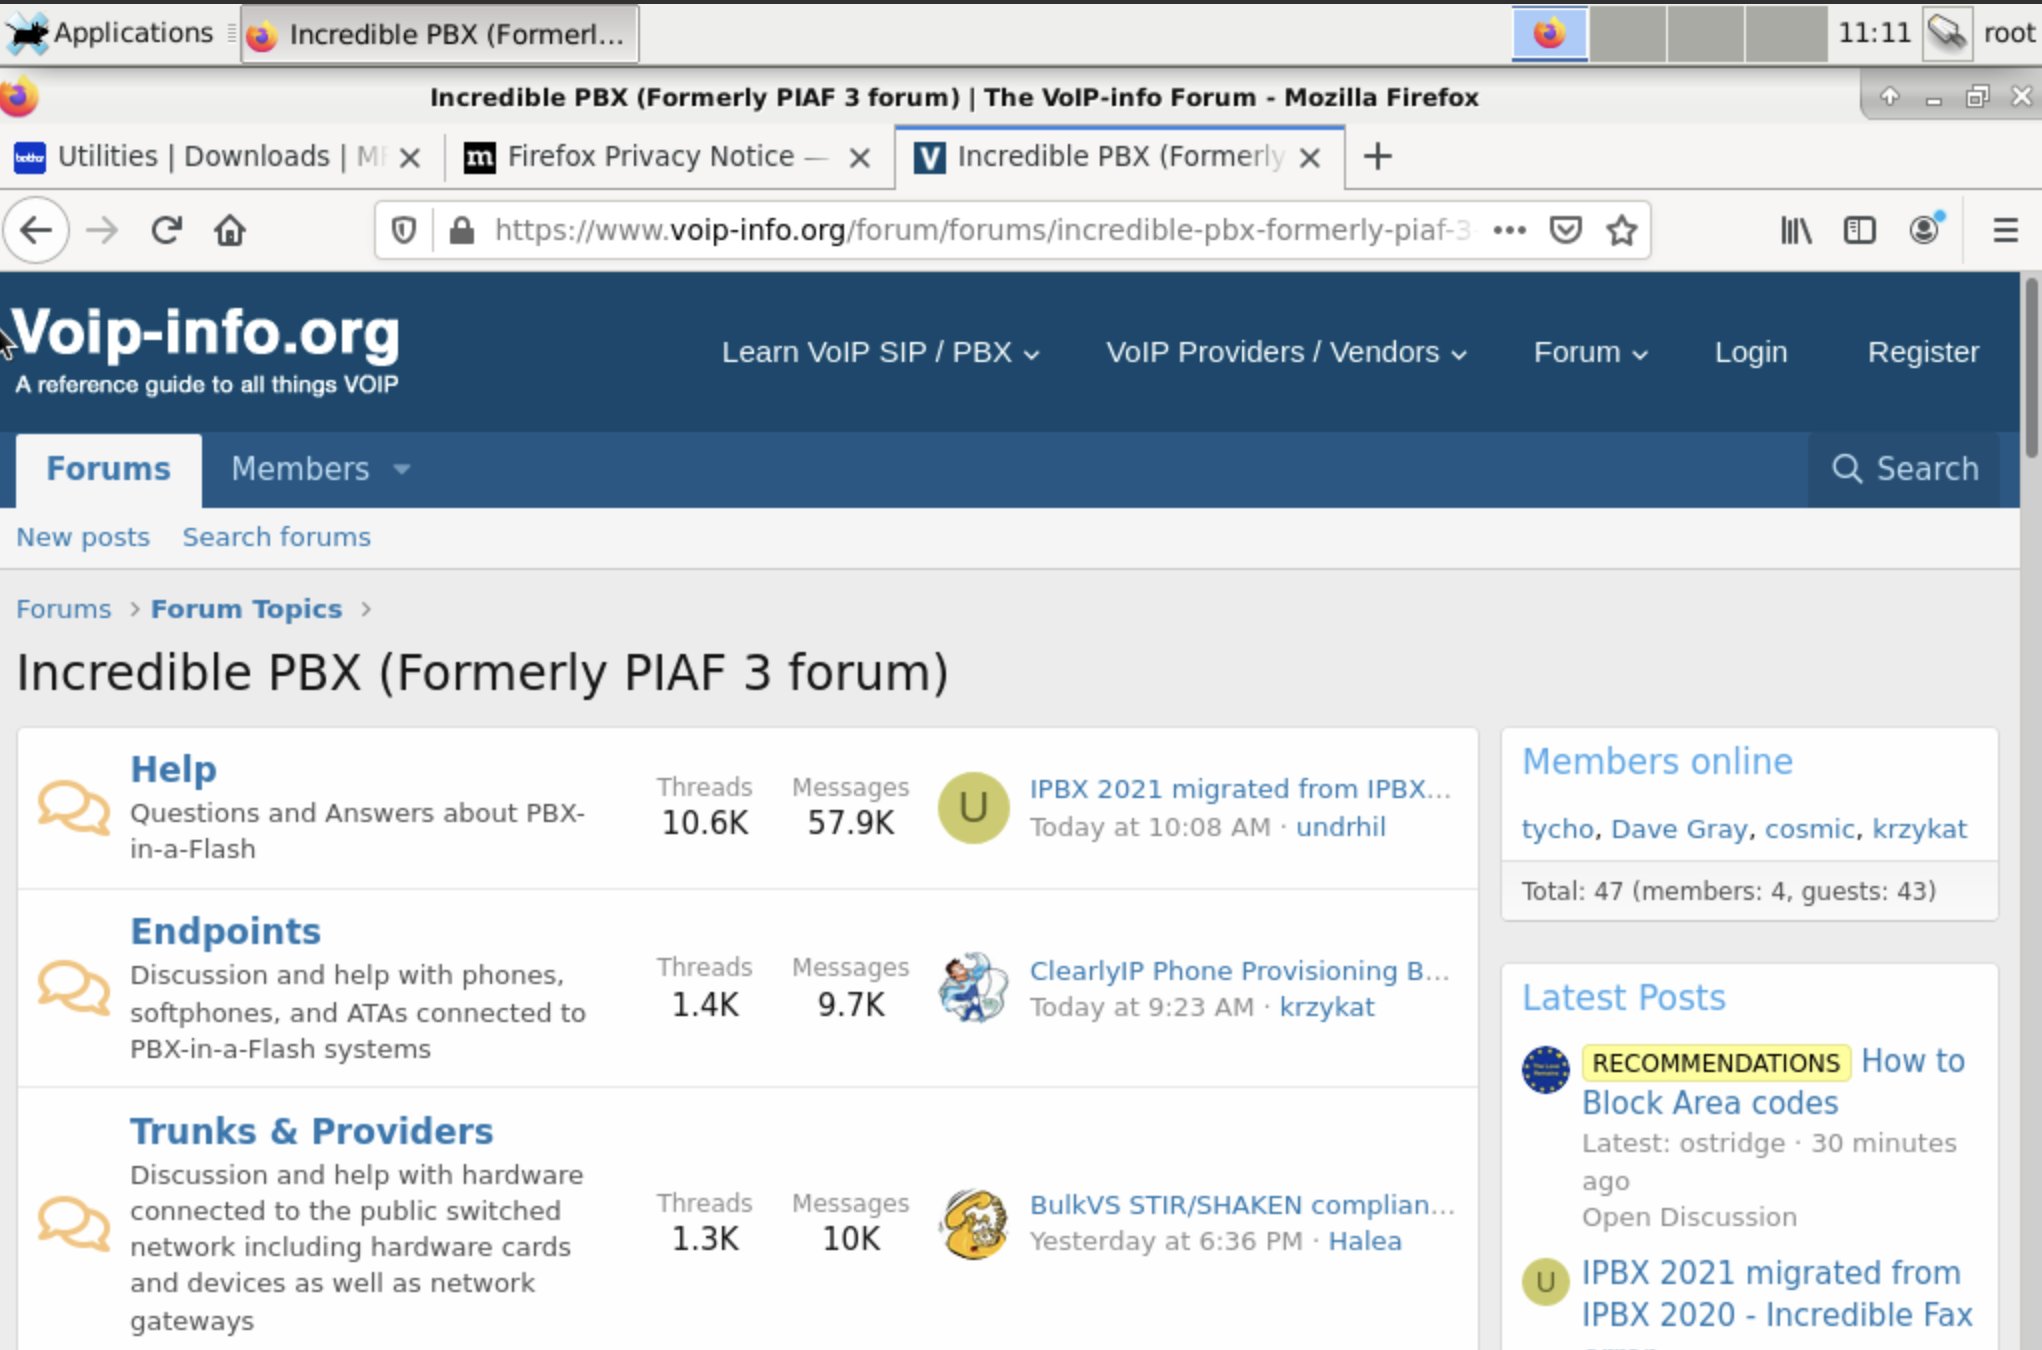
Once your server has rebooted, click on the Console icon in your cloud management portal or in VMware ESXi portal and login with your root credentials when prompted:

blank

Double-click on the Home folder icon and the Home menu for the root user will open:
blank

Icons at the bottom of the display allow you to minimize open windows as well as access the terminal emulator, file manager, web browser, application finder, and your root directory.

At the top of the display, you’ll find tabs for all of your open windows including Applications which provides access to all of the installed GUI applications:

blank

CrownCloud & RackNerd Setup for Remote VNC Access

If you’re running Incredible PBX 2021 on CrownCloud or RackNerd or any other provider using the SolusVM Control Panel, here are the steps for remote VNC access. First, login to your Control Panel and click on the VNC Access button. Write down the IP address, port number, and password for remote VNC access. Next, install the appropriate VNC Viewer for your desktop computer from RealVNC. Open the VNC Viewer app on your desktop and enter the IP address followed by a colon and the port number that you wrote down above. When prompted for your password, enter the VNC password assigned by your provider. You then will get a login screen to enter your root username and root password for Incredible PBX 2021. NOTE: The public IP address of your desktop computer must be whitelisted in IPtables using the All-Access option 0 with add-ip or add-fqdn in the /root folder of your server.

Vultr & Digital Ocean Setup for Remote VNC Access

If you’re running Incredible PBX 2021 on Vultr, Digital Ocean, and most other platforms including VMware, here are the additional steps to gain remote VNC access to your server’s public IP address or VMware’s private IP address. Issue the following commands after logging into your server as root:

apt-get -y install xorg lxde-core tightvncserver
reboot

Once your server has rebooted, log back in as root. First, set an 8-character VNC access password: tightvncserver :1

Next, edit the xstartup config file: nano ~/.vnc/xstartup

Uncomment the x-window-manager line. Immediately below that line, add the two new entries below and save the file:

x-window-manager &
lxterminal &
/usr/bin/lxsession -s LXDE &

Finally, stop and restart tightvncserver:

tightvncserver -kill :1
vncserver :1 -geometry 1024x768 -depth 16 -pixelformat rgb565

With VMware ESXi, substitute the following vncserver startup command:

vncserver :1 -geometry 800x600 -depth 16 -pixelformat rgb565

Now install the appropriate VNC Viewer for your desktop computer from RealVNC. Open the VNC Viewer app on your desktop and enter the IP address followed by :1. Enter your root credentials when prompted.

With VMware, you also can access VNC through the VMware ESXi Console by simply entering your root credentials.

NOTE: The public IP address of your desktop computer must be whitelisted in IPtables using the All-Access option 0 with add-ip or add-fqdn in the /root folder of your server.

Originally published: Friday, June 11, 2021


blank
Need help with Asterisk? Visit the VoIP-info Forum.


blank

Finding the Perfect Laptop: Meet the System76 Lemur Pro

blank

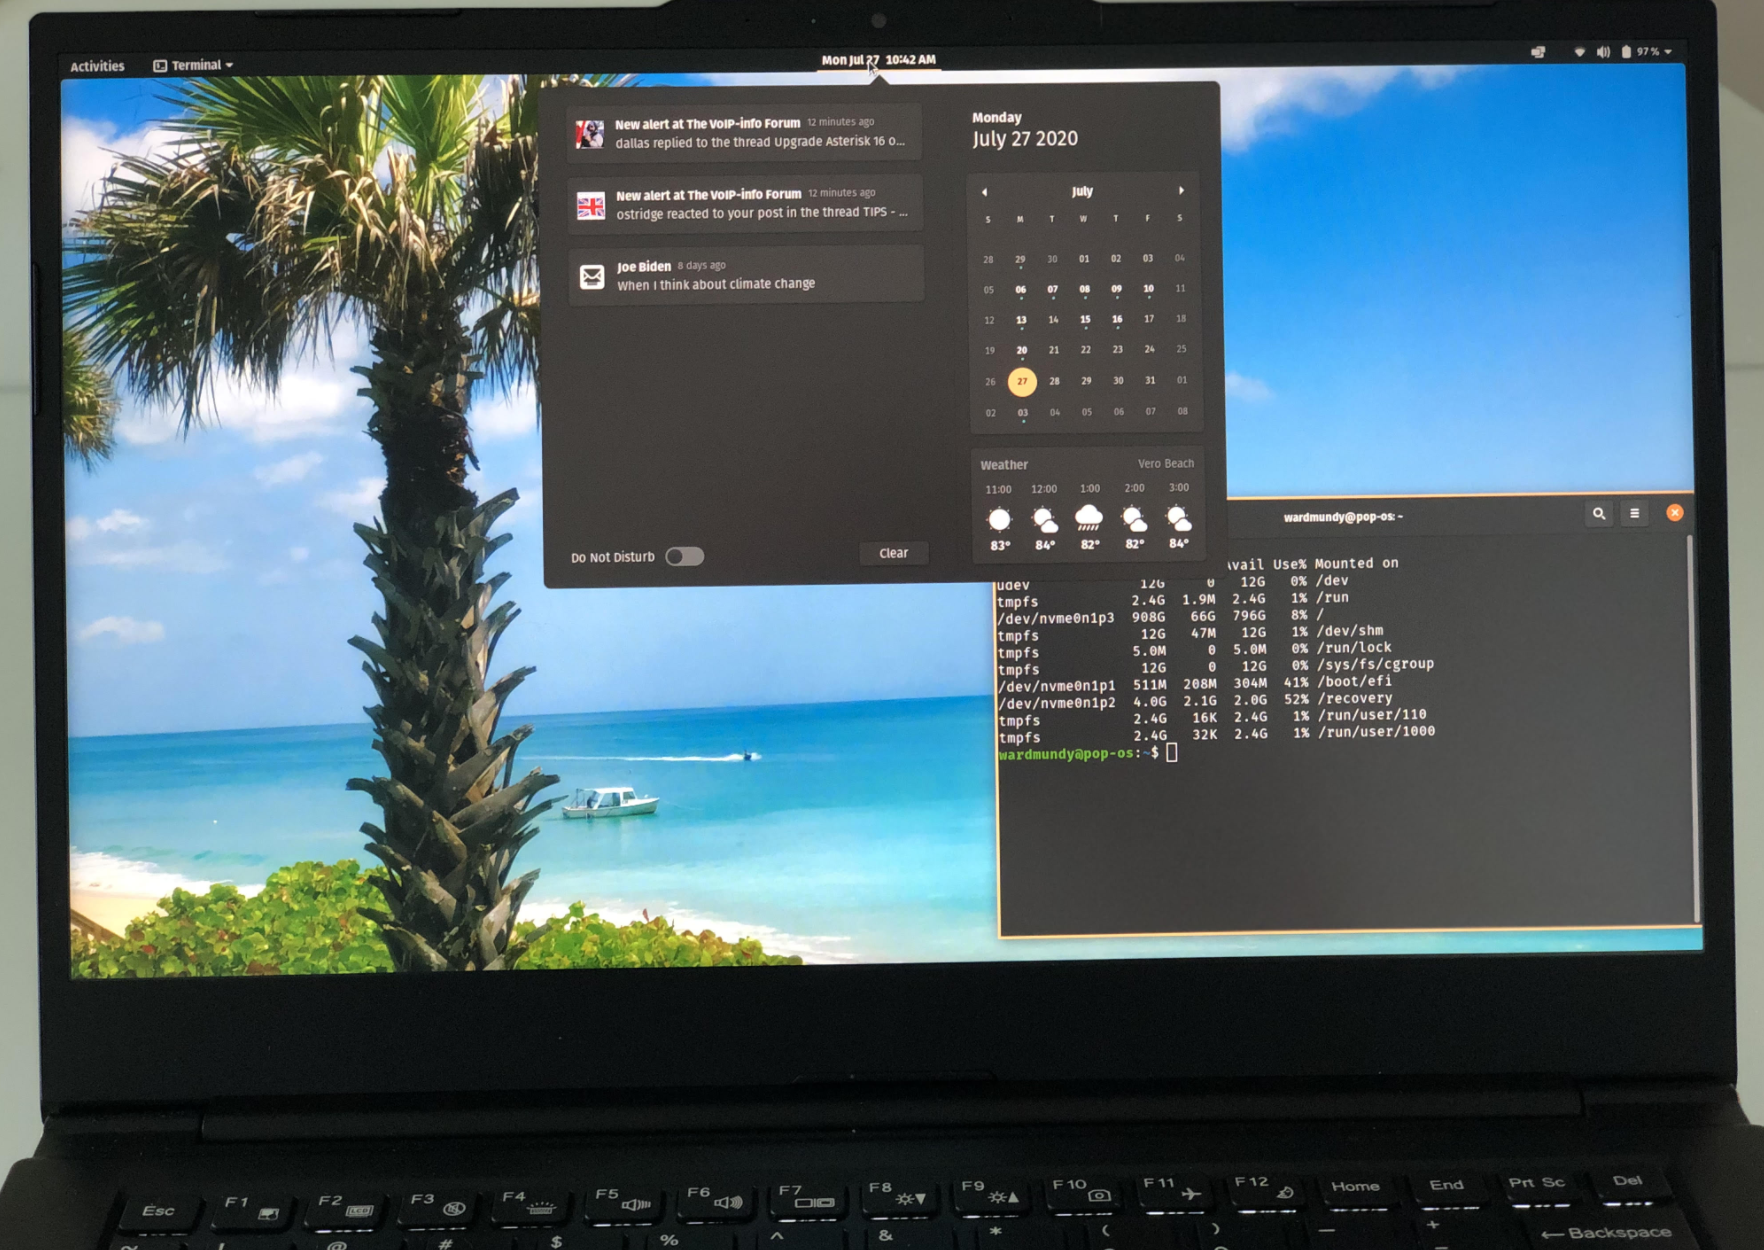
While we’ve been hunkered down in Vero Beach dodging the Covid-19 bullets, we spent a little time searching for a turnkey Linux notebook computer that could do everything a MacBook Pro could do… and more. The machine had to offer PORTS WITHOUT DONGLES plus the added benefits that only a pure Linux platform could provide. For $1099, our dream machine has arrived. The Lemur Pro is custom-built which means you order the 2.2 pound base computer with its 14-hour battery and then choose your operating system, CPU, RAM, storage devices, and warranty period. Shipping in the U.S. is free. We ended up at $1,322.21. In addition to 2 USB 3.0 Type-A slots, an HDMI port, a USB 3.1 Type-C w/ DisplayPort 1.2a, touchpad, stereo speakers, an audio jack, a webcam, and a backlit keyboard, the icing on the cake was a microSD slot which made the machine perfect for Raspberry Pi development.
blank

Software, of course, has always been what separated the Mac from the Linux desktops. No more! The System76 developers of the Lemur Pro have released their own flavor of Ubuntu. It’s a refined and open source desktop environment with most of the modern feature set available in either Windows or Mac OS. You can read all about Pop!_OS here. You can even download an ISO suitable for installation in VirtualBox if you just want to try it out for free.

blank

In addition to a robust desktop solution out of the box, Pop!_OS also includes an Automatic Update Utility to push out security fixes and software updates. And they have a terrific Pop!_Shop, an apt front-end, which is similar to Android’s Play Store or Apple’s App Store. All of the apps in Pop!_Shop have been engineered to work within Pop!_OS seamlessly, and they do. We also encountered no issues installing a traditional LAMP stack, PHPmyAdmin, VirtualBox, OpenVPN, or Twinkle, a SIP client to connect to Asterisk® and IncrediblePBX®. Of course you also can run the VirtualBox image of Incredible PBX 2020 on the Lemur Pro. And, if you’re ever curious how we build Incredible PBX images for the Raspberry Pi, here’s our soup-to-nuts tutorial using the Lemur Pro. We’ve also built the images for CrownCloud and VirtualBox on the Lemur Pro. So life is good.

blank

Booted up a Windows machine, or a Mac, or even an iPad Pro lately? Then you already know it takes about as long as making your own breakfast. Imagine our surprise with the Lemur Pro when the login prompt appeared in less than 10 seconds. There are other clever touches that are too numerous to mention. One that jumps out is our pet peeve about the MacBook Pro. Whenever your wrist happens to slide over the touchpad while you’re typing, the cursor magically jumps to some random place in your document as you continue to type. With the Lemur Pro, the touchpad is disabled whenever you are actively typing. Brilliant!
 

blank

Did we mention the tutorials? They are equally brilliant. Here’s one of many examples. In addition to a Quick Start Guide, there’s even a service manual. Remember those?


System76 purchases come with a 30-day, money back guarantee. What are you waiting for?
 

Originally published: Tuesday, August 4, 2020


blank
Need help with Asterisk? Visit the VoIP-info Forum.


Special Thanks to Our Generous Sponsors


FULL DISCLOSURE: ClearlyIP, Skyetel, Vitelity, DigitalOcean, Vultr, VoIP.ms, 3CX, Sangoma, TelecomsXchange and VitalPBX have provided financial support to Nerd Vittles and our open source projects through advertising, referral revenue, and/or merchandise. As an Amazon Associate and Best Buy Affiliate, we also earn from qualifying purchases. We’ve chosen these providers not the other way around. Our decisions are based upon their corporate reputation and the quality of their offerings and pricing. Our recommendations regarding technology are reached without regard to financial compensation except in situations in which comparable products at comparable pricing are available from multiple sources. In this limited case, we support our sponsors because our sponsors support us.

blankBOGO Bonaza: Enjoy state-of-the-art VoIP service with a $10 credit and half-price SIP service on up to $500 of Skyetel trunking with free number porting when you fund your Skyetel account. No limits on number of simultaneous calls. Quadruple data center redundancy. $25 monthly minimum spend required. Tutorial and sign up details are here.

blankThe lynchpin of Incredible PBX 2020 and beyond is ClearlyIP components which bring management of FreePBX modules and SIP phone integration to a level never before available with any other Asterisk distribution. And now you can configure and reconfigure your new Incredible PBX phones from the convenience of the Incredible PBX GUI.

blankVitalPBX is perhaps the fastest-growing PBX offering based upon Asterisk with an installed presence in more than 100 countries worldwide. VitalPBX has generously provided a customized White Label version of Incredible PBX tailored for use with all Incredible PBX and VitalPBX custom applications. Follow this link for a free test drive!
 

blankSpecial Thanks to Vitelity. Vitelity is now Voyant Communications and has halted new registrations for the time being. Our special thanks to Vitelity for their unwavering financial support over many years and to the many Nerd Vittles readers who continue to enjoy the benefits of their service offerings. We will keep everyone posted on further developments.


blank

Introducing Incredible PBX 11-12 with Incredible GUI for the Ubuntu 14 Platform

blank

On May 15, we turned the page on Asterisk® GUIs by introducing a new GUI that hopefully provides the best of both worlds. It preserves the GPL components of the FreePBX® product that many of us have nurtured for almost a decade while removing the commercial pieces that have introduced some friction into the equation for users and companies that simply wished to deploy or redistribute a graphical user interface for Asterisk in accordance with the free GPL licenses under which the product and its components were licensed. Last week we did much the same thing with the essential cloud component which serves as the lynchpin for GPL module administration within the GUI itself. Hopefully, these two tweaks will encourage Sangoma, the new owner of the FreePBX project, to do the right thing and get the non-commercial pieces of the project back on the right track moving forward. What we did not want to do was tarnish the incredibly hard work that dozens of developers in the open source community have poured into this project over the past decade. We continue to be amazed at what they’ve been able to achieve, and we salute their accomplishments. The Asterisk 12 and 13 revolution never would have been achieved without the contributions of the FreePBX development team. We think the new Incredible PBX GUI stands as a testament to what can be accomplished while preserving the true spirit of open source development and the terms of the GPL licenses under which this product and its numerous modules were licensed.

Two weeks ago, we introduced the all-new Incredible PBX with Incredible GUI for CentOS, Scientific Linux, and Oracle Linux. Last week we added a Cloud-based GPL repository and all the tools necessary to maintain it. Today we’re pleased to release the production-ready version for the Ubuntu 14 platform with all the bells and whistles including Incredible Fax featuring HylaFax and AvantFax. Today’s release mimics the functionality of the previous build for the CentOS platform with literally dozens of turnkey applications that show off the very best features of Asterisk®. In addition to Incredible PBX, you also get our new GPL repository to maintain release 12 of the GUI. No strings, no gotchas, and no murky licenses. Pure GPL!

Building an Ubuntu 14.04 Platform for Incredible PBX

As a result of the trademark and copyright morass, we’ve steered away from the bundled operating system in favor of a methodology that relies upon you to put in place the operating system platform on which to run PBX in a Flash or Incredible PBX. The good news is it’s easy! With many cloud-based providers1, you can simply click a button to choose your favorite OS flavor and within minutes, you’re ready to go. With many virtual machine platforms such as VirtualBox, it’s equally simple to find a pre-built Ubuntu 14.04 image or roll your own.

If you’re new to VoIP or to Nerd Vittles, here’s our best piece of advice. Don’t take our word for anything! Try it for yourself in the Cloud! You can build an Ubuntu 14.04 image on Digital Ocean in under one minute and install today’s Incredible PBX for Ubuntu 14.04 in about 15 minutes. Then try it out for two full months. It won’t cost you a dime. Use our referral link to sign up for an account. Enter a valid credit card to verify you’re who you say you are. Create an Ubuntu 14.04 (not 14.10!) 512MB droplet of the cheapest flavor ($5/mo.). Go to the Billing section of the site, and enter the following promo code: UBUNTUDROPLET. That’s all there is to it. A $10 credit will be added to your account, and you can play to your heart’s content. Delete droplets, add droplets, and enjoy the free ride!

For today, we’ll walk you through building your own stand-alone server using the Ubuntu 14.04 mini.iso. If you’re using Digital Ocean in the Cloud, skip down to Installing Incredible PBX 11-12 (HINT: 11 tells you the Asterisk release and 12 tells you the GUI release). If you’re using your own hardware, to get started, download the 64-bit Ubuntu 14.04 "Trusty Tahr" Minimal ISO from here. Then burn it to a CD/DVD or thumb drive and boot your dedicated server from the image. Remember, you’ll be reformatting the drive in your server so pick a machine you don’t need for other purposes.

For those that would prefer to build your Ubuntu 14.04 Wonder Machine using VirtualBox on any Windows, Mac, or existing Linux Desktop, here are the simple steps. Create a new virtual machine specifying the 64-bit version of Ubuntu. Allocate 1024MB of RAM (512MB also works fine with a swap file) and at least 20GB of disk space using the default hard drive setup in all three steps. In Settings, click System and check Enable I/O APIC and uncheck Hardware Clock in UTC Time. Click Audio and Specify then Enable your sound card. Click Network and Enable Network Adapter for Adapter 1 and choose Bridged Adapter. Finally, in Storage, add the Ubuntu 14.04 mini.iso to your VirtualBox Storage Tree as shown below. Then click OK and start up your new virtual machine. Simple!

blank

Here are the steps to get Ubuntu 14.04 humming on your new server or virtual machine once you’ve booted up. If you can bake cookies from a recipe, you can do this:

UBUNTU mini.iso install:
Choose language
Choose timezone
Detect keyboard
Hostname: incrediblepbx < continue >
Choose mirror for downloads
Confirm archive mirror
Leave proxy blank unless you need it
< continue >
** couple minutes of whirring as initial components are loaded **
New user name: incredible
< continue >
Account username: incredible
< continue >
Account password: makeitsecure
< continue >
Encrypt home directory < no >
Confirm time zone < yes >
Partition disks: Guided - use entire disk and set up LVM
Confirm disk to partition
Write changes to disks and configure LVM
Whole volume? < continue>
Write changes to disks < yes> < -- last chance to preserve your disk drive!
** about 15 minutes of whirring during base system install ** < no touchy anything>
** another 5 minutes of whirring during base software install ** < no touchy anything>
Upgrades? Install security updates automatically
** another 5 minutes of whirring during more software installs ** < no touchy anything>
Software selection: *Basic Ubuntu server (only!)
** another couple minutes of whirring during software installs ** < no touchy anything>
Grub boot loader: < yes>
UTC for system clock: < no>
Installation complete: < continue> after removing installation media
** on VirtualBox, PowerOff after reboot and remove [-] mini.iso from Storage Tree & restart VM
login as user: incredible
** enter user incredible's password **
sudo passwd
** enter incredible password again and then create secure root user password **
su root
** enter root password **
apt-get update
apt-get install ssh -y
sed -i 's|without-password|yes|' /etc/ssh/sshd_config
sed -i 's|yes"|without-password"|' /etc/ssh/sshd_config
sed -i 's|"quiet"|"quiet text"|' /etc/default/grub
update-grub
ifconfig
** write down the IP address of your server from ifconfig results
reboot
** login via SSH to continue **

Installing Incredible PBX 11-12 on Your Ubuntu 14.04 Server

Adding Incredible PBX 11-12 to a running Ubuntu 14.04 server is a walk in the park. To restate the obvious, your server needs a reliable Internet connection to proceed. Using SSH (or Putty on a Windows machine), log into your new server as root at the IP address you deciphered in the ifconfig step at the end of the Ubuntu install procedure above. First, make sure to run the update step for Ubuntu below before you begin the install. This is especially important if you’re using a cloud-based Ubuntu 14 server.

WARNING: As of early June, 2016, Ubuntu has introduced a bug in their latest MySQL upgrade. Do NOT run apt-get upgrade for the time being, or your Incredible PBX install will fail.

apt-get update && touch /root/COPYING

WARNING: If you’re using a 512MB droplet at Digital Ocean, be advised that the DO Ubuntu setup does NOT include a swap file. This may cause serious problems when you run out of RAM. Uncomment ./create-swapfile-DO line below to create a 1GB swap file which will be activated whenever you exceed 90% RAM usage on Digital Ocean.

Now let’s begin the Incredible PBX 11-12 install. Log back in as root and issue the following commands:

cd /root
wget http://incrediblepbx.com/incrediblepbx11-12.2-ubuntu14.tar.gz
tar zxvf incrediblepbx*
#./create-swapfile-DO
./Incredible*

Once you have agreed to the license agreement and terms of use, press Enter and go have a 30-minute cup of coffee. The Incredible PBX installer runs unattended so find something to do for a bit unless you just like watching code compile. When you see "Have a nice day", your installation is complete. Write down your admin password for the GUI as well as your three "knock" ports for PortKnocker. If you forget your admin password or wish to change it, just run: /root/admin-pw-change. Retrieve your PortKnocker setup like this: cat /root/knock.FAQ.

Log out and back in as root and you should be greeted with a status display that looks something like this after the Automatic Update Utility runs:

blank

Perform the following steps:

Make your root password very secure: passwd
Set your correct time zone: ./timezone-setup
Restart Asterisk: amportal restart
Create admin password for web apps: htpasswd -b /etc/pbx/wwwpasswd admin newpassword
Make a copy of your other passwords: cat passwords.FAQ
Make a copy of your Knock codes: cat knock.FAQ
Decipher IP address and other info about your server: status

Incredible PBX includes an automatic update utility which downloads important updates whenever you log into your server as root. We recommend you log in once a week to keep your server current. Now would be a good time to log out and back into your server at the Linux command line to bring your server up to current specs.

You can access the Incredible PBX GUI using your favorite web browser to configure your server. Just enter the IP address shown in the status display.

blank

When the Kennonsoft menu (shown above) appears, click on the User tab to open the Admin menu. Then click on Incredible GUI Administration to access the Incredible PBX GUI. The default username is admin with the randomized password you wrote down above. If desired, you can change them after logging into the GUI by clicking Admin -> Administrators -> admin. Enter a new password and click Submit Changes then Apply Config. Now edit extension 701 so you can figure out (or change) the randomized passwords that were set up for default 701 extension and voicemail: Applications -> Extensions -> 701.

blank

Setting Up a Soft Phone to Use with Incredible PBX

Now you’re ready to set up a telephone so that you can play with Incredible PBX. We recommend YateClient which is free. Download it from here. Run YateClient once you’ve installed it and enter the credentials for the 701 extension on Incredible PBX. You’ll need the IP address of your server plus your extension 701 password. Choose Settings -> Accounts and click the New button. Fill in the blanks using the IP address of your server, 701 for your account name, and whatever password you created for the extension. Click OK.

blank

Once you are registered to extension 701, close the Account window. Then click on YATE’s Telephony Tab and place some test calls to the numerous apps that are preconfigured on Incredible PBX. Dial a few of these to get started:

123 - Reminders
222 - ODBC Demo (use acct: 12345)
947 - Weather by ZIP Code
951 - Yahoo News
*61 - Time of Day
*68 - Wakeup Call
TODAY - Today in History

The next step is establishing an interface on your PBX to connect to the telephones in the rest of the world. If you live in the U.S., the easiest way (at least for now) is to use an existing (free) Google Voice account. Google has threatened to shut this down but as this is written, it still works with previously set up Google Voice accounts. The more desirable long-term solution is to choose several SIP providers and set up redundant trunks for your incoming and outbound calls. The PIAF Forum includes dozens of recommendations to get you started.

blank

Configuring Google Voice

If you want to use Google Voice, you’ll need a dedicated Google Voice account to support Incredible PBX. If you want to use the inbound fax capabilities of Incredible Fax 11, then you’ll need an additional Google Voice line that can be routed to the FAX custom destination using the GUI. The more obscure the username (with some embedded numbers), the better off you will be. This will keep folks from bombarding you with unsolicited Gtalk chat messages, and who knows what nefarious scheme will be discovered using Google messaging six months from now. So keep this account a secret!

We’ve tested this extensively using an existing Google Voice account, and inbound calling is just not reliable. The reason seems to be that Google always chooses Gmail chat as the inbound call destination if there are multiple registrations from the same IP address. So, be reasonable. Do it our way! Use a previously configured and dedicated Gmail and Google Voice account, and use it exclusively with Incredible PBX 11.

IMPORTANT: Be sure to enable the Google Chat option as one of your phone destinations in Settings, Voice Setting, Phones. That’s the destination we need for The Incredible PBX to work its magic! Otherwise, all inbound and outbound calls will fail. If you don’t see this option, you’re probably out of luck. Google has disabled the option in newly created accounts as well as some old ones that had Google Chat disabled. Now go back to the Google Voice Settings.

While you’re still in Google Voice Settings, click on the Calls tab. Make sure your settings match these:

  • Call ScreeningOFF
  • Call PresentationOFF
  • Caller ID (In)Display Caller’s Number
  • Caller ID (Out)Don’t Change Anything
  • Do Not DisturbOFF
  • Call Options (Enable Recording)OFF
  • Global Spam FilteringON

Click Save Changes once you adjust your settings. Under the Voicemail tab, plug in your email address so you get notified of new voicemails. Down the road, receipt of a Google Voice voicemail will be a big hint that something has come unglued on your PBX.

One final word of caution is in order regardless of your choice of providers: Do NOT use special characters in any provider passwords, or nothing will work!

Now you’re ready to set up your Google Voice trunk in the GUI. After logging in with your browser, click the Connectivity tab and choose Google Voice/Motif. To Add a new Google Voice account, just fill out the form. Do NOT check the third box or incoming calls will never ring!

blank

IMPORTANT LAST STEP: Google Voice will not work unless you restart Asterisk from the Linux command line at this juncture. Using SSH, log into your server as root and issue the following command: amportal restart.

If you have trouble getting Google Voice to work (especially if you have previously used your Google Voice account from a different IP address), try this Google Voice Reset Procedure. It usually fixes connectivity problems. If it still doesn’t work, enable Less Secure Apps using this Google tool.

And here’s another way to access Google Voice securely using an inexpensive commercial SIP gateway:

Troubleshooting Audio and DTMF Problems

You can avoid one-way audio on calls and touchtones that don’t work by entering these simple settings in the GUI: Settings -> Asterisk SIP Settings. Just plug in your public IP address and your private IP subnet. Then set ULAW as the only Audio Codec.

blank

Adding Speech Recognition to Incredible PBX

To support many of our applications, Incredible PBX has included Google’s speech recognition service for years. These applications include Weather Reports by City (949), AsteriDex Voice Dialing by Name (411), and Wolfram Alpha for Asterisk (4747), all of which use Lefteris Zafiris’ terrific speech-recog AGI script. Unfortunately (for some), Google now has tightened up the terms of use for their free speech recognition service. Now you can only use it for "personal and development use." If you meet those criteria, keep reading.

First, log into your server as root and issue the following commands:

# for Ubuntu and Debian platforms
apt-get clean
apt-get install libjson-perl flac -y
# for RedHat and CentOS platforms
yum -y install perl-JSON
# for all Linux platforms
cd /var/lib/asterisk/agi-bin
mv speech-recog.agi speech-recog.last.agi
wget --no-check-certificate https://raw.githubusercontent.com/zaf/asterisk-speech-recog/master/speech-recog.agi
chown asterisk:asterisk speech*
chmod 775 speech*
nano -w speech-recog.agi

Here’s how to activate speech recognition on Incredible PBX. Don’t skip any steps!

Now you’re ready to try out the speech recognition apps. Dial 949 and say the name of a city and state/province/country to get a current weather forecast from Yahoo. Dial 411 and say "American Airlines" to be connected to American.

To use Wolfram Alpha by phone, you first must install it. Obtain your free Wolfram Alpha APP-ID here. Then run the one-click installer: /root/wolfram/wolframalpha-oneclick.sh. Insert your APP-ID when prompted. Now dial 4747 to access Wolfram Alpha by phone and enter your query, e.g. "What planes are overhead." Read the Nerd Vittles tutorial for additional examples and tips.

A Few Words about the Incredible PBX Security Model for Ubuntu

Incredible PBX for Ubuntu 14 is a very secure, turnkey PBX implementation. As configured, your server is protected by both Fail2Ban and a hardened configuration of the IPtables Linux firewall. Nobody can access your PBX without blank your credentials AND blank an IP address that is either on your private network or that matches the IP address of your server or the PC from which you installed Incredible PBX. Incredible PBX is preconfigured to let you connect to many of the leading SIP hosting providers without additional firewall tweaking.

You can whitelist additional IP addresses for remote access in several ways. First, you can use the command-line utilities: /root/add-ip and /root/add-fqdn. You can also remove whitelisted IP addresses by running /root/del-acct. Second, you can dial into extension 864 (or use a DID pointed to extension 864 aka TM4) and enter an IP address to whitelist. Before Travelin’ Man 4 will work, you’ll need to add credentials for each caller using the tools in /root/tm4. You must add at least one account before dial-in whitelisting will be enabled. Third, you can temporarily whitelist an IP address by successfully executing the PortKnocker 3-knock code established for your server. You’ll find the details and the codes in /root/knock.FAQ. Be advised that IP addresses whitelisted with PortKnocker (only!) go away whenever your server is rebooted or the IPtables firewall is restarted. For further information on the PortKnocker technology and available clients for iOS and Android devices, review the Nerd Vittles tutorial.

HINT: The reason that storing your PortKnocker codes in a safe place is essential is because it may be your only available way to gain access to your server if your IP address changes. You obviously can’t use the command-line tools to whitelist a new IP address if you cannot gain access to your server at the new IP address.

We always recommend you also add an extra layer of protection by running your server behind a hardware-based firewall with no Internet port exposure, but that’s your call. If you use a hardware-based firewall, be sure to map the three PortKnocker ports to the internal IP address of your server!

The NeoRouter VPN client also is included for rock-solid, secure connectivity for remote users. Read our previous tutorial for setup instructions.

As one would expect, the IPtables firewall is a complex piece of software. If you need assistance configuring it, visit the PIAF Forum for some friendly assistance.

Adding Incredible Fax 11 to Your Server

Once you’ve completed the Incredible PBX install, log out and log back in to load the latest automatic updates. Then reboot. Now you’re ready to continue your adventure by installing Incredible Fax 11 for Ubuntu. Special thanks to Josh North for all his hard work on this! The latest download includes the Incredible Fax 11 installer. So just run the script:

cd /root
./incrediblefax11_ubuntu14.sh

Accept all of the defaults during the installation process. IMPORTANT: Once you complete the install, reboot your server. After rebooting, log into the GUI and choose Module Admin and enable the AvantFax module. When you log out of the GUI, there now will be an option for AvantFax on the GUI’s main login screen. Choose it and enter admin:password to login and change your default password. You also can set your AvantFax admin password by logging into the Linux CLI and… /root/avantfax-pw-change.

Incredible Backup and Restore

We’re pleased to introduce our latest backup and restore utilities for Incredible PBX. Running /root/incrediblebackup will create a backup image of your server in /tmp. This backup image then can be copied to any other medium desired for storage. To restore it to another Incredible PBX 11 server, simply copy the image to a server running Asterisk 11 and the Incredible PBX 11-12 GUI. Then run /root/incrediblerestore. Doesn’t get much simpler than that.

Incredible PBX Automatic Update Utility

Every time you log into your server as root, Incredible PBX will ping the IncrediblePBX.com web site to determine whether one or more updates are available to bring your server up to current specs. We recommend you log in at least once a week just in case some new security vulnerability should come along. Also be sure to check the PBX in a Flash RSS Feed inside the GUI for the latest security alerts.

Mastering the Incredible PBX Applications

Your next stop should be a quick read of the Application User’s Guide for Incredible PBX. Even though the target audience was Raspberry Pi users, the feature set is identical, and this guide will tell you everything you need to know about the dozens of applications for Asterisk that have been installed on your new server.

We also want to encourage you to sign up for an account on the PIAF Forum and join the discussion. In addition to providing first-class, free support, we think you’ll enjoy the camaraderie. Come join us!

Originally published: Monday, June 1, 2015


blankSupport Issues. With any application as sophisticated as this one, you’re bound to have questions. Blog comments are a terrible place to handle support issues although we welcome general comments about our articles and software. If you have particular support issues, we encourage you to get actively involved in the PBX in a Flash Forums. It’s the best Asterisk tech support site in the business, and it’s all free! Please have a look and post your support questions there. Unlike some forums, ours is extremely friendly and is supported by literally hundreds of Asterisk gurus and thousands of users just like you. You won’t have to wait long for an answer to your question.


blank
Need help with Asterisk? Visit the PBX in a Flash Forum.


Special Thanks to Our Generous Sponsors


FULL DISCLOSURE: ClearlyIP, Skyetel, Vitelity, DigitalOcean, Vultr, VoIP.ms, 3CX, Sangoma, TelecomsXchange and VitalPBX have provided financial support to Nerd Vittles and our open source projects through advertising, referral revenue, and/or merchandise. As an Amazon Associate and Best Buy Affiliate, we also earn from qualifying purchases. We’ve chosen these providers not the other way around. Our decisions are based upon their corporate reputation and the quality of their offerings and pricing. Our recommendations regarding technology are reached without regard to financial compensation except in situations in which comparable products at comparable pricing are available from multiple sources. In this limited case, we support our sponsors because our sponsors support us.

blankBOGO Bonaza: Enjoy state-of-the-art VoIP service with a $10 credit and half-price SIP service on up to $500 of Skyetel trunking with free number porting when you fund your Skyetel account. No limits on number of simultaneous calls. Quadruple data center redundancy. $25 monthly minimum spend required. Tutorial and sign up details are here.

blankThe lynchpin of Incredible PBX 2020 and beyond is ClearlyIP components which bring management of FreePBX modules and SIP phone integration to a level never before available with any other Asterisk distribution. And now you can configure and reconfigure your new Incredible PBX phones from the convenience of the Incredible PBX GUI.

blankVitalPBX is perhaps the fastest-growing PBX offering based upon Asterisk with an installed presence in more than 100 countries worldwide. VitalPBX has generously provided a customized White Label version of Incredible PBX tailored for use with all Incredible PBX and VitalPBX custom applications. Follow this link for a free test drive!
 

blankSpecial Thanks to Vitelity. Vitelity is now Voyant Communications and has halted new registrations for the time being. Our special thanks to Vitelity for their unwavering financial support over many years and to the many Nerd Vittles readers who continue to enjoy the benefits of their service offerings. We will keep everyone posted on further developments.


Some Recent Nerd Vittles Articles of Interest…

  1. With some providers including ones linked in this article, Nerd Vittles receives referral fees which assist in keeping the Nerd Vittles lights burning brightly. []

Introducing Incredible PBX with Incredible GUI for CentOS and Scientific Linux


[iframe-popup id="4″]
If you’re looking for a pure GPL, open source Asterisk® aggregation with a pure GPL, open source graphical user interface, then today’s your lucky day. Incredible PBX™ with the new Incredible GUI for CentOS 6.5 and 7 is an independent aggregation based solely upon GPL code. Because of the nature of the CentOS platform, it was built from the ground up. The Incredible PBX installers are pure GPL open source code so you are more than welcome (encouraged!) to examine it, improve upon it, and share your discoveries with all of us.

Incredible PBX for CentOS 6.5 and 7 follows our standard install procedure which means it’s up to you to first create a CentOS 6.5 or 7 platform. If you prefer Scientific Linux or Oracle Linux, feel free to start there. All work equally well as a base platform and are supported by a worldwide group of developers. Once your OS platform is in place, simply run the Incredible PBX installer of your choice. After 30-60 minutes of whirring, you’ll end up with an awesome (free) state-of-the-art Asterisk-based VoIP server with the very latest version of Asterisk 11 as well as dozens of turnkey Incredible PBX applications. So enjoy a nice lunch while the Incredible PBX installer works its magic. No user intervention is required during the installation procedure. All text-to-speech (TTS) applications work out of the box. You can add Google’s Speech Recognition to many Incredible PBX applications by following our 5-minute tutorial.

Installing a Base CentOS Operating System

UPDATE AND WARNING: CentOS 7 build is not yet ready for prime time. Stick with 6.5/6.6.

Let’s begin by installing 64-bit CentOS 6.5 or 7 on your favorite hardware or Desktop. Or you may prefer to use a Cloud provider1 that already offers a preconfigured CentOS image. In the latter case, you can skip this section.

For those using a dedicated hardware platform or wishing to install CentOS as a virtual machine, the drill is the same. Start by downloading the 64-bit CentOS 6.5 minimal ISO or the CentOS 7 minimal ISO or . Burn the ISO to a DVD unless you’ll be booting from the ISO on a virtual machine platform such as VirtualBox. On virtual platforms, we recommend at least 1GB RAM and a 20GB dedicated drive. For VirtualBox, here are the settings:

Type: Linux
Version: RedHat 64-bit
RAM: 1024MB
Default Drive Options with 20GB+ space
Create
Settings->System: Enable IO APIC and Disable HW Clock (leave rest alone)
Settings->Audio: Enable
Settings->Network: Enable, Bridged
Settings->Storage: Far right CD icon (choose your ISO)
Start

Boot your server with the ISO, and start the CentOS install. Here are the simplest installation steps:

Choose Language and Click Continue
Click: Install Destination (do not change anything!)
Click: Done
Click: Network & Hostname
Click: ON
Click: Done
Click: Begin Installation
Click: Root Password: password, password, Click Done twice
Wait for Minimal Software Install and Setup to finish
Click: Reboot

Configuring CentOS 6.5 or 7 for Incredible PBX Installation

Now log into your server as root and issue the following commands to put the basic pieces in place and to reconfigure your Ethernet port as eth0. Make a note of your IP address so you can log in with SSH.

setenforce 0
yum -y upgrade --skip-broken
yum -y install net-tools nano wget tar
# decipher your server's IP address
ifconfig
# patch grub and ignore any errors if your server doesn't use it
sed -i 's|quiet|quiet net.ifnames=0 biosdevdame=0|' /etc/default/grub
grub2-mkconfig -o /boot/grub2/grub.cfg
# for CentOS/Scientific Linux 6.5/6.6 platforms, perform these additional steps:
wget http://incrediblepbx.com/update-kernel-devel
chmod +x update-kernel-devel
./update-kernel-devel
reboot

If you’re on a virtual machine platform, now would be a good time to make an export or backup of your CentOS image. The minimal install is about 500MB. Don’t forget to first remove your hardware address (HWADDR) and network UUID from /etc/sysconfig/network-scripts/ifcfg-enp0s3 or whatever file name was assigned to your hardware. The saved image will be bootable with DHCP network support anywhere down the road.

NEWS FLASH: For those wanting to test things out using VirtualBox, a Scientific Linux 7 Minimal Install image (401MB) is now available on SourceForge. It gets you to right here in the install process.

blank

Installing Incredible PBX for CentOS 6.5 or 7

Adding Incredible PBX to a running CentOS 6.5 or 7 server is a walk in the park. To restate the obvious, your server needs a reliable Internet connection to proceed. Be sure to use SSH (or Putty on a Windows machine) to begin because the installer locks the firewall down to your local network and the IP address of the machine from which you perform the install. Log into your new server as root at the IP address you deciphered in the ifconfig step in the CentOS installation procedure above.

WARNING: If you’re using a 512MB droplet at Digital Ocean, be advised that their setups do NOT include a swap file. This may cause serious problems when you run out of RAM. Uncomment ./create-swapfile-DO line below to create a 1GB swap file which will be activated whenever you exceed 90% RAM usage on Digital Ocean.

Now let’s begin the Incredible PBX install. You have a choice of GUI versions: 2.11 or 12.0.

NOTE: To more clearly identify packaging as we move forward, there has been a change in the Incredible PBX naming and numbering scheme. Henceforth, the file name and version reflects the Asterisk version, the GUI version, the Incredible PBX release number, and the OS platform. For example, incrediblepbx11-11.1.centos tells you the product includes Asterisk 11, the 2.11 GUI, .1 release number, and the CentOS platform.

To install the 2.11 GUI, log back in as root and issue the following commands:

cd /root
wget http://incrediblepbx.com/incrediblepbx11-11.2.centos.tar.gz
tar zxvf incrediblepbx*
#./create-swapfile-DO
./IncrediblePBX*

To install the version 12 GUI, log back in as root and issue the following commands:

cd /root
wget http://incrediblepbx.com/incrediblepbx11-12.2.centos.tar.gz
tar zxvf incrediblepbx*
#./create-swapfile-DO
./IncrediblePBX*
gui-fix

Once you have agreed to the license agreement and terms of use, press Enter and go have a long cup of coffee. The Incredible PBX installers run unattended so find something to do for the next 30-60 minutes unless you just like watching code compile. When the installation is complete, run /root/admin-pw-change to set the admin password for GUI access using a browser. If you’re using the version 12 GUI, don’t forget: gui-fix.

Log out and back into your server as root and you should be greeted by something like this:

blank

Perform the following steps:

Make your root password very secure: passwd
Set your correct time zone: ./timezone-setup
Restart Asterisk: amportal restart
Create admin password for web apps: htpasswd /etc/pbx/wwwpasswd admin
Make a copy of your other passwords: cat passwords.FAQ
Make a copy of your Knock codes: cat knock.FAQ
Decipher IP address and other info about your server: status

Incredible PBX includes an automatic update utility which downloads important updates whenever you log into your server as root. We recommend you log in once a week to keep your server current. Now would be a good time to log out and back into your server at the Linux command line to bring your server up to current specs.

You can access the Incredible PBX GUI using your favorite web browser to configure your server. Just enter the IP address shown in the status display.

blank

Choose Incredible GUI Administration from the Admin menu of the Kennonsoft GUI (shown above). The default username is admin and the password is what you set when the install completed. Now edit extension 701 so you can figure out (or change) the randomized passwords that were set up for your 701 extension and voicemail account: Applications -> Extensions -> 701. If you’re behind a hardware-based firewall, change the NAT setting to: YES.

Setting Up a Soft Phone to Use with Incredible PBX

Now you’re ready to set up a telephone so that you can play with Incredible PBX. We recommend YateClient which is free. Download it from here. Run YateClient once you’ve installed it and enter the credentials for the 701 extension on Incredible PBX. You’ll need the IP address of your server plus your extension
701 password. Choose Settings -> Accounts and click the New button. Fill in the blanks using the IP address of your server, 701 for your account name, and whatever password you created for the extension. Click OK.

blank

Once you are registered to extension 701, close the Account window. Then click on YATE’s Telephony Tab and place some test calls to the numerous apps that are preconfigured on Incredible PBX. Dial a few of these to get started:


947 - Weather by ZIP Code
951 - Yahoo News
*61 - Time of Day
*68 - Wakeup Call
TODAY - Today in History

Now you’re ready to connect to the telephones in the rest of the world. If you live in the U.S., the easiest way (at least for now) is to set up a free Google Voice account. Google has threatened to shut this down but as this is written, it still works. The more desirable long-term solution is to choose several SIP providers and set up redundant trunks for your incoming and outbound calls. The PIAF Forum includes dozens of recommendations to get you started.

blank

Configuring Google Voice

If you want to use Google Voice, you’ll need a dedicated Google Voice account to support Incredible PBX. If you want to use the inbound fax capabilities of Incredible Fax 11, then you’ll need an additional Google Voice line that can be routed to the FAX custom destination using the GUI. The more obscure the username (with some embedded numbers), the better off you will be. This will keep folks from bombarding you with unsolicited Gtalk chat messages, and who knows what nefarious scheme will be discovered using Google messaging six months from now. So keep this account a secret!

We’ve tested this extensively using an existing Gmail account, and inbound calling is just not reliable. The reason seems to be that Google always chooses Gmail chat as the inbound call destination if there are multiple registrations from the same IP address. So, be reasonable. Do it our way! Set up a dedicated Gmail and Google Voice account, and use it exclusively with Incredible PBX. It’s free at least through 2013. Google Voice no longer is by invitation only so, if you’re in the U.S. or have a friend that is, head over to the Google Voice site and register.

You must choose a telephone number (aka DID) for your new account, or Google Voice calling will not work… in either direction. Google used to permit outbound Gtalk calls using a fake CallerID, but that obviously led to abuse so it’s over! You also have to tie your Google Voice account to at least one working phone number as part of the initial setup process. Your cellphone number will work just fine. Don’t skip this step either. Just enter the provided 2-digit confirmation code when you tell Google to place the test call to the phone number you entered. Once the number is registered, you can disable it if you’d like in Settings, Voice Setting, Phones. But…

IMPORTANT: Be sure to enable the Google Chat option as one of your phone destinations in Settings, Voice Setting, Phones. That’s the destination we need for The Incredible PBX to work its magic! Otherwise, all inbound and outbound calls will fail. If you don’t see this option, you may need to call up Gmail and enable Google Chat there first. Then go back to the Google Voice Settings.

While you’re still in Google Voice Settings, click on the Calls tab. Make sure your settings match these:

  • Call ScreeningOFF
  • Call PresentationOFF
  • Caller ID (In)Display Caller’s Number
  • Caller ID (Out)Don’t Change Anything
  • Do Not DisturbOFF
  • Call Options (Enable Recording)OFF
  • Global Spam FilteringON

Click Save Changes once you adjust your settings. Under the Voicemail tab, plug in your email address so you get notified of new voicemails. Down the road, receipt of a Google Voice voicemail will be a big hint that something has come unglued on your PBX.

One final word of caution is in order regardless of your choice of providers: Do NOT use special characters in any provider passwords, or nothing will work!

Now you’re ready to set up your Google Voice trunk in the GUI. After logging in with your browser, click the Connectivity tab and choose Google Voice/Motif. To Add a new Google Voice account, just fill out the form. Do NOT check the third box or incoming calls will never ring!

blank

IMPORTANT LAST STEP: Google Voice will not work unless you restart Asterisk from the Linux command line at this juncture. Using SSH, log into your server as root and issue the following command: amportal restart.

If you have trouble getting Google Voice to work (especially if you have previously used your Google Voice account from a different IP address), try this Google Voice Reset Procedure. It usually fixes connectivity problems. If it still doesn’t work, enable Less Secure Apps using this Google tool.

Troubleshooting Audio and DTMF Problems

You can avoid one-way audio on calls and touchtones that don’t work with these simple settings in the GUI: Settings -> Asterisk SIP Settings. Just plug in your public IP address and your private IP subnet. Then set ULAW as the only Audio Codec.

blank

A Few Words about the Incredible PBX Security Model for CentOS

Incredible PBX for CentOS joins our previous Ubuntu build as our most secure turnkey PBX implementation, ever. As configured, it is protected by both Fail2Ban and a hardened configuration of the IPtables Linux firewall. The latest release also includes Port Knocker for simple, secure access from any remote computer or smartphone. You can get up to speed on how the technology works by reading the Nerd Vittles tutorial. Your Port Knocker credentials are stored in /root/knock.FAQ together with activation instructions for your server and mobile devices. The NeoRouter VPN client also is included for rock-solid, secure connectivity to remote users. Read our previous tutorial for setup instructions. As configured, nobody can access your PBX without blank your credentials AND blank an IP address that is either on your private network or that matches the IP address of your server or the PC from which you installed Incredible PBX. You can whitelist additional IP addresses by running the command-line utility /root/add-ip. You can remove whitelisted IP addresses by running /root/del-acct. Incredible PBX is preconfigured to let you connect to many of the leading SIP hosting providers without additional firewall tweaking. We always recommend you also add an extra layer of protection by running your server behind a hardware-based firewall with no Internet port exposure, but that’s your call. And it’s your phone bill. 😉

The IPtables firewall is a complex piece of software. If you need assistance with configuring it, visit the PIAF Forum for some friendly assistance.

Incredible Backup and Restore

We’re pleased to introduce our latest backup and restore utilities for Incredible PBX. Running /root/incrediblebackup will create a backup image of your server in /tmp. This backup image then can be copied to any other medium desired for storage. To restore it to another Incredible PBX server, simply copy the image to a server running Asterisk 11 and the same version of the Incredible PBX GUI. Then run /root/incrediblerestore. Doesn’t get much simpler than that.

Incredible PBX Automatic Update Utility

Every time you log into your server as root, Incredible PBX will ping the IncrediblePBX.com web site to determine whether one or more updates are available to bring your server up to current specs. We recommend you log in at least once a week just in case some new security vulnerability should come along.

In the meantime, we encourage you to sign up for an account on the PIAF Forum and join the discussion. In addition to providing first-class, free support, we think you’ll enjoy the camaraderie.

Originally published: Wednesday, May 20, 2015


blankSupport Issues. With any application as sophisticated as this one, you’re bound to have questions. Blog comments are a terrible place to handle support issues although we welcome general comments about our articles and software. If you have particular support issues, we encourage you to get actively involved in the PBX in a Flash Forums. It’s the best Asterisk tech support site in the business, and it’s all free! Please have a look and post your support questions there. Unlike some forums, ours is extremely friendly and is supported by literally hundreds of Asterisk gurus and thousands of users just like you. You won’t have to wait long for an answer to your question.

NEWS FLASH: There’s a message thread to handle Bugs & Fixes for this new release. If you have issues with your install, start there.


blank
Need help with Asterisk? Visit the PBX in a Flash Forum.


Special Thanks to Our Generous Sponsors


FULL DISCLOSURE: ClearlyIP, Skyetel, Vitelity, DigitalOcean, Vultr, VoIP.ms, 3CX, Sangoma, TelecomsXchange and VitalPBX have provided financial support to Nerd Vittles and our open source projects through advertising, referral revenue, and/or merchandise. As an Amazon Associate and Best Buy Affiliate, we also earn from qualifying purchases. We’ve chosen these providers not the other way around. Our decisions are based upon their corporate reputation and the quality of their offerings and pricing. Our recommendations regarding technology are reached without regard to financial compensation except in situations in which comparable products at comparable pricing are available from multiple sources. In this limited case, we support our sponsors because our sponsors support us.

blankBOGO Bonaza: Enjoy state-of-the-art VoIP service with a $10 credit and half-price SIP service on up to $500 of Skyetel trunking with free number porting when you fund your Skyetel account. No limits on number of simultaneous calls. Quadruple data center redundancy. $25 monthly minimum spend required. Tutorial and sign up details are here.

blankThe lynchpin of Incredible PBX 2020 and beyond is ClearlyIP components which bring management of FreePBX modules and SIP phone integration to a level never before available with any other Asterisk distribution. And now you can configure and reconfigure your new Incredible PBX phones from the convenience of the Incredible PBX GUI.

blankVitalPBX is perhaps the fastest-growing PBX offering based upon Asterisk with an installed presence in more than 100 countries worldwide. VitalPBX has generously provided a customized White Label version of Incredible PBX tailored for use with all Incredible PBX and VitalPBX custom applications. Follow this link for a free test drive!
 

blankSpecial Thanks to Vitelity. Vitelity is now Voyant Communications and has halted new registrations for the time being. Our special thanks to Vitelity for their unwavering financial support over many years and to the many Nerd Vittles readers who continue to enjoy the benefits of their service offerings. We will keep everyone posted on further developments.


Some Recent Nerd Vittles Articles of Interest…

  1. Some of our links refer users to Amazon or other service providers when we find their prices are competitive for the recommended products. Nerd Vittles receives a small referral fee from these providers to help cover the costs of our blog. We never recommend particular products solely to generate commissions. However, when pricing is comparable or availability is favorable, we support these providers because they support us. []