Home » Posts tagged 'IncrediblePBX' (Page 35)

Tag Archives: IncrediblePBX

The Most Versatile VoIP Provider: FREE PORTING

Smartphone Trifecta: 2016’s Very Best Cellphones with Two Awesome Surprises

blank

Every year we try to check out the latest and greatest smartphones with emphasis on finding those that are the best fit with Asterisk®. So this year is really special because our three favorite new phones all come with a couple of surprises. First, monthly cellular service can be FREE on all of them! Second, all of the phone numbers associated with the three phones can be used as free SIP trunks with Incredible PBX™ or your favorite Asterisk server.

If you’ve been following Nerd Vittles since early February of this year, then you already know that RingPlus, a Sprint MVNO, is the best bargain on the planet. Over the past six weeks of weekly specials from RingPlus, we’ve managed to update all of our free RingPlus accounts to either unlimited calling, texting, and 2GB of monthly data or 3,000 minutes of calling, 3,000 text messages, and 3GB of data. For anybody (except teenagers) that’s sufficient monthly capacity to do almost anything you’d like to do with a smartphone except stream movies all day.

We initially showed how to take dirt cheap Boost Mobile and Virgin Mobile prepaid phones and repurpose them for use with RingPlus. Sprint apparently read our article as well because that loophole is going away on April 17. However, you still have time to find one and activate it on RingPlus following our previous tutorial. The only catch is that, if you ever deactivate it, you will lose the ability to reactivate it without first using it with Boost or Virgin for a full year. The landfills will be so happy with all these cellphone bricks because of Sprint’s latest attempt to shoot itself in the foot. We think there also are some legal issues that the FCC needs to address. These phones are sold as "contract-free" when, in fact, there is a very specific and undisclosed contractual requirement. If you don’t keep service with the provider for a year, your phone becomes a brick. In antitrust terminology, it’s called tying. And some would argue that it also constitutes false advertising. We plan to file a complaint and would urge all of our readers to do the same. Here’s a link.

But enough about the Sprint mentality. It really is legendary, and it’s been the same for 20+ years. We doubt it will ever change unless the entire Sprint management team is replaced. So where do we go from here? Well we decided to upgrade most of our phones to the latest and greatest postpaid phones available, and we wanted to try out our 2016 favorites (pictured above). Here’s some really great news. Samsung’s new Galaxy S7 and S7 Edge as well as Apple’s new iPhone SE work swimmingly with RingPlus as long as you purchase the Sprint-branded models at full retail price from either Best Buy or an Apple Store. Sprint and Target will refuse to sell you one unless you activate it with Sprint in the store. You also can’t buy the Sprint-branded iPhones on line from Apple without activating Sprint service, but that restriction doesn’t apply if you visit an Apple Store.

It took a week to chase down a Galaxy S7 and almost two weeks to find a Galaxy S7 Edge at a Best Buy store. Don’t believe the store inventory on their web site. Neither of the phones we purchased was shown as available at the locations where we bought them. So you’ll need to call or visit a store at least while the new Galaxy phones remain a scarce commodity. As for the iPhone SE, it went on sale at Apple Stores this morning at 10 a.m. At the Charleston store, I was third in line and both of the people in front of me also were buying the Sprint-branded iPhone SE to use with RingPlus. The Apple sales folks said they had never before seen a run on Sprint phones. Guess why?

blank

Here’s the drill. Purchase your favorite phone after you read our mini-reviews below. Don’t open the box just yet. Instead, look on the bottom of the box and decipher the IMEI/MEID of your phone. Immediately run that number through the RingPlus Device Checker to be sure it will work on the Sprint network using a RingPlus account. There shouldn’t be a problem with any of these three phones, and all of them come with a Sprint SIM card so you won’t have to worry about obtaining one from RingPlus. Some have reported that the Best Buy phones were locked. We can only surmise that the customer delayed activating the phone with RingPlus which gave Sprint time to block the serial number which Best Buy reported. If this happens to you, we are told that Sprint will unlock the phone once you provide proof that it was purchased at full retail price. If all else fails, Best Buy has a 14-day return policy. Remember, anything is possible when dealing with Sprint.

Once your phone passes the compatibility check, sign up for a new free RingPlus plan. These plans change weekly and sometimes are only offered for a couple of hours so you may want to hold off on signing up until a deal comes along that meets your requirements. Update: There are a number of excellent promotions at the moment which run through April 5. Our previous article explained in detail how these free plans work. Switching plans typically is limited to those that buy into the annual Member+ program. You can read all about the plans and programs on the RingPlus Community Forum. If you already have a RingPlus account with a registered phone, you can swap out the phone with one of these three new ones for a one-time charge of $1.99. All you’ll need is your new MEID and ICC ID numbers. The entire phone swap only takes a minute or two. Once it’s complete, turn on your phone. The rest is automagic!

Comparing the Phones. We don’t often glow about reviews, but the TechRadar review of the Galaxy S7 Edge is a must-read. There has never been a better phone than this one. And, only an inch behind it is the Galaxy S7 which bears an uncanny resemblance to the new iPhone SE except for its 50% larger screen size. We actually are more comfortable carrying the Galaxy S7 with its all-metal construction. For whatever reason, the S7 Edge always feels like its about a millisecond away from slipping out of your hand. You will most definitely want a case for the S7 Edge.

In terms of performance and camera quality, the new Galaxy phones are in a league of their own. Here’s a photo hurriedly snapped through a restaurant window with our Galaxy S7 earlier this week. If you’ve ever tried to take sunset pictures with an iPhone or cheapo Android device, you’ll appreciate what a challenge these shots can be. We’ll annotate this article with an iPhone SE photo if and when the opportunity presents itself. The other good news with the new Galaxy phones is they are at least waterproof for a few minutes. If you live near the water, that will come as a welcome addition as well. Finally, Samsung has closed the gap with Apple’s iPhones on backing up and restoring everything on your phone. For years, this has been Apple’s best feature in our humble opinion. Now Samsung goes Apple one better. If you happen to have two Samsung devices that you want clone, simply choose Backup and Reset from Settings. Then Open Smart Switch on both devices and hold the two phones back to back. It’s that easy. Or you can opt for the more traditional restore method that works precisely as it does with an iPhone using the Samsung Cloud. For some additional tips and tricks, visit the PCMag.com site and watch the video "Exploring the Galaxy S7″ which includes a number of comparisons with Apple iPhone devices including the iPhone SE. Enjoy!

blank

We previously covered the SIP setup for RingPlus devices using their WiFi Fluidcall feature. It provides a free SIP trunk for Asterisk at a cost of zero dollars. For the complete tutorial, take a look at the original article. Enjoy!

Originally published: Thursday, March 31, 2016


blank
Need help with Asterisk? Visit the PBX in a Flash Forum.


Special Thanks to Our Generous Sponsors


FULL DISCLOSURE: ClearlyIP, Skyetel, Vitelity, DigitalOcean, Vultr, VoIP.ms, 3CX, Sangoma, TelecomsXchange and VitalPBX have provided financial support to Nerd Vittles and our open source projects through advertising, referral revenue, and/or merchandise. As an Amazon Associate and Best Buy Affiliate, we also earn from qualifying purchases. We’ve chosen these providers not the other way around. Our decisions are based upon their corporate reputation and the quality of their offerings and pricing. Our recommendations regarding technology are reached without regard to financial compensation except in situations in which comparable products at comparable pricing are available from multiple sources. In this limited case, we support our sponsors because our sponsors support us.

blankBOGO Bonaza: Enjoy state-of-the-art VoIP service with a $10 credit and half-price SIP service on up to $500 of Skyetel trunking with free number porting when you fund your Skyetel account. No limits on number of simultaneous calls. Quadruple data center redundancy. $25 monthly minimum spend required. Tutorial and sign up details are here.

blankThe lynchpin of Incredible PBX 2020 and beyond is ClearlyIP components which bring management of FreePBX modules and SIP phone integration to a level never before available with any other Asterisk distribution. And now you can configure and reconfigure your new Incredible PBX phones from the convenience of the Incredible PBX GUI.

blankVitalPBX is perhaps the fastest-growing PBX offering based upon Asterisk with an installed presence in more than 100 countries worldwide. VitalPBX has generously provided a customized White Label version of Incredible PBX tailored for use with all Incredible PBX and VitalPBX custom applications. Follow this link for a free test drive!
 

blankSpecial Thanks to Vitelity. Vitelity is now Voyant Communications and has halted new registrations for the time being. Our special thanks to Vitelity for their unwavering financial support over many years and to the many Nerd Vittles readers who continue to enjoy the benefits of their service offerings. We will keep everyone posted on further developments.


Some Recent Nerd Vittles Articles of Interest…

The Sensational Raspberry Pi 3 Featuring Incredible PBX GUI with Raspbian 8 Jessie

blank

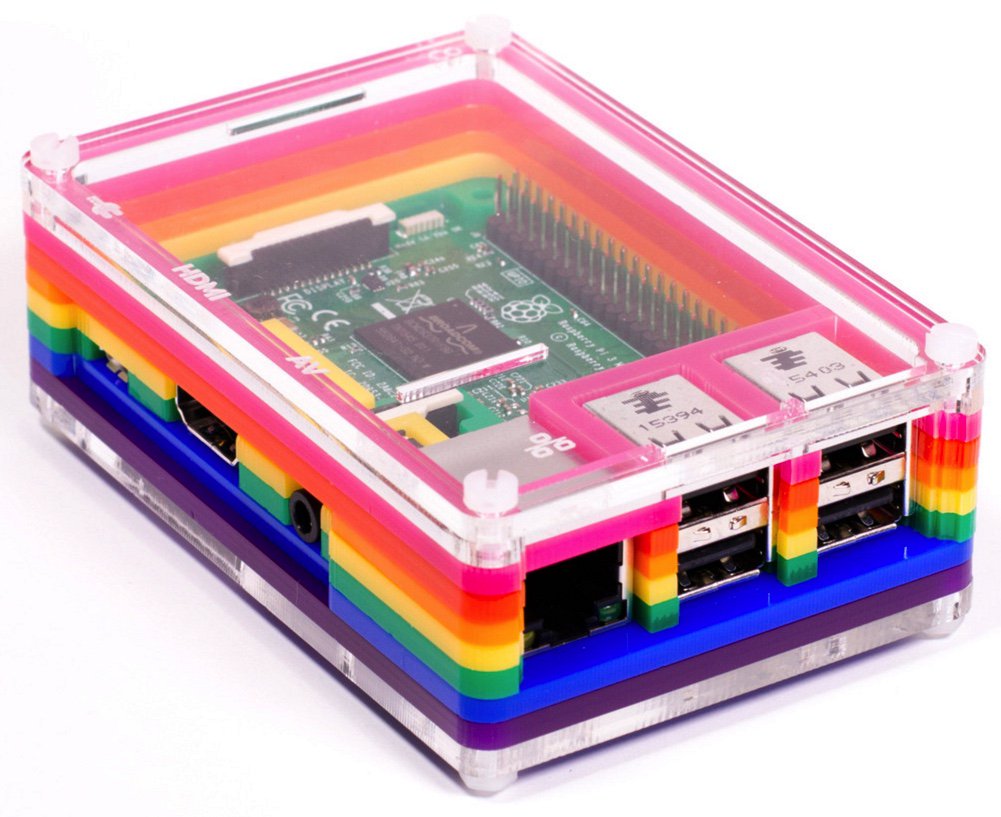
[iframe-popup id="3″]
Hard to believe it’s been four years since the introduction of the original Raspberry Pi®. Over eight million RasPi’s have been shipped. To celebrate its fourth birthday, Eben Upton has done it again. Meet the sensational Raspberry Pi 3 sporting a 1.2GHz 64-bit quad-core ARM Cortex-A53 CPU with ten times the performance of the original Raspberry Pi. Of particular interest to the VoIP community will be the RasPi 3’s integrated 802.11n wireless LAN and Bluetooth 4.1 hardware. And, of course, the RasPi 3 retains its compatibility with the Raspberry Pi 1 and 2. Did we mention it’s still just $35? Because we like to celebrate birthdays, too, we’re pleased to introduce a brand new Incredible PBX™ image for the Raspberry Pi 2 and 3 featuring Raspbian 8 and the latest release of Asterisk® 13. Unlike previous builds, this one installs in under a minute. Yes, it’s still FREE and features pure open source GPL code. No Gotchas!

07/01/2019 NEWS FLASH: Just released Incredible PBX LITE for the Raspberry Pi 2, 3, and 4 featuring Raspbian 10 Buster. Tutorial here.

Raspberry Pi 3 Performance. Gone are the days of worrying about Raspberry Pi performance. Both the user interface and call quality now match what you’d expect to find on a $300-$500 VoIP server. Even with a Raspberry Pi 2, we have detected no performance degradation thanks to the latest Raspbian 8 OS and a virtually flawless Asterisk 13 platform. For best results, we recommend 32GB Class 10 microSD cards which now are plentiful at the $10 price point.1

Raspberry Pi 3 Shopping List. Before you can install Incredible PBX, you’ll need a compatible Raspberry Pi 3 platform. Here’s the short list:

  • $35* Raspberry Pi 3 from MCM or Newark or Amazon
  • $10 Power Adapter (2.5 amps minimum!)
  • $9 32GB microSDHC Class 10 card
  • £12.95 Rainbow Pibow case or $9.50 Official RasPi case
  • About That Asterisk. We write about Asterisk® regularly, but the asterisk we’re talking about is the one accompanying the $35* price tag for the Raspberry Pi 3. Yes, that’s the advertised price. And, no, if you want one this year, you’re not going to pay that. There are the marked up shipping prices, the bundled add-on’s that you don’t need or want, and the must-have accessories like a power adapter. We’re assuming you already own a USB keyboard and an HDMI-compatible monitor. If so, just plan on $100 and consider yourself lucky if you get all the pieces for less. Our order from Pimoroni in the U.K. with a case and 3-day shipping was £59.36 or $82.95 U.S. Our order from MCM for just the RasPi 3 with shipping was $46.99.

    Incredible PBX Feature Set. Where to begin? Let’s start with the Alphabet Stew: IAX, SIP, GVSIP, SMS, and SRTP functionality. Voice Recognition and Text-to-Speech VoIP application support using FLITE, GoogleTTS, and PicoTTS. Free calling with Google Voice, Simonics SIP gateway, or RingPlus cellular service. And all of your Nerd Vittles favorites: Fax, AsteriDex, Click-to-Dial, News, Weather, Reminders, and Wakeup Calls. Plus hundreds of features that typically are found in commercial PBXs: Conferencing, IVRs and AutoAttendants, Email Delivery of Voicemail, Voicemail Blasting, and more…

    10-Layer Network Security Model. Most phone calls cost money. Unlike many of the other "free" VoIP solutions, our most important criteria for VoIP is rock-solid security. If your free server ends up costing you thousands of dollars in phone bills due to fraud, it isn’t free at all. Once you plug in that network cable, you’ve painted a bullseye on your checkbook.

    No single network security system can protect you against zero-day vulnerabilities that no one has ever seen. Deploying multiple layers of security is not only smart, it’s essential with today’s Internet topology. It works much like the Bundle of Sticks from Aesop’s Fables. The more sticks there are in your bundle, the more difficult it is to break them apart. If a vulnerability suddenly appears in the Linux kernel, or in Asterisk, or in Apache, or in your favorite web GUI, you can continue to sleep well knowing that other layers of security have your back. No one else in the telecommunications industry has anything close. Ours is all open source GPL code so we would encourage everyone to get on board and do their part to make the Internet a safer place!

    Do your part and do your homework. Comparison shop as if your phone bill matters! 😉 Incredible PBX provides:

    1. Preconfigured IPtables Linux Firewall
    2. Preconfigured Travelin’ Man 3 WhiteLists
    3. Randomized Port Knocker for Remote Access
    4. TM4 WhiteListing by Telephone (optional)
    5. Fail2Ban Log Monitoring for SSH, Apache, Asterisk
    6. Randomized Ultra-Secure Passwords
    7. Automatic Update Utility for Security & Bug Fixes
    8. Asterisk Manager Lockdown to localhost
    9. Apache htaccess Security for Vulnerable Web Apps
    10. Security Alerts via RSS Feeds in Kennonsoft and Incredible PBX GUIs

    Installation Tutorial. Here’s everything need to know about installation and setup. "Automatic" means you just watch.

    1. Download and unzip Incredible PBX image from SourceForge (with or without GV OAuth support)
    2. Transfer Incredible PBX image to microSD card
    3. Boot Raspberry Pi from new microSD card
    4. Login to RasPi console as pi:raspberry to initialize your server (Automatic)
    5. Reboot after writing down your server IP address (Automatic)
    6. Login via SSH as root:password to randomize passwords & configure firewall (Automatic)
    7. Optionally, install Incredible Fax: /root/incrediblefax13_raspi3.sh (Credentials: admin:password)
    8. Enjoy!

    Configuring Trunks with Incredible PBX

    Before you can actually make and receive calls, you’ll need to add one or more VoIP trunks with providers, create extensions for your phones, and add inbound and outbound routes that link your extensions to your trunks. Here’s how a PBX works. Phones connect to extensions. Extensions connect to outbound routes that direct calls to specific trunks, a.k.a. commercial providers that complete your outbound calls to any phone in the world. Coming the other way, incoming calls are directed to your phone number, otherwise known as a DID. DIDs are assigned by providers and you register your trunks using credentials handed out by these providers. Incoming calls are routed to your DIDs which use inbound routes telling the PBX how to direct the calls internally. A call could go to an extension to ring a phone, or it could go to a group of extensions known as a ring group to ring a group of phones. It could also go to a conference that joins multiple people into a single call. Finally, it could be routed to an IVR or AutoAttendant providing a list of options from which callers could choose by pressing various keys on their phone.

    We’ve done most of the prep work for you with Incredible PBX. We’ve set up an Extension to which you can connect a SIP phone or softphone. We’ve set up an Inbound Route that, by default, sends all incoming calls to a Demo IVR. And we’ve built a dozen trunks for some of the best providers in the business. Sign up with the ones you prefer, plug in your credentials, and you’re good to go.

    Unlike traditional telephone service, you need not and probably should not put all your eggs in one basket when it comes to telephone providers. In order to connect to Plain Old Telephones, you still need at least one provider. But there is nothing wrong with having several. And a provider that handles an outbound call (termination) need not be the same one that handles an incoming call (origination) and provides your phone number (DID). We cannot recommend Vitelity highly enough, and it’s not just because they have financially supported our projects for almost a decade. They’re as good as VoIP providers get, and we use lots of them. If you’re lucky enough to live in the U.S., you’d be crazy not to set up a Google Voice account. It’s free as are all phone calls to anywhere in the U.S. and Canada. The remaining preconfigured providers included in Incredible PBX are equally good, and we’ve used and continue to use almost all of them. So pick a few and sign up. You only pay for the calls you make with each provider so you have little to lose by choosing several. The PIAF Forum includes dozens of recommendations on VoIP providers if you want additional information.

    With the preconfigured trunks in Incredible PBX, all you need are your credentials for each provider and the domain name of their server. Log into Incredible PBX GUI Administration as admin using a browser. From the System Status menu, click Connectivity -> Trunks. Click on each provider you have chosen and fill in your credentials including the host entry. Be sure to uncheck the Disable Trunk checkbox! Fill in the appropriate information for the Register String. Save your settings by clicking Submit Changes. Then click the red Apply Config button.

    Configuring a Softphone for Incredible PBX

    We’re in the home stretch now. You can connect virtually any kind of telephone to your new PBX. Plain Old Phones require an analog telephone adapter (ATA) which can be a separate board in your computer from a company such as Digium. Or it can be a standalone SIP device such as ObiHai’s OBi100 or OBi110 (if you have a phone line from Ma Bell to hook up as well). SIP phones can be connected directly so long as they have an IP address. These could be hardware devices or software devices such as the YateClient softphone. We’ll start with a free one today so you can begin making calls. You can find dozens of recommendations for hardware-based SIP phones both on Nerd Vittles and the PIAF Forum when you’re ready to get serious about VoIP telephony.

    We recommend YateClient which is free. Download it from here. Run YateClient once you’ve installed it and enter the credentials for the 701 extension on Incredible PBX. You’ll need the IP address of your server plus your extension 701 password. Choose Applications _> Extensions -> 701 and write down your SIP/IAX Password. You can also find it in /root/passwords.FAQ. Fill in the blanks using the IP address of your Server, 701 for your Username, and whatever Password you assigned to the extension when you installed Incredible PBX. Click OK to save your entries.

    blank

    Once you are registered to extension 701, close the Account window. Then click on YATE’s Telephony Tab and place some test calls to the numerous apps that are preconfigured on Incredible PBX. Dial a few of these to get started:

    DEMO - Apps Demo
    123 - Reminders
    947 - Weather by ZIP Code
    951 - Yahoo News
    *61 - Time of Day
    TODAY - Today in History

    If you are a Mac user, another great no-frills softphone is Telephone. Just download and install it from the Mac App Store.

    Configuring Google Voice

    If you want to use Google Voice, you’ll need a dedicated Google Voice account to support Incredible PBX. The more obscure the username (with some embedded numbers), the better off you will be. This will keep folks from bombarding you with unsolicited Gtalk chat messages, and who knows what nefarious scheme will be discovered using Google messaging six months from now. So keep this account a secret!

    IMPORTANT: Do NOT under any circumstances take Google’s bait to switch from Google Chat to Hangouts, or you will forever lose the ability to use Google Chat with Incredible PBX. Also be sure to enable the Google Chat option as one of your phone destinations in Settings, Voice Setting, Phones. That’s the destination we need for The Incredible PBX to work its magic! Otherwise, all inbound and outbound calls will fail. Good News! You’re in luck. Google has apparently had a change of heart on discontinuing Google Chat support so it’s enabled by default in all new Google Voice accounts. Once you’ve created a Gmail and Google Voice account, go to Google Voice Settings and click on the Calls tab. Make sure your settings match these:

    • Call ScreeningOFF
    • Call PresentationOFF
    • Caller ID (In)Display Caller’s Number
    • Caller ID (Out)Don’t Change Anything
    • Do Not DisturbOFF
    • Call Options (Enable Recording)OFF
    • Global Spam FilteringON

    Click Save Changes once you’ve adjusted your settings. Under the Voicemail tab, plug in your email address so you get notified of new voicemails. Down the road, receipt of a Google Voice voicemail will be a big hint that something has come unglued on your PBX.

    One final word of caution is in order regardless of your choice of providers: Do NOT use special characters in any provider passwords, or nothing will work!

    Now you’re ready to configure your Google Voice account in Incredible PBX. You can do it from within the Incredible PBX GUI by choosing Connectivity -> Google Voice. How you enter your credentials depends upon whether you have chosen the Incredible PBX image with OAuth 2 support. For a complete Google Voice OAuth tutorial, follow steps 8-10 in this Nerd Vittles tutorial. Once you’ve entered your credentials, you MUST restart Asterisk from the command line, or Google Voice calls will fail.

    If you have trouble getting Google Voice to work (especially if you have previously used your Google Voice account from a different IP address), try this Google Voice Reset Procedure. It usually fixes connectivity problems. If it still doesn’t work, enable Less Secure Apps using this Google tool.

    If you have difficulty finding the Google Chat option after setting up a new Google Voice account, follow this tutorial.

    Another option is to use an inexpensive SIP Gateway to Google Voice. The Simonics trunk in the Incredible PBX GUI is preconfigured for this purpose. All you’ll need is your Google Voice credentials. Get started with this tutorial.

    Adding Speech Recognition Support to Incredible PBX

    To support many of our applications, Incredible PBX has included Google’s speech recognition service for years. These applications include Weather Reports by City (949), AsteriDex Voice Dialing by Name (411), and Wolfram Alpha for Asterisk (4747), all of which use Lefteris Zafiris’ terrific speech-recog AGI script. Unfortunately (for some), Google now has tightened up the terms of use for their free speech recognition service. Now you can only use it for "personal and development use." If you meet those criteria, keep reading. Here’s how to activate speech recognition on Incredible PBX. Don’t skip any steps!

    To use Wolfram Alpha by phone, you first must obtain a free Wolfram Alpha APP-ID. Then issue the following command replacing APP-ID with your actual ID. Do NOT change the yourID portion of the command:

    sed -i "s|yourID|APP-ID|" /var/lib/asterisk/agi-bin/4747
    

    Now you’re ready to try out the speech recognition apps. Dial 949 and say the name of a city and state/province/country to get a current weather forecast from Yahoo. Dial 411 and say "American Airlines" to be connected to American.

    To access Wolfram Alpha by phone, dial 4747 and enter your query, e.g. "What planes are overhead." Read the Nerd Vittles tutorial for additional examples and tips.

    Enabling WiFi on the Raspberry Pi

    With the Raspberry Pi 3, wi-fi hardware is included. With the Raspberry Pi 2, you’ll need to add an inexpensive wifi dongle. The next step is connecting to your WiFi router. Simply open /etc/wpa_supplicant/wpa_supplicant.conf with your favorite editor and insert the following code using the actual SSID name and password to access your local, password-protected WiFi router or any open WiFi network:

    network={
     ssid="YourSSID"
     psk="YourSSIDpassword"
     key_mgmt=WPA-PSK
     scan_ssid=1
     priority=5
    }
    
    network={
     key_mgmt=NONE
     priority=1
    }
    

    Finally, stop and restart the wlan0 interface, count to 15, and check the status of your server to decipher the new IP address for your WiFi connection:

    ifdown wlan0
    ifup wlan0
    pbxstatus
    

    If you want to run your Raspberry Pi exclusively off the WiFi connection, simply unplug the network cable from your RasPi and reboot your server.

    UPDATE: There still is a quirk with the wireless LAN driver on the Raspberry Pi 3. The problem has to do with the default power management of the wlan0 interface which results in it being powered off after very brief periods of inactivity. Special thanks to Matt Gemmell for this fix. Just cut-and-paste the lines below into a terminal window, and you’ll be good to go.

    WARNING: Run pbxstatus first. If the top line shows Raspberry Pi 3, the following WiFi patch is already installed.

    echo "options 8192cu rtw_power_mgnt=0 rtw_enusbss=0 rtw_ips_mode=1" > /etc/modprobe.d/8192cu.conf
    sed -i '/exit 0/d' /etc/rc.local
    echo "sleep 10" >> /etc/rc.local
    echo "iwconfig wlan0 power off" >> /etc/rc.local
    echo "exit 0" >> /etc/rc.local
    echo "[Unit]" > /etc/systemd/system/root-resume.service
    echo "Description=Turn off wlan power management" >> /etc/systemd/system/root-resume.service
    echo "After=suspend.target" >> /etc/systemd/system/root-resume.service
    echo "" >> /etc/systemd/system/root-resume.service
    echo "[Service]" >> /etc/systemd/system/root-resume.service
    echo "Type=simple" >> /etc/systemd/system/root-resume.service
    echo "ExecStartPre= /bin/sleep 10" >> /etc/systemd/system/root-resume.service
    echo "ExecStart= /sbin/iwconfig wlan0 power off" >> /etc/systemd/system/root-resume.service
    echo "" >> /etc/systemd/system/root-resume.service
    echo "[Install]" >> /etc/systemd/system/root-resume.service
    echo "WantedBy=suspend.target" >> /etc/systemd/system/root-resume.service
    systemctl enable root-resume
    reboot
    

    After rebooting, if you issue the iwconfig wlan0 command, it should show: Power Management:off.

    Update: Lessons Learned for Raspberry Pi 3 Road Warriors

    As with all new devices, you learn some things as you go along. So we’re providing an update to our original article to offer a couple of additional tips and tricks for those that want to travel with a RasPi…

    Alternative Power Sources. If you’re like us, you have a number of devices around the house or office that all require 5V power adapters of various amperages. The Raspberry Pi has traditionally been one of the most temperamental when it came to power adapters and, with the Raspberry Pi 3, the developers specifically mention a 2.5 amp minimum. If you travel and want to take devices such as the Raspberry Pi with you, the last thing you want to do is approach airport security with a bunch of wires hanging out of your carry-on bag. Well, there’s good news. The Anker device shown in the Amazon ad in the right column of Nerd Vittles can supply power to 6 devices including a Raspberry Pi 3. And we’ve given the RasPi a healthy workout with no adverse effects.

    Deciphering the RasPi IP Address. As we mentioned, we travel a lot so obtaining a DHCP address for your RasPi in WiFi mode is not always the easiest thing to accomplish. If your smartphone supports tethering, that’s the easiest way to get connectivity on the road. A better way is to stick a WiFi HotSpot in your luggage and it, too, can be powered using the Anker device. See our recent article for WiFi HotSpot choices. Regardless of which option you choose, it will require some planning to use your RasPi sans monitor and keyboard. First, you need to preconfigure /etc/wpa_supplicant/wpa_supplicant.conf with the SSID of the device you’ll be using to hand out DHCP addresses. You’ll note from the discussion above that each entry in this file has a priority with higher numbers having higher priority. The way we typically do this is to assign our home network as the highest priority. Below that, we set up credentials for our MiFi Hotspot, then our smartphones, and finally open networks. So it looks like this:

    • Home Network – 6
    • MiFi HotSpot – 5
    • Android phone – 4
    • iPhone (AT&T) – 3
    • Open Network – 1

    Keep in mind that the Incredible PBX firewall probably will block you from accessing the RasPi from a computer on the public network. So you also must connect your computer to the same private WiFi network because private LAN addresses are whitelisted in the firewall by default.

    Once you have connectivity for your RasPi and your laptop, the other wrinkle is figuring out the IP address of the Raspberry Pi. Our recommended approach goes like this. First, configure SendMail on the RasPi to use a Gmail account that you own as an SMTP smarthost to send emails. That should work almost anywhere you go. Second, modify /etc/rc.local to automatically send you an email with the IP address and SSID of your wireless network whenever the RasPi boots. Again, this takes some advance planning because you need to set all of this up and test it before you go on the road.

    Here are the steps to modify SendMail to use an existing Gmail account as a SmartHost. Log into your RasPi as root and issue the following commands:

    cd /etc/mail
    hostname -f > genericsdomain
    touch genericstable
    makemap -r hash genericstable.db < genericstable
    mv sendmail.mc sendmail.mc.original
    wget http://nerdvittles.dreamhosters.com/pbxinaflash/source/sendmail/sendmail.mc.gmail
    cp sendmail.mc.gmail sendmail.mc
    mkdir -p auth
    chmod 700 auth
    cd auth
    echo AuthInfo:smtp.gmail.com \"U:smmsp\" \"I:user_id\" \"P:password\" \"M:PLAIN\" > client-info
    echo AuthInfo:smtp.gmail.com:587 \"U:smmsp\" \"I:user_id\" \"P:password\" \"M:PLAIN\" >> client-info
    echo AuthInfo:smtp.gmail.com:465 \"U:smmsp\" \"I:user_id\" \"P:password\" \"M:PLAIN\" >> client-info
    nano -w client-info
    

    When the nano editor opens the client-info file, change the 3 user_id entries to your Gmail account name without @gmail.com and change the 3 password entries to your actual Gmail password. Save the file: Ctrl-X, Y, then ENTER.

    Now issue the following commands. In the last step, press ENTER to accept all of the default prompts:

    chmod 600 client-info
    makemap -r hash client-info.db < client-info
    cd ..
    make
    sed -i 's|sendmail-cf|sendmail\/cf' /etc/mail/sendmail.mc
    sed -i 's|sendmail-cf|sendmail\/cf|' /etc/mail/sendmail.mc
    sed -i 's|sendmail-cf|sendmail\/cf|' /etc/mail/Makefile
    sed -i 's|sendmail-cf|sendmail\/cf|' /etc/mail/sendmail.cf
    sed -i 's|sendmail-cf|sendmail\/cf|' /etc/mail/databases
    sed -i 's|sendmail-cf|sendmail\/cf|' /etc/mail/sendmail.mc.gmail
    sed -i 's|sendmail-cf|sendmail\/cf|' /etc/mail/sendmail.cf.errors
    sendmailconfig
    

    Next, edit /etc/hosts and /etc/hostname. Change the raspberypi3 entries to: raspberrypi3.incrediblepbx.com.

    Finally, stop and restart SendMail and then send yourself a test message. Be sure to check your spam folder!

    /etc/init.d/sendmail stop
    /etc/init.d/sendmail start
    apt-get install mailutils -y
    echo "test" | mail -s testmessage yourname@yourdomain.com
    

    The last step is to add these commands to /etc/rc.local to send you an email with your IP address and SSID whenever the RasPi is rebooted. Insert the following commands just above the exit 0 line at the end of the file. Use an email address to which you have access on the road!

    ESSID=`iwconfig | grep ESSID | tail -1 | cut -f 9 -d " "`
    echo "IP address: $(hostname -I) on $ESSID" | mail -s "RaspberryPi3 IP Address" yourname@yourdomain.com
    

    Enabling Bluetooth on the Raspberry Pi


    Incredible Fax Returns for the Raspberry Pi


    Mastering the Incredible PBX Feature Set

    Now would be a good time to explore the Incredible PBX applications. Continue reading there. If you have questions, join the PBX in a Flash Forums and take advantage of our awesome collection of gurus. There's an expert available on virtually any topic, and the price is right. As with Incredible PBX, it's absolutely free. Enjoy!

    Originally published: Monday, March 7, 2016  Updated: Saturday, March 26, 2016


    blankSupport Issues. With any application as sophisticated as this one, you're bound to have questions. Blog comments are a difficult place to address support issues although we welcome general comments about our articles and software. If you have particular support issues, we encourage you to get actively involved in the PBX in a Flash Forum. It's the best Asterisk tech support site in the business, and it's all free! Please have a look and post your support questions there. Unlike some forums, the PIAF Forum is extremely friendly and is supported by literally hundreds of Asterisk gurus and thousands of users just like you. You won't have to wait long for an answer to your question.


    blank
    Need help with Asterisk? Visit the PBX in a Flash Forum.


    Special Thanks to Our Generous Sponsors


    FULL DISCLOSURE: ClearlyIP, Skyetel, Vitelity, DigitalOcean, Vultr, VoIP.ms, 3CX, Sangoma, TelecomsXchange and VitalPBX have provided financial support to Nerd Vittles and our open source projects through advertising, referral revenue, and/or merchandise. As an Amazon Associate and Best Buy Affiliate, we also earn from qualifying purchases. We’ve chosen these providers not the other way around. Our decisions are based upon their corporate reputation and the quality of their offerings and pricing. Our recommendations regarding technology are reached without regard to financial compensation except in situations in which comparable products at comparable pricing are available from multiple sources. In this limited case, we support our sponsors because our sponsors support us.

    blankBOGO Bonaza: Enjoy state-of-the-art VoIP service with a $10 credit and half-price SIP service on up to $500 of Skyetel trunking with free number porting when you fund your Skyetel account. No limits on number of simultaneous calls. Quadruple data center redundancy. $25 monthly minimum spend required. Tutorial and sign up details are here.

    blankThe lynchpin of Incredible PBX 2020 and beyond is ClearlyIP components which bring management of FreePBX modules and SIP phone integration to a level never before available with any other Asterisk distribution. And now you can configure and reconfigure your new Incredible PBX phones from the convenience of the Incredible PBX GUI.

    blankVitalPBX is perhaps the fastest-growing PBX offering based upon Asterisk with an installed presence in more than 100 countries worldwide. VitalPBX has generously provided a customized White Label version of Incredible PBX tailored for use with all Incredible PBX and VitalPBX custom applications. Follow this link for a free test drive!
     

    blankSpecial Thanks to Vitelity. Vitelity is now Voyant Communications and has halted new registrations for the time being. Our special thanks to Vitelity for their unwavering financial support over many years and to the many Nerd Vittles readers who continue to enjoy the benefits of their service offerings. We will keep everyone posted on further developments.


    Some Recent Nerd Vittles Articles of Interest...

    1. Many of our purchase links refer users to Amazon when we find their prices are competitive for the recommended products. Nerd Vittles receives a small referral fee from Amazon to help cover the costs of our blog. We never recommend particular products solely to generate Amazon commissions. However, when pricing is comparable or availability is favorable, we support Amazon because Amazon supports us. []

    The Best of Both Worlds: Taking Incredible PBX from the Cloud to the Ocean

    blank

    We’ve spent a good bit of time documenting a dirt cheap way to learn about VoIP in the Cloud with our Incredible PBX offering using a $10.50 virtual machine at CloudAtCost. Is it production ready? Probably not. But we’re reminded of the old saying that pizza is a lot like sex: "When it’s good, it’s really good. And, when it’s bad, it’s still pretty good." That pretty much sums up CloudAtCost. And it’s not like a one-time investment for the cost of a pizza lunch is going to break the bank.

    Today we turn our attention to a more reliable, long term Cloud solution with a fresh look at Incredible PBX with Digital Ocean. This setup runs about $5 a month after a free $10 trial using our referral link. If you continue to use the service, it also generates a little revenue for Nerd Vittles to keep the lights on.

    It’s been about two years since we first introduced the Digital Ocean platform. Back then, it was the experimental platform. But a lot has changed, and it’s all for the better. First, you get a Cloud Server on which you can create virtually any Linux platform you like including CentOS, Fedora, Debian, Ubuntu, and more. Second, you get your choice of seven datacenters all around the world: New York, San Francisco, Toronto, London, Frankfurt, Amsterdam, and Singapore. Third, you get enormous scalability. You can start with the $5/month flavor with 512MB of RAM and a single CPU, 20GB of SSD storage, and 1TB of bandwidth. As your requirements grow and with a couple clicks, you can scale up through 8 multiples of capacity to a whopping 64GB of RAM with 20 CPUs, 640GB of storage, and 9TB of bandwidth for less than a dollar an hour. Just make a Snapshot of any off-line Droplet, and then use that Snapshot as the image for your new server in lieu of a Linux Distribution.

    blank

    For our purposes today and for home and SOHO business users, the $5/month Digital Ocean platform is a perfect fit for both the CentOS 6.7 and Ubuntu 14.04 flavors of Incredible PBX. Once you’ve created your Digital Ocean Droplet with your choice of operating system, the Incredible PBX install procedure takes about 25 minutes. This includes the time necessary to compile and install the latest release of Asterisk® 13 from source code. When you’re finished, you’ll have a rock-solid PBX that is fully secured using the Linux firewall. For out-of-the-gate security, no other PBX comes close… at any price. Incredible PBX is and always will be pure open source GPL code and, of course, it’s FREE!

    Creating Your First Digital Ocean Droplet

    CentOS 6.7 remains our Gold Standard of Linux operating systems. We’ll start there and walk you through the Incredible PBX install procedure. Begin by signing up for a Digital Ocean account and creating a 512MB $5 droplet in your choice of data centers. Choose the CentOS 6.7 x32 platform just to keep things simple, and pick a hostname such as centos.incrediblepbx.com. It doesn’t matter if it is not resolvable, but it does need to be in FQDN format.

    By the way, you only pay for the time your droplet actually exists so build several and play for a couple hours. Your total cost will be about 5¢. And, as we noted, your first $10 of server charges are actually free. So you have nothing to lose by experimenting. If you make a mistake, delete your droplet and start over. No big deal. Once your droplet has been created, Digital Ocean will send you an email with your root user credentials and the IP address of your new server. Login with SSH or Putty, and you’ll be prompted to immediately change your root password. Make it secure… as if your bank account depended upon it. 😉

    Installing Incredible PBX 13 for CentOS 6.7

    Now we’re ready to begin the Incredible PBX install. It’s a two-step procedure. First, we’ll get CentOS up to date and reboot. Then we’ll kick off the actual install. Just cut-and-paste the following commands while logged into your droplet as root:

    setenforce 0
    yum -y upgrade --skip-broken
    yum -y install net-tools nano wget tar
    reboot
    

    Once your server reboots, login again as root and cut-and-paste the following commands. Take a 30-minute break while the installer does its thing. If you’re one that likes to watch, don’t worry if you see some error messages. They all get sorted out before the installation finishes.

    cd /root
    wget http://incrediblepbx.com/incrediblepbx13-12.2-centos.tar.gz
    tar zxvf incrediblepbx*
    ./create-swapfile-DO
    ./IncrediblePBX*
    reboot
    

    Let’s login to your server one more time to get the latest Incredible PBX updates and set up your passwords and time zone. Then you’ll be ready to handle future server admin using your browser:

    Make your root password very secure: passwd
    Create admin password for GUI access: /root/admin-pw-change
    Create admin password for web apps: htpasswd /etc/pbx/wwwpasswd admin
    Set your correct time zone: /root/timezone-setup
    Make a copy of your Knock codes: cat /root/knock.FAQ
    Review current info about your server: status OR pbxstatus (depends on release)
    

    If you want to add fax support to your PBX, we’ve got one more installer to run, and you’ll be all set. Just run the following command and press the ENTER key each time you are prompted for input (about 21 times):

    cd /root
    ./incrediblefax11.sh
    

    Success!

    blank

    It’s a GUI, GUI World Out There

    Most management of Incredible PBX will be handled using your favorite browser and one of two GUIs: the Kennonsoft menu which appears when you access the IP address of your server using a browser AND the Incredible GUI which is available on the Admin page of the Kennonsoft menu.

    blank

    Choose Incredible GUI Administration from the Admin menu of the Kennonsoft GUI (shown above) by clicking on User to switch. The default username is admin and the password is what you set in the preceding step. Now edit extension 701 so you can decipher or change the randomized passwords that was assigned to the 701 extension and its voicemail account: Applications -> Extensions -> 701.

    Setting Up a Soft Phone to Use with Incredible PBX

    Now you’re ready to set up a telephone so that you can play with Incredible PBX. We recommend YateClient which is free. Download it from here. Run YateClient once you’ve installed it and enter the credentials for the 701 extension on Incredible PBX. You’ll need the IP address of your server plus your extension
    701 password. Choose Settings -> Accounts and click the New button. Fill in the blanks using the IP address of your server, 701 for your account name, and whatever password you created for the extension. Click OK.

    blank

    Once you are registered to extension 701, close the Account window. Then click on YATE’s Telephony Tab and place some test calls to the numerous apps that are preconfigured on Incredible PBX. Dial a few of these to get started:


    DEMO - Allison's IVR Demo
    947 - Weather by ZIP Code
    951 - Yahoo News
    *61 - Time of Day
    *68 - Wakeup Call
    TODAY - Today in History

    Now you’re ready to connect to the telephones in the rest of the world. If you live in the U.S., the easiest way (at least for now) is to set up a free Google Voice account. Google has threatened to shut this down but as this is written, it still works. An update supporting Google Voice OAUTH 2 authentication is available here with a complete tutorial. Just start at step #1b. A better long-term solution is to choose several SIP providers and set up redundant trunks for your incoming and outbound calls. The PIAF Forum includes dozens of recommendations to get you started. You’ll also find an incredible deal from our platinum sponsor, Vitelity, at the end of this article.

    blank

    Configuring Google Voice

    If you want to use Google Voice, you’ll need a dedicated Google Voice account to support Incredible PBX. If you want to use the inbound fax capabilities of Incredible Fax, then you’ll need an additional Google Voice line that can be routed to the FAX custom destination using the GUI. The more obscure the username (with some embedded numbers), the better off you will be. This will keep folks from bombarding you with unsolicited Gtalk chat messages, and who knows what nefarious scheme will be discovered using Google messaging six months from now. So keep this account a secret!

    We’ve tested this extensively using an existing Gmail account, and inbound calling is just not reliable. The reason seems to be that Google always chooses Gmail chat as the inbound call destination if there are multiple registrations from the same IP address. So, be reasonable. Do it our way! Set up a dedicated Gmail and Google Voice account, and use it exclusively with Incredible PBX. It’s free at least through 2013. Google Voice no longer is by invitation only so, if you’re in the U.S. or have a friend that is, head over to the Google Voice site and register.

    You must choose a telephone number (aka DID) for your new account, or Google Voice calling will not work… in either direction. Google used to permit outbound Gtalk calls using a fake CallerID, but that obviously led to abuse so it’s over! You also have to tie your Google Voice account to at least one working phone number as part of the initial setup process. Your cellphone number will work just fine. Don’t skip this step either. Just enter the provided 2-digit confirmation code when you tell Google to place the test call to the phone number you entered. Once the number is registered, you can disable it if you’d like in Settings, Voice Setting, Phones. But…

    IMPORTANT: Be sure to enable the Google Chat option as one of your phone destinations in Settings, Voice Setting, Phones. That’s the destination we need for The Incredible PBX to work its magic! Otherwise, all inbound and outbound calls will fail. If you don’t see this option, you may need to call up Gmail and enable Google Chat there first. Then go back to the Google Voice Settings.

    While you’re still in Google Voice Settings, click on the Calls tab. Make sure your settings match these:

    • Call ScreeningOFF
    • Call PresentationOFF
    • Caller ID (In)Display Caller’s Number
    • Caller ID (Out)Don’t Change Anything
    • Do Not DisturbOFF
    • Call Options (Enable Recording)OFF
    • Global Spam FilteringON

    Click Save Changes once you adjust your settings. Under the Voicemail tab, plug in your email address so you get notified of new voicemails. Down the road, receipt of a Google Voice voicemail will be a big hint that something has come unglued on your PBX.

    One final word of caution is in order regardless of your choice of providers: Do NOT use special characters in any provider passwords, or nothing will work!

    Now you’re ready to set up your Google Voice trunk in the GUI. After logging in with your browser, click the Connectivity tab and choose Google Voice/Motif. To Add a new Google Voice account, just fill out the form. Do NOT check the third box or incoming calls will never ring!

    blank

    IMPORTANT LAST STEP: Google Voice will not work unless you restart Asterisk from the Linux command line at this juncture. Using SSH, log into your server as root and issue the following command: amportal restart.

    If you have trouble getting Google Voice to work (especially if you have previously used your Google Voice account from a different IP address), try this Google Voice Reset Procedure. It usually fixes connectivity problems. If it still doesn’t work, enable Less Secure Apps using this Google tool.

    Troubleshooting Audio and DTMF Problems

    You can avoid one-way audio on calls and touchtones that don’t work with these simple settings in the GUI: Settings -> Asterisk SIP Settings. Just plug in your public IP address and your private IP subnet. Then set ULAW as the only Audio Codec.

    blank

    A Few Words about the Incredible PBX Security Model for CentOS

    Incredible PBX for CentOS joins our previous Ubuntu build as our most secure turnkey PBX implementation. As configured, it is protected by both Fail2Ban and a hardened configuration of the IPtables Linux firewall. The latest release also includes Port Knocker for simple, secure access from any remote computer or smartphone. You can get up to speed on how the technology works by reading the Nerd Vittles tutorial. Your Port Knocker credentials are stored in /root/knock.FAQ together with activation instructions for your server and mobile devices. The NeoRouter VPN client also is included for rock-solid, secure connectivity to remote users. Read our previous tutorial for setup instructions. As configured, nobody can access your PBX without blank your credentials AND blank an IP address that is either on your private network or that matches the IP address of your server or the PC from which you installed Incredible PBX. You can whitelist additional IP addresses by running the command-line utility /root/add-ip. You can remove whitelisted IP addresses by running /root/del-acct. Incredible PBX is preconfigured to let you connect to many of the leading SIP hosting providers without additional firewall tweaking. We always recommend you also add an extra layer of protection by running your server behind a hardware-based firewall with no Internet port exposure, but that’s your call. And it’s your phone bill. 😉

    The IPtables firewall is a complex piece of software. If you need assistance with configuring it, visit the PIAF Forum for some friendly assistance.

    Incredible Backup and Restore

    We’re also pleased to offer our latest backup and restore utilities for Incredible PBX. Running /root/incrediblebackup will create a backup image of your server in /tmp. This backup image then can be copied to any other medium desired for storage. To restore it to another Incredible PBX server, simply copy the image to a server running Asterisk 13 and the same version of the Incredible PBX GUI. Then run /root/incrediblerestore. Doesn’t get much simpler than that.

    Incredible PBX Automatic Update Utility

    Every time you log into your server as root, Incredible PBX will ping the IncrediblePBX.com web site to determine whether one or more updates are available to bring your server up to current specs. We recommend you log in at least once a week just in case some new security vulnerability should come along.

    In the meantime, we encourage you to sign up for an account on the PIAF Forum and join the discussion. In addition to providing first-class, free support, we think you’ll enjoy the camaraderie.

    Originally published: Thursday, March 17, 2016


    blankSupport Issues. With any application as sophisticated as this one, you’re bound to have questions. Blog comments are a terrible place to handle support issues although we welcome general comments about our articles and software. If you have particular support issues, we encourage you to get actively involved in the PBX in a Flash Forums. It’s the best Asterisk tech support site in the business, and it’s all free! Please have a look and post your support questions there. Unlike some forums, ours is extremely friendly and is supported by literally hundreds of Asterisk gurus and thousands of users just like you. You won’t have to wait long for an answer to your question.


    blank


    blank
    Need help with Asterisk? Visit the PBX in a Flash Forum.


    Special Thanks to Our Generous Sponsors


    FULL DISCLOSURE: ClearlyIP, Skyetel, Vitelity, DigitalOcean, Vultr, VoIP.ms, 3CX, Sangoma, TelecomsXchange and VitalPBX have provided financial support to Nerd Vittles and our open source projects through advertising, referral revenue, and/or merchandise. As an Amazon Associate and Best Buy Affiliate, we also earn from qualifying purchases. We’ve chosen these providers not the other way around. Our decisions are based upon their corporate reputation and the quality of their offerings and pricing. Our recommendations regarding technology are reached without regard to financial compensation except in situations in which comparable products at comparable pricing are available from multiple sources. In this limited case, we support our sponsors because our sponsors support us.

    blankBOGO Bonaza: Enjoy state-of-the-art VoIP service with a $10 credit and half-price SIP service on up to $500 of Skyetel trunking with free number porting when you fund your Skyetel account. No limits on number of simultaneous calls. Quadruple data center redundancy. $25 monthly minimum spend required. Tutorial and sign up details are here.

    blankThe lynchpin of Incredible PBX 2020 and beyond is ClearlyIP components which bring management of FreePBX modules and SIP phone integration to a level never before available with any other Asterisk distribution. And now you can configure and reconfigure your new Incredible PBX phones from the convenience of the Incredible PBX GUI.

    blankVitalPBX is perhaps the fastest-growing PBX offering based upon Asterisk with an installed presence in more than 100 countries worldwide. VitalPBX has generously provided a customized White Label version of Incredible PBX tailored for use with all Incredible PBX and VitalPBX custom applications. Follow this link for a free test drive!
     

    blankSpecial Thanks to Vitelity. Vitelity is now Voyant Communications and has halted new registrations for the time being. Our special thanks to Vitelity for their unwavering financial support over many years and to the many Nerd Vittles readers who continue to enjoy the benefits of their service offerings. We will keep everyone posted on further developments.


    Some Recent Nerd Vittles Articles of Interest…

    It’s Back: $10.50 Buys an Incredible PBX in the Cloud For Life… If You Hurry

    In January, we began our new series on Cloud Computing by documenting how to build an awesome LAMP server in the Cloud using Linux. Today we’re again going to show you how to use the same Cloud platform and take advantage of the $10.50 coupon code TAKE70 to build an Incredible PBX in the Cloud FOR LIFE. When you’re finished, you’ll have a state-of-the-art Incredible PBX 13 server with hundreds of PBX features including free calling to the U.S. and Canada using any (free) Google Voice account. Keep in mind this isn’t $10.50 a month for your cloud server. It’s $10.50, period! The whole project takes less than an hour. Before we begin, let’s revisit our cautionary note for those that missed it in the previous article. It’s important.

    There’s lots to hate at Cloud At Cost, a Canadian provider that offers virtual machines in the cloud for a one-time fee with no recurring charges. For $35 $10.50, you get a virtual machine with 512MB of RAM, 10GB of storage, and a gigabit Internet connection FOR LIFE. We haven’t seen a week go by when Cloud at Cost didn’t offer some sort of discount. Today it’s 70% which brings the total cost down to $10.50. That’s less than a burger at Five Guys. That’s the good news. But, if security, 99.999% reliability, performance, and excellent customer support are your must-haves, then look elsewhere. So why would anyone in their right mind sign up for a cloud solution that didn’t offer those four things? Did we mention it’s $10.50 for a lifetime cloud server?

    If you take our recommendation and plunk down your $10.50, you’ll need to go into this with the right attitude. It’s not going to be flawless perfection computing. It’s a sandbox on which to experiment with [VoIP] and Cloud Computing. Will your virtual machine disintegrate at some juncture? Probably. Our experience is that the first couple days are critical. If you start seeing sluggish performance which degenerates to zero, don’t waste your time. Take good notes as you go along, delete the virtual machine, and rebuild a new one. It won’t cost you a dime, and it’ll save you hours of frustration. We suspect that bad folks get onto some of the servers and delight in bringing the machines to their knees. So the quicker you cut your losses, the better off you will be. Is CloudAtCost a good solution for production use? Absolutely Probably not so don’t try to fit a square peg in the round hole. It’s not gonna work, and you WILL be disappointed.

    Today’s experiment will give you a platform on which to learn before you decide upon a more permanent deployment solution. And it will give you a terrific home for a backup server once you do move to a long-term solution so your $10.50 won’t be wasted.


    The objective today is to show you how to build a rock-solid, secure VoIP server in the Cloud with all the bells and whistles you’d typically find on a PBX costing tens of thousands of dollars. Incredible PBX is pure GPL, open source code with one major difference. It’s FREE! And it’s supported by thousands of users on the PIAF Forum that started just like you.

    Some of you are probably wondering why you would want a PBX at all. Hearing is believing as they say. Spend a couple minutes and call our CloudAtCost demo server. We preconfigured it using everything provided in today’s tutorial. It’ll let you play with some of the features that a PBX offers such a voice dialing from a directory, news and weather forecasts, and much more. And, in case you’re wondering, it’s been running 24/7 for two full months without a single hiccup. To try it for yourself, just dial: blank

    Nerd Vittles Demo IVR Options
    1 – Call by Name (say “Delta Airlines” or “American Airlines” to try it out)
    2 – MeetMe Conference (password is 1234)
    3 – Wolfram Alpha (say “What planes are flying overhead now?”)
    4 – Lenny (The Telemarketer’s Worst Nightmare)
    5 – Today’s News Headlines
    6 – Weather Forecast (Just enter your ZIP Code!)
    7 – Today in History
    8 – Speak to a Real Person (or maybe just voicemail if we’re out)

    For long time readers of Nerd Vittles, you already know that the component we continually stress is security. Without that, the rest really doesn’t matter. You’ll be building a platform for someone else to hijack and use for nefarious purposes. When we’re finished today, you’ll have a cloud-based VoIP server that is totally invisible to the rest of the world except a short list of VoIP providers that have been thoroughly vetted by Nerd Vittles staff. You can whitelist additional locations and phones to meet your individual needs without worrying about your server being compromised.

    Creating Your Virtual Machine Platform in the Cloud

    To get started, you’ve got to cough up your $10.50 at Cloud at Cost using coupon code TAKE70. Once you’ve signed up, CloudAtCost will send you credentials to log into the Cloud at Cost Management Portal. Change your portal password IMMEDIATELY after logging in. Just go to SETTINGS and follow your nose. HINT: DC2 is the preferred data center!

    blank

    To create your virtual machine, click on the CLOUDPRO button and click Add New Server. If you’ve only purchased the $10.50 CloudPRO 1 platform, then you’ll need all of the available resources shown in the pick list. Leave CentOS 6.7 64bit selected as the OS Type and click Complete. Depending upon the type of special pricing that Cloud at Cost is offering when you sign up, the time to build your virtual machine can take anywhere from a minute to the better part of a day. Things have settled down since the 90% off week so new servers typically are ready in a few minutes. However, we’ve learned to build new virtual machines at night where possible. Then they’re usually available for use by the next morning. Luckily, this slow performance does not impact existing virtual machines that already are running in the CloudAtCost hosting facilities.

    Initial Configuration of Your CentOS 6.7 Virtual Machine

    blank

    With a little luck, your virtual machine soon will appear in your Cloud at Cost Management Portal and look something like what’s shown above. The red arrow points to the i button you’ll need to click to decipher the password for your new virtual machine. You’ll need both your IP address and the password for the new virtual machine in order to log into the server which is now up and running with a barebones CentOS 6.7 operating system. Note the yellow caution flag. That’s telling you that Cloud at Cost will automatically shut down your server in a week to save (them) computing resources. You can change the setting to keep your server running 24/7. Click Modify, Change Run Mode, and select Normal – Leave Powered On. Click Continue and OK to save your new settings.

    blank

    Finally, you’ll want to change the Host Name for your server to something more descriptive than c7…cloudpro.92… Click the Modify button again and click Rename Server to change it. IncrediblePBX13 has a nice ring to it, but to each his own.

    Logging into Your New CentOS 6.7 Virtual Machine

    In order to configure and manage your new CentOS 6.7 virtual machine, you’ll need to log into the new server using either SSH or, for Windows users, Putty. After installing Putty, run it and log in to the IP address of your VM with username root and the password you deciphered above. On a Mac, open a Terminal session and issue a command like this using the actual IP address of your new virtual machine:

    ssh root@12.34.56.78
    

    Before you do anything else, reset your Virtual Machine’s root password to something very secure: passwd

    Next, let’s address a couple of CloudAtCost quirks that may cause problems down the road. CloudAtCost has a nasty habit of not cleaning up after itself with fresh installs. The net result is your root password may get reset every time you reboot even though you changed it.

    sed -i '/exit 0/d' /etc/rc.local
    killall plymouthd
    echo killall plymouthd >> /etc/rc.local
    rm -f /etc/rc3.d/S97*
    echo "exit 0" >> /etc/rc.local
    

    Installing Incredible PBX 13 with CentOS 6.7

    Now we’re ready to build your VoIP server platform. There aren’t many steps so just cut-and-paste the code into your SSH or Putty session and review the results to make sure nothing comes unglued. If something does, the beauty of virtual machines is you can delete them instantly within your management portal and just start over whenever you like. So here we go…

    We’ll begin by permanently turning off SELINUX which causes more problems than it solves. The first command turns it off instantly. The second line assures that it’ll stay off whenever you reboot your virtual machine.

    setenforce 0
    sed -i s/SELINUX=enforcing/SELINUX=disabled/g /etc/selinux/config
    

    Now let’s bring CentOS 6.7 up to current specs and add a few important applications:

    yum -y update
    yum -y install net-tools nano wget tar
    reboot
    

    Once your server reboots, we’re ready to kick off the Incredible PBX 13 install:

    cd /root
    wget http://incrediblepbx.com/incrediblepbx13-12.2-centos.tar.gz
    tar zxvf incrediblepbx*
    ./IncrediblePBX*
    

    When the install begins, read the license agreement and press ENTER to agree to the terms and get things rolling. Now would be a great time to go have breakfast or lunch. Come back in about an hour and your server should be ready to go.

    Implementing Dynamic DNS Service on Your Client Machines

    Unlike some other PBX offerings that leave your server exposed to the Internet, Incredible PBX is different. Unless the IP address from which you are accessing the server has been whitelisted, nobody on the Internet can see your server. The only exception is the preferred providers list and those on the same local area network (which is nobody in the case of CloudAtCost). As part of the Incredible PBX install, the IP address of the computer you used to perform the install was whitelisted automatically. But there may be other computers from which you wish to allow access to the PBX in order to deploy telephones at remote sites. Some of these sites may have dynamic IP addresses that change from time to time. Or you may have traveling salesman that land in a new hotel almost every night with a new IP address. Fortunately, there are a number of free and paid Dynamic DNS providers. For sites with dynamic IP addresses, simply choose a fully-qualified domain name (FQDN) to identify each location where you need computer access or need to deploy a phone. Then run a dynamic DNS update utility periodically from a computer or router at that site. It reports back the current public IP address of the site and your DNS provider updates the IP address assigned to that FQDN whenever there are changes.

    DNS update clients are available for Windows, Mac OS X, and many residential routers. They’re also available for Android devices. Then it’s just a matter of plugging in the remote users’ FQDNs so Incredible PBX knows to give them server access via the whitelist. You implement this in seconds using the add-ip and add-fqdn utilities in the /root directory.

    There are other ways to gain access as well using the PortKnocker utility or Travelin’ Man 4 from a telephone. Both of these are covered in the Incredible PBX 13 tutorial so we won’t repeat it here.

    Incredible PBX Preliminary Setup Steps

    First, let’s check things out and make sure everything is working as it should. With your favorite web browser, visit the IP address of your new server. You should see the default Incredible PBX page, the Kennonsoft Menu. It’s divided into two parts, a Users tab (shown below) and an Admin tab with additional options that we’ll cover shortly.

    blank

    Now we need to jump back to SSH or Putty and log back into your server as root. You’ll note that the Incredible PBX Automatic Update Utility is run each time you log in. This is how important security updates are pushed to your server so do it regularly. And, no, you don’t need to contribute to our open source projects unless you want to. You’ll still get the updates as they are released.

    After the Automatic Update Utility runs, the login script will execute status which tells you everything you need to know about the health of your server. After the initial install, it will look something like this with your server’s IP address obviously. We’ll cover the RED items down the road a bit.

    blank

    For now, we need to complete a few preliminary setup steps for Incredible PBX to make sure you can log into the various components which have been installed on your computer. There are several different credentials you will need. Most of these are configured using scripts in the /root folder of your server. First, you need your root password for the server itself, and you should have already set that up with a very secure password using passwd. These same credentials are used to login to WebMin.

    Next you’ll need an admin password for the Incredible PBX GUI. This is the management utility and Asterisk® code generator which consists of FreePBX® GPL modules that are open source and free to use. The admin password is set by running admin-pw-change in the /root directory.

    There are also a number of web-based applications such as Telephone Reminders, AsteriDex, phpMyAdmin, and VoiceMail & Recordings (User Control Panel). You obviously don’t want everyone with a telephone using all of these applications so they are protected using a couple different Apache web server credentials. First, you set up an admin password for the administrator-level applications using the htpasswd utility. Then you set up an end-user account and password for access to AsteriDex, Reminders, and the User Control Panel. With the User Control Panel, end users also will need a username and password for their particular phone extension and this is configured with the Incredible PBX GUI using Admin -> User Management -> Add New User. If this sounds convoluted, it’s really not. Apache credentials can be entered once in an administrator’s or end user’s browser and they’re stored permanently.

    Here is a checklist of the preliminary steps to complete before using your server:

    Make your root password very secure: passwd
    Create admin password for Incredible PBX GUI access: /root/admin-pw-change
    Create admin password for web apps: htpasswd /etc/pbx/wwwpasswd admin
    Create joeuser password for web apps: htpasswd /etc/pbx/wwwpasswd joeuser
    Set up UCP accounts for Voicemail & Recordings access using Incredible PBX GUI
    Make a copy of your Knock codes: cat /root/knock.FAQ
    Decipher IP address and other info about your server: status
    Set your correct time zone: /root/timezone-setup

    Activating Incredible Fax on Your Server

    Incredible PBX also includes an optional (and free) faxing component that lets you send and receive faxes that are delivered to your email address. To activate Incredible Fax, run the following script and plug in your email address for delivery of incoming faxes: /root/incrediblefax11.sh. After entering your email address, you’ll be prompted for all sorts of additional information. Unless you have unusual requirements, pressing the ENTER key at every prompt is the appropriate response. You’ll need to reboot your server again when the fax installation is complete. Once you log back into your server as root, the bottom line of the status display should now be green UP entries.

    Managing Your Server with the Incredible PBX GUI

    About 99% of your time managing your server will be spent in the Incredible PBX GUI. To access it, fire up your browser and point to the IP address of your server. At the Kennonsoft menu, click on the Users tab which will change to Admin and bring up the Admin menu shown here:

    blank

    From the Administrator menu in the Kennonsoft GUI, click on Incredible PBX Administration. This will bring up the following menu:

    blank

    Click on the first icon to access the Incredible PBX GUI. You’ll be prompted for your credentials. For the username, enter admin. For the password, enter the password you set up using admin-pw-change above. You should then be greeted by the main status display in the Incredible GUI:

    blank

    If you’re new to Asterisk and FreePBX, here’s the one paragraph primer on what needs to happen before you can make free calls with Google Voice. You’ll obviously need a free Google Voice account. This gets you a phone number for people to call you and a vehicle to place calls to plain old telephones throughout the U.S. and Canada at no cost. You’ll also need a softphone or SIP phone (NOT a regular POTS telephone) to actually place and receive calls. YATE makes a free softphone for PCs, Macs, and Linux machines so download your favorite and install it on your desktop. Phones connect to extensions to work with Incredible PBX. Extensions talk to trunks (like Google Voice) to make and receive calls. We use outbound routes to direct outgoing calls from extensions to trunks, and we use inbound routes to route incoming calls from trunks to extensions to make your phones ring. In a nutshell, that’s how a PBX works. There are lots of bells and whistles that you can explore down the road.

    As configured after installation, you have everything you’ll need except a Google Voice trunk, and we’ll cover that next. Then we’ll add a softphone with your extension 701 credentials, and you’ll be ready to make and receive calls. Before we move on, let’s decipher your extension 701 password so that you’ll have it for later. Choose Applications -> Extensions -> 701 and scroll down the screen to the Secret field and write down your password. You can also change it if you like and click Submit and then the Red button to update your settings. While you’re here, write down your extension 701 Voicemail Password.

    Deploying Google Voice on Your Server

    That leaves one RED entry on your status display, GV OAUTH. Whether to use plain text passwords or OAUTH 2 credentials with Google Voice accounts presently is a matter of choice although Google regularly threatens to discontinue access to Google Voice without OAUTH authentication. We suggest you play with Google Voice using plain text passwords just to get your feet wet because OAUTH implementation gets complicated. When you get ready to deploy a permanent Incredible PBX server, that would be the appropriate time to switch to OAUTH. This tutorial (beginning at step 1b) will guide you through the process.

    If you want to use Google Voice, you’ll need a dedicated Google Voice account to support Incredible PBX. If you want to use the inbound fax capabilities of Incredible Fax, then you’ll need an additional Google Voice line that can be routed to the FAX custom destination using the GUI. The more obscure the username (with some embedded numbers), the better off you will be. This will keep folks from bombarding you with unsolicited Gtalk chat messages, and who knows what nefarious scheme will be discovered using Google messaging six months from now. So keep this account a secret!

    We’ve tested this extensively using an existing Gmail account, and inbound calling is just not reliable. The reason seems to be that Google always chooses Gmail chat as the inbound call destination if there are multiple registrations from the same IP address. So, be reasonable. Do it our way! Set up a dedicated Gmail and Google Voice account, and use it exclusively with Incredible PBX. It’s free at least through 2013. Google Voice no longer is by invitation only so, if you’re in the U.S. or have a friend that is, head over to the Google Voice site and register.

    You must choose a telephone number (aka DID) for your new account, or Google Voice calling will not work… in either direction. Google used to permit outbound Gtalk calls using a fake CallerID, but that obviously led to abuse so it’s over! You also have to tie your Google Voice account to at least one working phone number as part of the initial setup process. Your cellphone number will work just fine. Don’t skip this step either. Just enter the provided 2-digit confirmation code when you tell Google to place the test call to the phone number you entered. Once the number is registered, you can disable it if you’d like in Settings, Voice Setting, Phones. But…

    IMPORTANT: Be sure to enable the Google Chat option as one of your phone destinations in Settings, Voice Setting, Phones. That’s the destination we need for The Incredible PBX to work its magic! Otherwise, all inbound and outbound calls will fail. If you don’t see this option, you may need to call up Gmail and enable Google Chat there first. Then go back to the Google Voice Settings.

    While you’re still in Google Voice Settings, click on the Calls tab. Make sure your settings match these:

    • Call ScreeningOFF
    • Call PresentationOFF
    • Caller ID (In)Display Caller’s Number
    • Caller ID (Out)Don’t Change Anything
    • Do Not DisturbOFF
    • Call Options (Enable Recording)OFF
    • Global Spam FilteringON

    Click Save Changes once you adjust your settings. Under the Voicemail tab, plug in your email address so you get notified of new voicemails. Down the road, receipt of a Google Voice voicemail will be a big hint that something has come unglued on your PBX.

    One final word of caution is in order regardless of your choice of providers: Do NOT use special characters in any provider passwords, or nothing will work!

    Once you have your Google Voice account properly configured with Google, here is the proper sequence to get a Google Voice account working with Incredible PBX. First, using a browser, login to your Google Voice account. Second, make sure that Google Chat is activated in your Phone -> Settings. Third, in a separate browser tab, enable Less Secure Apps for your Google account. Fourth, in another separate browser tab, activate the Google Voice reset procedure. Fifth, in the Incredible PBX GUI, choose Connectivity -> Google Voice (Motif) and enter your Google Voice credentials:

    blank

    Sixth, save your settings by clicking Submit and the Red Button to reload the GUI. Finally, using SSH or Putty, log into your server as root and restart Asterisk: amportal restart.

    Setting Up a Soft Phone to Use with Incredible PBX

    Now you’re ready to set up a telephone so that you can play with Incredible PBX. We recommend YateClient which is free. Download it from here. Run YateClient once you’ve installed it and enter the credentials for the 701 extension on Incredible PBX. You’ll need the IP address of your server plus your extension 701 password. Choose Settings -> Accounts and click the New button. Fill in the blanks using the IP address of your server, 701 for your account name, and your extension 701 password. Click OK.

    blank

    Once you are registered to extension 701, close the Account window. Then click on YATE’s Telephony Tab and place some test calls to the numerous apps that are preconfigured on Incredible PBX. Dial a few of these to get started:


    DEMO - Allison's IVR Demo
    947 - Weather by ZIP Code
    951 - Yahoo News
    *61 - Time of Day
    *68 - Wakeup Call
    TODAY - Today in History

    Now you’re ready to connect to the telephones in the rest of the world. If you live in the U.S., the easiest way (at least for now) is to use the free Google Voice account we set up above. Unlike traditional telephone service where you were 100% dependent upon MaBell, there is no such limitation with VoIP. The smarter long-term solution is to choose several SIP providers and set up redundant trunks for your incoming and outbound calls. The PIAF Forum includes dozens of recommendations to get you started. Here are a few of our favorites:

    blank

    Originally published: Friday, January 29, 2016   Republished: Monday, March 14, 2016


    blank
    Need help with Asterisk? Visit the PBX in a Flash Forum.


    Special Thanks to Our Generous Sponsors


    FULL DISCLOSURE: ClearlyIP, Skyetel, Vitelity, DigitalOcean, Vultr, VoIP.ms, 3CX, Sangoma, TelecomsXchange and VitalPBX have provided financial support to Nerd Vittles and our open source projects through advertising, referral revenue, and/or merchandise. As an Amazon Associate and Best Buy Affiliate, we also earn from qualifying purchases. We’ve chosen these providers not the other way around. Our decisions are based upon their corporate reputation and the quality of their offerings and pricing. Our recommendations regarding technology are reached without regard to financial compensation except in situations in which comparable products at comparable pricing are available from multiple sources. In this limited case, we support our sponsors because our sponsors support us.

    blankBOGO Bonaza: Enjoy state-of-the-art VoIP service with a $10 credit and half-price SIP service on up to $500 of Skyetel trunking with free number porting when you fund your Skyetel account. No limits on number of simultaneous calls. Quadruple data center redundancy. $25 monthly minimum spend required. Tutorial and sign up details are here.

    blankThe lynchpin of Incredible PBX 2020 and beyond is ClearlyIP components which bring management of FreePBX modules and SIP phone integration to a level never before available with any other Asterisk distribution. And now you can configure and reconfigure your new Incredible PBX phones from the convenience of the Incredible PBX GUI.

    blankVitalPBX is perhaps the fastest-growing PBX offering based upon Asterisk with an installed presence in more than 100 countries worldwide. VitalPBX has generously provided a customized White Label version of Incredible PBX tailored for use with all Incredible PBX and VitalPBX custom applications. Follow this link for a free test drive!
     

    blankSpecial Thanks to Vitelity. Vitelity is now Voyant Communications and has halted new registrations for the time being. Our special thanks to Vitelity for their unwavering financial support over many years and to the many Nerd Vittles readers who continue to enjoy the benefits of their service offerings. We will keep everyone posted on further developments.


    Some Recent Nerd Vittles Articles of Interest…

    I Have A Dream: Free Cellular Service with Integrated Remote SIP Connectivity

    As part of our Mobile Internet adventure this year, we’ve been scouring the countryside with two requirements in mind. First, we wanted a smartphone on which we could activate some type of free cellular service for making calls and sending text messages. Second, we wanted to integrate remote SIP connectivity using the same provider and phone number so that we could make and receive calls transparently using any SIP phone or Asterisk® server anywhere in the world. Sounds like a tall order, you say? Well, if you’ve enjoyed your Cloud@Cost Sandbox, you’re gonna love RingPlus!

    Yes, you’ll have to buy a compatible cellphone, but there are thousands to choose from. And, yes, you’ll need Sprint service in your neighborhood. Then you’ll have to cough up $10 to activate your cellular account. RingPlus offers dozens of plans.1 We recommend the Michelangelo plan which best meets what we’re trying to accomplish today, but the choice is all yours.2 With the Michelangelo plan, you can make and receive 1,000 minutes of free calls a month to anywhere in the U.S. (calls to Canada are 3¢ a minute), you can send and receive 1,000 free text messages a month, and you can use 500MB of free data service every month. You also can use your same account credentials with any SIP phone, softphone, or Asterisk server anywhere in the world to make and receive phone calls transparently using the same phone number as your smartphone. In other words, you can travel anywhere and make and receive phone calls just as if you were sitting in Atlanta, Georgia dialing from your smartphone. The SIP calls are deducted from your free minutes. No cellular service required at all. Meet RingPlus!


    So what’s the catch? How does RingPlus make money? Well, of course, they would prefer that you sign up for a plan with monthly fees. For those on the free plans, the only difference you will notice is an occasional ad which plays instead of a ring tone when you place outbound calls. This only occurs until the other party answers the call, and it can be all but eliminated by choosing a music selection in the RingPlus Radio feature in your RingPlus Dashboard.

    Who are the ones most likely to use something like this? Well, for openers, all of your kids unless you like springing for a $500 phone and spending $40+ dollars a month for cellular service for each of them. One of the other real beauties of RingPlus is you can set up a whitelist of numbers that can be called from the phone. Blacklists are supported as well. It’s perfect for kids just getting started with a cellphone. A second potential user group would be those who travel outside the United States and prefer not to pay exorbitant roaming rates for calls. Using a SIP phone connected to your RingPlus account, all of the international calls suddenly are free. And the calls are delivered with the same CallerID number as calls placed from your actual smartphone. In fact, your smartphone doesn’t have to be in service at all. A third and perhaps most important use for us was to serve as a failover trunk on one or more Asterisk servers. When all else fails, you can route outbound calls to your RingPlus SIP trunk for free calling using your RingPlus account. Doesn’t get any better than that.

    Official RingPlus WARNING: Starting April 17, 2016, per our carrier partner Sprint, Members and potential Members will no longer be able to activate prepaid devices which are not eligible under Sprint’s FED policies [Requires activation of prepaid phone on original Sprint MVNO network for at least one year!]. Such prepaid devices will no longer pass FED until actual eligibility date is met.

    There are probably numerous ways to put all these pieces in place so that things function just as we’ve described. Today we’ll share with you the solution that actually worked for us. You can take it from there and avoid the thousands of horror stories about incompatible smartphones. Be advised that acquiring used cellphones or even incompatible cellphones is a very dangerous and expensive business. If you buy one that happens to be stolen, or that has a balance due on the account, or that is incompatible with RingPlus, then you’ve bought a tiny boat anchor and not much else. So, our best advice is buy one from the provider. That’s the one and only RingPlus, and the smartphones start at just under $100. Many Sprint post-paid phones also work, such as the new iPhone SE (Sprint Model) from any Apple Store.

    If store employees will let you, find the Sprint postpaid phone that you like and look on the bottom of the box. There you will find the decimal value of the MEID. Log into http://nerd.bz/nvringplus and plug in the MEID to see if it is RingPlus compatible. If it passes, buy it. If it flunks, try another one. Whatever you do, DON’T BUY A PHONE IN AN OPENED BOX, AND DON’T OPEN THE BOX YET! Make certain there is a return policy in case things don’t work out as expected!

    Funny story. The Radio Shack employees at our local store were very savvy and refused to let me look at the MEID claiming it was a security issue. Fair enough. Of course, they were also curious why I wanted a phone without letting them configure it. Once I told them the deal, they all wanted one, too. They asked for the link to the MEID verification site and said they’d do it for me. Once it worked, excitement broke out in the room with all the staff reading an early copy of this article. While Radio Shack typically charges a $35 restocking fee on cell phones, that fee is waived if you return the phone in an unopened box. So the only thing you’re wasting if they insist that you purchase the phone is a little bit of your time and a lot of Radio Shack employee time if, in fact, the MEID flunks the verification test.

    Configuring Your Phone for RingPlus Service

    Now sign up for a RingPlus free plan using the MEID and ICC ID you previously verified. Michelangelo is probably the best bet if you missed our Twitter tip this past weekend. Deposit $10 in your new account, and activate it. Log into your RingPlus Dashboard, click on your phone in the upper right frame, and choose Manage Device. Write down your MSID, your phone number, and MSL. Once your account is active, then and only then unbox and turn on your phone. Go through the minimal setup steps by choosing your Language and choosing an available WiFi network. During this setup, RingPlus should push a PRL update to your new phone, and it will reboot. Check in Settings -> General -> About Phone -> Status and see if you have a phone number. If so, you’re good to go. If not, open the Phone Dialer application and dial ##72786# which should force another PRL update to your phone with another reboot. When it finishes, check again for a phone number and place an outbound call.

    Using a browser on your desktop computer, go back into the RingPlus Dashboard and sign in. Your phone device should show Active in the upper right corner of the screen. Click there and you’ll get a display like this:

    blank

    While still in the Device Settings Menu, click on the WiFi FluidCall option to decipher your SIP credentials. You’ll need these to set up your SIP phone or a SIP trunk on your Asterisk server. Your username is your 10-digit phone number, the domain name is sip.ringplus.net, and the password is a system-generated entry which you can recreate whenever you like. That’s probably a very good idea whenever you use public WiFi services to make calls with your SIP phone or a softphone.

    By the way, this isn’t some kludgy SIP-GSM gateway where the calls actually are routed out through your cellphone device. The RingPlus SIP gateway connects your SIP device directly to the Internet and simply uses your existing RingPlus CallerID to identify the calls. In short, you get the best of both worlds: a dirt cheap or free cellphone service plus a dirt cheap or free SIP trunk for use anywhere in the world.

    blank

    Configuring a RingPlus SIP Trunk with Asterisk

    If you’d like to set up your RingPlus number as a failover trunk on your Asterisk server, here is the setup that worked for us with Incredible PBX using your assigned 10-digit phone number for your username and fromuser settings and your assigned password for your secret. If you include a registration string and configure an inbound route using your RingPlus DID, then inbound calling will work as well. If you skip the registration step, then you can use the same RingPlus trunk on multiple Asterisk servers for emergency outbound calling. No firewall adjustments should be necessary.

    blank

    There are all sorts of other magic tricks you can implement using the RingPlus API, but you probably won’t need any of the features in light of the robust SIP connectivity RingPlus provides to an existing Asterisk server where the feature set is virtually unlimited. Be advised that you must make a call out at least once every 60 days to keep your account active. The simple way to do this is to set up a monthly reminder using your RingPlus trunk. Schedule the reminder to call out once every month using Telephone Reminders in Incredible PBX.

    RingPlus Gotcha Checklist

    Free service wouldn’t be free without a few land mines. So here’s a checklist to keep things running smoothly without any problems down the road. First, link your account to one of the social media options (Twitter, Facebook, or LinkedIn) when you sign up for service. You’ll find the link on your Dashboard under the Your Social Networks icon. Second, make at least one outbound call a month on every line you activate. As noted, this can be accomplished automatically using the Telephone Reminders application in Incredible PBX. Third, keep a valid credit card on file in your account at all times. Fourth, keep a positive balance in your account for each phone that you activate to avoid automatic replenishment at the original rate when you signed up for your plan. Fifth, be mindful of the Domino Effect. With some plans, if you allow a related plan to end (for example, Queen of Hearts when you also have an Ace of Hearts plan), then your better plan will be demoted in its feature set. Enjoy the Free Ride!

    Originally published: Monday, February 8, 2016


    blank
    Need help with Asterisk? Visit the PBX in a Flash Forum.


    Special Thanks to Our Generous Sponsors


    FULL DISCLOSURE: ClearlyIP, Skyetel, Vitelity, DigitalOcean, Vultr, VoIP.ms, 3CX, Sangoma, TelecomsXchange and VitalPBX have provided financial support to Nerd Vittles and our open source projects through advertising, referral revenue, and/or merchandise. As an Amazon Associate and Best Buy Affiliate, we also earn from qualifying purchases. We’ve chosen these providers not the other way around. Our decisions are based upon their corporate reputation and the quality of their offerings and pricing. Our recommendations regarding technology are reached without regard to financial compensation except in situations in which comparable products at comparable pricing are available from multiple sources. In this limited case, we support our sponsors because our sponsors support us.

    blankBOGO Bonaza: Enjoy state-of-the-art VoIP service with a $10 credit and half-price SIP service on up to $500 of Skyetel trunking with free number porting when you fund your Skyetel account. No limits on number of simultaneous calls. Quadruple data center redundancy. $25 monthly minimum spend required. Tutorial and sign up details are here.

    blankThe lynchpin of Incredible PBX 2020 and beyond is ClearlyIP components which bring management of FreePBX modules and SIP phone integration to a level never before available with any other Asterisk distribution. And now you can configure and reconfigure your new Incredible PBX phones from the convenience of the Incredible PBX GUI.

    blankVitalPBX is perhaps the fastest-growing PBX offering based upon Asterisk with an installed presence in more than 100 countries worldwide. VitalPBX has generously provided a customized White Label version of Incredible PBX tailored for use with all Incredible PBX and VitalPBX custom applications. Follow this link for a free test drive!
     

    blankSpecial Thanks to Vitelity. Vitelity is now Voyant Communications and has halted new registrations for the time being. Our special thanks to Vitelity for their unwavering financial support over many years and to the many Nerd Vittles readers who continue to enjoy the benefits of their service offerings. We will keep everyone posted on further developments.


    Some Recent Nerd Vittles Articles of Interest…

    1. Be advised that future upgrades of these "free" plans may go away after February 15 unless you join the Member+ program, the cost of which changes almost weekly. This will not affect those that already are participating in the program according to RingPlus. []
    2. In case you’re curious, a plan equivalent to the free Michelangelo plan at RingPlus would run you $41.00 per month at Ting. Ouch! []

    Mobile Internet: The 2016 Road Warrior’s Guide to Choosing New Wheels


    OK. We’re not going to bring Mobile Computing down to the teepee level, but we have decided to dedicate a column regularly to Mobile Internet developments in the marketplace. Of course, our major focus will remain the impact on unified communications and especially Asterisk®, FreeSWITCH™, PBX in a Flash™, and Incredible PBX™. The idea here is to document a design that lets road warriors travel with the same communications dexterity that they have at home or in the home office. In other words, our vision is a mobile computing environment that makes travel status transparent. Things that worked a certain way in the office should work similarly on the road or in the comfort of your Motel 6 suite. 🙂

    To get 2016 started on the right foot, we want to lay out some of the technology that’s available to the road warrior who spends a significant amount of time in an automobile. Our objective today is to help you choose that next set of wheels, the proverbial perfect vehicle. We began documenting some of what we’re looking for in our December Mobile Internet column. Today we’ll follow up with more details and some real-world feedback. What we’ll be covering in coming months applies equally to those that travel for pleasure as well as those that do it for a living. Unless you prefer hiding in your Man Cave, we hope you’ll find something useful that makes travel away from your home office amenities easier and less intimidating.

    Let’s begin by documenting some of our inexpensive must-haves. These can round out your vehicle shopping list without much impact on the cost of a vehicle: cup holders (lots of them), cigarette lighter connections (lots of them), USB ports (lots of them), and compartments especially those with access to power or USB ports. Another must have for us was a fold down table for the back seat. These come standard in Mercedes S Class sedans as well as the Jaguar XJ. For other vehicles, you’ll need to consider aftermarket options which is a little surprising when you consider that every airline seat has had fold down tables FOREVER. In their haste to roll out the latest gee whiz features, many car manufacturers have forgotten the basic essentials that make all of this technology useful. But there’s hope. General Motors is among those that have finally awakened to the 21st century. Our best advice is this. Before you get swept away by the self-parking car, take a quick look inside the cabin and consider whether the vehicle has the road warrior essentials.

    Now for the fun stuff. Take a quick look at this AutoBytel article which ticks off some of the more interesting high tech features that are available in the marketplace today: GPS-linked temperature control, a sensor that provides a text alert if someone is hiding in your car, a collection of audio and visual alerts if the car senses that you are distracted or falling asleep at the wheel, self-parking vehicles, night vision with pedestrian detection, adaptive cruise control that adjusts your speed based upon the speed of the vehicle in front of you, blind spot detection that provides visual warnings on your side view mirrors when a vehicle is cruising along beside you at 70+ mph, lane departure warnings which include console alerts, buzzing your seat, or adjusting your steering wheel to guide you back into your lane. And, last but not least, the latest Tesla which can drive itself under certain highway conditions. In case you haven’t guessed, none of this technology comes cheap. Typically, the features first appear in the high end cars and require the purchase of even higher priced, factory-installed options. Then they trickle down to less costly vehicles as the price of the technology drops.

    Here’s our two cents worth of advice on some of these features. We happen to live in the southeastern United States so we really don’t need a GPS to tell us to turn on the air conditioner. Almost any road warrior’s dream machine will have automatic temperature control. That’s as much technology as you need to stay cool in the summer and warm in the winter.

    A sensor to tell us someone is hiding inside our car is another clever idea, but we much prefer a vehicle that can lock itself when you leave the vehicle or when you place the vehicle in motion. Newer GM vehicles can also sound an alarm if someone sticks a hand into your window while you’re stopped at a traffic light. Works great unless people are passing you things while parked in a carpool line.

    blank

    If you’re a road warrior that does a lot of night driving, all of the high tech features you can find that help you drive and stay awake at the wheel are terrific additions. Not mentioned in the AutoBytel article is one of our favorites that’s actually been around for decades. The head-up display (HUD) appears on the lower part of the driver’s windshield. It shows information such as your speed and the speed limit without taking your eyes off the road. For the science behind it, see this article.

    blank

    If you’re a road warrior that spends considerable time commuting in heavy traffic or driving on interstates, adaptive cruise control is the best invention since sliced bread. It doesn’t completely drive the car for you, but it reduces your need to stay 99.9% focused on what’s in front of you every second of the trip. You simply set the separation distance between your vehicle and the vehicle in front of you, and radar in your vehicle does the rest, adjusting your speed to keep you at or below the cruise control speed you set for your vehicle while preserving the spacing you predefined. Newer versions of adaptive cruise control include support for bringing your vehicle to a complete stop at traffic signals. The best testimonial we can provide is this. Once you have a vehicle with adaptive cruise control, you’ll never buy another vehicle without it. It’s that good!

    blank

    Blind spot detection is another radar-based feature. Visual side view mirror alerts are provided whenever something is hiding in your vehicle’s blind spot. Of course, you can accomplish much the same thing by adding supplemental wide-view (blindspot) mirrors to your existing side view mirrors at considerably less cost. However, the radar-enhanced version typically is bundled with features such as adaptive cruise control and lane departure alerts so there is no additional cost for the convenience. Just be sure to test them for accuracy before dispensing with turning your head to check for vehicles. We’ve actually had a vehicle in which the sensors were incorrectly positioned. Merging into traffic without any visual warning of what’s beside you is a quick ticket to the body shop, both for the car and for you.

    blank

    Lane departure alerts and autocorrection are equally important for those that spend endless hours on long stretches of boring highway. The other essential ingredient for every road warrior is the smartphone app, Waze. Between hazard alerts, speed trap notifications, and directions, it’s the single-most important traveling enhancement that’s come along in a very long time. Think of it as you free copilot. It can watch for things up ahead and alert you to problems before you actually encounter them. Because its data is based upon real-time data and feedback from thousands of road warriors, it has no equal in terms of accuracy. See our first article in this series for more details.

    blank

    Wireless charging is another feature that has been touted by many of the Android device manufacturers. In the case of Samsung, the technology was available in the Galaxy Note 4 except for the back cover which can be replaced easily. Surprisingly, Apple has completely ignored it thus far. There are, of course, aftermarket cases that will bring wireless charging to any smartphone including the iPhones. Beginning with some 2014 models, General Motors, Chrysler, and Toyota began integrating wireless charging stations into the center consoles of some of their vehicles. By 2017, most car manufacturers probably will support it either as an included or add-on accessory.

    blank

    No review of automotive technology would be complete without mention of Apple CarPlay and Android Auto, the two smartphone integration systems from America’s finest software development companies. One can only hope that the car manufacturers see the light and drop their insistence upon their own proprietary consoles. Both Apple CarPlay and Android Auto provide navigation, messaging, and numerous music platforms including Spotify, Pandora, Google Play Music, and Apple Music. Many newer vehicles offer one or the other, and some offer both. The systems also are available as aftermarket add-ons. For an excellent review of the two competing systems, take a look at this CNET review. Our only complaint with Apple CarPlay at the moment is the inability to add applications other than those that Apple has chosen for you. That means no Google Maps and no Waze, at least for now. For an excellent interview with the man behind both technologies at General Motors, see this article from The Verge.

    So which vehicle did we choose for our Mobile Internet Lab? Well, come back next month and we’ll take you for a ride as we review the best WiFi Hotspots to complement that new set of wheels. We’ll consider offerings from Sprint, T-Mobile, Verizon, and AT&T so there will be something for almost everybody with a smartphone.

    Originally published: Monday, January 18, 2016


    blank
    Need help with Asterisk? Visit the PBX in a Flash Forum.


    Special Thanks to Our Generous Sponsors


    FULL DISCLOSURE: ClearlyIP, Skyetel, Vitelity, DigitalOcean, Vultr, VoIP.ms, 3CX, Sangoma, TelecomsXchange and VitalPBX have provided financial support to Nerd Vittles and our open source projects through advertising, referral revenue, and/or merchandise. As an Amazon Associate and Best Buy Affiliate, we also earn from qualifying purchases. We’ve chosen these providers not the other way around. Our decisions are based upon their corporate reputation and the quality of their offerings and pricing. Our recommendations regarding technology are reached without regard to financial compensation except in situations in which comparable products at comparable pricing are available from multiple sources. In this limited case, we support our sponsors because our sponsors support us.

    blankBOGO Bonaza: Enjoy state-of-the-art VoIP service with a $10 credit and half-price SIP service on up to $500 of Skyetel trunking with free number porting when you fund your Skyetel account. No limits on number of simultaneous calls. Quadruple data center redundancy. $25 monthly minimum spend required. Tutorial and sign up details are here.

    blankThe lynchpin of Incredible PBX 2020 and beyond is ClearlyIP components which bring management of FreePBX modules and SIP phone integration to a level never before available with any other Asterisk distribution. And now you can configure and reconfigure your new Incredible PBX phones from the convenience of the Incredible PBX GUI.

    blankVitalPBX is perhaps the fastest-growing PBX offering based upon Asterisk with an installed presence in more than 100 countries worldwide. VitalPBX has generously provided a customized White Label version of Incredible PBX tailored for use with all Incredible PBX and VitalPBX custom applications. Follow this link for a free test drive!
     

    blankSpecial Thanks to Vitelity. Vitelity is now Voyant Communications and has halted new registrations for the time being. Our special thanks to Vitelity for their unwavering financial support over many years and to the many Nerd Vittles readers who continue to enjoy the benefits of their service offerings. We will keep everyone posted on further developments.


    Some Recent Nerd Vittles Articles of Interest…

    The Last Sunset: Say Goodbye to Google TTS… Hello Pico TTS

    blank

    Despite the heroic efforts of Lefteris Zafiris to keep GoogleTTS afloat for use with Asterisk®, Google has made it increasingly clear that they intend to blow everyone’s apps out of the water (except theirs) if you choose to use their text to speech engine, even in open source, non-commercial products. As much as we’ve loved the voice quality and Google’s previous generosity in sharing their work product with the open source community, there comes a time when the mud wrestling simply is no longer worth the effort. Thanks to the pioneering efforts of Steven Mirabito, we all now have a choice. Steven took the work of Lefteris on GoogleTTS and retrofitted it to support the free SVOX Pico TTS engine. While Pico lacks a bit of the voice quality of GoogleTTS, it’s a quantum leap improvement over Festival and FLITE and perfectly suitable for Incredible PBX TTS apps.


    [soundcloud url="https://api.soundcloud.com/tracks/240804855″ params="auto_play=false&hide_related=false&show_comments=true&show_user=true&show_reposts=false&visual=true" width="500″ height="300″ iframe="true" /]

    Unlike FLITE which has no voice alternatives to Lurch, Pico for Android has a rich assortment of 40+ male/female voices supporting 25+ languages. Many of them are free. Hopefully, it’s only a matter of time until someone documents how to move them over to the Linux platforms. For today, our default install includes support for US English, British English, French, Spanish, and German. After the install, you’ll find them in /usr/share/pico/lang. Changing voices and languages in your Asterisk scripts is simple. Replace the default language identifier, en-US, with the voice of your choice, e.g. en-GB for British accents, fr-FR for French, es-ES for Spanish, and de-DE for German. If you wish to generate wave files at the command prompt, the syntax is shown below. Here’s the command we used to generate the sample sound file above.

    pico2wave --wave sample.wav -l en-US "Here is a sample, using the PICO text to speech engine."
    

    We’re getting a little ahead of ourselves here. Before you can use Pico TTS, we first need to get it installed. There are two different procedures depending upon whether Incredible PBX is running on the CentOS/Scientific Linux platform or Debian/Ubuntu/Raspbian. The installation procedure below will install all of the necessary components for Pico TTS on an existing Incredible PBX platform. It also will modify the Incredible PBX apps that currently rely upon GoogleTTS. And, as of yesterday, all new Incredible PBX 13 installs include Pico TTS by default.

    To get started, log into your server as root and choose the installation steps documented below for your particular platform.1

    Installing Pico TTS on the CentOS/Scientific Linux Platforms

    cd /
    wget http://incrediblepbx.com/picotts.tar.gz
    tar zxvf picotts.tar.gz
    cd /root
    ./picotts-install.sh
    sed -i 's|en)|en-US)|' /etc/asterisk/extensions_custom.conf
    sed -i 's|googletts|picotts|' /etc/asterisk/extensions_custom.conf
    asterisk -rx "dialplan reload"
    

    Installing Pico TTS on the Debian/Ubuntu Platforms

    cd /
    wget http://incrediblepbx.com/picotts.tar.gz
    tar zxvf picotts.tar.gz
    cd /root
    rm -f picotts-install.sh
    apt-get update
    apt-get install -y libttspico-utils
    sed -i 's|en)|en-US)|' /etc/asterisk/extensions_custom.conf
    sed -i 's|googletts|picotts|' /etc/asterisk/extensions_custom.conf
    asterisk -rx "dialplan reload"
    

    Installing Pico TTS on the Raspberry Pi Raspbian Platform

    cd /
    wget http://incrediblepbx.com/picotts-raspi.tar.gz
    tar zxvf picotts-raspi.tar.gz
    rm -f picotts-raspi.tar.gz
    cd /root
    echo "Installing Pico TTS..."
    ./picotts-install.sh
    

    Post-Install Testing of Pico TTS with Incredible PBX

    The easiest way to make sure everything is working properly is to pick up a phone on your server and dial 951 for the latest Yahoo News headlines. Keep in mind that Google Speech Recognition (Google STT) still works for apps such as Voice Dialing (411), Voice Messaging (767), Wolfram Alpha (4747), and Star (8). However, these apps require a free API key before use. The procedure to obtain and install one is documented in this Nerd Vittles article.

    Changing the Pico TTS Voice with Incredible PBX

    All of the Incredible PBX application scripts are saved in extensions_custom.conf in the /etc/asterisk directory. To change the default voice for Pico TTS apps, simply search and replace en-US with the desired voice: en-GB, fr-FR, es-ES, or de-DE. Save your changes. And then reload your Asterisk dialplan: asterisk -rx "dialplan reload"

    Originally published: Monday, January 11, 2016


    blank
    Need help with Asterisk? Visit the PBX in a Flash Forum.


    Special Thanks to Our Generous Sponsors


    FULL DISCLOSURE: ClearlyIP, Skyetel, Vitelity, DigitalOcean, Vultr, VoIP.ms, 3CX, Sangoma, TelecomsXchange and VitalPBX have provided financial support to Nerd Vittles and our open source projects through advertising, referral revenue, and/or merchandise. As an Amazon Associate and Best Buy Affiliate, we also earn from qualifying purchases. We’ve chosen these providers not the other way around. Our decisions are based upon their corporate reputation and the quality of their offerings and pricing. Our recommendations regarding technology are reached without regard to financial compensation except in situations in which comparable products at comparable pricing are available from multiple sources. In this limited case, we support our sponsors because our sponsors support us.

    blankBOGO Bonaza: Enjoy state-of-the-art VoIP service with a $10 credit and half-price SIP service on up to $500 of Skyetel trunking with free number porting when you fund your Skyetel account. No limits on number of simultaneous calls. Quadruple data center redundancy. $25 monthly minimum spend required. Tutorial and sign up details are here.

    blankThe lynchpin of Incredible PBX 2020 and beyond is ClearlyIP components which bring management of FreePBX modules and SIP phone integration to a level never before available with any other Asterisk distribution. And now you can configure and reconfigure your new Incredible PBX phones from the convenience of the Incredible PBX GUI.

    blankVitalPBX is perhaps the fastest-growing PBX offering based upon Asterisk with an installed presence in more than 100 countries worldwide. VitalPBX has generously provided a customized White Label version of Incredible PBX tailored for use with all Incredible PBX and VitalPBX custom applications. Follow this link for a free test drive!
     

    blankSpecial Thanks to Vitelity. Vitelity is now Voyant Communications and has halted new registrations for the time being. Our special thanks to Vitelity for their unwavering financial support over many years and to the many Nerd Vittles readers who continue to enjoy the benefits of their service offerings. We will keep everyone posted on further developments.


    Some Recent Nerd Vittles Articles of Interest…

    1. If you’re using an older version of CentOS, see the install tips documented on the PIAF Forum. []

    Mobile Internet: A 2015 Update on Caribbean Cruising and WiFi-Enabled Travel

    blank

    We decided to spend Christmas a little differently this year and joined 10,000 of our closest friends on cruises to the Western Caribbean taking in Cozumel and Grand Cayman with a few extra days at sea. If you haven’t tried it, put it on your bucket list. Christmas week is a bargain and about 50% cheaper than the same cruise to ring in the new year. Rates start at about $300 per person for the 5-day cruise. You’d be hard-pressed to dine out for a week in your home town at those prices. Today we want to provide an update on the dramatic changes in Internet connectivity not only aboard ship but also in navigating 1,000 miles of highway to get there. Let’s start with the glamorous part.

    Surfing the Internet Aboard Ship

    What a difference a couple years has made. On previous cruises to Alaska and the Eastern Caribbean, Internet service was spotty at best and cost prohibitive on sea days. Typical connection rates were $25 or more per hour. You found yourself scrambling to find a bar with cheap Internet service every time you hit a port. But that was then. Here’s our 2015 update.

    Carnival which owns the majority of the cruise ship companies (9 different brands) prides itself on making cruising affordable for almost any traveler. So we qualified. They’ve also revolutionized Internet service with rates on some ships (including ours) as low as $5 a day for unlimited (but basic) Internet connectivity. Here’s a typical pricing plan, but ours was even less expensive. $70 got us unlimited premium Internet service including Skype (one user at a time) for the entire 5-day cruise, and performance was surprisingly good, roughly triple the speed of the $5 a day plan and equivalent to or better than cellular 3G service regardless of the time of day. During early mornings, dinner hours, and when docked at a port, the speed difference from DSL was barely noticeable. Part of this is due to Carnival’s new hybrid Internet technology which blends satellite service with strategically placed Internet towers along your itinerary. The way it works is simple. You login with your account number and birthday, and you can stay logged in as long as you like. If another member of your family wishes to use the service, they simply login on a different device with the same account number and birthday. They’ll be prompted whether to bump you off. Clicking YES transfers the Internet connection to their device and terminates your connection. With three people, it worked amazingly well and was a wonderful testament to what it means to share. Complete details of the WiFi@Sea Internet program are available here. The rollout will be complete by the end of the first quarter in 2016.

    blank

    We made roughly a dozen Skype calls to test the quality of the calls. With a couple of exceptions, the calls were roughly equivalent to what you would expect using a cable modem connection. With the two bad calls, it was obvious within a couple seconds, and the simple solution was to hang up and try again.

    blank

    If you’re an Asterisk user, connectivity to an office or home server was easy by making a free call with Skype Connect which we documented just last week. Once connected to an AutoAttendant on the home server, using DISA to make secondary calls to other destinations at minimal cost was a no-brainer. The setup is simple, and we showed how to do it over 10 years ago. Today, it’s built into the GUI. We routed the incoming Skype calls to a Stealth AutoAttendant on the Asterisk server. By pressing an unannounced key during the welcome message, we were prompted for our DISA password. After entering it successfully, we were prompted for a number to dial. In our setup, this includes any number supported by our dialplan: local extensions, 10-digit NANPA numbers throughout the U.S., Canada, and 18 other north American countries as well as special dial codes to retrieve voicemails and other Asterisk functions.

    Bottom Line: Do your homework before you book a cruise. Decide what your must-have’s for the cruise are and then compare prices.

    Surfing the Internet from Your Car or Motorhome

    blank

    The other eye-opener was the advances in cellular service along America’s interstates. 4G service now is available almost everywhere. Average download speeds were in the 20-40 Mb range. We used 7.18GB of data during 16 hours of travel. That works out to roughly a half gig per hour of travel with three users. YMMV! Funny how quickly 4G service rolled out once the (not so) Baby Bells got their monopoly back and could charge by the megabyte. We were one of the lucky ones to snag one of the few remaining Verizon unlimited data plans on eBay. Verizon now has tightened the screws and doesn’t allow transfer of the plans to others. But, if you’re one of the lucky ones that still pays over $100 a month for an unlimited data plan (Verizon just quietly raised the monthly charge by $20), then here’s some information for you. First, as part of the FCC’s 4G spectrum auction, bidders (Verizon in this case) were required to agree to the following condition as laid out in 47 C.F.R. 27.16:

    (b) Use of devices and applications. Licensees offering service on spectrum subject to this section shall not deny, limit, or restrict the ability of their customers to use the devices and applications of their choice on the licensee’s C Block network, except:
    (1) Insofar as such use would not be compliant with published technical standards reasonably necessary for the management or protection of the licensee’s network, or
    (2) As required to comply with statute or applicable government regulation.

    When Verizon won the auction, they reluctantly acknowledged a customer’s ability to move a SIM card from one device to another so long as the new device was on Verizon’s approved devices list. It doesn’t mean Verizon hasn’t dragged its feet on adding new approved devices, however. The important takeaway from this is that moving between approved devices appears to be safe even though there have been some reported problems. You’ll know whether you’re using a Verizon-approved device by examining your Verizon account to see if a picture of the new device shows up once you insert your SIM card.

    blank

    So what does all of this have to do with surfing the Internet from your vehicle? Well, you have two choices. You can use your existing smartphone, enable tethering, and have multiple passengers surfing the Internet at 4G speeds with unlimited bandwidth. Or you can purchase a Verizon-approved Novatel T1114 4G Router on eBay and move your SIM card there for trips. Just be sure you buy one with the required 3.5W power adapter. Then add a $20 150W Power Inverter, and you’ve got a Mobile WiFi powerhouse plus a POTS phone connection… in your car.

    blank

    If you’re one of the unlucky ones that doesn’t have an unlimited data plan with Verizon Wireless, there’s now another option if you live in an area with Sprint service. HINT: Sprint works great along most interstate highways in the United States. For $50 or less per month, you can set up a WiFi HotSpot in your vehicle with unlimited data using Karma Go. If you use our signup link, you get $10 off, and we get a $10 referral credit. There’s a 45-day money-back guarantee. For a great review of Karma Go, go here. And 2016 promises more choices with most new GM vehicles sporting an integrated WiFi HotSpot.


    UPDATE: Karma Go this week began backing off from its unlimited Internet pledge. Seems these companies never learn the bait-and-switch lessons from those that preceded them… or they don’t want to. You can read all about it here.

    1/18 UPDATE: Karma Go today announced that they were restoring the original 5 Gbit performance of the product but would cap usage at 15GB/month after which performance would be throttled to "speeds good enough for emailing and messaging."

    NEWS FLASH: Beginning January 12, 2016, unlimited Internet plans return to AT&T Wireless for those that also subscribe to DirecTV or U-Verse. Details available here.

    blank

    There’s more good news from our 1,000 mile travel adventure. We were late to this party, but what an awesome addition for those that travel for a living or just for vacations. If you’ve never tried Waze, add it to your smartphone right now! Not only do you get turn-by-turn directions to any destinations, but you also get road hazard alerts, automatic traffic rerouting to avoid bottlenecks, cheap gas price alerts, and… did we mention that in 1,000 miles it didn’t miss alerting us to every single speed trap. Police departments are government bureaucracies that have grown just like the rest of federal, state, and local government agencies. We counted nearly 100 police vehicles doing nothing but traffic enforcement. On 70 mile per hour Interstate highways, our unscientific survey showed that speeds increased to 75 miles per hour with no police presence compared to 69 miles per hour when a speed trap had been identified. It was readily apparent that truckers and frequent travelers have been using Waze long before us. What we kept asking ourselves was whether the cost of 100 police officers + 100 police cars + an enormous fuel bill was really worth it to slow folks down (momentarily) by 6 miles per hour. We hear a lot about government waste, but the police seem to get a pass on frugality by claiming they’re saving lives. We just didn’t see much of a correlation. It looked more like a game of cat and mouse. Happy New Year everybody. Don’t Drink and Drive!

    Originally published: Monday, December 28, 2015


    blank
    Need help with Asterisk? Visit the PBX in a Flash Forum.


    Special Thanks to Our Generous Sponsors


    FULL DISCLOSURE: ClearlyIP, Skyetel, Vitelity, DigitalOcean, Vultr, VoIP.ms, 3CX, Sangoma, TelecomsXchange and VitalPBX have provided financial support to Nerd Vittles and our open source projects through advertising, referral revenue, and/or merchandise. As an Amazon Associate and Best Buy Affiliate, we also earn from qualifying purchases. We’ve chosen these providers not the other way around. Our decisions are based upon their corporate reputation and the quality of their offerings and pricing. Our recommendations regarding technology are reached without regard to financial compensation except in situations in which comparable products at comparable pricing are available from multiple sources. In this limited case, we support our sponsors because our sponsors support us.

    blankBOGO Bonaza: Enjoy state-of-the-art VoIP service with a $10 credit and half-price SIP service on up to $500 of Skyetel trunking with free number porting when you fund your Skyetel account. No limits on number of simultaneous calls. Quadruple data center redundancy. $25 monthly minimum spend required. Tutorial and sign up details are here.

    blankThe lynchpin of Incredible PBX 2020 and beyond is ClearlyIP components which bring management of FreePBX modules and SIP phone integration to a level never before available with any other Asterisk distribution. And now you can configure and reconfigure your new Incredible PBX phones from the convenience of the Incredible PBX GUI.

    blankVitalPBX is perhaps the fastest-growing PBX offering based upon Asterisk with an installed presence in more than 100 countries worldwide. VitalPBX has generously provided a customized White Label version of Incredible PBX tailored for use with all Incredible PBX and VitalPBX custom applications. Follow this link for a free test drive!
     

    blankSpecial Thanks to Vitelity. Vitelity is now Voyant Communications and has halted new registrations for the time being. Our special thanks to Vitelity for their unwavering financial support over many years and to the many Nerd Vittles readers who continue to enjoy the benefits of their service offerings. We will keep everyone posted on further developments.


    Some Recent Nerd Vittles Articles of Interest…