

Setting Up a SIP Trunk at LocalPhone
1. Sign up for a LocalPhone account.
2. Login to your LocalPhone account. You can order a DID here. For a free iNum DID, choose International (iNum) as your desired country.
3. Click Settings to configure your account with a very secure password.
4. Click on the Internet Phone icon to obtain your SIP credentials.
Setting Up a LocalPhone SIP Trunk on Wazo
SIP trunks are different than traditional Ma Bell phone lines. With SIP trunks, you need not use the same provider to process incoming and outgoing calls. With some SIP providers including LocalPhone, incoming and outgoing calls are managed on the same server. To place outgoing calls with LocalPhone, all you need are your credentials. You do NOT need a DID. To receive calls from Plain Old Telephones, you will need a LocalPhone DID (aka Incoming Number).
In the Wazo GUI, create a new LocalPhone SIP Trunk by choosing IPBX:Trunk Management:SIP Protocol. Click on + Add to open a new template.
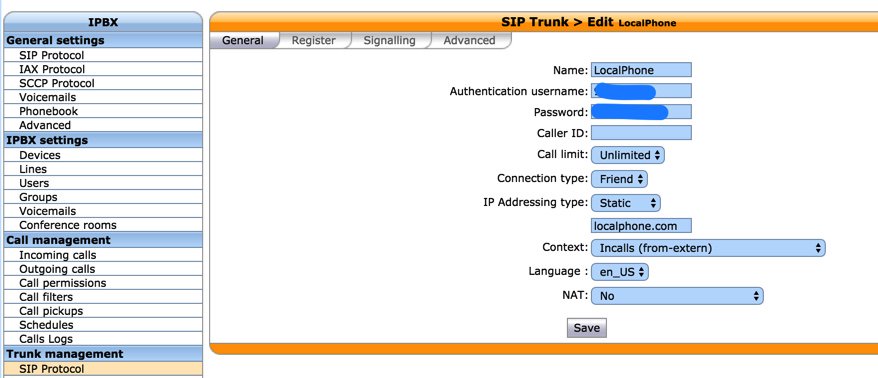
In the General tab, fill in the blanks using your LocalPhone credentials in the template below:
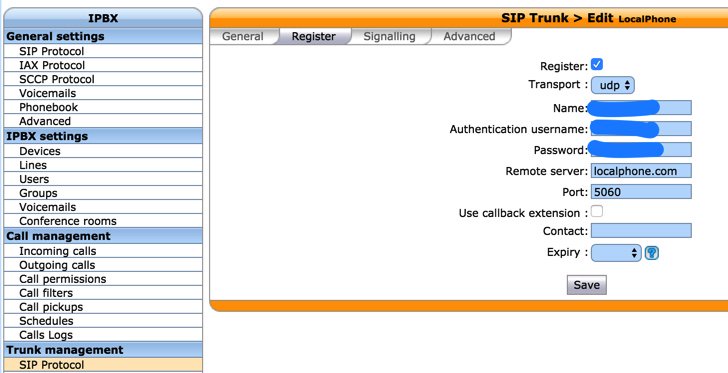
Next, click on the Register tab and fill in the blanks using your SIP credentials from LocalPhone. Name and Authentication username are your LocalPhone account number. Password is your LocalPhone SIP password.
In the Signalling tab, set DTMF to RFC2833 and add the ULAW and ALAW Codecs.
In the Advanced tab, set Insecure = ALL and Port = 5060.
Click SAVE when you’ve finished.
Wazo will not actually process incoming and outgoing calls through this LocalPhone trunk until you configure an outgoing route in IPBX:Call Management:Outgoing Calls and an incoming route using IPBX:Call Management:Incoming Calls if you have a DID. Outgoing and Incoming call routing are covered in separate tutorials.

 JUST RELEASED: Visit the Incredible PBX Wiki
