

[iframe-popup id="3″]
NOTICE: This version is no longer supported because Digium® has discontinued support of Asterisk-GUI. Check out our latest fully-supported offerings featuring pure open source GPL code: Incredible PBX GUI for Asterisk 11 and Incredible PBX GUI for Asterisk 13.
OK. The Raspberry Pi 2 may not quite rival the Raspberry Pi supercomputer built at Boise State, but it’s getting closer. The supercomputer that included 32 Raspberry Pi’s a year ago can now be built with about 5 Raspberry Pi 2’s. While the footprint may look the same as the $35 Raspberry Pi that you knew and loved two years ago, the RasPi² sports a 900MHz ARMv7 quad core processor with a full gig of RAM under the hood. And even though the Raspberry Pi 2 may be camera-shy, there’s a good reason. It’s a screamer! Early testing indicates a six-fold increase in performance even though it still looks much the same. What hasn’t changed is the price. It’s still $35 in the U.S. if you can find one. We couldn’t wait so we headed to the Pimoroni Shop in the U.K. to order ours with a Pibow case. Shipped within hours, and we got it in 2 days!
Do we have a Valentine’s Treat for you! Today we’re pleased to introduce the all-new Raspberry Pi edition of Incredible PBX for Asterisk-GUI featuring the just-released Raspberry Pi 2 and the just-released Asterisk® 11.16. And, not to worry, if you ever get tired of running your own PBX (and we don’t think you will), Micro$oft announced last week that you’re going to get a free version of Windows 10 for the Raspberry Pi 2 later this year.
Last week we released a tutorial covering all of the new Gotcha Free PBX applications, and that guide applies to today’s Raspberry Pi 2 release as well. That’s the beauty of the new Incredible PBX modular design. And, speaking of design, we don’t build Incredible PBX servers with an included operating system any longer so we’ll walk you through getting the Raspberry Pi 2 squared away with the latest and greatest version of Raspbian before we actually install Incredible PBX.
|
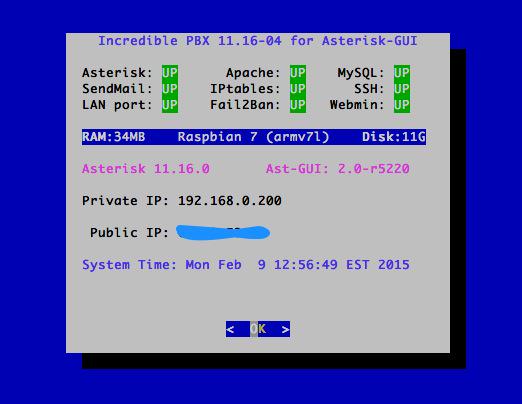
Target Audience: Home or SOHO/SBO in need of a turnkey, Gotcha-Free PBX Default Configuration: Asterisk 11 with enhanced Asterisk-GUI, Kennonsoft GUI, and NANPA dialplan Platform: Raspbian 7 running on a Raspberry Pi 2 Standard Memory: 1024MB Recommended Disk: 16GB+ Default Trunks: Google Voice, CallCentric, DIDlogic, Future-Nine, IPcomms, Les.net, Vitelity, VoIP.ms1 Feature Set: SMS messaging, VPN, Reminders, ConfBridge Conferencing, AsteriDex, Voicemail, Email, IVR, News, Weather, Voice Dialer, Wolfram Alpha, Today in History, TM3 Firewall WhiteList, Speed Dialer, iNUM and SIP URI (free) worldwide calling, OpenCNAM CallerID lookups, DISA, Call Forwarding, CSV CDRs Administrator Utilities: Incredible Backup/Restore, Automatic Updater, Asterisk Upgrader, phpMyAdmin, Timezone Config, Plug-and-Play Trunk Configurator, WebMin, External IP Setup, Firewall WhiteList Tools |
Getting Started with Incredible PBX for Asterisk-GUI (RasPi 2 Edition)
Here’s a quick overview of the installation and setup process for Incredible PBX for Asterisk-GUI:
- Install Linux for Raspberry Pi 2 – Install Raspbian 7 Platform
- Configure Raspbian 7 – Optimize Raspbian 7 for Incredible PBX
- Download and Install Incredible PBX for Asterisk-GUI
- Install Incredible Fax for Asterisk-GUI (optional)
- Set Up Passwords for Incredible PBX for Asterisk-GUI
- Configure Trunks with Incredible PBX for Asterisk-GUI
- Connect a Softphone to Incredible PBX for Asterisk-GUI
1. Install Raspbian 7 Platform for Raspberry Pi 2
For those with Raspberry Pi experience, this is the same drill you’ve performed a dozen times before. For newbies, here’s the procedure. You’ll need a microSD card of at least 8GB, and we strongly recommend a 16GB or 32GB Type 10 card for Incredible PBX. We’ve tested both the SanDisk and Transcend cards, and they work great.
Begin by downloading the very latest RASPBIAN image from RaspberryPi.org to your desktop. After you’ve unzipped the image, you need to get it moved to your microSD card. RaspberryPi.org has excellent tutorials that will walk you through the process using a Linux, Mac, or Windows desktop platform. Don’t forget to unmount the card before removing it!
Once you have your microSD card ready to go, plug it into the slot on the back of the Raspberry Pi 2 and then plug in the power cord. On your attached monitor, you can follow the boot up process. When the login prompt appears, log in as user pi with the password raspberry.
2. Optimizing Raspbian 7 for Incredible PBX for Asterisk-GUI
The first time you boot up your Raspberry Pi 2 with Raspbian 7, it will run the raspi-config script. This allows you to make a number of changes to your Raspberry Pi environment to maximize performance. Let’s take advantage of it.
Option 1. Expand the File System to fill your SD card. Otherwise, there’s insufficient disk space to complete the install.
Option 3. Enable Boot to Desktop (top selection). No Linux GUI please!
Option 8. Change your Hostname under A2 to incrediblepi2.
Tab to the Finish option and press ENTER. Then choose Reboot and YES.
After the reboot, log back in as pi:raspberry and set a very secure root password: sudo passwd root. Decipher your IP address so that you can log in as root via SSH: ifconfig.
We recommend completing the install by logging in as root using a desktop computer via SSH or Putty (for Windows). This gives you the ability to scroll back up and find errors if something happens to come unglued during the install process.
3. Install Incredible PBX on Your Raspberry Pi 2
Adding Incredible PBX to the Raspberry Pi 2 is easy. To restate the obvious, your server needs a reliable Internet connection to proceed. Using SSH (or Putty on a Windows machine), log into your Raspberry Pi 2 as root at the IP address you deciphered in the ifconfig step at the end of the Raspbian install procedure above.
IMPORTANT: Before you begin the Incredible PBX install, expand your console window to at least 80×27, or the Asterisk compilation step may fail. If you’re in doubt about the window dimensions, just maximize the window to full-screen during the install process.
Now let’s begin the Incredible PBX install. After logging in as root, issue the following commands. The install takes less than an hour and runs unattended so there’s no need to watch unless you’re curious how sausage is made. Remember, we compile all of the major components for Incredible PBX as part of the build process. And you can review the open source GPL2 script to see how it’s done if you have an interest or wish to embellish. It’s Gotcha-Free code so go for it and share your discoveries. After all, that’s what open source is all about!
cd /root
wget http://incrediblepbx.com/incrediblepbx11guiPi.tar.gz
tar zxvf incrediblepbx11guiPi.tar.gz
rm -f incrediblepbx11guiPi.tar.gz
./IncrediblePBX11Pi-GUI.sh
4. Install Incredible Fax for Asterisk-GUI (optional)
Administrators have been trying to stomp out faxing for at least two decades. Here’s a hint. It ain’t gonna happen. So go with the flow and add Gotcha-Free Faxing to your server. It’ll be there when you need it. And sooner or later, you’ll need it. This install script is simple enough for any monkey to complete. Run the script and enter the email address for delivery of your faxes. Then, if you’re in the U.S. or Canada, press the Enter key to accept every default entry during the HylaFax and AvantFax installation steps. For other countries, read the prompts and answer accordingly. When the installation finishes, reboot your server to bring faxing on line. Be sure to change your AvantFax admin password by logging in to AvantFax from the Incredible PBX GUI. By default, the admin password is password. You can also use the script included in the /root folder: avantfax-pw-change. REMINDER: Don’t forget to reboot your server!
cd /root
./incrediblefax11-GUI.sh
Outgoing faxes using standard document attachments can be created using the AvantFax GUI. The faxes will be sent out using your default outbound dial rules. For example, a 10-digit number will be sent using the default Google Voice trunk unless you haven’t configured it. Then the next configured trunk will be used. You can add a dial prefix in sending a fax with AvantFax to force the call out a particular trunk.
Incoming faxes will be delivered to the email address you specified when installing Incredible Fax; however, incoming faxes will be ignored until you configure a destination DID to accept the faxes. In the /etc/asterisk directory, edit extensions.conf. As noted, a dedicated DID is required to support incoming faxes! Find the desired incoming fax context which will be of the form: DID_TRUNKNAME_default, e.g. DID_GoogleVoice_default. Toward the end of the context, there will be several destination options for incoming calls to this DID. It looks like this:
;exten = _.,n,Gosub(macro-dumpvars,s,1())  ; in case you ever want to look at all of the Asterisk variables on the CLI
;exten = _.,n,Goto(default,6001,1)         ; routes incoming call to extension 6001
;exten = _.,n,Goto(ringroups-custom-1,s,1) ; routes incoming call to Ring Group #1
;exten = _.,n,Goto(voicemenu-custom-2,s,1) ; routes incoming call to Nerd Vittles Demo IVR
 exten = _.,n,Goto(voicemenu-custom-1,s,1)  ; routes incoming call to Stealth AutoAttendant and then to Ring Group #1
Comment out the destination entry that is not already commented out. Then add the following line just below that entry:
exten = _.,n,Goto(ext-fax,in_fax,1)
Now save the file and reload your Asterisk dialplan: asterisk-reload.

5. Initial Configuration of Incredible PBX for Asterisk-GUI
Incredible PBX is installed with the preconfigured IPtables Linux firewall already in place. It implements WhiteList Security to limit server access to connected LANs, your server’s IP address, your desktop computer’s IP address, and a few of our favorite SIP providers. You can add additional entries to this WhiteList whenever you like using the add-ip and add-fqdn tools in /root. There’s also an Apache security layer for our web applications. And, of course, Asterisk-GUI has its own security methodology using Asterisk’s manager.conf. Finally, we randomize extension and DISA passwords as part of the initial install process. Out of the starting gate, you won’t find a more secure VoIP server implementation anywhere. After all, it’s your phone bill.
Even with all of these layers of security, here are 10 Quick Steps to better safeguard your server. You only do this once, but failing to do it may lead to security issues you don’t want to have to deal with down the road. So DO IT NOW!
First, log into your server as root with your root password and do the following:
Make your root password very secure: passwd
Set your correct time zone: ./timezone-setup
Restart Asterisk: asterisk-restart
Create admin password for web apps: htpasswd -b /etc/pbx/wwwpasswd admin newpassword
Make a copy of your other passwords: cat passwords.FAQ
Make a copy of your Knock codes: cat knock.FAQ
Decipher IP address and other info about your server: status
Second, log into your server as admin using a web browser pointed to your server’s IP address:
Click USERS tab in Incredible PBX GUI
Click Asterisk-GUI Administration
Log in as user: admin with password: password
Immediately change your admin password and login again
Log in to Asterisk-GUI again with your new password. Expand the options available in the GUI:
Options -> Advanced Options -> Show Advanced Options
Last but not least, Incredible PBX includes an automatic update utility which downloads important updates whenever you log into your server as root. We recommend you log in once a week to keep your server current. Now would be a good time to log out and back into your server at the Linux command line to bring your Raspberry Pi 2 up to current specs.
6. Configure Trunks with Incredible PBX for Asterisk-GUI
Now for the fun part. If this is your first VoIP adventure, be advised that this ain’t your grandma’s phone system. You need not and should not put all your eggs in one basket when it comes to telephone providers. In order to connect to Plain Old Telephones, you still need at least one provider. But there is nothing wrong with having several. And a provider that handles an outbound call (termination) need not be the same one that handles an incoming call (origination) and provides your phone number (DID). We cannot recommend Vitelity highly enough, and it’s not just because they have financially supported our projects for almost a decade. They’re as good as VoIP providers get, and we use lots of them. If you’re lucky enough to live in the U.S., you’d be crazy not to set up a Google Voice account. It’s free as are all phone calls to anywhere in the U.S. and Canada. The remaining preconfigured providers included in Incredible PBX for Asterisk-GUI are equally good, and we’ve used and continue to use almost all of them. So pick a few and sign up. You only pay for the calls you make with each provider so you have little to lose by choosing several. The PIAF Forum includes dozens of recommendations on VoIP providers if you want additional information.
With the preconfigured trunks in Incredible PBX for Asterisk-GUI, all you need are your credentials for each provider and the FQDN of their server. Log into Asterisk-GUI Administration as admin using a browser. From the System Status screen, click Incredible PBX Apps. Click on each provider you have chosen and fill in the blanks with your credentials. When you’ve saved all of your settings, log into your server as root via SSH and type: service asterisk restart or asterisk-restart. You can also issue the command in the Asterisk-GUI by choosing the Asterisk CLI tab2 in the left column. Doesn’t get any simpler!
Update: It should be noted that Incredible PBX for Asterisk-GUI also supports Anveo Direct trunks; however, they are configured differently because of the way Anveo handles the calls. You’ll need the PIN provided by Anveo to set up your trunk, and Anveo supports CallerID spoofing so you can enter any CallerID number for the trunk that you are authorized to use. You’ll find the Anveo Direct setup link in the Incredible PBX Apps tab. To route an outgoing call through Anveo trunk, dial 2 + any desired 10-digit number.
Here is the complete list of dialing prefixes and the trunks to which they are associated:
- 1 – Google Voice
- 2 – Anveo Direct
- 3 – Future Nine
- 4 – CallCentric
- 5 – DIDlogic
- 6 – IPcomms
- 7 – Les.net
- 8 – Vitelity
- 9 – VoIP.ms
For free iNUM calling worldwide, the following dialing prefixes are supported in conjunction with the last seven digits of any destination iNUM DID. Free iNUM DIDs for your own PBX are available from both of these providers as well.
- 0XXXXXXX – CallCentric
- 90XXXXXXX – VoIP.ms
7. Configure a Softphone with Incredible PBX for Asterisk-GUI
We’re in the home stretch now. You can connect virtually any kind of telephone to your new Gotcha-Free PBX. Plain Old Phones require an analog telephone adapter (ATA) which can be a separate board in your computer from a company such as Digium. Or it can be a standalone SIP device such as ObiHai’s OBi100 or OBi110 (if you have a phone line from Ma Bell to hook up as well). SIP phones can be connected directly so long as they have an IP address. These could be hardware devices or software devices such as the YateClient softphone. We’ll start with a free one today so you can begin making calls. You can find dozens of recommendations for hardware-based SIP phones both on Nerd Vittles and the PIAF Forum when you’re ready to get serious about VoIP telephony.
We recommend YateClient which is free. Download it from here. Run YateClient once you’ve installed it and enter the credentials for the 6002 extension on Incredible PBX. You’ll need the IP address of your server plus your extension 6002 password. Choose Users -> 6002 and write down your SIP/IAX Password. You can also find it in /root/passwords.FAQ. Fill in the blanks using the IP address of your server, 6002 for your account name, and whatever password is assigned to the extension. Click OK to save your entries.
Once you are registered to extension 6002, close the Account window. Then click on YATE’s Telephony Tab and place some test calls to the numerous apps that are preconfigured on Incredible PBX. Dial a few of these to get started:
7001 - IVR Demo

123 - Reminders

947 - Weather by ZIP Code

951 - Yahoo News

*61 - Time of Day

TODAY - Today in History
If you are a Mac user, another great no-frills softphone is Telephone. Just download and install it from the Mac App Store.
Configuring Google Voice
If you want to use Google Voice, you’ll need a dedicated Google Voice account to support Incredible PBX. The more obscure the username (with some embedded numbers), the better off you will be. This will keep folks from bombarding you with unsolicited Gtalk chat messages, and who knows what nefarious scheme will be discovered using Google messaging six months from now. So keep this account a secret!
IMPORTANT: Do NOT under any circumstances take Google’s bait to switch from Google Chat to Hangouts, or you will forever lose the ability to use Google Chat with Incredible PBX. Also be sure to enable the Google Chat option as one of your phone destinations in Settings, Voice Setting, Phones. That’s the destination we need for The Incredible PBX to work its magic! Otherwise, all inbound and outbound calls will fail. Good News! You’re in luck. Google has apparently had a change of heart on discontinuing Google Chat support so it’s enabled by default in all new Google Voice accounts. Once you’ve created a Gmail and Google Voice account, go to Google Voice Settings and click on the Calls tab. Make sure your settings match these:
- Call Screening – OFF
- Call Presentation – OFF
- Caller ID (In) – Display Caller’s Number
- Caller ID (Out) – Don’t Change Anything
- Do Not Disturb – OFF
- Call Options (Enable Recording) – OFF
- Global Spam Filtering – ON
Click Save Changes once you’ve adjusted your settings. Under the Voicemail tab, plug in your email address so you get notified of new voicemails. Down the road, receipt of a Google Voice voicemail will be a big hint that something has come unglued on your PBX.
One final word of caution is in order regardless of your choice of providers: Do NOT use special characters in any provider passwords, or nothing will work!
Now you’re ready to configure your Google Voice account in Incredible PBX. You can do it from within Asterisk-GUI by choosing Google Voice within the Incredible PBX Apps tab. Once you’ve entered your credentials, don’t forget to restart Asterisk, or Google Voice calls will fail. If you still have trouble placing or receiving calls, try BOTH of these tips.
If you have difficulty finding the Google Chat option after setting up a new Google Voice account, follow this tutorial.
NOTE: There are all sorts of rumors circulating again that the Google Voice free ride may be coming to a close. We’ve heard this song before, but who knows?? Whether true or not, you are well advised to not rely solely on Google Voice for your phone calls. That’s the real beauty of a PBX. So take advantage of it!
OK, Smarty Pants: Show Me the Beef!
We know what some of you are thinking. "What does a fast food worker really know about VoIP and Gotcha-Free PBXs?? Before wasting a bunch of time on this, show me the beef!" Fair enough. Sit by your phone and click the Call Me icon below. Type in a fake name and your real phone number. Click the Connect button, answer your phone when it rings, and press 1. You’ll be connected to the Incredible PBX IVR for Asterisk-GUI. Pick an option from the menu of choices and take the Incredible PBX apps for a spin on our dime… actually it’s Google’s dime. Everything you see and hear is part of what you get with Incredible PBX for Asterisk-GUI including the ability to set up your own click-to-dial web interface exactly like this one. The demo just happens to be running on our Raspberry Pi 2 instead of yours. So… what are you waiting for? Click away and try Incredible PBX for yourself. And, by the way, nobody besides the NSA and Google will be monitoring your call. 😉
Nerd Vittles Demo IVR Options
1 – Call by Name (say “Delta Airlines” or “American Airlines” to try it out)
2 – MeetMe Conference (password is 1234)
3 – Wolfram Alpha (say “What planes are overhead?”)
4 – Lenny (The Telemarketer’s Worst Nightmare)
5 – Today’s News Headlines
6 – Weather Forecast (say the city and state, province, or country)
7 – Today in History
8 – Speak to a Real Person (or maybe just voicemail if we’re out)
Homework Assignment: Mastering the Asterisk-GUI
Now would be a good time to explore the Incredible PBX applications. Continue reading there. After you’ve played with the preconfigured features, it’s time to roll up your sleeves and learn about Asterisk-GUI and its powerful feature set. Here’s one word of warning. We mentioned that Incredible PBX was a hybrid system that combines some customized settings with the standard Asterisk-GUI interface. Before modifying existing settings for the default trunks, extensions, and default routes, take a look at the credentials* files in /etc/asterisk. If you modify any of these trunk entries or the Outgoing or Incoming Call Rules in Asterisk-GUI, you may break the Incredible PBX setup. So steer clear of that minefield until you know what you’re doing. Adding new extensions and additional trunks is perfectly fine and will not break anything.
Rather than reinvent the wheel, we’ll point you to some excellent tutorials that already exist. Start with Chapter 3 of Digium’s Asterisk Appliance™ Administrator Manual. Next, review Chapter 11 of The Asterisk Book (Second Edition). Finally, take a look at a couple of the tutorials that have been written by other companies that incorporated Asterisk-GUI into their hardware products, e.g. Yeastar’s MyPBX SOHO User Manual and Grandstream’s UCM6100 User Manual.
In the meantime, if you have questions, join the PBX in a Flash Forums and take advantage of our awesome collection of gurus. There’s an expert available on virtually any topic, and the price is right. As with Incredible PBX, it’s absolutely free.
We also are quickly building a collection of tutorials tailored specifically for Incredible PBX for Asterisk-GUI:
- Gotcha-Free PBX: Scripts 101
- Gotcha-Free PBX: Inbound Call Routing
- Gotcha-Free PBX: Outbound Call Routing
- Gotcha-Free PBX: Add-a-Trunk
- Gotcha-Free PBX: SMTP Mail Relay with SendMail or PostFix (if Incredible Fax installed)
- Gotcha-Free PBX: Music on Hold
- Gotcha-Free PBX: Changing TTS Engine
- Gotcha-Free PBX: Voicemail with Email Attachments
- Gotcha-Free PBX: Telephone and Web Reminders
- Gotcha-Free PBX: Sending Faxes
- Gotcha-Free PBX: VMobile Extension
- Gotcha-Free PBX: Anveo Direct
- Gotcha-Free PBX: Google Voice
- Gotcha-Free PBX: Voice Menus Setup
- Gotcha-Free PBX: Harnessing SIP URIs for Free Worldwide Calling
Just Released: The Gotcha-Free Incredible PBX Application User’s Guide
Originally published: Monday, February 9, 2015
Support Issues. With any application as sophisticated as this one, you’re bound to have questions. Blog comments are a terrible place to handle support issues although we welcome general comments about our articles and software. If you have particular support issues, we encourage you to get actively involved in the PBX in a Flash Forums. It’s the best Asterisk tech support site in the business, and it’s all free! Please have a look and post your support questions there. Unlike some forums, ours is extremely friendly and is supported by literally hundreds of Asterisk gurus and thousands of users just like you. You won’t have to wait long for an answer to your question.
Need help with Asterisk? Visit the PBX in a Flash Forum.
Some Recent Nerd Vittles Articles of Interest…
Will this setup work on a non-Pi 2?
[WM: NOT recommended, but… it boots on a RasPi B+. PortKnocker fails. Everything else seems to at least start up. If you have a working B+ with the older software, I’d recommend you stick with it.]
How many calls do you think this could handle (ulaw — no transcoding)?
[WM: My wag would be 20-30 simultaneous calls if you have the bandwidth to support that many. The Raspberry Pi 2 is an incredible performer. You’d be hard-pressed to find much performance difference comparing it with some pretty beefy Atom-based PCs. I’m sure there will be real tests in coming months but, for our target audience, we don’t foresee a performance bottleneck as long as you stick with ulaw.]
What about calls on cubox?
[WM: It’s on my list. 🙂 ]
I’d pay some bucks for someone to put this in a file that I could just flash to a 16 gig card…. surely that has to be somewhere to download…
[WM: As we indicated in the article, we originally built images in the way you suggest. The problem with the approach was that the Raspberry Pi universe changes often and sometimes dramatically. That forced us to release new images constantly because the old ones simply blew up when someone attempted to use them. We wanted everyone to have the opportunity to use the latest and greatest RasPi advances without our having to babysit the Incredible PBX build which changes less frequently. After all, it’s a phone system. By separating the two pieces, we can accomplish that and eliminate the frustration that came from new (incompatible) Raspbian releases. The Incredible PBX install is a simple matter of running a couple commands once you have the latest Raspberry Pi platform in place. We don’t think you’ll find it burdensome at all. And the tradeoffs are well worth adding the second step. ]
Thanks again for an awesome write up Mr. Ward.
Keep up the good work (and labor of love).
-TimJ
I followed all the instructions and everything seems to work. But, since I was used to Incredible PBX with FreePBX, I would like to have the FreePBX GUI. Is this possible?
[WM: Assuming the new owners of FreePBX are planning to maintain it as an open source product, we plan to support FreePBX down the road. Because Asterisk-GUI and FreePBX are fundamentally different designs, it is not possible to migrate from one to the other. We have provided upgrade tips for migrating from Incredible PBX for the Raspberry Pi B+ (includes FreePBX) to the Raspberry Pi 2 platform.]
I’ve been running IncrediblePBX on Raspberry Pi (Model B) for more than a year now. I am planning on moving to Raspberry Pi 2 and wondering if I could simply copy the content of my SD card to a micro SD and get going on the new hardware with my current setup and configuration. I realize that it might not give me the benefit of the quad core performance, but just a higher clock rate and double the amount of RAM might be worthwhile. I am just concerned about not being able to reconfigure a new system in an identical way as my attempts to backup and restore incredible pbx in the past have only partially succeeded. If this scenario doesn’t work, what would you suggest? Thanks.
[WM: Take a look at this thread on the forums.]
I must be missing something incredibly easy. I have followed the above instructions, but I can’t receive or place calls via Google Voice. When checking the Call Detail Records I also notice outbound calls are being routed through SIP/Vitelity. I also don’t see Google Voice listed in my trunks. Any help or suggestions would be appreciated.
WM: Did you complete the two steps outlined in the troubleshooting link in the article:
1. Google Voice Reset Procedure
2. Enable Less Secure Apps for Google Voice
Thanks for your help. I was able to migrate my pbx to the new generation hardware. It’s now running flawlessly on Raspberry Pi2. The performance improvement is quite noticeable both with the GUI and connections. Pi2 can definitely handle more calls without choking and the audio quality seems to be better.
Just went from rPi B+ to rPi 2 and the switch from FreePBX to Asterisk-gui has a bit of a learning curve. One thing I can’t seem to figure out is how to have multiple google voice trunks/accounts like was easily done with freepbx and the motif module.
[WM: Coming soon. Stay tuned.]