
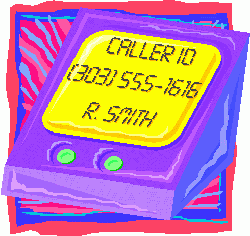
 It’s been more than 10 years since we first introduced CallerID Trifecta for Asterisk® and the FreePBX® platform. A few months later it morphed into CallerID Superfecta and, as they say, the rest is history. Today CallerID Superfecta is used by over a million people around the globe to obtain CallerID Name (CNAM) information from over 70 different lookup sources. WOW! Just call me the Proud Papa. What a journey it has been, and our special thanks to the dozens of contributors.
Unfortunately, for those in the United States, most of the lookup sources now are commercial enterprises much like the original Bell Sisters that monopolized CallerID information by keeping it proprietary instead of forwarding CallerID Name data together with the CallerID number of incoming calls. In fact, for many users, the cost of CallerID lookups now is more expensive than the cost of the VoIP trunks carrying the calls. While we can’t solve the problem, we can make the cost of these CallerID lookup services considerably cheaper using a neat little trick with CallerID Superfecta.


Here’s the problem. Many cell phone users don’t subscribe to any service that keeps track of the caller’s identity. The same is true for those using services such as Google Voice. When you receive a call from one of these users, the CNAM provided for the caller will either show something like "Mobile Phone User" or the city and state of the caller’s cellphone provider. This doesn’t keep the commercial CNAM providers from dinging you every time you receive one of these calls. And if your girlfriend calls you a hundred times a month, the commercial CNAM providers charge you for a hundred lookups even when the calls are from the same caller. That ends today. Once you implement this new CallerID add-on, you’ll only get billed for a single CNAM lookup regardless of how many times that person calls your PBX. Better yet, with a little effort, you can quickly replace the CNAM entries of the mystery cellphone and Google Voice callers by inserting their actual names into your Asterisk phonebook using either the FreePBX GUI or the Asterisk CLI. We’ll show you how.
Here’s the trick. CallerID Superfecta lets you prioritize source lookups when incoming calls hit your PBX. For example, you can lookup the CallerID number in AsteriDex and the Asterisk Phonebook in a fraction of a second at no cost. Once there’s a match on the CallerID number of the caller, additional lookups stop. So what we want to do is prioritize the lookups so that the free sources are used before any commercial lookup service is triggered. For the commercial CNAM source in the U.S., we’re going to use OpenCNAM in our examples because their service is one of the easiest and least expensive to implement. All OpenCNAM lookup options are less than a half a cent per lookup. By placing OpenCNAM third in the Default Superfecta lookup sequence, it will only be used when there is no match in either AsteriDex or the Asterisk Phonebook.
Getting Started. It would obviously be a hassle to have to add every caller to one of these phonebooks every time a call arrives on your PBX. So the other half of today’s magic is to automatically add an entry to the Asterisk Phonebook every time a call hits your PBX. Then, the next time you receive a call from that same number, CallerID Superfecta will be able to find it in your free databases instead of querying OpenCNAM for yet another commercial lookup. As a general rule, in the United States, phonebook data is not copyrightable. However, you should consult an attorney for questions regarding the legality of this methodology as it applies to any particular CNAM lookup service.
We’re aware that CallerID Superfecta has had a caching option which provides similar functionality; however, users have reported mixed results and data corruption with that feature so we’ll be implementing a slightly different solution that relies on Asterisk’s extremely reliable SQLite3 database. This also provides the flexibility to customize the entries after completion of a call for more accurate CNAM information on subsequent calls. Unfortunately, a CNAM entry of ATLANTA, GA doesn’t tell you much about the caller even though you paid for the lookup. By inserting these call entries in the Asterisk Phonebook, you then have the option of easily customizing them in multiple ways. Not only will this provide better CNAM data on subsequent inbound calls, but the phonebook can also be used to make outgoing calls and to produce an alphabetized phonebook listing as well.
cd /var/lib/asterisk
sqlite3 astdb.sqlite3 "select key,value from astdb where key LIKE '%cidname/%' order by value"
Upgrading Asterisk Phonebook Module. Before we get too deep in the weeds, let’s get your Asterisk Phonebook module in FreePBX upgraded to resolve a bug in the version that ships with Incredible PBX which won’t let you edit phonebook entries without also adding a speed dial number for each entry. For generic FreePBX platforms, you can use Module Admin to upgrade the Phonebook module. For Incredible PBX platforms, log into your server as root and issue these commands:
cd /root
./gpl-install-fpbx phonebook
Activating CallerID Superfecta. There are three steps in activating CallerID Superfecta. First, configure the Default Scheme for CallerID Superfecta in Admin:CID Superfecta using the settings we previously displayed. Use the Arrow keys to properly order the three lookup sources: AsteriDex, Asterisk Phonebook, and OpenCNAM.
Be advised that there is a credentials mismatch in the Default setup for AsteriDex. To correct this, open the Default configuration for Superfecta and click on the Tool icon to the left of AsteriDex. The username must be root, and the password is passw0rd with a zero. Save your settings.
Next, you need to create and fund an account at OpenCNAM.com. Once your account is established, copy your credentials and insert them into the OpenCNAM lookup source by clicking on OpenCNAM’s tool icon ![]() :
:
Once you have saved the Default Scheme, then you need to enable CallerID Superfecta for each of your Inbound Routes under the Other tab in Connectivity:Inbound Routes:
Adding Hook for Inbound Call Processing. One of the decade-old shortcomings of FreePBX has always been the inability to insert dialplan code into the Inbound Call process without forever damaging your ability to add additional DIDs moving forward. While extensions_override_freepbx.conf lets you extract and manipulate large chunks of FreePBX code, the drawback is that once you do that, the flexibility provided by the GUI goes up in smoke unless you remember to always move the newly generated dialplan code back into the override context.
We much prefer a simpler way of inserting custom dialplan code into the Inbound Call processing routine, but it requires a change in the FreePBX Core module. We would caution you about using this except on Incredible PBX 13-13 servers running under CentOS 6 or 7 or Ubuntu 18.04 with Signature Checking Disabled. It will trigger nasty signature checking errors on the FreePBX Dashboard. See the next section for a workaround on generic FreePBX 13 platforms. On Incredible PBX 13 servers, login as root and issue the following commands making sure that you expand the last two lines into a single command before executing it:
cd /var/www/html/admin/modules/core
sed -i "s|new ext_noop('CallerID Entry Point')|new ext_gosub('1','s','sub-log-caller')|" \\
functions.inc.php
mysql -u root -ppassw0rd asterisk -e "update admin set value='true' \\
where variable='need_reload'"
amportal a r
Next, we need to add some supplemental dialplan code to extensions_custom.conf. This code actually populates the Asterisk Phonebook with the new call entries each time a call is received by your PBX:
cd /tmp
wget http://incrediblepbx.com/sub-log-caller.tar.gz
tar zxvf sub-log-caller.tar.gz
rm -f sub-log-caller.tar.gz
cd /etc/asterisk
cat /tmp/sub-log-caller.txt >> extensions_custom.conf
fwconsole reload
amportal restart
Disabling Module Signature Checking. If you’re running FreePBX 13 behind a secure firewall that blocks web access to FreePBX for anonymous users, then here’s a simple way that you can apply the patch above and take advantage of the sub-log-caller functionality without having to endure module signature errors within FreePBX. Simply disable Module Signature Checking. Here’s how:
cd /var/www/html/admin/libraries
sed -i 's|"SIGNATURECHECK", true|"SIGNATURECHECK", false|' modulefunctions.class.php
mysql -u root -ppassw0rd asterisk -e "UPDATE notifications SET candelete =  '1' WHERE  true;"
mysql -u root -ppassw0rd asterisk -e "DELETE FROM notifications WHERE true;"
mysql -u root -ppassw0rd asterisk -e "UPDATE freepbx_settings SET value='0' WHERE \\
keyword='SIGNATURECHECK';"
amportal restart
Adding CNAM data to CDR Listings. One of our concerns with the current CDR implementation in FreePBX is the lack of display of CNAM data for most entries in CDR listings. Currently, the only way to decipher the CNAM information is to use your mouse to hover over each of the CallerID numbers. We much prefer displaying both CallerID Name and Number in the CallerID column of CDR Reports. Here’s how to fix it:
cd /var/www/html/admin/modules/cdr
sed -i "s|cdr_formatSrc(\$row\['src'], \$row\['clid']);|cdr_formatSrc(\$row\['clid'], \\
\$row\['clid']);|" page.cdr.php
amportal a r
Managing Your Asterisk Phonebook. As we mentioned, there are a couple of ways to display and/or update entries in your Asterisk Phonebook that have been populated with OpenCNAM lookups. From the Asterisk CLI, you can display entries like this: database show cidname.
You also can add or update entries using the Asterisk CLI like this:
database put cidname 8431234567 "Mundy, Ward"
The simplest method to manage your Asterisk Phonebook is from within the FreePBX GUI. Simply navigate to Admin:Asterisk Phonebook. There you can edit individual entries and replace generic CNAM entries such as Atlanta, GA within something more descriptive of the caller’d identity. You also have the ability to export the data and even create speed dial entries for frequently called parties. Once Speed Dial numbers have been created, you can reach the party from any phone connected to your PBX by dialing *0 plus the speed dial number.
Finally, you need to complete some additional steps to implement the Spam Call Blocker as documented in this tutorial. Enjoy!
Originally published: Wednesday, May 30, 2018 Updated: Monday, November 26, 2018
Support Issues. With any application as sophisticated as this one, you’re bound to have questions. Blog comments are a terrible place to handle support issues although we welcome general comments about our articles and software. If you have particular support issues, we encourage you to get actively involved in the PBX in a Flash Forums. It’s the best Asterisk tech support site in the business, and it’s all free! Please have a look and post your support questions there. Unlike some forums, ours is extremely friendly and is supported by literally hundreds of Asterisk gurus and thousands of users just like you. You won’t have to wait long for an answer to your question.
Need help with Asterisk? Visit the PBX in a Flash Forum.
Special Thanks to Our Generous Sponsors
FULL DISCLOSURE: ClearlyIP, Skyetel, Vitelity, DigitalOcean, Vultr, VoIP.ms, 3CX, Sangoma, TelecomsXchange and VitalPBX have provided financial support to Nerd Vittles and our open source projects through advertising, referral revenue, and/or merchandise. As an Amazon Associate and Best Buy Affiliate, we also earn from qualifying purchases. We’ve chosen these providers not the other way around. Our decisions are based upon their corporate reputation and the quality of their offerings and pricing. Our recommendations regarding technology are reached without regard to financial compensation except in situations in which comparable products at comparable pricing are available from multiple sources. In this limited case, we support our sponsors because our sponsors support us.
BOGO Bonaza: Enjoy state-of-the-art VoIP service with a $10 credit and half-price SIP service on up to $500 of Skyetel trunking with free number porting when you fund your Skyetel account. No limits on number of simultaneous calls. Quadruple data center redundancy. $25 monthly minimum spend required. Tutorial and sign up details are here.
The lynchpin of Incredible PBX 2020 and beyond is ClearlyIP components which bring management of FreePBX modules and SIP phone integration to a level never before available with any other Asterisk distribution. And now you can configure and reconfigure your new Incredible PBX phones from the convenience of the Incredible PBX GUI.
VitalPBX is perhaps the fastest-growing PBX offering based upon Asterisk with an installed presence in more than 100 countries worldwide. VitalPBX has generously provided a customized White Label version of Incredible PBX tailored for use with all Incredible PBX and VitalPBX custom applications. Follow this link for a free test drive!
Special Thanks to Vitelity. Vitelity is now Voyant Communications and has halted new registrations for the time being. Our special thanks to Vitelity for their unwavering financial support over many years and to the many Nerd Vittles readers who continue to enjoy the benefits of their service offerings. We will keep everyone posted on further developments.
Some Recent Nerd Vittles Articles of Interest…
This week I setup a new VULTR server using the 13-13 iso from January, all works great except the Superfecta module; the PIAF dashboard errors went away after upgrading the Superfecta module also. I updated with a newer version of it from Github and it stopped complaining, but also stopped resolving CID sources; bummer.
I tested OpenCNAM and Gevonden.cc and the Superfecta logged complained about not being able to resolve those IPs.
What finally resolved that issue was doing a simple ping, (which also failed), but revealed the desirable IP address. So I manually entered the DNS CNAME with the desirable IP address in /etc/hosts and life is good.
Thanks folks!