

Dec. 17 Update: Before signing up for HiFormance service, read the latest update on this provider here.
Part of the challenge of deploying an Asterisk®-based server on a cloud platform is getting all of 1,000+ pieces in place without a hiccup during the installation. Particularly for first-time users of a VoIP platform, this can be problematic. HiFormance is one of our favorite low-cost cloud providers, and today they’re introducing something that no other cloud provider offers: a configured Incredible PBX 13-13 VPS that’s ready to accept calls in under a minute. We’ve been inching toward a new low-cost plateau for VoIP cloud providers, and today we have a new milestone that finally makes running VoIP servers out of your home or office look like the horse-and-buggy days.

$10 to $13 a year now buys you a cloud platform that is less expensive than the cost of electricity to run a server on premise. You get 2GB of RAM, 20GB of SSD storage, two virtual core processors, and 2TB of monthly bandwidth. If you prepay for 3 years, you can double either the RAM or SSD storage by simply opening a ticket after you sign up. The $10/year offering is in limited supply and gives you your choice of the following sites: L.A., Buffalo, or Dallas. The $13/year offering adds the following additional sites: Chicago, Atlanta, and New York. It’s a near perfect platform for Incredible PBX 13-13 with CentOS 6.9. Add a Google Voice trunk and you get unlimited calling in the U.S. and Canada combined with a feature set that you’ll be hard-pressed to find on any PBX at any price. Putting all the pieces in place is about as simple as preparing slice-and-bake cookies, and you’ll be up and running before the cookies come out of the oven. Skip that hamburger lunch and come join the party!
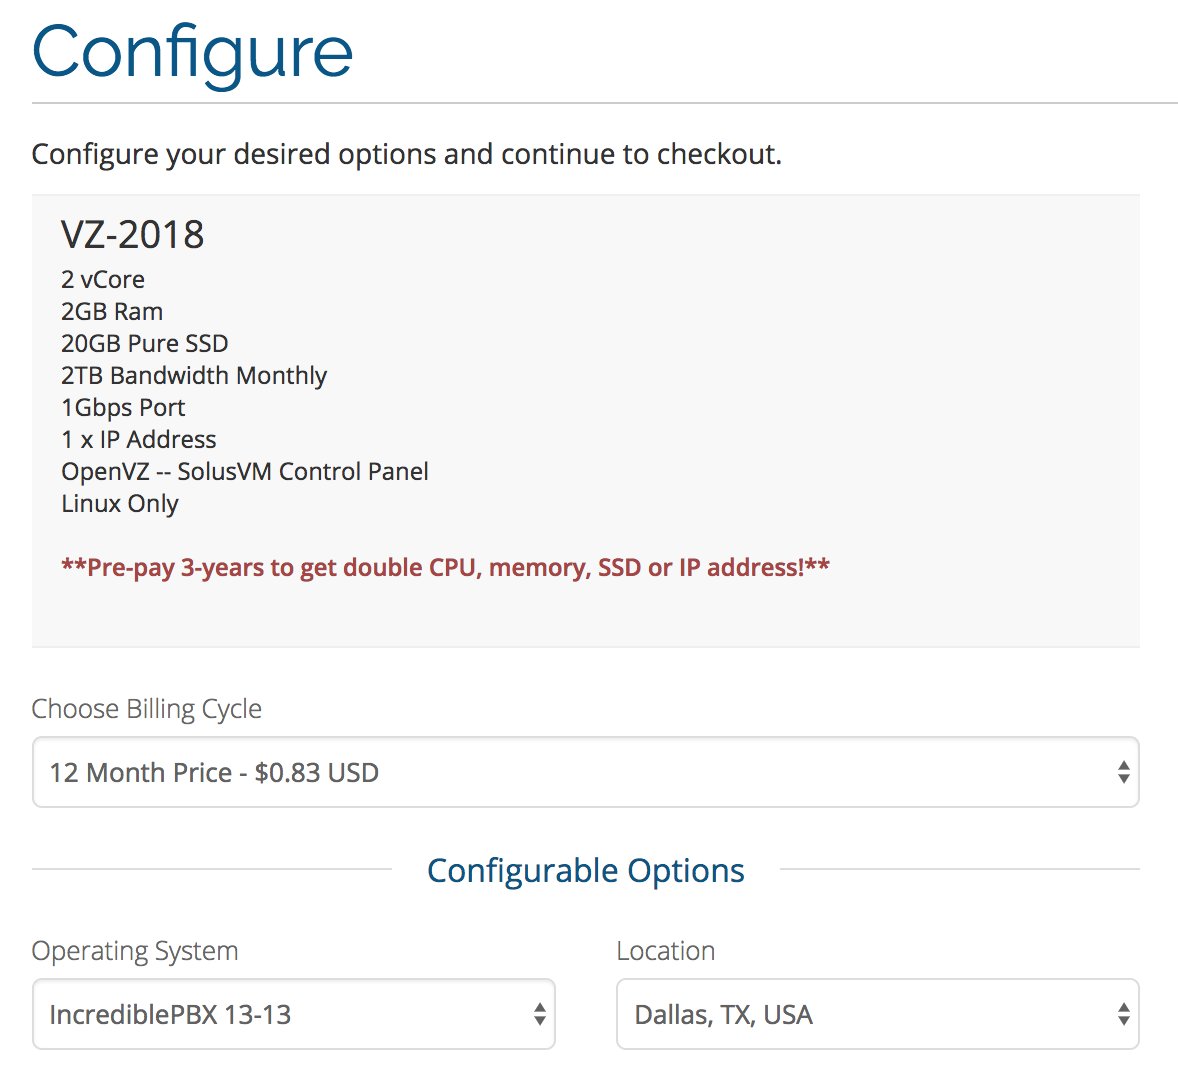
So what’s the catch? Well, there’s no catch with Incredible PBX 13-13 and CentOS 6.9. This HiFormance platform uses OpenVZ with SolusVM. Someone always asks, "If the platform is so great, why aren’t you using it?" And our answer is we are. We have deployed HiFormance cloud-based VoIP servers running Incredible PBX 13-13 in Atlanta, Buffalo, Chicago, and Los Angeles without any hiccups in service. Performance is excellent. Support is excellent. So run, don’t walk, to sign up for one of these before they’re all gone. You won’t be disappointed. Just fill out the entries as shown above once you log into the HiFormance site. Nerd Vittles receives no commissions from signups.
June 20 Update: For those of you on the West Coast and readers in the Far East, we are pleased to announce that HiFormance has extended the Incredible PBX offer to their new $1/month VZ-2019 platform featuring 4GB RAM, 20GB SSD storage, 4TB of bandwidth, and DDOS protection at the QuadraNet Los Angeles data center. As with the other offers, you can double the bandwidth or storage by prepaying for three years in advance and opening a ticket. For those in the Far East, you can upgrade to the Asia Optimized CN2, Los Angeles offering for an additional $10.99 a year.
Getting Started with Incredible PBX 13-13
Once you’ve signed up for an account, choose a location for your server and select Incredible PBX 13-13 as your "operating system." It’s a preconfigured implementation that uses the latest CentOS 6.9 platform. Once you receive your credentials by email, login to your SolusVM Control Panel with a browser. Click the Manage tab for your virtual machine. In the Settings tab at the bottom of the control panel, turn TUN/TAP ON if you plan to use the NeoRouter VPN. Next, click the Root/Admin Password tab and set a default root password for your virtual machine. Take a look around in the control panel while you’re there. This is where you’d return if you need to restart your virtual machine or if you wish to reinstall your virtual machine with the same or a different operating system.
Now that your virtual machine is up and running, log into your server with SSH as root and type YES to get started. Be sure to log in from a desktop machine that you plan to use to manage your server since this IP address will be whitelisted. You’ll be prompted to immediately change all of your passwords. When the setup finishes, just type "reboot" to reboot your server. Log back in as root and the Automatic Update Utility will bring your server up to current specs. If you’re not in the Eastern U.S. time zone, type: /root/timezone-setup. Then you’re ready to go.
One of the unique features of Incredible PBX 13-13 is that most of the major components of the aggregation including Asterisk were compiled from source, and the source code is actually on your server. The advantage is you can quickly make any future modifications desired to meet your own unique requirements. You won’t find this in any other VoIP implementation. For example, here’s all it takes to upgrade to the very latest release of Asterisk. As with the current version, both support SRTP encrypted communications!
cd /usr/src
rm -rf asterisk-13.21.0
wget http://downloads.asterisk.org/pub/telephony/asterisk/releases/asterisk-13.21.1.tar.gz
tar zxvf asterisk-13.21.1.tar.gz
mv asterisk-13.21.1.tar.gz /tmp
cd asterisk-13.21.1
contrib/scripts/get_mp3_source.sh
 mv res/res_xmpp.c res/res_xmpp.c.orig
 wget http://incrediblepbx.com/res_xmpp-13.tar.gz
 tar zxvf res_xmpp-13.tar.gz
 cp -p res/res_xmpp.c res/res_xmpp.c.oauth
make distclean
wget http://incrediblepbx.com/menuselect-incredible13.8.tar.gz
tar zxvf menuselect-incredible*
rm -f menuselect-incredible*
wget https://issues.asterisk.org/jira/secure/attachment/54233/srtp_aead_and_big_aes.patch
wget http://incrediblepbx.com/srtp_aead_and_big_aes.patch.patch
patch -p0 < ./srtp_aead_and_big_aes.patch.patch
patch -p0 <./srtp_aead_and_big_aes.patch
CFLAGS='-DENABLE_SRTP_AES_256 -DENABLE_SRTP_AES_GCM' ./configure --libdir=/usr/lib64 --with-pjproject-bundled
 make menuselect.makeopts
 menuselect/menuselect --enable-category MENUSELECT_ADDONS menuselect.makeopts
 menuselect/menuselect --enable-category MENUSELECT_CODECS menuselect.makeopts
 menuselect/menuselect --disable-category MENUSELECT_TESTS menuselect.makeopts
 menuselect/menuselect --enable CORE-SOUNDS-EN-GSM --enable MOH-OPSOUND-WAV --enable EXTRA-SOUNDS-EN-GSM --enable cdr_mysql menuselect.makeopts
 menuselect/menuselect --disable app_mysql --disable app_setcallerid --disable func_audiohookinherit --disable res_fax_spandsp menuselect.makeopts
 menuselect/menuselect --disable test_named_lock --disable test_res_pjsip_scheduler --disable test_file --disable test_bridging --disable test_res_pjsip_scheduler menuselect.makeopts
 sed -i 's|march=native|mtune=native|' Makefile.rules
expect -c 'set timeout 60;spawn make menuselect;expect "Save";send "\t\t\r";interact'
make
make install
ldconfig
cd /usr/src/Asterisk-Flite-2.2-rc1-flite1.3
make clean
make
make install
amportal restart
WebMin is also installed and configured as part of the base install. The root password for access is the same as your Linux root password. We strongly recommend that you not use WebMin to make configuration changes to your server. You may inadvertently damage the operation of your PBX beyond repair. WebMin is an excellent tool to LOOK at how your server is configured. When used for that purpose, we highly recommend WebMin as a way to become familiar with your Linux configuration.
Using the Incredible PBX 13-13 Web GUI
Most of the configuration of your PBX will be performed using the web-based Incredible PBX GUI with its FreePBX 13 GPL modules. Use a browser pointed to the IP address of your server and choose Incredible PBX Admin. Log in as admin with the password you configured in the previous step. HINT: You can always change it if you happen to forget it: /root/admin-pw-change. You can safely ignore the warning about a missing swap file. You have plenty of RAM, and OpenVZ platforms don't permit swap files. If you're worried about it, choose the 3-year prepayment option and double your ram from 2GB to 4GB which is more than ample for even the busiest PBXs.
To get a basic system set up so that you can make and receive calls, you'll need to configure a VoIP trunk, create one or more extensions, set up an inbound route to send incoming calls to an extension, and set up an outbound route to send calls placed from your extension to a VoIP trunk that connects to telephones in the real world. You'll also need a SIP phone or softphone to use as an extension on your PBX.
Continue Reading: Configuring Extensions, Trunks & Routes

Introducing Incredible PBX Whole Enchilada
The Whole Enchilada upgrade already is included on the HiFormance platform. You can review the tutorial for the three dozen apps here.
Reconfiguring NeoRouter VPN for OpenVZ
On OpenVZ platforms including HiFormance, you'll need to enable TUN/TAP in the Control Panel for your VPS. After adjusting the setting, reboot your server. Then the NeoRouter VPN client will function properly.
Installing Incredible Fax with HylaFax/AvantFax
To install Incredible Fax, log into your server as root and issue the following commands. Install time: 2 minutes.
cd /root
./incrediblefax13.sh
After entering your email address to receive incoming faxes, you'll be prompted about two dozen times to choose options as part of the install. Simple press the ENTER key at each prompt and accept all of the defaults. When the install finishes, make certain that you reboot your server to bring Incredible Fax on line. There will be a new AvantFax option in the Incredible PBX GUI. The default credentials for AvantFax GUI are admin:password; however, you first may be prompted for your Apache admin credentials which were set when you installed your server. Then you'll be asked to change your AvantFax password.

Be advised that HiFormance blocks outbound email ports including port 587 by default. You'll need to open a ticket with them to use email from your server. You can test whether port 25 and 587 are blocked with the following command:
telnet gmail-smtp-msa.l.google.com 587
Backing Up Your Server
One of the reasons we love the CentOS 6.9 platform is the ease with which you can make full system backups, particularly on cloud platforms. There's no MySQL InnoDB databases to worry about so you can treat MySQL databases just like any other Linux file. We're offering the following script for your use pursuant to the GPL2 license. By using the script at no cost, you agree to assume all risks and absolve us from any liability regarding bugs, performance, or any other failure in the code. If that's acceptable to you, copy the commands below and create a backup-full script in the /root folder of your primary server. After saving the script, make it executable: chmod +x backup-full.
#!/bin/bash
# backup-full for Incredible PBX, Copyright (c) 2008-2018, Ward Mundy & Associates, LLC
# Licensed pursuant to GPL2. See /root/COPYING on any Incredible PBX server for details
amportal stop
service mysqld stop
service httpd stop
service sendmail stop
cd /
tar -cf /tmp/backup.tar /bin /etc /home /lib /lib64 /media /mnt /opt /root /sbin /usr /var
service sendmail start
service httpd start
service mysqld start
amportal start
tar --delete -f /tmp/backup.tar etc/udev/rules.d
tar --delete -f /tmp/backup.tar etc/sysconfig/network-scripts
tar --delete -f /tmp/backup.tar var/lib/dhclient
tar --delete -f /tmp/backup.tar etc/fstab
tar --delete -f /tmp/backup.tar etc/resolv.conf
tar --delete -f /tmp/backup.tar etc/hosts
tar --delete -f /tmp/backup.tar etc/hostname
gzip /tmp/backup.tar
echo "Your backup is available: /tmp/backup.tar.gz"
echo "Copy it and test it in a safe place OFF SITE"
echo " "
To run the script, execute the following command: /root/backup-full
We recommend running the backup-full script during hours when your PBX is not in active use since Asterisk and other services typically are shut down for 2-10 minutes. Depending upon the size and performance of your server, the complete backup process typically takes 5-20 minutes. Once the backup script finishes, copy /tmp/backup.tar.gz to a safe place away from the primary server every week. You can automate the backup and the copying procedure with a cron job if desired.
To restore, copy your backup.tar.gz file back to the /tmp directory on the new server and then:
#!/bin/bash
# restore-full for Incredible PBX, Copyright (c) 2008-2018, Ward Mundy & Associates, LLC
# Licensed pursuant to GPL2. See /root/COPYING on any Incredible PBX server for details
amportal stop
service mysqld stop
service httpd stop
service sendmail stop
cd /
tar zxvf /tmp/backup.tar.gz
reboot
Upgrading to IBM Speech Engines
NOV. 1 UPDATE: IBM has moved the goal posts effective December 1, 2018:
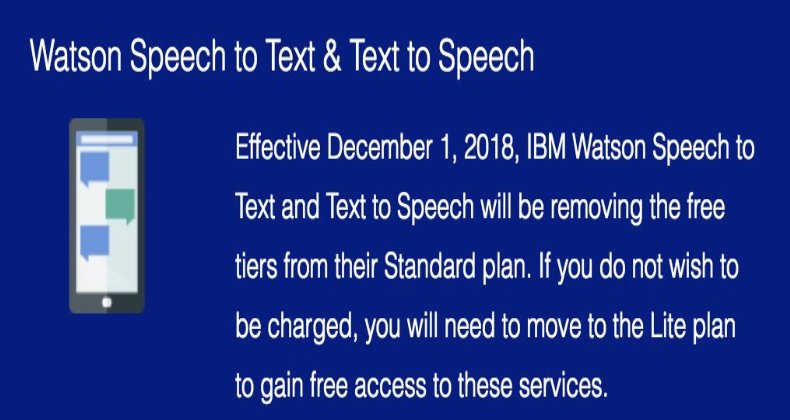
If you've endured Google's Death by a Thousand Cuts with text-to-speech (TTS) and voice recognition (STT) over the years, then we don't have to tell you what a welcome addition IBM's new speech utilities are. We can't say enough good things about the new IBM Watson TTS and STT offerings. While IBM's services are not free, that’s really theoretical for most of our readers. Your first month on the platform is entirely free. And, after that, you get 1,000 minutes a month of free STT voice recognition services. And the first million characters of text-to-speech synthesis are FREE every month as well. So let's put the pieces in place so you'll be ready to play with the Whole Enchilada. Here's our tutorial that will walk you through the one-time IBM setup.
Next, login to your Incredible PBX server and issue these commands to update your Asterisk dialplan and edit ibmtts.php:
cd /var/lib/asterisk/agi-bin
./install-ibmtts-dialplan.sh
nano -w ibmtts.php
Insert your credentials in $IBM_username and $IBM_password. Verify that $IBM_url matches the entry provided when you registered with IBM. Then save the file: Ctrl-X, Y, then ENTER. Now reload the Asterisk dialplan: asterisk -rx "dialplan reload". Try things out by dialing 951 (news) or 947 (Weather) from an extension registered on your PBX.
To get IBM's Speech to Text service configured, while still logged in to your Incredible PBX server, issue these commands to edit getnumber.sh:
cd /var/lib/asterisk/agi-bin
nano -w getnumber.sh
Insert your API_USERNAME and API_PASSWORD in the fields provided. Then save the file: Ctrl-X, Y, then ENTER. Update your Voice Dialer (411) to use the new IBM STT service:
sed -i '\\:// BEGIN Call by Name:,\\:// END Call by Name:d' /etc/asterisk/extensions_custom.conf
sed -i '/\\[from-internal-custom\]/r ibm-411.txt' /etc/asterisk/extensions_custom.conf
asterisk -rx "dialplan reload"
Now try out the Incredible PBX Voice Dialer with AsteriDex by dialing 411 and saying "Delta Airlines."
Configuring Google Voice with Incredible PBX
The advantage of Google Voice trunks for those of you in the United States is that all of your calls within the U.S. and Canada are free. You can't beat the price, and it has worked reliably for many, many years but it may disappear any day now. If so, we'll have a fresh tutorial with a workaround for you soon. Unless Google pulls the plug on XMPP support for Google Voice, there are three different ways to set up Google Voice trunks with Incredible PBX. For a one-time fee of $4.99 with this coupon, you can use the Simonics GV/SIP gateway to configure a Google Voice account using OAuth 2 authentication. Then just set up the Simonics SIP trunk on your PBX to point to the Simonics gateway. A second option is to choose the (recommended) OAuth 2 authentication method for Google Voice when you initially install Incredible PBX 13-13. Finally, you can choose plain-text passwords for Google Voice when you set up Incredible PBX. The drawback of this last option is Google has hinted that they may discontinue support of plain-text passwords.
Here are the initial setup steps on the Google side:
1. Set up a dedicated Gmail and Google Voice account to use exclusively for this Google Voice setup on your PBX. Head over to the Google Voice site and register. You'll need to provide a U.S. phone number to verify your account by either text message or phone call.
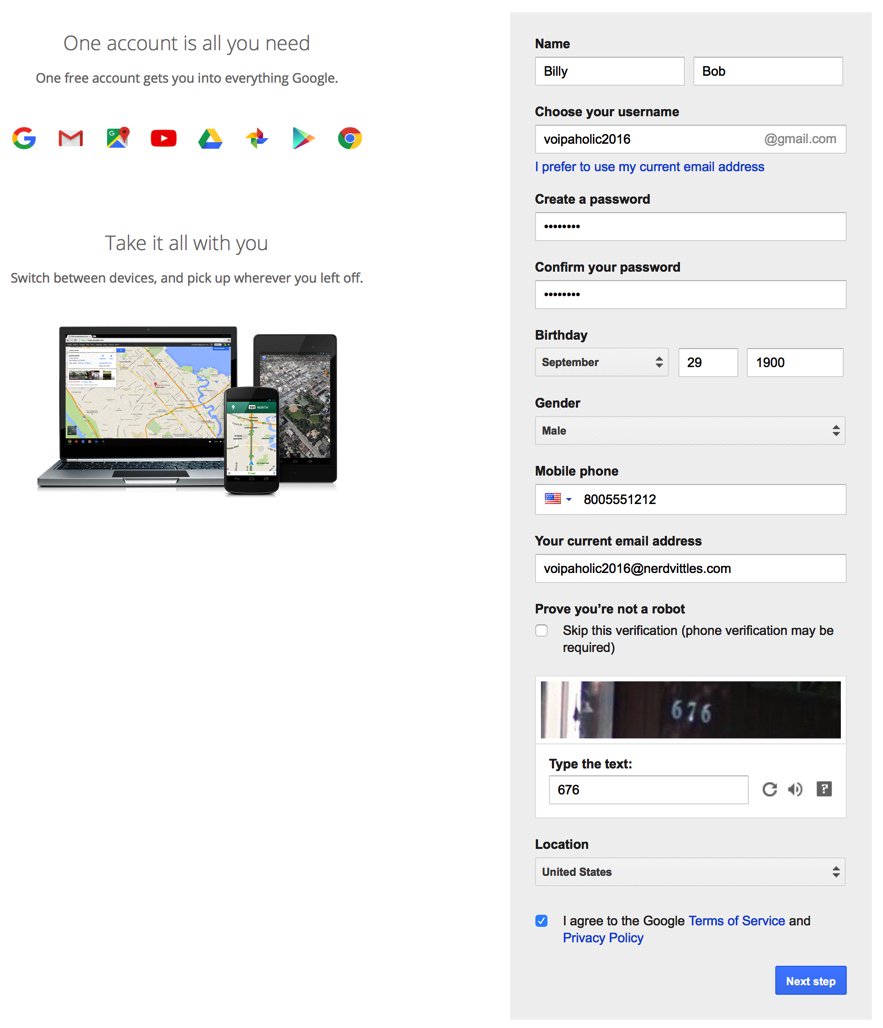
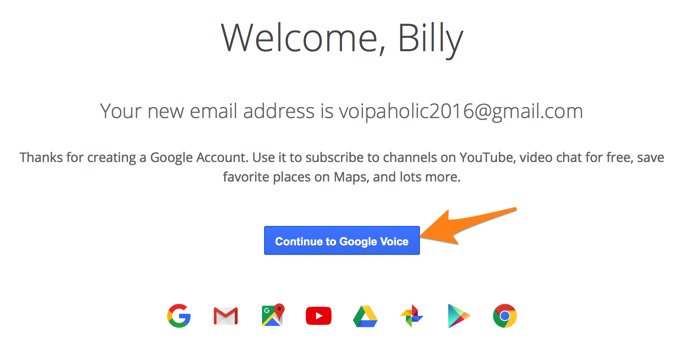
2. Once you have verified your account by entering your verification code, you'll get a welcome message from Mr. Google. Click Continue to Google Voice.
3. Provide an existing U.S. phone number for verification. It can be the same one you used to set up your Google account in step #1.
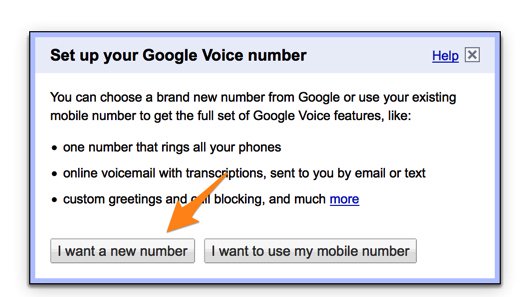
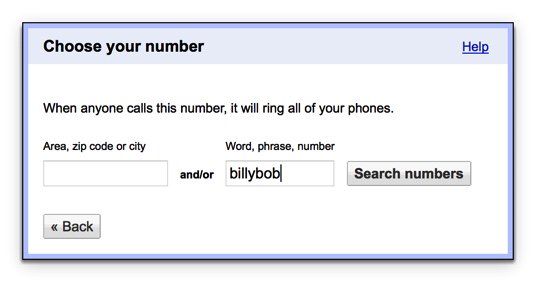
4. Once your phone number has been verified, choose a DID in the area code of your choice.
Special Note: Google continues to tighten up on obtaining more than one Google Voice number from the same computer or the same IP address. If this is a problem for you, here's a workaround. From your smartphone, install the Google Voice app from iPhone App Store or Google's Play Store. Then open the app and login to your new Google account. Choose your new Google Voice number when prompted and provide a cell number with SMS as your callback number for verification. Once the number is verified, log out of Google Voice. Do NOT make any calls. Now head back to your PC's browser and login to https://voice.google.com. You will be presented with the new Google Voice interface which does not include the Google Chat option. But fear not. At least for now there's still a way to get there. After you have set up your new phone number and opened the Google Voice interface, click on the 3 vertical dots in the left sidebar (it's labeled More). When it opens, click Legacy Google Voice in the sidebar. That will return you to the old UI. Now click on the Gear icon (upper right) and choose Settings. Make sure the Google Chat option is selected and disable forwarding calls to whatever default phone number you set up.
5. When your DID has been assigned, click the More icon at the bottom of the left column of the Google Voice desktop. Click Legacy Google Voice. Now click the Settings icon on your legacy Google Voice desktop. Make certain that Forward Calls to Google chat is checked and disable calls to your forwarding number. Click on the Calls tab and select Call Screening:OFF, CallerID (Incoming):Display Caller's Number, and Global Spam Filtering:checked. The remaining entries should be blank.
6. Google Voice configuration is now complete. Sign out of your Google Voice account.
The Simonics GV-SIP Gateway Solution. Here's the quick thumbnail of the steps to put all the pieces in place. First, we set up a Google Voice account at Google as documented above. Next, we'll set up an account at the Simonics site to link our Google Voice account to the Simonics SIP Gateway. Then we'll plug our Simonics SIP credentials into the preconfigured Simonics trunk on Incredible PBX. Finally, we'll add Incoming and Outgoing Routes to tell Incredible PBX how to process Google Voice calls.
Now you're ready to set up an account on the Simonics site. With this Nerd Vittles link, there's a one-time fee of $4.99.
1. Start by registering your new Google account.
2. After paying the $4.99 registration fee via PayPal, proceed through the setup process to link your Google Voice account and 11-digit Google Voice phone number to the Simonics SIP Gateway.
3. You then will be provided your SIP username and password as well as the gateway address, gvgw.simonics.com, to use in building your SIP trunk on your PBX.

4. If your SIP credentials ever get compromised, regenerate your password by logging back into the Simonics GW site.
Now it's time to configure your Simonics trunk in Incredible PBX. Start by logging into the web interface as admin with your admin password from above. Click Connectivity:Trunks and choose the Simonics trunk in the PBX Configuration menu. The Simonics trunk template will display:

1. Untick the Disable Trunk check box.
2. In Outbound CallerID, insert your 10-digit Google Voice number.
3. In username, insert GV1 followed by your 10-digit Google Voice number.
4. In secret, insert your Simonics SIP password.
5. In the Registration String, insert GV1 followed by your 10-digit Google Voice number followed by a colon (:)
6. In the Registration String after the colon, insert your Simonics SIP password.
7. In the tail of the Registration String after the slash (/), insert your 10-digit Google Voice number.
8. Click Submit Changes and then Reload the Dialplan when prompted.
Configuring GV Trunk with Motif in the GUI. If you elect to configure your Google Voice trunk natively using the Incredible PBX GUI, you first will need to obtain a Refresh_Token if you elected to use OAuth 2 authentication.
1. Be sure you are still logged into your Google Voice account. If not, log back in at https://voice.google.com.
2. In a separate browser tab, go to the Google OAUTH Playground using your browser while still logged into your Google Voice account.
3. Once logged in to Google OAUTH Playground, click on the Gear icon in upper right corner (as shown below).
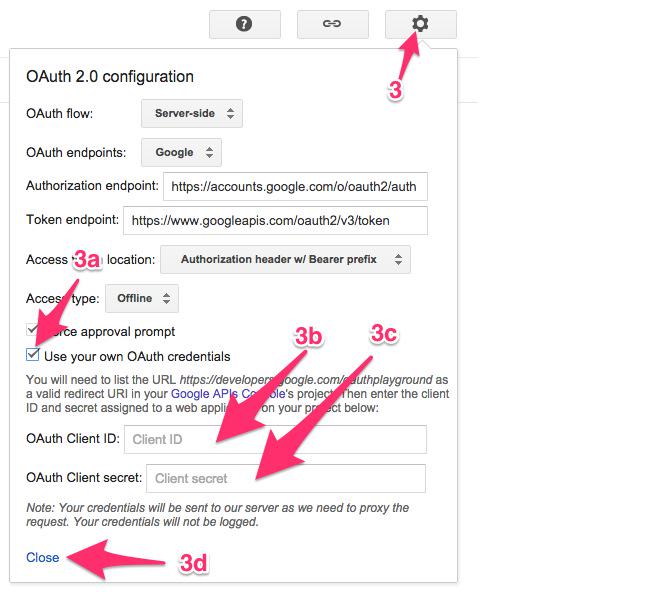
3a. Check the box: Use your own OAuth credentials
3b. Enter Incredible PBX OAuth Client ID:
466295438629-prpknsovs0b8gjfcrs0sn04s9hgn8j3d.apps.googleusercontent.com
3c. Enter Incredible PBX OAuth Client secret: 4ewzJaCx275clcT4i4Hfxqo2
3d. Click Close
4. Click Step 1: Select and Authorize APIs (as shown below)
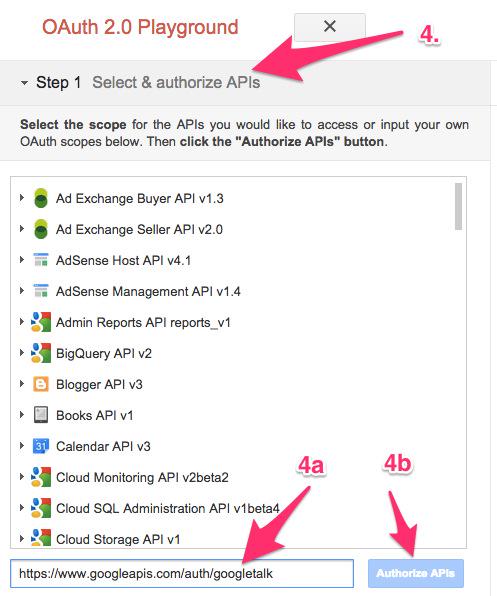
4a. In OAUTH Scope field, enter: https://www.googleapis.com/auth/googletalk
4b. Click Authorize APIs (blue) button.
5. Click Step 2: Exchange authorization code for tokens
5a. Click Exchange authorization code for tokens (blue) button
5b. When the tokens have been generated, Step 2 will close.
6. Reopen Step 2 and copy your Refresh_Token. This is the "password" you will need to enter (together with your Gmail account name and 10-digit GV phone number) when you add your GV trunk in the Incredible PBX GUI. Store this refresh_token in a safe place. Google doesn't permanently store it!
7. Authorization tokens NEVER expire! If you ever need to remove your authorization tokens, go here and delete Incredible PBX Google Voice OAUTH entry by clicking on it and choosing DELETE option.
Switch back to your Gmail account and click on the Phone icon at the bottom of the window to place one test call. Once you successfully place a call, you can log out of Google Voice and Gmail.
Yes, this is a convoluted process. Setting up a secure computing environment often is. Just follow the steps and don't skip any. It's easy once you get the hang of it. And you'll sleep better.
Now you’re ready to configure your Google Voice account in Incredible PBX. You do it from within the Incredible PBX GUI by choosing Connectivity:Google Voice. Just plug in your Google Voice Username, enter your refresh_token from Step #6 above as your Google Voice Password, enter your 10-digit Google Voice Phone Number, and check the first two boxes: Add Trunk and Add Outbound Routes. Then click Submit and Apply Settings to save your new entries.
If you elected to use plain-text passwords for Google Voice, simply skip obtaining OAuth 2 credentials and substitute your plain-text password for the refresh_token when you create the Google Voice trunk above. If you have trouble getting Google Voice to work using a plain-text password, try this Google Voice Reset Procedure. It usually fixes connectivity problems. If it still doesn’t work, enable Less Secure Apps using this Google tool.
IMPORTANT: Once you’ve entered your credentials, you MUST restart Asterisk from the Linux command line, or Google Voice calls will fail: amportal restart
Incredible PBX Wholesale Providers Access
Nerd Vittles has negotiated a special offer that gives you instant access to 300+ wholesale carriers around the globe. In lieu of paying the $650 annual fee for the service, a 13% wholesale surcharge is assessed to cover operational costs of TelecomsXchange. In addition, TelecomsXchange has generously offered to contribute a portion of the surcharge to support the Incredible PBX open source project. See this Nerd Vittles tutorial for installation instructions and signup details.
Continue Reading: Configuring Extensions, Trunks & Routes
Don't Miss: Incredible PBX Application User's Guide covering the 31 Whole Enchilada apps
Originally published: Monday, June 18, 2018
 Support Issues. With any application as sophisticated as this one, you're bound to have questions. Blog comments are a difficult place to address support issues although we welcome general comments about our articles and software. If you have particular support issues, we encourage you to get actively involved in the PBX in a Flash Forum. It's the best Asterisk tech support site in the business, and it's all free! Please have a look and post your support questions there. Unlike some forums, the PIAF Forum is extremely friendly and is supported by literally hundreds of Asterisk gurus and thousands of users just like you. You won't have to wait long for an answer to your question.

2018 TREAT: If you could use one or more free DIDs in the U.S. with unlimited inbound calls and unlimited simultaneous channels, then today's your lucky day. TelecomsXChange and Bluebird Communications have a few hundred thousand DIDs to give away so you better hurry. You have your choice of DID locations including New York, New Jersey, California, Texas, and Iowa. The DIDs support Voice, Fax, Video, and even Text Messaging (by request). The only requirement at your end is a dedicated IP address for your VoIP server. Once you receive your welcome email with your number, be sure to whitelist the provider's IP address in your firewall. For Incredible PBX servers, use add-ip to whitelist the UDP SIP port, 5060, using the IP address provided in your welcoming email.
Here's the link to order your DIDs.
Your DID Trunk Setup in your favorite GUI should look like this:
Trunk Name: IPC
Peer Details:
type=friend
qualify=yes
host={IP address provided in welcome email}
context=from-trunk
Your Inbound Route should specify the 11-digit DID beginning with a 1. Enjoy!

Need help with Asterisk? Join our new MeWe Support Site.
Special Thanks to Our Generous Sponsors
FULL DISCLOSURE: ClearlyIP, Skyetel, Vitelity, DigitalOcean, Vultr, VoIP.ms, 3CX, Sangoma, TelecomsXchange and VitalPBX have provided financial support to Nerd Vittles and our open source projects through advertising, referral revenue, and/or merchandise. As an Amazon Associate and Best Buy Affiliate, we also earn from qualifying purchases. We’ve chosen these providers not the other way around. Our decisions are based upon their corporate reputation and the quality of their offerings and pricing. Our recommendations regarding technology are reached without regard to financial compensation except in situations in which comparable products at comparable pricing are available from multiple sources. In this limited case, we support our sponsors because our sponsors support us.
 BOGO Bonaza: Enjoy state-of-the-art VoIP service with a $10 credit and half-price SIP service on up to $500 of Skyetel trunking with free number porting when you fund your Skyetel account. No limits on number of simultaneous calls. Quadruple data center redundancy. $25 monthly minimum spend required. Tutorial and sign up details are here.
![]() The lynchpin of Incredible PBX 2020 and beyond is ClearlyIP components which bring management of FreePBX modules and SIP phone integration to a level never before available with any other Asterisk distribution. And now you can configure and reconfigure your new Incredible PBX phones from the convenience of the Incredible PBX GUI.
The lynchpin of Incredible PBX 2020 and beyond is ClearlyIP components which bring management of FreePBX modules and SIP phone integration to a level never before available with any other Asterisk distribution. And now you can configure and reconfigure your new Incredible PBX phones from the convenience of the Incredible PBX GUI.
 VitalPBX is perhaps the fastest-growing PBX offering based upon Asterisk with an installed presence in more than 100 countries worldwide. VitalPBX has generously provided a customized White Label version of Incredible PBX tailored for use with all Incredible PBX and VitalPBX custom applications. Follow this link for a free test drive!
 Special Thanks to Vitelity. Vitelity is now Voyant Communications and has halted new registrations for the time being. Our special thanks to Vitelity for their unwavering financial support over many years and to the many Nerd Vittles readers who continue to enjoy the benefits of their service offerings. We will keep everyone posted on further developments.


i just bought the vm from hiformance. using putty i log in as root but what is the password? You wrote there as YES, but I tried it was not working. I tried changing the password from the panel but it said "A process has already been initiated for this virtual server. Please wait for the process to finish"
Ward, sorry for the early post. I think I waited another 10 minutes and I could login to hiformance panel to change the password, everything is working perfect. thanks for the software
I purchased the hiformance vm and chose Dallas. It ran an hour and then started to slow down and stopped working. Finally after screwing with it an hour or so,trying to reinstall, I submitted a ticket. After a few hours, hiformance said they were moving me no explanation. A few hours more, they responded that I was on the Buffalo cloud. Everything is working fine now . Thanks for all you do in the Voip world.
First of all, thanks for all the great articles you write. I got setup in Dallas and everything is working with the exception of voicemail to email. I can send from Webmin to my email, but Asterisk won’t send it. Any ideas?
[WM: Try issuing the following commands. Then log out and back into your VPS as root.]
chattr -i /etc/pbx/.update729

rm -f /etc/pbx/.update729
Is the original article that was published in April still available? When I click on the link in the article list, it brings me to this article instead.
[WM: Try here: http://dev.nerdvittles.com/?p=25645 ]