

The Holy Grail for a mobile VoIP solution is a simple way to connect back to your primary Asterisk® PBX via Wi-Fi from anywhere in the world to make and receive calls as if you never left. Let’s tick off the potential problems. First, many home-based PBXs are sitting behind NAT-based routers. Second, almost all remote Wi-Fi connections are made through a NAT-based router. Third, chances are the remote hosting platform blocks outgoing email from downstream servers such as a mobile PBX. Fourth, deciphering the IP address of your remote connection can be problematic. Fifth, the chances of experiencing one-way audio or no audio on your VoIP calls is high because of NAT-based routers at both ends of your connection.
For those that travel regularly or those that are living elsewhere during the Coronavirus pandemic and want to avoid the complexity of configuring OpenVPN, here is a quick thumbnail of the setup we recommend as your mobile companion. We use it regularly. You’ll never have a one-way audio problem again. In terms of hardware, you’ll need a Raspberry Pi 4B or 3B+ with its native WiFi support plus a Windows or Mac notebook computer for traveling. You’ll also need a NeoRouter VPN server to make this process seamless. If you’ve already set up an OpenVPN server platform, it will work equally well. One advantage of NeoRouter is that clients can be added from the client side without having to create a config file on the VPN server. All you need is a username and password. But the choice of VPN platform is totally a matter of preference. The objective using either OpenVPN or NeoRouter is secure communications to your home base. We don’t want to have to reconfigure either your home PBX or your traveling Raspberry Pi or your notebook PC based upon changes in your public and private IP addresses.
Today we’ll walk you through the easiest way to set up a (free) NeoRouter server on the Internet. It can be used to connect up to 254 devices on an encrypted private LAN. We’re delighted to have finally found a perfect use for the (free) Google Cloud instance.
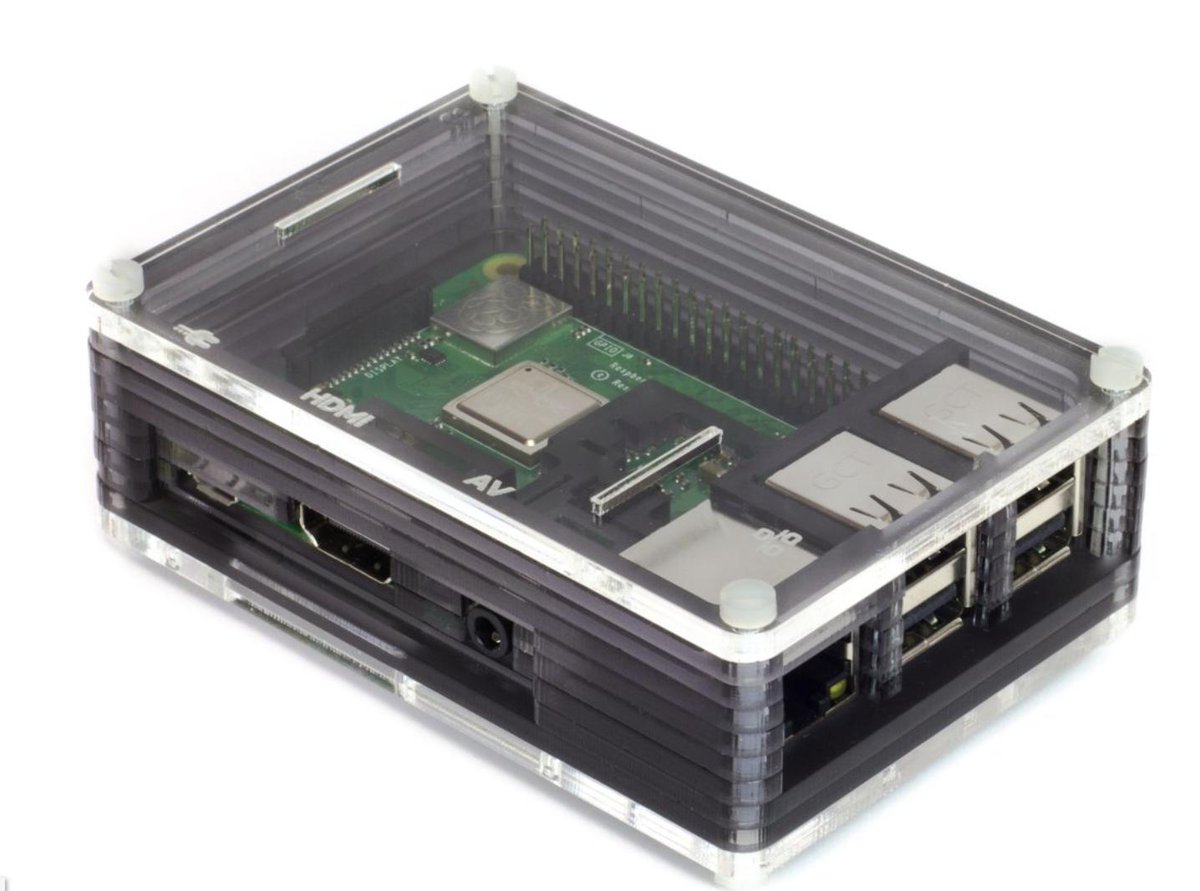
Using a Raspberry Pi, build an Incredible PBX 2020 platform by following our latest tutorial. We’ll set this up on your home WiFi network so that you only have to throw the Raspberry Pi and its power supply in your suitcase when you travel. As part of the setup, we’ll download NeoRouter and activate private IP addresses for your notebook computer as well as both of your PBXs (using nrclientcmd). Next, we’ll interconnect the two PBXs using SIP trunks and the NeoRouter private LAN IP addresses. We’ll take advantage of a neat little Raspberry Pi trick by storing a wpa_supplicant.conf template on your PC for the remote WiFi setup even though we don’t yet know anything about the remote LAN. Once we know the SSID and password at the remote destination, we’ll use your notebook computer to edit the template and transfer the file to the /boot folder of your RasPi’s microSD card. When the card then is inserted and the RasPi is booted, it will automatically move the template to the proper /etc/wpa_supplicant folder to successfully activate your WiFi connection. We’ll also load links, a fast text-based browser, just in case you encounter a remote site that requires some sort of acknowledgement or password before establishing your WiFi connection to the Internet.

Setting Up a (free) NeoRouter Server in the Cloud
Because NeoRouter uses a star-based VPN architecture, that means the NeoRouter Server must always be available at the same IP address for all of the NeoRouter Clients (aka Nodes) to talk to. If you already have a cloud-based server that has a static IP address and can handle the traffic cop duties of NeoRouter Server, then that’s an ideal place to install NeoRouter Server. Simply download the Free flavor of NeoRouter Server that matches your existing platform and install it. Add an FQDN for your server’s IP address, and you’re all set. A detailed summary of available management options is included in our previous NeoRouter v2 article.
We devoted a couple weeks to Google Cloud instances, and it turned out to be a pretty awful platform for hosting Asterisk. But the free offering looks to be a perfect fit as a hosting platform for NeoRouter Server. You also won’t have to worry about Google going out of business anytime soon. So let us walk you through an abbreviated setup process on the Google Cloud platform. If you’re just getting started with Google Cloud, read our previous article to take advantage of Google’s generous $300 offer to get you started and to generally familiarize yourself with the mechanics of setting up an instance in the Google Cloud.
For NeoRouter Server, navigate to https://console.cloud.google.com. Click the 3-bar image ![]() in the upper left corner of your Dashboard. This exposes the Navigation Menu. In the COMPUTE section of the Dashboard, click Compute Engine -> VM Instances. Then click CREATE PROJECT and name it. Now click CREATE INSTANCE and Name it nrserver. The instance name becomes the hostname for your virtual machine. If you want to remain in the Free Tier, choose f1-micro instance as the Machine Type and choose a U.S. Region (us-central1, us-east1 or us-west1). For the Boot Disk, choose CentOS 6 and expand the disk storage to at least 20GB (30GB is available with the Free Tier). For the Firewall setting, leave HTTP and HTTPS disabled. Check your entries carefully and then click the Create button.
in the upper left corner of your Dashboard. This exposes the Navigation Menu. In the COMPUTE section of the Dashboard, click Compute Engine -> VM Instances. Then click CREATE PROJECT and name it. Now click CREATE INSTANCE and Name it nrserver. The instance name becomes the hostname for your virtual machine. If you want to remain in the Free Tier, choose f1-micro instance as the Machine Type and choose a U.S. Region (us-central1, us-east1 or us-west1). For the Boot Disk, choose CentOS 6 and expand the disk storage to at least 20GB (30GB is available with the Free Tier). For the Firewall setting, leave HTTP and HTTPS disabled. Check your entries carefully and then click the Create button.
When your virtual machine instance comes on line, jot down the assigned public IP address. We’ll need it in a minute. Now click on the SSH pull-down tab and choose Open in a Browser Window. Now we need to set a root password and adjust the SSH settings so that you can login from your desktop computer using SSH or Putty:
sudo passwd root
su root
nano -w /etc/ssh/sshd_config
When the editor opens the SSH config file, add the following entries. Then save the file and restart SSH: service sshd restart
PermitRootLogin yes
PasswordAuthentication yes
You now should be able to log in to your instance as root from your desktop computer using SSH or Putty. Test it to be sure: ssh root@server-IP-address
Before we leave the Google Cloud Dashboard, let’s make the assigned public IP address permanent so that it doesn’t get changed down the road. Keep in mind that, if you ever delete your instance, you also need to remove the assigned static IP address so you don’t continue to get billed for it. From Home on the Dashboard, scroll down to the NETWORKING section and choose VPS Network -> External IP Addresses. Change the Type of your existing address to Static and Name it staticip. Next, choose Firewall Rules in the VPS Network section and click CREATE FIREWALL RULE. Fill in the template like the following leaving the other fields with their default entries. Then click CREATE.
- Name: neorouter
- Target Tags: neorouter
- Source IP Range: 0.0.0.0/0
- Protocols/Ports: check tcp: 32976
CAUTION: Before this firewall rule will be activated for your instance, it also must be specified in the Network Tags section for your instance. Shut down your instance and add the neorouter tag by editing your instance. Then restart your instance.
Now we’re ready to install NeoRouter Free v2 Server on your instance. Be sure to choose the Free v2 variety. Log back into your server as root using SSH/Putty and issue these commands:
yum -y update
yum -y install nano
wget http://download.neorouter.com/Downloads/NRFree/Update_2.3.1.4360/Linux/CentOS/nrserver-2.3.1.4360-free-centos-x86_64.rpm
rpm -Uvh nrserver-2.3.1.4360-free-centos-x86_64.rpm
/etc/rc.d/init.d/nrserver.sh restart
nrserver -setdomain <DOMAINNAME> <DOMAINPASSWORD>
nrserver -adduser <USERNAME> <PASSWORD> admin
nrserver -enableuser <USERNAME>
nrserver -showsettings
Finally, add the following command to /etc/rc.local so that NeoRouter Server gets started whenever your instance is rebooted:
echo "/etc/rc.d/init.d/nrserver.sh start" >> /etc/rc.local
Installing Incredible PBX 2020 on a Raspberry Pi
Configuring NeoRouter Client on Your Computers
On Linux-based (non-GUI) platforms, setting up the NeoRouter Client is done by issuing the command: nrclientcmd. You’ll be prompted for your NeoRouter Server FQDN as well as your username and password credentials. Perform this procedure on both your home PBX and the Raspberry Pi.
To add your Windows or Mac notebook to the NeoRouter VPN, download the appropriate client and run the application which will prompt for your NeoRouter Server FQDN as well as your NeoRouter credentials. Once completed, you should see all three machines in your NeoRouter Free Client Dashboard: your PC as well as your home PBX and Raspberry Pi-based Incredible PBX. Make note of the private VPN addresses (10.0.0.X) of both your home PBX and your Raspberry Pi. These VPN addresses never change, and we’ll need them to interconnect your PBXs and to set up a softphone on your notebook computer.
Admininistrative Tools to Manage NeoRouter
Here are a few helpful commands for monitoring and managing your NeoRouter VPN.
To access your NeoRouter Linux client: nrclientcmd
To restart NeoRouter Linux client: /etc/rc.d/init.d/nrservice.sh restart
To restart NeoRouter Linux server: /etc/rc.d/init.d/nrserver.sh restart
To set domain: nrserver -setdomain YOUR-VPN-NAME domainpassword
For a list of client devices: nrserver -showcomputers
For a list of existing user accounts: nrserver -showusers
For the settings of your NeoRouter VPN: nrserver -showsettings
To add a user account: nrserver -adduser username password user
To add admin account: nrserver -adduser username password admin
For a complete list of commands: nrserver –help
Interconnecting Your Raspberry Pi and Home PBX
To keep things simple, our setup examples below assume the following NeoRouter VPN addresses: Home PBX (10.0.0.1) and Raspberry Pi (10.0.0.2). Using a browser, you’ll need to login to the GUI of your Home PBX and Raspberry Pi and add a Trunk to each PBX. Be sure to use the same secret on BOTH trunk setups. We don’t recommend forwarding incoming calls from your Home PBX to your Raspberry Pi because most folks won’t be sitting in their hotel room all day to answer incoming calls. Instead, add the number of your smartphone to a Ring Group on the Home PBX and don’t forget the # symbol at the end of the number. On the Raspberry Pi side, we are assuming that whenever a call is dialed from a registered softphone with the 9 prefix, the call will be sent to the Home PBX for call processing (without the 9). For example, 98005551212 would send 800-555-1212 to the Home PBX for outbound routing and 9701 would send 701 to the Home PBX for routing to the 701 extension. You can obviously adjust your dialplan to meet your own local requirements.
On the Home PBX, the chan_sip trunk entries should look like this:
Trunk Name: raspi-remote

PEER DETAILS

host=10.0.0.2
type=friend
context=from-internal
username=home-pbx
fromuser=home-pbx
secret=some-password
canreinvite=no
insecure=port,invite
qualify=yes
nat=yes
On the Raspberry Pi, the chan_sip trunk entries should look like this:
Trunk Name: home-pbx

PEER DETAILS

host=10.0.0.1
type=friend
context=from-internal
username=raspi-remote
fromuser=raspi-remote
secret=some-password
canreinvite=no
insecure=port,invite
qualify=yes
nat=yes
On the Raspberry Pi, add an Outbound Route named Out9-home-pbx pointed to home-pbx Trunk with the following Dial Patterns. For each Dial Pattern, prepend=blank and prefix=9:
dial string: 1NXXNXXXXXX
dial string: NXXNXXXXXX
dial string: *98X.
dial string: XXX
dial string: XXXX
dial string: XXXXX
Tweaking Your Raspberry Pi for WiFi Mobility
wpa_supplicant.conf config file to the /boot directory on the card once you arrive at your destination and know the SSID and password of the local WiFi network. When the Raspberry Pi is subsequently booted, the operating system will move the config file to the /etc/wpa_supplicant directory so that your WiFi network will come on line. Here’s what a typical wpa_supplicant.conf file should look like using your actual credentials. The last network section handles open WiFi network connections (think: McDonald’s) if you want to enable them:
country=US
update_config=1

network={
 ssid="your-SSID"
 psk="your-SSID-password"
 key_mgmt=WPA-PSK
 scan_ssid=1
 priority=5
}

network={
 key_mgmt=NONE
 priority=1
}
The other gotcha is that some public WiFi networks require some type of web login procedure before you can actually access the Internet even though an IP address may have been assigned to your Raspberry Pi. To handle this situation, you’ll need a text-based web browser on the Raspberry Pi that can be accessed through your notebook PC using SSH and your Raspberry Pi’s VPN address. Our favorite is links which can be installed on your Raspberry Pi before you pack up.
apt-get install links -y
Once you arrive at your destination, connect both your notebook PC and Raspberry Pi to the same WiFi network, login to the RasPi with SSH at the VPN address assigned to your RasPi, and run links to start the browser. Press <esc> to access the links menu options. If you can’t access your RasPi at the VPN IP address, try its WiFi-assigned local IP address.
Adding a Softphone to Your Notebook PC
For Windows PCs, we recommend VitalPBX Communicator. It’s a free download from here.
Another good choice is YateClient for Windows which also is free. Download it from here. Run YateClient once you’ve installed it and enter the credentials for an extension on your Raspberry Pi. Then enter the VPN IP address of your server plus your extension’s password. Click OK to save your entries.
If you are a Mac user, another great no-frills softphone is Telephone. Just download and install it from the Mac App Store.
Adding a Softphone to Your Smartphone
Enjoy your pain-free Home Away from Home!
Originally published: Tuesday, April 2, 2020
Need help with Asterisk? Visit the VoIP-info Forum.
Special Thanks to Our Generous Sponsors
FULL DISCLOSURE: ClearlyIP, Skyetel, Vitelity, DigitalOcean, Vultr, VoIP.ms, 3CX, Sangoma, TelecomsXchange and VitalPBX have provided financial support to Nerd Vittles and our open source projects through advertising, referral revenue, and/or merchandise. As an Amazon Associate and Best Buy Affiliate, we also earn from qualifying purchases. We’ve chosen these providers not the other way around. Our decisions are based upon their corporate reputation and the quality of their offerings and pricing. Our recommendations regarding technology are reached without regard to financial compensation except in situations in which comparable products at comparable pricing are available from multiple sources. In this limited case, we support our sponsors because our sponsors support us.
BOGO Bonaza: Enjoy state-of-the-art VoIP service with a $10 credit and half-price SIP service on up to $500 of Skyetel trunking with free number porting when you fund your Skyetel account. No limits on number of simultaneous calls. Quadruple data center redundancy. $25 monthly minimum spend required. Tutorial and sign up details are here.
The lynchpin of Incredible PBX 2020 and beyond is ClearlyIP components which bring management of FreePBX modules and SIP phone integration to a level never before available with any other Asterisk distribution. And now you can configure and reconfigure your new Incredible PBX phones from the convenience of the Incredible PBX GUI.
VitalPBX is perhaps the fastest-growing PBX offering based upon Asterisk with an installed presence in more than 100 countries worldwide. VitalPBX has generously provided a customized White Label version of Incredible PBX tailored for use with all Incredible PBX and VitalPBX custom applications. Follow this link for a free test drive!
Special Thanks to Vitelity. Vitelity is now Voyant Communications and has halted new registrations for the time being. Our special thanks to Vitelity for their unwavering financial support over many years and to the many Nerd Vittles readers who continue to enjoy the benefits of their service offerings. We will keep everyone posted on further developments.
No Language Download cant find mirror?
[wm: See this thread.]
Hi Ward,
Here is one that I am hoping that you can help out with. I have a did point to a conference bridge no pin required for people to listen., I have everyone muted except the leader, that part works. I want to stream a live youtube event over the conference number. any ideas? we have people that don’t have internet but want to listen in.