Home » Posts tagged 'vpn' (Page 2)

Tag Archives: vpn

The Most Versatile VoIP Provider: FREE PORTING

Deploying an Incredible PBX 2021 PUBLIC Server


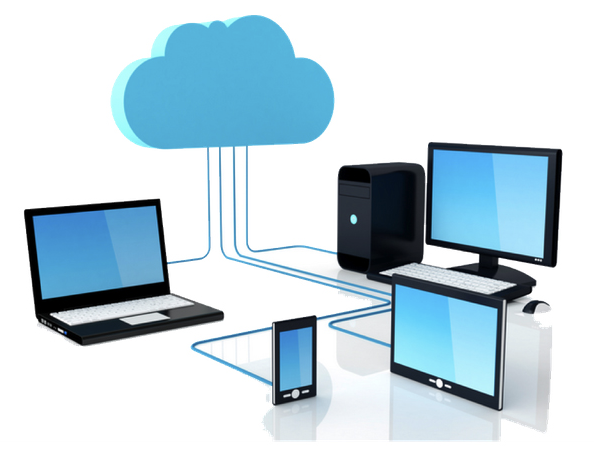
With the almost overnight popularity of the new Clearly Anywhere softphone which provides Incredible PBX connectivity from virtually anywhere, we wanted to add a missing piece to our Incredible PBX 2021 release. Because softphones need connectivity on both cellular networks and using Wi-Fi with dynamic IP addresses in multiple locations, exclusive whitelist-based access to Incredible PBX platforms simply was no longer feasible. Additionally, due to Clearly Anywhere’s tight integration with the FreePBX® User Control Panel (UCP), remote access to UCP for mobile users has become more important particularly with the new QR Code auto-configuration option for Clearly Anywhere clients.

Safely deploying a public-facing Asterisk® server with full FreePBX functionality has become the Holy Grail for Nerd Vittles in 2020. Today we tackle it with the new Incredible PBX® 2021 Debian platform featuring the latest releases of Asterisk 16 and FreePBX 15. The icing on today’s cake is an additional offer from Skyetel that supplements the current Nerd Vittles BOGO offer of up to $500 in half-priced VoIP services. Skyetel now starts you off with a $10 credit just for opening an account here. Then, after you have had an opportunity to kick the tires and perhaps purchase a DID for a buck, you can make $9 worth of phone calls before deciding whether to take advantage of the BOGO special by making a purchase of up to $250 and having Skyetel match your contribution. Once you have funded your account, you then can also take advantage of Skyetel’s free number porting offer for the next 60 days. To get your $10 credit, just open a ticket and request the $10 Nerd Vittles credit once you’ve signed up. To get the Nerd Vittles BOGO price match and take advantage of free number porting, simply open another ticket once you have added up to $250 to your account. Effective 10/1/2023, $25/month minimum spend required.

Making the Case for a Public-Facing PBX

We’ve had folks using our Incredible PBX PUBLIC implementation for over a year, and today we expand the offering to support the new Incredible PBX 2021 with Debian 10. Early on, the first question we got was why anyone would want to do this. After all, PBX in a Flash 3 and Incredible PBX for the better part of a decade have been deployed with a whitelist using the Travelin’ Man 3 firewall, and there’s never been a security issue. So why switch horses now? The short answer is mobile users with dynamic IP addresses. If all the users of your PBX are sitting behind the same NAT-based router with static IP addresses, the Travelin’ Man 3 design is perfect. The bad guys could never even see your server. But if some of your users either reside or travel outside your home base or if you want calls to follow you on your smartphone with Clearly Anywhere when you leave home or the office, then Travelin’ Man 3 blocked SIP access from these remote phones until their new IP addresses were whitelisted. Multiply this by dozens or hundreds of users, and network management suddenly became a full-time job. Yes, we’ve had tools such as dynamic DNS and PortKnocker to ease the pain, but it still was a knuckle-drill for mobile users. And, in today’s Covid world, much of the workforce is quickly morphing into mobile users without a traditional desk at any office. What we were also beginning to see were homegrown "improvements" to the IPtables firewall where users that didn’t appreciate the risks were exposing their servers to SIP attacks simply to ease the pain of connecting remotely.

The world also is becoming more SIP savvy. Just as folks are learning that a $35 antenna can provide an awesome collection of 4K Ultra HD TV channels without the expense of a monthly cable bill, others are learning that a SIP telephone or softphone app on your smartphone can provide free calls to and from anybody with a SIP URI without sharing your communications with Facebook or Microsoft. A public-facing PBX makes free worldwide SIP calling a reality.

Building the Base Platform for Incredible PBX PUBLIC

To get started today, begin by installing Incredible PBX 2021 using our latest tutorial. We strongly recommend a cloud-based KVM platform with a static IP address on the Internet.

Once you have set up your Incredible PBX 2021 server, the next step is to assign one or two fully-qualified domain names (FQDNs) to your server. You can have one FQDN for registering SIP extensions and a different one for anonymous SIP (invite) access to your server, or you can use the same FQDN for both. Security through obscurity provides an extra layer of protection for your server so choose your FQDNs carefully. sip.yourname.com provides almost no protection while f246g.yourname.com pretty much assures that nobody is going to guess your domain name. This is particularly important with the FQDN for SIP registrations because registered extensions on your PBX can obviously make phone calls that cost money. If you don’t have your own domain, you can always obtain a free FQDN from a service such as NoIP.com.

By default, Incredible PBX 2021 configures five extensions (701-705) and a Ring Group for those extensions (777) as well as four trunks. With Skyetel, your PBX is ready to make and receive calls as soon as you sign up. With the other three trunk providers, you only need to enable the trunk. You can add as many additional providers and extensions as you like and modify the ring group to meet your needs. To get started, be sure to configure the correct time zone for your server as this affects delivery of reminders. Run /root/timezone-setup. Next, set a secure password for admin access to the FreePBX GUI modules. Run /root/admin-pw-change. Then set a secure password for admin access to web applications such as AsteriDex, Reminders, and User Control Panel. Run /root/apache-pw-change. In addition to reviewing your extensions and ring group, review the default inbound route and choose the destination for the incoming calls from your provider. Finally, configure the outbound route to use the provider sequence desired. By default, it uses Skyetel for outbound calls.

If you plan to use Clearly Anywhere, you’ll need to add at least one PJsip extension on your PBX or use the preconfigured PJsip extension 701. Simply navigate to Applications -> Extensions in the FreePBX GUI. Choose Add Extension -> Add PJsip Extension. In the General tab, insert an extension number in User Extension and Display Name, e.g. 707. In the Advanced tab, set Max Contacts to 11 which will let you connect up to 5 Clearly Anywhere softphones to the extension. Click Submit and Reload Dialplan when prompted. Go back into the new extension and make note of your new credentials for User Manager. You’ll need these for Clearly Anywhere. Remember to also add the PJsip extension to the Inbound Route for your incoming calls.

Going Public with Incredible PBX 2021

Once you’ve tested making and receiving calls with your new server, you’re ready to convert it into a public-facing PBX. Before proceeding, remove any whitelist entries you’ve added using add-ip and add-fqdn by running del-acct. These can be added back after the GO-PUBLIC-2021 install script is run. In order to run the install script below, you’ll need your FQDNs that you chose above, plus a port number for future SSH/Putty access to your server, plus a list of the extensions you wish to make available for public access to your PBX. These whitelisted extensions can be reached via SIP URI from anywhere in the world by anybody. It works just like your old MaBell phone. Anybody, anywhere can dial your number. What’s changed is now the calls are free. So choose your list carefully. We recommend using the year you were born for your SSH port to keep things simple for you. Once the GO-PUBLIC-2021 script has been run, you can only access your PBX via SSH/Putty at the new port, for example: ssh -p 1990 root@yourFQDN.com

Now we’re ready to run the install script. It takes less than a minute. Before you begin, log out of ALL SIP extensions you have previously registered with Incredible PBX 2021 and change the server destination from an IP address to the FQDN you plan to assign to SIP registrations. Otherwise, these IP addresses will get banned while the install script is running below!

cd /root
wget http://incrediblepbx.com/go-public-2021.tar.gz
tar zxvf go-public-2021.tar.gz
rm -f go-public-2021.tar.gz
./GO-PUBLIC-2021

A Few Words About Incredible PBX PUBLIC Security

As with all Incredible PBX servers, Incredible PBX 2021-PUBLIC includes the Automatic Update Utility. Please don’t disable it. It’s our only way to push updates to you if some vulnerability is discovered down the road. It gets run whenever you login to your server as root using SSH/Putty. Do so regularly and follow us on Twitter for security alerts. There’s also an Incredible PBX RSS Feed that is displayed when you login to the Incredible PBX GUI with a browser. It, too, includes security alerts and should be checked regularly. It’s your phone bill.

Incredible PBX 2021-PUBLIC uses the ipset utility in conjunction with the IPtables firewall to block several countries that have inordinately high concentrations of folks that try to break into VoIP servers. In addition, your public PBX includes the VoIP Blacklist which includes another 100,000 bad guys from around the globe. These blacklists get updated every night by a script which is run from /etc/crontab. For your own safety, don’t disable or delete /etc/update-voipbl.sh or the other components upon which it relies.

Here are some other things you should do regularly to assure that your server remains secure. Login via SSH/Putty as root and check pbxstatus after the Automatic Update Utility is run. With the exception of the fax components, all the other items should be green all the time. From the Linux CLI, run: iptables -nL. This will show your firewall rules and whether any IP addresses have been banned by Fail2Ban. If there are banned IP addresses that are not your own, please open a thread on the VoIP-Info Forum and let us know about it. If there are dozens of banned IP addresses, shutdown your server immediately until the problem is identified and resolved. If the IP addresses happen to be your own users because of using incorrect passwords or because of using a server IP address instead of its FQDN for SIP registrations, unban the IP address:

fail2ban-client set asterisk unbanip xxx.xxx.xxx.xxx

Finally, watch the Asterisk CLI periodically for abnormal activity: asterisk -rvvvvvvvvvv

Tightening Up SSH Server Access

You obviously need a very secure root password for access to your server using SSH/Putty. Changing the TCP port for SSH access avoids the script kiddies, but it doesn’t offer much protection from a determined cracker. SSH login attempts are monitored by Fail2Ban, but Fail2Ban has issues when a determined intruder is using a powerful computing platform such as Amazon EC2. The prudent solution is to disable SSH password access and use SSH Public Key Authentication as documented in the linked tutorial. Always, always use ssh-copy-id to copy your credentials to more than one desktop machine so that you don’t inadvertently lock yourself out of your PBX in case of a hardware failure. Then set PasswordAuthentication no in /etc/ssh/sshd_config and restart SSH: systemctl restart sshd.

Web Access to Incredible PBX 2021 PUBLIC

By default, web access to all apps including FreePBX, UCP, AvantFax, AsteriDex, and Reminders is limited to whitelisted IP addresses. For some implementations, particularly those using Clearly Anywhere, this may not be ideal as UCP can assist with user management of the PBX as well as QR code provisioning of Clearly Anywhere. The Apache web server can be used to manage web access so long as you understand the need to apply Apache security patches in a timely manner.

Assign the same FQDN that you use for SIP access to port 80 for the UCP application. Deploy OpenVPN on your server and use the PBX’s OpenVPN IP address for general access to all web applications we listed above. If you’d like public access to the FreePBX GUI, assign web access for it to another random port, e.g. 8080 in our example below. Block web access to your server from the public IP address of your PBX on both port 80 and 8080 in our example below. Here’s how to accomplish that. Create a new file in /etc/pbx/httpdconf. Create public.conf with the following contents:

Listen 8080
 
<virtualhost *:80>
ServerAdmin you@gmail.com
ServerName 111.112.113.114
Redirect 403 /
UseCanonicalName Off
UserDir disabled
</virtualhost>

<virtualhost *:8080>
ServerAdmin you@gmail.com
ServerName 111.112.113.114
Redirect 403 /
UseCanonicalName Off
UserDir disabled
</virtualhost>

<virtualhost *:80>
ServerAdmin you@gmail.com
ServerName server-fqdn.com
DocumentRoot /var/www/html/ucp
ErrorLog /var/log/httpd/error_log
CustomLog /var/log/httpd/access_log common
</virtualhost>

<virtualhost *:80>
ServerAdmin you@gmail.com
ServerName 10.8.0.123
DocumentRoot /var/www/html
ErrorLog /var/log/httpd/error_log
CustomLog /var/log/httpd/access_log common
</virtualhost>

<virtualhost *:8080>
ServerAdmin you@gmail.com
ServerName server-fqdn.com
DocumentRoot /var/www/html
ErrorLog /var/log/httpd/error_log
CustomLog /var/log/httpd/access_log common
</virtualhost>

<virtualhost 127.0.0.1:80>
ServerAdmin you@gmail.com
ServerName 127.0.0.1
ServerAlias localhost
DocumentRoot /var/www/html
</virtualhost>

In the ServerAdmin lines, insert your email address. Replace 111.112.113.114 with the public IP address of your server. Replace server-fqdn.com with the FQDN assigned for SIP registration access to your PBX. Replace 10.8.0.123 with the OpenVPN private IP address of your PBX. Replace 8080 with the port you chose for FreePBX access to your server. Save the file and then restart Apache:  systemctl restart httpd.

Now it should be safe to open TCP port 80 and 8080 (or whatever port you chose) for web access to your server. Let’s also whitelist TCP 2267 for Clearly Anywhere access while we’re at it. On the Debian 10 platform, here are the commands:

cd /etc/iptables
sed -i 's/10000:20000 -j ACCEPT/&\\n-A INPUT -p tcp -m tcp --dport 8080 -j ACCEPT/' rules.v4
sed -i 's/10000:20000 -j ACCEPT/&\\n-A INPUT -p tcp -m tcp --dport 80 -j ACCEPT/' rules.v4
sed -i 's/10000:20000 -j ACCEPT/&\\n-A INPUT -p tcp -m tcp --dport 2267 -j ACCEPT/' rules.v4
iptables-restart

Be sure to test all three access methods to verify that you haven’t left a security hole.

Keeping FreePBX 15 Modules Current

We strongly recommend that you periodically update all of your FreePBX modules to eliminate bugs and to reduce security vulnerabilities. From the Linux CLI, log into your server as root and issue the following commands:

rm -f /tmp/*
fwconsole ma upgradeall
fwconsole reload
/root/sig-fix
systemctl restart apache2
/root/sig-fix

Special Thanks: We want to give an extra special tip of the hat to the VoIP-Info Forum members who assisted in working the kinks out of the Incredible PBX 2021 PUBLIC offering. We also wish to thank JavaPipe LLC for a number of DDOS tips and tricks in securing Linux with IPtables.

Originally published: Monday, December 21, 2020


Need help with Asterisk? Visit the VoIP-info Forum.


Special Thanks to Our Generous Sponsors


FULL DISCLOSURE: ClearlyIP, Skyetel, Vitelity, DigitalOcean, Vultr, VoIP.ms, 3CX, Sangoma, TelecomsXchange and VitalPBX have provided financial support to Nerd Vittles and our open source projects through advertising, referral revenue, and/or merchandise. As an Amazon Associate and Best Buy Affiliate, we also earn from qualifying purchases. We’ve chosen these providers not the other way around. Our decisions are based upon their corporate reputation and the quality of their offerings and pricing. Our recommendations regarding technology are reached without regard to financial compensation except in situations in which comparable products at comparable pricing are available from multiple sources. In this limited case, we support our sponsors because our sponsors support us.

BOGO Bonaza: Enjoy state-of-the-art VoIP service with a $10 credit and half-price SIP service on up to $500 of Skyetel trunking with free number porting when you fund your Skyetel account. No limits on number of simultaneous calls. Quadruple data center redundancy. $25 monthly minimum spend required. Tutorial and sign up details are here.

The lynchpin of Incredible PBX 2020 and beyond is ClearlyIP components which bring management of FreePBX modules and SIP phone integration to a level never before available with any other Asterisk distribution. And now you can configure and reconfigure your new Incredible PBX phones from the convenience of the Incredible PBX GUI.

VitalPBX is perhaps the fastest-growing PBX offering based upon Asterisk with an installed presence in more than 100 countries worldwide. VitalPBX has generously provided a customized White Label version of Incredible PBX tailored for use with all Incredible PBX and VitalPBX custom applications. Follow this link for a free test drive!
 

Special Thanks to Vitelity. Vitelity is now Voyant Communications and has halted new registrations for the time being. Our special thanks to Vitelity for their unwavering financial support over many years and to the many Nerd Vittles readers who continue to enjoy the benefits of their service offerings. We will keep everyone posted on further developments.


A New Day: Introducing Incredible PBX 2021 Beta for Debian

Shifting gears is never easy, and sometimes it takes an ill-advised corporate blunder to move the needle. But IBM’s decimation of the CentOS project last week was just the motivation we needed to begin exploring alternatives for the Incredible PBX project. We are delighted to introduce the beta release of Incredible PBX 2021 for Debian 10 for those with a pioneering spirit that would like to participate in development of this promising new platform.

Before we get started, a few cautionary notes. This is not production-ready software. It’s been in development for less than a week by a single individual. As much as we believe in miracles, this probably is not one of them. Having said that, many talented individuals on the VoIP-Info.org Forum have taken this for a spin and offered numerous suggestions. You, too, can follow our progress and participate. With a little luck, we’ll have a production-ready release before the end of 2020. We’ve successfully built a fully-functional version of Incredible PBX 2021 with on-premise hardware using VirtualBox and VMware ESXi. And we’ve deployed virtual machines at Vultr and Digital Ocean without a hiccup.

For those that would like to roll up your sleeves and contribute to this open source project, here’s how to get started. If you’re using on-premise hardware, begin by downloading the netinst ISO image of Debian 10.7 for amd64. Follow our previous tutorials for tips on installation with VirtualBox or VMware ESXi. If you’d prefer to experiment in the cloud for about a penny an hour, open an account at Vultr or Digital Ocean using our referral links that support the Nerd Vittles project. You’ll also get some free credit to try out the service. Then create a new $5/month Debian 10, 64-bit instance in your favorite city.


Once your Debian 10 platform is up and running, login as root using SSH or Putty and issue the following commands:

wget http://incrediblepbx.com/IncrediblePBX2021.sh
chmod +x IncrediblePBX2021.sh
./IncrediblePBX2021.sh

At about 5 minutes into the install procedure, you’ll be prompted for your telephone country code. It’s 1 for Canada and the United States. Just before the install completes, you’ll be prompted to save your default IPtables setup. Once the installation completes, reboot and you should be good to go. For tips on next steps, review the Incredible PBX 2020 CentOS 7 tutorial.

After you log back in following a reboot, check the version of Debian 10 in the pbxstatus display. If it’s less than 10.7, issue the following commands to bring your server up to Debian 10.7. Do NOT do this before the base install is finished, or Asterisk may fail to install properly.

apt-get update
apt-get upgrade -y

Next Steps with Incredible PBX 2021

Before you can manage your PBX through a web browser, you first will need to set the admin passwords for FreePBX, Apache web apps such as Reminders and AsteriDex, and AvantFax (if you are using Incredible Fax). These all can be set by logging into your server as root and issuing the following commands: admin-pw-change, apache-pw-change, and avantfax-pw-change. The AvantFax password can also be reset with a browser by first logging in as admin with a password of password.

Outbound mail functionality needs to be working so that you can receive voicemail messages and faxes by email. To prevent SPAM, most ISPs and ITSPs block messages from downstream mail servers. That would be you. The easiest way to resolve this is to configure SendMail using Gmail as an SMTP Smarthost. You obviously need a Gmail account to implement this and, if you have turned on two-factor authentication for your Gmail account, you also will need to obtain an App password for your Gmail account, and use that in lieu of your regular Gmail password when configuring SendMail. With your Gmail username and password in hand, log into your server as root and run: /root/enable-gmail-smarthost-for-sendmail.

If your Incredible PBX 2021 is hosted with a cloud provider, be advised that many providers do not include a swap file as part of their offering. FreePBX requires a swap file. To add one, issue this command after logging into your server as root: /root/create-swapfile-DO.

To correctly set the time on your PBX, run: /root/timezone-setup.

By default, the voicemail password for each of the configured extensions (701-705) is set to the extension number. This means the user will be prompted to set a voicemail password on the first login to voicemail for each extension. A phone must be registered to the actual extension to access its voicemail account. For example, once a phone is registered to extension 701, the voicemail setup can be accessed by dialing *98701.

If you want to send and receive faxes with Incredible PBX 2021, run the following script while logged into your server as root: /root/incrediblefax2020-debian10.sh. When prompted, accept all the defaults. Once the HylaFax and AvantFax components are installed, reboot your server. To send faxes, click on the AvantFax tab in the FreePBX GUI and enter your login credentials (default: admin/password). To receive incoming faxes once you have configured a trunk and DID for your PBX, login to the FreePBX GUI as admin. Navigate to Connectivity -> Inbound Routes. For each of your DIDs on which you wish to receive faxes, select the inbound route and click the Fax tab. Review the Default Inbound Route Fax settings for proper setup.

NOTE: If you get a database error when you attempt to access AvantFax from a web browser, log into your server as root and reinstall the AvantFax database: ./avantfax-db-replace.

Audio Issues with Incredible PBX 2021

If you experience one-way or no audio on some calls, add your external IP address and LAN subnet in the GUI by navigating to Settings -> Asterisk SIP Settings. In the NAT Settings section, click Detect Network Settings. Click Submit and Apply Settings to save your changes.

Adding Incredible PBX 2021 to an OpenVPN Network

We previously have documented the procedure for creating an OpenVPN server as well as OpenVPN client templates (.ovpn). If you need a refresher, the tutorial is here. To add your Incredible PBX 2021 server to an existing OpenVPN network, begin by creating an incrediblepbx2021.ovpn template on your OpenVPN server. Be sure to comment out or delete the setenv line in the template. Then copy this template to /etc on your Incredible PBX 2021 server. Next, issue the following commands to put the remaining pieces in place:

cp -p /root/openvpn-start /etc/.
echo "[Unit]
Description=openvpn2021
ConditionPathExists=/etc/openvpn-start
After=rclocal.service
[Service]
Type=forking
ExecStart=/etc/openvpn-start /etc/incrediblepbx2021.ovpn
TimeoutSec=0
StandardOutput=tty
RemainAfterExit=yes
PermissionsStartOnly=true
SysVStartPriority=99
[Install]
WantedBy=multi-user.target" > /etc/systemd/system/openvpn2021.service

Finally, enable the new openvpn2021.service and reboot your server. The OpenVPN IP address should now appear on the LAN line in pbxstatus:

systemctl enable openvpn2021.service
reboot

Incredible PBX 2021 Administration

We’ve eased the pain of administering your new PBX with a collection of scripts which you will find in the /root folder after logging in with SSH or Putty. Here’s a quick summary of what each of the scripts does.

add-fqdn is used to whitelist a fully-qualified domain name in the firewall. Because Incredible PBX 2021 blocks all traffic from IP addresses that are not whitelisted, this is what you use to authorize an external user for your PBX. The advantage of an FQDN is that you can use a dynamic DNS service to automatically update the IP address associated with an FQDN so that you never lose connectivity.

add-ip is used to whitelist a public IP address in the firewall. See the add-fqdn explanation as to why this matters.

del-acct is used to remove an IP address or FQDN from the firewall’s whitelist.

admin-pw-change is used to set the admin password for access to the FreePBX/Incredible PBX web GUI using a browser pointed to the local IP address of your server.

apache-pw-change is used to set the admin password for access to Apache/Incredible PBX apps including AsteriDex and Reminders. This provides a password layer of protection for access to these applications.

avantfax-email-change is used to change the destination email address for incoming faxes.

avantfax-pw-change is used to change your admin password for the AvantFax web console.

iaxmodem-restart is used to restart the modems used to send and deliver faxes. The pbxstatus display will tell you whether the IAXmodems are down.

incrediblebackup2021 makes a backup of critical components on your PBX to a tarball saved in /backup. This should be copied to safe location off-site for a rainy day.

incrediblerestore2021 restores a backup file which has been copied to the /backup folder.

ipchecker is a script which deciphers the public IP addresses associated with whitelisted FQDNs created with add-fqdn on your server. If any of the addresses have changed, the firewall is restarted after updating the IP addresses. By default, it is executed every 10 minutes by /etc/crontab.

licenses.sh displays the license associated with each of the FreePBX modules on your server.

logos-b-gone removes proprietary artwork from your PBX and is no longer necessary with the included IncrediblePBX FreePBX module.

mime-construct is a command-line utility to send emails with attachments.

neorouter-login is a script to add your PBX to a NeoRouter VPN. Tutorial here.

odbc-gen.sh is a script that was run to generate the ODBC settings for Asterisk. Do NOT use it.

openvpn-start is a script to add your PBX to an existing OpenVPN network using an .ovpn config file. Tutorial here.

pbxstatus displays status of all major components of Incredible PBX 2021.

pptp-install is a script to create a PPTP network connection for your PBX. Tutorial here.

purge-cdr-cel-records removes all CDR and CEL records from the MySQL database.

reset-conference-pins is a script that automatically and randomly resets the user and admin pins for access to the preconfigured conferencing application. Dial C-O-N-F from any registered SIP phone to connect to the conference.

reset-extension-passwords is a script that automatically and randomly resets ALL of the SIP passwords for extensions 701-705. Be careful using this one, or you may disable existing registered phones and cause Fail2Ban to blacklist the IP addresses of those users. HINT: You can place a call to the Ring Group associated with all five extensions by dialing 777.

reset-reminders-pin is a script that automatically and randomly resets the pin required to access the Telephone Reminders application by dialing 123. It’s important to protect this application because a nefarious user could set up a reminder to call a number anywhere in the world assuming your SIP provider’s account was configured to allow such calls.

show-feature-codes is a cheat sheet for all of the feature codes which can be dialed from any registered SIP phone. It documents how powerful a platform Incredible PBX 2021 actually is. A similar listing is available in the GUI at Admin -> Feature Codes.

show-passwords is a script that displays most of the passwords associated with Incredible PBX 2021. This includes SIP extension passwords, voicemail pins, conference pins, telephone reminders pin, and your Anveo Direct outbound calling pin (if configured). Note that voicemail pins are configured by the user of a SIP extension the first time the user accesses the voicemail system by dialing *97.

sig-fix disables Module Signature Checking in the FreePBX GUI. This should not be necessary unless you have added or edited FreePBX Modules with missing module signatures.

sms-skyetel is a script to send SMS messages using a Skyetel trunk.

sms-voip.ms is a script to send SMS messages using a VoIP.ms trunk.

sms-blast, sms-blaster, and sms-dictator are scripts for message blasting. Tutorial here.

switch-to-php5.6 is a script to disable PHP 7.3 and set PHP 5.6 as the default version for your PBX. PHP 5.6 is required to use AvantFax. It is the default configuration for Incredible PBX 2021. The current default PHP version is displayed in the Apache listing of pbxstatus.

switch-to-php7.3 is a script to disable PHP 5.6 and set PHP 7.3 as the default version for your PBX. You cannot use AvantFax when PHP 7.3 is the default.

timezone-setup is a script to set the timezone for your PBX.

update-IncrediblePBX is a script that runs the Automatic Update Utility whenever you login to your server as root. These updates typically resolve bugs and security issues with your PBX. Do NOT remove it.

wolfram is a script to deploy Wolfram Alpha on your PBX. Tutorial here.

Forwarding Calls to Your Cellphone. Keep in mind that inbound calls to your DIDs automatically ring all five SIP extensions, 701-705. The easiest way to also ring your cellphone is to set one of these five extensions to forward incoming calls to your cellphone. After logging into your PBX as root, issue the following command to forward calls from extension 705 to your cellphone: asterisk -rx "database put CF 705 6781234567"

To remove call forwarding: asterisk -rx "database del CF 705"

Keeping FreePBX 15 Modules Current

We strongly recommend that you periodically update all of your FreePBX modules to eliminate bugs and to reduce security vulnerabilities. From the Linux CLI, log into your server as root and issue the following commands:

rm -f /tmp/*
fwconsole ma upgradeall
fwconsole reload
/root/sig-fix
systemctl restart apache2
/root/sig-fix


Originally published: Monday, December 14, 2020


Need help with Asterisk? Visit the VoIP-info Forum.


Special Thanks to Our Generous Sponsors


FULL DISCLOSURE: ClearlyIP, Skyetel, Vitelity, DigitalOcean, Vultr, VoIP.ms, 3CX, Sangoma, TelecomsXchange and VitalPBX have provided financial support to Nerd Vittles and our open source projects through advertising, referral revenue, and/or merchandise. As an Amazon Associate and Best Buy Affiliate, we also earn from qualifying purchases. We’ve chosen these providers not the other way around. Our decisions are based upon their corporate reputation and the quality of their offerings and pricing. Our recommendations regarding technology are reached without regard to financial compensation except in situations in which comparable products at comparable pricing are available from multiple sources. In this limited case, we support our sponsors because our sponsors support us.

BOGO Bonaza: Enjoy state-of-the-art VoIP service with a $10 credit and half-price SIP service on up to $500 of Skyetel trunking with free number porting when you fund your Skyetel account. No limits on number of simultaneous calls. Quadruple data center redundancy. $25 monthly minimum spend required. Tutorial and sign up details are here.

The lynchpin of Incredible PBX 2020 and beyond is ClearlyIP components which bring management of FreePBX modules and SIP phone integration to a level never before available with any other Asterisk distribution. And now you can configure and reconfigure your new Incredible PBX phones from the convenience of the Incredible PBX GUI.

VitalPBX is perhaps the fastest-growing PBX offering based upon Asterisk with an installed presence in more than 100 countries worldwide. VitalPBX has generously provided a customized White Label version of Incredible PBX tailored for use with all Incredible PBX and VitalPBX custom applications. Follow this link for a free test drive!
 

Special Thanks to Vitelity. Vitelity is now Voyant Communications and has halted new registrations for the time being. Our special thanks to Vitelity for their unwavering financial support over many years and to the many Nerd Vittles readers who continue to enjoy the benefits of their service offerings. We will keep everyone posted on further developments.


Meet Acer Spin 713: A Phenomenal Computer for All Seasons


It’s a portable office. It’s a movie theater. It’s a LAMP server. It’s a desktop PC. It’s a tablet computer. It’s a Chrome browser. It’s an Android platform. It’s a Linux server. And it gets almost 8 years of free software and firmware updates. Meet the $629 Acer Chromebook Spin 713. And, if you hurry, it’s $80 off at Best Buy today.

The checklist of superlatives is almost too lengthy to mention: a touchscreen of unrivaled quality, a 12-hour battery, dongle-free ports galore: HDMI, USB-C, USB 3.0, microSD slot, and headphone jack. While Chromium notebooks began as little more than a Chrome browser, that was then. The 2020 iteration includes complete Android integration as well as a feature-complete Debian 10 virtual machine platform supporting Apache, PHP 7, and the latest MariaDB/MySQL. If movies and television are your thing, Netflix and Sling TV transform the Chromebook into a near perfect viewing platform. As they say, seeing is believing. So here’s a snapshot from an iPhone that captures the quality of the 2256×1504-pixel (3:2 QHD) display. Suffice it to say, the display is as good or better than our $3,000 MacBook Pro’s screen.


Did we mention Best Buy’s $629 price. This 2-in-1 is a steal. It’s $200 below today’s Amazon pricing and is $400 below the closest comparable Chromebook models. Some may recall that we reviewed the System76 Lemur Pro Linux notebook in August and raved about its pricing at $1322, more than double the cost of Acer’s Spin 713. Having used both machines, I can honestly say you lose nothing by choosing the Acer device, and you gain access to the entire Android platform including Google Play as well as Linux. And the Spin 713 converts into a touchscreen tablet simply by flipping the screen. The only downside is, if these machines go on sale for Black Friday, you will be hard-pressed to find one to buy.

Deploying a LAMP Server with a Chromebook

If you pick up one of these bad boys, here’s a quick primer on setting up a LAMP server on the Linux virtual machine. Begin by enabling it in the Settings tab. Next, click on the Linux Terminal option in your Applications. At the Linux prompt, set up a new root user password: sudo passwd root. Switch to the root user account: su root. Now enter these commands:

cd ~
apt update
apt upgrade
apt install apache2 apache2-utils -y
systemctl start apache2
systemctl enable apache2
chown www-data:www-data /var/www/html/ -R
apt install mariadb-server mariadb-client -y
systemctl start mariadb
systemctl enable mariadb
mysql_secure_installation
apt install php7.3 libapache2-mod-php7.3 php7.3-mysql php-common \\
php7.3-cli php7.3-common php7.3-json php7.3-opcache php7.3-readline \\
php7.3-mbstring php7.3-dev -y
systemctl restart apache2
echo "<?php phpinfo(); ?>" > /var/www/html/info.php
echo "ip a" > /usr/local/bin/ifconfig
chmod +x /usr/local/bin/ifconfig
ifconfig | grep "inet "

 
Make note of your Linux machine’s IP address (last command above) and use a browser to access and verify the PHP info for your server: http://Spin-IP-Address/info.php

In the alternative, use this FQDN: http://penguin.linux.test/info.php

In keeping with their tradition of idiotic obsolescence, the PHP developers dropped support for mysqli in PHP 7 which means the mysql_connect function to interact with MySQL databases fails. Here’s how to restore it:

mkdir /usr
mkdir /usr/src
apt install build-essential git
cd /usr/src
git clone https://github.com/wardmundy/pecl-database-mysql mysql --recursive
cd mysql
phpize
./configure
make
make install
cd /etc/php/7.3/apache2
echo "extension=/usr/lib/php/20180731/mysql.so" >> php.ini
systemctl restart apache2

The mysql and mysqli sections will now magically reappear in your phpinfo() listing.


Adding Clearly Anywhere Softphone to the Spin 713

As noted, the Spin 713 also is a fully functional Android platform so adding the Clearly Anywhere softphone is easy. Simply download the software from Google Play. Then run the app and enter your extension credentials and FQDN of Incredible PBX 2020 PUBLIC server.

Adding Linphone Softphone to the Spin 713

Adding the Linphone softphone is equally easy. Simply download the software from Google Play. Then run the app and enter your Linphone SIP credentials with the configuration setup documented in our tutorial. Linphone calls to other Linphone users and to Incredible PBX 2020 PUBLIC users or anyone with a SIP URI worldwide are free.

Installing OpenVPN for Android on the Spin 713

There are several ways to install OpenVPN on the Spin 713 platform. You can use the traditional method we’ve documented for Linux installs; however, you will lose the ability to use OpenVPN IP addresses from your desktop and browser. The better method is to install the OpenVPN for Android client from the Play Store. Next, send yourself an email with the .ovpn file you created for the Chromebook. Open the message using Gmail on the Chromebook and save the received file in your Downloads folder. Open the OpenVPN for Android app on your desktop. Choose the + icon to create a new Profile and select the .ovpn file from Downloads. Once installed, edit the Settings. In the IP and DNS tab, disable No Local Binding. Enable Override DNS Settings and specify 8.8.8.8 and 8.8.4.4 for your DNS servers. Enable PULL Settings.In the ROUTING tab, enable Bypass VPN for Local Networks and Block IPv6. Then Start the VPN Client by clicking on your saved Profile.

Installing Zoom for Debian 10 on the Spin 713

No computer platform would be complete without Zoom. Begin by downloading Zoom for Debian here. In the File Manager (Alt-Shift-m), navigate to your Downloads folder and double-click on zoom_amd64.deb to install the application. Once installed, it will appear in your Linux apps container. Right-click (HINT: tap touchpad with two fingers) on Zoom icon to add Zoom to your Shelf.

Installing phpMyAdmin for PHP 7.3 on the Spin 713

No development platform would be complete without phpMyAdmin. We found an excellent tutorial to get everything set up properly with a few minor changes. Your LAMP platform already is in place so skip down to Step 2 in the tutorial. There’s one important correction in the instructions. Step 4, item 1 should be: sudo mkdir /var/www/html/phpmyadmin. And accessing phpMyAdmin once installed should be: http://Spin-IP-address/phpmyadmin.

Mastering Chromebook Shortcuts on the Spin 713

If you learn no other keyboard shortcut, remember this one: Ctrl + Alt + /. That gets you the entire list of keyboard shortcuts on the Chromebook. These keyboard shortcuts are a bit like memorizing multiplication tables. The sooner you learn them, the happier you will be using your Chromebook. If you’re an avid Linux user, be advised that the Linux virtual machine and the Chromebook desktop share the same clipboard so you can easily copy-and-paste between the two environments. On the desktop, Ctrl-c copies to the clipboard, and Ctrl-v pastes data from the clipboard. In the Linux virtual machine, Ctrl-Shift-C copies to the clipboard, and Ctrl-Shift-V pastes data from the clipboard. Learn a few new shortcuts each time you use your Chromebook. You’ll be amazed how quickly your productivity improves.

Where To Go From Here?

While you’re getting your feet wet, here are some must-have’s for your Spin 713. For openers, feast your eyes on the 4K Nature Videos on YouTube. Prepare to be blown away.

Next, you’ll want a free Office Suite for your Chromebook. Our favorite is WPS Office which provides Microsoft-compatible versions of Word, Excel, Powerpoint and a PDF Viewer/Editor.

For video editing, nothing comes close to PowerDirector. Also check out YouTube Studio.

For photo editing, Adobe Lightroom is the hands-down winner. Google Photos and Snapseed (our personal favorite) are also worth a careful look. Both are free compliments of Google.

For Nerds, check out the Crostini Wiki on Reddit. And master the Crosh terminal commands.


Originally published: Monday, November 16, 2020  Updated: Monday, December 7, 2020


Need help with Asterisk? Visit the VoIP-info Forum.


Special Thanks to Our Generous Sponsors


FULL DISCLOSURE: ClearlyIP, Skyetel, Vitelity, DigitalOcean, Vultr, VoIP.ms, 3CX, Sangoma, TelecomsXchange and VitalPBX have provided financial support to Nerd Vittles and our open source projects through advertising, referral revenue, and/or merchandise. As an Amazon Associate and Best Buy Affiliate, we also earn from qualifying purchases. We’ve chosen these providers not the other way around. Our decisions are based upon their corporate reputation and the quality of their offerings and pricing. Our recommendations regarding technology are reached without regard to financial compensation except in situations in which comparable products at comparable pricing are available from multiple sources. In this limited case, we support our sponsors because our sponsors support us.

BOGO Bonaza: Enjoy state-of-the-art VoIP service with a $10 credit and half-price SIP service on up to $500 of Skyetel trunking with free number porting when you fund your Skyetel account. No limits on number of simultaneous calls. Quadruple data center redundancy. $25 monthly minimum spend required. Tutorial and sign up details are here.

The lynchpin of Incredible PBX 2020 and beyond is ClearlyIP components which bring management of FreePBX modules and SIP phone integration to a level never before available with any other Asterisk distribution. And now you can configure and reconfigure your new Incredible PBX phones from the convenience of the Incredible PBX GUI.

VitalPBX is perhaps the fastest-growing PBX offering based upon Asterisk with an installed presence in more than 100 countries worldwide. VitalPBX has generously provided a customized White Label version of Incredible PBX tailored for use with all Incredible PBX and VitalPBX custom applications. Follow this link for a free test drive!
 

Special Thanks to Vitelity. Vitelity is now Voyant Communications and has halted new registrations for the time being. Our special thanks to Vitelity for their unwavering financial support over many years and to the many Nerd Vittles readers who continue to enjoy the benefits of their service offerings. We will keep everyone posted on further developments.


Harnessing the Cloud to Start An Incredible PBX Business


If you’ve ever wanted to start your own VoIP business and earn some big bucks through consulting and hosting cloud-based PBXs, now’s your chance. One of the requests we often receive from those that deploy Incredible PBX 2020® for a living is a quicker way to produce new Incredible PBX servers on cloud platforms such as Vultr and Digital Ocean while also preserving Incredible PBX’s unique ability to upgrade source components for Asterisk® and FreePBX®. For small businesses, these cloud providers offer a perfect $5 a month platform for Incredible PBX. You can mark it up to $10 or $15 a month and make a handsome 100% to 200% profit without lifting a finger as a VoIP consultant. And Vultr and Digital Ocean will spot you a $100 credit to get the ball rolling.

Today’s solution was especially designed for those that would like to host virtual machines for customers in your own cloud account. It would work equally well for anyone wanting a quick way to create multiple Incredible PBX platforms in 5 minutes for friends and neighbors.

To begin, you’ll need to create a master image of Incredible PBX 2020 on the cloud platform of your choice using the recommended $5/month platform with CentOS 7. The July 1, 2020 or later tarball of Incredible PBX 2020 is required. Here are the Five Easy Steps:

1. Create the base Incredible PBX 2020 platform in the traditional way:

# create a secure root password to hand out to future customers
passwd
yum -y update
yum -y install net-tools nano wget tar
cd /root
wget http://incrediblepbx.com/incrediblepbx2020.1.tar.gz
tar zxvf incrediblepbx2020.1.tar.gz
rm -f incrediblepbx2020.1.tar.gz
# to add swap file on non-OpenVZ cloud platforms with no swap file
./create-swapfile-DO
# kick off Phase I install
./IncrediblePBX2020.sh
# after reboot, kick off Phase II install
./IncrediblePBX2020.sh
# set desired timezone
./timezone-setup
# optionally install Incredible Fax 2020
./incrediblefax2020.sh

2. Once you complete the Phase I and Phase II installs and optionally install Incredible Fax, log out of your server and log back in so that the Automatic Update Utility can do its thing.

3. Next, we need to configure your master image so that it can be replicated using a simple image snapshot. A snapshot is free on the Vultr platform and will cost you about $5 a month with Digital Ocean. While still logged into your server as root, issue the following commands and then shut down your server gracefully:

cd /etc/sysconfig
cp -p rules.v4.tm3 iptables
sed -i 's|#-A|-A|' iptables
touch /etc/update_hostconfig
touch /etc/update_serverconfig
halt

4. Once your server has halted, create a snapshot image of the server from Vultr or Digital Ocean dashboard. You do NOT need to preserve your Master VM once the snapshot is created.

5. Create a new virtual machine but, instead of choosing CentOS 7 as the base platform, choose the snapshot image built in the previous step. Once the 5-minute install completes, it’s ready for handover to a new customer by providing the root password from the Master Image together with the IP address of the new virtual machine.

When the new customer logs in via SSH using the root password from the Master Image, the Incredible PBX reconfiguration script will complete the setup of the new platform in a couple minutes prompting the user to change all of the passwords, resetting the ports for PortKnocker, and reconfiguring the firewall by whitelisting the customer’s IP addresses. If the build includes Incredible Fax, the customer should be instructed to change the AvantFax password. Run: /root/avantfax-pw-change. If the customer is in a different time zone, the customer should run /root/timezone-setup. Whooda thunk making money could be this easy.

The real beauty of this design is that you keep control of all the virtual machines you create. If a customer fails to pay, it’s easy to either shut down their VM or even delete it. You also can schedule automatic backups for the customer while recovering the extra $1 per month charge from the provider. In addition, if the customer ever needs hands-on support, you can use the Console link in the Dashboard without the need to whitelist your IP address. The customer still retains full control over the root password which would have to be provided.
 

Originally published: Monday, July 27, 2020


Need help with Asterisk? Visit the VoIP-info Forum.


Special Thanks to Our Generous Sponsors


FULL DISCLOSURE: ClearlyIP, Skyetel, Vitelity, DigitalOcean, Vultr, VoIP.ms, 3CX, Sangoma, TelecomsXchange and VitalPBX have provided financial support to Nerd Vittles and our open source projects through advertising, referral revenue, and/or merchandise. As an Amazon Associate and Best Buy Affiliate, we also earn from qualifying purchases. We’ve chosen these providers not the other way around. Our decisions are based upon their corporate reputation and the quality of their offerings and pricing. Our recommendations regarding technology are reached without regard to financial compensation except in situations in which comparable products at comparable pricing are available from multiple sources. In this limited case, we support our sponsors because our sponsors support us.

BOGO Bonaza: Enjoy state-of-the-art VoIP service with a $10 credit and half-price SIP service on up to $500 of Skyetel trunking with free number porting when you fund your Skyetel account. No limits on number of simultaneous calls. Quadruple data center redundancy. $25 monthly minimum spend required. Tutorial and sign up details are here.

The lynchpin of Incredible PBX 2020 and beyond is ClearlyIP components which bring management of FreePBX modules and SIP phone integration to a level never before available with any other Asterisk distribution. And now you can configure and reconfigure your new Incredible PBX phones from the convenience of the Incredible PBX GUI.

VitalPBX is perhaps the fastest-growing PBX offering based upon Asterisk with an installed presence in more than 100 countries worldwide. VitalPBX has generously provided a customized White Label version of Incredible PBX tailored for use with all Incredible PBX and VitalPBX custom applications. Follow this link for a free test drive!
 

Special Thanks to Vitelity. Vitelity is now Voyant Communications and has halted new registrations for the time being. Our special thanks to Vitelity for their unwavering financial support over many years and to the many Nerd Vittles readers who continue to enjoy the benefits of their service offerings. We will keep everyone posted on further developments.


Introducing OpenVPN for Incredible PBX

We’ve been wrestling with virtual private networks for more than 22 years now. Here’s a quick walk down memory lane. Our adventure began with the Altiga 3000 series VPN concentrators which we introduced in the federal courts in 1999. It was a near perfect plug-and-play hardware solution for secure communications between remote sites using less than secure Windows PCs. Cisco quickly saw the potential, gobbled up the company, and promptly doubled the price of the rebranded concentrators. Over a decade ago, we introduced Hamachi® VPNs to interconnect Asterisk® and PBX in a Flash servers. At the time, Hamachi was free, but that was short-lived when they were subsequently acquired by LogMeIn®. What followed was a short stint with PPTP VPNs which worked great with Macs, Windows PCs, and many phones but suffered from an endless stream of security vulnerabilities. Finally, in April 2012, we introduced the free NeoRouter® VPN. Version 2 still is an integral component in every Incredible PBX® platform today, and PPTP still is available as well. While easy to set up and integrate into multi-site Asterisk deployments, the Achilles’ Heel of NeoRouter remains its inability to directly interconnect many smartphones and stand-alone SIP phones, many of which now support the OpenVPN platform.

The main reason we avoided OpenVPN® over the years was its complexity to configure and deploy.1 In addition, it was difficult to use with clients whose IP addresses were frequently changing. Thanks to the terrific work of Nyr, Stanislas Angristan, and more than a dozen contributors, OpenVPN now has been tamed. And the new server-based, star topology design makes it easy to deploy for those with changing or dynamic IP addresses. Today we’ll walk you through building an OpenVPN server as well as the one-minute client setup for almost any Asterisk deployment and most PCs, routers, smartphones, and VPN-compatible soft phones and SIP phones including Yealink, Grandstream, Snom, and many more. And the really great news is that OpenVPN clients can coexist with your current NeoRouter VPN.

Finally, a word about the OpenVPN Client installations below. We’ve tested all of these with current versions of Incredible PBX 13-13 and 16-15 as well as Incredible PBX 2020 and Incredible PBX 2021. They should work equally well with other server platforms which have been properly configured. However, missing dependencies on other platforms are, of course, your responsibility.

Building an OpenVPN Server Platform

There are many ways to create an OpenVPN server platform. The major prerequisites are a supported operating system, a static IP address for your server, and a platform that is extremely reliable and always available. If the server is off line, all client connections will also fail. While we obviously have not tested all the permutations and combinations, we have identified a platform that just works™. It’s the CentOS 7, 64-bit cloud offering from Vultr. If you use our referral link at Vultr, you not only will be supporting Nerd Vittles through referral revenue, but you also will be able to take advantage of their $100 free credit for new customers. For home and small business deployments, we have found the $5/month platform more than adequate, and you can add automatic backups for an additional $1 a month. Cheap insurance!

A more recent and less costly hosting alternative is the $25/year Crown Cloud offering that we introduced several weeks ago. It includes a free snapshot backup in the $25 annual price.

To get started, create your CentOS 7 instance and login as root using SSH or Putty. Immediately change your password and update and install the necessary CentOS 7 packages. Be sure to turn off SELinux if it is installed by default.

passwd
setenforce 0
# edit /etc/selinux/config
# insert: SELINUX=disabled
# save the SELinux config file
yum -y update
yum -y install net-tools nano wget tar iptables-services
systemctl stop firewalld
systemctl disable firewalld
systemctl enable iptables

We recommend keeping your OpenVPN server platform as barebones as possible to reduce the vulnerability risk. By default, this installer routes all client traffic through the VPN server which wastes considerable bandwidth. The sed commands below modify this design to only route client VPN traffic through the OpenVPN server.


#!/bin/bash
##filename # openvpn-install-mod
echo "      Fix script /root/openvpn-install.sh to ensure internet traffic doesn't use vpn-tunnel."
echo " "
read -p "     Press 'Enter' to continue at your own risk,  or Ctrl+c to abort."
##trap user non root
if [ "$(id -u)" -ne 0 ]; then
echo ""
echo "Must be run as root user: sudo $0" echo ""
exit 1
fi
# cd /root
echo "     Fetching latest copy of install script  /root/openvpn-install.sh from github.com/Angristan"
curl -O https://raw.githubusercontent.com/Angristan/openvpn-install/master/openvpn-install.sh
chmod +x openvpn-install.sh
echo "        running  3 sed commands to ensure only local traffic uses vpn-tunnel :-"
echo '        1st commenting-out line 857'
#### fails to complete with \\"redirect-gateway ## sed -i "s|\\techo 'push \\"redirect-gateway|#\\techo 'push \\"redirect-gateway|" openvpn-install.sh
sed -e '/redirect-gateway d/s/^/#/' -i openvpn-install.sh

echo '2nd commenting-out line 865'
###sed -i "s|push \\"redirect-gateway|#push \\"redirect-gateway|" openvpn-install.sh
sed -e '/redirect-gateway ipv6/s/^/#/' -i openvpn-install.sh

echo '3rd after line 1042 ;  newline 1043   pull-filter ignore redirect-gateway'
###sed -i 's|tls-client|tls-client\\npull-filter ignore "redirect-gateway"|' openvpn-install.sh
sed -i 's|tls-client|tls-client\npull-filter ignore "redirect-gateway"|' openvpn-install.sh

Here are the recommended entries in running the OpenVPN installer:

  • Server IP Address: using FQDN strongly recommended to ease migration issues
  • Enabled IPv6 (no): accept default
  • Port (1194): accept default
  • Protocol (UDP): accept default
  • DNS (3): change to 9 (Google)
  • Compression (no): accept default
  • Custom encrypt(no): accept default
  • Generate Server
  • Client name: firstclient
  • Passwordless (1): accept default

NOTE: On CentOS 7 platforms, edit /usr/lib/systemd/system/openvpn@.service. Scroll down to the ExecStart= line and change %i.conf to %I.conf. Then save the file. Special thanks to @mattburris for catching the error.

In the following steps, we will use IPtables to block all server access except via SSH or the VPN tunnel. Then we’ll start your OpenVPN server:

cd /etc/sysconfig
wget http://incrediblepbx.com/iptables-openvpn.tar.gz
tar zxvf iptables-openvpn.tar.gz
rm -f iptables-openvpn.tar.gz
echo "net.ipv4.ip_forward = 1" >> /etc/sysctl.conf
sysctl -p
systemctl -f enable openvpn@server.service
systemctl start openvpn@server.service
systemctl status openvpn@server.service
systemctl enable openvpn@server.service
systemctl restart iptables

Once OpenVPN is enabled, the server can be reached through the VPN at 10.8.0.1. OpenVPN clients will be assigned by DHCP in the range of 10.8.0.2 through 10.8.0.254. You can list your VPN clients like this: cat /etc/openvpn/ipp.txt. You can list active VPN clients like this: cat /var/log/openvpn/status.log | grep 10.8. And you can add new clients or delete old ones by rerunning /root/openvpn-install.sh.

For better security, change the SSH access port replacing 1234 with desired port number:

PORT=1234
sed -i "s|#Port 22|Port $PORT|" /etc/ssh/sshd_config
systemctl restart sshd
sed -i "s|dport 22|dport $PORT|" /etc/sysconfig/iptables
systemctl restart iptables

We’ve made changes in the Angristan script to adjust client routing. By default, all packets from every client flowed through the OpenVPN server which wasted considerable bandwidth. Our preference is to route client packets destined for the Internet directly to their destination rather than through the OpenVPN server. The sed commands added to the base install above do this; however, if you’ve already installed and run the original Angristan script, your existing clients will be configured differently. Our recommendation is to remove the existing clients, make the change below, and then recreate the clients again by rerunning the script. In the alternative, you can execute the command below to correct future client creations and then run it again on each existing client platform substituting the name of the /root/.ovpn client file for client-template.txt and then restart each OpenVPN client.


cd /etc/openvpn
sed -i 's|tls-client|tls-client\\npull-filter ignore "redirect-gateway"|' client-template.txt

Creating OpenVPN Client Templates

In order to assign different private IP addresses to each of your OpenVPN client machines, you’ll need to create a separate client template for each computer. You do this by running /root/openvpn-install.sh again on the OpenVPN server. Choose option 1 to create a new .ovpn template. Give each client machine template a unique name and do NOT require a password for the template. Unless the client machine is running Windows, edit the new .ovpn template and comment out the setenv line: #setenv. Save the file and copy it to the /root folder of the client machine. Follow the instructions below to set up OpenVPN on the client machine and before starting up OpenVPN replace firstclient.ovpn in the command line with the name of .ovpn you created for the individual machine.


Renewing OpenVPN Server’s Expired Certificate

The server certificate will expire after 1080 days, and clients will no longer be able to connect. Here’s what to do next:

systemctl stop openvpn@server.service
cd /etc/openvpn/easy-rsa
./easyrsa gen-crl
cp /etc/openvpn/easy-rsa/pki/crl.pem /etc/openvpn/crl.pem
systemctl start openvpn@server.service


Installing an OpenVPN Client on CentOS/RHEL

cd /root
yum -y install epel-release
yum --enablerepo=epel install openvpn -y
# copy /root/firstclient.ovpn from server to client /root
# and then start up the VPN client
openvpn --config /root/firstclient.ovpn --daemon
# adjust Incredible PBX firewall below
iptables -A INPUT -s 10.8.0.0/24 -j ACCEPT
cd /usr/local/sbin
echo "iptables -A INPUT -s 10.8.0.0/24 -j ACCEPT" >> iptables-custom

Running ifconfig should now show the VPN client in the list of network ports:

tun0 Link encap:UNSPEC  HWaddr 00-00-00-00-00-00-00-00-00-00-00-00-00-00-00-00  
     inet addr:10.8.0.2  P-t-P:10.8.0.2  Mask:255.255.255.0
     UP POINTOPOINT RUNNING NOARP MULTICAST  MTU:1500  Metric:1
     RX packets:9 errors:0 dropped:0 overruns:0 frame:0
     TX packets:39 errors:0 dropped:0 overruns:0 carrier:0
     collisions:0 txqueuelen:100 
     RX bytes:855 (855.0 b)  TX bytes:17254 (16.8 KiB)

And you should be able to login to the VPN server using its VPN IP address:

# enter actual SSH port replacing 1234
PORT=1234
ssh -p $PORT root@10.8.0.1

Installing an OpenVPN Client on Debian and Ubuntu

cd /root
apt-get update
apt-get install openvpn unzip
dpkg-reconfigure tzdata
# copy /root/firstclient.ovpn from server to client /root
# and then start up the VPN client
openvpn --config /root/firstclient.ovpn --daemon
# adjust Incredible PBX firewall below
iptables -A INPUT -s 10.8.0.0/24 -j ACCEPT
cd /usr/local/sbin
echo "iptables -A INPUT -s 10.8.0.0/24 -j ACCEPT" >> iptables-custom

Running ifconfig should now show the VPN client in the list of network ports:

tun0 Link encap:UNSPEC  HWaddr 00-00-00-00-00-00-00-00-00-00-00-00-00-00-00-00  
     inet addr:10.8.0.2  P-t-P:10.8.0.2  Mask:255.255.255.0
     UP POINTOPOINT RUNNING NOARP MULTICAST  MTU:1500  Metric:1
     RX packets:9 errors:0 dropped:0 overruns:0 frame:0
     TX packets:39 errors:0 dropped:0 overruns:0 carrier:0
     collisions:0 txqueuelen:100 
     RX bytes:855 (855.0 b)  TX bytes:17254 (16.8 KiB)

And you should be able to login to the VPN server using its VPN IP address:

# enter actual SSH port replacing 1234
PORT=1234
ssh -p $PORT root@10.8.0.1

Installing an OpenVPN Client on Raspbian

The OpenVPN client now is easy to install on the latest Incredible PBX builds for the Raspberry Pi. Log into your server as root and issue the following commands to set your time zone and install the OpenVPN client. pbxstatus should then show the 10.8.0.x VPN address in the Private IP listing.

dpkg-reconfigure tzdata
apt-get install openvpn unzip
# copy your .ovpn template into /root
# edit template and comment out setenv line
# start up the client using actual .ovpn filename
openvpn --config /root/raspi.ovpn --daemon
# adjust Incredible PBX firewall
iptables -A INPUT -s 10.8.0.0/24 -j ACCEPT
cd /usr/local/sbin
echo "iptables -A INPUT -s 10.8.0.0/24 -j ACCEPT" >> iptables-custom
iptables-restart
pbxstatus


Installing an OpenVPN Client on a Mac

While there are numerous OpenVPN clients for Mac OS X, none hold a candle to Tunnelblick in terms of ease of installation and use. First, create a new client config on your server and copy it (/root/*.ovpn) to a folder on your Mac where you can find it. Download Tunnelblick and install it. Run Tunnelblick and then open Finder. Click and drag your client config file to the Tunnelblick icon in the top toolbar. Choose Connect when prompted. Done.

Installing an OpenVPN Client for Windows 10

The installation procedure for Windows is similar to the Mac procedure above. Download the OpenVPN Client for Windows. Double-click on the downloaded file to install it. Create a new client config on your server and copy it (/root/*.ovpn) to a folder on your PC where you can find it. Start up the OpenVPN client and click on the OpenVPN client in the activity tray. Choose Import File and select the config file you downloaded from your OpenVPN Server. Right-click on the OpenVPN icon again and choose Connect. Done.

Installing an OpenVPN Client for Android

Our favorite OpenVPN client for Android is called OpenVPN for Android and is available in the Google Play Store. Download and install it as you would any other Android app. Upload a client config file from your OpenVPN server to your Google Drive. Run the app and click + to install a new profile. Navigate to your Google Drive and select the config file you uploaded.

Installing an OpenVPN Client for iOS Devices

The OpenVPN Connect client for iOS is available in the App Store. Download and install it as you would any other iOS app. Before uploading a client config file, open the OpenVPN Connect app and click the 4-bar Settings icon in the upper left corner of the screen. Click Settings and change the VPN Protocol to UDP and IPv6 to IPV4-ONLY Tunnel. Accept remaining defaults.

To upload a client config file, the easiest way is to use Gmail to send yourself an email with the config file as an attachment. Open the message with the Gmail app on your iPhone or iPad and click on the attachment. Then choose the Upload icon in the upper right corner of the dialog. Next, choose Copy to OpenVPN in the list of apps displayed. When the import listing displays in OpenVPN Connect, click Add to import the new profile. Click ADD again when the Profile has been successfully imported. You’ll be prompted for permission to Add VPN Configurations. Click Allow. Enter your iOS passcode when prompted. To connect, tap once on the OpenVPN Profile. To disconnect, tap on the Connected slider. When you reopen the OpenVPN Connect app, the OVPN Profiles menu will display by default. Simply tap once on your profile to connect thereafter.

Installing a Web Interface to Display Available Clients

One advantage of NeoRouter is a simple way for any VPN client to display a listing of all VPN clients that are online at any given time. While that’s not possible with OpenVPN, we can do the next best thing and create a simple web page that can be accessed using a browser but only from a connected OpenVPN client pointing to http://10.8.0.1.

To set this up, log in to your OpenVPN server as root and issue the following commands:


yum --enablerepo=epel install lighttpd -y
systemctl start lighttpd.service
systemctl enable lighttpd.service
chown root:lighttpd /var/log/openvpn/status.log
chmod 640 /var/log/openvpn/status.log
cd /var/www
rm -rf lighttpd
wget http://incrediblepbx.com/lighttpd.tar.gz
tar zxvf lighttpd.tar.gz
ln -s /var/log/openvpn/status.log /var/www/lighttpd/status.log
sed -i 's|#server.bind = "localhost"|server.bind = "10.8.0.1"|' /etc/lighttpd/lighttpd.conf
systemctl restart lighttpd.service

 
UPDATE: On some cell phones and on Windows PCs, you may observe that you can no longer reach your favorite web sites after enabling the OpenVPN client. Luckily there’s a simple fix that allows 10.8.0.x traffic to be sent through the OpenVPN tunnel while all other traffic is routed out of your standard network connection. Here’s the fix. Make sure the .ovpn client config file includes the following lines:

pull-filter ignore redirect-gateway
route-nopull
route 10.8.0.0 255.255.255.0

Originally published: Monday, July 20, 2020  Updated: Saturday, June 25, 2022


Need help with Asterisk? Visit the VoIP-info Forum.


Special Thanks to Our Generous Sponsors


FULL DISCLOSURE: ClearlyIP, Skyetel, Vitelity, DigitalOcean, Vultr, VoIP.ms, 3CX, Sangoma, TelecomsXchange and VitalPBX have provided financial support to Nerd Vittles and our open source projects through advertising, referral revenue, and/or merchandise. As an Amazon Associate and Best Buy Affiliate, we also earn from qualifying purchases. We’ve chosen these providers not the other way around. Our decisions are based upon their corporate reputation and the quality of their offerings and pricing. Our recommendations regarding technology are reached without regard to financial compensation except in situations in which comparable products at comparable pricing are available from multiple sources. In this limited case, we support our sponsors because our sponsors support us.

BOGO Bonaza: Enjoy state-of-the-art VoIP service with a $10 credit and half-price SIP service on up to $500 of Skyetel trunking with free number porting when you fund your Skyetel account. No limits on number of simultaneous calls. Quadruple data center redundancy. $25 monthly minimum spend required. Tutorial and sign up details are here.

The lynchpin of Incredible PBX 2020 and beyond is ClearlyIP components which bring management of FreePBX modules and SIP phone integration to a level never before available with any other Asterisk distribution. And now you can configure and reconfigure your new Incredible PBX phones from the convenience of the Incredible PBX GUI.

VitalPBX is perhaps the fastest-growing PBX offering based upon Asterisk with an installed presence in more than 100 countries worldwide. VitalPBX has generously provided a customized White Label version of Incredible PBX tailored for use with all Incredible PBX and VitalPBX custom applications. Follow this link for a free test drive!
 

Special Thanks to Vitelity. Vitelity is now Voyant Communications and has halted new registrations for the time being. Our special thanks to Vitelity for their unwavering financial support over many years and to the many Nerd Vittles readers who continue to enjoy the benefits of their service offerings. We will keep everyone posted on further developments.


  1. Our discussion today is focused on the free, MIT-licensed version of OpenVPN. For details on their commercial offerings, follow this link. []

Interconnect Incredible PBX 2020 to the Asterisk Mothership

The Holy Grail for a mobile VoIP solution is a simple way to connect back to your primary Asterisk® PBX via Wi-Fi from anywhere in the world to make and receive calls as if you never left. Let’s tick off the potential problems. First, many home-based PBXs are sitting behind NAT-based routers. Second, almost all remote Wi-Fi connections are made through a NAT-based router. Third, chances are the remote hosting platform blocks outgoing email from downstream servers such as a mobile PBX. Fourth, deciphering the IP address of your remote connection can be problematic. Fifth, the chances of experiencing one-way audio or no audio on your VoIP calls is high because of NAT-based routers at both ends of your connection.

For those that travel regularly or those that are living elsewhere during the Coronavirus pandemic and want to avoid the complexity of configuring OpenVPN, here is a quick thumbnail of the setup we recommend as your mobile companion. We use it regularly. You’ll never have a one-way audio problem again. In terms of hardware, you’ll need a Raspberry Pi 4B or 3B+ with its native WiFi support plus a Windows or Mac notebook computer for traveling. You’ll also need a NeoRouter VPN server to make this process seamless. If you’ve already set up an OpenVPN server platform, it will work equally well. One advantage of NeoRouter is that clients can be added from the client side without having to create a config file on the VPN server. All you need is a username and password. But the choice of VPN platform is totally a matter of preference. The objective using either OpenVPN or NeoRouter is secure communications to your home base. We don’t want to have to reconfigure either your home PBX or your traveling Raspberry Pi or your notebook PC based upon changes in your public and private IP addresses.

Today we’ll walk you through the easiest way to set up a (free) NeoRouter server on the Internet. It can be used to connect up to 254 devices on an encrypted private LAN. We’re delighted to have finally found a perfect use for the (free) Google Cloud instance.


Using a Raspberry Pi, build an Incredible PBX 2020 platform by following our latest tutorial. We’ll set this up on your home WiFi network so that you only have to throw the Raspberry Pi and its power supply in your suitcase when you travel. As part of the setup, we’ll download NeoRouter and activate private IP addresses for your notebook computer as well as both of your PBXs (using nrclientcmd). Next, we’ll interconnect the two PBXs using SIP trunks and the NeoRouter private LAN IP addresses. We’ll take advantage of a neat little Raspberry Pi trick by storing a wpa_supplicant.conf template on your PC for the remote WiFi setup even though we don’t yet know anything about the remote LAN. Once we know the SSID and password at the remote destination, we’ll use your notebook computer to edit the template and transfer the file to the /boot folder of your RasPi’s microSD card. When the card then is inserted and the RasPi is booted, it will automatically move the template to the proper /etc/wpa_supplicant folder to successfully activate your WiFi connection. We’ll also load links, a fast text-based browser, just in case you encounter a remote site that requires some sort of acknowledgement or password before establishing your WiFi connection to the Internet.

Setting Up a (free) NeoRouter Server in the Cloud

Because NeoRouter uses a star-based VPN architecture, that means the NeoRouter Server must always be available at the same IP address for all of the NeoRouter Clients (aka Nodes) to talk to. If you already have a cloud-based server that has a static IP address and can handle the traffic cop duties of NeoRouter Server, then that’s an ideal place to install NeoRouter Server. Simply download the Free flavor of NeoRouter Server that matches your existing platform and install it. Add an FQDN for your server’s IP address, and you’re all set. A detailed summary of available management options is included in our previous NeoRouter v2 article.

We devoted a couple weeks to Google Cloud instances, and it turned out to be a pretty awful platform for hosting Asterisk. But the free offering looks to be a perfect fit as a hosting platform for NeoRouter Server. You also won’t have to worry about Google going out of business anytime soon. So let us walk you through an abbreviated setup process on the Google Cloud platform. If you’re just getting started with Google Cloud, read our previous article to take advantage of Google’s generous $300 offer to get you started and to generally familiarize yourself with the mechanics of setting up an instance in the Google Cloud.

For NeoRouter Server, navigate to https://console.cloud.google.com. Click the 3-bar image in the upper left corner of your Dashboard. This exposes the Navigation Menu. In the COMPUTE section of the Dashboard, click Compute Engine -> VM Instances. Then click CREATE PROJECT and name it. Now click CREATE INSTANCE and Name it nrserver. The instance name becomes the hostname for your virtual machine. If you want to remain in the Free Tier, choose f1-micro instance as the Machine Type and choose a U.S. Region (us-central1, us-east1 or us-west1). For the Boot Disk, choose CentOS 6 and expand the disk storage to at least 20GB (30GB is available with the Free Tier). For the Firewall setting, leave HTTP and HTTPS disabled. Check your entries carefully and then click the Create button.

When your virtual machine instance comes on line, jot down the assigned public IP address. We’ll need it in a minute. Now click on the SSH pull-down tab and choose Open in a Browser Window. Now we need to set a root password and adjust the SSH settings so that you can login from your desktop computer using SSH or Putty:

sudo passwd root
su root
nano -w /etc/ssh/sshd_config

When the editor opens the SSH config file, add the following entries. Then save the file and restart SSH: service sshd restart

PermitRootLogin yes
PasswordAuthentication yes

You now should be able to log in to your instance as root from your desktop computer using SSH or Putty. Test it to be sure: ssh root@server-IP-address

Before we leave the Google Cloud Dashboard, let’s make the assigned public IP address permanent so that it doesn’t get changed down the road. Keep in mind that, if you ever delete your instance, you also need to remove the assigned static IP address so you don’t continue to get billed for it. From Home on the Dashboard, scroll down to the NETWORKING section and choose VPS Network -> External IP Addresses. Change the Type of your existing address to Static and Name it staticip. Next, choose Firewall Rules in the VPS Network section and click CREATE FIREWALL RULE. Fill in the template like the following leaving the other fields with their default entries. Then click CREATE.

  1. Name: neorouter
  2. Target Tags: neorouter
  3. Source IP Range: 0.0.0.0/0
  4. Protocols/Ports: check tcp: 32976

CAUTION: Before this firewall rule will be activated for your instance, it also must be specified in the Network Tags section for your instance. Shut down your instance and add the neorouter tag by editing your instance. Then restart your instance.

Now we’re ready to install NeoRouter Free v2 Server on your instance. Be sure to choose the Free v2 variety. Log back into your server as root using SSH/Putty and issue these commands:

yum -y update
yum -y install nano
wget http://download.neorouter.com/Downloads/NRFree/Update_2.3.1.4360/Linux/CentOS/nrserver-2.3.1.4360-free-centos-x86_64.rpm
rpm -Uvh nrserver-2.3.1.4360-free-centos-x86_64.rpm
/etc/rc.d/init.d/nrserver.sh restart
nrserver -setdomain <DOMAINNAME> <DOMAINPASSWORD>
nrserver -adduser <USERNAME> <PASSWORD> admin
nrserver -enableuser <USERNAME>
nrserver -showsettings

Finally, add the following command to /etc/rc.local so that NeoRouter Server gets started whenever your instance is rebooted:

echo "/etc/rc.d/init.d/nrserver.sh start" >> /etc/rc.local

Installing Incredible PBX 2020 on a Raspberry Pi

We won’t regurgitate our Raspberry Pi tutorial. Simply follow the steps outlined there to acquire the necessary components and to get Incredible PBX 2020 installed. You’ll also get a free fax machine as part of the install. We do want to stress the importance of getting WiFi working, configuring Exim to use your Gmail credentials as a smarthost, and making sure you added the email addition to /etc/rc.local so that you receive IP address information about your PBX whenever it is rebooted. If you skipped any of these steps, stop here and revisit the RasPi tutorial to complete those items.

Configuring NeoRouter Client on Your Computers

All flavors of Incredible PBX come with the NeoRouter client preinstalled. If your Asterisk-based home PBX is of another variety, you can install the NeoRouter Client matching the architecture of your server from here. Be sure to click on the NeoRouter Free v2 tab before making your selection. The other varieties are incompatible with the Free NeoRouter v2 Server installed above and are not free. The only exception is the latest release of Mac OS. With it, you’ll need to use the NeoRouter NeoRouter Pro v2 client for Mac. Also be sure you match both the operating system and architecture of your server platform. Finally, make certain that TCP 32976 is whitelisted in your firewalls.

On Linux-based (non-GUI) platforms, setting up the NeoRouter Client is done by issuing the command: nrclientcmd. You’ll be prompted for your NeoRouter Server FQDN as well as your username and password credentials. Perform this procedure on both your home PBX and the Raspberry Pi.

To add your Windows or Mac notebook to the NeoRouter VPN, download the appropriate client and run the application which will prompt for your NeoRouter Server FQDN as well as your NeoRouter credentials. Once completed, you should see all three machines in your NeoRouter Free Client Dashboard: your PC as well as your home PBX and Raspberry Pi-based Incredible PBX. Make note of the private VPN addresses (10.0.0.X) of both your home PBX and your Raspberry Pi. These VPN addresses never change, and we’ll need them to interconnect your PBXs and to set up a softphone on your notebook computer.

Admininistrative Tools to Manage NeoRouter

Here are a few helpful commands for monitoring and managing your NeoRouter VPN.

To access your NeoRouter Linux client: nrclientcmd

To restart NeoRouter Linux client: /etc/rc.d/init.d/nrservice.sh restart

To restart NeoRouter Linux server: /etc/rc.d/init.d/nrserver.sh restart

To set domain: nrserver -setdomain YOUR-VPN-NAME domainpassword

For a list of client devices: nrserver -showcomputers

For a list of existing user accounts: nrserver -showusers

For the settings of your NeoRouter VPN: nrserver -showsettings

To add a user account: nrserver -adduser username password user

To add admin account: nrserver -adduser username password admin

For a complete list of commands: nrserver –help


Interconnecting Your Raspberry Pi and Home PBX

To keep things simple, our setup examples below assume the following NeoRouter VPN addresses: Home PBX (10.0.0.1) and Raspberry Pi (10.0.0.2). Using a browser, you’ll need to login to the GUI of your Home PBX and Raspberry Pi and add a Trunk to each PBX. Be sure to use the same secret on BOTH trunk setups. We don’t recommend forwarding incoming calls from your Home PBX to your Raspberry Pi because most folks won’t be sitting in their hotel room all day to answer incoming calls. Instead, add the number of your smartphone to a Ring Group on the Home PBX and don’t forget the # symbol at the end of the number. On the Raspberry Pi side, we are assuming that whenever a call is dialed from a registered softphone with the 9 prefix, the call will be sent to the Home PBX for call processing (without the 9). For example, 98005551212 would send 800-555-1212 to the Home PBX for outbound routing and 9701 would send 701 to the Home PBX for routing to the 701 extension. You can obviously adjust your dialplan to meet your own local requirements.

On the Home PBX, the chan_sip trunk entries should look like this:

Trunk Name: raspi-remote

PEER DETAILS

host=10.0.0.2
type=friend
context=from-internal
username=home-pbx
fromuser=home-pbx
secret=some-password
canreinvite=no
insecure=port,invite
qualify=yes
nat=yes

On the Raspberry Pi, the chan_sip trunk entries should look like this:

Trunk Name: home-pbx

PEER DETAILS

host=10.0.0.1
type=friend
context=from-internal
username=raspi-remote
fromuser=raspi-remote
secret=some-password
canreinvite=no
insecure=port,invite
qualify=yes
nat=yes

On the Raspberry Pi, add an Outbound Route named Out9-home-pbx pointed to home-pbx Trunk with the following Dial Patterns. For each Dial Pattern, prepend=blank and prefix=9:

dial string: 1NXXNXXXXXX  
dial string: NXXNXXXXXX  
dial string: *98X.
dial string: XXX
dial string: XXXX
dial string: XXXXX
  

Tweaking Your Raspberry Pi for WiFi Mobility

Typically, you don’t know the WiFi SSID or password of your destination location before you travel. Because you won’t be traveling with a monitor and keyboard for your Raspberry Pi, we needed some way to adjust the WiFi credentials on the microSD card to accommodate the destination WiFi network when you arrive. Luckily, the Raspberry Pi folks thought of a clever way to handle this. You can simply plug your microSD card into your notebook PC (Mac ALERT: Don’t forget your SD card dongle!) and add a wpa_supplicant.conf config file to the /boot directory on the card once you arrive at your destination and know the SSID and password of the local WiFi network. When the Raspberry Pi is subsequently booted, the operating system will move the config file to the /etc/wpa_supplicant directory so that your WiFi network will come on line. Here’s what a typical wpa_supplicant.conf file should look like using your actual credentials. The last network section handles open WiFi network connections (think: McDonald’s) if you want to enable them:

country=US
update_config=1

network={
 ssid="your-SSID"
 psk="your-SSID-password"
 key_mgmt=WPA-PSK
 scan_ssid=1
 priority=5
}

network={
 key_mgmt=NONE
 priority=1
}

The other gotcha is that some public WiFi networks require some type of web login procedure before you can actually access the Internet even though an IP address may have been assigned to your Raspberry Pi. To handle this situation, you’ll need a text-based web browser on the Raspberry Pi that can be accessed through your notebook PC using SSH and your Raspberry Pi’s VPN address. Our favorite is links which can be installed on your Raspberry Pi before you pack up.

apt-get install links -y

Once you arrive at your destination, connect both your notebook PC and Raspberry Pi to the same WiFi network, login to the RasPi with SSH at the VPN address assigned to your RasPi, and run links to start the browser. Press <esc> to access the links menu options. If you can’t access your RasPi at the VPN IP address, try its WiFi-assigned local IP address.

Adding a Softphone to Your Notebook PC

Last, but not least, you obviously need a way to make and receive calls once your Raspberry Pi is up and running at the remote site. We recommend installing a softphone on your Mac or PC notebook that connects to an extension on your Raspberry Pi using the VPN IP address of the Raspberry Pi. Using the VPN address assures that the connection will always be available regardless of the WiFi network’s local IP addresses. Everyone has their own favorite softphone, but here are some suggestions.

For Windows PCs, we recommend VitalPBX Communicator. It’s a free download from here.


Another good choice is YateClient for Windows which also is free. Download it from here. Run YateClient once you’ve installed it and enter the credentials for an extension on your Raspberry Pi. Then enter the VPN IP address of your server plus your extension’s password. Click OK to save your entries.

If you are a Mac user, another great no-frills softphone is Telephone. Just download and install it from the Mac App Store.

Adding a Softphone to Your Smartphone

We actually prefer adding a free softphone app to our smartphone. There are a number of alternatives on both the iOS and Android platforms. With iPhones and iPads, we’ve had great success with Acrobits Softphone, Grandstream Wave, Linphone, and Zoiper Lite. All are available in the App Store. For Android devices, our current favorite is the VitalPBX Communicator. Acrobits Groundwire is another good choice. But Grandstream Wave, Linphone, and Zoiper Lite also are available. Keep in mind that Zoiper also supports IAX connections to simplify NAT connections. And, on both platforms, don’t forget that Google now lets you make and receive calls using the new Google Voice app using your old Google Voice numbers that no longer work directly with Asterisk.

Enjoy your pain-free Home Away from Home!

Originally published: Tuesday, April 2, 2020


Need help with Asterisk? Visit the VoIP-info Forum.


Special Thanks to Our Generous Sponsors


FULL DISCLOSURE: ClearlyIP, Skyetel, Vitelity, DigitalOcean, Vultr, VoIP.ms, 3CX, Sangoma, TelecomsXchange and VitalPBX have provided financial support to Nerd Vittles and our open source projects through advertising, referral revenue, and/or merchandise. As an Amazon Associate and Best Buy Affiliate, we also earn from qualifying purchases. We’ve chosen these providers not the other way around. Our decisions are based upon their corporate reputation and the quality of their offerings and pricing. Our recommendations regarding technology are reached without regard to financial compensation except in situations in which comparable products at comparable pricing are available from multiple sources. In this limited case, we support our sponsors because our sponsors support us.

BOGO Bonaza: Enjoy state-of-the-art VoIP service with a $10 credit and half-price SIP service on up to $500 of Skyetel trunking with free number porting when you fund your Skyetel account. No limits on number of simultaneous calls. Quadruple data center redundancy. $25 monthly minimum spend required. Tutorial and sign up details are here.

The lynchpin of Incredible PBX 2020 and beyond is ClearlyIP components which bring management of FreePBX modules and SIP phone integration to a level never before available with any other Asterisk distribution. And now you can configure and reconfigure your new Incredible PBX phones from the convenience of the Incredible PBX GUI.

VitalPBX is perhaps the fastest-growing PBX offering based upon Asterisk with an installed presence in more than 100 countries worldwide. VitalPBX has generously provided a customized White Label version of Incredible PBX tailored for use with all Incredible PBX and VitalPBX custom applications. Follow this link for a free test drive!
 

Special Thanks to Vitelity. Vitelity is now Voyant Communications and has halted new registrations for the time being. Our special thanks to Vitelity for their unwavering financial support over many years and to the many Nerd Vittles readers who continue to enjoy the benefits of their service offerings. We will keep everyone posted on further developments.


Interconnect Incredible PBX 16-15 to the Asterisk Mothership

The Holy Grail for a mobile VoIP solution is a simple way to connect back to your primary Asterisk® PBX via Wi-Fi from anywhere in the world to make and receive calls as if you never left. Let’s tick off the potential problems. First, many home-based PBXs are sitting behind NAT-based routers. Second, almost all remote Wi-Fi connections are made through a NAT-based router. Third, chances are the remote hosting platform blocks outgoing email from downstream servers such as a mobile PBX. Fourth, deciphering the IP address of your remote connection can be problematic. Fifth, the chances of experiencing one-way audio or no audio on your VoIP calls is high because of NAT-based routers at both ends of your connection.

For those that travel regularly and want to avoid the complexity of configuring OpenVPN, here is a quick thumbnail of the setup we recommend as your mobile companion. You’ll never have a one-way audio problem again. In terms of hardware, you’ll need a Raspberry Pi 4B or 3B+ with its native WiFi support plus a Windows or Mac notebook computer for traveling. You’ll also need a NeoRouter VPN server to make this process seamless. If you’ve already set up an OpenVPN server platform, it will work equally well. One advantage of NeoRouter is that clients can be added from the client side without having to create a config file on the VPN server. All you need is a username and password. But the choice of VPN platform is totally a matter of preference. The objective using either OpenVPN or NeoRouter is secure communications to your home base. We don’t want to have to reconfigure either your home PBX or your traveling Raspberry Pi or your notebook PC based upon changes in your public and private IP addresses.

Today we’ll walk you through the easiest way to set up a (free) NeoRouter server on the Internet. It can be used to connect up to 254 devices on an encrypted private LAN. We’re delighted to have finally found a perfect use for the (free) Google Cloud instance.


Using a Raspberry Pi, build an Incredible PBX 16-15 platform by following our previous tutorial. We’ll set this up on your home WiFi network so that you only have to throw the Raspberry Pi and its power supply in your suitcase when you travel. As part of the setup, we’ll download NeoRouter and activate private IP addresses for your notebook computer as well as both of your PBXs (using nrclientcmd). Next, we’ll interconnect the two PBXs using SIP trunks and the NeoRouter private LAN IP addresses. We’ll take advantage of a neat little Raspberry Pi trick by storing a wpa_supplicant.conf template on your PC for the remote WiFi setup even though we don’t yet know anything about the remote LAN. Once we know the SSID and password at the remote destination, we’ll use your notebook computer to edit the template and transfer the file to the /boot folder of your RasPi’s microSD card. When the card then is inserted and the RasPi is booted, it will automatically move the template to the proper /etc/wpa_supplicant folder to successfully activate your WiFi connection. We’ll also load links, a fast text-based browser, just in case you encounter a hotel that requires some sort of acknowledgement or password before establishing your WiFi connection to the Internet.

Setting Up a (free) NeoRouter Server in the Cloud

Because NeoRouter uses a star-based VPN architecture, that means the NeoRouter Server must always be available at the same IP address for all of the NeoRouter Clients (aka Nodes) to talk to. If you already have a cloud-based server that has a static IP address and can handle the traffic cop duties of NeoRouter Server, then that’s an ideal place to install NeoRouter Server. Simply download the Free flavor of NeoRouter Server that matches your existing platform and install it. Add an FQDN for your server’s IP address, and you’re all set. A detailed summary of available management options is included in our previous NeoRouter v2 article.

We devoted a couple weeks to Google Cloud instances, and it turned out to be a pretty awful platform for hosting Asterisk. But the free offering looks to be a perfect fit as a hosting platform for NeoRouter Server. You also won’t have to worry about Google going out of business anytime soon. So let us walk you through an abbreviated setup process on the Google Cloud platform. If you’re just getting started with Google Cloud, read our previous article to take advantage of Google’s generous $300 offer to get you started and to generally familiarize yourself with the mechanics of setting up an instance in the Google Cloud.

For NeoRouter Server, navigate to https://console.cloud.google.com. Click the 3-bar image in the upper left corner of your Dashboard. This exposes the Navigation Menu. In the COMPUTE section of the Dashboard, click Compute Engine -> VM Instances. Then click CREATE PROJECT and name it. Now click CREATE INSTANCE and Name it nrserver. The instance name becomes the hostname for your virtual machine. If you want to remain in the Free Tier, choose f1-micro instance as the Machine Type and choose a U.S. Region (us-central1, us-east1 or us-west1). For the Boot Disk, choose CentOS 6 and expand the disk storage to at least 20GB (30GB is available with the Free Tier). For the Firewall setting, leave HTTP and HTTPS disabled. Check your entries carefully and then click the Create button.

When your virtual machine instance comes on line, jot down the assigned public IP address. We’ll need it in a minute. Now click on the SSH pull-down tab and choose Open in a Browser Window. Now we need to set a root password and adjust the SSH settings so that you can login from your desktop computer using SSH or Putty:

sudo passwd root
su root
nano -w /etc/ssh/sshd_config

When the editor opens the SSH config file, add the following entries. Then save the file and restart SSH: service sshd restart

PermitRootLogin yes
PasswordAuthentication yes

You now should be able to log in to your instance as root from your desktop computer using SSH or Putty. Test it to be sure: ssh root@server-IP-address

Before we leave the Google Cloud Dashboard, let’s make the assigned public IP address permanent so that it doesn’t get changed down the road. Keep in mind that, if you ever delete your instance, you also need to remove the assigned static IP address so you don’t continue to get billed for it. From Home on the Dashboard, scroll down to the NETWORKING section and choose VPS Network -> External IP Addresses. Change the Type of your existing address to Static and Name it staticip. Next, choose Firewall Rules in the VPS Network section and click CREATE FIREWALL RULE. Fill in the template like the following leaving the other fields with their default entries. Then click CREATE.

  1. Name: neorouter
  2. Target Tags: neorouter
  3. Source IP Range: 0.0.0.0/0
  4. Protocols/Ports: check tcp: 32976

CAUTION: Before this firewall rule will be activated for your instance, it also must be specified in the Network Tags section for your instance. Shut down your instance and add the neorouter tag by editing your instance. Then restart your instance.

Now we’re ready to install NeoRouter Free v2 Server on your instance. Be sure to choose the Free v2 variety. Log back into your server as root using SSH/Putty and issue these commands:

yum -y update
yum -y install nano
wget http://download.neorouter.com/Downloads/NRFree/Update_2.3.1.4360/Linux/CentOS/nrserver-2.3.1.4360-free-centos-x86_64.rpm
rpm -Uvh nrserver-2.3.1.4360-free-centos-x86_64.rpm
/etc/rc.d/init.d/nrserver.sh restart
nrserver -setdomain <DOMAINNAME> <DOMAINPASSWORD>
nrserver -adduser <USERNAME> <PASSWORD> admin
nrserver -enableuser <USERNAME>
nrserver -showsettings

Finally, add the following command to /etc/rc.local so that NeoRouter Server gets started whenever your instance is rebooted:

echo "/etc/rc.d/init.d/nrserver.sh start" >> /etc/rc.local

Installing Incredible PBX 16-15 on a Raspberry Pi

We won’t regurgitate our Raspberry Pi tutorial. Simply follow the steps outlined there to acquire the necessary components and to get Incredible PBX 16-15 installed. We do want to stress the importance of getting WiFi working, configuring Exim to use your Gmail credentials as a smarthost, and making sure you added the email addition to /etc/rc.local so that you receive IP address information about your PBX whenever it is rebooted. If you skipped any of these steps, stop here and revisit the RasPi tutorial to complete those items.

Configuring NeoRouter Client on Your Computers

All flavors of Incredible PBX come with the NeoRouter client preinstalled. If your Asterisk-based home PBX is of another variety, you can install the NeoRouter Client matching the architecture of your server from here. Be sure to click on the NeoRouter Free v2 tab before making your selection. The other varieties are incompatible with the Free NeoRouter v2 Server installed above and are not free. Also be sure you match both the operating system and architecture of your server platform. Finally, make certain that TCP 32976 is whitelisted in your firewalls.

On Linux-based (non-GUI) platforms, setting up the NeoRouter Client is done by issuing the command: nrclientcmd. You’ll be prompted for your NeoRouter Server FQDN as well as your username and password credentials. Perform this procedure on both your home PBX and the Raspberry Pi.

To add your Windows or Mac notebook to the NeoRouter VPN, download the appropriate client and run the application which will prompt for your NeoRouter Server FQDN as well as your NeoRouter credentials. Once completed, you should see all three machines in your NeoRouter Free Client Dashboard: your PC as well as your home PBX and Raspberry Pi-based Incredible PBX. Make note of the private VPN addresses (10.0.0.X) of both your home PBX and your Raspberry Pi. These VPN addresses never change, and we’ll need them to interconnect your PBXs and to set up a softphone on your notebook computer.

Admininistrative Tools to Manage NeoRouter

Here are a few helpful commands for monitoring and managing your NeoRouter VPN.

To access your NeoRouter Linux client: nrclientcmd

To restart NeoRouter Linux client: /etc/rc.d/init.d/nrservice.sh restart

To restart NeoRouter Linux server: /etc/rc.d/init.d/nrserver.sh restart

To set domain: nrserver -setdomain YOUR-VPN-NAME domainpassword

For a list of client devices: nrserver -showcomputers

For a list of existing user accounts: nrserver -showusers

For the settings of your NeoRouter VPN: nrserver -showsettings

To add a user account: nrserver -adduser username password user

To add admin account: nrserver -adduser username password admin

For a complete list of commands: nrserver –help


Interconnecting Your Raspberry Pi and Home PBX

To keep things simple, our setup examples below assume the following NeoRouter VPN addresses: Home PBX (10.0.0.1) and Raspberry Pi (10.0.0.2). Using a browser, you’ll need to login to the GUI of your Home PBX and Raspberry Pi and add a Trunk to each PBX. Be sure to use the same secret on BOTH trunk setups. We don’t recommend forwarding incoming calls from your Home PBX to your Raspberry Pi because most folks won’t be sitting in their hotel room all day to answer incoming calls. Instead, add the number of your smartphone to a Ring Group on the Home PBX and don’t forget the # symbol at the end of the number. On the Raspberry Pi side, we are assuming that whenever a call is dialed from a registered softphone with the 9 prefix, the call will be sent to the Home PBX for call processing (without the 9). For example, 98005551212 would send 800-555-1212 to the Home PBX for outbound routing and 9701 would send 701 to the Home PBX for routing to the 701 extension. You can obviously adjust your dialplan to meet your own local requirements.

On the Home PBX, the chan_sip trunk entries should look like this:

Trunk Name: raspi-remote

PEER DETAILS

host=10.0.0.2
type=friend
context=from-internal
username=home-pbx
fromuser=home-pbx
secret=some-password
canreinvite=no
insecure=port,invite
qualify=yes
nat=yes

On the Raspberry Pi, the chan_sip trunk entries should look like this:

Trunk Name: home-pbx

PEER DETAILS

host=10.0.0.1
type=friend
context=from-internal
username=raspi-remote
fromuser=raspi-remote
secret=some-password
canreinvite=no
insecure=port,invite
qualify=yes
nat=yes

On the Raspberry Pi, add an Outbound Route named Out9-home-pbx pointed to home-pbx Trunk with the following Dial Patterns. For each Dial Pattern, prepend=blank and prefix=9:

dial string: 1NXXNXXXXXX  
dial string: NXXNXXXXXX  
dial string: *98X.
dial string: XXX
dial string: XXXX
dial string: XXXXX
  

Tweaking Your Raspberry Pi for WiFi Mobility

Typically, you don’t know the WiFi SSID or password of your destination location before you travel. Because you won’t be traveling with a monitor and keyboard for your Raspberry Pi, we needed some way to adjust the WiFi credentials on the microSD card to accommodate the destination WiFi network when you arrive. Luckily, the Raspberry Pi folks thought of a clever way to handle this. You can simply plug your microSD card into your notebook PC (Mac ALERT: Don’t forget your SD card dongle!) and add a wpa_supplicant.conf config file to the /boot directory on the card once you arrive at your destination and know the SSID and password of the local WiFi network. When the Raspberry Pi is subsequently booted, the operating system will move the config file to the /etc/wpa_supplicant directory so that your WiFi network will come on line. Here’s what a typical wpa_supplicant.conf file should look like using your actual credentials. The last network section handles open WiFi network connections (think: McDonald’s) if you want to enable them:

country=US
update_config=1

network={
 ssid="your-SSID"
 psk="your-SSID-password"
 key_mgmt=WPA-PSK
 scan_ssid=1
 priority=5
}

network={
 key_mgmt=NONE
 priority=1
}

The other gotcha is that some public WiFi networks require some type of web login procedure before you can actually access the Internet even though an IP address may have been assigned to your Raspberry Pi. To handle this situation, you’ll need a text-based web browser on the Raspberry Pi that can be accessed through your notebook PC using SSH and your Raspberry Pi’s VPN address. Our favorite is links which can be installed on your Raspberry Pi before you pack up.

apt-get install links -y

Once you arrive at your destination, connect both your notebook PC and Raspberry Pi to the same WiFi network, login to the RasPi with SSH at the VPN address assigned to your RasPi, and run links to start the browser. Press <esc> to access the links menu options. If you can’t access your RasPi at the VPN IP address, try its WiFi-assigned local IP address.

Adding a Softphone to Your Notebook PC

Last, but not least, you obviously need a way to make and receive calls once your Raspberry Pi is up and running at the remote site. We recommend installing a softphone on your Mac or PC notebook that connects to an extension on your Raspberry Pi using the VPN IP address of the Raspberry Pi. Using the VPN address assures that the connection will always be available regardless of the WiFi network’s local IP addresses. Everyone has their own favorite softphone, but here are some suggestions.

For Windows PCs, we recommend VitalPBX Communicator. It’s a free download from here.


Another good choice is YateClient which also is free. Download it from here. Run YateClient once you’ve installed it and enter the credentials for an extension on your Raspberry Pi. Then enter the VPN IP address of your server plus your extension’s password. Click OK to save your entries.

If you are a Mac user, another great no-frills softphone is Telephone. Just download and install it from the Mac App Store.

Adding a Softphone to Your Smartphone

We actually prefer adding a free softphone app to our smartphone. There are a number of alternatives on both the iOS and Android platforms. With iPhones and iPads, we’ve had great success with Acrobits Softphone, Grandstream Wave, Linphone, and Zoiper Lite. All are available in the App Store. For Android devices, our current favorite is the VitalPBX Communicator. Acrobits Groundwire is another good choice. But Grandstream Wave, Linphone, and Zoiper Lite also are available. Keep in mind that Zoiper also supports IAX connections to simplify NAT connections. And, on both platforms, don’t forget that Google now lets you make and receive calls using the new Google Voice app using your old Google Voice numbers that no longer work directly with Asterisk.

Enjoy your pain-free traveling!

Originally published: Monday, September 9, 2019


Need help with Asterisk? Visit the VoIP-info Forum.


Special Thanks to Our Generous Sponsors


FULL DISCLOSURE: ClearlyIP, Skyetel, Vitelity, DigitalOcean, Vultr, VoIP.ms, 3CX, Sangoma, TelecomsXchange and VitalPBX have provided financial support to Nerd Vittles and our open source projects through advertising, referral revenue, and/or merchandise. As an Amazon Associate and Best Buy Affiliate, we also earn from qualifying purchases. We’ve chosen these providers not the other way around. Our decisions are based upon their corporate reputation and the quality of their offerings and pricing. Our recommendations regarding technology are reached without regard to financial compensation except in situations in which comparable products at comparable pricing are available from multiple sources. In this limited case, we support our sponsors because our sponsors support us.

BOGO Bonaza: Enjoy state-of-the-art VoIP service with a $10 credit and half-price SIP service on up to $500 of Skyetel trunking with free number porting when you fund your Skyetel account. No limits on number of simultaneous calls. Quadruple data center redundancy. $25 monthly minimum spend required. Tutorial and sign up details are here.

The lynchpin of Incredible PBX 2020 and beyond is ClearlyIP components which bring management of FreePBX modules and SIP phone integration to a level never before available with any other Asterisk distribution. And now you can configure and reconfigure your new Incredible PBX phones from the convenience of the Incredible PBX GUI.

VitalPBX is perhaps the fastest-growing PBX offering based upon Asterisk with an installed presence in more than 100 countries worldwide. VitalPBX has generously provided a customized White Label version of Incredible PBX tailored for use with all Incredible PBX and VitalPBX custom applications. Follow this link for a free test drive!
 

Special Thanks to Vitelity. Vitelity is now Voyant Communications and has halted new registrations for the time being. Our special thanks to Vitelity for their unwavering financial support over many years and to the many Nerd Vittles readers who continue to enjoy the benefits of their service offerings. We will keep everyone posted on further developments.


The Very Best Cellphone Plans and Smartphones for 2019


You can read reviews of the best cellphone plans and smartphones until your eyes glaze over and still end up scratching your head when it comes to making a decision. Our approach is a little different. It’s about making smart choices based upon the specific requirements for you and your family. Let’s get the obvious criteria out of the way first. The cellphone provider that you choose has to work in your home, on your way to work, at your office, and in the places to which you typically travel. In the United States, that used to rule out everyone except AT&T, Verizon, and their MVNOs. Not any more. T-Mobile’s coverage now rivals that of the Bell Sisters, and Sprint isn’t far behind. The second important criteria is how many phones you need. If it’s a plan just for you or you and your spouse, it’s a very different landscape than finding suitable providers for a family of four or five. Age also matters. If it’s just two of you and one of you is at least 55 years old, there’s at least one incredible deal. Another important consideration is how much of your cellular usage is from locations with good Wi-Fi coverage. With most providers and newer smartphones, WiFi usage doesn’t cost you anything when it comes to your monthly cellphone bill. And, last but not least, is a careful analysis of how you use your phones. Binge watching Netflix and sending hundreds of high resolution photos every day through cellular connections is very different than using a phone primarily to make calls, send text messages, and retrieve text-based email. Equally important is whether you need your smartphone to also provide Internet connectivity for a tethered computer or tablet.

Let’s get the easy choices out of the way first. If you’re shopping for no more than two phones and one of you is at least 55 years old and one or both of you consumes enormous amounts of data without WiFi every month, T-Mobile is the hands-down winner at $70 a month with no tax/fees for two phones with unlimited talk as well as text and 50GB of data in 210+ countries. You may wish to consider the T-Mobile One Plus add-on if you do considerable traveling or regularly use tethering.

Excluding WiFi, the average cell phone user today consumes between 2GB and 8GB of data per month. If you have an existing cellphone plan, check your bill and see where your usage typically falls. If you’re within the range of 3GB and 12GB per phone per month with no WiFi coverage, then MintMobile’s $15 (3GB), $20 (8GB), and $25 (12GB) plans with unlimited talk and text using the T-Mobile network are the clear winner. HotSpot tethering with a PC is allowed. The only wrinkle is having to pay for a year of service after your 3-month trial ends.

If you’re part of a family of four or five with heavy cellphone usage, the best "unlimited" deal is probably Cricket Wireless which is an AT&T subsidiary and uses the AT&T network. If you don’t mind data speeds reduced to 3 Mbps with unlimited streaming at 480p, then their $100/month plan for four phones is a great deal even with the usual AT&T throttling after 22GB of data usage per month. Add a fifth phone for $25. Tethering is an extra $10/phone.

If Sprint works well in your surroundings and you have your own compatible phones, then Sprint’s Unlimited Kickstart offering is worth a careful look. Up to 5 lines can be purchased for $25/month each, but there is no guarantee as to network speeds, streaming is limited to 480p, and there is no tethering. You can move up to their Unlimited Basic Plan with up to 5 phones for a total of $100/month plus taxes and fees for 2 to 5 phones until June 30, 2020.

MetoPCS from T-Mobile has an offer similar to Sprint’s for 4 lines with unlimited data up to 35GB/month for $100/month with no taxes or additional fees. Pricing escalates to $40/line for two phones and $30/line for three. Tethering is not supported.

If Verizon is your preference, the least costly unlimited plan is offered by their Visible subsidiary at $40/month with data speeds limited to 5 Mbps and video streaming limited to 480p DVD quality. Tethering is permitted. iPhones and Galaxy S9/S9+ phones are supported. Or you can purchase for $99 or swap any Android phone for the Visible R2 phone from ZTE.

Things get murkier and more expensive from here. One consideration we haven’t touched upon with the low cost providers is bundling. Depending upon your Internet service provider and cable TV provider, the cost of your cellphone plan can change dramatically. For example, AT&T bundles DirecTV service for 4 TVs plus 4 cellphones sharing 15GB of monthly data for $200/month with lots of fine print. Xfinity/Comcast mobile service on Verizon’s network is available to existing Xfinity Internet customers for $12/GB with no line access fees on up to 5 smartphones. Or you can sign up for "unlimited" service at $45/phone with 20GB throttling. Spectrum has a similar mobile offer using Verizon at $14/GB or $45/phone for Spectrum Internet customers. And Google offers their GoogleFi service for $20/phone plus $10/GB of data actually used. Additional lines are $15. Google uses both T-Mobile and Sprint for service.

The elephant in the room with all of these cellphone plans is data throttling. All of the providers do it with impunity, and the short answer is you’ll simply have to choose a provider whose terms of service you can live with. While T-Mobile’s 50GB cap is considerably higher than AT&T’s 22GB, there are plenty of weasel words in T-Mobile’s terms that allow them to do what is necessary to "protect" their network. On the other hand, AT&T actually has locations (including ours) where data throttling reportedly isn’t used at all. We actually have a MiFi device on AT&T’s network that, during some months, has recorded over 100GB of data usage without throttling. So the bottom line is your mileage may vary, and it behooves you to shop around until you find a provider with whom you are comfortable based upon your own usage patterns.


We haven’t touched upon choosing a smartphone up until now. We all have our favorites and some providers have extremely favorable pricing if you bundle phones as part of your initial signup. If you don’t mind a 2-year-old model of an iPhone, these often can be free. The same holds for older Android top tier phones from Samsung and other providers. Just last week, Google offered its latest Pixel phones at half price for new GoogleFi customers. Whatever we listed today would probably be old news before you finished reading about it. We will mention one incredibly versatile Android phone, and that’s Motorola’s one-year-old Corning® Gorilla® glass, unlocked Moto G6 which can be found for under $200. In appearance it is indistinguishable from Samsung’s Galaxy S7 Edge, and it compares favorably to almost every feature in Apple’s latest $1,000+ iPhone with the possible exception of the camera (see photo above). It’s compatible with all of the carriers mentioned above except Visible. As with many of the newer smartphones, the G6 supports Wi-Fi calling as well as OpenVPN connectivity.

Originally published: Monday, May 6, 2019


Need help with Asterisk? Visit the VoIP-info Forum.


Special Thanks to Our Generous Sponsors


FULL DISCLOSURE: ClearlyIP, Skyetel, Vitelity, DigitalOcean, Vultr, VoIP.ms, 3CX, Sangoma, TelecomsXchange and VitalPBX have provided financial support to Nerd Vittles and our open source projects through advertising, referral revenue, and/or merchandise. As an Amazon Associate and Best Buy Affiliate, we also earn from qualifying purchases. We’ve chosen these providers not the other way around. Our decisions are based upon their corporate reputation and the quality of their offerings and pricing. Our recommendations regarding technology are reached without regard to financial compensation except in situations in which comparable products at comparable pricing are available from multiple sources. In this limited case, we support our sponsors because our sponsors support us.

BOGO Bonaza: Enjoy state-of-the-art VoIP service with a $10 credit and half-price SIP service on up to $500 of Skyetel trunking with free number porting when you fund your Skyetel account. No limits on number of simultaneous calls. Quadruple data center redundancy. $25 monthly minimum spend required. Tutorial and sign up details are here.

The lynchpin of Incredible PBX 2020 and beyond is ClearlyIP components which bring management of FreePBX modules and SIP phone integration to a level never before available with any other Asterisk distribution. And now you can configure and reconfigure your new Incredible PBX phones from the convenience of the Incredible PBX GUI.

VitalPBX is perhaps the fastest-growing PBX offering based upon Asterisk with an installed presence in more than 100 countries worldwide. VitalPBX has generously provided a customized White Label version of Incredible PBX tailored for use with all Incredible PBX and VitalPBX custom applications. Follow this link for a free test drive!
 

Special Thanks to Vitelity. Vitelity is now Voyant Communications and has halted new registrations for the time being. Our special thanks to Vitelity for their unwavering financial support over many years and to the many Nerd Vittles readers who continue to enjoy the benefits of their service offerings. We will keep everyone posted on further developments.