

We’ve sung the praises of VirtualBox for many years because it provides a wonderful platform for experimentation as well as production-ready systems using almost any hardware and any operating system. Versions of VirtualBox are available for Windows PCs, Macs, Linux desktops, and even Solaris machines. And, once you have VirtualBox in place, you can load gigabyte-sized turnkey virtual machines in a couple minutes. It literally transforms complex computer setups into child’s play.
We’ve received dozens of emails about Wazo, and many of them go something like this:
I’d love to experiment with Wazo as an Asterisk® platform, but I worry that the environment is just too different and the learning curve too steep. I just wish there were a simple way to get started so that I could learn the basics.
Today, your prayers have been answered. You don’t have to buy any hardware. You can use the desktop computer you already have. We’ve taken the Incredible PBX for Wazo tutorial and turned it into a turnkey virtual machine for VirtualBox. You can load it in a couple minutes and be ready to go. It’s got all of the Incredible PBX bells and whistles, and extensions already are configured for a SIP phone and WebRTC so that you can hit the ground running. Just install VirtualBox. Next, load the Incredible PBX for Wazo image. Install your favorite SIP phone or run WebRTC in your browser. A complete WebRTC tutorial is available here. Once you finish configuring your SIP or WebRTC client, you’re ready to start making calls. You can add a SIP trunk using one of preconfigured setups by following one of SIP provider tutorials we’ve provided. Or, if you live in the United States, you can add a Google Voice trunk and make free calls in the U.S. and Canada. Let’s get started!
Installing Oracle VM VirtualBox

Oracle’s virtual machine platform inherited from Sun is amazing. It’s not only free, but it’s pure GPL2 code. VirtualBox gives you a virtual machine platform that runs on top of any desktop operating system. In terms of limitations, we haven’t found any. We even tested this on an Atom-based Windows 7 machine with 2GB of RAM, and it worked without a hiccup. So step #1 today is to download one or more of the VirtualBox installers from VirtualBox.org or Oracle.com. Our recommendation is to put all of the 100MB installers on a 4GB thumb drive.1 Then you’ll have everything in one place whenever and wherever you happen to need it. Once you’ve downloaded the software, simply install it onto your favorite desktop machine. Accept all of the default settings, and you’ll be good to go. For more details, here’s a link to the Oracle VM VirtualBox User Manual.
Installing Incredible PBX for Wazo VM
To begin, download Incredible PBX for Wazo .ova image (1.9 GB) to the computer on which you installed VirtualBox.
When the download completes, double-click on the .ova file you downloaded to load it into VirtualBox. When prompted, be sure to check the Reinitialize the Mac address of all network cards box, agree to the license agreement, and then click the Import button. Once the import is finished, you’ll see a new (1) Incredible PBX for Wazo virtual machine in the VM List of the VirtualBox Manager Window. We need to make a couple of one-time adjustments to the Incredible PBX for Wazo configuration to account for differences in sound and network cards on different host machines.

(1) Click once on the Incredible PBX for Wazo virtual machine in the VM List. Then (2) click the Settings button. In the Audio tab, check the Enable Audio option and choose your sound card. In the Network tab for Adapter 1, check the Enable Network Adapter option. From the Attached to pull-down menu, choose Bridged Adapter. Then select your network card from the Name list. Then click OK. That’s all the configuration that is necessary for your Incredible PBX for Wazo.
Running Incredible PBX for Wazo VM
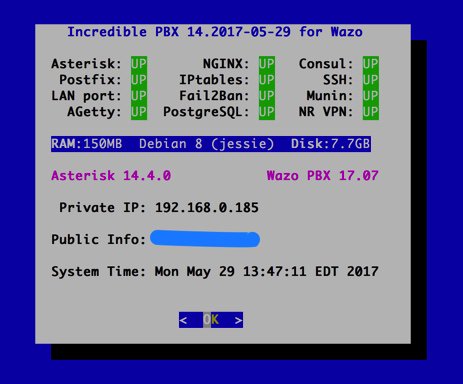
Once you’ve imported and configured the Incredible PBX for Wazo Virtual Machine, you’re ready to go. Highlight Incredible PBX for Wazo virtual machine in the VM List on the VirtualBox Manager Window and click the Start button. The standard Wazo boot procedure will begin and, within a short time, you’ll get the familiar Linux login prompt. During the bootstrap procedure, you’ll see a couple of dialogue boxes pop up that explain the keystrokes to move back and forth between your host operating system desktop and your virtual machine. Remember, you still have full access to your desktop computer. Incredible PBX for Wazo is merely running as a task in a VirtualBox window. Always gracefully halt Incredible PBX just as you would on a dedicated computer.
Here’s what you need to know. To work in the Incredible PBX for Wazo virtual machine, just left-click your mouse while it is positioned inside the VM window. To return to your host operating system desktop, press the right Option key on Windows machines or the left Command key on any Mac. For other operating systems, read the dialogue boxes for instructions on moving around. To access the Linux CLI, login as root with the default password: password.
Once you log into your virtual machine, a startup script will briefly configure a few things and then advise you that it’s time to reboot. If prompted for the hostname, type xivo. Write down the IP address provided because for Phase 2 of the setup, we need to use SSH or Putty on the desktop that you will actually be using to manage your server. The reason for this is that Incredible PBX automatically creates a whitelist of IP addresses that the firewall will allow to access your server. If the IP address isn’t in your whitelist, you may lock yourself out except from the VirtualBox console window.
Once the VirtualBox console window shows that your server has rebooted by displaying the Linux login prompt, switch to SSH or Putty and login as root using the IP address you wrote down. You’ll then be prompted to change your root password for Linux as well as your root password for Wazo GUI access using a web browser. You’ll also need to set a PIN that will be used to authorize access to extension 123 to schedule Telephone Reminders on your server. This completes the configuration. You’ll get a final screen showing the credentials for the preconfigured 701 and 702 extensions as well as a reminder that your PortKnocker credentials are stored in /root/knock.FAQ in the event you ever lock yourself out of your machine. It’s a good idea to leave this screen displayed while you install and configure a softphone since you can cut-and-paste your extension 702 credentials without having to type anything. Extension 701 comes preconfigured to support WebRTC using a Chrome or Firefox browser.
Once you complete the SIP or WebRTC setup below, you can return to the SSH window and press ENTER to finish the install. The Incredible PBX Automatic Update Utility will run, and then you will be presented with the pbxstatus display. You can access the Asterisk CLI by typing: asterisk -rvvvvvvvvvv. Exit from the CLI by typing quit. As mentioned previously, always shut down your server gracefully by typing halt. When prompted for the hostname, type xivo. Once the shutdown procedure finishes, it’s safe to turn off your virtual machine.
Choosing a SIP Softphone for Incredible PBX
Softphones tend to be a matter of taste for most folks so we’ll keep our suggestions to a minimum. On the Windows platform, it’s hard to go wrong with X-Lite. It works out of the box by simply plugging in the IP address of your server and your SIP username and password. It also happens to be free. The only downside is that X-Lite has a nasty habit of embedding time bombs in their free software so you may have to reinstall it from time to time. If you know what you’re doing, Zoiper is another alternative but be advised that it doesn’t work out of the box on servers behind NAT-based routers.
On the Mac platform, our favorite free softphone is Telephone. It’s a barebones SIP client that just works. As with X-Lite, you plug in your server’s IP address and SIP credentials, and you’re in business.
On the Linux or Solaris platforms, we assume that you know what you’re doing and that you are perfectly capable of choosing and installing a SIP phone that meets your requirements.
Incredible PBX Application Quick Start Guide
We’ve finished the basic Incredible PBX for Wazo setup. You now have a functioning PBX with dozens of applications for Asterisk that work out of the box. It’s probably a good idea to spend a little time getting acquainted with Incredible PBX for Wazo before you add trunks to communicate with the outside world.
Here’s a handy cheat sheet for some of the Incredible PBX applications that have been installed or are available as add-ons. There’s also a link for more information.
- Google Voice CLI interface and SMS Message Blasting (Add-On)
- CallerID Superfecta – Match Names to CallerID Numbers
- CallerID Blacklist – Block Calls from Spammers and Old Girlfriends
- CDR Reports in CSV Format
- CDR Reports in SQLite3 Format
- Asteridex – The Poor Man’s Rolodex (SQLite3 version)
- AsteriDex Click-to-Dial with Wazo Phonebook
- NeoRouter VPN for Wazo
- FCC RoboCall BlackList
- CallerID WhiteList Override
- Dial 123 – Telephone Reminders
- Dial 411 – Call by Name from AsteriDex
- Dial 947 – Weather Forecasts by ZIP Code
- Dial 951 – Latest Yahoo News
- Dial 2663 – Conference Call
- Dial 3472 – DISA Access
- Dial 4871 – Allison’s Sample IVR
- Dial *881400 – Schedule an Alarm for 2 p.m. (1400 military time)
- Dial 53669 – Meet Lenny, the Robocaller’s Worst Nightmare
Configuring Trunks and Routes with Wazo
The next step in your Wazo adventure is connecting your PBX to the outside world so that you can make and receive phone calls from anywhere in the world. For this you’ll need one or more trunks. Unlike the Ma Bell world, there’s no reason to put all your eggs in one basket. You can use one or more trunk providers for incoming calls with separate phone numbers for each. And you can use one or more trunk providers for outgoing calls and save money on calls to certain countries by choosing the best provider for where you want to call. And, of course, if you live in the United States, you can set up one or more Google Voice trunks and make calls to the U.S. and Canada for free. We’ve written a number of tutorials to make it easy to set up these trunks.
To get started, point a web browser to the IP address of your PBX. Login as root with the Wazo GUI password you set up above. If you ever forget your password, you can run /root/admin-pw-change to reconfigure it.
Wazo Trunk Implementation Tutorials
- Wazo Trunks Tutorial: Installing a Vitelity SIP Trunk2
- Wazo Trunks Tutorial: Installing a VoIP.ms SIP Trunk
- Wazo Trunks Tutorial: Installing a FreeVoipDeal (Betamax) SIP Trunk
- Wazo Trunks Tutorial: Installing a Google Voice-Simonics SIP Trunk
- Wazo Trunks Tutorial: Deploying Native Google Voice with OAuth Trunks
- Wazo Trunks Tutorial: Installing an Anveo Direct Outbound SIP Trunk
- Wazo Trunks Tutorial: Installing a Skype Connect SIP Trunk
Once you’ve added one or more trunks, you’ll need to tell Wazo how to route outgoing and incoming calls. Here are our step-by-step tutorials on setting up Outbound Calling Routes and Incoming Call Routes:
Wazo Call Routing Tutorials
- Wazo Call Routing Tutorial: Creating Outbound Routes for PSTN Calling
- Wazo Call Routing Tutorial: Creating Inbound Routes for DIDs
Now you’re ready to explore. We recommend you read through the Incredible PBX for Wazo tutorial to familiarize yourself with the inner workings of Wazo. Enjoy the ride!
Originally published: Monday, June 12, 2017

Need help with Asterisk? Visit the PBX in a Flash Forum.
Special Thanks to Our Generous Sponsors
FULL DISCLOSURE: ClearlyIP, Skyetel, Vitelity, DigitalOcean, Vultr, VoIP.ms, 3CX, Sangoma, TelecomsXchange and VitalPBX have provided financial support to Nerd Vittles and our open source projects through advertising, referral revenue, and/or merchandise. As an Amazon Associate and Best Buy Affiliate, we also earn from qualifying purchases. We’ve chosen these providers not the other way around. Our decisions are based upon their corporate reputation and the quality of their offerings and pricing. Our recommendations regarding technology are reached without regard to financial compensation except in situations in which comparable products at comparable pricing are available from multiple sources. In this limited case, we support our sponsors because our sponsors support us.
 BOGO Bonaza: Enjoy state-of-the-art VoIP service with a $10 credit and half-price SIP service on up to $500 of Skyetel trunking with free number porting when you fund your Skyetel account. No limits on number of simultaneous calls. Quadruple data center redundancy. $25 monthly minimum spend required. Tutorial and sign up details are here.
![]() The lynchpin of Incredible PBX 2020 and beyond is ClearlyIP components which bring management of FreePBX modules and SIP phone integration to a level never before available with any other Asterisk distribution. And now you can configure and reconfigure your new Incredible PBX phones from the convenience of the Incredible PBX GUI.
The lynchpin of Incredible PBX 2020 and beyond is ClearlyIP components which bring management of FreePBX modules and SIP phone integration to a level never before available with any other Asterisk distribution. And now you can configure and reconfigure your new Incredible PBX phones from the convenience of the Incredible PBX GUI.
 VitalPBX is perhaps the fastest-growing PBX offering based upon Asterisk with an installed presence in more than 100 countries worldwide. VitalPBX has generously provided a customized White Label version of Incredible PBX tailored for use with all Incredible PBX and VitalPBX custom applications. Follow this link for a free test drive!
 Special Thanks to Vitelity. Vitelity is now Voyant Communications and has halted new registrations for the time being. Our special thanks to Vitelity for their unwavering financial support over many years and to the many Nerd Vittles readers who continue to enjoy the benefits of their service offerings. We will keep everyone posted on further developments.
Some Recent Nerd Vittles Articles of Interest…
- Many of our purchase links refer users to Amazon when we find their prices are competitive for the recommended products. Nerd Vittles receives a small referral fee from Amazon to help cover the costs of our blog. We never recommend particular products solely to generate Amazon commissions. However, when pricing is comparable or availability is favorable, we support Amazon because Amazon supports us. [↩]
- Vitelity is a platinum sponsor of Nerd Vittles, and they also happen to be the best in the business. You’ll find a discount coupon to get a great deal on a DID and 4-channel trunk toward the end of this article. [↩]


