Home » Posts tagged 'sip' (Page 7)

Tag Archives: sip

The Most Versatile VoIP Provider: FREE PORTING

SIP Happens! Deploying a Publicly-Accessible Asterisk PBX – replaced

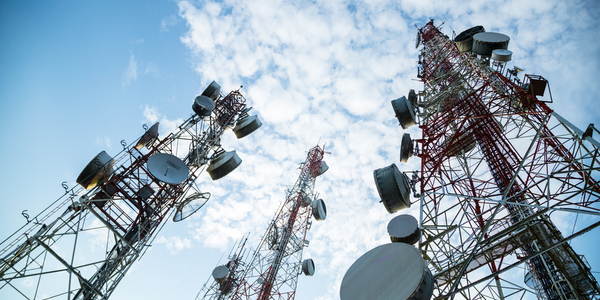
We’ve previously documented the benefits of SIP URI calling. Because the calls are free from and to anywhere in the world, the use case is compelling. The drawbacks, particularly with Asterisk® servers, have primarily centered around the security implications of exposing SIP on a publicly-accessible server. Today we want to take a fresh look at a possible SIP implementation for Asterisk based upon the pioneering work of Dr. Lin Song back in the PBX in a Flash heyday. We’ve embellished Lin’s original IPtables creation with additional security mechanisms now available with Fail2Ban, Asterisk, FreePBX®, and Travelin’ Man 3 as well as a terrific tutorial from JavaPipe. All of Lin’s work and ours is open source GPL3 code which you are more than welcome to use or improve pursuant to the terms of the GPL3 license.

Consider this. If everyone in the world had an accessible SIP address instead of a phone number, every call to every person in the world via the Internet would be free. That pretty much sums up why SIP URIs are important. The syntax for SIP URIs depends upon your platform. With Asterisk they look like this: SIP/somebody@FQDN.yourdomain.com. On SIP phones, SIP URIs look like this: sip:somenameORnumber@FQDN.yourdomain.com. Others use somenameORnumber@FQDN.yourdomain.com. Assuming you have a reliable Internet connection, once you have “dialed” a SIP URI, the destination SIP device will ring just as if the called party had a POTS phone. Asterisk® processes SIP URIs in much the same way as calls originating from commercial trunk providers, but anonymous SIP calls are blocked.

Before we get too deep in the weeds, let us take a moment to stress that we don’t recommend this SIP design for mission-critical PBXs because there still are some security risks with denial of service attacks and other vulnerabilities. For these deployments, Incredible PBX® coupled with the Travelin’ Man 3 firewall which blocks SIP access except from whitelisted IP addresses and FQDNs has no equal. When properly deployed, the bad guys cannot even see your server much less attack it. A typical use case for today’s new SIP design would be a public Asterisk server that provides anonymous SIP access to the general public without any exposure to corporate jewels. For example, we’ve put up a demonstration server that provides news and weather reports. In the corporate world, an equivalent deployment might provide access to a product database with pricing and availability details. Our rule of thumb before deploying today’s platform would be to ask yourself what damage could be inflicted if your server were totally compromised. If the answer is zero, then proceed. Otherwise, stick with Incredible PBX and the Travelin’ Man 3 firewall. The ideal platform for deployment using the same rule of thumb as above is one of these $7 to $15/year OpenVZ cloud platforms.

Overview. There are a number of moving parts in today’s implementation. So let’s briefly go through the steps. Begin with a cloud-based installation of Incredible PBX. Next, we’ll upgrade the Fail2Ban setup to better secure a publicly-accessible Asterisk server. We’ll also customize the port for SSH access to reduce the attack rate on the SSH port. You’ll need a fully-qualified domain name (FQDN) for your server because we’ll be blocking all access to your server by IP address. If you want to allow SIP URI calls to your server, you’ll need this FQDN. If you want to also allow SIP registrations from this same FQDN, then a single FQDN will suffice; however, with OpenVZ platforms, we recommend using a different (and preferably more obscure) FQDN for SIP registrations since registered users have an actual extension on your PBX that is capable of making outbound calls which usually cost money. In this case, the obscure FQDN performs double-duty as the equivalent of a password to your PBX. For example, an FQDN such as hk76dl34z.yourdomain.com would rarely be guessed by an anonymous person while sip.yourdomain.com would be fairly obvious to attempted intruders. But that’s your call.

Using whatever FQDN you’ve chosen for SIP registrations, we’ll add an entry to /etc/asterisk/sip_custom.conf that looks like this: domain=hk76dl34z.yourdomain.com. That will block all SIP registration attempts except from that domain. It will not block SIP invitations! The next step will be to add a new [from-sip-external] context to extensions_override_freepbx.conf. Inside that context, we’ll specify the FQDN used for public SIP URI connections to your server, e.g. sip.yourdomain.com. This will block SIP invitations except SIP URIs containing that domain name. We’ll also define all of the extensions on your Asterisk server which can be reached with SIP URI invitations. These could be actual extensions, or ring groups, or IVRs, or Asterisk applications. The choice is yours. These SIP URI authorizations can be either numeric (701@sip.yourdomain.com) or alpha (weather@sip.yourdomain.com) or alphanumeric (channel7@sip.abc.com). Finally, we’ll put the new IPtables firewall rules in place and adjust your existing iptables-custom setup to support the new publicly-accessible PBX. For example, we’ll still use whitelist entries for web access to your server since anonymous users would cause nothing but mischief if TCP ports 80 and 443 were exposed. It’s worth noting that KVM platforms provide a more robust implementation of IPtables that can block more types of nefarious traffic. We’ve supplemented the original article with a KVM update below. With OpenVZ platforms, we have to rely upon Asterisk to achieve IP address blocking and some types of packet filtering. So why not choose a KVM platform? It’s simple. These platforms typically cost twice as much as equivalent OpenVZ offerings. With this type of deployment, KVM is worth it.

Installing Incredible PBX Base Platform

Today’s design requires an Incredible PBX platform on a cloud-based server. Start by following this tutorial to put the pieces in place. We recommend you also install the Whole Enchilada addition once the base install is finished. Make sure everything is functioning reliably before continuing.

Upgrading the Fail2Ban Platform

Because this will be a publicly-accessible server, we’re going to tighten up the Asterisk configuration in Fail2Ban and lengthen the bantime and findtime associated with Fail2Ban’s Asterisk log monitoring. We also recommend that you whitelist the IP addresses associated with your server and PCs from which you plan to access your server so that you don’t inadvertently block yourself.

Log into your server as root and issue the following commands. When the jail.conf file opens in the nano editor, scroll down to line 34 and add the IP addresses you’d like to whitelist to the existing ignoreip settings separating each IP address with a space. Then press Ctrl-X, Y, then Enter to save your changes. Verify that Fail2Ban restarts successfully.

cd /etc/fail2ban
wget http://incrediblepbx.com/fail2ban-public.tar.gz
tar zxvf fail2ban-public.tar.gz
rm -f fail2ban-public.tar.gz
nano -w jail.conf
service fail2ban restart

If you ever get locked out of your own server, you can use the Serial Console in your VPS Control Panel to log into your server. Then verify that your IP address has been blocked by issuing the command: iptables -nL. If your IP is shown as blocked, issue this command with your address to unblock it: fail2ban-client set asterisk unbanip 12.34.56.78

Obtaining an FQDN for Your Server

Because we’ll be blocking IP address SIP access to your server, you’ll need to obtain one or perhaps two FQDNs for your server. If you manage DNS for a domain that you own, this is easy. If not, you can obtain a free FQDN from ChangeIP here. Thanks, @mbellot.

For the FQDN that you’ll be using for SIP registrations on your server, configure Asterisk to use it by logging into your server as root and issuing the following command using your new FQDN, e.g. xyz.yourdomain.com. Thanks, @ou812.

echo "domain=xyz.yourdomain.com" >> /etc/asterisk/sip_custom.conf

SECURITY ALERT: Never use the SIP URI MOD on a server such as this one with a publicly-exposed SIP port as it is possible for some nefarious individual to spoof your FQDN in the headers of a SIP packet and easily gain outbound calling access using your server’s trunk credentials.

Customizing the [sip-external-custom] Context

All FreePBX-based servers include a sip-external-custom context as part of the default installation; however, we need a customized version to use for a publicly-accessible PBX. You can’t simply update the context in /etc/asterisk/extensions.conf because FreePBX will overwrite the changes the next time you reload your dialplan. Instead we have to copy the context into extensions_override_freepbx.conf and make the changes there. So let’s start by copying the new template there with the following commands:

cd /tmp
wget http://incrediblepbx.com/from-sip-external.txt
cd /etc/asterisk
cat /tmp/from-sip-external.txt >> extensions_override_freepbx.conf
rm -f /tmp/from-sip-external.txt
nano -w extensions_override_freepbx.conf

When the nano editor opens the override file, navigate to line #10 of the [from-sip-external] context and replace xyz.domain.com with the FQDN you want to use for SIP invites to your server. These are the connections that are used to actually connect to an extension on your server (NOT to register). As noted previously, this can be a different FQDN than the one used to actually register to an extension on your server. Next, scroll down below line #24, and you will see a series of lines that actually authorize anonymous SIP connections with your server. There are two numeric entries and also two alpha entries to access the News and Weather apps on your server. The 13th position in the dialplan is required for all authorized calls.

exten => 947,13,Dial(local/947@from-internal)
exten => 951,13,Dial(local/951@from-internal)
exten => news,13,Dial(local/951@from-internal)
exten => weather,13,Dial(local/947@from-internal)

You can leave these in place, remove them, or add new entries depending upon which extensions you want to make publicly accessible on your server. Here are some syntax examples for other types of server access that may be of interest.

; Call VoIP Users Conference
exten => 882,13,Dial(SIP/vuc@vuc.me)
exten => vuc,13,Dial(SIP/vuc@vuc.me)
; Call Default CONF app
exten => 2663,13,Dial(local/${EXTEN}@from-internal)
exten => conf,13,Dial(local/2663@from-internal)
; Call Bob at Local Extension 701
exten => 701,13,Dial(local/${EXTEN}@from-internal)
exten => bob,13,Dial(local/701@from-internal)
; Call Default Inbound Route thru Time Condition
exten => home,13,Goto(timeconditions,1,1)
; Call Inbound Trunk 8005551212
exten => 8005551212,13,Goto(from-trunk,${DID},1)
; Call Lenny
exten => 53669,13,Dial(local/${EXTEN}@from-internal)
exten => lenny,13,Dial(SIP/2233435945@sip2sip.info)
; Call any toll-free number (AT&T Directory Assistance in example)
exten => information,13,Dial(SIP/18005551212@switch.starcompartners.com)

Once you’ve added your FQDN and authorized SIP URI extensions, save the file: Ctrl-X, Y, then Enter.

One final piece is required to enabled anonymous SIP URI connections to your server:

echo "allowguest=yes" >> /etc/asterisk/sip_general_custom.conf

Now restart Asterisk: amportal restart

UPDATE for DialPlan Junkies: We received a few inquiries following publication inquiring about the dialplan design. We’ve taken advantage of a terrific feature of Asterisk which lets calls fall through to the next line of a dialplan if there is no match on a Goto(${EXTEN},13) command. For example, if a caller dials ward@sip.domain.com and there is a line 12 in the dialplan directing the call to ward,13 which exists, call processing will continue there. However, if the extension does not exist, the call will not be terminated. Instead, if there exists a more generic line 13 in the dialplan, e.g. exten => _X.,13,Goto(s,1), call processing will continue there. We use this trick to then redirect the call to an ‘s’ extension sequence to announce that the called extension could not be reached. It’s the reason all of the whitelisted extensions have to have the same line 13 designation so that call processing can continue with the generic line 13 when a specific extension match fails.

Configuring IPtables for Public SIP Access

You may recall that, with Incredible PBX, we bring up the basic IPtables firewall using the /etc/sysconfig/iptables rules. Then we add a number of whitelist entries using /usr/local/sbin/iptables-custom. We’re going to do much the same thing with today’s setup except the rule sets are a bit different. Let’s start by putting the default iptables-custom file in place:

cd /usr/local/sbin
wget http://incrediblepbx.com/iptables-custom-public.tar.gz
tar zxvf iptables-custom-public.tar.gz
rm -f iptables-custom-public.tar.gz
nano -w iptables-custom

When the nano editor opens, scroll to the bottom of the file. You’ll note that we’ve started a little list of notorious bad guys to get you started. Fail2Ban will actually do a pretty good job of managing these, but for the serious recidivists, blocking them permanently is probably a good idea. In addition to the bad guys, you’ll want to whitelist your own IP addresses and domains so that you don’t get blocked from FreePBX web access to your server. The syntax looks like the following two examples:

/usr/sbin/iptables -I INPUT -s pbxinaflash.dynamo.org -j ACCEPT
/usr/sbin/iptables -I INPUT -s 8.8.8.8                -j ACCEPT

Whenever you make changes to your IPtables configuration, remember to restart IPtables using the following command ONLY: iptables-restart

Now let’s put the final IPtables piece in place with the default IPtables config file:

cd /etc/sysconfig
wget http://incrediblepbx.com/iptables-public.tar.gz
tar zxvf iptables-public.tar.gz
rm -f iptables-public.tar.gz
nano -w iptables

When the nano editor opens the file, scroll down to line 51 which controls the TCP port for SSH access to your server. We strongly recommend you change this from 22 to something in the 1000-2000 range. HINT: Your birth year is easy to remember. In the next step, we’ll make the change in your SSH configuration as well.

Next, scroll down to lines 143 and 144. Replace YOUR_HOSTNAME.no-ip.com on both lines with the FQDN of your server that will be used to accept SIP invitations (connections) on your server. These entries have no effect on SIP registrations which we covered above!

Once you’ve made these changes, save the file BUT DO NOT RESTART IPTABLES JUST YET.

Securing the SSH Access Port

TCP port 22 is probably one of the most abused ports on the Internet because it controls access to SSH and the crown jewels by default. Assuming you changed this port in the IPtables firewall setup above, we now need to change it in your SSH config file as well. Edit /etc/ssh/sshd_config and scroll down to line 12. Change the entry to: Port 1999 assuming 1999 is the port you’ve chosen. Be sure to remove the comment symbol (#) at the beginning of the line if it exists. Then save the file. Now reboot your server, and you should be all set.

Dealing with the Bad Guys

You’ll be amazed how quickly and how many new friends you’ll make on the public Internet within the first few hours. You can watch the excitement from the Asterisk CLI by logging into your server as root and issuing the command: asterisk -rvvvvvvvvvv. Another helpful tool is to monitor your IPtables status which will show IP addresses that have been temporarily blocked by Fail2Ban: iptables -nL. This will catch most of the bad guys and block them. But some are smarter than others, and many know how to spoof IP addresses in SIP packets as you will quickly see. Unlike on KVM platforms, IPtables on most OpenVZ platforms cannot search packets for text strings which is a simple way to block many of these attackers. HINT: You get what you pay for. And, in some cases, attackers disguise their address or use yours. We’ve now found that ${SIPURI} holds the caller’s true identity so we’ve updated the code accordingly. Whether to permanently block these guys is completely up to you. A typical SIP INVITE before such a call is dropped only consumes about 100 bytes so it’s usually not a big deal. You also can manually block callers using the Fail2Ban client with the desired IP address: fail2ban-client set asterisk banip 12.34.56.78.

Additional Security on KVM Platforms

As we mentioned above, a KVM platform provides considerably more security for your public-facing server because you can block entire countries using the ipset extension to IPtables. You can read all about it here. After considerable discussion and suggestions on the PIAF Forum, we would offer the following code which blocks the countries we have identified as causing the majority of problems. First, modify your /etc/sysconfig/iptables configuration and insert the following code in the IPSPF section of the script around line 93. You can change the list of blocked countries to meet your own needs. Just be sure to make the same country-code changes in the blockem.sh script which we will cover in step 2. A list of available country codes can be found here. Save your changes, but do NOT restart IPtables just yet.

-A IPSPF -m set --match-set cn src -j DROP
-A IPSPF -m set --match-set ru src -j DROP
-A IPSPF -m set --match-set ps src -j DROP
-A IPSPF -m set --match-set kp src -j DROP
-A IPSPF -m set --match-set ua src -j DROP
-A IPSPF -m set --match-set md src -j DROP
-A IPSPF -m set --match-set nl src -j DROP
-A IPSPF -m set --match-set fr src -j DROP

Second, we want to add a new /etc/blockem.sh script and make it executable (chmod +x /etc/blockem.sh). Make sure the country list in line #5 matches the dropped countries list you added to IPtables in step #1 above.

#!/bin/bash
cd /etc
wget -qO - http://www.ipdeny.com/ipblocks/data/countries/all-zones.tar.gz| tar zxvf -
for i in \\
cn ru ps kp ua md nl fr
do
/usr/sbin/ipset create -exist $i hash:net
for j in $(cat $i.zone); do /usr/sbin/ipset add -exist $i $j; done
done
wait
sleep 5
service iptables restart
wait
service fail2ban restart
exit 0

Third, try things out by running the script: /etc/blockem.sh. Verify that IPtables is, in fact, blocking the listed countries: iptables -nL.

BUG: Some early releases had a missing line which caused the IPSPF section of code in the IPtables script not to be executed. You can test whether you’re missing the necessary line by issuing the following command:

 grep "INPUT -j IPSPF" /etc/sysconfig/iptables

If the result is a blank line, then issue the following command to fix the problem:

sed -i 's|-A INPUT -j ASIP|-A INPUT -j IPSPF\\n-A INPUT -j ASIP|' /etc/sysconfig/iptables

Finally, we recommend adding the script to /etc/rc.d/rc.local so that it gets run whenever you reboot your server.

In choosing a KVM platform, we’ve had good luck with the $5/month Digital Ocean platform where you still can get a $100 credit to kick the tires for 60 days, Vultr (similar pricing to D.O. without the 60-day credit). With either of these providers, you can add automatic backups for an extra dollar a month. In the bargain basement (may not be here tomorrow) category, we like (and use) both the SnowVPS KVM $15/year and AlphaRacks KVM $22/year offerings. Many other low-cost options are documented on the LowEndBox site. Just don’t invest more than you can afford to lose… and make a backup.1

Connecting a SIP Phone to Kamailio or LinPhone

If you followed along in our initial Kamailio adventure, then it’s easy to test some SIP URI calls to your new server. You can connect virtually any kind of SIP telephone or endpoint to Kamailio. Another easy way to try out SIP calling is to first set up a free LinPhone SIP Account.

You can find dozens of recommendations for hardware-based SIP phones both on Nerd Vittles and the PIAF Forum. For today we’ll get you started with one of our favorite (free) softphones, YateClient. It’s available for almost all desktop platforms. Download YateClient from here. Run YateClient once you’ve installed it and enter the credentials for your Kamailio or LinPhone account you’ve previously created. You’ll need the IP address of your Kamailio server or LinPhone’s FQDN (sip.linphone.org) plus your account’s password. Fill in the Yate Client template using the IP address or FQDN as well as your Username and whatever Password you assigned to the account when you created it. Click OK to save your entries.

Once the Yate softphone shows that it is registered, try a test call to one of the SIP URIs you authorized on your new Asterisk server: sip:947@sip.yourdomain.com.

If you don’t happen to have a Kamailio server or a LinPhone SIP account to play with but you have another Asterisk server, then the simple way to enable SIP URI extensions is by editing /etc/asterisk/extensions_custom.conf. In the [from-internal-custom] context, add an extension that can be used to contact any desired SIP URI. Then reload your dialplan: asterisk -rx "dialplan reload". Now dial that extension (2468 in the following example) from any phone connected to your Asterisk server. The entry would look something like this to call the SIP URI on your new server for the latest weather forecast:

exten => 2468,1,Dial(SIP/weather@sip.yourdomain.com)

Originally published: Monday, January 28, 2019  Updated: Wednesday, February 6, 2019


Need help with Asterisk? Visit the VoIP-info Forum.


Special Thanks to Our Generous Sponsors


FULL DISCLOSURE: ClearlyIP, Skyetel, Vitelity, DigitalOcean, Vultr, VoIP.ms, 3CX, Sangoma, TelecomsXchange and VitalPBX have provided financial support to Nerd Vittles and our open source projects through advertising, referral revenue, and/or merchandise. As an Amazon Associate and Best Buy Affiliate, we also earn from qualifying purchases. We’ve chosen these providers not the other way around. Our decisions are based upon their corporate reputation and the quality of their offerings and pricing. Our recommendations regarding technology are reached without regard to financial compensation except in situations in which comparable products at comparable pricing are available from multiple sources. In this limited case, we support our sponsors because our sponsors support us.

BOGO Bonaza: Enjoy state-of-the-art VoIP service with a $10 credit and half-price SIP service on up to $500 of Skyetel trunking with free number porting when you fund your Skyetel account. No limits on number of simultaneous calls. Quadruple data center redundancy. $25 monthly minimum spend required. Tutorial and sign up details are here.

The lynchpin of Incredible PBX 2020 and beyond is ClearlyIP components which bring management of FreePBX modules and SIP phone integration to a level never before available with any other Asterisk distribution. And now you can configure and reconfigure your new Incredible PBX phones from the convenience of the Incredible PBX GUI.

VitalPBX is perhaps the fastest-growing PBX offering based upon Asterisk with an installed presence in more than 100 countries worldwide. VitalPBX has generously provided a customized White Label version of Incredible PBX tailored for use with all Incredible PBX and VitalPBX custom applications. Follow this link for a free test drive!
 

Special Thanks to Vitelity. Vitelity is now Voyant Communications and has halted new registrations for the time being. Our special thanks to Vitelity for their unwavering financial support over many years and to the many Nerd Vittles readers who continue to enjoy the benefits of their service offerings. We will keep everyone posted on further developments.


  1. Digital Ocean and Vultr provide modest referral credits to Nerd Vittles for those that use our referral code. It in no way colors our recommendations regarding these two providers, both of whom we use extensively. []

SIP Happens! And Kamailio Makes It Easy, Part I


If ever there was a Swiss Army Knife for SIP, Kamailio (a.k.a. OpenSER) is the hands-down winner. The flexibility of this open source SIP server is legendary. Whether it’s secure communications, insulation from brute force attacks, load balancing, failover, WebRTC, or the return of shared line appearances on your office phone system, Kamailio can handle it while processing thousands of call setups per second on minimal hardware platforms.

Our plan for today is to walk you through setting up a Debian-based Kamailio server on an inexpensive cloud platform that is suitable for making thousands of free SIP phone calls worldwide. Down the road, we’ll walk you through using Kamailio as a frontend for one or more Asterisk® servers to insulate your communications workhorses without sacrificing network security. If, like us, you managed an office which migrated from key telephones to a platform like Asterisk, then you will most certainly appreciate the ability to once again let your managers and secretaries share phone lines without the aggravation of call parking and pickup. Other than removing a free office coffee machine, I can’t think of any single event that ever prompted a staff and management revolt quite like the one we experienced with the removal of key telephones. Little wonder that it’s part of all Cisco and Avaya phone systems as well as cloud offerings from Vonage, 8X8, Jive, and probably others.

Before we begin our adventure, let me caution everyone that this is an experimental platform with a tutorial prepared by a Kamailio novice. While we’ve done our homework, digging out information on Kamailio is a challenge because many of the experts depend upon Kamailio consulting for their livelihood. It’s quite similar to the early Asterisk years. We also don’t vouch for the longevity of any of these VPS providers. Reread our article for details.

SIP URI (Free) Calling Opportunities

We mentioned free SIP phones in our introduction of Kamailio. But let that sink in for a moment. As we have stressed for many years, SIP calls to anyone with a public SIP URI (somebody@somewhere.com) are entirely free to anyone worldwide. And you can talk as long as you like. All that’s required is an Internet connection, a SIP phone or softphone, and a SIP URI. As part of the Kamailio implementation, we’ll show you how easy it is to create SIP URIs for all your friends and business acquaintances securely… in seconds. First, let’s take a moment to consider what SIP URI (free) calling opportunities are available. There literally are millions of SIP URI resources that await. But, unless you want to be one of the "don’t call us, we’ll call you" folks, you also will need one or more SIP URIs for yourself. YOU DON’T NEED A KAMAILIO SERVER TO OBTAIN A SIP URI. Here are just a few of the possibilities. Using SIP Broker, you can call anyone on more than 2,000 VoIP networks around the globe. Using a softphone and a free or almost free registration with VoIP.ms, CallCentric, or LocalPhone, you not only get a SIP URI, but you also can request an iNUM number which also doubles as a SIP URI by coupling it with @81.201.82.50. 3CX and pbxes.org also offer SIP URIs to complement their free offerings. All of these companies will let you connect a softphone or SIP endpoint directly to their service without the need for an Asterisk PBX in the middle.1 You can even refer your favorite spam callers to Lenny via SIP URI: 2233435945@sip2sip.info.

Deploying a Cloud-Based Debian Server

We hope you took advantage of one of the special VPS offerings we highlighted to start the New Year. Some are still available with annual pricing that’s less than the cost of most lunches these days. We recommend a cloud platform because (1) it’s cheap, (2) it’s easy to set up a Debian platform, and (3) it provides a static IP4 address for your server. When you sign up or if you wish to reconfigure an existing VPS that you may have gathering dust, just choose the Debian 8/64 operating system and assign an FQDN to your server. Once you get your credentials, log into the server as root with the password that was provided. Immediately change your root password and issue the following commands to bring Debian up to date. We also strongly recommend changing the SSH port to deter would-be attackers. A TCP port in the 1000-2000 range works wonders. Simply edit /etc/ssh/sshd_config and change the Port 22 entry before rebooting. HINT: Birth years make the SSH port easy to remember.

passwd
apt-get update
apt-key update
apt-get dist-upgrade
apt-get -y install gcc flex bison libmysqlclient-dev make libssl-dev nano
apt-get -y install libcurl4-openssl-dev libxml2-dev libpcre3-dev ntp ntpdate
reboot

Once the reboot is complete, log back into your server’s new SSH port using this syntax where 1234 is the port number you chose.

ssh -p 1234 root@server-ip-address

Now we’re ready to install the necessary packages to support Kamailio:

apt -y install mysql-server
mysql_secure_installation
apt -y install kamailio kamailio-mysql-modules
apt -y install kamailio-dbg
apt -y install kamailio-extra-modules
apt -y install kamailio-outbound-modules
apt -y install kamailio-presence-modules
apt -y install kamailio-tls-modules
apt -y install kamailio-utils-modules
apt -y install kamailio-websocket-modules

Configuring Kamailio’s kamctlrc File

For today, we’ll be configuring Kamailio to allow user logins from SIP endpoints including SIP phones and softphones. Down the road, we’ll change things up to let Kamailio serve as the front-end to one or more Asterisk PBXs. But let’s learn to walk before we start running. We’ll be editing three configuration files and then adding a SIP account to support logging in from a SIP phone. Let’s begin with kamctlrc.

(1) Edit kamctlrc: nano -w /etc/kamailio/kamctlrc

(2) Start by uncommenting SIP_DOMAIN and insert the FQDN you associated with your VPS.

(3) Uncomment DBENGINE line and make certain it points to MYSQL.

(4) Uncomment the following line: DBRWUSER="kamailio".

(5) Uncomment the DBRWPW line and insert your own password between the quotes.

(6) Uncomment the following line: DBROUSER="kamailioro".

(7) Uncomment the DBROPW line and insert a different password between the quotes.

(8) Uncomment the DBACCESSHOST line and insert the IP address of your server.

(9) Drop down near the bottom of the file and uncomment the PID_FILE line.

(10) Save the file.

Configuring Kamailio’s kamailio.cfg Startup File

(1) Edit kamailio.cfg: nano -w /etc/kamailio/kamailio.cfg

(2) Make the top of the startup file look like the following:

#!KAMAILIO
#!define WITH_MYSQL
#!define WITH_AUTH
#!define WITH_USRLOCDB
#!define WITH_ANTIFLOOD
#!define WITH_PRESENCE
# change next line to comment to disable logging
#!define WITH_ACCDB
#
# Kamailio (OpenSER) SIP Server v4.2 - default configuration script

(3) Find the line: #!define DBURL "mysql://kamailio:kamailiorw@localhost/kamailio"

(4) Change the kamailiorw entry to the password you entered in step #5 above.

(5) Tighten up security a bit by searching for the line containing friendly-scanner.

(6) Immediately above that line, cut-and-paste this addition from Fred Posner at AstriCon:

### Posner additions
        if ($ua =~ "(friendly-scanner|sipvicious|sipcli)") {
                xlog("L_INFO","script kiddies from IP:$si:$sp - $ua \n");
$sht(ipban=>$si) = 1;
                sl_send_reply("200", "OK");
                exit;
        }
        if($au =~ "(\=)|(\-\-)|(')|(\#)|(\%27)|(\%24)" and $au != $null) {
                xlog("L_INFO","[R-REQINIT:$ci] sql injection from IP:$si:$sp - $au \n");
$sht(ipban=>$si) = 1;
                exit;
        }
###

(7) Save the file.

(8) Generate the MySQL database and tables to support Kamailio: kamdbctl create

(9) At every prompt, type Y to add the feature.

(10) Open MySQL as root using the actual MySQL password you assigned when adding the MySQL package:

mysql -u root -ppassw0rd kamailio

(11) At the MySQL prompt, cut-and-paste the following commands:

ALTER TABLE acc ADD COLUMN src_user VARCHAR(64) NOT NULL DEFAULT '';
ALTER TABLE acc ADD COLUMN src_domain VARCHAR(128) NOT NULL DEFAULT '';
ALTER TABLE acc ADD COLUMN src_ip varchar(64) NOT NULL default '';
ALTER TABLE acc ADD COLUMN dst_ouser VARCHAR(64) NOT NULL DEFAULT '';
ALTER TABLE acc ADD COLUMN dst_user VARCHAR(64) NOT NULL DEFAULT '';
ALTER TABLE acc ADD COLUMN dst_domain VARCHAR(128) NOT NULL DEFAULT '';
ALTER TABLE missed_calls ADD COLUMN src_user VARCHAR(64) NOT NULL DEFAULT '';
ALTER TABLE missed_calls ADD COLUMN src_domain VARCHAR(128) NOT NULL DEFAULT '';
ALTER TABLE missed_calls ADD COLUMN src_ip varchar(64) NOT NULL default '';
ALTER TABLE missed_calls ADD COLUMN dst_ouser VARCHAR(64) NOT NULL DEFAULT '';
ALTER TABLE missed_calls ADD COLUMN dst_user VARCHAR(64) NOT NULL DEFAULT '';
ALTER TABLE missed_calls ADD COLUMN dst_domain VARCHAR(128) NOT NULL DEFAULT '';
quit

Configuring Kamailio Defaults in /etc/default/kamailio

(1) Edit Kamailio defaults: nano -w /etc/default/kamailio

(2) Make the startup defaults look like the following:

#
# Kamailio startup options
#

# Set to yes to enable kamailio, once configured properly.
RUN_KAMAILIO=yes

# User to run as
USER=kamailio

# Group to run as
GROUP=kamailio

# Amount of shared and private memory to allocate
# for the running Kamailio server (in Mb)
SHM_MEMORY=128
PKG_MEMORY=4

# Config file
CFGFILE=/etc/kamailio/kamailio.cfg

(3) Save the file.

Managing Kamailio Startups & Shutdowns

With all the pieces in place, here’s how to start, restart, stop, and check status of Kamailio:

systemctl start kamailio
systemctl restart kamailio
systemctl stop kamailio
systemctl status kamailio

Adding Users/Accounts to Kamailio

Now we’re ready to add accounts to Kamailio. These can be numeric, alphanumeric, or purely alpha entries. They become the user’s respective SIP URIs when coupled with @FQDN where FQDN is the fully-qualified domain name assigned to your server:

kamctl add username userpw

As you probably have guessed, kamctl is the main management tool for Kamailio. Issuing the command by itself will list all of the possible options that are available.

Monitoring Kamailio Access

There are a number of ways to monitor access (both legitimate and otherwise) to your Kamailio server. Here are a few of our favorites:

systemctl status kamailio
cat /var/log/syslog | grep kamailio
mysql -u root -ppassw0rd kamailio -e "select * from acc"
mysql -u root -ppassw0rd kamailio -e "select * from missed_calls"

Connecting a SIP Phone to Kamailio

You can connect virtually any kind of SIP telephone or endpoint to Kamailio. You can find dozens of recommendations for hardware-based SIP phones both on Nerd Vittles and the PIAF Forum. For today we’ll get you started with one of our favorite (free) softphones, YateClient. It’s available for almost all desktop platforms.

Download YateClient from here. Run YateClient once you’ve installed it and enter the credentials for the account you created above. You’ll need the IP address of your server plus your account’s password. Fill in the Yate Client template using the IP address or FQDN of your Server as well as your Username and whatever Password you assigned to the account when you created it. Click OK to save your entries.

Once the Yate softphone shows that it has registered with Kamailio, try a test call to Lenny by dialing sip:2233435945@sip2sip.info.

Next week, we’ll tackle security. If you run systemctl status kamailio for a few days, you’ll understand why. We’ll also get your Kamailio server interconnected with Asterisk so that inbound calls to your new SIP URI pass through to Asterisk transparently. Enjoy!

Originally published: Monday, January 14, 2019


Need help with Asterisk? Visit the VoIP-info Forum.


Special Thanks to Our Generous Sponsors


FULL DISCLOSURE: ClearlyIP, Skyetel, Vitelity, DigitalOcean, Vultr, VoIP.ms, 3CX, Sangoma, TelecomsXchange and VitalPBX have provided financial support to Nerd Vittles and our open source projects through advertising, referral revenue, and/or merchandise. As an Amazon Associate and Best Buy Affiliate, we also earn from qualifying purchases. We’ve chosen these providers not the other way around. Our decisions are based upon their corporate reputation and the quality of their offerings and pricing. Our recommendations regarding technology are reached without regard to financial compensation except in situations in which comparable products at comparable pricing are available from multiple sources. In this limited case, we support our sponsors because our sponsors support us.

BOGO Bonaza: Enjoy state-of-the-art VoIP service with a $10 credit and half-price SIP service on up to $500 of Skyetel trunking with free number porting when you fund your Skyetel account. No limits on number of simultaneous calls. Quadruple data center redundancy. $25 monthly minimum spend required. Tutorial and sign up details are here.

The lynchpin of Incredible PBX 2020 and beyond is ClearlyIP components which bring management of FreePBX modules and SIP phone integration to a level never before available with any other Asterisk distribution. And now you can configure and reconfigure your new Incredible PBX phones from the convenience of the Incredible PBX GUI.

VitalPBX is perhaps the fastest-growing PBX offering based upon Asterisk with an installed presence in more than 100 countries worldwide. VitalPBX has generously provided a customized White Label version of Incredible PBX tailored for use with all Incredible PBX and VitalPBX custom applications. Follow this link for a free test drive!
 

Special Thanks to Vitelity. Vitelity is now Voyant Communications and has halted new registrations for the time being. Our special thanks to Vitelity for their unwavering financial support over many years and to the many Nerd Vittles readers who continue to enjoy the benefits of their service offerings. We will keep everyone posted on further developments.


  1. Some of our links refer users to sites or service providers when we find their prices are competitive for the recommended products. Nerd Vittles receives a small referral fee from these providers to help cover the costs of our blog. We never recommend particular products solely to generate commissions. []

FusionPBX on Steroids: Text-to-Speech Apps Have Arrived


SECURITY ALERT: https://securityboulevard.com/2019/06/rce-using-caller-id-multiple-vulnerabilities-in-fusionpbx/

And you thought you needed an Asterisk® PBX for your users to enjoy FREE text-to-speech applications such as current News Headlines and Weather reports from the convenience of their telephone. Well, move over Asterisk. FusionPBX™ for FreeSWITCH™ now offers virtually identical functionality with all of the terrific advantages that FusionPBX provides: reliability, updates, performance, security and an unmatched UC platform with no rivals. To get started, make sure you have completed the steps in our FusionPBX introductory tutorial.

Intuitive support in FusionPBX for interactive TTS or STT applications is not (yet) available. So we’re doing the next best thing. Once or more a day, we will use cron jobs to retrieve the latest News Headlines and Weather reports for your local area. Then anyone using your PBX can pick up a phone and listen to the News Headlines by dialing 951 or U.S. weather forecasts by dialing 947, or worldwide weather forecasts from ApiXU by dialing 949.1 We’ll be using IBM’s awesome TTS engine to handle the text-to-speech chores. We think you will agree that IBM’s offering is the best in the business. And you can’t beat the price. After your first free month, you get a million characters of FREE text-to-speech synthesis every month forever! For ApiXU worldwide weather data, your first 2,500 queries are also FREE every month.

Here’s a sample from the 3CX implementation of these identical applications:


[soundcloud url="https://api.soundcloud.com/tracks/364353344″ params="auto_play=false&hide_related=false&show_comments=true&show_user=true&show_reposts=false&visual=true" width="80%" height="350″ iframe="true" /]


Getting Started with IBM Bluemix TTS Service

NOV. 1 UPDATE: IBM has moved the goal posts effective December 1, 2018:

You can start your free, 30-day trial of IBM Bluemix services without providing a credit card. Just sign up here. Once your account is activated, here’s how to obtain credentials for the TTS service to use with FusionPBX. Start by logging in to your IBM Bluemix account. Once you’re logged in, click on your account name (1) in the upper right corner of your web page to reveal the pull-down to select your Region, Organization, and Space. Follow the blue links at the bottom of the pull-down menu to create an Organization and Space for your TTS service.


Next, click the Menu icon which is displayed as three horizontal bars on the left side of the web page. Choose Watson. Click Create Watson Service and select Text to Speech from the applications listing. Watson will generate a new TTS service template and display it. Make certain that your Region, Organization, and Space are shown correctly. Then verify that the Standard Pricing Plan is selected. When everything is correct, click the Create button.

When your Text to Speech application displays, click Service Credentials and then click New Credential (+). When the Add New Credential dialog appears, leave the default settings as they are and click Add. Your Credentials Listing then will appear. Click View Credentials beside the new entry you just created. Write down your URL, username, and password. You’ll need these in Step #4 below to configure the IBM Bluemix TTS service. Logout of the IBM Cloud by clicking on the little face in the upper right corner of your browser window and choose Log Out. Confirm that you do, indeed, wish to log out.

Getting Started with ApiXU Weather

Finding free worldwide weather forecasts has been a difficult nut to crack. So we’re pleased to introduce ApiXU. Your first 5,000 API calls every month are free, but our Worldwide Weather application for FusionPBX actually makes two API calls to retrieve the latest weather conditions AND the weather forecast. What that means is you can make 2,500 free queries a month with the Nerd Vittles application. One or two a day should suffice. While the U.S. weather reports are retrieved by ZIP code, the ApiXU queries are retrieved by city. So long as you don’t choose small towns, the city names should be sufficiently unique to work well with the WorldWide Weather application. HINT: Nicosia in Cyprus (home of 3CX) works great! 😉


Before you can obtain worldwide weather reports, you’ll need to sign up for an account at ApiXU.com. Once you’re registered, log into your account and copy down your API Key. You’ll need it in a minute.

5 Steps to TTS Paradise with FusionPBX

Once you have your IBM TTS credentials in hand, there are only five simple steps to get everything set up for TTS application support on FusionPBX. When we’re finished, anyone on your PBX can pick up a phone and listen to the News Headlines by dialing 951, a U.S. Weather Forecast by dialing 947, or Worldwide Weather for most international cities by dialing 949.

  1. Download WAV file placeholders to FusionPBX
  2. Set up TTS Extensions in FusionPBX
  3. Install the Linux components to support TTS Applications
  4. Insert IBM and ApiXU Credentials, Email Address and Weather Locations
  5. Run the News Headlines and Weather Update Scripts

1. Downloading WAV File Placeholders

Login to your FusionPBX server as root using SSH or Putty. Change to /var/lib/freeswitch/recordings directory. List its contents to decipher the names of any subdirectories that have been created for your various FusionPBX domains. Change to each subdirectory under /var/lib/freeswitch/recordings and issue the following commands to install the TTS placeholders:

wget http://incrediblepbx.com/freeswitch/placeholders.tar.gz
tar zxvf placeholders.tar.gz
rm -f placeholders.tar.gz

IMPORTANT: Once you’ve copied the placeholders into position, use a browser to open the FusionPBX Dashboard for each of your domains. Navigate to Apps then Recordings and play each of the three placeholder files that were uploaded: News-update, Weather-forecast, and Weather-zip. Otherwise, they won’t be available for use in the next step of the setup.

2. Setting Up TTS Apps in FusionPBX

Before you can implement the Nerd Vittles TTS Apps for News Headlines, Weather by ZIP Code, and Worldwide Weather, we first need to create the proper environment on the FusionPBX side to support the new applications. We’ll be using the FusionPBX Dialplan Manager for this purpose. We need to set up three extensions to handle the calls: one for the News Headlines and one for each of the Weather applications.

Login to your FusionPBX Dashboard with a browser.

News Headlines: From the FusionPBX Dashboard, navigate to DialPlan, then Dialplan Manager, and click the Add (+) icon. Using your default Context, insert the following new entry into the Dialplan for News Headlines (951) by filling in the Name, Condition1, Action1, and Description fields as shown below. Leave the other defaults. Then click SAVE.


When the Dialplan listing reappears, find the NewsHeadlines entry in the list and click the pencil icon to Edit the entry. Add 951 in the Number field as shown below. Then click SAVE and BACK.


Now let’s add the Dialplan entries to support the two Weather applications.

Weather by ZIP Code: From the FusionPBX Dashboard, navigate to DialPlan, then Dialplan Manager, and click the Add (+) icon. Using your default Context, insert the following new entry into the Dialplan for Weather by ZIP Code (947) by filling in the Name, Condition1, Action1, and Description fields as shown below. Leave the other defaults. Then click SAVE.


When the Dialplan listing reappears, find the WeatherZIP entry in the list and click the pencil icon to Edit the entry. Add 947 in the Number field as shown below. Then click SAVE and BACK.


Worldwide Weather: From the FusionPBX Dashboard, navigate to DialPlan, then Dialplan Manager, and click the Add (+) icon. Using your default Context, insert the following new entry into the Dialplan for Worldwide Weather (949) by filling in the Name, Condition1, Action1, and Description fields as shown below. Leave the other defaults. Then click SAVE.


When the Dialplan listing reappears, find the WorldwideWeather entry in the list and click the pencil icon to Edit the entry. Add 949 in the Number field as shown below. Then click SAVE and BACK.


Try things out by dialing 947, 949, and 951 from any FusionPBX extension. Be sure these work before proceeding!

3. Installing Linux Components for TTS

First, we need to get the missing pieces in place to support TTS applications using IBM Bluemix TTS and the Nerd Vittles scripts. We want to add PHP support from the Linux CLI only so there will be no security issues. And we want to add support for SQLite 3 so we can look up latitude and longitude data for U.S. zip codes. Just issue the following commands to get everything set up:

apt-get update
apt-get -y install php-fpm php-curl php-cli php-pear php-db php-gd sqlite3 libsqlite3-dev
apt-get -y install sox lame libsox-fmt-mp3
sed -i 's|;cgi.fix_pathinfo=1|cgi.fix_pathinfo=0|' /etc/php/7.1/fpm/php.ini
systemctl restart php7.1-fpm

Next, we need to put the Nerd Vittles scripts and ZIP code database for SQLite 3 in place:

cd /
wget http://incrediblepbx.com/freeswitch/fusionpbx-tts-linux.tar.gz
tar zxvf fusionpbx-tts-linux.tar.gz
rm -f fusionpbx-tts-linux.tar.gz

Finally, we need to add cron jobs to run the three update scripts at least once a day. You can run them more often depending upon your needs. We have these configured to run at 6:15 am and 6:20 am every day. Adjust to meet your own requirements. On a busy PBX, you probably don’t want to run them during the workday.

echo "15 6 * * * root /root/nv-weather-update.sh >/dev/null 2>&1" >> /etc/crontab
echo "20 6 * * * root /root/nv-news-update.sh >/dev/null 2>&1" >> /etc/crontab
echo "25 6 * * * root /root/nv-wwweather-update.sh >/dev/null 2>&1" >> /etc/crontab

4. Adding TTS Credentials to FusionPBX

Now we need to add your IBM TTS and ApiXU credentials, email address, a local ZIP code for Weather by ZIP code reports, and a city for Worldwide Weather reports. Edit the credentials file and save it with your information:

cd /root
nano -w ibm-credentials.php

5. Running the News & Weather Update Scripts

Finally, we need to run the News Headlines and two Weather update scripts once to put current data in place for FusionPBX callers. After the initial setup, the cron jobs will update the News Headlines and Weather reports every day moving forward. Press ENTER as each of the scripts finishes to get back to a command prompt.

cd /root
./nv-news-update.sh
./nv-weather-update.sh
./nv-wwweather-update.sh

Taking the News & Weather Apps for a Spin

Now you’re ready to try things out. From any phone connected to your PBX, dial 951 for current News Headlines. Then dial 947 for a local Weather Report matching your zip code. Finally, dial 949 to retrieve a worldwide weather forecast for most international cities.

If you don’t yet have a FusionPBX server set up but would like to sample the voice quality of the TTS applications running on our FusionPBX server in New York, here are several ways to try them out using an IVR we set up using an IBM voice prompt from last week’s tutorial. Airport codes reflect (PROVIDER LOCATION-SERVER LOCATION-DID LOCATION).

  • Skyetel DID: 843-970-9997 (SEA-BUF-CHS)
  • Vitelity DID: 646-666-5997 (DEN-BUF-NYC)
  • VoIPms DID: 843-606-0444 (ATL-BUF-CHS)
  • Free iNUM Call: 883510009901997 (ATL-BUF-ATL)
  • Free SIP Call: 883510009901997@sip.inum.net (ATL-BUF-ATL)

Originally published: Monday, September 24, 2018


Support Issues. With any application as sophisticated as this one, you’re bound to have questions. Blog comments are a terrible place to handle support issues although we welcome general comments about our articles and software. If you have particular support issues, we encourage you to get actively involved in the PBX in a Flash Forums. It’s the best Asterisk tech support site in the business, and it’s all free! Please have a look and post your support questions there. Unlike some forums, ours is extremely friendly and is supported by literally hundreds of gurus and thousands of users just like you. You won’t have to wait long for an answer to your question.


Need help with Asterisk? Visit the PBX in a Flash Forum.


Special Thanks to Our Generous Sponsors


FULL DISCLOSURE: ClearlyIP, Skyetel, Vitelity, DigitalOcean, Vultr, VoIP.ms, 3CX, Sangoma, TelecomsXchange and VitalPBX have provided financial support to Nerd Vittles and our open source projects through advertising, referral revenue, and/or merchandise. As an Amazon Associate and Best Buy Affiliate, we also earn from qualifying purchases. We’ve chosen these providers not the other way around. Our decisions are based upon their corporate reputation and the quality of their offerings and pricing. Our recommendations regarding technology are reached without regard to financial compensation except in situations in which comparable products at comparable pricing are available from multiple sources. In this limited case, we support our sponsors because our sponsors support us.

BOGO Bonaza: Enjoy state-of-the-art VoIP service with a $10 credit and half-price SIP service on up to $500 of Skyetel trunking with free number porting when you fund your Skyetel account. No limits on number of simultaneous calls. Quadruple data center redundancy. $25 monthly minimum spend required. Tutorial and sign up details are here.

The lynchpin of Incredible PBX 2020 and beyond is ClearlyIP components which bring management of FreePBX modules and SIP phone integration to a level never before available with any other Asterisk distribution. And now you can configure and reconfigure your new Incredible PBX phones from the convenience of the Incredible PBX GUI.

VitalPBX is perhaps the fastest-growing PBX offering based upon Asterisk with an installed presence in more than 100 countries worldwide. VitalPBX has generously provided a customized White Label version of Incredible PBX tailored for use with all Incredible PBX and VitalPBX custom applications. Follow this link for a free test drive!
 

Special Thanks to Vitelity. Vitelity is now Voyant Communications and has halted new registrations for the time being. Our special thanks to Vitelity for their unwavering financial support over many years and to the many Nerd Vittles readers who continue to enjoy the benefits of their service offerings. We will keep everyone posted on further developments.


Some Recent Nerd Vittles Articles of Interest…

  1. The included applications are licensed pursuant to GPL2 with the exception of nv-worldwide-weather.php which is licensed pursuant to The MIT License. Terms and conditions of both licenses are included in /root/COPYING. []

Back to School: Introducing FusionPBX for FreeSWITCH

SECURITY ALERT: https://securityboulevard.com/2019/06/rce-using-caller-id-multiple-vulnerabilities-in-fusionpbx/

It’s been quite a week with the surprise acquisition of Digium® and Asterisk® by Sangoma®. It became official on Wednesday, September 5. You can read all about it here, and you can read our cautious optimism here. As with the recent Google Voice transformation, we hope it serves as a gentle reminder to the VoIP community not to put all your eggs in one basket. With the start of the new school year, we could think of no better time to explore an excellent alternative. And today we’re pleased to introduce FusionPBX™ for FreeSwitch™.

9/10 EDIT: We’ll be updating this article in coming days to add tutorials on additional features rather than releasing new articles that force you to jump around. So mark your place at the end of the article and come back soon to see the new additions.

FreeSWITCH is an open source softswitch that’s been around for over a decade. The lead designer is Anthony Minessale, who originally worked on the Asterisk project. FusionPBX is a GUI front end for FreeSWITCH that performs many of the same functions that FreePBX® performs for Asterisk. It’s the brainchild of Mark J. Crane. With that background, let’s dive right in.

Today we’ll get a functioning server set up with trunks and extensions so that you can begin making calls. We’ll also show you how to interconnect with an Incredible PBX server in the Cloud to add Google Voice GVSIP functionality for free calling in the U.S. and Canada. Once you get that far, we’d recommend you pick up a good book on FreeSWITCH, review the excellent FusionPBX documentation, and roll up your sleeves. There’s virtually nothing that FusionPBX and FreeSWITCH can’t do with a telephone.

Creating the Debian 8 Minimal Platform

We’ll be building FusionPBX atop a minimal install of Debian 8 (Jessie). If you’re creating your server in the Cloud with 1GB or less of RAM (such as the $3.50/month Vultr platform), we strongly recommend creation of a swap file after you set up the Debian 8 platform:

dd if=/dev/zero of=/swapfile bs=1024 count=1024k
chown root:root /swapfile
chmod 0600 /swapfile
mkswap /swapfile
swapon /swapfile
echo "/swapfile          swap            swap    defaults        0 0" >> /etc/fstab
sysctl vm.swappiness=10
echo vm.swappiness=10 >> /etc/sysctl.conf
free -h
cat /proc/sys/vm/swappiness

Next, create a very secure root password: passwd

Now put the missing pieces in place to support your FusionPBX install:

apt-get update
apt-get upgrade
apt-get install nano -y
apt-get install dialog -y
apt-get install ca-certificates -y
apt-get install systemd -y
apt-get install systemd-sysv -y
reboot

Installing FusionPBX and FreeSWITCH

Now we’re ready to install FusionPBX with FreeSWITCH. Issue the following command on a single line. Be advised that FusionPBX currently uses FreeSWITCH 1.6, not 1.8. If you buy a book about FreeSWITCH 1.8, just be aware that there may be some features that are not yet available with FusionPBX.

wget -O - https://raw.githubusercontent.com/fusionpbx/fusionpbx-install.sh/master/debian/pre-install.sh | sh; cd /usr/src/fusionpbx-install.sh/debian && ./install.sh

When the install completes, you’ll see a message that looks something like this:

Installation has completed.

   Use a web browser to login.
      domain name: https://45.76.249.125
      username: admin*
      password: D6pHudQGqeYsQUWK

   *The browser domain name is used as part of the authentication.

   If you need to login to a different domain then use username@domain.
      username: admin@45.76.249.125

   Official FusionPBX Training
      Fastest way to learn FusionPBX: https://www.fusionpbx.com.
      Available online and in person. Includes documentation and recording.

      Location:               Online
      Admin Training:          7 -  9 August 2018 (3 Days)
      Advanced Training:      21 - 22 August 2018 (2 Days)
      Continuing Education:        30 August 2018 (1 Day)
      Timezone:               https://www.timeanddate.com/weather/usa/boise

   Additional information.
      https://fusionpbx.com/training.php
      https://fusionpbx.com/support.php
      https://www.fusionpbx.com
      http://docs.fusionpbx.com

If you’re coming from the FreePBX world and you’re new to FusionPBX and FreeSWITCH, be advised that your browser login name is NOT admin. It’s admin@some-IP-address. The reason is because FreeSWITCH supports multiple domains, unlike FreePBX. The default domain will be the IP address from which you performed the installation. On a server in the cloud, it will be your public IP address. On a private LAN, it will be the localhost private IP address, e.g. 127.0.0.1 or 127.0.0.2.

Locking Down Your Server

FusionPBX includes a basic IPtables firewall setup. Those that have followed Nerd Vittles over the years know that we view a firewall whitelist (Travelin’ Man 3) as absolutely essential to avoid security problems down the road. In the case of FusionPBX, we recommend changing the SSH access port from 22 to a random number above 1000. Then it can remain exposed so long as you check regularly to make certain no one is attempting to access your server via SSH: cat /var/log/auth.log. We also recommend locking down HTTP and HTTPS to your whitelisted IP addresses rather than leaving those ports open to the world. Finally, we recommend closing off IPv6 access to your server except from localhost. Here’s how.

Let’s assume you want to change the SSH access port from 22 to 1789. Simply issue the following commands and restart SSH. WARNING: Be careful not to log out of your server until we update the firewall, or you will lock yourself out of your server!

sed -i 's|#Port 22|Port 22|'  /etc/ssh/sshd_config
sed -i 's|Port 22|Port 1789|' /etc/ssh/sshd_config
/etc/init.d/ssh restart

To reconfigure IPtables using a WhiteList of allowed IP addresses, you first need to decipher what those IP addresses actually are. You’ll need the public and private IP addresses of any PCs from which you wish to access FusionPBX. Depending upon your pain threshold and bank account, SIP access can remain open. However, you’ll still need the IP addresses of your hosting providers and the IP addresses of each of the locations where you plan to install a SIP phone for direct access to properly configure FusionPBX. Once you have those IP addresses in hand, it’s time to edit /etc/iptables/rules.v4. The filter section of the default install looks like:

*filter
:INPUT DROP [1:40]
:FORWARD DROP [0:0]
:OUTPUT ACCEPT [58:8069]
-A INPUT -i lo -j ACCEPT
-A INPUT -m state --state RELATED,ESTABLISHED -j ACCEPT
-A INPUT -p udp -m udp --dport 5060:5091 -m string --string "friendly-scanner" --algo bm --to 65535 -j DROP
-A INPUT -p udp -m udp --dport 5060:5091 -m string --string "sipcli/" --algo bm --to 65535 -j DROP
-A INPUT -p udp -m udp --dport 5060:5091 -m string --string "VaxSIPUserAgent/" --algo bm --to 65535 -j DROP
-A INPUT -p tcp -m tcp --dport 22 -j ACCEPT
-A INPUT -p tcp -m tcp --dport 80 -j ACCEPT
-A INPUT -p tcp -m tcp --dport 443 -j ACCEPT
-A INPUT -p tcp -m tcp --dport 7443 -j ACCEPT
-A INPUT -p tcp -m tcp --dport 5060:5091 -j ACCEPT
-A INPUT -p udp -m udp --dport 5060:5091 -j ACCEPT
-A INPUT -p udp -m udp --dport 16384:32768 -j ACCEPT
-A INPUT -p icmp -m icmp --icmp-type 8 -j ACCEPT
-A INPUT -p udp -m udp --dport 1194 -j ACCEPT
COMMIT

1. Modify the SSH rule (–dport 22) replacing 22 with your new SSH port number, e.g. 1789.

2. Using #, comment out the HTTP (–dport 80) and HTTPS (–dport 443) rules. There simply are too many zero day vulnerabilities with PHP and SQL injection to leave web ports exposed to the public.

3. Just above the COMMIT line, whitelist your private LAN IP addresses. Do NOT whitelist the 172 subnet if you’re deploying on Amazon! Amazon treats these as routable IP addresses on their network.

-A INPUT -s 127.0.0.0/8 -j ACCEPT
-A INPUT -s 10.0.0.0/8 -j ACCEPT
-A INPUT -s 172.16.0.0/12 -j ACCEPT
-A INPUT -s 192.168.0.0/16 -j ACCEPT

4. If you’re planning to use NeoRouter VPN, add the following above the COMMIT line:

-A INPUT -p tcp -m tcp --dport 32976 -j ACCEPT

5. Add rules above the COMMIT line for each IP address you wish to WhiteList, e.g.

-A INPUT -s 8.8.8.8 -j ACCEPT

6. Save the file.

7. Edit /etc/iptables/rules.v6 to look like this:

*filter
:INPUT DROP [0:0]
:FORWARD ACCEPT [0:0]
:OUTPUT ACCEPT [0:0]
-A INPUT -s ::1 -j ACCEPT
COMMIT

8. Restart IPtables and Fail2Ban:

/etc/init.d/netfilter-persistent restart
/etc/init.d/fail2ban restart
iptables -nL
ip6tables -nL

9. If your server is on the public Internet and you’d like to add SSL security, which is required for WebRTC deployments, we’re adding a separate tutorial below as part of the WebRTC implementation to show you the easy way to do this. Keep reading.

Finally, a cautionary note. If you leave your SIP ports exposed to the Internet, then you’ll need to regularly monitor your FreeSWITCH log for attempted attacks. You can download the Incredible Utilities scripts including update-blacklist that we run regularly as a cron job to blacklist all of the most recent bad guys. Please note that IP addresses detected as "bad guys" with this script take precedence over whitelist entries you may have made in step #5 above so be sure to also add the IP addresses from step #5 to this script’s WHITELIST table before running the script, or you may inadvertently lock yourself out of your own server.

cd /
wget http://incrediblepbx.com/freeswitch/incredible-utils-FS.tar.gz
tar zxvf incredible-utils-FS.tar.gz
rm -f incredible-utils-FS.tar.gz

Getting Started with FusionPBX

Using the account credentials displayed after your installation completed, login to FusionPBX using your favorite browser. Don’t forget to include the IP address in the admin field:


Before you do anything else, navigate to Advanced -> Access Controls. Here you will want to whitelist all of the IP addresses of SIP service providers and other PBXs to which you want to interconnect. Simply add Allow entries in the Domains category for each IP address/CIDR entry. HINT: Single IP addresses have a CIDR entry of /32. WARNING: We don’t recommend using FQDN/Domain entries. Despite legitimate FQDNs, all of our entry attempts resulted in "cannot locate" alerts in the FreeSWITCH CLI (fs_cli). This means that future connection attempts from those providers would fail without any indication of what caused the failures. Also, do NOT add entries for IP addresses of phones/softphones that will register to extensions or calls to and from those extensions will fail. This is anything but intuitive but, trust us, you will save hours of hair-pulling.

Creating Extensions in FusionPBX

While you’re still logged into the FusionPBX GUI, let’s add an extension to demonstrate how easy it is. Choose Accounts -> Extensions and click on the + symbol to add a new extension. Here is a sample to get you started, but you really only need the extension number and voicemail PIN entries:


Unlike in FreePBX, the default extension password is not displayed on the template. Once you SAVE the extension, you then have to edit it and click on the Password field to display the default entry. This can be changed, if desired.

Configuring a Softphone for FusionPBX

You can connect virtually any kind of telephone to your new PBX, and FusionPBX includes terrific provisioning tools for dozens of SIP phones. We’ll start with a free SIP softphone today so you can begin making calls. You can find dozens of recommendations for hardware-based SIP phones both on Nerd Vittles and the PIAF Forum when you’re ready to get serious about VoIP telephony.

We recommend YateClient which is free. Download it from here. Run YateClient once you’ve installed it and enter the credentials for the extension you created above. You’ll need the IP address of your server plus your extension’s password. Fill in the Yate Client template using the IP address of your Server, the extension number for your Username, and whatever Password you assigned to the extension when you created it. Click OK to save your entries.

Once the Yate softphone shows that it has registered with FusionPBX, try a test call by dialing *9664 which should begin playing the default Music on Hold.

Creating Trunks/Providers/Gateways in FusionPBX

In FusionPBX and FreeSWITCH, what FreePBX and Asterisk users call Trunks are referred to as Providers or Gateways. These are commercial outfits that offer to interconnect your PBX with the rest of the telephones in the world using a SIP connection. The first step is to register with the providers of your choice and obtain your SIP credentials and the FQDN(s) of the provider’s servers to which you should register. Most allow authentication by either username/password or by IP address. If you have a static IP address for your server, that is the safer method since you don’t have to worry about someone guessing your password. The only difference in the setup is the Register field should be changed to False.

As luck would have it, there is thorough documentation on the FreeSWITCH site to configure literally hundreds of Providers. Here’s the link.

Before you actually set up your new Provider in FusionPBX, we first need to add the provider’s server to FusionPBX’s Access Control List (ACL). As noted, we’ve encountered problems attempting to register FQDNs in the ACL so we strongly recommend you ping the FQDN of your provider’s server and obtain its actual IP address. Once you have it, navigate to Advanced -> Access Controls -> domains. Click on the Pencil icon to edit the ACL list for domains. Next, click on the + icon at the top of the Nodes listing. Change Type to allow. Enter the IP address of your provider’s server in CIDR. Leave the Domain field blank. Enter your Provider in the Description field. Click the SAVE button.

Now we’re ready to add your Provider. Navigate to Accounts -> Gateways and click the + symbol to add a new one. Click on the Advanced button to expose all of the available fields. Now find your provider in the FreeSWITCH listing and copy the sample entries using your own credentials to the appropriate fields in the FusionPBX template. SAVE your settings when you’re finished. If you chose username/password authentication with Register=True, then your new gateway’s Status should display as Running with a State of REGED.

If you want to take advantage of free calling in the U.S. and Canada using Google Voice, then you’ll need to interconnect your FusionPBX server with an Incredible PBX GVSIP gateway as described in this Nerd Vittles article. On the FusionPBX side, the first step is to add the IP address of the Incredible PBX GVSIP gateway to the ACL (as described above). Next, assuming you followed the tutorial and created a trunk on the Incredible PBX server named FusionPBX in step #2, here’s what the corresponding Gateway should look like on the FusionPBX side:

Gateway: GVSIP-Host
Username: FusionPBX
Password: same as on GVSIP-Host
From User: FusionPBX
From Domain: FusionPBX
Realm: IP address of GVSIP-Host
Expire Seconds: 90
Register: True
Retry Seconds: 30
Auth Username (in Advanced): FusionPBX
Domain: default setting
Context: Public
Profile: external
Description: GVSIP-Host

Be advised that you still need to WhiteList the IP addresses of the two servers on the corresponding sites using IPtables. And you need to whitelist the public IP addresses even if you choose to register the trunk using private VPN addresses. The reason is because FreeSwitch uses the public IP addresses internally, and the registration will fail without the whitelist entries.

Creating Inbound Routes in FusionPBX

As with all PBXs, Inbound Routes define how incoming calls from Trunks/Gateways are routed to destinations on your PBX. Creating inbound routes in FusionPBX (Dialplan -> Inbound Routes) is much the same as the process with FreePBX except the search Conditions are considerably broader than merely a DID or CallerID match and may include Time Conditions to accommodate after-hours calling:


As with FreePBX, the Action can be any destination available on your PBX including an extension, voicemail, company directory, or an IVR:


Typically, inbound calls should be routed to the public Context. And, unlike FreePBX where the first matching inbound route wins, with FusionPBX, you can prioritize the routes numerically to assign a certain search Order.


Creating Outbound Routes in FusionPBX

Outbound Routes tell your PBX how to route calls to destinations outside your PBX using Trunks/Gateways available on your PBX. Creating outbound routes in FusionPBX (Dialplan -> Outbound Routes) is equally flexible offering virtually limitless combinations to assist PBX designers in setting up scenarios for processing outbound calls. As with inbound routes, outbound routes can be prioritized by assigning an Order. And each outbound route can include a primary Gateway as well as up to two Alternates for routing the calls.


Unlike FreePBX which used NXXNXXXXXX and similar combinations as Dialplan Expressions, FusionPBX uses more powerful RegEx coding with many predefined options:


Choosing Providers for FusionPBX

Here’s a shameless plug for our Platinum Sponsor, Vitelity, if you’re looking for an incredible deal on a DID with unlimited inbound calling. You’ll find the offer at the end of this article. If dirt-cheap outbound calls are of interest and Google Voice isn’t an option where you’re calling from or to, then you can’t beat Anveo Direct. The AnveoDirect provider setup for FusionPBX isn’t included in the link we posted above, but it couldn’t be simpler.


To make outbound calls with Anveo Direct, you dial a number with the country code preceded by a special 6-character code starting with 0 which you create on the Anveo Direct web site. You also must whitelist the IP address of your PBX as part of the setup on the Anveo side. Once configured, a call to a number in the U.S. would look like this: 04He9x18005551212@sbc.anveo.com. When creating the Outbound Route for 10-digit dialing using the tutorial above, the AnveoDirect setup would define the Dialplan Expression as 10-digit dialing with a Prefix of 04HE9x1 assuming your 6-character secret code was 04He9x. The trailing 1 in the Prefix converts the 10-digit dialed number to 11-digits as required by Anveo’s international dial code requirement. We think you’ll like their pricing:


Using Gmail as SMTP Smarthost with FusionPBX

Be sure to test sending an email to yourself from the command line to be sure Exim is working properly. Here’s how:

echo "test" | mail -s testmessage yourname@yourmailserver.com

If you don’t receive the email, be advised that many providers block downstream SMTP mail servers in which case you may want to use your Gmail account as an SMTP Smarthost with FusionPBX. Here’s how. Begin by reconfiguring Exim: dpkg-reconfigure exim4-config

  • Type Mail Server: Mail sent by smarthost using SMTP
  • System Mail Name: Your server’s FQDN (see /etc/hostname)
  • Allowed Senders: accept defaults
  • Other Destinations: accept default
  • Relay Mail: leave blank
  • Outgoing SmartHost: smtp.gmail.com::587 (note the double colons)
  • Hide local name: no
  • Keep DNS-queries minimal: no
  • Delivery method local mail: Maildir format in home directory
  • Split config into small files: no
  • Root and Postmaster recipient: root

After exim4 restarts, add the following entries to the end of /etc/exim4/passwd.client using your Gmail credentials:

gmail-smtp.l.google.com:YOUR-NAME@gmail.com:PASSWORD
*.google.com:YOUR-NAME@gmail.com:PASSWORD
smtp.gmail.com:YOUR-NAME@gmail.com:PASSWORD

Finally, issue the following commands to update exim4 and implement your changes:

update-exim4.conf
/etc/init.d/exim4 restart

Send yourself another test email to verify that everything is working properly. If the mail still doesn’t make it, be sure your provider (HiFormance, for example) is not also blocking port 587. You’ll need to open a ticket with them if this is the case. You can test whether the port is blocked with the following command:

telnet gmail-smtp-msa.l.google.com 587

Solving NAT and Audio Problems with FusionPBX

If you experience one-way audio, no audio, or calls that won’t disconnect when the called party hangs up, you’ve probably entered NAT Hell. First, make sure that SIP ALG is turned off on your router. If that doesn’t solve it, edit /etc/default/freeswitch from the Linux CLI and remove -nonat. Save the file and then systemctl daemon-reload. Switch to the FusionPBX GUI and navigate to Advanced -> SIP Profiles. Edit BOTH the internal and external profiles. Then modify BOTH the ext_rtp_ip AND ext_sip_ip entries and change them to autonat:XXX.XXX.XXX.XXX replacing XXX.XXX.XXX.XXX with your server’s public IP address. Then SAVE both profiles. Finally, return to the Linux CLI and restart FreeSWITCH: service freeswitch restart.

Congratulations! You now should have a working PBX. We’ll get deeper into the weeds down the road, but today’s tutorial coupled with the HTML FusionPBX Documentation or PDF version should be sufficient to get you started with a functioning PBX. Take some time to explore all of the Applications that are included in FusionPBX. Enjoy!


9/10 EDIT: New additions begin here…

Implementing WebRTC with FusionPBX

The first step in deploying WebRTC is to add SSL security to your server. The easiest way to do this is to take advantage of the free offering from LetsEncrypt. Begin by assigning a fully-qualified domain name (FQDN) to the public IP address of your server. Wait a few minutes for DNS propagation. Then you’re ready to install your LetsEncrypt certificate. Unlike many of the other LetsEncrypt implementations, the FusionPBX folks have made this a walk in the park. While logged into your server as root, issue the following commands:

cd /usr/src/fusionpbx-install.sh
cd debian/resources
./letsencrypt.sh
service freeswitch restart


Once the certificate is installed and you’ve restarted FreeSWITCH, close your browser and then restart it. Go to the FQDN of your server, and the lock should appear signifying that your site is now fully encrypted. Don’t proceed with the WebRTC steps until this is working.

To get a successful WebRTC implementation where you can make and receive phone calls from a browser, you’re going to need to use the Chrome or Firefox browser. We’ve also had success using the latest Safari browser.

For those that despise implementing complex procedures by viewing video tutorials, we offer the following regurgitation of the steps documented by Mark Crane in his ClueCon video below. This isn’t hard, but it is tedious so don’t skip any steps.


While you’re still logged into your server as root, let’s put the FusionPBX WebRTC client in place so you’ll have that option as one of several WebRTC clients to use down the road. The advantage of the FusionPBX WeRTC client is that it can handle your login automatically.

cd /usr/src
git clone https://github.com/fusionpbx/fusionpbx-apps
cd fusionpbx-apps
cp -R sipjs/ /var/www/fusionpbx/app/
chown -R www-data:www-data /var/www/fusionpbx/

Now let’s switch back to your browser and login to FusionPBX using your superadmin credentials. A word of caution… To get WebRTC working, your default Domain must be the FQDN of your server, not an IP address. Once you add this domain, you must switch to it and enter new extensions, trunks, and routes to that domain before proceeding. Begin by adding the domain: Advanced -> Domains -> Add (+). Switch to the domain in the upper right column that’s showing your current domain by clicking on it. It doubles as the Domain Selector.

First, let’s tell FreeSwitch to use your secure SSL setup. Navigate to Advanced -> Variables. Go to the SIP Profile: Internal section and change the false setting of internal_ssl_enable to true. Click SAVE. Go to the SIP Profile: External section and change the false setting of external_ssl_enable to true. Click SAVE. Navigate to Status -> SIP Status and click FLUSH CACHE. Switch back to your SSH session as root and restart FreeSWITCH: service freeswitch restart. Back in your browser, return to Status -> SIP Status, click REFRESH, and verify that both the Internal and External interfaces show TLS enabled.

Navigate to Advanced -> SIP Profiles -> Internal and set wss-binding to true. Switch back to your SSH session as root and restart FreeSWITCH: service freeswitch restart. Back in your browser, return to Status -> SIP Status, click FLUSH CACHE and then REFRESH. You now should see an internal entry for Secure Web Sockets (WSS) in your internal SIP Profile. Finally, to do video with WebRTC, navigate to Advanced -> Variables and add H264 to the list of supported codecs in both outbound_codec_prefs and global_codec_prefs: ULAW, ALAW, H264. Click SAVE. Navigate to Status -> SIP Status and click FLUSH CACHE then RESCAN the internal profile. Clicking on sofia status profile internal will let you verify that the H264 codec has been added successfully. That completes the required pieces to support WebRTC with FusionPBX.

To use the FusionPBX WebRTC client that we installed earlier, we first need to update the FusionPBX menus in the browser: Advanced -> Upgrade -> Menu Defaults and EXECUTE.

Now create an extension to use with WebRTC: Accounts -> Extensions -> Add (+). Once you’ve created the new Extension, drop down to the fourth item (Users) and click on the pull-down menu. Choose the Admin user and click the ADD button followed by SAVE. Next, log out and back into FusionPBX to associate the extension with your user account.

We’re now ready to try out the FusionPBX WebRTC client. Navigate to Apps -> SIPjs which will activate the WebRTC client with your extension credentials. In a separate window, you can verify that SIPjs is registered to your extension by navigating to Status -> Registrations. Verify that you can make a call by dialing *9664 for some nice Hold Music.

Adding Free IBM Voice Prompts to FusionPBX

NOV. 1 UPDATE: IBM has moved the goal posts effective December 1, 2018:

One of the first things you’ll need with your new FusionPBX server is voice prompts for IVRs and custom applications. We’ve now added a tutorial which will walk you through setting up a platform to obtain free IBM voice prompts for your server. Here’s the link.

Blocking SIP Access by IP Address

If you’ve implemented SSL security with an FQDN as recommended above, then you’ll reduce the hammering your server takes from the bad guys by blocking those that attempt SIP registrations or calls using the IP address of your server. This, of course, means that all of your SIP registrations must be made using the FQDN of your server, not by IP address. For providers, you MUST whitelist their IP addresses in the ignoreip field of /etc/fail2ban/jail.conf and restart Fail2Ban, or they will be blocked when they attempt to send data by IP address. We’ve included a script in /root which will tell you which IP addresses currently are blocked: sip-attackers-blocked.

cd /
wget http://incrediblepbx.com/freeswitch/block-sip-by-ip.tar.gz
tar zxvf block-sip-by-ip.tar.gz
rm -f block-sip-by-ip.tar.gz
service fail2ban restart

Adding Free News/Weather TTS Apps

We’ve rolled out the first three Incredible PBX text-to-speech applications for FusionPBX: Yahoo News Headlines, Weather Reports by ZIP Code, and Worldwide Weather Forecasts. This new Nerd Vittles tutorial will walk you through the simple installation steps.

Originally published: Monday, September 3, 2018  Updated: Monday, September 24, 2018


Support Issues. With any application as sophisticated as this one, you’re bound to have questions. Blog comments are a terrible place to handle support issues although we welcome general comments about our articles and software. If you have particular support issues, we encourage you to get actively involved in the PBX in a Flash Forums. It’s the best tech support site in the business, and it’s all free! Please have a look and post your support questions there. Unlike some forums, ours is extremely friendly and is supported by literally hundreds of gurus and thousands of users just like you. You won’t have to wait long for an answer to your question.


Need help with Asterisk? Visit the PBX in a Flash Forum.


Special Thanks to Our Generous Sponsors


FULL DISCLOSURE: ClearlyIP, Skyetel, Vitelity, DigitalOcean, Vultr, VoIP.ms, 3CX, Sangoma, TelecomsXchange and VitalPBX have provided financial support to Nerd Vittles and our open source projects through advertising, referral revenue, and/or merchandise. As an Amazon Associate and Best Buy Affiliate, we also earn from qualifying purchases. We’ve chosen these providers not the other way around. Our decisions are based upon their corporate reputation and the quality of their offerings and pricing. Our recommendations regarding technology are reached without regard to financial compensation except in situations in which comparable products at comparable pricing are available from multiple sources. In this limited case, we support our sponsors because our sponsors support us.

BOGO Bonaza: Enjoy state-of-the-art VoIP service with a $10 credit and half-price SIP service on up to $500 of Skyetel trunking with free number porting when you fund your Skyetel account. No limits on number of simultaneous calls. Quadruple data center redundancy. $25 monthly minimum spend required. Tutorial and sign up details are here.

The lynchpin of Incredible PBX 2020 and beyond is ClearlyIP components which bring management of FreePBX modules and SIP phone integration to a level never before available with any other Asterisk distribution. And now you can configure and reconfigure your new Incredible PBX phones from the convenience of the Incredible PBX GUI.

VitalPBX is perhaps the fastest-growing PBX offering based upon Asterisk with an installed presence in more than 100 countries worldwide. VitalPBX has generously provided a customized White Label version of Incredible PBX tailored for use with all Incredible PBX and VitalPBX custom applications. Follow this link for a free test drive!
 

Special Thanks to Vitelity. Vitelity is now Voyant Communications and has halted new registrations for the time being. Our special thanks to Vitelity for their unwavering financial support over many years and to the many Nerd Vittles readers who continue to enjoy the benefits of their service offerings. We will keep everyone posted on further developments.


Some Recent Nerd Vittles Articles of Interest…

VoIP 101: Developing a Cost-Effective SIP Strategy

In the lead up to the demise of Google Voice XMPP service next week, we wanted to offer what we have found to be a cost-effective SIP strategy which takes advantage of the best of all worlds. We would divide SIP offerings into five broad categories: business-class unlimited SIP trunks, Old Faithful SIP providers, Mom-and-Pop SIP services, dirt-cheap termination services, and Gee Whiz SIP providers. As we have said many times, the beauty of setting up an Asterisk® PBX such as Incredible PBX® is you don’t have to put all your VoIP eggs in one basket. In our particular case, that has included a mix of Google Voice trunks plus all five of the SIP categories above. Today we want to document why we’ve personally made the selections we’ve made and hope that it provides a roadmap for your own VoIP setup while encouraging you to venture out of your safe zone and try some new VoIP options.

The all-you-can-eat business plans, which we previously have covered, make little sense for most home and small business users. Then there are the rock-solid, long term pay-as-you-go providers such as Vitelity and CallCentric that make perfect sense as your primary DID and SIP provider. While they may not always be the cheapest VoIP providers, the tradeoff is dependability and long-term reliability for your VoIP platform. In the case of Vitelity, it turns out the Nerd Vittles DID special (detailed below) from our Platinum Sponsor is perhaps one of the best VoIP deals on the planet.

The third category of SIP providers and our personal favorite is what we would call the mom-and-pop providers. These are typically one or two-person operations that offer incredible deals on all-you-can-eat VoIP plans for home users. Included in this category are Vestalink (available to existing customers only), Future-Nine and CircleNet. VestaLink originally began as OBiVoice and morphed over trademark issues. While the service is no longer available to new customers, it remains the best bargain at $72 for two years of unlimited inbound and outbound residential calling services. A close second goes to Future-Nine and their "Future 5 Grey" plan which provides 1,500 inbound and 1,500 outbound minutes a month for only $5. You can sign up here. Be sure to read the Terms of Services carefully, especially item #18. The New Kid on the Block is CircleNet. In addition to very attractive pay-by-the-minute offerings of $.005 per minute to most of the U.S. and Canada, they also have an $8 a month all-you-can-eat plan for residential customers that includes a very reasonable 5,000 minutes a month for calls to the following countries: United States, Canada, Australia, Bangladesh, Belgium, Brazil, Chile, Cyprus, Denmark, Finland, France, Germany, Greece , Guam, Hungary, India,Ireland, Italy, Japan, Latvia, Mexico, Netherlands, New Zealand, Norway, Poland, Puerto Rico, Singapore, Spain, Sweden, Taiwan, Thailand, United Kingdom, and Vatican City. Just let them know that you plan to use it with an Asterisk-based PBX. CircleNet also is offering Nerd Vittles readers a free month of the $8/month service to kick the tires. Simply send an email to sales@circlenet.us with your valid email address to take advantage of the offer. One free trial per customer/email address. CircleNet also offers a $15 a month business plan with even more minutes.

A fourth class of VoIP providers is the dirt-cheap termination services including Anveo Direct, TelecomsXchange, V1VoIP and the Betamax companies for low-cost international calling. These providers make terrific additions for supplementing your other VoIP services. TelecomsXchange is our personal favorite because of the special deal they have extended to Incredible PBX users. You get access to 300 VoIP wholesalers and can read about their services in this Nerd Vittles article. V1VoIP also has some terrific deals with 15¢/mo. DIDs from 13,000 Rate Centers and incoming and outgoing U.S. call pricing as low as $.003 per minute (not a typo!). Anveo Direct was perhaps the first provider to offer wholesale pricing to consumers, and they remain a terrific service both for DID and origination services with T.38 fax support as well as many of the lowest cost SIP terminations worldwide featuring user-configurable least-cost routing. Check out their pricing and rates here.

Finally, there are the SIP providers such as VoIP.ms that offer a rich collection of special features that you won’t find in many places and certainly not under the same roof. These features include SMS messaging, SIP URI proxying and iNUM for free worldwide calling, and fax support. Every one of these features is free when you sign up for an account at VoIP.ms. We encourage you to take advantage of these little known free services to enhance your PBX.

Putting It All Together. Now that we’ve covered the options, let’s go over how we would actually implement this. For the inbound trunk and primary DID, we’d recommend a SIP trunk from either Vitelity, VoIP.ms, or CallCentric. If you have multiple, simultaneous inbound calls, then the Nerd Vittles Vitelity special below can’t be beat because it provides four call paths. In addition, you get SMS support on the same trunk. Many people now assume your primary number supports SMS. We actually get dozens of unsolicited SMS messages on our home number from schools, churches, and political groups. If incoming call volume isn’t an issue, then VoIP.ms and CallCentric also offer a free iNUM number for your account. And VoIP.ms throws in a SIP URI as well.

For outbound calling for home and SOHO deployments, we recommend at least one of the mom-and-pop, all-you-can-eat providers: Future-Nine or CircleNet. If international calling is a requirement, you can’t beat the CircleNet offering. In addition to using your primary incoming provider, we also recommend you set up SIP accounts with a couple of the dirt-cheap termination providers. These don’t cost you anything other than a modest deposit unless you actually use them to place calls. And, when your primary outbound service has an outage, your PBX will never miss a beat.

The icing on the cake always has been several Google Voice trunks which work well for IVRs, Stealth AutoAttendants with DISA support, and faxing. While this may change with the demise of XMPP support, it appears that Bill Simon’s SIP Gateway to Google Voice will live on. With the Nerd Vittles sign-up link, you can migrate your existing Google Voice XMPP connections to the Simonics gateway for $4.99 each should the need arise. Enjoy!

Originally published: Monday, June 11, 2018


CircleNet SIP Setup for FreePBX/IncrediblePBX/VitalPBX/Issabel:

username=acct-id
type=friend
trustrpid=yes
sendrpid=yes
secret=acct-pword
qualify=yes
nat=yes
insecure=port,invite
host=sip.circlenet.biz
fromuser=acct-id
context=from-trunk
disallow=all
allow=ulaw

Registration String: acct-id:acct-pword@sip.circlenet.biz:5060/did-num

Future-Nine SIP Setup for FreePBX/IncrediblePBX/VitalPBX/Issabel:

username=acct-num
type=friend
trustrpid=yes
sendrpid=yes
secret=acct-pword
qualify=yes
nat=yes
insecure=port,invite
host=incoming.future-nine.com
fromuser=acct-num
context=from-trunk
canreinvite=no
disallow=all
allow=ulaw

Registration String: acct-num:acct-pword@incoming.future-nine.com/acct-num


Need help with Asterisk? Visit the PIAF Forum.


Special Thanks to Our Generous Sponsors


FULL DISCLOSURE: ClearlyIP, Skyetel, Vitelity, DigitalOcean, Vultr, VoIP.ms, 3CX, Sangoma, TelecomsXchange and VitalPBX have provided financial support to Nerd Vittles and our open source projects through advertising, referral revenue, and/or merchandise. As an Amazon Associate and Best Buy Affiliate, we also earn from qualifying purchases. We’ve chosen these providers not the other way around. Our decisions are based upon their corporate reputation and the quality of their offerings and pricing. Our recommendations regarding technology are reached without regard to financial compensation except in situations in which comparable products at comparable pricing are available from multiple sources. In this limited case, we support our sponsors because our sponsors support us.

BOGO Bonaza: Enjoy state-of-the-art VoIP service with a $10 credit and half-price SIP service on up to $500 of Skyetel trunking with free number porting when you fund your Skyetel account. No limits on number of simultaneous calls. Quadruple data center redundancy. $25 monthly minimum spend required. Tutorial and sign up details are here.

The lynchpin of Incredible PBX 2020 and beyond is ClearlyIP components which bring management of FreePBX modules and SIP phone integration to a level never before available with any other Asterisk distribution. And now you can configure and reconfigure your new Incredible PBX phones from the convenience of the Incredible PBX GUI.

VitalPBX is perhaps the fastest-growing PBX offering based upon Asterisk with an installed presence in more than 100 countries worldwide. VitalPBX has generously provided a customized White Label version of Incredible PBX tailored for use with all Incredible PBX and VitalPBX custom applications. Follow this link for a free test drive!
 

Special Thanks to Vitelity. Vitelity is now Voyant Communications and has halted new registrations for the time being. Our special thanks to Vitelity for their unwavering financial support over many years and to the many Nerd Vittles readers who continue to enjoy the benefits of their service offerings. We will keep everyone posted on further developments.


Some Recent Nerd Vittles Articles of Interest…

300 New Wholesale Providers Make Asterisk Shine


For many years, we’ve offered Vitelity’s $3.99 Unlimited DID special with a DID, 4 channels, unlimited inbound calling, and free text messaging. It’s a deal no VoIP user should pass up. And today we have another revolutionary development for Asterisk® deployments. Once in a while we feature a carrier with great calling rates. Today we’re introducing a service providing access to 300+ wholesale carriers, all under one roof. Almost 30 BILLION billed minutes already have been logged through TCXC so you’re in good hands!1 You can choose from any or all of their 300 wholesale VoIP carriers worldwide to make outbound calls at the same wholesale rates offered to the very largest resellers. Simply pay a 13% surcharge in lieu of the $650 annual fee, and TelecomsXchange (TCXC) will provide you access to their entire suite of wholesale carriers together with state-of-the-art tools to manage all of the services.2 You’ll never have to haggle with individual carriers or provide funds on a piecemeal basis to use any of the services. TCXC already has done the negotiating for you and TCXC handles financial reimbursements to carriers based upon the services you use. There’s more good news. When compared to commercial providers, TCXC’s one-second billing increment on most routes will recoup a healthy portion of the 13% wholesale surcharge. Here are a few sample per minute wholesale rates (all with one-second billing) to whet your appetite:

  • $.0000 – U.S. TollFree
  • $.0009 – U.S.
  • $.0010 – Cyprus
  • $.0011 – Canada
  • $.0019 – Germany
  • $.0021 – U.K. (London)
  • $.0042 – China

What does a penny buy? 11-minute call to U.S., 10-minute call to Cyprus, 9-minute call to Canada, 5-minute call to Germany, 5 minute call to England, or 2½-minute call to China.

 
If you’re new to wholesale terminations, be advised that carriers change their rates regularly and, from time to time, every carrier experiences outages. Not to worry. For a modest additional charge, TelecomsXchange will manage rates and provide automatic failover for carrier outages. Simply choose TelecomsXchange as your preferred provider to the outbound destinations desired.

Before we get into the nuts and bolts of configuring Asterisk to use TCXC carriers for wholesale call terminations, let’s spend a minute discussing the architecture of the FreePBX® trunk and outbound routes model. In this design which you will find in most Incredible PBX® implementations including Issabel 4, Incredible PBX for CentOS and Ubuntu, and Incredible PBX for the Raspberry Pi as well as in other Asterisk distributions including AsteriskNOW® and the FreePBX Distro®, the administrator specifies Trunks for each provider and then assigns Outbound Routes for calls using those providers. When calls are placed, FreePBX chooses an Outbound Route based upon the dial string match specified in the route. If you have a dozen outbound routes, dialed numbers are analyzed against dial strings specified in each Outbound Route, and the routes are examined from the top to the bottom of the list. Once FreePBX chooses an Outbound Route to process a call, that ends the Outbound Route selection process. No other Outbound Route is ever considered whether it has a matching dial string or not. And it doesn’t matter whether the call fails or not, no other Outbound Route is attempted. The good news is that, within every Outbound Route, you can specify multiple Trunks which will be used in the order you’ve chosen to complete the call. If the ninth trunk happens to be the first trunk that doesn’t experience congestion, then the call will be routed to carrier #9. Keep in mind that calls to the previous eight carriers have to be attempted before we ever get to carrier #9. For this reason, it is important to create a Trunk for every carrier and specify multiple Trunks in every Outbound Route to avoid failed calls. Or, as noted above, you can specify TelecomsXchange as your final Trunk in every Outbound Route and leave it to TCXC to identify a working carrier to complete your call. In this way, you never have to worry about failed calls even though some may cost a little more depending upon carrier outages. So that’s how VoIP terminations work. You’re now an expert!

Getting Started with TelecomsXchange

The first step in your wholesale VoIP adventure is to sign up for an account with TelecomsXchange. Unless you’re chomping at the bit to pay the $650 annual fee, use our referral link. Your PBX will need a public IP address but, if it happens to be a dynamic IP address assigned by your provider, don’t worry. It’s easy to change it down the road, and we’ll show you how. Obviously, a cloud-based PBX makes this easier since you get a dedicated IP address, and this Nerd Vittles article provides several options.

Once you receive your credentials, simply login to the TelecomsXchange web site. Just a few words about how the site is organized. Dashboard is where you’ll land when you login. Accounts let you specify more than one account to be associated with your credentials. If you manage multiple PBXs, this is where you set things up. Each account must have a unique IP address. This is also where you can change the IP address associated with your primary account if the need ever arises. My Interconnections displays each of your accounts and all of the carriers you’ve chosen to associate with each account. Market View is where you search for prices and choose carriers to associate with your account(s). We’ll cover this one in more detail a little later. Payment History tracks all of your payments to TelecomsXchange by date. Call Statistics lets you download CDR and Stats data by the day, week, or month. CDR gives you an instant snapshot of your calling history and the price of the calls based upon criteria you specify. It’s very similar to the same feature in the Incredible PBX or FreePBX GUI. Preferences let you change settings for your account.

The item you’ll need to use first is the plus sign (+) at the top of the form. This is how you fund your account. As noted previously, there is a 13% wholesale surcharge and this will be deducted from whatever amount you choose to add to your account. For example, if you add $100 using PayPal, the PayPal fee plus 13% will be deducted from the $100. So your account would show an available balance of approximately $84. Cash or bank wires also are accepted.

Finally, here’s a link to the TelecomsXchange Knowledge Base and Help Center. There’s lot of helpful information there to get you started.

Choosing a Carrier with TelecomsXchange

Let’s walk through the procedure to add new carriers to your account. This is the first thing you’ll want to do after you get your credentials and fund your account. Begin by making yourself a list of the countries or dialing prefixes you’d like to call using TCXC wholesale carriers. The easiest way to perform searches and find carriers is to decipher the dialing prefix for the calls you wish to make. For example, to call London, the Prefix would be the U.K. country code (44) plus the London city code (20).

Now open the Market View tab to get started. Here’s how we’d fill in the form to find London carriers and to order the first hundred matches from least costly to most expensive: Prefix (4420), Results (100), Order By (PRICE), and Route Type (CLI) which means you can specify your own CallerID for the outgoing calls. Click Search to proceed. The results look like this:

To add a carrier to your account, simply click on the plus sign (+) on the right side of the Action column beside the carrier of your choice. You then can choose whether to add it to all of your accounts, or you specify the account to which the carrier should be added. If you want to review the carrier’s history and ratings with TCXC, click on the Information icon in the Action column beside the carrier of your choice.

For NANPA call destinations, specify 1 plus the area code in the Prefix field. You can add the first 3 digits of the exchange to drill down further. Be advised that adding the 3-digit exchange may eliminate a number of carriers that only specify rates for an entire area code. For example, if a carrier specifies an area code rate for 1212 and no exchange limitations, then searching for 1212652 would not return that carrier.

If you already know which carriers you’d like to add, just search for them by specifying the carrier name in the Seller field and leaving the Prefix field blank. To get started, here are a few favorites for U.S./Int’l routes: IDT, LEXICO, TATA, VOXBEAM, and TELECOMSXCHANGE.

Placing Carrier-Specific Calls with TelecomsXchange

To set up the FreePBX Trunks and Outbound Routes, you first need to understand how calls are placed through TelecomsXchange carriers. In lieu of traditional trunk registrations on your PBX, TelecomsXchange uses the IP address that you registered for your account to determine whether SIP calls arriving at TCXC for routing to a carrier are authorized. Thus, it’s important that you keep your IP addresses updated whenever they change. Assuming your call passes the IP address check, the next hurdle is for TCXC to decipher which carrier should be used to route the call to its destination. This is handled by dialing prefixes which are unique to each TCXC carrier. For example, TATA has a dialing prefix of 32270#. To dial a U.S. call using the TATA carrier, the dial string would look like this: 32270#16785551212. A carrier must be assigned to your account before you can place calls from your PBX using that carrier’s dialing prefix. So there are two layers of protection on the TCXC side to prevent fraudulent calls. There must be both an IP address match and a carrier prefix match on your account before a call will be forwarded to a carrier.

Before we begin setting up your Trunks and Outbound Routes for Incredible PBX or one of the other Asterisk platforms, write down the names of each of the carriers you have chosen as well as their Dialing Prefixes. You’ll need them in the next steps. You can decipher carrier’s dialing prefixes assigned to your account under the My Interconnections tab in your TCXC Dashboard.

Setting Up TCXC Carrier Trunks in FreePBX

To begin, make certain that chan_SIP is assigned to UDP 5060 on your PBX. Particularly for trunks, there were just too many issues with PJsip in some releases of Asterisk so steer clear. With every TCXC carrier, the good news is the chan_SIP Trunk setup is virtually identical except for the carrier name and the carrier’s dialing prefix. For each carrier, start by adding a new chan_SIP Trunk in the Incredible PBX or FreePBX GUI. In the General tab, insert the carrier name in the Trunk Name field, e.g. TCXC. Leave the other default settings as they are.

Switch to the Dialed Number Manipulation Rules tab. Leave the Dialing Rules empty and insert the carrier’s dialing prefix in the Outbound Dial Prefix field, e.g. 77379#.

Switch to the SIP Settings tab. In the Outgoing tab, insert the carrier name in the Trunk Name field. Insert the following in the PEER Details field:

type=peer
qualify=yes
progressinband=never
port=5060
nat=yes
insecure=port,invite
ignoresdpversion=yes
host=sip01.telecomsxchange.com
dtmfmode=rfc2833
disallow=all
context=from-trunk
allow=ulaw&alaw

 
While still in SIP Settings, switch to the Incoming tab, and clear out the default User Detail entries. Now click the Submit button and reload your dialplan when prompted.

Repeat this procedure for each of the carriers you set up in your TCXC profile.

Setting Up Outbound Routes for TCXC Calls

Our preferred Outbound Route setup for TCXC carriers is to create a new Outbound Route for each destination (typically a country) to which you wish to enable calling. Be advised that setting up a dialing prefix of just the number 1 authorizes considerably more calls than just those to destinations in the United States. For foreign countries, if all of your calls to the U.K are to destinations in London, then don’t authorize country-wide calling. Narrow it down to the country code and city code for London. Remember, it’s your phone bill.

For international calls, we prefer that callers enter a dialing prefix that specifies that it’s a long distance call plus a two-digit prefix representing the country abbreviation, not the dial code of the country. For example, for the U.K., we use 085 where 0 specifies long distance call and 85 is the phone representation for UK. We’ll then use the Outbound Route to strip off the caller’s dialed prefix and to insert the proper country code to complete the call.

Within each Outbound Route, we recommend you specify one or more low-cost carriers and a final TCXC carrier to catch calls that fail to all of your designated carriers. Otherwise, the caller will get a failed call. And you will get the next call. 🙂

So here’s what our Outbound Route setup for London, England looks like. You only need entries in the Route Settings and Dial Patterns tabs. Be sure to put your desired CallerID in the Route CID field and set the Override Extension option to YES. Then add your preferred Trunks in the order in which you want the calls attempted:

In the Dial Patterns tab, we specify a Prefix of 4420 to tell Asterisk to add a dialing prefix to the call to get it to London. Then we enter 085 in the Prefix field to tell Asterisk to strip off those digits entered by the caller before sending the call to the designated Trunk for processing. The Match Pattern is 8 X’s which represents an 8-digit London telephone number. To get a match on this Outbound Route, Asterisk will be searching for a dial string that looks like this: 085 + XXXXXXXX

Here’s an example of the Asterisk call flow using IDT as the primary trunk with this Outbound Route.

Caller Dials: 085-7499-0888
Outbound Route finds match on 085 Prefix + 8 X's and discards Prefix
Outbound Route sends 4420 (for London) + 74990888 to Trunk #1 (IDT)
IDT Trunk adds IDT Dialing Prefix 10729# before sending call to TCXC
TCXC receives: 10729#442074990888
TCXC strips IDT dialing prefix and sends call to IDT: 4420 + 74990888
IDT connects caller to Four Seasons Hotel in London

Adjustment with NAT-Based Implementations

Keep in mind that TCXC was designed primarily for commercial resellers, not for PBX-level implementations. If your PBX is sitting in the cloud or is directly connected to the Internet rather than sitting behind a NAT-based router, then you’re good to go now. If, on the other hand, your PBX is sitting on a private LAN behind a NAT-based router, make certain that your router forwards all UDP 5060 traffic to the private LAN address of your PBX. Otherwise, you may experience disconnect anomalies where the called party hangs up a call before your callers since there will be no call path for TCXC to return the disconnect alert (BYE) when the call is completed. For Incredible PBX servers, this isn’t really a problem because Incredible PBX will disconnect the call automatically after detecting 30 seconds of RTP traffic inactivity anyway. But we wanted to make you aware of the potential issue. The good news is you won’t be billed for the extra connection time since TCXC already has dropped the call with the carrier and turned off the billing meter.

Adding Trunk Information to Incredible PBX

Some may wish to include Trunk information in the CDR listings of Incredible PBX or FreePBX. This makes it much easier to spot problems when calls aren’t routed to the Trunk destinations you expect. It also makes it easy to generate trunk-specific reports within the GUI. In the FreePBX 12 and 13 implementations, the trunk information can be added painlessly by revising the [macro-dialout-trunk] context. However, you cannot make these changes directly in /etc/asterisk/extensions_additional.conf because your modifications will be overwritten the next time your dialplan is reloaded. Instead, the modified context must be added to extensions_override_freepbx.conf. Here’s how:

cd /tmp
wget http://incrediblepbx.com/cdr-trunk-info.tar.gz
tar zxvf cdr-trunk-info.tar.gz
rm -f cdr-trunk-info.tar.gz
cat cdr-trunk-info.txt >> /etc/asterisk/extensions_override_freepbx.conf
asterisk -rx "dialplan reload"

 
The modified CDR listing will look something like this:

We also developed a handy utility to make it easy to list out all of your trunks and their status. Here’s how:

cd /root
wget http://incrediblepbx.com/list-trunks.tar.gz
tar zxvf list-trunks.tar.gz
rm -f list-trunks.tar.gz
./list-trunks

 
The listing will look something like this:

Rate Queries Using the TCXC API

For those that want to query the TCXC rate tables locally, we’ve modified a TCXC sample JSON script slightly so that you can use Chrome (with JSONView) or FireFox (with JSON Lite viewer) to view JSON results. Using one of these browsers with the specified add-on, JSON results will be formatted automatically. The query results identity current providers and rates by entering a dialing prefix. The syntax for the web queries looks like the following where 192.168.0.224 is your server’s IP address and 357 is the dialing prefix rate table desired:


http://192.168.0.224/rates.php?prefix=357

 
The first 30 matching results will look something like this:


To use this script, you’ll need to insert your account name and API key (found in your TCXC Profile) into rates.php before first use. To install the script in the root folder of Apache, issue the following commands:


cd /var/www/html
wget http://incrediblepbx.com/TCXC-rates.tar.gz
tar zxvf TCXC-rates.tar.gz
rm -f TCXC-rates.tar.gz


Published: Monday, February 12, 2018


NEW YEAR’S TREAT: If you could use one or more free DIDs in the U.S. with unlimited inbound calls and unlimited simultaneous channels, then today’s your lucky day. TelecomsXChange and Bluebird Communications have a few hundred thousand DIDs to give away so you better hurry. You have your choice of DID locations including New York, New Jersey, California, Texas, and Iowa. The DIDs support Voice, Fax, Video, and even Text Messaging (by request). The only requirement at your end is a dedicated IP address for your VoIP server. Once you receive your welcome email with your number, be sure to whitelist the provider’s IP address in your firewall. For Incredible PBX servers, use add-ip to whitelist the UDP SIP port, 5060, using the IP address provided in your welcoming email.

Here’s the link to order your DIDs.

Your DID Trunk Setup in your favorite GUI should look like this:

Trunk Name: IPC
Peer Details:
type=friend
qualify=yes
host={IP address provided in welcome email}
context=from-trunk

Your Inbound Route should specify the 10-digit DID. Enjoy!


Need help with Asterisk? Visit the PBX in a Flash Forum.


Special Thanks to Our Generous Sponsors


FULL DISCLOSURE: ClearlyIP, Skyetel, Vitelity, DigitalOcean, Vultr, VoIP.ms, 3CX, Sangoma, TelecomsXchange and VitalPBX have provided financial support to Nerd Vittles and our open source projects through advertising, referral revenue, and/or merchandise. As an Amazon Associate and Best Buy Affiliate, we also earn from qualifying purchases. We’ve chosen these providers not the other way around. Our decisions are based upon their corporate reputation and the quality of their offerings and pricing. Our recommendations regarding technology are reached without regard to financial compensation except in situations in which comparable products at comparable pricing are available from multiple sources. In this limited case, we support our sponsors because our sponsors support us.

BOGO Bonaza: Enjoy state-of-the-art VoIP service with a $10 credit and half-price SIP service on up to $500 of Skyetel trunking with free number porting when you fund your Skyetel account. No limits on number of simultaneous calls. Quadruple data center redundancy. $25 monthly minimum spend required. Tutorial and sign up details are here.

The lynchpin of Incredible PBX 2020 and beyond is ClearlyIP components which bring management of FreePBX modules and SIP phone integration to a level never before available with any other Asterisk distribution. And now you can configure and reconfigure your new Incredible PBX phones from the convenience of the Incredible PBX GUI.

VitalPBX is perhaps the fastest-growing PBX offering based upon Asterisk with an installed presence in more than 100 countries worldwide. VitalPBX has generously provided a customized White Label version of Incredible PBX tailored for use with all Incredible PBX and VitalPBX custom applications. Follow this link for a free test drive!
 

Special Thanks to Vitelity. Vitelity is now Voyant Communications and has halted new registrations for the time being. Our special thanks to Vitelity for their unwavering financial support over many years and to the many Nerd Vittles readers who continue to enjoy the benefits of their service offerings. We will keep everyone posted on further developments.


Some Recent Nerd Vittles Articles of Interest…

  1. We obviously have not verified TCXC’s billed minutes counter. Don’t rely upon it in deciding whether to use the service. As with all VoIP providers, what matters is the quality and cost of the calls. []
  2. Our special thanks to TelecomsXchange. They have generously offered to contribute a portion of the wholesale surcharge to support the Incredible PBX open source project. []

Revolutionary VoIP: The Best (free) PBX Ever from 3CX

There are evolutions, and then there are revolutions. Today is another revolutionary day for free VoIP. The new 3CX v15.5 Update 3 is revolutionary on so many levels: price, feature set, flexibility, stability, and security for openers. For Nerd Vittles readers that want a free PBX for your home or business, here’s the latest and greatest. You get the 3CX Standard License features listed here with up to 16 simultaneous calls for one year. That setup easily supports about 50 extensions. At the expiration of the year, you can purchase the standard annual license OR your free license will automatically convert to a 4-simultaneous-call perpetual license with unlimited trunks for the duration of the installation, including DNS, email, SSL certs, webmeeting, etc. Nothing else to buy ever!1 This perpetual license includes unlimited SIP trunks and gateways, 25-participant conferencing, G.722 and G.729 support with HD Voice, custom FQDNs, BLF support, Call Parking, Call Queueing, Call Pickup, Call Recordings and Management, Call Reporting, Intercom/Paging, Integrated Fax Server and Office 365 Address Book/Microsoft Outlook integration plus all of the 3CX client software. Better hurry. This offer won’t last forever! Here’s the signup link. 2

Unlimited Trunks, 50 Extensions, 16 Simultaneous Calls… Free!

The 3CX development team not only heard but also heeded our suggestion to expand the number of trunks in the free edition by removing the limitation entirely. With small businesses and home users, the number of times you ever will need to make more than 16 simultaneous calls is probably NEVER. Based upon industry standards, this 16-call, 50-extension PBX with unlimited trunks can easily support several dozen people so it’s perfect for home use and small to medium-sized businesses. And, when your business grows, upgrading to a larger PBX is inexpensive and a one-minute key swap.

Cost savings, of course, are only part of the VoIP story. There’s a reason 3CX’s business is growing geometrically while others struggle. 3CX provides an unmatched feature set that’s easy to use and deploy. Version 15.5 Update 3 brings the Linux platform to full parity with 3CX’s previous Windows editions plus all-new 3CX clients for every desktop and mobile device. There’s also an awesome new web client providing users easy access to all key 3CX features without installing any software. Desktop call control including Click2Call now is based on uaCSTA technology. Snom, Yealink, and Granstream phones as well as 3CX clients can be controlled from any desktop client even if your phone system is running in the cloud. And we’ve got a whopper deal for you there as well today.

With 3CX’s powerful client software, your office and your PBX can literally be anywhere. Your desktop is always as close as your smartphone or the nearest WiFi hotspot. That’s what unified communications is all about. And, should you ever need support, 3CX has offices in the U.S., U.K., Germany, Hong Kong, South Africa, Russia and Australia. Review the 3CX feature comparison chart and you can judge the feature set for yourself. Whether you’re a homebody or world traveler, we think you’ll agree that 3CX’s new free edition for Nerd Vittles readers offers everything that a home or SOHO user will ever need in a PBX.

Getting Started with 3CX on Dedicated Hardware or a Virtual Machine. If your platform supports ISO installs, here are the simple steps to get 3CX up and running. Just follow this 3CX tutorial to download the ISO and begin your adventure. Boot your server from the ISO image and walk through the Debian 9 setup process. We recommend 2GB of RAM and a 20GB drive for 3CX. When the install is finished, make note of the IP address to access with a web browser to complete the setup. Enter your 3CX license key when prompted. Set up one or more SIP trunks with inbound and outbound call routes. Once you have the ISO and your license key in hand, the installation procedure takes less than 10 minutes.

Getting Started with 3CX in the Cloud. Begin by setting up a 64-bit Debian 9 platform. Obtain a free Nerd Vittles license key for 3CX. Once your Debian install is finished, log in as root using SSH or Putty and issue these commands. NOTE: What appears as the third line below needs to be added to line #2!

wget -O- http://downloads.3cx.com/downloads/3cxpbx/public.key | apt-key add -
echo "deb http://downloads.3cx.com/downloads/debian stretch main" | tee /etc/apt/sources.list.d/3cxpbx.list
apt-get update
apt-get install libcurl3=7.38.0-4+deb8u5
apt-get install net-tools
apt-get install 3cxpbx

When the initial setup finishes, choose the Web Interface Wizard and complete the install using your favorite web browser. Enter your 3CX license key when prompted. Set up one or more SIP trunks with inbound and outbound call routes. Done.

Beginning with this release, you have your choice of using a Google Cloud-hosted 3CX server at no cost for a year or many other cloud providers of your choice. The problem with the Google Cloud offering is what to do after the first year. Our personal preference is to set up your own cloud server where things stay the same as you move forward from year to year. At this time, 3CX does not support OpenVZ containers. However, Vultr offers a $2.50/month 512MB RAM plan that works just fine. 50 cents more buys you automatic backups that we highly recommend. And OVH offers quadruple the RAM for $4.49/month on a 12-month plan.

Configuring Gmail as SMTP RelayHost for 3CX. 3CX has a detailed tutorial explaining how to set up your Gmail account as the SMTP relay host for 3CX. Be advised that there is one additional step before Google will authorize access from an IP address it doesn’t already have for your GMail account. In addition to Enabling Less Secure Apps (as covered in the 3CX tutorial), you also will need to activate the Google Reset Procedure while logged into your Gmail account. Otherwise, Google will block access. Once you have configured Gmail as your relay host and performed the two enabling steps above, immediately test email delivery within the 3CX GUI while Google security is relaxed: Settings → Email → TEST.

Free Calling in the U.S. and Canada with 3CX. We know our more frugal U.S. residents are wondering if there’s a way to make free calls even with 3CX. You didn’t really think there would be a release of PBX in a Flash without Google Voice support, did you? It’s easy using the Simonics SIP to Google Voice gateway service. Setup time is about a minute, and the one-time cost is $4.99 using this Nerd Vittles link. Setup instructions for the 3CX side are straight-forward as well, and we’ve documented the procedure on the PIAF Forum.

Free Calling Worldwide with SIP URIs. There’s another free calling option as well. 3CX supports worldwide SIP URI calling at no cost. As part of the 3CX install procedure, 3CX registers an FQDN for you with one of the 3CX domains if you indicate that your server has a dynamic IP address. Unless you really know what you’re doing with DNS, it’s a good idea to tell 3CX you have a dynamic IP address whether you do or not. Here’s why. Once you have an assigned FQDN in the 3CX universe, one very slick feature is the ease with which you can publish a SIP URI address for any or all of your 3CX extensions thereby allowing 3CX users to receive calls from any SIP client worldwide at no cost. Setup takes less than a minute. It’s as easy as 1-2-3. Here’s how:

1. Login to the 3CX GUI and go to Settings → Network → FQDN. Tick "Allow calls from/to external SIP URIs" and make note of your FQDN, e.g. mypiaf5server.3cx.us. Click OK.

2. For an extension to enable (e.g. 001), go to Extensions → Edit 001 → Options → SIP ID and create any desired SIP URI alias for this extension, e.g. billybob. Click OK.

3. If your PBX is sitting behind a router/firewall, be sure the following UDP ports are forwarded to the local IP address of your PBX: 5001, 5060, 5090, and 9000-9255.

4. Anyone with a SIP client anywhere worldwide can now call extension 001 using SIP URI: billybob@mypiaf5server.3cx.us.

Originally published: Wednesday, June 7, 2017  Updated: Thursday, February 8, 2018


Need help with 3CX or VoIP? Visit the PBX in a Flash Forum.


Special Thanks to Our Generous Sponsors


FULL DISCLOSURE: ClearlyIP, Skyetel, Vitelity, DigitalOcean, Vultr, VoIP.ms, 3CX, Sangoma, TelecomsXchange and VitalPBX have provided financial support to Nerd Vittles and our open source projects through advertising, referral revenue, and/or merchandise. As an Amazon Associate and Best Buy Affiliate, we also earn from qualifying purchases. We’ve chosen these providers not the other way around. Our decisions are based upon their corporate reputation and the quality of their offerings and pricing. Our recommendations regarding technology are reached without regard to financial compensation except in situations in which comparable products at comparable pricing are available from multiple sources. In this limited case, we support our sponsors because our sponsors support us.

BOGO Bonaza: Enjoy state-of-the-art VoIP service with a $10 credit and half-price SIP service on up to $500 of Skyetel trunking with free number porting when you fund your Skyetel account. No limits on number of simultaneous calls. Quadruple data center redundancy. $25 monthly minimum spend required. Tutorial and sign up details are here.

The lynchpin of Incredible PBX 2020 and beyond is ClearlyIP components which bring management of FreePBX modules and SIP phone integration to a level never before available with any other Asterisk distribution. And now you can configure and reconfigure your new Incredible PBX phones from the convenience of the Incredible PBX GUI.

VitalPBX is perhaps the fastest-growing PBX offering based upon Asterisk with an installed presence in more than 100 countries worldwide. VitalPBX has generously provided a customized White Label version of Incredible PBX tailored for use with all Incredible PBX and VitalPBX custom applications. Follow this link for a free test drive!
 

Special Thanks to Vitelity. Vitelity is now Voyant Communications and has halted new registrations for the time being. Our special thanks to Vitelity for their unwavering financial support over many years and to the many Nerd Vittles readers who continue to enjoy the benefits of their service offerings. We will keep everyone posted on further developments.


Some Recent Nerd Vittles Articles of Interest…

  1. This offering applies to 3CX V15.5 Update 3 released on February 8, 2018. []
  2. Don’t confuse 3CX’s free PBX with Sangoma’s FreePBX® GUI. The former is a truly free PBX provided by a well-respected developer of commercial PBXs and used by many of the world’s largest companies including Boeing, McDonalds, Hugo Boss, Ramada Plaza Antwerp, Harley Davidson, Wilson Sporting Goods, and Pepsi. The latter is a code generator for Asterisk® that commingles free components with commercial NagWare, each of which requires payment of separate licensing and maintenance fees before and during subsequent use. []

It’s Soup: The Definitive Quick Start Guide to Wazo 17.17

Today we’re pleased to introduce Wazo 17.17, the latest iteration in the Wazo fork of XiVO. Twelve years in the making with the same development team, Wazo 17.17 is really something special. It’s the latest release featuring Asterisk® 15 with multi-party videoconferencing and also includes a new easy-to-use WebRTC feature and support for Asterisk FollowMe Roaming. We are pleased to announce that this release of Wazo 17.17 using the latest Incredible PBX 15 installer for Asterisk 15 now supports native Google Voice trunks with OAuth 2. Of course, all of your favorite Incredible PBX add-ons are ready as well. What follows is a new soup-to-nuts tutorial covering everything you need to know to get started with Incredible PBX for Wazo 17.17.

Wazo 17.17 enhances the brand new user interface to complement Wazo’s existing GUI. Revolutionary is probably the best way to describe its design. The reason is that it is generated using pure API calls to the Wazo engine. What that means to the administrator is you can tweak it, enhance it, replace it, or build additional functionality into your UI using the same API calls that the Wazo developers employed to build these components. This is obviously the first of many iterations that will be released in coming months, but it gives you an opportunity to kick the tires. Once you complete the installation process which follows, simply use a browser to log into the IP address of your server at the following link: https://serverIP/admin/. To begin, login with your root GUI credentials and click Plugins to display available options (pictured above). Then install each of the following plugins to begin: Users, Extensions, Contexts, and Devices. The remaining plugins are optional; however, the following plugins are not yet operational: Outcalls and Trunks. The Parking Lots and Switchboard plugins are functional but do not yet show existing setups configured through the legacy GUI. Additional tips and getting started tips are available here and here.

If you’ve been following along in our XiVO adventure with Incredible PBX last year, then you already know that there were a significant number of configuration hoops to jump through once the base install was finished. While these steps are well documented in the original Incredible PBX for XiVO tutorial, there still were plenty of opportunities for typos and skipping steps. Any misstep could spell the difference in a perfectly functioning PBX and one that couldn’t make or receive calls. So we introduced XiVO Snapshots, and today we bring the same technology to the Wazo platform as well.

A Wazo Snapshot is just what the name implies. It’s a snapshot of a working Wazo PBX that has virtually everything already configured: SIP settings that work with Asterisk®, a SIP extension that works with a SIP phone plus your cellphone, a SIP extension preconfigured for WebRTC that uses the new Opus codec, SIP and Google Voice trunk setups for many of the major commercial providers, and default inbound and outbound routes to ease the task of routing calls into and out of your PBX. Basically, you plug in your credentials from your favorite provider after running the Incredible PBX for Wazo installer, tell Wazo how to route the calls, and you’re done. You can have a stable and functional PBX making calls to anywhere in the world in a matter of minutes. Then you can review our numerous tutorials to add additional bells and whistles while actually using your Wazo PBX while you learn.

Incredible PBX for Wazo Installation Overview

Before we roll up our sleeves and walk you through the installation process, we wanted to provide a quick summary of the 10 Basic Steps in setting up Incredible PBX for Wazo. By the way, the whole process takes less than an hour!

  1. Set Up Desired PBX Platform: Stand-alone PC, Virtual Machine, or Cloud-Based Server
  2. Run the Incredible PBX for Wazo installer
  3. Set Up One or More SIP or Google Voice Trunks for Your PBX
  4. Tell Wazo Where to Direct Incoming Calls from Each Trunk
  5. Tell Wazo Which Trunk to Use for Every Outbound Calling Digit Sequence
  6. Set Up a SoftPhone or WebRTC Phone (or both)
  7. Decide Whether to Activate Simultaneous Ringing on your Cellphone
  8. Add Google Speech Recognition Key (if desired)
  9. Activate DISA with Incredible PBX for Wazo (if desired)
  10. Test Drive Incredible PBX for Wazo

1. Incredible PBX for Wazo Hardware Platform Setup

NOTE: Ignore references to Debian 9 in the platform setup tutorials. Debian 9 is not quite ready yet so stick with Debian 8.

The first step is to choose your hardware platform and decide whether you want to babysit a server and network or leave those tasks to others. We’ve taken the guesswork out of the setups documented below. Five of the options are cloud providers, each of whom provides a generous discount to let you kick the tires. So click on the links below to review the terms and our walkthrough of the setup process on each platform.

2. Running the Incredible PBX for Wazo Installer

Once you have your hardware platform up and running, the rest of the initial setup process is easy. Simply download and run the Incredible PBX for Wazo installer. On some platforms, it first updates Debian 8 to current specs and reboots. Then log back in and rerun the installer a second time if you are prompted to do so.

cd /root
wget http://incrediblepbx.com/IncrediblePBX15-Wazo.sh
chmod +x IncrediblePBX15-Wazo.sh
./IncrediblePBX15-Wazo.sh


3. Setting Up SIP and Google Voice Trunks with Wazo

When the installation is finished, you can make toll-free calls in the U.S. and Canada without doing anything except dialing "1″ and the 10-digit number from any phone connected to your server. For other calls, there are two steps in setting up trunks to use with Incredible PBX. First, you have to sign up with the provider of your choice and obtain trunk credentials. These typically include the FQDN of the provider’s server as well as your username and password to use for access to that server. Second, you have to configure a trunk on the Incredible PBX for Wazo server so that you can make or receive calls outside of your PBX. As with the platform tutorials, we have taken the guesswork out of the trunk setup procedure for roughly a dozen respected providers around the globe. In addition, Wazo Snapshots goes a step further and actually creates the trunks for you, minus your credentials, as part of the initial Incredible PBX install.

For Google Voice trunks with Incredible PBX 15, log into your server as root and run ./add-gvtrunk. When prompted, insert your 10-digit Google Voice number, your Google Voice email address and your OAuth 2 token. The native Google Voice OAuth tutorial explains how to obtain it.

For the other providers, review the setup procedure below and then edit the preconfigured trunk for that provider by logging into the Wazo web GUI and choosing IPX → Trunk Management → SIP Protocol. Edit the setup for your provider (as shown above) and fill in your credentials and CallerID number in the General tab. Activate the trunk in the Register tab after again filling in your credentials. Save your settings when finished. No additional configuration for these providers is required using the Incredible PBX for Wazo Snapshot.

4. Directing Incoming Calls from Wazo Trunks

Registered Wazo trunks typically include a DID number. With the exception of CallCentric, this is the number that callers would dial to reach your PBX. With CallCentric, it’s the 11-digit account number of your account, e.g. 17771234567. In the Wazo web GUI, we use IPX → Call Management → Incoming Calls to create inbound routes for every DID and trunk associated with your PBX. Two sample DIDs have been preconfigured to show you how to route calls to an extension or to an IVR. To use these, simply edit their settings and change the DID to match your trunk. Or you can create new incoming routes to send calls to dozens of other destinations on your PBX.

5. Routing Outgoing Calls from Wazo to Providers

Outgoing calls from extensions on your Wazo PBX must be routed to a trunk provider to reach call destinations outside your PBX. Outgoing call routing is managed in IPX → Call Management → Outgoing Calls. You tell Wazo which trunk provider to use in the General tab. Then you assign a Calling Digit Sequence to this provider in the Exten tab. For example, if NXXNXXXXXX were assigned to Vitelity, this would tell Wazo to send calls to Vitelity if the caller dialed a 10-digit number. Wazo has the flexibility to add and remove digits from a dialed number as part of the outbound call routing process. For example, you might want callers to dial 48NXXNXXXXXX to send calls to a Google Voice trunk where 48 spells "GV" on the phone keypad. We obviously don’t want to send the entire dial string to Google Voice so we tell Wazo to strip the first 2 digits (48) from the number before routing the call out your Google Voice trunk. We’ve included two examples in the Wazo Snapshot to get you started. Skype Connect (shown below) is an example showing how to strip digits and also add digits before sending a call on its way:


6. Setting Up a Softphone & WebRTC with Wazo

If you’re a Mac user, you’re lucky (and smart). Download and install Telephone from the Mac App Store. Start up the application and choose Telephone:Preference:Accounts. Click on the + icon to add a new account. To set up your softphone, you need 3 pieces of information: the IP address of your server (Domain), and your Username and Password. In the World of Wazo, you’ll find these under IPBX → Services → Lines. Just click on the Pencil icon beside the extension to which you want to connect. Now copy or cut-and-paste your Username and Password into the Accounts dialog of the Telephone app. Click Done when you’re finished, and your new softphone will come to life and should show Available. Dial the IVR (4871) to try things out. With Telephone, you can use over two dozen soft phones simultaneously on your desktop.

For everyone else, we recommend the YateClient softphone which is free. Download it from here. Run YateClient once you’ve installed it and enter the credentials for the Wazo Line. You’ll need the IP address of your server plus your Line username and password associated with the 701 extension. On the Wazo platform, do NOT use an actual extension number for your username with Wazo. Go to IPBX Settings → Lines to decipher the appropriate username and password for the desired extension. Click OK to save your entries.


WebRTC allows you to use your Chrome or Firefox browser as a softphone. Extension 701 comes preconfigured for WebRTC access with Incredible PBX for Wazo. It shares the same password as the Line associated with extension 701, but the username is 701 rather than the username associated with the Line. You can decipher the password by accessing the Wazo Web GUI and then IPBX → Services → Users → Incredible PBX → XiVO Client Password. Or log into your server as root using SSH or Putty and run: /root/show-701-pw. Wazo introduces several new features to WebRTC including support for the awesome new Opus codec plus voicemail management and even Gravatar support. It’s all preconfigured!

Special Note: Beginning with version 17.02 of Wazo, WebRTC is fully integrated with NGINX on your server, and a simplified method for configuring WebRTC users has been added. When you create a new User account, simply choose the SIP (WebRTC) Protocol when creating a new user account, and all of the Advanced Line options required to support WebRTC will be preconfigured for you.

To use WebRTC, you no longer need to accept the different SSL certificates associated with the WebRTC app. From your browser, go to the following site and click on each link to accept the certificates. Once you’ve completed this process, simply visit the Wazo WebRTC site.

Before logging in, click on the Gear icon in the lower right corner and then click on the Pencil icon to edit your Settings. Fill in the public IP address of your Wazo server and specify 443 for the Port. Leave the Backend field blank and click Save. Now login to your WebRTC account with Username 701. The Password is the one you obtained running show-701-pw. The IP Address (if required) is the address of your Wazo PBX.

Implementing FollowMe Roaming with a CellPhone

In addition to ringing your SIP extension when incoming calls arrive, Wazo 17.17 can also ring your cellphone simultaneously. This obviously requires at least one outbound trunk. If that trunk provider also supports CallerID spoofing, then Wazo will pass the CallerID number of the caller rather than the DID associated with the trunk. Incredible PBX for Wazo comes with cellphone support for extension 702 ready to go. To enable it, access the Wazo Web GUI and go to IPBX → Services → Users → Incredible PBX and insert your Mobile Phone Number using the same dial string format associated with the trunk you wish to use to place the calls to your cellphone. You then can answer the incoming calls on either your cellphone or the registered SIP phone. If you answer on your cellphone, you will be prompted whether you wish to accept the call. If you press 1 after observing the CallerID, the caller will be connected. If you decline, the caller will be routed to the Wazo voicemail account of the extension.

8. Activating Voice Recognition for Wazo

Google has changed the licensing of their speech recognition engine about as many times as you change diapers on a newborn baby. Today’s rule restricts use to “personal and development use.” Assuming you qualify, the very first order of business is to enable speech recognition for your Wazo PBX. Once enabled, the Incredible PBX feature set grows exponentially. You’ll ultimately have access to the Voice Dialer for AsteriDex, Worldwide Weather Reports where you can say the name of a city and state or province to get a weather forecast for almost anywhere, Wolfram Alpha for a Siri-like encyclopedia for your PBX, and Lefteris Zafiris’ speech recognition software to build additional Asterisk apps limited only by your imagination. And, rumor has it, Google is about to announce new licensing terms, but we’re not there yet. To try out the Voice Dialer in today’s demo IVR, you’ll need to obtain a license key from Google. This Nerd Vittles tutorial will walk you through that process. Add your key to /var/lib/asterisk/agi-bin/speech-recog.agi on line 72.

9. Adding DISA Support to Your Wazo PBX

If you’re new to PBX lingo, DISA stands for Direct Inward System Access. As the name implies, it lets you make calls from outside your PBX using the call resources inside your PBX. This gives anybody with your DISA credentials the ability to make calls through your PBX on your nickel. It probably ranks up there as the most abused and one of the most loved features of the modern PBX.

There are three ways to implement DISA with Incredible PBX for Wazo. You can continue reading this section for our custom implementation with two-step authentication. There also are two native Wazo methods for implementing DISA using a PIN for security. First, you can dedicate a DID to incoming DISA calls. Or you can add a DISA option to an existing IVR. Both methods are documented in our tutorial on the PIAF Forum.

We prefer two-step authentication with DISA to make it harder for the bad guys. First, the outside phone number has to match the whitelist of numbers authorized to use your DISA service. And, second, you have to supply the DISA password for your server before you get dialtone to place an outbound call. Ultimately, of course, the monkey is on your back to create a very secure DISA password and to change it regularly. If all this sounds too scary, don’t install DISA on your PBX.

1. To get started, edit /root/disa-xivo.txt. When the editor opens the dialplan code, move the cursor down to the following line:

exten => 3472,n,GotoIf($["${CALLERID(number)}"="701"]?disago1)  ; Good guy

2. Clone the line by pressing Ctrl-K and then Ctrl-U. Add copies of the line by pressing Ctrl-U again for each phone number you’d like to whitelist so that the caller can access DISA on your server. Now edit each line and replace 701 with the 10-digit number to be whitelisted.

3. Move the cursor down to the following line and replace 12341234 with the 8-digit numeric password that callers will have to enter to access DISA on your server:

exten => 3472,n,GotoIf($["${MYCODE}" = "12341234"]?disago2:bad,1)

4. Save the dialplan changes by pressing Ctrl-X, then Y, then ENTER.

5. Now copy the dialplan code into your Wazo setup, remove any previous copies of the code, and restart Asterisk:

cd /root
sed -i '\:// BEGIN DISA:,\:// END DISA\:d' /etc/asterisk/extensions_extra.d/xivo-extrafeatures.conf
cat disa-xivo.txt >> /etc/asterisk/extensions_extra.d/xivo-extrafeatures.conf
/etc/init.d/asterisk reload

6. The traditional way to access DISA is to add it as an undisclosed option in an IVR that is assigned to one of your inbound trunks (DIDs). For the demo IVR that is installed, edit the ivr-1.conf configuration file and change the "option 0″ line so that it looks like this. Then SAVE your changes.

exten => 0,1(ivrsel-0),Dial(Local/3472@default)

7. Adjust the inbound calls route of one of your DIDs to point to the demo IVR by changing the destination to Customized with the following Command:

Goto(ivr-1,s,1)

A sample is included in the Wazo Snapshot. Here’s how ours looks for the Demo IVR:


8. Now you should be able to call your DID and choose option 0 to access DISA assuming you have whitelisted the number from which you are calling. When prompted, enter the DISA password you assigned and press #. You then should be able to dial a 10-digit number to make an outside call from within your PBX.

SECURITY HINT: Whenever you implement a new IVR on your PBX, it’s always a good idea to call in from an outside number 13 TIMES and try every key from your phone to make sure there is no unanticipated hole in your setup. Be sure to also let the IVR timeout to see what result you get.

10. NEW: Travelin’ Man 3 WhiteList Firewall

All new installs of Incredible PBX for Wazo include the newly enhanced and preconfigured IPtables Firewall featuring Travelin’ Man 3. Please read the new tutorial when you have a few minutes. It documents how to enable access to your server for remote phones and traveling users.

PortKnocker previously let a remote user ping the server with a 3-digit code to temporarily add the remote user’s IP address to the IPtables Firewall WhiteList so that the user could gain remote access. We now are adding the ability to let end-users make successful PortKnocks permanent just as if an administrator had used add-ip on the server to add an IP address. Administrators still can remove these entries using del-acct although you will have to know the date and time that the entry was added. The file names consist of timestamp.iptables in /root and the additions are made to the custom WhiteList in /usr/local/sbin/iptables-custom. To enable permanent PortKnocker additions, simply run this command while logged into your server as root: iptables-knock activate.

11. Test Drive Incredible PBX for Wazo

To give you a good idea of what to expect with Incredible PBX for Wazo, just pick up a phone and dial any toll-free number in the U.S. and Canada using a 1 prefix. We’ve also set up a sample IVR using voice prompts from Allison. Try it out from any phone on your PBX by dialing 4871 (IVR1):

Nerd Vittles Demo IVR Options
1 – Call by Name (say "Delta Airlines" or "American Airlines" to try it out)
2 – MeetMe Conference
3 – Wolfram Alpha (Coming Soon!)
4 – Lenny (The Telemarketer’s Worst Nightmare)
5 – Today’s News Headlines
6 – Weather Forecast (enter a 5-digit ZIP code)
7 – Today in History (Coming Soon!)
8 – Speak to a Real Person (or maybe just Lenny if we’re out)

What To Do and Where to Go Next?

Here are a boatload of projects to get you started exploring Wazo on your own. Just plug the keywords into the search bar at the top of Nerd Vittles to find numerous tutorials covering the topics or simply follow our links. Unless there is an asterisk (*) the components already are in place so do NOT reinstall them. Just read the previous tutorials to learn how to configure each component. Be sure to also join the PIAF Forum to keep track of the latest tips and tricks with Wazo. There’s a treasure trove of information that awaits.

Wazo and Incredible PBX Dial Code Cheat Sheets

Complete Wazo documentation is available here. But here are two cheat sheets in PDF format for Wazo Star Codes and Incredible PBX Dial Codes.

Published: Wednesday, December 14, 2016  Last Updated: Monday, December 12, 2017


Don’t forget to List Yourself in Directory Assistance so everyone can find you by dialing 411. And add your new number to the Do Not Call Registry to block telemarketing calls. Or just call 888-382-1222 from your new number.


Need help with Asterisk? Visit the PBX in a Flash Forum.


Special Thanks to Our Generous Sponsors


FULL DISCLOSURE: ClearlyIP, Skyetel, Vitelity, DigitalOcean, Vultr, VoIP.ms, 3CX, Sangoma, TelecomsXchange and VitalPBX have provided financial support to Nerd Vittles and our open source projects through advertising, referral revenue, and/or merchandise. As an Amazon Associate and Best Buy Affiliate, we also earn from qualifying purchases. We’ve chosen these providers not the other way around. Our decisions are based upon their corporate reputation and the quality of their offerings and pricing. Our recommendations regarding technology are reached without regard to financial compensation except in situations in which comparable products at comparable pricing are available from multiple sources. In this limited case, we support our sponsors because our sponsors support us.

BOGO Bonaza: Enjoy state-of-the-art VoIP service with a $10 credit and half-price SIP service on up to $500 of Skyetel trunking with free number porting when you fund your Skyetel account. No limits on number of simultaneous calls. Quadruple data center redundancy. $25 monthly minimum spend required. Tutorial and sign up details are here.

The lynchpin of Incredible PBX 2020 and beyond is ClearlyIP components which bring management of FreePBX modules and SIP phone integration to a level never before available with any other Asterisk distribution. And now you can configure and reconfigure your new Incredible PBX phones from the convenience of the Incredible PBX GUI.

VitalPBX is perhaps the fastest-growing PBX offering based upon Asterisk with an installed presence in more than 100 countries worldwide. VitalPBX has generously provided a customized White Label version of Incredible PBX tailored for use with all Incredible PBX and VitalPBX custom applications. Follow this link for a free test drive!
 

Special Thanks to Vitelity. Vitelity is now Voyant Communications and has halted new registrations for the time being. Our special thanks to Vitelity for their unwavering financial support over many years and to the many Nerd Vittles readers who continue to enjoy the benefits of their service offerings. We will keep everyone posted on further developments.