

We’ve previously documented the benefits of SIP URI calling. Because the calls are free from and to anywhere in the world, the use case is compelling. The drawbacks, particularly with Asterisk® servers, have primarily centered around the security implications of exposing SIP on a publicly-accessible server. Today we want to take another look at an open Internet SIP implementation for Asterisk based upon the pioneering work of Dr. Lin Song back in the PBX in a Flash heyday. We’ve embellished Lin’s original IPtables creation and our original article with some additional security mechanisms for Fail2Ban, Asterisk, FreePBX®, and Travelin’ Man 3. Special thanks also for a terrific tutorial from JavaPipe. All of today’s implementation is open source code which you are more than welcome to use or improve pursuant to GPL3.
July 22 UPDATE: New Incredible PBX 16-15-PUBLIC deployment tutorial is now available here.
Consider this. If everyone in the world had an accessible SIP address instead of a phone number, every call to every person in the world via the Internet would be free. That pretty much sums up why SIP URIs are important. The syntax for SIP URIs depends upon your platform. With Asterisk they look like this: SIP/somebody@FQDN.yourdomain.com. On SIP phones, SIP URIs look like this: sip:somenameORnumber@FQDN.yourdomain.com. Others use somenameORnumber@FQDN.yourdomain.com. Assuming you have a reliable Internet connection, once you have “dialed” a SIP URI, the destination SIP device will ring just as if the called party had a POTS phone. Asterisk® processes SIP URIs in much the same way as calls originating from commercial trunk providers except anonymous SIP calls are blocked.
While we have tested today’s design extensively including implementation of a cloud-based server with no security issues since deployment over four months ago, we still don’t recommend this SIP design for mission-critical PBXs because there remain some security risks with denial of service attacks and zero-day vulnerabilities. For these deployments, Incredible PBX® coupled with the Travelin’ Man 3 firewall which blocks SIP access except from whitelisted IP addresses and FQDNs has no equal. When properly deployed, the bad guys cannot even see your server much less attack it. A typical use case for today’s new SIP design would be a public Asterisk server that provides anonymous SIP access to the general public without any exposure to the corporate jewels. For example, we’ve put up a demonstration server that provides news and weather reports. In the corporate world, an equivalent deployment might provide access to a product database with pricing and availability details. Our rule of thumb before deploying today’s platform would be to ask yourself what damage could be inflicted if your server were totally compromised. If the answer is zero, then proceed. Otherwise, stick with Incredible PBX and the Travelin’ Man 3 firewall. The ideal platform for deployment using the same rule of thumb as above is one of the $1 a month cloud platforms.
| Provider | RAM | Disk | Bandwidth | Performance as of 12/1/19 | Cost |
|---|---|---|---|---|---|
| CrownCloud KVM (LA) | 1GB | 20GB + Snapshot | 1TB/month | 598Mb/DN 281Mb/UP 2CPU Core | $25/year Best Buy! |
| Naranjatech KVM (The Netherlands) | 1GB | 20GB | 1TB/month | Hosting since 2005 VAT: EU res. | 20€/year w/code: SBF2019 |
| BudgetNode KVM (LA) | 1GB | 40GB RAID10 | 1TB/month | Also available in U.K PM @Ishaq on LET before payment | $24/year |
| FreeRangeCloud KVM (Ashburn VA, Winnipeg, Freemont CA) | 1GB | 20GB SSD | 3TB/month | Pick EGG loc'n Open ticket for last 5GB SSD | $30/year w/code: LEBEGG30 |
Overview. There are a number of moving parts in today’s implementation. So let’s briefly go through the steps. Begin with a cloud-based installation of Incredible PBX. Next, we’ll upgrade the Fail2Ban setup to better secure a publicly-accessible Asterisk server. We’ll also customize the port for SSH access to reduce the attack rate on the SSH port. You’ll need a fully-qualified domain name (FQDN) for your server because we’ll be blocking all access to your server by IP address. If you want to allow SIP URI calls to your server, you’ll need this FQDN. If you want to also allow SIP registrations from this same FQDN, then a single FQDN will suffice; however, with OpenVZ platforms, we recommend using a different (and preferably more obscure) FQDN for SIP registrations since registered users have an actual extension on your PBX that is capable of making outbound calls which usually cost money. In this case, the obscure FQDN performs double-duty as the equivalent of a password to your PBX. For example, an FQDN such as hk76dl34z.yourdomain.com would rarely be guessed by an anonymous person while sip.yourdomain.com would be fairly obvious to attempted intruders. But that’s your call.
Using whatever FQDN you’ve chosen for SIP registrations, we’ll add an entry to /etc/asterisk/sip_custom.conf that looks like this: domain=hk76dl34z.yourdomain.com. That will block all SIP registration attempts except from that domain. It will not block SIP invitations! The next step will be to add a new [from-sip-external] context to extensions_override_freepbx.conf. Inside that context, we’ll specify the FQDN used for public SIP URI connections to your server, e.g. sip.yourdomain.com. This will block SIP invitations except SIP URIs containing that domain name. We’ll also define all of the extensions on your Asterisk server which can be reached with SIP URI invitations. These could be actual extensions, or ring groups, or IVRs, or Asterisk applications. The choice is yours. These SIP URI authorizations can be either numeric (701@sip.yourdomain.com) or alpha (weather@sip.yourdomain.com) or alphanumeric (channel7@sip.abc.com). Finally, we’ll put the new IPtables firewall rules in place and adjust your existing iptables-custom setup to support the new publicly-accessible PBX. For example, we’ll still use whitelist entries for web access to your server since anonymous users would cause nothing but mischief if TCP ports 80 and 443 were exposed. It’s worth noting that KVM platforms provide a more robust implementation of IPtables that can block more types of nefarious traffic. We’ve supplemented the original article with a KVM update below. With OpenVZ platforms, we have to rely upon Asterisk to achieve IP address blocking and some types of packet filtering. So why not choose a KVM platform? It’s simple. These platforms typically cost twice as much as equivalent OpenVZ offerings. With this type of deployment, KVM is worth it.
Installing Incredible PBX Base Platform
Today’s design requires an Incredible PBX platform on a cloud-based server. Start by following this tutorial to put the pieces in place. We recommend you also install the Whole Enchilada addition once the base install is finished. Make sure everything is functioning reliably before continuing.
Upgrading the Fail2Ban Platform
Because this will be a publicly-accessible server, we’re going to tighten up the Asterisk configuration in Fail2Ban and lengthen the bantime and findtime associated with Fail2Ban’s Asterisk log monitoring. We also recommend that you whitelist the IP addresses associated with your server and PCs from which you plan to access your server so that you don’t inadvertently block yourself.
Log into your server as root and issue the following commands. When the jail.conf file opens in the nano editor, scroll down to line 34 and add the IP addresses you’d like to whitelist to the existing ignoreip settings separating each IP address with a space. Then press Ctrl-X, Y, then Enter to save your changes. Verify that Fail2Ban restarts successfully.
cd /etc/fail2ban
wget http://incrediblepbx.com/fail2ban-public.tar.gz
tar zxvf fail2ban-public.tar.gz
rm -f fail2ban-public.tar.gz
nano -w jail.conf
service fail2ban restart
If you ever get locked out of your own server, you can use the Serial Console in your VPS Control Panel to log into your server. Then verify that your IP address has been blocked by issuing the command: iptables -nL. If your IP is shown as blocked, issue this command with your address to unblock it: fail2ban-client set asterisk unbanip 12.34.56.78
Obtaining an FQDN for Your Server
Because we’ll be blocking IP address SIP access to your server, you’ll need to obtain one or perhaps two FQDNs for your server. If you manage DNS for a domain that you own, this is easy. If not, you can obtain a free FQDN from ChangeIP here. Thanks, @mbellot.
For the FQDN that you’ll be using for SIP registrations on your server, configure Asterisk to use it by logging into your server as root and issuing the following command using your new FQDN, e.g. xyz.yourdomain.com. Thanks, @ou812.
echo "domain=xyz.yourdomain.com" >> /etc/asterisk/sip_custom.conf
SECURITY ALERT: Never use the SIP URI MOD on a server such as this one with a publicly-exposed SIP port as it is possible for some nefarious individual to spoof your FQDN in the headers of a SIP packet and easily gain outbound calling access using your server’s trunk credentials.
Customizing the [sip-external-custom] Context
All FreePBX-based servers include a sip-external-custom context as part of the default installation; however, we need a customized version to use for a publicly-accessible PBX. You can’t simply update the context in /etc/asterisk/extensions.conf because FreePBX will overwrite the changes the next time you reload your dialplan. Instead we have to copy the context into extensions_override_freepbx.conf and make the changes there. So let’s start by copying the new template there with the following commands:
cd /tmp
wget http://incrediblepbx.com/from-sip-external.txt
cd /etc/asterisk
cat /tmp/from-sip-external.txt >> extensions_override_freepbx.conf
rm -f /tmp/from-sip-external.txt
nano -w extensions_override_freepbx.conf
When the nano editor opens the override file, navigate to line #10 of the [from-sip-external] context and replace xyz.domain.com with the FQDN you want to use for SIP invites to your server. These are the connections that are used to actually connect to an extension on your server (NOT to register). As noted previously, this can be a different FQDN than the one used to actually register to an extension on your server. Next, scroll down below line #27, and you will see a series of lines that actually authorize anonymous SIP connections with your server. There are two numeric entries and also two alpha entries to access the News and Weather apps on your server. The 13th position in the dialplan is required for all authorized calls.
exten => 947,13,Dial(local/947@from-internal)
exten => 951,13,Dial(local/951@from-internal)
exten => news,13,Dial(local/951@from-internal)
exten => weather,13,Dial(local/947@from-internal)
You can leave these in place, remove them, or add new entries depending upon which extensions you want to make publicly accessible on your server. Here are some syntax examples for other types of server access that may be of interest.
; Call VoIP Users Conference
exten => 882,13,Dial(SIP/vuc@vuc.me)
exten => vuc,13,Dial(SIP/vuc@vuc.me)
; Call Default CONF app
exten => 2663,13,Dial(local/${EXTEN}@from-internal)
exten => conf,13,Dial(local/2663@from-internal)
; Call Bob at Local Extension 701
exten => 701,13,Dial(local/${EXTEN}@from-internal)
exten => bob,13,Dial(local/701@from-internal)
; Call Default Inbound Route thru Time Condition
exten => home,13,Goto(timeconditions,1,1)
; Call Inbound Trunk 8005551212
exten => 8005551212,13,Goto(from-trunk,${DID},1)
; Call Lenny
exten => 53669,13,Dial(local/${EXTEN}@from-internal)
exten => lenny,13,Dial(SIP/2233435945@sip2sip.info)
; Call any toll-free number (AT&T Directory Assistance in example)
exten => information,13,Dial(SIP/18005551212@switch.starcompartners.com)
Once you’ve added your FQDN and authorized SIP URI extensions, save the file: Ctrl-X, Y, then Enter.
One final piece is required to enabled anonymous SIP URI connections to your server:
echo "allowguest=yes" >> /etc/asterisk/sip_general_custom.conf
Now restart Asterisk: amportal restart
UPDATE for DialPlan Junkies: We received a few inquiries following publication inquiring about the dialplan design. We’ve taken advantage of a terrific feature of Asterisk which lets calls fall through to the next line of a dialplan if there is no match on a Goto(${EXTEN},13) command. For example, if a caller dials ward@sip.domain.com and there is a line 12 in the dialplan directing the call to ward,13 which exists, call processing will continue there. However, if the extension does not exist, the call will not be terminated. Instead, if there exists a more generic line 13 in the dialplan, e.g. exten => _X.,13,Goto(s,1), call processing will continue there. We use this trick to then redirect the call to an ‘s’ extension sequence to announce that the called extension could not be reached. It’s the reason all of the whitelisted extensions have to have the same line 13 designation so that call processing can continue with the generic line 13 when a specific extension match fails.
Configuring IPtables for Public SIP Access
You may recall that, with Incredible PBX, we bring up the basic IPtables firewall using the /etc/sysconfig/iptables rules. Then we add a number of whitelist entries using /usr/local/sbin/iptables-custom. We’re going to do much the same thing with today’s setup except the rule sets are a bit different. Let’s start by putting the default iptables-custom file in place:
cd /usr/local/sbin
wget http://incrediblepbx.com/iptables-custom-public.tar.gz
tar zxvf iptables-custom-public.tar.gz
rm -f iptables-custom-public.tar.gz
nano -w iptables-custom
When the nano editor opens, scroll to the bottom of the file. You’ll note that we’ve started a little list of notorious bad guys to get you started. Fail2Ban will actually do a pretty good job of managing these, but for the serious recidivists, blocking them permanently is probably a good idea. In addition to the bad guys, you’ll want to whitelist your own IP addresses and domains so that you don’t get blocked from FreePBX web access to your server. The syntax looks like the following two examples:
/usr/sbin/iptables -I INPUT -s pbxinaflash.dynamo.org -j ACCEPT
/usr/sbin/iptables -I INPUT -s 8.8.8.8                -j ACCEPT
Whenever you make changes to your IPtables configuration, remember to restart IPtables using the following command ONLY: iptables-restart
Now let’s put the final IPtables piece in place with the default IPtables config file:
cd /etc/sysconfig
wget http://incrediblepbx.com/iptables-public.tar.gz
tar zxvf iptables-public.tar.gz
rm -f iptables-public.tar.gz
nano -w iptables
When the nano editor opens the file, scroll down to line 55 which controls the TCP port for SSH access to your server. We strongly recommend you change this from 22 to something in the 1000-2000 range. HINT: Your birth year is easy to remember. In the next step, we’ll make the change in your SSH configuration as well.
Next, scroll down to lines 148 and 149. Replace YOUR_HOSTNAME.no-ip.com on both lines with the FQDN of your server that will be used to accept SIP invitations (connections) on your server. These entries have no effect on SIP registrations which we covered above!
Once you’ve made these changes, save the file BUT DO NOT RESTART IPTABLES JUST YET.
Securing the SSH Access Port
TCP port 22 is probably one of the most abused ports on the Internet because it controls access to SSH and the crown jewels by default. Assuming you changed this port in the IPtables firewall setup above, we now need to change it in your SSH config file as well. Edit /etc/ssh/sshd_config and scroll down to line 12. Change the entry to: Port 1999 assuming 1999 is the port you’ve chosen. Be sure to remove the comment symbol (#) at the beginning of the line if it exists. Then save the file.
You’ll also want to update the SSH port in Fail2Ban. Edit /etc/fail2ban/jail.conf and search for port=ssh. In the [ssh-iptables] context, change the entry to port=1999 assuming 1999 is your chosen port. Save the file and reboot your server. Then you should be all set.
Dealing with the Bad Guys
You’ll be amazed how quickly and how many new friends you’ll make on the public Internet within the first few hours. You can watch the excitement from the Asterisk CLI by logging into your server as root and issuing the command: asterisk -rvvvvvvvvvv. Another helpful tool is to monitor your IPtables status which will show IP addresses that have been temporarily blocked by Fail2Ban: iptables -nL. This will catch most of the bad guys and block them. But some are smarter than others, and many know how to spoof IP addresses in SIP packets as you will quickly see. Unlike on KVM platforms, IPtables on most OpenVZ platforms cannot search packets for text strings which is a simple way to block many of these attackers. HINT: You get what you pay for. And, in some cases, attackers disguise their address or use yours. We’ve now found that ${SIPURI} holds the caller’s true identity so we’ve updated the code accordingly. Whether to permanently block these guys is completely up to you. A typical SIP INVITE before such a call is dropped only consumes about 100 bytes so it’s usually not a big deal. You also can manually block callers using the Fail2Ban client with the desired IP address: fail2ban-client set asterisk banip 12.34.56.78.
Additional Security on KVM Platforms
As we mentioned above, a KVM platform provides considerably more security for your public-facing server because you can block entire countries using the ipset extension to IPtables. You can read all about it here. After considerable discussion and suggestions on the PIAF Forum, we would offer the following code which blocks the countries we have identified as causing the majority of problems. First, modify your /etc/sysconfig/iptables configuration and insert the following code in the IPSPF section of the script around line 93. You can change the list of blocked countries to meet your own needs. Just be sure to make the same country-code changes in the blockem.sh script which we will cover in step 2. A list of available country codes can be found here. Save your changes, but do NOT restart IPtables just yet.
-A IPSPF -m set --match-set cn src -j DROP
-A IPSPF -m set --match-set ru src -j DROP
-A IPSPF -m set --match-set ps src -j DROP
-A IPSPF -m set --match-set kp src -j DROP
-A IPSPF -m set --match-set ua src -j DROP
-A IPSPF -m set --match-set md src -j DROP
-A IPSPF -m set --match-set nl src -j DROP
-A IPSPF -m set --match-set fr src -j DROP
-A IPSPF -m set --match-set SIPFLOOD src -j DROP
Second, we want to add a new /etc/blockem.sh script and make it executable (chmod +x /etc/blockem.sh). With the exception of the SIPFLOOD entry which is our custom Bad Guys List, make sure the country list in line #5 below matches the dropped countries list you added to IPtables in step #1 above.
#!/bin/bash
cd /etc
wget -qO - http://www.ipdeny.com/ipblocks/data/countries/all-zones.tar.gz| tar zxvf -
for i in \\
cn ru ps kp ua md nl fr
do
/usr/sbin/ipset create -exist $i hash:net
for j in $(cat $i.zone); do /usr/sbin/ipset add -exist $i $j; done
done
wait
sleep 5
wget http://incrediblepbx.com/badguys.tar.gz
tar zxvf badguys.tar.gz
rm -f badguys.tar.gz
/usr/sbin/ipset restore -! < /etc/SIPFLOOD.zone
wait
sleep 5
service iptables restart
wait
sleep 5
/usr/local/sbin/iptables-custom
wait
sleep 5
service fail2ban restart
wait
exit 0
Third, try things out by running the script: /etc/blockem.sh. Verify that IPtables is, in fact, blocking the listed countries: iptables -nL.
Finally, we recommend adding the script to /etc/rc.d/rc.local replacing the existing iptables-restart line. In that way, it gets run whenever you reboot your server.
In choosing a KVM platform, we've had good luck with the $5/month Digital Ocean platform where you still can get a $50 credit to kick the tires for 60 days, Vultr (similar pricing to D.O. also with a $50 credit). With either of these providers, you can add automatic backups for an extra dollar a month. In the bargain basement (may not be here tomorrow) category, we like the following providers. Many other low-cost options are documented on the LowEndBox site. Just don't invest more than you can afford to lose... and make a backup.1
Connecting a SIP Phone to OpenSIPS or LinPhone
If you followed along in our OpenSIPS adventure, then it's easy to test some SIP URI calls to your new server. You can connect virtually any kind of SIP telephone or endpoint to OpenSIPS. Another easy way to try out SIP calling is to first set up a free LinPhone Account.
You can find dozens of recommendations for hardware-based SIP phones both on Nerd Vittles and the PIAF Forum. For today we'll get you started with one of our favorite (free) softphones, YateClient. It's available for almost all desktop platforms. Download YateClient from here. Run YateClient once you’ve installed it and enter the credentials for your OpenSIPS or LinPhone account you've previously created. You’ll need the IP address of your OpenSIPS server or LinPhone's FQDN (sip.linphone.org) plus your account’s password. Fill in the Yate Client template using the IP address or FQDN as well as your Username and whatever Password you assigned to the account when you created it. Click OK to save your entries.
Once the Yate softphone shows that it is registered, try a test call to one of the SIP URIs you authorized on your new Asterisk server or try ours: ![]()
If you don't happen to have an OpenSIPS server or a LinPhone SIP account to play with but you have another Asterisk server, then the simple way to enable SIP URI extensions is by editing /etc/asterisk/extensions_custom.conf. In the [from-internal-custom] context, add an extension that can be used to contact any desired SIP URI. Then reload your dialplan: asterisk -rx "dialplan reload". Now dial that extension (2468 in the following example) from any phone connected to your Asterisk server. The entry would look something like this to call our SIP URI for the latest weather forecast:

NEWS FLASH: A new One-Minute Installer to use Incredible PBX on the open Internet is now available here.
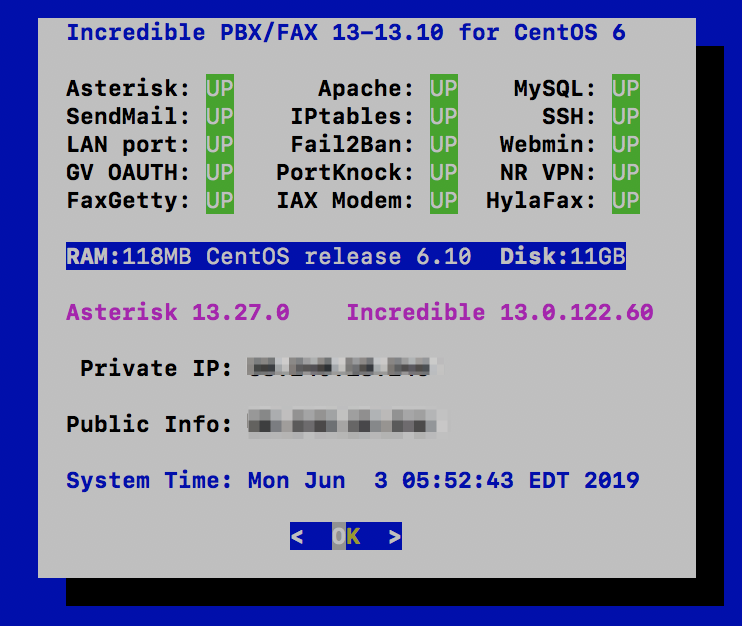
Originally published: Monday, June 3, 2019
Need help with Asterisk? Visit the VoIP-info Forum.
Special Thanks to Our Generous Sponsors
FULL DISCLOSURE: ClearlyIP, Skyetel, Vitelity, DigitalOcean, Vultr, VoIP.ms, 3CX, Sangoma, TelecomsXchange and VitalPBX have provided financial support to Nerd Vittles and our open source projects through advertising, referral revenue, and/or merchandise. As an Amazon Associate and Best Buy Affiliate, we also earn from qualifying purchases. We’ve chosen these providers not the other way around. Our decisions are based upon their corporate reputation and the quality of their offerings and pricing. Our recommendations regarding technology are reached without regard to financial compensation except in situations in which comparable products at comparable pricing are available from multiple sources. In this limited case, we support our sponsors because our sponsors support us.
BOGO Bonaza: Enjoy state-of-the-art VoIP service with a $10 credit and half-price SIP service on up to $500 of Skyetel trunking with free number porting when you fund your Skyetel account. No limits on number of simultaneous calls. Quadruple data center redundancy. $25 monthly minimum spend required. Tutorial and sign up details are here.
The lynchpin of Incredible PBX 2020 and beyond is ClearlyIP components which bring management of FreePBX modules and SIP phone integration to a level never before available with any other Asterisk distribution. And now you can configure and reconfigure your new Incredible PBX phones from the convenience of the Incredible PBX GUI.
VitalPBX is perhaps the fastest-growing PBX offering based upon Asterisk with an installed presence in more than 100 countries worldwide. VitalPBX has generously provided a customized White Label version of Incredible PBX tailored for use with all Incredible PBX and VitalPBX custom applications. Follow this link for a free test drive!
Special Thanks to Vitelity. Vitelity is now Voyant Communications and has halted new registrations for the time being. Our special thanks to Vitelity for their unwavering financial support over many years and to the many Nerd Vittles readers who continue to enjoy the benefits of their service offerings. We will keep everyone posted on further developments.
- Digital Ocean and Vultr provide modest referral credits to Nerd Vittles for those that use our referral code. It in no way colors our recommendations regarding these two providers, both of whom we use extensively. [↩]
Want to BlackList 100,000+ abusive IP addresses in one pass? Implementation details are here.