
What a difference a decade makes! We haven’t spent much time with Proxmox for well over a decade so we decided to experiment with a new server and the latest Proxmox 7.4 release to see how things have changed. And it was quite a surprise. Not only has the hardware footprint changed dramatically, but the Proxmox software itself is like a new animal. If you haven’t explored Proxmox lately, we would encourage you to give it a careful look before deciding on a virtual machine platform. In this tutorial we’ll cover everything you need to get started both with Proxmox and with Incredible PBX 2027.
Hardware Options for the Proxmox Server Platform
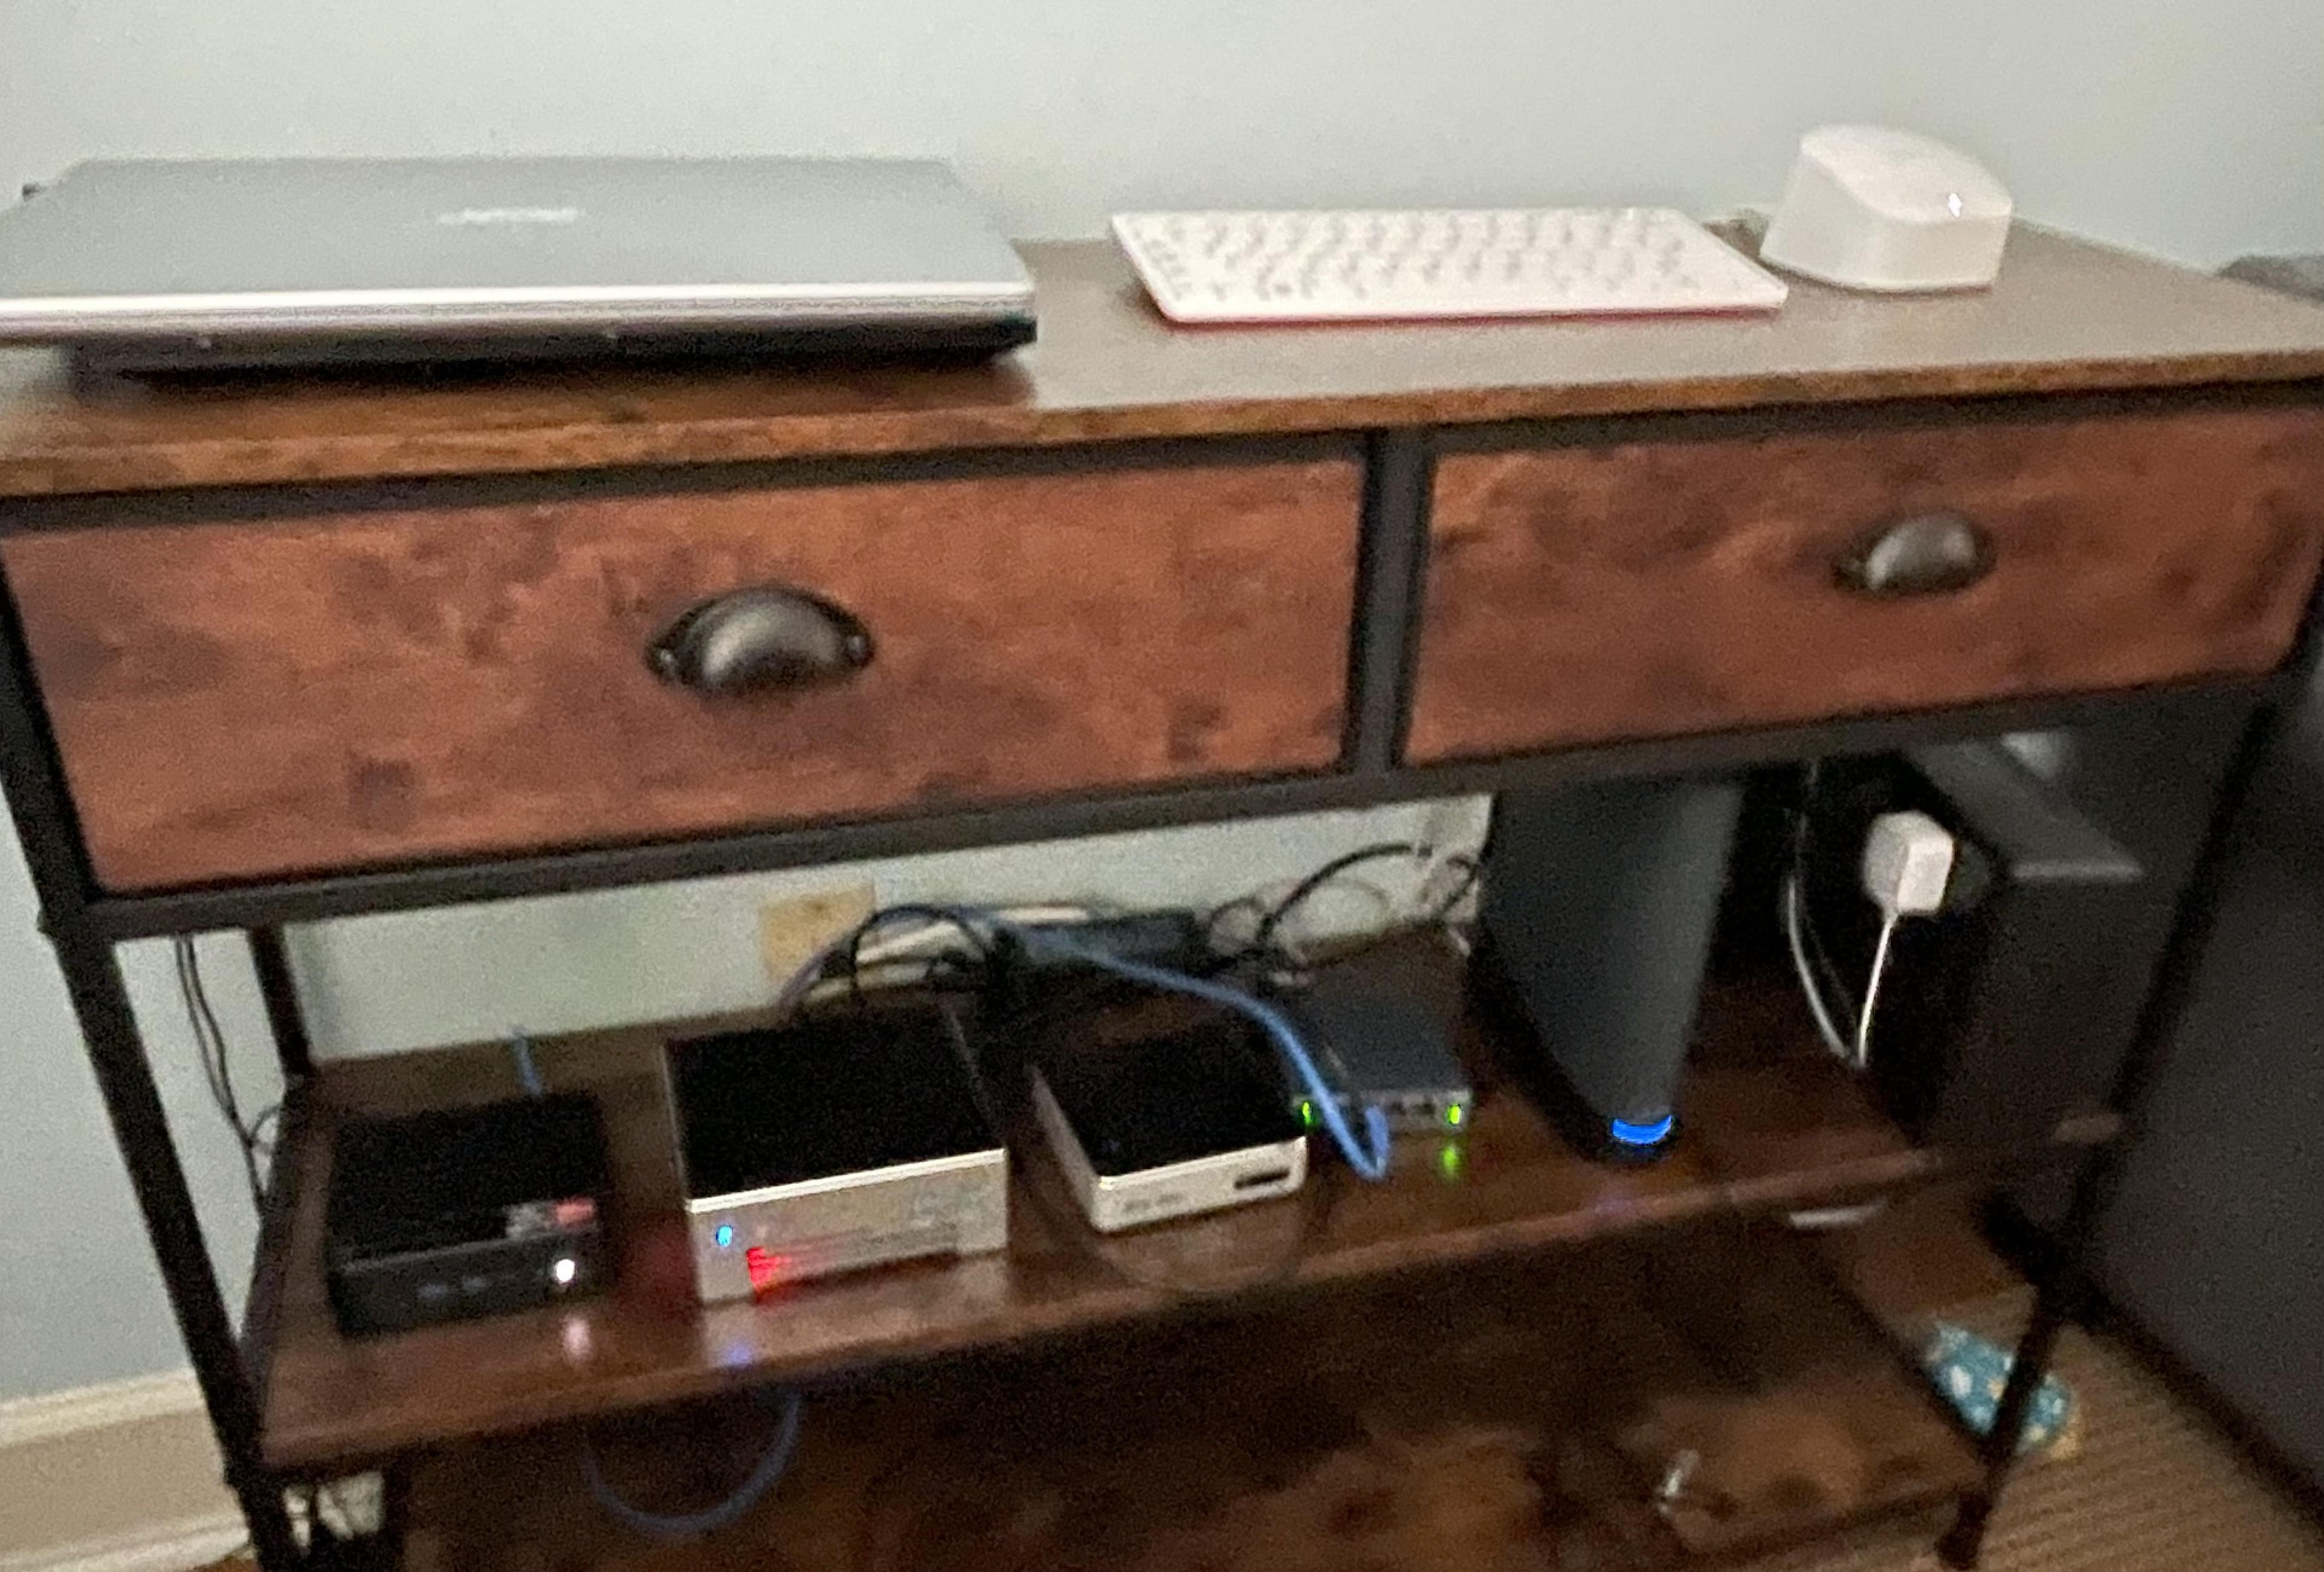
We do most of our shopping on Amazon not only because it’s cheap and easy but also because they financially support our projects through referral revenue. If those considerations bother you, feel free to do your own research. For this review, in terms of requirements, we were looking for a small-footprint, quiet machine with a robust processor, lots of RAM, and ample disk space. Our office has about a foot of remaining space in a bookshelf that already houses a UPS, two Internet routers, three notebook PCs (Windows 11, MacBook, and System76), a VMware ESXi server, a combination WEBDAV/SAMBA server, and a Raspberry Pi 400.
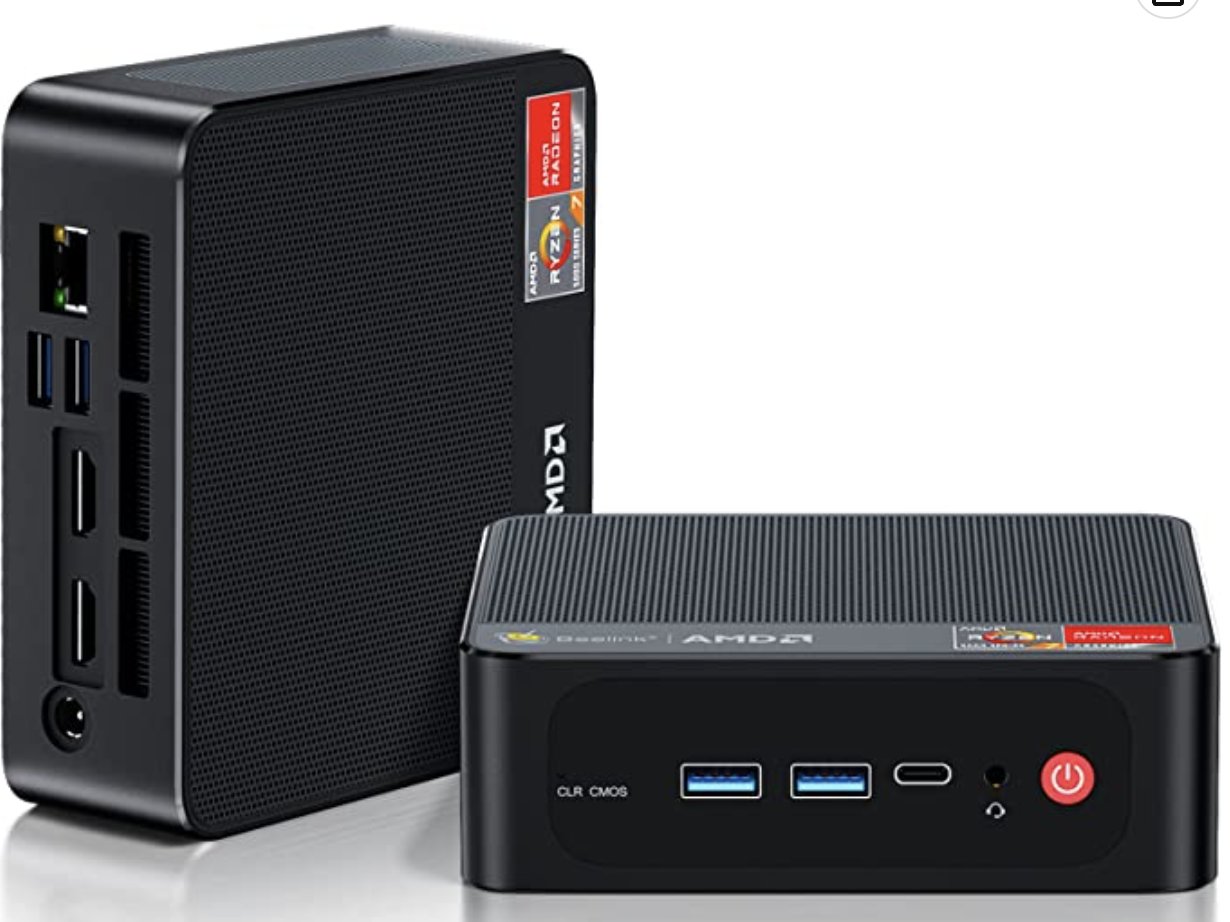
We narrowed the search down to Beelink’s SER5 Pro (shown above) with an AMD Ryzen 7 5800H 8 Core CPU(Up to 4.4GHz) with 32GB DDR4 RAM, and a 500GB NVME M.2 SSD for $429 $359 and the ASUS PN52 Mini PC, AMD Ryzen 9 5900HX(8C/16T, Up to 4.6GHz) with 32GB DDR4 RAM, and a 512GB PCIe SSD for $699. Both are shipped with Windows 11 which was the major issue since we wanted to run Proxmox natively. From reading everything we could find on the web, it sounded as if the Beelink stumbled if you attempted to run any Linux flavor other than Ubuntu 20.04. So we gambled and ordered both machines knowing we could return either or both of them at no cost if Proxmox wouldn’t install. Gotta love Amazon!
Because the Beelink machine was $270 cheaper, we decided to start our testing there. To our surprise, pressing DEL on bootup to access the BIOS let us reconfigure the boot mode from UEFI to LEGACY with one click and reorder the boot order to first boot from a USB stick, neither of which we were able to do on our recently purchased Acer Aspire 5 notebook PC.
Installing the Proxmox 7 Server Platform
We began by downloading the Proxmox 7.4 ISO. Then we burned it to a USB flash drive using Balena Etcher. When we powered on the Beelink machine after inserting the USB stick and plugging in a network cable, keyboard, mouse, and monitor, presto! The Proxmox installer appeared, and Proxmox installed without a hitch. We quickly logged in as root via SSH and ran: apt update | apt dist-upgrade. We added Proxmox free repo to /etc/apt/sources.list: deb http://download.proxmox.com/debian/pve bullseye pve-no-subscription. Next, we deleted the commercial repo from /etc/apt/sources.list.d. And reissued: apt update. Finally, we removed the subscription nag by following this tutorial. That got everything squared away. And we were ready to log into the web portal at https://server-ip:8006 using the root password we set up as part of the install.
A Word to the Wise: Keep your Proxmox server behind a hardware firewall unless you’re a savvy network administrator.
Interacting with the Proxmox Server
There are two basic ways to administer your Proxmox server, either through the Linux command line interface (CLI) or using the Proxmox GUI. With the CLI, you will probably want to enable root logins using SSH. With the GUI, you will access it using a browser pointed to the IP address of your server at port 8006: https://server-ip:8006. With both CLI and GUI access, login as root with the password you set up when you installed Proxmox.
Installing Linux ISOs on Proxmox Server
We always like to begin our setup of virtual machine platforms by installing the ISOs for Debian 11, Ubuntu 22.04, and Rocky 8. CAUTION: Even though Ubuntu 22.04.2 is now available, the Ubuntu 22.04.1 ISO was necessary to install earlier releases of Incredible PBX 2027-U. To be on the safe side, install both flavors so they will be available for other tasks.
In the Proxmox portal, navigate to Folder View -> Storage -> local -> ISO Images. You can begin by either downloading the desired ISO images to your desktop and then clicking Upload. Or you can download the ISO images directly from the web by clicking Download from URL. Here are the direct ISO links for Debian 11.7.0, Ubuntu 22.04.1, Ubuntu 22.04.2, and Rocky 8.8. Please note that new ISO images are released regularly which means these links will fail at some point in the future. Please let us know if you discover it first by sending a kind note to support [at] incrediblepbx.com. If you’re in a hurry, try bumping up the value in the point release of the download link. Or download these versions from the new Incredible PBX Repo.
Installing Linux Containers on Proxmox Server
For slightly better performance by sharing the kernel instance with the physical server, you may wish to use Containers instead of Virtual Machines. If you’re familiar with OpenVZ templates, Proxmox Containers are nearly identical. The downside is you cannot migrate LXC Containers. Play with both and choose for yourself. To install Debian 10 and 11, Ubuntu 22.04, and Incredible PBX 2027-U Container templates, here’s how. Log into your Proxmox CLI as root and issue these commands:
pveam update
pveam available
pveam download local debian-10-standard_10.7-1_amd64.tar.gz
pveam download local debian-11-standard_11.6-1_amd64.tar.zst
pveam download local debian-12-standard_12.2-1_amd64.tar.zst
pveam download local ubuntu-22.04-standard_22.04-1_amd64.tar.zst
cd /var/lib/vz/template/cache
wget -O incrediblepbx2027U.tar.zst https://bit.ly/3nxswhc
We’ll cover how to create an Incredible PBX 2027-U Container from a template below.
Installing Incredible PBX 2027-U on Proxmox Server
Now for the fun part. Once you deploy the latest Incredible PBX 2027-U image on your Proxmox server, your VMs will be up and running in less than a minute. Here are the steps. Begin by logging into the command line interface (CLI) as root. Then issue the following commands using a unique number for the virtual machine image you wish to create, e.g. 777:
cd /var/lib/vz/dump
wget https://filedn.com/lBgbGypMOdDm8PWOoOiBR7j/IncrediblePBX2027-Proxmox/vzdump-qemu-ipbx2027u.vma.zst
# verify MD5 checksum: 8f86465e88ce3dfcf7b510bdc3b60393
md5sum vzdump-qemu-ipbx2027u.vma.zst
# create virtual machine with unique VM number, e.g. 777
qmrestore vzdump-qemu-ipbx2027u.vma.zst 777
To create additional VMs, you can either issue the qmrestore command above with a different VM number while positioned in the CLI at /var/lib/vz/dump, or you can create them in the GUI by navigating to Server View -> proxmox -> local and choosing Backups. Then highlight the vzdump-qemu-ipbx2027u.vma.zst backup image and click Restore. Now give the new VM a unique number and then click Restore to build the virtual machine.
Installing Incredible PBX 2027-D on Proxmox Server
To deploy the latest Incredible PBX 2027-D image with Debian 11 on your Proxmox server, issue the following commands from the CLI:
cd /var/lib/vz/dump
wget https://filedn.com/lBgbGypMOdDm8PWOoOiBR7j/IncrediblePBX2027-Proxmox/vzdump-qemu-ipbx2027d.vma.zst
# create virtual machine with unique VM number, e.g. 777
qmrestore vzdump-qemu-ipbx2027d.vma.zst 777
Create additional VMs using the steps documented in the previous section.
Installing Incredible PBX 2027-R on Proxmox Server
To deploy the latest Incredible PBX 2027-R image with Rocky 8 on your Proxmox server, issue the following commands from the CLI:
cd /var/lib/vz/dump
wget https://filedn.com/lBgbGypMOdDm8PWOoOiBR7j/IncrediblePBX2027-Proxmox/vzdump-qemu-ipbx2027r.vma.zst
# create virtual machine with unique VM number, e.g. 777
qmrestore vzdump-qemu-ipbx2027r.vma.zst 777
Create additional VMs using the steps documented in the previous section.
Installing Incredible PBX 2021-D on Proxmox Server
Believe it or not, there still are folks that depend upon faxing in their daily lives. While a somewhat kludgy fax solution exists for Incredible PBX 2027, it’s not the same as the slick Incredible Fax application using HylaFax and Avantfax. If you really need faxing, the problem is easily solved by deploying Incredible PBX 2021-D with Debian 10, Asterisk 18, FreePBX 15, and Incredible Fax. We’ve even freshened up the 2021-D Proxmox image to current specs. Here’s how to deploy it. Once you deploy the latest Incredible PBX 2021-D image on your Proxmox server, your VMs will be up and running in less than a minute. Here are the steps. Begin by logging into the Proxmox CLI as root. Then issue the following commands using a unique number for the 2021-D virtual machine you wish to create, e.g. 555:
cd /var/lib/vz/dump
wget https://filedn.com/lBgbGypMOdDm8PWOoOiBR7j/IncrediblePBX2021-Proxmox/vzdump-qemu-ipbx2021d.vma.zst
# verify MD5 checksum: b37e6fba28fd03fbcf99760e0bdbf866
md5sum vzdump-qemu-ipbx2021d.vma.zst
# create virtual machine with unique VM number, e.g. 555
qmrestore vzdump-qemu-ipbx2021d.vma.zst 555
To create additional VMs, you can either issue the qmrestore command above with a different VM number while positioned in the CLI at /var/lib/vz/dump, or you can create them in the GUI by navigating to Server View -> proxmox -> local and choosing Backups. Then highlight the vzdump-qemu-ipbx2021d.vma.zst backup image and click Restore. Now give the new VM a unique number and then click Restore to build the virtual machine.
We would encourage you to try both the Incredible PBX 2027-U image and the Incredible PBX 2021-D image. Both are absolutely free so you have nothing to lose by experimenting a bit.
Incredible PBX Startup Steps with Proxmox
When the upload finishes, log into your Proxmox web portal: https://server-ip:8006
Then navigate to Folder View -> Virtual Machine -> 555 or 777 -> Start. Choose the Console option and wait for your virtual machine to boot up. Then log in as root with the default password: password. Press ENTER to kick off the brief setup procedure. Create a very secure root password as well as an admin password for the FreePBX GUI and Apache web apps. Press ENTER to keep your local version of sshd_config. Carefully read the configuration messages when the setup completes. Press ENTER to reboot.
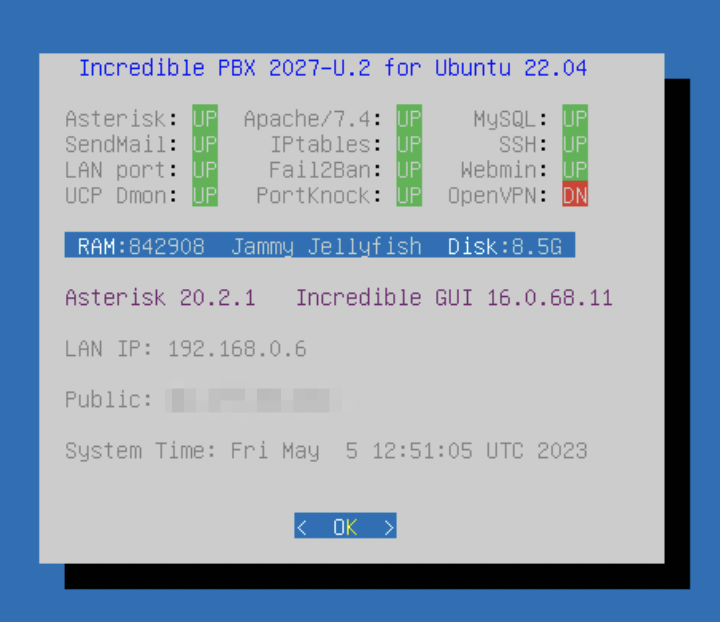
After the server reboots, log back in as root using the Console option and your new root password. The Automatic Update Utility will load any late-breaking security fixes and then the pbxstatus screen will display. Make note of your private IP address. All private IP addresses are whitelisted in the firewall; however, if you will be accessing your Proxmox VM from a public IP address, then there’s one additional step. Run /root/add-ip and whitelist the IP address of your desktop machine replacing mypc and 12.34.56.78 in this example with a label for the PC and its actual public IP address: /root/add-ip mypc 12.34.56.78.
You now can log into the VM’s Linux CLI as root at the IP address you deciphered above. And you can log into the FreePBX Web GUI as admin by pointing a browser to that same IP address and entering the FreePBX password you assigned during setup.
Creating Incredible PBX Containers on Proxmox
If you wish to compare performance with Containers, here’s how to set up an Incredible PBX 2027-U Container from the Incredible PBX 2027-U template you installed previously. We don’t recommend containers for production use.
Log into your Proxmox web portal: https://server-ip:8006. Navigate to Server View -> proxmox. Click Create CT. Assign a CT ID (the next available number is the default). Enter a root password twice for the Container. Click Next. Choose incrediblepbx2027U.tar.zst from the Template pulldown menu. Click Next. For disk size, we recommend 20GB but you can set any size above 15GB. Click Next. Assign the number of Cores desired for your Container. 1 is ample. Click Next. For Memory, we recommend 2048. For Swap, we recommend 1024. Click Next. For Network settings, we recommend DHCP for both IPv4 and IPv6. Click Next. Leave the default DNS settings. Click Next. Review your Settings and then click Finish. Once the Container is created, close the window and start the new Container. Then follow the Incredible PBX Startup Steps outlined above.
Continue your journey by hopping over to our tutorials for Incredible PBX 2027-U and Incredible PBX 2021-D. Enjoy!
Originally published: Monday, May 8, 2023

Need help with Asterisk? Visit the VoIP-info Forum.
Special Thanks to Our Generous Sponsors
FULL DISCLOSURE: ClearlyIP, Skyetel, Vitelity, DigitalOcean, Vultr, VoIP.ms, 3CX, Sangoma, TelecomsXchange and VitalPBX have provided financial support to Nerd Vittles and our open source projects through advertising, referral revenue, and/or merchandise. As an Amazon Associate and Best Buy Affiliate, we also earn from qualifying purchases. We’ve chosen these providers not the other way around. Our decisions are based upon their corporate reputation and the quality of their offerings and pricing. Our recommendations regarding technology are reached without regard to financial compensation except in situations in which comparable products at comparable pricing are available from multiple sources. In this limited case, we support our sponsors because our sponsors support us.
 BOGO Bonaza: Enjoy state-of-the-art VoIP service with a $10 credit and half-price SIP service on up to $500 of Skyetel trunking with free number porting when you fund your Skyetel account. No limits on number of simultaneous calls. Quadruple data center redundancy. $25 monthly minimum spend required. Tutorial and sign up details are here.
![]() The lynchpin of Incredible PBX 2020 and beyond is ClearlyIP components which bring management of FreePBX modules and SIP phone integration to a level never before available with any other Asterisk distribution. And now you can configure and reconfigure your new Incredible PBX phones from the convenience of the Incredible PBX GUI.
The lynchpin of Incredible PBX 2020 and beyond is ClearlyIP components which bring management of FreePBX modules and SIP phone integration to a level never before available with any other Asterisk distribution. And now you can configure and reconfigure your new Incredible PBX phones from the convenience of the Incredible PBX GUI.
 VitalPBX is perhaps the fastest-growing PBX offering based upon Asterisk with an installed presence in more than 100 countries worldwide. VitalPBX has generously provided a customized White Label version of Incredible PBX tailored for use with all Incredible PBX and VitalPBX custom applications. Follow this link for a free test drive!
 Special Thanks to Vitelity. Vitelity is now Voyant Communications and has halted new registrations for the time being. Our special thanks to Vitelity for their unwavering financial support over many years and to the many Nerd Vittles readers who continue to enjoy the benefits of their service offerings. We will keep everyone posted on further developments.


Thanks for posting this. Should we be going into module admin and upgrading things? I find I run into many errors installing modules there or upgrading them. Please advise. Thanks!
[WM: Nerd Vittles tutorials are your friend. Most reliable way to upgrade FreePBX modules is from the Linux CLI as shown below:]
rm /tmp/*

fwconsole ma upgradeall

fwconsole reload

/root/sig-fix

/root/sig-fix