
Virtualization Trifecta: $500 Buys a Perfect Hosting Platform
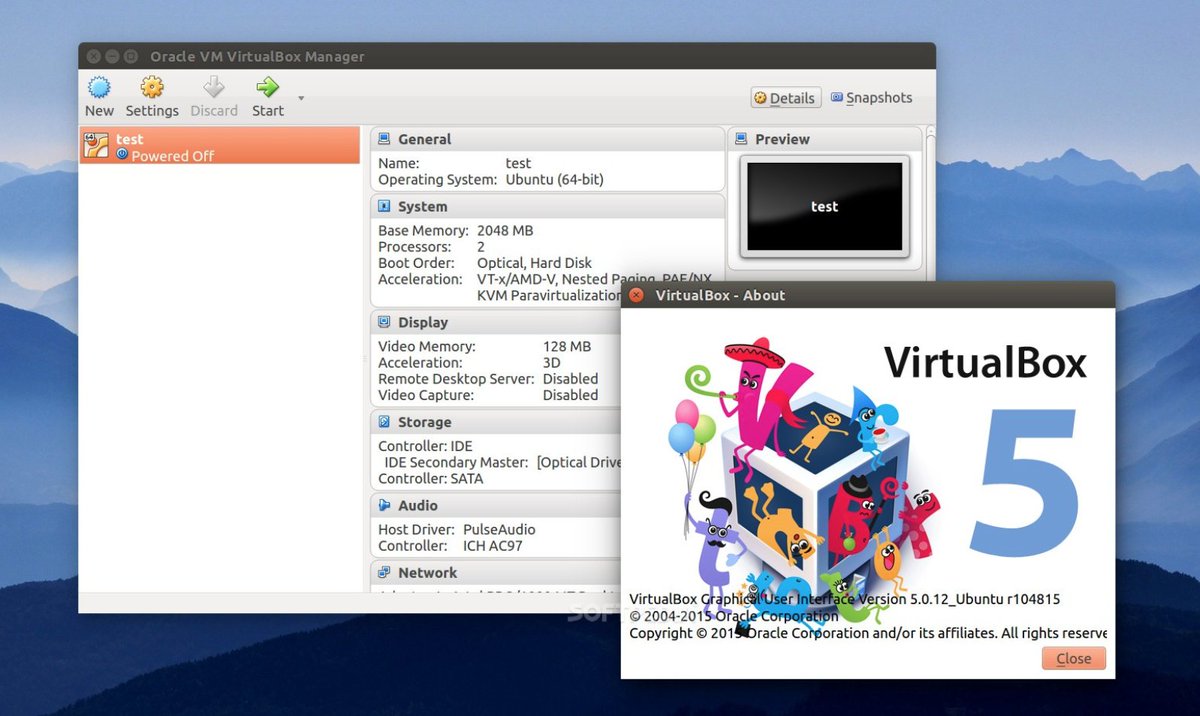
We’ve been raving about Zorin OS 16 last month as the best desktop operating system available. And today we combine it with a $500 MiniPC to provide not one, but three, virtualization platforms with a single machine. You get LXC Linux Containers, VirtualBox, and the Windows 11 WSL platform all rolled into one dual-boot desktop PC. On the Linux side with Zorin OS 16, you can run multiple LXC containers (shown above) and VirtualBox virtual machines simultaneously. And on the… Read More ›


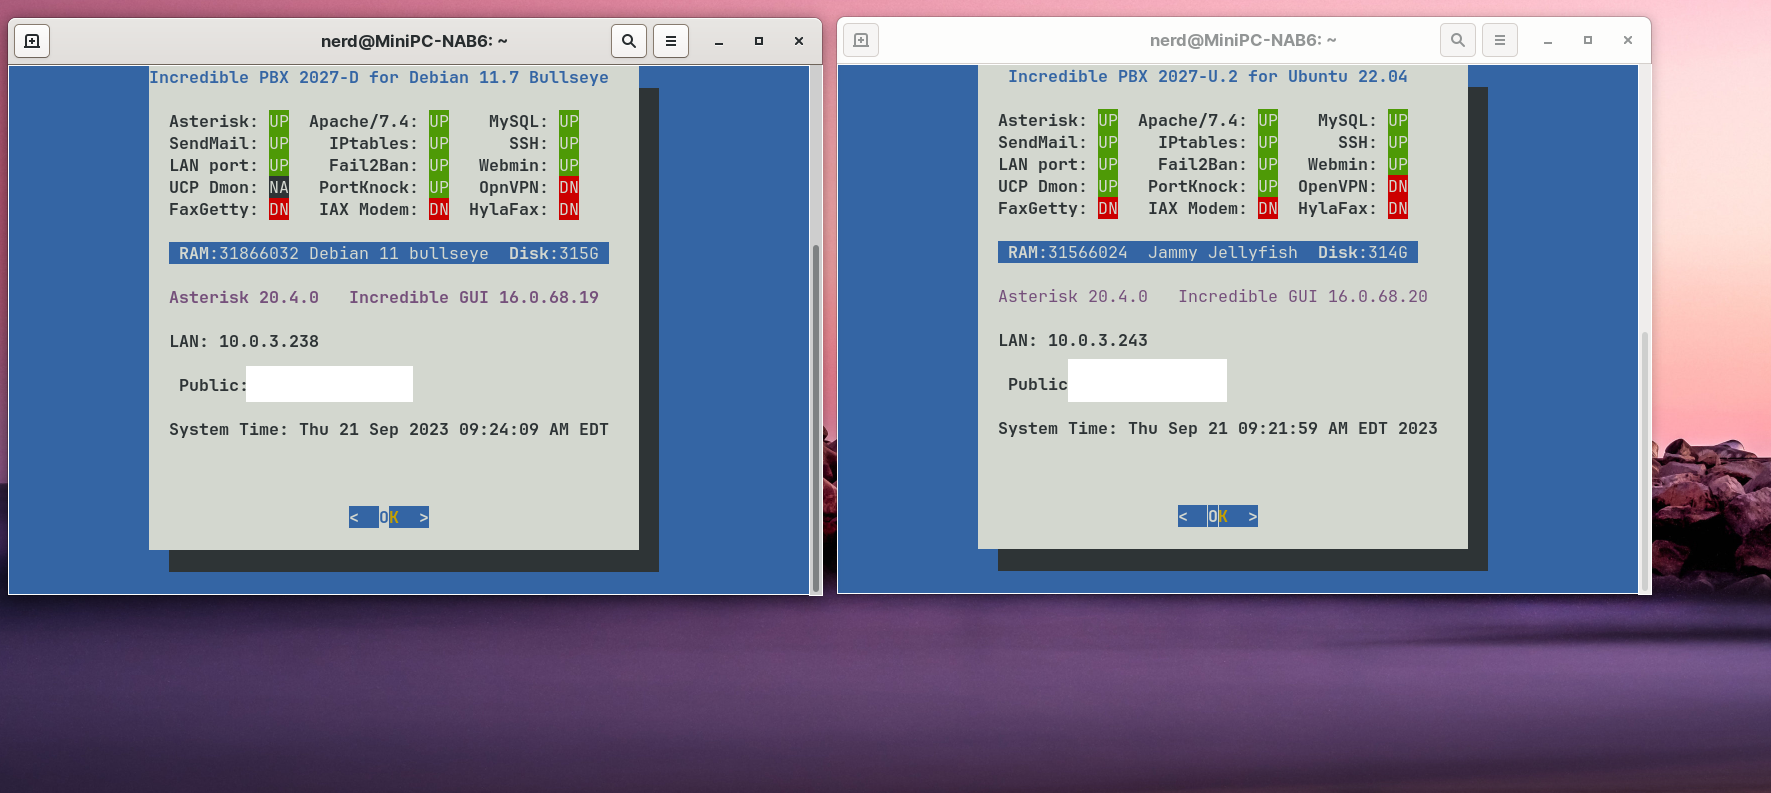
 JUST RELEASED: Visit the Incredible PBX Wiki
