
 One of the really terrific features of Asterisk® is it’s ability using DISA (Direct Inward System Access) to provide dial tone to an incoming caller. This allows a caller to Phone Home and place outgoing calls through a remote Asterisk server to take advantage of all those VoIP cost savings we’ve been discussing ad nauseum. You obviously need to be thinking about security before you implement DISA but, properly secured, DISA is one of the most powerful functions of your Asterisk PBX so why not use it to your advantage. But there are some wrinkles. Suppose you’re traveling in a foreign country that charges a $14 minimum for any completed call to the U.S. regardless of duration. Or you may just be at a neighbor’s house and want to make a quick call on your nickel to check on Aunt Betty in Paris. Or you may be on a Nextel free incoming call plan and don’t want to burn up your cellphone minutes placing outgoing calls directly with your cellphone.
Several weeks ago, we provided a quick and dirty HOW-TO on activating a DISA callback using a web browser and entering a specific command to your Asterisk@Home’s web server. But there may be folks that don’t want the security risks associated with supporting a web server. So today we want to revisit our original Phone Home column and give you three different ways to implement DISA. The three methods are the following: (1) the AutoAttendant, (2) the CallMe Web Interface, and (3) the One Ringy-Dingy. These obviously can be mixed and matched to meet your own specific requirements.
AutoAttendant DISA. The simplest DISA implementation is to add an option to your AutoAttendant. With this option, you phone home, pay the costs of the call, and while still connected make another call through your Asterisk server by picking the DISA selection when your AutoAttendant plays. You’ll be prompted for a password and, after entering it correctly, Asterisk will provide dialtone for your use. The drawback of this option is obviously the cost, if any, of the call to your home base. If that’s not a problem, then this is a great solution. And it’s very easy to implement. Take a look at the [from-external-custom] code in our Securing Your Asterisk@Home PBX article for all the details. But basically you only need to add a couple of lines to your AutoAttendant to support DISA. Choose the number that people will press to activate DISA and pick a very secure password, and you’re all set. Assuming the number to press is 4 and your chosen password was 1234588, here’s how to set up the AutoAttendant code to implement DISA. It doesn’t get much easier than this.
exten => 4,1,Authenticate(1234588)

exten => 4,2,Background(pls-wait-connect-call)

exten => 4,3,DISA(no-password|from-internal)
CallMe Web Interface. We’ve put together a little web application (actually a PHP script) so that, using a web browser on the road, you can tell your Asterisk server to call you and provide dialtone to any number you specify. The only prerequisite here is that we don’t want to sell the farm, i.e. provide free dial tone service and unlimited international calling for all the world’s hackers and crackers. We also don’t want to have to go through a bunch of authentication steps to access the web site and put the call in motion. So here’s the design. We have a PHP script which you can download here. It needs to be renamed to callme.php. Then copy it into the /var/www/html directory on your Asterisk server. You’ll also need to tell your firewall/router to route HTTP or port 80 traffic to the internal IP address of your Asterisk server. This is usually done under the Services or Rules menus on most routers. You’ll want to specify that all port 80 traffic be allowed through the firewall all of the time. Be sure you’ve changed ALL of your Asterisk passwords before you do this!
To use this script from the Internet, you’ll probably want to have to have a more permanent fully-qualified domain name associated with your Asterisk server. We explained here how to do this using dyndns.org. If you use a SIP provider with your Asterisk server, the syntax is as follows: http://asterisk.dyndns.org/callme.php?number=sip/bv/4045551212 where asterisk.dyndns.org is the fully-qualified domain name for your Asterisk server and 4045551212 is the area code and number where you wish to accept a call with dialtone, and bv is the outgoing trunk name of your SIP provider. If you use an IAX provider with your Asterisk server, the syntax is as follows: http://asterisk.dyndns.org/callme.php?number=iax2/goiax/14045551212 where asterisk.dyndns.org is the fully-qualified domain name for your Asterisk server and 14045551212 is the all-important 1 followed by the area code and number where you wish to accept a call with dialtone, and goiax is the outgoing trunk name of your free IAX provider. Nothing else needs to be changed. To dial a local extension, use this syntax: http://asterisk.dyndns.org/callme.php?number=sip/204 where asterisk.dyndns.org is the fully-qualified domain name for your Asterisk server and 204 is the local number to ring. Beginning on the first ring, Asterisk will start prompting for a password. It doesn’t care whether the call is answered or not, and it times out after 10 seconds. After three unsuccessful password attempts (each timeout counts as 1), Asterisk hangs up. Stated another way, you have about 30 seconds to enter your password after the phone first rings. Then Asterisk disconnects the call. To enter your password, key in the touchtone numbers which match the numerical password code you specified in your [callout] context (see below). Then press the pound (#) key. Note that a web page will not display at this web address unless you enter the portion of the address following the question mark. Nor will a call be placed unless the sip/bv/ syntax precedes a phone number. We did this for security reasons.
Before the above script will work, you also need to add the following context to the bottom of the extensions_custom.conf configuration file discussed above. Make sure you change the password 24681234 to something very secure. After all, it’s your phone bill! Once you make this change, it won’t take effect until you restart Asterisk. The easiest way to do that is to access setup within AMP, click Incoming Calls, then click the Submit Changes button, then click on the red bar which appears. Count to 10 and your changes should be operational.
[callout]

exten => s,1,Authenticate(24681234)

exten => s,2,DISA(no-password|from-internal)
One Ringy-Dingy. As we mentioned at the beginning of this article, there may be times when you don’t have access to a web browser and the cost of completed outgoing calls is astronomical. Or you may just find it more convenient to place a quick call to your Asterisk server rather than firing up a web browser. For the One Ringy-Dingy option to work, you must place a call to your Asterisk server from a phone that can accept incoming calls directly (not most hotel rooms or pay phones), and you must call from a phone with a legitimate CallerID number. Ideally, for this option to work in an unattended way all the time, you’d want to have a separate Direct-Inward-Dial (DID) number dedicated to this task. Why? Because, once Asterisk detects one ring on this number, it will issue a Congestion tone (fast busy) and immediately build and then process a DISA script to call you back. That obviously isn’t a desirable response on your regular phone number. We still will configure DISA to prompt for a password when the return call is answered, but callers may be a little surprised if they call you at home, hear a fast busy, and then immediately get a return call from your home asking them for a password.
Here are the steps to get this set up. We’ll tweak our Asterisk@Home/AMP dial-in context to turn on support for tracking incoming calls by DID. Then, for security, we’ll build a separate context for this DID number to isolate it from our default AutoAttendant which manages the rest of our incoming calls. Once we have the DID context created, we’ll build a DID entry in AMP to support this incoming line. Next, we’ll drop in the code to actually process the incoming call and build and execute the scripts necessary to make the return call. There are several new and very important Asterisk features that we’ll be taking advantage of. First, we’ll be executing code based upon a ringing phone line as opposed to an answered call. Second, we’ll show you how to execute context code and scripts after a call ends. And finally, we’ll be setting a maximum call limit on the outgoing DISA calls just to provide some food for thought on how you can better harrass your teenagers. So let’s get started.
Tweaking the Dial-In Context. From our previous articles, you will recall that Asterisk@Home and other Asterisk systems using the Asterisk Management Portal (AMP), rely upon the [from-sip-external] context in extensions.conf to process incoming calls. Right now, we have that context pointed to our AutoAttendant context which we built in the extensions_custom.conf file. You can read all about how to build the AutoAttendant here. The AutoAttendant implementation effectively disabled support for AMP’s DID Routes, but it secured your Asterisk system by reducing the number of points of attack to one, i.e. every incoming call had to flow through our one AutoAttendant. For those just getting started with Asterisk, this was a good thing. But, now that you’re an expert, we need a little more flexibility because we want to set up a DID line just to handle requests for DISA services, and we don’t want incoming calls on that line going to our AutoAttendant. Why? Because, with a separate DISA DID, we can eliminate any costs in placing calls to the Asterisk server requesting remote dial tone. How? This DID will never be answered. All it will do is ring once or twice before handing out a Congestion tone, and that activity will be sufficient to capture the incoming call’s CallerID and then set in motion the DISA return call process … hence the name One Ringy-Dingy. Won’t the telemarketers be thrilled! Just think of this DID as a toll-free number without having to pay for a toll-free number. To turn on support for AMP’s DID Route management, just add the following line to your [from-sip-external] context, and be sure you add it immediately below the [from-sip-external] label. See how easy this is when there’s some documentation (HINT!).
include => ext-did
Configuring an AMP DID Route. Now that we’ve activated DID Route support for Asterisk, let’s actually build a DID Route to show you how it’s done. This presupposes that you’ve ordered an additional DID from one of your providers and that you already have a trunk for that provider set up. When you order the additional DID, make sure that you specify that you do not want voicemail activated on this DID. Or, if you have control of the voicemail setup for this DID, turn it off. The reason is that, when incoming calls to this number get a congestion tone from Asterisk, that will activate the voicemail option with most providers. That, in turn, defeats our purpose of not answering calls ringing on this DID line to save money.
To create the DISA DID route, use a web browser to access the Asterisk Management Portal. Then choose AMP->Setup->DID Routes. Plug in the DID phone number you wish to assign to DISA duty. For the Destination, click on the Custom App button, and then enter the following: custom-teliax-in,8435551212,1 substituting your actual DID number. Click the Submit button and then the red bar to reset Asterisk. Note that AMP does no error checking for this custom context other than looking for the word "custom." Remember, we haven’t even built this context yet! But let’s do it now.
DISA Custom Contexts. For our One Ringy Dingy example, we’re going to use two different providers. The DID line is rented from Teliax.com. That’s where you call to trigger a callback. But Teliax is just too expensive for actual outgoing or incoming calls so we’re using two TelaSIP trunks (with permission): one to return the call to the original caller (that’s you or me) and one to place our outgoing DISA call (to the callee). If you happen to use TelaSIP, remember that you don’t need two separate accounts for the outbound calls since TelaSIP gives you two voice paths with your single line account.
There are three separate contexts we need to create at the bottom of extensions_custom.conf file to make all of this work. Keep in mind that there are three steps in the One Ringy-Dingy process: (1) you place a call to your DID number, and your Asterisk server detects the incoming call; (2) your Asterisk server calls you back, and you’re given dialtone after successfully entering your DISA password; and (3) your Asterisk server lets you to place an outgoing DISA call for a specified length of time to anywhere permitted in this context’s custom DISA dialplan. Here are the three contexts to support the three functions: (1) [custom-teliax-in] listens to the DID line for an incoming call and then sets up and executes the code setting the return call in motion; (2) [custom-telasip-callout] actually manages the return call once someone answers and authenticates the user for DISA service; and (3) [custom-telasip] sets the dialplan and timeout options for the call and then actually connects and times the call if the caller satisfies the dialplan rules. If you’re a little confused at this point, an example may help. Skip down to the Free Samples section below and actually try a test call to see how all this works. Then come back, and we’ll finish building it for your own Asterisk system.
Incoming Call Context. So a user first calls your DID number to initiate a DISA callback. Let’s start with the code that handles the incoming call on your DID line:
[custom-teliax-in]

exten => 8436541010,1,NoOp(Incoming call from Teliax #8436541010)

exten => 8436541010,2,Congestion

exten => 8436541010,3,Hangup

exten => h,1,SetCIDNum(${CALLERIDNUM:2})

exten => h,2,System(echo channel: SIP/telasip-gw/${CALLERIDNUM} > /tmp/${CALLERIDNUM})

exten => h,3,System(echo context: custom-telasip-callout >> /tmp/${CALLERIDNUM})

exten => h,4,System(echo extension: ${CALLERIDNUM} >> /tmp/${CALLERIDNUM})

exten => h,5,System(echo priority: 1 >> /tmp/${CALLERIDNUM})

exten => h,6,System(echo callerid: 2025560000 >> /tmp/${CALLERIDNUM})  ; Your CallerID for your TelaSIP account goes here

exten => h,7,System(echo sleep 30 > /tmp/${CALLERIDNUM}.2)

exten => h,8,System(echo cp /tmp/${CALLERIDNUM} /var/spool/asterisk/outgoing >> /tmp/${CALLERIDNUM}.2)

exten => h,9,System(chmod 775 /tmp/${CALLERIDNUM}.2)

exten => h,10,System(/tmp/${CALLERIDNUM}.2)

exten => h,11,Hangup()
Let’s walk through each line of the script so that you’ll know what needs to be changed on your own system if you use this. The first three lines get processed every time someone calls your dedicated DISA DID number. Adjust the numbers in each line to match your DISA line’s 10-digit CallerID number. Line 1 just outputs a message to the console indicating that there’s an incoming call on this line. Line 2 sends the Congestion tone back to the incoming caller. Line 3 is just a safety net to be sure the call is hung up as far as Asterisk is concerned. The next 11 lines beginning with exten=>h tell Asterisk what to do when it detects that the caller has hung up on the call. This code gets processed after the caller hangs up or after Asterisk processes the Hangup command in the third line.
Line h,1 is very important. Different providers relay CallerID numbers in different ways. Teliax sends a U.S. number as +14041234567. Many providers (including BroadVoice and TelaSIP) just send the ten-digit number for incoming U.S. calls. You need to know this because we’ll need to format the CallerID number properly to match what your outgoing provider expects to see when you process the return call in step 2. So how do you know what the CALLERIDNUM format is? Run asterisk -r from a command window and watch the information about an incoming call on the DID line you plan to use. If the format is a 10-digit number, then change SetCIDNum(${CALLERIDNUM:2}) to SetCIDNum(${CALLERIDNUM:0}) which means "use every digit as received." If the number is in the format 1+8901234567 then leave the expression the way it is. It basically says strip off the first two digits and store the rest as the CallerID number.
Line h,2 is where you identify which of your VoIP providers will be used to place the return call in step 2. If you’re using TelaSIP (as we are here), then just make sure the outbound trunk name matches your entry for this provider under AMP->Setup->Trunks. If you’re using an IAX provider instead of a SIP provider, change SIP to IAX2 as well. Finally, be sure what is now a 10-digit CallerID number is formatted properly for the return call through your dialback provider. TelaSIP wants a 10-digit number. GoIAX, for example, expects to receive a 1 and then the area code and number. For GoIAX, just insert a 1 before the CallerID number.
Line h,3 identifies the context which will actually place the return call. Line h,6 is where you specify the CallerID number of your Asterisk trunk that will be placing the return call. Teliax, for example, lets you spoof the CallerID for your calls so this is where you would enter the main number of the White House (if that’s your thing): 2024561414. Finally, in line h,7 you can set how much of a delay will be imposed before your Asterisk system places the return call. It’s set to 30, but you can change it to meet your requirements. The rest of this code should work as is.
Callback Context. Now we’re ready for Asterisk to place the return call. The previous code actually sets the call in motion with a 30 second delay and then a call to the CallerID number specified using the [custom-telasip-callout] context. But here’s the code that actually manages the callback. It also prompts for the DISA password once someone answers. Line s,3 is where you set the DISA password. Make it secure! Remember: IT’S YOUR PHONE BILL!
[custom-telasip-callout]

exten => s,1,Background(silence/2)

exten => s,2,Background(asterisk-friend)

exten => s,3,Authenticate(6373)

exten => s,4,Background(pls-wait-connect-call)

exten => s,5,DISA(no-password|custom-telasip)
When someone answers the return phone call, Asterisk counts to 2 and then says, "Asterisk is your friend. Please enter your password and press the pound key." That’s the person’s clue to enter their DISA password. Three guesses and Asterisk hangs up. If the password is successfully entered, Asterisk provides dialtone and passes the call to the [custom-telasip] context in s,5.
DISA Outbound Call Context. Once dialtone is provided, the user can enter whatever digits are permitted in the [custom-telasip] context’s dialplan. Here’s ours:
[custom-telasip]

exten => _1NXXNXXXXXX,1,AbsoluteTimeout(600)

exten => _1NXXNXXXXXX,2,Macro(dialout-trunk,8,${EXTEN:1},)

exten => _1NXXNXXXXXX,3,Macro(outisbusy)	; No available circuits

exten => T,1,Playback(thank-you-for-calling)

exten => T,2,Playback(goodbye)

exten => T,3,Hangup
Lines 1, 2, and 3 specify that the user has one and only one dialing option: dial 1 and then a 3-digit U.S. area code and then a 7-digit U.S. phone number. Line 1 is where you set the maximum duration for the call in seconds (600=10 minutes). Line 2 is where you really have to be careful. It has three gotcha’s. First, you need to identify which trunk will be used to place the DISA call. If your provider only offers one dial path per circuit, then this trunk cannot be the same one as what’s specified in custom-telasip-in,h,2 above or you’ll get an "all circuits are busy" message. In short, you need one outbound trunk for the callback and another outbound trunk to place the actual DISA call from dialtone. If you use TelaSIP’s residential plan, then you can use the same trunk for both. Second, you need to know the number of the dialout trunk to be used for the DISA call. AMP numbers all of your outbound trunks. If you look in the [globals] context at the top of the extensions_additional.conf file, you’ll see all of your outbound trunks labeled as OUT_1, OUT_2, etc. Find the number of the one that matches the name of the outbound trunk you want to use for your DISA call. Replace the "8″ in line 2 of [custom-telasip] with the appropriate number you wrote down. Don’t use OUT_8, just 8. Third, you’ve got to get the DISA number dialed by the user properly formatted for the provider that will be handling the call. In our case, we accepted only numbers beginning with 1 plus a U.S. area code plus a 7-digit number, but TelaSIP doesn’t want the 1 so we strip it off. If, however, your provider (such as GoIAX) expects a 10-digit number with a leading 1, then you’d adjust line 2 above to look like this: exten => _1NXXNXXXXXX,2,Macro(dialout-trunk,8,${EXTEN},). This tells Asterisk not to strip off the first digit before sending the rest to dialout-trunk 8. The extension entries beginning with an upper case T tell Asterisk what to do when the maximum duration of a call expires.
That about does it. To complete your work, save the three new contexts to extensions_custom.conf and then restart Asterisk.
Making a Test Call. To be sure everything is working as it should, start up Asterisk in interactive mode using the Command Line Interface (CLI) so that you can actually watch what’s happening when calls are placed and received. This works best if you connect to your Asterisk server through SSH from a Mac or PC. SSH comes with every Mac and the syntax is simple: ssh root@AsteriskIPaddress. If you’re still chained to Microsoft, download Putty from the Mother Country, and you can do the same thing using a Windows machine. Once you’re logged in as root, issue the following command: asterisk -r. Quit ends your Asterisk CLI session, and exit logs you out of your SSH session. Now issue the command: set verbose 10 to get maximum information. Then place a call to your DISA DID number from your cellphone and watch what happens. You should see the call being processed without being answered. Asterisk will then issue a Congested tone and disconnect. Your CLI display will remain quiet for 20 seconds, and then the return call will be placed. When you answer the call, you’ll be prompted for your password. Enter it, wait for dial tone, dial a number with 1, then area code, then 7-digit number and watch what happens. If the call fails, exit from CLI by typing Quit. Change to the /tmp directory: cd /tmp. Do a directory listing in reverse date order: ls -all -t -r. At the bottom of the list should be two files with the area code and number of your cellphone. One will have a .2 extension. Display the contents of the file without the extension: cat 6781234567 using your cellphone number. The contents should look something like this. If not, check your typing in the contexts we added and try again. Keep in mind that editing either of these two files is pointless. They both get built on the fly in the h section of the [custom-teliax-in] context depending upon the CallerID of the caller. Linux will automatically handle deletion of files from the /tmp directory in due course.
[root@asterisk1 tmp]# cat 6781234567

channel: SIP/telasip-gw/16781234567

context: custom-telasip-callout

extension: 6781234567

priority: 1

callerid: 2025560000
And, yes, we know the extension specified does not match the extension (s) actually entered in the [custom-telasip-callout] context. But, fear not, your call will fall back to the s extension when Asterisk can’t find an entry matching your cell phone number. Why did we do this? Well, you may want to have Asterisk do something special when it knows it’s you calling from your cellphone or one of your kids calling from your house at the lake. For example, you might want to provide a wide open dialplan for yourself with a different password as well. Remember, people can spoof your CallerID number so make the password VERY SECURE! Here’s how it would look. Substitute your own cellphone number and a new password. Once you make the changes, restart Asterisk and then place another call from your cellphone to your DISA DID and try entering a local extension or a foreign phone number if your regular dialplan supports it. Enjoy!
[custom-telasip-callout]

exten => 6781234567,1,Background(silence/2)

exten => 6781234567,2,Background(asterisk-friend)

exten => 6781234567,3,Authenticate(63738488537)

exten => 6781234567,4,Background(pls-wait-connect-call)

exten => 6781234567,5,DISA(no-password|from-internal)
exten => s,1,Background(silence/2)
exten => s,2,Background(asterisk-friend)
exten => s,3,Authenticate(6373)
exten => s,4,Background(pls-wait-connect-call)
exten => s,5,DISA(no-password|custom-telasip)
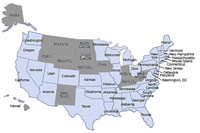 Free Samples. Everybody loves free samples so here’s one for you. You may remember Gene Willingham and the good folks at TelaSIP, the winner and least expensive provider in our unlimited U.S. long distance calling shootout. In a moment of weakness, TelaSIP’s agreed to let you try out our One Ringy-Dingy service (known affectionately around our house as the One Rinky-Dink Service because of the amount of time we’ve wasted on this). Anyway, it uses our Asterisk server and TelaSIP’s long distance bandwidth. Calls are limited to 10 minutes after which the callee will hear "Goodbye" followed by a click. You’ll get two beeps followed by a fast busy. In other words, time’s up! Here’s how to use this free service. Call from a phone in the U.S. with CallerID. Call the number shown on the map (inset) which is one of our DIDs in Charleston, South Carolina. The call will never be answered so you won’t be billed for the long distance call. Within 10 seconds, you should hear a fast busy. Just hang up, and our Asterisk server will call you back within 30 seconds. Listen carefully! You’ll be provided a random password for your call, and then you’ll be prompted to key it in. With your phone keypad, just do that and press the pound key (#). If you get a message that it’s incorrect, just try again (HINT: I told you to listen carefully). We used to have a fixed password, but the war-dialers were abusing the system so now it’s random. Back to the drawing boards, boys! Once you successfully enter the password, you’ll then get a DISA dial tone. Dial 1 and then the area code and phone number of someone you love (in the United States only). This is an excellent way for you to check out the voice quality of TelaSIP calls without spending a dime. Just don’t abuse the offer or this paragraph may magically disappear … as will the free calls. For those that don’t know us, we don’t record your calls, and we don’t store the number of the person you’re calling although the Asterisk logs probably have it for a while anyway. For security purposes, we do log your CallerID and the time of your call just in case you do something you shouldn’t be doing and the FBI traces the call back to us. If any of the above offends you, exercise your constitutional right to not use this free service. And a final reminder: none of this works if you don’t have CallerID enabled when you call. How would we know where to call you back? You won’t believe how many calls we receive with a CallerID of Asterisk. That obviously won’t work either.
Homework. There’s really a fourth DISA option. Under this scenario, you would call your home number, have the AutoAttendant answer, and then press 4 for DISA. After providing your password, Asterisk would hang up and call you back with DISA dial tone using the same type scripts we implemented in One Ringy Dingy above. The advantage of this approach is you don’t need a separate DID line to support DISA. The disadvantage is you have to pay for a one minute phone call to your home number each time you want remote dial tone. But it would save the expense of lengthy calls to your home just to use your outbound trunks. We’ll leave it to you to figure this one out. It shouldn’t take you long now that you understand how all the pieces fit together.
Some Recent Nerd Vittles Articles of Interest…


Just to prove I have a bad memory and time to waste… the free call number’s best mnemonics I found is 8-idol-i-1010 🙂 BTW – Ward, thanks lots for Nerd Vittles!! and your invitation to lunch in the Atlanta area is still open!
Ringy-Dingy has gone to Notty-Worky …if this is due to some kind of abuse – SHAME ON YOU!! –and sorry for the few, Ward. It was a neat tool to show others what Asterisk can do in skilled hands…
[WM: Actually, it wasn’t an abuse issue. GoIAX stopped supporting the GSM codec that we were using to make calls. And now GoIAX has blocked everything except toll-free calls because of war dialers. So we’ve switched the sample to TelaSIP and rewritten the article accordingly. Thanks for the heads up. It’s never dull in VoIPland! Please let me know if there are further problems.]
Simply magic!! Thank you.
I just set up One Ringy-Dingy and CallMe Web Interface. They both work great! I plan to use them when I travel out of the country as my cell phone there will have free incoming calls. How come on the call me Web interface there is no record of the call on the Asterisk log? BTW The call me interface works with asterisk@home 1.1.
Jeff
Some interesting enhancements to the DISA suggestions above can be found at this link on the Voxilla forum.
I’m not complaining – just advising that I can’t get the one ringy dingy service to work. I call in, get the fast busy, then receive a call back from 202-556-0000 but theres never any audio or instructions after I get the call, I’ve tried from my cell phone and my home phone.
[WM: Thanks for the heads up. I just tried a couple calls and got the same result. There appears to be a problem at TelaSIP, and I’ve reported it.
Update: It was an issue with TelaSIP’s new SIP reinvite support which has been resolved.]
Thank you for the wonderful tutorials. I managed to set up the one ringy dingy service in my asterisk in Norway. I get message: — Playing ‘auth-incorrect’ (language ‘en’) event when I dial the correct password. Is it a DTMF issue? regards Nabil M.
[WM: Sounds like a DTMF problem to me. RFC2833 usually has the least problems, but try other options until you find one that works reliably with your phones and your provider.]
For those who did not receive a 2nd DID from your provider, Here is a really quick way to receive a free one that works. The whole process takes under 10 minutes.
Check it out here:
http://www.darksource.org/asterisk/stanaphone.html
Sorry, just a noobe at this.
Trying to do the "AutoAttendant DISA" and dont see which file I am to modify?
Help?
I added a couple of lines to check the incoming caller ID on the initial call against the asterisk database, which I’ve populated with ‘trusted’ phone numbers (my cell, wife’s cell, my desk at work and the in-laws home, etc).
These lines check the ‘disa’ db family for the caller id with a value of 1. If found the call is allowed to proceed. If not, you go to the first hangup and the call is never attempted. I kept the subsequent authorization step as well.
exten => h,1,Set(TRUST=${DB_EXISTS(disa/${CALLERIDNUM})}); Check CID against Trusted DISA Users List
exten => h,2,GotoIf($["${TRUST}" = "1″]?3:13)
Tom
Still running AAH 1.5, but planning to upgrade to 2.5 soon.
Will this work with 2.5, or are there any changes needed?
Many thanks for some great tutorials,
[WM: Oughta be just fine.]
The link to the "Securing Your Asterisk@Home PBX article" points to the wp-admin side of (editing) the post.
[WM: Ooops. Long day! Thanks.]
You seem to be big fan of Telasip, however I went to their site to sign up, and was really disappointed with the level of information they provide. Several links do not work and there is no information/service details provided. The site did not look professional at all. I hope they make modifications and add more details.
[WM: I am a big fan. Great phone service at great prices. Lousy web site. That’s better than the other way around in my book.]
Amazing.. I actually implemented more or less the same thing, except instead of using a seperate DID, I check the CID, and only perform the callback if its my cellphone calling (and yes, it still requires a passcode before it gives DISA tone) This lets me use my ‘free incoming’ cell minutes to make outbound calls from anywhere, anytime. I’m using BV with just one ‘trunk’, and apparently they do permit two calls – I beleive it looks like three-way calling to them.
I followed your tutorial and was indeed able to generate a dialtone successfully. However, I get an "all circuits are busy" signal after dialing the new number. I have contacted telasip and was told that I am only able to initiate one call at a time while using the residential plan. Has anyone else run into this problem? Is there a workaround? Or, do I have something configured incorrectly. Any help is greatly appreciated – Thanks.
I think the One Ringy-Dingy and the Phone Home ideas are just great, but we always want more and I don’t know if it is to complicate things or not, but I was wondering if it is possible for when using the "One Ringy-Dingy" to call the user back it’ll actually prompt him or her for the a2billing pin.
Ward:
This is great, but I have a question. Is it correct that line:
exten => h,2,System(echo channel: SIP/telasip-gw/${CALLERIDNUM} > /tmp/${CALLERIDNUM})
will dial out thru the telasip-gw trunk WITHOUT processing the Outgoing dial runs for the trunk. Is there a way of processing the rules or would I have to code some rules in line here.
Keep up the great code!!!
THanks
Figured it out, you can also use local:
exten => h,2,System(echo channel: local/5${CALLERIDNUM}@from-internal > /tmp/${CALLERIDNUM})
Thanks for the great ideas!
Correction for #18 ( a "5″ snuck into the line)
Figured it out, you can also use local:
exten => h,2,System(echo channel: local/${CALLERIDNUM}@from-internal > /tmp/${CALLERIDNUM})
Thanks for the great ideas! This works great, but fairly frequently when using this from a cell phone, the DTMF recognition is bad and the users get doubled up digits at times, which either end up as wrong numbers or incomplete calls. Any fixes for those symptoms?
Thanks Again!
Great approach! The only problem I have come across though is that even though it works when I call from a home #, and it fails to dial out when I use my cell phone.
Hi, I found this, i think to get a remote callback would be the one ringy-dingy feature right? Would it be possible to modify it such that it will only trigger a Congestion tone (fast busy) & "callback" if it detects my mobile number, but gives normal ringing tone as normal behaviour if it is other people calling my number? This way we don’t have to dedicate a DID for this trigger purpose? Or is this not possible? Thanks.
How do we broadcast the desired Caller ID ?
[WM: http://nerdvittles.com/index.php?p=115 ]
Thanks for a great tutorial. Got the ringy-dingy process working on a remote plain Asterisk 1.2 by changing a few small details — didn’t take long at all, even with the tiny Asterisk knowledge level here. Works as it should and is indeed useful. Again, thank you very much.
Okay, me again (hhb) — stumbled onto a nice surprise with your ringy-dingy routine. For some years, have had no land line LD here– VOIP covers that pretty well. However, the regular land line here is one of those base phone things with three portable handsets — works very well all over this place and even outside on a small farm. But no LD with them ….
So, got a "lite" DID VOIP line with area code/city within the local call area. Plugged that number into ringy-dingy on the Asterisk with the result that now I can make LD calls on the land line phonesets here with no inconvenience — just dial the "local" ringy-dingy VOIP number on a land line handset, Asterisk calls back with dialtone after password. Amazing really. The bonus is, of course that it will work from any direct phone number anywhere, but it is also quite useful even here at home. Thank you again, very much indeed, for this setup.
Final question, and promise to let it go. Is there any way to use ringy-dingy internationally? For example, a friend in Australia agreed to test it for me. He dialed the "international" ringy-dingy number to ringy-dingy, got the busy signal. But ringy-dingy was unable to call him back. I checked the remote Asterisk console to see that ringy-dingy was getting a callerid from him that included the correct area code and number, but with no 011 preceding it, so of course ringy-dingy could not call him back. Is there any remedy for this? And thanks again.
[WM: So long as you’re willing to absorb the costs of the international calls, it would be a simple matter to change the script. Your dial plan also needs to support international calling as well.]
I was able to get the CallMe Web Interface working, but I am looking to make some improvements on it. What I’m looking to do is remove the DISA and replace with the DIAL command.
What I want is to dial phone #1 and, once #1 picks up, dial phone #2. Anyone have any ideas on this?
[WM: Take a look at our AsteriDex application. That’s exactly what it does. Good luck!]
Thanks for the response, but I use AsteriDex and would like to specifiiy phone#1 and phone #2 for each call, where as asteridesk only lets me specify phone number to call.
[WM: I understand. I just wasn’t clear. I meant you could use the AsteriDex code as a model to build what you need. You’ll see where it stuffs in the two phone numbers to dial. In your example, you’d stuff new numbers for both while AsteriDex always uses the same number for phone #1.]
SUPA: I have a script, based on the VoipJots click to dial scripts, that may serve your needs. It lets you write in the number where you want to be reached, and the number where you want to call. It then calls the first number, and connects it to the second number. If you are interested let me know at rd_cortes (a_t) walla (do_t) com.
You can read my comment in http://www.voipjots.com/2006/03/asteriskhome-click-to-call-application.html#c116432983388545739
[WM: Beam it to me as well, and I’ll post it on Nerd Vittles.]
Hi Everyone i’ve been playing with things for some days now, when i get the number i get the busy signal..but i can’t get asterisk to call me back..i’m using broadvoice…and i want asterisk to call me in a canada phone witch means long distance..and it needs to dial out using a 1 before the area code witch is 514 ex: 1514xxxxxxx so should i put a 1 before ${CALLERIDNUM} or where should i put it..
i’m also using only one line to receive and place the call back..
thanks for your response
I’ll do you one better… Just stick a Goto(prepaid,s,1) in your dialplan..
Here is a dialback app I hacked up in a few minutes…
Enjoy.
extensions
Nate Kettlewell
p.s. I release this free of any responsibility that it may damage your system. And please include my name if you choose to repost it somewhere else.
This script is great! If I need to make 4 calls I currently have to call the dedicated DID 4 times and wait 4 time to be called back. How can I program Asterisk not to hang-up the call but give me dialtone when the other party hangs-up?
Could you comment? 1)Why not use voicemail to manage passwords etc So multiple users can use the service ? exten => s,n,VMAuthenticate() 2) Do you have a script for a user supplied callback number? CallerID is not always reliable if you are calling from different phones.
I was trying to put together something like this…
[custom-callback]
exten => s,1,Answer
exten => s,n,VMAuthenticate() ; Authenciate using the voicemail system, person enters their extension
exten => s,n,GotoIf($["${CALLERID(number)}" = ""]?3) ; if no id, then skip annoucement
exten => s,n,Playback(your)
exten => s,n,Playback(number)
exten => s,n,Playback(is)
exten => s,n,SayDigits(${CALLERID(number)})
exten => s,n,Playback(if-this-is-not-correct)
exten => s,n,Playback(press-1)
exten => s,n,Set(CALLBACKNUM=${CALLERID(number)})
exten => s,n,Read(CALLBACKNUM,agent-user) ; get callback number from user somehow???
exten => s,n,Wait(2)
exten => s,n,Hangup
exten => s,n,Dial(${CALLBACKNUM})
exten => s,n,Playback(pls-entr-num-uwish2-call)
exten => s,n,DISA,no-password|from-internal
[WM: Haven’t tried this, but I think the last three lines need to begin with h (not s) since they occur after the initial hangup.]
Hi All,
I have a DISA setup and working, how would I go about adding a prefix to be automatıcly dialed before the number that the user enters… this so I can use seperate trunks for each DISA..
Thanks in advance…
My current config is:
[disa]
include => disa-custom
exten => 1,1,Set(TIMEOUT(digit)=5)
exten => 1,n,Set(TIMEOUT(response)=10)
exten => 1,n,Wait(1)
exten => 1,n,Playback(enter-password)
exten => 1,n,DISA(/etc/asterisk/disa-1.conf)
exten => 1,n(end),Hangup
which is standard freepbx generated apart from the Wait line.. which I added so the start of enter-password.gsm isnt garbled
The Ringy Dingy Thingy was just what I was looking for. This is an old post – I hope the feature is still available 🙂