
The Future of VoIP Telephony in an Asterisk World
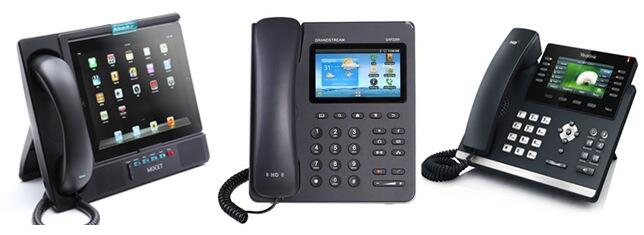
If you don’t think there’s a telephony revolution underway, then take a look at this year’s crop of new VoIP telephones. No doubt that Alexander Graham Bell would be a happy camper. We’ve picked three of our favorites to take for a spin this week. Pictured above (left to right) are the Mocet Communicator, Grandstream’s GXP2200, and Yealink’s T46G. These three devices offer three dramatically different, but equally effective, approaches to the future of VoIP telephony. The Mocet Communicator is… Read More ›


 JUST RELEASED: Visit the Incredible PBX Wiki
